PA7300 Instruction Manual - TECO-Westinghouse Motor Company
PA7300 Instruction Manual - TECO-Westinghouse Motor Company
PA7300 Instruction Manual - TECO-Westinghouse Motor Company

Create successful ePaper yourself
Turn your PDF publications into a flip-book with our unique Google optimized e-Paper software.
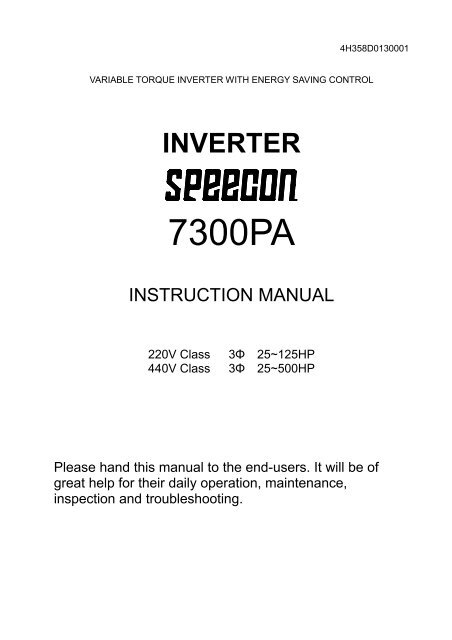
4H358D0130001VARIABLE TORQUE INVERTER WITH ENERGY SAVING CONTROLINVERTER7300PAINSTRUCTION MANUAL220V Class440V Class3 25~125HP3 25~500HPPlease hand this manual to the end-users. It will be ofgreat help for their daily operation, maintenance,inspection and troubleshooting.
BEFORE INSTALLATION & USE1. Ensure nameplate data corresponds with your requirements.2. Ensure the apparatus is undamaged.WARNINGThe following safety precautions must be observed:1. Electric apparatus and electricity can cause serious or fatal injury if theapparatus is improperly installed, operated or maintained.Responsible personnel must be fully trained to understand thehazards to themselves and others before being involved in installing,operating, maintaining and decommissioning electrical apparatus.European Union Safety information can be obtained from such as:BS4999; EN60204-11 EN292-1 EN294IEE Wiring RegulationsParticular industries and countries have further safety requirements.Refer to their trade safety bodies, British Standards Institution, Dept. ofTrade & Industry, etc., for further information. For instance, in the USA,refer to NEMA MG2, the National Electrical Code, local safetyrequirements, etc.2. When servicing, all power sources to the apparatus and to theaccessory devices should be de-energized and disconnected and allmoving parts at standstill.3. Safety guards and other protective, devices must neither be bypassednor rendered inoperative.4. The apparatus must be earthed. Refer to relevant standards such asEN60204-1, IEE Wiring Regulation etc.5. A suitable enclosure must be provided to prevent access to live parts.Extra caution should be observed around apparatus that isautomatically started or has automatic resetting relays or is remotelystarted in case such starting means has not been properly disabledand the apparatus starts unexpectedly.
CAUTION AND WARNING:WARNINGDo not change the wiring while power is applied to the circuit.After turning OFF the main circuit supply, do not touch circuit components until CHARGELED is extinguished.Never connect power circuit output U (T1), V (T2), W (T3) to AC power supply.When the retry function (Cn-36) is selected, motor may restart suddenly after beingstopped by momentary power loss.!CAUTIONWhen mounting units in a separate enclosure, install a fan or other cooling device to keepthe intake air temperature below 45.Do not perform a withstand voltage test to the inverter.All the constants of the inverter have been factory preset. Do not change the settingsunnecessarily.1
PART II OPERATION MANUALPages1. DESCRIPTION OF USING 7300PA ...................................................................................341.1 Using LCD (OR LED) digital operator.............................................................................341.2 DRIVE mode and PRGM mode displayed contents .........................................................361.3 Parameter description........................................................................................................371.4 Sample example of using LCD digital operator................................................................382. SETTING USER CONSTANT.............................................................................................402.1 Frequency Command An-.............................................................................................402.2 Parameters Can Be Changed during Running Bn- .......................................................412.3 Control Parameters Cn- ................................................................................................492.4 System Parameters Sn-.................................................................................................642.5 Monitoring Parameters Un-........................................................................................1052.6 Monitoring Parameters Hn-........................................................................................1072.7 Order Parameters On-.................................................................................................1093. FAULT DISPLAY AND TROUBLE SHOOTING ........................................................... 111APPENDIX:A. ENERGY-SAVING CONTROL ..........................................................................................119B. PID CONTROL....................................................................................................................121C. RS-485 COMMUNICATION CONNECTION DIAGRAM ...............................................126D. SINK/SOURCE TYPICAL CONNECTION DIAGRAM...................................................128E. RS-232C SERIAL COMMUNICATIONS CONNECTION DIAGRAM............................130F. NOTES ON APPLICATION OF MOTORS .........................................................................131G. PERIPHERAL UNIT NOTES ..............................................................................................132H. CIRCUIT PROTECTION AND ENVIRONMENTAL RATING NOTES..........................133I . INVERTER HEAT LOSS…………………………………………………………………..135J. DRIVE INPUT FUSES……………………………………………………………………..136K.CERTIFICATION FOR THE INVERTER…………………………………………………1373
PART IINSTALLATION MANUAL4
1. GENERAL1.1 SAFE OPERATION NOTESRead this installation manual thoroughly before installation, operation, maintenance orinspection of the inverter. Only authorized personnel should be permitted to performmaintenance, inspections or parts replacement.In this manual, notes for safe operation are classified as:"WARNING" or "CAUTION".!WARNINGCAUTION: Indicates a potentially hazardous situation which, if not avoided, couldresult in death or serious injury to personnel.: Indicates a potentially hazardous situation which, if not avoided, may resultin minor or moderate injury to personnel and damage to equipment. It mayalso be used to alert against unsafe practices.This inverter has been placed through demanding tests at the factory before shipment. Afterunpacking, check for the following:1. Verify that part numbers on shipping carton and unit match the purchase order sheetand/or packing list.2. Do not install or operate any inverter which is damaged or missing parts.3. Do not install or operate any inverter which has no QC marking.Contact your local distributor or <strong>TECO</strong> representative if any of the above have been found.1.2 PRODUCT CHANGES<strong>TECO</strong> reserves the right to discontinue or make modifications to the design of its productswithout prior notice, and holds no obligation to make modifications to products sold previously.<strong>TECO</strong> also holds no liability for losses of any kind which may result from this action.5
2. RECEIVING!CAUTIONThis 7300PA has been put through demanding tests at the factory before shipment. Afterunpacking, check the followings.Verify the received product with the purchase order sheet (invoice) and/or packing list.Transit damage.If any part of 7300PA is damaged or lost, immediately notify the shipper. NAMEPLATE DATA ( 220V CLASS 75HP example )MODELINPUTOUTPUTJNTFBGBA0075JK- - -220V CLASS INVERTERAC 3PH 200-230V 50/60HzAC 3PH 0-230V 81KVA 212AInverter ModelInput Spec.Output Spec.Series No.SER. NO.CE Mark CSA Mark MODEL DESIGNATIONJNTFBGBA0075JK ---ReservedInverter Series7300PAEnclosures andmountingsBAOpen chassis typeIEC IP00BBEnclosed, wall-mounted typeNEMA-1VoltageJK:220V, 60Hz(200V, 50Hz)AZ:440V, 60Hz(400V,50Hz)Applicable maximummotor outputHP002525HP0500500HP6
3. INSTALLATION!CAUTIONNever move, lift or handle the 7300PA cabinet by the front cover.Lift the cabinet from the bottom.Do not drop the inverter.3.1 MOUNTING SPACEInstall 7300PA vertically and allow sufficient space for effective cooling as shown in Fig. 1.1.18in(30mm)OR MORE1.18in(30mm)OR MORE5.9in(150mm)OR MOREAIRALLOWABLETEMPERATURE OFCONTROL PART: 131 (55)FRONTCOVER5.9in(150mm)OR MOREAIROPEN CHASSIS TYPE:113 (45)ENCLOSEDWALL-MOUNTEDTYPE: 104 (40)(a) Front View(b) Side ViewNote: For product external dimensions and mounting dimensions,refer to “DIMENSIONS” on page 23.Fig. 1 Mounting Spaces7
3.2 LOCATIONLocation of the equipment is important to achieve proper performance andnormal operating life. The 7300PA should be installed in areas where thefollowing conditions exist:Protected from rain or moisture.Protected from direct sunlight.Protected from corrosive gases or liquids.Free from airborne dust or metallic particles.Free from vibration.Free from magnetic noise (e.g. welding machines, power units)Ambient temperature:+14 to 104, -10 to +40 (For enclosed type),+14 to 113, -10 to +45 (For open chassis type)Free from combustible materials, gases, etc.!CAUTIONWhen mounting multiple units in a common enclosure, install a coolingfan or some other means to cool the air entering the inverter to at least113 (45) or below.8
4. WIRING4.1 NOTES ON WIRING TO PERIPHERAL UNITSPower SupplyMCCBMCAC REACTORINPUT NOISE FILTER7300PAOUTPUT NOISE FILTER3 ACINDUCTION MOTORMCCB (molded case circuit breaker)Please refer to Table 1. for MCCB selection.Do not use a circuit breaker for start/stop operation.When a ground fault interrupter is used, select the one withno influence for high frequency. Setting current should be200mA or above and the operating time at 0.1 second orlonger to prevent malfunction.MC (magnetic contactor)It is not always necessary to have the MC on the input side.However, an input MC can be used to prevent an automaticrestart after recovery from an external power loss duringremote control operation.Do not use the MC for start/stop operation.AC REACTORTo improve power factor or to reduce surge, install an ACreactor. There is a DC choke built-in on 7300PA, models40HP(30 KW) and larger. The 440V 350 ~ 500HP need toinstall AC reactor externally.Input Noise FilterWhen used with specified input noise filter, the 7300PA cancomply with EN55011 class A. Please refer to our EMCtechnical manual for noise filter selection.InverterWire input to terminals L1, L2 and L3 for three phase input.Make sure to connect the ground terminal to an appropriatesafety ground.Output Noise Filter (EMI Suppression zero core)When used with output noise filter, radiated and conductedemissions may be reduced.<strong>Motor</strong>When multiple motors are driven in parallel with an inverter,the inverter rated current should be at least 1.1 times thetotal motor rated current. Make sure that the motor and theinverters are separately grounded.9
4.2 CONNECTION DIAGRAMThe following diagram shows interconnection of the main circuit and controlcircuit. With the digital operator, the motor can be operated by wiring the maincircuit only. (Terminal Symbols: indicates main circuit; indicates controlcircuit).POWERSUPPLY3-PHASEL1(R)L2(S)MCCBACL* 4L1(R)L2(S)-7300PA+T1(U)T2(V)MOTORIML3(T)FORWARDRUN/STOPREVERSERUN/STOPEXTERNAL FAULT123L3(T)T3(W)E{GROUNDING100 OR LESS}STANDARDFUNCTIONSSET ATFACTORYPRIOR TOSHIPMENTFAULT RESETMULTI-STEP SPEED SETTING 1(MASTER/AUX)MULTI-STEP SPEEDSETTING 2JOG COMMANDEXERNALCOAST TO STOP4567824VGANALOGMONITOR 1A01A02ANALOGMONITOR 2GNDEMULTI-FUNCTIONANALOG OUTPUT 1, 2(0 TO +10V)SC24V24VEXTERNALFREQUENCYCOMMAND2k2k0+10V420mA0+10V0VPP( 3)( 3)PESHIELDCONNECTIONR3AR3BR3C+15VSPEED SETTING POWER SUPPLY+15V 20mAVIN MASTER SPED REF0 TO 10V (20k)AIN MASTER SPEED REF 4TO 20mA (250)R2AR2CAUX MULTI-FUNCTION ANALOGGND INPUT 0 TO 10V (20k) R1ASTANDARD OUTPUT0VAUX. FREQUENCYREFERENCER1CMT+15VFAULT CONTACT OUTPUT250VAC 2A OR LESS30VDC 2A OR LESSMULTI-FUNCTION CONTACT OUTPUT250VAC 2A OR LESS30VDC 2A OR LESSSIGNAL DURING OPERATION IS SETAT FACTORY SETTINGAGREED FREQUENCY SIGNAL ISSET AT FACTORY SETTINGMOTORPTC THERMISTORAUXGND0VD01DCOMOPEN COLLECTOR 1(ZERO SPEED SIGNAL ISSET AT FACTORY)(48VDC, 50mA OR LESS)MULTI-FUNCTIONOUTPUT COMMONMULTI-FUNCTIONOUTPUTP1. shield wire shield twisted wire2. The terminal 1 ~ 8 can be connected as SINK or SOURCE type input interface.(Ref. to Appendix D)3. The terminal arrangement.1 2 3 4 5 6 7 8 9 10 11 12 13 14 15 16 17 18 19 20 21 22 23 24 1 2 3 4 5 6 724VG 24VG 1 2 3 4 5 6 7 8 SC 24V E 15V VIN AIN AUX MT GND A01 A02 GND D01 DCOM R1A R1C R2A R2C R3A R3B R3CShorted at factory For 440V 350HP ~ 500HP need to install ACL externally.10
Fig. 2Standard connection diagram.4.3 TERMINAL FUNCTION4.3.1 MAIN CIRCUIT TERMINALSTerminalsR / L1S / L2T / L3U / T1V / T2W / T3Table 1. Main Circuit TerminalsMain Circuit Input Power SupplyInverter OutputTerminal FunctionB2DC Power Supply Input or Braking UnitB2External Braking Resistor (Only for 220V 25HP, 440V 25HP, 30HP)E ( PE, ) Grounding (3rd Type Grounding)4.3.2 CONTROL CIRCUIT TERMINALSTable 2. Control Circuit TerminalsI/O Terminal Functions1 Forward operation-stop signal.DigitalInputTerminalsAnalogInputTerminalsDigitalOutputTerminalsAnalogOutputT i l2 Reverse operation-stop signal.3 External fault input.4 Fault reset.5Multi-function contact input: the following signals available to select. Forward/reverse select, run6 mode select, multi-speed select, jog frequency select, accel/decel time select, external fault, external7 coast to stop, hold command, inverter overheat prediction, DB command, aux. Input effective,speed search, energy-saving operation.824VG SINK Common (0V), ref to appendix D.24V SOURCE Common (24V), ref to appendix D.SC Sequence input Common (24V), ref to appendix D.+15V +15V power supply for external frequency command.VINAINMaster speed voltage reference (0 to 10V).Master speed current reference (4 to 20mA).Auxiliary analog command: one of the following signals available to select. Frequency command,AUX frequency gain, frequency bias, overtorque detection level, voltage bias, accel/decel rate, DBcurrent.MT <strong>Motor</strong> temperature PTC thermistor. (active: 1330, Return: 550)GNDER3AR3BR3CR2A-R2CR1A-R1CD01DCOMA01A02Analog signal common.Connection to shield signal lead. (frame ground)Fault contact output A (Closed at fault).Fault contact output B (Open at fault).Fault contact output common.Multi-function contact output: one of the following signals available to output. Output duringrunning, zero speed, synchronized speed, arbitrary speed agreed, frequency detection, overtorque,undervoltage, run mode, coast to stop, braking resistor overheat, alarm, fault.Multi-function PHC (photo-coupler) output 1 (open collector, 48VDC,50mA)Multi-function PHC output common.Analog multifunction output port: Frequency command, Outputfrequency, Output current, Output voltage, DC voltage, Output power.11The same functions asterminals R1A-R1C andR2A-R2C0~11V max.2mA or less
Terminals GND Common lead for analog port.4.3.3 MAIN CIRCUIT SCHEMATIC1. 220V25HP440V25HP, 30HP2. 220V30HP440V40HP, 50HP, 60HP+ B2DCL+R(L1)S(L2)T(L3)+U(T1)V(T2)W(T3)R(L1)S(L2)T(L3)+U(T1)V(T2)W(T3)--ERCCXCONTROLCIRCUITSEXRCCCONTROLCIRCUITS3. 220V40HP, 50HP440V75HP, 100HP4. 220V60HP, 75HP, 100HP, 125HP++DCLDCLR(L1)S(L2)T(L3)+U(T1)V(T2)W(T3)R(L1)S(L2)T(L3)+U(T1)V(T2)W(T3)--EAC/DCXRCCCONTROLCIRCUITSEAC/DCRCCXCONTROLCIRCUITS5. 440V125HP, 150HP, 175HP, 215HP,250HP, 300HP6. 440V350HP, 400HP, 500HPDCL+ExternalACL+R(L1)S(L2)T(L3)+U(T1)V(T2)W(T3)R(L1)S(L2)T(L3)+U(T1)V(T2)W(T3)--RCCCONTROLCIRCUITSRCCCONTROLCIRCUITSEAC/DCXEX External ACL is necessary12
4.4 WIRING PARTS4.4.1 RECOMMENDED WIRING PARTSBe sure to connect MCCBs between power supply and 7300PA input terminalsL1 (R), L2 (S), L3 (T). Recommended MCCBs are listed in Table 3.When a ground fault interrupter is used, select the one with no influence for high frequency.The current setting should be 200mA or over and operating time, 0.1 second or over to preventmalfunction.Table 3. 220V and 440V class applicable wire size and contactor(a) 220V SERIESMax. Applicable<strong>Motor</strong> OutputHP (KW)[Note 1]Power Cable[Note 2]Cable Size - mm 2 (AWG)Ground Cable E[G]Control Cable[Note 3]Molded-CaseCircuit Breaker[Note 4]MagneticContactor [Note4]25(18.5)22(4)14(6)0.52(20-14)TO-225S(150A)CN-8030(22)22(4)14(6)0.52(20-14)TO-225S(175A)CN-10040(30)60(2/0)22(4)0.52(20-14)TO-225S(175A)CN-12550(37)60(2/0)22(4)0.52(20-14)TO-225S(200A)CN-15060(45)60×2P(2/0×2P)22(4)0.52(20-14)TO-225S(225A)CN-18075(55)60×2P(2/0×2P)30(2)0.52(20-14)TO-400S(300A)CN-300100(75)125(90)100×2P(4/0×2P)100×2P(4/0×2P)50(1/0)50(1/0)0.52(20-14)0.52(20-14)TO-400S(400A)TO-400S(400A)CN-300S-K400Note 5Note1. For Constant Torque Load.2. Power Cable Include Cables to the Terminals R (L1), S (L2), T (L3), , , B2, U (T1),V (T2), W (T3).3. Control Cable Include Cables to the Control Terminals.4. The Molded-Case Circuit Breaker and Magnetic Contactors Shown in Table are Taian Products and arefor reference only. Other manufactures' equivalent products may be selected.5. The Magnetic contactors S-K400 and S-K600 are Mitsubishi Products and are for reference only. Othermanufactures' equivalent products may be selected.14
(b) 440V SERIESMax. Applicable<strong>Motor</strong> OutputHP (KW)[Note 1]Power Cable[Note 2]Cable Size - mm 2 (AWG)Ground Cable E[G]Control Cable[Note 3]Molded-CaseCircuit Breaker[Note 4]MagneticContactor [Note4]25(18.5)8(8)8(8)0.52(20-14)TO-100S(75A)C-50L30(22)8(8)8(8)0.52(20-14)TO-100S(100A)C-50L40(30)14(6)8(8)0.52(20-14)TO-100S(100A)C-65L50(37)22(4)14(6)0.52(20-14)TO-125S(125A)C-80L60(45)22(4)14(6)0.52(20-14)TO-225S(175A)C-100L(170A)75(55)38(1)22(4)0.52(20-14)TO-225S(175A)C-125G(170A)100(75)60(2/0)22(4)0.52(20-14)TO-225S(225A)C-150G(200A)125(90)60×2P(2/0×2P)30(2)0.52(20-14)TO-400S(300A)C-300L(400A)150(110)60×2P(2/0×2P)30(2)0.52(20-14)TO-400S(300A)C-300L(400A)175(125)60×2P(2/0×2P)50(1/0)0.52(20-14)TO-400S(400A)C-300L(400A)215(160)250(185)100×2P(4/0×2P)100×2P(4/0×2P)50(1/0)50(1/0)0.52(20-14)0.52(20-14)TO-400S(400A)TO-600S(600A)C-300L(400A)S-K400[Note 5](450A)300(220)100×2P(4/0×2P)60(2/0)0.52(20-14)TO-800S(800A)S-K600(800A)350(270)325×2P(650×2P)60(2/0)0.52(20-14)TE-1000(1000A)S-K600(800A)400(300)325×2P(650×2P)60(2/0)0.52(20-14)TE-1000(1000A)S-K600(800A)500(375)325×2P(650×2P)60(2/0)0.52(20-14)TE-1000(1000A)S-K800(1000A)15
4.4.2 CAUTIONS FOR WIRING!CAUTIONThe external interconnection wiring must be performed with the following procedures.After completing 7300PA interconnections, be sure to check that connections are correct.Never use control circuit buzzer check.(A) MAIN CIRCUIT INPUT/OUTPUT(1) Phase rotation of input terminals L1 (R), L2 (S), L3 (T) is available in either direction.(Clockwise and counterclockwise).(2) When inverter output terminals T1 (U), T2 (V), and T3 (W) are connected to motorterminals T1 (U), T2 (V), and T3 (W), respectively, motor rotates counterclockwise.(Viewed from opposite side of drive end, upon forward operation command). Toreverse the rotation interchange any two of the motor leads.(3) Never connect AC main circuit power supply to output terminals T1 (U), T2 (V), andT3 (W). This may cause damage to the inverter.(4) Care should be taken to prevent contact of wiring leads with 7300PA cabinet. If thisoccurs, a short-circuit may result.(5) Never connect power factor correction capacitors or noise filters to 7300PA output.(6) Never open or close contactors in the output circuit unless inverter is properly sized.!CAUTIONLead size should be determined taking into account voltage drop of leads. Voltage drop canbe obtained by the following equation: select such lead size that voltage drop will bewithin 2% of normal rated voltage.phase-to-phase voltage drop (V)= 3 x lead resistance ( /km) X wiring distance(m) x current(A) X 10 -3 .Wiring length between inverter and motor.If total wiring distance between inverter and motor is excessively long and inverter carrierfrequency (main transistor switching frequency) is high, harmonic leakage current fromthe cable will increase to effect the inverter unit or peripheral devices. If the wiringdistance between inverter and motor is long, reduce the inverter carrier frequency.16
(B) GROUNDING (PE: Protective Earth)Ground the 7300PA through ground terminal E (PE).(1) Ground resistance should be 100 ohms or less.(2) Never ground 7300PA in common with welding machines, motors, and otherlarge-current electrical equipment, or ground pole. Run the ground lead in separateconduit from leads for large-current electrical equipment.(3) Use the ground leads which comply with AWG standards and make the sure the lengthis as short as possible.(4) Where several 7300PA units are used side by side, it is preferable to ground each unitseparately to ground poles. However, connecting all the ground terminals of 7300PAin parallel while grounding only one of the 7300PA’s to the ground pole is alsopermissible (Fig. 3). Be sure not to form a loop with the ground leads.CORRECT CORRECT NOT ACCEPTABLEPE PE PE PE PE PE PE PE PE(a) (b) (c)Fig. 3 Grounding of Three 7300PA Units(C) CONTROL CIRCUIT(1) Separation of control circuit leads and main circuit leads: All signal leads must beseparated from main circuit leads L1 (R), L2 (S), L3 (T), +, - , B2, T1 (U), T2 (V),T3 (W) and other power cables to prevent erroneous operation caused by noiseinterference.(2) Control circuit leads R1A-R1B-R1C, R2A-R2C, R3A-R3C (contact output) must beseparated from leads 1 to 8, A01, A02, D01-DCOM and 24V, SC, 24VG,VIN, AIN,AUX, MT, GND.(3) Use twisted shielded or twisted pair shielded wire for the control circuit line andconnect the shield sheath to the inverter terminal E to prevent malfunction caused bynoise. See Fig.4. Wiring distance should be less than 164ft (50m).SHIELDSHEATHARMORTO INVERTER SHIELDSHEATH TERMINAL ENEVER CONNECTINSULATE THESE PARTSWITH INSULATING TAPE.Fig. 4 Shielded Wire Termination17
5. TEST OPERATIONTo assure safety, prior to test operation, disconnect the coupling or belt whichconnects the motor with the machine so that motor operation is isolated. If anoperation must be performed while the motor is directly connected to themachine, use great care to avoid any possible hazardous condition.5.1 CHECK BEFORE TEST OPERATIONAfter completion of installation and wiring, check for(1) proper wiring(2) short-circuit due to wire clippings(3) loose screw-type terminals(4) proper load5.2 SETTING THE LINE VOLTAGE SELECTING CONNECTOR FOR460V CLASS 40HP (30kW) AND ABOVEThe cooling fan line voltage selecting connector shown in Fig. 5 must be setaccording to the type of main circuit power supply. Insert the connector at theposition showing the appropriate line voltage.The unit is preset at the factory to 440 line voltage.(a) 440V CLASS: 40HP ~ 100HP350HP ~ 500HP1 23CN 3 1 24CN 3 1 25CN 3 1 26CN 3JP1 JP2 JP3 JP4R TB2 SFU2380V 400/415 440V 460V1 21CN 4 1 22CN 41 (220) 2R (440) S1 TB3 2(b) 440V CLASS: 125HP ~ 300HPTB4(220V)33CNFU1SA4(220V)26CN440V220VDM1 25CN4P108C0010103 VER.03 36CN32CN31CN34CN380V1 JP135CN400/415 440V1 JP21 JP3JP41460V220V440V2S1RTB3TB2Fig. 5 Voltage Selecting Connector18
6. MAINTENANCE6.1 PERIODIC INSPECTIONThe 7300PA requires very few routine checks. It will function longer if it is keptclean, cool and dry. Observe precautions listed in "Location". Check for tightnessof electrical connections, discoloration or other signs of overheating. Use Table 4 asyour inspection guide. Before servicing, turn OFF AC main circuit power and be surethat CHARGE lamp is OFF.Table 4 Periodic InspectionComponent Check Corrective ActionExternal terminals, unit Loose screwsTightenmounting bolts,connectors, etc. Loose connectors TightenCooling finsPrinted circuit boardCooling fanPower elementsSmoothing capacitorBuild-up of dust and dirtAccumulation of conductive dust or oilAbnormal noise and vibration. Whetherthe cumulative operation time exceeds20,000 hours or not.Accumulation of dust and dirtDiscoloration or odorNote: Operating conditions as follows:Ambient temperature: Yearly average 30, 86Load factor: 80% or lessOperating time: 12 hours or less per dayStandard Parts ReplacementBlow with dry compressed air of39.2 ×10 4 to 58.8 x 10 4 Pa (57 to85psi.) pressure.Blow with dry compressed air of39.2 x10 4 to 58.8 x 10 4 Pa (57 to85psi.) pressure.If dust and oil cannot be removed,replace the board.Replace the cooling fan.Blow with dry compressed air of39.2 x10 4 to 58.8 x 10 4 Pa (57 to85psi) pressure.Replace the capacitor or inverterunit.Item Name Replacement Cycle RemarksCooling fan 2 or 3 years Replace with a new product.Smoothing capacitor5 yearsReplace with a new product. (Determineafter examination).Circuit Breakers and relays Determine after examination.Fuse 10 years Replace with a new product.Aluminum capacitor on PC board5 yearsNote: Operating conditions as follows:Ambient temperature: Yearly average 30, 86Load factor: 80% or lessOperating time: 20 hours or less per dayReplace with a new product. (Determineafter examination).19
6.2 SPARE PARTSAs insurance against costly downtime, it is strongly recommended that renewalparts be kept on hand in accordance with the table below. When orderingrenewal parts, please specify to your local distributor or <strong>TECO</strong> representativethe following information: Part Name, Part Code No. and Quantity.Table 5 Spare Parts for 220V ClassINVERTER & PARTNAMEHP253040506075100125SPECControl PCBoard*Power BoardMain CircuitTransistorMain Circuit DiodeMODEL - - 7MBP160RTA060 DF150BA80 AFB0824SHCooling FanCODE 4P101C0070008 3P106C06500A5 277831708 277192179 3H300D2370006Qty 1 1 1 1 2MODEL - - CM200DU-12F 2P/DDB6U145N12L A2123-HBT ASB0624HCODE 4P101C0070008 4P106C02900B1 277810255 277190214 4M903D1890001 4H300D333001Qty 1 1 3 1 2 1MODEL - - CM200DU-12F 2P/DDB6U145N12L AFB1224SHE ASB0624HCODE 4P101C0070008 4P106C02900B1 277810255 277190214 4M300D3670007 4H300D333001Qty 1 1 3 1 2 1MODEL - - CM300DU-12F 2P/DDB6U205N12L AFB1224SHE ASB0824SHCODE 4P101C0070008 4P106C02900B1 277810263 277190231 4M300D3670007 43003340007Qty 1 1 3 1 2 1MODEL - - CM300DU-12F VUO190-08NO7 AFB1224SHE ASB0824SHCODE 4P101C0070008 4P106C02900C9 277810263 277191539 4M300D3670007 43003340007Qty 1 1 3 1 2 1MODEL - - CM400DU-12F VUO190-08NO7 AFB1224SHE ASB0824SHCODE 4P101C0070008 4P106C02900C9 277810271 277191539 4M300D3670007 43003340007Qty 1 1 3 1 2 1MODEL - - CM600HU-12F 2RI00E-080 AFB1224SHE A2123-HBTCODE 4P101C0070008 4P106C02700C8 277800233 277051516 4M300D3670007 4M903D1890001Qty 1 1 6 6 3 1MODEL - - CM600HU-12F 2RI100E-080 AFB1224SHE A2123-HBTCODE 4P101C0070008 4P106C02700C8 277800233 277051516 4M300D3670007 4M903D1890001Qty 1 1 6 6 3 120
Table 6 Spare Parts for 440V ClassINVERTER &PART NAMEControl PC Board* Power Board Main Circuit Transistor Main Circuit Diode Cooling FanHP253040506075100125150175215250300350400500SPECMODEL - - 7MBP075RA120 DF75LA160 AFB0824SHCODE 4P101C0070008 3P106C06500C1 277831538 277192195 3H300D2370006Qty 1 1 1 1 2MODEL - - 7MBP075RA120 DF75LA160 AFB0824SHCODE 4P101C0070008 3P106C06500C1 277831538 277192195 3H300D2370006Qty 1 1 1 1 2MODEL - - CM100DU-24F DF75LA160 A2123-HBT ASB0624HCODE 4P101C0070008 4P106C02900A2 277810280 277192195 4M903D1890001 4H300D3330001Qty 1 1 3 1 2 1MODEL - - CM150DU-24F DF100LA160 A2123-HBT ASB0624HCODE 4P101C0070008 4P106C02900A2 277810298 277192217 4M903D1890001 4H300D3330001Qty 1 1 3 1 2 1MODEL - - CM150DU-24F 2U/DDB6U145N16L A2123-HBT ASB0624HCODE 4P101C0070008 4P106C02900A2 277810298 277190222 4M903D1890001 4H300D3330001Qty 1 1 3 1 2 1MODEL - - CM200DU-24F 2U/DDB6U145N16L AFB1224SHE AFB0824SHCODE 4P101C0070008 4P106C02900A2 277810301 277190222 4M300D3670007 4H300D3340007Qty 1 1 3 1 2 1MODEL - - CM300DU-24F 2U/DDB6U205N16L AFB1224SHE AFB0824SHCODE 4P101C0070008 4P106C02900A2 277810310 277190249 4M300D3670007 4H300D3340007Qty 1 1 3 1 2 1MODEL - - CM400HU-24F 2RI60G-160 AFB1224SHE A2123-HBTCODE 4P101C0070008 4P106C02700A1 277800217 277051541 4M300D3670007 4M903D1890001Qty 1 1 6 6 3 1MODEL - - CM400HU-24F 2RI100G-160 AFB1224SHE A2123-HBTCODE 4P101C0070008 4P106C02700A1 277800217 277051524 4M300D3670007 4M903D1890001Qty 1 1 6 6 3 1MODEL - - CM600HU-24F 2RI100G-160 AFB1224SHE A2123-HBTCODE 4P101C0070008 4P106C02700A1 277800225 277051524 4M300D3670007 4M903D1890001Qty 1 1 6 6 3 1MODEL - - CM600HU-24F 2RI100G-160 EFB1524HHG A2123-HBTCODE 4P101C0070008 4P106C02700A1 277800225 277051524 4M300D3680002 4M903D1890001Qty 1 1 6 6 3 1MODEL - - CM600HU-24F 2RI100G-160 EFB1524HHG A2123-HBTCODE 4P101C0070008 4P106C02700A1 277800225 277051524 4M300D3680002 4M903D1890001Qty 1 1 6 6 3 1MODEL - - CM400HU-24F 2RI100G-160 EFB1524HHG A2123-HBTCODE 4P101C0070008 4P106C02700B0 277800217 277051524 4M300D3680002 4M903D1890001Qty 1 1 12 6 3 1MODEL - - Skiip1013GB122-2DL SKKH330/E16 2RRE4525056RCODE 4P101C0070008 3P106C0060009 4M903D2020001 4M903D1990006 4M903D1940009Qty 1 1 3 3 1MODEL - - Skiip1203GB122-2DL SKKH500/E16 2RRE4525056RCODE 4P101C00700A6 3P106C0060009 4M903D2030006 4M903D2000000 4M903D1940009Qty 1 1 3 3 2MODEL - - Skiip1513GB122-3DL SKKH500/E16 2RRE4525056RCODE 4P101C0070008 3P106C0060009 4M903D2040001 4M903D2000000 4M903D1940009Qty 1 1 3 3 221
7. SPECIFICATIONS Basic Specifications230V CLASSINVERTER (HP) 25 30 40 50 60 75 100 125MAX. APPLICABLE MOTOROUTPUT HP (KW)*1InverterCapacity(KVA)Rated OutputOutputCurrent (A)CharacteristicsMax. OutputFrequencyRated OutputFrequencyRated InputVoltage AndFrequencyAllowablePower Supply VoltageFluctuationAllowableFrequencyFluctuation25(18.5)30(22)40(30)50(37)60(45)75(55)100(75)125(90)27.4 33 44 55 63 81 110 12572 88 117 144 167 212 288 3273-Phase, 200/208/220/230V(Proportional to input voltage)Up to 180Hz available3-Phase, 200/208/220V, 50Hz200/208/220/230V, 60Hz+10% ~ -15%±5%460V CLASSINVERTER (HP) 25 30 40 50 60 75 100 125 150 175 215 250 300 350 400 500MAX. APPLICABLE MOTOROUTPUT HP (KW)*125(18.5)30(22)40(30)50(37)60(45)75(55)100(75)125(90)150(110)175(132)215(160)250(185)300(220)350(260)400(300)500(375)InverterCapacity(KVA)29 34 45 57 66 85 115 144 176 203 232 259 290 393 446 558OutputCharacteristicsPower SupplyRated OutputCurrent (A)Max. OutputFrequencyRated OutputFrequencyRated InputVoltage AndFrequencyAllowableVoltageFluctuationAllowableFrequencyFluctuation Based on 4 pole motor38 44 59 75 86 111 151 189 231 267 304 340 380 516 585 7323-Phase, 380/400/415/440/460V(Proportional to input voltage)Up to 180Hz available3-Phase, 380/400/415/440/460V, 50/60Hz+10% ~ -15%±5%22
CHARACTERISTICSControl MethodFrequency Control RangeSine wave PWM0.1 to 180HzControl Characteristics+14 to 104 77 ± 18Frequency AccuracyDigital command: 0.01% -10 to 40 Analog command: 0.1% 25 ± 10Frequency Setting Resolution Digital operator reference: 0.01Hz Analog reference: 0.06Hz/60HzOutput Frequency Resolution 0.01Hz (1/30000)Overload Capacity110% rated output current for one minute.Frequency Setting Signal 0 to 10VDC (20K), 4~20mA (250), 0 ~ ± 10 (option)Accel/Decel time0.1 to 6000 sec (independent Accel/Decel time settings)Braking Torque Approximately 20%No. of. V/f patterns(Total of 5)<strong>Motor</strong> Overload ProtectionInstantaneous OvercurrentOverloadOvervoltage (460V class)Overvoltage (230V class)1: For adjustable pattern. 4: For fans and pumps.Electric thermal overload relay<strong>Motor</strong> coasts to stop at approx. 200% rated current.<strong>Motor</strong> coasts to stop after 1 minute at 110% rated output current.<strong>Motor</strong> coasts to stop if inverter output voltage exceeds 820VDC.<strong>Motor</strong> coasts to stop if inverter output voltage exceeds 410VDC.Protective FunctionsUndervoltage (460V class)Undervoltage (230V class)Momentary Power Loss*1<strong>Motor</strong> coasts to stop if inverter output voltage drops to 380VDC or below.<strong>Motor</strong> coasts to stop if inverter output voltage drops to 190VDC or below.<strong>Motor</strong> coasts to stop after momentary power loss lasting over 15ms.(time-setting made before shipment).<strong>Motor</strong> Overheat Protection <strong>Motor</strong> PTC thermistor (Active: 1330, Return: 550)Input phase LossSingle phase protection.Output phase LossFin OverheatStall PreventionGround FaultProvided by electronic circuit.ThermostatStall prevention at acceleration/deceleration and constant speed operation.Provided by electronic circuit.Power Charge Indication Charge lamp stays ON until bus voltage drops below 50V.Environmental ConditionsLocationAmbient TemperatureStorage TemperatureHumidityVibrationIndoor (Protected from corrosive gases and dust)Wall-mounted type: +14 to 104 (-10 to +40),(not frozen)Open chassis type: +14 to 113 (-10 to +45), (not frozen)-4 to 140 (-20 to +60)95% RH (non-condensing)1G at 10 to 20Hz, up to 0.2G at 20 to 50Hz.Communication FunctionNoise Interference SuppressionNoise ImmunityRS-485 MODBUS, PROFIBUS (option)EN 50081-2 (1994) with specified noise filterPr EN50082-223
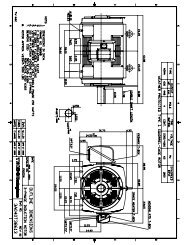
8. DIMENSIONSTable 7 Dimension and WeightVoltage(V)220V440VInverter Open Chassis Type (IP00) mmCapacity(HP) W H D W1 H1 dWeightEnclosed Type (NEMA1) mm(Kg) W H D W1 H1 dWeight(Kg)25 265 360 225 245 340 M6 12 265 360 225 245 340 M6 1230 36 3840 283.5 525 307 220 505 M8 36 291.5 745 307 220 505 M8 3850363860 47 50344 630 324.5 250 610 M8 352 945 324.5 250 610 M8754952100 82 87459 790 324.6 320 760 M10 462 1105 324.6 320 760 M10125828725 12 12265 360 225 245 340 M6 265 360 225 245 340 M630121240 36 38283.5 525 307 220 505 M8 291.5 745 307 220 505 M850363860 47 5075 344 630 324.5 250 610 M8 47 352 945 324.5 250 610 M8 501004750125 80 85150 459 790 324.6 320 760 M10 80 462 1105 324.6 320 760 M10 851758186215 128 135250 599 1000 381.6 460 960 M12 128 602 1305 381.6 460 960 M12 135300132139ACL/DCLExternal ACL(option)DCL Built-in(Standard)DCL Built-in(Standard)External ACL(option)DCL Built-in(Standard)DCL Built-in(Standard)DCL Built-in(Standard)DCL Built-in(Standard)ReferenceFigure350 160 166 (c)External ACL400 730 1230 382 690 930 M12 170 730 1330 382 690 930 M12 176(option) (d)500190196(a)(b)(a)(b)(a) 220V25HP440V25HP, 30HPWW1dDH2H1H24
(b) 220V30HP125HP440V40HP300HPWW1DWW1DOpen Chassis Type IP00(Wall-mounted TypeNEMA1(c) 440V350HPWW1DWW1dd23200200365365HH365365HHH1H1ddD500122500Open Chassis Type IP00(Wall-mounted TypeNEMA1)25
(d) 440V400HP, 500HPWW1DWW1Ddd23200200365365HH365365500122500Open Chassis Type IP00(Wall-mounted TypeNEMA1)26
9. PERIPHERAL AND OPTIONS9.1 AC REACTORWhen power capacity is significantly large compared to inverter capacity, or when thepower factor needs to be improved, externally connect an AC reactor.7300PA 220V 30 ~ 125HP and 440V 40 ~300HP have built-in DC reactor as standard.(When the power factor needs to be improved, externally connect an AC reactor).220V 25HP and 440V 25HP, 30HP connect an optional AC reactor When the power factorneeds to be improved.440V 350 ~500HP need to connect an AC reactor externally.Table 8 AC REACTORInverterAC ReactorVoltage HP Rated current (A) Current (A) Inductance (mH) Code NO.25 72 90 0.12 3M200D161010230 88 90 0.12 3M200D161010240 117 120 0.09 3M200D1610111220V50 144 160 0.07 3M200D161026960 167 160 0.07 3M200D161026975 212 240 0.044 3M200D1610285100 288 360 0.026 3M200D1610307125 327 360 0.026 3M200D161030725 38 50 0.42 3M200D1610218440V30 44 50 0.42 3M200D161021840 59 60 0.36 3M200D161022650 75 80 0.26 3M200D161023460 86 90 0.24 3M200D161024275 111 120 0.18 3M200D1610251100 151 200 0.11 3M200D1610323125 189 200 0.11 3M200D1610323150 231 250 0.09 3M200D1610331175 267 330 0.06 3M200D1610340215 304 330 0.06 3M200D1610340250 340 400 0.05 4M200D0010008300 380 500 0.04 4M200D0020003350 516 670 0.032 4M200D0030009400 585 670 0.032 4M200D0040004500 732 800 0.025 4M200D005000027
9.2 NOISE FILTER9.2.1 INPUT NOISE FILTERWhen input noise filter is installed as indicated, the 7300PA will comply with theEN50081-2 (1994) noise interference suppression directive.Input Noise FilterRMCCBIN14PAR/L1 U/T1ST2356S/L2 V/T2T/L3 W/T3IInput Noise Filter Connection ExampleVoltage (V)220V440VTable 9Input Noise FilterInverterInput Noise FilterHPRated currentRatedCode NO. Model NO.(A)current (A)25 72A 4H000D1690004 FS6100-90-34 90A30 88A 4H000D1690004 FS6100-90-34 90A40 117A 4H000D1710005 FS6100-150-36 150A50 144A 4H000D1710005 FS6100-150-36 150A60 167A 4H000D1720001 FS6100-250-99 250A75 212A 4H000D1720001 FS6100-250-99 250A100 288A 4H000D1750007 FS6100-400-99 400A125 327A 4H000D1750007 FS6100-400-99 400A25 38A 4H000D1770008 FS6101-50-47 50A30 44A 4H000D1770008 FS6101-50-47 50A40 59A 4H000D1790009 FS6101-80-52 80A50 75A 4H000D1790009 FS6101-80-52 80A60 86A 4H000D1800004 FS6101-120-35 120A75 111A 4H000D1800004 FS6101-120-35 120A100 151A 4H000D1820005 FS6101-200-36 200A125 189A 4H000D1820005 FS6101-200-36 200A150 231A 4H000D1850001 FS6101-320-99 320A175 267A 4H000D1850001 FS6101-320-99 320A215 304A 4H000D1850001 FS6101-320-99 320A250 340A 4H000D1880008 FS6101-400-99 400A300 380A 4H000D1880008 FS6101-400-99 400A350 516A 4H000D1900009 FS6101-600-99 600A400 585A 4H000D1900009 FS6101-600-99 600A500 732A 4H000D1910004 FS6101-800-99 800A28
DRIVE FWD REVDIGITAL OPERATOR JNEP-31REMOTERESET9.2.2 EMI SUPPRESSION ZERO COREModel: JUNFOC046S - - - - - - -Code No.: 4H000D0250001According to the required power rating and wire size, select the matched ferrite core tosuppress the zero sequence EMI filter.The ferrite core can attenuate the frequency response at high frequency range (from 100KHzto 50MHz, as shown below). It should be able to attenuate the RFI from inverter to outside.The zero-sequence noise filter ferrite core can be installed either on the input side or on theoutput side. The wire around the core for each phase should be winded by following thesame convention and one direction. The more winding turns the better attenuation effect.(Without saturation). If the wire size is too big to be winded, all the wire can be grouped andgo through these several cores together in one direction.Frequency attenuation characteristics (10 windings case)0attenuation value (dB)-10-20-30-4010 110 2 10 3 10 4 10 5Interference Frequency (kHz)Example: EMI suppression zero core application examplePRGMDRIVEJOGFWDREVRUNDSPLEDITENTERSTOPNote: All the line wire of U/T1, V/T2, W/T3 phase must pass through the same zero-phase corein the same winding sense.29
9.3 BRAKING RESISTOR AND BRAKING UNITThe braking transistor of 220V 25HP and 440V 25HP, 30HP was built-in as standard, thebraking resistor can be connected to main circuit terminals B2 and directly. The otherswithout built-in braking transistor need to connect braking unit with braking resistorexternally.When connecting braking resistor or braking unit with braking resistor, set system parameterSn-10=XX10 (i.e. stall prevention during deceleration not enabled).Braking resistor and braking unit selection table is shown below.Table 10 Braking Resistor and Braking UnitVoltage HPInverter Braking Unit Braking ResistorRated current(A)TypeNumberusedCode NO. Specs. Number usedBraking Torque(%)25 72A 3H333C0020086 3000W/10 1 100(5ED)30 88A JUVPLV-0060 1 3H333C0020108 4800W/6.8 1 125(10ED)40 117A JUVPLV-0040 2 3H333C0020086 3000W/10 2 125(10ED)220V50 144A JUVPLV-0040 2 3H333C0020086 3000W/10 2 100(10ED)60 167A JUVPLV-0060 2 3H333C0020108 4800W/6.8 2 120(10ED)75 212A JUVPLV-0060 2 3H333C0020108 4800W/6.8 2 100(10ED)100 288A JUVPLV-0060 3 3H333C0020108 4800W/6.8 3 110(10ED)125 327A JUVPLV-0060 3 3H333C0020108 4800W/6.8 3 90(10ED)440V25 38A 3H333C0190005 1600W/50 1 80(5ED)30 44A 3H333C0190005 1600W/50 1 70(5ED)40 59A JUVPHV-0040 1 3H333C0020213 6000W/20 1 125(10ED)50 75A JUVPHV-0060 1 3H333C0020221 9600W/16 1 125(10ED)60 86A JUVPHV-0060 1 3H333C0020230 9600W/13.6 1 125(10ED)75 111A JUVPHV-0040 2 3H333C0020213 6000W/20 2 135(10ED)100 151A JUVPHV-0060 2 3H333C0020230 9600W/13.6 2 145(10ED)125 189A JUVPHV-0040 3 3H333C0020213 6000W/20 3 120(10ED)150 231A JUVPHV-0040 3 3H333C0020213 6000W/20 3 100(10ED)175 267A JUVPHV-0040 4 3H333C0020230 6000W/20 4 115(10ED)215 304A JUVPHV-0060 4 3H333C0020230 9600W/13.6 4 140(10ED)250 340A JUVPHV-0060 4 3H333C0020230 9600W/13.6 4 120(10ED)300 380A JUVPHV-0060 4 3H333C0020230 9600W/13.6 4 100(10ED)350 516A JUVPHV-0060 5 3H333C0020230 9600W/13.6 5 110(10ED)30
400 585A JUVPHV-0060 5 3H333C0020230 9600W/13.6 5 100(10ED)500 732A JUVPHV-0060 6 3H333C0020230 9600W/13.6 6 95(10ED)31
RESET9.4 OTHERS9.4.1 DIGITAL OPERATOR WITH EXTENSION WIREUsed for the operation of LCD (or LED) digital operator or monitor when removed from thefront of inverter unit.DRIVE FWD REV REMOTESEQ REF7300PADIGITAL OPERATOR JNEP-312PRGMDSPLDRIVEJOGEDITENTERFW DREVRUNSTOPLCableLengthExtension Cable Set*1 Extension Cable Set*2 Blank Cover*31m 4H332D0010000 4H314C00100032m 4H332D0030001 4H314C00300043m 4H332D0020005 4H314C00200095m 4H332D0040006 4H314C00400004H300D1120000*1 : Including special cable for LCD (or LED) operator, blank cover, fixed use screws andinstallation manual.*2 : One special cable for digital operator.*3 : A blank cover to protect against external dusts, metallic powder, etc.The physical dimension of LCD (or LED) digital operator is drawn below. Fig. 6 LCD Digital Operator Dimension32
9.4.2 ANALOG OPERATORAll 7300PA have the LCD (or LED) digital operator. Moreover, an analog operator asJNEP-16 (shown in fig. 7) is also available and can be connected through wire as a portableoperator. The wiring diagram is shown below.R/L1S/L2T/L3BREAKERFWD-RUNSTOPREV-RUNRESETR/L1S/L2T/L37300PAU/T1V/T2W/T3IMMaster Freq. Ref.976, 1/4W2k0 ~ 10VFM- +SC24V15VVINGND 0VA01GNDANALOGOUTPUTAnalog Operator(JNEP-16)Fig. 7 Analog Operator9.4.3 LED DIGITAL OPERATORAll 7300PA have standard with LCD digital operator (JNEP-32). Moreover, an LED digitaloperator JNEP-33 (shown in Fig. 9-b) is also available and can be connected through thesame cable and connector.The LED digital operator has the same installation and dimension with the LCD digitaloperator.9.4.4 1-TO-8 PID RELAY CARDUsed in the constant pressure water supply system.The PA-PID option card has the same installation with the RS-485 communication optioncard (PA-M or PA-P).33
9.4.5 RS-485 COMMUNICATION OPTION CARDName Code NO. Function ReferenceMODBUS protocol communication optional cardPA-M4P502C0050006Communication method: AsynchronousCommunication speed: 19.2Kbps (max.)4H358D0150002Interface: RS-485, RS-422PROFIBUS protocol communication optional cardPA-P4P502C0060001Communication method: AsynchronousCommunication speed: depend4H358D0170003Interface: RS-485The RS-485 Communication option card can be mounted on the upper side of control boardCN2 connector.Use the following procedure to install three option card.1>. Turn off the main-circuit power supply.2>. Leave it off for at least one minute before removing the front cover of the inverter.Check to be sure that the CHARGE indicator is OFF.3>. Insert the spacer (Which is provided with the option card) into the spacer hole at thecontrol board.4>. Pass the spacer through the spacer hole at the option card. Check to be sure that it isprecisely aligned with the CN2 position, and snap it into the proper position.TopControl boardPA-M or PA-P cardor PA-PID cardCN2LCDoperatorSpacer hole4CN1RSTUVWBottomFig. 8 Option card InstallationMain power terminals34
PART IIOPERATION MANUAL33
1. DESCRIPTION OF USING 7300PA1.1 Using LCD (or LED) digital operator7300PA are standard with LCD digital operator JNEP-32. Moreover, an LED digitaloperator JNEP-33 is also available. Three two digital operator have the sameoperation functions except the LCD and 7-segments LED display difference.The LCD and LED digital operator has 2 modes: DRIVE mode and PRGM mode.When the inverter is stopped, DRIVE mode or PRGM mode can be selected bypressing the key PRGMDRIVE . In DRIVE mode, the operation is enabled. Instead, in thePRGM mode, the parameter settings for operation can be changed but the operationis not enabled.a> The LCD digital operator component names and functions shown as below:operation mode indicatorsDRIVE FWD REV REMOTESEQ REFDIGITAL OPERATOR JNEP-31 32PRGMDRIVEJOGJOG (L/R)FWDREVRUNPRGMDRIVEDSPLEDITENTERRESETSTOPDSPLDRIVE : lit when in DRIVE modeFWD : lit when there is a forward run command inputREV : lit when there is a reverse run command inputSEQ : lit when the run command is enabled from the controlcircuit terminal or RS-485 option card (REMOTE mode)REF : lit when the frequency reference from the control circuitterminals (VIN or AIN) or RS-485 option card enabled(REMOTE mode)LCD DisplayChinese Display: 2 row, each row has 8 characters at mostEnglish Display: 2 row, each row has 20 characters at mostKeys (Key functions are defined in Table 11)Fig 9-a LCD Digital operator component names and functionsb> The LED digital operator component names and functions shown as below:operation mode indicatorsDRIVE FWD REV REMOTEDRIVE : lit when in DRIVE modeSEQ REFFWD : lit when there is a forward run command inputREV : lit when there is a reverse run command inputSEQ : lit when the run command is enabled from the controlcircuit terminal or RS-485 option card (REMOTE mode)DIGITAL OPERATOR JNEP-31 32 33REF : lit when the frequency reference from the control circuitterminals (VIN or AIN) or RS-485 option card enabled(REMOTE mode)LED Display5 digitals 7-degment LED.JOGJOG (L/R)FWDREVEDITENTERRESETKeys (Key functions are defined in Table 11)RUNSTOPFig 9-b LED Digital operator component names and functions34
Table 11 Key’s functionsKey Name FunctionPRGMDRIVEPRGM/DRIVE keySwitches between operation (PRGM) and operation(DRIVE).DSPL DSPL key Display operation statusJOG(L/R)FWDREVRESETEDITENTERRUNSTOPJOG or L/R keyFWD/REV keyRESET keyINCRENMNT keyDECRENENT keyEDIT/ENTER keyRUN keySTOP keyEnable jog operation from digital operator in operation(DRIVE).L/R (Local/Remote)key function set by Sn-05.Select the rotation direction from digital operator.Set the number of digital for user constant settings.Also itacts as the reset key when a fault has occurred.Select the menu items, groups, functions, and userconstantname, and increment set values.Select the menu items, groups, functions, and userconstantname, and decrement set values.Select the menu items, groups, functions, and userconstantsname, and set values (EDIT). After finishingthe aboveaction, press the key (ENTER).Start inverter operation in (DRIVE) mode whenoperator is used. The led will light.Stop 7300PA operation from LCD digital operator. Thekey can be enable or disabled by setting a constantSn-05 when operating from the control circuit terminal(in this case, the LED will light).RUN, STOP indicator lights or blinks to indicate the 3 operating status:Inverter output frequencyFrequency SettingRUNSTOP ON Blink OFF 35
1.2 DRIVE mode and PRGM mode displayed contentsPower onPRGM modePRGMDRIVE modeDRIVE *1DSPLAn- monitorsetDSPLBn- monitorsetDSPLFrequency referenceDSPLOutput Frequency*3*2When faultsOccurred beforepower supplywas turned offDSPLOutput CurrentSn- monitorsetDSPLCn- monitorsetDSPLHn- monitorset*1When the inverter is put into operation,the inverter system immediately enters intoPID detected value*4Display of faults whichoccurred before power supplywas turned offDSPLUn- monitorDSPLDRIVE mode. Press the PRGMDRIVEkey,An- monitorsetthe system will switch into PRGM mode.*2If the fault occurred before powersupply was turned off, the fault contentsare displayed when power ON.Fault occurrence order and display are∧∨provided by or key.Un fault : n =1~4,the fault occurrenceOrder, fault :the fault contents,please refer to page 111~114,the fault display.DSPLBn- monitorsetDSPLDSPLSn- monitorDSPLCn- monitor*3If no fault occurred before power supply was turned off , display the monitored dataaccording to the Bn-10 setting*4This block will be by passed if no fault occurred before power supply was turned off or a*5 RESETfault occurs and was reset byRESET*5When in the DRIVE mode, press the DSPL key andRESETkey, the setting values of SnandCn- will only be displayed for monitoring but not for changing or setting.36
1.3 Parameter descriptionThe 7300PA has 4 groups of user parameters:Parameters *4DescriptionAn-Bn-Sn-Cn-Frequency commandParameter settings can be changed during runningSystem parameter settings (can be changes only after stop)Control parameter settings (can be changed only after stop)The parameter setting of Sn-03 (operation status) will determine if the setting valueof different parameter groups are allowed to be changed or only to be monitored, asshown below:Sn-03DRIVE modePRGM modeTo be set To be monitored To be set To be monitored0000 *1 An, Bn Sn, Cn An, Bn, Sn, Cn 0101 *2 An Bn, Sn, Cn An Bn, Sn, Cn*1Factory setting*2When in DRIVE mode, the parameter group Sn-, Cn- can only be monitored if theRESETkey and the DSPL key are to be pressed at the same time,*3 After a few trial operation and adjustment, the setting value Sn-03 is set to be “0101"so as not be modified again.*4The 7300PA has 2 groups of monitoring parameters and one group of orderparameters in addition to the above 4 groups of user parameters.Un-Can be monitored by the users under the DRIVE mode.Hn-Can be monitored by the users under the PRGM mode.On-Order parameters can be monitored and changed by setting Sn-03=1010.37
1.4 Sample example of using LCD digital operatorNoteBefore operation: Control parameter Cn-01 value must be set as the input ACvoltage value. For example, Cn-01=380 if AC input voltage is380.This sample example will explain the operating of 7300PA according to the following timechart. OPERATION MODE(1)(2) (3)(4) (5) (6) FWD (7) (8)60HzSTOPPOWERONFWD JOGOPERATION FWD RUN REV RUNSET INPUTVOLTAGEFREQUENCYSETTINGFREQ REF.VALUE CHANGEREV60Hz Sample operationDescriptionKey SequenceDigital OperatorDisplayRemarks(1) When POWER ONSect frequency referencevalue displayedSelect PRGM modePRGMDRIVEFreq. Cmd. 00.00Hz<strong>TECO</strong>An-01Freq. Cmd. 1LED DRIVEOFF(2)Input voltagesetting (e.g. ACinput voltage is380V)Select CONTROLPARAMETERDSPLEDITENTERPress 3timesCn-01-Input VoltageCn-01=440.0VInput Voltage(continued)Display Cn-01 settingInput Voltage 380VRESETEDITENTERCn-01=380.0VInput VoltageEntry AcceptedDisplay for 0.5sec38
DescriptionKey SequenceDigital OperatorDisplayRemarks(continued)(3) FWD JOGSelect DRIVE modePRGMDRIVEFreq. Cmd. 00.00Hz<strong>TECO</strong>LED DRIVEONSelect output frequencydisplayedDSPLFreq. Cmd. .0 Hz<strong>TECO</strong>LED FWDONSelect direction of rotation(When power on, initiallydefaulted FWD)Jog operationJOGO/P Freq. 6.00 Hz<strong>TECO</strong>(4) Frequency setting15HzSelect frequency cmddisplayedChange frequency cmdDSPLRESETPress 4timesFreq. Cmd. 00.00Hz<strong>TECO</strong>Freq. Cmd. 15.00Hz<strong>TECO</strong>Set new frequency cmdEDITENTERFreq. Cmd. 15.00Hz<strong>TECO</strong>Entry AcceptedDisplay for 0.5 secConfirm the display.Select O/P frequencydisplayedDSPLO/P Freq. .0 Hz<strong>TECO</strong>(5) FWD runRunning operationRUNO/P Freq. 15.00 Hz<strong>TECO</strong>LEDONRUN(6)Frequencycommand changeSelect frequency cmddisplayedDSPLPress 4timesFreq. Cmd. 15.00Hz<strong>TECO</strong>60HzChange reference valueRESETFreq. Cmd. 60.00Hz<strong>TECO</strong>Enter new frequency cmdsettingEDITENTERFreq. Cmd. 60.00Hz<strong>TECO</strong>Entry AcceptedDisplay for 0.5 secConfirm the display.Select frequency cmddisplayedDSPLO/P Freq. 60.00 Hz<strong>TECO</strong>(7) REV RUNChange to REVFWDREVO/P Freq. -60.00 Hz<strong>TECO</strong>LED REVON(8) STOPDecrement to STOPSTOPO/P Freq. .0 Hz<strong>TECO</strong>LEDONSTOP(Blinkingwhiledecel.)RUN39
2. SETTING USER CONSTANT2.1 Frequency command (in Multi-speed operation) A n - Under the DRIVE mode, the user can monitor the parameters and set their values.ParameterNo.Name LCD Display (English) Setting RangeSettingUnitFactorySettingRef.PageAn-01 Frequency Command 1An-01=000.00HzFrequency Command 10.00180.00 Hz 0.01Hz 00.00HzAn-02 Frequency Command 2An-02=000.00HzFrequency Command 20.00180.00 Hz 0.01Hz 0.00HzAn-03 Frequency Command 3An-03=000.00HzFrequency Command 30.00180.00 Hz 0.01Hz 0.00HzAn-04 Frequency Command 4An-05 Frequency Command 5An-04=000.00HzFrequency Command 4An-05=000.00HzFrequency Command 50.00180.00 Hz 0.01Hz 0.00Hz0.00180.00 Hz 0.01Hz 0.00Hz8788121An-06 Frequency Command 6An-06=000.00HzFrequency Command 60.00180.00 Hz 0.01Hz 0.00HzAn-07 Frequency Command 7An-07=000.00HzFrequency Command 70.00180.00 Hz 0.01Hz 0.00HzAn-08 Frequency Command 8An-08=000.00HzFrequency Command 80.00180.00 Hz 0.01Hz 0.00HzAn-09Jog FrequencyCommandAn-09=006.00HzJog Command0.00180.00 Hz 0.01Hz 6.00Hz*1. The displayed "Setting Unit” can be changed through the parameter Cn-20.*2. At factory setting, the value of "Setting Unit" is 0.01Hz.*3. The setting of An-01~16 should be with the multi-function analog terminals 5 ~8 .40
2.2 Parameters Can Be Changed during Running B n - Under the DRIVE mode, the Parameter group can be monitored and set by theusers.FunctionAcc/DectimeAnalogFrequencyCommandTorqueBoostA01 biasA02 biasA01 GainA02 GainPIDControlPID SleepModeParameterNo.Bn-01 Acceleration Time 1Bn-02 Deceleration Time 1Bn-03 Acceleration Time 2Bn-04 Deceleration Time 2Bn-05Bn-06Bn-07Bn-08Bn-09Bn-10Bn-11Bn-12Bn-13Bn-14Bn-15Bn-16Bn-17Bn-18Bn-19Bn-20Name LCD Display (English) Setting RangeAnalog FrequencyCmd. Gain (Voltage)Analog FrequencyCmd. Bias (Voltage)Auto torque BoostGain (Ineffective inenergy-saving mode)Multi-Function AnalogOutput A01 BiasMulti-Function AnalogOutput A02 BiasMonitor No. Afterpower ONMulti-Function AnalogOutput A01 GainMulti-Function AnalogOutput A02 GainPID Detection GainPID Proportional GainPID Integral GainPID Differential TimePID BiasPID sleep FrequencyPID sleep/Wake-upDelay TimePID Wake UpFrequency*1. Cn-04 is to be the 100% level.Bn-01=0010.0sAcc. Time 1Bn-02=0010.0sDec. Time 1Bn-03=0010.0sAcc. Time 2Bn-04=0010.0sDec. Time 2Bn-05=0100.0%Freq. Cmd. GainBn-06=0000.0%Freq. Cmd. BiasBn-07=1.0Auto_Boost GainBn-08 =00.0%~Output A01 BiasBn-09 =00.0%~Output A02 BiasBn-10=1Power ON. ContentsBn-11=1.00Output A01 GainBn-12=1.00Output A02 GainBn-13=01.00PID GainBn-14=01.0PID P-GainBn-15=010.0sPID I-TimeBn-16=0.00sPID D-TimeBn-17=000%PID BiasBn-18=000.00HzPID SLEEP FREQUENCYBn-19=000.0sPID SLEEP TIMEBn-20=60.00 HzWAKE UP FREQUENCYSettingUnitFactorySetting0.06000.0s 0.1s 10.0s0.06000.0s 0.1s 10.0s0.06000.0s 0.1s 10.0s0.06000.0s 0.1s 10.0s0.01000.0% 0.1% 100.0%-100.0%100.0% 0.1% 0.0%Ref.Page43430.02.0 0.1 1.0 43-25.0%~+25.0% 0.1% 0.0%-25.0%~+25.0% 0.1% 0.0%434414 1 1 440.012.55 0.01 1.00 440.012.55 0.01 1.00 440.0110.00 0.01 1.000.010.0 0.1 1.00.0100.0s 0.1s 10.0s0.001.00s 0.01s 0.00s0109%* 1 1% 0%0.00180.00Hz0.01Hz 00.00Hz0.0255.5Sec 0.1s 00.0s0.00180.00Hz0.01Hz 60.00Hz4445454641
FunctionPIDDisplayunitPA-PIDRelay CardControlFunctionParameterNo.Bn-21Bn-22Bn-23Bn-24Bn-25Bn-26Name LCD Display (English) Setting RangePID Detected ValueDisplay BiasPID Detected ValueDisplay GainFreq. CommandUpper-Bound DelayTimeFreq. CommandLower-Bound DelayTimeMC ON/OFF DelayTimePump ON/OFFDetection LevelBn-21=0.000PID Det. DSPL BiasBn-22=0.000PID Det. DSPL GainBn-23=300sUp-Bound Delay TimeBn-24=300sLow-Bound Delay TimeBn-25=1.00sMC ON/OFF Delay TimeBn-26=00.0%Pump ON/OFF Det. LevelSettingUnitFactorySettingRef.Page-9.999~+9.999 0.001 0.000 470.000~9.999 0.001 0.000 471~600sec 1s 300s 481~600sec 1s 300s 480.10~2.00sec 0.01s 1.00s 480.0~20.0% 0.1% 0.0% 4842
(1) Acceleration Time 1 (Bn-01)Acceleration time 1 is enabled when the accel/decel time change command of multi-functionterminal is "open", or the accel/decel time change function is not provided for themultifunction terminals. The acceleration time in which frequency reference goes from 0% to100% is set in the units of 0.1 second.(2) Deceleration Time 1 (Bn-02)Deceleration time 1 is enabled when the accel/decel time change command of multi-functionterminals is "open", or the accel/decel time change function is not provided for themultifunction terminals. The deceleration time in which frequency reference goes from 100%to 0% is set in the units of 0.1 second.(3) Acceleration Time 2 (Bn-03)Acceleration time 2 is enabled when the accelldecel time change command of multi-functionterminals is "closed". The acceleration time in which frequency reference goes from 0% to100% is set in the units of 0.1 second.(4) Deceleration Time 2 (Bn-04)Deceleration time 2 is enabled when the accel/decel time change command of multi-functionterminals is "closed". The deceleration time in which frequency reference goes form 100% to0% is set in the units of 0.1 second.(5) Frequency Reference Gain (Bn-05)The input level when frequency reference voltage is 10V is set in the units of 0.1%.Examples are shown in the below.(6) Frequency Reference Bias (Bn-06)The input level when frequency reference voltage is 0V is set in the units of 0.1%.ExampleINPUT LEVEL% Bn-06 is positive value. Bn-05 = 50.0Bn-05 a: Bn-06 = 10.050%Bn-06 isb: Bn-06 = -10.010Bn-06negative value.(a)0 FREQUENCY0V 10VREF.Bn-06(b) -10(7) Torque Compensation Gain (Bn-07)Torque compensation gain is set in the units of 0.1.(8) Multi-Function Analog Output A01 Bias(Bn-08)(9) Multi-Function Analog Output A02 Bias(Bn-09) The output voltage of Multi-function analog output A01 and A02 can be shifted upor down by Bn-08 and Bn-09 in the units of % individually.43
Output voltage10VGain(Bn-11or Bn-12)>1.00Gain(Bn-11or Bn-12)=1.00Bias (Bn-08 or Bn-09)=0.0%0V0% 100%Monitor items(10) Monitor No. after Turning On Power Supply (Bn-10)Data to be monitored after turning ON power supply is selected with constant No. in the formof Un-.1 Frequency reference2 Output frequency(Bn-10=01 — Display: Freq. Cmd)(Bn-10=02 — Display: O/P Freq.)3 Output current (Bn-10=03 — Display: O/P I)4 PID detected value after display unit changing(Bn-10=04 — Display: PID Det. Value). ref to page 47.(11) Multi-function Analog Output A01 Gain (Bn-11)Bias(Bn-08 or Bn-09)0.0%(12) Multi-function Analog Output A02 Gain (Bn-12)Multi-function Analog Output A01 and A02 can be set for their individual voltage levelrespectively.Multi-function Analog Output A01(Output contents depend on Sn-26)10.0V × Bn-11,Bn-08 Terminal A01Multi-function Analog Output A02(Output contents depend on Sn-27)10.0V × Bn-12,Bn-09 Terminal A02Fig.10 Diagram of Multi-function Analog Output(13) Detected Value Adjusting Gain (Bn-13)The detected feedback value can be adjusted by multiplying adjusting gain Bn-13.(14) Proportional Gain P (Bn-14)Output P is obtained by multiplying deviation value by proportional gain Bn-14. No Poperation when Bn-14=0.0. Refer to page 45, the block diagram of PID control section.(15) Integral Time I (Bn-15)Output I is an integral value of deviation. The additional value obtained at every 7 msec canbe calculated by the following equation:7 msec(Deviation x ———————— )Bn-15 set valueNo I operation when Bn-15 = 0.0 sec. Refer to page 45, the block diagram of PID controlsection.44
(16) Differential Time D (Bn-16) Output D is obtained by multiplying variation by gain. That is, the output is obtainedby multiplying the difference between the value before 7 msec of deviation and thecurrent value by gain of (Bn-16 set value/7msec). No D operation when Bn-16= 0.00sec. Refer to page 45, the block diagram of PID control section.(17) PID offset Adjustment (Bn-17)Constant Bn-17 adjusts the PID control offset. If both the target value and thefeedback value are set to zero, adjust the inverter’s output frequency to zero.Aimed Value(Multi-functionalanalog input AUXWhen Sn-19=09)Detected Value(VIN or AIN)Bn-13+-(P)Bn-14(I)IUpper limit Value +Bn-15+(D) Cn-43 +Bn-16Offset ValueBn-17Limit±109% Primary Lag Time Constant+Cn-44 Frequency+ReferenceFig 11-(a) Block Diagram of PID Control SectionDeviationDeviation Aimed ValueDetected Value(P Output=Deviation×Bn-14)(P)(I)(D)Deviation Bn −16(Variation× )7msec(Output I becomes the sameas deviation after lapse ofBn-15.)Fig 11-(b) Response when Deviation is of Step FormNote 1) All PID calculations are executed every 7 msec.2) The PID final outputs are all added.(18) PID Sleep Frequency (Bn-18)Frequency level for activation of sleep function, When the PA output frequency dropsbelow the PID sleep frequency set in parameter Bn-18, the PID sleep mode timer isstarted, The present output frequency (fout) will follow the frequency command (f CMD )until fmin is reached.45
(19) PID Sleep/Wake-up Delay Time (Bn-19)This parameter enables the inverter to stop and start running the motor if the load onthe motor is minimal.The time in Bn-19 starts when the output frequency (fout) drops below the frequencyset in Bn-18 or when the frequency command (f CMD ) exceeds the wake up frequency(Bn-20).At the sleep mode (i.e. when the output frequency Bn-18), when the time set inthe timer has expired, the inverter will ramp down the motor to stop. At the wake-upmode (i.e. when the frequency command Bn-20), when the time set in the timerhas expired, the inverter will accelerate to frequency command. If the outputfrequency rises above the frequency set in Bn-18, or the frequency command dropsbelow the set value in Bn-20, the timer is reset.(20) PID Wake Up Frequency (Bn-20)Frequency level for deactivation of sleep function. When the frequency command(f CMD ) exceeds the wake up frequency and after the time delay (set in Bn-19), theinverter restarts the motor.While the inverter has stopped the motor in sleep mode, the PID control function isstill working. When the frequency command rises above the wake up frequency inBn-20 and after the time delay (set in Bn-19), the inverter will restart the motor andthe output frequency will ramp up to the frequency command.PID Aimed ValuePID Detected ValuePID ControlFrequencyCommandf CMD fSoft StarttOutputFrequencyf out FrequencyHzFrequency Commandf CMD Wake-up FrequencyBn-20Sleep FrequencyBn-18Min Output FrequencyCn-07Output Frequencyf out Sleepdelay time(Bn-19)SleepWake-updelay time(Bn-19)Wake-up46
1. The PID sleep function is deactivation when PID control function disable(Sn-1909)2. When the timer runs out, the inverter will stop the motor depend on the stoppingmethod set in Sn-04.3. The sleep function is not active in JOG mode.4. Sleep mode makes it possible to stop the motor when it is running at low speed andthis has almost no load. If consumption in the system goes back up, the inverter willstart the motor and supply the power supply. Energy saving can be saved with thisfunction, since the motor is only in operative when the system needs it.(21) PID Detected Value Display Bias (Bn-21)(22) PID Detected Value Display Gain (Bn-22)The PID detected value can be input from control terminal VIN (0~10V) or AIN(4-20mA), the detected value is the addition of VIN and AIN, when the detectedfeedback signal is input from VIN and AIN terminal simultaneously.The multi-function analog output can be set to monitor the PID detected value (WhenSn-26=09 or Sn-27=09)The PID detected value can be monitored by the monitoring parameter Un-21, andthe display unit can be set by Bn-21 and Bn-22 (eg. 0~10V or 4-20mA detectedvalue can be set as pressure signal unit, using Bn-21 to set the equivalent pressurevalue for 0V or 4mA PID detected value and Bn-22 to set the equivalent pressurevalue for 10V or 20mA PID detected value).The PID detected value also can be monitored by digital operator after turning onpower supply. (When Bn-10=04).AimedValueAUXGain & BiasBn-05,Bn-06Frequency CommandUpper/Lower boundFreq.OutputCommandCn-14FrequencyPID Control (F CMD ) (F OUT )Cn-15DetectedValueVINAINdetectedValueBn-13A01, A02 multi-function analog output(when Sn-26=09 or Sn-27=09)Bn-21,Bn-22PID detected valueUn-21Digital operator monitor after turning on power supplywhen Bn-10=447
(23) Frequency Command Upper-Bound Delay Time (Bn-23)The PA-PID option card application parameter. If the inverter output frequency afterPID controlling exceeds the frequency command upper bound (the Cn-14 set value),the relay output on PA-PID card will active to increase the pump numbers when thedelay time set by Bn-23 has expired.The set value of Bn-23 depends on the pressure response of water supply system,the set value is the smaller the better as long as the system pressure cannot vibrate.(24) Frequency Command Lower-Bound Delay Time (Bn-24)The PA-PID option card application parameter. If the inverter output frequency afterPID controlling drops below the frequency command lower bound (the Cn-15 setvalue), the relay output on PA-PID card will active to decrease the pump numberswhen the delay time set by Bn-24 has expired.The set value of Bn-24 depends on the pressure response of water supply system,the set value is as small as better if the system pressure cannot vibrate.Please refer to “PA-PID instruction manual”.(25) MC ON/OFF Delay Time (Bn-25)The PA-PID option card application parameter. Please refer to “PA-PID instructionmanual”.When switching one motor (or pump) driving by inverter to ac power source or viceversa set the MC ON/OFF delay time (set value of Bn-25) to avoid the inverter outputand ac power source being short-circuited due to the different operation delay time ofMC1 and MC2.The delay time (Bn-25 set value) must be longer than the time from the MC ON/OFFcontrolled signal output from inverter until the external MC operation.Generally, the MC operation time from OFF to ON is longer than ON to OFF, set thedelay time according to the longer one.AC power sourceInverterMC1MC2IM(26) Pump ON/OFF Detection Level (Bn-26)The PA-PID option card application parameter. Please refer to “PA-PID instructionmanual”.The set value of Bn-26 is the deviation level of PID aimed value and PID detectedvalue when using PA-PID option card to increase or reduce the pump numbers.Set the pump ON/OFF detection level in units of 0.1%. If the value is set to 0.0%,when output frequency reaches the frequency upper bound )the set value of Cn-14)increases the pump numbers immediately, and when output frequency drops to thefrequency lower bound (the set value of Cn-15) decreases the pump numbersimmediately.48
2.3 Control Parameters C n - FunctionV/F PatternSettingDCBrakingFunctionFrequencyLimitFrequencyJumpDisplayUnitAgreedSpeedDetectionCarrierFrequencyParameterNo.Cn-01Cn-02Cn-03Cn-04Cn-05Cn-06Cn-07Cn-08Cn-09Cn-10Cn-11Cn-12Cn-13Cn-14Cn-15Cn-16Cn-17Cn-18Cn-19Cn-20Cn-21Cn-22Cn-23Cn-24Cn-25Name LCD Display (English) Setting RangeInput VoltageMax. OutputFrequencyMax. Output VoltageMax. VoltageFrequencyMiddle OutputFrequencyVoltage At MiddleOutput FrequencyMin Output FrequencyVoltage At Min.Output Frequency<strong>Motor</strong> Rated CurrentDC Injection BrakingStarting FrequencyDC Braking CurrentDC Injection BrakingTime At StopDC Injection BrakingTime At StartFrequency CommandUpper BoundFrequency CommandLower BoundFrequency JumpPoint 1Frequency JumpPoint 2Frequency JumpPoint 3Jump FrequencyWidthDigital OperatorDisplay UnitFrequency AgreeDetection LevelFrequency AgreeDetection WidthCarrier FrequencyUpper LimitCarrier FrequencyLower LimitCarrier Frequencyproportion GainCn-01=220.0VInput VoltageCn-02=060.0HzMax. O/P Freq.Cn-03=220.0VMax. VoltageCn-04=060.0HzMax. Volt FrequencyCn-05=030.0HzMiddle O/P Freq.Cn-06=055.0VMiddle VoltageCn-07=001.5HzMin O/P Freq.Cn-08=008.0VMin. VoltageCn-09=031.0A<strong>Motor</strong> Rated ICn-10=01.5HzDC Braking Start FCn-11=050%DC Braking CurrentCn-12=00.0sDC Braking Stop TimeCn-13=00.0sDC Braking Start TimeCn-14=100%Freq. Cmd. Up BoundCn-15=000%Freq. Cmd. Low BoundCn-16=000.0HzFrequency Jump 1Cn-17=0.0HzFrequency Jump 2Cn-18=0.0HzFrequency Jump 3Cn-19=01.0HzFreq. Jump WidthCn-20=00000Operator Disp. UnitCn-21=000.0HzF Agree Det. LevelCn-22=02.0HzF Agree Det. WidthCn-23=6.0KHzCarry-Freq. Up BoundCn-24=6.0KHzCarry-Freq. Low BoundCn-25=00Carry-Freq. P_ GainSettingUnitFactorySetting150255.0V* 1 0.1V 220.0V*250.0180.0Hz 0.1Hz 60.0Hz*70.1255.0V* 1 0.1V 220.0V*2,*70.1180.0Hz 0.1Hz 60.0Hz*70.1180.0Hz 0.1Hz 30.0Hz*70.1255.0V* 2 0.1V 55.0V*1,*70.1180.0Hz 0.1Hz 1.5Hz*70.1255.0V* 2 0.1V 8.0V*1,*7Ref.Page52713 0.1A 31A*4 520.110.0Hz 0.1Hz 1.5Hz*70100% 1% 50%0.025.5s 0.1s 0.0s0.025.5s 0.1s 0.0s0109% 1% 100%0109% 1% 0%0.0180.0Hz 0.1Hz 0.0Hz0.0180.0Hz 0.1Hz 0.0Hz0.0180.0Hz 0.1Hz 0.0Hz0.025.5Hz 0.1Hz 1.0Hz52535354039999 1 0 540.0180.0Hz 0.1Hz 0.0Hz0.125.5Hz 0.1Hz 2.0Hz0.46.0KHz* 5 0.1KHz 6.0KHz* 5550.46.0KHz* 5 0.1KHz 6.0KHz* 5 56099 1 0* 549
FunctionOVER-TorqueDetectionStallPreventionCommunic-ation FaultFreguencyDetectionFault RetryRide-thruTimeSpeedSearchControlPIDControlEnergy-SavingVoltageLimitParameterNo.Cn-26Cn-27Cn-28Cn-29Cn-30Cn-31Cn-32Cn-33Cn-34Cn-35Cn-36Cn-37Cn-38Cn-39Cn-40Cn-41Cn-42Cn-43Cn-44Cn-45Cn-46Cn-47Cn-48Name LCD Display (English) Setting RangeOvertorque DetectionLevelOvertorque DetectionTimeStall Prevention LevelDuring AccelerationNot usedStall Prevention LevelDuring RunningCommunication FaultDetection TimeFreguency Detection1 LevelFreguency Detection2 LevelNot usedNot usedNumber of AutoReatart AttemptPower Loss Ride-thruTimeSpeed SearchDetection LevelSpeed Search TimeMin. Baseblock TimeV/F Curve in SpeedSearchVoltage RecoveryTimePID Integral UpperBoundPID Primary DelayTime ConstantEnergy-Saving Volt.Upper Limit (60Hz)Energy-Saving Volt.Upper Limit (6Hz)Energy-Saving Volt.Lower Limit (60Hz)Energy-Saving Volt.Lower Limit (6Hz)Cn-26=160%Over Tq. Det. LevelCn-27=00.1sOver Tq. Det. TimeCn-28=150%ACC. StallCn-29=000ReservedCn-30=130%Running StallCn-31=01.0sComm. Flt. Det. TimeCn-32=000.0HzFreg.Det. 1 LevelCn-33=000.0HzFreg.Det. 2 LevelCn-34=0ReservedCn-35=0.0ReservedCn-36=00Retry TimeCn-37=2.0sRide-thru TimeCn-38=150%SP_Search LevelCn-39=02.0sSP_Search TimeCn-40=1.0sMin. B.B. TimeCn-41=100%SP_Search V/F GainCn-42=0.3sVoltage Recovery TimeCn-43=100%PID I-UpperCn-44=0.0sPID FilterCn-45=120%Hi_Spd. Sav V_UpperCn-46=16%Lo_Spd. Sav V_UpperCn-47=050%Hi_Spd. Sav V_LowerCn-48=12%Lo_Spd. Sav V_LowerSettingUnitFactorySetting30200% 1% 160%0.025.5s 0.1s 0.1sRef.Page5630200% 1% 150% 5600000 30200% 1% 130% 560.125.5s 0.1s 1s 570.0~180.0Hz 0.1Hz 0.0Hz 570.0~180.0Hz 0.1Hz 0.0Hz 5700 0.00.0 010 1 0586302.0s 0.1s 2.0s* 4 580200% 1% 150%0.125.5s 0.1s 2.0s0.55.0s 0.1s 1.0s* 410100% 1% 100%0.15.0s 0.1s 0.3s0109% 1% 100%0.02.5s 0.1s 0.0s0120% 1% 120%025% 1% 16%0100% 1% 50%025% 1% 12%59606050
FunctionEnergy-SavingTuningoperationEnergy-SavingCoefficientK2ParameterNo.Cn-49Cn-50Cn-51Cn-52Cn-53Cn-54Cn-55Cn-56Cn-57Cn-58Cn-59Cn-60NameTuning Operation VoltageLimitTuning Operation ControlCycleTuning Operation Volt.Step (100% output Volt)Tuning Operation Volt.Step (5% output Volt)Not usedNot usedNot usedNot usedNot usedEnergy-Saving CoefficientK2 (60Hz)Energy-Saving CoefficientReduction ratio (6Hz)<strong>Motor</strong> Code Cn-61 Not usedRetry time Cn-62 Auto Restart Time Interval<strong>Motor</strong>OverheattimeCn-63<strong>Motor</strong> Overheat protectiontime*1 For 220V class. × 2 for 440V class.LCD Display(English)Cn-49=00%Sav. Tuning V_LimitCn-50=01.0sSav. Tuning periodCn-51=00.5%Sav. Tuning Gain 1Cn-52=00.2%Sav. Tuning Gain 2Cn-53=00.000ReservedCn-54=00.000ReservedCn-55=00.000ReservedCn-56=00.000ReservedCn-57=000.00ReservedCn-58=115.74* 6Eg. Saving CoeffCn-59=100%K2 Redunce RatioCn-60=29* 4440V 25HPCn-61=000ReservedCn-62=00sRetry timeCn-63=060s<strong>Motor</strong> OH timeSetting RangeSettingUnitFactorySetting020% 1% 0%0.110.0s 0.1s 1.0s0.110.0% 0.1% 0.5%0.110.0% 0.1% 0.2%Ref.Page6100.00000.000 00.00000.000 00.00000.000 00.00000.000 000.00000.00 0.00655.35 0.01 115.74* 650100% 1% 100%616200FF 29* 8 62000~000 020s 1s 0s 631300s 1s 60s 63*2 For 220V class. × 2 for 440V class.*3 Setting range becomes 10 to 200% of inverter rated current. The factory setting base on <strong>TECO</strong> AEEFstandard 4 poles motor, 220V/60Hz, 440V/60Hz.*4 Factory settings differ depending on inverter capacity (Sn-01 set value).This example shows combination of <strong>TECO</strong> standard motor 440V 60Hz 25HP (18.5KW).(Refer to the table on page 69)At setting Sn-01, the set value changes to the factory setting. For any application other than <strong>TECO</strong>standard motors, set the value shown on the nameplate of the motor.*5 Factory setting and setting, range differ depending on inverter capacity (Sn-01 set value).*6 Differs depending on Cn-60 set value.*7 Factory setting differ depending on V/F curve selection (Sn-02).*8 The same value as Sn-01 is set.51
(1) Input voltage (Cn-01)Set inverter input voltage. (in the unit of 0.1V).(2) V/f constant (Cn-02 to Cn-08)Set inverter output frequency/voltage characteristics (V/f characteristics.)(a) Changing V/f characteristicsSn-02 = 0 to 3 : V/f characteristics determined by set value. settings of CN-02 toCn-08 cannot be changed.Sn-02 = 4 : Any V/f characteristic can be obtained by the set values ofconstants Cn-02 ~ Cn-08(b) Voltage values (Cn-03, Cn-06, Cn-08) displayed in the operator depend on theset value of Sn-02 (V/f selection)(c) Sn-02 = 4 : The set value is displayed.(b) When V/F characteristics are a straight line, the same value as Cn-07 is set inCn-05. The set value of Cn-06 is disregarded.VV Max .(Cn-03)V C(Cn-06)V Min .(Cn-08)0 F Min . F B F A F Max .(Cn-07) (Cn-05) (Cn-04) (Cn-02)FNotes:1. The maximum output voltage is limited by input voltage.2. When the set values of Cn-02 to Cn-08 do not satisfy the following conditions, a setting error occursand Invaid V/F OPE10 alarm is displayed.The set value is checked at power ON and switching from PRG mode to DRIVE mode.F MAX. F A F B F Min.(3) <strong>Motor</strong> rated current (Cn-09)Set motor rated current by the electronic thermal function in units of 0.1 A for motoroverload protection. The range of setting is 10% to 200% of inverter rated current.When the 1st digit of Sn-14 is 1, the electronic thermal function is disabled and themotor is not protected from overheating due to overload.(4) DC injection braking starting frequency (Cn-10)Set a frequency for starting DC braking at deceleration stop in units of 0.1 Hz.When a set value is not greater than Cn-07 (minimum output frequency), DC brakingis started with the minimum output frequency.52
(5) DC braking current (Cn-11)Set DC braking current in units of 1%. Inverter rated current is 100%.(6) DC injection braking time at stop (Cn-12)Set the duration of DC braking at stop in units of 0.1 second.When a set value is 0, DC braking is not performed, and inverter output is shut off atthe start of DC braking.(7) DC injection braking time at start (Cn-13)Set the duration of DC braking at starting in units of 0.1 second.When a set value is 0, DC braking is not performed, and acceleration begins with theminimum output frequency.Cn-07MIN. OUTPUTFREQUENCYCn-10DC INJECTION BRAKINGSTARTING FREQUENCYCn-13DC INJECTION BRAKINGTIME AT STARTCn-12DC INJECTION BRAKINGTIME AT STOP(8) Frequency command upper bound (Cn-14)Set the upper limit of frequency reference in units of 1%. Cn-02.(maximum frequency)is regarded as 100%.(9) Frequency command lower bound (Cn-15)Set the lower limit of frequency reference in units of 1%. Cn-02 (maximum frequency)is regarded as 100%. When the run command is input with frequency reference of 0,acceleration continues from the minimum frequency to the lower frequencyreference limit, and operation continues in the lower frequency reference limit.INTERNALFREQUENCYREF.Cn-14FREQUENCY COMMANDUPPER BOUNDCn-15FREQUENCY COMMANDLOWER BOUNDSETTING FREQUENCY REF.53
(10) Setting prohibit frequencies 1 to 3 (Cn-16 to Cn-18)Set a setting prohibit frequency in units of 0.1 Hz. A set value of 0.0 Hz disables thisfunction.If the setting prohibit frequency ranges overlap, set setting prohibit frequency 1 to 3as shown below:Cn-18 Cn-17 Cn-16(11) Setting prohibit frequency range (Cn-19)Set the range of setting prohibit frequency in units of 0.1 Hz. The range of the settingprohibit frequency is determined as follows, depending on combinations with Cn-16to Cn-18.Cn-16 to Cn-18 Cn-19 the range of the setting prohibit frequency Cn-16to Cn-18 Cn-19Cn-19SETTING PROHIBITFREQUENCY RANGEINTERNALFREQUENCYREF.Cn-17SETTING PROHIBITFREQUENCYCn-16SETTING PROHIBITFREQUENCYSETTING FREQUENCY REF.Note: Constant-speed operation is prohibited in the setting prohibit frequency range. Outputfrequency does not jump during acceleration or deceleration, which is performed smoothly.(12) Digital Operator Display Unit (Cn-20)The setting unit of frequency references 1 to 8 and jog frequency reference dependson the set value of operator display mode (Cn-20) as follows:Cn-200 Units of 0.01 Hz1 Units of 0.01%2 to 3940 to 39999Cn-18SETTING PROHIBITFREQUENCYSetting / Reading UnitSet in the units of r / min (0 to 39999).r / min = 120 x frequency reference (Hz) / Cn-20(Set the number of motor poles in Cn-20)The position of decimal point is set by the value of the 5th digit of Cn-20.Value of 5th digit = 0: Displayed as XXXXValue of 5th digit = 1: Displayed as XXX.XValue of 5th digit = 2: Displayed as XX.XXValue of 5th digit = 3: displayed as X.XXXA set value of 100% frequency is dewii6ned by the 1st digit to 4th digit of Cn-20.Example 1: When the set value of 100% speed is 200.0, Cn-20 = 12000 is set.100% speed is displayed as 200.0 at Cn-29 = 12000.60% speed is displayed as 120.0Example 2: When the set value of 100% speed is 65.00, Cn-20 = 26500 is set.60% speed is displayed as 39.00 at Cn-20 = 26500.54
(13) Frequency agree detection level (Cn-21)Set an agreed frequency point in units of 0.1 Hz.(14) Frequency agree detection width (Cn-22)Set an agreed frequency detection width in units of 0.1 Hz. The relation withmulti-function contact output are shown in the four figures below (a) , (b)and thefrequency detection 1,2(Cn-32,Cn-33) in page 57 .(a) Agreed frequency (set value of multi-function contact output Sn-20~22= 2)This is "closed" when output frequency is within the detection width shown in thefollowing figure.DETECTION WIDTH Cn-22FREQUENCY REF.OUTPUT FREQUENCYAGREED FREQUENCYSIGNALCLOSED(Frequency ref. Cn-22) Output frequency (Frequency ref. Cn-22)Cn-21: Agreed frequency pointCn-22: Agreed frequency detection width(b) Agreed frequency (set value of multi-function contact output Sn-20~22= 3)This is "closed" when acceleration or deceleration is completed and outputfrequency is within the detection width shown in the figure below.FREQUENCY REF.DETECTION WIDTH Cn-22Cn-21OUTPUT FREQUENCYAGREED FREQUENCYSIGNALCLOSED(Cn-21 Cn-22) Output frequency (Cn-21 Cn-22)Cn-21: Agreed frequency pointCn-22: Agreed frequency detection width55
(15) Carrier frequency upper/lower limit, proportion gain (Cn-23 to Cn-25)The relationship between output frequency and carrier frequency is determined asfollows from the set values of Cn-23 to Cn-25.(a) For constant carrier frequency (set value of Cn-23):Set 0 in Cn-25 and set the same value in Cn-23 and Cn-24.(b) For carrier frequency: Carrier frequency changes according to Cn-23 to 25 setvalues and output frequency as shown below.CARRIERFREQUENCYCn-23Cn-24OUTPUT FREQUENCYFOUT×Cn-25×KK: INTERNAL FIXEDCONSTANTInvalid Fc (OPE11) is displayed in the following cases:1 Cn-25 6 and Cn-24 Cn-232 Cn-23 5kHz and Cn-24 5 kHz(16) Overtorque detection level (Cn-26)Set overtorque level in units of 1%. Inverter rated current is regarded as 100%.(17) Overtorque detection time (Cn-27)Set overtorque detection time in units of 0.1 second.(18) Stall prevention level during acceleration (Cn-28)Set stall prevention level during acceleration in units of 1%. Inverter rated current isregarded as 100%.(19) Stall prevention level during running (Cn-30)Set a proportion as a stall prevention level during running in units of 1%. Inverterrated current is regarded as 100%Stall prevention during running starts deceleration when the output current reaches100 ms greater than the setting value of Cn-30 (stall prevention level during running)during agreed frequency. The inverter decelerates as long as the output currentexceeds the setting value of Cn-30 (stall prevention level during-running). When theoutput current goes below the setting value, the inverter reaccelerates. Thedeceleration time selected in the 4th digit of Sn-10 is taken.Even during stall prevention while running, stall prevention during deceleration andstall prevention during acceleration are enabled.56
OUTPUT FREQUENCYDECELERATION TIMEHYSTERESIS2%DETECTION LEVEL OFSTALL PREVENTIONDURING RUNNINGACCELERATIONTIMERETURN LEVELINVERTEROUTPUT CURRENTDETECTION TIME 100msOPERATION OF STALL PREVENTIONDURING RUNNING(20) Communication fault detection time (Cn-31)Please refer to “7300PA MODBUS/PROFIBUS application manual”.(21) Frequency detection 1 level (Cn-32) When the setting value of multi-function contact output (Sn-20~22)=4,this contact is "closed" when output frequency is equal to or less than Cn-32, asshown in the figure below.Cn-22OUTPUT FREQUENCYCLOSEDFREQUENCY DETECTIONSIGNALCn-32Output frequency Cn-32Cn-32: Frequency detection 1 levelCn-22: Agreed frequency detection width(22) Frequency detection 1 level (Cn-33) When the setting value of multi-function contact output (Sn-20~22)=5,this contact is "closed" when output frequency is equal to or more than Cn-33, asshown in the figure below.Cn-22Cn-33OUTPUT FREQUENCYCLOSEDFREQUENCY DETECTIONSIGNALOutput frequency Cn-33Cn-33: Frequency detection 2 levelCn-22: Agreed frequency detection width57
(23) Number of auto restart attempt (Cn-36)Set the number of auto reset/restart operation. Setting of zero causes no autoreset/restart operation.Each time one of OC, OV, OL1, OL2, OL3, OH, UV1 (OC, GF, OV, rr or UV1) faultoccurs, one is added to the number of auto reset/restart operation, and autoreset/restart operation is performed according to the following procedure.However, auto reset/restart operation is not performed in the following case:1 When operation not continued at momentary power loss (3rd digit of Sn-11=0)is specified, UV1 fault is not automatically reset.2 When OC or OV fault occurs due to external fault during deceleration stop orDC injection braking stop, inverter output is shut off.The number of auto reset/restart operation is cleared to zero when:1 No fault occurs for 10 minutes or more.2 A fault reset signal is input from control circuit terminals or digital operator.Auto reset/restart operation1 When a fault is detected, inverter output is shut off for the minimumbaseblock time (Cn-40). During shut off of inverter output, a fault occurring inthe operator is displayed.2 When the minimum baseblock time (Cn-40) elapses, the fault is automaticallyreset, and speed search operation is performed with the output frequency atthe time of the fault.3 When the total number of fault exceeds the number of auto restart attempts(Cn-36), automatic reset is not performed and inverter output is shut off. Atthis time, fault contact output is output.FAULTDETECTIONFAULTCONTACTOUTPUTFREQUENCYWHEN 2ND DIGIT OFSn-11=1,FAULT CONTACT ISOUTPUT.NUMBER OFREVOLUTIONSOF MOTOR12(24) Power loss ride-thru time (Cn-37)Set in units of 0.1 second. The initial value depends on the inverter capacity58
(25) Speed search detection level (Cn-38)When inverter output current immediately after power recovery is larger than the setvalue of Cn-38, speed search operation is started. When inverter output current issmaller than the set value of Cn-38, the frequency is interpreted as a speedsynchronization point and acceleration or deceleration is perormed again up to aspecified frequency.(26) Speed search time (Cn-39)Set deceleration time during speed search in units of 0.1 second. Setting of 0.0second causes no speed serch.(27) Minimum baseblock time (Cn-40)On detecting momentary power loss, the inverter shuts off output and maintains thebaseblock state for a given time. Set in Cn-40 the time when residual voltage isexpected to be almost zero.When momentary power loss time is longer than the minimum baseblock time,speed search operation is started immediately after power recovery.WHEN MIN. BASEBLOCKTIME IS LONGER THANMOMENTARY POWERLOSS TIME.WHEN MIN. BASEBLOCKTIME IS SHORTER THANMOMENTARY POWERLOSS TIME.MOMETARYPOWERLOSS TIMEMIN.BASEBLOCKTIMEINVERTERBASEBLOCKTIMEMOMETARYPOWERLOSS TIMEMIN.BASEBLOCKTIMEINVERTERBASEBLOCKTIME(28) V/f speed search (Cn-41)To ensure that a fault such as OC does not occur during speed search operation, V/fmust be reduced during speed search operation, as compared with that duringnormal operation. Set V/f during speed search as follows by the set value of Cn-41:V/f during speed search = V/f at normal operation × Cn-41(29) Voltage recovery time (Cn-42)Set in Cn-42 the time between completion of speed search operation and return toV/f at normal operation. The set of voltage recovery time is set as follows:220V Class: Time required to raise voltage from 0 to 220V440V Class: Time required to raise voltage from 0 to 440V59
(30) PID integral upper bound (Cn-43)The upper limit value of value I can be set by Cn-43. To increase the controlcapability by integration, increase the value of Cn-43. Reduce the setting of Cn-43 ifthere is a risk of load damage, or of the motor going out of step, by the inverter'sresponse when the load suddenly changes. Set this constant as a percentage of themaximum output frequency, with the maximum frequency taken as 100%. If thecontrol system vibrates and vibration cannot be eliminated even by adjusting theintegral time (bn-15) or primary lag time constant (Cn-44), decrease the value ofCn-43, but if the setting of Cn-43 is reduced too much, the target value and thefeedback value will not match. Refer to page 45, the block diagram of PID controlsection.(31) PID primary delay time constant (Cn-44)Constant Cn-44 is the low-pass filter setting for PID control outputs, there is normallyno need to change the setting, if the viscous friction of the mechanical system is high,or if the rigidity is low, causing the mechanical system to oscillate, increase thesetting so that it is higher than the oscillation frequency period. This will decrease theresponsiveness, but it will prevent oscillation. Refer to page 45, the block diagram ofPID control section.(32) Energy-saving voltage limit (Cn-45 to Cn-48)The upper and lower limits of output voltage are set. If the voltage reference valuecalculated in the energy-saving mode exceeds the upper or lower limit value, thisupper or lower limit value is output as voltage reference value.The upper limit value is set in order to prevent over excitation at low frequency andthe lower limit value is set in order to prevent stalling at a light load. Limit voltagevalues obtained at 6Hz and 60Hz are set: for any limit value other than at 6Hz and60Hz, the values calculated by linear interpolation of these values. Setting is made inthe units of % of rated voltage.Cn-45VoltageVoltageUpper LimitCn-47Cn-46Cn-486HzVoltageLower Limit60Hzfrequency60
(33) Energy-saving tuning operation (Cn-49 to Cn-52)In the energy-saving mode (Sn-09 = X1XX) the optimum voltage is calculatedaccording to load power and the voltage is supplied to the load. However, since thesetting motor constants are different depending on temperature variation or use ofother manufactures’-motors, the optimum voltage is not always output. At tuningoperation, operation is controlled so that the optimum operating status can beobtained by fine adjustment of voltage.(a) Tuning Operation voltage Limit (Cn-49)Limits the range where voltage is controlled by tuning operation. Setting is madein the units of % of rated voltage. By setting this value to 0, tuning operation isnot performed.Cn-49-Cn-49V HOLD(b) Tuning Operation Control Cycle (Cn-50)Sets the control cycle of tuning operation.(c) Tuning Operation voltage Step (Cn-51, 52)Sets voltage variation width of one tuning operation cycle. Setting is made in theunits of % of rated voltage. By increasing this value, rotation speed variationbecomes larger. This voltage variation width is set at tuning stanting voltage100% and 5%. With the other voltage value, voltage variation width obtained bylinear interpolation is set.VoltageVariationWidthCn-51Cn-525%100%Output Voltage(34) Energy-saving coefficient K2 (Cn-58)Voltage at which the motor efficient will be the maximum is calculated by using thiscoefficient at operation in the energy-saving mode, and the calculated value is to bevoltage reference. This value is already set to the value of a <strong>TECO</strong> motor as theinitial value. By increasing the energy-saving coefficient, output voltage becomeslarger.61
(35) Energy-saving coefficient reduction ratio (Cn-59)In order to prevent over excitation in the low frequency area, this constant reducesoutput voltage at low frequency. Set in the reduction ratio at 6Hz. According, to thisvalue, output voltage is reduced with the reduction ratio (Cn-59) when output voltageof 15Hz or less is 6Hz or with the reduction ratio obtained by linear interpolation ofreduction ratio (100%) at 15Hz.Reduction ratio100%Cn-59615 60HzOutput frequency(36) <strong>Motor</strong> code (Cn-60)By setting this code, energy-saving coefficient is set to Cn-58 when a <strong>TECO</strong> motor isused. This motor code is the same as that used for motor constant setting (Sn-01)By setting the capacity and initializing by Sn-01, the same code is written to Cn-60.Therefore, when the inverter and motor has the same capacity, setting is not needed.When exclusive use motor or other manufacturer's motor is used and its motorconstant is not known or when the inverter and motor has the different capacity, try toset the mother code corresponding to the motor voltage and capacity to Cn-60.The motor codes are shown in the table below.220V class440V classCn-60<strong>Motor</strong>CapacityCn-58Initial valueCn-60<strong>Motor</strong>CapacityCn-58Initial value09 25 57.87 29 25 115.740A 30 51.79 2A 30 103.580B 40 46.27 2B 40 92.540C 50 38.16 2C 50 76.320D 60 35.78 2D 60 71.560E 75 31.35 2E 75 67.200F 100 23.10 2F 100 46.2010 125 14.85 30 125 41.2231 150 36.2332 175 33.8833 215 30.1334 250 29.2035 300 27.1336 350 24.4537 400 21.7638 500 16.3862
(37) Auto Restart Time Interval (Cn-62)Set the auto reset / restart operation time interval when the number of auto reset /restart operation is more then 2.The setting range of Cn-62 is 0~20 sec, the auto restart time interval is minimumbaseblock time (Cn-40) when the setting value of Cn-62 is 0. The auto restart time interval is the setting value of Cn-40 when the setting valueof Cn-62 < Cn-40. The auto restart time interval is the setting value of Cn-62 when the setting valueof Cn-62 > Cn-40.(38) <strong>Motor</strong> Overheat Protection Time (Cn-63)Time delay for motor overheat protection when the detected temperature of PTCthermistor motor temperature sensor reached the trip level.Generally, it is not needed to change the set value of Cn-63, The factory setting is150%, 1 minutes motor overheat capability. Refer to motor overheat protectionsetting of Sn-19.63
2.4 System Parameters S n - FunctionParameterNo.NameLCD Display(English)DescriptionFactorySettingRef.PageCapacitySettingSn-01Inverter CapacitySelectionSn-01=29440V 25HPInverter Capacity Selection *16970V/f Curve Sn-02 V/f Curve SelectionOperatorStatuseration ModeSelectSn-03Sn-04Sn-05Sn-06Operation StatusOperation ModeSelect 1(RUNSTOPSelection)Operation ModeSelection 2(I/O terminal functionselection)Operation ModeSelection 3(S-curve andfrequency referencecharacteristics)Sn-02=2V/f CurveSn-03=0000Operate SettingSn-04=0011Stopping MethodSn-05=0000I/O term. FctSn-06=0000S-curve Cmd. Char.V/f pattern Selection 2 710000Setting and reading of An-, Bn-,Cn-, Sn- enabled0101Setting and reading of An-,Readinng of Bn-,Cn-, Sn- enabled1110Contents Initialigation (2-wire)*21111Contents Initialigation (3-wire)*21000Initialize Un-11 contents1001Initialize Un-12 contents- - -0Frequency Command = Controlcircuit terminals VIN or AIN- - -1Frequency Command = FrequencyCommand 1 (An-01)- -0 -RUNSTOP Command = Controlcircuit terminals- -1 -RUNSTOP Command =Digital Operator00- -Stopping method = Ramp to stop01- -Stopping method =Coastingto stop10- -Stopping method =Full-range DCinjection branking stop11- -Stopping method = Coasting stop(timer function provided)- - -0Stop key effective during operationfrom control terminal- - -1Stop key effective during operationfrom control terminal- -0 -Reverse run enabled- -1 -Reverse run disabled- 0- -Control input terminals 1 ~8 arescanned twice.-1- -Control input terminals 1 ~8 arescanned once.JOG0 - - -Digital operator (L/R) key= JOG key functionJOG1- - -Digital operator (L/R) key= L/R (Local/Remote) key function- -00S curve=0.2sec- -01S curve=0.0sec (NO S curve)- -10S curve=0.5sec- -11S curve=1.0sec-0 - -Reference command has forwardcharacteristics(0-10V or 4-20mA/0~100%)-1 - -Reference command has reversecharacteristics(0-10V or 4-20mA/100~0%)0- - -Stop by reference input whenfrequency reference is missing1- - -Operation to continue with 80% offrequence reference whenfrequency reference is missing0000 720011000000007374757677787964
FunctionOperationMode SelectProtectiveCharacteristicSelectParameterNo.Sn-07Sn-08Sn-09Sn-10Sn-11Name LCD Display (English) DescriptionOperation ModeSelection 4(overtorquedetection)Operation ModeSelection 5 (RS-485communicationstatus selection)Operation ModeSelection 6 (Energysaving functionselection)ProtectiveCharacteristicSelection 1(Stall prevention)ProtectiveCharacteristicSelection 2(Retry andmomentary powerfailure protection)Sn-07=0000Over Tq. DetectSn-08=0111RS-485 Comm. FunctionSn-09=0000Eg. Saving FunctionSn-10=0000Stall SelectSn-11=0000Retrypower Loss- - -0Overtorque detection notenabled- - -1Overtorque detection enabled- -0 -Enabled only if at agreedfrequency- -1 -Enable during operation (exceptduring DC injection)- 0- -Operation continued afterovertorque is detected- 1- -Coasts to stop if overtorque isdetected- - -0Frequency reference input byRS-485 communication optioncard (PA-M or PA-P)- - -1Frequency reference input bydigital operator or control circuitinput terminals- -0 -RUN/STOP command input byRS-485 Communication optioncard (PA-M or PA-P)- -1 -RUN/STOP command input bydigital operator or control circuitinput terminals00- -RS-485 communication fault,deceleration to stop (Bn-02)01- -RS-485 communication fault,coast to stop10- -RS-485 communication fault,deceleration to stop (Bn-04)11- -RS-485 communication fault,continue to run- 0- -Energy-saving functionineffective- 1- -Energy-saving functionineffective- - -0Stall prevention duringacceleration enabled- - -1Stall prevention duringacceleration not enabled- -0 -Stall prevention duringacceleration enabled- -1 -Stall prevention duringacceleration not enabled- 0- -Stall prevention during runningenabled- 1- -Stall prevention during runningnot enabled0- - -Decel time during stallprevention=Bn=02 set value1- - -Decel time during stallprevention=Bn=04 set value- -0 -Fault contact is not energizedduring Retry operation- -1 -Fault contact is energized duringRetry operation-0 - -Operation stopped bymomentary power lossdetection (UV1)-1 - -Operation continues aftermomentary power lossFactorySetting00000011Ref.Page798080810000 81000000008182828365
FunctionProtectiveCharacteristicSelectMulti-FunctionSelectParameterNo.Sn-12Sn-13Sn-14Sn-15Sn-16Sn-17Sn-18Sn-19Sn-20Sn-21Sn-22NameProtectiveCharacteristicSelection 3 (ExternalFault signal function)ProtectiveCharacteristicSelection 4 (phaselose protection andcooling fan ON/OFFcontrol)ProtectiveCharacteristicSelection 5(Electronic thermaloverload protection)Terminal 5FunctionTerminal 6 FunctionTerminal 7FunctionTerminal 8FunctionTerminal AUXFunctionTerminal R2A-R2CFunctionTerminal D01FunctionTerminal R1AFunctionLCD Display(English)Sn-12=0100External FaultSn-13=0000Phase Lose & fan ON/OFFSn-14=0000Over Load SelectSn-15=03Term.5 FunctionSn-16=04Term.6 FunctionSn-17=06Term.7 FunctionSn-18=08Term.8 FunctionSn-19=00Multi-Fct InputSn-20=00Term. R2A FunctionSn-21=01Term. D01 FunctionSn-22=02Term. R1A FunctionDescription- - -0External fault input (terminal 3 ):NO-contact input- - -1External fault input: NC-contact input- -0 -External fault signal: always detected- -1 -External fault signal: detected duringrunning only00- -External fault detected: Ramp to astop (major fault) by Bn-02 setvalue01- -External fault detected: Coasting tostop (major fault)10- -External fault detected: Ramp to astop (major fault) by Bn-04 setvalue11- -External fault detected: opeation tocontinue (major fault)- - -0Input phase loss protection functionineffctive- - -1Input phase loss protection functioneffctive- -0 -Output phase loss protection functionineffctive- -1 -Output phase loss protection functioneffctive- 0- -Cooling fan run while inverter powerON- 1- -Cooling fan run while heat sinktemperature higher then 50- - -0<strong>Motor</strong> overload (OL1) protectioneffective- - -1<strong>Motor</strong> overload (OL1) protectionineffective- -0 -<strong>Motor</strong> overload protection: standardmotor- -1 -<strong>Motor</strong> overload protection: Inverterduty motor- 0- -<strong>Motor</strong> overload protection timeconstants are standard time (8minutes)- 1- -<strong>Motor</strong> overload protection timeconstants are short-time (5 minutes)00~66 Terminal 5 (factory preset formulti-step speed reference 1)00~66 Terminal 6 (factory preset formulti-step speed reference 2)00~66 Terminal 7 (factory preset forjog frequency reference)00~66Terminal 8 (factory preset forexternal baseblock by NO contactinput)00~0CTerminal AUX (factory preset forauxiliary frequency command)00~0F00~0F00~0FTerminal R2A-R2C (factorypreset for running)Terminal D01 (factory preset forzero speed)Terminal R1A (factory preset forAgreed frequency)FactorySettingRef.Page0100 83000083840000 84030406080000010285~94959697~10066
FunctionParameterNo.NameLCD Display(English)DescriptionFactorySettingRef.PageSn-23Inverter ststionaddressSn-23=01Inverter AddressInverter address can be set as 1~31 01- -00No parityRS-485communicationFunctionSn-24RS-485communicationprotocol settingSn-24=0011RS-485 protocol- -01Even parity parity setting- -10Odd parity- -11not used00- -2400 bps (bit/sec)001110101- -4800 bps baud10- -9600 bps rate11- -19200 bps settingLanguageSn-25LCD Languagedisplayed selectionSn-25=0Language select0English1Chinese1 1020Ferquency command (10V/maxfrequency command, Cn-02)1Output Frequency (10V/max Outputfrequency)Sn-26Multi-FunctionAnalog Output A01Function SelectionSn-26=00Term. A01 Function2Output Cueeent (10V/inverter ratedcurrent)3Output Voltage (10V/input voltage,Cn-01)4DC Voltage (10V/400VDC or 800VDC)0 102Multi-FunctionAnalog OutputSelectionSn-27Multi-FunctionAnalog Output A02Function SelectionSn-27=01Term. A02 Function5Output Power (10V/max. applicablemotor capacity)0Ferquency command (10V/maxfrequency command, Cn-02)1Output Frequency (10V/max Outputfrequency)2Output Cueeent (10V/inverter ratedcurrent)3Output Voltage (10V/input voltage,Cn-01)4DC Voltage (10V/400VDC or 800VDC)1 1025Output Power (10V/max. applicablemotor capacity) Sn-28 Not used Sn-29 Not usedSn-28=0ReservedSn-29=0Reserved 0PA-PID Card ineffective1Fixed inverter driving mode, stop all thepumps by first-run-last-stop sequence.PA-PID CardFunctionSelectionSn-30Pump OperationMode SelectionSn-30=0Run-Mode Select2Fixed inverter driving mode, stop thepump drived by the inverter only.3Fixed inverter driving mode, stop all thepumps by first-run-first-stop sequence.4Cycled inverter driving mode, stop all thepumps by first-run-first-stop sequence.5Cycled inverter driving mode, stop thepump drived by the inverter only.0 10367
FunctionParameterNo.NameLCD Display(English)DescriptionFactorySettingRef.PageSn-31PA-PID CardRelay 2 ControlSn-31=0Relay 2 Invalid0Relay 2 Invalid1Relay 2 Valid0Sn-32PA-PID CardRelay 3 ControlSn-32=0Relay 3 Invalid0Relay 3 Invalid1Relay 3 Valid0Sn-33PA-PID CardRelay 4 ControlSn-33=0Relay 4 Invalid0Relay 4 Invalid1Relay 4 Valid0PA-PID CardRelay ControlSn-34PA-PID CardRelay 5 ControlSn-34=0Relay 5 Invalid0Relay 5 Invalid1Relay 5 Valid0104Sn-35PA-PID CardRelay 6 ControlSn-35=0Relay 6 Invalid0Relay 6 Invalid1Relay 6 Valid0Sn-36PA-PID CardRelay 7 ControlSn-36=0Relay 7 Invalid0Relay 7 Invalid1Relay 7 Valid0Sn-37PA-PID CardRelay 8 ControlSn-37=0Relay 8 Invalid0Relay 8 Invalid1Relay 8 Valid00Not loaded (not copied)1Upload (from digital operator to inverter)ParameterCopySn-38Parameter copySn-38=0Not Loaded2Download (from inverter to digitaloperator)3Inspect the EEPROM of digital operator0 104*1 Differs according to inverter capacity.*2 Initialization (Sn-03 = 1110, 1111)After depressing the ENTER key, input the initial value of An- , Bn- , Sn- , Cn- ,(except Sn-01, Sn-02) into NV-RAM, When the value is written in without an error, “ Entry Accepted ” isdisplayed. When the value is written in with an error, “ **Error ” is displayed. The values of Sn-15 to-18 differ as follows between initializations with Sn-03 = 1110 and with Sn-03 = 1111.Multi-functionTerminal1110(2 Wire Sequence)1111(3 Wire Sequence)Terminal 5 (Sn-15) 3* (Mufti-step speed command 1) 0 (FWD/REV run select)Terminal 6 (Sn-16) 4* (Multi-step speed command 2) 3 (Multi-step speed reference 1)Terminal 7 (Sn-17) 6* (Jog frequency reference) 4 (Multi-step speed reference 2)Terminal 8 (Sn-18) 8* (External baseblock command) 6 (Jog frequency reference)*Values have been factory-set.** Contents depend on the parameter setting items.68
Sn-XX = 1st digit2nd digit3rd digit4th digit(1) Inverter Capacity Selection (Sn-01)Inverter capacity has been preset at the factory. However, if a spare board is used,reset the inverter capacity referring to the table below. Control constant Cnfactorysetting values (initial values) differ according to Sn-01 setting.220V ClassInverter Capacity SelectionNameJNTPBG BABBData of Sn-0109 0A 0B 0C 0D 0E 0F 10JK - - - 0025 0030 0040 0050 0060 0075 0100 0125Inverter rated capacity KVA 27.4 33 44 55 63 81 110 125Max. applicable motor capacity HP(kW)25(18.5)30(22)40(30)50(37)60(45)75(55)100(75)125(90)Inverter rated current A 72 88 117 144 167 212 288 327Cn-09 <strong>Motor</strong> rated current A 62 73 97.4 118 141 176 227 284Factory SetCn-23Cn-24Cn-25On-17On-18On-19Cn-37Carrier frequency upper limitkHzCarrier frequency lower limitkHzCarrier frequencyproportional gain<strong>Motor</strong> phase-to-phaseresistance Torque compensation ironlossWTorque compensation limitVMomentary power lossassurance times6.0 6.0 6.0 6.0 3.0 3.0 3.0 3.06.0 6.0 6.0 6.0 3.0 3.0 3.0 3.00 0 0 0 0 0 0 00.077 0.060 0.041 0.033 0.028 0.019 0.007 0.005425 582 536 641 737 790 1800 210050 50 50 50 50 50 50 502.0 2.0 2.0 2.0 2.0 2.0 2.0 2.0Cn-40 Minimum baseblock time s 1.0 1.0 1.0 1.0 1.0 1.0 1.0 1.0Cn-41 V/f during speed search % 100 100 80 80 80 80 80 8069
440V ClassInverter Capacity SelectionNameData of Sn-0129 2A 2B 2C 2D 2E 2F 30 31 32 33 34 35 36 37 38BAJNTPBGBBAZ - - - 0025 0030 0040 0050 0060 0075 0100 0125 0150 0175 0215 0250 0300 0350 0400 0500Inverter rated capacity KVA 29 34 45 57 66 85 115 144 176 203 232 259 290 393 446 558Max. applicable motor capacityHP(kW)25(18.5)30(22)40(30)50(37)60(45)75(55)100(75)125(90)150(110)175(132)215(160)250(185)300(220)350(260)400(300)500(375)Inverter rated current A 38 44 59 75 86 111 151 189 231 267 304 340 380 516 585 732Cn-09<strong>Motor</strong> rated current A31 36 49 59 71 88 114 143 175 205 235 305 348 410 465 582Cn-23Carrier frequencyupper limit kHz6.0 6.0 6.0 6.0 6.0 6.0 3.0 3.0 3.0 3.0 3.0 3.0 2.0 2.0 2.0 2.0Cn-24Carrier frequencylower limit kHz6.0 6.0 6.0 6.0 6.0 6.0 3.0 3.0 3.0 3.0 3.0 3.0 2.0 2.0 2.0 2.0Cn-25Carrier frequencyproportional gain0 0 0 0 0 0 0 0 0 0 0 0 0 0 0 0Factory SetOn-17On-18<strong>Motor</strong> phase-to-phaseresistance Torque compensationiron lossW0.308 0.239 0.164 0.133 0.110 0.074 0.027 0.036 0.023 0.020 0.022 0.014 0.012 0.01 0.009 0.007425 582 536 641 737 790 1800 2900 2500 2600 2500 2600 2800 2400 3200 3600On-19Torque compensationlimitV100 100 100 100 100 100 100 100 100 100 100 100 100 100 100 100Cn-37Cn-40Momentary powerloss assurance timesMinimum baseblocktimes2.0 2.0 2.0 2.0 2.0 2.0 2.0 2.0 2.0 2.0 2.0 2.0 2.0 2.0 2.0 2.01.0 1.0 1.0 1.0 1.0 1.0 1.0 2.0 2.0 2.0 2.0 2.0 2.0 2.0 2.0 2.0Cn-41V/f during speedsearch %100 100 100 100 100 80 80 80 80 80 80 80 80 80 80 8070
(2) V/F Curve Selection (Sn-02)V/F curve is selected by the setting of Sn-02. When V/F curve is selected, never tofail to set input voltage of the inverter to Cn-01.Sn-02=0~3pre-set V/F curve pattern.Sn-02=0~4V/F pattern can be set by the user through setting of Cn-02~Cn-08.Table 12 V/F curve of 220V classSn-02setting Specifications VF pattern050Hz, Saturation Variable Torque(quadratic monotonicallydecreasing curve)(V)220553810801150Hz, Saturation Variable Torque(cubic monotonically decreasingcurve)1.3 25 50 (Hz)260Hz, Saturation Variable Torque(quadratic monotonicallydecreasing curve)(V)22055389823360Hz, Saturation Variable Torque(cubic monotonically decreasingcurve)1.5 30 60 (Hz)*1. Consider the following items as the conditions for selecting a V/F pattern.They must be suitable for1 The voltage and frequency characteristic of motor.2 The maximum speed of motor.*2. For 440V class, 2 times voltage value shown in table above.71
(3) Operation status (Sn-03)Passwords (Sn-03=0000 or 0101)The ability to set or read the different groups of constants is determined by Sn-03 as shownbelow.Sn-03DRIVE modePRGM modeTo be set To be monitored To be set To be monitored0000 *1 An, Bn Sn, Cn An, Bn, Sn, Cn 0101 *2 An Bn, Sn, Cn An Bn, Sn, Cn*1Factory setting*2When in DRIVE mode, the parameter group Sn-, Cn- can only be monitored if thekey and the DSPLRESETkey are to be pressed at the same time.*3After a few trial operation and adjustment, the setting value Sn-03 is set to be “ 1111” so asnot be modified again.Constants Initialization (Sn-03=1110 or 1111)Except the parameter of Sn-01~02, the parameter groups of An-, Bn-, Cn-, Sn- and On- can be initialized as factory setting. At the same time, the terminal 5~8can be set as 2-wire or 3-wire operation mode under different setting of Sn-03, please see2-/3-wire operation mode on page 85.Special mode (Sn-03=1010)The order parameters On- can be set and read when setting Sn-03=1010, afterchanging or monitoring any of the On- parameters, please set Sn-03=0000 or 0101.Initialize the contents of monitoring parameter Un-11 and Un-12 (Sn-03=1000 and 1001)The motor elapsed run hours (Un-11) and motor elapsed energy KWHR (Un-12)can be reset by Sn-03=1000 and 1001 individually. The LCD display (English) as below.Sn-03 setting000001011110111110001001LCD DisplaySn-03=0000Allow SettingSn-03=0101Inhibit SettingSn-03=11102-Wire InitializeSn-03=11113-Wire InitializeSn-03=1000Reset Un-11Sn-03=1001Reset Un-1272
(4) Operation Mode Select 1 (Sn-04)1st digit (frequency reference select)1st digit = 0Reference input from control circuit terminal 13 or 14 is the masterspeed frequency reference.1st digit = 1Frequency reference 1 (An-01) is the master speed frequencyreference.NoteFor combination of multi-step speed operation, refer to page 87 and 88.2nd digit (run command select)2nd digit = 0Run command from control circuit terminal is accepted.2nd digit = 1Run command from the digital operator is accepted.Valid run command and frequency references differ as shown in the table below,depending on the combination of the 1st and 2nd digits.CONSTANTREFSn-04Master Speed Frequency Ref.2nd2nd digit 1st digit 2nd digit 1st digit1st digit 2nd digit 1st digitdigit0 0 0 1 1 0 1 1Control circuitterminal VIN, AINAn-01Control circuitterminal VIN, AINFWD Run Command (Terminal 1 ) × ×An-01REV Run Command (Terminal 2 ) × ×External Fault (Terminal 3 ) Fault Reset (Terminal 4 ) 1 1 1 1Command of Terminal 5 2 2ControlTerminalOperatorCommand of Terminal 6 Command of Terminal 7 Command of Terminal 8 Aux. Input Fault Contact Output(R1A-R1B-R1C)Multi-function Contact Output(R2A, R3A) Multi-function PHC Output (D01) RUN Key × × JOG Key × × STOP Key 3 3 FWD/REV Key × × RESET Key 1 1 1 1DRIVEPRGM KeyValid only whenthe inverter stopValid only when theinverter stopValid only whenthe inverter stopValid only whenthe inverter stopLED of REF Lit OFF Lit OFFLED of SEQ Lit Lit OFF OFFMonitor display 73
1 Valid only when the inverter stops. (FWD run command, REV run command, and DC injection brakingcommand are "open".)2 FWD/REV run command is not accepted.3 When the STOP key is depressed, processing differs as follows, depending on the setting of-the 1stdigit of Sn-05.1st digit=0: During running by signals from control circuit terminals, the STOP key from the operator isaccepted.If the STOP key is depressed, the inverter stops according to the setting of 3rd and 4thdigits of Sn-04, while the STOP LED indicator blinks. This stop command is held within theinverter until both the FWD run command and REV run command of control circuitterminals become "open", or another frequency reference is selected in the multi-stepspeed command or jog frequency reference section.1st digit=1: During running by signals from control circuit terminals, the STOP key from the operator isnot accepted.3rd digit, 4th digit (stop method select)Stop method differs by the setting of 3rd and 4th digits as shown below.1 Sn-04=00 XX RAMP stopRUN COMMANDOUTPUT FREQUENCYCLOSEDOPENDECELERATION TIMEDC INJECTION BRAKINGSTART FREQUENCY(Cn-10)DC INJECTIONBRAKINGDC INJECTION BRAKINGTIME AT STOP (Cn-12)2 Sn-04=01 XX Coasting to a stopRUN COMMANDOUTPUT FREQUENCYCLOSEDOPENWHEN STOP REFERENCEIS INPUT, INVERTEROUTPUT IS CUTOFF.74
3 Sn-04=10 XX Full-range DC injection braking stopDC injection braking time differs by the output frequency when stop command isinput as shown below.RUN COMMANDOUTPUT FREQUENCYCLOSEDOPENDC INJECTIONBRAKING TIMECUTOFF OFINVERTEROUTPUT (Cn-40 setting value)DC INJECTIONBRAKING TIMECn-12×10DC INJECTION BRAKINGTIME AT STOP (Cn-12)10% SPEED 100% SPEEDOUTPUT FREQUENCY WHEN STOPREFERENCE IS INPUT4 Sn-04=11 XX Coasting to a Stop (timer function provided)Once stop command is input, run command is disregarded during T 1 time.CLOSEDRUN COMMANDOUTPUT FREQUENCYOPENCLOSEDWHEN STOP REFERENCEIS INPUT, INVERTEROUTPUT IS CUTOFFT 1 TIMEDECELERATION TIMET 1 TIME100% SPEEDOUTPUT FREQUENCY WHENSTOP REFERENCE IS INPUT75
(5) Operation Mode Select 2 (Sn-05)1st digitSelect processing to be performed when the STOP key of the digital operator isdepressed during running by control circuit terminals.1st digit = 0During running by signals from control circuit terminals, the STOP keyfrom the operator is accepted. If the STOP key is depressed, theinverter stops according to the setting of the 3rd and 4th digits of Sn-04while the STOP LED indicator blinks. This stop command is held withinthe inverter until both the FWD run command and REV run commandof control circuit terminals become "open", or other frequency referenceis selected in the multi-step speed command or jog frequencyreference section.1st digit = 1During running by signals from control circuit terminals, the STOP keyfrom the operator is not accepted.2nd digit (REV run prohibited)2nd digit = 0REV run command from control circuit terminals or the digital operatoris accepted.2nd digit = 1REV run command from control circuit terminals or the digital operatoris not accepted.3rd digit (selection of double scanning of sequence command)3rd digit = 0Sequence command (control circuit terminals I to 8) is scanned twice.3rd digit = 1Sequence command (control circuit terminals I to 8) is scanned once.JOG4th digit( (L/R) key functions select )JOG4th digit=0 : The digital operator (L/R) key is JOG key function.(the JOG key function is enabled under Local mode )JOG4th digit=1 : The digital operator(L/R)key is used as Local/Remote (L/R) switch key.At the Local mode, the inverter operates by frequency reference andrun command from digital operator.At the Remote mode, if selected the multi-function contact input(terminal ~) as Local/Remote operation signal(i.e. the set value of Sn-15~18 is 0 1) if terminal ~=”open”(Remote mode), the inverter operatesaccording to the setting of Sn-04 1 st ,2 nd digits and Sn-08 1 st ,JOG2 nd digits (i.e. the (L/R) key used as Remote key function.)if terminal ~=”close”(Local mode), the inverter operatesby frequency reference and run command from digital operator.(i.e. the Remote key function invalid).∗.The Local/Remote (L/R) key function is enabled only stopping.76
(6) Operation Mode Select 3 (Sn-06)1st digit, 2nd digit (s-curve selection of soft starter)The S-curve characteristics of the soft starter depend on the setting of the 1st and2nd digits as follows:2nd digit 1st digit Contents0 00 11 01 1The S-curve characteristics is 0.2 second.No S-curve characteristicsThe S-curve characteristics is 0.5 second.The S-curve characteristics is 1 second.FREQUENCYREF.OUTPUT FREQUENCYTIMES-CURVECHARACTERISTICSTIMETSCNote: S-curve characteristics time refers to the time from acceleration rate 0 to the time when anormal acceleration rate determined by a specified acceleration time is obtained.a Time chart at FWD/REV run change with S-curve characteristicsThe figure below shows the time chart at FWD/REV run change duringdeceleration and stop.FWD RUNCOMMANDREV RUNCOMMANDACCELERATIONOUTPUTFREQUENCYMIN. OUTPUTFREQUENCYCn-07 ACCELERATIONS-CURVE CHARACTERISTICDECELERATION*MIN. OUTPUTFREQUENCYCn-07DC INJECTIONBRAKING TIMEAT STOPPINGCn-12DC INJECTION BRAKINGSTART FREQUENCYCn-10DECELERATION* When 1st and 2nd digits are 00,no S-curve characteristics at completion of deceleration.77
The chart at FWD/REV run change without S-curve characteristicsThe figure below shows the time chart at FWD/REV run change duringdeceleration and stop.FWD RUNCOMMANDREV RUNCOMMANDACCELERATIONOUTPUTFREQUENCYMIN. OUTPUTFREQUENCYCn-07DECELERATION*ACCELERATIONMIN. OUTPUTFREQUENCYCn-07DC INJECTIONBRAKING TIMEAT STOPPING(Cn-12)DC INJECTION BRAKINGSTART FREQUENCYCn-10DECELERATION*3rd digit (reverse characteristics select)The input characteristics of the master speed frequency reference depend on the setvalue as follows. For the reverse characteristics, onlyinput is valid.3rd digit = 0Normal characteristics (0-10V or 4-20mA/0-100%)3rd digit = 1Reverse characteristics (10-0V or 20-4mA/0-100%)3rd digit=03rd digit=1FREQUENCYREF.100%0%4mA20mACURRENT INPUT (TERMINAL 14)FREQUENCYREF.100%0%0V10VVOLATGE INPUT (TERMINAL 13)78
4th digit (operation select when frequency reference is missing)4th digit = 0Normal operation (varies with change of reference)4th digit = 1Operation continues with 80% frequency.When 4th digit = 1 is set, the current master speed frequency reference is comparedat all times with the one occurred 0.4 second before. When the current master speedfrequency reference goes below 10% of the one that occurred 0.4 second before,operation continues with 80% (80% frequency) of the master speed frequencyreference of the prior one. Consequently, the master speed frequency reference ofthe previous one (0.4 second before) is used as the current frequency reference.In the following cases, this operation is released and the inverter returns tonormal operation:Master speed frequency reference exceeding 80% frequency is input.Stop reference is input.Reference is missing during operation at less than 5% of frequency.FWD RUNCOMMANDMASTER SPEEDFREQUENCYREF.80%0.4Sec0.4Sec10%INVERTEROUTPUTFREQUENCYTIME CHART80% OFFREQUENCY(7) Operation Mode Select 4 (Sn-07)Define the operation at overtorque detection. Overtorque is detected by the followingformula:Inverter output current B overtorque detection level (Cn-26, Initial value: 160 %)(Detection time Cn-27, Initial value: 0.1 second, Hysteresis fixed at 10%)1st digit1st digit = 0Overtorque is not detected.1st digit = 1Overtorque is detected.79
2nd digit2nd digit = 0 Overtorque is detected only during agreed frequency.2nd digit = 1Overtorque is detected during stop or during running except for DB.3rd digit3rd digit = 0When overtorque is detected, “Over Torque OL3” blinks in the digitaloperator and the operation continues.3rd digit = 1When overtorque is detected, “Over Torque OL3” displayed on thedigital operator and the inverter output is shut OFF. Fault contactsignal is output. (Treated as a fault)MOTORCURRENTCn-26 HYSTERESIS 10%TIMEMULTI-FUNCTION OUTPUT SIGNAL(OVERTORQUE DETECTION SIGNAL)Cn-27ONCn-27ONSetting either Sn-20 to 22 to "OB" enables signal to be output at overtorque detection.(8) Operation Mode Select 5 (Sn-08)1st digit (frequency reference input by RS-485 option card or inverter unit select)Specify whether RS-485 option card (PA-M or PA-P) or inverter frequency referenceis used for operation.1st digit = 0RS-485 Option card frequency reference is accepted.1st digit = 1Frequency reference from inverter control circuit terminals or the digitaloperator is accepted.2nd digit (RUN/STOP command input by RS-485 option card or inverter unit select)2nd digit = 0 RS-485 option card RUN/STOP command is accepted.2nd digit = 1RUN/STOP command from inverter control circuit terminals or thedigital operator is accepted.3rd, 4th digit (RS-485 stopping method after communication error)80
4th digit 3rd digit0 00 11 01 1ContentsRamp to a stop by Bn-02, When RS-485 has communication error.Coasting to a stop, When RS-485 has communication error.Ramp to a stop by Bn-04, When RS-485 has communication error.Operation to continue (will stop if the key stop is pressed)(9) Operation Mode Select 6 (Sn-09)1st, 2nd digit (Not used)3rd digit (energy-saving function selection)3rd digit = 0Energy-saving function ineffective and operation is performed withnormal V/f control.3rd digit = 1Energy-saving function effective.4th digit (Not used)(10) Protective Characteristics Select 1 (Sn-10)1st digit (selection of stall prevention during acceleration)1st digit = 0Stall prevention during acceleration is enabled.1st digit = 1Stall prevention during acceleration is not enabled.The function of stall preventionduring acceleration automaticaIly extends accelrationaccording to load status (inverter output current), thus preventing the motor fromstalling during acceleration. The stall prevention level during acceleration in aconstant output area is reduced as follows:Acceleration stallprevention level ofconstant output fieldacceleration stallprevention level (Cn-28) ×output frequencymaximum voltagefrequency (Cn-04)When the 1st digit of Sn-10 is 1, the output frequency increases at the ratedetermined by acceleration time:2nd digit (selection of stall prevention during deceleration)2nd digit = 0Stall prevention during deceleration is enabled.2nd digit = 1Stall prevention during deceleration is not enabled.The function of stall prevention during deceleration automatically extendsdeceleration time according to the magnitude of the main circuit DC voltage, thuspreventing overvoltage during deceleration.81
When the 2nd digit of Sn-10 is 1, the output frequency decreases at the ratedetermined by deceleration time. For positioning application, specify "stall preventionduring deceleration not provided" (2nd digit = 1) in order to obtain stopping accuracy.With large load inertia, use a braking resistor (For 440V: 25HP, 30HP and 220V:25HP) or braking unit with braking resistor to prevent overvoltage.3rd digit (stall prevention during running)3rd digit = 0Stall prevention during running is enabled.3rd digit = 1Stall prevention during running is not enabled.Stall prevention operation during running starts decelerating when the output currentreaches 100 ms or greater than the set value of Cn-30 during frequency coincidence(operation level of stall prevention during running). The inverter decelerates as longas the output current exceeds the set value of Cn-30 (operation level of stallprevention during running). When the output current goes below the set value, theinverter reaccelerates. The deceleration time selected in the 4th digit of Sn-10 istaken. Even during stall prevention while running, stall prevention duringdeceleration and stall prevention during acceleration are enabled.OUTPUTFREQUENCYDECELERATION TIMEHYSTERESIS2%ACCELERATIONTIMEDETECTION LEVEL OFSTALL PREVENTIONDURING RUNNINGRETURN LEVELINVERTER OUTPUTCURRENTDETECTION TIME: 100msSTALL PREVENTION DURING RUNNING4th digit (selection of deceleration time during stall prevention while running)4th digit = 0The inverter decelerates for the deceleration time specified in bn-02.4th digit = 1The inverter decelerates for the deceleration time specified in bn-04.(11) Protective Characteristics Select 2 (Sn-11)1st digit (Not used)2nd digit (fault contact signal during auto reset/restart operation)2nd digit = 0A fault contact signal is not output during auto reset/restart operation.2nd digit = 1A fault contact signal is output during auto reset/restart operation.82
3rd digit (operation continued at momentary power loss)3rd digit = 0When momentary power loss is detected, under-voltage fault (UV1)occurs and the inverter output is shut off.3rd digit = 1If momentary power loss time is within momentary power loss ride-thrutime (Cn-37), the operation Continues after the momentary power loss.If the momentary power loss ride-thru time is exceeded, under-voltagefault (UV1) occurs and the inverter output is shut OFF.Notes:1. When the 3rd digit = 1, be sure not to shut OFF the external sequence signal (e.g. FWD, REV)2. For lifters, do not use this function (the 3rd digit = 0)4th digit (Not used)(12) Protective Characteristics Select 3 (Sn-12)When an external fault signal of terminal 3 is input, “Ext. Fault 3 EF3” is displayedand a fault contact signal is output immediately. The inverter stops according to thesetting of the 3rd and 4th digits. The external fault signal is held within the inverteruntil a fault reset signal is input.1st digit (level selection of external fault signal)1st digit = 0NO-contact input (when "closed", external fault operation is performed)1st digit = 1NC-contact input (when "open", external fault operation is performed)2nd digit (acceptance of external fault signal)2nd digit = 0External fault signals are always accepted.2nd digit = 1External fault signals are accepted only during running. (Not acceptedduring baseblock)3rd digit, 4th digit (selection of processing at external fault detection)4th digit 3rd digit Contents0 00 11 01 1Ramp to a stop by Bn-02 (major fault).Coasting to a stop (major fault).Ramp to a stop by Bn-04 (major fault).Operation to continue (minor fault).(13) Protective Characteristics Selection 4 (Sn-13)1st digit (Input Phase Loss Protection, IPL)The input phase loss protection, function is disabled when input phase loss detectionlevel Cn-61=100%. The effectiveness or ineffectiveness of input phase lossprotection function can also be selected by the 1st digit of Sn-13.83
1st digit = 0Input Phase Loss protection function ineffective.1st digit = 1Input Phase Loss protection function effective.2nd digit (Output Phase Loss Protection, OPL)The output phase loss protection function is disabled during the inverter is stop orDC injection braking or inverter output current 30% of inverter rated outputcurrent. The effectiveness or ineffectiveness of output phase loss protection functioncan also be selected by the 2nd digit of Sn-13.2nd digit = 0Output Phase Loss protection function ineffective.2nd digit = 1Output Phase Loss protection function effective3rd digit (Heat Sink Cooling Fan ON/OFF Control)3rd digit = 0Inverter heat sink cooling fan runs while the inverter power ON.3rd digit = 1Inverter heat sink cooling fan runs only while the heat sink temperatureis higher than 50.(14) Protective Characteristics Selection 5 (Sn-14)1st digit (motor protection)1st digit = 0Electronic thermal motor protection is enabled.1st digit = 1Electronic thermal motor protection is not enabled.2nd digit (selection of electronic thermal characteristics)2nd digit = 0Electronic thermal characteristics are in accordance with reducedtorque motor (standard motor).2nd digit = 1Electronic thermal characteristics are in accordance with constanttorque motor (special motor).3rd digit (electronic thermal time constant)3rd digit = 0Used for standard motor and special motor (standard-time ratings, 8minutes)3rd digit = 1Used for motors other than the above (short-time ratings, 5 minutes)The electronic thermal overlaid function monitors motor temperature, bassed oninverter output current and time, to protect the motor from overheating. Whenelectronic thermal overload relay is enable, on "OL1" error occurs, shutting OFF theinverter output and preventing excessive overheating in the motor.When operating with one inverter connected to one motor, an external thermal relayis not needed. When operating several motors with one inverter, install a thermalrelay on each motor, In this case, set constant Sn-14=XXX1.4th digit (Not used)84
(15) Multi-Function Contact Input Selection (Sn-15~Sn-18)Select the set values shown below for Sn-15 to -18.Terminal NoSn-Terminal 5 15Terminal 6 16Terminal 7 17Terminal 8 18SetValueFunction LCD display (English) Description00 FWD / REV RUN select 3-wire RUN3-wire sequence mode (00Open: FWD run, set in Sn-15) terminal 1-run,Closed: REV run, 2-stop, 5 FWD / REVselection01Operation signal select Local/ RemoteLOC / REMOT controlOpen: Operated according to setting of Sn-041st ,2nd digits and Sn-08 1 st ,2 nd digits.Closed: Operated by frequency reference and runcommand from digital operator. (Localmode)02Option / inverter referenceselectOpt. Card SwitchOpen: Operated by operation or frequencyreference from option.Closed: Operated by operation or frequencyreference from inverter.03 Multi-step speed reference 1 Multi-Fct Command 104 Multi-step speed reference 2 Multi-Fct Command 205 Note used ReservedCombination of multi-step speed references 1, 2correspond to speed reference (master speedAn-01) and speed references 2 to 4 (An-02 to 04).Refer to “SYSTEM CONSTANT MULTI-STEPSPEED REFERENCE LIST"06Jog frequency referenceselectJOG CommandClosed: Jog frequency reference is selected.07 Accel / decel time select Acc.Dec. SwitchOpen: Accelerates / decelerates with ACCELtime 1 and DECEL time 1. (Bn-01, Bn-02set values)Closed: Accelerates / decelerates with ACCELtime 2 and DECEL time 2. (Bn-03, Bn-04set values)08External baseblock(NO-contact input)Ext. B.B. NO-Cont.Closed: Inverter output is shut off. (Frequencyreference is held.)09External baseblock(NC-contact input)Ext. B.B. NC-Cont.Open: Inverter output is shut off. (Frequencyreference is held.)0AAccel / decal speed prohibitcommand(HOLD command)Inhibit Acc.Dec.Frequency reference is held. (SFS operation isstopped.)0B Inverter overheat alarm Over Heat AlarmClosed: Over Heat OH2 blinks on operator andoperation continues. (Minor fault)85
SetValueFunction LCD display (English) Description0C to 0F Not used Reserved 10 UP command UP command Closed: Output frequency increment11 DOWN command DOWN command Closed: Output frequency decrement12 FJOG command Forward Jog13 RJOG command Reserved JogClosed: Forward jog runFWD LED lights. Display: 6HzClosed: Reverse jog runDigital operator REV LED does not light.Display: 6 Hz14 to 1F Not used Reserved 20 to 2F External fault 5 External fault 530 to 3F External fault 6 External fault 640 to 4F External fault 7 External fault 7External fault signal input50 to 5F External fault 8 External fault 860DC injection brakingcommand(JOG with priority)DC Brakin CommandClosed: DC injection braking applied when thefrequency output is less than the DCinjection start frequency and the DCinjection braking command is closed.61 Search 1 Max. Freq. Spd_Search Closed: Search from max frequency62 Search 2 Set Freq. Spd_Search Closed: Search from set frequency63~64 Not used Reserved 65 Integral value reset I_Time Reset Closed: Integral value reset at PID Control66 PID control cancel PID Invalid Closed: PID control canceled67 to FF Not used Reserved Setting error (OPE03) occurs by setting to Sn-15 to -18 in the following cases.When set values are not listed from the smaller to the larger.When more than two search references of set values 61, 62 and 64 are setsimultaneously.When the following combination is set at Sn-15 to -18, set value fault (OPE03) occurs.Set values are not in a descending order.More than two search commands of set values 61 and 62 are set.UP/DOWN commands are not set simultaneously (only one command can be set.)UP/DOWN and accel/decel prohibit commands are set simultaneouslyMore than two set values except FF are set.86
1 FWD/REV run select (set value = 00)When 0 is set in Sn-15, the mode becomes 3-wire sequence mode.STOPRUN12524VG7300PARUN COMMAND (RUNS WHEN "CLOSED")STOP COMMAND (STOPS WHEN "OPEN")FWD/REV RUN SELECT"OPEN": FWD RUN"CLOSED": REV RUNFig. 12 3-wire sequence2 Operation signal select (set value = 01)Selection of operation signals is enabled only stopping.Open: The inverter operates according to the setting of Sn-04 1st, 2nd digitsand Sn-08 1st, 2nd digits.Closed: The inverter operates by frequency reference and run command fromdigital operator.Example 1For local/remote mode select, set Sn-04 = × × 00 and Sn-08=× × 11.Open: Frequency reference and run command of control circuit terminals areaccepted (Remote mode).Closed: Frequency reference and run command of the digital operator areaccepted (Local mode).Example 2For local/remote mode select, set Sn-04 = × × 00 and Sn-08=× × 00.Open: Frequency reference and run command input by RS-485communication option card (Remote mode).Closed: Frequency reference and run/stop command input by digital operator(Local mode)3 Option card/inverter reference select (set value = 02)Specify which of the option or inverter references is used for operation. Theoption/inverter selection is effective only during stopping.Open: Option card frequency reference and operation signals are accepted.Closed: Frequency reference and operation signals from the inverter controlcircuit terminals or the digital operator are accepted.4 Selection of multi-step speed references 1 to 3 and jogging frequency select (setvalues = 3 to 6)Up to nine step speeds can be selected by combinations of multi-step speedreferences and jog frequencies.87
Closed ×OpenNo relationJog FrequencyMulti-step ReferenceReferenceSelect 3 2 1Frequency Reference× × × × Master speed frequency reference*× × × Auxiliary analog reference× × × Frequency reference 3 (An-03)× × Frequency reference 4 (An-04)× × × Frequency reference 5 (An-05)× × Frequency reference 6 (An-06)× × Frequency reference 7 (An-07)× Frequency reference 8 (An-08) Jog frequency reference 3 (An-09)* In operator mode (1st digit of Sn-04 is 1), frequency reference 1 (An-01) is enabled.† When the multi-function analog input is selected by functions other the frequency reference (Sn-19=0),frequency reference 2 (An-02) becomes effective. When the mufti-function analog input is not used, set Fto the set value.For multi-step speed operation with frequency reference by keypad, perform thefollowing setting:1 Sn-04 = ×××1 An-01 becomes effective.2 Sn-19 ≠00 An-02 becomes effective.5 Accel/decel time select (select value = 07)Accel/decel time is switched when "closed". Switching is permitted even duringacceleration or deceleration.Open: The accel/decel time set by gn-01 and Sn-02 isClosed: The accel/decel time set by Sn-03 and 13n-04 is accepted.6 External baseblock (set value = 08)Baseblock is performed when "closed". External baseblock differs as followsdepending on the input status of run command:When an external baseblock signal is input during running, “Ext. Baseblock bb"blinks at the digital operator and inverter output is shut OFF. When the externalbaseblock signal disappears, the inverter restarts with the frequency reference atthat time. The voltage returns to the set value in the voltage recovery time. When astop signal is input and an external baseblock signal is input while the inverter isdecelerating, “Ext. Baseblock bb" blinks at the digital operator, the inverter output isshut OFF, and the output frequency is set to 0Hz.88
7 External baseblock (set value = 09)Baseblock is performed when "open". All other operations are the same as when aset value = 8.8 Accel/decel speed prohibit command (set value = 0A)As long as accel/decel speed prohibit command is input, accel/decel speed isprohibited and the output frequency at that time is held. When stop command is input,accel/decel speed prohibit state is freed and the system enters stop state. The figurebelow shows a time chart.FWD RUNACCEL/DECELSPEEDPROHIBITCOMMANDFREQUENCYREF.OUTPUT FREQUENCYNote: If the run command is input again after the stop command is input while the accel/decel prohibitcommand is input, the holding output frequency is stored unless the accel/decel prohibit commandis released. Therefore, operation is performed at the stored output frequency. Also when the powersupply is turned OFF in the accel/decel prohibit command input status, the holding output frequencyis still stored.9 Inverter overheat alarm (set value = 0B)As long as an inverter overheat signal is input, “Over Heat OH2” blinks a the digitaloperator.10 UP command/DOWN command (set value = 10, 11)Acceleration/deceleration is performed by inputting the UP/DOWN commandswithout changing frequency reference in the forward (reverse) run command inputstatus, and operation can be performed at a desired speed.Set value = 10: UP commandSet value = 11: DOWN commandUP command Closed Open Open ClosedDOWN command Open Closed Open ClosedStatusAccel(UP)Decel(DOWN)HoldHold89
The follow shows the time chart when the UP/DOWN commands are used.FWD RUNUPCOMMANDDOWNCOMMANDUPPERLIMIT SPEEDLOWERLIMITE SPEEDOUTPUTFREQUENCYD1 H U H D H U H D D1 H U U1 H D D1 HU = UP (accel) statusD = DOWN (decel) statusH = HOLD (constant speed) statusU1 = During clamp at upper limit speed even in UP statusD1 = During clamp at lower limit speed even in DOWN statusNotes:1. When the UP/DOWN commands are used, set the Sn-04 1st digit. (frequency reference selection) asshown below.Set 1st digit = 0 without fail. .Setting 1st digit = 1 disables the UP/DOWN commands.2. When the UP/DOWN commands are selected, upper limit speed is set disregarding frequencyreference.Upper limit speed = maximum output frequency (Cn-02) × frequency reference lower limit (Cn-14)3. The largest value among minimum output frequency (Cn-07), frequency reference lower limit (Cn-15)and main frequency reference input from control circuit terminal VIN or AIN is employed as lower limitspeed.4. By inputting the FWD/REV run commands, operation is started at the lower limit speed even if theUP/DOWN command are not input.When the power supply is turned OFF in the HOLD status, the held output frequency is stored.Therefore, by inputting the FWD/REV run commands in the HOLD status continuously after the powersupply is tuned ON, operation is performed at the stored output frequency.5. When the jog run command is input during running by UP/DOWN commands, the jog run command haspriority.90
11 FJOG command, RJOG command (set value = 12, 13)Forward and reverse jog frequency operation is enabled.Set value = 12 FJOG command: Forward run by jog frequency reference (An-09)at closed.Set value = 13 RJOG command: Reverse run by jog frequency reference (An-09)at closed.Notes:1. When FJOG command or RJOG command is input during running, FJOG command or RJOG commandhas priority2. When both FJOG and RJOG commands are closed for 500 ms or more, the inverter stops according tothe stopping method selection (Sn-04).3. FJOG or RJOG command can be set individually.12 External faults 5 to 8 (set values = 2X, 3X, 4x, 5X: X is 0 to F)When external faults 5 to 8 are input, Ext. Fault 5 to 8 (EF5 to EF8) is displayed atthe digital operator, and the inverter operates according to combinations of four bitsshown in the table below. The hexadecimal equivalent of combinations of four bitsshow below is set in the 1st digit of the setting value (2X, 3X, 4X, 5X) of externalfaults 5 to 8.Bit No. 0 1013, 2External fault input:NO - contact inputExternal fault signal:Always detectedSelection of processingat external fault detectionExternal fault input:NC - contact inputExternal fault signal:Detected during running only00: Ramp to a stop (major fault)01: Coasting to a stop (major fault)10: Ramp to a stop by bn-04 (major fault)11: Operation to continue (minor fault) External fault 5 is set to as follows :⎯ NO-contact input (from terminal 5)⎯ Signal is always detected⎯ Processing is coasting to a stop91
Set value= 24 H0 1 0 0NO-contact inputAlways detected.Coasting to a stopExternal fault 5 is input from terminal 5The inverter operates differently as described below when Experiencing major faultsor minor faults. The digits in the error display Ext. Fault 5 to 8 (EF5 to EF8) indicate theterminal numbers in which external faults 5 to 8 are set.Major faultsIf an external fault is input, the fault is displayed and the inverter stops according toprocess selection at external fault detection. Fault contact output relay is outputimmediately.Minor faultsFault display blinks only when external fault is input (the display is made for 0.5 secondeven when input is less than 0.5 second). External faults 5 to 8 are set to multi-function terminals 1 to 4 (Nos. ofterminal 5 to 8)No. of FaultMulti-functionTerminal(Major Fault)Display of Digital Operator(Minor Fault) BlinkingExternal Fault 5 Terminal 5 Ext. Fault 5 (Fault EF5) Ext. Fault 5 (Alarm EF5)External Fault 6 Terminal 6 Ext. Fault 6 (Fault EF6) Ext. Fault 6 (Alarm EF6)External Fault 7 Terminal 7 Ext. Fault 7 (Fault EF7) Ext. Fault 7 (Alarm EF7)External Fault 8 Terminal 8 Ext. Fault 8 (Fault EF8) Ext. Fault 8 (Alarm EF8)Additional Notes of External Faults1. External fault reset is enabled in baseblock status.2. The following shows the priority order of process selection when more than oneexternal fault is input.Coasting to a stop ramp to a stop by bn-04 ramp to a stop by Bn-023. Fault retry is disabled when an external fault is input.92
13 DC injection braking command (set value = 60)When DC braking command is input when the inverter stops, DC braking operationis performed. When operation signal or jog operation command is input, the DCbraking operation is stopped and the operation is started. (Privileged operation)DC INJECTIONBRAKINGCOMMANDFWD RUNCOMMANDOUTPUTFREQUENCYDC INJECTIONBRAKINGDC INJECTIONBRAKING STARTFREQUENCY(Cn-10)DC INJECTIONBRAKING14 Search command (set value = 61,62)To start the motor during coasting when commercial power supply/inverter changingoperation is performed, the motor can be operated without tripping by using thespeed search function.Set value = 61: Speed search starts with the maximum frequency.Set value = 62: Speed search starts with the frequency reference value whensearch command is input.Search commands with set values of 61 and 62 cannot be set at the same time.By inputting the run command with the search command "closed" during baseblock,speed search starts after shutting down the inverter output for the minimumbaseblock time (Cn-40).Speed search operation starts when inverter output current is larger than the setvalue of the speed search operation level (Cn-38), Frequency at which inverteroutput current is smaller determined as speed synchronous point:Re-acceleration/deceleration is performed in the set accel/decel time up to the setfrequency.The following shows the time hart where the speed search command is input.93
FWD (REV) RUNCOMMANDSEARCHCOMMANDMAX. FREQUENCY ORFREQUENCY REF. VALUEWHEN SEARCHCOMMAND IS INPUTAGREED SPEEDDETECTIONOUTPUTFREQUENCYMIN. BASEBLOCKTIMEVOLTAGE ATSPEED SEARCHOUTPUTVOLTAGESPEED SEARCHOPERATIONRETURN TOTHE VOLTAGEAT NORMALRUNNINGNotes:1. In momentary power loss operation continuation mode, speed search operation is performedbeginning with current output frequency, regardless of the existence of search command. Aftercompletion of speed search, the operation is performed according to the run command.2. Determine a sequence so that FWD/REV run command enters at the same time or later thansearch command.Example of SequenceRELAY 1RELAY 1 RELAY 2SEACHCOMMANDFWD / REV RUNCOMMAND3. More than two search commands of set values 61 and 62 cannot be set.15 Integral value reset (set value = 65)Value I is reset to 0 when an integral value reset command is input from multifunctioncontact inputs (terminal 5 ~ 8, set 65 either to Sn-15 to 18)16 PID control cancel (set value = 66)PID control circuit can be canceled by multifunction contact input signal. Set 66either to Sn-15 to 18 and close the contact (either terminal 5 to 8) during running.Then the PID control circuit is canceled and the aimed value signal is used as afrequency reference signal without being changed. In this case, the signal input levelis 0 the 10V (or 4 to 20mA)/0 to 100%.94
(16) Multi-Function Analog Input Selection (Sn-19)The settings and functions for the multi-function analog input (terminal AUX) arelisted as below.SetValueFunction LCD display (English) Remarks00 AUX frequency reference* Auxiliary Freq. Cmd.Used for MASTER/AUX frequency referenceselection010203Frequency reference gain(F GAIN)Frequency reference bias 1(F BIAS 1)Frequency reference bias 2(F BIAS 2) (+ -)~ Freq. Cmd. Gain Total gain: Internal gain (bn-05) × F GAINCmd. Bias 1 Total bias: Internal bias (bn-06) + F BIAS 1Cmd. Bias 2 Total bias: Internal bias (bn-06) + F BIAS 204 Overtorque detection level Over Tq. LevelInternal over torque detection level (Cn-26)ineffective05 V BIAS † V/F curve Bias V BIAS addition after V/F conversion06Accel/decel time reductioncoefficientAcc.Dec. coeff.Accel/decel time varied by analog input07 DC braking current DC Brakin current08 Stall level during running Run stall LevelDC injection braking current varied by analog input(10 V/inverter rated current) Internal DC brakingcurrent setting (Cn-11) ineffectiveStall level during running is set by analog input.Cn-30 becomes ineffective.09 PID control selection PID Command PID control performed0AFrequency reference lowerlimitFreq. Cmd. Low BoundFrequency reference lower value is set by analoginput. (Either Cn-15 set value or andog insutwhichever is larger becomes effective.)0B Setting prohibit frequency 4 Freq. Jump 40C <strong>Motor</strong> overheat protection MTR OH protectSet prohibit frequency is set. (The fourth value inaddition to frequency values set by Cn-16 to 18 canbe set)<strong>Motor</strong> temperature sensor PTC thermistorconnected to terminal MT-AUX and GND. <strong>Motor</strong>overheat protection active when the resistor of PTCthermistor1330, return when5500D~0F Not used Reserved * Not to be used with An-02† 440 class: V BIAS value 0 to 200 V.Note: For combinations of multi-step speed references at set value = 00. refer to pages 85 and 86.95
Multi-function Analog Input Characteristics1 Sn-19 = 00 2 Sn-19 = 01 3 Sn-19 = 02100%FREQUENCYREF.F GAIN2.001.000% 0V 10V 0V 5V 10VMULTI-FUNCTIONMULTI-FUNCTIONANALOG INPUTANALOG INPUT4 Sn-19 = 03 5 Sn-19 = 04 6 Sn-19 = 0510%OVER-200%100VTORQUEF BIAS 2 0% V BIAS0V 5VDETECTION10V-10%LEVEL 0% 0V 10V0VMULTI-FUNCTIONMULTI-FUNCTIONANALOG INPUTANALOG INPUT7 Sn-19 = 068 Sn-19 = 07 9 Sn-19 = 0810DC INp100%200%REDUCTIONJECTIONSTALLCOEFFI- 1BRACKINGLEVELCIENT30%CURRENT0% DURING0V 1V 10V0V 10VRUNNUNG0VMULTI-FUNCTIONMULTI-FUNCTIONANALOG INPUTANALOG INPUTActual accel/decel time =Accel/decel timeBn-0104Reduction coefficient10 Sn-19 = 0911 Sn-19 = 0A12 Sn-19 = 0BMAX. OUTPUT FREQ.(Cn-02)(Cn-02)multi-function analog inputFreq. Ref.SETTING(terminal be used as theLower LimitPROHIBITsetting of PID control aimedFREQUENCY 40V10V0Vvalues (0~10V input)MULTI-FUNCTIONANALOG INPUT13 Sn-19 =0CThe motor temperature detected sensor (PTC thermistor)R T connected to terminal MT-AUX and GND.The motor overheat protection active when R T 1330and the delay time is over the motor overheat protectionRTtime (Cn-63), digital operator will display “<strong>Motor</strong> OverheatOH3” alarm and inverter stop the motor depend on thestopping method set in 3rd and 4th digits of Sn-12 and thefault contact signal is output.The motor overheat (OH3) alarm can be reset Resistance ()when R T 550.The typical characteristic of PTC thermistorR T must follow the British Standard:Tr 5RT 550Tr 5RT1330Tr20RT 250Tr15RT4000133055010%F BIAS 10% 0V 10VMULTI-FUNCTIONANALOG INPUTTr-5 Tr Tr+510VMULTI-FUNCTIONANALOG INPUT1.5V10VMULTI-FUNCTIONANALOG INPUTMAX. OUTPUT FREQ.10VMULTI-FUNCTIONANALOG INPUTMTAUXGND+15VTemperature ()96
(17) Multi-Function Contact Output Selection (Sn-20~Sn-22)Select the set values shown below for Sn-20 to -22.Contact output for 0.1 sec. while detecting signal.Terminal NoControl circuit terminal R2A-R2C (Contact output)Control circuit terminal D01-DCOM (Open collector output)Control circuit terminal R1A-R1C (Open collector output)Sn-Sn-20Sn-21Sn-22SetValueFunctionLCD display(English)Description00 During running Running Closed: During running01 Zero speed Zero speed Closed: Zero speed02 Agreed frequency Frequency Arrive03 Agreed frequency setting Agreed F ArriveClosed: Frequency ref. Output Frequency ref.Cn-22 Frequency Cn-22Closed: Set value 2 in agreed frequency status and(Cn-21Cn-22)output frequency(Cn-21Cn-22)04 Frequency detection 1 Freq. Det. 1 Closed: Output frequencyCn-3205 Frequency detection 2 Freq. Det. 2 Closed: Output frequencyCn-3306 Inverter operation ready Run Ready OK! Closed: Inverter operation ready07During undervoltagedetectionLow Volt DetectClosed: During undervoltage detection08 During baseblock Output B.B. Closed: During inverter output baseblock09 Frequency reference mode Ref. Cmd. Operator0A Control command Run Source OperatorOpen: From control circuit terminalClosed: From operatorOpen: From control circuit terminalClosed: From operator0B Overtorque detection Over Tq. Detect Closed: During overtorqucy reference missing0CFrequency referencemissingFreq. Cmd. MissingClosed: While frequency reference missing0D Not used Reserved 0E Fault Fault Closed: Fault (except CPF 00, CPF 01)0F Not used Reserved 97
1 Operation (set value=0)The operation contact is "closed" when FWD or REV run command is input, or theinverter outputs voltage.2 Zero-speed (set value=1)The zero-speed contact is "closed" when inverter output frequency is less than theminimum output frequency.3 Agreed frequency (set value=2)This is "closed" when output frequency is within the detection width shown in thefigure below.DETECTION WIDTH Cn-22FREQUENCY REF.OUTPUT FREQUENCYAGREED FREQUENCYSIGNALCLOSED(Frequency ref. Cn-22) Output frequency (Frequency ref. Cn-22)Cn-22: Agreed frequency detection width4 Agreed frequency (Set value=3)This is "closed" when acceleration or deceleration is completed and outputfrequency is within the detection width shown in the figure below.FREQUENCY REF.DETECTION WIDTH Cn-22Cn-21OUTPUT FREQUENCYAGREED FREQUENCYSIGNALCLOSED(Cn-21 Cn-22) Output frequency (Cn-21 Cn-22)Cn-21: Agreed frequency pointCn-22: Agreed frequency detection width98
5 Frequency detection (set value=4)This contact is "closed" when output frequency is equal to or less than Cn-32, asshown in the figure below.Cn-22OUTPUT FREQUENCYFREQUENCYCLOSEDDETECTION SIGNALCn-32Output frequency Cn-32Cn-32: Frequency detection 1 levelCn-22: Agreed frequency detection width6 Frequency detection (set value=5)This contact is "closed" when output frequency is equal to or greater than Cn-33, asshown in the figure below.Cn-22OUTPUT FREQUENCYFREQUENCYDETECTION SIGNALCLOSEDCn-33Output frequency Cn-33Cn-33: Frequency detection 2 levelCn-22: Agreed frequency detection width7 Inverter operation ready (set value=6)This is "closed" when the inverter has become ready for operation.8 During undervoltage (UV) detection (set value=7)This contact remains "closed" as long as the inverter is detecting undervoltage.9 During baseblock (set value=8)This contact is always "closed" when inverter output is shut OFF.10 Frequency reference mode (set value=9)This contact is "closed" when the frequency reference mode from the operator isselected.99
11 Control command (set value=A)This contact is "closed" when the control command from the keyboard is selected.12 Overtorque detection (set value=B)This contact remains "closed" as long as the inverter is detecting overtorque. Setovertorque detection level in Cn-26 and set overtorque detection time in Cn-27.13 Frequency reference missing (set value=C)This is "closed" when frequency reference missing is detected.14 Not used (set value= D)15 Fault (set value=E)This contact is "closed" when the inverter detects a major fault. However, in theevent of a fault in the watchdog (OP Commu. Error 1 CPF00) or transmissionbetween the mainframe and operator, the inverter is not operated.16 Not used (set value=F)Set F in multi-function contact output not used.100
(18) Inverter station address (Sn-23)(19) RS-485 Communication protocol setting (Sn-24)The 7300PA inverter has two RS-485 communication option card PA-M (MODBUSprotocol) and PA-P (PROFIBUS protocol). These two option cards can be used formonitoring inverter status, reading the parameter setting, and changing theparameter setting to control the inverter operation.Parameter definition is as follows:Sn-23Inverter station address, setting range 1~31.Sn-24= Communication parity setting00No parity01Even parity10Odd parity11Not usedCommunication baud rate setting002400 bps (bit/sec)014800 bps109600 bps1119200 bpsEvery data has a data length of II bits: 1 start_bit, 8 data_bits , 1 parity_bit and 1stop_bit. If communication parity setting as no parity (Sn-24=XX00), the parity_bit is1.3 different commands are used for communication between the inverter and externalunits:a. Read Command external units to read the memory address of the inverter.b. Write command external units to write the memory address of the inverter in orderto control the inverter.c. Circuit test command: To test the communication status between the inverter andexternal units.The change of setting Sn-23, Sn-24 will be effective in the next start time afterturning off the inverter.Forbid the DRIVE/PRGM change while writing through RS-485.For more details of RS-485 communication refer to7300PA RS-485 MODBUSCommunication Application <strong>Manual</strong>or7300PA RS-485 PROFIBUS CommunicationApplication <strong>Manual</strong>.101
(20) LCD Language displayed selection (Sn-25)Sn-25 = 0EnglishSn-25 = 1Chinese(21) Multi-Function Analog Output A01 Function Selection (Sn-26)(22) Multi-Function Analog Output A02 Function Selection (Sn-27)The multi-function analog output A01 and A02 can be set to monitor the following 11status items as shown below:Sn-26, Sn-27SettingMonitored Contents (LCD Display)Input0 Frequency Command 0 ~ max. frequency1 Output Frequency 0 ~ max. frequency2 Output Current 0 ~ rated Current3 Output Voltage 0 ~ rated Voltage4 DC Voltage220V: 0 ~ 400VDC440V: 0 ~ 800VDCDescriptionOutput5 Output Power0 ~ max. applicable motorcapacity0 ~ 10V10 Comm. Control 0 ~ 100%* 16 VIN Analog Command 0 ~ 10V7 AIN Analog Command 4 – 20mA8 AUX Analog Command 0 ~ 10V9 PID detected value (VIN + AIN) 0 ~ 10VThe output gain Bn-11, Bn-12 will determine the output voltage at multi-functionanalog output at A01 and A02 terminal. The specified multiple of 10V will correspondto the 100% output monitored value.*1When Sn-26 ~ Sn-27=10, the multi-function output terminals A01, A02 are controlledby RS-485 commutation. Please ref. To “7300PA MODBUS/PROFIBUS applicationmanual”.(23) Not Used (Sn-28)(24) Not Used (Sn-29)102
(25) Pump Operation Mode Selection (Sn-30)The PA-PID option card application parameter. Set PA-PID card ineffective (Sn-30=0)when the PA-PID card is not installed. Please refer to “PA-PID instruction manual”.Sn-30=0PA-PID card ineffective.Sn-30=1Fixed inverter driving mode, stop all the pumps by first-run-last-stopsequence. i.e. Only one of the pumps is drived by inverter, the others aredrived by ac power source, and take the first run pump last stop sequenceto stop all the pumps. This operation mode is better for the different motorKW application.Sn-30=2Fixed inverter driving mode, stop the pump drived by the inverter only. i.e.When the inverter output the stop signal, only the pump drived by theinverter is stopped.Sn-30=3Fixed inverter driving mode, stop all the pumps by first-run-first-stopsequence. i.e. The first-run (the motor running for the longest time)-first-stop sequence is adopted to stop the motors and it keeps the pumpshave almost the same working duty. This operation mode is better for thesame motor KW application.Sn-30=4Cycled inverter driving mode, stop all the pumps by first-run-first-stopsequence. i.e. Except the auxiliary pumps, all the pumps are controlled byinverter, and take the first-run-first-stop sequence to stop all the pumps.Sn-30=5Cycled inverter driving mode, stop the pump drived by the inverter only.Fixed inverter driving mode and Cycled inverter driving mode connection examples:3powersourceINVMC0(RY1)MC1(RY2)MC2(RY3)MC3(RY4)MC4(RY5)M1M3M2M43powersourceINVMC0(RY1)MC1(RY2)MC2(RY3)MC3(RY4)MC4(RY5)M1M2MC5(RY6)MC6(RY7)M5M6MC5(RY6)MC6(RY7)M3MC7(RY8)M7MC7(RY8)M4(a) Fixed inverter driving mode(b) Cycled inverter driving modeFig. 13 Pump Operation mode(26) PA-PID Card Relay 2 Control (Sn-31)(27) PA-PID Card Relay 3 Control (Sn-32)(28) PA-PID Card Relay 4 Control (Sn-33)103
(29) PA-PID Card Relay 5 Control (Sn-34)(30) PA-PID Card Relay 6 Control (Sn-35)(31) PA-PID Card Relay 7 Control (Sn-36)(32) PA-PID Card Relay 8 Control (Sn-37)The PA-PID option card application parameters. Please refer to “PA-PID instructionmanual”.Used to control the pump ON/OFF.Sn-31 ~ 37=0Relay output invalid.Sn-31 ~ 37=1Relay output valid.(33) Parameter Copy (Sn-38)JNEP-32 LCD digital operator can upload the parameter settings from the digitaloperator to inverter and download parameter settings from the inverter to the digitaloperator.The digital operator will check its EEPROM or the inverter's EEPROM under thefollowing settings.Sn-38 = 0NO actionSn-38 = 1Upload data (digital operator inverter). During this period, the LED onthe digital operator will light sequentially in the CW sense.Sn-38 = 2Download data (inverter digital operator). During this period, the LEDon the digital operator will light sequentially in the CCW sense.Sn-38 = 3Verification check on digital operator’s EEPROM; during this period theLED will be switch-on between 2 groups.Please follow the below steps to implement the action of parameter copy betweendifferent inverters (either upload or download).Step 1Check the contents of digital operator EEPROM. (Sn-38='03'), then checkthe contents of inverter's EEPROM (Sn-38='04'). Make sure that bothEEPROM function properly.Step 2Download and copy the ' inverter's parameter settings to digital operatorEEPROM (Sn-38=2).Step 3Upload and copy the parameter settings of digital operator to other inverter'sEEPROM (Sn-38=1)104
2.5 Monitoring Parameters U n - ParameterNo.Un-01Un-02Un-03Un-04Un-05Un-06Un-07NameFrequency CommandOutput FrequencyOutput CurrentOutput VoltageMain Circuit DC VoltageOutput PowerOutput Power FactorLCD Display(English)Un-01=60.00HzFrequency CommandUn-02=60.00HzOutput FrequencyUn-03=12.5AOutput CurrentUn-04=220.0VOutput VoltageUn-05=310.0VDC VoltageUn-06= KWOutput PowerUn-07=0.90Output P.F.UnitDescriptions0.01HzDisplay frequency command, the displayedunit is determined by Cn-200.01HzDisplay output frequency, the displayed unitis determined by Cn-200.1A Display inverter output current0.1V Display output voltage command of inverter0.1V Display DC voltage of inverter main circuit0.1KW Display output power of inverter0.01 Display output power factor of inverterUn-08Input Terminal Status*2Un-08=00000000I/P Term. Status0 0 0 0 0 0 0 00OPEN1CLOSEInput terminal 1Input terminal 2Input terminal 3Input terminal 4Input terminal 5Input terminal 6Input terminal 7Input terminal 8Un-09Output Terminal Status*3Un-09=00000000O/P Term. Status0 0 0 0 0 0 0 00OPEN1CLOSERelay ContactR2A-R2COpto-contactD01-DCOMOpto-contactR1A-R1CReversedReversedReversedReversedReversedUn-10Un-11Un-12S/W Version<strong>Motor</strong> Elapsed RunHours<strong>Motor</strong> Elapsed EnergyKWHRUn-10=00001Software VersionUn-11=00001HrElapsed TimeUn-12=00001KwhElapsed Energy1Hr1KwhManufacturing useDisplay total time elapsed after pressingRUN (display data is resetable)*1Display total motor output energy (displaydata is resetable)*1105
ParameterNo.Un-13Un-14Un-15Un-16Un-17Un-18Un-19Un-20NameOption card codeU phase current (IU)conversion valueW phase current (IW)conversion value3 phase rectify current(DIAC) conversion valueADC Reference Volt.conversion valueExternal AnalogCommand VINExternal AnalogCommand AINMulti-Function AnalogInput Command AUXLCD Display(English)Un-13=0None Opt. CardUn-14=1.00VIU currentUn-15=1.00VIW currentUn-16=1.00VDIAC currentUn-17=2.50VADCHK VoltageUn-18=10.00VVoltage InputUn-19=20.0mACurrent InputUn-20=10.00VMulti-Fun InputUnit10.01VDescriptions0None of option card is installed1PA-M (MODBUS) card is installed in CN2.2~5Reserved6PA-P (PROFIBUS) card is installed in CN2.7Reserved8PA-PID card is installed in CN2.Range0.00V ~ 5.00VUn-14, Un-15 can be used to check DCCTfunction.Un-16, Un-17 can be used to check ADCfunction in the control board.Troubleshooting used0.01VRange0.00V ~ 10.00V0.1mARange0.0 ~ 20.0mA0.01VRange0.00V ~ 10.00VRange-9.999 ~ +9.999The display conversion unit depend on Bn-21and Bn-22.Un-21PID Detected Valueafter display unitconversionUn-21=1.000PID Detect0.001AUXVINAimed Value DetectedBn-13ValuePIDFrequencyCommandBn-21/ Bn-22AINPID detected Valueafter unit conversion(Un-21)*1 The contents of Un-11 and Un-12 can be reset by Sn-03=1000 and 1001Individually.*2 The display status for JNEP-33 LED operator : *3. The display status for JNEP-33 LED operatorOFF: OPENLIT : CLOSEDterminal terminal terminal terminal terminal terminal terminal terminal OFF: OPENLIT : CLOSEDterminal R2A-R2Cterminal D01-DCOMterminal R1A-R1C106
2.6 Monitoring Parameters H n - The inverter input/output interface status can be monitored under the PRGM modeby Hn- parameter.Hn- parameter will toggle display with low voltage protection alarm (UV) if theUV alarm occurred.ParameterNo.NameLCD Display(English)UnitDescriptionsHn-01Main Circuit DC VoltageHn-01=622.0VDC Voltage0.1V Display DC voltage of inverter main circuit0 0 0 0 0 0 0 0Hn-02Input Terminal StatusHn-02=00000000I/P Term. Status0OPEN1CLOSEInput terminal 1Input terminal 2Input terminal 3Input terminal 4Input terminal 5Input terminal 6Input terminal 7Input terminal 80 0 0 0 0 0 0 0Hn-03Output Terminal StatusHn-03=00000000O/P Term. Status0OPEN1CLOSERelay ContactR2A-R2COpto-contactD01-DCOMOpto-contactR1A-R1CReversedReversedReversedReversedReversedHn-04Option card codeHn-04=0None Opt. Card10None of option card is installed1PA-M (MODBUS) card is installed.2~5Reserved6PA-P (PROFIBUS) card is installed .7Reserved8PA-PID card is installed.Hn-05Hn-06Hn-07Hn-08U phase current (IU)conversion valueW phase current (IW)conversion value3 phase rectify current(DIAC) conversion valueADC Reference Volt.conversion valueHn-05=2.50VIU currentHn-06=2.50VIW currentHn-07=1.00VDIAC currentHn-08=2.50VADCHK Voltage0.01VRange0.00V ~ 5.00VHn-05, Hn-06 can be used to check DCCTfunction.Hn-07, Hn-08 can be used to check ADCfunction in the control board.Troubleshooting used.107
ParameterNo.Hn-09Hn-10Hn-11Hn-12Hn-13NameExternal AnalogCommand VINExternal AnalogCommand AINMulti-Function AnalogInput Command AUX<strong>Motor</strong> Elapsed RunHoursS/W VersionLCD Display(English)Hn-09=10.00VVoltage InputHn-10=20.0mACurrent InputHn-11=10.00VMulti-Fun InputHn-12=00001HrElapsed TimeHn-13=00001Software VersionUnitDescriptions0.01VRange0.00V ~ 10.00V0.1mARange0.0 ~ 20.0mA0.01VRange0.00V ~ 10.00V1HrDisplay total time elapsed after pressingRUN (display data is resetable)Manufacturing use108
2.7 Order Parameters O n - Order parameters are already set to the optimum value as initial values, adjustmentis not needed in the normal status.FunctionControlStatusHuntingPreventioncontrolParameterN0.On-01 Control Status 1On-02 Control Status 2On-03 Control Status 3On-04On-05On-06On-07On-08Not usedNot usedNot usedName LCD Display (English) DescriptionHunting PreventiongainHunting PreventionlimitEffectivecurrentOn-09Effective currentdetection filter timeconstantdetectioncontrol On-10 Not usedOn-delaycontrolEnergySavingpowerdetectionOn-11On-12On-13On-14On-15On-16ON-DELAY TIMEON-DELAYCompensated valueNot usedNot usedPower detection filterchanging widthPower detection filtertime constantOn-01=0000Control Status 1On-02=0000Control Status 2On-03=0000Control Status 3On-04=0000ReservedOn-05=0ReservedOn-06=0ReservedOn-07=0.10Hunt_Prev. GainOn-08=030%Hunt_Prev. LimitOn-09=005I_Det. Time constOn-10=0ReservedOn-11=011ON-Delay TimeOn-12=014ON-Delay Compen.On-13=0ReservedOn-14=0ReservedOn-15=010%Power_Det. Dead ZoneXX0Xstored the frequency reference in theHOLD status (for up/down operation)XX1XDo not store the frequency reference inthe HOLD statusXXX0Inverter overload protection (OL2) validXXX1Inverter overload protection (OL2) invalidXX0XAVR function validXX1XAVR function invalidXXX0Anti-hunting gain change depending oninverter output voltageXXX1Anti-hunting gain depending on On-07settingXX0XTwo-phase PWM modulationXX1XThree-phase PWM modulationX0XXPower angle compensation bias changedepending on inverter output frequencyX1XXPower angle compensation bias fixedFactorySetting000000000000 0000 0.00 0Setting range0.01 ~ 2.55 0.10Setting range0 ~ 100% 30%*1Setting range1 (3.5ms) ~ 100 (350ms)Setting range11 (2.75µs) ~ 160 (40µs), =0.25µs5*1(17.5ms) 0Setting range0 ~ 160 (40µs), =0.25µsSetting range0 ~100%Setting unit 1%On-16=020 Setting range1 ~255Power_Det. Time Const. Setting unit 1 (=7ms)11(2.75µs)14(3.5µs) 0 010%20(140ms)109
FunctionTorqueBoostControlEnergysaving<strong>Motor</strong>Constant*3ParameterN0.On-17On-18On-19On-20On-21On-22On-23On-24Name LCD Display (English) Description<strong>Motor</strong> phase to phaseresistanceTorque Compensation ofcare lossTorque Compensation limit<strong>Motor</strong> Constant R1<strong>Motor</strong> Constant R2<strong>Motor</strong> Constant L<strong>Motor</strong> Constant Rm<strong>Motor</strong> Constant LmOn-17=00.308<strong>Motor</strong> Line ROn-18=425WTq. Compens. Care LossOn-19=100VTq. Compens. LimitOn-20=00.000<strong>Motor</strong> R1On-21=00.000<strong>Motor</strong> R2On-22=00.000mH<strong>Motor</strong> LOn-23=00.000m/<strong>Motor</strong> RmOn-24=00.00mH<strong>Motor</strong> LmSetting range0 ~ 65.535Setting unit 0.001Setting range0 ~ 65535WSetting unit 1WSetting range0 ~ 50V* 2Setting unit 1VSetting range0.000 ~ 65.535Setting unit 0.001Setting range0.000 ~ 65.535Setting unit 0.001Setting range0.000 ~ 65.535mHSetting unit 0.001mHSetting range0.000 ~ 65.535m/Setting unit 0.001m/Setting range0.00 ~ 655.35mHSetting unit 0.01mHFactorySetting0.308* 1425W* 1100V* 10.0000.0000.000mH0.000m/0.00mH1. Factory setting differ depending on inverter capacity (Sn-01 set value).This example shown combination of <strong>TECO</strong> standard motor 440V, 60Hz, 25HP(18.5KW).2. For 220V class, X2 for 440V class.3. Setting can be made only when Cn-60=FFH. When the value is changed, K2(Energy-saving Coefficient K2) is calculated and the calculated value is set toCn-58. <strong>Motor</strong> constants (On-20 ~On-24) are not stored in NVRAM and become 0 atpower startup. The unit and setting range change depending on the inverter capacity:1/10 for 220V class 25HP ~ 125HP, 440V class 75HP ~ 500HP.110
3. FAULT DISPLAY AND TROUBLESHOOTINGThe 7300PA has protection function and warning self-diagnosis function. If a fault a occurs, theprotection functions operate to shut off the inverter output and the motor coasts to a stop, at the sametime, the fault contact signal (terminal R3A-R3C, R3B-R3C) is output.A). PROTECTION FUNCTION AND TROUBLESHOOTINGProtection functionLowvoltageprotectionMain circuitlow voltageMomentarypower lossprotectionControl circuitlow voltageMan circuitsoft chargecontactordefectiveExplanationWhen the inverter power voltage drops, torque becomes insufficient andmotor is overheated.Inverter output is stopped when the main circuit DC voltage becomes lowerthan the low voltage detection level for 15 ms or longer. or about 2 secondsor longer if the momentary power loss redo-thru function is used.Detection level: Approximately 210V or less for 200V classand 420V or less for 400V classThe inverter output is shut-off when he control circuit voltage drops belowthe low voltage level.The inverter output is shut-off when no answer back is received from themain circuit soft-start contactor.LCD display(English)Fault (UV1)* 1DC Volt. LowFault (UV2)* 1C/B DC Volt. LowFault (UV3)* 1MC Ans. FaultOvercurrent protectionThe inverter output is shut-off when the inverter output current becomesapprox. 200% and above of inverter rated current.Fault (OC)* 1Over CurrentGround-fault protectionOvervoltage protectionCooling fin overheatOverloadprotectionExternalfaultsignalinputControlCircuitFaultThe inverter output is shut-off when a ground-fault occurs at the inverteroutput side and the ground-fault current exceeds approximately 50% of theinverter rated current.The inverter output is shut-off when the main circuit DC voltage becomesexcessive because or regeneration energy caused by motor decelerationand negative load.Detection. Approx. 800V for input voltage set 400V and aboveLevel : Approx. 700V for input voltage set 400V or less and approx.400V for 200V classThe inverter output is shut-off when the ambient temperature rises and theheat sink fin reaches 90. Please check for a detective cooling fan orclogged filter.Fault (GF)* 1Ground ShortFault (OV)* 1Over VoltageFault (OH)* 1Over HeatInverter output is stopped when motor overload is detected by the electronicthermal overload in the inverter. Either a inverter duty constant-torqueFault (OL1)* 1<strong>Motor</strong> specialized motor or general-purpose motor can 9 selected. If more than<strong>Motor</strong> Over Loadone motor is driven. overload protection should be disabled. Use a thermalrelay or thermal protector for each motor.The inverter output is shut-off when the electronic thermal overload reachesFault (OL2)* 1Inverter or exceeds the inverse time limit of 103% of the inverter's rated currentInverter Over Loadoccurs. Maximum rated overload: 110%. 1 min.The motor operates according to a preset mode when the inverter outputOver torqueFault (OL3)* 1current execeeds the overtorque detection level. This function is used todetectionOver Torqueprotect the machine or to monitor the output torque.Fault (EF3)* 1Terminal 3External Fault 3Fault (EF5)* 1Terminal 5External Fault 5When an external alarm signal is input. the inverter operates according to aFault (EF6)* 1Terminal 6 preset stop method (coasting to a stop, continuous operation. or ramp toExternal Fault 6stop)Fault (EF7)* 1Terminal 7Terminal 8ControlCircuit FaultEEPROMfaultEEPROMBCC CODEErrorCPU ADCFaultOption CardFaultThe inverter output is shut-off when a transmission error occurs in thecontrol circuit or a component fails. The inverter output is also shut-off whena specialized option such as the digital operator is not properly connected.External Fault 7Fault (EF8)* 1External Fault 8Fault (CPF02)* 1Logic board FaultFault (CPF03)* 1EEPROM FaultFault (CPF04)* 1EEPROM CODE Err.Fault (CPF05)* 1A/D FaultFault (CPF06)* 1Opt. Card A/D Fault111
The warning and self-diagnosis functions do not operate fault contact output (except OH1 warningfunction) and returns to the former operation status automatically when the factor is removed.The fault display and troubleshooting are proudided as shown in the table below.Fault ContactoutputError causesAction to be takenOperationInverter capacity is too small.Voltage drop due to wiring.Inverter power voltage selection is wrongA motor of large capacity (11 kW or greater) connectedto the same power system has been started.Rapid acceleration with generator power supplyOperation sequence when power is offDefective electromagnetic contactorCheck the power capacity and power system.UV display appears when the inverter power isturned off while operation signal is input. Removethe power after stopping the inverter.(Set the third and fourth bits of Sn-04 to 01.)OperationOperationExtremely rapid accel/decel<strong>Motor</strong> on/off switching at the inverter output sideShort-circuit or ground-fault at the inverter output side<strong>Motor</strong> of a capacity greater than the inverter rating hasbeen startedHigh-speed motor or pulse motor has been started.<strong>Motor</strong> dielectric strength is insufficient.Load wiring is not proper.Transistor error may occur. Investigate the error cause,correct it, then restart.Check for ground-fault in motor or load wiring.OperationOperationOver voltageInsufficient deceleration timeRegenerative load (<strong>Motor</strong> is turned by the load.)High input voltage compared to motor rated voltageDefective cooling fan.Ambient temperature riseClogged filterIf braking torque is not proper, extend the decel time oruse a braking resistor. (If braking resistor is alreadyinstalled, verify that Sn-10. 2nd digit to 1.)Replace the cooling fan and clean the filter.Ambient temperature:104 (40) or less for enclosed type122 (45) or less for open chassisOperationOverload, low speed operation or extended accelerationtime, improper V/f characteristic settingInvestigate the cause of overload and review theoperation pattern, V/f characteristic, and motor/invertercapacities. (If inverter is repeatedly reset after anoverload occurs, the inverter may fault. Investigate andcorrect the cause of overload.)Operation<strong>Motor</strong> current exceeds the preset value because ofmachine error or overload.Check the use of the machine. Correct the overloadcause or set a higher detection level which is within theallowable range.Operation External fault condition occurred. Correct the Cause of the fault input.OperationExternal noiseExcess vibration or shockCPF 02: Control circuit faultCPF 03: NVRAM (SRAM) faultCPF 04: NVRAM BCC Code errorCPF 05: AD converter fault in CPUCheck data in Sn-01 and Sn-02. Record all data, thenuse, Sn-03 for initializing.Turn off power, then turn on again. If error is persistent,contact your <strong>TECO</strong> representative.112
Protection functionExplanationLCD display(English)Parameter Setting ErrorParameter Setting ErrorFault (Err)* 1ParameterInput Phase Loss FaultDC bus voltage ripple Vinput phase loss detection level (Cn-61), themotor coasts to stopFault (IPL)* 1Input phase lossOutput Phase Loss Fault<strong>Motor</strong> overheatFault 1Fault 2One of the inverter output phases are lost, the motor coasts to stop.The motor temperature detected sensor PTC thermistor RT1330RS-485 communication error or transmission fault during communicatingand the RS-485 stopping method after communication error of Sn-08 is tostop the motor.RS-485 communication protocol error and the RS-485 stopping methodafter communication error of Sn-08 is to stop the motorFault (oPL)* 1Output phase lossFault (OH3)* 1<strong>Motor</strong> Overheat(CPF21)* 1RS-485 comm. Fault 1(CPF22)* 1RS-485 comm. Fault 2RS-485communicationFaultFault 3Fault 4PROFIBUS communication option card PA-P Dual port RAM fault.PROFIBUS communication option card PA-P EEPROM checksum error.(CPF23)* 1RS-485 comm. Fault 3(CPF24)* 1RS-485 comm. Fault 4Fault 5PROFIBUS communication option card PA-P RAM fault(CPF25)* 1RS-485 comm. Fault 5Fault 6PROFIBUS communication option card PA-P communication IC fault.(CPF26)* 1RS-485 comm. Fault 6Fault 7PROFIBUS communication option card PA-P Watch dog timer active.(CPF27)* 1RS-485 comm. Fault 71. The display contents of LED digital operator.113
Fault ContactoutputOperationError causesParameter setting errorAction to be takenOperationOperationOperationOperationOperationOne of the inverter input phases are lost3 phases power source are unbalance.The main circuit smooth capacitor are deteriated.Improper input phase loss detection level (Cn-61)settingOne of the inverter output phases are lostDCCT fault.<strong>Motor</strong> load current is too large.The effective cooling of motor is not sufficient.RS-485 communication option card faultExcess vibration or shockExternal noiseThe RS-485 communication protocols setting inverter(Sn-24) and option card are inconsistent.Check the inverter input power supply wiring.Check the capacitors.Check the setting of Cn-61.Check the wiring between inverter and motor.Replace the DCCT.Check the motor load current.Check the motor effective cooling.Turn off power, then turn on again. If error ispersistent, replace the option card.Check the setting in Sn-24 and option card.OperationOperationOperationPA-P card faultTurn off power, then turn on again. If error ispersistent, replace the option card.OperationOperation114
B.) Warning and Self-Diagnosis FunctionsProtection functionLow-voltage protectionmain circuit voltageinsufficientExplanationMonitor display appears if low voltage protection conditions such as a dropin main circuit voltage or momentary power loss occur while the inverteroutput is off.LCD display(English)(blinking)Alarm (UV)* 1DC Volt. LowHigh voltage protectionMonitor display appears when the main circuit DC voltage rises above thedetection level while the inverter output is off.(blinking)Alarm (OV)* 1Over VoltageCooling fin overheat warningMonitor display appears when a separate thermal protector contact is inputto the external terminal. (Sn-15 ~ 18 = OB)(blinking)Alarm (OH2)* 1Over HeatOvertorque detectionThis function is used to protect the machine and to monitor the inverteroutput torque. The inverter output reacts in a preset manner when theinverter output current exceeds the over torque detection level. Themonitor display blinks when “operation continue” is preset.(blinking)Alarm (OL3)* 1Over TorqueStall preventionAccel/decel isaccomplishedwith maximumcapacity of theinverter withouttripping onover-current orovervoltage aDuringaccelerationDuringnormaloperationDuringdecelerationInverter acceleration is stopped when 150% of or more of the inverter ratedcurrent is required by the load. This prevents overload protection (OL2) orovercurrent (OC) from occurring. When current is reduced to less than170%, acceleration is enabled.Output frequency is decreased when 130% of the inverter rated current orgreater is required by the load. This prevents motor and inverter overload(OL1, OL2). When current is reduced below 130%, inverter acceleration isthan enabled.Deceleration is stopped when the DC voltage is caused to rise by motorregenerative energy. This prevents overvoltage trips (OV). When DCvoltage decreases, deceleration to the set value then resumesSimultaneous normal andreverse rotation commandsWhen forward and reverse rotation commands are simultaneouslydetected for a period of time exceeding 500 ms, the inverter is stoppedaccording to the preset stop method.(blinking)Alarm (EF)* 1Input ErrorExternal FaultSignal Input(Minor fault)Terminal 3Terminal 5Terminal 6Terminal 7Terminal 8It is indicated on the monitor when the mode after external signal input isset to "Operation continue."Ref. to the external faults 5 ~ 8 setting on page 87Minor fault setting terminal 3 (Sn-12=11XX)terminal 5 (Sn-15=2C)terminal 6 (Sn-16=3C)terminal 7 (Sn-17=4C)terminal 8 (Sn-18=5C)(blinking)Alarm (EF3)* 1External Fault 3(blinking)Alarm (EF5)* 1External Fault 5(blinking)Alarm (EF6)* 1External Fault 6(blinking)Alarm (EF7)* 1External Fault 7(blinking)Alarm (EF8)* 1External Fault 8Digital Operatorcommunication errorOperator transmission fault 1(Initial fault)Operator transmission fault 2(on lime fault)Alarm (CPF00)* 1OP comm. Error 1Alarm (CPF01)* 1OP comm. Error 2115
Fault ContactoutputNon Operation Input voltage dropError causesAction to be takenCheck the main circuit DC voltage in Un-xx. If thevoltage is low, adjust the input voltage.Non Operation Input voltage riseCheck the main circuit DC voltage in Un-xx. If thevoltage is high, adjust the input voltage.Non OperationOverloadCooling fan faultAmbient temperature riseClogged filterReplace the cooling fan and clean the filter.Ambient temperature:104 (40) or less for enclosed type122 (45) or less for open chassisNon Operation<strong>Motor</strong> current exceeded the set value because ofmachine fault or overload.Check the driven machine and correct the cause of thefault or set to a higher value.Non OperationInsufficient power for accel/decelOverloadPhase lossSet proper accel/decel time for smooth operation.For stall prevention during normal operation lightenthe load or increase inverter capacity.Non OperationOperation sequence error3-wire/2-wire selection errorRecheck the control sequence.Recheck system constant (Sn-15 to -18)Non Operation External fault conditions set-upTake appropriate measurement for the cause of externalfault input.Non OperationTransmission between the inverter and digitaloperator cannot be established 5 seconds aftersupplying power.Transmission between the inverter and digitaloperator is established once after supplying power,but later transmission fault continued for more than 2seconds.Insert the operator connector again.Check the wiring of control circuit.Replace the control board or operator.116
Protection functionExternal baseblock signalinput (Minor failure)main circuit transistorinstantance shut-offExplanationWhen an external base block signal is input, the motor coasts to a stop.When the external base block signal is removed, the inverter output isimmediately turned on at the previously set frequency.LCD display(English)(blinking)Alarm (bb)* 1B.B.lnvaid parameter settingParameter read errorWhen an invalid parameter is set, it is indicated on the monitor at power upor when the inverter is changed from the PRGM mode to the DRIVE mode.Parameter read errorAlarm (OPE01)* 1Set Cap. ErrorAlarm (OPE02)* 1Parameter IncorrectAlarm (OPE03)* 1I/P Term. IncorrectAlarm (OPE10)* 1V/F curve IncorrectAlarm (OPE11)* 1Carry-Freq IncorrectAlarm (Err)* 1Read ErrorRS-485CommunicationFaultFault 1Fault 2RS-485 Communication error or transmission fault during communicatingand the Rs-485 stopping method after communication error of Sn-08 is tocontinue to run (Sn-08=11xx)RS-485 Communication protocol error and the RS-485 stopping methodafter communication error of Sn-08 is to continue to run (Sn-08=11xx)(blinking) (CPF21)* 1RS-485 comm Fault 1(blinking) (CPF22)* 1RS-485 comm Fault 2RS-485 CommunicationReadyWhen the inverter with communication option card (PA-M, PA-P or PA-D)does not receive correct data from master controller.(CALL)* 1RS-485 comm Ready117
Fault ContactoutputError causesAction to be takenNon Operation Inverter KVA setting (Sn-01) errorParameter setting range errorNon OperationNon OperationMulti-function contact input setting error(Sn-15 ~ Sn-18)Improper setting of V/F characteristic(Cn-02 ~ Cn-08)Improper setting of carrier frequency(Cn-23 ~ Cn-25)EEPROM internal data did not match when initializing theconstantReview the parameter setting range andconditionsTurn off power, then turn on again. If error ispersistent, replace the control board.Non OperationRS-485 communication option card fault.Excess vibration or shock.External noiseTurn off power, then turn on again. If error ispersistent, replace the option card.Non OperationThe RS-485 communication protocols setting in inverter(Sn-24) and option card are in consistent.Check the setting in Sn-24 and option card.Non OperationPoor connectionDefective communication software (in master controller)Check for communication cable betweencommunication option card and master controller(PLC)Check for communication software.118
APPENDIXA. ENERGY-SAVING CONTROLa Constants related to Energy-saving ModeThe table below shows the constants used in the energy-saving mode.Constants used in Energy-saving Drive ModeFunction ParameterNOOperationModeSelectEnergy-SavingVoltageLimitEnergysavingtuningoperationEnergysavingcoefficientK2*3EnergysavingpowerdetectionSn-09Cn-45Cn-46Cn-47Cn-48Cn-49Cn-50Cn-51Cn-52Cn-58Cn-59Cn-60On-15On-16Name and description-0- -: Energy Saving functionineffective (V/F)-1- -: Energy Saving function effectiveEnergy Saving Voltage upper limit(60Hz)Energy Saving Voltage upper limit(6Hz)Energy Saving Voltage lower limit(60Hz)Energy Saving Voltage lower limit(6Hz)Tuning operation voltage limitTuning operation control cycleTuning operation voltage step (100%output voltage)Tuning operation voltage step (5%output voltage)Energy-saving coefficient K2 (60Hz)Energy-saving coefficient reductionratio (6Hz)<strong>Motor</strong> codePower detection filter changing widthPower detection filter time constantLCD Display(English)Sn-09=0000Term. A01Eng. SavingCn-45=120%Hi_spd. Sav. V_UpperCn-46=16%Lo_spd. Sav. V_UpperCn-47=050%Hi_spd. Sav. V_LowerCn-48=12%Lo_spd. Sav. V_LowerCn-49=00%Sav. TuningCn-50=01.0sSav. Tuning periodCn-51=00.5%Sav. Tuning Gain 1Cn-52=00.2%Sav. Tuning Gain 2Cn-58=115.74* 1Eng. Saving coeff.Cn-59=100%K2 Reduce RatioCn-60=29* 2<strong>Motor</strong> SelectOn-15=10%Power-Det. Dead ZoneOn-16=20Power-Det. Time ControlUnitSettingRangeFactorySetting 00001% 0120% 120%1% 025% 16%1% 0100% 50%1% 025% 12%1% 020% 0%0.1s 0.110.0s 1.0s0.1% 0.110.0% 0.5%0.1% 0.110.0% 0.2%0.01 0.00655.35 115.74* 11% 50100% 100% 00FF 29* 21% 0100% 10%1(7ms)125520(140ms) 1. Differences depending on the setting of Cn-60. 2. The same value as Sn-01 is set by initializing. 3.To change any of the On-parameters, it is necessary to set Sn-03 to 1010.119
Energy-Saving operation procedures(1) Enter the energy-saving mode by setting the third digit of operation modeselection 5 (Sn-09) to 1. (The energy-saving mode is already set at prior toshipping.)(2) Set Cn-60 to the motor code (refer to page 119) which is determined by themotor capacity and voltage.(3) Set operation frequency.(4) Input the run commandThe motor accelerates up to the set frequency (bn-01), when it reaches to theset value, the energy-saving mode is entered and operation is performed atvoltage according to the load.c Verification of Energy-saving PowerEnergy-saving power can be verified by comparing power in the V/f control modeoperation (Sn-09 third digit to 0) with power in the energy-saving mode operation(Sn-08 third digit to 1). Power can be monitored by Un-06.Energy saved value varies according to the load ratio. Little energy-saving effectis obtained with the load ratio exceeding 70%. As the load becomes lighter, theeffect becomes larger.d AdjustmentSince the constants used in the energy-saving mode are already set to theoptimum values as initial values, adjustment is not needed in the normal status.However, when the motor characteristics are much different from those of the<strong>TECO</strong> standard motors or if a fault occurs because of improper constant setting,perform the following, adjustment.Adjustment at fault OccurrenceFaultPower does not change in the energy-saving mode.Power variation is very small in the energy-savingmode.Hunting at a light loadCurrent increases to cause OL1 or OL2 althoughwithin rated load torque (Especially at lowfrequency).When the energy-saving mode is entered aftercompletion of acceleration, the motor stalls to astop (Especially at a light load).Revolutions change periodically and its cycle isalmost equal to Cn-50 set value.Corrective ActionDoes setting frequency exceed 100Hz? If it does,the energy-saving mode is released.Is the load ratio excessively large? When the loadratio is excessively large, energy saved valuebecomes larger as the load becomes lighter.Increase the time constant (On-16) of powerdetecting filter.Decrease the value (Cn-46) of energy-savingvoltage upper limit at 6Hz. Or decrease theenergy-saving coefficient reduction ratio (Cn-59).Increase the lower (Cn-47 or Cn-48).Decrease search operation voltage stop (Cn-51 orCn-52)120
B. PID CONTROLa Constants related to PID Control ModeThe table below shows the constants used in the PID control mode.Constants used in PID control ModeFunctionSetting ofPID Controlaimedvalue(Note 1)Setting ofPID ControlConstantIntegralvalue resetPID ControlCancelPID ControlselectionParameterNOAn-01An-02An-03An-04An-09Bn-13Bn-14Bn-15Bn-16Bn-17Cn-43Cn-44Sn-15Sn-18Sn-15Sn-18Sn-19Name and descriptionSetting of aimed value 1(Frequency command 1)Setting of aimed value 2(Frequency command 2)Setting of aimed value 3(Frequency command 3)Setting of aimed value 4(Frequency command 4)Setting of aimed value 5(Frequency command 5)Setting of detected valueadjustment (PID Detection Gain)Setting of proportional Gain (P)Setting of integral time (I)Setting of differential time (D)PID offset adjustment(PID Bias)PID integral upper BoundPID primary delay time constantIntegral value reset by externalcontact signalPID Control Canceled by externalcontact signalPID Control mode is entered bysetting Sn-19=09LCD Display(English)An-01060.00HzFrequency command 1An-02000.00HzFrequency command 2An-03000.00HzFrequency command 3An-04000.00HzFrequency command 4An-09006.00HzJog commandBn-1301.00PID GainBn-1401.0PID P-GainBn-15010.0SPID I-TimeBn-160.00SPID D-TimeBn-17000%PID BiasCn-43100%PID I-UpperCn-440.0SPID FilterUnitSetting RangeFactorySetting0.01Hz 0.00~180.00Hz 60.00Hz0.01Hz 0.00~180.00Hz 0.00Hz0.01Hz 0.00~180.00Hz 0.00Hz0.01Hz 0.00~180.00Hz 0.00Hz0.01Hz 0.00~180.00Hz6.00Hz0.01 0.01~10.00 1.000.1 0.0~10.0 1.00.1S 0.0~100.0S 10.0S0.01S 0.00~1.00S 0.00S1% 0~109% 0%1% 0~109% 100%0.1S 0.0~2.5S 0.0S (Note 1) The unit and setting range of An- can be changed according to the settingof the operator display mode (Cn-20) as shown in the table above.121
How to input PID control signalsFor setting of aimed values, the multi-function analog input (control terminal AUX)or Constant An-01 ~ 04 can be selected. The detected feedback value can beinput from control terminal VIN (0 ~ 10V voltage signal) or Control terminal AIN.(4 ~ 20mA current signal), as shown below.7300PA2K+15V (+15V Power Supply)2KAUX Aimed Value Setting (0 to 10V)(when Sn-19=09)VIN In case of Voltage Signal (0 to 10V)Detected Value InputAINGNDIn case of Current Signal(4 to 20mA)(1) When only control terminal AUX is used: set Sn-04 = XXX0.(2) When constant An for frequency reference is used:Set the aimed values to An-01 to 04 and 09 The aimed value to be used canbe selected by combination of multi-step speed reference 1 or 2 and jogcommand (setting by constant Sn-15 ~ 18), as the table below shown.Selection of Aimed ValuesJog Command Multi-step Speed 2 Multi-step Speed 1 Value to be SelectedOFF OFF OFF An-01OFF OFF ON An-02OFF ON OFF An-03OFF ON ON An-04ON An-09: When Sn-04 = XXX0 is set, AUX terminal signal is used instead of An-01. An-01 isused when Sn-04 = XXX1.122
c How to adjustThe PID control function is a control system that matches a feedback value (ie.,a detected value) to the aimed value. Combining P (Proportional, Bn-14), I(Integral, Bn-15), and D (Derivated, Bn-16) makes control possible even for amechanical system with dead time. The PID control function, using differentdetected sensors, can be used for speed, pressure. flow or temperature etc.applications.(1) PID control operations.In order to distinguish the separate PID control operations. The figure belowshown the changes in the control input when the deviation between the targetvalue and the feed back is held constant.DeviationTimeControl inputD controlPID controlI controlP controlTimeFig. 14 PID Control OperationsP Control:I Control:A control input proportional to the deviation is output. The deviationcannot be zeroed by P control alone.A control input which is an integral of the deviation is output. This iseffective for matching the feedback to the target value. Suddenchanges, however, cannot be followed.D Control: A control input which is an integral of the deviation is output. Quickresponse to sudded changes is possible.PID Control: Optimum control is achieved by combining the best features of P, I, andD control.123
(2) Adjusting PID contantRefer to page, the block diagram of PID control selection, using the followingprocedure to activate PID control and then adjust it while monitoring theresponse.( ) Enable PID control function (Setting Sn-19 = 09, and if any constantSn-15 ~ 18 setting value is 66, then none of control terminal 5 ~ 8can be closed).( ) Increase the proportional gain P (Bn-14) as far as possible withoutcreating oscillation.( ) Reduce in integral time I (Bn-15) as far as possible without creatingoscillation.( ) Increase the differential time D (Bn-16) as far as possible withoutcreating oscillation.First set the individual PID control constants, and then make fineadjustments.Reducing OvershootingIf overshooting occurs, shorten the derivative time D (Bn-16) and lengthenthe integral time I (Bn-15)ResponseBefore adjustmentAfter adjustmentTimeRapidly Stabilizing Control StatusTo rapidly stabilize the control conditions even when overshooting occurs,shorten the integral time I (Bn-15) and lengthen the derivative time D (Bn-16)ResponseAfter adjustmentBefore adjustmentTime124
Reducing Long-cycle OscillationIf oscillation occurs with a longer cycle than the integral time I (Bn-15) settingit means that integral operation is strong. The oscillation will be reduced asthe integral time I is lengthened.ResponseBefore adjustmentAfter adjustmentTimeReducing Short-cycle OscillationIt the oscillation cycle is short and oscillation occurs with a cycleapproximately the same as the derivative time D (Bn-16) setting, it meansthat the derivative operation is strong. The oscillation will be reduced as thederivative time (D) is shortened.If oscillation cannot be reduced even by setting the derivative time (D) to"0.00" (no derivative control), then either lower the proportional gain P (Bn-14)or raise the PID's primary delay time constant (Cn-44).ResponseBefore adjustmentAfter adjustmentTime125
C. RS-485 COMMUNICATION CONNECTION DIAGRAM7300PA provide PA-M (MODBUS protocol) and PA-P (PROFIBUS-DP protocol)option card for RS-485 communication interface. The wiring diagrams of PA-M andPA-P are as below.(a) PA-M MODBUS protocol communicationThe PA-M option card supports the MODBUS protocol can be placed at the upperside of the control board.7300 PA(PA-M)TB1RS-485TP1 S+ XS- Xshield XPM1RS-485interface220(TerminatorResistor)RS-485Controller7300 PAM2or(PA-M)TB1RS-485RS-485RS232adaptorTP1S+S-shieldXXXPDATA(+)DATA(-)TxRxRxTxRS-232interfaceRS-232Controller7300 PAM31(PA-M)TB1RS-485S+TP1 XS-XSW1shield XPFig. 15 Wiring for PA-M MODBUS Protocol communicationNote1. A Host Controller with RS-485 interface can communicate with the 7300PA unit through PA-Moption card. If the Host Controller does not provide the RS-485 port and its RS-232 port isavailable, an RS-485/RS-232 conversion card should be used to connect between this HostController and PA-M option card of 7300PA.2. A MODBUS Host Controller can drive the network with no more than 31 drivers connected, usingMODBUS communication standard. If the driver (e.g., 7300PA drive) is at the end of the networkit must have the terminating resistors 220 at both terminals (By SW1 dip Switch). All otherdrives in the system should not have terminators.3. The PA-M card with RS-485 and RS-422 interface can be selected by TP1 jumper.4. Please refer to “7300PA PA-M RS-485 MODBUS Communication Application <strong>Manual</strong>".126
(b) PA-P PROFIBUS protocol communicationThe PA-P PROFIBUS option supports the PROFIBUS protocol. The PA-P optioncard can be mounted at the control board directly.7300 PAM1(PA-P)TB1B+ XA- Xshield XP220(TerminatorResistor)PROFIBUS-DPController7300 PAM2(PA-P)TB1B+A-shieldXXXP7300 PA(PA-P)TB1SW2B+XA-XM31PshieldXFig. 16 Wiring for PROFIBUS protocol communicationNote1. A maximum of 31 PROFIBUS-DP stations (nodes) may be contained within a single networksegment. If the drive is at the end of the network it must have 220 between terminals B and A of PA-P card by SW2 dip switch.2. For more details, please refer to the manual “7300PA PA-P PROFIBUS-DP CommunicationApplication manual".127
D. SINK/SOURCE TYPICAL CONNECTION DIAGRAMThe terminal 1 ~ 8 can be connected as SINK or SOURCE type input interfaceby different connection of terminal 24VG, SC and 24V.a SINK MODE1 Internal power supply (Sinking Mode) 2 External power supply (Sinking Mode)112233445566778824VG24VGSCSC 24V IP24(+24V) shorted at factory settingExternal+24V24VIP24(+24V)Note 1 Contact signal used foroperation signal1Note 2 NPN sensor (Sink) used foroperation signal12234567NPN345678824VG24VGSCSC24VIP24(+24V)24VIP24(+24V)128
SOURCE MODE1 Internal power supply (Sourcing Mode) 2 External power supply (Sourcing Mode)112233445566778824VG24VGSC+24VSC24VIP24(+24V)External+24V24VIP24(+24V)Note 2 PNP sensor (Source) used for operation signalPNP1234567824VGSC24VIP24(+24V)129
E. RS-232C SERIAL COMMUNICATIONS CONNECTION DIAGRAMThe Digital operator uses RS-232C serial communication through connectorCN1 to communicate with control board. Using the CN1 port on the control board,parameters can be monitored and updated by a suitable PC programming tool.The CN1 port is an un-isolated RS-232C with baud rate 2400 bps. Contact<strong>TECO</strong> for further information.The pin definitions of CN1 6 pin telephone jackPinSignal Definition1 LCD/PC selection2 5V3 Rx4 Tx5 0V6 Reserved (negative voltage, for LCD display)Typical connection diagramconnector 130
F. NOTES ON APPLICATION OF MOTORS<strong>Motor</strong> Application Notes for Standard <strong>Motor</strong>sA standard motor driven by the inverter generates slightly lesspower than it does when it is driven with commercial power supply.Also, the cooling effect deteriorates in low speed range so that themotor temperature rise increases. Reduce load torque in the lowspeed range. Allowable load characteristics of the standard motorare shown in the figure. If 100% continuous torque is required inthe low speed range, use an inverter duty motor. Torque characteristics<strong>Motor</strong> torque characteristics vary when the motor is driven by an inverter instead of commercial power supply. Check the load torquecharacteristics of the machine to be connected. VibrationsBecause of the high carrier modulation technique for PWM control, the 7300PA series reduces motor vibration to a level equal torunning with a commercial power supply. Larger vibrations may occur under the following conditions:(1) Response at resonant frequency of the mechanical system.Special care is required if a machine which has previously been driven at a constant speed, is to be driven at varying speeds.Installation of anti-vibration rubber padding under the motor base and frequency jump control are recommended.(2) Rotator residual imbalanceSpecial care is required for operation at 60Hz or higher frequencies. NoiseInverter operation is as quiet as operation with commercial power supply. At above rated speed (60Hz), noise may increase bymotor cooling fan.Application to Special Purpose <strong>Motor</strong>sTorque(%)25% ED(OR 15MIN)40% ED(OR 20MIN)36 20 60FREQUENCE (Hz) High speed operationAllowable Load Characteristicsof the Standard <strong>Motor</strong>When the motor is used above 60Hz, motor mechanical design should be verified. Contact your motor manufacturer.10082706050060% ED(OR 40MIN)<strong>Motor</strong>s with BrakesPole Change <strong>Motor</strong>sSubmersible <strong>Motor</strong>sExplosion-proof <strong>Motor</strong>sGeared <strong>Motor</strong>sSingle-phase <strong>Motor</strong>sUse brake-equipped motors with an independent power supply. Connect the brake power supply to theinverter primary side. When the brake Operates (the motor stops) it turns the inverter output OFF.Some types of brakes may make abnormal sounds in low speed range.Select the inverter with a capacity exceeding the rated current of each pole. Pole change should bemade only after the motor stops. If a pole is changed while the motor is rotating, the regenerativeovervoltage or overcurrent protection circuit is activated and the motor coasts to a stop.Since the rated current of underwater motors is large compared with general purpose motors, select aninverter with a larger capacity. If the wire length between the inverter and the motor is large, use cableswith sufficiently large diameter.Explosion-proof motors which are applied to inverters must be currently approved as explosion-proofequipment. The inverter is not explosion-proof and should not be located where explosive gases exist.Lubrication method and continuous rotation limit differ with manufacturers. When oil lubrication isemployed, continuous operation only in low speed range may cause burnout. Before operating themotor at more than 60Hz, you should consult the motor manufacturer.Single-phase motors are not suitable for variable speed operation with an inverter. If the inverter isapplied to a motor using a capacitor stack, a high harmonic current flows and the capacitor may bedamaged. For split-phase start motors and repulsion start motors, the internal centrifugal switch will notbe actuated and the starting coil may be burned out. Therefore, only use 3-phase motors. Power Transmission Mechanism (Gear Reduction, Belt, Chain, etc.)When gear boxes and change/reduction gears lubricated with oil are used in power transmission systems,(Continuous low speed operation decreases the oil lubrication function). Also, operation at more than 60Hz may result in noise,reduced life, etc.131
G. PERIPHERAL UNIT NOTES Installation and selection of molded-case circuit breaker ————————————On the input power side, a molded case circuit breaker (MCCB) to protect inverter primary wiring should be installed. The inverterpower factor (depending on power voltage, output frequency, and load) must be taken into account for selecting the MCCB. Forstandard selection, see page 13. If a full electromagnetic MCCB is to be used, select a larger capacity because the operatingcharacteristics are altered by harmonic current. A leakage current breaker of inverter use is recommended. Use of input side magnetic contactor ————————————————————The inverter can be used without an input side magnetic contactor (MC). An input MC can be used to prevent an automatic restartafter recovery from an external power loss during remote control operation. However, do not use the MC frequently for start/stopoperation, or it will lead to a reduced reliability. When the digital operator is used, automatic restart after power failure is disabled sothat MC starting is impossible. Although the MC can stop the inverter, regeneration braking is disabled and the motor coasts to stop. Use of secondary magnetic contactor ————————————————————In general, magnetic contactors on the output of the inverter for motor control should not be used. Starting a motor with the inverterrunning will cause large surge currents and the inverter overcurrent protector to be triggered. If an MC is used for switching tocommercial power supply, switch MC after the inverter and the motor stop. To switch during motor rotation, use the speed searchfunction. Use of overload relay ———————————————————————————The inverter includes an electronic thermal protective function to protect the motor from overheating. If more than one motor is drivenwith a single inverter or when a multi-pole motor is used, place an overload relay between the inverter and the motor. Set 1 to the firstposition of Sn-14 (xxx1), and set the overload relay to the current nameplate value at 50Hz, or 1.1 times of that at 60 Hz. Power-factor improvement (elimination of phase advance capacitor) ———————To improve the power-factor, install an AC reactor on the inverter's primary side. Power-factor improvement capacitors or surgesuppressors on the inverter output side will be damaged by the harmonic component in the inverter output. Also, the overcurrentcaused in the inverter output will trigger the overcurrent protection. To avoid this, do not use capacitors or surge suppressors in theinverter's output. To improve the power-factor, install an AC reactor on the inverter primary side. Radio frequency interference ————————————————————————Because the inverter I/O (main circuit) contains a higher harmonics component, it may emit RFI noise to communication equipment(AM radio, etc.) near the inverter. Use a noise filter to decrease the noise. Use of a metallic conduit between the inverter and motorand grounding the conduit is also effective. Proper routing of input and output leads is also recommended. Wire thickness and cable length ———————————————————————If the inverter is connected to a distant motor, (especially when low frequency is output,) motor torque decreases because of voltagedrop in the cable. Use sufficiently heavy wire.When a digital operator is to be installed separately from the inverter, use the <strong>TECO</strong> connection cable (option). For remote controlwith analog signals, connect the operating pot or operating signal terminal and the inverter within 30m of the inverter. The cable mustbe routed separately from power circuits (main circuit and relay sequence circuit) so that it is not subjected to inductive interferenceby other equipment. If frequencies are set not only from the digital operator but also with external frequency controller, use twistedpair shielded wire as shown in the following figure and connect the shielding to terminal E, not to the ground.FREQUENCYCONTROLLER2k13 0 TO +10V24 TO 20mA P0 TO +10V0V2kPPE+15VVINAINSPEED SETTING POWER SUPPLY+15V 200mASHIELDED INSULATED WIRECONNECTION TERMINALAUXGNDMASTER SPEED REFERENCE0 - 10V (20k)MASTER SPEED REFERENCE4 - 20mA (250)AUX. FREQ. REFERENCE0 - 10V (20k) INPUTTWISTED PAIRINSULATED WIRE0V.132
H. CIRCUIT PROTECTION AND ENVIRONMENTAL RATINGS NOTES Circuit ProtectionThe maximum rms symmetrical amperes and voltage of 7300PA series are to listedas followsDevice RatingVoltage HPShort circuitRating (A)MaximumVoltage (V)220V440V1.5 ~ 50 5,00051 ~ 100 10,0001.5 ~ 50 5,00051 ~ 200 10,000201 ~ 500 18,000240V480V Environmental RatingsThe 7300PA is suitable for use in pollution degree 2 environments. Field Wiring Terminals and Tightening TorqueThe wiring terminals and tightening torque as follows.(The main circuit terminal specifications – use 60/75°C copper wire only)(a) 220V classCircuitMainCircuitControlCircuitInverterRating (HP)253040506075100, 125Terminals MarkCable Size(AWG)TerminalsTighteningTorque (pound-in.)L1, L2, L3, T1, T2, T3, B2, , 4 M5 306 M6 35L1, L2, L3, T1, T2, T3, , 4 M8 786 M10 156L1, L2, L3, T1, T2, T3, , 2/0 M8 784 M10 156L1, L2, L3, T1, T2, T3, , 2/0 M8 784 M10 156L1, L2, L3, T1, T2, T3, , 2/0 x 2P M8 784 M10 156L1, L2, L3, T1, T2, T3, , 2/0 x 2P M8 782 M10 156L1, L2, L3, T1, T2, T3, , 4/0 x 2P M10 1561/0 M10 156All series 1 ~ 33 24 - 14 M3 5133
(b) 440V classCircuitMainCircuitControlCircuitInverterRating (HP)253040506075100125150175215250300350, 400400, 500Terminals MarkCable SizeTighteningTerminals(AWG)Torque (pound-inchs)L1, L2, L3, T1, T2, T3, B2, , 8 M4 158 M6 35L1, L2, L3, T1, T2, T3, B2, , 8 M4 158 M6 35L1, L2, L3, T1, T2, T3, , 6 M6 358 M10 156L1, L2, L3, T1, T2, T3, , 4 M6 356 M10 156L1, L2, L3, T1, T2, T3, , 4 M8 786 M10 156L1, L2, L3, T1, T2, T3, , 1 M8 784 M10 156L1, L2, L3, T1, T2, T3, , 2/0 M8 784 M10 156L1, L2, L3, T1, T2, T3, , 2/0 x 2P M10 1564 M10 156L1, L2, L3, T1, T2, T3, , 2/0 x 2P M10 1562 M10 156L1, L2, L3, T1, T2, T3, , 2/0 x 2P M10 1562 M10 156L1, L2, L3, T1, T2, T3, , 4/0 x 2P M10 1561/0 M10 156L1, L2, L3, T1, T2, T3, , 4/0 x 2P M10 1561/0 M10 156L1, L2, L3, T1, T2, T3, , 4/0x 2P M10 1562/0 M10 156L1, L2, L3, T1, T2, T3, , 650 x 2P M12 2772/0 M10 156L1, L2, L3, T1, T2, T3, , 650 x 2P M12 2772/0 M10 156All series 1 ~ 33 20 - 14 M3 5134
I. INVERTER HEAT LOSS 220V CLASSInverter (HP) 25 30 40 50 60 75 100 125Inverter Capacity (KVA) 27.4 33 44 55 63 81 110 125Rated Output Current (A) 72 88 117 144 167 212 288 327Switching Frequency (KHz) 6 6 6 6 3 3 3 3Fin CoolingFan cooledTotal Power Loss (W) 681 705 944 1086 1468 1924 2151 2452 440V CLASSInverter (HP) 25 30 40 50 60 75 100 125 150 175 215 250 300 350 400 500Inverter Capacity29 34 45 57 66 85 115 144 176 203 232 259 290 393 446 558(KVA)Rated Output38 44 59 75 86 111 151 189 231 267 304 340 380 516 585 732Current (A)Switching6 6 6 6 6 6 3 3 3 3 3 3 2 2 2 2Frequency (KHz)Fin CoolingFan cooledTotal Power Loss573 676 764 1010 1088 1254 1507 1882 2240 2614 3016 3487 3500 6205 7270 8808(W)135
J. DRIVE INPUT FUSES Drive input fuses are provided to disconnect the drive from power in theevent that a component fails in the drive’s power circuitry . The drive’s electronicprotection circuitry is designed to clear drive output short circuits and groundfaults without blowing the drive input fuses . Below table shows the 7300PAinput fuse ratings.InverterDrive Input Fuse Ratings(Semiconductor protection)Voltage HP Rated Voltage Amps Fuse Type (FERRAZ)25 125 A30QS125-430 150 A30QS150-440 175 A30QS175-4220V50300VAC250 A30QS250-460 250 A30QS250-475 350 A30QS350-4100 450 A30QS450-4125500 A30QS500-425 60 A50QS60-430 70 A50QS70-440 90 A50QS90-450 125 A50QS125-460 125 A50QS125-475 175 A50QS175-4100 225 A50QS225-4440V125500VAC300 A50QS300-4150 350 A50QS350-4175 400 A50QS400-4215 450 A50QS450-4250 500 A50QS500-4300 600 A50QS600-4350 800 A50QS800-4400 900 A50QS900-45001200 A50QS1200-4136
K. CERTIFICATION FOR THE INVERTER CE Mark The 7300PA drives conform to the European Union Electromagnetic CompatibilityDirective, when installed according to the recommendations described in the“EMC Installation Guideline” manual. The tests were made in accordance with the following basic standards:EN55011 (2000-05) : Conducted Emission and Radiated Emission.EN61000-4-2 (1995-03) : ESDEN61000-4-3 (1998 ) : RFI ImmunityEN61000-4-4 (1995-03) : Fast Transient (Burst)EN61000-4-5 (1995-03) : Slow Transient (Surge)EN61000-4-6 (1996-07) : RF Common Mode ImmunityEN61000-4-11(1994) : Voltage Dips, Short Interruptions andVoltage Variations Immunity CSA Mark CSA Certificate Number : 219607 Applicable Requirements :C22.2 NO. 0-92 : General RequirementsCAN/CAS − C22.2 NO. 14-95 : Industrial Control Equipment−Industrial Products.UL std. NO.508C : Power Conversion Equipment137