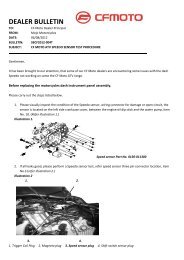
150 Leader (CF150-A) User Manual.pdf - Mojo
150 Leader (CF150-A) User Manual.pdf - Mojo
150 Leader (CF150-A) User Manual.pdf - Mojo
- No tags were found...

You also want an ePaper? Increase the reach of your titles
YUMPU automatically turns print PDFs into web optimized ePapers that Google loves.
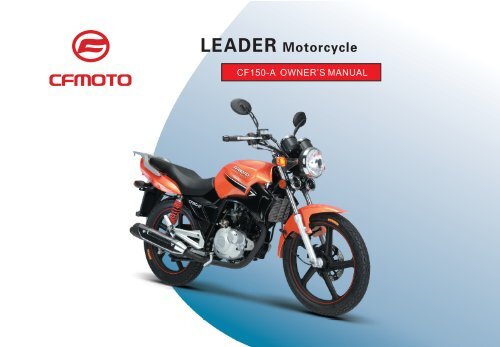
LEADER MotorcycleCF<strong>150</strong>-A OWNER’S MANUAL
FORWARDThank you very much for choosing excellent product made by CFMOTO.This owner’s manual introduces basic and necessary driving and maintenance informationof motorcycle model CF<strong>150</strong>-A. Please read it very carefully before driving.Proper use, repair and maintenance can guarantee driving safety, reduce driving problems,keep vehicle at best condition and longer life time to use.When periodic maintenance or repair is necessary, please consult with our local authorizeddealer who knows best how to do that optimum performance can be achieved.Wish you a pleasant drive.CFMOTO reserves right to make improvements of product at any time without prior noticeand without any obligation whatever.The model is subject to standard of Q/CFD004-2010
ATTENTIONLocal traffic rules and operation guide must be followed for your safety.The owner’s manual is necessary part of vehicle. If your vehicle is transferred to otherpotential users,please hand the owner’s manual over to them for their safety operation.Copyright reserved by CFMOTO.
CONTENTS1.Brief introduction of Model CF<strong>150</strong>-A ………………………………………… ( 1 )2.Guides for driving …………………………………………………………………( 2 )3.Traffic, Storage & Assembly…………………………………………………… … ( 2 )4.Important information for safety driving(1)Rules for safety driving ……………………………………………………………( 3 )(2)Safety protector accessaries ……………………………………………………… ( 5 )(3)Vehicle modification ……………………………………………………………… ( 5 )(4)Cargo loading ………………………………………………………………………( 6 )(5)Accessories …………………………………………………………………………( 6 )5.Parts location & function(1)Parts location ……………………………………………………………… ………( 7 )(2)Dashboard & Ignition switch ………………………………………………………( 10 )(3)Right handlebar switch ………………………………………………………… … ( 13 )(4)Left handlebar switch ………………………………………………………………( 14 )(5)Fuel and Fuel tank …………………………………………………………… ……( 15 )(6)Fuel switch …………………………………………………………… ……… ……( 15 )(7)Lubricant selection …………………………………………………………………( 17 )(8)Tire …………………………………………………………………………………( 17 )6.Operation guides(1)Break-in period ………………………………………………………………… … (19)(2)Inspection before drive …………………………………………………………… (20 )(3)Starting motorcycle …………………………………………………………………(21 )(4)Driving motocycle …………………………………………………………… ……(23)7. Repair & Maintenance
(1)Periodic maintenance table ……………………………………………………… (27)(2)Engine oil check & change …………………………………………………………(28)(3)Spark plug selection & replacement ……………………………………………… (30)(4)Air filter cleaning & reassembly ……………………………………………… … (30)(5)Throttle check & Adjustment ………………………………………………… … (31)(6)Clutch adjustment …………………………………………………………………(33)(7)Drive chain check, adjustment & lubricant ……………………………………… (34)(8)Front brake check & adjustment ……………………………………………………(35)(9)Rear brake check & adjustment …………………………………………………(37)(10)Battery maintenance …………………………………………………………… (39)(11)Engine cooling system maintenance……………………………………… …… (41)(12)Vehicle cleaning & storage ………………………………………………………(42)(13)Vehicle use life-time & disposal …………………………………………………… (44)(14)Vehicle adjustment data ……………………………………………………………(44)(15)Vehicle specification ……………………………………………………………… (45)(16)Vehicle common trouble & causes ………………………………………………(47)(17)Electric diagram ………………………………………………………………………(49)
Brief introduction of Model CF<strong>150</strong>-AThe model is designed for multifunctional purpose, combined with sporty style and utility.It’s compact and new-looking with different style.The model can make our customersdrive comfortably and with stability.Equiped with CFMOTO newly-developed liquid-cooled engine,it’s more environment-friendly and achieve Euro-III emission standardand lower fuel comsumption, by using fuel-evaporated recycling system and optimizedcatalyzer.There’re main features as follows.1. Multifunctional-purposeIt’s not only for commuters, travellers, but also for carrying cargoes.It can also be driven on both city roads and rural roads.2. Powerful engineEquiped with engine 157MJ-2A, it’s Max.power reaches 10.00KW/9000RPM3. Big torqueMax. torque is 11.9N.m/6500RPM.4. More environment-friendlyEquiped with fuel-evaporated recycling system, optimized catalyzer and secondary gulpvalve, it has lower emission and lower fuel comsumption.5. State-of- the -art technologyThe engine is developed by state –of- the- art technology, has better engine cooling effect,engine temperature adjusted more easily, more powerful, lower fuel consumption, longerworking life.6. Complete DC (Direct current) charging systemQuicker charging for battery and brighter light effect during night driving.-1-
Guides for driving1. Loading limitIt can only for 2 persons use (Maximum) , one is driver and the other is passenger. It’s notallowed to carry more than 2 persons.Max. Loading is <strong>150</strong>Kg.2. Fuel standard selectionOver 90# standard gasoline is needed. Gasoline is flammable, take care during driving andif there’s any leakage of fuel tank, fuel pipes, fuel filter, carburetor and so on., please go tolocal dealer workshop to remove leakage and repair.3. Electrical componentsIt’s not allowed to modify electric components and wiring layout, also not allowed to addother electric equipment. Because it can easily overload electric components and burn itwhen overheating. Any consequence caused by modifying or adding components,CFMOTO will not take resposibility.<strong>User</strong>s must keep maintenance following “Periodic maintenance table”Motorccyle transportation, storage and assembly1. During transportation, it should be fixed on transportation vehicle to avoid damage.2. It should be stored in a well-ventilated,dry and clean warehouse, keep distance awayfrom toxic material.3. Only after assembled and checked by local dealer,then hand it to our customer.-2-
Assembly procedures is as follows:1. Unpack carton and remove all accessaries.2. Install handble bar, and tighten screw cap, remove seat and install rear rack.3. Remove fixing bolts of front shock absorber (Left & Right). Support up vehicle with mainstand. Install front brake system, front wheel, front fender, battery and other parts (such asfootrest and rear view mirror). Finally tighten all bolts and screws. Check electric system andstart engine.4. Adjust headlight, front & rear brake, clutch and throttle etc. Test driving and if it’s ok, thenhand it over to customers.Above information is only for local dealer reference.Important information for safety drivingMotorcycle can bring our customer many conveninces. In order to keep motorcycle at bestcondition, you need to learn how to use properly and do maintenance regularly. When drivingmotorcycle, it should be safe and drivers should also be at good health condition.Attention: Before driving, please check vehicle very carefully and followtraffic rules strictly during driving.(1). Rules for safety driving1. Before switch on ignition, please carefully check vehicle to guarantee it’s ok and safe.It’s very improtant to avoid traffic accident and vehicle damage.-3-
2. Drivers should have “motorcycle driving licence”before driving.It’s not allowed forpeople without driving licence to drive motorcycle.3. To avoid accidents from using motorcycle, the following items should be reminded.Make all effort to be seen clearly by automobile driversDon’t be too close to other running vehicle.Properly use turn light,brake light and horn.4.Avoid drive carelessly or under dark of traffic.Strictly follow local traffic rulesOver speed is one of main causes for many motorcycle accidents.Please drive withinspeed limit.5.When turn or change lanes of road,please use turn light or other signal light to remind otherdrivers.Many accidents occur at the crossroad,entrance or exit of parking lot and driveway,therefore payattention in the above places.6.When driving,hold tightly steering handlebar and put feet on the main footrest. Passengershould hold driver’s waist or handrest tightly, put feet on the assistant footrest.7.Look ahead and pay attention to left or right side conditions when driving.At the same timelook back by rear view mirror.-4-
(2). Protective accessories1. Many injuries of motorcycle or scooter accidents are on head. Therefore please wear helmetand other protections, For example, goggles, boots and thick coats.2. When driving, temperature of muffler is very high, good quality of boots must be wear toprotect feet.3. Don’t wear loose clothes to avoid potential accidents.Attention: Please always drive very carefully and follow road rules for safety.(3). Modification of vehicleCaution:(1) It's prohibited to modify vehicle or add components on vehicle,because it will bring safety problems. Local vehicle managementregualtions must be obeyed.(2) In order to keep very low emission level, don't modify or removethe following components.1Don't adjust mixture adjustment screw of carburetor and change main jetof carburetor.2Don't use muffler from other supplier since muffler catalyzer provided byCFMOTO is optimized.3Canister is key component of fuel-evaporated recycling system, don'tremove it without permisiion of our local dealer workshop.(3)If any good suggestions for modification or improvements, please kindlycontact CFMOTO directly. Without our permission, CFMOTO will not takeresponsible for any consequences caused by your modification.-5-
WARNING:It's not allowed to modify electric components and wiring layout, alsonot allowed to add other electric equipment. Because it can easilyoverload electric components and burn it when overheating. Anyconsequence caused by modifying or adding components, CFMOTOwill not take resposibility.(4). Cargo LoadCaution: Trunk or storage equipment etc. is only for light-weight load.1. Max. cargo load for trunk is 10Kg. Max. total load (including driver and passenger)is not more than <strong>150</strong>Kg.2. Overload will affect the stability and controbility.3. All the loads should be hold firmly.4. Child or pets should not be carried in trunk. e.g dog or cat.5. All the loads should not be stretched out of the trunk.(5). AccessoriesAll accessories in the carton are specially designed, produced and tested. Strongly recommendedto select accessories made by CFMOTO. If other supplier’s accessories selected,CFMOTO will not be responsible for its quality and safety.-6-
(1).Parts locationParts location & function1. Left side view1 Front brake2 VIN No.3 Engine serial No.4 Fuel switch5 Oil drain bolt6 Gearshifting lever7 Left main footrest8 Air filter (inside leftside cover)9 Side stand10 Left assitant footrest11 Rear handrest (Load limit is 3Kg.)Pic1: Left side view-7-
3. Front part of vehicle1 Clutch lever2 Rear view mirror (LH)3 Left handblebar switch comp4 Dashboard5 Ignition switch comp6 Right handblebar switch comp7 Throttle lever8 Front brake lever9 Rear view mirror (RH)1 2 3 4 5 6 7 8 9Pic3: Front part of vehicle4. Location of VIN No. Name plate and Engine serial No.VIN No. is at right side of front fork as drawing shows.Name plate is at left side of front fork as drawing shows.Engine serial No. is at bottom of cylinder as drawing shows.VIN No. Nameplate Engine serial No.Pic 4:Location of VIN,Nameplate and Engine serial No.-9-
(2)Dashboard and Ignition switchThe following is function table of dashboard.Sheet 1Item No. Part name Function description123456789“Zero” mileagesetting leverSpeedometerMileageLeft turn signal lightShort-distance mileageNeutral signal lightFuel level meterIgnition switchGear indicationRecover 0 mileage setting for short distance when use itIt shows vehicle running speedIt shows total drive distanceIt flashes green light when turn leftIt shows distance between two drivingsIt shows Neutral position of gear when it's lightedIt shows remaining fuel volumeIt controls engine start, lighting and signal lightIt shows gear position ( at 1-speed, 2-speed, 3-speed, 4-speed,5-speed)-10-
Item No. Part name Function description10111213High-beam lightWater temp. alarmsignal lightRight turn signal lightRPM meterIt flashes blue light to light long-distanceWater temp. too high if lightedIt flashes green light when turn rightIt shows RPM data1 2 3 4 5 6 7 8 9 10 11 12 13Pic 5: Dashboard-11-
Ignition switch:it’s location as drawing shown, Switch on ignition before starting engine.Ignition key position andit’s function as follows.Key position Function StatusOFFON““ ””STEERINGLOCK “ ”POSITIONLIGHT “ P ”Sheet 2Electric circuit is open, cannot start engine and signallight is offElectric circuit is closed, can start engine when gearon Neutral positionElectric circuit is open, steering is lockedPosition signal lighted, and steering lockedKey can be taken outKey cannot be taken outKey can be taken outKey can be taken outATTENTION: 1. Keep key at “ ”position when not using motorcycle. If switchat “ P ” position, Position light will use power and make batttery out of power long time.2. When parking, be sure to lock steering. Turn left the steering bar, insert key into steeringlock hole, and turn anti-clockwise to lock steering. Unlock steering as reverse procedure.3. Need to lock steering when not using motorcycle.-12-
(3)Right handlebar switch comp.1 Kill switch2 Headlight & Position light switch3 Start button[Kill switch]There’re two position of kill switch “ ” and “ ”“ ” : Press this button, engine stop“ ”: Press this button, engine can be started.123Pic 6:RH handlebar switch Comp[Start button]Press this buttonATTENTION: When start engine, switch must be “ ” position.to start engine.“ ”[ Headlight and Position light ]There’re three position “ ” “ ” “ ” for headlight and position light switch.“ ” : Headlight, dashboard light and tail light are on.“ ” : Position light, tail light and dashboard are on.: Headlight,dashboard light,tail light and position light are on.“ ”-13-
(4)Left handlebar switch comp.1 Horn button2 Turn light switch3 Headlight switching beam control4 Passing light switch5 Choke cable lever[Horn button]Pic 7:LH handlebar switch CompPress this button, horn will speak to remind other driver or people.[Turn light switch]There’re 3 positions “ ” 、 “ ” 、and “Middle” for turn light switch.“ ”: Left turn light on and turn left.“ ”: Right turn light on and turn right.“Middle” : In the middle position, go straight.[Headlight switching beam control]There’re two position “ ” and “ ”“ ”: Low beam“ ”: High beam[Passing light switch]When press passing light switch, passing light “ON”,it means passing action willbe taken.WARNING: When making turn or lane change, be sure to switch on turn lightand switch off until go straight.-14-
[ Choke lever]Turn the choke lever backwards to close the choke and turn it forth to open.Note: Please close the choke while start a cold engine; Choke must befully open after engine is pre-heated for 2 to 5 minutes(steady idle)(5)Fuel and fuel tank cap【Fuel】It is recommended to use fuel of 90# or above;【How to open the fuel tank cap】Insert the key into fuel tank hole and then turn close wise; Press the pin on the fuel tankcap into groove of fuel tank neck and then take out the key.Warning: 1.Fuel is highly flammable, and refuelmust be performed after engine is offand in well-ventilated ploce; It isforbidden to smoke and create relatedfire in surrounding;2.Never over refuel (below the refuelneck );3.Never mix oil and fuel to avoid damageto engine.(6)Fuel switch (see pic 9)Pic 8: Fuel tank capThe fuel switch is on the left rear position of fuel tank.Fuel flows into carburetor-15-
through the filter, see illustration. There are three positions for the switch. “ ● ” is “on”and “ ” is “off” and “ ” is spare fuel pipe.OFF ON ReadyPic 9:Fuel switchIn ● position, it means no fuel to the carburetor and in“ ”position, fuel is flowingto the carburetor; in “ ”position, it is for spare fuel with capacity of 1.5L and refuel mustbe carried shortly.WARNING:1. In order to avoid sudden stop due to lack of fuel, fuel switch must be inposition of “ ”position;2. Do not get burnt by heated engine while operating the switch.-16-
(7)Use of engine oil:Use of quality and proper engine oil can extend the engine life;engine oil should beSG or over SG level with SAE15W-40.If this is not available,please select asfollowing: 10W-30 should be used in cold areas.Sheet 320W-50SG levelSAE15W-40SAE20W-5010W-3015W-40-20 -10 0 10 20 30 40℃Pic 10: Engine oilWARNING:Engine life and performance will be damaged due to unqualified engine oil.(8)Tire (Illustration 11)Appropriate tire pressure will promise steady and enjoyable drive and also will prolong thetire life. Inspection of the tire pressure should be carried out in a “cold ” situation.See chart 4 to check tire specs of tires:-17-
Tire pressureat cold conditionFront wheelRear wheelTire sizeSheet4For one personkPa kgf/cm 2 psi175 1.75 25200 2.00 29Front wheel2.75-18 42PFor two personskPa kgf/cm 2 psi175 1.75 25225 2.25 33Rear wheel3.25-18 52PPic 11:TireIt is dangerous to ride on worn tires and also will defect tire performance, turning, operating,stability, etc. Tire must be replaced when tire is worn to 1 position. Check before ride if thereare cuts or nails, or deformation of tires and rims.Note:1. Extra tire wearing can be caused by improper tire pressure and leadaccidents;2. Damage of the tire or tire off the rims can be caused due to insufficienttire pressure.-18-
Operation guide(1).Break-inBreak-in period is to guarantee parts surface to be polished well and keep a goodperformance in future ride.New vehicle break-in mileage: <strong>150</strong>0km.Notes:1.During break-in, do not drive in full throttle, and keep engine below6500rpm;2.Each gear should be practiced;3.Do not drive at a fixed throttle position;4.Do not carry over max loading capacity;Replace three times of engine oil.Operation tips during break-in period:1. 0-300km:Keep throttle open less than a half and speed within 35km/h;2. 300-600km:Keep throttle open less than a 2/3 and speed within 45km/h;3. 600-<strong>150</strong>0km:Keep throttle open less than a 3/4 and speed within 55km/h.【Replace engine oil three times during break-in】Replace engine oil three times at 300km,600km and 1000km,and replace after each<strong>150</strong>0km.-19-
Engine oil: SG or above.Note:1.Replace the enginge oil in engine warming condition ;2.Contact CFMOTO for service or inspection if necessary during break-in;Maintenance in the service place is needed when break-in is over.(2)Inspection before driving.To ensure the performance and safety, a routine inspection shall be performed before daily drive.Procedures:1. Check engine oil(see P29) and make sure there is no leakage;2. Check if there is enough fuel;3. Check if there is enough coolant and make sure there is no leakage;4. Check front and rear brakes(free distance: front 10-20mm & rear 10-20mm) for smoothoperation;5. Check front and rear tire air pressure and for cuts or wearing;6. Check driven chain to see if lubrication status is good;7. Check throttle hand lever: free distance is 2 to 6 mm,and easy operation;8. Check lights and signals: front headlights, tail lights, brake lights, turning lights, signals,and horns;9. Check the battery and add distilled water if necessary;10. Checking steering for smooth operation, no loose position;11. Check clutch lever: free distance should be between 10 to 20 mm and easy handling;-20-
12. Tightening inspection: front and rear shocks, wheel shafts, engine suspension, steering,handlebar, front and rear brakes, clutch, rear suspension, rack, and electronic parts, bolts,screws, etc.(3)Starting(Illustration 12)1 Clutch lever 2 Kill switch 3 Throttle handle grip 4 Ignition switchPic12: Ready to start【Starting preparations】1.Turn on and to position “ ” and turn kill switch to“ ” and turn throttle lever to start theengine.2.Put gear position at low or neutral;3.Left hand hold tight and clutch lever.Starting preparations are finished to finish above three steps.-21-
【Starting the vehicle】After finishing starting preparations, press button “ ” and turn throttle lever to start theengine.Notes:1.Always drive after 2 to 5 minutes for pre-heating;2.Release “ ” button after 3 to 5 minutes to avoid damage to the battery;3.After starting, release “ ” immediately; never press starting button toavoid damage to the engine;4.Make sure side stand will be ok for smooth drive or operation;5.Increase the throttle slowly;6.Never drive in limited space to avoid danger from exhaust gas;7.Replace clutch switches if necessary;8.Never start engine with clutch switch on, or parts will be damaged andlead to accident.-22-
(4).Ride【 Gear shifting operation】This vehicle has five gears, 1 is low gear, 3 is middle gear and 4 and 5 are high gears. Gearsshifting operations procedures as follows:a. During idle, release clutch lever and put foot on the gear lever to position 1;Slowly increase engine turning and release clutch lever slowly to start the engine steadily;b.When vehicle steadily drive, decrease engine turning and release clutch lever and put footonto gear lever and to 2 position;c. Increase engine turning and release clutch lever slowly;d.Gears of 3、4、5 follow operation of 2 ,in case of decrease gears,follow operationof 1 ;e.During gear shifting, make sure gear lever is pressed to bottom and then release clutch lever.-23-
→1 →←0 →← →← ← → →←←2 3 4 5Pic14: Gear shift flowchartGear shift armPic13: Location of gear shiftWARNING:Never perform gear shifting with open throttle or do not hold the clutchlever, this will lead to damage to engine and transmission, and causeaccidents.-24-
【 CLIMBING OR TURNING】1. During climbing, power is also very limited due to high gear. In this case, shift to low gearwhen climbing to avoid clutch slippery due to too sharp speed deceleration;2. During turning, clutch slippery may occur due to sudden throttle release and deceleration.In this case.【 BRAKE】Front brake leverFoot brake leverPic15:Brake position1. During acceleration,front and rear brake are both needed(Slowly grasp front brakelever and put foot on rear brake, never brake with only front or rear brake)for brake;2. In case of emergency, switch off vehicle and use front and rear brake to stop;3. Try to avoid sudden brake, because sudden brake will cease the front and rear wheelsuddenly and cause vehicle out of control;-25-
4. Do not accelerate or decelerate or turn sharply on soft or slipper road to avoid falling andvehicle out of control;5. During long downgrade, use the front or rear brake once in a while and shift to low gear.Brake with the engine to avoid paws and rims too hot and reduce the braking capability.【 STOP VEHICLE】1. Slowly release throttle and decelerate;2. Gently use the front and rear brake to stop the vehicle;3. Switch off vehicle “ ” , or turn off the engine switch;4. Use the main stand to support the vehicle;5. Lock the wheel for anti-theft.-26-
Vehicle maintenanceFollow suggestions and instructions in below chart for vehicle maintenance and vehicle mustbe cleaned before maintenance.Sheet 5TIMESODEMETER(KM REMARK2 )PERIODITMES1000km 4000km 8000km 12000km REMARK* Fuel tank tuberREPLACE IN CASE OF DAMAGE, AGINGBefore use* ThrottleI I I I Before use* CoolantI I I I Before useAir filter element REMARK 1 CCRCSpark plugI I R II for each 2000km,and C for each 6000.Engine oilReplace at 300km, 600 km and 1000km for new vehicle and then replace for each <strong>150</strong>0km.Oil FilterC for every year C C C RDriven belt and Sprocket REMARK1I & L is needed for every 500 km.* Brake discI & L is needed for every 500 km.* * Brake liquidReplace every two years** F & R brake REMARK3 I I II Before use* SwitchI I I I Before use* Light and hornII I I Before use* BatteryEvery month I I I IFuse or overload protectorI I I ICircuitIIII* * Valve adjustment REMARK3IIII* ClutchIIII Before use* SuspensionIIII Before use* Bolt and tighteningIIII Before use* WheelIIII Before use** Bearing turning leverIIII** Engine maintenanceI I I I-27-
REMARK: I means on-time inspection, cleaning, adjustment, lubrication or replacement.C means cleaning, R means replacement, L means lubrication.* No such mark means customers can do the service himself or go to CFMOTOservice point for service or maintenance;* One such mark means service should be done in CFMOTO service station, butcan also be handled by customer himself if tools, parts are available;* Two marks mean service must be done in CFMOTO service station for safety drive;Remark1 means cleaning period should be reduced in drive roads with a lot of sand ordust;Remark2 means service periods must be respected again after odometer data is overmaximum reading data;Remark3 means related service or adjustment must be done in CFMOTO service station.Engine oil inspection or changeUses of engine lubrication oil:reduce scrub,increase sealing,cool down parts,cleanparts and anti-corrosion;Engine life can be reduced or parts wear due to poor quality, lasting use or insufficient volumeof engine oil. And also they will cause engine overheating,clutch wear or burnt,powerdecrease,abnormal noise or engine oil over consumed.Please refer to Page 8 for choice of the oil.(2) Engine oil inspectionBefore every use,check level of engine oil,which should be over the marked level(see Pic 16)on oil window on cover of right crankcase .1. Use main stand on flat surface of the road;2. In case of insufficient engine oil,add SAE15W-40/SG or oil above to upper marked level;3. Install the engine oil cap to check for oil leakage.-28-
WARNING:Engine can be seriously damaged due to lack of engine oil.Cap ofengine OilUpper limitLower limitOil drain boltPic16: Inspection of engine oil【Replacement of engine oil】1. Please refer to Page 19 “Run-in period ”for engine oil replacement for new vehicles;2. Run-in period should be every time of <strong>150</strong>0 km;3. Before replacement, heat the engine and then switch off the key and then drain engine oil(Do not get burnt by the oil);4. Place an empty case for drained oil and remove the drain bolt;5. Clean oil filter and drain bolt after oil drainage and check if it is necessary to replacegasket as well.Install oil filter,spring,gasket and then drain bolt cap;6. Add 1200 ml of engine oil and install engine oil cap if there is no oil leakage.-29-
(3)Selection of spark plug and replacement;【Selection of spark plug】Model number: CR9EP;CFMOTO genuine part must be used.【Inspection and replacement of spark plug】1. Replacement period: 6000km;2. Take off spark plug and clean surrounding. Use tool to remove the spark plug and usesteel thread to clean carbon deposition or dust;3. Check spark plug for any damage or burnt and also check if seal is working and replace partsif necessary;4. Use a feeler gauge to check electro polar,standard is 0.8 to 0.9 mm;5. During spark plug, put spark plug onto thread and then tighten with spark plug wrench;(4) Air filter cleaning and installationFuel tank joint Hook Oil filter Frame joint Element1 2 3 4 5Pic 18: Position of air filter.-30-
1. Element of air filter must be replaced in certain period. Service period should beshortened in places with a lot of dust or high temperature;2. Air filter must be cleaned after 1000km ride,and after 4000km,air filter must be checkedcarefully and cleaned;3. Replace the element in case of dirty or crack or damaged;clean air filter can improve engineperformance and prolong its life;4. Vehicle is equipped with foam element and could be cleaned with non-flammable coal oil orcleaning liquid;5. Disassembly: Remove left side cover and then remove tightening bolt and then take out theelement;6. Follow the reverse procedures for assembly;NOTE: Don't get water into the element during wash, it will damageengine starting or acceleration performance.(5)Throttle lever inspection and adjustmentUpper adjustment tube tightening bolt 3Idle speed adjustment boltPic19: Throttle operation line inspection;-31-
1. Check RH turning lever to full right position for normal turning and whether positionfixing is reliable;2. Upper adjustment bolt allows minor adjustment, and same for lower adjustment bolt tube;3. During minor adjustment, release tightening screw 2 and then turn 1 for adjustment.Throttle lever adjustment:1. Throttle lever free travel: 2-6 mm;2. Upper adjustment bolt tube can be slightly adjusted and bottom bolt tube(join between throttlebody & throttle cable) can be adjustmend to a certain extent;3. During slight adjustment, loose tightening bolt 2 and adjust 1;4. When doing bigger-range adjustment, loose tightening bolt 4 and adjust free travel between2-6 mm.NOTE:1. Re-assembly must be done in case of throttle operation line incorrect;2.Replace the operation line in case of throttle line broken or performancefailure.【Carburetor adjustment】The vehicle idle speed is <strong>150</strong>0±RPM/min(Neutral gear). Adjust the idle speed after startingthe engine;Adjustment: Turn nut 3 clockwise and idle increases;Turn nut 3, idle decreases;Carburetor idle speed can be adjusted lower decreased in higher temperature; and higher inlower temperature.-32-WARNING:<strong>User</strong>s can not often adjust the idle speed and never adjustidle speed below 1300, or head cylinder will faster damagewear or damage the engine due to insufficient fuel.
(6)Clutch adjustment:Clutch is operated by hand. Clutch lever: free play is 10 to 20 mm;Clutch is used to pass power from engine to transmission or cut the power if necessary;The clut chlever must be grasped completely or released completely.Try to avoiddoing only half(half-clutch),or clutch will be worn or damaged.PIC 20 shows biggerrange of adjustment, and left pic shows smaller adjustment;1. Smaller range adjustment: Release tightening bolt and turn small adjustment bolt tube. Turnadjustment tube 5 clockwise and clutch free stroke is increased and decreased in anti-clockwise;2. Bigger range adjustment: Release 1 tightening bolt on the crankshaft clutch operation lineand adjust 2 big adjustment bolt tube; Clutch free stroke is increased when big adjustmentbolt is turning clockwise and decreased in anti-clockwise;3. Ride for a while after clutch adjustment to see if clutch can be released;4. In case of clutch worn too much or burnt, replacement must be done in CFMOTO servicestation.Small adjustment boltTightening bolt Lever Tightening bolt Big adjustment boltPic20:Inspection of clutch cableNOTE: Please go to CFMOTO service station if vehicle is not in goodstatus after your adjustment.-33-
(7)Driven chain inspection, adjustment or lubricationDriven chain contains a lot of parts working together. Good lubrication and proper adjustmentdecides its last life. Ignorance of chain service or maintenance will lead chain wear or damage.Chain must be serviced in certain period and replace the chain, big sprocket or small sprocketif necessary.Inspection:1.Shift to neutral gear and switch off the engine;2.Put figure on 1 and sway the chain, swaying from 10 to 20mm;3.Check any wear, missing part or damage, replace if necessary;4.Check any wear of big & small sprockets and replace in case of any wear, teeth missing orbroken teeth;Lubrication:1.Clean driven belt, big sprocket and small sprocket. Add proper volume of oil or new lubricantonto these parts;2.Lubricate every 500 km and maintenance should be more frequent in places with a lotof dust.7Adjust scale1 Drive chain6 Tightening bolt2Turning direction5Adjustment bolt-34-3Tightening clampPic21:Inspection of drive chain4Big sprocket
【Drive chain adjustment & replacement】If adjustment1. Stop engine and stand up vehicle with main stand, shift to Neutral position2. Loosen nut of rear wheel shaft, move adjsutable bolt of 5 to make chain swing between10mm and 20mm. Left & right adjustment indication should be at 7 position. Checkchain tension properly, Finally tighten nut of rear wheel shaft and lock nut 6 .If replacement1. Use snipe nose pliers to remove lock plate 3 of drive chain.2. Use tool to remove big chain sprocket and small sprocket.3. Reinstall chain as reverse procedures and adjust free play of drive chain.4. Assemble lock plate with open end in the opposite direction of chain running.(8)Front brake check & adjustment【 If check】1. Check fluid level of fluid reservoir, and check brake caliper if it’s ok.2. Check if any leakage or damage of brake fluid reservoir or brake hose.3. Check brake disc wear4. When move brake lever, if pressure not enough, please check air bubbles of brake hose orbrake system. Must eliminate air bubbles to guarantee brake effect. This work should bedone by CFMOTO authorized local dealer workshop.-35-
[Replacement for brake disc & pad]1 Brake disc 2Brake caliper 3 Brake fluid hose 4Master cylinderPic22: Inspection of front brake1. When limit thickness of brake disc reaches 3mm after long-time wear,new disc mustbe replaced.2. When limit thickness of brake pad reaches 1.5mm after long-time wear,new pad mustbe replaced.3. Before replace brake disc, brake caliper and front wheel should be removed.4. Before replace brake pad, remove brake caliper and loosen brake spring of caliper.5.After replacement of brake disc or brake caliper,don't drive immediately. Operatebrake lever several times to make sure brake disc can fit brake caliper very well.[Front brake light switch]1. Front brake light switch is located at between front brake lever and master cylinder.2. When grasp brake lever, brake light is on and loosen brake lever, it will be off.3. If brake light switch broken, replace it immediately.-36-
WARNING:1. Use and refill DOT 3 or DOT 4 brake fluid, and DON'T mix DOT 3 and DOT 4fluid together.2. Fluid is strong corrosive, DON'T splash to human skins. DON'T drink fluid. Ifit happen, please wash it immediately with lots of clean water and go to hospital .3. Make sure to replace brake disc and pad periodically according to maintenanceperiodical table.4. Brake system repair and maintenance shoud be done by CFMOTO authorizedlocal dealer.(9)Rear brake check & adjustment1Cover of rearbrake2 Scale3 Indication4Rear brake arm 5 Adjustable nut 6 Rear brake light 7Adjustable nutPic23: Inspection of rear brake[ If check]Free play of rear brake pedal: 10~20mmStand up motorcycle with main stand and measure free play of rear brake pedal.There’s indication 4 on rear brake arm 3 .There’s scale on cover of rear brake drum 1 .If brake indication align with brake scale when step pedal brake,that mean brake shoe is wornout,please replace brake shoe immediately.-37-
[Adjustment & replacement]When adjust rear brake, rotate adjustable nut 5 clockwise to reduce free play and increasefree play if by anti-clockwise.Disassemble muffler and drive chain, then remove nut of rear wheel shaft and undo fixing nutof rear brake , finally remove rear wheel and rear brake to replace rear brake or brake shoe.This work should be done by CFMOTO authorized local dealer workshop.WARNING:1. When brake shoe assembled into brake drum, spring hook should be fixedcompletely and properly.2. After adjusting free play of rear brake, Need to check by testing drive.3. Step on and off rear brake pedal several times, rotate rear wheel to check if itcan run freely.4. After adjustment of free play, 5 arc groove must be in the arm pin of rearbrake.5. If not adjustable properly, please go to local dealer workshop to do it.[Rear brake light switch adjustment]Rear brake light switch is located on bracket of footpedal which is at the rear and right side ofengine.If light ON lately, rotate 7 adjustable nut by anti-clockwise direction.If light ON earlier, rotate 7 adjustable nut by clock-wise direction.-38-
drink lots of clean water or milk and edible oil , then go to hospital immediately.6. Keep away from children.[Fill electrolyte of battery]Battery specification is 12N7-4A. Battery is located inside right side panel.. Whenremove right side panel, need to disconnect fixing points with frame 1 and fuel tank.5 .Finally remove right side panel from hook hole 3 .When filling electrolyte, open cover of battery, then fill electrolyte into each unit ofbattery.Keep it’s level between upper and lower line. Waiting for 30 minutes to checkif its leverl is between upper and lower line. After that, if it’s lower than Lower line,only distilled water can be refilled. If over Upper line, it’s overfilled and will erode frameand other components. It will also cause short circuit between each unit and burn battery.When refilling distilled water, be sure to use air blow-by hose to remove air inside battery.[Check & Adjustment]Check electrolyte level monthly to guarantee it’s between upper and lower line. If it’slower than Lower line, need to refill distilled water into battery, but don’t overfill to overUpper line.If Not using motorcycle for long time, please remove battery from vehicle and fully charged.Disconnect cathode of battery firstly.Regularly clean anode and cathode of battery.Connect anode firstly and then cathode.DON'T connect wrongly.If repalce battery, be sure to use same specification of battery.[Replacement of fuse]Rated current of starter relay fuse is 20A.Starter relay fuse is located behind battery.Auxuliary fuse is inside rubber protector.Fuse of main cable is under seat. Its rated current is 10A.There’s also auxiliary fuse.-40-
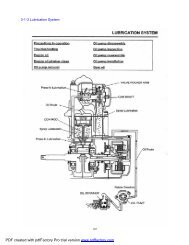
If fuse is often burned, please go to CFMOTO authorized local dealer workshop to repair.Replace new fuse after disconnect used fuse.WARNING:When replace fuse, ignition switch and other switchs must be off to avoidshort circuit. Never use fuse which is different rated current with abovementionedrated current. Otherwise it will burn vehicle. It will cause lightcannot be switched on when driving or use at night.(11)Maintenance for engine cooling system[Location of radiator]2 is located at front of vehicle as picture shows.Coolant typeOnly high-quality of anti-freezing and anti-corrosion long life coolant can be used foraluminium-alloy engine. There’re 50% anti-freezging coolant and 50% distilled water.ATTENTION:1. Engine coolant is special liquid, cannot use normal water or otherliquid. Otherwise it will damage engine.2. Please go to CFMOTO authorized local dealer to buy good quality coolant.How to check coolant level1. Stand up motorcycle with main stand2. Check coolant level when engine is cooling down3. Coolant level should be between UPPER line and LOWER line-41-
How to refill coolant when coolant level is under LOWER line1. Stand up motorcycle with main stand2. Remove left and right side cover of fuel tank3. Remove fuel tank4. Open 7 cover of reservior tank as picture shown and refill until coolant level close to 5UPPER line7 Reservoir tank5. Reverse above procedure to finish operation.6 Cap of reservoir tank5 Upper limit4 Lower limit1 Cap of coolant filler 2 Radiator3Cooling fanPic25: Cooling systemATTENTION:When refill coolant or coolant leakage, please go to CFMOTO authorizedlocal dealer workshop to do or repair.(12)Cleaning & Storage[Cleaning]Regularly clean motorcycle and check if any damage ,wear or leakage.After cleaning, start engine for several minutes. Use lubricant to make drive chain smootherand check if brake is ok before driving.-42-
WARNING:1. Components which cannot be washed by high-pressure water pipe:Ignition switch, Electric switches, Dashboard, Electric components, Battery,Air filter, Wheel rim, Outlet of Exhaust pipe, Parts under fuel tank.2. Cleaning sometimes reduces brake performance. Need to check and adjustbefore driving.[Vehicle storage]After daily use, keep motorcycle at dry and well-ventilated place.If long-time storage (more than 30 days), NEED to check and maintain before storage to avoidproblems when driving.Besides above-mentioned maintenance, following action should be done.1. Clean and make it dry and cerated for painted plastics.2. Drain out fuel from fuel tank and spray anti-corrosion material.3. Remove spark plug and inject 15~20ml oil into cylinder, then reassemble spark plug.4. Remove battery and keep it at well-ventilated and dry place. Avoid sunshine on motorcyclefor long time.5. Charge air into tire to stipulated pressure and keep front wheel and rear wheel away ground.6. Use good quality mantle to cover motorcycle and keep dry and well-ventilated place.[Driving after storage]1. Remove mantle from motorcycle and clean it.2. Measure battery voltage, if voltage value is lower than 12.30V,NEED to rechargebattery slowly. After charged fully, assemble it on motorcycle.3. Clean anti-corrosion material and refill fuel into fuel tank.4. Test motorcycle at safety place to check if it’s ok.-43-
(13)Motorcycle use time-limit and Disposal[Use time-limit]Please follow local transportation department regualtions or rules.[Disposal]How to deal with used engine oilPour used engine oil into plastic barrel and send it to recycled company.DON’T drain used engine oil to anywhere to avoid pollution.How to dispose other used material1. Classify these parts such as used battery, used bulb, used filter element, used plastics, usedtires and so on, and put them into dustbin for recycle. DON’T throw at your disposal anddrain out electrolyte to pollute environment.2. Scrap motorcycle upon regulations of local transportation department.(14)Adjustment values of motorcycleFreeplay of hand brake lever: 10-20mm Freeplay of throttle lever: 2-6mmFreeplay of pedal brake lever: 10-20mm Freeplay of clutch lever: 10-20mmDrive chain looseness: 10-20mmClearance of spark plug: 0.8-0.9mmClearance of inlet&outlet valve: 0.10-0.15mm Torque of tighten nut of rear shockTorque of tighten nut of handlebar: 10-14N.m absorber:35-45N.mTorque of tighten nut of front fork: 50-80N.mTorque of tighten nut of front wheel shaft: 50-80N.mTorque of tighten nut of steering system: 60-90N.mTorque of tighten nut of rear wheel shaft: 50-80N.mTorque of tighten bolt fixing front shock absorber and upper connecting plate: 10-14N.mTorque of tighten bolt fixing front shock absorber and steering column: 10-14N.mTorque of tighten nut of suspension: M8 (20-30N.m) , M10(30-40N.m)-44-
(15)Main specifications for CF<strong>150</strong>-AItemVehicle chassisMakerModelTechnical StandardBrandTypeVIN serail No.PersonsSteeringGear typeBrakeBrake operationClutchClutch operationEngine StartingLength.Width. HeightWheel baseMinimum Ground ClearanceComplete vehicle kerb massMax. loadVolume of fuel tankNumber of tireSize and pressure of front wheel and tireSize and pressure of rear wheel and tireIgnitionSpark plug typeSpecificationsZhejiang CFMOTO Power Co., Ltd.CF<strong>150</strong>-AQ/CFD004-2010CFMOTO2-wheel motorcycleLCEPDKL2XXXXXXXXMax. 2 people (driver and passenger)Handlebar5-speed gearFront: Disc brake / Rear:Drum brakeFront: Hand brake/Rear: Pedal brakeWetClutch leverElectric start2040mmx750mmx1070mm1280mm170mm128kg<strong>150</strong>kg15 L22.75-18 42P3.25-18 52PCDICR9EP-45-
-46-Vehicle chassisEngineHeadlightTurn lightTail light/ Brake lightFuseBatteryInitial gear ratio1-speed gear ratio2-speed gear ratio3-speed gear ratio4-speed gear ratio5-speed gear ratioFinal gear ratioMax. speedClimbing abilityFuel consumptionEngine typeEngine modelCompression ratioCylinder volumeMax. powerMax. torqueBore X StrokeIdle speedEngine oil typeEngine oil changeFuel typeSpark plug clearance12V/ 35W12V/ 10W12V /21W/ 5W20A (1 unit) 10A (1 unit)12V. 7A.H3.47131.8571.3681.1430.9572.867100Km/h>20 degree
(16)Frequent troubles of motorcycle and causesTroubles Related system Possible causes RemarksFuel system1.Wrong angle of check valve or No fuelinside fuel tank2. Screen of fuel switch blocked ordamaged, or bad quality of fuel3. Fuel hose blocked or bad quality of fuel4. Intake air pipe leakage or use with fatigue5. Needle of carburetor blocked or badquality of fuelAdjustment ang leor refill fuelClean or replaceClean or replaceAdjustment orreplaceClean or replaceCannot startengineIgniiton system1.Spark plug problem, too much carbon onspark plug or too long time to use2.Problem of spark plug cap: improperconnection or burned3.Problem of ignition coil: improperconnection or burned4.Problem of CDI: improper connectionor burned5.Problem of pick-up coil: improperconnection or burned6.Problem of stator7.Problem of cables: improper connectionCheck or replaceCheck or replaceCheck or replaceCheck or replaceCheck or replaceCheck or replaceCheck or AdjustCylinder headsystem1.Problem of starter: overwear or damage Check or replaceProblem of inlet&outlet valve and valve seat:too much colloid of fuel or overuse2. Air leakage of intake pipe: overuse Check or replace3. Timing problemCheck or replace-47-
-48-Power notenoughNo light ofheadlight andtail lightNo sound ofhornToo much carbon of inlet&outlet valve andValves and piston piston; bad fuel quality or bad oil quality Repair & adjustClutchClutch skid: bad oil quality or overuse oroverloadAdjust & replaceCylinder orpiston ringCylinder or piston wear: bad oil quality oroveruseRepair & replaceBrake system Difficult to split of brake pad and caliper:Brake too tightAdjustDrive chain Chain too tight: improper adjustment of chain Adjust & replaceEngineOverheating: too strong or too lean mixtures,bad quality of fuel or oilAdjust or replaceSpark plug Incorrect clearance: out of range (0.8-09mm) Adjust or replaceIntake air pipe Air leakage: overuse Adjust or replaceCylinder head Air leakage of cylinder head or valves Adjust or repairElectric system There're problems of electric system Check &repairAir filter Air filter blocked Clean or replaceWires & CablesImproper or poor connecting between wiresand cablesAdjustSwitches Damaged or poor contact Adjust & replaceHeadlight Damaged or poor contact Adjust & replaceRegulator Burned or poor contact Check or replaceFlywheel Burned or poor contact Check or replaceBattery No power or not enough power Recharge or replaceLeft switch Check button of left switch Replace or repairWires & cables Improper or poor contact Adjust & repairHorn Damaged ReplaceAbove list is frequent problems for motorcycles. If your motorcycle has some problem,Please go to CFMOTO authorized local dealer workshop for repair and maintenance.KINDLY REMINDED:DON'T deal with motorcycle problems by yourself. It's bettergo to CFMOTO authorized local dealer workshop to have repairand maintenance for your driving safety.
(17) Electric diagramStart relay& FuseBatteryLlumination switchFront brake switchKill switchStart switchHand light relpayFan&Motor relpayRear brake switchIgnition switch lockFuse boxFlasher relayFuel sensorCDIHigh beam indicatorTurning indicator(RH)Turning indicator(LH)Starting MotorInstrumert indicatorEngine rotate speed indicatorRear turning signal(RH)Fuel indicatorTail light/ brake light12v 21/5wWater temperature indicatorNeutral gear indicatorRear turning signal(LH)water ThermostatFan motorFront turning light(RH)Water Temperature alarmHead lightPosition lightHornFront turning light(LH)R-RedB-BlackG-GreenY-YellowL-BlueW-WhiteGr-GreyBr-BrownO-OrangeP-PaleLR-Light redSb-Light BlueLg-light greenOverriding switchHorn Clutch switchDimmer switch Turning switchAutomatic switchThermostat3-Phase shift sensorMagnetoRegulatorLgnitioncoil and spark plug-49-
ZHE JIANG CFMOTO POWER CO.,LTD.Add: NO.116 Wuzhou Road, Yuhang Economic DevelopmentZone, Hangzhou, Zhejiang 311100, ChinaTel: 0571-89265684 Fax:0571-89265696Website: www.cfmoto.com1012