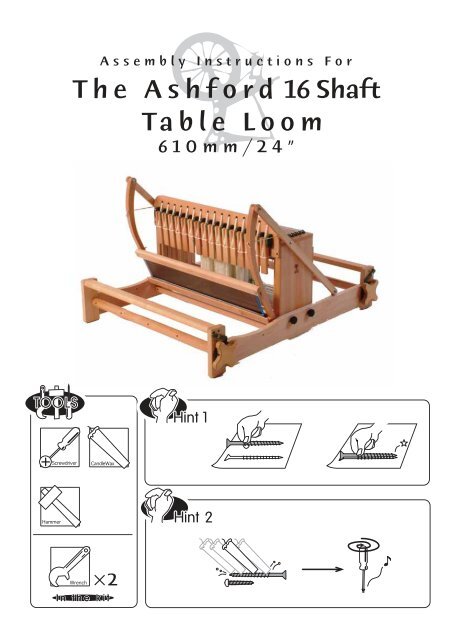
The Ashford 16 Shaft Table Loom
The Ashford 16 Shaft Table Loom
The Ashford 16 Shaft Table Loom

Create successful ePaper yourself
Turn your PDF publications into a flip-book with our unique Google optimized e-Paper software.
Troubleshooting 34Setup of FM receivers 38Important points 41Declaration of conformity 43Service and warranty 45Phonak distributors worldwide 463
<strong>The</strong> <strong>Ashford</strong> <strong>Table</strong> <strong>Loom</strong> Eight shaft<strong>The</strong> <strong>16</strong> <strong>Shaft</strong> has longer sides444222
<strong>The</strong> <strong>Ashford</strong> <strong>Table</strong> <strong>Loom</strong> Eight shaft<strong>The</strong> <strong>16</strong> <strong>Shaft</strong> loom has <strong>16</strong> shafts<strong>16</strong>32<strong>16</strong>
<strong>The</strong> <strong>Ashford</strong> <strong>Table</strong> <strong>Loom</strong> Eight shaft<strong>The</strong> <strong>16</strong> <strong>Shaft</strong> loom has <strong>16</strong> <strong>Shaft</strong>s
Cont.<strong>The</strong> <strong>Ashford</strong> <strong>Table</strong> <strong>Loom</strong> Eight shaft<strong>The</strong> <strong>16</strong> <strong>Shaft</strong> loom has <strong>16</strong> <strong>Shaft</strong>s
Cont.Texsolv cordHandleHeddle frame endsNote:Adjust Texsolv cord soheddle frame ends arehigher at the back.
<strong>The</strong> <strong>Ashford</strong> <strong>Table</strong> <strong>Loom</strong> Eight shaft<strong>The</strong> <strong>16</strong> <strong>Shaft</strong> has 2 bolts either side4440mm - no gap!
<strong>The</strong> <strong>Ashford</strong> <strong>Table</strong> <strong>Loom</strong> Eight shaft and <strong>16</strong> <strong>Shaft</strong>222222
<strong>The</strong> <strong>Ashford</strong> <strong>Table</strong> <strong>Loom</strong> Eight shaft and <strong>16</strong> <strong>Shaft</strong>2242
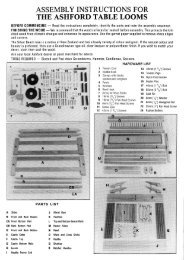
Meaning of SymbolsReal scale InstructionsWax the screws and hooksCheck the directionsor shapes carefullyRight Wrong Really tightScrew Down levelAssembly Instructions for <strong>The</strong> <strong>Ashford</strong> <strong>Table</strong> <strong>Loom</strong> - Sixteen <strong>Shaft</strong>Step 1Step 2Step 3Step 4Step 5Step 6Step 7Step 8Step 9Step 10Step 11Step 12Step 13Step 14Assemble the castle with 12 screws.Rest the castle front on a table edge for support. Tap the <strong>16</strong> nylon guides into the cord holes fromthe back.Screw the castle front to the castle. Locate the beater pins into the holes in the castle front.Place the rollers into the holes in the loom sides. With the long ends of roller on the right hand side(if you are left handed you can put the long ends on the left hand side).Screw the front and back beams into place. Check the rounded edge of the beams face out.Attach the rubber feet and the metal support brackets to the sides. <strong>The</strong>n attach the support arms tothe brackets after checking they are the correct way around.Place the handles onto the roller ends. After checking the direction of the ratchet teeth, secure withscrews.Attach the pawls with screws. Leave a 0.5 mm (1/32" inch) gap so the pawls can move freely.Thread the screws into the heddle frame ends but leave a 5mm (1/4” inch) gap to loop the texsolvnylon cord over.Push the metal bars into one end, slide a bundle of texsolv heddles over the bars and push the otherend in place.Slide the heddle frames into the castle. <strong>The</strong>n attach the lengths of texsolv cord to the heddle framesand levers in the sequence as shown, It is important to adjust the heddle frames so they slope downfrom back to front as illustrated to achieve the maximum shed.Place the castle inside the frame and attach with 2 bolts, washers and tri knobs on each side. Tapthe bolts into the inside of the castle. Make sure the bolt heads are level with the castle side.Lift the support arms up and attach them to castle sides with screws.Beater frame assembly.Attach beater frame to the support arms. Leave 0.5 mm (1/32" inch) gap so the beater can swingfreely. NOTE: If the beater frame rubs against the loom sides loosen the wing nuts and retighten.Stretchy cord - knot the cord at one end, slide through the hole in beater support rail, the hole in thecastle front and knot the other end.Now follow the easy step by step warping guide to warp and weave your first woven sample!