DISCOVERY ULTRA Quick Start Guide - Ventana Medical Systems
DISCOVERY ULTRA Quick Start Guide - Ventana Medical Systems
DISCOVERY ULTRA Quick Start Guide - Ventana Medical Systems
You also want an ePaper? Increase the reach of your titles
YUMPU automatically turns print PDFs into web optimized ePapers that Google loves.
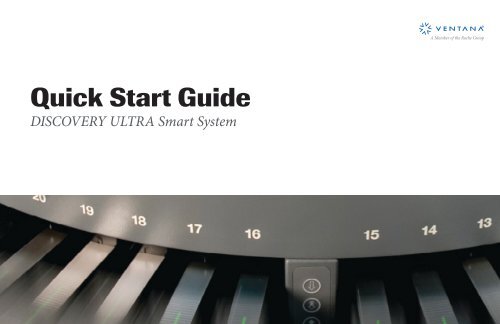
This handbook is a convenient reference guide to assist with implementation of <strong>DISCOVERY</strong> <strong>ULTRA</strong> instrumentsin the following scenarios:• Optimization of laboratory workflow with <strong>DISCOVERY</strong> <strong>ULTRA</strong> instruments• Enhanced utilization of <strong>DISCOVERY</strong> <strong>ULTRA</strong> software• Explanation of <strong>DISCOVERY</strong> <strong>ULTRA</strong> protocol flexibility and creation• <strong>Quick</strong> tips to facilitate rapid implementationFor more<strong>Start</strong> overdetailed instructions, please refer to the <strong>DISCOVERY</strong>Bookmarks<strong>ULTRA</strong> Operators’ Manual located on your desktopPreviouscomputer.BookmarksNext<strong>Start</strong> overBookmarksPreviousNext
Visual ManagementUtilization of the reagent carousel• It is recommended to keep the 35 most used reagentson the carousel whenever instrument is in use.--This includes detection, ancillaries and as manyprimary antibodies that can be accommodated• Filling the reagent carousel with the most commonlyused antibodies will limit interruptions to workflow.Slide Histogram• Refer to the Slide Histogram to see the completiontime for each individual slide.• It is recommended that you keep this screen activethroughout the day while your instrument is running.Slide Histogramdisplays slideprogressSee whenslides will becompletedRed line iscurrent time<strong>Start</strong> overBookmarksPreviousBookmarksNext2<strong>Start</strong> overBookmarksPreviousNext
Reagent ManagementPrinting a Pre-Run Pick List• A pre-run list of required reagents can be created from the Order List.• Once the desired barcode labels are printed, users can go to the Order List screen and select “printed case slide orders”from the drop-down list.<strong>Start</strong> overBookmarksPreviousBookmarksNext3<strong>Start</strong> overBookmarksPreviousNext
Landing Zones• The VENTANA system software is designed to allowaccess to the reagent carousel in the event that a newreagent needs to be added.• This pause point is referred to as a Landing Zone,a point in the protocol where all running slides arepaused in a non-reactive state for up to 10 minutes.• The Landing Zone is selected from the Slide Histogramscreen.<strong>Start</strong> overBookmarksAvailable Landing Zones arerepresented by pause buttons.Once a Landing Zone has beenselected, the Pause icon will turn red.PreviousBookmarksNext6<strong>Start</strong> overBookmarksPreviousNext
Landing Zones—Step by Stepcontinued• Once the Landing Zone is reached, the instrument willpause staining and emit an audible alarm.• During this time, the reagent hood will be unlocked toadd the required reagent(s) and, if applicable, removeany reagents no longer in use.• The user has 10 minutes to open the instrument hoodand add/remove reagents.• If the user does not interact with the system within this10 minute time frame, the instrument will abort thatLanding Zone and continue processing existing slides.<strong>Start</strong> overBookmarksPreviousBookmarksNext8<strong>Start</strong> overBookmarksPreviousNext
Landing Zones—Step by Stepcontinued• After you add/remove reagents, slide processingwill continue once the reagent hood is closed.Once closed, the instrument will begin scanningthe reagents to ensure all required reagents arepresent before proceeding.Note: If manual application is scheduled before LandingZone, the instrument will wait until the manual applicationhas occurred before entering the Landing Zone.<strong>Start</strong> overBookmarksPreviousBookmarksNext9<strong>Start</strong> overBookmarksPreviousNext
Landing Zones1. New order arrives and required reagent is noton the instrument.2. Immediately select the best Landing Zone choicefor workflow.3. Load the slide onto instrument once it is ready.4. When the Landing Zone occurs, add all requiredreagents.5. If the Landing Zone occurs before the slides are added,simply add required reagents and add slides at a latertime once ready.6. The Landing Zone will not allow you to proceedif any required reagents are accidentally removed.<strong>Start</strong> overBookmarksPreviousBookmarksNext10<strong>Start</strong> overBookmarksPreviousNext
Landing Zone Pick ListUtilize your Landing Zone Pick List• You can print a list of reagents that needed to beadded during the scheduled pause.• This is referred to as a “pick list”.• Utilizing the pick list will ensure all necessary reagentsare added to the reagent carousel.• The pick list also shows which reagents can be takenoff of the carousel.Once theLanding Zonehas beenselected, thisicon will allowa pick list to beprinted<strong>Start</strong> overBookmarksPreviousBookmarksNext11<strong>Start</strong> overBookmarksPreviousNext
Tech TipsControl panel• The slide control panel, located between drawers 15 and16, allows you to operate multiple reaction chamberssimultaneously.Open all available drawersOpen all drawers with completed slidesClose all open drawersAborting a slide (s)• Individual slides can be aborted by selecting a slide (leftclick with the mouse) on the Instrument View and thenright click with the mouse to choose Abort Selected.• To abort multiple slides, hold the Ctrl button down on yourkeyboard and select each slide you would like to abort (leftclick with the mouse). Then, simply press Abort Selectedonce and each slide you selected will begin to flash red.<strong>Start</strong> overBookmarksPreviousBookmarksNext12<strong>Start</strong> overBookmarksPreviousNext
What Do All the Colors Mean?Solid green: reaction chamber availableBlinking green: slide is completeSolid yellow: slide in progressBlinking yellow: acquiring informationRapidly blinking yellow: manual antibody application requiredRed: attention requiredReaction chamber access button<strong>Start</strong> overBookmarksGrouping visualizationPreviousBookmarksNext13<strong>Start</strong> overBookmarksPreviousNext
<strong>DISCOVERY</strong> <strong>ULTRA</strong> Protocol Editor• The new <strong>DISCOVERY</strong> <strong>ULTRA</strong> Protocol Editor allows significantly decreased protocol loading time, as well as betterflexibility and ease of use, while creating and modifying protocols.<strong>Start</strong> overBookmarksPreviousBookmarksNext14<strong>Start</strong> overBookmarksPreviousNext
<strong>DISCOVERY</strong> <strong>ULTRA</strong> Protocol Editorcontinued• The protocol selection tables can be viewed two different ways, in a pop up view that appears near the mouse whena protocol option is selected. This view reduces the need for mouse movement across the protocol screen.Pop up view<strong>Start</strong> overBookmarksPreviousBookmarksNext15<strong>Start</strong> overBookmarksPreviousNext
<strong>DISCOVERY</strong> <strong>ULTRA</strong> Protocol Editorcontinued• Alternatively, a sidebar view is also available. In this view, protocol selections are presented to the right of the main protocol,allowing you to see an unobstructed view of the entire Protocol Editor.Sidebar view<strong>Start</strong> overBookmarksPreviousBookmarksNext16<strong>Start</strong> overBookmarksPreviousNext
<strong>DISCOVERY</strong> <strong>ULTRA</strong> Protocol Editorcontinued• The toggle to go back and forth between the pop up view and the sidebar view is located on the right side,next to the Clear button.Toggle<strong>Start</strong> overBookmarksPreviousBookmarksNext17<strong>Start</strong> overBookmarksPreviousNext
<strong>DISCOVERY</strong> <strong>ULTRA</strong> Protocol Editorcontinued• The protocol filter feature allows for accelerated searching through 5,000 protocols by eliminating protocols from view thatdo not meet the search criteria.<strong>Start</strong> overBookmarksPreviousBookmarksNext18<strong>Start</strong> overBookmarksPreviousNext
<strong>DISCOVERY</strong> <strong>ULTRA</strong> Protocol Editorcontinued• A Find feature has been added in two places, in the Protocol field and within the Protocol Selections field. For both fields,type the keyword within the Find field and the cursor will highlight the next instance of that word in the Protocol Field.<strong>Start</strong> overBookmarksPreviousBookmarksNext19<strong>Start</strong> overBookmarksPreviousNext
<strong>DISCOVERY</strong> <strong>ULTRA</strong> Protocol Editorcontinued• Once a protocol has been highlighted, you can print the summary or extended protocol report from the editor.<strong>Start</strong> overBookmarksPreviousBookmarksNext20<strong>Start</strong> overBookmarksPreviousNext
<strong>DISCOVERY</strong> <strong>ULTRA</strong> Protocol Editorcontinued• The zoom feature allows you to increase the font size of the protocol view.<strong>Start</strong> overBookmarksPreviousBookmarksNext21<strong>Start</strong> overBookmarksPreviousNext
Manual ApplicationsManual applicationsHaving individual reaction chambers is extremely useful whenmanually applying a reagent. A manual application run canbe run simultaneously alongside any other assays.To manually apply a reagent:1. Select “Manual Application” when creating the protocol.2. Once the instrument reaches the manual applicationstep, the LED will flash yellow.3. Acknowledge the hold step by pressing the button onthe slide drawer. The instrument will apply fresh bufferto the slide for the manual application.4. The instrument will audibly alarm and the slide drawerwill flash yellow when the instrument is ready for themanual application to occur.5. Open the slide drawer, apply 100μl of reagent unlessotherwise instructed.6. Press and hold the slide drawer access button untilthe blinking yellow LED returns to solid yellow.<strong>Start</strong> overBookmarksPreviousBookmarksNext27<strong>Start</strong> overBookmarksPreviousNext
Cleaning Reaction ChambersCleaning the reaction chambers• It is recommended that a cleaning cycle be performed once per day.• The Clean button is located on the Instrument View, Reagent Histogram, or Slide Histogram of the system software.Once the instrument begins a cleaning cycle, theicon indicates that the system is running.IMPORTANT: <strong>Start</strong> over Slides cannot be loaded while the system is executing Bookmarks a cleaning cycle.PreviousBookmarksNext23<strong>Start</strong> overBookmarksPreviousNext
Cleaning Reaction ChamberscontinuedCleaning the reaction chambers• When the instrument cleaning cycle is running, the Clean icon and slides turn amber in the Instrument View.The cleaning cycle process will take approximately 12 minutes to complete.• The Clean icon changes color to indicate if the Clean function is disabled, enabled, or running.You can still access the Clean function within the maintenance menu, if desired.<strong>Start</strong> overBookmarksPreviousBookmarksNext24<strong>Start</strong> overBookmarksPreviousNext
Managing InventorySelect Active Status Only fromthe Layout dropdown list to helpmanage inventory. Users can alsoselect an option in the Group Byfield to further sort data.Filter Builder icon opensa custom filter builder.Creating a custom filterwill allow you to defineActive Status settings.Registration Wandis used to registera product intothe inventory.<strong>Start</strong> overBookmarksPreviousBookmarksNext25<strong>Start</strong> overBookmarksPreviousNext
Creating Custom Inventory Filters1. Filter Builder icon opens acustom filter builder. Creatinga custom filter will allowuser to define Active Statussettings.2. To begin selecting thecustomizable selection,press the customizebutton displayedbelow.<strong>Start</strong> overBookmarksPreviousBookmarksNext26<strong>Start</strong> overBookmarksPreviousNext
Managing InventoryCreating a customer filter will allow the user to define theActive Status settings. This filter can be easily created in theInventory Screen.1. Build the filter by clickingthe add a new conditionbutton. This will bring up alist of properties and theirassociated values.2. Once the desired filter hasbeen created, press Save As.<strong>Start</strong> over3. Name the filter and press Save.BookmarksPreviousBookmarksNext27<strong>Start</strong> overBookmarksPreviousNext
Consolidated Reports• The Consolidated Run Report is a new report that is used to select several individual runs which are compiled into a singlereport and include system metrics, such as reagent usage, bulk usage, or system messages.• To choose the new Consolidated Run Report, select the icon from the Report View button.<strong>Start</strong> overBookmarksPreviousBookmarksNext28<strong>Start</strong> overBookmarksPreviousNext
Consolidated Reportscontinued• Click the button<strong>Start</strong> overBookmarksPreviousBookmarksNext29<strong>Start</strong> overBookmarksPreviousNext
Consolidated Reportscontinued• In the Include Section box, select one or more checkboxes to include Reagent Usage, or System Messages on the report.--To deselect a report option, uncheck the box.--The Slide Data Type to Print option allows for a choice of data to be printed from the barcode label if keycodes are being used.• In the Successful Runs list, select the runs that you want to consolidate onto one report. Do any of the following:--To select multiple runs individually, Ctrl + click each order.--To select a group of runs, Shift + click the first and last runs in the group. Active selections will be highlighted in blue.--Once selections have been made, click on the button.• If enabled, a Print Preview window appears so you can review the report before you print it.• Click the printer icon to print the report.• When you are finished, click the Close button.Slide dataInclude SectionClick hereto changecolumn headersData <strong>Start</strong> selection overBookmarksPreviousBookmarksNext30<strong>Start</strong> overBookmarksPreviousNext
Consolidated Reportscontinued1. The Protocol Detail band has been added to outlinehow the information for each run will be displayed. RunNumber, Instrument Serial Number, Run Operator, and<strong>Start</strong> Time are now displayed at the protocol detail level,instead of the report header.2. The detail of each run will be displayed prior to theReagent Usage detail.<strong>Start</strong> overBookmarksPreviousBookmarksNext31<strong>Start</strong> overBookmarksPreviousNext
Consolidated Reportscontinued• If you select the System Messages section to beincluded in the report, the data appears at the end of theconsolidated run report.• The System Messages detail now displays associatedRun Number and Instrument.<strong>Start</strong> overBookmarksPreviousBookmarksNext32<strong>Start</strong> overBookmarksPreviousNext
Case ReportsThere are two ways to generate a slide report on the<strong>DISCOVERY</strong> <strong>ULTRA</strong>:• Individual run reports will print out a single report perreaction chamber.• Case reports will group runs together either by AccessionID, Requestor, or Date.--Setting up a case report will allow you to customizethe report settings and create a useful tool to aid inworkflow.--The information needed to create this report mustcome from either the barcode label or the Order List.<strong>Start</strong> overBookmarksPreviousBookmarksNext33<strong>Start</strong> overBookmarksPreviousNext
Setting Up a Case ReportStep 1Select CaseReportsStep 3Name the reportStep 2Select NewReportStep 4Select a default date range togenerate reports. Press Next.<strong>Start</strong> overStep 5Select the primary grouping.Unclick Stopped Runs. Press Next.BookmarksStep 6Select the secondary grouping.Be sure to UnclickPreviousPage Breakon Group. Press Next.BookmarksNext34<strong>Start</strong> overBookmarksPreviousNext
Setting Up a Case ReportcontinuedStep 7Select any othercategories to appear onthe report. Press Next.<strong>Start</strong> overStep 8Select how muchinformation you wouldlike on your report.Press NextStep 10If you do not like the layout of thegenerated report, simply pressPrevious and alter your choices. Youmany do this as many times as youwould like before pressingBookmarksSave.Step 9Every run that matches the set criteria will behighlighted. Press Print to view your report.PreviousBookmarksNext35<strong>Start</strong> overBookmarksPreviousNext
Central ManagementCentral ManagementAllows for reagent, protocol and case slide sharing betweenmultiple host computers to improve workflow and laboratoryefficiency.<strong>Quick</strong> Tips• The NexES and\or VSS Software must be opened onall hosts that are connected via Central Managementin order for the data to replicate properly across allcomputers.• All reagents except bulk fluids can replicate and beshared across multiple computers.• Run reports can only be viewed from the computerrunning that instrument, the run reports are host specificthey do not replicate to all computers.• Most common error message: “unable to acquireownership” of the reagents.--When beginning a run, all inventory/view registeredproducts screens must be closed.--These screens lock the ownership of all products andwill not allow the reagents to be shared on the hostcomputer that is starting the run.<strong>Start</strong> overBookmarksPreviousBookmarksNext36<strong>Start</strong> overBookmarksPreviousNext
Troubleshooting and General InformationResolution/explanation:The VSS calculates the bulk volume needed per slide at the time each slide is added. The available amount of bulk fluid foreach run is calculated based on only the internal reservoirs. If running a large volume of ISH slides, the system may produceone of the messages seen on the following pages. Two approaches can be taken.• In batch mode – the system allows you to account for the additional bulk volume needed to complete your run inthe external bottles. If the additional amount of bulk reagent is present, simply press “yes” when the warning pops up.• In continuous mode - start as many slides as the system allows and continue to add slides as the limiting bulk reservoirrefills itself.<strong>Start</strong> overBookmarksPreviousBookmarksNext37<strong>Start</strong> overBookmarksPreviousNext
Troubleshooting and General Informationcontinued• Inadequate SSC (RiboWash) to perform run error<strong>Start</strong> overBookmarksPreviousBookmarksNext38<strong>Start</strong> overBookmarksPreviousNext
Troubleshooting and General Informationcontinued• Verify bulk screen<strong>Start</strong> overBookmarksPreviousBookmarksNext39<strong>Start</strong> overBookmarksPreviousNext
Troubleshooting and General InformationcontinuedResolution/explanation:How to disable the Enhanced Protocol Editor View, step by step.• If you prefer the previous version of the Protocol Editor, you can change it back to that view.1. Click the Home icon.2. Click the Setup button, andthen click the Host Optionstab.<strong>Start</strong> overBookmarksPreviousBookmarksNext40<strong>Start</strong> overBookmarksPreviousNext
Troubleshooting and General InformationcontinuedDisable the Enhanced Protocol Editor View, step by step3. For the EnhancedProtocol EditorEnabled setting,double click thevalue to change itfrom yes to no.<strong>Start</strong> overBookmarksPreviousBookmarksNext41<strong>Start</strong> overBookmarksPreviousNext
Troubleshooting and General InformationcontinuedDisable the Enhanced Protocol Editor View, step by step4. The system prompts you to save your changes and thenloads the previous version of the Protocol Editor.<strong>Start</strong> overBookmarksPreviousBookmarksNext42<strong>Start</strong> overBookmarksPreviousNext
Troubleshooting and General InformationcontinuedDisable the Enhanced Protocol Editor View, step by step5. Return to original viewin protocol editor.<strong>Start</strong> overBookmarksPreviousBookmarksNext43<strong>Start</strong> overBookmarksPreviousNext
Troubleshooting and General InformationcontinuedSubsystem Issue/Question Resolution/ExplanationHardwareHardware<strong>Start</strong> over<strong>DISCOVERY</strong> <strong>ULTRA</strong> requires aseparate host computer from other<strong>DISCOVERY</strong> series platformsSlide “jumps” off the heater padduring the run<strong>DISCOVERY</strong> <strong>ULTRA</strong> comes standard with Central Management to allowreagent sharing between <strong>DISCOVERY</strong>, <strong>DISCOVERY</strong> XT and <strong>DISCOVERY</strong><strong>ULTRA</strong> platforms.Sometimes a small amount of liquid on the thermoflex pad can causethe slides to move or “jump” when the slide is heated. Cleaning the slidepad prior to starting run should correct this.VSS Identifying time to titration This is graphically represented on <strong>DISCOVERY</strong> <strong>ULTRA</strong> witha diamond symbol on the “slide view.” You can determinethe exact titration time by hovering the mouse over the diamond symbol.VSSRight after I added a slide, the systemindicated that I needed to schedule aLanding Zone. How do I avoid this?Try starting in “batch mode.” In this mode, the system reads all the slidesand reagents before beginning any staining.If a reagent is needed, you will be able to add it without waiting for aLanding ZoneVSS How do I start in batch mode? Put the system into “sleep” mode and then back to “ready” mode. See“<strong>DISCOVERY</strong> <strong>ULTRA</strong> Operator’s Manual” page 32.VSS Kit integrity If a component of a kit is not on the reagent carousel, even if the kit isnot in use, the system will flag an error and require you to either removethe entire kit or add all components.BookmarksPreviousBookmarksNext44<strong>Start</strong> overBookmarksPreviousNext
Troubleshooting and General InformationcontinuedSubsystem Issue/Question Resolution/ExplanationVSSHow do I put the instrument into“ready mode”?There are two ways to get into “ready mode”:1. Click the Ready button on the instrument view2. When the instrument has completed a staining run(all slides in all drawers completed), it waits for a brief period andthen automatically returns to Ready mode.VSS/Procedure How do I run with a delayed start? <strong>DISCOVERY</strong> <strong>ULTRA</strong> offers a means of building in delays at the beginningof each protocol. Simply go to the protocol editor and select “delay” asthe first step in the protocol. Then choose the amount of time you wouldlike to delay, up to 24 hours.ProcedureProcedureWhere do I find QDots in theprocedures?How do I run a dual multimer/streptavidin protocol?The QDots are considered a “fluorescent” detection andare therefore found in the “<strong>DISCOVERY</strong> RUO Fluorescence” proceduregroup.Currently, the <strong>DISCOVERY</strong> <strong>ULTRA</strong> procedures are built to accommodatea single type of detection during a protocol. However, there arenumerous options for achieving dual stains using any combinationof detection, both chromogenic and fluorescent. Contact your local<strong>DISCOVERY</strong> Product Specialist for more information.<strong>Start</strong> overBookmarksPreviousBookmarksNext45<strong>Start</strong> overBookmarksPreviousNext
<strong>Ventana</strong> <strong>Medical</strong> <strong>Systems</strong>, Inc.1910 E. Innovation Park DriveTucson, Arizona 85755USA+1 (520) 887 2155(800) 227 2155© 2011VENTANA, the <strong>Ventana</strong> logo, <strong>DISCOVERY</strong>, NexES andultraView are trademarks of Roche.All other trademarks are the property of their respective owners.N2348 0111A46<strong>Start</strong> overBookmarksPrevious


