Rosemount 3051S Electronic Remote Sensors - Emerson Process ...
Rosemount 3051S Electronic Remote Sensors - Emerson Process ...
Rosemount 3051S Electronic Remote Sensors - Emerson Process ...

You also want an ePaper? Increase the reach of your titles
YUMPU automatically turns print PDFs into web optimized ePapers that Google loves.
Reference Manual<br />
00809-0100-4804, Rev AA<br />
January 2011<br />
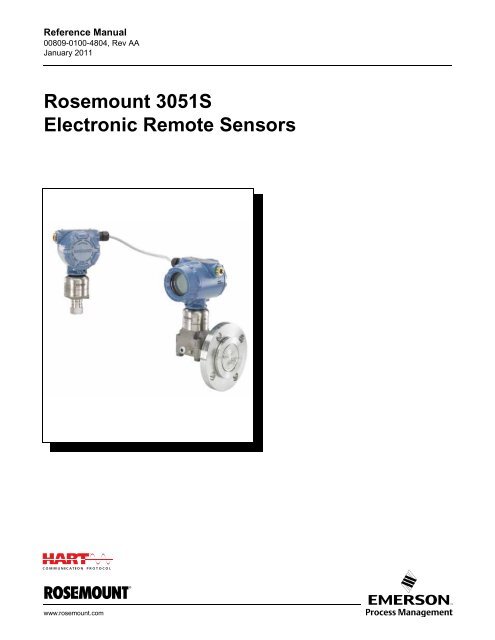
<strong>Rosemount</strong> <strong>3051S</strong><br />
<strong>Electronic</strong> <strong>Remote</strong> <strong>Sensors</strong><br />
www.rosemount.com
Reference Manual<br />
00809-0100-4804, Rev AA<br />
January 2011 <strong>Rosemount</strong> <strong>3051S</strong> ERS System<br />
www.rosemount.com<br />
<strong>Rosemount</strong> <strong>3051S</strong><br />
<strong>Electronic</strong> <strong>Remote</strong> <strong>Sensors</strong><br />
NOTICE<br />
Read this manual before working with the product. For personal and system safety, and<br />
for optimum product performance, make sure you thoroughly understand the contents<br />
before installing, using, or maintaining this product.<br />
For technical assistance, contacts are listed below:<br />
Customer Central<br />
Technical support, quoting, and order-related questions.<br />
Americas 1 800 999 9307<br />
Europe +41 (0) 41 768 6111<br />
Middle east +971 4 811 8100<br />
Asia +65 6777 8211<br />
North American Response Center<br />
Equipment service needs.<br />
1-800-654-7768 (24 hours—includes Canada)<br />
Outside of these areas, contact your local <strong>Rosemount</strong> ® representative.<br />
The products described in this document are NOT designed for nuclear-qualified<br />
applications. Using non-nuclear qualified products in applications that require<br />
nuclear-qualified hardware or products may cause inaccurate readings.<br />
For information on <strong>Rosemount</strong> nuclear-qualified products, contact your local <strong>Rosemount</strong><br />
Sales Representative.
Reference Manual<br />
00809-0100-4804, Rev AA<br />
January 2011<br />
Table of Contents<br />
SECTION 1<br />
Introduction<br />
SECTION 2<br />
Installation<br />
SECTION 3<br />
Configuration<br />
SECTION 4<br />
Operation and<br />
Maintenance<br />
SECTION 5<br />
Troubleshooting<br />
APPENDIX A<br />
Specifications and<br />
Reference Data<br />
APPENDIX B<br />
HART Menu Tree<br />
APPENDIX C<br />
Product<br />
Certifications<br />
<strong>Rosemount</strong> <strong>3051S</strong> ERS System<br />
Using This Manual . . . . . . . . . . . . . . . . . . . . . . . . . . . . . . . . . . . . . . . 1-1<br />
Models Covered . . . . . . . . . . . . . . . . . . . . . . . . . . . . . . . . . . . . . . . . . 1-1<br />
Service Support . . . . . . . . . . . . . . . . . . . . . . . . . . . . . . . . . . . . . . . . . 1-2<br />
Product Recycling/Disposal . . . . . . . . . . . . . . . . . . . . . . . . . . . . . . . . 1-2<br />
Overview. . . . . . . . . . . . . . . . . . . . . . . . . . . . . . . . . . . . . . . . . . . . . . . 2-1<br />
Safety Messages . . . . . . . . . . . . . . . . . . . . . . . . . . . . . . . . . . . . . . . . 2-1<br />
Considerations . . . . . . . . . . . . . . . . . . . . . . . . . . . . . . . . . . . . . . . . . . 2-2<br />
Installation Procedures . . . . . . . . . . . . . . . . . . . . . . . . . . . . . . . . . . . . 2-6<br />
<strong>Rosemount</strong> Manifolds . . . . . . . . . . . . . . . . . . . . . . . . . . . . . . . . . . . . 2-21<br />
Overview. . . . . . . . . . . . . . . . . . . . . . . . . . . . . . . . . . . . . . . . . . . . . . . 3-1<br />
Safety Messages . . . . . . . . . . . . . . . . . . . . . . . . . . . . . . . . . . . . . . . . 3-1<br />
Wiring Diagrams . . . . . . . . . . . . . . . . . . . . . . . . . . . . . . . . . . . . . . . . . 3-2<br />
Basic Setup. . . . . . . . . . . . . . . . . . . . . . . . . . . . . . . . . . . . . . . . . . . . . 3-3<br />
Additional Configuration . . . . . . . . . . . . . . . . . . . . . . . . . . . . . . . . . . . 3-6<br />
Overview. . . . . . . . . . . . . . . . . . . . . . . . . . . . . . . . . . . . . . . . . . . . . . . 4-1<br />
Safety Messages . . . . . . . . . . . . . . . . . . . . . . . . . . . . . . . . . . . . . . . . 4-1<br />
Calibration. . . . . . . . . . . . . . . . . . . . . . . . . . . . . . . . . . . . . . . . . . . . . . 4-3<br />
Functional Tests . . . . . . . . . . . . . . . . . . . . . . . . . . . . . . . . . . . . . . . . . 4-7<br />
Field Upgrades and Replacements . . . . . . . . . . . . . . . . . . . . . . . . . . 4-8<br />
Overview. . . . . . . . . . . . . . . . . . . . . . . . . . . . . . . . . . . . . . . . . . . . . . . 5-1<br />
Device Overview. . . . . . . . . . . . . . . . . . . . . . . . . . . . . . . . . . . . . . . . . 5-1<br />
Measurement Quality Status . . . . . . . . . . . . . . . . . . . . . . . . . . . . . . . 5-5<br />
Performance Specifications . . . . . . . . . . . . . . . . . . . . . . . . . . . . . . . . A-1<br />
Functional Specifications . . . . . . . . . . . . . . . . . . . . . . . . . . . . . . . . . . A-4<br />
Physical Specifications . . . . . . . . . . . . . . . . . . . . . . . . . . . . . . . . . . . . A-9<br />
Dimensional Drawings . . . . . . . . . . . . . . . . . . . . . . . . . . . . . . . . . . . A-11<br />
Ordering Information. . . . . . . . . . . . . . . . . . . . . . . . . . . . . . . . . . . . . A-17<br />
Spare Parts. . . . . . . . . . . . . . . . . . . . . . . . . . . . . . . . . . . . . . . . . . . . A-37<br />
Approved Manufacturing Locations . . . . . . . . . . . . . . . . . . . . . . . . . . C-1<br />
Ordinary Location Certification for FM . . . . . . . . . . . . . . . . . . . . . . . . C-1<br />
TOC-1
<strong>Rosemount</strong> <strong>3051S</strong> ERS System<br />
TOC-2<br />
Reference Manual<br />
00809-0100-4804, Rev AA<br />
January 2011
Reference Manual<br />
00809-0100-4804, Rev AA<br />
January 2011<br />
Section 1 Introduction<br />
<strong>Rosemount</strong> <strong>3051S</strong> ERS System<br />
Using This Manual . . . . . . . . . . . . . . . . . . . . . . . . . . . . . . . page 1-1<br />
Models Covered . . . . . . . . . . . . . . . . . . . . . . . . . . . . . . . . . page 1-1<br />
Service Support . . . . . . . . . . . . . . . . . . . . . . . . . . . . . . . . . page 1-2<br />
Product Recycling/Disposal . . . . . . . . . . . . . . . . . . . . . . . page 1-2<br />
USING THIS MANUAL The sections in this manual provide information on installing, operating, and<br />
maintaining a <strong>Rosemount</strong> <strong>3051S</strong> ERS System with HART ® protocol. The<br />
sections are organized as follows:<br />
• Section 2: Installation contains mechanical and electrical installation<br />
instructions, and field upgrade options.<br />
• Section 3: Configuration provides instruction on commissioning and<br />
operating a <strong>3051S</strong> ERS System. Information on software functions,<br />
configuration parameters, and online variables is also included.<br />
• Section 4: Operation and Maintenance contains operation and<br />
maintenance techniques.<br />
• Section 5: Troubleshooting provides troubleshooting techniques for the<br />
most common operating problems.<br />
• Appendix A: Specifications and Reference Data supplies reference and<br />
specification data as well as ordering information.<br />
• Product Certifications contains approval information, European ATEX<br />
directive information, and approval drawings.<br />
MODELS COVERED The <strong>3051S</strong> ERS System is a flexible, 2-wire HART architecture that calculates<br />
differential pressure (DP) electronically, using two pressure sensors. The<br />
pressure sensors are linked together with an electrical cable and<br />
synchronized to create a single <strong>3051S</strong> ERS system. The sensors used in the<br />
<strong>3051S</strong> ERS System can consist of any combination of <strong>3051S</strong>AM and<br />
<strong>3051S</strong>AL models. One of the sensors is required to be a “Primary” and the<br />
other is required to be a “Secondary.”<br />
The Primary sensor contains the 4-20 mA loop termination and optional LCD.<br />
The Secondary sensor is made up of a pressure sensor module and junction<br />
box housing that is connected to the Primary sensor, using a standard<br />
instrument cable.<br />
<strong>Rosemount</strong> <strong>3051S</strong>AM ERS Sensor<br />
• Coplanar and In-Line sensor module platforms<br />
• Variety of process connections including NPT, flanges, manifolds, and<br />
1199 remote diaphragm seals<br />
<strong>Rosemount</strong> <strong>3051S</strong>AL ERS Sensor – Liquid Level Configuration<br />
• Integrated transmitter and remote diaphragm seal in a single model<br />
number<br />
• Variety of process connections including flanged, threaded, and<br />
hygienic remote diaphragm seals<br />
1-1
<strong>Rosemount</strong> <strong>3051S</strong> ERS System<br />
Figure 1-1. ERS Models and<br />
Possible Configurations<br />
1-2<br />
<strong>3051S</strong>AM Inline<br />
(Secondary)<br />
<strong>3051S</strong>AL Coplanar with FF Seal<br />
(Primary)<br />
Reference Manual<br />
00809-0100-4804, Rev AA<br />
January 2011<br />
<strong>Rosemount</strong> 300ERS Housing Kit<br />
• Upgrade and convert an existing <strong>3051S</strong> transmitter into a <strong>3051S</strong> ERS<br />
sensor.<br />
• Easily order replacement housings and electronics for an existing ERS<br />
system.<br />
SERVICE SUPPORT To expedite the return process outside of the United States, contact the<br />
nearest <strong>Rosemount</strong> representative.<br />
PRODUCT<br />
RECYCLING/DISPOSAL<br />
<strong>3051S</strong>AM Inline<br />
(Primary)<br />
<strong>3051S</strong>AL Coplanar with FF Seal<br />
(Secondary)<br />
<strong>3051S</strong>AM Inline<br />
(Secondary)<br />
<strong>3051S</strong>AL Coplanar with FF Seal<br />
and <strong>Remote</strong> Display (Primary)<br />
Within the United States, call the <strong>Emerson</strong> <strong>Process</strong> Management Instrument<br />
and Valves Response Center using the 1-800-654-RSMT (7768) toll-free<br />
number. This center, available 24 hours a day, will assist you with any needed<br />
information or materials.<br />
The center will ask for product model and serial numbers, and will provide a<br />
Return Material Authorization (RMA) number. The center will also ask for the<br />
process material to which the product was last exposed.<br />
Individuals who handle products exposed to a hazardous substance can avoid injury if they<br />
are informed of and understand the hazard. If the product being returned was exposed to a<br />
hazardous substance as defined by OSHA, a copy of the required Material Safety Data Sheet<br />
(MSDS) for each hazardous substance identified must be included with the returned goods.<br />
<strong>Emerson</strong> <strong>Process</strong> Management Instrument and Valves Response Center<br />
representatives will explain the additional information and procedures<br />
necessary to return goods exposed to hazardous substances.<br />
Recycling of equipment and packaging should be taken into consideration<br />
and disposed of in accordance with local and national legislation/regulations.
Reference Manual<br />
00809-0100-4804, Rev AA<br />
January 2011 <strong>Rosemount</strong> <strong>3051S</strong> ERS System<br />
Section 2 Installation<br />
www.emersonprocess.com/rosemount<br />
Overview . . . . . . . . . . . . . . . . . . . . . . . . . . . . . . . . . . . . . . . page 2-1<br />
Safety Messages . . . . . . . . . . . . . . . . . . . . . . . . . . . . . . . . . page 2-1<br />
Considerations . . . . . . . . . . . . . . . . . . . . . . . . . . . . . . . . . . page 2-2<br />
Installation Procedures . . . . . . . . . . . . . . . . . . . . . . . . . . . page 2-6<br />
<strong>Rosemount</strong> Manifolds . . . . . . . . . . . . . . . . . . . . . . . . . . . . page 2-21<br />
OVERVIEW This section covers installation considerations for the <strong>Rosemount</strong> <strong>3051S</strong> ERS<br />
system. A Quick Installation Guide (document number 00825-0100-4804) is<br />
shipped with every <strong>3051S</strong> ERS sensor to describe basic installation, wiring,<br />
configuration, and startup procedures. Dimensional drawings for each<br />
<strong>Rosemount</strong> <strong>3051S</strong> ERS sensor are included in Appendix A: Specifications<br />
and Reference Data.<br />
SAFETY MESSAGES Procedures and instructions in this section may require special precautions to<br />
ensure the safety of personnel performing the operation. Information that<br />
raises potential safety issues is indicated with a warning symbol ( ). Refer<br />
to the following safety messages before performing an operation preceded by<br />
this symbol.
<strong>Rosemount</strong> <strong>3051S</strong> ERS System<br />
CONSIDERATIONS<br />
2-2<br />
Reference Manual<br />
00809-0100-4804, Rev AA<br />
January 2011<br />
Failure to follow these installation guidelines could result in death or serious injury:<br />
• Make sure only qualified personnel perform the installation.<br />
Explosions could result in death or serious injury:<br />
• Do not remove the housing covers in explosive atmospheres when the circuit is live.<br />
• Before connecting a Field Communicator in an explosive atmosphere, make sure the<br />
instruments in the loop are installed in accordance with intrinsically safe or non-incendive<br />
field wiring practices.<br />
• Both housing covers must be fully engaged to meet flameproof / explosion-proof<br />
requirements.<br />
• Verify that the operating atmosphere of the transmitter is consistent with the appropriate<br />
hazardous location certifications.<br />
Electrical shock could cause death or serious injury. If the ERS system is installed in a high-voltage<br />
environment and a fault or installation error occurs, high voltage may be present on the sensor leads<br />
and terminals:<br />
• Use extreme caution when making contact with the leads and terminals.<br />
<strong>Process</strong> leaks could result in death or serious injury:<br />
• Install and tighten all four flange bolts before applying pressure.<br />
• Do not attempt to loosen or remove flange bolts while the ERS system is in service.<br />
• Replacement equipment or spare parts not approved by <strong>Emerson</strong> <strong>Process</strong> Management<br />
for use as spare parts could reduce the pressure retaining capabilities of the transmitter<br />
and may render the instrument dangerous.<br />
• Use only bolts supplied or sold by <strong>Emerson</strong> <strong>Process</strong> Management as spare parts.<br />
Improper assembly of manifolds to traditional flange can damage the device:<br />
• For the safe assembly of the manifold to the sensor flange, bolts must break the back<br />
plane of the flange web (i.e. bolt hole) but must not contact the sensor module.<br />
Static electricity can damage sensitive components:<br />
• Observe safe handling precautions for static-sensitive components.<br />
General Measurement performance depends upon proper installation of each sensor<br />
and impulse piping. Mount each <strong>3051S</strong> ERS sensor close to the process and<br />
use minimum piping to achieve best performance. Also, consider the need for<br />
easy access, personnel safety, practical field calibration, and a suitable<br />
environment. Install each sensor to minimize vibration, shock, and<br />
temperature fluctuation.<br />
NOTE:<br />
Install the enclosed pipe plugs (found in the box) in any unused conduit<br />
openings. For proper straight and tapered thread engagement requirements,<br />
see the appropriate approval drawings in Appendix C: Product Certifications.<br />
For material compatibility considerations, see technical note<br />
00816-0100-3045 on www.emersonprocess.com/rosemount.
Reference Manual<br />
00809-0100-4804, Rev AA<br />
January 2011<br />
<strong>Rosemount</strong> <strong>3051S</strong> ERS System<br />
Mechanical For dimensional drawing information, refer to Appendix A: Specifications and<br />
Reference Data on page A-11.<br />
For steam service or for applications with process temperatures greater than<br />
the limits of each ERS sensor, do not blow down impulse piping through either<br />
sensor. Flush lines with the blocking valves and refill lines with water before<br />
resuming measurement.<br />
If a <strong>3051S</strong> ERS sensor is mounted on its side, position the flange / manifold to<br />
ensure proper venting or draining.<br />
Field Terminal Side of Housing<br />
Mount each ERS sensor so the terminal side is accessible. Clearance of<br />
0.75-in. (19 mm) is required for cover removal.<br />
<strong>Electronic</strong>s Side of Housing<br />
Provide 0.75-in. (19 mm) of clearance for units without an LCD display. Three<br />
inches of clearance is required for cover removal if an LCD display is<br />
installed.<br />
Cover Installation<br />
Always ensure a proper seal by installing the housing covers so that metal<br />
contacts metal in order to prevent performance degradation due to<br />
environmental effects. For replacement cover o-rings, use <strong>Rosemount</strong> o-rings<br />
(part number 03151-9040-0001).<br />
Conduit Entry Threads<br />
For NEMA 4X, IP66, and IP68 requirements, use thread seal (PTFE) tape or<br />
paste on male threads to provide a watertight seal.<br />
Cover Jam Screw<br />
For housings shipped with a cover jam screw (as shown in Figure 2-1), the<br />
screw should be properly installed once the ERS system has been wired and<br />
powered up. The cover jam screw is intended to prevent the removal of the<br />
housing covers in flameproof environments without the use of tools. Follow<br />
these steps to install the cover jam screw:<br />
1. Verify that the cover jam screw is completely threaded into the<br />
housing.<br />
2. Install the housing covers and verify that metal contacts metal in order<br />
to meet flameproof / explosion-proof requirements.<br />
3. Using an M4 hex wrench, turn the jam screw counterclockwise until it<br />
contacts the housing cover.<br />
4. Turn the jam screw an additional ½ turn counterclockwise to secure<br />
the cover. Application of excessive torque may strip the threads.<br />
5. Verify that the covers cannot be removed.<br />
2-3
<strong>Rosemount</strong> <strong>3051S</strong> ERS System<br />
Figure 2-1. Cover Jam Screw<br />
2-4<br />
Reference Manual<br />
00809-0100-4804, Rev AA<br />
January 2011<br />
PlantWeb ® Housing Junction Box Housing<br />
Cover Jam<br />
Screw<br />
2X Cover Jam Screw<br />
(1 per side)<br />
Environmental Access requirements and cover installation can help optimize transmitter<br />
performance. Mount each transmitter to minimize ambient temperature<br />
changes, vibration, mechanical shock, and to avoid external contact with<br />
corrosive materials. Refer to Appendix A: Specifications and Reference Data<br />
for temperature operating limits.<br />
NOTE:<br />
The ERS system contains additional electrical protection that is inherent to<br />
the design. As a result, ERS cannot be used in applications with floating<br />
electrical grounds greater than 50 Vdc (such as Cathodic Protection). Consult<br />
an <strong>Emerson</strong> <strong>Process</strong> Management sales representative for additional<br />
information or considerations on use in similar applications.
Reference Manual<br />
00809-0100-4804, Rev AA<br />
January 2011<br />
Figure 2-2. <strong>3051S</strong> ERS<br />
Installation Flowchart<br />
START HERE<br />
Bench<br />
Commissioning<br />
?<br />
Yes<br />
Run “Basic<br />
Setup” Wizard<br />
Device Tagging<br />
Units of Measure<br />
& Damping<br />
Variable Mapping<br />
4 & 20 mA Range<br />
Points<br />
Alarm &<br />
Saturation Levels<br />
No<br />
Verify<br />
Review ERS<br />
System<br />
Configuration<br />
Verify P HI and<br />
P LO Designations<br />
Apply Pressure<br />
Bench<br />
Commissioning<br />
? Yes<br />
No<br />
Refer to Section 4:<br />
Operation and<br />
Maintenance<br />
<strong>Rosemount</strong> <strong>3051S</strong> ERS System<br />
Field Installation<br />
Identify P HI and<br />
P LO ERS <strong>Sensors</strong><br />
Mount Each ERS<br />
Sensor<br />
Consider<br />
Housing Rotation<br />
Set Switches<br />
Connect Wiring<br />
and Apply Power<br />
Trim ERS System<br />
for Mounting<br />
Effects<br />
Finish<br />
2-5
<strong>Rosemount</strong> <strong>3051S</strong> ERS System<br />
INSTALLATION<br />
PROCEDURES<br />
2-6<br />
Reference Manual<br />
00809-0100-4804, Rev AA<br />
January 2011<br />
Identify ERS <strong>Sensors</strong> A complete ERS system contains two pressure sensors. One is mounted on<br />
the high-pressure (P HI ) process connection, and the other is mounted on the<br />
low-pressure (P LO ) process connection. An optional remote display and<br />
interface may also be included if ordered.<br />
Figure 2-3. ERS P HI and P LO<br />
Wire-On Tags<br />
1. Look at the wire-on tag on the ERS sensor to identify whether it is<br />
configured as the PHI or PLO sensor (see Figure 2-3)<br />
2. Locate the second sensor that will be used in the ERS System:<br />
• For new installations or applications, the second ERS sensor may<br />
have been shipped in a separate box.<br />
• If servicing or replacing part of an existing ERS system, the other<br />
sensor may already be installed.<br />
NOTE:<br />
ERS sensors are shipped from the factory preconfigured such that the<br />
primary unit (4-20 loop termination and optional LCD) is assigned as the P HI<br />
device, and the secondary unit (junction box housing) is assigned as the P LO<br />
device. The P HI and P LO process connection (such as at the top of a tank),<br />
these designations may be switched electronically using a Field<br />
communicator (page 3-12).<br />
OR
Reference Manual<br />
00809-0100-4804, Rev AA<br />
January 2011<br />
<strong>Rosemount</strong> <strong>3051S</strong> ERS System<br />
Mount Each ERS Sensor Mount the P HI and P LO sensors at the correct process connections for the<br />
application. Common ERS installations are shown in Figure 2-4.<br />
Figure 2-4. Vertical and<br />
Horizontal ERS Installations<br />
P LO Sensor<br />
P HI Sensor<br />
Vertical Installation<br />
In a vertical installation such as on a vessel or distillation column, the PHI sensor should be installed at the bottom process connection. The PLO sensor<br />
should be installed at the top process connection.<br />
Horizontal Installation<br />
In a horizontal installation, the PHI sensor should be installed at the upstream<br />
process connection. The PLO sensor should be installed downstream.<br />
P HI Sensor P LO Sensor<br />
Pressure Drop<br />
2-7
<strong>Rosemount</strong> <strong>3051S</strong> ERS System<br />
Table 2-1. Mounting Brackets<br />
2-8<br />
Reference Manual<br />
00809-0100-4804, Rev AA<br />
January 2011<br />
Mounting Brackets<br />
Mounting brackets are available to facilitate mounting the transmitter to a 2-in.<br />
pipe or to a panel. The B4 SST bracket option is for use with Coplanar and<br />
In-Line process connections. “Coplanar Flange Mounting Configurations” on<br />
page A-14 shows dimensions and mounting configuration for the B4 bracket.<br />
Other bracket options are listed in Table 2-1.<br />
When installing a <strong>3051S</strong> ERS Sensor to one of the optional mounting<br />
brackets, torque the bolts to 125 in-lb. (0,9 N-m).<br />
Options Description Mounting Type Bracket Material Bolt Material<br />
B4 Coplanar Flange Bracket 2-in. Pipe/Panel SST SST<br />
B1 Traditional Flange Bracket 2-in. Pipe Painted Carbon Steel Carbon Steel<br />
B2 Traditional Flange Bracket Panel Painted Carbon Steel Carbon Steel<br />
B3 Traditional Flange Flat Bracket 2-in. Pipe Painted Carbon Steel Carbon Steel<br />
B7 Traditional Flange Bracket 2-in. Pipe Painted Carbon Steel SST<br />
B8 Traditional Flange Bracket Panel Painted Carbon Steel SST<br />
B9 Traditional Flange Flat Bracket 2-in. Pipe Painted Carbon Steel SST<br />
BA Traditional Flange Bracket 2-in. Pipe SST SST<br />
BC Traditional Flange Flat Bracket 2-in. Pipe SST SST<br />
Flange Bolts<br />
An ERS sensor can be shipped with a Coplanar flange or a traditional flange<br />
installed with four 1.75-in. flange bolts. Mounting bolts and bolting<br />
configurations for the Coplanar and traditional flanges can be found on<br />
page 2-9. Stainless steel bolts supplied by <strong>Emerson</strong> <strong>Process</strong> Management<br />
are coated with a lubricant to ease installation. Carbon steel bolts do not<br />
require lubrication. No additional lubricant should be applied when installing<br />
either type of bolt. Bolts supplied by <strong>Emerson</strong> <strong>Process</strong> Management are<br />
identified by their head markings:<br />
B7M<br />
Carbon Steel (CS) Head Markings<br />
660<br />
316 B8M CL A F593_*<br />
KM<br />
Alloy K-500 Head Marking<br />
Stainless Steel (SST) Head Markings<br />
* The last digit in the F593_ head marking<br />
may be any letter between A and M.
Reference Manual<br />
00809-0100-4804, Rev AA<br />
January 2011<br />
Table 2-2. Bolt Installation<br />
Torque Values<br />
Figure 2-5. Common ERS<br />
Sensor / Flange Assemblies<br />
ERS Sensor with Coplanar Flange<br />
1.75 in. (44 mm) x 4<br />
<strong>Rosemount</strong> <strong>3051S</strong> ERS System<br />
Bolt Installation<br />
Only use bolts supplied with the ERS sensor or sold by <strong>Emerson</strong> <strong>Process</strong><br />
Management as spare parts. Use the following bolt installation procedure:<br />
1. Finger-tighten the bolts.<br />
2. Torque the bolts to the initial torque value using a crossing pattern.<br />
For initial torque values, see Table 2-2.<br />
3. Torque the bolts to the final torque value using the same crossing<br />
pattern. For final torque values, see Table 2-2.<br />
Torque values for the flange and manifold adapter bolts are as follows:<br />
Bolt Material Option Code Initial Torque Value Final Torque Value<br />
CS-ASTM-A449 Standard 300 in.-lb (34 N-m) 650 in.-lb (73 N-m)<br />
316 SST Option L4 150 in.-lb (17 N-m) 300 in.-lb (34 N-m)<br />
ASTM-A-193-B7M Option L5 300 in.-lb (34 N-m) 650 in.-lb (73 N-m)<br />
Alloy K-500 Option L6 300 in.-lb (34 N-m) 650 in.-lb (73 N-m)<br />
ASTM-A-453-660 Option L7 150 in.-lb (17 N-m) 300 in.-lb (34 N-m)<br />
ASTM-A-193-B8M Option L8 150 in.-lb (17 N-m) 300 in.-lb (34 N-m)<br />
ERS Sensor with Coplanar Flange and<br />
Flange Adapters<br />
1.75 in.<br />
(44 mm) x 2<br />
2.88 in.<br />
(73 mm) x 2<br />
ERS Sensor with Traditional Flange and<br />
Flange Adapters<br />
1.75 in.<br />
(44 mm) x 4<br />
1.5 in.<br />
(38 mm) x 2<br />
2-9
<strong>Rosemount</strong> <strong>3051S</strong> ERS System<br />
2-10<br />
Reference Manual<br />
00809-0100-4804, Rev AA<br />
January 2011<br />
<strong>Process</strong> Connections The process connection size on a <strong>3051S</strong> ERS Sensor flange is 1 /4-18 NPT.<br />
Flange adapters with a 1 /4-18 NPT to 1 /2-14 NPT connection are available with<br />
the D2 option. Use a plant-approved lubricant or sealant when making the<br />
process connections.<br />
Figure 2-6. Sensor Module<br />
Isolator Plate<br />
Install and tighten all four flange bolts before applying pressure to avoid<br />
leakage. When properly installed, the flange bolts will protrude through the top<br />
of the sensor module Isolator Plate. See Figure 2-6. Do not attempt to loosen<br />
or remove the flange bolts while the transmitter is in service.<br />
To install adapters to a Coplanar flange, perform the following procedure:<br />
1. Remove the flange bolts.<br />
2. Leaving the flange in place, move the adapters into position with the<br />
o-rings installed.<br />
3. Attach the adapters and the Coplanar flange to the transmitter sensor<br />
module assembly using the longer of the bolts supplied.<br />
4. Tighten the bolts. Refer to Table 2-2 on page 2-9 for torque<br />
specifications.<br />
Refer to “Spare Parts” on page A-37 for the correct part number of the flange<br />
adapter and o-rings designed for a Coplanar <strong>3051S</strong> ERS sensor.<br />
When removing flanges or adapters, visually inspect the PTFE o-rings.<br />
Replace them if there are any signs of damage such as nicks or cuts. If<br />
replacing o-rings, re-torque the flange bolts after installation to compensate<br />
for seating of the PTFE o-ring.<br />
Bolt<br />
Sensor Module<br />
Isolator Plate<br />
Coplanar Flange<br />
Flange Adapters<br />
Use only the o-rings included with the flange adapter for the <strong>3051S</strong> ERS sensor. Failure<br />
to install proper fitting flange adapter o-rings may cause process leaks, which can result<br />
in death or serious injury.
Reference Manual<br />
00809-0100-4804, Rev AA<br />
January 2011<br />
Consider Housing<br />
Orientation<br />
<strong>Rosemount</strong> <strong>3051S</strong> ERS System<br />
Impulse Piping<br />
The piping between the process and each ERS sensor must accurately<br />
transfer the pressure to obtain accurate measurements. There are many<br />
possible sources of error: pressure transfer, leaks, friction loss (particularly if<br />
purging is used), trapped gas in a liquid line, liquid in a gas line, and plugged<br />
impulse lines.<br />
The best location for each ERS sensor depends on the process itself. Use the<br />
following guidelines to determine sensor location and placement of impulse<br />
piping:<br />
• Keep impulse piping as short as possible.<br />
• For liquid service, slope the impulse piping at least 1 inch per foot (8<br />
cm per m) upward from the transmitter toward the process connection.<br />
• For gas service, slope the impulse piping at least 1 inch per foot (8 cm<br />
per m) downward from the transmitter toward the process connection.<br />
• Avoid high points in liquid lines and low points in gas lines.<br />
• When purging, make the purge connection close to the process tap and<br />
purge through equal lengths of the same size pipe. Avoid purging<br />
through either <strong>3051S</strong> ERS sensor.<br />
• Keep corrosive or hot (above 250 °F or 121 °C) process material out of<br />
direct contact with the sensor module process connection and flanges.<br />
• Prevent sediments from depositing in the impulse piping.<br />
NOTE:<br />
Take necessary steps to prevent process fluid from freezing with the process<br />
flange to avoid damage to the <strong>3051S</strong> ERS sensor.<br />
NOTE:<br />
Verify the zero point on each ERS sensor after installation. To reset the zero<br />
point, refer to “Calibration Overview” on page 4-3.<br />
Housing Rotation<br />
The housing can be rotated to improve access to wiring or to better view the<br />
LCD display (if ordered). To rotate the housing, perform the following<br />
procedure:<br />
1. Loosen the housing set screw.<br />
2. Turn the housing up to 180 degrees to the left or right of its original<br />
(as shipped) position.<br />
NOTE:<br />
Do not rotate the housing more than 180 degrees from its original position<br />
without first performing a disassembly procedure (see page 4-8). Over<br />
rotation may sever the electrical connection between the sensor module and<br />
the electronics featureboard.<br />
3. Retighten the housing rotation set screw.<br />
2-11
<strong>Rosemount</strong> <strong>3051S</strong> ERS System<br />
Figure 2-7. Housing Rotation<br />
Configure Security and<br />
Alarm<br />
2-12<br />
Reference Manual<br />
00809-0100-4804, Rev AA<br />
January 2011<br />
PlantWeb Housing Junction Box Housing<br />
Housing Rotation Set Screw<br />
(3/32 inch)<br />
LCD display Rotation<br />
In addition to rotating the housing, the optional LCD display on the primary<br />
ERS sensor can be rotated in 90° increments by squeezing the two tabs,<br />
pulling out the display, rotating, and snapping the display back into place.<br />
NOTE:<br />
If the LCD pins are inadvertently removed from the electronics featureboard,<br />
re-insert the pins before snapping the LCD display back into place.<br />
Security Switch<br />
Changes to the ERS system configuration can be prevented with the security<br />
(write protect) switch, which is located on the electronics featureboard of the<br />
ERS primary sensor. See Figure 2-8 for the location of the switch. Position the<br />
switch in the “ON” position to prevent accidental or deliberate change to the<br />
ERS system configuration.<br />
If the write protect switch is in the “ON” position, the ERS System will not<br />
accept any “writes” to its memory. Configuration changes, such as digital trim<br />
and reranging, cannot take place when the security switch is set to “ON.”<br />
Alarm Direction<br />
The alarm direction of the analog output of the ERS system is set by<br />
repositioning the alarm switch, which is located on the electronics<br />
featureboard of the primary transmitter. Position the switch in the “HI” position<br />
to have the ERS system go to high alarm in a fail condition, or position the<br />
switch in the “LO” position to have the system go to low alarm in a fail<br />
condition. See “Alarm and Saturation Levels” on page 3-5 for more<br />
information on alarm and saturation levels.
Reference Manual<br />
00809-0100-4804, Rev AA<br />
January 2011<br />
Figure 2-8. Alarm and Security<br />
Switches<br />
Connect Wiring and<br />
Power UP<br />
<strong>Rosemount</strong> <strong>3051S</strong> ERS System<br />
Switch Configuration Procedure<br />
To reposition the hardware switches, follow the procedure below:<br />
1. Do not remove the housing covers in explosive atmospheres when<br />
the circuit is live. If the ERS system is live, set the loop to manual and<br />
remove power.<br />
2. On the ERS primary sensor, remove the housing cover opposite the<br />
field terminal side.<br />
3. Reposition the alarm and security switches as desired, by using a<br />
small screwdriver.<br />
4. Reinstall the housing cover. Covers must be fully engaged so that the<br />
metal contacts metal in order to meet flameproof / explosion-proof<br />
requirements.<br />
Security<br />
Switch<br />
Alarm<br />
Switch<br />
Typical ERS System (Figure 2-9)<br />
1. Remove the housing cover labeled “Field Terminals” on both ERS<br />
sensors.<br />
2. Using the ERS Madison Cable (if ordered) or an equivalent 4-wire<br />
shielded assembly per the specifications detailed on page 2-14,<br />
connect the 1, 2, A, and B terminals between the two sensors per<br />
Figure 2-9.<br />
3. Connect the ERS system to the control loop by wiring the “+” and “–”<br />
PWR / COMM terminals of the ERS primary sensor to the positive<br />
and negative leads, respectively.<br />
4. Plug and seal all unused conduit connections.<br />
5. If applicable, install wiring with a drip loop. Arrange the drip loops so<br />
that the bottom is lower than the conduit connections and the<br />
transmitter housings.<br />
6. Reinstall and tighten the housing covers on both sensors so that<br />
metal contacts metal to meet explosion-proof requirements.<br />
2-13
<strong>Rosemount</strong> <strong>3051S</strong> ERS System<br />
2-14<br />
Reference Manual<br />
00809-0100-4804, Rev AA<br />
January 2011<br />
ERS System with Optional <strong>Remote</strong> Display and Interface (Figure 2-10<br />
and Figure 2-11)<br />
1. Remove the housing cover labeled “Field Terminals” on both ERS<br />
sensors and the remote housing.<br />
2. Using the ERS Madison Cable (if ordered) or an equivalent 4-wire<br />
shielded assembly per the specifications detailed on page 2-14,<br />
connect the 1, 2, A, and B terminals between the two sensors and<br />
remote housing in a “tree” (Figure 2-10) or daisy-chain (Figure 2-11)<br />
configuration.<br />
3. Connect the ERS system to the control loop by wiring the “+” and “–”<br />
PWR / COMM terminals of the remote housing to the positive and<br />
negative leads, respectively.<br />
4. Plug and seal all unused conduit connections.<br />
5. If applicable, install wiring with a drip loop. Arrange the drip loops so<br />
that the bottom is lower than the conduit connections and the<br />
transmitter housings.<br />
6. Reinstall and tighten all housing covers so that metal contacts metal<br />
to meet explosion-proof requirements.<br />
NOTE:<br />
I.S. barriers with inductive loads greater than 1 mH should not be used with<br />
the <strong>3051S</strong> ERS System and may cause the device to not function properly.<br />
ERS Cable Specifications<br />
• Cable Type: Recommend Madison 04ZZXLF015 cable. Other<br />
comparable cable may be used as long as it has independent dual<br />
twisted shielded pair wires with an outer shield. The Power wires (pin<br />
terminals 1 & 2) must be 22 AWG minimum and the communication<br />
wires (pin terminals A & B) must be 24 AWG minimum.<br />
• Maximum Cable Length: Up to 100 feet (30,5 meters), depending on<br />
cable capacitance<br />
• Cable Capacitance: The capacitance between the communication<br />
lines as wired must be less than 5000 picofarads total. This allows up<br />
to 50 picofarads per foot (163 picofarads / meter) for a 100 ft. cable.<br />
• Cable Outside Diameter: 0.270 in. (6.86 mm).<br />
4-20 mA Loop Wiring Specifications<br />
It is recommended to use twisted pair wiring. To ensure proper<br />
communication, use 24 AWG to 14 AWG wire, and do not exceed 5000 ft.<br />
(1500 meters).<br />
Surges / Transients<br />
The ERS system will withstand electrical transients of the energy level usually<br />
encountered in static discharges or induced switching transients. However,<br />
high-energy transients, such as those induced in wiring from nearby lightning<br />
strikes, can damage the ERS system.
Reference Manual<br />
00809-0100-4804, Rev AA<br />
January 2011<br />
<strong>Rosemount</strong> <strong>3051S</strong> ERS System<br />
Optional Transient Protection Terminal Block<br />
The transient protection terminal block can be ordered as an installed option<br />
(Option Code T1) or as a spare part to retrofit an existing <strong>3051S</strong> ERS System<br />
in the field. A lightning bolt symbol on a terminal block identifies it as having<br />
transient protection.<br />
NOTE:<br />
The transient terminal block is only available as an option on the Primary ERS<br />
sensor. When ordered and installed, a Primary ERS sensor with the transient<br />
terminal block will protect the entire ERS assembly including the Secondary<br />
ERS sensor.<br />
Power Supply Requirements<br />
The DC power supply should provide power with less than two percent ripple.<br />
The total loop resistance is the sum of the resistance from the signal leads<br />
and the load resistance of the controller, indicator, and related pieces. Note<br />
that the resistance of intrinsically safe barriers, if used, must be included.<br />
NOTE:<br />
A minimum loop resistance of 250 ohms is required to communicate with a<br />
Field Communicator. If a single power supply is used to power more than one<br />
<strong>3051S</strong> ERS system, the power supply used and circuitry common to the<br />
transmitters should not have more than 20 ohms of impedance at 1200 Hz.<br />
2-15
<strong>Rosemount</strong> <strong>3051S</strong> ERS System<br />
Figure 2-9. Wiring Diagram for<br />
Typical ERS System<br />
2-16<br />
Power Supply<br />
250 � Resistor needed for HART<br />
Communications<br />
+<br />
PWR/<br />
COMM_<br />
TEST<br />
WIRE TO<br />
ERS<br />
SECONDARY _<br />
B<br />
A<br />
1<br />
2<br />
1 2 A B<br />
WIRE TO ERS PRIMARY<br />
Field<br />
Communicator<br />
Reference Manual<br />
00809-0100-4804, Rev AA<br />
January 2011<br />
Wiring Legend<br />
Wire Terminal Connection<br />
Red 1<br />
Black 2<br />
White A<br />
Blue B
Reference Manual<br />
00809-0100-4804, Rev AA<br />
January 2011<br />
Figure 2-10. Wiring Diagram for<br />
ERS System with <strong>Remote</strong><br />
Display in “Tree” Configuration<br />
Power Supply<br />
250 � Resistor<br />
needed for HART<br />
Communications<br />
Field<br />
Communicator<br />
1 2 A B<br />
1 2 A B<br />
WIRE TO ERS PRIMARY<br />
+<br />
PWR/<br />
1<br />
COMM<br />
TEST _<br />
WIRE TO<br />
2 ERS<br />
SECONDARY _<br />
B<br />
A<br />
WIRE TO ERS PRIMARY<br />
<strong>Rosemount</strong> <strong>3051S</strong> ERS System<br />
Wiring Legend<br />
Wire Terminal Connection<br />
Red 1<br />
Black 2<br />
White A<br />
Blue B<br />
2-17
<strong>Rosemount</strong> <strong>3051S</strong> ERS System<br />
Figure 2-11. Wiring Diagram for<br />
ERS System with <strong>Remote</strong><br />
Display in “Daisy-Chain”<br />
Configuration<br />
2-18<br />
Power Supply<br />
250 � Resistor<br />
needed for HART<br />
Communications<br />
Field<br />
Communicator<br />
+<br />
PWR/<br />
1<br />
COMM<br />
TEST _<br />
WIRE TO<br />
2 ERS<br />
SECONDARY _<br />
B<br />
A<br />
1 2 A B 1 2 A B<br />
WIRE TO ERS PRIMARY<br />
WIRE TO ERS PRIMARY<br />
Reference Manual<br />
00809-0100-4804, Rev AA<br />
January 2011<br />
Wiring Legend<br />
Wire Terminal Connection<br />
Red 1<br />
Black 2<br />
White A<br />
Blue B
Reference Manual<br />
00809-0100-4804, Rev AA<br />
January 2011<br />
<strong>Rosemount</strong> <strong>3051S</strong> ERS System<br />
Grounding Loop Wiring Grounding<br />
Do not run signal wiring in conduit or open trays with power wiring or near<br />
heavy electrical equipment. Ground the shield of the signal wiring at any one<br />
point on the signal loop. See Figure 2-12. The negative terminal of the power<br />
supply is a recommended grounding point.<br />
Figure 2-12. Loop Wire<br />
Grounding (ERS Primary<br />
Sensor)<br />
NOTE:<br />
Grounding the transmitter case using the threaded conduit connection may<br />
not provide a sufficient ground. The transient protection terminal block (Option<br />
Code T1) will not provide transient protection unless the transmitter case is<br />
properly grounded. Do not run transient protection ground wire with signal<br />
wiring; the ground wire may carry excessive current if a lightning strike<br />
occurs.<br />
Positive<br />
Negative<br />
Minimize<br />
Distance<br />
Insulate Shield<br />
Connect Shield<br />
Back to the Power<br />
Supply Negative<br />
Terminal<br />
Trim Shield and<br />
Insulate<br />
2-19
<strong>Rosemount</strong> <strong>3051S</strong> ERS System<br />
Figure 2-13. Shield Grounding<br />
2-20<br />
Reference Manual<br />
00809-0100-4804, Rev AA<br />
January 2011<br />
Shield Grounding<br />
Connect the shield from the Madison Cable assembly to each housing case<br />
for the applicable wiring configuration as shown in Figure 2-13.<br />
1 2 A B<br />
WIRE TO ERS PRIMARY<br />
1 2 A B<br />
WIRE TO ERS PRIMARY<br />
1 2 A B<br />
WIRE TO ERS PRIMARY<br />
Cable Shield<br />
Cable Shield<br />
1<br />
WIRE TO<br />
2 ERS<br />
SECONDARY<br />
B<br />
A<br />
Cable Shield<br />
1 2 A B<br />
WIRE TO ERS PRIMARY<br />
1<br />
WIRE TO<br />
2 ERS<br />
SECONDARY<br />
B<br />
A<br />
1<br />
WIRE TO<br />
2 ERS<br />
SECONDARY<br />
B<br />
A<br />
1 2 A B<br />
WIRE TO ERS PRIMARY
Reference Manual<br />
00809-0100-4804, Rev AA<br />
January 2011<br />
ROSEMOUNT<br />
MANIFOLDS<br />
Figure 2-14. <strong>Rosemount</strong> 305<br />
Integral Manifolds<br />
Figure 2-15. <strong>Rosemount</strong> 304<br />
Conventional Manifolds<br />
<strong>Rosemount</strong> <strong>3051S</strong> ERS System<br />
Transmitter Case<br />
Always ground the transmitter case in accordance with national and local<br />
electrical codes. The most effective transmitter case grounding method is a<br />
direct connection to earth ground with minimal impedance (< 1 ohm).<br />
Methods for grounding the transmitter case include:<br />
• Internal Ground Connection: The Internal Ground Connection screw is<br />
inside the terminal side of the electronics housing. The screw is<br />
identified by a ground symbol ( ), and is standard on all <strong>3051S</strong><br />
ERS transmitters.<br />
• External Ground Connection: The External Ground Connection is on<br />
the outside of the SuperModule housing. The connection is identified<br />
by a ground symbol ( ).<br />
The <strong>Rosemount</strong> 305 Integral Manifold assembles directly to an ERS sensor,<br />
eliminating the need for the flange. The 305 is available in two designs:<br />
Coplanar (bottom process connections) and Traditional (side process<br />
connections).<br />
305 COPLANAR<br />
The <strong>Rosemount</strong> 304 Conventional Manifold assembles directly to an<br />
instrument flange for easy servicing and retrofitting. The 304 manifold is<br />
available in two basic styles: Traditional (flange x flange and flange x pipe)<br />
and Wafer.<br />
304 TRADITIONAL 304 WAFER<br />
305 TRADITIONAL<br />
The <strong>Rosemount</strong> 306 Manifold assembles directly to an In-Line style<br />
transmitter and is available with male or female 1 /2-in. NPT process<br />
connections.<br />
2-21
<strong>Rosemount</strong> <strong>3051S</strong> ERS System<br />
Figure 2-16. <strong>Rosemount</strong> 306<br />
In-Line Manifold<br />
<strong>Rosemount</strong> 305 Manifold<br />
Installation Procedure<br />
2-22<br />
306 IN-LINE<br />
Reference Manual<br />
00809-0100-4804, Rev AA<br />
January 2011<br />
To install a 305 Integral Manifold to a <strong>3051S</strong> ERS sensor:<br />
1. Inspect the PTFE sensor module o-rings. If the o-rings are<br />
undamaged, reusing them is recommended. If the o-rings are<br />
damaged (if they have nicks or cuts, for example), replace them with<br />
new o-rings.<br />
NOTE:<br />
If replacing the o-rings, be careful not to scratch or deface the o-ring grooves<br />
or the surface of the isolating diaphragm when removing the damaged<br />
o-rings.<br />
2. Install the Integral Manifold on the sensor module process<br />
connection. Use the four manifold bolts for alignment. Finger tighten<br />
the bolts, then tighten the bolts incrementally in a cross pattern to final<br />
torque value. See “Flange Bolts” on page 2-8 for complete bolt<br />
installation information and torque values. When fully tightened, the<br />
bolts should extend through the top of the SuperModule housing.<br />
3. If the PTFE sensor module o-rings have been replaced, the flange<br />
bolts should be re-tightened after installation to compensate for<br />
seating of the o-rings.<br />
4. If applicable, install flange adapters on the process end of the<br />
manifold using the 1.75-in. flange bolts supplied with the <strong>3051S</strong> ERS<br />
sensor.<br />
<strong>Rosemount</strong> 304 Manifold<br />
Installation Procedure To install a 304 Conventional Manifold to a <strong>3051S</strong> ERS sensor:<br />
1. Align the 304 Manifold with the sensor flange. Use the four manifold<br />
bolts for alignment.<br />
2. Finger tighten the bolts, then tighten the bolts incrementally in a cross<br />
pattern to final torque value. See “Flange Bolts” on page 2-8 for<br />
complete bolt installation information and torque values. When fully<br />
tightened, the bolts should extend through the top of the sensor<br />
module assembly bolt hole but must not contact the transmitter<br />
housing.<br />
3. If applicable, install flange adapters on the process end of the<br />
manifold using the 1.75-in. flange bolts supplied with the ERS sensor.
Reference Manual<br />
00809-0100-4804, Rev AA<br />
January 2011<br />
<strong>Rosemount</strong> 306 Manifold<br />
Installation Procedure<br />
Manifold Valve<br />
Configurations<br />
<strong>Rosemount</strong> <strong>3051S</strong> ERS System<br />
To install a 306 In-Line Manifold to a <strong>3051S</strong> ERS sensor:<br />
1. Place the <strong>3051S</strong> ERS sensor into holding fixture.<br />
2. Apply appropriate thread paste or tape to the threaded instrument<br />
end of the manifold.<br />
3. Count the total threads on the manifold before starting assembly.<br />
4. Start turning the manifold by hand into the process connection on the<br />
transmitter. Be sure the thread tape does not strip.<br />
5. Wrench-tighten the manifold into the process connection. The<br />
minimum torque value is 425 in-lbs.<br />
6. Count how many threads are still showing. The minimum thread<br />
engagement is three revolutions.<br />
7. Subtract the number of threads showing (after tightening) from the<br />
total threads to calculate the revolutions engaged. Further tighten<br />
until a minimum of 3 rotations is achieved.<br />
8. For block and bleed manifold, verify the bleed screw is installed and<br />
tightened. For two-valve manifold, verify the vent plug is installed and<br />
tightened.<br />
9. Leak-check assembly to maximum pressure range of transmitter.<br />
Block-and-Bleed Manifold<br />
The block-and-bleed configuration is available on the <strong>Rosemount</strong> 306<br />
Manifold for use with In-Line gage and absolute pressure transmitters. A<br />
single block valve provides instrument isolation, and a plug provides<br />
draining/vent capabilities.<br />
Transmitter<br />
Isolate<br />
<strong>Process</strong><br />
Bleed Screw<br />
2-23
<strong>Rosemount</strong> <strong>3051S</strong> ERS System<br />
2-24<br />
Reference Manual<br />
00809-0100-4804, Rev AA<br />
January 2011<br />
Two-Valve Manifold<br />
The two-valve configuration is available on the <strong>Rosemount</strong> 304, 305, and 306<br />
Manifolds for use with gage and absolute pressure transmitters. A block valve<br />
provides instrument isolation, and a drain/vent valve allows for venting,<br />
draining, or calibration.<br />
Test<br />
(Plugged)<br />
Transmitter<br />
Isolate<br />
<strong>Process</strong><br />
304 2-Valve Configuration<br />
Test<br />
/Vent<br />
Isolate<br />
Transmitter<br />
<strong>Process</strong><br />
305 & 305 Valve Configuration<br />
Test<br />
/Vent
Reference Manual<br />
00809-0100-4804, Rev AA<br />
January 2011<br />
Section 3 Configuration<br />
<strong>Rosemount</strong> <strong>3051S</strong> ERS System<br />
Overview . . . . . . . . . . . . . . . . . . . . . . . . . . . . . . . . . . . . . . . page 3-1<br />
Safety Messages . . . . . . . . . . . . . . . . . . . . . . . . . . . . . . . . . page 3-1<br />
Wiring Diagrams . . . . . . . . . . . . . . . . . . . . . . . . . . . . . . . . . page 3-2<br />
Basic Setup . . . . . . . . . . . . . . . . . . . . . . . . . . . . . . . . . . . . . page 3-3<br />
Additional Configuration . . . . . . . . . . . . . . . . . . . . . . . . . . page 3-6<br />
OVERVIEW This section contains information on commissioning and tasks that should be<br />
performed on the bench prior to installation.<br />
Instructions for performing configuration functions are given for a handheld<br />
Field Communicator and AMS version 10.5. For convenience, Field<br />
Communicator fast key sequences are labeled “Fast Keys” for each software<br />
function below the appropriate headings.<br />
Example Software Function<br />
Fast Keys 1, 2, 3, etc.<br />
SAFETY MESSAGES Procedures and instructions in this section may require special precautions to<br />
ensure the safety of the personnel performing the operation. Information that<br />
raises potential safety issues is indicated with a warning symbol ( ). Refer to<br />
the following safety messages before performing an operation preceded by<br />
this symbol.<br />
3-1
<strong>Rosemount</strong> <strong>3051S</strong> ERS System<br />
Warnings<br />
Setting the Loop to<br />
Manual<br />
3-2<br />
Reference Manual<br />
00809-0100-4804, Rev AA<br />
January 2011<br />
Failure to follow these installation guidelines could result in death or serious injury:<br />
• Make sure only qualified personnel perform the installation<br />
Explosions could result in death or serious injury:<br />
• Do not remove the transmitter covers in explosive atmospheres when the circuit is live.<br />
• Before connecting a Field Communicator in an explosive atmosphere, make sure the<br />
instruments in the loop are installed in accordance with intrinsically safe or non-incendive<br />
field wiring practices.<br />
• Both transmitter covers must be fully engaged to meet flameproof / explosion-proof<br />
requirements.<br />
• Verify that the operating atmosphere of the transmitter is consistent with the appropriate<br />
hazardous location certifications.<br />
Electrical shock could cause death or serious injury. If the ERS system is installed in a high-voltage<br />
environment and a fault or installation error occurs, high voltage may be present on the transmitter<br />
leads and terminals:<br />
• Use extreme caution when making contact with the leads and terminals.<br />
<strong>Process</strong> leaks could result in death or serious injury:<br />
• Install and tighten all four flange bolts before applying pressure.<br />
• Do not attempt to loosen or remove flange bolts while the transmitter is in service.<br />
• Replacement equipment or spare parts not approved by <strong>Emerson</strong> <strong>Process</strong> Management<br />
for use as spare parts could reduce the pressure retaining capabilities of the transmitter<br />
and may render the instrument dangerous.<br />
• Use only bolts supplied or sold by <strong>Emerson</strong> <strong>Process</strong> Management as spare parts.<br />
Improper assembly of manifolds to traditional flange can damage the device:<br />
• For the safe assembly of the manifold to the transmitter flange, bolts must break the back<br />
plane of the flange web (i.e. bolt hole) but must not contact the sensor module.<br />
Static electricity can damage sensitive components:<br />
• Observe safe handling precautions for static-sensitive components.<br />
Whenever sending or requesting data that would disrupt the loop or change<br />
the output of the transmitter, set the process application loop to manual. The<br />
Field Communicator or AMS will prompt you to set the loop to manual when<br />
necessary. Acknowledging this prompt does not set the loop to manual. The<br />
prompt is only a reminder; set the loop to manual as a separate operation.<br />
WIRING DIAGRAMS Connect a Field Communicator or AMS using a wiring configuration as shown<br />
in Figure 2-9, Figure 2-10, or Figure 2-11. The Field Communicator or AMS<br />
may be connected at “PWR / COMM” on the terminal block of the ERS<br />
primary transmitter, across the load resistor, or at any termination point in the<br />
signal loop.<br />
The Field Communicator or AMS will search for a HART-compatible device<br />
and indicate when the connection is made. If the Field Communicator or AMS<br />
fail to connect, it indicates that no device was found. If this occurs, refer to<br />
Section 5: Troubleshooting.
Reference Manual<br />
00809-0100-4804, Rev AA<br />
January 2011<br />
<strong>Rosemount</strong> <strong>3051S</strong> ERS System<br />
BASIC SETUP It is recommended that the following items are verified and configured to<br />
ensure the proper functionality of the ERS system.<br />
Device Tagging Tag<br />
Fast Keys 2, 1, 1, 1<br />
An 8 character free-form text field that can be used to uniquely identify the<br />
device.<br />
Long Tag<br />
A 32 character free-form text field that can be used to uniquely identify the<br />
device. Long Tag is only supported by host systems that are HART 6 or<br />
higher.<br />
Descriptor<br />
A 16 character free-form text field that can be used to further describe the<br />
device or application.<br />
Message<br />
A 32 character free-form text field that can be used to save a message or<br />
memo about the device or application.<br />
Date<br />
A formatted field (mm/dd/yyyy) available to enter and store a date (such as<br />
the day of installation or last calibration).<br />
Units of Measure The Differential Pressure, P HI Pressure, and P LO Pressure measurements<br />
Fast Keys 2, 1, 1, 2, 1<br />
Table 3-1. Pressure Units of<br />
Measure<br />
can be independently configured for any of the units shown in Table 3-1.<br />
The PHI and PLO Module Temperatures can be independently configured for<br />
Fahrenheit or Celsius.<br />
inH2O @ 68 °F<br />
Pressure Units of Measure<br />
bar Torr<br />
inHg @ 0 °C mbar Atm<br />
ftH2O @ 68 °F g/cm 2<br />
MPa<br />
mmH2O @ 68 °F kg/cm2 inH2O at 4 °C<br />
mmHg @ 0 °C Pa mmH2O at 4 °C<br />
Psi kPa in H2O @ 60 °F<br />
Damping The damping software feature introduces a delay in processing which<br />
Fast Keys 2, 1, 1, 2, 2<br />
increases the response time of the measurement, smoothing variations in<br />
output readings caused by rapid input changes. Determine the appropriate<br />
damping setting based on the necessary response time, signal stability, and<br />
other requirements of your application.<br />
Damping can be set independently for the Differential Pressure, PHI Pressure,<br />
and PLO Pressure measurements. Damping values can be set anywhere from<br />
0 to 60 seconds.<br />
3-3
<strong>Rosemount</strong> <strong>3051S</strong> ERS System<br />
Variable Mapping Select which ERS parameters to assign to each HART variable.<br />
3-4<br />
Fast Keys 2, 1, 1, 3<br />
Reference Manual<br />
00809-0100-4804, Rev AA<br />
January 2011<br />
Primary Variable<br />
The parameter assigned to the HART Primary Variable controls the 4-20 mA<br />
Analog Output. The following ERS parameters can be assigned to the<br />
Primary Variable:<br />
• Differential Pressure<br />
• PHI Pressure<br />
• PLO Pressure<br />
• Scaled Variable<br />
2 nd , 3 rd , and 4 th Variables<br />
The 2 nd , 3 rd , and 4 th Variables can be accessed digitally through a HART host.<br />
A HART-to-Analog converter, such as the <strong>Rosemount</strong> 333 Tri-Loop, can also<br />
be used to convert each of the variables to a separate 4-20 mA analog output<br />
signal. These variables can also be accessed wirelessly by using a 775<br />
SmartWireless THUM Adapter. The following ERS parameters can be<br />
assigned to the 2nd, 3rd, and 4th Variables:<br />
• Differential Pressure<br />
• PHI Pressure<br />
• PLO Pressure<br />
• PHI Module Temperature<br />
• PLO Module Temperature<br />
• Scaled Variable<br />
Analog Output Configure the Lower and Upper Range Values, which correspond to the 4 mA<br />
Fast Keys 2, 1, 1, 4<br />
and 20 mA Analog Output range points. The 4 mA point represents the 0% of<br />
span reading, and the 20 mA point represents the 100% of span reading.<br />
The Analog Output range points can also be set using the Zero and Span<br />
adjustment buttons located on the electronics of the ERS Primary Transmitter<br />
(see Figure 3-1) and a pressure source.<br />
1. Using a pressure source with an accuracy three to ten times the desired<br />
calibrated accuracy, apply a pressure equivalent to the lower range value<br />
to the PHI transmitter.<br />
2. Push and hold the zero adjustment button for at least two seconds but no<br />
longer than ten seconds.<br />
3. Apply a pressure equivalent to the upper range value to the PHI transmitter.<br />
4. Push and hold the span adjustment button for at least two seconds but<br />
no longer than ten seconds.
Reference Manual<br />
00809-0100-4804, Rev AA<br />
January 2011<br />
Figure 3-1. Zero and Span<br />
Buttons<br />
Alarm and Saturation<br />
Levels<br />
Fast Keys 2, 1, 1, 5<br />
Table 3-2. Alarm and Saturation<br />
Values<br />
Zero<br />
<strong>Rosemount</strong> <strong>3051S</strong> ERS System<br />
Span<br />
The <strong>3051S</strong> ERS system automatically and continuously performs<br />
self-diagnostic routines. If a self-diagnostic routine detects a failure, the ERS<br />
system will drive the output to the configured alarm value that is based on the<br />
position of the failure mode alarm switch (see Configure Security and Alarm<br />
on page 2-13). The ERS system will also drive the output to configured<br />
saturation values if the applied pressure goes outside the 4-20 mA range<br />
values.<br />
The <strong>3051S</strong> ERS system has three options for configuring the failure mode<br />
alarm and saturation levels:<br />
NOTE<br />
The ERS system will drive the output to alarm level (high or low) if the<br />
pressure applied to either sensor is outside of the LRL or URL limits.<br />
<strong>Rosemount</strong> (Standard) Alarm and Saturation Values<br />
Switch Position Saturation Level Alarm Level<br />
Low 3.9 mA � 3.75 mA<br />
High 20.8 mA � 21.75 mA<br />
NAMUR-Compliant Alarm and Saturation Values<br />
Switch Position Saturation Level Alarm Level<br />
Low 3.8 mA � 3.6 mA<br />
High 20.5 mA � 22.5 mA<br />
Custom Alarm and Saturation Values<br />
Switch Position Saturation Level Alarm Level<br />
Low 3.7 mA — 3.9 mA 3.54 mA — 3.8 mA<br />
High 20.1 mA — 21.5 mA 20.2 mA — 23.0 mA<br />
Additional considerations when using Custom Alarm and Saturation Values:<br />
• Low alarm must be less than low saturation<br />
• High alarm must be higher than high saturation<br />
• Alarm and saturation levels must be separated by at least 0.1 mA.<br />
3-5
<strong>Rosemount</strong> <strong>3051S</strong> ERS System<br />
ADDITIONAL<br />
CONFIGURATION<br />
3-6<br />
Reference Manual<br />
00809-0100-4804, Rev AA<br />
January 2011<br />
The following items are considered optional and may be configured as<br />
needed. Refer to Appendix B: for the full Field Communicator menu tree.<br />
Local Display A local display is available as an orderable option on the ERS Primary<br />
Fast Keys 2, 1, 3<br />
Table 3-3. Available Parameters<br />
for Local Display<br />
Transmitter. The display will show a 0-100% scaled bar graph, the selected<br />
measurements from Table 3-3, and any diagnostic or error messages. At least<br />
one parameter from Table 3-3 must be selected. If more than one item is<br />
selected, the display will scroll through the selected parameters, showing<br />
each for three seconds.<br />
Burst Mode When configured for burst mode, ERS provides faster digital communication<br />
Fast Keys 2, 2, 5, 3<br />
Table 3-4. Burst Command<br />
Options<br />
Available Parameters for Local Display<br />
Differential Pressure PHI Module Temperature Output (% of Range)<br />
PHI Pressure PLO Module Temperature<br />
PLO Pressure Scaled Variable<br />
from the ERS assembly to the control system by eliminating the time required<br />
for the control system to request information from the ERS assembly.<br />
When in burst mode, the ERS system will continue to output a 4-20 mA<br />
analog signal. Because the HART protocol features simultaneous digital and<br />
analog data transmission, the analog value can drive other equipment in the<br />
loop while the control system is receiving the digital information. Burst mode<br />
applies only to the transmission of dynamic data (process variables in<br />
engineering units, primary variable in percent of span, and the analog output<br />
reading), and does not affect the way other transmitter data is accessed.<br />
Access to information that is not burst can be obtained through the normal<br />
poll/response method of HART communication. A Field Communicator, AMS,<br />
or the control system may request any of the information that is normally<br />
available while the ERS system is in burst mode.<br />
Burst Mode Configuration<br />
To have the ERS system configured to communicate in burst mode:<br />
• Set the Burst Mode parameter to “on.”<br />
• Select a Burst Option from Table 3-4 below. This parameter determines<br />
what information is communicated through burst mode.<br />
HART Command Burst Option Description<br />
1 PV Primary Variable<br />
2 % range/current Percent of range and mA output<br />
3 Dyn vars/current All process variables and mA output<br />
9 Devices vars w/ status Burst variables and status information<br />
33 Device variables Burst variables<br />
NOTE:<br />
If using an ERS system with the <strong>Rosemount</strong> 333 HART Tri-Loop, the burst<br />
option should be set to “Dyn vars/current.”
Reference Manual<br />
00809-0100-4804, Rev AA<br />
January 2011<br />
Multidrop<br />
Communication<br />
Fast Keys 2, 2, 5, 2<br />
Figure 3-2. Typical Multidrop<br />
Network<br />
HART<br />
Modem<br />
<strong>Rosemount</strong> <strong>3051S</strong> ERS System<br />
Burst Variable Slot Definition<br />
If either “Device vars w/ status” or “Device Variables” is selected as the Burst<br />
Option, you will need to configure which variables are communicated in Burst<br />
Mode. This is accomplished by assigning a variable to a Burst Slot. ERS has<br />
four available Burst Slots for burst communication.<br />
The HART protocol allows several transmitters to communicate digitally on a<br />
single transmission line when wired in a Multidrop network. If using an ERS<br />
system in a multi-drop network, the connection to the network is made<br />
through the Primary Sensor as shown in Figure 3-2.<br />
NOTE:<br />
Figure 3-2 shows a typical multidrop network. This figure is not intended as an<br />
installation diagram.<br />
Communication between the host and the transmitters takes place digitally,<br />
and the analog output on each transmitter is deactivated.<br />
NOTE:<br />
A transmitter in multidrop mode with “Loop Current Mode” disabled has the<br />
analog output fixed at 4 mA.<br />
Power<br />
Supply<br />
ERS<br />
System<br />
3-7
<strong>Rosemount</strong> <strong>3051S</strong> ERS System<br />
3-8<br />
Reference Manual<br />
00809-0100-4804, Rev AA<br />
January 2011<br />
Enabling Multidrop Configuration<br />
To configure an ERS system to be part of a multidrop network:<br />
1. Assign a unique address to the ERS system. For a HART 5 system, the<br />
valid address range is 1-15. For systems that are HART 6 or above, the<br />
valid address range is 1-63. All <strong>Rosemount</strong> transmitters are shipped<br />
from the factory with the default address of zero (0).<br />
2. Disable “Loop Current Mode.” This will cause the analog output of the<br />
ERS system to be fixed at 4 mA.<br />
NOTE:<br />
When an ERS system is configured for multidrop communication, a failure or<br />
alarm condition will no longer be indicated through the Analog Output. Failure<br />
signals in multidropped transmitters are communicated digitally through<br />
HART messages.<br />
Disabling Multidrop Configuration<br />
To configure an ERS system with the factory default point-to-point<br />
communication:<br />
1. Assign the ERS system with an address of zero (0).<br />
2. Enable “Loop Current Mode.”<br />
Scaled Variable Scaled Variable can be used to convert the Differential Pressure (DP) that is<br />
Fast Keys 2, 2, 3<br />
calculated by the ERS system into an alternative measurement such as level,<br />
mass, or volume. For example, an ERS system that measures 0 – 500 mbar<br />
of DP can be configured to output a level measurement of 0 – 5 meters. The<br />
Scaled Variable calculation can be shown on the LCD display and can also be<br />
assigned to the 4-20 mA output.<br />
Anywhere from two to 20 points can be used to define the mathematical<br />
relationship between the measured DP and the calculated Scaled Variable.<br />
Configuring Scaled Variable to Calculate Level<br />
Fast Keys 2, 2, 3, 5, 1<br />
Because Level can be linearly derived from DP, only two Scaled Variable<br />
points are required to configure ERS to calculate a Level measurement. The<br />
steps required to configure Scaled Variable for a Level application are<br />
highlighted below:<br />
1. Enter in a text string (up to five characters: A-Z, -, %, /, *, and “space”) to<br />
define the unit of measure for the scaled output. Examples include<br />
METER, FEET, or INCH.<br />
2. Enter the minimum DP (in engineering units) that the ERS system will<br />
measure. This value will usually be zero (0).<br />
3. Enter the Scaled Variable value (in terms of the scaled units defined in<br />
Step 1) that corresponds to the minimum DP from Step 2.<br />
4. Enter the maximum DP that the ERS system will measure.<br />
5. Enter the Scaled Variable value that corresponds to the DP from Step 4.<br />
6. To have the 4-20 mA signal of the ERS system output the Scaled<br />
Variable measurement, map Scaled Variable to the HART Primary<br />
Variable and configure the Upper and Lower Range Values.
Reference Manual<br />
00809-0100-4804, Rev AA<br />
January 2011<br />
Figure 3-3. Scaled Variable -<br />
Level Example<br />
Specific Gravity<br />
= 0.94<br />
4.5 feet<br />
1.5 feet<br />
<strong>Rosemount</strong> <strong>3051S</strong> ERS System<br />
Scaled Variable Configuration<br />
1. Scaled Units FEET METER<br />
2. DP 1 (Minimum DP) 0 (in. H 2 0) 0 (mmH 2 0)<br />
3. Scaled 1 (Level at Min. DP) 1.5 (feet) 0.46 (meters)<br />
4. DP 2 (DP at Max Level) 50.76 (in. H 20) 1289 (mmH 20)<br />
5. Scaled 2 (Max Level) 6.0 (feet) 1.83 (meters)<br />
6. Primary Variable Scaled Variable<br />
LRV (4 mA) 1.5 (feet) 0.46 (meters)<br />
URV (20 mA) 6.0 (feet) 1.83 (meters)<br />
Configuring Scaled Variable to Calculate Mass or Volume<br />
Fast Keys 2, 2, 3, 5, 1<br />
To derive a mass or volume calculation from a DP measurement, more than<br />
two Scaled Variable points may be required depending on the tank shape and<br />
geometry. ERS supports three different methods for configuring Scaled<br />
Variable for mass or volume applications:<br />
• Direct: manually configure Scaled Variable using anywhere from two to<br />
20 points.<br />
• Tank Formulas: Scaled Variable will automatically be configured by<br />
inputting the tank shape, tank geometry, and specific gravity of the<br />
process.<br />
• Strapping Table: Scaled Variable will automatically be configured by<br />
inputting a traditional “Level vs. Volume” strapping table.<br />
Direct Method<br />
The steps required to configure Scaled Variable for a Mass or Volume<br />
application using the Direct Method are highlighted below:<br />
1. Enter in a text string (up to 5 characters: A-Z, -, %, /, *, and “space”) to<br />
define the unit of measure for the scaled output. Examples include<br />
GALNS, POUND, or LITER.<br />
2. Define the number of Scaled Variable points that will be configured (valid<br />
range = 2 – 20).<br />
3. Enter the first DP value (in engineering units) and the corresponding<br />
Scaled Variable value.<br />
4. Repeat Step #3 for the number of Scaled Variable points defined in Step<br />
#2.<br />
3-9
<strong>Rosemount</strong> <strong>3051S</strong> ERS System<br />
Figure 3-4. Scaled Variable -<br />
Direct Method Example<br />
3-10<br />
Reference Manual<br />
00809-0100-4804, Rev AA<br />
January 2011<br />
NOTE:<br />
The values entered for each successive DP and Scaled Variable pair must be<br />
greater than or equal to the previous pair.<br />
5. The ERS system will not be able to calculate mass or volume if the<br />
process is below the PHI pressure tap. If the Scaled Variable<br />
configuration needs to be adjusted to account for the mounting location<br />
of PHI sensor, you can enter in an offset:<br />
a. No Offset: the Scaled Variable configuration defined in Steps 3 and 4<br />
already accounts for the mounting location of the PHI transmitter.<br />
b. Offset A: Adjust the Scaled Variable configuration by providing the<br />
height of the PHI pressure tap (relative to the bottom of the vessel) and<br />
the specific gravity of the process.<br />
c. Offset B: Adjust the Scaled Variable configuration by defining how<br />
much mass or volume is located below the PHI pressure tap (this will<br />
define how much scaled output is present when the ERS system is<br />
reading “0 DP”).<br />
6. If an offset was used in step 5, a new Scaled Variable configuration will<br />
automatically be created which accounts for the mounting location of the<br />
PHI transmitter.<br />
50 in. H20 = 300 GALNS<br />
20 in. H20 = 50 GALNS<br />
15 in. H20 = 30 GALNS<br />
0 in. H20 = 15 GALNS<br />
Scaled Variable Configuration<br />
1. Scaled Units GALNS (LITER)<br />
2. # of Scaled Points 4<br />
3. DP 1<br />
Scaled 1<br />
4. DP 2<br />
Scaled 2<br />
DP 3<br />
Scaled 3<br />
DP 4<br />
Scaled 4<br />
5. Offset No Offset<br />
0 inH 20 (0 mmH 20)<br />
15 GALNS (57 LITER)<br />
15 inH 2 0 (381 mmH 2 0)<br />
30 GALNS (114 LITER)<br />
20 inH 20 (508 mmH 20)<br />
50 GALNS (189 LITER)<br />
50 inH 20 (1270 mmH 20)<br />
300 GALNS (1136<br />
LITER)<br />
6. Primary Variable Scaled Variable<br />
LRV (4 mA) 15 GALNS (57 LITER)<br />
URV (20 mA) 50 GALNS (189 LITER)
Reference Manual<br />
00809-0100-4804, Rev AA<br />
January 2011<br />
Figure 3-5. Supported Tank<br />
Shapes for “Tank Formula”<br />
Configuration Method<br />
T<br />
T<br />
R<br />
R<br />
L<br />
Horizontal Cylinder<br />
L<br />
<strong>Rosemount</strong> <strong>3051S</strong> ERS System<br />
Tank Formula Method<br />
The tank formula method for configuring Scaled Variable can be used if the<br />
ERS system is installed on one of the types of tanks shown in Figure 3-5. The<br />
steps for using the Tank Formula method are described below:<br />
1. Enter in a text string (up to 5 characters: A-Z, -, %, /, *, and “space”) to<br />
define the unit of measure for the scaled output. Examples include<br />
GALNS, POUND, or LITER.<br />
2. Select the type of tank for the ERS application (refer to Figure 3-5).<br />
3. Define the following information about the tank:<br />
a. Units of measure used for tank dimensions<br />
b. Tank length (L) (not applicable for spherical tanks)<br />
c. Tank radius (R)<br />
d. Location of PHI pressure tap (T)<br />
e. Maximum capacity of vessel (in terms of unit of measure defined in<br />
Step 1)<br />
f. Specific gravity of process fluid<br />
4. A Scaled Variable configuration will automatically be generated based on<br />
the information from Step 3. Verify and modify the Scaled Variable<br />
configuration if necessary.<br />
5. To have the 4-20 mA signal of the ERS system output the Scaled<br />
Variable measurement, map Scaled Variable to the HART Primary<br />
Variable and configure the Upper and Lower Range Values.<br />
T<br />
L<br />
R<br />
Horizontal Bullet Vertical Bullet Vertical Cylinder Sphere<br />
L<br />
R<br />
T<br />
T<br />
R<br />
3-11
<strong>Rosemount</strong> <strong>3051S</strong> ERS System<br />
3-12<br />
Reference Manual<br />
00809-0100-4804, Rev AA<br />
January 2011<br />
Strapping Table Method<br />
Scaled Variable can also be configured by inputting a traditional “level vs.<br />
volume” strapping table. The steps for using the Strapping Table method are<br />
described below:<br />
1. Select the unit of measure that the Level data will be inputted.<br />
2. Enter in a text string (up to 5 characters: A-Z, -, %, /, *, and “space”) to<br />
define the unit of measure for the volume data. Examples include<br />
GALNS or LITER.<br />
3. Define the specific gravity of the process fluid.<br />
4. Define the number of strapping table points that will be inputted.<br />
5. Enter the first Level value (in engineering units) and the corresponding<br />
Volume value.<br />
6. Repeat Step 5 for the number of strapping table points defined in Step 4.<br />
7. A Scaled Variable configuration will automatically be generated based on<br />
the provided strapping table information. Verify and modify the Scaled<br />
Variable configuration if necessary.<br />
8. To have the 4-20 mA signal of the ERS system output the Scaled<br />
Variable measurement, map Scaled Variable to the HART Primary<br />
Variable and configure the Upper and Lower Range Values.<br />
Module Assignments The ERS system calculates DP by taking the pressure measurement from the<br />
Fast Keys 2, 2, 6<br />
PHI transmitter and subtracting the pressure measurement from the PLO transmitter.<br />
ERS transmitters are shipped from the factory preconfigured such that the<br />
primary sensor (4-20 loop termination and optional LCD) is assigned as the<br />
PHI device, and the secondary sensor (junction box housing) is assigned as<br />
the PLO device. In installations where the primary transmitter is installed on<br />
the PLO process connection (such as at the top of a tank), these designations<br />
may be switched electronically using a Field communicator.<br />
Changing the PHI and PLO Module Assignments<br />
1. View the neck label on each ERS transmitter and note the serial number<br />
and pressure location (PHI vs. PLO) of the transmitter.<br />
2. Using a Field communicator, view the serial number and the assigned<br />
pressure location for either “Module 1” or “Module 2.”<br />
3. If the currently assigned PHI / PLO designations do not reflect the actual<br />
installation as recorded from Step 1, change the PHI / PLO assignments<br />
using either of the following commands:<br />
• Set Module 1 = PHI , Module 2 = PLO • Set Module 1 = PLO, Module 2 = PHI View the DP measurement from the ERS system and verify the calculation is<br />
of positive magnitude. If the DP measurement is of negative magnitude, use<br />
the other Module Assignment command from Step 3.
Reference Manual<br />
00809-0100-4804, Rev AA<br />
January 2011<br />
Figure 3-6. Example of How to<br />
Change the P HI and P LO Module<br />
Assignments<br />
1<br />
P LO Sensor<br />
Serial Number 11223344<br />
DP = P HI - P LO<br />
<strong>Rosemount</strong> <strong>3051S</strong> ERS System<br />
<strong>Process</strong> Alerts <strong>Process</strong> alerts allow for the configuration of the ERS system to output a HART<br />
Fast Keys 2, 3<br />
P HI Sensor<br />
Serial Number 44332211<br />
2<br />
3<br />
message when a parameter (such as the measured DP) exceeds a<br />
user-defined operating window. An alert will be communicated to the HART<br />
host (such as a Field communicator or AMS), when polled, and on the LCD<br />
display of the ERS system. The alert will reset once the value returns within<br />
range.<br />
<strong>Process</strong> alerts may be configured for the following parameters:<br />
• Differential Pressure<br />
• PHI Pressure<br />
• PLO Pressure<br />
• PHI Module Temperature<br />
• PLO Module Temperature<br />
Configuring <strong>Process</strong> Alerts<br />
1. Select a parameter for which the process alert will be configured.<br />
2. Set the Alert Mode to “enable.”<br />
3. Define the Low Alert Value. If the measured value for the parameter goes<br />
below the Low Alert Value, an alert message will be generated.<br />
4. Define the High Alert Value. If the measured value for the parameter<br />
goes above the High Alert Value, an alert message will be generated.<br />
3-13
<strong>Rosemount</strong> <strong>3051S</strong> ERS System<br />
3-14<br />
Reference Manual<br />
00809-0100-4804, Rev AA<br />
January 2011<br />
Disabling <strong>Process</strong> Alerts<br />
1. Select a parameter for which the process alert will be disabled.<br />
2. Set the Alert Mode to “disabled.”
Reference Manual<br />
00809-0100-4804, Rev AA<br />
January 2011<br />
<strong>Rosemount</strong> <strong>3051S</strong> ERS System<br />
Section 4 Operation and Maintenance<br />
Overview . . . . . . . . . . . . . . . . . . . . . . . . . . . . . . . . . . . . . . . page 4-1<br />
Safety Messages . . . . . . . . . . . . . . . . . . . . . . . . . . . . . . . . . page 4-1<br />
Calibration . . . . . . . . . . . . . . . . . . . . . . . . . . . . . . . . . . . . . . page 4-3<br />
Functional Tests . . . . . . . . . . . . . . . . . . . . . . . . . . . . . . . . . page 4-7<br />
Field Upgrades and Replacements . . . . . . . . . . . . . . . . . . page 4-8<br />
OVERVIEW This section contains information on commissioning and operating a <strong>3051S</strong><br />
ERS system.<br />
Instructions for performing operation and maintenance functions are given for<br />
a handheld Field Communicator. For convenience, Field Communicator fast<br />
key sequences are labeled “Fast Keys” for each software function below the<br />
appropriate headings.<br />
Example Software Function<br />
Fast Keys 1, 2, 3, etc.<br />
SAFETY MESSAGES Procedures and instructions in this section may require special precautions to<br />
ensure the safety of the personnel performing the operation. Information that<br />
raises potential safety issues is indicated with a warning symbol ( ). Refer to<br />
the following safety messages before performing an operation preceded by<br />
this symbol.<br />
4-1
<strong>Rosemount</strong> <strong>3051S</strong> ERS System<br />
Warnings<br />
4-2<br />
Reference Manual<br />
00809-0100-4804, Rev AA<br />
January 2011<br />
Failure to follow these installation guidelines could result in death or serious injury:<br />
• Make sure only qualified personnel perform the installation.<br />
Explosions could result in death or serious injury:<br />
• Do not remove the transmitter covers in explosive atmospheres when the circuit is live.<br />
• Before connecting a Field Communicator in an explosive atmosphere, make sure the<br />
instruments in the loop are installed in accordance with intrinsically safe or non-incendive<br />
field wiring practices.<br />
• Both transmitter covers must be fully engaged to meet flameproof / explosion-proof<br />
requirements.<br />
• Verify that the operating atmosphere of the transmitter is consistent with the appropriate<br />
hazardous location certifications.<br />
Electrical shock could cause death or serious injury. If the ERS system is installed in a high-voltage<br />
environment and a fault or installation error occurs, high voltage may be present on the transmitter<br />
leads and terminals:<br />
• Use extreme caution when making contact with the leads and terminals.<br />
<strong>Process</strong> leaks could result in death or serious injury:<br />
• Install and tighten all four flange bolts before applying pressure.<br />
• Do not attempt to loosen or remove flange bolts while the transmitter is in service.<br />
• Replacement equipment or spare parts not approved by <strong>Emerson</strong> <strong>Process</strong> Management<br />
for use as spare parts could reduce the pressure retaining capabilities of the transmitter<br />
and may render the instrument dangerous.<br />
• Use only bolts supplied or sold by <strong>Emerson</strong> <strong>Process</strong> Management as spare parts.<br />
Improper assembly of manifolds to traditional flange can damage the device:<br />
• For the safe assembly of the manifold to the transmitter flange, bolts must break the back<br />
plane of the flange web (i.e. bolt hole) but must not contact the sensor module.<br />
Static electricity can damage sensitive components:<br />
• Observe safe handling precautions for static-sensitive components.
Reference Manual<br />
00809-0100-4804, Rev AA<br />
January 2011<br />
CALIBRATION<br />
<strong>Rosemount</strong> <strong>3051S</strong> ERS System<br />
Calibration Overview Calibrating a <strong>3051S</strong> ERS System involves the following tasks:<br />
1. Configure process variables<br />
See “Basic Setup” on page 3-3 for additional details:<br />
• Units of measure<br />
• Damping<br />
• Variable mapping<br />
• 4 and 20 mA range points<br />
• Alarm and saturation levels<br />
2. Calibrate the PHI and PLO pressure sensors<br />
Calibrate each pressure sensor by performing a zero/lower and an upper<br />
sensor trim.<br />
3. Differential Pressure zero trim<br />
Perform a zero-trim on the Differential Pressure (DP) reading to establish<br />
a zero-based measurement.<br />
4. Calibrate the 4-20 mA output<br />
Adjust the analog output to match the control loop.<br />
P HI and P LO Sensor<br />
Calibration Each pressure sensor in the <strong>3051S</strong> ERS System can be individually<br />
P HI Sensor 3, 4, 3, 1<br />
P LO Sensor 3, 4, 4, 1<br />
calibrated. The calibration trim functions for both pressure sensors can be<br />
accessed by connecting to the entire <strong>3051S</strong> ERS System with a field<br />
communicator or AMS as shown in Figure 2-9, Figure 2-10, and Figure 2-11.<br />
While calibrating each pressure sensor is not mandatory, it is recommended<br />
in order to improve the accuracy of the DP calculation.<br />
Zero Trim<br />
A zero trim is a single-point offset adjustment. It is useful for compensating for<br />
mounting position effects and is most effective when performed after the<br />
transmitter is installed in its final mounting position.<br />
NOTE<br />
The pressure reading from the sensor must be within three percent of the true<br />
zero (atmospheric pressure) in order to calibrate with the zero trim function.<br />
A zero trim cannot be performed on an absolute-style pressure sensor. To<br />
correct for mounting position effects on an absolute sensor, perform a lower<br />
sensor trim. The lower sensor trim function provides an offset correction<br />
similar to the zero trim, but it does not require a zero-based input.<br />
To perform a zero trim, follow the procedure below:<br />
4-3
<strong>Rosemount</strong> <strong>3051S</strong> ERS System<br />
4-4<br />
Reference Manual<br />
00809-0100-4804, Rev AA<br />
January 2011<br />
1. Vent the PHI / PLO sensor to atmosphere.<br />
2. Wait for the PHI / PLO pressure measurement to stabilize.<br />
3. Using AMS or a field communicator, perform the zero trim function on the<br />
PHI / PLO sensor.<br />
Upper and Lower Sensor Trims<br />
Sensor trim is a two-point sensor calibration where lower and upper end-point<br />
pressures are applied, and all readings are linearized between the two points.<br />
Always perform a lower sensor trim first to establish the correct offset. The<br />
upper sensor trim provides a slope correction to the sensor characterization<br />
curve based on the lower sensor trim value. The trim values allow for the<br />
optimization of performance over a specified measurement range.<br />
NOTE<br />
Use a pressure reference source that is at least three times more accurate<br />
than the actual transmitter sensor, and allow the input pressure to stabilize for<br />
a minimum of ten seconds prior to entering any values.<br />
To perform a two-point sensor trim on the PHI or PLO sensor, follow the<br />
procedure below:<br />
1. Launch the “Lower Sensor Trim” function using AMS or a Field<br />
Communicator.<br />
2. Physically apply the desired low pressure value to the PHI / PLO sensor<br />
using a reference pressure device such as a high-accuracy dead-weight<br />
tester.<br />
3. Wait for the PHI / PLO pressure measurement to stabilize.<br />
4. When prompted by AMS or the Field Communicator, define the amount<br />
of pressure that was applied to the PHI / PLO sensor.<br />
5. Launch the “Upper Sensor Trim” function using AMS or a Field<br />
Communicator.<br />
6. Physically apply the desired high-pressure value to the PHI / PLO sensor<br />
using a reference pressure device such as a high-accuracy dead-weight<br />
tester.<br />
7. Wait for the PHI / PLO pressure measurement to stabilize.<br />
8. When prompted by AMS or the Field Communicator, define the amount<br />
of pressure that was applied to the PHI / PLO sensor.
Reference Manual<br />
00809-0100-4804, Rev AA<br />
January 2011<br />
<strong>Rosemount</strong> <strong>3051S</strong> ERS System<br />
DP Calibration The DP calibration function can be used to adjust the calculated DP<br />
Fast Keys 3, 4, 2, 1<br />
measurement of the ERS system. For example, a DP zero trim can be<br />
performed if the calculated DP of the ERS system has a small offset when the<br />
expected output should be “0 DP.”<br />
NOTE<br />
Because the DP calculation is dependent on the P HI and P LO pressure<br />
measurements, all DP calibration functions should be performed after<br />
completing the calibration functions on the individual P HI and P LO sensors.<br />
While a lower or upper DP trim is not required, a zero DP trim should be<br />
performed after installing and calibrating the individual pressure sensors and<br />
before subjecting the ERS system to the actual process conditions in order to<br />
establish a zero-based DP measurement.<br />
DP Zero Trim<br />
The DP Zero Trim function establishes a true zero-based DP calculation by<br />
taking the current measurement output and forcing that value as the new<br />
zero-reference. A DP Zero Trim should only be performed when the expected<br />
output of the ERS system is “0 DP.” For non-zero based trims, a DP Lower<br />
Trim should be performed instead.<br />
The DP zero trim function requires both pressure sensors to be wired and<br />
connected.<br />
To perform a DP zero trim, follow the procedure below:<br />
1. Ensure that the individual PHI and PLO pressure sensors have been<br />
calibrated as detailed on page 4-3 and are wired together as shown in<br />
Figure 2-9, Figure 2-10, or Figure 2-11.<br />
2. Launch the “DP Zero Trim” function using AMS or a Field Communicator.<br />
3. Apply “0 DP” to the ERS System and wait for the DP measurement to<br />
stabilize.<br />
4. Using AMS or a Field Communicator, perform the zero trim function on<br />
the <strong>3051S</strong> ERS System.<br />
Upper and Lower DP Trims<br />
The DP calculation can be trimmed using a two-point calibration where lower<br />
and upper end-point pressures are applied, and all readings are linearized<br />
between the two points.<br />
Unlike the DP Zero Trim function, the Upper and Lower DP Trims can be<br />
performed when the ERS system is pressurized under actual process<br />
conditions.<br />
Always perform a lower DP trim first to establish the correct offset. The upper<br />
DP trim provides a slope correction.<br />
4-5
<strong>Rosemount</strong> <strong>3051S</strong> ERS System<br />
4-6<br />
Reference Manual<br />
00809-0100-4804, Rev AA<br />
January 2011<br />
To perform a two-point DP trim, follow the procedure below:<br />
1. Launch the “Lower DP Trim” function using AMS or a Field<br />
Communicator.<br />
2. Physically apply the desired low DP value to the entire ERS system. This<br />
may require the use of two separate reference pressure devices.<br />
3. Wait for the DP value to stabilize.<br />
4. When prompted by AMS or the Field Communicator, define the amount<br />
of DP that was applied to the ERS system.<br />
5. Launch the “Upper DP Trim” function using AMS or a Field<br />
Communicator.<br />
6. Physically apply the desired high DP value to the entire ERS system.<br />
This may require the use of two separate reference pressure devices.<br />
7. Wait for the DP value to stabilize.<br />
8. When prompted by AMS or the Field Communicator, define the amount<br />
of DP that was applied to the ERS system.<br />
Analog Output Trim The Analog Output Trim command allows for the adjustment of the 4-20 mA<br />
Fast Keys 3, 4, 1, 1<br />
output of the ERS system to match a plant or control system standard. This<br />
command only impacts the digital-to-analog conversion that drives the analog<br />
output and does not affect the actual DP calculation.<br />
To perform an Analog Output trim, follow the procedure below:<br />
1. Launch the “Analog Trim” function using AMS or a Field Communicator.<br />
2. Connect a reference milliamp meter to the 4-20 mA output of the ERS<br />
Primary sensor. Connect the positive lead to the positive terminal and the<br />
negative lead to the test terminal.<br />
3. The “Analog Trim” function will then force the analog output of the ERS<br />
system to 4 mA. Enter the mA reading from the reference meter when<br />
prompted.<br />
4. The mA output of the <strong>3051S</strong> ERS system will be adjusted based on the<br />
value that was entered from Step 3.<br />
a. If the reference meter still does not read “4 mA,” select “NO,” and<br />
repeat Step 3.<br />
b. If the reference meter now reads “4 mA,” select “YES” and<br />
continue on to Step 5.<br />
5. Repeat steps 3 and 4 for the 20 mA output.<br />
Recall Factory Trim The Recall Factory Trim command allows the restoration of the as-shipped<br />
Analog Output 3, 4, 1, 2<br />
DP 3, 4, 2, 2<br />
P HI Sensor 3, 4, 3, 2<br />
P LO Sensor 3, 4, 4, 2<br />
factory settings of the analog output, DP, and the P HI and P LO sensor<br />
calibrations. This command can be useful for recovering from an inadvertent<br />
trim or an inaccurate pressure source.
Reference Manual<br />
00809-0100-4804, Rev AA<br />
January 2011<br />
<strong>Rosemount</strong> <strong>3051S</strong> ERS System<br />
FUNCTIONAL TESTS The Loop Test command verifies the output of the <strong>3051S</strong> ERS system, the<br />
Fast Keys 3, 5, 5<br />
integrity of the 4-20 mA loop, and the operations of any recorders or similar<br />
devices installed in the loop.<br />
To perform a Loop Test, follow the procedure below:<br />
1. Connect a reference meter to the <strong>3051S</strong> ERS system by either<br />
connecting the meter to the test terminals on the terminal block of the<br />
ERS Primary sensor or shunting power through the meter at some point<br />
in the loop.<br />
2. Launch the Loop Test function using AMS or a Field Communicator.<br />
3. When prompted, select a mA value to have the ERS system output on<br />
the 4-20 mA loop.<br />
4. Check the reference meter installed in the test loop to verify and<br />
compare the reading to the expected mA output of the ERS system.<br />
a. If the values match, the ERS system and the loop are configured and<br />
functioning properly.<br />
b. If the values do not match, the reference meter may be attached to<br />
the wrong loop, there may be a fault in the wiring, the ERS system<br />
may require an analog output trim, or the reference meter may be<br />
malfunctioning.<br />
Find Device The Find Device function causes the ERS system to flash a unique pattern of<br />
Fast Keys 1, 7<br />
Figure 4-1. “Find Device”<br />
Pattern<br />
characters (Figure 4-1) on the LCD display, making the system easily<br />
identifiable in person. The Find Device function requires a digital display to be<br />
installed on the ERS Primary sensor.<br />
0 - 0 - 0 - 0<br />
To run the Find Device function, follow the procedure below:<br />
1. Launch the Find Device function using AMS or a Field Communicator.<br />
2. The ERS system will continue to display the pattern shown in Figure 4-1<br />
until the Find Device function is stopped. Note that it may take up to 60<br />
seconds for the ERS display to return to normal operation upon<br />
completion of the Find Device function.<br />
4-7
<strong>Rosemount</strong> <strong>3051S</strong> ERS System<br />
FIELD UPGRADES AND<br />
REPLACEMENTS<br />
Disassembly<br />
Considerations<br />
4-8<br />
Reference Manual<br />
00809-0100-4804, Rev AA<br />
January 2011<br />
• During disassembly, do not remove any instrument covers in explosive<br />
atmospheres when the circuit is live as this may result in serious injury<br />
or death. Also, be aware of the following:<br />
• Follow all plant safety rules and procedures.<br />
• Isolate and vent the process from the transmitter before removing the<br />
transmitter from service.<br />
• Disconnect optional process temperature sensor leads and cable.<br />
• Remove all other electrical leads and conduit.<br />
• Detach the process flange by removing the four flange bolts and two<br />
alignment screws that secure it.<br />
• Do not scratch, puncture, or depress the isolating diaphragms.<br />
• Clean isolating diaphragms with a soft rag and a mild cleaning solution,<br />
then rinse with clear water.<br />
• Whenever the process flange or flange adapters are removed, visually<br />
inspect the PTFE o-rings. <strong>Emerson</strong> <strong>Process</strong> Management<br />
recommends reusing o-rings if possible. If the o-rings show any signs<br />
of damage, such as nicks or cuts, they should be replaced.<br />
Labeling Field Device Labels<br />
The label on the SuperModule reflects the replacement model code for<br />
reordering a complete ERS sensor, including both the SuperModule assembly<br />
and the electronics housing. The 300ERS model code stamped on the<br />
electronics housing nameplate can be used to reorder an electronics housing<br />
assembly.<br />
Removing the Terminal<br />
Block<br />
Electrical connections are located on the terminal block in the compartment<br />
labeled “FIELD TERMINALS.”<br />
<strong>3051S</strong> ERS Primary (PlantWeb Housing)<br />
Loosen the two small screws located at the 10 o'clock and 4 o'clock positions,<br />
and pull the entire terminal block out.<br />
<strong>3051S</strong> ERS Secondary (Junction Box)<br />
Loosen the two small screws located at the 8 o'clock and 4 o'clock positions,<br />
and pull the entire terminal block out. This procedure will expose the<br />
SuperModule connector (see Figure 4-3). Grasp the SuperModule connector<br />
and pull upwards.
Reference Manual<br />
00809-0100-4804, Rev AA<br />
January 2011<br />
Figure 4-2. Terminal Blocks<br />
Removing the<br />
<strong>Electronic</strong>s<br />
Figure 4-3. SuperModule<br />
Electrical Connector<br />
Removing the<br />
SuperModule from the<br />
Housing<br />
<strong>Rosemount</strong> <strong>3051S</strong> ERS System<br />
<strong>3051S</strong> ERS Primary <strong>3051S</strong> ERS Secondary<br />
+<br />
PWR/<br />
COMM<br />
1<br />
_<br />
TEST<br />
WIRE TO<br />
2 ERS<br />
SECONDARY _<br />
B<br />
A<br />
1 2 A B<br />
WIRE TO ERS PRIMARY<br />
To remove the electronics featureboard from a <strong>3051S</strong> ERS Primary device:<br />
1. Remove the housing cover opposite the field terminal side.<br />
2. Remove the LCD display (if applicable). Do this by holding in the two<br />
clips and pulling outward. This will provide better access to the two<br />
screws located on the electronics featureboard.<br />
3. Loosen the two small screws located on the assembly in the 8 o’clock<br />
and 2 o’clock positions.<br />
4. Pull out the assembly to expose the SuperModule connector (see<br />
Figure 4-3).<br />
5. Grasp the SuperModule connector and pull upwards (avoid pulling<br />
wires). Housing rotation may be required to access locking tabs.<br />
<strong>3051S</strong> ERS Primary <strong>3051S</strong> ERS Secondary<br />
IMPORTANT<br />
To prevent damage to the SuperModule cable, remove the featureboard or<br />
terminal block assembly with the connector before separating the<br />
SuperModule from the housing assembly.<br />
1. Loosen the housing rotation set screw by one full turn with a 3/32-in. hex<br />
wrench.<br />
2. Unscrew the housing from the SuperModule.<br />
4-9
<strong>Rosemount</strong> <strong>3051S</strong> ERS System<br />
Figure 4-4. Location of Housing<br />
Rotation Set Screw<br />
Attaching the<br />
SuperModule to the<br />
Housing<br />
Installing <strong>Electronic</strong>s<br />
Assembly<br />
Installing the Terminal<br />
Block<br />
4-10<br />
IMPORTANT<br />
The V-Seal must be installed at the bottom of the housing.<br />
Reference Manual<br />
00809-0100-4804, Rev AA<br />
January 2011<br />
PlantWeb Housing Junction Box Housing<br />
Housing Rotation Set Screw<br />
(3/32 in.)<br />
1. Apply a light coat of low temperature silicon grease to the SuperModule<br />
threads and o-ring.<br />
2. Thread the housing completely onto the SuperModule. The housing must<br />
be no more than one full turn from flush with the SuperModule to comply<br />
with explosion-proof requirements.<br />
3. Tighten the housing rotation set screw using 3/32-in. hex wrench.<br />
1. Apply a light coat of low temperature silicon grease to the SuperModule<br />
connector.<br />
2. Insert the SuperModule connector into the top of the SuperModule.<br />
3. Gently slide the assembly into the housing, making sure the pins from<br />
the PlantWeb housing properly engage the receptacles on the assembly.<br />
4. Tighten the captive mounting screws.<br />
5. Attach the PlantWeb housing cover and tighten so that metal contacts<br />
metal to meet explosion-proof requirements.<br />
<strong>3051S</strong> ERS Primary (PlantWeb Housing)<br />
1. Gently slide the terminal block into the housing, making sure the pins<br />
from the PlantWeb housing properly engage the receptacles on the<br />
terminal block.<br />
2. Tighten the captive screws on the terminal block.<br />
3. Attach the PlantWeb housing cover and tighten so that metal contacts<br />
metal to meet explosion-proof requirements.
Reference Manual<br />
00809-0100-4804, Rev AA<br />
January 2011<br />
Reassemble the <strong>Process</strong><br />
Flange<br />
<strong>Rosemount</strong> <strong>3051S</strong> ERS System<br />
<strong>3051S</strong> ERS Secondary (Junction Box)<br />
1. Apply a light coat of low temperature silicon grease to the SuperModule<br />
connector.<br />
2. Insert the SuperModule connector into the top of the SuperModule.<br />
3. Push the terminal block into the housing and hold for screw position<br />
alignment.<br />
4. Tighten the captive mounting screws.<br />
5. Attach the Junction Box housing cover and tighten so that metal contacts<br />
metal to meet explosion-proof requirements.<br />
NOTE<br />
If the installation uses a manifold, see “<strong>Rosemount</strong> Manifolds” on page 2-21.<br />
1. Inspect the SuperModule PTFE o-rings. If the o-rings are undamaged,<br />
reusing them is recommended. If the o-rings are damaged (if they have<br />
nicks or cuts, for example), replace them with new o-rings.<br />
NOTE<br />
If replacing the o-rings, be careful not to scratch or deface the o-ring grooves<br />
or the surface of the isolating diaphragm when removing the damaged<br />
o-rings.<br />
2. Install the process flange on the SuperModule. To hold the process<br />
flange in place, install the two alignment screws to finger tight (screws<br />
are not pressure retaining). Do not over-tighten; this will affect<br />
module-to-flange alignment.<br />
3. Install the appropriate flange bolts.<br />
a. If the installation requires a 1 /4-18 NPT connection(s), use four<br />
1.75-in. flange bolts. Go to step d.<br />
b. If the installation requires a 1 /2–14 NPT connection(s), use two<br />
2.88-in. process flange/adapter bolts and two 1.75-in. bolts. Go to<br />
step c.<br />
c. Hold the flange adapters and adapter o-rings in place while<br />
finger-tightening the bolts. Go to step e.<br />
d. Finger-tighten the bolts.<br />
e. Tighten the bolts to the initial torque value using a crossed pattern.<br />
See Table 4-1 on page 4-12 for appropriate torque values.<br />
f. Tighten the bolts to the final torque value using a crossed pattern.<br />
See Table 4-1 for appropriate torque values. When fully tightened,<br />
the bolts should extend through the top of the module housing.<br />
g. If the installation uses a conventional manifold, then install flange<br />
adapters on the process end of the manifold using the 1.75-in. flange<br />
bolts supplied with the <strong>3051S</strong> ERS sensor.<br />
4-11
<strong>Rosemount</strong> <strong>3051S</strong> ERS System<br />
Table 4-1. Bolt Installation<br />
Torque Values<br />
4-12<br />
Reference Manual<br />
00809-0100-4804, Rev AA<br />
January 2011<br />
Bolt Material Initial Torque Value Final Torque Value<br />
CS-ASTM-A445 Standard 300 in-lb. (34 N-m) 650 in-lb. (73 N-m)<br />
316 SST - Option L4 150 in-lb. (17 N-m) 300 in-lb. (34 N-m)<br />
ASTM-A-193-B7M - Option L5 300 in-lb. (34 N-m) 650 in-lb. (73 N-m)<br />
Alloy K-500 - Option L6 300 in-lb. (34 N-m) 650 in-lb. (73 N-m)<br />
ASTM-A-453-660 - Option L7 150 in-lb. (17 N-m) 300 in-lb. (34 N-m)<br />
ASTM-A-193-B8M - Option L8 150 in-lb. (34 N-m) 300 in-lb. (34 N-m)<br />
4. If replacing the PTFE SuperModule o-rings, re-torque the flange bolts<br />
after installation to compensate for cold flow.<br />
5. Install the drain/vent valve.<br />
a. Apply sealing tape to the threads on the seat. Starting at the base of<br />
the valve with the threaded end pointing toward the installer, apply<br />
two clockwise turns of sealing tape.<br />
b. Take care to place the opening on the valve so that process fluid will<br />
drain toward the ground and away from human contact when the<br />
valve is opened.<br />
c. Tighten the drain/vent valve to 250 in-lb. (28.25 N-m).
Reference Manual<br />
00809-0100-4804, Rev AA<br />
January 2011<br />
Section 5 Troubleshooting<br />
<strong>Rosemount</strong> <strong>3051S</strong> ERS System<br />
Overview . . . . . . . . . . . . . . . . . . . . . . . . . . . . . . . . . . . . . . . page 5-1<br />
Device Overview . . . . . . . . . . . . . . . . . . . . . . . . . . . . . . . . . page 5-1<br />
Measurement Quality Status . . . . . . . . . . . . . . . . . . . . . . . page 5-5<br />
OVERVIEW This section contains information for troubleshooting the <strong>3051S</strong> ERS System.<br />
Diagnostic messages are communicated via the LCD Display or a HART host.<br />
DEVICE OVERVIEW Procedures and instructions in this section may require special precautions to<br />
ensure the safety of the personnel performing the operation. Information that<br />
raises potential safety issues is indicated with a warning symbol ( ). Refer to<br />
the following safety messages before performing an operation preceded by<br />
this symbol.<br />
HART Host Diagnostics The <strong>3051S</strong> ERS System provides numerous diagnostic alerts via a HART<br />
host, including a Field Communicator and AMS Device Manager.<br />
Table 5-1 lists the possible diagnostic alerts that may be shown with the<br />
<strong>3051S</strong> ERS System. The table provides a brief description of each alert and<br />
the recommended actions.<br />
Table 5-2 provides summarized maintenance and troubleshooting<br />
suggestions for the most common operating problems. If a malfunction is<br />
suspected despite the absence of any diagnostic messages on a field<br />
communicator or host, follow the procedures described here to verify that<br />
<strong>3051S</strong> ERS System and process connections are in good working order.<br />
LCD Display Diagnostics The optional LCD display on the <strong>3051S</strong> ERS System can show abbreviated<br />
operation, error, and warning messages for troubleshooting. Messages<br />
appear according to their priority; normal operating messages appear last. To<br />
determine the cause of a message, use a HART host to further interrogate the<br />
<strong>3051S</strong> ERS System. A description of each LCD diagnostic message follows.<br />
Error Messages<br />
An error indicator message appears on the LCD display to warn of serious<br />
problems affecting the operation of the <strong>3051S</strong> ERS System. The error<br />
message is displayed until the error condition is corrected; ERROR appears<br />
at the bottom of the display.<br />
Warning Messages<br />
Warning messages appear on the LCD display to alert the user of<br />
user-repairable problems with the <strong>3051S</strong> ERS System, or current operations.<br />
Warning messages appear alternately with other information until the warning<br />
condition is corrected or the <strong>3051S</strong> ERS System completes the operation that<br />
triggered the warning message.<br />
5-1
<strong>Rosemount</strong> <strong>3051S</strong> ERS System<br />
5-2<br />
Reference Manual<br />
00809-0100-4804, Rev AA<br />
January 2011<br />
Table 5-1. Diagnostic Message<br />
Troubleshooting<br />
LCD display<br />
Message Host Diagnostic Message Possible Problems Recommended Actions<br />
CURR<br />
SAT<br />
DP<br />
ALERT<br />
FAIL<br />
BOARD<br />
ERROR<br />
FAIL<br />
PHI ERROR<br />
FAIL<br />
PLO ERROR<br />
FAIL<br />
THI ERROR<br />
FAIL<br />
TLO ERROR<br />
PHI ALERT<br />
P HI<br />
COMM<br />
ERROR<br />
P HI<br />
LIMIT<br />
P LO<br />
ALERT<br />
P LO<br />
COMM<br />
ERROR<br />
P LO<br />
LIMIT<br />
LOOP<br />
TEST<br />
SNSR<br />
COMM<br />
ERROR<br />
SNSR<br />
CONFIG<br />
ERROR<br />
mA Output Saturated The primary variable has exceeded the<br />
range points defined for the 4-20 mA<br />
analog output signal. The analog<br />
output is fixed at the high<br />
or low saturation point and is not<br />
representative of the current process<br />
conditions.<br />
System DP Alert The ERS system is measuring a<br />
differential pressure value that exceeds<br />
the configured upper or lower alert<br />
value.<br />
<strong>Electronic</strong>s Error The electronics featureboard in the<br />
ERS Primary Unit has malfunctioned.<br />
Verify the process conditions and modify the<br />
Analog Range Values if necessary.<br />
Verify the measured DP is beyond the trip limits.<br />
If necessary, modify the trip limits or disable the<br />
diagnostic.<br />
Replace the electronics featureboard.<br />
PHI Module Failure The PHI sensor module has failed. Verify the PHI Module Temperature is within the<br />
operating limits of the sensor. Replace the PHI sensor module if necessary.<br />
PLO Module Failure The PLO sensor module has failed. Verify the PLO Module Temperature is within the<br />
operating limits of the sensor. Replace the PLO sensor module if necessary.<br />
P HI Pressure Alert The P HI sensor module has detected a<br />
pressure value that exceeds the<br />
configured upper or lower alert value.<br />
P HI Module<br />
Communication Error<br />
Communication between the P-Hi<br />
sensor module and the electronics<br />
featureboard has been lost.<br />
PHI Pressure Out of Limits The PHI Pressure reading has<br />
exceeded the sensor’s maximum<br />
measurement range.<br />
PLO Pressure Alert The PLO sensor module has detected a<br />
pressure value that exceeds the<br />
configured upper or lower alert value.<br />
P LO Module<br />
Communication Error<br />
Communication between the P LO<br />
sensor module and the electronics<br />
featureboard has been lost.<br />
PLO Pressure Out of Limits The PLO Pressure reading has<br />
exceeded the sensor’s maximum<br />
measurement range.<br />
mA Output Fixed The analog output of the ERS System<br />
is in “fixed current mode” and is not<br />
representative of the HART PV.<br />
Sensor Module Missing A sensor module is missing or not<br />
detected.<br />
No P HI Module<br />
Configuration Present<br />
Neither of the modules in the ERS<br />
system are configured as the P HI<br />
sensor.<br />
Verify the measured PHI Pressure is beyond the<br />
trip limits. If necessary, modify the trip limits or<br />
disable the diagnostic.<br />
Verify the wiring between the PHI module and the<br />
electronics featureboard. Replace the PHI module and/or electronics featureboard if<br />
necessary.<br />
Check the process for potential overpressure<br />
conditions.<br />
Verify the measured PLO Pressure is beyond the<br />
trip limits. If necessary, modify the trip limits or<br />
disable the diagnostic.<br />
Verify the wiring between the PLO module and<br />
the electronics featureboard. Replace the PLO module and/or electronics featureboard if<br />
necessary.<br />
Check the process for potential overpressure<br />
conditions.<br />
Using a Field Communicator or AMS, disable<br />
“Loop Current Mode.”<br />
Verify that both sensors are connected and<br />
properly wired.<br />
Verify that both sensors are connected and<br />
properly wired. Change the pressure designation<br />
of one of the two modules to “P HI” using a Field<br />
Communicator or AMS.
Reference Manual<br />
00809-0100-4804, Rev AA<br />
January 2011<br />
SNSR<br />
CONFIG<br />
ERROR<br />
SNSR<br />
CONFIG<br />
ERROR<br />
SNSR<br />
INCOMP<br />
ERROR<br />
STUCK<br />
KEY<br />
STUCK<br />
KEY<br />
T HI<br />
ALERT<br />
No P LO Module<br />
Configuration Present<br />
Unknown Sensor Module<br />
Configuration<br />
Sensor Module<br />
Incompatibility<br />
Neither of the modules in the ERS<br />
system are configured as the P LO<br />
sensor.<br />
<strong>Rosemount</strong> <strong>3051S</strong> ERS System<br />
LCD display<br />
Message Host Diagnostic Message Possible Problems Recommended Actions<br />
T HI<br />
LIMIT<br />
T LO<br />
ALERT<br />
T LO<br />
LIMIT<br />
XMTR<br />
INFO<br />
XMTR<br />
INFO<br />
ERROR<br />
The configuration of one or both sensor<br />
modules is unknown.<br />
The <strong>3051S</strong> ERS System contains two<br />
sensor modules that will not work<br />
together.<br />
Stuck “Span” Button The “Span” button on the electronics<br />
featureboard is stuck.<br />
Stuck “Zero” Button The “Zero” button on the electronics<br />
featureboard is stuck.<br />
P HI Temperature Alert The P HI sensor module has detected a<br />
temperature value that exceeds the<br />
configured upper or lower alert value.<br />
P HI Module Temp. Out of<br />
Limits<br />
The internal temperature sensor on the<br />
P HI Pressure module has exceeded<br />
the safe operating range.<br />
P LO Temperature Alert The P LO sensor module has detected a<br />
temperature value that exceeds the<br />
configured upper or lower alert value.<br />
P LO Module Temp. Out of<br />
Limits<br />
Non-Volatile Memory<br />
Warning<br />
The internal temperature sensor on the<br />
PLO Pressure module has exceeded<br />
the safe operating range.<br />
<strong>3051S</strong> ERS System information data is<br />
incomplete. ERS System operation will<br />
not be affected.<br />
Non-Volatile Memory Error Non-volatile data of the device is<br />
corrupt.<br />
(LCD is blank) LCD Update Error The electronics circuit board on the<br />
ERS Primary Unit has lost<br />
communication with the LCD display.<br />
NO UPDATE LCD Update Error The LCD Display on the ERS Primary<br />
Unit is not updating<br />
Verify that both sensors are connected and<br />
properly wired. Change the pressure designation<br />
of one of the two modules to “PLO” using a Field<br />
Communicator or AMS.<br />
Verify that both sensors are connected and<br />
properly wired. Using a Field Communicator or<br />
AMS, assign one of the modules as the “PHI” sensor and the other module as the “PLO ”<br />
sensor.<br />
The <strong>3051S</strong> ERS System cannot contain one<br />
gage and one absolute sensor. Replace one of<br />
the two modules so that both sensors are either<br />
gage or absolute.<br />
Locate the ERS Primary Unit, remove the front<br />
housing cover (considering hazardous location<br />
requirements), and gently pry the span button.<br />
Locate the ERS Primary Unit, remove the front<br />
housing cover (considering hazardous location<br />
requirements), and gently pry the zero button.<br />
Verify the measured PHI temperature is beyond<br />
the trip limits. If necessary, modify the trip limits<br />
or disable the diagnostic.<br />
Verify that the ambient conditions do not exceed<br />
the temperature limits of the pressure module<br />
(-40 to 185 °F / -40 to 85 °C).<br />
Verify the measured PLO temperature is beyond<br />
the trip limits. If necessary, modify the trip limits<br />
or disable the diagnostic.<br />
Verify that the ambient conditions do not exceed<br />
the temperature limits of the pressure module<br />
(-40 to 185 °F / -40 to 85 °C).<br />
Replace the electronics featureboard at the next<br />
maintenance shutdown.<br />
Replace the electronics featureboard.<br />
Examine the LCD Connector and reinstall and<br />
repower the LCD. If the problem persists, first<br />
replace the LCD then replace the feature board<br />
electronics if necessary.<br />
Make sure that the correct LCD has been<br />
installed (refer to Spare Parts List in Appendix A:<br />
for LCD part number).<br />
5-3
<strong>Rosemount</strong> <strong>3051S</strong> ERS System<br />
Table 5-2. <strong>3051S</strong> ERS System<br />
Troubleshooting<br />
Symptom Corrective Actions<br />
The mA output of the <strong>3051S</strong> ERS System is<br />
zero<br />
The <strong>3051S</strong> ERS System is not communicating<br />
with a Field Communicator or AMS<br />
The mA output of <strong>3051S</strong> ERS System is low or<br />
high<br />
The <strong>3051S</strong> ERS System is not responding to<br />
changes in measured process variables<br />
5-4<br />
Reference Manual<br />
00809-0100-4804, Rev AA<br />
January 2011<br />
• Verify power is applied to “+” and “-” PWR / COMM terminals on the ERS primary unit<br />
• Check power wires for reversed polarity<br />
• Verify terminal voltage is 16 to 42.4 Vdc<br />
• Check for open diode across test terminals on the ERS primary unit.<br />
• Verify the output is between 4 and 20 mA or saturation levels<br />
• Verify clean DC Power to transmitter (Max AC noise 0.2 volts peak to peak)<br />
• Check loop resistance, 250-1321 Ω<br />
Loop Resistance = (Power supply voltage - transmitter voltage) / loop current<br />
• Check if ERS system is at an alternate HART address<br />
• Verify applied process conditions<br />
• Verify the desired process variable is mapped to the HART PV<br />
• Verify 4 and 20 mA range points<br />
• Verify output is not in alarm or saturation condition<br />
• An analog output trim or sensor trim may be required<br />
• Check to ensure isolation valves are not closed<br />
• Check test equipment<br />
• Check impulse piping or manifold for blockage<br />
• Verify primary variable measurement is between the 4 and 20 mA set points<br />
• Verify output is not in alarm or saturation condition<br />
• Verify ERS system is not in Loop Test, Multidrop, Test Calculation, or Fixed Variable<br />
mode<br />
Digital Variable output is too low or high • Check test equipment (verify accuracy)<br />
• Check impulse piping for blockage or low fill in wet leg<br />
• Verify sensor trim on each pressure sensor<br />
• Verify measured variables are within all sensor limits<br />
Digital Variable output is erratic • Verify power source to ERS system has adequate voltage and current<br />
• Check for external electrical interference<br />
• Verify ERS system is properly grounded<br />
• Verify shield for twisted pairs only grounded at one end<br />
The <strong>3051S</strong> ERS System output is normal, but<br />
the LCD is off and diagnostics indicate an LCD<br />
problem<br />
• Verify LCD display is installed correctly<br />
• Replace LCD display<br />
The DP calculation is negative • Verify the P HI / P LO module assignments and change if necessary
Reference Manual<br />
00809-0100-4804, Rev AA<br />
January 2011<br />
MEASUREMENT<br />
QUALITY STATUS<br />
Figure 5-1. Measurement<br />
Quality Status<br />
<strong>Rosemount</strong> <strong>3051S</strong> ERS System<br />
The <strong>3051S</strong> ERS System is compliant with the HART Revision 6 Standard.<br />
One of the most noticeable enhancements available with the HART 6<br />
standard is that each variable has a measurement quality status. These<br />
statuses can be viewed in AMS, with a Field Communicator, or with any<br />
HART 6 compatible host system.<br />
Quality Status on DP Measurement Status<br />
Possible Measurement Quality Statuses<br />
• Good: Displayed during normal device operation.<br />
• Poor: Indicates the accuracy of the measured variable has been<br />
compromised. For example, the P-Hi Module Temperature has failed<br />
and is no longer compensating the P-Hi Pressure measurement.<br />
• Bad: Indicates the variable has failed. For example, the P-Hi Pressure<br />
sensor has failed.<br />
5-5
<strong>Rosemount</strong> <strong>3051S</strong> ERS System<br />
5-6<br />
Reference Manual<br />
00809-0100-4804, Rev AA<br />
January 2011
Reference Manual<br />
00809-0100-4804, Rev AA<br />
January 2011 <strong>Rosemount</strong> <strong>3051S</strong> ERS System<br />
Appendix A Specifications and<br />
Reference Data<br />
PERFORMANCE<br />
SPECIFICATIONS<br />
Conformance to<br />
Specification (±3�)<br />
Reference Accuracy<br />
Table A-1. DP Reference Accuracy of <strong>3051S</strong> ERS System (1)<br />
Two Coplanar Gage <strong>Sensors</strong> (<strong>3051S</strong>AM_ _G)<br />
www.rosemount.com<br />
Performance Specifications . . . . . . . . . . . . . . . . . . . . . . . page A-1<br />
Functional Specifications . . . . . . . . . . . . . . . . . . . . . . . . . page A-4<br />
Physical Specifications . . . . . . . . . . . . . . . . . . . . . . . . . . . page A-9<br />
Dimensional Drawings . . . . . . . . . . . . . . . . . . . . . . . . . . . . page A-11<br />
Ordering Information . . . . . . . . . . . . . . . . . . . . . . . . . . . . . page A-17<br />
Spare Parts . . . . . . . . . . . . . . . . . . . . . . . . . . . . . . . . . . . . . page A-37<br />
For zero-based spans, reference conditions, silicone oil fill, glass-filled PTFE<br />
o-rings, SST materials, Coplanar flange, or 1 /2 in.-14 NPT process<br />
connections, digital trim values are set to equal range points.<br />
Technology leadership, advanced manufacturing techniques, and statistical<br />
process control ensure specification conformance to at least ±3�.<br />
Ultra Classic<br />
Range 2-4 ±0.035% of DP span ±0.078% of DP span<br />
Range 5 ±0.071% of DP span ±0.092% of DP span<br />
Two Coplanar Absolute <strong>Sensors</strong> (<strong>3051S</strong>AM_ _A)<br />
Ultra Classic<br />
Ranges 1-4 ±0.035% of DP span ±0.078% of DP span<br />
Two In-Line Gage <strong>Sensors</strong> (<strong>3051S</strong>AM_ _T)<br />
Two In-Line Absolute <strong>Sensors</strong> (<strong>3051S</strong>AM _ _E)<br />
Ultra Classic<br />
Ranges 1-4 ±0.035% of DP span ±0.078% of DP span<br />
Two Liquid Level <strong>Sensors</strong> (<strong>3051S</strong>AL)<br />
Ultra Classic<br />
Ranges 1-5 ±0.092% of DP span ±0.092% of DP span<br />
(1) DP Accuracy specifications for the <strong>3051S</strong> ERS System assume that the configuration contains two sensors with identical ranges that are calibrated<br />
0 – URL, and that the DP Span = 10% of each sensor’s URL.
<strong>Rosemount</strong> <strong>3051S</strong> ERS System<br />
Table A-2. Gage / Absolute Pressure Reference Accuracy<br />
Coplanar Gage Sensor (<strong>3051S</strong>AM_ _G)<br />
Ultra Classic<br />
Range 2-4 ±0.025% of span<br />
±0.055% of span<br />
Range 5 ±0.05% of span<br />
A-2<br />
For spans less than 10:1,<br />
±[0.005 + 0.0035(URL / Span)] % of span<br />
For spans less than 10:1,<br />
±[0.005 + 0.0045(URL / Span)] % of span<br />
Coplanar Absolute Sensor (<strong>3051S</strong>AM_ _A)<br />
Ultra Classic<br />
Ranges 1-4 ±0.025% of span<br />
±0.055% of span<br />
For spans less than 10:1,<br />
±[0.015 + 0.005(URL / Span)] % of span<br />
±0.065% of span<br />
For spans less than 10:1,<br />
±[0.015 + 0.005(URL / Span)] % of span<br />
For spans less than 10:1,<br />
±[0.004(URL / Span)] % of span<br />
In-Line Gage Sensor (<strong>3051S</strong>AM_ _T)<br />
In-Line Absolute Sensor (<strong>3051S</strong>AM _ _E)<br />
For spans less than 10:1,<br />
±[0.0065(URL / Span)] % of span<br />
Ultra Classic<br />
Ranges 1-4 ±0.025% of span<br />
±0.055% of span<br />
Ranges 5 ±0.04% of span<br />
For spans less than 10:1,<br />
±[0.004(URL / Span)] % of span<br />
For spans less than 10:1,<br />
±[0.0065(URL / Span)] % of span<br />
±0.065% of span<br />
For spans less than 10:1,<br />
±[0.004(URL / Span)] % of span<br />
Liquid Level Sensor (<strong>3051S</strong>AL)<br />
For spans less than 10:1,<br />
±[0.0065(URL / Span)] % of span<br />
Ultra Classic<br />
Ranges 1-5 ±0.065% of span<br />
±0.065% of span<br />
For spans less than 10:1,<br />
±[0.015 + 0.005(URL / Span)] % of span<br />
For spans less than 10:1,<br />
±[0.015 + 0.005(URL / Span)] % of span<br />
Reference Manual<br />
00809-0100-4804, Rev AA<br />
January 2011<br />
Long Term Stability (1)<br />
Gage / Absolute “Ultra” Sensor Gage / Absolute “Classic” Sensor<br />
±0.20% of URL for 10 years; for ±50 °F (28 °C) temperature ±0.125% of URL for 5 years; for ±50 °F (28 °C) temperature<br />
changes, up to 1000 psi (68,9 bar) line pressure<br />
changes, up to 1000 psi (68,9 bar) line pressure<br />
(1) Long term stability specification is for each gage / absolute pressure sensor of the ERS System and is not reflective of the DP calculation.<br />
Warranty (1)<br />
Gage / Absolute “Ultra” Sensor Gage / Absolute “Classic” Sensor<br />
12-year limited warranty (2) 1-year limited warranty (3)<br />
(1) Warranty details can be found in <strong>Emerson</strong> <strong>Process</strong> Management Terms & Conditions of Sale, Document 63445, Rev G (10/06).<br />
(2) <strong>Rosemount</strong> Ultra sensors in an ERS configuration have a limited warranty of twelve (12) years from date of shipment. All other provisions of<br />
<strong>Emerson</strong> <strong>Process</strong> Management standard limited warranty remain the same.<br />
(3) Goods are warranted for twelve (12) months from the date of initial installation or eighteen (18) months from the date of shipment by seller,<br />
whichever period expires first.
Reference Manual<br />
00809-0100-4804, Rev AA<br />
January 2011<br />
Dynamic Performance (1)<br />
(1) Consult Instrument Toolkit for <strong>3051S</strong> ERS configurations that include remote seals.<br />
Ambient Temperature Effects per 50 °F (28 °C) (1)<br />
Coplanar Gage Sensor (<strong>3051S</strong>AM_ _G)<br />
<strong>Rosemount</strong> <strong>3051S</strong> ERS System<br />
• Total Time Response at 75 °F (24 °C), Includes Dead Time: 360 ms<br />
• Dead Time (nominal): 220 ms<br />
• Update Rate: 11 updates per second<br />
Ultra Classic<br />
Range 2-5<br />
±(0.009% URL + 0.025% Span) from 1:1 to 10:1<br />
±(0.018% URL + 0.05% Span) from >10:1 to 200:1<br />
±(0.0125% URL + 0.0625% Span) from 1:1 to 5:1<br />
±(0.025% URL + 0.125% Span) from >5:1 to 100:1<br />
Coplanar Absolute Sensor (<strong>3051S</strong>AM_ _A)<br />
Ultra Classic<br />
Ranges 1-4<br />
±(0.0125% URL + 0.0625% Span) from 1:1 to 5:1<br />
±(0.025% URL + 0.125% Span) from >5:1 to 100:1<br />
±(0.0125% URL + 0.0625% Span) from 1:1 to 5:1<br />
±(0.025% URL + 0.125% Span) from >5:1 to 100:1<br />
In-Line Gage Sensor (<strong>3051S</strong>AM_ _T)<br />
In-Line Absolute Sensor (<strong>3051S</strong>AM _ _E)<br />
Ultra Classic<br />
Ranges 2-4 ±(0.009% URL + 0.025% Span) from 1:1 to 10:1<br />
±(0.0125% URL + 0.0625% Span) from 1:1 to 5:1<br />
±(0.018% URL + 0.08% Span) from >10:1 to 100:1 ±(0.025% URL + 0.125% Span) from >5:1 to 100:1<br />
Ranges 5 ±(0.05% URL + 0.075% Span) from 1:1 to 10:1 ±(0.05% URL + 0.075% Span) from 1:1 to 10:1<br />
Ranges 1<br />
±(0.0125% URL + 0.0625% Span) from 1:1 to 5:1<br />
±(0.025% URL + 0.125% Span) from >5:1 to 100:1<br />
±(0.0125% URL + 0.0625% Span) from 1:1 to 5:1<br />
±(0.025% URL + 0.125% Span) from >5:1 to 100:1<br />
Liquid Level Sensor (<strong>3051S</strong>AL)<br />
Ultra Classic<br />
Ranges 1-5 Consult Instrument Toolkit Consult Instrument Toolkit<br />
(1) Ambient Temperature Effects specifications are for each gage / absolute pressure sensor of the ERS System and are not reflective of the DP<br />
calculation.<br />
Mounting Position Effects (1)<br />
Coplanar Gage Sensor (<strong>3051S</strong>AM_ _G)<br />
Zero shifts up to ±1.25 inH2O (3,11 mbar), which can be zeroed<br />
Span: no effect<br />
Coplanar Absolute Sensor (<strong>3051S</strong>AM_ _A)<br />
Zero shifts up to ±2.5 inH2O (6,22 mbar), which can be zeroed<br />
Span: no effect<br />
In-Line Gage Sensor (<strong>3051S</strong>AM_ _T)<br />
In-Line Absolute Sensor (<strong>3051S</strong>AM _ _E)<br />
Zero shifts up to ±2.5 inH2O (6,22 mbar), which can be zeroed<br />
Span: no effect<br />
Liquid Level Sensor (<strong>3051S</strong>AL)<br />
With remote seal diaphragm in vertical plane, zero shifts of up to ±1 inH2O (2,5 mbar), which can be zeroed<br />
With remote seal diaphragm in horizontal plane, zero shifts of up to ±5 inH2O (12,5 mbar), which can be zeroed<br />
Span: no effect<br />
(1) Mounting Position Effects specifications are for each gage / absolute pressure sensor of the ERS System and are not reflective of the DP calculation.<br />
A-3
<strong>Rosemount</strong> <strong>3051S</strong> ERS System<br />
Vibration Effect (1)<br />
Transient Protection<br />
FUNCTIONAL<br />
SPECIFICATIONS<br />
A-4<br />
Reference Manual<br />
00809-0100-4804, Rev AA<br />
January 2011<br />
Less than ±0.1% of URL when tested per the requirements of IEC60770-1<br />
field or pipeline with high vibration level (10-60 Hz 0.21 mm displacement<br />
peak amplitude / 60-2000 Hz 3g).<br />
For Housing Style codes 1J, 1K, 1L, 2J, and 2M: Less than ±0.1% of URL<br />
when tested per the requirements of IEC60770-1 field with general application<br />
or pipeline with low vibration level (10-60 Hz 0.15 mm displacement peak<br />
amplitude / 60-500 Hz 2g).<br />
(1) Vibration Effect specifications are for each gage / absolute pressure sensor of the ERS System and are not reflective of the DP<br />
calculation.<br />
Tested in accordance with IEEE C62.41.2-2002, Location Category B<br />
• 6 kV crest (0.5 µs – 100 kHz)<br />
• 3 kA crest (8 x 20 microseconds)<br />
• 6 kV crest (1.2 x 50 microseconds)<br />
Range and Sensor Limits<br />
Coplanar Gage Sensor (<strong>3051S</strong>AM_ _G, <strong>3051S</strong>AL _ _G)<br />
Lower Range Limit (LRL) (1) Upper Range Limit (URL)<br />
Range 2 -250 in.H20 (-623 mbar) 250 in.H20 (623 mbar)<br />
Range 3 -393 in.H20 (-979 mbar) 1000 in.H20 (2,49 bar)<br />
Range 4 -14.2 psig (-979 mbar) 300 psig (20,7 bar)<br />
Range 5 -14.2 psig (-979 mbar) 2000 psig (137,9 bar)<br />
Coplanar Absolute Sensor (<strong>3051S</strong>AM_ _A, <strong>3051S</strong>AL_ _A)<br />
Lower Range Limit (LRL) Upper Range Limit (URL)<br />
Range 1 0 psia (0 bar) 30 psia (2,07 bar)<br />
Range 2 0 psia (0 bar) 150 psia (10,34 bar)<br />
Range 3 0 psia (0 bar) 800 psia (55,16 bar)<br />
Range 4 0 psia (0 bar) 4000 psia (275,8 bar)<br />
In-Line Gage Sensor (<strong>3051S</strong>AM_ _T, <strong>3051S</strong>AL _ _T)<br />
Lower Range Limit (LRL) (1)<br />
Upper Range Limit (URL)<br />
Range 1 -14.7 psig (-1 bar) 30 psig (2,07 bar)<br />
Range 2 -14.7 psig (-1 bar) 150 psig (10,34 bar)<br />
Range 3 -14.7 psig (-1 bar) 800 psig (55,16 bar)<br />
Range 4 -14.7 psig (-1 bar) 4000 psig (275,8 bar)<br />
Range 5 -14.7 psig (-1 bar) 10000 psig (689,5 bar)<br />
In-Line Absolute Sensor (<strong>3051S</strong>AM_ _E, <strong>3051S</strong>AL _ _E)<br />
Lower Range Limit (LRL) Upper Range Limit (URL)<br />
Range 1 0 psia (0 bar) 30 psia (2,07 bar)<br />
Range 2 0 psia (0 bar) 150 psia (10,34 bar)<br />
Range 3 0 psia (0 bar) 800 psia (55,16 bar)<br />
Range 4 0 psia (0 bar) 4000 psia (275,8 bar)<br />
Range 5 0 psia (0 bar) 10000 psia (689,5 bar)<br />
(1) Assumes atmospheric pressure of 14.7 psig (1 bar).
Reference Manual<br />
00809-0100-4804, Rev AA<br />
January 2011<br />
Minimum Span Limits<br />
HART Specifications<br />
<strong>Rosemount</strong> <strong>3051S</strong> ERS System<br />
Minimum Calibrated Span for Each Sensor<br />
The values shown below are the minimum calibrated spans for each pressure sensor range.<br />
Coplanar Gage Sensor (<strong>3051S</strong>AM_ _G, <strong>3051S</strong>AL _ _G)<br />
Ultra Classic<br />
Range 2 1.3 in.H20 (3,11 mbar) 2.5 in.H20 (6,23 mbar)<br />
Range 3 5.0 in.H20 (12,4 mbar) 10.0 in.H20 (24,9 mbar)<br />
Range 4 1.5 psig (103,4 mbar) 3.0 psig (206,8 mbar)<br />
Range 5 10.0 psig (689,5 mbar) 20.0 psig (1,38 bar)<br />
Coplanar Absolute Sensor (<strong>3051S</strong>AM_ _A, <strong>3051S</strong>AL_ _A)<br />
Ultra Classic<br />
Range 1 0.3 psia (20,7 mbar) 0.3 psia (20,7 mbar)<br />
Range 2 0.75 psia (51,7 mbar) 1.5 psia (103,4 mbar)<br />
Range 3 4 psia (275,8 mbar) 8 psia (0,55 bar)<br />
Range 4 20 psia (275,8 mbar) 40 psia (2,76 bar)<br />
In-Line Gage Sensor (<strong>3051S</strong>AM_ _T, <strong>3051S</strong>AL _ _T)<br />
Ultra Classic<br />
Range 1 0.3 psig (20,7 mbar) 0.3 psig (20,7 mbar)<br />
Range 2 0.75 psig (51,7 mbar) 1.5 psig (103,4 mbar)<br />
Range 3 4 psig (275,8 mbar) 8 psig (0,55 bar)<br />
Range 4 20 psig (1,38 bar) 40 psig (2,76 bar)<br />
Range 5 1000 psig (68,9 bar) 2000 psig (137,9 bar)<br />
In-Line Absolute Sensor (<strong>3051S</strong>AM_ _E, <strong>3051S</strong>AL _ _E)<br />
Ultra Classic<br />
Range 1 0.3 psia (20,7 mbar) 0.3 psia (20,7 mbar)<br />
Range 2 0.75 psia (51,7 mbar) 1.5 psia (103,4 mbar)<br />
Range 3 4 psia (275,8 mbar) 8 psia (0,55 bar)<br />
Range 4 20 psia (275,8 mbar) 40 psia (2,76 bar)<br />
Range 5 1000 psia (68,9 bar) 2000 psia (137,9 bar)<br />
DP Span Considerations<br />
It is recommended that the DP rangedown (Operating Pressure / DP Span)<br />
not exceed 100:1. Consult with your <strong>Emerson</strong> <strong>Process</strong> Management sales<br />
representative or Instrument Toolkit when considering a <strong>3051S</strong> ERS System<br />
for use on applications beyond 100:1 rangedown.<br />
Service<br />
Liquid, gas, and vapor applications<br />
Zero and Span Adjustment<br />
Zero and span values can be set anywhere within the range. Span must be<br />
greater than or equal to the minimum span.<br />
Output<br />
Two-wire 4-20 mA is user-selectable for linear output. Digital process variable<br />
superimposed on 4-20 mA signal, available to any host that conforms to<br />
HART protocol.<br />
A-5
<strong>Rosemount</strong> <strong>3051S</strong> ERS System<br />
A-6<br />
Power Supply<br />
External power supply required (16 – 42.4 Vdc with no load)<br />
Reference Manual<br />
00809-0100-4804, Rev AA<br />
January 2011<br />
Load Limitations<br />
Maximum loop resistance is determined by the voltage level of the external<br />
power supply:<br />
• If supply voltage ≤ 16.74 Vdc, Maximum Loop Resistance = 277.8 *<br />
(Power Supply Voltage – 16.0)<br />
• If supply voltage > 16.74 Vdc, Maximum Loop Resistance = 43.5 *<br />
(Power Supply Voltage – 12.0)<br />
1322<br />
Load (Ohms)<br />
206<br />
Burst Pressure Limits<br />
• Coplanar Gage / Absolute Sensor Module (<strong>3051S</strong>AM_ _G,<br />
<strong>3051S</strong>AM_ _A): 10000 psi (689,5 bar)<br />
• In-Line Gage / Absolute Sensor Module (<strong>3051S</strong>AM_ _T,<br />
<strong>3051S</strong>AM_ _E)<br />
• Ranges 1-4: 11000 psi (758,4 bar)<br />
• Range 5: 26000 psi (1792,64 bar)<br />
Ambient Temperature Limits<br />
0<br />
Operating<br />
Region<br />
16 16.74 42.4<br />
Voltage (Vdc)<br />
Overpressure Limits (1)<br />
<strong>3051S</strong> ERS sensor modules can withstand the following limits without damage<br />
Coplanar Gage Sensor<br />
(<strong>3051S</strong>AM_ _G)<br />
Coplanar Absolute Sensor<br />
(<strong>3051S</strong>AM_ _A)<br />
In-Line Gage Sensor<br />
(<strong>3051S</strong>AM_ _T)<br />
During Operation<br />
• -40 to 185 °F (-40 to 85 °C)<br />
• With LCD display (1) : -40 to 175 °F (-40 to 80 °C)<br />
In-Line Absolute Sensor<br />
(<strong>3051S</strong>AM_ _E)<br />
Range 1 N/A 750 psia (51,7 bar) 750 psia (51,7 bar) 750 psia (51,7 bar)<br />
Range 2 3626 psi (250 bar) 1500 psia (103,4 bar) 1500 psia (103,4 bar) 1500 psia (103,4 bar)<br />
Range 3 3626 psi (250 bar) 1600 psia (110,3 bar) 1600 psia (110,3 bar) 1600 psia (110,3 bar)<br />
Range 4 3626 psi (250 bar) 6000 psia (413,7 bar) 6000 psia (413,7 bar) 6000 psia (413,7 bar)<br />
Range 5 3626 psi (250 bar) N/A 15000 psig (1034,2 bar) 15000 psig (1034,2 bar)<br />
(1) The overpressure limit for configurations with remote seals (including <strong>3051S</strong>AL) is dependent on the flange rating or sensor rating (whichever is lower).<br />
Use Instrument Toolkit to ensure the seal system meets all pressure and temperature limits.<br />
(1) LCD display may not be readable, and LCD updates will be slower at temperatures below -4 °F (-20 °C)
Reference Manual<br />
00809-0100-4804, Rev AA<br />
January 2011<br />
<strong>Process</strong> Temperature<br />
Limits<br />
<strong>Rosemount</strong> <strong>3051S</strong> ERS System<br />
Storage<br />
• -50 to 185 °F (-46 to 85 °C)<br />
• With LCD display: -40 to 185 °F (-40 to 85 °C)<br />
At 70 °F (21 °C) ambient temperature and atmospheric pressure or above<br />
Table A-3. Gage / Absolute Sensor<br />
Coplanar Gage / Absolute Sensor<br />
In-Line Gage Sensor / Absolute Sensor<br />
Configuration<br />
(<strong>3051S</strong>AM_ _G, <strong>3051S</strong>AM_ _A)<br />
(<strong>3051S</strong>AM_ _T, <strong>3051S</strong>AM_ _E)<br />
Silicone Fill Fluid (1)<br />
- -40 to 250 °F (-40 to 121 °C) (2)<br />
with Coplanar Flange -40 to 250 °F (-40 to 121 °C) (2) -<br />
with Traditional Flange -40 to 300 °F (-40 to 149 °C) (2) -<br />
with Level Flange -40 to 300 °F (-40 to 149 °C) (2)<br />
-<br />
with 305 Integral Manifold -40 to 300 °F (-40 to 149 °C) (2) -<br />
Inert Fill Fluid (1)(3) -40 to 185 °F (-40 to 85 °C) (4) -22 to 250 °F (-30 to 121 °C) (2)<br />
(1) <strong>Process</strong> temperatures above 185 °F (85 °C) require de-rating the ambient limits by a 1.5:1 ratio. For example, for process temperature of 195 °F (91 °C),<br />
new ambient temperature limit is equal to 170 °F (77 °C). This can be determined as follows: (195 °F - 185 °F) x 1.5 = 15 °F, 185 °F - 15 °F = 170 °F.<br />
(2) 220 °F (104 °C) limit in vacuum service; 130 °F (54 °C) for pressures below 0.5 psia.<br />
(3) Not available with <strong>3051S</strong>AM_ _A<br />
(4) 160 °F (71 °C) limit in vacuum service.<br />
Table A-4. Liquid Level Sensor (<strong>3051S</strong>AL)<br />
<strong>Process</strong> Temperature Limits at 70 °F (21 °C) Ambient and Atmospheric Pressure or Above<br />
Fill Fluid<br />
No Extension 2-in (50 mm) Extension 4-in (100 mm) Extension Thermal Optimizer (1)<br />
200 Silicone -49 to 401 °F<br />
-49 to 401 °F<br />
-49 to 401 °F<br />
-49 to 401 °F<br />
(-45 to 205 °C)<br />
(-45 to 205 °C)<br />
(-45 to 205 °C)<br />
(-45 to 205 °C)<br />
704 Silicone 32 to 401 °F<br />
32 to 464 °F<br />
32 to 500 °F<br />
32 to 599 °F<br />
(0 to 205 °C)<br />
(0 to 240 °C)<br />
(0 to 260 °C)<br />
(0 to 315 °C)<br />
Inert (Halocarbon) -49 to 320 °F<br />
-49 to 320 °F<br />
-49 to 320 °F<br />
-49 to 320 °F<br />
(-45 to 160 °C)<br />
(-45 to 160 °C)<br />
(-45 to 160 °C)<br />
(-45 to 160 °C)<br />
Syltherm ® XLT Silicone -102 to 293 °F<br />
-102 to 293 °F<br />
-102 to 293 °F<br />
-102 to 293 °F<br />
(-75 to 145 °C)<br />
(-75 to 145 °C)<br />
(-75 to 145 °C)<br />
(-75 to 145 °C)<br />
Glycerin and Water 5 to 203 °F<br />
5 to 203 °F<br />
5 to 203 °F<br />
5 to 203 °F<br />
(-15 to 95 °C)<br />
(-15 to 95 °C)<br />
(-15 to 95 °C)<br />
(-15 to 95 °C)<br />
Propylene Glycol and<br />
5 to 203 °F<br />
5 to 203 °F<br />
5 to 203 °F<br />
5 to 203 °F<br />
Water<br />
(-15 to 95 °C)<br />
(-15 to 95 °C)<br />
(-15 to 95 °C)<br />
(-15 to 95 °C)<br />
Neobee M-20 5 to 401 °F<br />
5 to 437 °F<br />
5 to 437 °F<br />
5 to 437 °F<br />
(-15 to 205 °C)<br />
(-15 to 225 °C)<br />
(-15 to 225 °C)<br />
(-15 to 225 °C)<br />
(1) Consult Figure A-1 below for the specific operating range of using the Thermal Optimizer with 704 Silicone Fill Fluid.<br />
A-7
<strong>Rosemount</strong> <strong>3051S</strong> ERS System<br />
Figure A-1. Thermal Optimizer<br />
with Silicone 704 Fill Fluid<br />
Temperature Limits<br />
A-8<br />
Humidity Limits<br />
0-100% relative humidity<br />
Reference Manual<br />
00809-0100-4804, Rev AA<br />
January 2011<br />
Turn-On Time<br />
The <strong>3051S</strong> ERS System will be within specifications within six seconds from<br />
when power is applied to the system.<br />
Damping<br />
The PHI and PLO Pressure measurements and the DP calculation may be<br />
independently dampened from 0 – 60 seconds.<br />
Failure Mode Alarm<br />
If self-diagnostics detect a gross failure in the <strong>3051S</strong> ERS System, the analog<br />
output will be driven offscale to alert the user. <strong>Rosemount</strong> standard (default),<br />
NAMUR, and custom alarm levels are available. High or low alarm signal is<br />
selectable via a switch located on the LCD / device electronics located in ERS<br />
Primary Unit.<br />
Configuration High Alarm Low Alarm<br />
Default (<strong>Rosemount</strong> Standard) ≥ 21.75 mA ≤ 3.75 mA<br />
NAMUR compliant (1)<br />
≥ 22.5 mA ≤ 3.6 mA<br />
Custom (2)<br />
20.2 to 23.0 mA 3.54 to 3.8 mA<br />
(1) Analog output levels are compliant with NAMUR recommendation NE 43, see option codes C4 or<br />
C5.<br />
(2) Low alarm must be 0.1 mA less than the low saturation. High alarm must be 0.1 mA greater than<br />
the high saturation.
Reference Manual<br />
00809-0100-4804, Rev AA<br />
January 2011<br />
PHYSICAL<br />
SPECIFICATIONS<br />
Electrical Connections<br />
<strong>Process</strong> Connections<br />
<strong>Process</strong> Wetted Parts <strong>Process</strong> Isolating Diaphragms<br />
<strong>Rosemount</strong> <strong>3051S</strong> ERS System<br />
1 /2 -14 NPT, G 1 /2, and M20 x 1.5 conduit. HART interface connections fixed to<br />
terminal block of ERS Primary Unit.<br />
Coplanar Gage / Absolute Sensor (<strong>3051S</strong>AM_ _G, <strong>3051S</strong>AL _ _A)<br />
Standard<br />
Flange Adapters<br />
1 1<br />
/4 - 18 NPT on 2 /8-in. centers<br />
1 1<br />
/2 - 14 NPT and RC /2 on 2-in. (50.8 mm) centers<br />
1 /2 - 14 NPT and RC 1 /2 on 2 1 /8-in. (54.0 mm) centers<br />
1 /2 - 14 NPT and RC 1 /2 on 2 1 /4-in. (57.2 mm) centers<br />
In-Line Gage Sensor / Absolute (<strong>3051S</strong>AM_ _T, <strong>3051S</strong>AL _ _E)<br />
1 Standard<br />
/2 - 14 NPT Female<br />
F11 Code<br />
Non-threaded instrument flange (available in SST for sensor ranges 1-4<br />
only)<br />
G11 Code<br />
G 1 /2 A DIN 16288 Male (available in SST for sensor ranges 1-4 only)<br />
Autoclave type F-250C (Pressure relieved 9/16 – 18 gland thread;<br />
H11 Code<br />
1 /4<br />
OD high pressure tube 60° cone; available in SST for sensor range 5<br />
only)<br />
Liquid Level Sensor (<strong>3051S</strong>AL)<br />
FF Seal ANSI/ASME B16.5: 2-in, 3-in., and 4-in. with Class 150, Class 300, and<br />
Class 600 flanges<br />
EN 1092-1: DN 50, DN 80, and DN 100 with PN 10/16 and PN 40<br />
flanges<br />
JIS B2238: 50A, 80A, and 100A with 10K, 20K, and 40K flanges<br />
ANSI/ASME B16.5: 3-in., and 4-in. with Class 150, Class 300, and Class<br />
600 flanges<br />
EF Seal<br />
EN 1092-1: DN 80 and DN 100 with PN10/16 and PN 40 flanges<br />
JIS B2238: 80A and 100A with 10K, 20K, and 40K flanges<br />
ANSI/ASME B16.5: 1-in. and 1.5-in. with Class 150, Class 300, and<br />
Class 600 flanges<br />
RF Seal<br />
EN 1092-1: DN 25 and DN 40 with PN10/16 and PN 40 flanges<br />
JIS B2238: 25A and 40A with 10K, 20K, and 40K flanges<br />
1 1 3<br />
RT Seal<br />
/4-18 NPT, /2-14 NPT, /4-14 NPT, and 1-11.5 NPT<br />
SC Seal<br />
1 1 /2-in., 2-in., and 3-in. Tri-Clover Style Tri-Clamp<br />
SS Seal<br />
4-in. Sch.5 Tri-Clamp<br />
Coplanar Gage / Absolute Sensor (<strong>3051S</strong>AM_ _G, <strong>3051S</strong>AL _ _A)<br />
316L SST (UNS S31603), Alloy C-276 (UNS N10276), Alloy 400 (UNS N04400), Tantalum<br />
(UNS R05440), Gold-Plated Alloy 400, Gold-Plated 316L SST<br />
In-Line Gage Sensor / Absolute (<strong>3051S</strong>AM_ _T, <strong>3051S</strong>AL _ _E)<br />
316L SST (UNS S31603), Alloy C-276 (UNS N10276)<br />
Liquid Level Sensor (<strong>3051S</strong>AL)<br />
FF Seal<br />
EF Seal<br />
316L SST, Alloy C-276, Tantalum<br />
RF Seal<br />
RT Seal<br />
SC Seal<br />
316L SST, Alloy C-276<br />
SS Seal<br />
A-9
<strong>Rosemount</strong> <strong>3051S</strong> ERS System<br />
Non-Wetted Parts <strong>Electronic</strong>s Housing<br />
A-10<br />
Reference Manual<br />
00809-0100-4804, Rev AA<br />
January 2011<br />
Drain / Vent Valves<br />
316 SST, Alloy C-276, or Alloy 400/K-500 material (drain / vent seat: Alloy<br />
400, drain / vent stem: Alloy K-500)<br />
<strong>Process</strong> Flanges and Adapters<br />
• Plated carbon steel<br />
• SST: CF-8M (Cast 316 SST) per ASTM A743<br />
• Cast C-276: CW-12MW per ASTM A494<br />
• Cast Alloy 400: M-30C per ASTM A494<br />
Wetted O-rings<br />
Glass-filled PTFE, Graphite-filled PTFE (used only with Gold-Plated Alloy 400<br />
isolating diaphragm)<br />
Low-copper aluminum alloy or CF-8M (Cast 316 SST)<br />
NEMA 4X, IP 66, IP 68<br />
Coplanar Sensor Module Housing<br />
SST: CF-3M (Cast 316L SST)<br />
Bolts<br />
• Plated carbon steel per ASTM A449, Type 1<br />
• Austenitic 316 SST per ASTM F593<br />
• ASTM A453, Class D, Grade 660 SST<br />
• ASTM A193, Grade B7M alloy steel<br />
• ASTM A193, Class 2, Grade B8M SST<br />
• Alloy K-500<br />
Sensor Module Fill Fluid<br />
Silicone or Inert (halocarbon)<br />
Seal Fill Fluid (<strong>3051S</strong>AL Liquid Level Sensor)<br />
Silicone 200, Silicone 704, Syltherm XLT, Inert (halocarbon), Glycerin and<br />
Water, Neobee M-20, Propylene Glycol, and Water<br />
Paint<br />
Polyurethane<br />
Cover O-rings<br />
Buna-N
Reference Manual<br />
00809-0100-4804, Rev AA<br />
January 2011<br />
<strong>Rosemount</strong> <strong>3051S</strong> ERS System<br />
DIMENSIONAL<br />
DRAWINGS<br />
Figure A-2. <strong>3051S</strong> ERS Coplanar Sensor and Flange<br />
PlantWeb Housing Junction Box Housing<br />
Front View Front View<br />
4.20 (107)<br />
Dimensions are in inches (millimeters)<br />
Side View Side View<br />
4.55 (116)<br />
6.44 (164)<br />
8.53<br />
(217)<br />
9.63<br />
(245)<br />
4.20 (107)<br />
3.45 (88)<br />
6.44 (164)<br />
8.53<br />
(217)<br />
9.63<br />
(245)<br />
A-11
<strong>Rosemount</strong> <strong>3051S</strong> ERS System<br />
Figure A-3. <strong>3051S</strong> ERS Coplanar Sensor with Traditional Flange<br />
PlantWeb Housing Junction Box Housing<br />
A-12<br />
9.26<br />
(235)<br />
1.63 (41)<br />
Dimensions are in inches (millimeters)<br />
Front View Front View<br />
3.40<br />
(86)<br />
1.10<br />
(28)<br />
9.26<br />
(235)<br />
Side View Side View<br />
2.13 (54)<br />
Reference Manual<br />
00809-0100-4804, Rev AA<br />
January 2011<br />
3.40<br />
(86)<br />
3.45 (88)<br />
1.10<br />
(28)
Reference Manual<br />
00809-0100-4804, Rev AA<br />
January 2011<br />
<strong>Rosemount</strong> <strong>3051S</strong> ERS System<br />
Figure A-4. <strong>3051S</strong> ERS In-Line Sensor<br />
PlantWeb Housing Junction Box Housing<br />
Front View Front View<br />
4.20 (107)<br />
8.22<br />
(209)<br />
Dimensions are in inches (millimeters)<br />
4.20 (107)<br />
Side View Side View<br />
5.21 (132)<br />
4.55 (116) 3.45 (88)<br />
8.22<br />
(209)<br />
A-13
<strong>Rosemount</strong> <strong>3051S</strong> ERS System<br />
A-14<br />
Reference Manual<br />
00809-0100-4804, Rev AA<br />
January 2011<br />
Figure A-5. Coplanar Mounting Configurations (B4 Bracket)<br />
Pipe Mount Panel Mount<br />
Front View Front View Front View<br />
3.54 (90)<br />
Dimensions are in inches (millimeters)<br />
6.25 (159)<br />
2.58 (66) 4.55 (116)<br />
6.15<br />
(156)<br />
2.81<br />
(71)<br />
4.70 (120)<br />
Figure A-6. Traditional Mounting Configurations<br />
Pipe Mount Pipe Mount (Flat Bracket) Panel Mount<br />
0.93<br />
(24)<br />
2.62<br />
(67)<br />
3.42<br />
(87)<br />
8.18<br />
(208)<br />
Dimensions are in inches (millimeters)<br />
7.7<br />
(196)<br />
5.32<br />
(135)<br />
3.42<br />
(87)<br />
4.85<br />
(123)<br />
13.03<br />
(331)<br />
2.62<br />
(67)<br />
10.70 (272)<br />
7.70 (196)
Reference Manual<br />
00809-0100-4804, Rev AA<br />
January 2011<br />
<strong>Rosemount</strong> <strong>3051S</strong> ERS System<br />
Figure A-7. In-Line Mounting Configurations (B4 Bracket)<br />
Pipe Mount Panel Mount<br />
Front View Side View<br />
3.08<br />
(78)<br />
Dimensions are in inches (millimeters)<br />
6.25<br />
(159)<br />
6.15<br />
(156) 6.15<br />
2.58<br />
(66)<br />
2.81<br />
(71)<br />
4.55 (116)<br />
4.72 (120)<br />
6.90 (175)<br />
Figure A-8. <strong>Remote</strong> Display Mounting Configurations (B4 Bracket)<br />
Pipe Mount Panel Mount<br />
Front View Side View<br />
3.08<br />
(78)<br />
1.82 (46)<br />
6.90 (175)<br />
Dimensions are in inches (millimeters)<br />
6.24 (158)<br />
2.66<br />
(68)<br />
6.15<br />
(156)<br />
2.33<br />
(59)<br />
4.48<br />
(114<br />
4.72 (120)<br />
5.19 (132)<br />
2.66<br />
(68)<br />
A-15
<strong>Rosemount</strong> <strong>3051S</strong> ERS System<br />
Figure A-9. <strong>Rosemount</strong> <strong>3051S</strong>_L Liquid Level Transmitter<br />
Side View Front View<br />
Flush Flanged Configuration Extended Flanged Configuration<br />
Extension<br />
2, 4, or 6 (51, 102, or 152)<br />
Dimensions are in inches (millimeters)<br />
Class<br />
A-16<br />
4.20 (107)<br />
A<br />
H<br />
Pipe<br />
Size<br />
E D<br />
Flange<br />
Thickness A<br />
Bolt Circle<br />
Diameter B<br />
A<br />
4.20 (107)<br />
H<br />
Outside<br />
Diameter C<br />
No. of<br />
Bolts<br />
Bolt Hole<br />
Diameter<br />
5.21 (132)<br />
4.55 (116)<br />
B<br />
C<br />
Reference Manual<br />
00809-0100-4804, Rev AA<br />
January 2011<br />
7.09<br />
(180)<br />
8.53<br />
(217)<br />
9.65<br />
(245)<br />
Extension<br />
Diameter (1) D E H<br />
ASME B16.5 (ANSI) 150 2 (51) 0.69 (18) 4.75 (121) 6.0 (152) 4 0.75 (19) N/A 3.6 (92) 5.65 (143)<br />
3 (76) 0.88 (22) 6.0 (152) 7.5 (191) 4 0.75 (19) 2.58 (66) 5.0 (127) 5.65 (143)<br />
4 (102) 0.88 (22) 7.5 (191) 9.0 (229) 8 0.75 (19) 3.5 (89) 6.2 (158) 5.65 (143)<br />
ASME B16.5 (ANSI) 300 2 (51) 0.82 (21) 5.0 (127) 6.5 (165) 8 0.75 (19) N/A 3.6 (92) 5.65 (143)<br />
3 (76) 1.06 (27) 6.62 (168) 8.25 (210) 8 0.88 (22) 2.58 (66) 5.0 (127) 5.65 (143)<br />
4 (102) 1.19 (30) 7.88 (200) 10.0 (254) 8 0.88 (22) 3.5 (89) 6.2 (158) 5.65 (143)<br />
ASME B16.5 (ANSI) 600 2 (51) 1.00 (25) 5.0 (127) 6.5 (165) 8 0.75 (19) N/A 3.6 (92) 7.65 (194)<br />
3 (76) 1.25 (32) 6.62 (168) 8.25 (210) 8 0.88 (22) 2.58 (66) 5.0 (127) 7.65 (194)<br />
DIN 2501 PN 10–40 DN 50 20 mm 125 mm 165 mm 4 18 mm N/A 4.0 (102) 5.65 (143)<br />
DIN 2501 PN 25/40 DN 80 24 mm 160 mm 200 mm 8 18 mm 66 mm 5.4 (138) 5.65 (143)<br />
DN 100 24 mm 190 mm 235 mm 8 22 mm 89 mm 6.2 (158) 5.65 (143)<br />
DIN 2501 PN 10/16 DN 100 20 mm 180 mm 220 mm 8 18 mm 89 mm 6.2 (158) 5.65 (143)<br />
(1) Tolerances are 0.040 (1,02), –0.020 (0,51).
Reference Manual<br />
00809-0100-4804, Rev AA<br />
January 2011<br />
ORDERING INFORMATION<br />
<strong>Rosemount</strong> <strong>3051S</strong> ERS System<br />
<strong>Rosemount</strong> <strong>3051S</strong>AM Transmitter for ERS Applications<br />
• Coplanar and In-Line sensor module platforms<br />
• Variety of process connections including threaded NPT, flanges, manifolds, and 1199 remote<br />
seals<br />
• Available with 10-year stability and limited 12-year warranty<br />
Table A-5. <strong>3051S</strong>AM Scalable Advanced Measurement Transmitter for ERS Applications Ordering Information<br />
★ The Standard offering represents the most common models and options. These options should be selected for best delivery.<br />
__The Expanded offering is subject to additional delivery lead time.<br />
Model Transmitter Type<br />
<strong>3051S</strong>AM Scalable Advanced Measurement Transmitter<br />
Performance Class<br />
Standard Standard<br />
1 Ultra: 0.025% span accuracy, 200:1 rangedown, 10-year stability, 12-year limited warranty ★<br />
2 Classic: 0.055% span accuracy, 100:1 rangedown, 5-year stability ★<br />
Configuration Type<br />
Standard Standard<br />
P <strong>Electronic</strong> <strong>Remote</strong> Sensor - Primary ★<br />
S <strong>Electronic</strong> <strong>Remote</strong> Sensor - Secondary ★<br />
Pressure Module Type Pressure Sensor Type<br />
Standard Standard<br />
G Coplanar Gage ★<br />
T In-Line Gage ★<br />
E<br />
Expanded<br />
In-Line Absolute ★<br />
A Coplanar Absolute<br />
Pressure Range (1)<br />
Coplanar Gage Coplanar Absolute In-Line Gage In-Line Absolute<br />
Standard Standard<br />
1A N/A 0 to 30 psia<br />
-14.7 to 30 psig<br />
0 to 30 psia<br />
★<br />
(0 to 2,06 bar)<br />
(-1,0 to 2,06 bar)<br />
(0 to 2,06 bar)<br />
2A -250 to 250 inH2O 0 to 150 psia<br />
-14.7 to 150 psig<br />
0 to 150 psia<br />
★<br />
(-623 to 623 mbar) (0 to 10,34 bar)<br />
(-1,0 to 10,34 bar) (0 to 10,34 bar)<br />
3A -393 to 1000 inH2O 0 to 800 psia<br />
-14.7 to 800 psig<br />
0 to 800 psia<br />
★<br />
(-0,98 to 2,49 bar) (0 to 55,2 bar)<br />
(-1,0 to 55,2 bar)<br />
(0 to 55,2 bar)<br />
4A -14.2 to 300 psig<br />
0 to 4000 psia<br />
-14.7 to 4000 psig 0 to 4000 psia<br />
★<br />
(-0,98 to 20,7 bar) (0 to 275,8 bar)<br />
(-1,0 to 275,8 bar) (0 to 275,8 bar)<br />
5A -14.2 to 2000 psig<br />
(-0,98 to 137,9 bar)<br />
N/A -14.7 to 10000 psig<br />
(-1,0 to 689,5 bar)<br />
0 to 10000 psia<br />
(0 to 689,5 bar)<br />
Isolating Diaphragm<br />
Standard Standard<br />
2 (2) 316L SST ★<br />
3 (2)<br />
Expanded<br />
Alloy C-276 ★<br />
4 (3) Alloy 400<br />
5 (3)(4)<br />
Tantalum<br />
6 (3) Gold-plated Alloy 400 (includes Graphite-Filled PTFE o-Ring)<br />
7 (3) Gold-plated 316L SST<br />
<strong>Process</strong> Connection<br />
Coplanar Module Type In-Line Module Type<br />
Standard Standard<br />
★<br />
A-17
<strong>Rosemount</strong> <strong>3051S</strong> ERS System<br />
A-18<br />
Reference Manual<br />
00809-0100-4804, Rev AA<br />
January 2011<br />
000 None N/A ★<br />
A11 (5) Assemble to <strong>Rosemount</strong> 305 Manifold Assemble to <strong>Rosemount</strong> 306 Manifold ★<br />
A12 (5) Assemble to <strong>Rosemount</strong> 304 or AMF Manifold with SST<br />
Traditional Flange<br />
N/A ★<br />
B11 (5)(6) Assemble to One <strong>Rosemount</strong> 1199 <strong>Remote</strong> Diaphragm<br />
Seal with SST transmitter flange<br />
Assemble to One <strong>Rosemount</strong> 1199 <strong>Remote</strong> Diaphragm ★<br />
E11 Coplanar Flange (CS), ¼-18 NPT, 316 SST Drain Vents ½ -14 NPT Female ★<br />
E12 Coplanar Flange (SST), ¼-18 NPT, 316 SST Drain<br />
Vents<br />
N/A ★<br />
E13 (2)<br />
Coplanar Flange (Cast C-276), ¼-18 NPT, Alloy C-276<br />
Drain Vents<br />
N/A ★<br />
E14 Coplanar Flange (Cast Alloy 400), ¼-18 NPT, Alloy<br />
400/K-500 Drain Vents<br />
N/A ★<br />
E15 (2) Coplanar Flange (SST), ¼-18 NPT, Alloy C-276 Drain<br />
Vents<br />
N/A ★<br />
E16 (2)<br />
Coplanar Flange (CS), ¼-18 NPT, Alloy C-276 Drain<br />
Vents<br />
N/A ★<br />
E21 Coplanar Flange (CS), RC ¼, 316 SST Drain Vents N/A ★<br />
E22 Coplanar Flange (SST), RC ¼, 316 SST Drain Vents N/A ★<br />
E23 (2) Coplanar Flange (Cast C-276), RC ¼, Alloy C-276<br />
Drain Vents<br />
N/A ★<br />
E24 Coplanar Flange (Cast Alloy 400), RC ¼, alloy<br />
400/K-500 Drain Vents<br />
N/A ★<br />
E25 (2) Coplanar Flange (SST), RC ¼, Alloy C-276 Drain Vents N/A ★<br />
E26 (2)<br />
Coplanar Flange (CS), RC ¼, Alloy C-276 Drain Vents N/A ★<br />
F12 Traditional Flange (SST), 1 /4-18 NPT, 316 SST Drain<br />
Vents<br />
N/A ★<br />
F13 (2)<br />
Traditional Flange (Cast C-276), 1 /4-18 NPT, Alloy<br />
C-276 Drain Vents<br />
N/A ★<br />
F14 Traditional Flange (Cast Alloy 400), 1 /4-18 NPT, Alloy<br />
400/K-500 Drain Vents<br />
N/A ★<br />
F15 (2) Traditional Flange (SST), 1 /4-18 NPT, Alloy C-276 Drain<br />
Vents<br />
N/A ★<br />
F22 Traditional Flange (SST), RC ¼, 316 SST Drain Vents N/A ★<br />
F23 (2) Traditional Flange (Cast C-276), RC ¼, Alloy C-276<br />
Drain Vents<br />
N/A ★<br />
F24 Traditional Flange (Cast Alloy 400), RC ¼, Alloy<br />
400/K500 Drain Vents<br />
N/A ★<br />
F25 (2) Table A-5. <strong>3051S</strong>AM Scalable Advanced Measurement Transmitter for ERS Applications Ordering Information<br />
★ The Standard offering represents the most common models and options. These options should be selected for best delivery.<br />
__The Expanded offering is subject to additional delivery lead time.<br />
Traditional Flange (SST), RC ¼, Alloy C-276 Drain<br />
Vents<br />
N/A ★<br />
F52 DIN-Compliant Traditional Flange (SST), ¼-18 NPT,<br />
316 Drain Vents, 7-16-in. Bolting<br />
N/A ★<br />
G11 Vertical Mount Level Flange (SST), 2-in. ANSI Class<br />
150, 316 SST Drain Vents<br />
G ½ A DIN 16288 Male (Range 1-4 Only) ★<br />
G12 Vertical Mount Level Flange (SST), 2-in. ANSI Class<br />
300, 316 SST Drain Vents<br />
N/A ★<br />
G21 Vertical Mount Level Flange (SST), 3-in. ANSI Class<br />
150, 316 SST Drain Vents<br />
N/A ★<br />
G22 Vertical Mount Level Flange (SST), 3-in. ANSI Class<br />
300, 316 SST Drain Vents<br />
N/A ★<br />
G31 Vertical Mount Level Flange (SST), DIN-DN 50 PN 40,<br />
316 SST Drain Vents<br />
N/A ★<br />
G41<br />
Expanded<br />
Vertical Mount Level Flange (SST), DIN-DN 80 PN 40,<br />
316 SST Drain Vents<br />
N/A ★<br />
F11 Traditional Flange (CS), ¼-18 NPT, 316 SST Drain /<br />
Vents<br />
Non-Threaded Instrument Flange (I-Flange)
Reference Manual<br />
00809-0100-4804, Rev AA<br />
January 2011<br />
<strong>Rosemount</strong> <strong>3051S</strong> ERS System<br />
Table A-5. <strong>3051S</strong>AM Scalable Advanced Measurement Transmitter for ERS Applications Ordering Information<br />
★ The Standard offering represents the most common models and options. These options should be selected for best delivery.<br />
__The Expanded offering is subject to additional delivery lead time.<br />
F32 Bottom Vent Traditional Flange (SST), ¼-18 NPT, 316<br />
SST Drain Vents<br />
N/A<br />
F42 Bottom Vent Traditional Flange (SST), RC ¼, 316 SST<br />
Drain Vents<br />
N/A<br />
F62 DIN-Compliant Traditional Flange (316 SST), ¼-18<br />
NPT, 316 Drain Vents, M10 Bolting<br />
N/A<br />
F72 DIN-Compliant Traditional Flange (316 SST), ¼-18<br />
NPT, 316 Drain Vents, M12 Bolting<br />
N/A<br />
Transmitter Output<br />
Standard Standard<br />
A 4–20 mA with digital signal based on HART protocol ★<br />
Housing Style Material Conduit Entry Size<br />
Standard<br />
Housings for ERS Primary<br />
Standard<br />
1A PlantWeb Housing Aluminum 1 /2–14 NPT ★<br />
1B PlantWeb Housing Aluminum M20 x 1.5 (CM 20) ★<br />
1J PlantWeb Housing SST 1 /2–14 NPT ★<br />
1K PlantWeb Housing SST M20 x 1.5 (CM 20) ★<br />
2E Junction Box with <strong>Remote</strong> Display<br />
Output<br />
Aluminum<br />
1<br />
/2–14 NPT ★<br />
2F Junction Box with <strong>Remote</strong> Display<br />
Output<br />
Aluminum M20 x 1.5 (CM 20) ★<br />
2M Junction Box with <strong>Remote</strong> Display<br />
Output<br />
SST 1 /2–14 NPT ★<br />
Housings for ERS Secondary<br />
2A Junction Box Aluminum 1 /2–14 NPT ★<br />
2B Junction Box Aluminum M20 x 1.5 (CM 20) ★<br />
2J<br />
Expanded<br />
Junction Box SST<br />
1<br />
/2–14 NPT ★<br />
Housings for ERS Primary<br />
1C PlantWeb Housing Aluminum G 1 /2<br />
1L PlantWeb Housing SST G1 /2<br />
2G Junction Box with <strong>Remote</strong> Display<br />
Output<br />
Aluminum G1 /2<br />
Housings for ERS Secondary<br />
2C Junction Box Aluminum G1 /2<br />
Options (Include with selected model number)<br />
<strong>Electronic</strong> <strong>Remote</strong> Sensor Connection Cable<br />
Standard Standard<br />
R05 50 ft. (15.2 m) Spool of <strong>Electronic</strong> <strong>Remote</strong> Sensor Cable ★<br />
R10 100 ft. (30.5 m) Spool of <strong>Electronic</strong> <strong>Remote</strong> Sensor Cable ★<br />
Mounting Bracket<br />
Standard Standard<br />
B1 (3)<br />
Traditional flange bracket, CS, 2-in. pipe ★<br />
B2 (3)<br />
Traditional flange bracket, CS, panel ★<br />
B3 (3) Traditional flange flat bracket, CS, 2-in. pipe ★<br />
B4 Bracket, all SST, 2-in. Pipe and Panel ★<br />
B7 (3)<br />
Traditional flange bracket, B1 with SST bolts ★<br />
B8 (3) Traditional flange bracket, B2 with SST bolts ★<br />
B9 (3) Traditional flange bracket, B3 with SST bolts ★<br />
BA (3)<br />
Traditional flange bracket, B1, all SST ★<br />
BC (3) Traditional flange bracket, B3, all SST ★<br />
Special Configuration (Software)<br />
Standard Standard<br />
A-19
<strong>Rosemount</strong> <strong>3051S</strong> ERS System<br />
A-20<br />
Reference Manual<br />
00809-0100-4804, Rev AA<br />
January 2011<br />
C1 (7)<br />
Customer Software Configuration (“Configuration Data Sheet” Must Be Completed) ★<br />
C3 Gage Pressure Calibration on <strong>Rosemount</strong> <strong>3051S</strong>AM_ _A4 only ★<br />
C4 (7) NAMUR Alarm and Saturation Levels, High Alarm ★<br />
C5 (7)<br />
NAMUR Alarm and Saturation Levels, Low Alarm ★<br />
C6 (7) Custom Alarm and Saturation Levels, High Alarm (Requires C1 and Configuration Data Sheet) ★<br />
C7 (7) Custom Alarm and Saturation Levels, Low Alarm (Requires C1 and Configuration Data Sheet) ★<br />
C8 (7)<br />
Low alarm (standard <strong>Rosemount</strong> alarm and saturation levels) ★<br />
Special Configuration (Hardware)<br />
Standard Standard<br />
D2 (8) 1 /2-14 NPT Flange Adapters ★<br />
D4 External ground screw assembly ★<br />
D5 (8) Expanded<br />
Delete transmitter drain/vent valves (install plugs) ★<br />
D7 (8) Coplanar flange without drain/vent ports<br />
D9 (8) RC 1 /2 Flange Adapters<br />
Product Certifications<br />
Standard Standard<br />
E1 ATEX Flameproof ★<br />
I1 ATEX Intrinsic Safety ★<br />
N1 ATEX Type n ★<br />
K1 ATEX Flameproof and Intrinsically Safe, Type n, Dust ★<br />
ND ATEX Dust ★<br />
E4 TIIS Flameproof ★<br />
E5 FM Explosion-proof, Dust Ignition-proof ★<br />
I5 FM Intrinsically Safe, Division 2 ★<br />
K5 FM Explosion-proof, Dust Ignition-proof, Intrinsically Safe, Division 2 ★<br />
E6 (9) CSA Explosion-proof, Dust Ignition-proof, Division 2 ★<br />
I6 CSA Intrinsically Safe ★<br />
K6 (9) CSA Explosion-proof, Dust Ignition-proof, Intrinsically Safe, Division 2 ★<br />
E7 IECEx Flameproof ★<br />
I7 IECEx Intrinsic Safety ★<br />
N7 IECEx Type n ★<br />
K7 IECEx Flameproof, Intrinsic Safety, Type n ★<br />
E2 INMETRO Flameproof ★<br />
I2 INMETRO Intrinsically Safe ★<br />
K2 INMETRO Flameproof, Intrinsic Safety, Type n ★<br />
E3 China Flameproof ★<br />
I3 China Intrinsic Safety ★<br />
KA (9) ATEX and CSA Flameproof, Intrinsically Safe, Division 2 ★<br />
KB (9)<br />
FM and CSA Explosion-proof, Dust Ignition-proof, Intrinsically Safe, Division 2 ★<br />
KC FM and ATEX Explosion-proof, Intrinsically Safe, Division 2 ★<br />
KD (9) FM, CSA, and ATEX Explosion-proof, Intrinsically Safe ★<br />
Special Certifications<br />
Standard Standard<br />
Q4 Calibration Certificate ★<br />
QP Calibration Certificate and Tamper Evident Seal ★<br />
Q8 Material Traceability Certification per EN 10204 3.1B ★<br />
Q16 Surface Finish Certification for Hygienic <strong>Remote</strong> Seals ★<br />
QZ (10) <strong>Remote</strong> Seal System Performance Calculation Report ★<br />
Terminal Blocks<br />
Standard Standard<br />
T1 (7) Transient Terminal Block ★<br />
Alternate Materials of Construction<br />
Standard Standard<br />
L1 (11) Inert Sensor Fill Fluid ★<br />
L2 Graphite-Filled PTFE O-Ring ★<br />
L4 (8) Table A-5. <strong>3051S</strong>AM Scalable Advanced Measurement Transmitter for ERS Applications Ordering Information<br />
★ The Standard offering represents the most common models and options. These options should be selected for best delivery.<br />
__The Expanded offering is subject to additional delivery lead time.<br />
Austenitic 316 SST Bolts ★
Reference Manual<br />
00809-0100-4804, Rev AA<br />
January 2011<br />
<strong>Rosemount</strong> <strong>3051S</strong> ERS System<br />
L5 (2)(8)<br />
ASTM A 193, Grade B7M Bolts ★<br />
L6 (8) Alloy K-500 Bolts ★<br />
L7 (2)(8) ASTM A 453, Class D, Grade 660 Bolts ★<br />
L8 (8)<br />
ASTM A 193, Class 2, Grade B8M Bolts ★<br />
Display Type (ERS Primary Only)<br />
Standard Standard<br />
M5 (7)<br />
PlantWeb LCD Display ★<br />
M7 (7) <strong>Remote</strong> Mount LCD Display and Interface, PlantWeb Housing, No Cable, SST Bracket ★<br />
M8 (7) <strong>Remote</strong> Mount LCD Display and Interface, PlantWeb Housing, 50 ft. (15.2 m) Cable, SST Bracket ★<br />
M9 (7)<br />
<strong>Remote</strong> Mount LCD Display and Interface, PlantWeb Housing, 100 ft. (30.5 m) Cable, SST Bracket ★<br />
Special Procedures<br />
Expanded<br />
P1 Hydrostatic Testing with Certificate<br />
P2 (8) Cleaning for Special Services<br />
P3 (8) Table A-5. <strong>3051S</strong>AM Scalable Advanced Measurement Transmitter for ERS Applications Ordering Information<br />
★ The Standard offering represents the most common models and options. These options should be selected for best delivery.<br />
__The Expanded offering is subject to additional delivery lead time.<br />
Cleaning for Less than 1 PPM Chlorine/Fluorine<br />
Typical Model Number: <strong>3051S</strong>AM 1 S T 2A 2 E11 A 2A<br />
(1) The pressure range should be specified based on the maximum static pressure, not differential pressure.<br />
(2) Materials of Construction comply with metallurgical requirements highlighted within NACE MR0175/ISO 15156 for sour oil field production environments.<br />
Environmental limits apply to certain materials. Consult latest standard for details. Selected materials also conform to NACE MR0103 for sour refining<br />
environments.<br />
(3) Not available with Pressure Sensor / Module codes T or E.<br />
(4) Tantalum diaphragm material is only available with Pressure Sensor / Module code G.<br />
(5) “Assemble to” items are specified separately and require a completed model number.<br />
(6) Consult an <strong>Emerson</strong> <strong>Process</strong> Management representative for performance specifications.<br />
(7) Not available with Configuration Type code S.<br />
(8) Not available with <strong>Process</strong> Connection code A11.<br />
(9) Not available with M20 or G ½ conduit entry size.<br />
(10) The QZ report quantifies the performance of the entire ERS system. One report is provided per ERS system. The QZ option is specified on the Primary<br />
Transmitter (Configuration Type code P).<br />
(11) Silicone fill fluid is standard.<br />
A-21
<strong>Rosemount</strong> <strong>3051S</strong> ERS System<br />
A-22<br />
Reference Manual<br />
00809-0100-4804, Rev AA<br />
January 2011<br />
<strong>Rosemount</strong> <strong>3051S</strong>AL Level Transmitter for ERS Applications<br />
• Integrated transmitter and remote seal in a single model number<br />
• Variety of process connections including flanged, threaded, and hygienic remote seals<br />
• Available with 10-year stability and limited 12-year warranty<br />
A <strong>3051S</strong>AL Transmitter consists of 3 parts. First, specify the transmitter model codes found on page A-22. Then,<br />
specify a remote seal found on page A-26. Finish the model number by specifying all desired options on<br />
page A-24.<br />
ERS Transmitter Model Codes page A-22 <strong>Remote</strong> Seal Model Codes____ page A-26 ERS Options______page A-24<br />
Table A-6. <strong>3051S</strong>AL Scalable Advanced Level Transmitter for ERS Applications Ordering Information<br />
★ The Standard offering represents the most common models and options. These options should be selected for best delivery.<br />
__The Expanded offering is subject to additional delivery lead time.<br />
Model Transmitter Type<br />
<strong>3051S</strong>AL Scalable Advanced Level Transmitter<br />
Performance Class<br />
Standard Standard<br />
1 Ultra: 0.025% span accuracy, 200:1 rangedown, 10-year stability, 12-year limited warranty ★<br />
2 Classic: 0.055% span accuracy, 100:1 rangedown, 5-year stability ★<br />
Configuration Type<br />
Standard Standard<br />
P <strong>Electronic</strong> <strong>Remote</strong> Sensor - Primary ★<br />
S <strong>Electronic</strong> <strong>Remote</strong> Sensor - Secondary ★<br />
Pressure Module Type Pressure Sensor Type<br />
Standard Standard<br />
G Coplanar Gage ★<br />
T In-Line Gage ★<br />
E<br />
Expanded<br />
In-Line Absolute ★<br />
A Coplanar Absolute<br />
Pressure Range (1)<br />
Coplanar Gage Coplanar Absolute In-Line Gage In-Line Absolute<br />
Standard Standard<br />
1A N/A 0 to 30 psia<br />
-14.7 to 30 psig<br />
0 to 30 psia<br />
★<br />
(0 to 2,06 bar)<br />
(-1,0 to 2,06 bar) (0 to 2,06 bar)<br />
2A -250 to 250 inH2O<br />
0 to 150 psia<br />
-14.7 to 150 psig 0 to 150 psia<br />
★<br />
(-623 to 623 mbar)<br />
(0 to 10,34 bar)<br />
(-1,0 to 10,34 bar) (0 to 10,34 bar)<br />
3A -393 to 1000 inH2O 0 to 800 psia<br />
-14.7 to 800 psig 0 to 800 psia<br />
★<br />
(-0,98 to 2,49 bar)<br />
(0 to 55,2 bar)<br />
(-1,0 to 55,2 bar) (0 to 55,2 bar)<br />
4A -14.2 to 300 psig<br />
0 to 4000 psia<br />
-14.7 to 4000 psig 0 to 4000 psia<br />
★<br />
(-0,98 to 20,7 bar)<br />
(0 to 275,8 bar)<br />
(-1,0 to 275,8 bar) (0 to 275,8 bar)<br />
5A -14.2 to 2000 psig<br />
(-0,98 to 137,9 bar)<br />
N/A -14.7 to 10000 psig<br />
(-1,0 to 689,5 bar)<br />
0 to 10000 psia<br />
(0 to 689 bar)<br />
Transmitter Output<br />
Standard Standard<br />
A 4-20 mA with Digital Signal Based on HART Protocol ★<br />
Housing Style Material Conduit Entry Size<br />
Standard Standard<br />
★
Reference Manual<br />
00809-0100-4804, Rev AA<br />
January 2011<br />
<strong>Rosemount</strong> <strong>3051S</strong> ERS System<br />
Housings for ERS Primary<br />
1A PlantWeb Housing Aluminum 1 /2–14 NPT ★<br />
1B PlantWeb Housing Aluminum M20 x 1.5 (CM 20) ★<br />
1J PlantWeb Housing SST<br />
1<br />
/2–14 NPT ★<br />
1K PlantWeb Housing SST M20 x 1.5 (CM 20) ★<br />
2E Junction Box with <strong>Remote</strong> Display Output Aluminum 1 /2–14 NPT ★<br />
2F Junction Box with <strong>Remote</strong> Display Output Aluminum M20 x 1.5 (CM 20) ★<br />
2M Junction Box with <strong>Remote</strong> Display Output SST 1 /2–14 NPT ★<br />
Housings for ERS Secondary<br />
2A Junction Box Aluminum<br />
1<br />
/2–14 NPT ★<br />
2B Junction Box Aluminum M20 x 1.5 (CM 20) ★<br />
2J<br />
Expanded<br />
Junction Box SST 1 /2–14 NPT ★<br />
Housings for ERS Primary<br />
1C PlantWeb Housing Aluminum G1 /2<br />
1L PlantWeb Housing SST G 1 /2<br />
2G Junction Box with <strong>Remote</strong> Display Output Aluminum G1 /2<br />
Housings for ERS Secondary<br />
2C Junction Box Aluminum G 1 Table A-6. <strong>3051S</strong>AL Scalable Advanced Level Transmitter for ERS Applications Ordering Information<br />
★ The Standard offering represents the most common models and options. These options should be selected for best delivery.<br />
__The Expanded offering is subject to additional delivery lead time.<br />
/2<br />
Seal System Type<br />
Standard Standard<br />
1 Direct-Mount Seal System ★<br />
Direct-Mount Extension (Between Transmitter Flange and Seal)<br />
Standard Standard<br />
0 No Extension ★<br />
2 2-in. (50 mm) Extension ★<br />
4 4-in. (100 mm) Extension ★<br />
5 Thermal Optimizer ★<br />
Transmitter Reference Pressure Connection<br />
Standard Standard<br />
00 None (In-Line Style Sensor) ★<br />
20 316L SST Isolator / SST Transmitter Flange ★<br />
30 Alloy C-276 Isolator / SST Transmitter Flange ★<br />
Seal Fill Fluid<br />
Standard Standard<br />
A Syltherm XLT ★<br />
C Silicone 704 ★<br />
D Silicone 200 ★<br />
H Inert (Halocarbon) ★<br />
G Glycerin and Water ★<br />
N Neobee M-20 ★<br />
P Propylene Glycol and Water ★<br />
A-23
<strong>Rosemount</strong> <strong>3051S</strong> ERS System<br />
Continue specifying a completed model number by choosing a remote seal type below:<br />
A-24<br />
page A-26 FF Flush Flanged Seal <strong>Process</strong> Connections:<br />
2 in. / DN 50<br />
3 in. / DN 80<br />
4 in. / DN 100<br />
page A-28 EF Extended Flanged Seal <strong>Process</strong> Connections:<br />
3 in. / DN 80<br />
4 in. / DN 100<br />
page A-29 RF <strong>Remote</strong> Flanged Seal <strong>Process</strong> Connections:<br />
1 in. / DN 25<br />
1.5 in. / DN 40<br />
page A-31 RT <strong>Remote</strong> Threaded Seal <strong>Process</strong> Connections:<br />
¼ - 18 NPT<br />
½ - 14 NPT<br />
¾ - 14 NPT<br />
1 – 11.5 NPT<br />
page A-33 SC Hygienic Tri-Clamp Seal <strong>Process</strong> Connections:<br />
1.5 in.<br />
2 in.<br />
3 in.<br />
page A-34 SS Hygienic Tank Spud Seal <strong>Process</strong> Connections:<br />
4 in.<br />
Reference Manual<br />
00809-0100-4804, Rev AA<br />
January 2011<br />
Options (Include with selected model number)<br />
<strong>Electronic</strong> <strong>Remote</strong> Sensor Connection Cable<br />
Standard (1) Standard<br />
R05 50 ft. (15.2 m) Spool of <strong>Electronic</strong> <strong>Remote</strong> Sensor Cable ★<br />
R10 100 ft. (30.5 m) Spool of <strong>Electronic</strong> <strong>Remote</strong> Sensor Cable ★<br />
Special Configuration (Software)<br />
Standard Standard<br />
C1 (2) Customer Software Configuration (“Configuration Data Sheet” Must Be Completed) ★<br />
C3 Gage Pressure Calibration on <strong>Rosemount</strong> <strong>3051S</strong>AL_ _A4 only ★<br />
C4 (2)<br />
NAMUR Alarm and Saturation Levels, High Alarm ★<br />
C5 (2)<br />
NAMUR Alarm and Saturation Levels, Low Alarm ★<br />
C6 (2) Custom Alarm and Saturation Levels, High Alarm (Requires C1 and Configuration Data Sheet) ★<br />
C7 (2) Custom Alarm and Saturation Levels, Low Alarm (Requires C1 and Configuration Data Sheet) ★<br />
C8 (2)<br />
Low Alarm (Standard <strong>Rosemount</strong> Alarm and Saturation Levels) ★<br />
Special Configuration (Hardware)<br />
Standard Standard<br />
D4 External Ground Screw Assembly ★<br />
Product Certifications<br />
Standard Standard<br />
E1 ATEX Flameproof ★<br />
I1 ATEX Intrinsic Safety ★<br />
N1 ATEX Type n ★<br />
K1 ATEX Flameproof and Intrinsically Safe, Type n, Dust ★<br />
ND ATEX Dust ★<br />
E4 TIIS Flameproof ★<br />
E5 FM Explosion-proof, Dust Ignition-proof ★
Reference Manual<br />
00809-0100-4804, Rev AA<br />
January 2011<br />
<strong>Rosemount</strong> <strong>3051S</strong> ERS System<br />
I5 FM Intrinsically Safe, Division 2 ★<br />
K5 FM Explosion-proof, Dust Ignition-proof, Intrinsically Safe, Division 2 ★<br />
E6 (3)<br />
CSA Explosion-proof, Dust Ignition-proof, Division 2 ★<br />
I6 CSA Intrinsically Safe ★<br />
K6 (3) CSA Explosion-proof, Dust Ignition-proof, Intrinsically Safe, Division 2 ★<br />
E7 IECEx Flameproof ★<br />
I7 IECEx Intrinsic Safety ★<br />
N7 IECEx Type n ★<br />
K7 IECEx Flameproof, Intrinsic Safety, Type n ★<br />
E2 INMETRO Flameproof ★<br />
I2 INMETRO Intrinsically Safe ★<br />
K2 INMETRO Flameproof, Intrinsic Safety, Type n ★<br />
KA (3) ATEX and CSA Flameproof, Intrinsically Safe, Division 2 ★<br />
KB (3) FM and CSA Explosion-proof, Dust Ignition-proof, Intrinsically Safe, Division 2 ★<br />
KC FM and ATEX Explosion-proof, Intrinsically Safe, Division 2 ★<br />
KD (3) FM, CSA, and ATEX Explosion-proof, Intrinsically Safe ★<br />
Alternate Materials of Construction<br />
Standard Standard<br />
L1 (4) Inert Sensor Fill Fluid ★<br />
L2 Graphite-Filled PTFE O-Ring ★<br />
L4 Austenitic 316 SST Bolts ★<br />
L5 (5) ASTM A 193, Grade B7M Bolts ★<br />
L6 Alloy K-500 Bolts ★<br />
L7 (5)<br />
ASTM A 453, Class D, Grade 660 Bolts ★<br />
L8 ASTM A 193, Class 2, Grade B8M Bolts ★<br />
Display Type (ERS Primary Only)<br />
Standard Standard<br />
M5 (2) PlantWeb LCD Display ★<br />
M7 (2) <strong>Remote</strong> Mount LCD Display and Interface, PlantWeb Housing, No Cable, SST Bracket ★<br />
M8 (2)<br />
<strong>Remote</strong> Mount LCD Display and Interface, PlantWeb Housing, 50 ft. (15.2 m) Cable, SST Bracket ★<br />
M9 (2) <strong>Remote</strong> Mount LCD Display and Interface, PlantWeb Housing, 100 ft. (30.5 m) Cable, SST Bracket ★<br />
Special Procedures<br />
Expanded<br />
P1 Hydrostatic Testing with Certificate<br />
P2 Cleaning for Special Services<br />
P3 Cleaning for Less than 1 PPM Chlorine/Fluorine<br />
Special Certifications<br />
Standard Standard<br />
Q4 Calibration Certificate ★<br />
QP Calibration certificate with tamper evident seal ★<br />
Q8 Material traceability certification per EN 10204 3.1 ★<br />
QZ (6)<br />
<strong>Remote</strong> Seal System Performance Calculation Report ★<br />
Transient Protection<br />
Standard Standard<br />
T1 (2)<br />
Transient Terminal Block ★<br />
Typical Model Number: <strong>3051S</strong>AL 1 P G 4A A 1A 1 0 20 D FF 7 1 DA 0 0 M5<br />
(1) The pressure range should be specified based on the maximum static pressure, not differential pressure.<br />
(2) Not available with Configuration Type code S.<br />
(3) Not available with M20 or G ½ conduit entry size.<br />
(4) Silicone fill fluid is standard.<br />
(5) Materials of construction comply with metallurgical requirements highlighted within NACE MR0175 / ISO 15156 for sour oil field production environments.<br />
Environmental limits apply to certain materials. Consult latest standard for details. Selected materials also conform to NACE MR0103 for sour refining<br />
environments.<br />
(6) The QZ report quantifies the performance of the entire ERS system. One report is provided per ERS system. The QZ option is specified on the Primary<br />
Transmitter (Configuration Type code P).<br />
A-25
<strong>Rosemount</strong> <strong>3051S</strong> ERS System<br />
DIRECT MOUNT SEALS FOR <strong>3051S</strong>AL ORDERING INFORMATION<br />
A-26<br />
Reference Manual<br />
00809-0100-4804, Rev AA<br />
January 2011<br />
Flush Flanged (FF) Seal<br />
• Most common seal<br />
• Good for use in general applications<br />
• Easy installation on flanged connections ranging from 2-in. (DN 50) to 4-in. (DN 100)<br />
Table A-7. Flush Flanged (FF) Seal Ordering Information<br />
★ The Standard offering represents the most common models and options. These options should be selected for best delivery.<br />
__The Expanded offering is subject to additional delivery lead time.<br />
Model <strong>Process</strong> Connection<br />
FF Flush Flanged Seal<br />
<strong>Process</strong> Connection Size<br />
Standard Standard<br />
G 2-in. / DN 50 ★<br />
7 3-in. ★<br />
J DN 80 ★<br />
9 4-in. / DN 100 ★<br />
Flange / Pressure Rating<br />
Standard Standard<br />
1 Class 150 per ANSI/ASME B16.5 ★<br />
2 Class 300 per ANSI/ASME B16.5 ★<br />
4 Class 600 per ANSI/ASME B16.5 ★<br />
G PN 40 per EN 1092-1 ★<br />
Expanded<br />
A 10K per JIS B2238<br />
B 20K per JIS B2238<br />
D 40K per JIS B2238<br />
E PN 10/16 per EN 1092-1<br />
Materials of Construction<br />
Isolating Diaphragm Upper Housing Flange<br />
Standard Standard<br />
CA 316L SST 316L SST CS ★<br />
DA 316L SST 316L SST 316 SST ★<br />
CB (1) Alloy C-276 316L SST CS ★<br />
DB (1) Alloy C-276 316L SST 316 SST ★<br />
CC Tantalum 316L SST CS ★<br />
DC Tantalum 316L SST 316 SST ★<br />
Flushing Connection Ring (Lower Housing) (2)<br />
Standard Standard<br />
0 None ★<br />
A 316 SST ★<br />
B Alloy C-276 ★<br />
Flushing Connection Quantity & Size<br />
Standard Standard<br />
0 None<br />
1 One 1 /4-18 NPT Flushing Connection ★<br />
3 Two 1 /4-18 NPT Flushing Connections ★<br />
7 One 1 /2-14 NPT Flushing Connection ★<br />
9 Two 1 /2-14 NPT Flushing Connections ★<br />
Options (Include with selected model number)<br />
Flushing Connection Ring Plugs<br />
Standard Standard<br />
SD Alloy C-276 Plug(s) for Flushing Connection(s) ★<br />
SG SST Plug(s) for Flushing Connection(s) ★<br />
SH SST Drain / Vent(s) for Flushing Connection(s) ★
Reference Manual<br />
00809-0100-4804, Rev AA<br />
January 2011<br />
<strong>Rosemount</strong> <strong>3051S</strong> ERS System<br />
Flushing Connection Ring Gaskets<br />
Expanded<br />
SK Barium Sulfate-Filled PTFE Gasket<br />
SN Grafoil Gasket<br />
Additional Options<br />
Expanded<br />
SB Extra Fill Fluid for Cold Temperature Applications<br />
SJ PTFE Gasket<br />
SC (3) 0.006-in. (150 μm) Diaphragm Thickness<br />
ST (4)<br />
Wetted Materials Compliance to NACE MR 0175 / ISO 1516, MR 0103<br />
SU (3) 0.001-in. (25 μm) Gold Plated Diaphragm<br />
SV (5) Table A-7. Flush Flanged (FF) Seal Ordering Information<br />
★ The Standard offering represents the most common models and options. These options should be selected for best delivery.<br />
__The Expanded offering is subject to additional delivery lead time.<br />
PTFE Coated Diaphragm for Non-Stick Purposes<br />
Complete the <strong>3051S</strong>AL model number by specifying options as needed:<br />
page A-24 ERS Transmitter Options<br />
(1) Not available with option code SC.<br />
(2) Supplied with Thermo Tork TN9000 gasket.<br />
(3) Not available with Tantalum diaphragms (Material of Construction codes CC and DC).<br />
(4) Materials of construction comply with metallurgical requirements highlighted within NACE MR0175 / ISO 15156 for sour oil field production environments.<br />
Environmental limits apply to certain materials. Consult latest standard for details. Selected materials also conform to NACE MR0103 for sour refining<br />
environments.<br />
(5) Not available with transmitter option code Q8 (Material Traceability per EN 10204 3.1)<br />
A-27
<strong>Rosemount</strong> <strong>3051S</strong> ERS System<br />
A-28<br />
Extended Flanged (EF) Seal<br />
• Good for use in viscous applications with plugging issues<br />
• Seal diaphragm installed flush with inner tank wall to prevent process plugging<br />
• Easy installation on 3-in. (DN 80) and 4-in. (DN 100) flanged connections<br />
Reference Manual<br />
00809-0100-4804, Rev AA<br />
January 2011<br />
Table A-8. Extended Flanged (EF) Seal Ordering Information<br />
★ The Standard offering represents the most common models and options. These options should be selected for best delivery.<br />
__The Expanded offering is subject to additional delivery lead time.<br />
Model <strong>Process</strong> Connection<br />
EF Extended Flanged Seal<br />
<strong>Process</strong> Connection Size<br />
Standard Standard<br />
7 3-in. / DN 80 ★<br />
9 4-in. / DN 100 ★<br />
Flange / Pressure Rating<br />
Standard Standard<br />
1 Class 150 per ANSI/ASME B16.5 ★<br />
2 Class 300 per ANSI/ASME B16.5 ★<br />
4 Class 600 per ANSI/ASME B16.5 ★<br />
G PN 40 per EN 1092-1 ★<br />
Expanded<br />
A 10K per JIS B2238<br />
B 20K per JIS B2238<br />
D 40K per JIS B2238<br />
E PN 10/16 per EN 1092-1<br />
Materials of Construction<br />
Isolating Diaphragm Extension / Gasket Surface Mounting Flange<br />
Standard Standard<br />
CA 316L SST 316L SST CS ★<br />
DA 316L SST 316L SST 316 SST ★<br />
CB Alloy C-276 Alloy C-276 CS ★<br />
DB Alloy C-276 Alloy C-276 316 SST ★<br />
Seal Extension Length<br />
Standard Standard<br />
20 2-in. (50 mm) ★<br />
40 4-in. (100 mm) ★<br />
60 6-in. (150 mm) ★<br />
Options (Include with selected model number)<br />
Standard Standard<br />
ST (1)<br />
Wetted Materials Compliance per NACE MR 0175 / ISO 1516, MR 0103 ★<br />
SB<br />
Expanded<br />
Extra Fill Fluid for Cold Temperature Applications ★<br />
SC 0.0016-in. (150 μm) Diaphragm Thickness<br />
SU 0.001-in. (25 μm) Gold Plated Diaphragm<br />
SV (2) PTFE Coated Diaphragm for Non-Stick Purposes<br />
Complete the <strong>3051S</strong>AL model number by specifying options as needed:<br />
page A-24 ERS Transmitter Options<br />
(1) Materials of construction comply with metallurgical requirements highlighted within NACE MR0175 / ISO 15156 for sour oil field production environments.<br />
Environmental limits apply to certain materials. Consult latest standard for details. Selected materials also conform to NACE MR0103 for sour refining<br />
environments.<br />
(2) Not available with transmitter option code Q8 (Material Traceability per EN 10204 3.1)
Reference Manual<br />
00809-0100-4804, Rev AA<br />
January 2011<br />
<strong>Rosemount</strong> <strong>3051S</strong> ERS System<br />
<strong>Remote</strong> Flanged (RF) Seal<br />
• Designed to improve performance on smaller process connections<br />
• Easy installation on flanged connections ranging from 1-in. to 1.5-in. (DN 50 – DN 40)<br />
• Lower housing / flushing ring required<br />
Table A-9. <strong>Remote</strong> Flanged (RF) Seal Ordering Information<br />
★ The Standard offering represents the most common models and options. These options should be selected for best delivery.<br />
__The Expanded offering is subject to additional delivery lead time.<br />
Model <strong>Process</strong> Connection<br />
RF <strong>Remote</strong> Flanged Seal<br />
<strong>Process</strong> Connection Size<br />
Standard Standard<br />
2 1-in. ★<br />
4 1.5-in. ★<br />
D DN 25 ★<br />
F DN 40 ★<br />
Flange / Pressure Rating<br />
Standard Standard<br />
1 Class 150 per ANSI/ASME B16.5 ★<br />
2 Class 300 per ANSI/ASME B16.5 ★<br />
4 Class 600 per ANSI/ASME B16.5 ★<br />
G PN 40 per EN 1092-1 ★<br />
Expanded<br />
A 10K per JIS B2238<br />
B 20K per JIS B2238<br />
D 40K per JIS B2238<br />
Materials of Construction<br />
Isolating Diaphragm Upper Housing Flange<br />
Standard Standard<br />
CA 316L SST 316L SST CS ★<br />
DA 316L SST 316L SST 316 SST ★<br />
CB Alloy C-276 316L SST CS ★<br />
DB Alloy C-276 316L SST 316 SST ★<br />
CC Tantalum 316L SST CS ★<br />
DC Tantalum 316L SST 316 SST ★<br />
Flushing Connection Ring Material (Lower Housing) (1)<br />
Standard Standard<br />
A 316L SST ★<br />
B Alloy C-276 ★<br />
D Plated CS ★<br />
Number of Flushing Connections<br />
Standard Standard<br />
1 One ¼-18 NPT Flushing Connection ★<br />
3 Two ¼-18 NPT Flushing Connections ★<br />
5 None ★<br />
Options (Include with selected model number)<br />
Flushing Connection Ring Plugs<br />
Standard Standard<br />
SD Alloy C-276 Plugs ★<br />
SG 316 SST Plugs ★<br />
SH 316 SST Drain / Vents ★<br />
Flushing Connection Ring Gaskets<br />
Standard Standard<br />
SJ PTFE Gasket ★<br />
Expanded<br />
SK Barium Sulfate-Filled PTFE Gasket<br />
A-29
<strong>Rosemount</strong> <strong>3051S</strong> ERS System<br />
A-30<br />
Reference Manual<br />
00809-0100-4804, Rev AA<br />
January 2011<br />
SN Grafoil Gasket<br />
SR Ethylene Propylene Gasket<br />
Additional Options<br />
Standard Standard<br />
ST (2) Wetted Materials Compliance per NACE MR 0175 / ISO 1516, MR 0103 ★<br />
SB<br />
Expanded<br />
Extra Fill Fluid for Cold Temperature Applications ★<br />
SC (3) 0.006-in. (150 μm) Diaphragm Thickness<br />
SU (3) 0.001-in. (25 μm) Gold Plated Diaphragm<br />
SV (4)<br />
Table A-9. <strong>Remote</strong> Flanged (RF) Seal Ordering Information<br />
★ The Standard offering represents the most common models and options. These options should be selected for best delivery.<br />
__The Expanded offering is subject to additional delivery lead time.<br />
PTFE Coated Diaphragm for Non-Stick Purposes<br />
Complete the <strong>3051S</strong>AL model number by specifying options as needed:<br />
page A-24 ERS Transmitter Options<br />
(1) Supplied with C4401 Aramid fiber gasket.<br />
(2) Materials of construction comply with metallurgical requirements highlighted within NACE MR0175 / ISO 15156 for sour oil field production environments.<br />
Environmental limits apply to certain materials. Consult latest standard for details. Selected materials also conform to NACE MR0103 for sour refining<br />
environments.<br />
(3) Not available with Tantalum diaphragms (Material of Construction codes CC and DC).<br />
(4) Not available with transmitter option code Q8 (Material Traceability per EN 10204 3.1)
Reference Manual<br />
00809-0100-4804, Rev AA<br />
January 2011<br />
<strong>Rosemount</strong> <strong>3051S</strong> ERS System<br />
<strong>Remote</strong> Threaded (RT) Seal<br />
• For use with threaded process connections ( 1 /4-18 to 1-11.5 NPT)<br />
• Rated for use in high-pressure applications (up to 2500 PSI)<br />
• Optional flushing connections available<br />
Table A-10. RT Threaded Seal Ordering Information<br />
★ The Standard offering represents the most common models and options. These options should be selected for best delivery.<br />
__The Expanded offering is subject to additional delivery lead time.<br />
<strong>Process</strong> Connection Style<br />
Standard Standard<br />
RT <strong>Remote</strong> Threaded Seal ★<br />
<strong>Process</strong> Connection Size<br />
Standard Standard<br />
3 1 /2-14 NPT ★<br />
4<br />
3<br />
/4-14 NPT ★<br />
5<br />
Expanded<br />
1-11.5 NPT ★<br />
1<br />
1<br />
/4-18 NPT<br />
Pressure Rating<br />
Standard Standard<br />
0 2500 psi ★<br />
Isolating Diaphragm Material Upper Housing Material Flange<br />
Standard Standard<br />
CA 316L SST 316L SST CS ★<br />
DA 316L SST 316L SST 316 SST ★<br />
CB Alloy C-276 316L SST CS ★<br />
DB Alloy C-276 316L SST 316 SST ★<br />
CC Tantalum 316L SST CS ★<br />
DC Tantalum 316L SST 316 SST ★<br />
(1) (2)<br />
Flushing Connection Ring Material (Lower Housing)<br />
Standard Standard<br />
A 316L SST ★<br />
B<br />
Expanded<br />
Alloy C-276 ★<br />
D Plated CS<br />
Number of Flushing Connections<br />
Standard Standard<br />
1 One 1 /4-in. Flushing Connection ★<br />
3 Two 1 /4-in. Flushing Connection ★<br />
5 No Flushing Connection ★<br />
Options (Include with selected model number)<br />
Flushing Connection Ring Plugs<br />
Standard Standard<br />
SD Alloy C-276 Plugs ★<br />
SG 316 SST Plugs ★<br />
SH 316 SST Drain / Vents ★<br />
Flushing Connection Ring Gaskets<br />
Standard Standard<br />
SJ PTFE Gasket ★<br />
SN Grafoil Gasket ★<br />
SR Ethylene Propylene Gasket ★<br />
A-31
<strong>Rosemount</strong> <strong>3051S</strong> ERS System<br />
A-32<br />
Reference Manual<br />
00809-0100-4804, Rev AA<br />
January 2011<br />
Expanded<br />
SK<br />
Bolting<br />
Barium Sulfate-Filled PTFE Gasket<br />
Standard Standard<br />
S3<br />
Expanded<br />
304 SST Bolts ★<br />
S4 S16 SST Bolts<br />
Additional Options<br />
Standard Standard<br />
ST (3)<br />
Wetted Materials Compliance per NACE MR 0175 / ISO 1516, MR 0103 ★<br />
SB<br />
Expanded<br />
Extra Fill Fluid for Cold Temperature Applications ★<br />
SC (4)<br />
0.006-in. (150 μm) Diaphragm Thickness<br />
SU (4) 0.001-in. (25 μm) Gold Plated Diaphragm<br />
SV (5) Table A-10. RT Threaded Seal Ordering Information<br />
★ The Standard offering represents the most common models and options. These options should be selected for best delivery.<br />
__The Expanded offering is subject to additional delivery lead time.<br />
PTFE Coated Diaphragm for Non-Stick Purposes<br />
Complete the <strong>3051S</strong>AL model number by specifying options as needed:<br />
page A-24 ERS Transmitter Options<br />
(1) Supplied with C4401 aramid fiber gasket.<br />
(2) Flushing Connection Ring / Lower Housing assembly bolts provided as standard are carbon steel.<br />
(3) Materials of construction comply with metallurgical requirements highlighted within NACE MR0175 / ISO 15156 for sour oil field production environments.<br />
Environmental limits apply to certain materials. Consult latest standard for details. Selected materials also conform to NACE MR0103 for sour refining<br />
environments.<br />
(4) Not available with Tantalum diaphragms (Material of Construction codes CC and DC).<br />
(5) Not available with transmitter option code Q8 (Material Traceability per EN 10204 3.1)
Reference Manual<br />
00809-0100-4804, Rev AA<br />
January 2011<br />
<strong>Rosemount</strong> <strong>3051S</strong> ERS System<br />
Hygienic Tri-Clamp (SC) Seal<br />
• Good for use in hygienic applications<br />
• Easy installation on Tri-Clover style Tri-Clamp connections (1.5-in. to 3-in.)<br />
• Conforms to 3-A standard 74-03<br />
Table A-11. SC Hygienic Tri-Clover Style Tri-Clamp Seal Ordering Information<br />
★ The Standard offering represents the most common models and options. These options should be selected for best delivery.<br />
__The Expanded offering is subject to additional delivery lead time.<br />
<strong>Process</strong> Connection<br />
Standard Standard<br />
SC (1) Tri-Clover Style Tri-Clamp Seal ★<br />
<strong>Process</strong> Connection Size<br />
Standard Standard<br />
3 (2) 1½ in. ★<br />
5 (2) 2 in. ★<br />
7 3 in. ★<br />
Maximum Working Pressure<br />
Standard Standard<br />
0 1000 PSI ★<br />
Isolating Diaphragm Material Upper Housing Material<br />
Standard Standard<br />
LA00<br />
Expanded<br />
316L SST 316L SST ★<br />
LB00 Alloy C-276 316L SST<br />
Options (Include with selected model number)<br />
Diaphragm Surface Finish and Polishing<br />
Expanded<br />
R6 Electropolishing<br />
RD 10 �in. (0.25 �m) Ra Diaphragm Surface Finish<br />
RG 15 �in. (0.375 �m) Ra Diaphragm Surface Finish<br />
RH 20 �in. (0.5 �m) Ra Diaphragm Surface Finish<br />
Certifications<br />
Standard Standard<br />
Q16 Surface Finish Certification ★<br />
Complete the <strong>3051S</strong>AL model number by specifying options as needed:<br />
page A-24 ERS Transmitter Options<br />
(1) Clamp and gasket furnished by user. The maximum working pressure is dependent upon the clamp pressure rating.<br />
(2) Consult factory for calibrated spans lower than 5 psi (345 mbar).<br />
A-33
<strong>Rosemount</strong> <strong>3051S</strong> ERS System<br />
A-34<br />
Hygienic Tank Spud (SS) Seal<br />
• Commonly used in hygienic level applications<br />
• Seal diaphragm installed flush with inner tank wall<br />
• Conforms to 3-A standard 74-03<br />
Reference Manual<br />
00809-0100-4804, Rev AA<br />
January 2011<br />
Table A-12. SS Hygienic Tank Spud Seal Ordering Information<br />
★ The Standard offering represents the most common models and options. These options should be selected for best delivery.<br />
__The Expanded offering is subject to additional delivery lead time.<br />
<strong>Process</strong> Connection<br />
Standard Standard<br />
SS (1) Hygienic Tank Spud Seal ★<br />
<strong>Process</strong> Connection Size<br />
Standard Standard<br />
A 4-in. Sch. 5 Tri-Clamp ★<br />
Maximum Working Pressure (Clamp Rating)<br />
Standard Standard<br />
0 600 PSI (41 bar) ★<br />
Upper Housing<br />
Standard Standard<br />
A 316L SST ★<br />
Diaphragm and Wetted, Extension Material<br />
Diaphragm and Wetted Extension<br />
Standard Standard<br />
AL 316L SST (2) 316L SST (2) Expanded<br />
★<br />
BB Alloy C-276 316L SST<br />
Extension Length<br />
Standard Standard<br />
2 2 in. (50 mm) Extension ★<br />
6 6 in. (150 mm) Extension ★<br />
Options (Include with selected model number)<br />
Diaphragm Surface Finish and Polishing<br />
Expanded<br />
R6 Electropolishing<br />
RH<br />
RG<br />
20 �in. (0.5 �m) Ra Diaphragm Surface Finish<br />
(3) 15 �in. (0.375 �m) Ra Diaphragm Surface Finish<br />
Additional Options<br />
Standard Standard<br />
Q16 Surface Finishing Certification ★<br />
S1 Tank Spud Included with Shipment ★<br />
Expanded<br />
SC 0.006-in. (150 �m) Diaphragm Thickness<br />
Complete the <strong>3051S</strong>AL model number by specifying options as needed:<br />
page A-24 ERS Transmitter Options<br />
(1) Clamp and Ethylene Propylene o-ring (conforms to 3-A standard 74 and USP class VI) supplied.<br />
(2) Diaphragm brazed and TIG-welded to extension.<br />
(3) Require Option code R6 (Electropolishing).
Reference Manual<br />
00809-0100-4804, Rev AA<br />
January 2011<br />
<strong>Rosemount</strong> <strong>3051S</strong> ERS System<br />
<strong>Rosemount</strong> 300 ERS Transmitter Housing Kit<br />
• Housing kit for <strong>Rosemount</strong> <strong>3051S</strong>AM and <strong>3051S</strong>AL ERS transmitters<br />
• Upgrade an existing <strong>3051S</strong> transmitter to an ERS configuration<br />
Table A-13. <strong>Rosemount</strong> 300 ERS Transmitter Housing Kit Ordering Information<br />
★ The Standard offering represents the most common models and options. These options should be selected for best delivery.<br />
__The Expanded offering is subject to additional delivery lead time.<br />
Model<br />
300ERS Housing Kit for <strong>Rosemount</strong> <strong>3051S</strong>AM and <strong>3051S</strong>AL <strong>Electronic</strong> <strong>Remote</strong> Sensor Transmitter<br />
Configuration Type<br />
Standard Standard<br />
P <strong>Electronic</strong> <strong>Remote</strong> Sensor - Primary ★<br />
S <strong>Electronic</strong> <strong>Remote</strong> Sensor - Secondary ★<br />
Housing Style<br />
Material Conduit Entry<br />
Standard<br />
Housing for ERS Primary - Configuration Type P<br />
Standard<br />
1A PlantWeb Housing Aluminum 1<br />
/2 - 14 NPT ★<br />
1B PlantWeb Housing Aluminum M20 x 1.5 (CM20) ★<br />
1J PlantWeb Housing 316L SST 1<br />
/2 - 14 NPT ★<br />
1K PlantWeb Housing 316L SST M20 x 1.5 (CM20) ★<br />
3A <strong>Remote</strong> Mount Display Housing Aluminum<br />
1<br />
/2 - 14 NPT ★<br />
3B <strong>Remote</strong> Mount Display Housing Aluminum M20 x 1.5 (CM20) ★<br />
3J <strong>Remote</strong> Mount Display Housing 316L SST 1<br />
/2 - 14 NPT ★<br />
Housing for ERS Secondary - Configuration Type S<br />
2A Junction Box Housing Aluminum 1<br />
/2 - 14 NPT ★<br />
2B Junction Box Housing Aluminum M20 x 1.5 (CM20) ★<br />
2J<br />
Expanded<br />
Junction Box Housing 316L SST<br />
1<br />
/2 - 14 NPT ★<br />
Housing for ERS Primary - Configuration Type P<br />
1C PlantWeb Housing Aluminum G 1 /2<br />
1L PlantWeb Housing 316L SST G1 /2<br />
3C <strong>Remote</strong> Mount Display Housing Aluminum G1 /2<br />
Housing for ERS Secondary - Configuration Type S<br />
2C Junction Box Housing Aluminum G 1 /2<br />
Transmitter Output<br />
Standard Standard<br />
A 4-20 mA with Digital Signal Based on HART Protocol ★<br />
Options (Include with selected model number)<br />
<strong>Electronic</strong> <strong>Remote</strong> Sensor Connection Cable<br />
Standard Standard<br />
R05 50 ft. (15.2 m) Spool of <strong>Electronic</strong> <strong>Remote</strong> Sensor Cable ★<br />
R10 100 ft. (30.5 m) Spool of <strong>Electronic</strong> <strong>Remote</strong> Sensor Cable ★<br />
Special Configuration (Software)<br />
Standard Standard<br />
C4 (1)<br />
NAMUR Alarm and Saturation Levels, High Alarm ★<br />
C5 (1) NAMUR Alarm and Saturation Levels, Low Alarm ★<br />
C6 (1) Custom Alarm and Saturation Levels, High Alarm ★<br />
C7 (1)<br />
Custom Alarm and Saturation Levels, High Alarm ★<br />
C8 (1) Low Alarm (Standard <strong>Rosemount</strong> Alarm and Saturation Levels) ★<br />
Special Configuration (Hardware)<br />
Standard Standard<br />
D4 External Ground Screw Assembly ★<br />
Product Approval<br />
Standard Standard<br />
A-35
<strong>Rosemount</strong> <strong>3051S</strong> ERS System<br />
A-36<br />
Reference Manual<br />
00809-0100-4804, Rev AA<br />
January 2011<br />
E1 ATEX Flameproof ★<br />
E2 INMETRO Flameproof ★<br />
E4 TIIS Flameproof ★<br />
E5 FM Explosion-proof, Dust Ignition-proof ★<br />
E6 CSA Explosion-proof, Dust Ignition-proof, Division 2 ★<br />
E7 IECEx Flameproof ★<br />
I1 ATEX Intrinsic Safety ★<br />
I2 INMETRO Intrinsically Safe ★<br />
I5 FM Intrinsically Safe, Division 2 ★<br />
I6 CSA Intrinsically Safe ★<br />
I7 IECEx Intrinsic Safety ★<br />
K1 ATEX Flameproof and Intrinsically Safe, Type n, Dust ★<br />
K2 INMETRO Flameproof, Intrinsic Safety, Type n ★<br />
K5 FM Explosion-proof, Dust Ignition-proof, Intrinsically Safe, Division 2 ★<br />
K6 CSA Explosion-proof, Dust Ignition-proof, Intrinsically Safe, Division 2 ★<br />
K7 IECEx Flameproof, Intrinsic Safety, Type n ★<br />
KA ATEX and CSA Flameproof, Intrinsically Safe, Division 2 ★<br />
KB FM and CSA Explosion-proof, Dust Ignition-proof, Intrinsically Safe, Division 2 ★<br />
KC FM and ATEX Explosion-proof, Intrinsically Safe, Division 2 ★<br />
KD FM, CSA, and ATEX Explosion-proof, Intrinsically Safe, Division 2 ★<br />
N1 ATEX Type n ★<br />
N7 IECEx Type n ★<br />
ND ATEX Dust ★<br />
Digital Display (ERS Primary Configuration Only)<br />
Standard Standard<br />
M5 (1) PlantWeb LCD Display ★<br />
M7 (1) <strong>Remote</strong> Mount LCD Display Interface, PlantWeb Housing, No Cable, SST Bracket ★<br />
M8 (1)<br />
<strong>Remote</strong> Mount LCD Display Interface, PlantWeb Housing, 50 ft. (15.2 m) Cable, SST Bracket ★<br />
M9 (1) Table A-13. <strong>Rosemount</strong> 300 ERS Transmitter Housing Kit Ordering Information<br />
★ The Standard offering represents the most common models and options. These options should be selected for best delivery.<br />
__The Expanded offering is subject to additional delivery lead time.<br />
<strong>Remote</strong> Mount LCD Display Interface, PlantWeb Housing, 100 ft. (30.5 m) Cable, SST Bracket ★<br />
Terminal Block<br />
Standard Standard<br />
T1 Transient Protection ★<br />
(1) Not available with Configuration Type S.
Reference Manual<br />
00809-0100-4804, Rev AA<br />
January 2011<br />
SPARE PARTS<br />
<strong>Rosemount</strong> <strong>3051S</strong> ERS System<br />
Sensor Modules<br />
See <strong>Rosemount</strong> <strong>3051S</strong>_T, and <strong>3051S</strong>AL Liquid Level ordering tables in the <strong>3051S</strong> Product<br />
Data Sheet (00813-0100-4801) for ordering spare <strong>3051S</strong> sensor modules. Use housing code<br />
style 00 in the model number.<br />
• Example model number: <strong>3051S</strong>1CG4A2000A00<br />
Housing Assemblies<br />
See <strong>Rosemount</strong> 300ERS ordering table in Appendix A for ordering spare housing assemblies.<br />
• Example model number: 300ERSP1AAM5<br />
<strong>Electronic</strong>s Board (ERS Primary Unit only)<br />
<strong>3051S</strong> ERS electronics featureboard kit 03151-9028-0001<br />
<strong>3051S</strong> ERS electronics featureboard kit for remote display housing 03151-9028-0002<br />
LCD Display (ERS Primary Unit only)<br />
LCD Display with extended aluminum housing cover 00753-9004-0001<br />
LCD Display with extended SST housing cover 00753-9004-0004<br />
LCD Display only 00753-9004-0002<br />
Aluminum housing cover for LCD Display 00753-9004-0003<br />
SST housing cover for LCD Display 00753-9004-0005<br />
Terminal Blocks<br />
Terminal Block for ERS Primary Unit 03151-9006-1001<br />
Transient Terminal Block for ERS Primary Unit 03151-9006-1002<br />
Terminal Block for ERS Secondary unit 03151-9000-3001<br />
Covers<br />
Aluminum <strong>Electronic</strong>s Cover and O-Ring 03151-9030-0001<br />
316L SST <strong>Electronic</strong>s Cover and O-Ring 03151-9030-0002<br />
Miscellaneous Housing Parts<br />
External Ground Screw Assembly (Option D4): Screw, clamp, washer 03151-9060-0001<br />
Housing V-Seal (for both PlantWeb and Junction Box housings) 03151-9061-0001<br />
Flanges (for Gage / Absolute Sensor)<br />
Coplanar Flange: Nickel-plated Carbon Steel 03151-9200-1025<br />
Coplanar Flange: 316 SST 03151-9200-1022<br />
Coplanar Flange: Cast C-276 03151-9200-1023<br />
Coplanar Flange: Cast Alloy 400 03151-9200-1024<br />
Coplanar Flange Alignment Screw (package of 12) 03151-9202-0001<br />
Traditional Flange: 316 SST 03151-9203-0002<br />
Traditional Flange: Cast C-276 03151-9203-0003<br />
Traditional Flange: Cast Alloy 400 03151-9203-0004<br />
Level Flange, Vertical Mount: 2-in. Class 150, SST 03151-9205-0221<br />
Level Flange, Vertical Mount: 2-in. Class 300, SST 03151-9205-0222<br />
Level Flange, Vertical Mount: 3-in. Class 150, SST 03151-9205-0231<br />
Level Flange, Vertical Mount: 3-in. Class 300, SST 03151-9205-0232<br />
Level Flange, Vertical Mount: DN 50, PN 40 03151-9205-1002<br />
Level Flange, Vertical Mount: DN 80, PN 40 03151-9205-1012<br />
Flange Adapter Kits (each kit contains adapter, bolts, and o-rings) Qty 2<br />
CS Bolts, Glass Filled PTFE O-Rings<br />
SST Adapters 03031-1300-0002<br />
Cast C-276 Adapters 03031-1300-0003<br />
Cast Alloy 400 Adapters 03031-1300-0004<br />
Ni Plated CS Adapters 03031-1300-0005<br />
SST Bolts, Glass Filled PTFE O-Rings<br />
SST Adapters 03031-1300-0012<br />
A-37
<strong>Rosemount</strong> <strong>3051S</strong> ERS System<br />
A-38<br />
Reference Manual<br />
00809-0100-4804, Rev AA<br />
January 2011<br />
Cast C-276 Adapters 03031-1300-0013<br />
Cast Alloy 400 Adapters 03031-1300-0014<br />
Ni Plated CS Adapters<br />
CS Bolts, Graphite PTFE O-Rings<br />
03031-1300-0015<br />
SST Adapters 03031-1300-0102<br />
Cast C-276 Adapters 03031-1300-0103<br />
Cast Alloy 400 Adapters 03031-1300-0104<br />
Ni Plated CS Adapters<br />
SST Bolts, Graphite PTFE O-Rings<br />
03031-1300-0105<br />
SST Adapters 03031-1300-0112<br />
Cast C-276 Adapters 03031-1300-0113<br />
Cast Alloy 400 Adapters 03031-1300-0114<br />
Ni Plated CS Adapters<br />
Flange Adapter<br />
03031-1300-0115<br />
Nickel-plated Carbon Steel 03151-9259-0005<br />
316 SST 03151-9259-0002<br />
Cast C-276 03151-9259-0003<br />
Cast Alloy 400<br />
Drain / Vent Kits<br />
03151-9259-0004<br />
316 SST Valve Stem and Seat Kit 03151-9268-0012<br />
Alloy C-276 Valve Stem and Seat Kit 03151-9268-0013<br />
Alloy K-500 Valve Stem and Alloy 400 Seat Kit 03151-9268-0014<br />
316 SST Ceramic Ball Drain/Vent Kit 03151-9268-0112<br />
Alloy C-276 Ceramic Ball Drain/Vent Kit 03151-9268-0113<br />
Alloy 400/K-500 Ceramic Ball Drain/Vent Kit<br />
O-Rings (Qty 12)<br />
03151-9268-0114<br />
<strong>Electronic</strong>s Housing, Cover 03151-9040-0001<br />
<strong>Electronic</strong>s Housing, Module 03151-9041-0001<br />
<strong>Process</strong> Flange, Glass-filled PTFE 03151-9042-0001<br />
<strong>Process</strong> Flange, Graphite-filled PTFE 03151-9042-0002<br />
Flange Adapter, Glass-filled PTFE 03151-9043-0001<br />
Flange Adapter, Graphite-filled PTFE<br />
Gland and Collar Kits<br />
03151-9043-0002<br />
Gland and Collar Kits<br />
Mounting Brackets<br />
Mounting Brackets for Coplanar Flange<br />
03151-9250-0001<br />
B4 Bracket, SST, 2-in. pipe mount, SST bolts<br />
Mounting Brackets for In-Line Sensor Module<br />
03151-9270-0001<br />
B4 Bracket, SST, 2-in. pipe mount, SST bolts<br />
Mounting Brackets for Traditional Flange<br />
03151-9270-0002<br />
B1 Bracket, 2-in. pipe mount, CS bolts 03151-9272-0001<br />
B2 Bracket, panel mount, CS bolts 03151-9272-0002<br />
B3 Flat Bracket for 2-in. pipe mount, CS bolts 03151-9272-0003<br />
B7 (B1 style bracket with SST bolts) 03151-9272-0007<br />
B8 (B2 style bracket with SST bolts) 03151-9272-0008<br />
B9 (B3 style bracket with SST bolts) 03151-9272-0009<br />
BA (SST B1 bracket with SST bolts) 03151-9272-0011<br />
BC (SST B3 bracket with SST bolts)<br />
Bolt Kits<br />
Coplanar Flange Bolt Kit {44 mm (1.75 in.)}<br />
03151-9272-0013<br />
Carbon Steel (set of 4) 03151-9280-0001<br />
316 SST (set of 4) 03151-9280-0002<br />
ANSI/ASTM-A-193-B7M (set of 4) 03151-9280-0003<br />
Alloy K-500 (set of 4) 03151-9280-0004
Reference Manual<br />
00809-0100-4804, Rev AA<br />
January 2011<br />
<strong>Rosemount</strong> <strong>3051S</strong> ERS System<br />
Coplanar Flange/Adapter Bolt Kit {73 mm (2.88 in.)}<br />
Carbon Steel (set of 4) 03151-9281-0001<br />
316 SST (set of 4) 03151-9281-0002<br />
ANSI/ASTM-A-193-B7M (set of 4) 03151-9281-0003<br />
Alloy K-500 (set of 4)<br />
Manifold/Coplanar Flange Bolt Kit {57 mm (2.25 in.)}<br />
03151-9281-0004<br />
Carbon Steel (set of 4) 03151-9282-0001<br />
316 SST (set of 4) 03151-9282-0002<br />
ANSI/ASTM-A-193-B7M (set of 4) 03151-9282-0003<br />
Alloy K-500 (set of 4)<br />
Traditional Flange and Adapter Bolt Kit<br />
03151-9282-0004<br />
Carbon Steel (set of 6) 03151-9283-1001<br />
316 SST (set of 6) 03151-9283-1002<br />
ANSI/ASTM-A-193-B7M (set of 6) 03151-9283-1003<br />
Alloy K-500 (set of 6)<br />
Manifold and Traditional Flange<br />
Use bolts supplied with Manifold<br />
Vertical Mount Level Flange Bolt Kit<br />
03151-9283-1004<br />
Carbon Steel (set of 4) 03151-9285-0001<br />
316 SST (set of 4)<br />
ERS Communication Cable<br />
03151-9285-0002<br />
50 ft. (15 meter) spool of communication cable 03151-9101-0001<br />
100 ft. (31 meter) spool of communication cable 03151-9101-0002<br />
A-39
<strong>Rosemount</strong> <strong>3051S</strong> ERS System<br />
A-40<br />
Reference Manual<br />
00809-0100-4804, Rev AA<br />
January 2011
Reference Manual<br />
00809-0100-4804, Rev AA<br />
January 2011<br />
Appendix B HART Menu Tree<br />
Home<br />
1 Overview<br />
2 Configure<br />
3 Service Tools<br />
Overview<br />
1 Device Status<br />
2 Communications<br />
3 Device Information<br />
4 Analog Output<br />
5 Variables<br />
6 Calibration<br />
7 Find Device<br />
Communications<br />
1 Variable Mapping<br />
2 Communications Setting<br />
3 Configure Burst Mode<br />
Device Information<br />
1 General<br />
2 Model Numbers<br />
3 HART Revision Numbers<br />
4 P-Hi Module Information<br />
5 P-Lo Module Information<br />
6 Alarm and Security<br />
7 View Device Topology<br />
<strong>Rosemount</strong> <strong>3051S</strong> ERS System<br />
Variable Mapping<br />
1 Primary Variable<br />
2 2nd Variable<br />
3 3rd Variable<br />
4 4th Variable<br />
Variable Mapping<br />
1 Polling Address<br />
2 Loop Current Mode<br />
Configure Burst Mode<br />
1 Burst Mode<br />
2 Burst Option<br />
3 Burst Slot 0<br />
4 Burst Slot 1<br />
5 Burst Slot 2<br />
6 Burst Slot 3<br />
General<br />
1 Tag<br />
2 Long Tag<br />
3 Model<br />
4 Date<br />
5 Descriptor<br />
6 Message<br />
7 ERS Serial Number<br />
8 <strong>Electronic</strong>s Serial Number<br />
Model Numbers<br />
1 Model Number 1<br />
2 Model Number 2<br />
3 Model Number 3<br />
4 Model Number 4<br />
HART Revision Numbers<br />
1 HART Universal<br />
2 Field Device<br />
3 Software<br />
4 Hardware<br />
P-Hi Module Information<br />
1 Sensor Module Information<br />
2 Flange Information<br />
3 <strong>Remote</strong> Seal Information<br />
P-Lo Module Information<br />
1 Sensor Module Information<br />
2 Flange Information<br />
3 <strong>Remote</strong> Seal Information<br />
Alarm and Security<br />
1 Alarm Direction<br />
2 High Alarm<br />
3 High Saturation<br />
4 Low Saturation<br />
5 Low Alarm<br />
6 Write Protect<br />
Sensor Module Information<br />
1 Sensor Module Serial Number<br />
2 Type<br />
3 Configuration<br />
4 Sensor Range<br />
5 Upper Limit<br />
6 Lower Limit<br />
7 Isolator Material<br />
8 Fill Fluid<br />
Flange Information<br />
1 <strong>Process</strong> Connection<br />
2 Connection Material<br />
3 O-Ring Material<br />
4 Drain / Vent Material<br />
<strong>Remote</strong> Seal Information<br />
1 Number of Seals<br />
2 <strong>Remote</strong> Seal Type<br />
3 Diaphragm Material<br />
4 Fill Fluid<br />
B-1
<strong>Rosemount</strong> <strong>3051S</strong> ERS System<br />
B-2<br />
Home<br />
1 Overview<br />
2 Configure<br />
3 Service Tools<br />
Configure<br />
1 Guided Setup<br />
2 Manual Setup<br />
3 Alert Setup<br />
Guided Setup<br />
1 Basic Setup<br />
2 Zero Trim<br />
3 Configure Display<br />
4 Configure Burst Mode<br />
5 Scaled Variable<br />
6 Change Module Assignments<br />
7 Configure <strong>Process</strong> Alerts<br />
Manual Setup<br />
1 <strong>Process</strong> Variables<br />
2 Analog Output<br />
3 Scaled Variable<br />
4 Configuration Display<br />
5 HART<br />
6 Module Assignment<br />
7 Device Information<br />
Alert Setup<br />
Continued on next page...<br />
Basic Setup<br />
1 Device Tagging<br />
2 Units of Measure / Damping<br />
3 Variable Mapping<br />
4 Analog Output<br />
5 Alarm / Saturation Levels<br />
Zero Trim<br />
1 P-Hi Sensor Zero Trim<br />
2 P-Lo Sensor Zero Trim<br />
3 System DP Zero Trim<br />
Configure Burst Mode<br />
1 Burst Mode<br />
2 Burst Option<br />
Scaled Variable<br />
1 Linear Scaled Variable<br />
2 Non-Linear Scaled Variable<br />
Change Module Assignments<br />
1 View "Module 1" Assignment<br />
2 View "Module 2" Assignment<br />
3 Set Modules as P-Hi - P-Lo<br />
4 Set Modules as P-Lo - P-Hi<br />
5 View Device Topology<br />
Configure <strong>Process</strong> Alerts<br />
1 Pressure Alerts<br />
2 Temperature Alerts<br />
<strong>Process</strong> Variables<br />
1 System DP<br />
2 P-Hi Module<br />
3 P-Lo Module<br />
4 View Device Topology<br />
Analog Output<br />
1 Analog Output Information<br />
2 Configuration<br />
3 Sensor Limits<br />
4 Alarm / Saturation Levels<br />
Device Tagging<br />
1 Tag<br />
2 Long Tag<br />
3 Descriptor<br />
4 Message<br />
5 Date<br />
Units of Measure / Damping<br />
1 Units of Measure<br />
2 Damping<br />
Variable Mapping<br />
1 Primary Variable<br />
2 2nd Variable<br />
3 3rd Variable<br />
4 4th Variable<br />
Analog Output<br />
1 Primary Variable<br />
2 Upper Range Value<br />
3 Lower Range Value<br />
Pressure Alerts<br />
1 System DP<br />
2 P-Hi Pressure<br />
3 P-Lo Pressure<br />
4 View Device Topology<br />
Temperature Alerts<br />
1 System DP<br />
2 P-Hi Module Temperature<br />
3 P-Lo Module Temperature<br />
4 View Device Topology<br />
System DP<br />
1 System DP Value<br />
2 System DP Unit<br />
3 System DP Damping<br />
4 Upper Limit<br />
5 Lower Limit<br />
6 Minimum Span<br />
P-Hi Module<br />
1 P-Hi Pressure Value<br />
2 P-Hi Pressure Unit<br />
3 P-Hi Pressure Damping<br />
4 P-Hi Sensor Limits<br />
5 P-Hi Module Temperature<br />
6 P-Hi Module Temp. Unit<br />
P-Lo Module<br />
1 P-Lo Pressure Value<br />
2 P-Lo Pressure Unit<br />
3 P-Lo Pressure Damping<br />
4 P-Lo Sensor Limits<br />
5 P-Lo Module Temperature<br />
6 P-Lo Module Temp. Unit<br />
Analog Output Information<br />
1 Analog Output Value<br />
2 Percent of Range<br />
Configuration<br />
1 Primary Variable<br />
2 Upper Range Value<br />
3 Lower Range Value<br />
Sensor Limits<br />
1 Upper<br />
2 Lower<br />
3 Minimum Span<br />
Alarm / Saturation Levels<br />
1 Alarm Direction<br />
2 High Alarm<br />
3 High Saturation<br />
4 Low Saturation<br />
5 Low Alarm<br />
6 Configure<br />
Scaled Variable<br />
1 Scaled Variable Value<br />
2 Damping<br />
3 Upper Limit<br />
4 Lower Limit<br />
5 Configure<br />
6 View Configuration<br />
7 Tank Dimensions<br />
8 View Strapping Table<br />
HART<br />
1 Variable Mapping<br />
2 Communication Settings<br />
3 Configure Burst Mode<br />
Module Assignment<br />
1 View “Module 1” Assignment<br />
2 View “Module 2” Assignment<br />
3 Set Modules as P-Hi – P-Lo<br />
4 Set Modules as P-Lo – P-Hi<br />
5 View Device Topology<br />
Device Information<br />
Continued on next page...<br />
Reference Manual<br />
00809-0100-4804, Rev AA<br />
January 2011<br />
Units of Measure<br />
1 P-Lo Pressure Unit<br />
2 P-Lo Temperature Unit<br />
3 System DP Unit<br />
4 P-Hi Temperature Unit<br />
5 P-Hi Pressure Unit<br />
Damping<br />
1 P-Lo Pressure Damping<br />
2 System DP Damping<br />
3 P-Hi Pressure Damping<br />
P-Hi Sensor Limits<br />
1 Upper Limit<br />
2 Lower Limit<br />
3 Minimum Span<br />
P-Lo Sensor Limits<br />
1 Upper Limit<br />
2 Lower Limit<br />
3 Minimum Span<br />
Configure<br />
1 Linear Scaled Variable<br />
2 Non-Linear Scaled Variable<br />
Tank Dimensions<br />
1 Tank Type<br />
2 Tank Length<br />
3 Tank Radius<br />
4 P-Hi Tap Location<br />
5 Specific Gravity<br />
View Strapping Table<br />
1 Update Table<br />
2 View Table<br />
3 Level Unit<br />
4 Scaled Variable Unit<br />
5 Specific Gravity<br />
6 Offset<br />
Variable Mapping<br />
1 Primary Variable<br />
2 2nd Variable<br />
3 3rd Variable<br />
4 4th Variable<br />
Communication Settings<br />
1 Polling Address<br />
2 Loop Current Mode<br />
Configure Burst Mode<br />
1 Burst Mode<br />
2 Burst Option<br />
3 Burst Slot 0<br />
4 Burst Slot 1<br />
5 Burst Slot 2<br />
6 Burst Slot 3
Reference Manual<br />
00809-0100-4804, Rev AA<br />
January 2011<br />
Home<br />
1 Overview<br />
2 Configure<br />
3 Service Tools<br />
Configure<br />
1 Guided Setup<br />
2 Manual Setup<br />
3 Alert Setup<br />
Service Tools<br />
1 Device Alerts<br />
2 Variables<br />
3 Trends<br />
4 Maintenance<br />
5 Simulate<br />
Manual Setup<br />
1 <strong>Process</strong> Variables<br />
2 Analog Output<br />
3 Scaled Variable<br />
4 Configuration Display<br />
5 HART<br />
6 Module Assignment<br />
7 Device Information<br />
Alert Setup<br />
1 Pressure Alerts<br />
2 Temperature Alerts<br />
3 View Device Topology<br />
Variables<br />
1 System DP<br />
2 P-Hi Pressure<br />
3 P-Lo Pressure<br />
4 P-Hi Module Temperature<br />
5 P-Lo Module Temperature<br />
6 Scaled Variable<br />
Trends<br />
1 System DP<br />
2 P-Hi Pressure<br />
3 P-Lo Pressure<br />
4 P-Hi Module Temperature<br />
5 P-Lo Module Temperature<br />
6 Scaled Variable<br />
Maintenance<br />
1 Analog Calibration<br />
2 System DP Calibration<br />
3 P-Hi Calibration<br />
4 P-Lo Calibration<br />
5 Find Device<br />
Simulate<br />
1 Loop Test<br />
<strong>Rosemount</strong> <strong>3051S</strong> ERS System<br />
Device Information<br />
1 General<br />
2 Model Numbers<br />
3 HART Revision Numbers<br />
4 P-Hi Module Information<br />
5 P-Lo Module Information<br />
6 Alarm and Security<br />
7. View Device Topology<br />
Pressure Alerts<br />
1 System DP<br />
2 P-Hi Pressure<br />
3 P-Lo Pressure<br />
4 View Device Topology<br />
Temperature Alerts<br />
1 System DP<br />
2 P-Hi Module Temperature<br />
3 P-Lo Module Temperature<br />
4 View Device Topology<br />
Analog Calibration<br />
1 Analog Trim<br />
2 Restore Factory Calibration<br />
3 Analog Output Value<br />
4 Percent of Range<br />
5 Primary Variable<br />
6 Upper Range Value<br />
7 Lower Range Value<br />
System DP Calibration<br />
1 System DP Trim<br />
2 Restore Factory Calibration<br />
3 View Last Trim<br />
4 View DP Limits<br />
5 System DP Value<br />
6 Data Quality<br />
7 Status<br />
8 Damping<br />
P-Hi Calibration<br />
1 P-Hi Sensor Trim<br />
2 Restore Factory Calibration<br />
3 View Last Trim<br />
4 View P-Hi Sensor Limits<br />
5 P-Hi Pressure Value<br />
6 Data Quality<br />
7 Status<br />
8 Damping<br />
P-Lo Calibration<br />
1 P-Lo Sensor Trim<br />
2 Restore Factory Calibration<br />
3 View Last Trim<br />
4 View P-Hi Sensor Limits<br />
5 P-Lo Pressure Value<br />
6 Data Quality<br />
7 Status<br />
8 Damping<br />
General<br />
1 Tag<br />
2 Long Tag<br />
3 Model<br />
4 Date<br />
5 Descriptor<br />
6 Message<br />
7 ERS Serial Number<br />
Model Numbers<br />
1 Model Number 1<br />
2 Model Number 2<br />
3 Model Number 3<br />
4 Model Number 4<br />
HART Revision Numbers<br />
1 HART Universal<br />
2 Field Device<br />
3 Software<br />
4 Hardware<br />
P-Hi Module Information<br />
1 Sensor Module Information<br />
2 Flange Information<br />
3 <strong>Remote</strong> Seal Information<br />
P-Lo Module Information<br />
1 Sensor Module Information<br />
2 Flange Information<br />
3 <strong>Remote</strong> Seal Information<br />
Alarm and Security<br />
1 Alarm Direction<br />
2 High Alarm<br />
3 High Saturation<br />
4 Low Saturation<br />
5 Low Alarm<br />
6 Write Protect<br />
P-Lo Sensor Trim<br />
1 Upper Trim<br />
2 Lower Trim<br />
3 Zero Trim<br />
4 Calibration Type<br />
View Last Trim<br />
1 Last Upper Trim<br />
2 Last Lower Trim<br />
View P-Hi Sensor Limits<br />
1 Upper Limit<br />
2 Lower Limit<br />
3 Minimum Span<br />
P-Lo Sensor Trim<br />
1 Upper Trim<br />
2 Lower Trim<br />
3 Zero Trim<br />
4 Calibration Type<br />
View Last Trim<br />
1 Last Upper Trim<br />
2 Last Lower Trim<br />
View P-Lo Sensor Limits<br />
1 Upper Limit<br />
2 Lower Limit<br />
3 Minimum Span<br />
Sensor Module Information<br />
1 Sensor Module Serial Number<br />
2. Type<br />
3 Configuration<br />
4 Sensor Range<br />
5 Upper Limit<br />
6 Lower Limit<br />
7 Isolator Material<br />
8 Fill Fluid<br />
Flange Information<br />
1 <strong>Process</strong> Connection<br />
2 Connection Material<br />
3 O-Ring Material<br />
4 Drain / Vent Material<br />
<strong>Remote</strong> Seal Information<br />
1 Number of Seals<br />
2 <strong>Remote</strong> Seal Type<br />
3 Diaphragm Material<br />
4. Fill Fluid<br />
B-3
<strong>Rosemount</strong> <strong>3051S</strong> ERS System<br />
B-4<br />
Reference Manual<br />
00809-0100-4804, Rev AA<br />
January 2011
Reference Manual<br />
00809-0100-4804, Rev AA<br />
January 2011<br />
<strong>Rosemount</strong> <strong>3051S</strong> ERS System<br />
Appendix C Product Certifications<br />
APPROVED<br />
MANUFACTURING<br />
LOCATIONS<br />
ORDINARY LOCATION<br />
CERTIFICATION FOR FM<br />
European Directive<br />
Information<br />
Hazardous Locations<br />
Certifications<br />
Approved Manufacturing Locations . . . . . . . . . . . . . . . . . page C-1<br />
Ordinary Location Certification for FM . . . . . . . . . . . . . . . page C-1<br />
Hazardous Locations Certifications . . . . . . . . . . . . . . . . . page C-1<br />
This section contains hazardous location certifications for <strong>3051S</strong> HART protocol.<br />
<strong>Rosemount</strong> Inc. – Chanhassen, Minnesota, USA<br />
<strong>Emerson</strong> <strong>Process</strong> Management GmbH & Co. – Wessling, Germany<br />
<strong>Emerson</strong> <strong>Process</strong> Management Asia Pacific Private Limited – Singapore<br />
Beijing <strong>Rosemount</strong> Far East Instrument Co., LTD – Beijing, China<br />
As standard, the transmitter has been examined and tested to determine that the design meets<br />
basic electrical, mechanical, and fire protection requirements by FM, a nationally recognized<br />
testing laboratory (NRTL) as accredited by the Federal Occupational Safety and Health<br />
Administration (OSHA).<br />
Consult your <strong>Emerson</strong> <strong>Process</strong> Management sales representative for more information about the<br />
EC declaration of conformity.<br />
North American Certifications<br />
FM Approvals<br />
E5 Explosion-proof for Class I, Division 1, Groups B, C, and D; Dust Ignition-proof for Class II<br />
and Class III, Division 1, Groups E, F, and G; hazardous locations; enclosure Type 4X,<br />
conduit seal not required.<br />
I5 Intrinsically Safe for use in Class I, Division 1, Groups A, B, C, and D; Class II, Division 1,<br />
Groups E, F, and G; Class III, Division 1; Class I, Zone 0 AEx ia IIC when connected in<br />
accordance with <strong>Rosemount</strong> drawing 03151-1306; Non-Incendive for Class I, Division 2,<br />
Groups A, B, C, and D Enclosure Type 4X<br />
For entity parameters see control drawing 03151-1306.<br />
Canadian Standards Association (CSA)<br />
All CSA hazardous approved transmitters are certified per ANSI/ISA 12.27.01-2003.<br />
E6 Explosion-proof for Class I, Division 1, Groups B, C, and D; Dust Ignition-Proof for Class II<br />
and Class III, Division 1, Groups E, F, and G; suitable for Class I, Division 2, Groups A, B, C,<br />
and D, CSA Enclosure Type 4X; conduit seal not required; Dual Seal.<br />
I6 Intrinsically Safe for Class I, Division 1, Groups A, B, C, and D when connected in<br />
accordance with <strong>Rosemount</strong> Drawings 03151-1316; Dual Seal.<br />
For entity parameters see control drawing 03151-1316.<br />
European Certifications<br />
I1 ATEX Intrinsic Safety<br />
Consult factory for availability.<br />
N1 ATEX Type n<br />
Certificate No. BAS01ATEX3304X II 3 G<br />
Ex nL IIC T5 (Ta = -40 °C to 70 °C)<br />
Ui = 45 Vdc max<br />
Ci = 11.4 nF<br />
IP66<br />
1180<br />
Special Conditions for Safe Use (X)<br />
The apparatus is not capable of withstanding the 500 V insulation test required by Clause<br />
6.8.1 of EN 60079-15. This must be taken into account when installing the apparatus.<br />
C-1
<strong>Rosemount</strong> <strong>3051S</strong> ERS System<br />
C-2<br />
Reference Manual<br />
00809-0100-4804, Rev AA<br />
January 2011<br />
ND ATEX Dust<br />
Certificate No.: BAS01ATEX1374X II 1 D<br />
Ex tD A20 IP66 T105 °C (-20 °C � Tamb � 85 °C)<br />
Vmax = 42.4 V max<br />
IP66<br />
1180<br />
Special Conditions for safe use (X):<br />
1. Cable entries must be used which maintain the ingress protection of the enclosure to at<br />
least IP66.<br />
2. Unused cable entries must be filled suitable blanking plugs which maintain the ingress<br />
protection of the enclosure to at least IP66.<br />
3. Cable entries and blanking plugs must be suitable for the ambient range of the<br />
apparatus and capable of withstanding a 7J impact test.<br />
4. Each <strong>3051S</strong> ERS transmitter must be securely screwed in place to maintain the ingress<br />
protection of the enclosure. (The <strong>3051S</strong> Super Module must be properly assembled to<br />
the <strong>3051S</strong> housing to maintain ingress protection.)<br />
E1 ATEX Flameproof<br />
Certificate No.: KEMA00ATEX2143X II 1/2 G<br />
Ex d IIC T6 (-50 °C � Tamb � 65 °C)<br />
Ex d IIC T5 (-50 °C � Tamb � 80 °C)<br />
Vmax = 42.4 V<br />
1180<br />
Special Conditions for safe use (X):<br />
1. The Ex d blanking elements, cable glands and wiring shall be suitable for a temperature<br />
of 90 °C.<br />
2. Transmitter Model <strong>3051S</strong> contains a thin wall diaphragm. Installation, maintenance and<br />
use shall take into account the environmental conditions to which the diaphragm will be<br />
subjected. The manufacturer's instructions for maintenance shall be followed in detail to<br />
assure safety during its expected lifetime.<br />
3. In case of repair, contact the manufacturer for information on the dimensions of the<br />
flameproof joints.<br />
Japanese Certifications<br />
E4 TIIS Flameproof: Consult factory for availability<br />
INMETRO Certifications<br />
E2 INMETRO Flameproof: Consult factory for availability<br />
I2 INMETRO Intrinsic Safety: Consult factory for availability<br />
China Certifications<br />
E3 China Flameproof: Consult factory for availability<br />
I3 China Intrinsically Safe: Consult factory for availability<br />
IECEx Certifications<br />
I7 IECEx Intrinsic Safety<br />
Consult factory for availability.<br />
N7 IECEx Type n<br />
Certificate No.: IECExBAS04.0018X<br />
Ex nC IIC T5 (T a = -40 °C to 70 °C)<br />
U i = 45 Vdc Max<br />
IP66<br />
Special conditions for safe use (X)<br />
The apparatus is not capable of withstanding the 500 V insulation test required by Clause 8<br />
of IEC 60079-15.
Reference Manual<br />
00809-0100-4804, Rev AA<br />
January 2011<br />
Combinations of<br />
Certifications<br />
<strong>Rosemount</strong> <strong>3051S</strong> ERS System<br />
E7 IECEx Flameproof and Dust (each listed separately)<br />
IECEx Flameproof<br />
Certificate No.: IECExKEM08.0010X<br />
Ex d IIC T6 (-50 °C � Tamb � 65 °C)<br />
Ex d IIC T5 (-50 °C � Tamb � 80 °C)<br />
Vmax = 42.4 V<br />
Special conditions for safe use (X)<br />
1. The Ex d blanking elements, cable glands and wiring shall be suitable for a temperature<br />
of 90 °C.<br />
2. Transmitter Model <strong>3051S</strong> contains a thin wall diaphragm. Installation, maintenance and<br />
use shall take into account the environmental conditions to which the diaphragm will be<br />
subjected. The manufacturer's instructions for maintenance shall be followed in detail to<br />
assure safety during its expected lifetime.<br />
3. In case of repair, contact the manufacturer for information on the dimensions of the<br />
flameproof joints.<br />
IECEx Dust<br />
Certificate No. IECExBAS09.0014X<br />
Ex tD A20 IP66 T105°C (-20 °C ≤ Tamb ≤ 85 °C)<br />
Vmax = 42.4 V<br />
A = 22 mA<br />
IP66<br />
Special conditions for safe use (x)<br />
1. Cable entries must be used which maintain the ingress protection of the enclosure to at<br />
least IP66.<br />
2. Unused cable entries must be filled with suitable blanking plugs which maintain the<br />
ingress protection of the enclosure to at least IP66.<br />
3. Cable entries and blanking plugs must be suitable for the ambient range of the<br />
apparatus and capable of withstanding a 7J impact test.<br />
4. Each <strong>3051S</strong> ERS sensor must be securely screwed in place to maintain the ingress<br />
protection of the enclosure. (Each sensor module must be properly assembled to the<br />
housing to maintain ingress protection.)<br />
Stainless steel certification tag is provided when optional approval is specified. Once a device<br />
labeled with multiple approval types is installed, it should not be reinstalled using any other<br />
approval types. Permanently mark the approval label to distinguish it from unused approval types.<br />
K1 Combination of E1, I1, N1, and ND<br />
K2 Combination of E2 and I2<br />
K5 Combination of E5 and I5<br />
K6 Combination of E6 and I6<br />
K7 Combination of E7, I7, and N7<br />
KA Combination of E1, E6, I1, and I6<br />
KB Combination of E5, E6, I1, and I6<br />
KC Combination of E5, E1, I5, and I1<br />
KD Combination of E5, E6, E1, I5, I6, and I1<br />
C-3
<strong>Rosemount</strong> <strong>3051S</strong> ERS System<br />
C-4<br />
Reference Manual<br />
00809-0100-4804, Rev AA<br />
January 2011
Reference Manual<br />
00809-0100-4804, Rev AA<br />
January 2011 <strong>Rosemount</strong> <strong>3051S</strong> ERS System<br />
Standard Terms and Conditions of Sale can be found at www.rosemount.com/terms_of_sale<br />
The <strong>Emerson</strong> logo is a trademark and service mark of <strong>Emerson</strong> Electric Co.<br />
<strong>Rosemount</strong> and the <strong>Rosemount</strong> logotype are registered trademarks of <strong>Rosemount</strong> Inc.<br />
SuperModule and Coplanar are trademarks of <strong>Rosemount</strong> Inc.<br />
PlantWeb is a mark of one of the <strong>Emerson</strong> <strong>Process</strong> Management companies.<br />
HART is a registered trademark of the HART Communications Foundation.<br />
ASP Diagnostics Suite is a trademark of one of the <strong>Emerson</strong> <strong>Process</strong> Management companies.<br />
Syltherm and D.C. are registered trademarks of Dow Corning Co.<br />
Neobee M-20 is a registered trademark of Stephan Chemical Co.<br />
The 3-A symbol is a registered trademark of the 3-A Sanitary Standards Symbol Council.<br />
FOUNDATION fieldbus is a registered trademark of the Fieldbus Foundation.<br />
Grafoil is a trademark of Union Carbide Corp.<br />
All other marks are the property of their respective owners.<br />
© 2011 <strong>Rosemount</strong>, Inc. All rights reserved.<br />
<strong>Emerson</strong> <strong>Process</strong> Management<br />
<strong>Rosemount</strong> Measurement<br />
8200 Market Boulevard<br />
Chanhassen MN 55317 USA<br />
Tel (USA) 1 800 999 9307<br />
Tel (International) +1 952 906 8888<br />
Fax +1 952 949 7001<br />
00809-0100-4804 Rev AA, 01/11<br />
<strong>Emerson</strong> <strong>Process</strong> Management<br />
GmbH & Co.<br />
Argelsrieder Feld 3<br />
82234 Wessling<br />
Germany<br />
Tel 49 (8153) 9390<br />
Fax 49 (8153) 939172<br />
<strong>Emerson</strong> <strong>Process</strong> Management Asia<br />
Pacific Private Limited<br />
1 Pandan Crescent<br />
Singapore 128461<br />
T (65) 6777 8211<br />
F (65) 6777 0947<br />
Enquiries@AP.<strong>Emerson</strong><strong>Process</strong>.com<br />
Beijing <strong>Rosemount</strong> Far East<br />
Instrument Co., Limited<br />
No. 6 North Street,<br />
Hepingli, Dong Cheng District<br />
Beijing 100013, China<br />
T (86) (10) 6428 2233<br />
F (86) (10) 6422 8586