

GD9520 - GME
GD9520 - GME
GD9520 - GME

You also want an ePaper? Increase the reach of your titles
YUMPU automatically turns print PDFs into web optimized ePapers that Google loves.
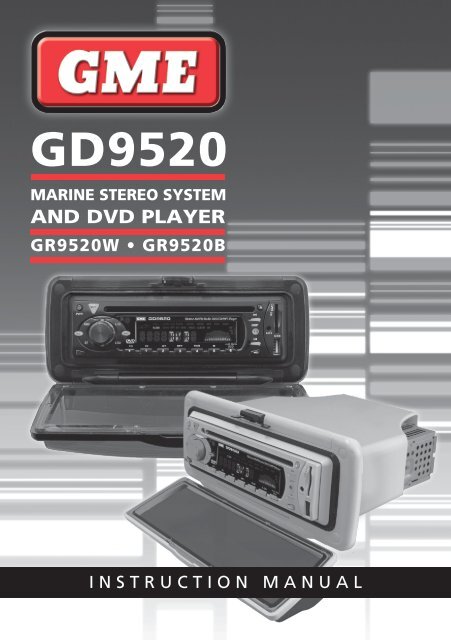
IntroductionCongratulations on the purchase of the <strong>GME</strong> <strong>GD9520</strong>Marine Stereo and Digital Video Disc system.Your <strong>GD9520</strong> has been designed using the latest digitalAV technology combined with <strong>GME</strong>’s 35 years of marineproduct development.With all circuitry conformally coated, exposed metalworkprotected against the harsh marine environment andcontained in a UV stabilised water resistant polycarbonatehousing, the <strong>GD9520</strong> will ensure many years ofsterling service.Read this instruction booklet carefully, drop in yourfavourite DVD or music selection, sit back and enjoythe performance.product description and modeldesignatorsThe <strong>GD9520</strong> is available in the following options:<strong>GD9520</strong>W (White) and <strong>GD9520</strong>B (Black)Designed for flush mounting into bulkheads or dashboardswhere the rear case of the product is not exposed to anywater ingress or moisture. The <strong>GD9520</strong> has a semi openrear case to permit heat dissipation generated by operatingthe system at high volumes for extended periods of time.Type of disc Label on Disc Recorded material Size of discDVDVCDSound and movingpicturesSound and movingpictures12 cm12 cmMP3/WMA MP3/WMA Sound only 12 cmMPEG4*/DIVX*Sound and movingpictures12 cmCD Sound and still pictures 12 cmNOTE: The unit is compatible with DVD, DVD +/-R, VCD 1.0/2.0/3.0, SVCD, CD, CD-R, CD-RW and JPEGCONTROL LOCATIONSPower Mute LOC/OX Remote Control Band LCD CD Slot Clock/Time Eject SD CardOn/Off 5 selector Receptor Selector Display selector 12 input18 10 6<strong>GD9520</strong>Marine AM/FM Radio DVD/CD/MP3 Player15Release Button3 Select13 AMS294 147LoudP-EQ Button Number Keys Mode Switchmode switch11Audio/Volume ControlTuning/SelectingTracksST SelectorUSB InputAuxiliaryInputGd9520 instruction manual PAGE 3
INSTALLATIONINSTALLATION PRECAUTIONSIf you are connecting your <strong>GD9520</strong> for the first time or havejust reconnected your boat battery and you are experiencingproblems with the unit’s operation, we suggest you tryresetting the unit. The reset button is located under theremovable face panel (see below for instructions). Gentlypress the reset button with a paper clip or similar object.You can then refit the face panel.The preset station memories and clock time are retainedonly while the yellow ‘Memory 12 V+’ lead is connected(see Electrical Wiring section). If the battery is disconnectedor switched off at the master switch, or the unit is removedfrom the vessel, the station memories will be lost and theclock will need to be reset.REMOVING & REFITTING THE FACE PANELBefore removing the face panel, turn the unit OFF bypressing the PWR button.1. Press the 15 release button to release theleft hand end of the face panel.2. Lift the face panelout towards you.3. After removingthe face panel,place it inside thesupplied case toprotect it from damage.Handling Compact Discs• Handle the CD/DVD by it’s edge, avoid touching thedisc surface.• Store your discs away from directsunlight or heat sources. Keepingthe disc in it’s original case willhelp to avoid damage.• Clean the disc with a soft clothfrom the centre to the outer edge,(see diagram) rather than in acircular motion. Do not use solvents.Reset ButtonMoisture CondensationYour <strong>GD9520</strong> uses optical laser technology. Occasionallydamp or humid conditions may cause condensation toappear on the lenses inside the unit. Should this occur, theunit might not operate correctly. Simply eject the disc andleave the unit turned on for a while until themoisture evaporates.flush mountingThe <strong>GD9520</strong> is designed for flush mounting only.The <strong>GD9520</strong> can be neatly flush mounted into a panel orbulkhead so that just the controls and the protective coverare visible.Using the template provided, select a suitable location on apanel or bulkhead. Examine behind the panel to determinethe best method of support. If the thickness of the panelis not sufficient to support the unit, it will be necessaryto use the strap supplied (see following diagrams). <strong>GME</strong>recommends that the unit should be mounted in a positionthat is free from direct sunlight and excessive vibration.Rear centre Screw with SpacersScrewStrapScrewFlush MountSupport StrapScrewScrewRemoving Clear FRONT CoverIf your <strong>GD9520</strong> is to be mounted in a dry protected locationaway from the possibility of water ingress, the front clearcover can be permanently removed.1. Remove the 4 screws from each of the top and bottominside edge of the mount frame as shown below.Remove top latch assembly and clear cover.PAGE 4 instruction manual Gd9520
2. Fit replacement fill strips as supplied into top andbottom frame edges.ScrewCapsFill Strips3. Mount your unit into the bulkhead. Use supplied sparescrew caps to cover screw heads.Electrical WiringDC ConnectionsCaution: The <strong>GD9520</strong> is designed for vessels with a12 Volt negative ground electrical system only!Referring to the wiring diagram below:1. Connect the Yellow wire directly to the positive terminalof the vessel’s battery, or to a point that has +12 Voltsavailable at all times. This lead maintains the memorieswithin the <strong>GD9520</strong> and is the main power source forthe unit.2. Connect the Red wire to the vessels +12 V supply viaan appropriate isolating switch or circuit breaker. Thislead enables the radio to be switched ON and OFF.Alternatively, this wire can be connected directly to thebattery’s positive terminal and the <strong>GD9520</strong> switched ONand OFF using it’s own controls.Important: Your <strong>GD9520</strong> is able to maintain it’smemories when it is switched off using the PWR button bydrawing power directly from your battery via the Yellow‘MEMORY 12 V+’ lead. Although the memory backupcurrent is very small (about 20 mA) it may eventuallydischarge your battery if left connected indefinitely. Thetime taken to completely discharge your battery could varydepending on its Amp-hour rating and battery condition.If you do not run your boat’s motor regularly or your batteryis not kept charged between outings (e.g. Solar or windcharger), we recommend you disconnect the Yellow leadeach time you secure or trail your boat. This is easily doneby connecting the Yellow ‘MEMORY 12 V+’ lead via aMaster switch, which can be switched off after each outing.This will mean you will lose all your preset station memoriesand clock settings.Speaker ConnectionsWhen connecting the speakers, observe the correct polarityas shown in the diagram below. Incorrect polarity will result in areduction of bass response and Stereo effect. The use of speakerswith an impedance of less that 4 Ohms is not recommended, asthey will cause excessive loading of the <strong>GD9520</strong>’s output circuitand may result with the radio overheating.Caution: The <strong>GD9520</strong> is a four-speaker system thatrequires 2 separate wires for each speaker.A range of <strong>GME</strong> speakers are available from your local<strong>GME</strong> retailer.3. Connect the Black wire to the battery’s negative terminalor to the common negative bus in the electrical system.REAR LEFT – GREEN/BLACKREAR LEFT + GREENFRONT LEFT – WHITE/BLACKFRONT LEFT + WHITEFRONT RIGHT + GREYFRONT RIGHT – GREY/BLACKREAR RIGHT + PURPLEREAR RIGHT – PURPLE/BLACKYELLOWVideo InBLACKVideo OutBLACKDigital AudioCoaxial OutFront Audio OutBLACKLch WHITERch REDRear Audio OutGreyLch WHITERch REDAntennaConnectorGd9520 instruction manual PAGE 5
Programas transversalesNidia Piedad Neira SosaCoordinadora del Programa Nacional deConcertación CulturalKatherine Eslava OtáloraCoordinadora del Programa Nacional de EstímulosSilvia Mora SierraGerente del Plan Nacional de Lectura y EscrituraCarmen Patricia Hernández BallesterosCoordinadora del Grupo de Infraestructura CulturalÁngel Eduardo Moreno MarínCoordinador del Grupo de Emprendimiento CulturalUnidades administrativas especialesMaria Victoria de Angulo de RobayoDirectora Museo Nacional de ColombiaMaría Claudia López SorzanoViceministra de CulturaDirectora (e) Biblioteca Nacional de ColombiaEntidades adscritasFabián Sanabria SánchezDirector del Instituto Colombiano de Antropologíae Historia (ICANH)Carlos Zapata CárdenasDirector Archivo General de la Nación (AGN)José Luis Acosta HerreraDirector (e) Instituto Caro y Cuervo
11 PauseTo pause playing the CD/DVD, press the button once.The disc symbol on the LCD will stop rotating when thepause function has been selected.Press the button again to resume playing the CD/DVD.Repeat PlayTo continually play the current track or chapter, press theRPT button (Numeric button #3 on the front panel).A ‘RPT’ flag will be illuminated on the LCD when in therepeat mode. Press the RPT button again to return to thenormal mode.Random PlayTo play tracks on the CD in a random order, press the RDMbutton (Numeric button #4 on the front panel). A ‘RDM’ flagwill be illuminated on the LCD when in the random mode.Press the RDM button again to return to the normal mode.Note: the RDM function is not operational whenplaying DVDs.Intro-ScanThe intro-scan feature plays the first 10 seconds of eachtrack allowing you to identify the songs on the CD.To select intro-scan press the INT button (Numeric button#2 on the front panel), the LCD will display INT, tracknumber and elapsed time.Press the INT button again to return to the normal mode.Note: Intro – Scan does not operate in DVD, MP3 orWMA formats.OSD (On Screen Display)Press the OSD button (Numeric button #6 on the frontpanel) to display Track, Chapter, Elapsed Time and otherinformation on the monitor.MP3 FunctionsMP3 (MPEG-1 Layer 3) is a format for the compression ofaudio files to approximately 8% of their original size. Thispermits a large number of files to be stored on a CD-R, CD-RW, SD Card or USB memory stick.Unique Remote Control FunctionsThere are a number of functions on the <strong>GD9520</strong> that areonly accessible through the remote control handset.Zoom (DVD Mode only)The <strong>GD9520</strong> has 6 Zoom settings, to enter the Zoommode, press the ZOOM button on the remote control, thesequentially move to either x2, x3, x4 or 1/2, 1/3 or Zoommode the cursor keys may be used to pan around the picture.Subtitles (DVD Mode only)Press the SUBTITLE button on the remote control todisplay subtitles.Set UpTo enter the SET UP mode, Press the STOP button, thenpress the SET UP button on the remote control.Use the / keys to select SYSTEM SET UP, LANGUAGESET UP, AUDIO SET UP, VIDEO SET UP or DIGITAL SET UP.Then use the / / / keys to navigate around thesub-menu to select and change operating parameters.Multi Angle (DVD Mode only)Press the ANGLE button on the remote control to view theDVD content from a different angle.Note: Not All DVDs support this feature.Slow Motion (DVD Mode only)Press the SLOW button on the remote control to slow theDVD viewing speed. There are 6 speeds available, continuepressing the SLOW button to access the different speeds.PBC Title (DVD Mode only)Press the PBC button to access the menu, then use the/ / / keys to navigate around the screen andselect options.Numeric KeysIn RADIO Mode – Press any one of the 1 to 6 NUMERICKEYS to select a pre-set radio station.In the CD mode – Press any one of the NUMERIC KEYS toselect a track.GOTOThe GOTO function allows the operator to select specifictracks or chapters from the disc.Press the GOTO button on the remote control; use the/ keys to move the highlighted cursor to the requiredfield, then using the Numeric keypad modify the selectedfield to the track or chapter required, press ENTER toconfirm selection.Precautions for CD-R and CD-RW DiscsThe <strong>GD9520</strong> will not play a CD/DVD that has not beenfinalised, please refer to the instruction manual of thesoftware or the recorder you are using to write these CDsfor the finalisation process.To ensure a more reliable playback, please follow <strong>GME</strong>recommendations:• Use CD-RWs with a speed of 1x to 4x and write with aspeed of 1x to 2x.PAGE 8 instruction manual Gd9520
• Use CD-Rs with a speed of 1x to 8x and write with aspeed of 1x to 2x.• Do not play CD-RWs that have been written to more that5 times.Note: If a disc contains audio CD data and MP3 files, the<strong>GD9520</strong> will only play which ever is first on the disc. If thefirst track on the disc is an MP3 file, the unit will only playthe MP3 files from the disc, and will ignore all other filesand vice versa.Precautions for MP3The format of the disc must be ISO9660 level 1 or 2, orJoliet or Romeo in the expansion format.When naming an MP3 file, ensure the file extension is ‘.MP3’The <strong>GD9520</strong> will not recognise a non MP3 file even thoughthe name extension is ‘.MP3’.AUXILIARY INPUTS & OUTPUTSTo maximise the owner’s listening flexibility and pleasurethe <strong>GD9520</strong> has several auxiliary inputs and outputs.Front Panel InputsThere are standard USB and SD card inputs located on thefront panel.When using the USB input please ensure the USB Adaptor(Part # AD003) supplied as a standard accessory with each<strong>GD9520</strong> is utilised and the transparent front cover is alwaysfully closed to avoid any possibility of water ingress.The are many styles and sizes of USB memory sticks and SDcards available on the market today, however for optimumperformance <strong>GME</strong> recommends:• Part # USB001 <strong>GME</strong> USB Memory Stick• Part # SDC001 <strong>GME</strong> SD CardThese devices have been specifically manufactured for <strong>GME</strong>and are available from your local <strong>GME</strong> retailer.Aux InputThe <strong>GD9520</strong> has a 2.5 mm stereo jack low level (1 Voltpeak to peak) audio input lines. Owners may use this inputfor external audio sources that they wish to control andplay through the vessel’s stereo system.<strong>GME</strong> offers a custom interface cable for personelMP3 player connection; Part # LE68. When using thisconnection, it is necessary to use the portable devicefunctions to control play.Rear Outputs and InputsThe <strong>GD9520</strong> has Audio outputs plus Video inputs andoutputs. These inputs and outputs are clearly labelled andcolour coded, they are also identified in the wiring diagramshown on page 5 of this manual.When using the rear external video input, the audio inputmust be fed via the ‘Aux’ in at the front of the unit.REMOTE CONTROLA standard accessory with the <strong>GME</strong> <strong>GD9520</strong> is a a wirelessremote control (RCU9500). The remote will permit the control ofall major <strong>GD9520</strong> functions from a distance of up to 3 metres.Ensure plastic battery protection tab is removed from thehandset before initial operation.Simply point the remote handset at the <strong>GD9520</strong> and selectthe required option on the keypad.Remote control functionsModePowerBand/SystemEnterEjectProgramPlayingRepeat PlayRandom PlayTuning/Selectingtracks/FF/RewindPBC MenuOn-screenDisplayNumberbuttonsBNDSYSAMSRPTLOCRDMMODEENTERSTPROGSEEK-Pause/PlayMuteMenu DisplaySubtitleSet-upAngleSlow-motionPlayZoomVolumeSoundCharacteristicsAudioGo ToButtonCautions• The remote control handset is not waterproof and should bekept well away from both fresh and salt water at all times.• The remote control should not be left in direct sunlightfor prolonged periods, excessive sunlight and heatcould cause damage to the keypad resulting in incorrectoperation or non function.TITLEANGLEVOL+SEL9 0 10+SUB-TSET-UPSLOWZOOMSEEK+PBC OSD VOL- AUDIO1 2 3 45 6 7 8GOTORCU9001Gd9520 instruction manual PAGE 9
Should the working range of remote control handsetreduce, or functions fail to operate correctly. The batteryshould be replaced:Battery Replacement1. Turn remoteover, Insertthumb nailbetween grooveson the batterycover latch and slideto the right, pull out thebattery tray.2. Replace the battery,(type CR 2025 or equivalent),with the positive side facing upwards.3. Slide the battery tray back into thehandset.OPTIONAL ACCESSORIESThere are a number of high quality <strong>GME</strong> accessoriesavailable to enhance your marine entertainment experience.These accessories are available through your local <strong>GME</strong>retailer, should you have any difficulty in obtaining any<strong>GME</strong> accessory, please call or email your local <strong>GME</strong> SalesOffice (within Australia and New Zealand). Contact detailsare listed on the back page of this manual.International customers should also refer to the back pagefor details of your local importer or visit:www.gme.net.au/export• Marine Speakers• Infrared Remote Control - replacement• SD Cards• USB Flash Drives• Comprehensive Range of Marine Antennas• Interface cable for MP3 devicesFrom time to time <strong>GME</strong> may introduce new and additionalproducts to the range or discontinue existing accessories.Details of any changes may be found at our website:www.gme.net.au/marineSPK001 and SPK002, both available in black or white.SPK003 and SPK004, both available in black or white.AE346B, AE83 and AE312B Marine Antennas.PAGE 10 instruction manual Gd9520
GR9520 Trouble Shooting GuideSymptom Cause SolutionNo Power. Vessel’s battery switch is not on. Check master switch if fitted.Error messages displayed on LCD orfunctions not operating.One of the fuses is blown.Microprocessor lock up.Replace the damaged fuse with thecorrect value.Press Reset Button.Poor radio reception. Damaged or incorrect type of antenna. Check antenna and replaceif necessary.CD/DVD cannot be loaded. There is already a CD in the player. Remove disc, then insert new disc.CD/DVD is upside down.CD/DVD is damaged or dirty.CD/DVD has moisture on it.CD/DVD reader has moisture on lens.Insert correct way up.Clean or try another disc.Dry disc and retry.Leave player on for an hour or soand retry.FM RadioFrequency Range: 87.5 - 108 MHz (Eu./Aust./N.Z.)87.5 - 107.9 MHz (U.S.A.)Frequency Step: 50 kHzIntermediate Frequency: 10.7 MHzSensitivity (30 dB S/N): 13 dBuV (typical)Channel Separation: >22 dBStation Memories: 18AM RadioFrequency Range: 522 - 1620 MHz (Eu./Aust./N.Z.)530 - 1710 MHz (U.S.A.)Frequency Step: 9 kHz (Eu./Aust./N.Z.)10 kHz (U.S.A.)Intermediate Frequency: 455 kHzSensitivity (20 dB S/N): 25 dBuVStation Memories: 12Compact disc mechanismMechanism: Auto LoadingSignal to Noise Ratio: 65 dBFormat: 8 times oversamplingEnvironmental: Anti-vibration/Anti-shockspecifications*audio amplifierAudio Output: (4 channels x 45 W Peak =180 W Peak) @ 10% THD.Speaker Impedance: 4 OhmFrequency Response: 40 Hz - 18 kHzBass Adjustment Range: +/- 8 dB @ 100 kHzTreble AdjustmentRange: +/- 10 dB @ 10 kHzDVD PlayerAspect Ratio: 4:3 Letter box4:3 Pan Scan or 16:9Video Output Level: 1.00 Volt Peak to Peak( 75 Ohms Impedance )Horizontal Resolution: 500Video System: Auto/PAL/NTSCGENERALDC Supply Input: 11 – 16 Volts Negative GroundMemory Back-up: External Back-up Memory WireBack-up Current: Approximately 20 mAOverall Size: 232 mm (W) x 97 mm (H) x200 mm (D)Weight: Approx 1.75 kgSupply Current: 7 Ampere (max.)*All specifications are typical and subject to change without notice or obligation.Gd9520 instruction manual PAGE 11
WARRANTY<strong>GME</strong> limit this warranty to the original purchaser ofthe equipment.<strong>GME</strong> warrant this product to be free from defects inmaterial and workmanship for a period of twelve (12)months from the date of purchase from theirauthorised retailer.Should the product require servicing during this period, alllabour and parts used to effect repairs will be supplied freeof charge. <strong>GME</strong> reserve the right to determine whetherdamage has been occasioned by accident, misuse orimproper installation whereby the warranty would bevoid, including:Equipment which has been damaged due to:(a) Incorrect or reverse polarity connection to a battery orpower supply.(b) Connection to incorrect supply voltage.(c) Effects of water or moisture penetration.(d) Non-factory modifications.(e) Use of incorrect replacement fuse.Procedure to be followed by claimant: In the event of adefect occurring during the twelve (12) month warrantyperiod, the original purchaser may return the defective unitalong with suitable proof of purchase date (i.e. receipt,docket, credit card slip etc.) and a full description of thedefect to any authorised retailer.All freight charges incurred for transportation by the retaileror <strong>GME</strong> are the purchaser’s responsibility.The retailer will forward the unit to the closest authorised<strong>GME</strong> Service Depot in your particular area.<strong>GME</strong> After Sales ServiceYour <strong>GME</strong> <strong>GD9520</strong> is especially designed for theenvironment encountered in mobile or portableinstallations. The use of all solid state circuitry, carefuldesign and rigorous testing, result in high reliability. Shouldfailure occur however, <strong>GME</strong> maintain a fully equippedservice facility and spare parts stock to meet the customer’srequirements long after expiry of thewarranty period.Warning: Extreme care should be taken when connectingany external device to your <strong>GD9520</strong> rear inputs or outputs.<strong>GME</strong> strongly recommends that all connections should becarried out by a suitably qualified technician.A Division of:Head Office: SYDNEY- Locked Bag 2086, North Ryde N.S.W. 1670, Australia. Tel: (02) 9844 6666, Fax: (02) 9844 6600.Melbourne Adelaide Perth Brisbane Sydney Auckland7 Mircro Circuit 14 Phillips St. Unit 1 Unit 1 Unit B Unit FDandenong South Thebarton 10-12 Harvard Way 89-101 Factory Rd. 22-24 College St. 35 Neilpark Dr.Vic. 3165 s.A. 5031 Canning Vale Oxley Gladesville East TamakiTel: (03) 9798 0988 Tel: (08) 8234 2633 W.A. 6155 Qld. 4075 n.S.W. 2111 n.Z. 2141Fax: (03) 9798 0177 Fax: (08) 8234 5138 Tel: (08) 9455 5744 Tel: (07) 3278 6444 Tel: (02) 9879 8888 Tel: (09) 274 0955Fax: (08) 9455 3110 Fax: (07) 3278 6555 Fax: (02) 9816 4722 Fax: (09) 274 0959For customers outside Australia and New Zealand, please contact your local <strong>GME</strong> retailer or email to: export@gme.net.auPAGE Part Number: 12 310395 Drawing Number: 4 3 7 8 7 - 2 instruction manual www.gme.net.au Gd9520


