

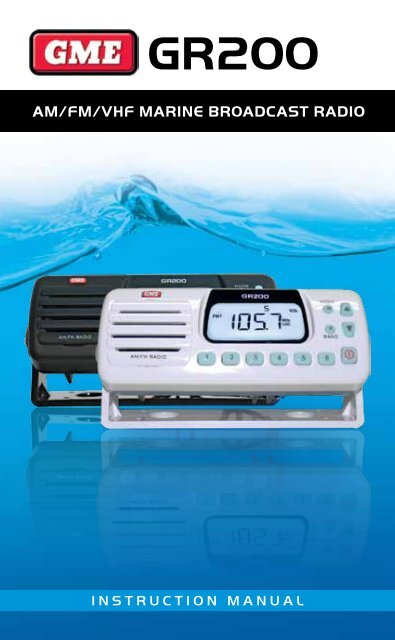
Instruction Manual - GME
Instruction Manual - GME
Instruction Manual - GME

Create successful ePaper yourself
Turn your PDF publications into a flip-book with our unique Google optimized e-Paper software.
COMPLIANCEThis device complies with AS/NZS 61000.6.3:2007.This device complies with part 15 of the FCC rules. Operation is subject to the conditionthat this device does not cause harmful interference.lISTENING TO FM IN YOUR BOATThe majority of FM broadcasts are music programs. Compared with AM signals, FMsignals have a wider dynamic range, are relatively immune to noise and provide virtuallydistortion free music reproduction. However, because of the nature of FM signals andthe fact that FM stations are usually positioned for shore based reception, reception in amoving boat may be accompanied by problems.FM programs are broadcast for local reception and may not be heard satisfactorily atdistant locations. To enjoy FM programs at their best, it is important that you tune to astation that is broadcasting in your locality.FM signals can reflect from solid objects such as buildings or hills. If these reflectedsignals are received along with signals that are arriving directly from the transmitter, theymay mix together to produce what is known as ‘multipath distortion’. This distortion isheard as noise. Often, moving as little as one metre from your position will correctthis problem.FM signals travel in straight lines. Because the signals are reflected from or absorbed bylarge solid objects, a signal ‘shadow’ may be present behind the object which may resultin poor reception in that area.LCD DISPLAYWeather ChannelsVHF ChannelsMemory NumberBand SelectionModesAuxiliary InputFrequencyPage 4 INSTRUCTION MANUAL GR200
Power KeyCONTROLSPress and hold the Power key to turn the GR200 ON or OFF. While the radio is ONbriefly press the Power key to toggle the audio mute function. ‘MUTE’ will flash onthe display when the mute function is activated.Mode Key (M)The Mode key provides access to the Volume, Bass, Treble, Balance, Frequency Adjustment,Automatic Memory Store (AMS) and Local/DX settings.The Mode selection will automatically return to the Volume setting 20 seconds after thelast key press.Band Key (B)The GR200 has 7 selectable frequency bands plus an Auxiliary audio input. The frequencybands available are Long Wave (LW), Short Wave (SW), AM (AM1 and AM2), FM (FM1and FM2) and VHF Marine (VHF). The Auxiliary input mode allows audio from externalsources such as MP3 players to be connected via a 3.5 mm socket lead on the rear panel.The frequency coverage of each band is listed in the specifications on page 14 ofthis manual.LCD DisplayMode KeyBand KeyMBUp KeyDown KeySpeakerMemory KeysPower/Mute KeyGR200INSTRUCTION MANUALPage 5
UP/Down KeysThe Up and Down keys are used to adjust functions selected using the Mode key.Memory keysSix memory keys are provided for storage and retrieval of station memories.TURNING THE GR200 ON and OFFTo switch the GR200 on, press and hold theThe radio will turn on.OperationTo switch the GR200 off, press and hold theThe radio will turn off.key for two seconds.key for two seconds.Note: When the GR200 is switched off or the power is interrupted, it will remember the laststate that it was set to and return to that state when it is switched back on.ADJUSTING THE SOUNDAdjusting the VolumeDuring normal use, the GR200 will default to the volume mode. Whenever the volumemode is selected ‘VOL’ is displayed on the right of the LCD. If you are not in the volumemode, briefly press the Mode key repeatedly until ‘VOL’ is displayed on the LCD.To adjust the volume, press the or key. Pressing the key will increase the volumewhile pressing the key will decrease the volume. The volume setting will be displayedon the LCD. Minimum volume setting displays a value of 0 with a maximum volumesetting of 30. To quickly adjust the volume setting, press and hold the or key.Adjusting the BassTo select the bass mode, briefly press the Mode key repeatedly until BAS is displayedon the right of the LCD. To adjust the bass, press the or key. Pressing the key willincrease the bass while pressing the Key will decrease the bass. The bass setting willbe displayed on the LCD. Minimum bass setting displays a value of -7 with a maximumbass setting of +7. A setting of 0 indicates a flat bass response. To quickly adjust the basssetting, press and hold the or key.Page 6 INSTRUCTION MANUAL GR200
Adjusting the TrebleTo select the treble mode, briefly press the Mode key repeatedly until ‘TRE’ is displayedon the right of the LCD. To adjust the treble, press the or key. Pressing the keywill increase the treble while pressing the key will decrease the treble. The treblesetting will be displayed on the LCD. Minimum treble setting displays a value of -7 witha maximum treble setting of +7. A setting of 0 indicates a flat treble response. To quicklyadjust the treble setting, press and hold the or key.Adjusting the BalanceThe balance setting controls the audio balance between the left and right speaker.Note: The balance mode is only available when the external speakers are attached. Ifrunning the GR200 from the internal monitor speaker, the balance function is skippedwhen the Mode key is pressed.Briefly press the Mode key repeatedly until ‘BAL’ is displayed on the right of the LCD.To adjust the Balance, press the or key. Pressing the key will adjust the balancetowards the left speaker while pressing the Key will adjust the Balance towards theright speaker. The Balance setting will be displayed on the LCD. Full left balance displays avalue of L10 with a full right balance setting of R10. A setting of 0 indicates the balanceis set equally between both speakers. To quickly adjust the Balance setting, press andhold the or key.Muting the SoundThe Mute feature allows the radio’s sound to be temporarily disabled without affectingany other settings. This is useful when making calls on your two way radio or mobilephone or during a local conversation where the radio sound is distracting.To temporarily mute the radio, briefly press the key. The audio will be temporarilydisabled and no sound will be heard from the speaker(s). While the sound is muted,‘MUTE’ will flash on the display.To cancel the Mute selection and restore the sound to its previous level, briefly press thekey again.Dimming the DisplayThe display lighting can be dimmed for night time viewing. The default setting ismaximum brightness. To dim the display:1. Press and hold the key to turn the GR200 OFF.2. Now press and hold the key again. The GR200 will turn on. DON’T RELEASE THEKEY YET.3. Now briefly press the M key to toggle the display lighting dim or bright. Once youhave selected the display lighting you can release the key.GR200INSTRUCTION MANUALPage 7
TUNING FOR STATIONSSelecting the Frequency BandThe GR200 has 7 selectable frequency bands plus an Auxiliary audio input. The frequencybands available are Long Wave (LW), Short Wave (SW), Medium Wave (AM1 and AM2),FM (FM1 and FM2) and VHF Marine (VHF). The Auxiliary input mode allows audio fromexternal sources such as MP3 players to be connected via a 3.5 mm socket lead on therear panel.To select the desired frequency band (or the Auxiliary input) briefly press the Band key.Each press will advance to the next band in the sequence and the corresponding symbolLW, SW, AUX, AM1, AM2, FM1, FM2 or VHF will appear on the display to confirm yourselection. Note that when the AUX input is selected, ‘In’ will also be displayed when anexternal device is connected.The frequency coverage of each band is listed in the specifications on page 14 of thismanual. For information on the ‘AUX’ selection please see ‘Auxiliary Input’ on page 13.Selecting USA or European Receiver StandardsThe GR200 supports USA, Canadian and European standards for AM and FM reception.Australian models conform to the European standard and are set that way by default.Owners in the USA or Canada should select the USA or Canadian standard.To switch between the standards, press and hold the Band key for 3 seconds. The GR200will display ‘E’ at the top of the display for European, ‘U’ for USA or ‘C’ for Canada. The‘E’, ‘U’ or ‘C’ symbols will disappear once any of the memory preset buttons are pressed.The differences between the European, USA and Canadian bands are listed in thespecifications on page 14 of this manual.Note: When the VHF marine band is selected, switching between USA, Canadian andEuropean standards will also select USA , Canadian or International VHF marinechannel allocations.<strong>Manual</strong>ly Tuning the FrequencyBriefly press the Mode key repeatedly until ‘FREQ’ is displayed on the right hand sideof the LCD. You can now manually change the frequency. To adjust the frequency, brieflypress the or key. Pressing the key will increase the frequency while pressing theKey will decrease the frequency. The frequency will be displayed on the LCD.Scanning for StationsWhile in frequency tuning mode, press and hold the or key for 3 seconds. TheGR200 will automatically scan upwards or downwards in frequency starting at thepresent frequency. When a station is found, scanning will stop on that frequency.Note: When tuning in the VHF band, standard VHF marine channel numbers 1-28 and 60-88are displayed. If the USA or Canadian standard is selected, an additional ten NOAA weatherchannels are also available. When these are selected, ‘WEATHER’ is displayed on the LCD.Page 8 INSTRUCTION MANUAL GR200
MEMORY KEYSThe GR200 has 6 preset memory keys which allow up to 6 frequencies to be stored andrecalled within each band. Because there are two identical AM bands and two identicalFM bands, this allows 12 AM and 12 FM preset memories. The memories can be storedeither manually or automatically.<strong>Manual</strong>ly Locating and Storing Station Frequencies in the Preset Memories1. Press the Band key repeatedly until the required band is selected.2. Press the Mode key repeatedly until the frequency adjustment mode is selected(‘Freq’ will be displayed).3. Press the or key briefly to manually step through the frequencies. Toautomatically scan for the next station, press and hold the or key.4. Once the required station has been located, press and hold one of the six memorykeys for 3 seconds. The frequency will flash and the sound will mute briefly as thefrequency is stored into the selected memory. The selected memory number will bedisplayed at the top of the LCD.Repeat steps 3 and 4 above to store other frequencies into the preset memories.Note: If a frequency or VHF marine channel is selected that is already stored in memory,the allocated memory number will also be displayed.Recalling Stations from the Preset MemoriesSelect the required band, then briefly press the required memory button. The GR200 willswitch to the frequency stored in that memory location and the selected memory numberwill be displayed at the top of the LCD.AUTOMATIC MEMORY STORAGE (AMS)The AMS feature allows the GR200 to search the selected band for stations andautomatically store the first six strongest stations it locates into the station memories.While activated, the Local (LOC) receiver sensitivity mode is temporarily enabled to ensureonly stronger local stations are selected.To activate the AMS feature, briefly press the Mode key repeatedly until ‘AMS’ isdisplayed on the lower right of the LCD. To begin the search, press the or key.Pressing the key will cause the GR200 to search upwards through the frequencieswhile pressing the key will cause it to search downwards. The search will begin fromthe last displayed frequency. As strong stations are found they will be automatically storedinto the station memories. When all six memories have been filled, or the entire band hasbeen searched, the search will stop and the station in Memory 1 will be selected.To manually stop the memory search, briefly press the or key. To change the searchdirection, briefly press the opposite key after the search has been manually stopped.GR200INSTRUCTION MANUALPage 9
LOCAL/DX MODEThe Local/DX mode controls the receiver’s sensitivity when in the FM mode. The GR200can be set to high sensitivity for long distance reception (DX) or low sensitivity for localreception (LOC).Briefly press the Mode key repeatedly until AMS is selected then press ONCE more toaccess the LOC function. Press the or keys to toggle LOCAL or DX modes. A solidLOC symbol on the display indicates LOCAL mode is selected. If the LOC symbol isflashing then DX mode is selected.When the GR200 returns to the normal display mode, LOC will be displayed if Local modeis selected. If LOC is not visible then DX mode is selected.STEREO/MONO MODEThe Stereo/Mono function can be selected on the FM band when the external stereospeakers are attached. If the GR200 is only operating from the internal monitor speaker,Mono/Stereo selection is not available.MonoSelecting Mono improves the quality of the reception when FM signals are weak or noisyby disabling stereo detection. When Mono is selected, there is no indication onthe display.StereoSelect stereo for normal stereo listening on the FM bands. When Stereo is selected and astereo signal is being received, ‘ST’ is displayed.To switch between Mono and Stereo modes, press and hold the Mode key for 3 seconds.The ST icon will appear or disappear indicating the current selection.Rear Panel ConnectionsAntennaSocketINSTALLATIONLeft SpeakerOutput3.5 mm AuxAudio InputDCPowerRight SpeakerOutputPage 10 INSTRUCTION MANUAL GR200
Mounting the GR200The GR200 is designed to be mounted in several different ways to enable it to beinstalled in the most convenient position. The GR200 is designed to meet IP55 Standard(Refer: www.gme.net.au/IPRatings). A location should be selected which provides the bestviewing angle for the display. For best results select a location that is free from excessivevibration and continuous direct sunlight.Panel Mount Overhead Mount Upright MountUpright or Overhead MountingPosition the mounting bracket onto the GR200 so that the mounting holes in the bracketalign with those on the side of the unit, and fit the gimbal knobs. Temporarily positionthe bracket in the desired location and roughly mark the bracket edges. Now remove theunit from the bracket and reposition the bracket to mark the mounting holes. Screw orbolt the bracket into position. The mounting method will depend on the surface to whichthe bracket is being attached. Refit the GR200 to the bracket and adjust the unit to thecorrect position before tightening the gimbal knobs.Complete the antenna lead and electrical wiring as described later.Flush MountingIf you require to flush mount your GR200 we recommend the MK100 flush mounting kitdesigned especially for the purpose. <strong>Instruction</strong>s and a mounting template are includedwith the kit.PanelGR200BracketGR200INSTRUCTION MANUALPage 11
Electrical WiringThe GR200 is suitable for either negative or positive ground systems.Note: The GR200 has an over voltage detector to indicate when excessive voltage isbeing applied to the radio. The over voltage detector is triggered when the voltage beingapplied to the power leads exceeds 18 volts DC. If this happens, the words ‘hi dc’ willflash on the display. If the voltage exceeds 21 volts DC, the radio will automatically shut down.LeftSpeakerRightSpeakerMP3PlayerAntennaAux Input6A FuseReferring to the Wiring Diagram1. Connect the RED fused wire directly to the positive terminal of the battery or to apoint in the vessels electrical wiring that provides a +12 Volt connection.2. Connect the Black negative wire directly to the battery’s negative terminal or to anegative point in the vessels wiring.Speaker ConnectionsNote: For simple installations, the GR200 can be used without external speakers ifrequired. The GR200’s internal monitor speaker can provide good quality mono soundsuitable for many applications. For full stereo sound you will need to connect a pair ofexternal speakers. The GR200’s internal monitor speaker is automatically disconnectedwhen the external speakers are plugged in.Page 12 INSTRUCTION MANUAL GR200
The GR200 is supplied with two speaker adapter leads which are designed to accept thestandard bullet connectors found on some <strong>GME</strong> marine speakers and most marine andautomotive speaker cables. The plugs on the speaker adapters plug into the matching thesockets on the rear of the GR200. The plugs are fitted with protective flexible covers.When connecting the speakers, observe the correct polarity as shown in the diagram.Incorrect polarity will result in a reduction of bass response and stereo effect. The use ofspeakers with an impedance of less than 4 Ohms is not recommended as they will causeexcessive loading of the GR200’s output circuit.The GR200 is a two speaker system that requires one pair of wires for each speaker. Avoidshorting the speaker wires together or touching them to the supply voltage or to ground.Once the GR200 is connected, you can adjust the balance between the left and rightspeaker using the Balance function.Auxiliary Audio InputConnect an MP3 player or other external audio device to the 3.5 mm socket on theAuxiliary Input lead mounted on the rear panel. To select the AUX input, press the Bandkey repeatedly until ‘AUX’ ‘In’ is displayed.A 3.5 mm to 3.5 mm accessory lead (LE74) is available separately from your <strong>GME</strong> dealer.Antenna ConnectionThe antenna should be mounted in a position as high as practical to ensure goodreception especially in areas of low signal strength. When installing the antenna, ensurea minimum clearance of around 20 cm from bow or stern rails or windscreen frames etc.It is also recommended the antenna be placed at least one metre from two-way radioantennas to minimise interference from radio transmissions.To connect the antenna to your GR200, simply plug the antenna lead into the flyingantenna socket on the rear of the unit.Waterproofing the ConnectionsAfter installation, the power, speaker and antenna connectors should be wrapped inwaterproof tape or similar to minimise the risk of corrosion or water damage. Do notuse normal electrical tape as this will not provide an adequate seal against water. Theconnectors should then be positioned where they are not directly exposed tothe elements.Fuse ReplacementIf the fuse in the DC lead should blow, it should be replaced with a 6 Amp 3AG type.In the event of a failure, the use of a higher value fuse could result in damage to yourGR200 which would void the warranty.GR200INSTRUCTION MANUALPage 13
specifications*GeneralComplies with: AS/NZS 61000.6.3:2007Frequency Range: LW, MW, SW, VHF, AM and FMChannel Set: Broadcast Radio Bands and VHF Marine BandScan Speed: 100 ms/channelSupply Voltage Range: 10.8 – 15.6 V DC negative earthCurrent Protection: 6 Amp 3AG fuseReverse Polarity &Over Voltage Protection: ‘hi dc’ at 18 V shutdown at 21 VReceiverLW Frequency Range: 144 – 430 kHz, 1 kHz stepSW Frequency Range: 2-10 MHz, 5 kHz stepMW (AM) Frequency Range: 522 – 1710 kHz, 9 kHz step (EU/AUS/NZ)530 – 1710 kHz, 10 kHz step (USA/CANADA)FM Frequency Range: 87.5 – 108 MHz, 100 kHz step (EU/AUS/NZ)87.5 – 108 MHz, 100 kHz step (USA/CANADA)VHF FM Marine Band: 155 – 165 MHz, 25 kHz stepIF Frequencies: 1st: 10.7 MHz, 2nd: 450 kHzModulation Frequency Response: 60 Hz –15 kHz for FMAdjacent Channel Rejection: > 73 dBIntermodulation Rejection: > 73 dBBlocking Rejection: > 90 dBSpurious Rejection: > 75 dBAudio Output Power: 2 x 40 watts P-P (2 x 15 watt Rms)Audio S/N: > 45 dBConducted Spurious Emission: < -70 dBCurrent Consumption: Full Volume: < 5 AmpsSensitivityAM: -101 dBm 20 dB SINADFM: -101 dBm 30 dB SINADVHF: -105 dBm 12 dB SINADMechanicalUnit Dimensions: 164 (W) x 65 (H) x 70 (D) mmUnit Weight: 482 g approx.Flush Mounting Depth: 55 mm min.EnvironmentalIngress Protection Rating: IP55 - Refer: www.gme.net.au/IPRatingsTemperature Range: -10°C to +60°CSolar Radiation: Case UV stabilisedCompass Safe Distance: 200 mmPage 14 INSTRUCTION MANUAL GR200
External connectionsDC Supply: 2 Pin polarised plug socketexternal Speakers: 3.5 mm mini phone jacksauxiliary input: 3.5 mm stereo phone jack*All specifications are typical and subject to change without notice or obligation.standard communicationsWARRANTY AGAINST DEFECTSThis warranty against defects is given byStandard Communications Pty Ltd ACN 000346 814 (We, us, our or <strong>GME</strong>). Our contactdetails are set out in clause 2.7. This warrantystatement only applies to products purchasedin Australia. Please contact your local <strong>GME</strong>distributor for products sold outside of Australia.Local distributor details at www.gme.net.au/export.1. Consumer guarantees1.1 Our goods come with guarantees thatcannot be excluded under the AustralianConsumer Law. You are entitled to areplacement or refund for a major failureand for compensation for any otherreasonably foreseeable loss or damage.You are also entitled to have the goodsrepaired or replaced if the goods fail to beof acceptable quality and the failure doesnot amount to a major failure.1.2 To the extent we are able, we excludeall other conditions, warranties andobligations which would otherwise beimplied.2. Warranty against defects2.1 This warranty is in addition to and doesnot limit, exclude or restrict your rightsunder the Competition and Consumer Act2010 (Australia) or any other mandatoryprotection laws that may apply.2.2 We warrant our goods to be free fromdefects in materials and workmanship forthe warranty period (see warranty table)from the date of original sale (or anotherperiod we agree to in writing). Subjectto our obligations under clause 1.2, wewill at our option, either repair or replacegoods which we are satisfied are defective.We warrant any replacement parts for theremainder of the period of warranty for thegoods into which they are incorporated.2.3 To the extent permitted by law, our soleliability for breach of a condition, warrantyor other obligation implied by law islimited(a) in the case of goods we supply,to any one of the following as wedecide -(i) the replacement of the goods orthe supply of equivalent goods;(ii) the repair of the goods;(iii) the cost of repairing the goods orof acquiring equivalent goods;(b) in the case of services we supply,to any one of the following as wedecide –(i) the supplying of the servicesagain;(ii) the cost of having the servicessupplied again.2.4 For repairs outside the warranty period,we warrant our repairs to be free fromdefects in materials and workmanship forthree months from the date of the originalrepair. We agree to re-repair or replace (atour option) any materials or workmanshipwhich we are satisfied are defective.2.5 We warrant that we will perform serviceswith reasonable care and skill and agreeto investigate any complaint regardingour services made in good faith. If we aresatisfied that the complaint is justified,and as our sole liability to you under thiswarranty (to the extent permitted at law),GR200INSTRUCTION MANUALPage 15
we agree to supply those services again atno extra charge to you.2.6 To make a warranty claim you must beforethe end of the applicable warranty period(see warranty table), at your own cost,return the goods you allege are defective,provide written details of the defect, andgive us an original or copy of the salesinvoice or some other evidence showingdetails of the transaction.2.7 Send your claim to:Standard Communications Pty Ltd.Unit B, 22-24 College Street,Gladesville, NSW 2111, Australia.Tel: (02) 9879 8888Fax: (02) 9816 4722Email: servadmin@gme.net.au2.8 If we determine that your goods aredefective, we will pay for the cost ofreturning the repaired or replaced goodsto you, and reimburse you for yourreasonable expenses of sending yourwarranty claim to us.3. What this warranty does not cover3.1 This warranty will not apply in relation to:(a) goods modified or altered in any way;(b) defects and damage caused by usewith non Standard Communicationsproducts;(c) repairs performed other than by ourauthorised representative;(d) defects or damage resulting frommisuse, accident, impact or neglect;(e) goods improperly installed or usedin a manner contrary to the relevantinstruction manual; or(f) goods where the serial number hasbeen removed or made illegal.4. Warranty period4.1 We provide the following warranty on<strong>GME</strong> and Kingray products. No repair orreplacement during the warranty periodwill renew or extend the warranty periodpast the period from original date ofpurchase.Product typeLand and marinestereo systemswarrantyperiod1 yearMELBOURNE, 11/202 Ferntree Gully Rd, Clayton, Vic 3168. T: (03) 9558 9999 F: (03) 9558 9088ADELAIDE, Unit 1, 14 Phillips St, THEBARTON 5031. T: (08) 8234 2633 F: (08) 8234 5138PERTH, Unit 1, 10-12 Harvard Way, CANNING VALE 6155. T: (08) 9455 5744 F: (08) 9455 3110BRISBANE, Unit 1, 89-101 Factory Rd, OXLEY 4075. T: (07) 3278 6444 F: (07) 3278 6555SYDNEY, Unit B, 22-24 College St, GLADESVILLE 2111. T: (02) 9879 8888 F: (02) 9816 4722AUCKLAND, 2/24 Bishop Dunn Pl, East Tamaki, Manukau 2163 NZ. T: (09) 274 0955 F: (09) 274 0959For customers outside Australia and New Zealand please contact your local <strong>GME</strong> retailer oremail:export@gme.net.auwww.gme.net.auPart No. 310481 Drawing. No.: 44945-5A division of: Standard Communications Pty. Ltd.Head Office: Sydney, Locked Bag 2086, North Ryde, NSW 1670,Australia. T: +61 (0)2 9844 6666 F: +61 (0)2 9844 6600


