OWNER'S MANUAL FOR EPILOG FiberMark ... - Epilog Laser
OWNER'S MANUAL FOR EPILOG FiberMark ... - Epilog Laser
OWNER'S MANUAL FOR EPILOG FiberMark ... - Epilog Laser

You also want an ePaper? Increase the reach of your titles
YUMPU automatically turns print PDFs into web optimized ePapers that Google loves.
THIS PAGE WASINTENTIONALLY LEFT BLANKii
IntroductionHow to Use This Owner’s ManualThank you for purchasing an <strong>Epilog</strong> <strong>FiberMark</strong> 8000 <strong>Laser</strong> System. Your <strong>Epilog</strong>system has been designed to be easy to operate, but you will utilize it to its fullestpotential by taking some time to read this owner’s manual prior to use. You willbe ready to use the <strong>Epilog</strong> laser system as soon as you read the first six sections.Then you can refer to topics in the remaining sections, as you work.Structure of the ManualPart I: <strong>Epilog</strong> <strong>FiberMark</strong> SetupSections 1 through 6 explain how to uncrate and set up your <strong>Epilog</strong> system,important safety information you need to know before you use it, the Do’s andDon’ts of operating the laser, configuring your computer to run the <strong>Epilog</strong>Dashboard print driver, configuring CorelDraw, and a brief user’s guide torunning your first job.Part II: <strong>Epilog</strong> <strong>FiberMark</strong> Basic OperationsSections 7 through 11 explain Using the <strong>Epilog</strong> Print Driver, basic <strong>Epilog</strong> laseroperations and maintenance, machine features, speed and powerrecommendations, and material suppliers.Part III: Troubleshooting, Service and SpecificationsSections 12 through 14 assist with problem troubleshooting; service information,system specifications, and firmware upgrade instructions.APPENDIX A<strong>Epilog</strong> Warranty Information.APPENDIX BPrinting from AutoCAD.INDEXvii
IntroductionIcons Used in this ManualLook for these symbols to help you find valuable information throughout the text:Sometimes the right perspective on a procedure is essential to success. This iconFlags a Quick Note regarding the task at hand.This Icon signifies places to look for additional information to assist with thetopic currently being discussed.This Icon highlights current contact information for receiving help.This Icon signifies advice you can try out with your machine right away.This Icon signifies advice you can try that will save you significant time.Running into trouble can be detrimental to your success so we’ve markedWarnings and Cautions with this Icon.viii
IntroductionIndicates pages including information regarding connecting your laser system toyour computer using an USB connection.Indicates pages including information regarding connecting your laser system toyour computer using an Ethernet connection.Indicates the potential for fire danger when operating the laser.ix
IntroductionTHIS PAGE WASINTENTIONALLY LEFT BLANKx
Manual<strong>Epilog</strong> <strong>Laser</strong> Setup1
THIS PAGE WASINTENTIONALLY LEFT BLANK2
Section 1: SafetyIn This Section‣ <strong>Laser</strong> Safety‣ Electrical Safety‣ Fire Safety‣ Safety Features And Regulatory Compliance<strong>Laser</strong> SafetyThe <strong>Epilog</strong> Model 8000 <strong>Laser</strong> System is a Class 2 laser product, as defined inInternational Standard IEC 60825-1.The <strong>Epilog</strong> Model 8000 complies with 21 CFR 1040.10 and 1040.11, the FederalPerformance Standards for Light-Emitting Products, except for deviationspursuant to <strong>Laser</strong> Notice No. 50, dated July 16, 2001. The Center for Devices andRadiological Health, of the US FDA, issued <strong>Laser</strong> Notice No. 50 to permitmanufacturers to classify and manufacture their products in accordance with theInternational Standard.The laser beam produced by the <strong>FiberMark</strong> laser can cause severe damage tothe eye or skin if direct contact is made with the beam.NEVER OPERATE THE MACHINE WITH ANY DOOROPEN OR WITH ANY COVER REMOVED!To prevent direct contact with the laser beam it is fully contained in the lasercabinet. The laser cabinet has safety interlocks that turn the laser off if either thefront door or top window is opened during operation. The green window in thetop access door is made of a special acrylic that is designed to block the infraredwavelength of light that is produced by the laser. It is common to see brightreflections coming from the marking surface when viewing through the greenwindow as the machine operates. The reflections are normal and it is not harmfulto view the machine in action through the green window, but because thereflections can be very bright it is recommended that viewing be limited while themachine is operating.3
Section 1: SafetyNo special precautions are necessary to operate the laser safely. However, thevisible output beam of the <strong>Laser</strong> Diode Pointer (Red Dot Pointer) is accessible tothe operator. While the Red Dot Pointer employs the same technology as thefamiliar laser pen-pointers, like them, it is potentially hazardous if its beam isdirected into the eye. We have made every effort to make the <strong>Laser</strong> Diode Pointer(Red Dot Pointer) as safe as possible. Its beam path is located well inside thecabinet, and under normal conditions, no hazardous levels of laser radiation canescape.The operator of the <strong>Epilog</strong> Model 8000 should observe the following generalprecautions:‣ DO NOT disassemble the machine or remove any of its protectivecovers while the unit is plugged in.‣ DO NOT attempt to defeat the door interlocks.‣ DO NOT operate the machine with any door open or coverremoved.‣ DO NOT view directly into the beam of the <strong>Laser</strong> Diode Pointer (Red DotPointer).‣ DO NOT operate the <strong>Laser</strong> Diode Pointer (Red Dot Pointer) without themachine’s focus lens in place. If the unfocused beam strikes a reflectivesurface, it could be directed out of the cabinet.Caution – Use of controls or adjustments or performance of procedures otherthan those specified herein may result in hazardous radiation exposure.* * *The standard reference for laser safety is the American Standard for the Safe Useof <strong>Laser</strong>s, Z136.1-2000, developed by the American National Standards Institute(ANSI). This reference is the basis for many of the federal regulations for laserand laser system manufacturers, and for the Occupational Safety and HealthAdministration (OSHA) laser safety guidelines. It contains detailed informationconcerning proper installation and use of laser systems.While the ANSI standard itself does not have the force of law, itsrecommendations, including warning signage, training, and the designation of alaser safety officer, may be compulsory under local workplace regulations whenoperating laser systems above Class I. It is the operator’s responsibility to ensurethat the installation and operation of the <strong>Epilog</strong> Model 8000 <strong>Laser</strong> System isperformed in accordance with all applicable laws.4
Section 1: SafetyCopies of ANSI Standard Z136.1-2000 are available from <strong>Epilog</strong> Corporation orfrom:<strong>Laser</strong> Institute of America12424 Research Parkway, Suite 125Orlando, FL 32826(407) 380-1553Electrical SafetyThe AC input power to the <strong>Epilog</strong> Model 8000 <strong>Laser</strong> System is potentially lethaland is fully contained within the cabinet.‣ DO NOT open any of the machine’s access panels while the unit is pluggedin. Opening a panel may expose the operator to the unit’s AC input power.‣ DO NOT make or break any electrical connections to the system while theunit is turned on.5
Section 1: SafetyEmergency Stop ButtonThe Emergency Stop Button is a safety feature designed to immediately stop thelaser from firing and stop the motion control system from moving should anemergency occur. By depressing the Emergency Stop button the electrical circuitsleading to the laser source and the main power supply are opened and all systemfunctions, except the cooling fans, come to an immediate stop.Emergency StopButtonIn order to restore the laser system to its standard operating mode after activatingthe Emergency Stop button, follow these instructions:1. Press the main power switch to the off position2. Reset the Emergency Stop button by twisting it in a clockwise direction tospring it back into its active position. This step is important as the lasersystem will not function if the Emergency Stop button remains in itsrecessed position.3. Power up the system using the main power switch.6
Section 1: SafetyFire Safety<strong>Laser</strong> systems can represent a significant fire hazard. Some engraving materialsare inherently combustible (including some metals and coatings) and can ignitewithout warning. Should the work piece actually ignite into flames, the fire mustbe extinguished by the operator at once!‣ DO NOT operate the machine in the presence of unnecessary combustiblematerials, explosives, or volatile solvents such as acetone, alcohol, orgasoline.‣ DO NOT let the machine operate unattended.‣ ALWAYS keep a properly maintained and inspected fireextinguisher on hand. <strong>Epilog</strong> recommends a carbon dioxide (CO 2 )or Halon® fire extinguisher. We do not recommend dry-chemicalfire extinguishers, because they discharge a corrosive powderwhich will severely damage the machine’s electrical andmechanical components.7
Section 1: SafetySafety Features and RegulatoryCompliance<strong>Epilog</strong> has incorporated specific safety features into the Model 8000 <strong>Laser</strong>System in order to meet the requirements of 21 CFR 1040 and the InternationalStandard IEC 60825-1. These safety features include:‣ A safety enclosure (cabinet), which fully encloses the engraving laser and itsbeam path.‣ Dual redundant interlock systems that turn off the engraving laser when thewindow is opened.‣ A visible emission indication when the <strong>Laser</strong> Diode Pointer (Red Dot Pointer)is operating. There is an LED indicator on the machine’s front panel.Warning!<strong>Epilog</strong> <strong>Laser</strong> systems and products arenot designed, manufactured, tested,authorized, or intended to be used in anymedical, surgical, non-medical or anysimilar or related procedure or processthat would allow the laser beam to comeinto contact with living tissue ororganisms of any kind.8
Section 1: Safety21 CFR 1040 and IEC 60825-1 require that certification, identification, andwarning labels be placed on laser products. Reproductions of labels on the <strong>Epilog</strong>Model 8000 <strong>Laser</strong> System follow, with their locations specified:4. Certification/Identification Label. This engraved plate is located on the rearof the machine’s cabinet. The example shown is for the Model 8000/20product having a 24 inch by 12 inch engraving area.<strong>Epilog</strong> Corporation16371 Table Mountain ParkwayGolden, CO 80403 USAModel Number: 8000 <strong>Laser</strong> SystemSerial Number: 8020-1003252412FMDate of Manufacture: March 2007Class 2 <strong>Laser</strong> ProductThis product complies with 21 CFR 1040.10 and1040.11 except for deviations pursuant to <strong>Laser</strong>Notice No. 50, dated July 26, 2001.This product complies with IEC 60825-1: 2001.Authorized Representative:Consultants Europe bvPO Box 50471380 GA WeespThe NetherlandsTel.: 31-294-483355Fax.: 31-294-414687E-Mail: info@ce-marking.nlMass:35 kg max9
Section 1: Safety5. Warning Label. This label is located on the rear of the machine’s cabinet,below the Certification/Identification Label above.6. Explanatory Label. This label identifies the classification of the Model8000 in accordance with IEC 60825-1. It is located on the rear of themachine’s cabinet, beside the Warning Label above.LASER RADIATIONAVOID DIRECT EYE EXPOSURECLASS 2 LASER PRODUCT1 mW CW MAXIMUM 600 - 700 nm7. Non-interlocked Protective Housing Safety Labels (4).Two of these labels are located on the rear of the machine; beside the edgesof each of the cabinet’s end covers. The other two labels are located on thecabinet walls under the covers, so that they are visible when the covers havebeen removed.CAUTION - CLASS 4 VISIBLEAND INVISIBLE LASER RADIATIONWHEN OPENAVOID EYE OR SKIN EXPOSURE TODIRECT OR SCATTERED RADIATION8. Defeatably-interlocked Protective Housing Safety Label. This label islocated on the machine’s cabinet door, in the upper left-hand corner.10
Section 1: SafetyCAUTION - CLASS 4 VISIBLE ANDINVISIBLE LASER RADIATIONWHEN OPENAND INTERLOCKS DEFEATEDAVOID EYE OR SKIN EXPOSURE TODIRECT OR SCATTERED RADIATION9. Aperture Safety Label.This label is located on thesteering-mirror cover inside themachine’s cabinet, beside theaperture where the laser beams enter the cabinet.10. Electrical Safety Label.This label is located on the access panel onthe rear of the machine’s cabinet.HIGH VOLTAGE INSIDE CABINETDISCONNECTPOWERBE<strong>FOR</strong>E OPENING PANEL11. Fire Safety Label.This label is located on the machine’s cabinetdoor, in the upper right-hand corner.FIRE HAZARDDO NOT OPERATEMACHINE UNATTENDED11
Section 1: SafetyTHIS PAGE WASINTENTIONALLY LEFT BLANK12
Section 2: Dos and Don’tsIn This Section‣ Operating Dos and Don’tsDON’T!NEVER operate the machine without a properly operating vent to theoutside! Most material will only produce an irritating smoke whenengraved. Some materials, including but not limited to paint, varnish,and plastics, produce compounds that can be harmful if concentrated.A properly installed vent is the only way to ensure that problems donot occur.NEVER engrave or cut any material containing PVC or vinyl. When engraved, acorrosive agent is produced that will destroy your machine. Your warranty willbe void if your machine is damaged by corrosion from engraving, marking orcutting PVC or Vinyl.NEVER allow your machine to operate unattended. There is a significant risk offire if the machine is set improperly, if the material being processed is flammable,or if the machine should experience a mechanical or electrical failure whileoperating.NEVER allow the machine to operate in Vector mode unattended. Becausevector mode moves relatively slowly compared to raster engraving, a tremendousamount of heat is applied to the material being processed. This buildup of heatcan cause significant fire risk and the machine should always be monitored.NEVER operate with any of the covers or enclosures open or removed, and nevermodify the enclosure. The laser beam is invisible!13
Section 2: Dos and Don’tsDOPlease allow a few minutes a week for cleaning your machine. Just a smallamount of effort at the end of the week will pay off with years of trouble freeoperation of your machine.See Section 11: Engraving Machine Calibration and Maintenance of thismanual for specifics.14
Section 3: Getting StartedIn This Section‣ Setting Up Your <strong>Laser</strong> System‣ Connecting The Exhaust‣ Connecting The Electrical Power‣ <strong>Laser</strong> Cooling Requirements And Operating TemperaturesSetting Up Your <strong>Laser</strong> SystemSetting up your <strong>Epilog</strong> <strong>Laser</strong> System is easy to do! If you’ve ever installed apaper printer on your computer, this is almost that easy. You will need to do thefollowing to use your machine:‣ Remove it from the crate‣ Connect the exhaust system‣ Connect electrical power‣ Connect the laser to your computer using a USB or Ethernet cable‣ Install the <strong>Epilog</strong> Dashboard print driver onto your computerYou may need a contractor to install the exhaust. This must be done PRIOR toinstallation of the laser system.Time Saver: PLEASE do not throw away the box that your laser came in. Youmay need it if you ever plan on shipping the machine. This will save considerabletime trying to repackage the machine for routing to different locations.15
Section 3: Getting StartedConnecting the ExhaustIt is mandatory that an exhaust blower is hooked up and operating whenever yourlaser system is running a job. The exhaust blower removes the dust, debris andsmell from the engraving cavity and exhausts it to the outside of the building.You should never operate your laser system without a properly working exhaust.Prior to the installation of the laser system, a contractor should install the exhaustsystem. The blower should be mounted outside your building for noiseconsiderations. The blower should not be more than twenty feet (6 meters) fromthe laser. You should provide a rigid, smooth duct (either PVC or galvanizedsheet metal will do) from the blower to the vicinity of the laser. All <strong>Epilog</strong> model8000 laser systems require an exhaust fan that is rated at a minimum of 400 CFMat 6” of static pressure 680 M 3 /hr. at 150 mm of static pressure.Note: Remember to put the blower switch for the laser system in an obvious andaccessible place so it can be routinely switched on prior to using the engraver.Please connect the exhaust blower to the laser as shown below and on thefollowing pages.16
Section 3: Getting Started<strong>Epilog</strong> Exhaust Blower ConnectionsAs part of the unpacking process youwill find a 4” (100mm) exhaust portin the accessories kit. This part needsto be attached to the rear of the<strong>FiberMark</strong> chassis before connectingthe Exhaust blower to the <strong>FiberMark</strong>.Mounting Screws (4 each) - remove fromchassis before installing exhaust port.The mounting screws for the exhaustport are in the mounting holes in thechassis. Remove these four screws,align the exhaust port to themounting holes and secure theexhaust port with the four screws.Exhaust Port (from accessories box)‣ Slip the 4” (100 mm) flex hoseover the port, and secure with ahose clamp.‣ Connect the other end ofthe flex hose to the rigid duct.‣ Use another piece of flex hose toconnect from the rigid duct to theexhaust blower.Check your exhaust system for leaks. Mostsmall leaks can be remedied with duct tape.Do not operate your laser with inadequate orleaking exhaust.(100mm)17
Section 3: Getting StartedConnecting Electrical PowerWhat voltage should be supplied to operate the<strong>FiberMark</strong>?All <strong>Epilog</strong> laser systems have an auto-switching power supply that detects theincoming voltage and automatically switches itself to operate properly at anysingle-phase voltage between 100 and 240 VAC. The power supply will alsoautomatically compensate for either 50 or 60 Hz. <strong>Epilog</strong> supplies the appropriatepower cord for all of our equipment. The electrical cord is found in the accessorypackage with your machine. The power cord for the laser plugs into the powerreceptacle located on the left side of the machine in the rear corner. It isrecommended that a dedicated 15 amp circuit be used if available, but it is notrequired.18
Section 3: Getting Started<strong>Laser</strong> Cooling Requirements andOperating TemperaturesCooling Fans – DoNot CoverYour <strong>Epilog</strong> laser system uses an air-cooled laser. <strong>Laser</strong> technology is such thatthe laser generates excess heat and the must be cooled in order for it to operatecorrectly. There are cooling fans located on the top of the system and coolingvents that are located along the back of the system. The fans and vents shouldalways be clear of restrictions and should never be covered.Warning: The cooling fans and vents should never be covered or blocked inany way. <strong>Laser</strong>s that overheat will not operate properly and may begin toproduce erratic laser output or possibly complete failure.Use compressed air to remove any dust buildup on the fans or the laser coolingfins.Cooling Vents – DoNot Block.Ambient air temperature where the laser system is operating should not exceed 90degrees F (32 C). Operating in an environment where the ambient air temperature isabove 90 degrees F (32 C) will void the <strong>Epilog</strong> warranty.19
Section 3: Getting StartedTHIS PAGE WASINTENTIONALLY LEFT BLANK20
Section 4: Connecting the<strong>Laser</strong> to Your ComputerIn This Section‣ Connecting the <strong>Laser</strong> to Your Computer‣ USB Port‣ Ethernet PortConnecting the <strong>Laser</strong> to YourComputer<strong>Epilog</strong> laser systems are designed to be used with Microsoft Windows XP, 2000or the 32 bit version of Vista operating systems. There are two different methodsof connecting the laser to your computer. You can connect to your computer witheither an Ethernet cable or a USB cable. Choose either the USB or Ethernetcable – but do not plug both cables into the laser at the same time! Many users,especially those that do not have a lot of experience installing printers or otherdevices to their computers, find the USB cable is the easier method of connection.If your laser is going to be a long distance from your computer, you will be betteroff using the Ethernet cable. If you are using the USB port, make sure the lasersystem is turned off before connecting the USB cable from your computer (itdoesn’t matter if the computer is on or off). For your convenience, <strong>Epilog</strong>includes both an Ethernet crossover cable and a USB cable in the Accessories kit.This drawing shows thedata port connectionsthat are located on theback of the lasersystem.TEST Port (notintended forconsumer use).Ethernet PortUSB Port21
Section 4: Connecting the <strong>Laser</strong> to YourComputerUSB PortA USB cable is also included in the accessory kit. The USB port is located on theright side of the machine, near the rear. USB cables have different connectors oneach end. Turn the laser Off, then connect this end to the laser and connect theother end into any available USB port at the back of your computer. Afterconnecting the USB cable, turn the laser back on.Ethernet PortConnect to laserThe Ethernet Port is a standard 10BaseT connection. A crossover cable (includedin the accessories kit) plugs into the Ethernet port. The Ethernet port is located onthe right side of the machine, near the rear. Your <strong>Epilog</strong> laser has all of theversatility of a Network capable peripheral. As such, there are many differentways that the laser can be connected to a computer or a network. A directconnection using a crossover cable is the only method that will be described. Thecrossover cable is identical at both ends. Plug the cable into the Ethernet port onthe laser and then plug the other end into the Ethernet port on the back of yourcomputer.Note: When you turn the laser back on after connecting the USB cable, youshould see a little window show up on the lower right of your computer monitorstating that it has “Found New Hardware”. Depending on the age of yourcomputer, there is a possibility that you will see a second window with a warning“!Found New Hardware: A problem occurred during new hardwareinstallation. Your new hardware may not work properly.” If this secondmessage appears, you must turn off the laser (but not your computer) then turn itback on again. Simply turning the laser off and back on again will now allowyour computer to talk to your laser.22
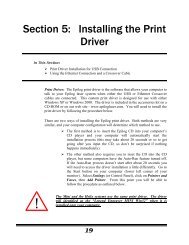
Section 5: Installing the<strong>Epilog</strong> Dashboard Print Driver- Windows XP or 2000In This Section‣ This section applies to Windows XP/2000 only. Installation instructions forWindows Vista are found in Appendix C – Additional Dashboard Print DriverInstructions, of this manual‣ Installing the Dashboard Print Driver Using an USB Connection‣ Installing the Dashboard Print Driver Using an Ethernet Connection and aCrossover CableThe <strong>Epilog</strong> Dashboard is the print driver that allows your computer to talk to your<strong>Epilog</strong> laser system when either the USB or Ethernet Crossover cables areconnected. The Dashboard is designed for use with Windows XP,Windows 2000 and the 32 bit version of Windows Vista (32 bit is thestandard version). The driver is included in the accessories kit on a CD-ROMor on our web site - www.epiloglaser.com. You will need to install theDashboard by following the procedures on the following pages.There are two ways of installing the <strong>Epilog</strong> Dashboard. Both methods are verysimilar, and your computer configuration will determine which method to use.1. The first method is using the USB connection. This is very straight forwardand easy to accomplish.2. The second method is using the Ethernet connection. This process is verysimilar to the USB installation, but there are a couple of importantadditional steps.Instructions for installing the Dashboard using the Windows Vista operatingsystem are included in the appendix.The <strong>FiberMark</strong> driver will be identified as the “<strong>Epilog</strong> Fiber <strong>Laser</strong>Win32” when it is installed onto your computer.23
Section 5: Installing the <strong>Epilog</strong> DashboardPrint Driver- Windows XP or 2000Installing the Dashboard DriverUsing a USB Connection and Cable1. Insert the <strong>Epilog</strong> <strong>Laser</strong> CD into your computer’s CD player. It shouldAuto-Start and the following window should appear:2. Click the <strong>FiberMark</strong> Driver button and the following window will appears:24
Section 5: Installing the <strong>Epilog</strong> DashboardPrint Driver- Windows XP or 20003. Click on the Unzip button. It will take just a few seconds for the followingwindow to appear:4. Click on OK and the following window appears:Click the Next > button to continue25
Section 5: Installing the <strong>Epilog</strong> DashboardPrint Driver- Windows XP or 2000Select Local printer attached to this computerDeselect Automatically Detect and InstallClick the Next> button to continue.Select one of the USB (USB001 or USB002) ports and then Click on Next > tocontinue.26
Section 5: Installing the <strong>Epilog</strong> DashboardPrint Driver- Windows XP or 2000Click the Have Disk button. The following window appears:Click the Browse… button.27
Section 5: Installing the <strong>Epilog</strong> DashboardPrint Driver- Windows XP or 2000Click on the <strong>Epilog</strong>Win32Fiber.inf file then click on the Open button.Click on the OK button.28
Section 5: Installing the <strong>Epilog</strong> DashboardPrint Driver- Windows XP or 2000Select the <strong>Epilog</strong> Engraver Win32 driver and then click on the Next> button.Name your printer and determine if you want the laser to be the default printer.You probably do if the laser is the only printer connected to your computer. Clickthe Next> button to continue.29
Section 5: Installing the <strong>Epilog</strong> DashboardPrint Driver- Windows XP or 2000Select Do not share this printer, then click on the Next> button to continue.Select No.Click on the Next>button30
Section 5: Installing the <strong>Epilog</strong> DashboardPrint Driver- Windows XP or 2000Click on the Finish button.Click on the Continue Anyway button. While the Dashboard print driver has notbeen tested by Microsoft, it will not destabilize your computer.That’s it! You’re now ready to print to your laser system!31
Section 5: Installing the <strong>Epilog</strong> DashboardPrint Driver- Windows XP or 2000Installing the Dashboard DriverUsing an Ethernet Connection and aCrossover Cable(Skip this part if you are using a USB cable described in the previous section.)There are three easy steps involved in setting up the laser and computer system tooperate through an Ethernet connection:1. Setting the IP Address from the laser keyboard.2. Setting up the IP Address in the computers TCP/IP.3. Dashboard Print Driver InstallationNote: The following instructions work only for a direct connection from thecomputer to the <strong>Epilog</strong> laser using a Crossover cable. This procedure does notwork with a hub or a server. For Ethernet connections that require a hub, server,or multiple machines/computers, please consult with your network administrator.Hardware Requirements‣ A 10Base-T or 10/100Base T Ethernet network card installed in yourcomputer. All brand name computers that have been built in the last couple ofyears should have come standard with an Ethernet card installed.‣ A crossover cable connecting your computer to the laser (included in youraccessories kit).Please Note! - The crossover cable looks almost exactly like a standard straightthroughnetwork cable, but they have different purposes for making networkconnections. Normally, the crossover cable should only be used when connectingthe <strong>Epilog</strong> laser directly to your computer. Ask your network administrator forassistance if you are unsure of which type of cable you have. It is a good idea toplace a tag or label on the cable indicating if it is a crossover cable or standard(CAT5) straight-through cable.32
Section 5: Installing the <strong>Epilog</strong> DashboardPrint Driver- Windows XP or 2000Step 1: Setting the Ethernet IP Addresson the <strong>Laser</strong>Be sure all packaging materials have been removed then plug the power cord intothe laser system and turn the machine “ON”. The laser will boot up, beep, and thecarriage will find its home position.Although it may seem intimidating if this is your first experience setting upEthernet connections, it’s really quite simple to accomplish. If you haveproblems, don’t panic! You cannot do anything wrong that starting over will notfix!There are three network protocols that will need to be set. They are set in thefollowing order.1. IP ADDRESS2. SUBNET MASK3. GATEWAYThe <strong>FiberMark</strong> control panel serves two functions. It acts as the main controlpanel for all of the common laser functions and it is also used to program some ofthe setup functions of the laser system. In standard working mode the keyscorrespond to the descriptive text below the key. In programming mode, the keyscorrespond to the numbers printed on the keys. The numbers are activated onlywhen the machine is in its programming mode that is described below. Thediagram below shows the front control panel.33
Section 5: Installing the <strong>Epilog</strong> DashboardPrint Driver- Windows XP or 2000IP ADDRESSIn order to program the laser system with the appropriate IP Address, you willneed to activate the programming mode through the sequence of steps describedbelow.4. To go into program mode and set the IP Address, press the GO andPOINTER buttons simultaneously on the control panel. You will see“FUNCTIONS MENU” displayed on the control panel LCD screen. Youare now in programming mode and the numbers on the keys have beenactivated.5. Press the GO button. - “SERIAL #” will appear on the screen. This is afactory set number and corresponds to the serial number of the lasersystem. You should not change this serial number!6. Press the GO button again. – “IP ADDRESS” will appear on the screen.7. Press the GO button again. - The factory set IP address will appear on thescreen. It will look something like this: “192.168.003.004”, with aflashing box over the 1 in 192.Note – This procedure uses 192.168.003.004 as the sample IP Address.Machines leaving the <strong>Epilog</strong> factory have this IP Address preset so you do nothave to change anything unless you want to use a different address.8. To change the IP Address, follow these instructions:a) If you want to change the 1 in 192 to any other number, simply pressthe number key for that number. For example, if you want to changethe 1 (in 192) to a 4, press the “4” (Power) key. After pressing thiskey the 1 will change to a 4 and the cursor box will advance to the nextnumber (in this case, the number 9).b) 5.2 At this point, press the appropriate key for the second number (ifyou want to keep the 9 a 9, you still must press the “9” (Pointer) key.c) 5.3 Finally, press the appropriate key for the third number.d) After pressing the key for the third number the flashing cursor box willgo back to the first number – it WILL NOT shift to the next set ofthree numerals. If you want to move to the next group of threenumbers simply press the GO button. Pressing GO will cause theflashing cursor box to shift right to the next set of three numbers.Repeat this process to change any of the numbers.Note: There is no way to simply scroll through the IP Address numbers andskip over single numbers you do not want to change. You can skip groups ofthree by pressing “Go”, but skipping single numbers cannot be done. There is34
Section 5: Installing the <strong>Epilog</strong> DashboardPrint Driver- Windows XP or 2000also no way to move the flashing cursor box backwards. The cursor scrollsthrough each three number group continuously until you press the “Go”button, where it will then go to the next three number groups.e) Repeat this process for all of the number groups to get the IP Addressyou need.9. After all the IP address numbers have either been changed or verified as theones you need, press GO again – this will move you to the next screenwhich is the “SUBNET MASK” screen.Subnet Mask1. Press GO again to see the “SUBNET MASK” settings. Use the sameprocess of number selection using the keypads to select the appropriatenumber for the “SUBNET MASK”Note: If you are using the cross-over cable provided by <strong>Epilog</strong>, make surethe “SUBNET MASK” is set to:“255.255.255.0”2. After you have set the “SUBNET MASK”, Press GO again.GATEWAY1. You will now see “GATEWAY”, Press GO again.2. The GATEWAY setting can be set using the same process of numberselection using the key pads to select the appropriate numbers for“GATEWAY”.Note: The GATEWAY address is not important if you are using the providedcross over cable. If you are running your laser through a network, you will needto set the laser GATEWAY numbers to correspond to your network.At the end of the programming process, the laser will prompt you to either SAVEor NO (Not Save) the numbers you have applied. The Screen will look like:Save – GO, No- STOP35
Section 5: Installing the <strong>Epilog</strong> DashboardPrint Driver- Windows XP or 2000Press the GO button to save the changes you made to the network settings. Pressthe STOP button if you do not want to save the changes and you want to return tothe factory default.If at any time in the programming process you want to stop or restart, press theSTOP button. This will take you out of the programming functions. If you wantto restart the programming process, simultaneously press GO and POINTER toget back to the start of the Function Menu.36
Section 5: Installing the <strong>Epilog</strong> DashboardPrint Driver- Windows XP or 2000Step 2: Setting up the Computer’s TCP/IPAddressOnce you have set the Network settings on the laser, you will need to set theTCP/IP at your computer.1. From the Start menu at the bottom of your computer monitor screen selectStart | Control Panel | Network Connections.Right click on the Local Area Connection icon, and then select Properties.2. Highlight the InternetProtocol (TCP/IP) option.3. Then click on Properties.37
Section 5: Installing the <strong>Epilog</strong> DashboardPrint Driver- Windows XP or 20004. The window below will appear. Select Use the following IP address radiobutton.5. Type in the following (leave everything else blank on this page)IP Address 192 168 3 3Subnet Mask 255 255 255 0Default Gateway Leave blankThis number is not an error --the last digit of the IP addressin this window only must bedifferent than the IP addressset in the <strong>Epilog</strong> <strong>FiberMark</strong>.6. Click the OK button inthis window and thenclick on the Close buttonin the next window.7. Your computer is now setto print through acrossover cable to theEthernet port on thelaser.38
Section 5: Installing the <strong>Epilog</strong> DashboardPrint Driver- Windows XP or 2000Step 3: Installing the Dashboard Driverfor an Ethernet Connection:1. Insert the <strong>Epilog</strong> <strong>Laser</strong> CD into your computer’s CD player. It shouldAuto-Start and the following window should appear (refer to Appendix C ifthe AutoRun feature does not bring up the following screen):2. Click the <strong>FiberMark</strong> Driver button and the following window will appears:39
Section 5: Installing the <strong>Epilog</strong> DashboardPrint Driver- Windows XP or 2000NOTE - When you Unzip the driver files they will be unzipped into thec:/<strong>Epilog</strong>_Driver directory. Do not move them from this directory. Theinstallation process looks for them in this directory later on in the process.3. Click on the Unzip button. It will take just a few seconds for the followingwindow to appear:4. Click on OK and the following window appears:Click Next > tocontinue.40
Section 5: Installing the <strong>Epilog</strong> DashboardPrint Driver- Windows XP or 2000Select Local printerattached to this computerDeselect AutomaticallyDetect and InstallClick the Next> button tocontinue.Click on Select aNew Port:Use the scrollbutton to selectTCP/IP Port.Click Next> tocontinue.41
Section 5: Installing the <strong>Epilog</strong> DashboardPrint Driver- Windows XP or 2000Click Next> to Continue.Enter the same IP Address that you set in the control panel (on page 27 and 28).It’s important that you use the same address in both places, but the format of thenumbers looks a little different. In the control panel the IP Address will look likethis: 192.168.003.004. When you enter the IP Address in this window, you do notneed the zeros, and the address will look like this: 192.168.3.4.42
Section 5: Installing the <strong>Epilog</strong> DashboardPrint Driver- Windows XP or 2000Click Custom, and thenSettings.Set Protocol to LPR. This isa very important step. Yourdownload time will be greatlyincreased if LPR is notselected.Type Legend in theQueue Name box.Click OK to continue.43
Section 5: Installing the <strong>Epilog</strong> DashboardPrint Driver- Windows XP or 2000Click Next> to continue.Click Finish to continue.44
Section 5: Installing the <strong>Epilog</strong> DashboardPrint Driver- Windows XP or 2000Click Have Disk….Make sure the <strong>Epilog</strong> CD-ROM is in the computer’sdrive and click Browse…Select the CD-ROM Drivefrom the drives listed.45
Section 5: Installing the <strong>Epilog</strong> DashboardPrint Driver- Windows XP or 2000Select DriversSelect Open tocontinueSelect Fiber DriverX.XXSelect Open tocontinue46
Section 5: Installing the <strong>Epilog</strong> DashboardPrint Driver- Windows XP or 2000Select<strong>Epilog</strong>Win32Fiber.inf, and thenselect Open tocontinue.Click OK tocontinue.47
Section 5: Installing the <strong>Epilog</strong> DashboardPrint Driver- Windows XP or 2000Select <strong>Epilog</strong>Fiber <strong>Laser</strong>Win32.Click Next> tocontinue.Name your printerand determine ifyou want the laserto be the defaultprinter.Click Next> tocontinue.48
Section 5: Installing the <strong>Epilog</strong> DashboardPrint Driver- Windows XP or 2000Select Do notshare this printer.Click Next> tocontinue.Select NoClick on the Next>button.49
Section 5: Installing the <strong>Epilog</strong> DashboardPrint Driver- Windows XP or 2000Click on the FinishbuttonClick on the ContinueAnyway button.While the print driverhas not been tested byMicrosoft, it will notdestabilize yourcomputer.That’s it! You’re nowready to print to your<strong>FiberMark</strong> lasersystem!50
Section 6: Quick Start & EasySetupIn This Section‣ Artwork Setup‣ Job SetupYour <strong>Epilog</strong> laser system is ready to use once you have followed the steps inSections 1 – 5. To get started quickly and run a sample piece of material on yournew laser, the following is a very quick setup guide to describe the general stepsfor running a first job. A detailed set of instructions for each step of the processfollows this quick setup guide:1. Set up a simple piece of artwork in your software program (e.g.CorelDraw).2. Turn on the power to your laser and wait for a “Beep” to note the machineis initialized.3. Turn on your exhaust.4. Place your sample material on the table in the upper left corner (make surethe table is low enough to accommodate the material).5. Focus6. Close the door.7. From CorelDraw click on the File pull down menu to print.8. Select Print. Make sure your Printer Destination is the “<strong>Epilog</strong> Fiber <strong>Laser</strong>Win32” and9. Click Properties to go to the Dashboard print driver to set the Speed,Power, etc., for the material you are using,More information on settings for the Dashboard are included in “Section 7:Using the <strong>Epilog</strong> Dashboard Print Driver” of this manual.10. Click OK to exit out of the Dashboard print driver with the settings in place.11. Click Print to print the page to your laser.12. The job you sent over most recently is shown in the LCD display.13. To run that job, just press the GO.51
Section 6: Quick Start & Easy Setup14. To run a previous job, press the JOBS button on the keypad and then scrollthrough the sent jobs by pressing either of the UP arrow keys or either ofthe Down Arrow keys. The corresponding job names will be displayed inthe LCD Display Panel. If more than one job of the same name is sent over,it is numbered after the word Job.15. Press GO when the job to be run is displayed in the LCD Display Panel.Artwork SetupCreate your job in the graphics software of your choice, (for example –CorelDraw). There are three different modes of operation for the laser and theway you setup your artwork will determine if you raster engrave or vector mark.Raster engraving can best be described as very high resolution dot matrix"printing" with a laser. Raster engraving is used to create highly detailed graphicimages. The laser head scans back and forth, left to right, engraving a series ofdots one line at a time. As the laser head moves down line by line, the dot patternforms the image that was printed from your computer. You can raster engravescanned images, text, clipart, photographs, or line drawings.This artwork is a goodrepresentation of a rasterfile. Data Matrix codes, barcodes, text and graphics canall be engraved with yourlaser system.Virtually any image youcreate or import onto yourcomputer screen can beengraved.52
Section 6: Quick Start & Easy SetupVector Marking is a continuous path that follows the outline or profile of animage. Using Vector mode with the <strong>FiberMark</strong> laser is restricted to vectormarking only and is not intended for cutting entirely through metal materials.You can vector mark with the laser by setting objects and text to be unfilled anddrawn with a 0.001-inch (0.025mm) outline. The thin outline will produce avector profile instead of the raster type mark that is commonly used whenengraving.This sample shows theresults of Vector marking.This image is a good representation of a vector file. There is nofill in the letters and the outline is .001 inch (0.025mm).53
Section 6: Quick Start & Easy SetupNote: Many people use the Combined mode when raster engraving and vectormarking in a single job setup. If your Raster artwork contains thin linesbetween .001 and .007 inches and you are using Combined mode, those thinlines will all be vector marked. This can be disconcerting when it happens. Themost common setup where this occurs is when you have a clipart image thatcontains hidden lines that are sent to the laser using Combined mode. Theartwork shown below is a good example of a piece of clipart as it appears on thescreen (top) and the hidden lines (bottom) that will vector mark if you are inCombined or Vector mode. If you only want to Raster engrave, make sure youselect Raster mode in the <strong>Epilog</strong> Dashboard print driver.For more information on Vector marking read “Section 7, Using the <strong>Epilog</strong>Dashboard print driver” of this manual.In CorelDraw you can view just the lines (bottom view)by clicking on the View button in the menu bar andselecting Simple Wire frame.Figure 1: Clipart Image w/Hidden LinesThe upper image is a complex piece of clipart. The lower image shows all ofthe hidden lines that are in this piece of clipart. If this clipart image is run inCOMBINED mode it would first raster most of the car then vector mark all butthe thickest lines.54
Section 6: Quick Start & Easy SetupJob SetupYour <strong>Epilog</strong> laser system has a prime reference point that is in the upper-leftcorner of the laser table. This is the 0,0 (zero, zero), or “Home” position. Allartwork and material placement is referenced from here. Keep this 0,0 point inmind when measuring and setting up your work.Artwork OrientationLandscape or Portrait – You can engrave using either landscape or portrait modes.Depending on the artwork, you can increase your efficiency and decrease the timeit takes to engrave an image by changing the orientation of your file. Many usersset up their artwork in portrait mode and then rotate the artwork 90 degrees if theyare going to print from landscape mode.The drawings below show the same job in portrait mode (left) and landscapemode (right). The portrait mode will engrave in less time because there is a largeamount of white space between the lines of text that the laser will automaticallyskip through. Engraving the same job in landscape mode eliminates the lasersability to skip through white space, resulting in a longer engraving time.Experiment with the artwork that you use. It will quickly become second naturewhich mode works best for different types of artwork.Portrait ModeLandscape Mode55
Section 6: Quick Start & Easy SetupPiece and Page SizeMany users like to create their artwork on a page size in Corel that matches thesize of the piece that is to be lasered. Compensating for beveled edges or placingan image in an exact location is easy when there is a one-for-one relationshipbetween the material and the page size of the artwork. If this method works foryou, remember that you must also set the Piece Size dimensions in the Dashboardprint driver to match the page size you have set in your graphics software.On the other hand, many users do not want to change the Piece Size dimensions inthe print driver every time they print something new. They prefer to use a pagesize that matches the table size (24 x 12 (610 x 305 mm)) and place their artworkinto the upper left corner of the page. Both methods are effective and it is amatter of personal preference which method is used.Place the material to be engraved on the engraving table in the upper left handcorner, pressing the material firmly against the metal rulers along the top and leftedges.Most material does not need to be held or clamped in place. Simply setting yourmaterial on the table and letting gravity hold it in place is enough. If you areusing a material that is likely to move during operation or is very thin, you canhold it in place using the <strong>Epilog</strong> Integrated Vacuum Table. Simply place yourmaterial on the table flush against the upper and left hand rulers. Then cover anyremaining holes in the metal table. For sheet stock this will create a vacuum andhold the piece of material in place. The material can also be held with a variety ofmaterials such as masking tape, modeling clay, magnets, etc. Creating jigs is alsoan excellent method of holding materials that are high volume, or high value.Engraving or cutting a jig to match an unusual shape is very easy to do.Focus on your materialIn order to mark a crisp clean image, your material must be the correct distancefrom the bottom of the focus lens. Setting the distance from the bottom of thefocus lens to the top of your material is the process of focusing, and isaccomplished by placing your material on the table and moving the table up ordown until the material is the correct distance from the focus lens.Focus: The photo below shows the “V” shaped focus gauge that is used todetermine the correct distance from the focus lens to the top of your material.This gauge is included in your Accessories Kit that comes with your system.56
Section 6: Quick Start & Easy SetupFocus GaugeFocus Gauge on carriageFOCUS MODETo focus, place the focus gauge on the carriage (see photo above). Press the Focus key on thefront panel and use the up and down cursor buttons on the front control panel to move the tableuntil your material just touches the bottom of the gauge.There are two sets of cursor buttons that control the up and down movement ofthe table:‣ The double triangle cursor buttons control the coarse speed ofthe table and move the table up and down quickly in largeincrements.‣ The single triangle cursor buttons control the fine speed of thetable and move the table up and down slowly in very small increments.57
Section 6: Quick Start & Easy SetupNumeric Display: When the Focus button is depressed a numeric readout isdisplayed. Wherever the table is when the machine is initially powered-up is the00.000 (Z-axis) position. Once the table is moved, the readout will display howfar the table has moved up or down. Once you move the table up or down to theposition you want, you can zero out the numeric display by pressing both doubletriangle cursor keys simultaneously. This feature is very helpful when veryprecise focus is important, and when Auto-Focus is used in Color Mapping mode.Foucs: +.00.000Once the focus position has been established, remove the gauge and press theReset button to return the carriage to its “Park” position before starting your job.When the Focus button is pressed, the carriage will move forward and to the rightseveral inches (~ 50 mm) from its “Park” position in the upper-left corner. If thetable is too high, the carriage may collide with your material. To prevent thecarriage from colliding with your material, you can do one of two things:1. Press the Stop button first before pressing the Focus button. Pressing theStop button immediately before pressing the Focus button prevents thecarriage from moving from its “Park” position, allowing you to lower thetable with your material in place.2. Remove your material, press the Focus button and use the Down button tolower the table.Once you have focused, pressing the Reset button will move the carriage back toits “Park” position, or you can begin engraving from the manual focus position.Neither position will affect the start position of your job.Focus Anywhere on the Table: If you wish to focus at a point on the table otherthan in the upper left corner you can do so by disabling the axes and moving thecarriage by hand to the location where you would like to focus. To do this, usethe following key sequence:58
Section 6: Quick Start & Easy SetupPress the X/Y Off key, then the Go key. This disables the axes and you can nowmove the carriage by hand to any point on the table (this also works when usingthe Rotary Attachment). Press the Up or Down cursor keys on the keyboard tomove the table up or down to set the proper focus height. After you have focused,press the Reset key to send the carriage back to its Park position.Be careful to avoid touching the optics when you are moving the carriage byhand!59
Section 6: Quick Start & Easy SetupTHIS PAGE WASINTENTIONALLY LEFT BLANK60
ManualBasic Operations61
THIS PAGE WASINTENTIONALLY LEFT BLANK62
Section 7: Using the <strong>Epilog</strong>DashboardIn This Section‣ General Tab‣ Advanced Tab‣ Color Mapping Tab‣ Additional Dashboard Features‣ Changing Dashboard DefaultsThe <strong>Epilog</strong> Dashboard is the print driver that allows you to set laser functionsfrom your computer and is the link that prints your data or images from yourcomputer to your laser system. Because the Dashboard is a print driver the termsDashboard and print driver may be used interchangeably throughout this manual.The Dashboard is shown below and can be installed from the driver CD thatcame in your accessories kit. It can also be downloaded from the <strong>Epilog</strong> web site– www.epiloglaser.com. If you are just getting started and are in a hurry toengrave a job, you can do so by setting just a couple of parameters in theDashboard without having a detailed understanding of what different choices areavailable to you.To get started with a simple engraving job, type your name in CorelDraw, pressthe Ctrl and P keys to print, select the Dashboard print driver and go intoProperties. Set the following parameters:‣ Job Type: Raster‣ Print Quality: 600 DPI‣ Piece Size: Match to your page size in CorelDraw.‣ Use the Speed and Power recommendations found in Section 10 of thismanual for the material you are using.‣ Select OK in the <strong>Epilog</strong> Dashboard‣ Select Print. You have sent the file to the laser system and are now ready toengrave your name.63
Section 7: Using the <strong>Epilog</strong> DashboardNow that you have printed a simple job, you are ready to gain a betterunderstanding of the different printing options available from the Dashboard.Most marking jobs can be accomplished by using only the General tab.Advanced features for more complex jobs can be found under the Advanced andColor Mapping tabs.Note! – When using the slider bars, there are several different ways to get thedesired setting. These different methods all follow standard Windows protocol,so they will work in other Windows software applications too!You can move the settings in increments of one by using the + and – icons.You can move the slider in increments of ten by clicking close to, but not on, theslider. Holding down the Alt key on your computer keyboard while clickingclose to the slider will bring up the dotted box outlining the slider and will allowa little better control of moving in increments of ten. Clicking directly on theslider control (the little box in the center) will also bring up the dashed outline.64
Section 7: Using the <strong>Epilog</strong> DashboardYou can move the little slider box by clicking down and then moving to thedesired number before releasing your mouse.You can type the setting into the number box.The following sections provide detailed explanations of the different features inthe Print Driver. Most marking jobs can be accomplished by using only theGeneral tab of the Dashboard print driver. Advanced features for more complexjobs can be found under the Advanced tab.65
Section 7: Using the <strong>Epilog</strong> DashboardGeneral TabJob TypeOne of the first things new users want to know is how the laser system knowswhen to raster engrave and when to vector mark. The decision is based onseveral variables:1. Line weight (or Stroke) as defined in your graphic image from Corel,Illustrator, etc. The line weight of your object will determine if it will rasteror vector mark.2. The Resolution as set in the DashBoard driver will also have an effect onwhich lines will raster engrave and which will vector mark.3. The Job Type as set in the DashBoard driver - Raster, Vector or Combined.The tables on the following pages show how the line weight from your graphicsprogram and the Resolution setting from the DashBoard affect which lines willengrave and which will vector mark. Getting used to how this works will beobvious after just a couple of jobs.The <strong>FiberMark</strong> laser system will mark / engrave in three modes: raster, vectorand / or combined.Raster Mode - Similar to a paper printer where the lens assembly moves leftand right in the x-dimension while moving toward the front or back of the systemin the y-dimension. Most marking applications will employ raster marking.Vector Mode - Similar to a plotter, where the lens assembly will trace definedline segments.Combined Mode – By properly setting up your artwork you can both raster markand vector mark from this mode.The following pages will describe how to set up your artwork so you can easilypredict what your output will be.66
Section 7: Using the <strong>Epilog</strong> DashboardThe Job Type:menu allows you tospecify Raster,Vector, orCombined. Thissetting works inconjunction withthe way yourartwork is setup toproduce a rasterengraving, a vectorprofile, or acombination of thetwo modes in asingle job.RasterRaster mode is used for marking or engraving materials. Typical uses would bereproducing clipart, scanned images, photos, text and graphic images. The RasterSpeed and Raster Power boxes will be enabled when you have selected Rasterunder Job Type. Set the Speed and Power boxes to the appropriate settings forthe material that you are engraving. For speed and power guidelines, see theSpeed and Power Recommendations section of this manual.Note – Very thin lines will not raster engrave, and the definition of “thin” variesdepending on the Resolution being used. The following table shows which lineweights will raster at different resolutions when in Raster or Combined mode.Example: The rectangle below has a line weight of 0.003 inch. It will not rasterengrave at any resolution (see following chart). If you send just this box to thelaser in Raster mode and try to run the job, the laser will beep once and befinished because the line is too small to be recognized as an engraving line.Line weight = 0.003 inch.67
Section 7: Using the <strong>Epilog</strong> DashboardEngraving Line WeightsLine weights that will engrave at different resolutions (DPI) when in Rasteror Combined mode.Resolution150 200 300 400 600 1200.001 No No No No No NoLine Weight (inches).002 No No No No No No.003 No No No No No No.004 No No No No No No.005 No No No.006 No No NoYes Yes YesYes Yes Yes.007 No No.008 No NoYes Yes Yes YesYes Yes Yes Yes68
Section 7: Using the <strong>Epilog</strong> DashboardVectorVector mode is used to mark or make a thin line drawing. The Vector Speed,Power and Frequency bars will be enabled when you have selected Vector underJob Type.Note - Artwork, such as scanned images, photos, JPEGs, etc. will not vectormark because they do not contain thin lines of any kind.Note: When you are marking in Vector or Combined mode be aware that yourbest results are typically produced at slower speeds. The highest speeds arespecifically designed for draft mode or less demanding applications where speedis much more important than quality.Note – Very thin lines are used to define Vector marking and the definition of“thin” varies depending on the Resolution being used. The following table showswhich line weights will vector mark at different resolutions when in Vector orCombined mode. As a general rule, most users set their vector line weights to.001 inch.Example: The rectangle below has a line weight of 0.001 inch. It will vector atany resolution (see following chart).Line weight = 0.001 inch.69
Section 7: Using the <strong>Epilog</strong> DashboardVector Line WeightsLine weights that will vector at different resolutions (DPI) when in Vectoror Combined mode.Resolution150 200 300 400 600 1200.001 Yes Yes Yes Yes Yes YesLine Weight (inches).002 Yes Yes Yes Yes Yes Yes.003 Yes Yes Yes Yes Yes Yes.004 Yes Yes Yes Yes Yes Yes.005 Yes Yes YesNo No No.006 Yes Yes YesNo No No.007 Yes Yes.008 Yes YesNo No No NoNo No No NoFor ease of use, we recommend that you set your vector lines to 0.001 or 0.003inches. These line weights are the most commonly used in most softwareapplications and as you gain experience, setting them will become second nature.As you can see from the table above, these line weights will vector at allresolutions.70
Section 7: Using the <strong>Epilog</strong> DashboardWhen using vector mode, it is necessary to design your job to give the intendedresult. Objects and text should be unfilled and drawn with the thinnest possibleoutline (other than zero), as shown below. A .001 inch (.025 mm) isrecommended.CORRECT Vector setupINCORRECT Vector setupCombined“Combined” mode is used when you want to incorporate both Raster and Vectorfunctions in the same job setup. When you are in Combined mode, all Rasteroperations will be performed first, with the Vector operations second.Note on Vectors: If you are in Vector or Combined mode, all thin linesbetween .001 (0.025mm) and .007 inch (.175 mm) will be vector marked! Thiscan be disconcerting, because even if the lines are not visible in your artworkthey will still vector mark. Usually, this happens when incorporating a clipartimage that has hidden lines that are not readily apparent. Please refer toSection 6 for an illustrated explanation of how this can affect your work.ResolutionPrint quality is commonly referred to as Resolution, and is one of the variablesthat determine image quality when engraving in raster mode. Resolution isexpressed in dots per inch and is determined by the number of lines or dots thatare engraved for every inch of movement. Each horizontal line is referred to as araster line. The higher resolution setting, the finer the detail that can be achieved.<strong>Epilog</strong> laser systems can engrave at resolutions ranging from 75 to 1200 DPI.Keep in mind that engraving resolution is only one factor in determining imagequality. The quality of the artwork being sent to the laser can have a biggerinfluence on the look of the final product than the resolution. If low qualityartwork is sent to the laser system, even the highest resolution will not improveit. Also keep in mind that image quality is subjective. 300 DPI may be just fine71
Section 7: Using the <strong>Epilog</strong> Dashboardfor some images and some customers, while 600 DPI is the absolute minimumfor others.Resolution (PrintQuality) is set inthe print driverprior to sendingthe job to thelaser.Higher resolutionproduces betterimage quality.Speed and Power settings are dependent on resolution setting. For example,there is greater overlap of each raster line at 600 DPI than there is at 300 DPI.The additional overlap at 600 DPI has the effect of lasering over more of eachline twice. Using higher resolutions will generally produce darker marks.Resolution SettingsUses for different resolution settings:75 – 150 - 200 DPIThese resolution values are used for non-production purposes where you want toexperiment with image location, or if you want to quickly produce a rough draft.300 DPIThis resolution can be good for production work where image quality needs to begood, but not great. Attempting to produce fine detail with 300 DPI is notrecommended.400 DPIThis resolution value is good for many applications. It combines very goodimage quality with fast engraving times.72
Section 7: Using the <strong>Epilog</strong> Dashboard600 DPIWhen really fine detail or overall excellent results are required, most userschoose 600 DPI.1200 DPIThis resolution is used for projects that require the best engraving qualitypossible, although it’s seldom used because under normal circumstances mostpeople cannot visually discern the difference between 1200 and 600 DPI. Thereare some users that appreciate this high level of quality and are willing to taketwice as long to produce an image at 1200 DPI as it would take them at 600 DPI.The diagram below shows the concept of raster lines and dots per inch (DPI).The arrows show the change in direction of the carriage between raster lines.The difference in dot density between 300 DPI and 600 DPI resolutions is shown.300 DPI600 DPIHelpful Hints1. There are four times as many dots engraved at 600 DPI than there are at300 DPI - twice as many horizontally and twice as many vertically.2. The gap between the dots is greatly reduced at 600 DPI. At 300 DPI thelesser overlap is responsible for the jagged edges that are visible whenengraving at lower resolutions. It’s important to remember that whileresolution plays a part in producing good image quality, the artwork that issent to be engraved is just as important. If the artwork that is sent to thelaser is poor quality, trying to engrave it at 600 DPI will not improve it.It’s always best to start with high resolution images. Poor artwork willprobably always look poor at any resolution, while good artwork will lookgood at any resolution.73
Section 7: Using the <strong>Epilog</strong> DashboardPiece SizeMany users like to create their artwork on a page size in CorelDraw or othersoftware program that matches the size of the piece that is to be lasered.Compensating for beveled edges or placing an image in an exact location is easywhen there is a one-for-one relationship between the material and the page size ofthe artwork. If this method works for you, set the Piece Size dimensions tomatch the page size you have set in your graphics software.On the other hand, many users do not want to change the Piece Size dimensionsevery time they print something new. They prefer to use a page size that matchesthe table size (24” x 12” for example) and place their artwork into the upper leftcorner of the page.Both methods are effective and it is a matter of personal preference whichmethod is used.Set the Piece Size in thedriver to match the page sizefrom your Corel file.74
Section 7: Using the <strong>Epilog</strong> DashboardEngrave DirectionThis feature applies to Raster engraving only and allows you to engrave yourproject either from the top down, or the bottom up. This is very helpful for somematerials like plastic or rubber stamps. In standard top-down engraving there canbe a large amount of engraving debris generated. As the debris moves towardsthe exhaust plenum, some of it collects in the area that has just been engraved.Bottom-Up engraving prevents the debris from collecting in the freshly engravedspaces.Top-down engraving starts from thetop and works its way down.Bottom-Up engraving starts from thebottom and works its way up.75
Section 7: Using the <strong>Epilog</strong> DashboardCenter EngravingThe Center Engraving Option allows you to define the center of your artwork asthe primary reference point (Home position) of your marking. The CenterEngraving Option has been designed to be used in conjunction with the Set Homefeature of the laser. This differs from standard printing where the upper leftcorner of the page and the upper left corner of the laser table define your primaryreference point. There are four options for centering your artwork:1.2.3.4. Page-Center76
Section 7: Using the <strong>Epilog</strong> DashboardCenter-CenterIt’s important to think about setting up your artwork for Center-Center differentlythan you think about most jobs. Setup for most jobs that do not use the Center-Center feature begin with a determination of page size with the idea that the pagesize in your graphics package will match the actual size of your work piece.Additionally, the upper–left corner of the laser table is referenced to the upperleftcorner of the page size you have set up in your graphics package. This makesit easy to visualize how your artwork will look on the work piece when it isfinished. Think of this method as the “Upper-left justified” method.When using Center-Center, the overall size of your work piece and the upper-leftcorner reference point are not very important. Here, the important starting pointsare the size of your artwork and the available space for it on your work piece.With Center-Center, you’re interested in positioning the center of your artwork toa specific point on your work piece, no matter where your work piece is on thelaser table. When using Center-Center you can place your artwork on almost anysize of page and almost anywhere on that page. The detailed examples on thenext few pages show how easy it is to think differently about Center-Center jobs.As you read these instructions you will find that there are four easy steps to usingCenter-Center.1. Measure the size of the area that you have available on your work piece.2. In your software package, size your artwork so that it will fit into thatavailable space.3. Move your carriage by hand (using the red dot pointer as your visualindicator) to locate the center of your work piece.4. Print using the Center-Center option in the Dashboard.Words of caution:Whatever size page you use in your graphics package should also be used whensetting the Page Size in the Dashboard.There are some limits to the maximum size page you can use and the placementof your artwork on the page. If you have a mismatch with your artworkplacement and your page size you will see a “Position Error” on the keyboard atthe laser. You will need to adjust your page size and/or artwork placement andprint the job over again if this happens.1. If your page size in your graphics program is gigantic in relation to yourartwork size, you may need to reduce the size of your page. There is no77
Section 7: Using the <strong>Epilog</strong> Dashboardformula for what page size will not work, but normally the only time a jobwill not print is if the page size is way out of proportion to your image size.2. Also, don’t place your artwork too close to the lower-right corner of yourgraphics page. If your artwork is too close to the lower-right edge of yourpage – and the page size is too big – you may need to adjust where youplace your artwork.The Center-Center concept is best illustrated with an example:Example #1: Let’s say a customer brings you an odd shaped piece that alreadyhas artwork on it and he wants to have a name engraved to finish the piece.Because of the shape of the piece, the location of the engraved name is not easilydefined by using traditional X-Y coordinates.Land Lubber AwardFewest Fish Caught!The nameneeds to beengraved here.xWhy Me??!!!!78
Section 7: Using the <strong>Epilog</strong> Dashboard1. To make engravingthe name simple,use the Center-Center feature inthe driver toquickly andaccurately place anameLand Lubber AwardFewest Fish Caught!Catfish JoeWhy Me??!!!!Finished piecewith engravedname.2. To set up your artwork, first measure how much engraving space isavailable on the work piece.a) Measure thearea (defined bythe box) so youknow how mucharea is availablefor engraving.In our examplethe boxmeasures 2inches x .4inches (51 mmx 10 mm).b) Don’t worryabout the size ofthe whole piece.It’s not asLand Lubber AwardFewest Fish Caught!Why Me??!!!!important forCenter-Center work.3. Open a page in Corel. The page size is not very important for using theCenter-Center feature, so the page can be almost any size.Note: If you are using a large page size, place your artwork towards the upper leftcorner of the page.79
Section 7: Using the <strong>Epilog</strong> DashboardIn this example we’regoing to use a small pagethat is 4” x 4” (102 x 102mm). Create your artworkso that it is sized to fit intothe available engravingarea. In this example, wesized the text to fit withinthe available engravingarea. 18 point text fitsnicely into our box. Noticethat the exact location ofwhere you place theartwork is not important.At this point your artworkis ready.Hint: Remove the box, or print Selected Only when you print to the laser. Thebox is used only to define the available engraving area and you do not want toprint it with the text.80
Section 7: Using the <strong>Epilog</strong> DashboardAfter your artwork is ready, the next step is to set up the laser before printing.Place the work piece in the machine and activate the Red Dot Pointer. We wantto set a new Home position by moving the carriage by hand so the Red DotPointer is at the center of where you want to engrave. To move the carriage byhand and set a new Home position, use the following instructions referring to thelaser keypad shown below.FOCUS MODE1. Press the X/Y OFF key on the keyboard of the laser system2. Press the GO key on the keyboard3. Move the carriage by hand so that the Red Dot Pointer is at the center ofthe available engraving area.4. Once the red dot is where you want it, press the SET HOME key5. Press the RESET keyThe machine is now ready.1. From CorelDraw select File | Print to prepare the job for printing.2. Select Preferences to establish the laser parameters.3. Click on the Center-Center selection and then set all other laser parametersas you normally would.4. Make sure to set the page size in the driver to match the page size in Corel.5. Print the job to the laser.81
Section 7: Using the <strong>Epilog</strong> DashboardAdditional information about using the Center-Center feature:The Center-Center feature is designed to be used in conjunction with the SetHome feature of the laser system. If you do not use the Set Home feature tocreate a new Home Position at the machine, the Center-Center feature willproduce a “Position Error” at the keyboard when you attempt to run the job.When a Center-Center job has been sent to the laser, the Keyboard will indicatethat it is a Center-Center job by displaying an asterisk (*) at the end of the jobname as it is displayed on the LCD.Job: 1.SampleFile.CDR *Where you place your work in the machine is not very important when using theCenter-Center feature. Your new Home position defines where the engravingwill take place, but you can get a “Position Error” if your artwork is going to gooutside of your available work space.Where you place your artwork on the Corel page is not too important. The sizeof your graphic just has to be sized so that it fits within the area available forengraving on your work piece.82
Section 7: Using the <strong>Epilog</strong> DashboardExample #2: <strong>Laser</strong> engravable pens:The Center-Center feature makes locating the name on a laser engravable penvery easy to do.1. First, measure the available engraving area on the barrel of the pen. Forour example the engraving area is 2” x .375” (49 x 9.5 mm).2. In Corel, create an area that is the same size as the available engraving areaon the pen. There are several different ways that you can establish theengraving area in Corel:a) draw a box to represent the engraving areab) create a page that matches the engraving areac) use guidelines to represent the engraving area– this is shown in ourexample.3. Size the text or imageso that it fits nicelywithin the engravingarea.83
Section 7: Using the <strong>Epilog</strong> Dashboard4. Place the work piece in the machine and activate the Red Dot Pointer. Wewant to set a new Home position by moving the carriage by hand so theRed Dot Pointer is at the center of where you want to engrave. To movethe carriage by hand and set a new Home position, use the followinginstructions:a) Press the “X/Y Off” key on the keyboard of the laser systemb) Press the “Go” key on the keyboardc) Move the carriage by hand so that the Red Dot Pointer is at the centerof the available engraving area.d) Once the red dot is where you want it, press the “Set Home” keye) Press the “Reset” keyPosition the Red Dotover the center of thearea to be engraved.The machine is now ready.5. Print using the Center-Center option in the Dashboard.84
Section 7: Using the <strong>Epilog</strong> DashboardLeft-Center or Top-CenterLeft-Center and Top-Center are used when you want to use a different startingreference point than the center of the object to start your engraving. These twooptions are most commonly used in situations when you can easily identify thelocation in one axis.Left-Center uses the left and center location as its starting reference point.Top-Center uses the top and center location of the object as its starting referencepoint.In the example below we use both the Left-Center and the Top–Center features toaccurately mark text to the right and bottom of a pre-drilled hole. Being able tomove the carriage by hand and use the center-left and center-top features savedus the trouble of trying to find an accurate X-Y coordinate for the pre-drilledhole.85
Section 7: Using the <strong>Epilog</strong> DashboardPage-CenterThe use of Page-Center option is a difficult concept to explain, but it’s a featurethat professional engravers are eager to use. The best way to explain it is to firstcompare it to one of the other centering options – Center-Center engraving.Page-Center engraving is used most often when engraving text on an arc.Medallions are a good example. Many people want to engrave text – differentnames, for instance – across the top of the medallion. The difficulty of doing thisis that each name is a different length, which means that the center of each nameis in a different location. Many users want to use the Center-Center option, butthey quickly find that each name is in a slightly different position on the arc. Thefollowing diagram shows that if you use Center-Center engraving the center ofeach name is at a different location (the center of the names is indicated by thestar in the diagram).The problem of usingCenter-Center is thatyou have to figureout the preciselocation of each star(Center-Center ofeach name) to get thename on the arccorrectly. Obviously,this would bedifficult to do.Longer Name on an ArcName on ArcSo, instead of using the center of our artwork as our reference point, we’ll use thecenter of our page as our reference point. We’ll find that using the exact sameartwork we’re able to perfectly position the names on the arc. In Page-Centermode we set up a page size that corresponds to our medallion size, and then allwe have to do is use our red dot pointer to find the center of the medallion and setthis as our new Home position.For the following example we used a three inch (76 mm) page size to match thethree inch medallion size. Use your red dot pointer to find the center of themedallion and then print to a 3” x 3” (76 x 76 mm) page using the Page-Centermode. You’ll find that every name will be precisely placed on the arc because thecenter (indicated by the star) has not changed position.86
Section 7: Using the <strong>Epilog</strong> DashboardThe important thing to remember is that for this type of project you want to usethe center of the page as your reference point (Page-Center mode). In most othercentering applications you use the center of the artwork as your reference point(Center-Center mode).Once users understand how to use Page-Center mode, they are still faced withfinding the exact center of the medallion (or circle) with the red dot pointer.Admittedly, this can be difficult to do, especially if the circle is large. Most userscreate a simple template to place over the medallion to find the center. To createa template, measure the diameter of the medallion you are engraving. In yourgraphics package, create a circle of the same diameter and place a crosshair or an“x” in the middle of the circle. Use raster mode to mark the crosshair or “x” andvector mode to cut out the circle. Place this template on top of the medallion andmove your red dot pointer until it is at the intersection of the crosshair or “x”. Setthis as your Home position using the front keyboard on the machine and thenPrint using Page-Center mode. You can use almost anything to make a simpletemplate. Many users use scrap plastic and in addition to the “x” they engrave thesize of the circle on it so they can easily keep track of the different sizes of eachtemplate.To review:1. Make sure your page size is the same as yourmedallion (or circle) size.2. Create a template to find the center of your circle.Place the template on top of your medallion anduse the red dot pointer to pinpoint the “x”.3. Set a new Home position using the “Set Home” button on the keyboard.4. Print using the Page-Center option in the driver.5. Make sure your Piece size in the Dashboard is the same as your page sizein Corel!87
Section 7: Using the <strong>Epilog</strong> DashboardRaster SettingsSpeedThe Speed setting determines the travel speed of the carriage in Raster mode andis adjustable in the Dashboard print driver in 1% increments from 1 to 100%.Slower speeds will typically produce a darker mark. Speed settings are heavilydependent on the material being engraved. Slower speed settings will producegreater depth of engraving. Please refer to the Speed & PowerRecommendations in Section 10 of this manual.An important note: Speed, Power and Frequency settings can sometimes beconfusing because not all materials that can be marked at the highest speeds andpowers should be marked at the highest speed or power. Many users feel that if amark can be made at high speed, it’s just a matter of adjusting the power toproduce an acceptable mark. Unfortunately, for some materials, this isn’t alwaysthe case. For some materials, the length of time the laser reacts with the materialis much more important to producing a good mark than the raw speed of thesystem or the amount of laser power that is output by the laser.PowerThe Power setting determines the amount of laser energy that is delivered to thepiece being engraved and is adjustable in the Dashboard print driver in 1%increments from 1 to 100%. For most applications using a higher power settingproduces a darker mark. Please refer to the Speed & Power Recommendationsin Section 10 of this manual.88
Section 7: Using the <strong>Epilog</strong> DashboardFrequency (kHz)Frequency refers to the pulsing frequency as well as the average output power perpulse of the laser. While the average output power in a given period of timeremains constant, the frequency allows you to adjust the power of each pulse.Each pulse at a low frequency setting will have a greater peak output than thesame pulse at a high frequency setting.Frequency is a useful setting mostly because it tends to greatly increase the peakpower output of the laser at low frequencies. This allows you to mark materialsthat would otherwise require a more powerful laser to mark.The frequency adjustment range is determined by the power of your laser, withthe different frequency range of different wattage lasers listed below:<strong>Laser</strong> WattageFrequency Range10 & 20 watt 20kHz – 80 kHz30 watt 30kHz – 80 kHz50 watt 50kHz – 100 kHzThe Frequency slider bar in the driver shows the relative frequency that is beingoutput by the laser and is adjustable in increments of 1 from 1 to 100. Thefrequency (kHz) associated with the number in the slider bar is shown for thedifferent wattage lasers in the following graphs:89
Section 7: Using the <strong>Epilog</strong> Dashboard10 & 20 Watt <strong>Laser</strong>Frequency (kHz) 21 23 26 29 32 35 38 41 44 47 50 53 56 59 62 65 68 71 74 77 80Slider Number(shown inincrements of 5).1 5 10 15 20 25 30 35 40 45 50 55 60 65 70 75 80 85 90 95 10030 Watt <strong>Laser</strong>Frequency (kHz) 31 33 35 38 40 43 45 48 50 53 55 58 60 63 65 68 70 73 75 78 80Slider Number(shown inincrements of 5).1 5 10 15 20 25 30 35 40 45 50 55 60 65 70 75 80 85 90 95 10050 Watt <strong>Laser</strong>Frequency (kHz) 51 53 55 58 60 63 65 68 70 73 75 78 80 83 85 88 90 93 95 98 100Slider Number(shown inincrements of 5).1 5 10 15 20 25 30 35 40 45 50 55 60 65 70 75 80 85 90 95 100Most materials do not need a specific frequency so we use a relative slider barthat can provide rough estimates of low, medium and high frequency settings.Frequency can be controlled either from your computer or from the control panelon the engraver. Frequency affects to the amount of power that is output witheach pulse of the laser. Low Frequency settings (~ 20 and below) will providehigher bursts of power at a low pulse rate, while higher Frequency settings(above 60 kHz) will produce slightly lower bursts of power, but at greaterfrequency. On most materials, lower frequency settings will produce darkermarks. Most plastics use high frequency settings. Please refer to the Speed &Power Recommendations in Section 10 of this manual.90
Section 7: Using the <strong>Epilog</strong> DashboardDitheringDithering defines how the dot patterns will be engraved in raster images thatcontain grayscales, blends, or color. The Dashboard offers six different ditheringpatterns to enhance your engraving projects. The default mode is Standard. Thismode can be used for all images including photographs. Dithering is used onlyfor Raster engraving and has no effect on vector marked lines.The dropdown list of dithering patterns is easier to think about if you separate thesix options into two categories that we will refer to as Clipart and Photograph:Clipart Modes – Standard, Brighten and Low Res modes are typically used forclipart images or anything that has been created using a software application likeCorel. Standard mode is the default mode and is by far the most commonly used.It produces a very structured pattern to the dot patterns being engraved. Brightenand Low Res decrease the number of dots in the engraving pattern and can beused effectively to remove the washed out appearance of some images (includingphotographs).Photograph Modes – Floyd Steinberg, Jarvis and Stucki modes are designedto modify an image by replacing the very structured dot patterns with a morerandom dot pattern. Engraving in one of these modes can make a photographengraved on marble or anodized aluminum look more appealing than using anunmodified image. These modes can also be used for special effects of clipartimages.91
Section 7: Using the <strong>Epilog</strong> DashboardExperiment with the different dithering patterns to determine which effect is mostpleasing. It is not mandatory that you use the clipart modes with only clipartimages or photograph modes with all photographs. Many users prefer one of thephotograph modes for many clipart images, and one of the clipart modes forphotographs. The choice is entirely up to you!We have included some sample photographs on the <strong>Epilog</strong> driver disk for you toexperiment with. Use these photographs to engrave on different materials usingthe different dithering options so you can get a feel for how each dithering patternaffects the image and the material.What is Dithering? - The best way to show dithering is with an example. In theexample below, we engraved the exact same photo in Standard mode and Stuckimode. Both photos were engraved at 300 DPI. As you can see, the photos lookdramatically different. As you can also see, the Standard mode shows a verystructured pattern, while the Stucki pattern shows a much more random patternthat is much more pleasing to the eye.300 DPI using Standard mode 300 DPI using Stucki mode92
Section 7: Using the <strong>Epilog</strong> Dashboard300 DPI using Standard mode 300 DPI using Stucki modeClipart Modes:Standard - This mode is the default mode and will be used for most engravingjobs that include text and clipart at 600 DPI.Brighten – Many users find this mode good for engraving photographs ontowood or marble at 600 DPI.Low Res - Adds an artistic half-tone type look to the engraving.Photograph Modes:Floyd-Steinberg – Produces an almost wave-like pattern to an image. Thisworks well for some photos containing a great deal of detail. Photos with moremonotone swatches of color may not be as pleasing as Jarvis or Stucki modes.Jarvis – Many users find this mode good for engraving photographs at 300 DPI.This mode produces a very nice looking pattern on almost all photos.Stucki - This mode produces results that are only marginally different than theJarvis dithering pattern. It is also very good for engraving photographs at 300DPI. The differences between Jarvis and Stucki are very subtle.Dithering is a great way to enhance your engraved products, but it can befrustrating sometimes because the look that is achieved will be different from one93
Section 7: Using the <strong>Epilog</strong> Dashboardmaterial to the next. A graphic image that looks good on wood may not look asgood on plastic. Give yourself some time to experiment with the differentdithering patterns. It’s easy to do and once you have a feel for it, you will be ableto use it with confidence!Vector SettingsSpeedThe Speed setting determines the travel speed of the carriage in Vector mode andis adjustable in the Dashboard print driver in 1% increments from 1 to 100%.The slower the speed, the darker the line. Slower speed settings will producebetter edge quality. Please refer to the Speed & Power Recommendations inSection 10 of this manual.PowerThe Power setting determines the amount of laser energy that is delivered to thepiece being marked and is adjustable in the Dashboard print driver in 1%increments from 1 to 100%. The higher the power, the darker the mark. Pleaserefer to the Speed & Power Recommendations in Section 10 of this manual.Frequency (kHz)Frequency refers to the pulsing frequency as well as the average output power perpulse of the laser. While the average output power in a given period of timeremains constant, the frequency allows you to adjust the power of each pulse.94
Section 7: Using the <strong>Epilog</strong> DashboardEach pulse at a low frequency setting will have a greater peak output than thesame pulse at a high frequency setting.Frequency is a useful setting mostly because it tends to greatly increase the peakpower output of the laser at low frequencies. This allows you to mark materialsthat would otherwise require a more powerful laser to mark.The frequency adjustment range is determined by the power of your laser, withthe different frequency range of different wattage lasers listed below:<strong>Laser</strong> WattageFrequency Range10 & 20 watt 20kHz – 80 kHz30 watt 30kHz – 80 kHz50 watt 50kHz – 100 kHz95
Section 7: Using the <strong>Epilog</strong> DashboardThe Frequency slider bar in the driver shows the relative frequency that is beingoutput by the laser and is adjustable in increments of 1 from 1 to 100. Thefrequency (kHz) associated with the number in the slider bar is shown for thedifferent wattage lasers in the following graphs:10 & 20 Watt <strong>Laser</strong>sFrequency (kHz) 21 23 26 29 32 35 38 41 44 47 50 53 56 59 62 65 68 71 74 77 80Slider Number(shown inincrements of 5).1 5 10 15 20 25 30 35 40 45 50 55 60 65 70 75 80 85 90 95 10030 Watt <strong>Laser</strong>Frequency (kHz) 31 33 35 38 40 43 45 48 50 53 55 58 60 63 65 68 70 73 75 78 80Slider Number(shown inincrements of 5).1 5 10 15 20 25 30 35 40 45 50 55 60 65 70 75 80 85 90 95 10050 Watt <strong>Laser</strong>Frequency (kHz) 51 53 55 58 60 63 65 68 70 73 75 78 80 83 85 88 90 93 95 98 100Slider Number(shown inincrements of 5).1 5 10 15 20 25 30 35 40 45 50 55 60 65 70 75 80 85 90 95 100Most materials do not need a specific frequency so we use a relative slider barthat can provides rough estimates of low, medium and high frequency settings.Frequency can be controlled either from your computer or from the control panelon the engraver. Frequency affects to the amount of power that is output witheach pulse of the laser. Low Frequency settings (~ 20 and below) will providehigher bursts of power at a low pulse rate, while higher Frequency settings(above 60 kHz) will produce slightly lower bursts of power, but at greaterfrequency. On most materials, lower frequency settings will produce darker96
Section 7: Using the <strong>Epilog</strong> Dashboardmarks. Most plastics use high frequency settings. Please refer to the Speed &Power Recommendations in Section 10 of this manual.Vector SortingA checkmark in the vector sorting box will order the sequence of vector marks.If sorting is enabled, you have two choices of how the vector lines will be sorted:Optimize and Inside-Out. In Optimize mode, vectors will be marked in the mostefficient manner, and will generally vector the next closest line to the one justfinished. This is by far the most preferred method as it saves the most time, is themost predictable and will create a continuous line path out lines that lookconnected, but are actually discrete line segments in the artwork. The continuouspath of discrete lines is most often found in AutoCAD or other CAD programs.Inside-Out mode will vector from the inside object first to the outside objectslast. As an example, if you have a small circle surrounded by a large circle, thesmall circle will mark first. If sorting is not checked, the vectors will mark in theorder in which they are presented, which with most software applications willmean in the order they were drawn.97
Section 7: Using the <strong>Epilog</strong> DashboardColor Mapping TabThe Color Mapping feature is an advanced feature that must be checked toactivate. Color Mapping is designed to be used in either Raster mode or Vectormode, but not in Combined mode. While Color mapping is a very powerful tool,most users use it for two main reasons:1. Using color to define different levels of focus. Many objects need to bemarked at different locations that are at different relative heights. Usingcolor mapping to change the focus in a single job setup is a convenient wayto make marking complex parts simple.2. Using different colors allows users the ability to sequence the order thatobjects will be marked.Color Mapping accomplishes these two tasks by assigning different attributes tothe different colors in your artwork. The functions that can be controlled bycolor are: Speed, Power, Frequency, and Focus.Color Mapping can be used in Raster mode or Vector mode. To understandColor Mapping, we will create a couple of examples that show the common usesfor Color Mapping, but first a quick note about the use of colors.98
Section 7: Using the <strong>Epilog</strong> DashboardA Note About Colors! It’s best to use one of the six basic colors (red, green,blue, cyan, yellow, magenta) when color mapping, because the values in ColorMapping MUST match exactly the colors that are used in your graphics package.The RGB color scheme uses numbers to define all colors and the six basic colorshave the following numerical definitions:Color Red Color Value Green Color Value Blue Color ValueRedGreenBlueCyanYellowMagenta255 0 00 255 00 0 2550 255 255255 255 0255 0 255The six basic colors are easiest to use because they only use combinations of 255and 0 (255 is the highest number value and 0 is the lowest in the RGB colorscheme). Because all graphics packages use the six basic colors, this is easy todo.Your drawing program may use a CMYK palette to define colors. The <strong>Epilog</strong>Color Map driver will automatically convert the six primary colors to RGBvalues. If you want to use a CMYK color other than the six primary colors, youwill need to determine what the equivalent RGB color value is and convert thatcolor manually.The <strong>Epilog</strong> Dashboard loads the six primary colors as presets for yourconvenience. Any color can be added or deleted to meet your needs.99
Section 7: Using the <strong>Epilog</strong> DashboardColor Mapping allows you to control the following six laser functions for eachcolor in the Map List:Color – Select the color you want to use or modify.Speed – Sets speed for all objects of the color.Power – Sets power for all objects of the color.Freq. - Sets Frequency for all objects of that color. The Frequency setting canonly be changed in increments of 5 and the number showing on the slider bar is arelative number that is determined by the wattage laser in your system.Focus – Each increment of one will change the table height by 0.001 inch(0.0254 mm). A minus sign in front of the number, -.250 for example, will movethe table up closer to the X-beam by 0.250 inch (approx. 6 mm).100
Section 7: Using the <strong>Epilog</strong> DashboardUsing Color MappingSetting up colors to be mapped is a very easy process. The color mapping tab isseparated into three functions:The left side of the Color Mapping tab is usedfor two purposes:1. Creating new colors. Use the sliderbars to create any RGB color.2. Defining the values we want to setfor the color that has been selectedfrom the right side of this tab.Defining the values on the left sideof the tab does not actually changethe values. That is done with thebuttons in the middle of the tab.In this example we have defined the values forthis color to be 71 for Speed, 43 for Power, 65for Freq., and Focus at 0.Another way to think about the settings in this example is that the selected color will be a vectoronly job, running at 71% Speed, 43% Power, 65 kHz Freq. and Focus is not offset either up ordown.101
Section 7: Using the <strong>Epilog</strong> DashboardOnce the values havebeen defined on the leftside of the tab, you willwant to change them bypressing the Modifybutton.After pressing the Modifybutton, the selected colorvalues will be changedand displayed on the rightside of the tab.The other buttons in themiddle of the color mappingtab are defined here:Add a custom color.Delete a color.Scroll buttons. These buttonsmove the selected color up ordown in the table. This isimportant because ColorMapping always starts at thetop color and works its waydown. This is explained inmore detail on the next pages.102
Section 7: Using the <strong>Epilog</strong> DashboardVector Color MappingUsually, when using Color Mapping in Vector mode, users want to produce adifferent look on two separate areas of a single piece of material in a single jobsetup. To achieve a different look for each mark the marking processes requiredifferent speed and power setups, so this is a perfect job for Color Mapping.The following screen shows a simple architectural drawing. The drawing is setup so that when we use Color Mapping, we will assign one Speed and Powersetting to first mark the window frames using the color green set at one Speedand Power, then mark the window panes using the color red with a differentspeed and power setting.The outside frame of the house will not be Color Mapped; however, it, and anyother lines that might be in the drawing will be marked at the Speed and Powersettings for Vector mode found in the General Tab of the Dashboard.Assign a green outline tothe window frame and ared outline to the fourwindow panes.103
Section 7: Using the <strong>Epilog</strong> DashboardOnce your vector outlines are set up in your artwork, Select File/Print and go tothe Color Mapping tab in the <strong>Epilog</strong> Dashboard.Make sure Color Mapping is checked so we can set up our color mappingscheme.In our example we want to mark the green window frames first, so green must bethe first color at the top of the list. Normally the color green is the second colordown in the list. In order to move it we just select it and use the Up cursor arrowto move it up one position.Note – It’s important to know that the values do not move with the colors. Youmust move the colors first, and then change the values.We now have green at the top and red is the second color down. This is the orderthat the colors will be processed. You do not need to delete the other colorsunless you want to. If there are no objects in your artwork that match theremaining colors, they will be ignored.104
Section 7: Using the <strong>Epilog</strong> DashboardWe will set the green color at a higher speed and lower power than the red color.This will allow us to raster the green and vector the red. For illustration purposeswe deleted the other colors so it will be easier to read the values we have set forthe colors we are going to use.Color Mapping Sequence - When color mapping is used, it always vectors insequence starting from the top color in the Map List and working down. In ourexample red will vector first and green second.Non-Mapped colors will be vectored at the Speed and Power settings from theVector Settings in the General tab. The image below shows that non-mappedcolors will be vectored at 50% Speed, 50% Power and 25 Freq.105
Section 7: Using the <strong>Epilog</strong> DashboardRaster Color MappingRaster Color Mapping usually has a different purpose than Vector ColorMapping although the process for setting up colors to be mapped is the same. InRaster Color Mapping mode most users want to reduce the amount of time ittakes to engrave a job that uses most of the table but has very little actualengraving. Saving time is accomplished by setting the different colors to allengrave at the same speed and power.In the following example we show a standard setup where Raster Color Mappingwill reduce the time it takes to engrave the entire table (let’s pretend we’reengraving a large number of pens). In non-Color Mapping mode, the lasercarriage would need to travel the full width of the table to engrave just one row ofpens. This is wasteful because the laser beam is not firing most of the time thatthe carriage is moving. Raster Color Mapping will allow us to decrease theamount of time it takes to engrave a full bed of pens by engraving in columnsinstead of rows.106
Section 7: Using the <strong>Epilog</strong> DashboardFor the above example we’ve assigned all of the names in the first column thecolor red, the second column the color green, and the third column, blue. In theDashboard you will follow the same process that was used in Vector ColorMapping for setting up the Raster Color Mapping colors, but for this example wewill assign all colors the same speed and power (see following diagram).We want all three of the pens to engrave at the same depth, so we have set theSpeed, Power. Freq., and Focus settings the same. The engraver will engrave thered column first, the green second and the blue third.When you run this Raster Color Mapping job, the laser beam will be on most ofthe time that the carriage is moving so the total amount of time to engrave thepens will be decreased.Color Mapping is most efficient as a time saver whenever there is a large amountof white space between engraving objects.Note: There’s one important distinction to recognize about how colors are rasterengraved in standard engraving mode vs. Color Mapping mode:‣ In standard engraving mode different colors are interpreted as differentshades of gray that will produce different fill patterns when engraved.‣ In Raster Color Mapping mode all of the different colors are engraved as ifthey have a black fill. There is no way for a color to produce both a fillpattern and be color mapped at the same time.107
Section 7: Using the <strong>Epilog</strong> DashboardCombined Mode – Color Mapping in combined mode requires a little moreplanning than Raster only or Vector only modes. Below are the sequencingconsiderations you will need to account for when using combined mode:1. Any object that is color mapped will be raster engraved first in the colororder from the right side of the tab. Any other raster objects that are notcolor mapped will then be raster engraved using the Raster settings foundin the General Tab of the Dashboard.2. After all of the raster objects have all been engraved, the vector objects willbe vectored in the color order from the right side of the tab. Any othervector objects that are not color mapped will then be vectored using theVector Settings found in the General Tab of the Dashboard.Advanced TabThe Advanced tab provides more options for controlling your laser system.ConfigurationsThe “Configurations” feature is a comprehensive data management tool that isused to save all of your Dashboard settings for individual jobs. Saving theDashboard settings as a database file allows you to retrieve the job parameters ata later time. This saves you the trouble of trying to remember what speed andpower and other settings you used on a job you did three months ago. All of yoursettings can all be stored as a permanent record!108
Section 7: Using the <strong>Epilog</strong> DashboardThe columns intheconfigurationssettings followstandardWindowsprotocol andcan be sized tosuit your needs.There are ninecolumns thatcan be viewedby using theslider bar.To establish a configuration file, first set all of the desired settings (Speed,Power, Piece Size, Color Mapping values, etc. for a particular job.109
Section 7: Using the <strong>Epilog</strong> DashboardTo save thesettings youhaveestablished, goto theAdvanced taband click onSave.The Dashboard usesstandard Windowsprotocol to save theconfiguration files.When you installed the<strong>Epilog</strong> Dashboard driverthere was a dedicatedconfigurations foldercreated where you willneed to save theconfigurations.110
Section 7: Using the <strong>Epilog</strong> DashboardThe path for theConfigurations folder isshown here:My Documents/<strong>Epilog</strong>/engraving_setting.Give your file a name andthen click on Save. You nowhave a custom Configurationfile that can be used the nexttime you need to run this jobor material.HINT! Many users find it helpful to save the configurations with a name thatassociates the configurations with one of two things:1. The customer. For example, ARC AeroSpace Serial tag 04.dat2. The material size and type. For example, 5 x 3 Stainless.datNotes on Saving Configuration Settings:If you would like to expand your folder options it is best to make changes fromWindows Explorer (My Computer). You can create as many folders under the“engraving_setting” folder as you wish and structure your saved configurationfiles in a way that best suits your needs.111
Section 7: Using the <strong>Epilog</strong> DashboardLoading Configuration FilesTo load a configuration file,click on the Browse…button.The Browse for Folderwindow will open. Selectthe epilog/engraving_settingfolder.Click Okay.After selecting your folder allof the configuration files willnow show in the Dashboard.Note – The individual fileswill not appear in the Browsefor Folder window. They onlyappear in the Configurationswindow after the folder hasbeen selected.Highlight theconfiguration filethat you want touse.Then, click on theLoad button.You MUST clickon the Load button.Double clicking onthe selected filewill not load thesettings.112
Section 7: Using the <strong>Epilog</strong> DashboardClick on theGeneral tab to seethe settings that theloaded file bringsup.Upgrade FirmwarePlease see Upgrading the Operational Firmware section of this manual fordetailed instructions on using this feature of the Dashboard.113
Section 7: Using the <strong>Epilog</strong> DashboardAdditional Dashboard DriverFeaturesMultiple PassesYou can automatically engrave or vector a job multiple times by setting theNumber of Copies to the number of passes that you want to make. When eachpass is finished the laser will automatically start another pass until all passes arecomplete.114
Section 7: Using the <strong>Epilog</strong> DashboardMultiple PagesCorelDraw allows you to set up and print multiple pages. The screen shot belowshows the Corel print window that is set up to print all three pages of a three pagedocument. You can print all of the pages, or you can specify which ones youwant to print by adjusting the settings in the Print range box.You can view the different pages in thePrint Preview screen.When a multiple page job is printed to the laser, the job will be displayed on theLCD as Job:3.Page 3. Note that the last page of the job (in this case there werethree pages) is what is shown on the LCD – not the first page! For this print jobyou will see as you scroll through the jobs on the LCD that the second page isdisplayed as Job:2.Page 2, and that the first page is displayed as Job:1. File Name(where the file name is the name of the file as it was saved in Corel).115
Section 7: Using the <strong>Epilog</strong> DashboardThe list below shows the file names a little more clearly:Job:1. File NameJob:2. Page 2Job:3. Page 3 – This file shows on the LCD when the file is received at the laser.If you already have jobs in the laser system, the naming structure will change.The Job number will pick up the first available number. For instance, if you havetwo jobs already in the laser system and then print a multi-page job of five pages,the file names for those five pages will be:Job:3. File NameJob:4. Page 2Job:5. Page 3Job:6. Page 4Job:7. Page 5 – This is the job that will show after the entire file has beenreceived.If you start engraving the jobs and become uncertain about which pages arewhich, you can refer back to your print preview screen and the Page number inthe laser will correspond to the page number in the print preview (see the screenshot on previous page).Changing Dashboard DriverDefaultsAll of the Dashboard driver default settings can be modified to suit yourengraving needs.1. Go to Start | Control Panel | Printers2. Right mouse click on the Fiber <strong>Laser</strong> Win323. Click on Properties4. Click on Printing Preferences5. Change any of the settings. These changes will become the default settingsfor your Dashboard print driver.6. Click Okay and close out all open windows.116
Section 8: Using the FrontControl PanelIn This Section‣ Keyboard Commands‣ Loading Your Work‣ Operation‣ Job StorageAs you start using your <strong>Epilog</strong> laser system, you will notice that the KeyboardCommands are helpful tools for operating your laser system. The keyboardcommands make the laser system extremely user friendly. The functions of eachcontrol panel key and other operations are described herein.Keyboard CommandsThe keyboard is located at the front center of the laser system as illustrated above.All of the keys have specific purposes, but using the laser can be as easy as pressingthe “Go” button once a job has been sent to the laser.117
Section 8: Using the Front Control PanelThe diagram below shows the control panel that has a job in queue and is ready tostart engraving. At this point, simply pressing the “Go” button will start theengraving job. Notice that the name of the job is the same as the file name fromCorelDraw.Job:1.Sample.cdrOnce the job starts, the display changes to show a job timer and the engravingresolution. The timer is a useful production tool that displays the elapsed time ofjob as it runs.00:00:12 600 DPI118
Section 8: Using the Front Control PanelDATAGOThis green indicator light flashes as data is being received at the laser system. Fornormal jobs, the DATA light will be illuminated for only a few seconds. Once thedata has been received at the laser system the DATA light turns off.This key is used to start a job. Once the desired job is selected, pressing the GObutton will start the job. If a job is paused (STOP button) it can be resumed bypressing the GO button. The GO button is also used to repeat a job – simply selectthe job you want to run on the display panel and press GO.STOPPressing the STOP button will immediately stop the laser from firing. If the STOPbutton is pressed while in raster mode the lens carriage will stop at the end of theengraving line that is in process. If the STOP button is pressed while in vector modethe lens carriage will stop at the end of a line segment or at the next line nodelocation. Once the lens carriage has stopped, you can open the door to examine theengraving. By closing the door and pressing the GO button, the job will commencewhere the carriage stopped. If the item being engraved is not moved the engravingregistration will not be affected.Note: Opening the front door or the top window on the laser cabinet duringmarking will immediately stop the laser from firing; however the lens carriage willcontinue to move. At this point, simply by closing the door or window will notprompt the laser to fire again. You must press Stop and then Go to resume laserfiring. It is important to STOP the job before you open the door to ensure theengraving is completed.RESETThis button is used to reset the carriage to home position after you have stopped a jobin progress. RESET does not erase the job from the laser systems memory; rather itwill stop the engraving job in process and send the carriage back to the homeposition. The STOP button should always be pressed before pressing the RESETbutton.119
Section 8: Using the Front Control PanelSPEEDDuring an engraving job, or when the laser is idle at Home Position, the Speed of thejob can be viewed on the control panel by pressing the SPEED button. In Rastermode you can change the speed on the fly. Speed can only be changed on the fly inRaster Mode. You cannot change the Speed on the fly during Vector marking.00:00:12 SP = 100%Pressing the SPEED button while engraving will change the display to show theamount of time the job has been running (00:00:12 on the left side of the displayabove) and the SPEED setting of the job while it is running (SP = 100% on the rightside of the display above). Pressing the UP or the DOWN buttons will increase ordecrease the speed of the carriage. Normally you will need to increase or decreasethe Speed by 20% or more before you start to notice a visible change in the speed.Changing the Speed on the fly is a useful way to experiment to get just the rightSpeed setting for a material that you are not used to engraving.The ability to change the Speed setting on the fly from the front control panel inRaster mode is disabled when the Color Mapping box in the Dashboard print driveris checked!You cannot change Speed on the fly in Vector or Combined mode.You can also change the Raster Speed from the laser system when it is in idle mode.To do this, press the SPEED button, and then press either of the UP or DOWNbuttons to change the Speed. Press GO and the job will run at the changed Speedsetting, not the setting that was sent from the computer.You cannot change the Speed setting for Vector mode when the machine is in idlemode from the front control panel.120
Section 8: Using the Front Control PanelPOWERThe Power setting of a job can be viewed on the control panel by pressing thePOWER button while the machine is in at idle or while it is running. In Raster modeyou can change the power on the fly. Power can only be changed on the fly in RasterMode. You cannot change the Power on the fly while in Vector mode.00:00:12 PW = 65%Pressing the POWER button while Raster engraving will change the display to showthe amount of time the job has been running (00:00:12 on the left side of the diagramabove) and the Power setting of the job while it is running (PW = 65% on the rightside of the diagram above). Pressing either of the UP or DOWN buttons will increaseor decrease the power output of the laser when in Raster Mode. Normally you willneed to increase or decrease the Power by 10% or more before you start to notice avisible change.The ability to change the Power setting on the fly from the front control panel inRaster mode is disabled when the Color Mapping box in the Dashboard print driveris checked!You cannot change the Power setting on the fly in Vector or Combined mode.You can also change the Raster Power from the laser system when it is in idle mode.To do this, press the POWER button, and then press either of the UP or DOWNbuttons to change the Power. Press GO and the job will run at the changed Powersetting, not the setting that was sent from the computer.You cannot change the Power setting for Vector operations when the machine is inidle mode from the front control panel.121
Section 8: Using the Front Control PanelX/Y OFFPressing the X/Y OFF button and then pressing the GO button disables the X and Ymotors and allows the operator to move the carriage by hand to any location on thetable (be careful to avoid touching the optics while moving the carriage!). Movingthe carriage by hand allows you to perform several different functions:1. Manually focus anywhere on the table or optional Rotary Attachment. Tomanually focus anywhere on the table, disable the axes by pressing the X/Y Offkey, then the Go key. Move the carriage to the desired focus position. Placethe manual focus gauge on the carriage and press the Up or Down cursor keyson the keyboard to move the table up or down until the focus gauge is justtouching your work. Your focus is now set to the proper focus height. Afteryou have focused, press the Reset key to send the carriage back to its Parkposition.2. Accurately determine X and Y axis location. When you disable the axes andmove the carriage by hand, the X and Y axis coordinates will be displayed onthe LCD panel. To set the units of measure to inches or mm, press the Resetand X/Y Off keys simultaneously. Use the Up or Down cursor keys on the frontcontrol panel to toggle between inches and mm. Press the Go key to finalizeyour selection.3. Create a new, temporary, home position. Using the red dot pointer helps tolocate the precise position where you want your new home position to be.Follow the Set Home instructions (next paragraph) to create a temporary Home.Note: Remember that creating a new home position will reduce the engraving /marking area. Make sure the image to be engraved / marked will fit within theremaining area of the laser system.SET HOMEOnce you have moved the lens assembly by hand to a temporary home position,pressing the SET HOME button will set this new position as your new, temporary,home position. This temporary home position now becomes your upper left corner.The process of setting a temporary home position involves the following steps:1. Press X/Y OFF2. Press GO to disable X and Y axis (Press STOP to cancel and send the carriageback to its Park position if you change your mind!)122
Section 8: Using the Front Control Panel3. Move the lens assembly by hand to your desired location (remember to turn theRed Diode Pointer on as a visual locator aid)4. Press SET HOME to establish your new home position5. After you have set home, pressing the RESET button will move the carriage toits park position a short distance (approx.1/2 inch (12 mm)) to the front ofwhere you set home.6. Once you are finished with your temporary home position, and want to restorethe carriage to the upper left corner of the machine, press the Set Home key andthe Reset key simultaneously. Press the GO key and the carriage will moveback and to the left to its normal upper left corner Park position.JOBPressing the JOB button displays the file name of the last job stored in memory.After pressing the JOB key, pressing the UP or DOWN keys allows the operator toscroll through all of the saved jobs that are stored in the laser systems on-boardmemory.The UP or DOWN buttons will loop continuously through all jobs stored in the lasersystem. Pressing the GO button will start the job that is displayed on the controlpanel.Job:1.Sample.cdrNotice that the Jobs are numbered. If you send the same job more than once, you willstill be able to distinguish it from the other jobs with the same name by the jobnumber.Note: Jobs stored in the laser systems will be erased when the laser system isturned off. Turning off the laser system also serves to clear the laser systemsmemory if so desired.123
Section 8: Using the Front Control PanelFOCUSFOCUS MODETo focus, place the focus gauge on the carriage. Press the Focus key on the frontpanel and use the up and down cursor buttons on the front control panel to move thetable up until your material just touches the bottom of the focus gauge.There are two sets of cursor buttons that control the up and down movement of thetable:1. The double triangle cursor buttons control the coarse speed ofthe table and move the table up and down quickly in largeincrements of about .030 to .050 inches (.75 to 1.2 mm)2. The single triangle cursor buttons control the fine speed of thetable and move the table up and down slowly in small increments of between.001 and .003 inches (.2 to .8 mm)Once the focus position has been established, remove the gauge and press the Resetbutton to return the carriage to its “Park” position before starting your job.When the Focus button is pressed, the carriage will move forward and to the rightseveral inches (~ 50 mm) from its “Park” position in the upper-left corner. If thetable is too high, the carriage may collide with your material. To prevent the carriagefrom colliding with your material, you can do one of two things:1. Press the Stop button first before pressing the Focus button. Pressing the Stopbutton immediately before pressing the Focus button prevents the carriage from124
Section 8: Using the Front Control Panelmoving from its “Park” position, allowing you to lower the table with yourmaterial in place.2. Remove your material, press the Focus button and use the Down button tolower the table.Once you have focused, pressing the Reset button will move the carriage back to its“Park” position, or you can begin engraving from the manual focus position. Neitherposition will affect the start position of your job.In general, material being marked with the <strong>FiberMark</strong> laser needs to be flat and theamount of taper that can be accommodated is small.The ability to change Focus on the fly from the front control panel is disabled whenthe Color Mapping box in the Dashboard print driver is checked!Focus Anywhere on the Table: If you wish to focus at a point on the table other thanin the upper left corner you can do so by disabling the axes and moving the carriageby hand to the location where you would like to focus. To do this, use the followingkey sequence:Press the X/Y Off key, then the Go key. This disables the axes and you can nowmove the carriage by hand to any point on the table (this also works when using theRotary Attachment). Press either of the Up or Down buttons on the keyboard tomove the table up or down to set the proper focus height. After you have focused,press the Reset key to send the carriage back to its Park position. Be careful to avoidtouching the optics when you are moving the carriage by hand!Numeric Display: When the Focus button is depressed a numeric readout isdisplayed. Wherever the table is when the machine is initially powered-up is the00.000 (Z-axis) position. Once the table is moved, the readout will display how farthe table has moved up or down. Once you move the table up or down to the positionyou want, you can zero out the numeric display by pressing both double trianglecursor keys simultaneously. This feature is very helpful when very precise focus isimportant, and when Auto-Focus is used in Color Mapping mode.125
Section 8: Using the Front Control PanelFoucs: +.00.000UP & DOWN Cursor KeysThe UP and DOWN cursor buttons serve four functions:1. Focus Adjustment2. Job Selection3. Speed and Power Adjustment from the machine4. Navigate through the menus on the keyboardThere are two sets of cursor buttons:1. The double triangle cursor buttons provide control in coarsesteps and moves quickly in large increments.2. The single triangle cursor buttons provide control in fine stepsand moves slowly in very small increments.126
Section 8: Using the Front Control PanelPOINTERThe POINTER button is a toggle switch that turns the laser systems Red Dot Pointeron and off. When the Red Dot Pointer is on, the green indicator light directly belowthe POINTER button will be illuminated.ConfigConfig. Menu:The Config button brings up the factory settings that normally only need to be set once tocalibrate your laser system. These setting are described in detail in Section 12 of this manual“Engraving Machine Calibration and Maintenance”.Loading Your WorkOperationThe home position of the engraving field is at the upper left corner of the table. Placeyour work piece in the upper left corner, pressed firmly against the metal rulers alongthe top and left edges.When you first receive your laser, load a practice piece, set the focus and close thedoor. Turn on the exhaust fan. Now go into your drawing program (CorelDraw, etc.)and set the page size to the dimensions of the practice piece you have loaded. Thenenter your name in half-inch (10 mm) text anywhere on the page. Once you have the127
Section 8: Using the Front Control Panelimage ready to engrave, print to the machine through the <strong>Epilog</strong> Dashboard printdriver using the standard print command.Remember these steps:1. Insert the item to be engraved.2. Focus3. Close the door.4. Confirm the exhaust is on.5. Press JOBS on the Display Panel.6. Press the UP or DOWN cursor keys to scroll through the jobs that are in the<strong>FiberMark</strong> print queue.7. Press GO to run the job that is displayed in the LCD.Job StorageThe laser has the capability to store multiple jobs in temporary memory. Themachine will save any and all jobs sent until all of the available 64 MB of memory isfull. At that point, the oldest job will be deleted automatically to make room for newjobs.Note: Jobs stored in the laser systems will be erased when the laser system isturned off. Turning off the laser system also serves to clear the laser systemsmemory if so desired.128
Section 9: Standard &Optional Machine FeaturesIn This SectionStandard Features‣ Integrated Air Curtain‣ Air Curtain Pump‣ Integrated Vacuum Table‣ Fold-down Front Loading Door‣ Internal Viewing Light‣ Red Dot PointerOptional Feature‣ Rotary Attachments‣ Additional Focal Length Lenses – 1.5” and 5.0 inchThe laser system is very versatile and has many standard features that are very usefulfor making engraving applications easier to perform! Features that are either includedwith the system or sold separately make the <strong>Epilog</strong> a high performance tool.Following is information regarding operation of these features.Standard Features included with the <strong>Epilog</strong> <strong>FiberMark</strong> system:‣ Integrated Air Curtain (Pump is optional)‣ Integrated Vacuum Table‣ Fold-down Front Loading Door‣ Internal Viewing Light‣ Red Dot PointerOptional Features that can be purchased with the <strong>Epilog</strong> <strong>FiberMark</strong> system include:‣ Standard Rotary Attachment‣ 3-Jaw Chuck Style Rotary Attachment‣ Air Curtain Pump‣ 1.5 inch and 5.0 inch lensesThese optional items can be purchased with your original order or at any time afterthe purchase of your laser system.129
Section 9: Standard & Optional MachineFeaturesIntegrated Air CurtainThe integrated air curtain consists of a perforated tube that is mounted to the X-beam.A continuous stream of air is pumped into the tube and exits the perforations. Theperforations direct the air towards the work surface at an angle that pushes the airdown and towards the front of the machine. The air curtain is designed to moveengraving debris or combustible gases generated from engraving away from themechanical components of the machine. You should always use the air curtain anytime the laser is operating.AIRTUBEHOLESYou can use clean, dry shop air or the Air Curtain Pump included with your<strong>FiberMark</strong> System. There is a ¼ inch (6 mm) air receptacle at the back of themachine on the side where the light switch is located.Air Curtain PumpThe Air Assist pump attaches to the backof the <strong>FiberMark</strong> using a ¼” flexiblehose. This is a standard accessory thatships will all <strong>FiberMark</strong> <strong>Laser</strong> Systems.130
Section 9: Standard & Optional MachineFeaturesIntegrated Vacuum TableOptional pump for air curtain.The unique design of your <strong>FiberMark</strong> laser system incorporates several valuablefeatures into the engraving table. The exhaust system is designed so that it evacuatesfrom both the top and the bottom of the table. The exhaust pulls air through the smallholes in the table to form enough of a vacuum that it will flatten slightly warped sheetstock.As long as the exhaust is operating and the table is no more than one inch(25.4 mm) below its highest point, the vacuum table will work.If you have a piece of sheet stock that does not flatten out because it is not coveringenough of the vacuum holes, you can use any material (including paper) to cover theexposed holes in the table. Simply blocking the majority of the vacuum holes will beenough to flatten most sheet stock.The vacuum table is not designed to flatten severely warped or bent materials.131
Section 9: Standard & Optional MachineFeaturesFold-down Front Loading DoorThe <strong>FiberMark</strong> system has an interlocked front door that folds down and allowsaccess to the front of the machine. This fold-down door makes inserting andremoving parts pallets quick and easy and is much easier than loading pallets throughthe top window. Pull on the door handle to open the door.‣ DO NOT attempt to defeat the door interlocks.‣ DO NOT operate the machine with the door open.132
Section 9: Standard & Optional MachineFeaturesRed Dot PointerThe Pointer setting allows for manually turning ON or OFF the <strong>Laser</strong> Diode Pointer(Red Dot Pointer). This visible red beam is much like a hand held laser pointer, andhas a bright red beam. This beam allows the operator to visually note where the laseris marking. While this device employs the same technology as the familiar laser penpointers,like them it is potentially hazardous if its beam is directed into the eye.When the Pointer is turned on, DO NOT place your head inside the engraving area,as you may look into the beam. For additional information, read Section 1: Safety ofthis manual. Use the diode pointer in conjunction with the Move X/Move Ycoordinates to locate a given position on the engraving table.The Red Dot Pointer automatically turns off when the doors are closed and a job isrunning.Internal Viewing LightThe inside of the cabinet is equipped with a viewing light that enhances your abilityto see inside the machine when the top access window is closed. The switch for thelight bank is located on top of the machine at the back–right corner.Light Switch133
Section 9: Standard & Optional MachineFeaturesTop Access Door - Viewing WindowThe green viewing window in the top access door is an acrylic sheet that is speciallydesigned to block infrared light between 830 nm and 1700 nm (the fiber laserproduces a wavelength of 1062 nm).While the window will block the light produced by the fiber laser source, viewing theengraving process should be limited because the reflected visible light produced bythe metal while it is being engraved is quite bright.NOTE: NEVER operate the <strong>FiberMark</strong> laser system with the doors open.NEVER attempt to defeat the window or door interlocks.Cleaning the Viewing Window - Special care should be taken whencleaning the viewing window. Use only a soft cloth and a mild glass cleaner to cleanthe window. Do not use paper towels or other coarse materials to clean the window.The window is susceptible to scratching if not properly cleaned. Damage to thewindow from cleaning is not covered under the warranty.134
Section 9: Standard & Optional MachineFeaturesRotary AttachmentsThe optional Rotary Attachments allow you to raster or vector mark cylindricalobjects. The rotary attachments work in both raster and vector modes. There are twotypes of rotary attachments available for the <strong>FiberMark</strong> System; the Standard RotaryAttachment and the 3-Jaw Chuck Style Rotary Attachment. The Standard rotary isused for general cylindrical marking applications while the 3-Jaw Chuck is preferredfor precision marking applications. Instructions for installation, artwork setup andoperation for both styles are included below respectively.Installation1. Lower the engraving table to its lowest point.2. Turn off the power to the engraver.Important! It’s important that you power down the machine before insertingthe rotary connector at the table. The rotary attachment cannot be plugged intothe machine while it is powered on without damaging the electronics of thelaser system.3. Insert the Rotary Attachment into the offset locating holesThere are three pins in thebottom of the rotaryattachment that mate to threeoffset holes in the table. It isimportant to place the rotaryin the offset locating holes sothat Home position isproperly maintained.The photo at left shows theapproximate location of twoof the offset locating holes.135
Section 9: Standard & Optional MachineFeatures4. With the machine off, insert the connector from the Rotary Attachment to themating connector on the inside of the cabinet.Turn off power to the machine andinsert the connector from theRotary Attachment to the matingconnector on the inside of thecabinet.The photo above shows the Standard Rotary Attachment installed in the machine.These installation instructions are for both the Standard and e-Jaw Chuck StyleRotary Attachments.5. The rotary attachment is now installed! Turn the power on.6. The engraver knows that the rotary attachment is installed and changes its homeposition to a point directly above the center point of the drive wheels on theattachment.136
Section 9: Standard & Optional MachineFeaturesStandard Rotary AttachmentInstall the standard rotary attachment as instructed above, and then follow theseinstructions to easily setup your artwork.Standard Rotary Artwork SetupThe rotary attachment works in either raster or vector mode, and the setup is the samefor both. The part to be engraved should rest between the two sets of wheels. Thewheels on the left are the driving wheels, which spin the cylinder to be engraved. Thewheels on the right are idler wheels for support. They can be raised or lowered tolevel the work surface to be engraved. They can also be moved from left to right toadjust for the length of the part being engraved. The top of the part being engravedmust be level for the part to engrave correctly.Load your part with the smaller diameter on the right side. Use the elevator to elevateyour work so that it is horizontal. Ensure the part is positioned so that the left end isclose to, but not touching the black bumper.Rotate the elevator knob on the rotary attachment to raise the right side of the objectbeing engraved so that the surface to be engraved is horizontal.The location (left to right) of where the elevator supports the cylinder is not overlyimportant. The elevator uses a set of idler wheels and as long as the cylinder issupported and rotates freely, the cylinder will engrave properly.137
Section 9: Standard & Optional MachineFeaturesThe photo below shows a typical setup for a cylindrical object. The larger diameter ison the left side of the rotary attachment and the right side of the flashlight has beenelevated so that it is resting horizontally and the flashlight is level.Correct Setup with flashlight level.The photo below shows the same flashlight at a severe angle to horizontal. If theflashlight (or other cylindrical object) is not horizontal the laser beam will lose focusas the carriage head moves across the flashlight, causing the engraving quality on theright hand side to suffer dramatically.Incorrect Setup. Flashlight is not level.138
Section 9: Standard & Optional MachineFeaturesDrive WheelsThe drive wheels are each two piece assemblies. Removing the front part of the drivewheels enables the user to accommodate a wider variety of cylindrical objects;especially those items that have something like a handle on a mug or a cup).Loosen the two small thumbscrews on each wheel to removethe front wheel.Front drive wheel removed.Artwork LayoutBecause the Rotary Attachment automatically compensates for the diameter of thecylinder, artwork setup is relatively easy. The most important thing to rememberwhen working with the rotary is that your artwork needs to be rotated 90 degrees tothe way it would normally be setup for flat work. There are several visual tools laterin this procedure that will help make rotary setup easy.Page size is not overly important, but the following descriptions will give you a goodstarting point. Many people set the page to roughly match the size of the piece to beengraved because this helps to visualize artwork placement.139
Section 9: Standard & Optional MachineFeaturesNote: The artwork in the following examples does not fill up much of the Corelpage that you are printing from. You can normally get by with using small pagesfor most artwork because the entire page is only necessary when you are laseringall the way around the cylinder (360 degrees) and/or if you are lasering from thetop to the bottom of the cylinder.Page width measurement for Rotary artworkFor the width (xdirection)of yourpage, lay the cylinderflat and orient it in theway that it will rest onthe rotary attachmentin the machine. Forthis cylinder the widthof the page will be 11inches (279 mm).Page height measurement for Rotary artworkFor the height (y-direction) of your page, use a flexible tape and measure thecircumference of the cylinder.For this flashlight, the height of your page will be 6 inches (152 mm).140
Section 9: Standard & Optional MachineFeaturesFor the above flashlight, set up your page size to 11 x 6 inches (152 x 279 mm).Place the top of your artwork close to the top edge of the page layout. When the jobstarts the engraving process, the first thing to happen is for the rotary attachment torotate through any white space that is between the top of your artwork and the top ofyour page. Once it has rotated through the white space it will begin to laser yourartwork.141
Section 9: Standard & Optional MachineFeaturesPlace your artwork near the top of the page.Keeping the white space between the top of yourartwork and the top of the page to a minimumwill reduce the distance the cylinder will rotatebefore engraving starts. Eliminating the whitespace at the top of the page provides the mostpredictable method of determining where thelaser will start engraving.The laser starts engraving at the top of the imageand works its way down.The edge of the black bumper on your rotary attachment corresponds to the left edgeof your page in CorelDraw.Set your cylinder on the rotaryattachment so that it is closeto this bumper but nottouching it. The cylinder maynot be able to rotate freely if itis rubbing against the bumperBecause the “top” of a cylinder can be at either end of the rotary attachment, it isuseful to visualize the orientation of the cylinder when it’s being engraved.142
Section 9: Standard & Optional MachineFeaturesAnother useful idea is to imagine the shape of your cylinder as it rests on the RotaryAttachment (see a photo of the flashlight on the rotary in the machine on the nextpage). In this example we are going to imagine engraving a logo onto a flashlight.When you’re setting up the artwork it’s not important that the imaginary cylinder beat the top of the page, it’s only important to imagine the left-to-right orientation of thecylinder (notice that the head of our imaginary flashlight is at the left of the page).This process helps to visually orient how your artwork will be engraved onto theflashlight.Imaginary flashlight.Additionally, the left edge of your page correspondsto the edge of the black bumper on your rotaryattachment (see photo on prior page). Use thedistance from the left edge of the page to determinehow far down from the top of the flashlight yourartwork will engrave. In this example you can seethat the top of the logo will engrave 4” (100 mm)over from the left edge of the flashlight.143
Section 9: Standard & Optional MachineFeaturesFocus with the RotaryNote: Make sure the table is set to its lowest position before loading the RotaryAttachment into the machine.Focus – With the cylindrical object in place, attach the focus gauge to the lensassembly. Disable the axes by pressing the X/Y Off key, then the Go key. Thisallows you to move the carriage to any point on your cylinder. Press the Up or Downcursor keys on the keyboard to move the table up or down until your cylinder justcontacts the focus gauge. Move the focus gauge to more than one point on thecylinder to make sure the cylinder is level. If focus is not the same at all locations,use the elevator on the rotary attachment to level the cylinder. Your focus shouldnow be set to the proper height. After focusing, press the Reset key to send thecarriage back to the rotary Park position.This photo showsfocusing on aflashlight withthe StandardRotaryAttachmentinstalled.144
Section 9: Standard & Optional MachineFeatures3-Jaw Chuck Style Rotary AttachmentThere are two different methods used for setting up the 3-Jaw chuck rotaryattachment. The two methods are based on cylinder size:‣ Method 1) is used for cylinders that are from 0.050” (12.7 mm) to approximately3” (76.2 mm) in diameter.‣ Method 2) is used for cylinders that are from 0.050” (12.7 mm) to approximately.125” (3 mm) in diameter.Instructions for installation, focusing, and setting x-home position apply to bothmethods. Instructions for Artwork Setup is different for each and explained later inthis section respectively.Important notes about the 3-Jaw chuck:‣ The 3-Jaw chuck only operates at 600 or 1200 DPI.‣ There are speed limitations that will cause erratic engraving. Use the lower speedranges (from 1% to about 50%). Your Power setting will then be adjustedaccording to the speed.‣ The 3-Jaw chuck was originally designed to be used with cylinders that range insize from 0.50” (12.7 mm) to approximately 3” (767.2 mm) in diameter.However, cylinders that are smaller than .5” (12.7 mm) can be processed using analternative process described at the end of this document.InstallationInstall the 3-Jaw Chuck Rotary following the instructions for Rotary AttachmentInstallation included above.1. Lower the engraving table to its lowest point.2. Turn off the power to the engraver. Make sure to turn off the power to thelaser system.Important! It’s important that you power down the machine before insertingthe rotary connector at the table. The rotary attachment cannot be plugged intothe machine while it is powered on without damaging the electronics of thelaser system.145
Section 9: Standard & Optional MachineFeatures3. Insert the Rotary Attachment into the offset locating holesThere are three pins in thebottom of the rotaryattachment that mate to threeoffset holes in the table. It isimportant to place the rotaryin the offset locating holes sothat Home position isproperly maintained.The photo at left shows theapproximate location of twoof the offset locating holes.4. With the machine off, insert the connector from the Rotary Attachment to themating connector on the inside of the cabinet.Turn off power to the machine andinsert the connector from theRotary Attachment to the matingconnector on the inside of thecabinet.The photo above shows the Standard Rotary Attachment installed in the machine.These installation instructions are for both the Standard and e-Jaw Chuck StyleRotary Attachments.5. The rotary attachment is now installed! Turn the power on.6. The engraver knows that the rotary attachment is installed and changes its homeposition to a point directly above the left-center point of the rotary attachment.146
Section 9: Standard & Optional MachineFeaturesSet the Rotary Numeric Display UnitsWith the machine on you will see numbers displayed on the rotary attachment displaypanel. The numeric display on the rotary attachment is used to set the diameter of thecylinder you’re engraving. The display can show numbers in either inches ormillimeters. There is not an indicator telling you if the units are in inches or mm. Theonly indicator is if there is a decimal point showing on the display. A decimal pointindicates it is displaying in millimeters. No decimal place indicates it is displaying ininches.Inches: There is no decimal pointdisplayed when the rotary units areset to inches. This display shows thenumber 1220 which is 1.220 inches.Millimeters: Notice the decimalmark is displayed when the rotaryunits are set to millimeters. Thisdisplay shows the number 35.50which is 35.50 mm.To toggle between inches and millimeters, press down and hold the Lock/Unlock keyfor several seconds until you see the display change.Once the display is set to the units you want, the rotary willdefault to those units every time it is powered up.The numeric display on the rotary attachment is used to set the diameter of thecylinder you’re engraving. Pressing any of the cursor keys on the keypad willincrease or decrease the diameter setting. The single triangles will increment in smallunits and the double-triangles will increment in larger units.147
Section 9: Standard & Optional MachineFeaturesMeasure your CylinderMeasure your cylinder and input the diameter intothe rotary keypad. The diameter of this cylinder is1.220 inches (31 mm).Insert your CylinderInsert the cylinder into the 3-jaw chuck and tighten the chuck so the cylinder is heldfirmly in place.You will almost always need to use the two tightening pins that are provided with therotary in order to clamp the cylindertightly into place.When you are setting up your cylinder you may need to rotate it when it is beingclamped. To deactivate the motor and spin the chuck freely by hand, briefly press theLock/Unlock key on the rotary keypad.You will see the light indicator switch from Lock to Unlock on the right side of thenumeric display.148
Section 9: Standard & Optional MachineFeaturesNote: Do not press and hold the Lock/Unlock key to disable the motor. Just press itbriefly. This key has two functions and if you press and hold the Lock/Unlock key itwill toggle the units between inches and mm.With the rotary installed, the diameter set, and the cylinder held tightly in place, youare ready to set up your artwork.Placing the Jaws in the ChuckThe following instructions show how the jaws are placed in the chuck.Pay particular attention to aligning the numbers as shown on the following diagramwhen inserting the jaws! Failure to align the correct jaw in the correct slot will resultin uneven spacing of the jaws when they are tightened.This image also shows that the jaws can be turned around to accommodate largercylinders by reversing the jaw orientation. The right side shows how to align the jawsfor a larger diameter configuration.In order to allow for wide-radius turning, the chuck jaws can be flipped in their slots. Thereis a stamped number on each side of the individual jaws. For wide-radius turning, simplyremove jaw 1, flip it, and reinsert it into slot 3. Then remove jaw 2 flip it and return it to slot2. Finally, remove jaw 3, flip it, and then insert it into slot 1. Though slots for jaws 1 and 3must be switched for wide-radius turning, jaw 2 always mates with slot 2 regardless of jaworientation. In both cases the jaws must be mounted on the cam in ascending order to catchthe spiral cam gear as it rotates – jaw 1 first, then jaw 2, and lastly jaw 3.149
Section 9: Standard & Optional MachineFeaturesSet X-Home PositionOnce your artwork is ready you will need to set the X-Home position on the rotary.Turn on the Red Dot Pointer. Press the X/Y Off button on the laser keyboard, thenpress the Go button. You can now move the carriage by hand to either the edge of thechuck or the edge of the jaw. Set one of these two points as your new Home positionby pressing the Set Home button on the laser keyboard. This position will correspondto the left-hand side of your page in Corel.The X-Home position is highly variable and can be set anywhere you want it to be.Most users prefer the edge of the chuck or the edge of the jaws.The edge you choose as your X-Home position defines where theleft edge of your page is in yourgraphics software.Edge of chuck.Edge of jaw.Set FocusThe last task to perform before printing the job is to set focus. Press the Focus button,and then attach the manual focus gage to the carriage. Use the Up and Down cursorsto raise or lower the table. For additional information, read Focus with the RotaryAttachment described above in the Standard Rotary Attachment instructions sectionof this manual.Printing is straight-forward and identical to printing non-rotary jobs.150
Section 9: Standard & Optional MachineFeaturesThe 3-jaw chuck rotary can be used with the standard 3” lens. The optional 1.5” lenscan be used to accommodate larger diameter pieces. The illustration below shows themaximum part size that can be used with each lens.151
Section 9: Standard & Optional MachineFeaturesArtwork SetupThere are two different methods used for setting up the 3-Jaw chuck rotaryattachment. The 3-Jaw chuck was originally designed to be used with cylinders thatrange in size from 0.50” (12.7 mm) to approximately 3” (767.2 mm) in diameter.Artwork setup for this size is explained in Method 1 below. However, cylinders thatare smaller than 0.5” (12.7 mm) can be processed using an alternative processdescribed in Method 2.The two methods are based on cylinder size:‣ Method 1) is used for cylinders that are 0.5” or larger in diameter (12.7 mm) toapproximately 3” (76.2 mm) in diameter.‣ Method 2) is used for cylinders that are less than 0.5” or smaller in diameter (12.7mm) to approximately .125” (3 mm) in diameter.Method 1) – 0.50” (12.7 mm) to 3” (76.2 mm)Artwork SetupYou will need to set up a custom page size in your engraving software that willaccommodate the length and circumference of your cylinder. To set up your page inCorel, measure the length of the cylinder you are engraving. Use this as the minimumsize of the horizontal dimension of your page. Measure the diameter of the cylinderand multiply this number by Pi (3.1416) to determine the circumference of thecylinder. Use the circumference as the minimum size of the vertical dimension ofyour page.152
Section 9: Standard & Optional MachineFeaturesThe actual size of the page is not overly important. If you have a cylinder that’s 5.23inches long with a circumference of 2.35 inches, use a page that’s slightly larger, say,6” x 3”.This image shows a page size of 6”x 3”. The gray inner rectanglerepresents the cylinder that is 5.23”x 2.35”. Insure your artwork fitswithin the cylinder size.Set up your artwork on your custom page. The image below shows that we are goingto engrave tick marks all the way around the cylinder with some text that extends tothe right.It’s important that you set up yourartwork so the top of the artwork isas close to the top of the page as youcan comfortably get it.Any white space between the top ofthe page and your artwork isconsidered part of the artwork andyour cylinder will rotate that amountuntil it reaches the first point ofengraving.Once your artwork is set up you can print and run your job.153
Section 9: Standard & Optional MachineFeaturesMethod 2) – 0.50” (12.7 mm) to 0.125” (3 mm)diameterProcessing small diameter cylinders involves two significant changes from Method1).‣ Inputting the circumference instead of the diameter of the cylinder onto the rotarykeypad‣ Stretching the artwork in your graphics package in the vertical dimension only.For our example we’re going to use the same type of image as we did earlier in theseinstructions that will engrave all the way around a cylindrical rod. We’re going to usea 0.250” (6.35 mm) rod in this example.The number we need to insert on the rotary keypad is the circumference of thecylinder. The formula for calculating circumference is D x Pi, where D is the cylinderdiameter and Pi is 3.1416. For our example multiply 0.250 x 3.1416 = .785 (19.94mm). Enter 0785 inches (or its nearest equivalent) into the rotary keypad (remember,the decimal point does not appear in the inches units so we have to use 0785. Formillimeters we would insert 19. 94.0785Set up your artwork as normal using the circumference of the cylinder as your verticaldimension. Once you have set up your artwork you will need to stretch it. Measurethe vertical dimension of your image and multiply that dimension by Pi (3.1416). Wehad measured .785 for the circumference of the rod. Because we are engravingaround the entire circumference of the rod, the vertical height of our artwork beforestretching will also be .785.154
Section 9: Standard & Optional MachineFeaturesMultiply .785 x 3.1416 = 2.466. Stretch your artwork so that it has a verticaldimension of 2.466 inches (62.63 mm). You will also need to increase the page sizein the vertical dimension to accommodate this larger stretched image.You’re now ready to print to the laser using a cylinder that is smaller than 0.50 inches(12.7 mm). Set your Speed and Power as you normally would, and print to the laser.Rotary Removal1. Turn off power to the laser.2. Open the door.3. Depress the release tab on the connector and unplug the connector.4. Remove the rotary attachment.155
Section 9: Standard & Optional MachineFeaturesAdditional Lenses<strong>Epilog</strong> offers optional 1.5 inch and 5.0 inch lenses for the <strong>FiberMark</strong>.The 1.5 inch lens is intended for use with larger diameter objects on the rotary device,or with taller (longer Z dimension) objects. By using the 1.5 inch lens, the maximumdiameter that can be marked with the rotary attachment is 4.25 inches (108 mm). Themaximum material thickness (Z-height) of a flat object (not using the rotaryattachment) is 6.75 inches (172mm).The 5.0 inch lens is being offered for those products that have a slight curvature ormarking area that is not perfectly flat. The 5.0 inch lens produces a slightly longerdepth of field which will provide for a more consistent mark over a non-flat surface.The 5.0 inch lens cannot be used with the Rotary Attachment.Please refer to the attached illustrations, which visually depict the distances for boththe 1.5 inch and 5.0 inch lenses.156
Section 9: Standard & Optional MachineFeatures1.5” <strong>FiberMark</strong> Lens AssemblyFocal Distance = 1.5” (approx 38 mm)Maximum material thicknesswithout Rotary is approximately 6.25” (160 mm)Maximum material diameterwith Rotary Device is approximately4.25” (108 mm)<strong>Epilog</strong> Rotary AttachmentTa b leThe maximum material thickness may varydepending on the material and desired mark.Not To Scale157
Section 9: Standard & Optional MachineFeatures5.0” <strong>FiberMark</strong> Lens AssemblyFocal Distance = 5.0” (approximately 127 mm)Maximum material thickness isapproximately 2.5” (63 mm)TableThe maximum material thickness may varydepending on the material and desired mark.Not To Scale158
Section 10: Speed, Power,Frequency and FocusRecommendationsIn This Section‣ Speed‣ Power‣ Frequency‣ Focus‣ RecommendationsSpeed, Power, Frequency and Focus are used in combination to produce the desiredmark on the material being used. Different materials require different combinationsand these combinations are listed in the tables later in this section.Speed and Power are very closely related and making a change to one of them canhave the same effect as changing the other one. For instance, increasing the Powercan be as effective as lowering the Speed in producing a darker mark.Frequency is less dependent on Speed and Power and can often be determinedindependently of those two variables.SpeedFocus can be used to affect the type of mark created. For example, when markingsteel in Raster mode, changing the focus is the most important variable in creating anannealed mark.Speed settings determine the travel speed of the carriage as it moves back and forth inthe X-axis (Raster Mode) and as it profile marks in Vector Mode. Adjustable in 1%increments, the Speed setting can be controlled either from your computer or, inRaster mode only, from the control panel on the engraver. On most ferrous materials159
Section 10: Speed, Power, Frequency andFocus RecommendationsPowerFrequencyslower speeds will produce darker marks. Speed settings are heavily dependent onthe type of material being marked and the type of mark that is desired. In Rastermode, optimization software allows the carriage to skip through horizontal whitespace, increasing laser on-time rates, which further enhances overall throughput.This is the amount of available laser power that is applied to the material surface. At agiven speed, higher power will usually produce a darker mark on most materials.Adjustable in 1% increments, the power can be controlled either from your computeror, in Raster mode only, from the control panel on the engraver.Frequency refers to the pulsing of the laser. The frequency adjustment range isdetermined by the power of your laser. The frequency range of different wattagelasers are listed below:<strong>Laser</strong> WattageFrequency Range10 & 20 watt 20kHz – 80 kHz30 watt 30kHz – 80 kHz50 watt 50kHz – 100 kHzThe Frequency slider bar in the driver shows the relative frequency that is beingoutput by the laser and is adjustable from 1 to 100. The frequency (kHz) associatedwith the number in the slider bar is shown for different wattage lasers in the followinggraphs:160
Section 10: Speed, Power, Frequency andFocus Recommendations10 & 20 Watt <strong>Laser</strong>Frequency (kHz) 21 23 26 29 32 35 38 41 44 47 50 53 56 59 62 65 68 71 74 77 80Slider Number 1 5 10 15 20 25 30 35 40 45 50 55 60 65 70 75 80 85 90 95 10030 Watt <strong>Laser</strong>Frequency (kHz) 31 33 35 38 40 43 45 48 50 53 55 58 60 63 65 68 70 73 75 78 80Slider Number 1 5 10 15 20 25 30 35 40 45 50 55 60 65 70 75 80 85 90 95 10050 Watt <strong>Laser</strong>Frequency (kHz) 51 53 55 58 60 63 65 68 70 73 75 78 80 83 85 88 90 93 95 98 100Slider Number 1 5 10 15 20 25 30 35 40 45 50 55 60 65 70 75 80 85 90 95 100Most materials do not need a specific frequency so we use a relative slider bar thatcan provide close estimates of low, medium and high frequency settings.Frequency can be controlled either from your computer or from the control panel onthe engraver. Frequency affects to the amount of power that is output with each pulseof the laser. Low Frequency settings (~ 20 and below) will provide higher bursts ofpower at a low pulse rate, while higher Frequency settings (above 60 kHz) willproduce slightly lower bursts of power, but at greater frequency. On most materials,lower frequency settings will produce darker marks. Most plastics use high frequencysettings.161
Section 10: Speed, Power, Frequency andFocus RecommendationsRecommendationsThe <strong>Epilog</strong> <strong>FiberMark</strong> guidelines for Speed, Power and Frequency are included onthe following pages. Please remember that these are only guidelines. Brightness ordarkness of a mark is a matter of personal preference and can be very dependent ofthe type of material being marked. As such, there is no “correct” setting. Workingwith the four different settings becomes fairly intuitive in a very short period of timefor most users. If you have a material that is not listed, try to compare it to similarmaterials listed and use those settings as your starting point.If you do not achieve the results you are looking for with the recommended settings,try resending the job and start by changing only one variable at a time. Changingonly one variable at a time will help to determine the correct setting for your material.In Raster mode you can change each of the variables “on the fly” while the machineis in motion. Being able to change the settings on the fly allows you to view thechanges on the material as it is being marked. Due to the small increments of changethat can be made to each variable, do not be surprised if the change does not becomevisible until the variable has been adjusted by units of 10 or more.Because there are many factors that influence the time it takes to mark a given image,the Speed settings were designed to be reference numbers only. The Speed settingscale of 1% to 100% is not linear – i.e. 100% speed will not be twice as fast as 50%speed. This non-linear scale is very useful in compensating for the different factorsthat affect engraving time, but using speed to predict a jobs engraving time is notpractical.The Power settings are linear – i.e. 50% power is half as much as 100% power.An important note: <strong>Laser</strong> settings can sometimes be confusing because manymaterials can be marked over such a broad range of settings. If you have difficulty infinding the correct setting you can send a sample to the <strong>Epilog</strong> <strong>Laser</strong> Applicationslab. We will determine if the material can be marked and provide appropriate settingfor your laser.162
Section 10: Speed, Power, Frequency andFocus RecommendationsGeneral Metal Engraving / BaseSettingsIn the world of metals the grade, type, hardness and chemical composition areendless. Metal alloys are engineered for specific applications and have their ownstrengths and weaknesses. With such an unlimited selection, we’ve yet come across ametal which proved to be incompatible with the <strong>FiberMark</strong>.Metals can be engraved at just about any settings. Of course there are many variablesto consider for metal engraving. The lasers wattage, hardness of metal, desired mark(etch, polish, anneal) and the required time/contrast/depth will have to be consideredwhen deciding on the final settings.Below are general guidelines for most common metals. Settings will have to beadjusted based on wattage. Less speed, lower frequency for lower wattage Fibers.Less power, higher frequency for higher wattage Fibers.Etching of “Metals”‣ 8 - 30% Speed‣ 100% Power‣ 1 - 10% Frequency‣ -.020” to +.020”Focus‣ 400 – 600 DPILike our C02 counterparts, the slower the speed setting, the deeper the etching.However, many metal applications have and can be processed at higher speed settingsin the range of 50-100%. Again, consider the marking requirements and if the onlystipulation is permanency, you’ll find the <strong>FiberMark</strong> can engrave a broad range ofmetals at higher speeds, regardless of laser wattage. Don’t be afraid to turn up thejuice!163
Section 10: Speed, Power, Frequency andFocus RecommendationsPolishing of Steel Alloys‣ 50 - 80% Speed‣ 30 - 50% Power‣ 70 - 100% Frequency‣ 0 Focus‣ 600 DPISome steel alloys are easier to polish than others. For best results, clean off thesurface with alcohol prior to processing. Any leftover grease, oils or residue canaffect how well the polished mark turns out. Polishing the metal where the finalmarks result in a bright white engraving requires finer tuning of settings, more so thanthe etched or annealed marks. Determine a base speed and frequency setting andadjust the power in small increments/decrements. If you are unable to get a whitebright mark, increase the frequency setting and try again by adjusting only the power.Annealing of Steel Alloys‣ 6 - 12% Speed‣ 100% Power‣ 1% Frequency‣ 600 or 1200 DPITo achieve an annealed mark, the focal point should be significantly away from zero.The unfocused, broader beam provides the heat to change the surface color withoutactually penetrating the metal. The focal point can be either closer to or away fromzero. Focusing away from the material should be in the range of -.060” to- .090”.Focusing closer to the material is generally in the range of +.070” to +.110”.Both focusing methods will result in a dark black annealing of the metal. Focusing uptypically results in a slight indentation of the metal.Multiple passes can darken the mark even more (no data to confirm whether multiplepasses offer more permanency).164
Section 10: Speed, Power, Frequency andFocus RecommendationsAluminum Alloys‣ 15 - 40% Speed‣ 100% Power‣ 1-10% Frequency‣ -.010” to +.010”Focus‣ 400 - 600 DPIEngraving aluminum will result in various shades of gray, not black. Fine tuning thesettings can provide a bit more contrast but the range of applicable marks isn’t asbroad as steel.If the application calls for a black etch, consider using an oxidizer if the aluminumhas a protective coating (urethane, clear coat, clear anodized). Deep metal engravingon aluminum can be done in just a few passes, consider deep engraving and using ablack epoxy/color fill.Although the marks on aluminum aren’t as black as the ones we’re capable ofproducing on steel, we have no difficulty getting 2D, UID barcodes to scan andverify.Titanium (Ti)Titanium and Ti alloys are highly amenable to marking at this wavelength. Similar toaluminum, a black mark from the etching process is difficult to achieve. Variousshades of gray can be made, from very dark gray to light grey.Annealed marks can also be made on titanium materials using the same processingparameter described for stainless steel. Depending on the Ti alloy, marks of variouscolors can be achieved by changing the frequency values for 1% up to 100%. It iscommon to see red, blue, green, orange, yellows and purple marks, depending on thefrequency selected.165
Section 10: Speed, Power, Frequency andFocus RecommendationsPlated MetalsMetals are often plated to assist with conductivity, to provide a protective coatingagainst rust and elements and for aesthetic purposes. Plating thickness will depend onapplication and purpose. Most of the plated metals processed thru the applications labare electronic components (to enhance conductivity) and various fittings (protectionagainst environment & rust). The typical plating thickness varies from .001” up to.005”.Our recommended settings for general metal engraving works well for ablating thruthe plating; exposing the base metal. Ablating the plating will also provide highcontrast. Using an oxidizer will enhance the look.Our recommended settings for polishing of metals are a good starting point whereablating thru the plating isn’t an option. This is likely the most common plated metalapplication as exposing the raw metal underneath will break continuity and / orexpose the bare metal to rust and other elements. Note that the contrast of polishing ofplated metals won’t be as consistent or contrasting as a direct ablation. Multiplepasses will help and end results will vary based on the metal used for plating,thickness of plating & size of mark.Our recommended settings for annealing will often work for plated metals where theplating has a thicker wall and material used has high levels of carbon or metal oxides.‣ 600 or 1200 DPI works well.Powder Coated Metals‣ 20 - 40% Speed‣ 80 - 100% Power‣ 1 - 20% Frequency‣ Up or down .030” to .050” focus‣ 600 DPI2-3 passes (one pass to ablate the powder coating, 2 nd or 3 rd pass to polish up themetal underneath).A little less power, higher frequency and less focus adjustment will be required forthe 2 nd or 3 rd pass, depending on the base metal. The idea is to ablate then polish.166
Section 10: Speed, Power, Frequency andFocus RecommendationsAn alternative to running two or more passes is to run one pass and then use acommon cleaner such as Simple Green or a citric-based cleaner with short, stiffbristle brush to scrub out the residual material remaining in the mark area. If usingthis technique, it may be necessary to raise or lower the marking table from around0.07” to 0.10”.Anodized Aluminum‣ 20 - 40% Speed‣ 80 - 100% Power‣ 1 - 15% Frequency‣ Up or down .030” to .050” focus‣ 600 DPIThe contrast / brightness of mark achievable on the <strong>FiberMark</strong> are excellent and areoften times much brighter than those done on a C02 laser. The key is to broaden thebeam by changing the focal setting by 30-50mils. This prevents the beam fromablating the anodized coating and penetrating the metal (results in dull white/graymarks). Lower frequency and higher power settings help offset the change in focalpoint.Different grades of anodized & core aluminum alloy will affect how the final markslook. Finding the right printing parameters is key in achieving a highly contrastingmark.Precious MetalsAny rare metal alloy is deemed precious. As mentioned earlier, we’ve yet comeacross a metal which could not be marked. This includes the rare “Grammium”, metalalloy used in casting a Grammy award. Regardless of rarity or value, the <strong>FiberMark</strong>can mark it. Depending on the marking requirements, use one of the above settings toget started.167
Section 10: Speed, Power, Frequency andFocus Recommendations10 Watt <strong>FiberMark</strong>Marking/EtchingAnodizedAluminumSPEED POWER FREQUENCY FOCUS10-25% 100% 30-70% -0.03 to +0.03Stainless Steel 5 -15% 100% 1-10% -0.01 to +0.01Brass 5-15% 100% 1-10% 0.00<strong>Laser</strong>able Plastic 30-40% 40%-100% 50-100% -0.02 to +0.02Bare Aluminum 5-12% 100% 1-20% -0.01 to +0.01Titanium 5-15% 100% 1-10% -0.02 to +0.02AnnealingSPEED POWER FREQUENCY FOCUSStainless Steel 3-5% 100% 1-5%Titanium 3-5% 100% 1-100%-0.08 to -0.1+0.05 to +0.08-0.08 to -0.1+0.05 to +0.08Notes on Annealing: Producing an annealed mark is very dependent on the materialbeing out of focus. Run the laser at slow speed and full power then adjust the focuswhile the machine is running until you achieve the annealed mark you need.Notes on settings: Don’t be afraid to experiment with Speed, Power and Frequencysettings. Many materials can be marked over the entire range of settings! Start withthe recommended settings and change one variable at a time to produce a mark thatbest suits your needs. Most users start with the highest speed setting listed and worktheir way faster or slower.168
Section 10: Speed, Power, Frequency andFocus Recommendations20 Watt <strong>FiberMark</strong>Marking/EtchingSPEED POWER FREQUENCY FOCUSAnodized Aluminum 20-50% 70-100% 50-100% -0.03 to +0.03Stainless Steel 10-30% 100% 1–35% -0.01 to +0.01Brass 5-30% 100% 1–20% 0.00<strong>Laser</strong>able Plastic 40-70% 50%-70% 50-100% -0.02 to +0.02Bare Aluminum 5-25% 100% 1–20% -0.01 to +0.01Titanium 10-20% 100% 1-10% -0.02 to +0.02AnnealingSPEED POWER FREQUENCY FOCUSStainless Steel 5-10% 100% 1-5%Titanium 5-10% 100% 1-100%-0.08 to -0.1+0.05 to +0.08-0.08 to -0.1+0.05 to +0.08Notes on Annealing: Producing an annealed mark is very dependent on the materialbeing out of focus. Run the laser at slow speed and full power then adjust the focuswhile the machine is running until you achieve the annealed mark you need.Notes on settings: Don’t be afraid to experiment with Speed, Power and Frequencysettings. Many materials can be marked over the entire range of settings! Start withthe recommended settings and change one variable at a time to produce a mark thatbest suits your needs. Most users start with the highest speed setting listed and worktheir way faster or slower.169
Section 10: Speed, Power, Frequency andFocus Recommendations30 Watt <strong>FiberMark</strong>Marking/EtchingSPEED POWER FREQUENCY FOCUSAnodized Aluminum 40-70% 50-100% 50-100% -0.03 to +0.03Stainless Steel 10-50% 100% 1–20% -0.01 to +0.01Brass 10-60% 100% 1-5% 0.00<strong>Laser</strong>able Plastic 40-100% 50-100% 50-100% -0.02 to +0.02Bare Aluminum 5-35% 100% 1-20% -0.01 to +0.01Titanium 10-40% 100% 1-10% -0.02 to +0.02SPEED POWER FREQUENCY FOCUSStainless Steel 7-12% 100% 1-5%Titanium 7-12% 100% 1 – 100%-0.08 to -0.1+0.05 to +0.08-0.08 to -0.1+0.05 to +0.08Notes on Annealing: Producing an annealed mark is very dependent on the materialbeing out of focus. Run the laser at slow speed and full power then adjust the focuswhile the machine is running until you achieve the annealed mark you need.Notes on settings: Don’t be afraid to experiment with Speed, Power and Frequencysettings. Many materials can be marked over the entire range of settings! Start withthe recommended settings and change one variable at a time to produce a mark thatbest suits your needs. Most users start with the highest speed setting listed and worktheir way faster or slower.170
Section 10: Speed, Power, Frequency andFocus Recommendations50 Watt <strong>FiberMark</strong>Marking/EtchingSPEED POWER FREQUENCY FOCUSAnodized Aluminum 40-80% 50-100% 50-100% -0.03 to +0.03Stainless Steel 15-60% 100% 1-20% -0.01 to +0.01Brass 15-60% 100% 1-10% 0.00<strong>Laser</strong>able Plastic 50-100% 40 -80% 50-100% -0.02 to +0.02Bare Aluminum 5-50% 100% 1–20% -0.01 to +0.01Titanium 15-60% 100% 1–15% -0.02 to +0.02AnnealingSPEED POWER FREQUENCY FOCUSStainless Steel 12-17% 100% 1-10%Titanium 12-17% 100% 1-100%-0.08 to -0.1+0.05 to +0.08-0.08 to -0.1+0.05 to +0.08Notes on Annealing: Producing an annealed mark is very dependent on the materialbeing out of focus. Run the laser at slow speed and full power then adjust the focuswhile the machine is running until you achieve the annealed mark you need.Notes on settings: Don’t be afraid to experiment with Speed, Power and Frequencysettings. Many materials can be marked over the entire range of settings! Start withthe recommended settings and change one variable at a time to produce a mark thatbest suits your needs. Most users start with the highest speed setting listed and worktheir way faster or slower.171
Section 11: EngravingMachine Calibration &MaintenanceIn This Section‣ Calibration Settings‣ Cleaning - Important!‣ <strong>Laser</strong> SourceThere are a number of factory settings that normally only need to be set once at thefactory to calibrate the system. All of the calibration settings are accessed from theConfig key on the front control panel.Config. Menu:.To scroll through the Config Menu use the single triangle cursor keys.X Home Pos: -368Use cursor keys to incrementor decrement position values.172
Section 11: Engraving Machine Calibration &MaintenanceOnce you have scrolled to the menu item you want to adjust, change the numericalsetting by using either set of cursor keys. The single cursor keys will increment ordecrement a single unit each time it is depressed. The double triangle cursor keyswill increment or decrement at a much higher rate of speed.The numerical range of adjustment is also shown in the table below. Each single digitchange is equal to .001 inch (0.025 mm) (except the <strong>Laser</strong> Match value, which is inpixels). For example, changing the X-Home position from a value of -350 to -395would move the X-Home position 0.045 inches (1.1 mm) to the right.Calibration SettingRangeX - Home Position Range: -600 to 0Increasing this value will move X-Home to the left.Y - Home Position Range: -600 to +200Increasing this value will move Y-Home up.X - Rotary Home Position Range: -3000 to +600Increasing this value will move the X-Rotary home to the left.Y - Rotary Home Position Range: -1200 to +1200Increasing this value will move the Y-Rotary Home up.<strong>Laser</strong> Match Range: -20 to +20Establishes the left to right alignment of alternating raster lines.Sys UnitsSets to units of measure for the system.Range: Inch or MM173
Section 11: Engraving Machine Calibration &MaintenanceChanging calibration settings:‣ Access the setting you want to change.‣ Increase or decrease the numerical value using the Up or Down cursor keys. Tospeed the process of changing a number, apply constant pressure to the doubletriangle keys.‣ Press the Go button when you have changed the setting you want. The setting isnow saved.‣ If you want to just see what the setting is, but do not want to change it, press theStop button after you have viewed the calibration setting.Calibration Settings - Key CombinationsThere are a number of factory settings that normally only need to be set once at thefactory to calibrate the system. All of the calibration settings can be accessed using atwo key combination of the above keyboard buttons.CALIBRATION SETTING KEY COMBINATION RANGEAuto Delete Reset + Job Range: Yes or NoAutomatically deletes every job after it has finished running or if the job is stopped andReset. The factory default is No.<strong>Laser</strong> Pwr: Reset + Power Range: 10, 20, 30, or 50 WattsSets the system to match the wattage of the laser source. This setting is important because ifit is does not match the laser source the system will potentially act erratic.174
Section 11: Engraving Machine Calibration &MaintenanceCleaning - Important!The single most important thing that you can do to keep your laser working as if itwere new is to keep it clean! Five minutes once a day will keep the residue anddebris from building up and causing problems. There is almost no maintenancerequired for your laser if you KEEP IT CLEAN!Cleaning the OpticsAbout once a week, or if you notice the optics are dirty, you will need to clean theoptics (mirrors and lenses) of your laser. If dust, debris, fine powder, or othercontaminants are allowed to accumulate too heavily, they will reduce the availablelaser power and may cause damage to the optics.The two optical components most likely to require cleaning are the focus lens and themirror directly above it. The lens and mirror are a single assembly, and can beremoved from the machine for cleaning, but it is generally not recommended.MirrorTo clean the focuslens and the mirrorthat is directly aboveit, use a cotton swabthat has beenmoistened with theOptics CleaningFluid that is suppliedas part of youraccessory kit. Gentlyswab the optics toremove dust anddebris.Focus LensClean both sides ofthe mirror and boththe top and bottom ofthe Focus Lens.175
Section 11: Engraving Machine Calibration &MaintenanceTo clean the optics use a high-quality cotton swab moistened with the optics cleanersupplied in the accessory kit. Please read the label on the bottle carefully. Rubbingalcohol should be used only to remove fingerprints. If you run out of the cleanersupplied by <strong>Epilog</strong>, acetone can be used as a temporary measure, but should not beused for regular cleaning as it contains impurities which can contaminate the optics.If you run out of optics cleaner, pure ethyl (grain) alcohol such “Golden Grain" and"Everclear" are highly recommended because of their pure nature and because theyare readily available at most liquor stores.Wet the swab thoroughly with the solvent, and then blot it against a piece of cotton sothat it is no longer soaking-wet. Then daub the optic gently, rotating the swab aftereach daub to expose clean cotton to the surface, until the optic is free of visiblecontamination. At that point, prepare a fresh swab and clean the surface with a gentlezigzag motion across it. Avoid any hard "scrubbing" of the surface, especially whilethere are visible particles on it, and try not to use repetitive circular motions. Whenyou are done, be careful to remove any cotton threads that may have snagged on themountings. Allow the optics to dry before you operate your engraver.In addition to the focuslens and the mirror directlyabove it, there is a mirrorlocated on the left side ofthe machine that ismounted to the X-beam.This mirror is very wellprotected and should notneed regular cleaning. Itcan be accessed with acotton swab if it does needcleaning. The photo atright shows where thismirror is located in relationto the X-beam andcarriage.176
Section 11: Engraving Machine Calibration &MaintenanceCleaning the ExhaustMake sure the exhaust blower you are using receives proper maintenance.Periodically clean the exhaust blower and duct system to remove built-up debris. Ifyou detect odor while engraving, or if there is smoke in the cabinet, inspect theexhaust system. Check for loose or broken pipe/hose connections or obstructions.The photos below show where to clean the duct work of your machine. You shouldalso occasionally check your exhaust blower and the duct work that is connected to it.Clean the plenum vents fromthe inside of the machine. It isbest to use a flexible plastic orwire brush that can access theinside of the vent.Periodically remove the ductfrom the back of the machineand clean the exhaust port.Periodically inspect and cleanyour exhaust fan and the ductwork connected to it.177
Section 11: Engraving Machine Calibration &MaintenanceCleaning the Viewing WindowSpecial care should be taken when cleaning the green viewing window. Use only asoft cloth and a mild glass cleaner to clean the window. Do not use paper towels orother coarse materials to clean the window. The window is susceptible to scratchingif not properly cleaned. Damage to the window from cleaning is not covered underthe warranty.<strong>Laser</strong> SourceThe laser source used in your system has a maximum service life, but there is verylittle maintenance that is required. At some point in the life of the laser you will needto replace it for electrical repair or mechanical repair. Replacing the laser source iscommon practice and <strong>Epilog</strong> has made the process of changing the laser sourceextremely easy for users to perform with a minimum amount of effort. The lasersource can be refurbished and is available on an exchange basis by contacting <strong>Epilog</strong>technical support.178
ManualTechnical Support,Troubleshooting,Specifications &Firmware Upgrade179
THIS PAGE WASINTENTIONALLY LEFT BLANK180
Section 12: In Case ofDifficultyIn This Section‣ Contacting Technical Support‣ Avoiding Common Print ProblemsContacting Technical SupportThe technical support department at <strong>Epilog</strong> is available to assist with solvingproblems you may encounter using your <strong>Epilog</strong>. Please review first the commonproblems and solutions as noted below, then if you are still in need of assistance youmay contact <strong>Epilog</strong>’s technical support department at the number or website listedbelow. Technical support is available in Golden, Colorado USA during the hours of 6a.m. and 6 p.m. Mountain Time.Technical Support Direct Line: 1 (303) 215-9171Email – tech@epiloglaser.comTechnical Support online:www.epiloglaser.com/service.htmWhat to do prior to contacting <strong>Epilog</strong> Technical Support:1. Have the machine serial number available2. Have time to work on machine. Many issues will require troubleshooting3. Clean your machine (especially the optics), this will solve many issuesThe machine serial number can be found on the Certification/Identification Label.This engraved plate is located on the back of the machine’s cabinet. An ID label isshown on next page.181
Section 12: In Case of DifficultySerial Number<strong>Epilog</strong> Corporation16371 Table Mountain ParkwayGolden, CO 80403 USAModel Number: 8000 <strong>Laser</strong> SystemSerial Number: 8020-0700012412FMDate of Manufacture: March 2007Class 3R <strong>Laser</strong> ProductThis product complies with 21 CFR 1040.10 and1040.11 except for deviations pursuant to <strong>Laser</strong>Notice No. 50, dated July 26, 2001.This product complies with IEC 60825-1: 2001.Authorized Representative:Consultants Europe bvPO Box 50471380 GA WeespThe NetherlandsTel.: 31-294-483355Fax.: 31-294-414687E-Mail: info@ce-marking.nlMass:35 kg maxAvoiding Common Print ProblemsPrinting problems are normally related to stopping, resetting or trying to repeat a jobbefore the computer has been allowed enough time to transmit the entire job. If youdo interrupt a job while it is being transmitted (printed) to the engraver, there is agood chance that the remaining data is still somewhere between the computer and theengraver, unless you take precautions to clear the print queue. To avoid mostcommon print problems, ALWAYS double click on the <strong>Epilog</strong> printer icon (undersettings, printers) to check for partial jobs, if you interrupt a job in progress. Theycan then be canceled or deleted from the computer. It is always a good idea to rebootthe laser before starting another print job if you have had print spooling problems.Problem: Engraver will not vector.Solution:1. Please verify that the print driver is set to “Vector” or “Combined”.2. Verify that the lines that you want to vector are set to .001 inch (0.025 mm).3. Scanned images will not vector.4. Filled or solid images will not vector (outlines only).Problem: Engraving appears weak.Solution:1. All mirrors and lenses need to be cleaned and inspected for damage. SeeSection 12: Engraving Machine Calibration and Maintenance of this manualfor cleaning instructions.If you are unsure of the location of all of the mirrors on your engraver, pleasecontact Technical Support at (303) 215-9171.2. Verify that the lens is in correct focus.3. Verify correct Speed, Power and Frequency settings for the type of material thatyou are engraving.182
Section 12: In Case of DifficultyProblem: No laser beam but the engraver appears to be running normally.Solution:1. Verify focus is set properly.2. Verify power and speed settings are appropriate.3. Verify both the top and front doors are closed tightly.Problem: Inadequate Exhaust.Solution:4. The closer the blower is to the machine the better exhaust you will receive.5. Clean your exhaust system on a regular basis including engraver and blower.Use a bottlebrush and a vacuum on the areas where the exhaust buildupaccumulates.Problem: Engraver will not power up. Nothing transpires when engraver isturned on.Solution:1. Verify there is power being supplied to the engraver, that your outlet is in goodworking condition and that the engraver is actually plugged in.2. Check to make sure the carriage can be moved freely with the power off. If theengraver can’t find the home position, it will not power up properly.Problem: Poor engraving quality.Solution:1. If you feel you are not getting the quality you once were, this is probably amaintenance issue. See the maintenance section of the manual (Section 11) forinstructions on cleaning the optics. If you are not sure of the location of all ofyour mirrors, contact <strong>Epilog</strong> technical support at Technical Support at 1 (303)215-9171.2. If you are experiencing a blurry or erratic image, check to make sure you are infocus and all optics are clean.3. If you are experiencing a double image problem or any other quality issue, it isbest to run a sample of what the machine is doing and send it to:Technical Support Department<strong>Epilog</strong> <strong>Laser</strong> Corporation16371 Table Mountain ParkwayGolden, CO 80403; USAPhone: (303) 215-9171Fax: (303) 277-9669Email: tech@epiloglaser.com183
Section 12: In Case of Difficulty4. Please include a letter stating the configuration of your machine along withspeed and power settings of the sample you ran and any other pertinentinformation.Problem: Image at the wrong location on the work piece.Solution:1. Verify that the page size in your drawing program does not exceed themaximum engravable area of the machine.2. Verify that the page size in drawing program matches the piece size in theDashboard print driver.3. Print Setup. If you have a page size of 2”x 3” (50 mm x 75 mm) and a PieceSize in Print Setup of 24 X 12”, then it will place the 2 X 3” (50 mm x 75 mm)in the center of the 24 X 12” area.4. If you see that the image is constantly off in one direction, you may need tocalibrate the “home position” of the machine. This procedure is explained inthe “Engraving Machine Calibration and Maintenance” section of this manual.Please call <strong>Epilog</strong> technical support if this does not rectify the problem.Problem: Cooling Fan Malfunction.Solution:5. Verify that there is nothing obstructing the rotation of the fan(s).6. Verify the fan is clean. Using a vacuum should clean the fan adequately.7. Verify the connector is still connected.8. If necessary, contact <strong>Epilog</strong> Technical Support for assistance.Problem: Table will not move.Solution:1. Verify that there is nothing obstructing the travel of the table.2. If you are still experiencing problems, contact <strong>Epilog</strong> Technical Support.Problem: Position Error displayed on LCD front console.Solution:‣ If you receive a Position Error on your display, the engraver is informing you thatit has lost its correct positioning. Power off engraver and verify there is nothingobstructing the travel of the carriage both left-to-right and front-to-back. With theengraver shut off, move the carriage with your hand in all directions. Thecarriage should travel quite freely. With the engraver on, the carriage shouldresist you trying to move it. It will still move if you force it (please do not) but itwill resist. Turn the engraver back on. Notify Technical Support if you are inneed of further assistance.184
Section 12: In Case of DifficultyProblem: Extreme right side of graphic is missing.Solution:‣ Check the printer driver by going into “Printer Setup”.‣ Make sure you have the <strong>Epilog</strong> Dashboard print driver selected.185
Section 12: In Case of DifficultyTHIS PAGE WASINTENTIONALLY LEFT BLANK186
Section 13: SpecificationsIn This Section‣ <strong>Epilog</strong> <strong>FiberMark</strong> Specifications‣ Compatibility‣ Recommended PC‣ Other Computer Hardware Recommendations‣ Federal Communications Commission (FCC) Notice<strong>FiberMark</strong> SpecificationsMaximum Engraving Area 24" x 12" (457 x 305 mm)Maximum Material Thickness 5” (152 mm)<strong>Laser</strong> Control Display Panel Displays stored file names, speed, power, runtime and more.Intelligent Memory Buffer Store unlimited files up to 64 MB. Rolling buffer allows files of any size (64MB and larger) to be engraved.Operating Modes Optimized raster engraving, vector marking, or combined Raster/Vector mode.Motion Control High speed, continuous loop, DC servomotors using linear encoding technologyfor precise positioning.<strong>Laser</strong> Source State-of-the-art, digitally controlled, pulsed, air-cooled Ytterbium fiber lasersources are fully modular, permanently aligned, and fieldreplaceable/upgradeable.Bearings Ground and polished stainless steel NeverWear bearing system.Belts Advanced B-style Kevlar precision drive belts.Resolution User controlled choice of 75, 150, 200, 300, 400, 600, or 1200 dpi.Speed/Power/Freq/Focus Computer controlled Speed, Power, Frequency and Focus. Color mapping linksSpeed, Power, Frequency and Focus to any RGB color.Print Interface 10 Base T Ethernet or USB 1.0 connections. Compatible with 32 bit WindowsXP/2000/Vista.Standard Features Red Dot Pointer, Air Curtain (pump optional), 3" focus lens, relocatable home,flash upgrade electronics, integrated vacuum table.Size/Weight 27.5" wide x 23" deep x 12.5" high (699 x 584 x 318 mm)90 lbs (41 kg)Electrical Requirements Auto-switching power supply accommodates 100 to 240 VACS, 50 or 60 Hz,single phase, 15 amps AC.Ventilation External exhaust to the outside required. Output diameter at machine is 4" (100mm).Safety CDRH Class 2Max Ambient Room Air 90 degrees F (32 C) Max TemperatureSpecifications subject to change without notice.187
Section 13: SpecificationsCompatibilityThe <strong>Epilog</strong> <strong>FiberMark</strong> has been designed as an “open architecture” product. The laserwill work with many popular Windows based graphics, engineering and specialtysoftware products. To benefit from all the functionality that was built into the laser, aWindows 32 bit based PC and 32 bit operating system is required. The Dashboardprint driver that is shipped with the laser offers a host of unique features, and onlyworks with Windows based operating systems.Recommended PCFor Optimum Computer PerformanceInvesting in a new computer is a great way to make sure you’re getting the most outof your new laser equipment. Why? Because today’s software (CorelDraw forinstance) requires a lot of computer processing speed and memory to functionproperly. A good computer won’t make a big difference in how your laser runs, butwhen compared to a slow computer it will save untold amounts of time andfrustration setting up the artwork that you “print” to the laser. Many users do notpurchase new computers for use with their new laser because their current computersare perfectly adequate. There’s no magical cut-off that makes a computer too slow.If you’re comfortable with the performance and speed of your current computer,there’s probably no reason to purchase another one. The following recommendationsare just advice to consider if a new computer is necessary.A new computer doesn’t have to be expensive to work great! Even many of today’slower cost computers work great for laser applications. As long as you don’t buy thecheapest computer you can find you should be fine.Read these recommendations and consider spending just a few dollars more for thosecomponents that will save you time and frustration.Operating SystemAny Windows XP, 2000, or Vista operating system is recommended. All new <strong>Epilog</strong>lasers are designed to work with all the different 32 bit versions of XP, 2000, andVista.RAM – Random Access Memory1 GB is the minimum that is recommended. RAM is kind of like short-term memory.It’s fast and readily available for the computer to access and makes time consuming188
Section 13: Specificationstasks go much quicker if you have lots of it. Having more than 1 GB of RAM is niceif you demand a lot from your computer.DVD (optical drive)All computers come with some sort of CD-ROM/DVD drive. Consider a DVD drivewith Read/Write capability. Many graphic files are very large and may not fit onsome portable media. Being able to copy a file to a DVD is a big advantage for filingpurposes and moving the file from one computer to another. Optical drives are anindispensable tool and many software applications now come exclusively on DVD.Floppy DriveUsually not necessary.Processor SpeedA faster processor will allow you to do more tasks in less time. While it’s notnecessary to purchase the fastest processor available, you’ll want adequate speed tooperate your graphics program. Processor speeds are always improving, butprocessor speeds of about 2.0 GHz or faster are a good place to start.10/100 Network Interface Card (NIC)All new computers have a 10/100 network connection as standard equipment. Aswell as allowing multiple computers to be linked together in a network, thistechnology also allows direct printing from the computer to the laser. <strong>Epilog</strong> suppliesa network Crossover cable with each laser system that allows one computer to print toa single <strong>Epilog</strong> laser system.Hard DriveThis is the permanent memory in your computer. Many users feel that you can neverhave a large enough hard drive, but for most laser applications 80 GB’s is going to beadequate for years of storage. Luckily, most computer manufacturers put highcapacity drives in new computers these days. When in doubt, buy bigger than youthink you might need. It’s so in-expensive that it’s worth the peace of mind to have itavailable.SoftwareMany users use Corel as their graphics software. Many other Windows softwareapplications can also be used, although all software is different and may not bepredictable, user friendly or functional. Additionally, the technical support staff at<strong>Epilog</strong> may be less familiar with software other than Corel and less able to help with189
Section 13: Specificationsquestions. Consult with your <strong>Epilog</strong> distributor on software compatibility issues.<strong>Epilog</strong> does not guarantee compatibility with any software.Many laser users find a Raster-to-Vector conversion software package indispensable.Sometimes, users may have this capability if they are using sign graphics softwarelike CadLink. There are also a number of 3rd party Raster-to-Vector conversionpackages available in the engraving industry. Corel includes a raster-to-vectorconversion program starting in version X3 and it is a very nice conversion programfor most users.Other Computer HardwareRecommendationsScannerA flatbed scanner is another indispensable tool for generating custom artwork.Almost any flatbed scanner today is adequate for scanning artwork. Scannertechnology has come so far in the last few years that even a $100 scanner today is asgood as a $1,000 scanner of a few years ago. Hand held “mouse” scanners do notprovide the necessary accuracy and should be avoided.Heavy Duty Surge ProtectorThe need for a surge protector varies greatly throughout the world. If the laser isoperated anywhere that the electrical power is subject to spikes, outages, lighting,fluctuations, etc. a surge protector should be used on both the laser and the computer.A surge protector is a very, very cheap insurance policy against catastrophic electricaldamage. A surge protector is designed to be an inexpensive device that absorbs anyelectrical problems before they can damage the expensive equipment (computer andlaser) they are protecting.190
Section 13: SpecificationsSummaryComputer Recommendations:Windows 2000, XP or 32 bit Vista1 GB RAM MinimumCD-ROM or DVD2.0 GHz or faster Processor10/100 Network Interface Card80 GB Hard Drive - (Minimum)CorelDraw or other Windows based softwareFederal Communications Commission(FCC) NoticeNote: This equipment has been tested and found to comply with the limits for aClass A digital device, pursuant to Part 15 of the FCC rules. These limits aredesigned to provide reasonable protection against harmful interference when theequipment is operated in a commercial environment. This equipment generates, uses,and can radiate radio frequency energy; and, if not installed and used in accordancewith the instruction manual, may cause harmful interference to radiocommunications. Operation of this equipment in a residential area is likely to causeharmful interference, in which case the user will be required to correct theinterference at his/her own expense.191
Section 13: SpecificationsTHIS PAGE WASINTENTIONALLY LEFT BLANK192
Section 14: Upgrading theOperational FirmwareIn This Section‣ Upgrading Your Firmware‣ Installing New Firmware Onto Your Computer‣ Transferring New Firmware From Your Computer To Your <strong>Laser</strong> System‣ Upgrading The <strong>Epilog</strong> Dashboard print driver‣ Converting Old .Dat Files To Be Compatible With A New Driver Version:Upgrading Your FirmwareYour laser system is capable of having its operational firmware upgraded. Thefirmware is the command software in your laser system that controls how yourlaser system operates (think of firmware as the “brains” of your system). Afirmware upgrade reprograms your laser system to take advantage of newcapabilities or enhancements to the system.To accomplish the reprogramming, you just “Print” a special file to your lasersystem. The process is explained below.Upgrading your laser is a two-step process:1. Download the new firmware to your computer and extract (also known asUnzipping or decompressing) it.2. Transfer the new firmware from your computer to your laser.193
Section 14: Upgrading the OperationalFirmwareInstalling New Firmware onto YourComputerFirmware upgrades are available at any time by downloading the firmware filefrom the <strong>Epilog</strong> web site - www.epiloglaser.com under the Technical Support tab.Or, you can contact <strong>Epilog</strong> Technical Support and they can e-mail the appropriatefile to you. (You can also join our Driver Notification mailing list to beautomatically notified when new versions of firmware or the driver becomeavailable!). The firmware version that your system is currently running isdisplayed on the LCD panel when you first power up your laser system – it willread Version 1_0_X_X.Downloading – From the <strong>Epilog</strong> web site download the new firmware and save.Normally, the default Save location is onto your Desktop folder. Use a thumbdrive, flash drive or other portable media to move the downloaded file from onecomputer to another if you need to.When you download the firmware it comes as a compressed file in the followingformat: fibermark_1_0_X_X.exe. The X’s designate the actual version of thefirmware. Once this file is on the computer that is attached to your laser you willneed to extract (Unzip or decompress) it so it’s in a format that can be transferredto the laser.Extracting – When you download the firmware file from our web site onto yourcomputer it will normally be saved to your Desktop. When it downloads it will create anicon on your Desktop named fibermark1_0_0_X_X.exe. Double click on the icon toextract it. After double clicking on the icon the following window will appear:194
Section 14: Upgrading the OperationalFirmwareAt this time it’s important toknow which folder you areunzipping this file to.If you are unsure, use theBrowse button to select afolder where you know youcan retrieve this file later.Click on the Unzip button.The following message appears after the file is Unzipped:Click the Okay button.Once the file is extracted it changes from an .exe format to a .hex format that willbe named fibermark1_0_X_X.hex, (again, the actual number will changedepending on revision level). It is the .hex format file that you will use to upgradeyour laser.Keep track of the folder where you saved the extracted .hex file. You will needto access this file again in the next step.195
Section 14: Upgrading the OperationalFirmwareTransferring New Firmware fromYour Computer to Your <strong>Laser</strong>Use the following procedure to transfer the fibermark.hex file to the laser:Create a simple drawing in your graphics package. For this example, we’ve typed in thetext “Firmware Upgrade”.The next step is to Print, select the Dashboard driver, and click on Properties.196
Section 14: Upgrading the OperationalFirmwareGo to the Advanced tab,check the UpdateFirmware box and thenclick on the Load button.Go to the folder thatcontains the unzipped.hex file, select it andthen click Open.197
Section 14: Upgrading the OperationalFirmwareThe .hex file will show inthe Update Firmware Filebox.Click Okay.Click Print.At this point, the .hex file will begin transfering to your laser. The laser knows that it isbeing upgraded and the graphic that you created will not print, nor will it show up as aJob. Instead, you will see the following messages on the LCD panel on the laser:“Receiving Data”“Erasing Flash”“Programing Flash”“Finished – Reboot!”The programing process takes about two minutes to complete.198
Section 14: Upgrading the OperationalFirmwareDO NOT DISTURB THE LASER DURING THE UPGRADE PROCESS!!!After you have rebooted your laser, the process is complete and you will see the newversion number of firmware on your LCD as the laser powers up.Close your Corel page and you are ready for you next job!199
Section 14: Upgrading the OperationalFirmwareTHIS PAGE WASINTENTIONALLY LEFT BLANK200
APPENDIX AWARRANTYSTATEMENT<strong>Epilog</strong> Corporation warrants to the original purchaser of <strong>Epilog</strong> Model 8000 that this product will be freefrom defects in material or workmanship when purchased, and under proper, normal use within one (1)year from the original date of purchase.<strong>Epilog</strong> will replace or, at its option, repair the defective part(s). Normally, <strong>Epilog</strong> will supply areplacement part for the customer to replace. Once the replacement has been performed, the replaced partmust be returned to <strong>Epilog</strong>. In the case where repair is required, <strong>Epilog</strong> requires that the defective part, ormachine, be returned to the <strong>Epilog</strong> factory or other <strong>Epilog</strong> designated facility. <strong>Epilog</strong> will be responsiblesolely for the cost of repairs, including parts and labor, which are made at an authorized <strong>Epilog</strong> facility.All other costs for replacement or repair, including, but not limited to, packaging and shipping both to andfrom <strong>Epilog</strong>, shall be paid by the owner. A “Core” charge may be required by <strong>Epilog</strong> to insure the returnof replacement and repair parts. This warranty excludes any damage from abuse (including, withoutlimitation, incorrect voltages, power surges, fires, improper or insufficient ventilation “acts of God” orother situations out of the control of <strong>Epilog</strong>), failure to operate in accordance with instructions provided inthe Owner’s Manuals for the <strong>Epilog</strong> models 8000, including specific safety and operational warningscontained therein, cosmetic damage sustained in use, and damage caused by unauthorized modificationsof any equipment. All warranties to original purchasers are non-transferable. The registered owner mustinitiate warranty claims within the warranty period.THE ABOVE AND <strong>FOR</strong>EGOING IS THE ONLY WARRANTY OF ANY KIND, EITHEREXPRESS OR IMPLIED; INCLUDING BUT NOT LIMITED TO ANY WARRANTIES OFMERCHANTABILITY AND FITNESS <strong>FOR</strong> A PARTICULAR PURPOSE, THAT ARE MADEBY <strong>EPILOG</strong> ON MODEL 8000. ANY WARRANTIES IMPLIED BY LAW ARE HEREBYEXPRESSLY DISCLAIMED. No oral or written information or advice given by <strong>Epilog</strong>, its dealers, itsdistributors, agents, officers, or employees shall create a warranty or in any way increase the scope of thiswarranty. Neither <strong>Epilog</strong> nor anyone else who has been involved in the creation, production, or deliveryof the <strong>Epilog</strong> Model 8000 shall be liable for any direct, indirect, consequential, or incidental damages,including but not limited to damages for loss of business profits, business interruption, loss of businessinformation, adverse health impacts, fire, and the like, arising out of the use or inability to use theseproducts.<strong>Epilog</strong> Corporation provides no warranties whatsoever on any software used in connection with <strong>Epilog</strong>Model 8000.201
THIS PAGE WASINTENTIONALLY LEFT BLANK202
APPENDIX B:PRINTING FROMAUTOCADIn This Section‣ Printing from AutoCADThe following include general instructions on Printing from AutoCAD Software.AutoCAD is a very powerful software tool that is often used in conjunction withthe laser for vectoring applications. AutoCAD versions 2004 to the present arecompatible with <strong>Epilog</strong> systems. Older versions are also compatible but useslightly different printing conventions that may or may not affect your output.Printing/PlottingSending jobs from AutoCAD is heavily dependent on the print settings in theAutoCAD print window. Previewing your image before sending it to the laser isvery helpful in preventing print problems.AutoCAD is capable of producing extremely complicated drawings with manylayers, colors, etc. Since there is no limit to the level of complexity that anAutoCAD drawing can achieve, users should keep in mind that the laser is a 2Dmarking machine that usually marks a single piece of material in any given job.While your laser system is capable of handling complex drawings, users may findthat eliminating extraneous detail before “Printing/Plotting” may make their laserequipment more productive.203
Appendix B Printing from AutoCADHelpful HintsWhen creating artwork in AutoCAD, the first thing you need to do is set upyour AutoCAD page so that it is square. This prevents theobjects from rotating 90 degrees when you print them. The page in the examplebelow is set to 24 x 24 inches 610 x 610 mm).Place all of your objects in the upper portion of the AutoCAD page (seeillustration below). Objects that are in the lower half of the page will not beprocessed.204
Appendix B Printing from AutoCADSet the Piece Size so that it is square; just like your Page Size in your AutoCADfile.In AutoCAD, set the pen colorsthat you are using to .001 inch.The AutoCAD default for all pensis .010 and a line weight this largedisables vectoring. If the lineweight is not changed to .001 inch,vectoring will not be possible.When the laser receives a jobwhere the line weights are toolarge, the laser system will justbeep when you attempt to run thejob.205
Appendix B Printing from AutoCADOther useful settings in the AutoCAD print window are:Set the page orientation to Portrait.Set Plot area to Limits.Set Plot Scale to 1:1.Pen Sizes should be .001 inch (0.0254 mm) for vector marking.206
APPENDIX CWindows VISTA - DriverInstallation InstructionsIn This Section‣ Windows Vista driver installation for USB connection‣ Windows Vista driver installation for Ethernet connectionWindows Vista DashboardDriver Installation for USBConnectionThere are a couple of different ways to install the Dashboard print driver whenusing the USB connection, but we have found the following sequence is very easyfor users who are installing a print driver for the first time.Please read through all of the first five steps before starting the installationprocess. This is a very easy installation, but it is dependent on following eachstep in the given order.1. Turn off your laser system (keep your computer powered on).2. Insert the <strong>Epilog</strong> driver disk into your CD or DVD drive on your computer.The following window will appear:207
Appendix C Windows Vista InstructionsClick on Run driver_interface.exe3. The Dashboard welcome screen will appear, but we want to close it.4. Connect the USB cable to both your system and your computer. The USBcable is provided in the Accessories Kit that came with your machine.5. Turn your laser system on. After a few moments the following window willappear, and you can now proceed with installing the Dashboard.208
Appendix C Windows Vista InstructionsClick on “Locate andinstall driver software(recommended)”The next window toappear will ask you forpermission to continue.Click on the Continuebutton for thefollowing screen:Since the driver diskwas inserted at thebeginning of thisprocedure you can justclick on the Nextbutton to continue.209
Appendix C Windows Vista InstructionsClick on Install thisdriver software anyway.The driver will now beinstalled by Windows.There will be a windowwith a gas gauge showinginstallation progress.When it disappears, clickon the close button.When you close this screen you’ve finished installing the driver!You can now print to your new laser!210
Appendix C Windows Vista InstructionsWindows Vista Dashboard driverinstallation for Ethernet connection(Skip this part if you are using a USB cable described in the previous section.)There are three easy steps involved in setting up the laser and computer system tooperate through an Ethernet connection:1. Setting the Ethernet IP Address on the laser.2. Setting up the TCP/IP Address in the computer.3. Dashboard Driver InstallationNote: The following instructions work only for a direct connection from thecomputer to the <strong>Epilog</strong> laser using a Crossover cable. This procedure does notwork with a hub or a server. For Ethernet connections that require a hub, server,or multiple machines/computers, please consult with your network administrator.Hardware Requirements‣ A 10Base-T or 10/100Base T Ethernet network card installed in yourcomputer. All brand name computers that have been built in the last coupleof years should have come standard with an Ethernet card installed.‣ A crossover cable connecting your computer to the laser (included in youraccessories kit).Please Note! - The crossover cable looks almost exactly like a standard straightthroughnetwork cable, but they have different purposes for making networkconnections. Normally, the crossover cable should only be used when connectingthe <strong>Epilog</strong> laser directly to your computer. Ask your network administrator forassistance if you are unsure of which type of cable you have. It is a good idea toplace a tag or label on the cable indicating if it is a crossover cable or standard(CAT5) straight-through cable.211
Appendix C Windows Vista InstructionsStep 1: Setting the Ethernet IP Address onthe <strong>Laser</strong>In order to set up the laser system with the appropriate IP Address, you will needto set-up the laser through a sequence of steps that are described below.Although it may seem intimidating if this is your first experience setting upEthernet connections, it’s really quite simple to accomplish. If you haveproblems, don’t panic! You cannot do anything wrong that starting over will notfix!There are three network protocols that will need to be set. They are set in thefollowing order.1. IP ADDRESS2. SUBNET MASK3. GATEWAYYou will use the <strong>FiberMark</strong> control panel to set these three protocols. The maincontrol panel on the laser systems is used for all of the common laser functions asexplained in later sections of this manual, and it is also used to program some ofthe setup functions of the laser system including the IP ADDRESS, SUBNETMASK, and the GATEWAY. In order to program these setup functions we haveassigned a set of numbers to the keys on the control panel. The followingdiagram shows which control panel keys are associated with each number neededto set the network protocols.212
Appendix C Windows Vista InstructionsIP ADDRESS1. To set the IP Address press the GO and POINTER buttons simultaneously.You will see “FUNCTIONS MENU” displayed on the control panel LCDscreen.2. Next, press the GO button. - “SERIAL #” will appear on the screen. Thisis a factory set number and corresponds to the serial number of the lasersystem. You should not change this serial number.3. Press the GO button again. – “IP ADDRESS” will appear on the screen.4. Press the GO button again. - The factory set IP address will appear on thescreen. It will look something like this: “192.168.003.004”, with a flashingbox over the 1 in 192.Note – This procedure uses 192.168.003.004 as the sample IP Address.Machines leaving the <strong>Epilog</strong> factory have this IP Address preset so you do nothave to change anything unless you want to use a different address.5. If you want to change the IP Address, please follow these instructions:a) If you want to change the 1 in 192 to any other number, simply pressthe key for that number. For example, if you want to change the 1 (in192) to a 4, press the Down cursor key. After pressing the Downcursor key the 1 will change to a 4. When a number key is pressed,the flashing box will automatically shift right to the next number inthat three number group.b) At this point, press the appropriate key for the second number (if youwant to keep the 9 a 9, you must press the Config key).213
Appendix C Windows Vista Instructionsc) Finally, press the appropriate key for the third number.d) After pressing the key for the third number the flashing box will goback to the first number – it WILL NOT shift to the next set of threenumerals. If you want to move to the next group of three numberssimply press the GO button. Pressing GO will cause the flashing boxto shift right to the next three number group. Repeat this process tochange any of the numbers.Note – There is no way to simply scroll through the IP Addressnumbers and skip over single numbers you do not want to change.You can skip groups of three by pressing GO, but skipping singlenumbers cannot be done. There is also no way to move the cursor(flashing box) backwards. The cursor scrolls through each threenumber group continuously until you press the GO button, where itwill then go to the next three number groups. The following exampleshows you how to change the number 196 to 195. When you startwith the flashing box over the 1, press the SPEED button (this keepsthe 1 a 1 and allows you to move to the next numeral). The flashingbox will shift to the 9, where you will press the “Config” button (itwill stay a 9 and the flashing box will shift right to the 6). Lastly, wewant to change the 6 to a 5. Press the “Focus” button. This willchange the 6 to a 5 (it will also move the flashing box back to the 1where you first started). If you now have the number you want to keep(195) and you are ready to move to the next three numeral set, pressingthe GO button will get you there.e) Repeat this process for all of the number groups to get the IP Addressyou need.6. After all the IP address numbers have either been changed or verified as theones you need, press GO again – this will bring the SUBNET MASKscreen.Subnet MaskPress GO again to see the SUBNET MASK settings. Use the same process ofnumber selection using the keypads to select the appropriate number for theSUBNET MASK.Note: If you are using the cross-over cable provided by <strong>Epilog</strong>, you can set the“SUBNET MASK” to one of two configurations:214
Appendix C Windows Vista Instructions1) “255.255.0.0”2) “255.255.255.0”There is no difference between these settings for our application. Because we setthe Subnet Mask at the factory, most users leave it as it is and just press “GO”four times to scroll through this settings without making any changes. After youhave set the “SUBNET MASK”, Press GO again.GATEWAYYou will now see “GATEWAY”, Press GO again.The GATEWAY setting can be set using the same process of number selectionusing the key pads to select the appropriate numbers for “GATEWAY”.Note: The GATEWAY address is not important if you are using the providedcross over cable. Press “Go” four times to scroll through this setting.If you are running your laser through a network, you will need to set the laserGATEWAY numbers to correspond to your network.At the end of the process to establish your IP Address, the laser will prompt youto either SAVE or NO (Not Save) the numbers you have applied. The Screen willlook like: Save – GO, No- STOPPress the GO button to save the changes you made to the network settings. Pressthe STOP button if you do not want to save the changes and you want to return tothe factory default.If at any time in the programming process you want to stop or restart, press theSTOP button. This will take you out of the programming functions. If you wantto restart the programming process, simultaneously press GO and POINTER toget back to the start of the Function Menu.215
Appendix C Windows Vista InstructionsStep 2) – Setting up the TCP/IP Address inthe ComputerOnce you have set the IP Address at the laser, you will need to set the TCP/IPaddress on your PC.Note: There are several different versions of Windows Vista and the Start screendiffers from one version to another. Due to the differences, finding the LocalArea Connection Properties will vary slightly from one version to the next.1. From the start menu at the bottom left corner of your PC monitor, selectStart|Settings|ControlPanelOr…If your Start menu looks like this, click onControl Panel.216
Appendix C Windows Vista Instructions2. On the left side of the Control Panel, click Classic View then click Networkand Sharing Center3. On the left side of the screen, click on Manage network connections.217
Appendix C Windows Vista InstructionsRight mouse click on Local AreaConnection,and then click PropertiesNote: After clicking on Properties, Vista will prompt: Windows needs yourpermission to continue (for security purposes). Click Continue to accept.From the list of protocols,highlight Internet ProtocolVersion 4 (TCP/IPv4).Then click on Properties218
Appendix C Windows Vista InstructionsWindows Vista has incorporated the new Internet Protocol called IPv6 in additionto the traditional IPv4 which is what most PCs will use. IPv6 will eventuallyreplace IPv4 but both will be available for years to come. For our purpose, IPv4 isthe standard.Select Use the following IPaddress:Type in the following (leaveeverything else blank on thisscreen)IP Address: 192.168.3.3Subnet mask: 255.255.255.0Default gateway: Leave blankThis number is not an error;the last digit of the IP addressin this window only, must bedifferent than the IP addressset in the<strong>Epilog</strong> EXT.Click the OK button in this window and then click on the close button in the nextwindow.That’s it! The IP Address in your computer is set. Your computer will be able totalk to your laser after you install the print driver (which is the next step).219
Appendix C Windows Vista InstructionsStep 3) – Dashboard Driver InstallationInsert the <strong>Epilog</strong> <strong>Laser</strong> CD into your computer’s CD player. It should Auto-Startand the window below should appear. (If the AutoRun feature does not bring upthe following screen refer to the Installing the Dashboard Print Driver when theAutoRun Feature Does Not Activate section of this Appendix C).Click on Run driver_interface.exeClick on the <strong>FiberMark</strong> Driverbutton.220
Appendix C Windows Vista InstructionsThe following screen will appear. Click on the Unzip button.Click on OK to proceed.Click on Add a localprinter.221
Appendix C Windows Vista InstructionsSelect Create a newport:In the drop downmenu, selectStandard TCP/IPPort.Click Next> tocontinueFor Device Type:select TCP/IPDevice,Type in 192.168.3.4for the Hostname orIP address.Click Next tocontinue.Enter the same IP address that you set in the laser control panel (Step 1 in thisprocedure). It is important that the IP address you use is the same in both places.The format of the numbers looks a little different. In the control panel of the laserthe IP address will look like this: 192.168.003.004. When you enter the IP addressin this window, you do not need the zeros, and the address will look like this:192.168.3.4222
Appendix C Windows Vista InstructionsUnder Device Type,select Custom,and then click onSettings.Click Next> tocontinue.Set the Protocol toLPR. This is a veryimportant step. Yourdownload time will begreatly increased ifLPR is not selected.Type Legend in theQueue Name box. Thenclick OK.223
Appendix C Windows Vista InstructionsClicking OK in the previousscreen brings you back to theAdditional Port InformationRequired screen.Click Next to continue.Click Have Disk…ClickBrowse…224
Appendix C Windows Vista InstructionsThe following window should appear.Highlight <strong>Epilog</strong>Win32Fiber.inf and then click Open to continue.225
Appendix C Windows Vista InstructionsClick OK.Select Fiber <strong>Laser</strong> Win32.Click Next> to continue.If you are upgrading from an older <strong>Epilog</strong> driver, you may have several choices inthis window. Be sure to select <strong>Epilog</strong> Engraver Win32.226
Appendix C Windows Vista InstructionsName your printerand determine if youwant the laser to bethe default printer.Click Next> tocontinue.Do not print a test page.Click on FinishThat’s it! You’re now ready to print to your new <strong>Epilog</strong> laser system!227
Appendix C Windows Vista InstructionsInstalling the Dashboard Driverwhen the AutoRun Feature Does NotStart when using Windows XP or2000If you inserted the <strong>Epilog</strong> CD driver disk and it did not start automatically, youcan install the Dashboard manually. The manual process is almost the same asthe AutoRun process. The following instructions help get you started and thenrefer you back to the instructions earlier in the manual.Click the Start button at the lower lefthandcorner of your PC Screen.Click Printer and FaxesIf Printers and Faxes is not displayed onyour screen, go to Control Panel andclick on the Printers and Faxes iconthere.228
Appendix C Windows Vista InstructionsClick Add aPrinterClick NextAt this point you can follow the instructions earlier in the manual. Follow thescreen prompts and navigate to the <strong>Epilog</strong> CD ROM where the files for the driver229
Appendix C Windows Vista Instructionsare located. If you have any trouble, <strong>Epilog</strong> Technical support is available at 303-215- 9171.Installing the Dashboard driverwhen the AutoRun feature Does NotStart when using Windows VistaIf you inserted the <strong>Epilog</strong> CD driver disk and it did not start automatically, youcan install the Dashboard manually. The manual process is almost the same asthe AutoRun process. The following instructions help get you started and thenrefer you back to the instructions earlier in the manual.From the start menu atthe bottom left cornerof your PC monitor,select Start| Settings|Control PanelOr…If your Start menu looks like this, click onControl Panel.230
Appendix C Windows Vista InstructionsClick on thePrinters icon .Click on Add aPrinterAfter clicking on Add a Printer you can follow the instructions earlier in themanual. Follow the screen prompts and navigate to the <strong>Epilog</strong> CD ROM wherethe files for the driver are located. If you have any trouble, <strong>Epilog</strong> Technicalsupport is available at 303-215- 9171.231
THIS PAGE WASINTENTIONALLY LEFT BLANK232
INDEX221 CFR 1040 · 3, 8, 9AAccessories Kit · 56, 208Acrylic · 168, 169, 170, 171Air-cooled <strong>Laser</strong> Tubes · 19Ambient Air Temperature · 19Anodized Aluminum · 168, 169, 170, 171ANSI · 4, 5Aperture Safety Label · 11Auto Focus · 187Auto Focus Adjustment · 126BBearings · 187Blower · 17CCalibration SettingsAuto Focus Adjustment · 126Calibration · 14, 172, 173, 174, 182, 184<strong>Laser</strong> Match · 173Stamp Match · 173Center Engraving Option · 76Center-Center · 77, 78, 79, 81, 82, 83, 84Left-Center · 85Top-Center · 85Center-Center · 77, 78, 79, 81, 82, 83, 84Cerdec · 168, 169, 170, 171Certification/Identification Label · 9, 10, 181Cleaning · 172, 175Color Mapping · 63, 64, 98, 99, 100, 101, 103, 104, 105,106, 107, 108, 109Compatibility · 188Control PanelData Light · 119JOB Key · 123Power Key · 121Reset Key · 119Set Home Key · 122Speed Key · 120Stop Key · 119X/Y Off Key · 122Control Panel Command KeysENTER/GO · 119Reset · 81RESET · 119, 123Control Panel KeysData · 119Focus · 124, 127Pointer · 34, 36, 127, 213, 215Power · 121Set Home · 81, 122, 123Speed · 120, 214Xy Off · 81XY OFF · 122Cooling · 15, 19, 184Coreldraw · 81, 188, 191CorelDraw · vii, 51, 52, 63, 74, 118, 127, 142Crossover Cable · 23DDashboard · 23, 24, 32, 63, 64, 77, 84, 91, 99, 103, 104,107, 108, 113, 188, 196, 207, 208, 211, 220, 228, 230Advanced Tab · 63Color Mapping · 63, 64, 98, 99, 100, 101, 103, 104,105, 106, 107, 108, 109Configurations · 108Dithering · 91, 92, 93Floyd Steinberg · 91Jarvis · 91, 93Low Res · 91, 93Stucki · 91, 92, 93Frequency · 69, 98, 100General Tab · 63, 103, 108Photograph ModeFloyd Steinberg · 91Jarvis · 91, 93Stucki · 91, 92, 93Piece Size · 109, 205Resolution · 67, 69Upgrade Firmware · 113Vector Settings · 105, 108Vector Sorting · 97Windows Xp/2000 · 23Data Light · 119Data Port ConnectionsEthernet 10BaseT · 22233
IndexEthernet Port · ix, 15, 21, 22, 23, 32, 33, 38, 39, 187,207, 211, 212Usb Port · 23, 24, 207, 208, 211USB Port · ix, 15, 21, 22, 26, 32, 187Defeatably-interlocked Protective Housing Safety Label ·10Dithering · 91, 92, 93Do Not · 199Door Interlocks · 4, 132Dpi · 92, 93DPI · 63, 71, 72, 73EElectrical · 3, 5, 11, 15, 18, 187Electrical Safety Label · 11<strong>Epilog</strong> CD-ROM · 45Ethernet · ix, 15, 21, 22, 23, 32, 33, 38, 39, 187, 207, 211,212Ethernet 10BaseT · 22Ethernet Network Port · 22Exhaust · 16, 127, 183Exhaust System · 15, 16, 17, 177, 183Blower · 17Explanatory Label · 10IIntegrated Vacuum Table · 56, 129Ip Address · 34, 211, 212, 213, 214, 216, 219IP Address · 32, 33, 34, 35, 38, 42JJarvis · 91, 93Jigs · 56JOB · 123JOB Button · 123KKeyboardFocus · 51, 56, 58, 124, 125, 126, 128, 144, 187Go · 34, 117, 118, 174Red Dot Pointer Indicator · 34, 123, 127, 132, 133, 134,187Reset · 58, 125Stop · 58, 124, 174Keyboard Commands · 117FFederal Performance Standards for Light-Emitting Products· 3Fire Safety Label · 11Fire Warning · ixFirmware · 113, 193, 194, 196Floyd Steinberg · 91Focus · 51, 56, 58, 124, 125, 126, 128, 144, 187Auto Focus · 187Auto Focus Adjustment · 126Manual · 51Frequency · 69, 98, 100GGo Button · 119Go Key · 34, 84, 116, 117, 118, 174HHome Position · 55, 76, 81, 82, 84, 120, 173LLabelsAperture Safety Label · 11Certification/Identification Label · 9, 10, 181Defeatably-interlocked Protective Housing Safety Label· 10Electrical Safety Label · 11Explanatory Label · 10Fire Safety Label · 11Non-interlocked Protective Housing Safety Labels · 10Warning Label · 10<strong>Laser</strong> Diode Pointer · 4, 8, 133<strong>Laser</strong> Institute of America · 5<strong>Laser</strong> Match · 173<strong>Laser</strong> Tube · 172, 178LCD Display Panel · 52LCD Service Menu<strong>Laser</strong> Match · 173Left-Center · 85Lpr · 223LPR · 43MMaintenanceCleaning Your Machine · 14Manual Focus · 56, 58, 125234
IndexDashboard Print Driver Mapping · 100, 105MaterialsAcrylic · 168, 169, 170, 171Anodized Aluminum · 168, 169, 170, 171PVC · 13, 16Stainless Steel · 168, 169, 170, 171Wood · 111Raster Settings · 88Resolution · 71, 72, 128, 187Vector Settings · 94Windows 95/98 · 32Windows XP/2000 · 187Protocol · 37, 43, 218, 219, 223PVC · 13, 16NNetwork · 21, 22, 37, 189, 191, 217Gateway Address · 38Ip Address · 34, 211, 212, 213, 214, 216, 219IP Address · 32, 33, 34, 35, 38, 42Queue Name · 223Subnet Mask · 38, 214Network ConnectionsCrossover Cable · 23Network Port · 22Non-interlocked Protective Housing Safety Labels · 10OOptics · 175OptionsAir Assist · 129, 187Auto Focus · 187Rotary · 129, 130, 135, 137, 139, 144, 155, 156, 173OSHA · 4PP9ower · 162Photograph ModeFloyd Steinberg · 91Jarvis · 91, 93Stucki · 91, 92, 93Photos · 67, 69, 92, 93Pointer · 4, 8, 34, 81, 84, 123, 127, 129, 132, 133, 134, 187,214Power · 15, 18, 51, 63, 67, 69, 72, 88, 89, 94, 98, 100, 103,105, 107, 109, 121, 126, 128, 159, 160, 162, 182, 184,187Power Button · 121Print Driver · vii, 23, 32, 39, 51, 54, 56, 63, 65, 114, 116,220Advanced Tab · 108Dashboard · 23, 24, 32, 63, 64, 77, 84, 91, 99, 103, 104,107, 108, 113, 188, 196, 207, 208, 211, 220, 228,230General Tab · 66Legend Engraver · 23, 29Piece Size · 56, 63, 74, 184Print Quality · 63RRaster Engraving · 52, 75, 91Reboot · 198Red Dot Pointer · 4, 8, 81, 84, 127, 129, 132, 133, 134, 187Reset · 81RESET · 119, 123Reset Button · 119Reset Key · 58, 84, 125, 174Resolution · 67, 69, 71, 72, 128, 187Resolution Settings · 63, 71, 72, 73, 92, 93Rgb Color · 99RGB Color · 187Rotary · 129, 130, 135, 137, 139, 144, 155, 156, 173SSafety · 3, 4, 5, 6, 7, 8, 10, 11, 133, 150, 187ANSI · 4, 5DO NOT · 4, 5, 7, 132, 133, 199Dos · 13Electrical · 3, 5, 6, 11Federal Performance Standards for Light-EmittingProducts · 3Fire · 3, 7, 11Halon® fire extinguisher · 7NEVER · 13OSHA · 4Scanned Images · 52, 67, 69Scanner · 190Service · viiSET HOME button · 122Software · 189, 193, 203Coreldraw · 81, 188, 191Specifications · vii, 179, 187Speed · 51, 63, 67, 69, 72, 88, 90, 94, 97, 98, 100, 103,105, 107, 109, 120, 126, 128, 159, 162, 182, 187, 189Speed Button · 120Stainless Steel · 168, 169, 170, 171Stamp · 173Stamp Match · 173Standard FeaturesAir Assist · 129, 187Auto Focus · 187Auto Focus Adjustment · 126Integrated Vacuum Table · 56, 129Task Plate · 131Stop Button · 119235
IndexStop Key · 58, 124, 174Stucki · 91, 92, 93Subnet Mask · 38, 214TTable Size · 56, 74Task Plate · 131Tcp/Ip Port · 222TCP/IP Port · 41Technical SupportDirect Line · i, 181Online · iTop-Center · 85UUpgrade Firmware · 113Usb · 23, 24, 207, 208, 211USB · ix, 15, 21, 22, 26, 32, 187USB Port · 21, 22VVector Cutting · 54, 120, 121Vinyl · 13Vista · 23, 188, 191, 207, 211, 216, 218, 219, 230WWarning Label · 10WarningsDO NOT · 199Warranty · vii, 13, 19, 201WindowsVista · 23, 188, 191, 207, 211, 216, 218, 219, 230Windows 2000 · 4, 5, 21, 23, 187, 188, 191, 228Windows XP · 21, 23, 187, 188, 228Wood · 111XX/Y OFF Button · 122236