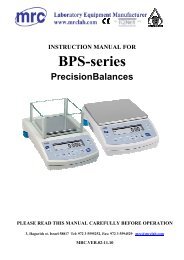
PL-600 - MRC LABS
PL-600 - MRC LABS
PL-600 - MRC LABS

You also want an ePaper? Increase the reach of your titles
YUMPU automatically turns print PDFs into web optimized ePapers that Google loves.
Content1. Introduction 42.Technical Data 43. Accessories and installations 54. LCD icon 55. Operation key 76. Measurement 86.1 PH measurement 86.2 mV measurement 96.3 Measurement ending point status setting 107. PH sensor calibration 108. Information storage, back display, clear & communication 128.1 Measurement information manual storage 128.2 Measurement information back display 138.3 Clear measurement information 138.4 RS232 communication 149. Setting of function parameters 149.1 Sensor calibration information(P1) 149.2 Date & time setting (P2) 1510. Self diagnostics information 1511. Maintenance 1612. Packing accessories 1713. Warranty period 18Appendix I PH linear error checking method 19- 2 -
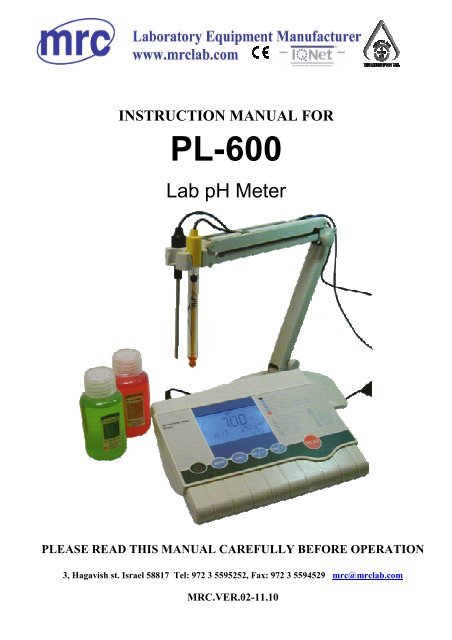
1. IntroductionWe thank you for having purchased <strong>PL</strong>-<strong>600</strong> lab pH meter。Before using the instrument, please note that the operationinstructions should be read carefully, which will help you to operate andmaintain the instrument, as well as to avoid trouble caused by unsuitableoperation and maintenance.<strong>PL</strong>-<strong>600</strong> pH meter employs leading edge technology with integratedmicroprocessor, which is suitable for pH and mV measurement in watersolutions for institutes, industrial labs and production fields.The information presented in this manual is subject to change withoutnotice as improvements are made.2.Technical data2.1 Instrument can be used under following condition:a. Ambiciant temperature:5~35℃;b. Relative humidity:≤85%;c. Power supply:DC9V power adapter;2.2 Main parameters2.2.1 Measurement arrangepH:0.00~14.00 pHmV:±2000 mVTemperature: -5.0~105.0℃2.2.2 Resolution:0.01pH、1mV、0.1℃2.2.3 Measurement precision:pH:≤0.01 pHmV:≤0.1% F.STemperature:≤0.5℃2.2.4 Input current:≤10 -12 A2.2.5 Input impedance:≥10 12 Ω2.2.6 Stability:≤0.01pH/3 hrs2.2.7 Temperature compensation range:0.0~100.0℃2.2.8 Storage capacity for measurement data:64 sets;- 3 -
2.2.9 Content of storage:number of measurement value、measurementvalue 、 temperature value 、 ATC or MTCstatus、measurement date、measurementtime2.2.10 pH buffer which are suitable for the instrument:standard PH buffer:PH4.00、PH7.00、PH10.012.2.11 Communication port:RS2322.2.12 Dimension of enclusre:200×160×65mm2.2.13 Weight:0.65 kg2.2.14 Power:≤5W3. Installation of accessoriesInstall the arm of the electrode holder on the base.Plug the pH combination electrode and DC9V power adaptor intorelative socket. As soon as you have connected the DC9V power adaptorto AC220V(or AC110V), the instrument is in hold mode.4. LCD icon12345678 9- 4 -
In above picture:Icon 1:RS232 communicationWhen this icon displays, the instrument has been connected with PC,the PS232 communication function is open automatically.Icon 2:Timing storage of the measurement value(only valid for type640) When this icon displays, the measurement value timing storagefunction is open, the instrument will store the measurement data accordingto set intervals.Icon 3:Sensor diagnostics 、 、After pH sensor calibration, the instrument will display sensorperformance::sensor is in good performance;:sensor performance is so so;:sensor is in bad performance, need to be changedIcon4:Measurement status icon 、 ::when display this icon, the measurement value is in stable status,but the instrument still goes on measurement.:when display this icon,the measurement value is in stablepoising status, the value will be kept(auto ending pointfunction)Icon 5:Error icon ErrThe instrument has self diagnostics function, when problems occursduring operation, the instrument will display relative tips for error signaland code, to remind you.Icon 6:Temperature measurement and pH temperature compensationstatus icon- 5 -
MTC icon:the temperature displays is manual entered, pH manualtemperature compensation.ATC icon:the temperature displays is actual measurement value, pHtemperature auto compensation.Icon 7:PH sensor calibration icon Cal1、Cal2、Cal3:IconIconCal1 icon:first point pH calibrationCal2 icon:second point pH calibrationCal3 icon:third point pH calibration8:PH sensor performance iconOffset icon:pH sensor zero point iconSlope icon:pH sensor slope icon9:Measurement data storage, back display icon5. Operation keyicon:measurement data storage iconicon:stored measurement data back displayThe instrument has 6 operation keys,as follows:ON/OFF: Power key. When switch off the instrument, but the poweradaptor has not plugged from the AC220V socket, the instrument is in holdmode.MODE: Function key. To be used to switch between measurementfunctions(pH measurement function/mV measurementfunction).Long key used to functional parameter setting.CAL:Calibration key. To be used to pH sensor calibration.M+/∧ : Storage key、manual temperature setting key( increase)、functional parameter setting key.After the measurement datameasurement information.getting stable, is used to store theDuring pH measurement and calibration, when sample temperature isunder MTC status, is used to setting the sample temperature manually.(increase)。- 6 -
Under the functional parameter setting condition, is used to modify thesetting of the functional parameter.RM/∨ : Back display key、manual temperature setting key(decrease)、functional parameter setting keyUnder measurement mode, short key(press the key 1.5s)to clear all stored measurement information.In pH measurement and calibration process,when the sampletemperature is under MTC mode, to set the sample temperaturemanually(decrease)。Under the functional parameter setting condition, is used to modify thesetting of the functional parameter.READ: Measurement key. This is a combination key. Press the key
Under pH measurement mode, immerse the sensor into the sampleafter rinsing with distilled water, shaking the vessel few minutes, if theinstrument has not been set to auto ending function, LCD will display“ ”icon if the measurement is stable,themeasurement value could be read. Inleft chart, the date is 1st March, time is 8o’clock 28,the sample temperature is25.0℃ , automatic temperaturecompensatio n ( ATC ), auto endingfunction , measurement value7.00pH,the electrode is in goodperformance.Under pH measurement mode, when press key, “MTC” iconflashes,to remind you the current pH temperature compensation mode, ismanual or automatic, as well as to confirm the sample temperaturedisplayed, then press < M+/∧>key、key to modify the sampletemperature, then press, key to confirm the entered temperaturevalue and measure.6.2 mV measurementUnder mV measurement mode, immerse the sensor into the sample afterrinsing with distilled water, shaking the vessel few minute, must press“READ” key(short key),when the LCDdisplay “ ”auto ending function icon,the instrumentwill block themeasurement value, the value cou ld beread. In left chart, the date is 1st March,time is 8 o’clock 28 , the sampletemperature is 25.0℃,automatic temperature compensation(ATC),autoending function,measurement value 1818mV.6.3 Set measurement ending point judgment statusThe instrument has 2 statuses of measurement ending pointjudgment(display“ ”or “ ”icon),under the measurement mode, (PH- 8 -
or mV measurement),press long key to change the status.When the measurement is in balance status, “ ”displays,theinstrument will keep this value, the measurement is end; when themeasurement is in stable status, “ ” displays,the measurement valuecould be recorded, and the measurement is continuing, according to thebalance stability, to be sure if display “ ” or not.7. pH sensor calibration1 point calibrationUnder the pH measurement mode,presskey,LCD displayed as leftchart,“Cal1”icon flashes,immerse theelectrode into the standard buffer afterrinsing with water, shake the vessel forfew minutes, wait for few seconds,presskey,the instrument willrecognize which buffer solution is it,display as well, wait the instrument judgepH sensor response to ending point,display as chart left, 1 point calibration isaccomplished the display shows below,“Cal2”flashes,the instrument remindsyou 1 point calibration is finished, do youwant to proceed 2 points calibration? Ifonly 1 point calibration needed, press“READ”to exit calibration process, switchto pH measurement mode. If the 2 pointscalibration is needed, the next chaptershould be followed by the operator.- 9 -
Remarks:After 1 point calibration, only the zero potential of thesensor is modified (Offset),the slope of the pH sensor is kept from lastcalibration. Even to those electrodes which have good performances,0.05pH measurement error could be reached during measurement.2 points calibrationAfter 1 point calibration, LCDdisplays as above chart (“Cal2”flashes),immerse the electrode into standardbuffer solution, shaking the vessel for fewminutes, wait for second, press“CA L”,theinstrument will recognize which buffersolution is it, display as well, wait the instrument judge pH sensorresponse to ending point, the instrument displays as above chart, 2 pointscalibration has been accomplished, automatically enter the pHmeasurement mode, the display shows below, “Cal3”flashes, theinstrument reminds you 1 pointcalibration is finished, do you want toproceed 3 points calibration? If only 2point calibration needed, press “READ”to exit calibration process, switch to pHmeasurement mode. If the 3 pointscalibration is needed, the next chapter should be followed by the operator.Remarks: After 2 points calibration, the instrument will modify theoffset and slope of the electrode。PH measurement under this kind ofcalibration status, the measurement precision is quite good.3 points calibrationAfter 2 point calibration, LCDdisplays as above chart (“Cal3”flashes),immerse the electrode into thirdstandard buffer solution(e.g. PH9.18Buffer), shaking the vessel for few- 10 -
minutes, wait for second, press“CA L”, the instrument will recognize whichbuffer solution is it, display as well, wait the instrument judge pH sensorresponse to ending point, the instrument displays as above chart, 3 pointscalibration has been accomplished, automatically enter the pHmeasurement mode, the sensor performance icon after calibration is alsodisplayed.After 3 pints calibration, the instrument has the best measurementprecision. Especially for broadly ranged pH measurement, themeasurement errors from unlinearity will also be modified.During pH calibration, “MTC” icon on LCD displays,to remind youcurrent temperature compensation method, is manually(MTC),andplease confirm the temperature of current sample, press < M+/∧>、key to moodily the temperature of the sample, then press key toconfirm the temperature imputed and start with pH sensor calibration.8. Measurement information store, back display, clear and RS232communication8.1 Store measurement information manuallyDuring PH or mV measurement, when the measurement value isstable,(display “ ”or “ ”icon),when the auto storage function of type640 meter is set to “Off”,press< M+/∧>key,store the current measurementvalue ( including measurement value number, measurement value,temperature value ( ATC or MTC status )、 measurement date,measurement time),LCD will display icon , together with measurementvalue store number in around 5 minutes, then back to last measurementstatus.(display date on the position of storage number display).8.2 Back display of measurement informationUnder measurement status (PH or mV measurement),press< RM/∨>short key,the instrument will back display of last stored measurementdata ( including measurement value number, measurement value,temperature value ( ATC or MTC status )、 measurement date,measurement time).- 11 -
In below chart, measurement value number is 88 , 7.00pH ,measurement time 8:28(display measurement date and measurementtime alternatively), sample temperatureis 25.0℃(ATC).Under the back display mode, theinstrument will pause operation of thetiming storage of the measurementinformation.(Only valid for type 640).8.3 Clear stored measurement informationWhen the instrument memory is full,will not store the measurementinformation; or the information stored isnot needed anymore, clear the memoryis needed. Under the measurementmode(PH or mV measurement),presslong key,LCD is displayed as left chart, iconflashes,toremind you clear the memory, if this operation is confirmed, then pressshort key to finish clearing of the memory; if this action is notneeded , press< READ>short key to abort, return to measurement mode.Remarks:The measurement information cleared will not be recovered!8.6 RS232 communicationAfter installed the communication software supplied by or companyon the PC, when connect PC and the instrument using the RS232communication cable, LCD will display RS232 communication iconshow that the instrument has been connected with PC.When the LCD displays RS232 communication icon,to,the manualsaving, auto saving, timing saving information (includes measurementvalue number, measurement value, temperature value (ATC or MTC),measurement time, measurement date) will be transferred through RS232port to PC. Otherwise, the manual saving, auto saving, timing savinginformation (includes measurement value number, measurement value,- 12 -
temperature value (ATC or MTC), measurement time, measurement date)will be stored in memory of the instrument.9. Functional parameter settingPress key longer than 1.5s, the instrument comes intofunctional parameter setting mode. Under this mode, operator could check,modify and set the relative information, parameter and function. Under thismode, using 、、 3 short keys to set the procedureparameter: short key is used to cycle choosing functionalparameter setting items, key、 key are used to modify theprocess functional status and parameters. Presslong key toprotect procedure setting item parameters and end procedure parametersetting status, back to formal status.9.1 Electrode calibration information(P1)Under this status, the operator could check the calibration information.Press long key to enter the program parameter setting status“P1”,the LCD displays as left chart. Press< M+/∧>short key to display zeropotential of the pH sensor(Offset)mV value、Slope value alternatively.Information displayed in left chart:the calibration date of PH sensor is 1 stof March ( display calibration date and calibration timealternatively);calibration method is 2 points calibration; temperature of thesolution is 25.0℃(ATC);PH sensor zero point (Offset)is 0.0mV.9.2 Date and time setting(P2)Factory setting of the instrument isaccording to current Beijing date andtime. Press key to choose thenumber to set, presskey tomodify the number. The instrument hasMarch, 2004, 8:28.set to 24 hours. The left chart is 1 st10. Self diagnostic information- 13 -
The instrument has self diagnostics function, during operation,relative information will be reminded by the instrument, to solve problemsduring usage:Err1: Electrode potential ≥2000mV。Please check if the instrument hasbeen connected with the sensor, the electrode has been hanged inair, or the electrode has damaged.Err2: Electrode potential≤-2000mV。Please check if the instrument hasbeen connected with the sensor, the electrode has been hanged inair, or the electrode has damaged.Err3: pH value>15.00pH。Please check if the instrument has beenconnected with the sensor, the electrode has been hanged in air, orthe electrode has damaged.Err4: pH value
good quality, then recalibrate the electrode. If the error still occurs,please change the electrode and calibrate the electrode.Err9:During 2 point/3point calibration, instrument judge 1point ( or 2 points)which used buffer solution are same ( or the electrode hasdamaged), the instrument will judge the reliable calibrationoperation and modify the relative electrode parameter. If thisoccurs, please recalibrate the pH electrode.11. Maintenance of the instrumentThe performance of the instrument, is not only rely on the selfconstruction of the instrument, but also on good maintenance. Especiallyfor pH meter, which high impedance is needed, and corrosive chemicalagents is sometimes contaminated, therefore, necessary maintenance is amustPlease, only when the instrument is power off, the plug of the adaptorcould be removed.Please keep the instrument away from directly sunshine, otherwisethe life time of the LCD will be shortened.The pH value of the sample solution should be between the pH buffersolutions you selected. If the temperature of the buffer solution duringcalibration is same as the temperature of the sample, the highestresolution will be reached by the instrument.Temperature compensation function in the instrument is onlyeffected to compensate the sample temperature changesaccording to pH sensor.The electrode plug should always keep high cleaning and dry. In orderto protect the electrode from broken, please do not contact the head of theelectrode with hard materials, since it is very thin. Please refer to theinstruction manual of the electrode for the storage, cleaning andmaintenance of the electrode. .Please do not contact the central part of the BNC electrode plug by- 15 -
hand or metal, the static electronic will destroy the electronic part of theinstrument and contaminate the input terminal of the electrode, decreasethe input impedance of the instrument.Please do not use agent to clean the enclosure of theinstrument. The enclosure of the instrument is ABS engineering plastics.11.Packing accessoriesOperation manual, QC certificate are included in the package of theinstrument, as well as accessories below,1. 1pcs of pH combination electrode;2. pH 4、7, buffer solution 1 bottle each;3. 1 set of electrode holder;4. 1pcs of DC9V power supply;13. Warranty periodThe warranty period of electronic components is 2 years from thedate of purchase, under the condition of normal storage, operation andtransportation, improper working of the instrument due to quality problems,the instrument will be repaired and the spare parts will be changed forcustomers with supplying of the sales invoice and product inspectioncertificate.- 16 -
Appendix 1 Checking method of pH linear errorInput 177.48mV(pH4.00 buffer solution electrode potential simulatevalue)、-178.07mV(pH10.01 buffer solution electrode potential simulatevalue) into the instrument,temperature compensation sent to 25℃,operate according to 2 points calibration;after calibration the instrumentdisplays “ ”signal.(if type 640 please set the buffer solution set tob1)Check the linear error of the instrument according to following table.mV 414.11 354.95 295.80 236.64 177.48 118.32 59.16 0pH 0.00 1.00 2.00 3.00 4.00 5.00 6.00 7.00mV -414.11 -354.95 -295.80 -236.64 -177.48 -118.32 -59.16pH 8.00 9.00 10.00 11.00 12.00 13.00 14.00- 17 -