ARB 4x4 ACCESSORIES - CARiD.com
ARB 4x4 ACCESSORIES - CARiD.com
ARB 4x4 ACCESSORIES - CARiD.com

You also want an ePaper? Increase the reach of your titles
YUMPU automatically turns print PDFs into web optimized ePapers that Google loves.
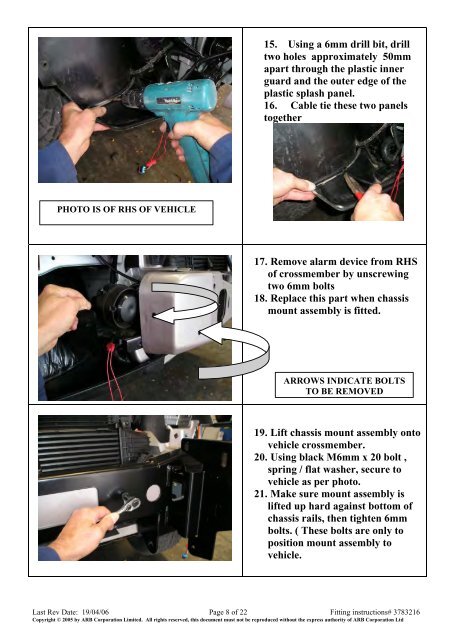
15. Using a 6mm drill bit, drilltwo holes approximately 50mmapart through the plastic innerguard and the outer edge of theplastic splash panel.16. Cable tie these two panelstogetherPHOTO IS OF RHS OF VEHICLE17. Remove alarm device from RHSof crossmember by unscrewingtwo 6mm bolts18. Replace this part when chassismount assembly is fitted.ARROWS INDICATE BOLTSTO BE REMOVED19. Lift chassis mount assembly ontovehicle crossmember.20. Using black M6mm x 20 bolt ,spring / flat washer, secure tovehicle as per photo.21. Make sure mount assembly islifted up hard against bottom ofchassis rails, then tighten 6mmbolts. ( These bolts are only toposition mount assembly tovehicle.Last Rev Date: 19/04/06 Page 8 of 22 Fitting instructions# 3783216Copyright © 2005 by <strong>ARB</strong> Corporation Limited. All rights reserved, this document must not be reproduced without the express authority of <strong>ARB</strong> Corporation Ltd