Create successful ePaper yourself
Turn your PDF publications into a flip-book with our unique Google optimized e-Paper software.
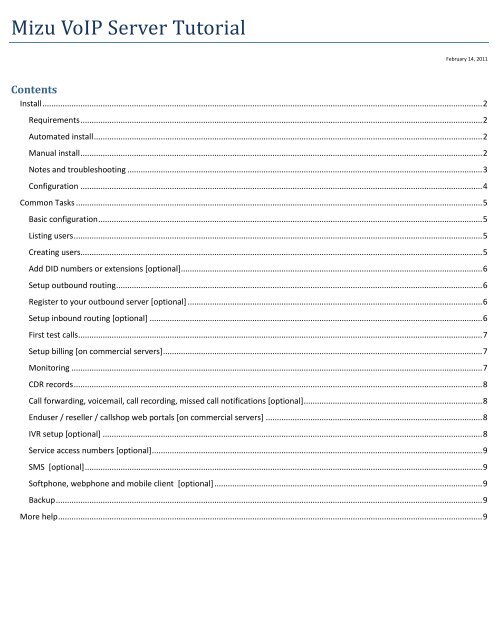
<strong>Mizu</strong> <strong>VoIP</strong> <strong>Server</strong> <strong>Tutorial</strong>February 14, 2011ContentsInstall ..................................................................................................................................................................................................... 2Requirements .................................................................................................................................................................................... 2Automated install .............................................................................................................................................................................. 2Manual install .................................................................................................................................................................................... 2Notes and troubleshooting ............................................................................................................................................................... 3Configuration .................................................................................................................................................................................... 4Common Tasks ...................................................................................................................................................................................... 5Basic configuration ............................................................................................................................................................................ 5Listing users ....................................................................................................................................................................................... 5Creating users.................................................................................................................................................................................... 5Add DID numbers or extensions [optional] ....................................................................................................................................... 6Setup outbound routing .................................................................................................................................................................... 6Register to your outbound server [optional] .................................................................................................................................... 6Setup inbound routing [optional] ..................................................................................................................................................... 6First test calls ..................................................................................................................................................................................... 7Setup billing [on commercial servers] ............................................................................................................................................... 7Monitoring ........................................................................................................................................................................................ 7CDR records ....................................................................................................................................................................................... 8Call forwarding, voicemail, call recording, missed call notifications [optional] ................................................................................ 8Enduser / reseller / callshop web portals [on commercial servers] ................................................................................................. 8IVR setup [optional] .......................................................................................................................................................................... 8Service access numbers [optional] .................................................................................................................................................... 9SMS [optional] .................................................................................................................................................................................. 9Softphone, webphone and mobile client [optional] ........................................................................................................................ 9Backup ............................................................................................................................................................................................... 9More help .............................................................................................................................................................................................. 9
<strong>Mizu</strong> <strong>VoIP</strong> <strong>Server</strong> is a Class4/5 softswitch application for the Microsoft Windows platforms.Modules: SIP stack, H323 gateway/gatekeeper, SIP-H323 protocol converter, access roles, routing (rule based, BRS or LCR),failowering, load balancing, quality routing, e-payment, billing, accounting, CDR records, blacklist/whitelist filtering, callcenter, IVR,HTTP service, call recording, conferencing, media server, alerting, statistics generation, watchdog, enduser web portal, clientapplications and others.InstallThe installation and first configuration tasks are usually handled by the <strong>Mizu</strong>tech support team however you are free to install the serveryourself based on this guide. If your server is already installed, then skip this and continue with the “Common Tasks” section.RequirementsThe <strong>Mizu</strong> <strong>VoIP</strong> server is a native application written in C++ with a big throughput that can scale well from old Pentium3 (testing or home usage) up to modernSMP systems with 32 processors (enterprise <strong>VoIP</strong> service providers)‣ OS: Windows <strong>Server</strong> 2003 or 2008 (Windows XP for home usage or testing)‣ Database: MS SQL Express 2005 or 2008 for less than 1000 simultaneous calls (included in the install package),full MSSQL (2000, 2005 or 2008) for more calls.‣ CPU: single core PIII for home, testing or small business usage, dual core cpu for less than 500 parallel call, quad core ormore for more than 1000 parallel call‣ RAM: minimum 500 MB RAM,1 GB RAM for less than 400 simultaneous calls, 4 GB RAM for more than 1000 simultaneouscalls‣ Disk: 128 GB HDD without voice recording and callcenter, 512 GB HDD for high load or if you have a long list of callcenterclients or need to use voice recording. Additional disks for big database load (for example one for temp database, another for the mserverdatabase and a third disk for the <strong>VoIP</strong> application server)‣ Network: ~1 Mbits for 200 parallel calls without RTP routing or 20 calls with routed RTP. Public static IP is preferable. Youmight also need a sub-domain (e.g. sip.yourcompany.com) for easier client software configuration.Typical recommended configuration for <strong>VoIP</strong> service providers: 2 server with quad core cpu, 4 GB RAM, 3x128 GB HDD. By using 2 servers you can separate theapplication server from the database server and also you will have a hot backup. App server and database clustering is also possible.Install process:‣ Follow the automated install procedures if you are not familiar with windows services and MS-SQL‣ Follow the manual install procedures in the following cases:o if you are familiar with MS-SQL and windows administrationo if custom installation needed (for production servers)o if you already have MS-SQL installed on the local server or LANo if the automatic install procedure failsAutomated install1. Download the server install package from the <strong>Mizu</strong>Tech webpage: http://www.mizuvoip.com/webinstaller/<strong>Mizu</strong><strong>VoIP</strong><strong>Server</strong>.exe.2. Launch the install wizard and follow the instructions.Manual install1. Hosting serverPrepare your server (set autoreboot on power failure, set /3GB or /PAE on 32bit systems with more than 4GB RAM, uninstall or disable anyunneeded service. No need for virus scanner on production servers!) Check the requirements above. For a test install any Windows PC is ok(2000,XP,Vista,Win7,<strong>Server</strong> 2003,2008). For production we recommend windows server 2003 or 2008. <strong>Mizu</strong>tech can also offer <strong>VoIP</strong> hosting. This isconvenient especially for smaller installations (below 500 simultaneous calls) to save on your hosting fee.2. <strong>Mizu</strong>-<strong>VoIP</strong> application serverDownload and install required software fromhttp://www.mizu-voip.com/webinstaller/<strong>Mizu</strong><strong>VoIP</strong><strong>Server</strong>NoSQL.exe
By executing the install package, all files are extracted in the install directory that you have specified.<strong>Mizu</strong> <strong>Server</strong> doesn’t copy anything to your system directory.The main executable (mserver.exe by default) is registered as a windows service (mserver.exe /install)3. MS-SQLInstall MS-SQL 2000, 2005 or 2008 if not already installed. Free download from here.You might choose a package that contains also the Management Studio tool for easy administration.While installing choose “Mixed mode SQL authentification”!TCP/IP access needs to be allowed. Use the “SQL <strong>Server</strong> Configuration Manager” tools shipped with the MS-SQL installpackage. Enable TCP/IP (enable separately for all interface that you might wish to use) and set the ports to 1433. You mightchange the default MS-SQL listen port to 2223 to filter out the most of the unauthorized login attempts.Make sure that the service startup type is set to automatic.4. DatabaseCreate a database in your SQL engine. You can use the “mserver” as its name but otherwise you can name it after yourchoice. Restore its content from dbtemplate.dbt (for example using the SQL Management Studio tool)To create the initial database you can also use the MDBSetup.exe application or you can create the initial database byrunning the scripts from mserverscript.sql.5. Firewall configurationWe recommend a local application firewall. The following executables have to be enabled:-MS-SQL main executable: C:\Program Files\Microsoft SQL <strong>Server</strong>\MSSQL10.MSSQLSERVER\MSSQL\Binn\sqlservr.exe-<strong>VoIP</strong> application server: C:\Program Files\<strong>Mizu</strong><strong>VoIP</strong><strong>Server</strong>\mserver.exe-Web portal template (optional): C:\Program Files\<strong>Mizu</strong><strong>VoIP</strong><strong>Server</strong>\<strong>Mizu</strong>WebService.exe-H323 server (optional): C:\Program Files\<strong>Mizu</strong><strong>VoIP</strong><strong>Server</strong>\atarongk.exe-SIP-H.323 converter (optional): C:\Program Files\<strong>Mizu</strong><strong>VoIP</strong><strong>Server</strong>\vsip.exe-Voice recording (optional): C:\Program Files\<strong>Mizu</strong><strong>VoIP</strong><strong>Server</strong>\mserverftp.exeFor a port based external firewall, the following ports should be enabled:-UDP: at least the SIP signaling and media ports (we recommend to enable all ports above-TCP: 21,22,80,443,5060, 1433,1720,1721, 2223, 8080,9885,9886,98896. <strong>VoIP</strong> serviceEdit the [database] section in mizuserver.ini configuration file (in the program directory near mserver.exe). Add the newlycreated database access here (ip, port, database name, username, password)Example:[database]location=127.0.0.1port=1433 (or 2223)name=mserverusername=sapassword= srEgtknj34fStart the <strong>Mizu</strong> <strong>VoIP</strong> service (start.bat or from Services)Check the log file if any startup error exists. (Open the last “log_xxx.dat” files near the mserver.exe with notepad orTotalCommander F3 or using the logviewer application from the Tools directory if you have installed it). Search for“CRITICAL”, “ERROR”, “catch” and “WARNIG” messages.7. License keyFor production usage you will have to get a license key from <strong>Mizu</strong>tech according to your licensing plan. Request yourlicense key from <strong>Mizu</strong>tech support (by default the server will run with a basic license which can be used for smallinstallations or tests)Notes and troubleshooting‣ You will need administrator rights for the install process‣ Make sure that the mserver.exe is allowed by your firewall. Also enable the mssql executable if you wish to use the admin client(<strong>Mizu</strong>Manage) remotely‣ .NET framework is needed for MS-SQL‣ You might have to enable App server roles (which will install .NET) if you are using Windows <strong>Server</strong> 2008‣ The service user (login as) needs full read and write access to the program files directory
‣ The automated install process will install an MS-SQL Express 2008 SP1 32 bit edition named MSSQL$MIZUThe default username for MS-SQL is “sa” and the default password is “srEgtknj34f”. You can change the sa password anytime later.For a production server it is recommended to setup a dedicated user with fine-tuned access rights instead of using the sa account.‣ If the installer fails then you might have to install the MS-SQL yourself then run the installer again‣ If the installer cannot install the ms-sql server automatically, then you can download and install it fromhttp://www.microsoft.com/express/sql/download/‣ The main <strong>VoIP</strong> service executable file is “mserver.exe”. This can be also installed manually with the /install command line switch andstarted/stopped using windows services management or the start.bat and stop.bat files.‣ Make sure that the <strong>VoIP</strong> service and the sql service startup type is set to automatic (otherwise they will not start automatically onserver restart)‣ If you get “object missing” or similar errors when you first open the <strong>Mizu</strong>Manage, make sure that the database structure was createdsuccessfully during setup. For this install the SQL management studio and check if you have tables under the mserver database. If not,then create the database if missing then open and run the mserverscript.sql file on the mizu database. This will create all tables andstored procedures needed. After this step you will have to run the Configuration wizard again (<strong>Mizu</strong> manage -> Tools menu -> <strong>Server</strong>setup)‣ Make sure that the sql service and the mserver service is running before to make any test calls‣ Check the log files if you have issues with the test calls (last *log.dat file)‣ All files required for the mizu voip server is also available from the ftp://mizu@mizu-voip.com/mizuvoipserverfiles‣ The NOD32 antivirus can trigger a false alert on some files. This is because the exe compression used. Set a rule to ignore theapplication directory.‣ Contact the <strong>Mizu</strong>tech support with a remote desktop access if you have any further issue with the installation and configuration.Use only the built-in remote desktop and not any third party tool like VNC or TeamViewer.Configuration<strong>Mizu</strong>ManageInstall and start the admin client software on the server or on any PC. It is part of the server install package or a separateinstall can be found at http://www.mizu-voip.com/Portals/0/Files/<strong>Mizu</strong>Management_Setup.exeLogin to <strong>Mizu</strong>Manage: App server: ip address of the server (database port followed after a comma if not using the default port) DB server: type “default” if you are running the sql server on the same server with the <strong>VoIP</strong> application server. Otherwise the IPaddress of the database server (database port followed after a comma if not using the default port) DB: database name (“mserver” by default) Username: database username (“sa” by default) Password: database password (“srEgtknj34f” by default)Example:App server: myserver (127.0.0.1,1433)DB server: defaultDB: mserverUsername: saPassword: srEgtknj34fBasic SettingsLaunch Tools -> <strong>Server</strong> setup -> Configuration wizard if not already started. Don’t change any setting that you don’t fully understand(leave default values) and click on Finish.After you have finished with the configuration wizard you might have to continue with the following tasks:- add your outbound routes and traffic senders: Access -> Users and devices -> Sip Proxy and Traffic Senders- add your outbound routes and traffic senders: Access -> Users and devices -> Sip Proxy and Traffic Senders, Routing- add users: Access -> Users and devices -> Power User, Enduser- fine-tune other settings: billing, blacklists, etcIf you are not sure where to find a specific configuration option, search for your keyword in the user guide and also in the“Configurations” form in the <strong>Mizu</strong>Manage application.
Common TasksAll administration and monitoring tasks can be done from the <strong>Mizu</strong>Manage remote administration client.Nearly all forms can be filtered with the followings:‣ Quick filter: found in the top-left side in <strong>Mizu</strong>Manage. For example type “44*” in the quick filter box then open the “CDRRecords” form and click “Load”. You should be able to see all calls to 44….. numbers. Or enter “test” and open the “Usersand devices” form. Click on the load button to see accounts containing the “test” word (in name, username, address, etc)‣ Direction filtering: accessible by double clicking on the space above the quick filter or from the Settings menu -> Setdirection. When you are doing operation which needs more precision (eg. billing), always use the Set Directions form andnot the quick filter.‣ Date-Time filter: found in the top-left side in the <strong>Mizu</strong>Manage. Useful to restrict statistics, reports and CDR listing intervals.To export data from the application, use File menu -> “Save As”. A more advanced export tool can be accessed from File menu ->“Export/Import”.From the “Edit” menu you can manipulate the selected dataset (grids, etc).Use the Tools menu -> “Connect to” items to easily access other directories. The items below the “<strong>Server</strong> Setups” section should beused only one time during the initial setup. Under the “Utilities” section you can find many tools to perform various operations likesend sms, play recorded voice, etc.The Tools menu -> “Settings” form is used for local MManage configuration only.Basic configurationFor the basic server configuration you should walk through the configuration wizard accessible from the Tools menu -> <strong>Server</strong>setup.For more advanced options you will have to change global config options manually on the “Configurations” form. (Under “Other”)Listing usersUsers can represent real people, devices or virtual endpoints.Open the “Users and Devices” form (below the “Access” section) and click on the “Load” button.You can apply various filtering using the user “Type” checkbox-list, the dropdown-list on the top of the form or the alreadydiscussed direction filter or quick filter.For example to list all outbound routes whose username or name contains the “carrier” word, select the “SIP <strong>Server</strong>” type and type“carrier” in the quick filter.Creating usersUsers can represent real people, devices or virtual endpoints.You can easily create new users in the <strong>Mizu</strong>Manage application by cloning existing ones with the same type.For this, launch the “Users and Devices” form, select a user type, and click on the “Load” button. Then select any user entry andclick on the “New User” button. You will be asked if you would like to create a new default user record or just clone the currentlyselected user. Usually you will select clone and just change the username, password, ip and authorization type for the new user.Endusers are the most commonly used type. It represents your customers. Usually you will select “Username/password”authorization for this type of users and enter a valid username and password. The username can be also used as a real phonenumber. Endusers can make voice or video calls between them usually for free of charge. IM and presence is also enabled bydefault. By default the server will route the RTP if needed (if users are behind NAT) or allow it to bypass your server saving yourbandwidth.Traffic sender users are used for receiving traffic from other SIP servers and carriers. The authorization type is usually set to “Authip must match” and you have to enter a correct “Auth Ip” (or a list of ip address separated by comma). If you don’t have specialrequirements, the only thing that you have to communicate to your peers to be able to send calls to your server is only your IPaddress. (Your server needs a public IP for this or you have to setup proper port forwarding)For outbound traffic you need a SIP <strong>Server</strong> user. The most important parameter here is the “IP” where the <strong>VoIP</strong> calls will be sent.
To be able to send and receive traffic to/from another SIP server or carrier you will have to add it as both a “traffic sender” and “sipserver” user.To import endusers from other data sources, use the Tools menu -> Import users items.Add DID numbers or extensions [optional]Unless in other traditional softswitch in the <strong>Mizu</strong><strong>VoIP</strong> server you can just add a new user with the “username” and “password”settings. Then the “username” field (which can be a phone number) will act as a SIP username for authentication but also as anextension number or a DID number. You can also use the same username/password to login on the enduser web-portal and in anyother operations requiring authentication.If one user has multiple DID number assigned, then you can add then using the “…” button near the “Other numbers” edit box(Users and devices form, Edit tab). If more user have to share the same DID number, then simply add it to the required users as“other number” with type 0. The call will be routed to the “best” device (based on the user status whether it is registered or in-call).Setup outbound routingThis is needed if you would like to route the calls from the users to another servers or carriers (for example calls to mobile andlandline numbers)For outgoing calls it is not enough to add a “sip server” user from the “Users and devices” form. Add it with any meaningfulusername and make sure to set the IP field correctly on the Edit tab. (This field can also contain a domain name instead of IPaddress). Some carriers requires the usage of a techprefix which can be entered in the “Tech Prefix” field. Others settings are rarelyused.You must also add this server(s) in your routing.Open the “Routing” form. In the left side you have to define your pattern which will restrict the condition when the actual routeentries can be used. If all fields are empty and the time definition is set to “All times” then all patterns will match. You can makerestriction if you make specification here (caller, called prefix, time restriction, etc) . Make sure that you increase the priority for thepattern (to be higher than the your “general” pattern where you have not made any restrictions)On the right side you will have to add one or more sip proxy user. If you set more than one route with equal priority, then you haveload balancing, LCR or BRS (depending on the “brs_lcr” global config option); otherwise the traffic will be routed after theprioritizations (will flow to the lower priority servers only if you have reached the maximum port limitations or because automaticfailowering). For more details please read the routing guide.Register to your outbound server [optional]Usually for a B2B usage, uppers servers (your carrier or <strong>VoIP</strong> service provider) will setup IP based authentication. This is thefavorized method for a high amount of calls. If your outbound server (where you are sending traffic and receive incoming calls)needs username/password based digest authentication instead of IP based authentication, you can set it from the “SIP server” userconfiguration. Create a SIP server user, then switch to the “Edit” page. On the bottom of the page you can find a grid named “Proxyauthentication”. Here you can add the login details (multiple username/passwords can be used for your convenience). Then select“Username/password must match” from the “Authorization” drop-down list.These are the basic and most commonly used authentication settings. There are many other combinations, for example you can forward theusername/password as received from your users. For more details please consult the Admin Guide.Setup inbound routing [optional]This is needed if you would like to route the calls from the users to another servers or carriers (for example calls to mobile andlandline numbers).If you would like to accept traffic from other servers (for example you are doing a wholesale business), then you must create a“Traffic sender” user. Usually you can use IP based authentication. For this, add the peer IP to the “Auth IP” field.For each incoming calls, the server will first check if the called party is a local user. If not, than the call are routed regarding therules which is set by the “Routing” form.Actually you could also use “Enduser” users for the same thing, but for a bigger traffic volume it is always to differentiate normalendusers from “traffic sender” so your statistics will be easier to understood.
First test callsFor a test call create 2 enduser accounts with username/password authentication.Register with two softphone and call from the first account to the second account.Softphone configuration:‣ domain: your server IP or domain name‣ proxy: you can leave it empty‣ username: the “username” field from the newly created user (tb_users.username)‣ password: the “password” field from the newly created user (tb_users.username)No any other special settings are required (such as NAT, STUN, etc).The network setting should be automatically handled by the server. If you don’t hear any voice you might change the RTP routing for the user(s) to“always route RTP”.During the call, you can open the “Current calls” form in the <strong>Mizu</strong>Manage to see the details.After the call you can see the CDR by opening the “CDR records” form in the <strong>Mizu</strong>Manage.If there are no CDR records, it means that the call has not reached the server (wrong network settings on server or client side)In case of call failure you can check the disconnect reason from the CDR record or for more details open the last logfile(“log_xxx.dat” files near the mserver.exe).Setup billing [on commercial servers]Open the Billing -> “Price setup” form.On the left column add a billing group with any name (“default” is ok).On the middle column specify your conditions. You should have at least one Enduser cost type without any further restriction onthe traffic direction (so it will be applied for all endusers/directions/time)On the right column enter or import your pricelist applied in the conditions defined by the middle column.For a default price enter prefix “*” (this will be applied to all destinations that is not specified explicitly)Make sure you have set the proper currency (in the global configuration, in the price setup and also for your users)Read the Billing guide for more details.The users can recharge their credits with various built-in methods:o by pin code (recharge cards), calling cards (“Pincodes” form)o ePayments, credit card payments (via a payment gateway which can be set from the wizard or from the“Configuration” form)o credit transfer between users (from/to)o PayPal (can be set from the “Configuration” form)o postpaid/invoice (invoices form)These methods are accessible from:o enduser web interfaceo client applications (built-in the softphone)o IVRo smsAny third party payment method can be easily added (see the database interface and http interface documentations)MonitoringList the active sessions: Monitoring -> “Current Calls” formCall detail record: Monitoring -> CDR Records formStatistics by users: Monitoring ->Advanced Statistics -> Group By: callerStatistics by day: Monitoring ->Advanced Statistics -> Group By: dayBy using the “Analyze” form you can have a quick overview about the system.Other more advanced statistics can be generated by using the Advanced Statistics form and using differentfields/options/grouping/directions.
All statistics can be filtered by the “set direction” form or the “quick filer” edit-box and by a time interval selection.Statistics can be exported as csv or html from File menu -> Save as. For other data formats you can use the Export/Import wizard.Real time monitoringStart the MSupervisor application to get notified about errors and malfunctions. (This application should be available in the startmenu if you have installed the <strong>Mizu</strong>Manage)Automatic reportsThe server can send daily reports for administrators or email/sms alerts on malfunctions. For this you have to setup an “Admin”user with a valid email address. Then set the following fields to 1 (after your needs): “sendemailalert”, “senddailyemal”,“sendmonthlyemail”, “sendsmsreport”, “sendsmsalert”The server will be able to send SMS messages only if an SMS provider is configured (see the Admin Guide)CDR recordsCDR records can be listed by using the “CDR records” form. By default only the most important fields are listed (date-time, connecttime, call duration, etc). You can see more details if you check the “All fields” checkbox.To quickly list the CDR records that belongs to a user, open the “Users and devices” form. Find the user record, then right-click on itand select “Set Direction”. Than go back to the CDR record form and click on the “Load/Reload” button.If you have enabled voice recording for some users, than you can play the recorded audio by filtering for “Recorded Conversation”(select the desired record and click on the Play button)Call forwarding, voicemail, call recording, missed call notifications [optional]These settings can be found on the “Users and devices” form by selecting an enduser record then switching to the “Functions” tab.To listen to a conversation, open the “Current calls” form and right click to a call, then select “voice here”.To record the calls, go to the “users and devices” -> “functions” tab and tick the “record” checkbox. Then playback the recordedvoices from the “CDR Records” form.Enduser / reseller / callshop web portals [on commercial servers]To setup a webportal you have these options:-use our default portal (installed by default and listening on port 80 or 8080, accessible as http://serverdomainorip:port)The default portal is included in the install package. You can install and start it from the start menu (start enduser web portal)You can check it by opening your browser on the server with this URL: http://127.0.0.1:8080 (or using your public server ip ordomain name). Login with any valid user account. For the customization options login as an admin user, You can easily embed thisportal in your main website (using IFrame for example). There are several options to customize the colors to match you design.-rewrite our webportal template to match your needs (Our template portal was written in C++. Request source code fromsupport@mizu-voip.com)-write your own portal and use the http and/or database API. You will find the documentation here.ResellerResellers typically will use the web frontend for all their activity. First you should login on the web interface with as an admin user(you can create admin user from MManage “Users and devices” form). First edit the portal settings after your needs then createone or more “top” resellers. Then these resellers can login and create its own sub-resellers after they have created their tarifflist(s).CallshopTo create a “callshop owner” open the “Users and devices” form in the <strong>Mizu</strong>Manage and create a new Enduser then from the“Functions” tab tick the “Is Callshop” checkbox. From now the user can login on the web user interface, create it’s cabins (which areactually represented as sub-endusers) and monitor it’s cabins activity.IVR setup [optional]The IVR module is used for various tasks like access numbers, calling-card operation, customer support etc.
You can assign different IVR’s to different access numbers by using the “Campaigns” form. To create a new campaign, just click onthe + sign and enter a “name” for the new record. The most important configuration for an IVR campaign is the script. Switch to the“details” tab to select a “Script”.Scripts can be created by using the “IVR” form. The server is shipped with several preconfigured script examples, but you shouldeasily add new scripts or modify the existing ones by following the admin guide or the IVR documentation: IVR.pdfService access numbers [optional]You can setup your calling card or callback business by using access numbers and assigning them to one of the existing or newlycreated IVR’s. You should be able to request DID numbers from your existing <strong>VoIP</strong> carrier or by contacting other companies e.g.www.didx.net. In this case you will have to add it as a Traffic Sender user usually with IP based authentication (fill the AuthIP boxwith the provider IP or domain name)After you have terminated with the traffic sender configuration, you can add the access numbers like usual endusers. Type thephone number in the “username” field or you can also use the “SIP number” field for the same reason. Then switch to the“Functions” tab and set the “Campaign ID” and the “Callback access” (if the DID number will be used as a callback access number);optionally you can enable A number authentication. The campaign id means the ID field from the tb_ccampaigns table (You can seethem by opening the “Campaigns” form).For more complex authentication and billing options please consult the admin guide.SMS [optional]To setup an outbound sms routing, you have to contact a company providing SMS services. (For example Clickatel)Then open the “Configurations” form and search for “smsurl”. Enter the details in this format:http://api.clickatell.com/http/sendmsg?api_id=APID&user=USERNAME&password=PASSWORD&to=[tonum]&text=[message]Pricing is done after the “smsprice” global config options or you can setup detailed pricing by using the “price setup” form.Users will be able to send sms messages by using a softphone, the webportal or there is a possibility to create an SMS senderapplication yourself by using the http or database api.For incoming SMS applications (SMS callback, balance request, etc) you will have to request a two way SMS service (to get a DIDnumber)Softphone, webphone and mobile client [optional]We provide customized softphone, webphone and mobile client applications for our customer as part of the “all in one package”.BackupAll data is stored in the database, so you have to make sure that you always have a working backup for it. A nightly backup to someother PC on the LAN is an affordable solution for this (depending on your business requirements).You can setup scheduled backup or (nearly) real time log shipping from SQL <strong>Server</strong> Management Studio or alternatively the <strong>Mizu</strong><strong>Server</strong> can schedule your backups (see the detailed documentation).Optionally you can use a dual server setup. This will increase the performance and in this way, you can always have a hot backupserver in case if the active server fails.To clone a VOIP server, just backup its database and restore it on your new server. Also install the <strong>VoIP</strong> server software (or copy theold directory) and make sure that your vserver.ini points to the new database.The only setting that must be changed is the local IP global config option. For more details check the cloning guide.If you migrate the application to another server a new license file might be needed from <strong>Mizu</strong>tech.-To find application errors, open the last log file in the server app directory and search for “ERROR” (you can modify the tracedetails with the “loglevel” configuration option: from 1 to 5)More helpFor more details, please consult the Admin Guide and other server related documentations on our website.For more help, contact support@mizu-voip.com. We offer free install, configuration, training and support services for ourcustomers.Copyright © 2008-2011 <strong>Mizu</strong>tech SRL


