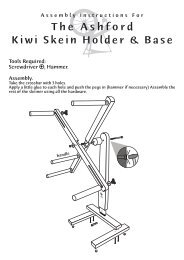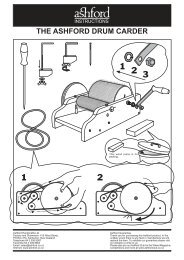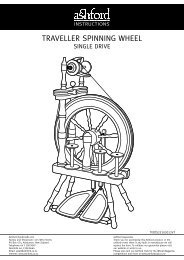
ASHFORD RIGID HEDDLE LOOM - Ashford Handicrafts
ASHFORD RIGID HEDDLE LOOM - Ashford Handicrafts
ASHFORD RIGID HEDDLE LOOM - Ashford Handicrafts
- No tags were found...

Create successful ePaper yourself
Turn your PDF publications into a flip-book with our unique Google optimized e-Paper software.
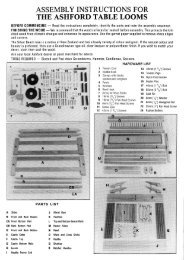
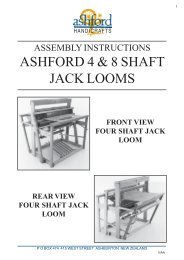
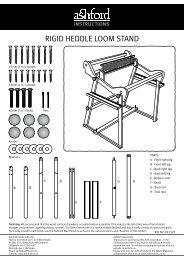
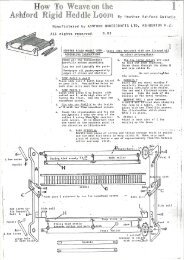
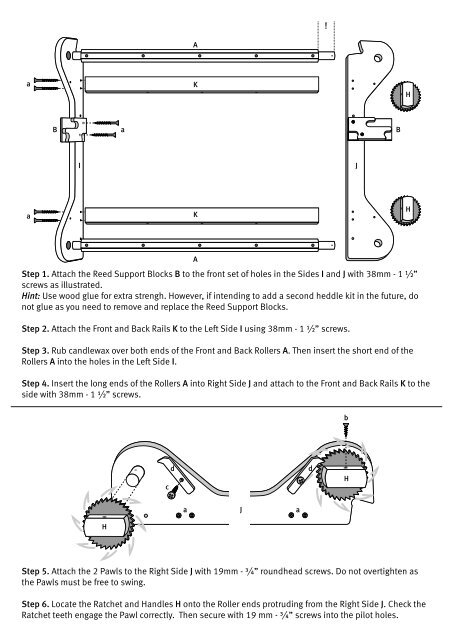
!AaKHBaBIJaKHAStep 1. Attach the Reed Support Blocks B to the front set of holes in the Sides I and J with 38mm - 1 ½”screws as illustrated.Hint: Use wood glue for extra strengh. However, if intending to add a second heddle kit in the future, donot glue as you need to remove and replace the Reed Support Blocks.Step 2. Attach the Front and Back Rails K to the Left Side I using 38mm - 1 ½” screws.Step 3. Rub candlewax over both ends of the Front and Back Rollers A. Then insert the short end of theRollers A into the holes in the Left Side I.Step 4. Insert the long ends of the Rollers A into Right Side J and attach to the Front and Back Rails K to theside with 38mm - 1 ½” screws.bcddHaJaHStep 5. Attach the 2 Pawls to the Right Side J with 19mm - ¾” roundhead screws. Do not overtighten asthe Pawls must be free to swing.Step 6. Locate the Ratchet and Handles H onto the Roller ends protruding from the Right Side J. Check theRatchet teeth engage the Pawl correctly. Then secure with 19 mm - ¾” screws into the pilot holes.