Buffalo Wild Wings
Buffalo Wild Wings
Buffalo Wild Wings
- No tags were found...

Create successful ePaper yourself
Turn your PDF publications into a flip-book with our unique Google optimized e-Paper software.
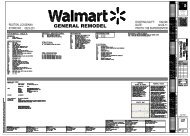
P R O J E C T M A N U A LFOR<strong>Buffalo</strong> <strong>Wild</strong> <strong>Wings</strong>at6709 Fayetteville RoadDurham, North CarolinaPrototype V3.11.1Issue Date: 6-27-11Issued: For BidProject No.: 10-0088
<strong>Buffalo</strong> <strong>Wild</strong> <strong>Wings</strong> – Durham, NCSECTION 00001 - PROJECT TITLE PAGEPROJECT MANUAL:GENERAL, MECHANICAL AND ELECTRICALPROJECT TITLE:BUFFALO WILD WING GRILL & BAR6709 Fayetteville RoadDurham, NCOWNER:ARCHITECT:CIVIL:DEVELOPER:STRUCTURAL ENGINEER:Blazin’ <strong>Wings</strong>, Inc.5500 Wayzata Blvd. Ste 1600Minneapolis, MN 55416Phone: 952.593.9943Fax: 952.593.9787Contact: Steve MerzDesign and Engineering, Inc.1645 Westgate CircleBrentwood, TN 37027Phone: 615.370.1779Fax: 615.370.9108Contact: Ryan NicholsonDesign and Engineering, Inc.1645 Westgate CircleBrentwood, TN 37027Phone: 615.370.1779Fax: 615.370.9108Contact: Byron BohrmanKBM Commercial Properties, LLC1550 Highway 126Bristol, TN 37260Phone: 423.968.9164Contact: Rob HicksDesign and Engineering, Inc.1645 Westgate CircleBrentwood, TN 37027Phone: 615.370.1779Fax: 615.370.9108Contact: Byron BohrmanMEP ENGINEER:Entech Engineering5301 Virginia Way Ste. 140Brentwood, TN 37027Phone: 615.373.2640Fax: 615.373.4837Contact: Mitch SimpsonISSUE DATE: 6-27-2011END OF PROJECT TITLE PAGE6/27/11 PROJECT TITLE PAGE00001 -1
<strong>Buffalo</strong> <strong>Wild</strong> <strong>Wings</strong>SECTION 00010 - TABLE OF CONTENTSDOCUMENTS 0 -- INTRODUCTORY INFORMATION, BIDDING REQUIREMENTS, ANDCONTRACT REQUIREMENTS00001 - PROJECT TITLE PAGE00010 - TABLE OF CONTENTS00011 - MATERIAL IDENTIFICATION LIST00100 - BID SOLICITATION00200 - INSTRUCTIONS TO BIDDERS00220 - SUBSURFACE INVESTIGATION00221 - SITE SPECIFIC SUBSURFACE INVESTIGATION REPORT00400 - BID FORM00500 - AGREEMENTDIVISION 1 -- GENERAL REQUIREMENTS01100 - SUMMARY OF WORK01200 - PRICE AND PAYMENT PROCEDURES01300 - ADMINISTRATIVE REQUIREMENTS01400 - QUALITY REQUIREMENTS01500 - TEMPORARY FACILITIES AND CONTROLS01600 - PRODUCT REQUIREMENTS01620 - REFERENCES01700 - EXECUTION REQUIREMENTSDIVISION 2 -- SITE CONSTRUCTION02223 - MINOR DEMOLITION FOR REMODELING02360 - SOIL TREATMENTDIVISION 3 – CONCRETE03300 - CAST-IN-PLACE CONCRETE03351 - CONCRETE INTEGRAL HARDENER AND SEALERDIVISION 4 – MASONRY04065 - MORTAR AND MASONRY GROUT04810 - UNIT MASONRY ASSEMBLIES04-27-11 TABLE OF CONTENTS00010 -1
<strong>Buffalo</strong> <strong>Wild</strong> <strong>Wings</strong>DIVISION 5 – METALS05120 - STRUCTURAL STEEL05210 - STEEL JOISTS05310 - STEEL DECK05400 - COLD FORMED METAL FRAMING05500 - METAL FABRICATIONSDIVISION 6 -- WOOD AND PLASTICS06100 - ROUGH CARPENTRY06200 - FINISH CARPENTRY06410 - CUSTOM CABINETS06415 - COUNTERTOPS06605 - FIBERGLASS REINFORCED PLASTIC PANELSDIVISION 7 -- THERMAL AND MOISTURE PROTECTION07100 - SHEET MEMBRANE WATERPROOFING (OPTIONAL)07160 - BITUMINOUS DAMPPROOFING07212 - BOARD AND BATT INSULATION07240 - EXTERIOR INSULATION AND FINISH SYSTEM07260 - AIR AND VAPOR BARRIERS07411 - PREFORMED METAL ROOF PANELS07424 - ALUMINUM COMPOSITE PANEL SYSTEM07535 - MECHANICALLY ATTACHED MEMBRANE ROOFING07620 - SHEET METAL FLASHING AND TRIM07720 - ROOF ACCESSORIES07900 - JOINT SEALERSDIVISION 8 -- DOORS AND WINDOWS08110 - HOLLOW METAL DOORS AND FRAMES08211 - FLUSH WOOD DOORS08310 - ACCESS DOORS AND PANELS08380 - TRAFFIC DOORS08410 - METAL FRAMED STOREFRONTS08710 - DOOR HARDWARE08800 - GLAZING04-27-11 TABLE OF CONTENTS00010 -2
<strong>Buffalo</strong> <strong>Wild</strong> <strong>Wings</strong>DIVISION 9 – FINISHES09220 - PORTLAND CEMENT PLASTER, STUCCO (OPTIONAL)09260 - GYPSUM BOARD ASSEMBLIES09300 - TILE09511 - SUSPENDED ACOUSTICAL CEILINGS09650 - RESILIENT FLOORING09666 - SPECIALTY FLOORING09680 - CARPET09720 - WALL COVERING09900 - PAINTS AND COATINGS09960 - FIELD APPLIED HIGH PERFORMANCE PAINT SYSTEM (OPTIONAL)DIVISION 10 -- SPECIALTIES10010 – MISCELLANEOUS SPECIALTIES10210 - WALL LOUVERS10263 - CORNER GUARDS10445 - DOOR AND ROOM SIGNS10500 - LOCKERS10523 - FIRE EXTINGUISHERS, CABINETS AND ACCESSORIES10536 - AWNINGS10810 - TOILET ACCESSORIESDIVISION 11 -- EQUIPMENT - Not used, Refer to DrawingsDIVISION 12 -- FURNISHINGS12493 - WINDOW SHADESDIVISION 13 -- SPECIAL CONSTRUCTION - Not usedDIVISION 14 -- CONVEYING SYSTEMS - Not used04-27-11 TABLE OF CONTENTS00010 -3
<strong>Buffalo</strong> <strong>Wild</strong> <strong>Wings</strong>DIVISION 15 -- MECHANICAL15010 - MECHANICAL GENERAL CONDITIONS15050 - BASIC MATERIALS AND METHODS15150 - PIPING MATERIALS AND METHODS15200 - INSULATION15300 - FIRE SPRINKLER SYSTEM (PERFORMANCE BASED)15400 - PLUMBING SPECIALTIES15440 - PLUMBING FIXTURES15700 - HEATING, VENTILATING AND AIR CONDITIONING15800 - DUCTWORK MATERIALS AND METHODS15976 - AUTOMATIC CONTROL SEQUENCE15990 - TESTING AND BALANCINGDIVISION 16 -- ELECTRICAL16010 - GENERAL CONDITIONS16030 - CUTTING AND PATCHING16050 - BASIC MATERIALS AND METHODS16111 - CONDUITS AND FITTINGS16112 - OUTLET BOXES16113 - PULL AND JUNCTION BOXES16117 - SAFETY SWITCHES16118 - FUSES16120 - WIRE AND CABLE16140 - WIRING DEVICES16150 - ELECTRICAL CONNECTIONS16450 - GROUNDING SYSTEM16470 - PANELBOARDS16500 - LIGHTINGEND OF TABLE OF CONTENTS04-27-11 TABLE OF CONTENTS00010 -4
Material Identification Codesfor use on Drawings and within SpecificationsOverviewThe Material Identification Codes List is intended to be a tool to improve the coordination andnaming conventions between Drawings and Specifications. The Material Identification CodesList is organized by CSI MasterFormat Specification Section numbers.These Material Identification Codes are indicated with the material and product choicescurrently available in the <strong>Buffalo</strong> <strong>Wild</strong> <strong>Wings</strong> Master Specification.Material Identification Codes List 04-27-1100011-1
DIVISION 2 - SITEWORKSECTION 02223 – MINOR DEMOLITION FOR REMODELING (Optional)As applicable for specific project(Remove): Indicate on Drawings items to be removed.(Remove/Reinstall): Provide list of existing building items to be removed by Contractorand reinstalled.(Remove/Salvage): Provide list of existing building items to be removed by Contractorand retained, (salvaged), by Owner.DIVISION 3 - CONCRETESECTION 03300 - CAST-IN-PLACE CONCRETEIndicated on Drawings as:(CONC1): Unexposed Form Finish, (Rough "as cast"), typical unless otherwiseindicated.(CONC2): Interior Concrete Slabs, Steel trowel (smooth).(CONC3): Exterior Horizontal Concrete Surfaces, Float finish, Heavy broom.(Vapor Retarder): Underslab, 10mil thick multi-layer plastic sheet.SECTION 03351 - CONCRETE INTEGRAL HARDENER AND SEALERIndicated on Drawings as: (SC) Sealed Concrete(SC): Water based, concrete hardener / sealer. Exterior horizontal concrete surfaces.DIVISION 4 - MASONRYSECTION 04065 – MORTAR AND MASONRY GROUTIndicated on Drawings as:(Mortar): Portland cement lime mortar, masonry cement not allowed.Mortar Colors:1. LaFarge North America; “Santan”; color to match (FBR1) Face Brick. Refer toSection 04810.2. Spec Mix; Color No. LM-9327-50 #930; color to match (CMU2) Rock FaceBlock. Refer to Section 04810.Mortar Locations:1. Locations of colored mortar: Used to match Face Brick and Rock Faced BlockUnits.2. Natural colored mortar for all other locations.(Grout): 3000psi grout.Material Identification Codes List 04-27-1100011-2
SECTION 04810 - UNIT MASONRY ASSEMBLIESIndicated on Drawings as:Concrete Masonry UnitsFace Brick Units(CMU1): Normal weight hollow concrete masonry units.(CMU2): Normal weight, Integral colored, Rock Face concrete masonry units.1. Manufacturers: Amcon Block and Precast, Inc., St. Cloud, MN 56304.Tel: 888-251-6030. www.amconblock.com2. Color: Custom BWW Blend # RF-526.(FBR): Type FBS, Grade SW brick units.1. Size: 3-5/8 inches wide by 2-1/4 inches high by 7-5/8 inches long.2. Manufacturers: Sioux City Brick and Tile Company, Sioux City, Iowa 51102.Tel: 712-258-7571. www.siouxcitybrick.com3. Color: Toasted Fine Art Velour.Block and Brick Coursing: Running Bond, 3/8” concave joints.Accessories for Section 04810(Joint Reinforcement): Single wythe, truss type, hot dip galvanized.(Wall Ties): Corrugated formed sheet metal, 7/8 inch wide, hot dip galvanized.(Masonry Veneer Anchors): 2-piece, triangular shape, hot dip galvanized.(Thru-Wall Flashing): Laminated asphalt impregnated cloth over 3 ounce copper core.(Building Paper): No. 15 asphalt felt.(Weeps): Cotton Rope.(Cavity Mortar Diverter): Semi rigid polyethylene mesh.DIVISION 5 - METALSSECTION 05400 - COLD FORMED METAL FRAMINGIndicated on Drawings as: Indicate stud and joist sizes and maximum spacing on Drawings.(Stl Studs): Structural Steel Studs.(Stl Joists): Structural Steel Joists.(Sill Sealer): 1/4” thick, close cell polyethylene.Exterior Wall Sheathing: Refer to Section 06100 - Rough Carpentry for wall sheathing.SECTION 05500 - METAL FABRICATIONSMiscellaneous steel shapes, plates and other metal fabrications:(Stl Angles)(Stl Channels)(Loose Lintel)(Stl Plate)(Stl Tube)(Stl Ladder): Steel ladders for roof access.(Stl Bollards): Exterior bollards.(SSTL): Stainless Steel ComponentsMaterial Identification Codes List 04-27-1100011-3
DIVISION 6 - WOODS AND PLASTICSSECTION 06100 - ROUGH CARPENTRYIndicated on Drawings as:Dimensional Framing Lumber and Wood Blocking(WD FRAMING): Wood framing lumber.(WD BLKG): Exposed or concealed wood blocking.Construction Plywood and Sheathing(SHTG-1): Wall Sheathing:1. Plywood Wall Sheathing: DOC PS 1, C-D, exposure 1, structural 1. 1/2"nominal thickness. - Or -2. Oriented Strand Board Wall Sheathing: DOC PS 2, exposure 1, structural 1.1/2" nominal thickness.(SHTG-2): Plywood Roof Sheathing: DOC PS 1, C-D, exterior, structural 1; 3/4" nominalthickness. Tongue and Groove.(SHTG-3): Concealed Plywood: DOC PS 1, C-C Plugged, exposure 1. Thickness asindicated on drawings.(SHTG-4): Exposed Plywood: DOC PS 1, A-D, interior grade. Thickness asindicated on drawings.(SHTG-5): Electrical Panel Boards: APA rated sheathing, fire retardant treated. 3/4”nominal thickness.Treated Wood Material(PT): Preservative treated wood materials.(FT): Fire retardant treated wood materials.Fiber Cement Siding and Trim(Fiber Cement Siding): 5/16” thick, vertical siding panels, smooth texture.(Fiber Cement Soffit): 1/4" thick, soffit panel, smooth texture.(Fiber Cement Trim): 1” thick, trim boards, width as indicated, smooth texture.Membrane Underlayment: 40 mil. thick, self-adhering sheet underlayment at Entry Canopy.SECTION 06200 - FINISH CARPENTRYIndicated on Drawings as:Items furnished by Owner’s Millwork Vendor:(WD1): White Maple, transparent finish.(WD2): Southern Pine.Factory Finished Millwork: WIC Manual of Millwork, Section 5, System #5 - CatalyzedPolyurethane, Clear.Accessories for Section 06200(Adjustable Shelf Brackets): Brackets and standards, white finish.SECTION 06410 – CUSTOM CABINETSItems furnished by Owner’s Millwork Vendor:(WD1): White Maple, transparent finish.Material Identification Codes List 04-27-1100011-4
Plastic Laminate(PLAM1): Wilsonart # 1573-60, Frosty White, Matte.(PLAM3): Wilsonart # 1595-60, Black, MatteAccessories for Section 06410(Grommet): Power cord grommet, 3” diameter.SECTION 06415 - COUNTERTOPSIndicated on Drawings as:Plastic LaminateSolid Surface(PLAM2): Wilsonart # 4884-38, Flame Soapstone, Standard finish.(SS1): Corian, Custom BWW color, #PDR AMG24-06-D.SECTION 06605 - FIBERGLASS REINFORCED PLASTIC PANELSIndicated on Drawings as:FRP AdhesiveFiberglass Reinforced Plastic Panels (FRP): 0.090 inch thick, USDA approved, texturedsurface wall panels with Class III/Class C fire rating.(FRP1): White.(FRP2): Black.Franklin International; Titebond Solvent-Based FRP Adhesive.DIVISION 7 - THERMAL AND MOISTURE PROTECTIONSECTION 07100 - SHEET MEMBRANE WATERPROOFING (Optional)Indicated on Drawings as:(Waterproofing): 60 mil. Thick, Self-Adhering, Sheet Membrane Waterproofing.(i.e. Bituthene 3000)(Protection Board): 1/4 thick, fan folded extruded-polystyrene board.SECTION 07160 - BITUMINOUS DAMPPROOFINGIndicated on Drawings as:(Dampproofing): Emulsified Bituminous Dampproofing, Non-fibered, water-based,non-sag asphaltic coating designed for spray application.(Protection Board): 1/4 thick, fan folded extruded-polystyrene board.SECTION 07212 – BOARD AND BATT INSULATIONIndicated on Drawings as: (INSUL#)(INSUL1): Unfaced fiberglass batt insulation.(INSUL2): Under Slab and Foundation Insulation, Extruded Polystyrene Board(INSUL3): Roof Insulation, Polyisocyanurate board with organic/inorganic facers.Material Identification Codes List 04-27-1100011-5
SECTION 07240 - EXTERIOR INSULATION AND FINISH SYSTEMIndicated on Drawings as: (EIFS#)(EIFS1) Key Note 18: Color: # 401, “Pretzel”.(EIFS2) Key Note 19: Color: Color to Match Sherwin Williams Color # SW6898,“Social Butterfly”, (C13).(EIFS3) Key Note 20: Color: # 714, “Licorice”.(EIFS4) Key Note 21: Color: # 310, “China White”.Finish: “Sandpebble” finish on all colors.SECTION 07260 – AIR AND VAPOR BARRIERSIndicated on Drawings as:(Air Barrier): DuPont Tyvek.(Vapor Barrier): 6 mil poly; Northern Climates OnlySECTION 07411 – PREFORMED METAL ROOF PANELSIndicated on Drawings as:(Standing Seam Metal Roof): 24 gauge, galvanized steel panels, 12 inch wide. Kynarfinish, Color: Matte Black.SECTION 07424 - ALUMINUM COMPOSITE PANEL SYSTEMIndicated on Drawings as:(Aluminum Composite Panels): 4mm composite panel with 3-coat, Kynar finish.Color: Una-Clad “Silver Metallic”. Rout and Return wetjoint system.SECTION 07535 – MECHANICALLY ATTACHED MEMBRANE ROOFINGIndicated on Drawings as(Membrane Roofing System): Mechanically attached thermoplastic sheet, .040 inchthick. FM Class A and I-60 wind resistance.SECTION 07620 - SHEET METAL FLASHING AND TRIMIndicated on Drawings as: (SHT MET#)(SHT MET1): Prefinished galvanized steel, kynar coated. Color: Una-Clad “Silver Metallic”.(SHT MET2): Standard galvanized flashing.(Reglets): Manufactured reglets, surface mounted and recessed.SECTION 07720 - ROOF ACCESSORIESIndicated on Drawings as:(Roof Hatch): Roof hatch for vertical ladder locations (2'-6" by 3'-0"), Bilco Type SRoof Hatch.SECTION 07900 - JOINT SEALERSIndicated on Drawings as: (SLNT)(SLNT1): General Purpose Exterior Sealant, 1 part, polyurethane.(SLNT2): General Purpose Interior Sealant, acrylic.(SLNT3): Sanitary/Tile Sealant, 1 part , mildew resistant silicone.(SLNT4): Concrete Paving Joint Sealant, 2 part, self-leveling polyurethane for traffic.(SLNT5): Butyl Sealant.(SLNT6): Low modulus Silicone Sealant, 1 part, general purpose silicone.(SLNT7): Ultra-Low Modulus Silicone Sealant, 1 part, silicone.Material Identification Codes List 04-27-1100011-6
Sealant Schedule - Sealant types will be scheduled within the project manual as follows:(SLNT1): General Purpose Exterior Sealant, use for:a. Control, expansion, and soft joints in masonry.b. Joints between concrete and other materials.c. Joints between metal frames and other materials.d. Other exterior joints for which no other sealant is indicated.(SLNT2): General Purpose Interior Sealant, use for:a. Interior wall and ceiling control joints.b. Joints between door and window frames and wall surfaces.c. Other interior joints for which no other type of sealant is indicated.(SLNT3): Sanitary/Tile Sealant, use for:a. Joints between plumbing fixtures and floor and wall surfaces.b. Joints between kitchen and bath countertops and wall surfaces.c. Control joints in tile installations in toilet rooms and kitchen.(SLNT4): Concrete Paving Joint Sealant use for:a. Joints in concrete sidewalks and vehicular paving.(SLNT5): Butyl Sealant, use for:a. Seam sealant for masonry flashing.b. Bedding sealant for thresholds and sills.(SLNT6): Low modulus Silicone Sealant, use for:a. Air barrier perimeter.b. Exterior sheet metal joints.(SLNT7): Ultra-Low Modulus Silicone Sealant, use for:a. Perimeter and internal joints in EIFS System.DIVISION 8 - DOORS AND WINDOWSSECTION 08110 – HOLLOW METAL DOORS AND FRAMESIndicated on Drawings as:(HM Frames): 14 gauge galvanized for Exterior Frames. 14 gauge for Traffic DoorFrames. 16 gauge for Interior Frames.(HM Doors): 16 gauge galvanized with polystyrene core for Exterior Doors. 16 gaugewith honeycomb core for Interior Doors.SECTION 08211 - FLUSH WOOD DOORSIndicated on Drawings as:(Wood Doors): Interior 1-3/4” Solid-Core Doors with Plain Sliced, Select White Mapleveneers.Finish (PS19): Transparent finished doors field finished under Section 09900 - Paintsand Coatings.SECTION 08310 - ACCESS DOORS AND PANELSIndicated on Drawings as:(AP) Access Panel: Access panels for drywall, EIFS and composite panel soffit locations.Material Identification Codes List 04-27-1100011-7
SECTION 08380 - TRAFFIC DOORSIndicated on Drawings as:(TD): Chase Model # SC-3018, Plastic laminate both sides, 18” s.s. impact plateand 9” x 14” acrylic vision panel.Plastic Laminate Colors:Black: Formica Black 909-58, Dining/Public side of door.White: Formica White 949-58, Kitchen side of door.SECTION 08410 – METAL FRAMED STOREFRONTSIndicated on Drawings as:(Aluminum Storefront & Window Framing): 2” x 4-1/2”, thermally broken, center glazedto accept 1/4" and 1” insulated glass. Clear Anodized Finish.(Aluminum Doors): 1-3/4 thick, medium stile aluminum doors.Aluminum Door Hardware: All Hardware specified except Cylinders and Door Stops.SECTION 08710 - DOOR HARDWAREIndicated within the Hardware Groups and on the Door ScheduleManufacturersHardware SupplierHinges: PBB.Lock and Latch Sets; Schlage; ND Series. Cylinders: Schlage.Exit Alarm Locks: Von Duprin; Guard – X.Panic Exit Devices: Detex; Value Series.Push/Pull Sets; Kick Plates/Armor Plates: Hiawatha.Closers: LCN.Flush Bolts; Coat Hooks; Hinge Pin Stops; Door Viewers: Ives.Wall Stops: Don-Jo Manufacturing.Weatherstripping; Sill Sweep; Thresholds; Rain Drips: Reese.Twin City Hardware: Brent Chuhel; 651-731-7126; bchuhel@tchco.comHARDWARE GROUPSHardware Furnished by Section 08410 – Metal Framed StorefrontsGROUP 1: Interior Entry Vestibule Doors – Door No. 02GROUP 2: Exterior Entry and Dining “B” (Patio) Doors – Door Nos. 01 and 15GROUP 14: Single Aluminum Bar (Patio) Door – Door No. 19Note: TCH to provide Door Stops for Group 1 & Cylinders and Door Stops for Group 2 & 14Hardware Furnished by TCHGROUP 3: Restroom Doors – Door Nos. 03 and 07GROUP 4: Office – Door No. 10GROUP 5: Not Used / Storage ClosetGROUP 6: Exterior Service Doors - Door Nos. 11 and 14GROUP 7: Restroom Stall Doors – Door Nos. 4, 5, 6, and 8GROUP 8: Rear Vestibule (Interior) - Door No. 13GROUP 9: Mechanical Room – Door No. 18GROUP 10: Patio Gates – Door Nos. 16 and 17GROUP 11: Traffic Doors – Door Nos. 9 and 12GROUP 12: Coat Hooks – Bar Stool AreaMaterial Identification Codes List 04-27-1100011-8
Hardware Furnished by OwnerGROUP 13: Padlocks – Keg Storage, Trash & Chemical Enclosure & Roof HatchSECTION 08800 - GLAZINGIndicated on Drawings as:Monolithic GlassInsulated Glass(GL1): Clear tempered glass, 1/4".(GL2): Clear insulated unit, heat strengthened/tempered, 1/4"/1/2"/1/4". Low E coatingon No. 2 surface.Insulated Spandrel UnitsUnframed MirrorsTinted Window FilmDIVISION 9 - FINISHES(GL3): Clear insulated unit, heat strengthened, 1/4" (clear/frit)/1/2"/1/4" (clear).Ceramic frit on No. 2 surface. Frit color: Black.(GL4): Standard tempered glass mirror, 1/4”.(GL5): One-way mirror glass, 1/4”. Provided by Section 08110.(TF1): 3M Sun Control Window Film, Prestige Series, PR 70.SECTION 09220 – PORTLAND CEMENT PLASTERIndicated on Drawings as: (PLS-##)(Stucco): Exterior portland cement plaster on metal lath.SECTION 09260 – GYPSUM BOARD ASSEMBLIESIndicated on Drawings as: (GYB-#)(GYB1): Not Used.(GYB2): 5/8" Mold and Moisture-Resistant Gypsum Board.Cement Backer Board(GYB5): 5/8" Portland Cement Panels, USG Corporation: Durock.Metal Framing Systems (interior non-load bearing)(Metal Studs): Non-Loadbearing framing.(Ceiling Channels): 2-1/2”, 20 gauge ceiling channels.(Furring Channels): 7/8” Hat-shaped furring channels.Gypsum Board Accessories and Trim Pieces(Sheet Metal Backing)(Corner Bead)(CJ): Control Joint.(EJ): Expansion Joint.Material Identification Codes List 04-27-1100011-9
Gypsum Board Finish Level ScheduleLevel 1: Above finished ceilings concealed from view.Level 2: Utility areas and areas behind cabinetry.Level 4: Walls and ceilings scheduled to receive paint finish.SECTION 09300 - TILECeramic TileIndicated on Drawings as:(CT1): 12” x 12” Floor and Wall Tile, Back Bay Iron Range,RBC # EQCP96-1212, Sparta.(CT2): 6” x 12” Cove Base Tile, BWW Super Black Textured,RBC # BW9235-COVE12, Black.(CT2a): 1” x 6” Cove Base Outcorner, BWW Super Black Textured,RBC # BW9235-COVE12OC, Black.(CT3): 4” x 4” Black Accent Tile, Back Bay BWW Accent #1, RBC # BB10890-44,Black.(CT4): 4” x 4” Yellow Accent Tile, Back Bay BWW Accent #2, RBC # BB10380-44,Yellow.(T2) Trim: Schluter Systems, Reno-TK; Finish: Brushed Aluminum. Use w/ carpet and tile.(T3) Trim: Schluter Systems, Rondec RO 80 EB, brushed stainless. Use w/ tile in restrooms.(Waterproof Membrane System): Laticrete: 9235 or Hydroment Black Top 90210.Quarry TileIndicated on Drawings as:(QT1): 6” x 6” Quarry Tile with abrasive surface, RBC # OT10A-66, Red.(QT2): 6” x 6” Quarry Tile Cove Base, RBC # 10-Q3565, Red.(QT2a): 6” x 6” Quarry Tile Cove Right Corner, RBC # 10-QCR3565, Red.(QT2b): 6” x 6” Quarry Tile Cove Left Corner, RBC # 10-QCL3565, Red.SECTION 09511 – SUSPENDED ACOUSTICAL CEILINGSIndicated on Drawings as: (ACT-#)(ACT1): 24 x 48, Vinyl faced gypsum board, White. USG ClimaPlus Vinyl, Stipple 3270.(ACT2): 24 x 24, Vinyl faced gypsum board, White. USG ClimaPlus Vinyl, Stipple 3260.(ACT3): 24 x 24, Mineral fiber, White. USG, Radar ClimaPlus 2210.(ACT4): 24 x 24, Mineral fiber, Flat Black. USG, Radar ClimaPlus 2210.(GRID1): 15/16" Light Duty, aluminum grid system. USG; Donn AX Suspension System.for (ACT1) and (ACT2).(GRID2): 15/16" Intermediate Duty, galvanized steel grid system. USG; Donn DX/DXLDouble Web Grid System, for (ACT3) and (ACT4).(Egg Crate Ceiling Panel): 1/2” x 1/2" x 3/8” thick, styrene plastic egg crate panel. 24” x24” panel, Color Black.SECTION 09650 - RESILIENT FLOORINGIndicated on Drawings as:Resilient Base(RB) 6 inch base, Coved, Color Black.SECTION 09666 - SPECIALTY FLOORINGIndicated on Drawings as:(SPFL): 1/4” thick, vinyl flooring with heat welded seams and coved base, Light Gray.(Cove Base Cap): Aluminum “Z” cove base cap.Material Identification Codes List 04-27-1100011-10
SECTION 09680 - CARPETIndicated on Drawings as: (CPT-#)(CPT1): Custom Mohawk, Broadloom, BWW 50545-37907.(Carpet Base): Mohawk, Broadloom, Spectrum V, BC246; Color: XJ7234, Black.6” high.SECTION 09720 - WALL COVERINGSIndicated on Drawings as: (WC-#)(WC1): Forbo Marmoleum, Linoleum Wall Covering, Pattern: Real, Color: #2939,Black.(T4) Trim: Corner Guard; 1-1/2” x 1-1/2” x length as required, PVC corner guard.SECTION 09900 – PAINTS AND COATINGSIndicated on Drawings as:Color IndicatorsSubstrates(PS#) = Paint System: Prime and Topcoat on Substrate(C#) = Color Number: Color and SheenExample: (PS1/C2) = Paint System and ColorAll products from Sherwin-Williams Co., (SW)(C1): Match RL Steeple Chase, Color Accents, Satin.(C2): SW #6328, “Fireweed”, Satin.(C3): SW #6683, “Bee”, Satin.(C4): SW #6991, “Black Magic”, Flat.(C5): SW #6991, “Black Magic”, Satin.(C6): SW #7006, “Extra White”, Satin.(C7): SW #6683, “Bee”, Gloss.(C8): SW #6991, “Black Magic”, Semi-Gloss.(C9): SW #7055, “Enduring Bronze”, Color to match Face Brick (FBR), Semi-Gloss.Refer to Section 04810.(C10): SW #6117, “Smoky Topaz”, Color to match (EIFS1), Semi-Gloss.Refer to Section 07240.(C11): SW #7055, “Enduring Bronze”, Semi-Gloss Epoxy.(C12): SW #7006, “Extra White”, Semi-Gloss Epoxy.(C13): SW #6898, “Social Butterfly”, Satin, Color match for (EIFS2).(C14): Clear Finish, Polyurethane Satin, Wood Doors.ExteriorConcreteConcrete blockSteelGalvanized steelHM Doors and FramesFiber Cement Siding and TrimGas PipingInteriorGypsum boardHM Doors and FramesSteel overhead structureWood, paintedWood, clear finishedSECTION 09960 – FIELD APPLIED HIGH PERFORMANCE PAINT SYSTEMThis Optional Section is used for specific remodel projects only.(PS30): PPG Coraflon ADS; Field applied kynar finish for application to existingstorefronts.(C20): Color: No. ADS9833030, “Anodized Aluminum”.Material Identification Codes List 04-27-1100011-11
DIVISION 10 - SPECIALTIESSECTION 10010 – MISCELLANEOUS SPECIALTIESIndicated on Drawings as:(Knox Box): Knox Company, 3200 Series, Option for Recessed or Surface Mount. Color:Dark Bronze.(Precast Concrete Splash Blocks): Install at downspout locations.Optional(Anti-Graffiti Film): 3M, “Scotchgard” Anti-Graffiti Window Protective Film; No. AG-4.Storefront and Restroom Mirrors.SECTION 10210 - WALL LOUVERSIndicated on Drawings as:(LVR1): Intake Louvers with insect screens.(LVR2): Exhaust Louvers with bird screens.SECTION 10263 – CORNER GUARDSIndicated on Drawings as:(WCG1): 2” x 2” x 48” long, stainless steel wall corner guards.SECTION 10445 – DOOR AND ROOM SIGNSIndicated on Drawings as:(SIGN1): 6” x 9”, Handicap Wall Sign, black sign with engraved white letters andsymbols and Braille coding. Product # SG 2521B, Women.(SIGN2): 6” x 9”, Handicap Wall Sign, black sign with engraved white letters andsymbols and Braille coding. Product # SG 2511B, Men.(SIGN3): 4” x 16”, Door sign, black sign with engraved white letters.Product # SG 2025B, Women.(SIGN4): 4” x 16”, Door sign, black sign with engraved white letters.Product # SG 2015B, Men.SECTION 10500 - LOCKERSIndicated on Drawings as:(Lockers): 12” x 12” surface mounted lockers. Configuration: Double tier. 2 units high, 4units wide, 45” coat rod mounted under lockers. ASI Storage Solutions, Inc.SECTION 10523 - FIRE EXTINGUISHERS, CABINETS, AND ACCESSORIESIndicated on Drawings as: (FE-#)(FE1): Multi-Purpose Dry Chemical, bracket mounted.(FE2): Class K Wet Chemical, bracket mounted.(FE1 CAB): Cabinet Mounted Portable Fire Extinguishers: Type (FE1) extinguisher.SECTION 10536 - AWNINGSIndicated on Drawings as:(Fabric Awnings): Fabric awning on aluminum frame, furnished as part of signagepackage.Material Identification Codes List 04-27-1100011-12
SECTION 10810 - TOILET ACCESSORIESIndicated on Drawings as:The following Toilet Accessories are supplied through Twin City HardwareFramed Mirrors(MIR1): Framed mirror, 24” x 36”.Unframed Mirrors Refer to codes under Section 08800 - Glazing.Sanitary Napkin Disposal(SND): Surface mounted, sanitary disposal, 1.5 gal, ASI 0473-A.Grab Bars (GB) 1-1/2" Grab Bar - Concealed mounting.(GB1) 18” long.(GB2) 36” long.(GB3) 42” long.Diaper Changing Station(DCS): Koala, Model KD-200, wall mounted, horizontal.The following Toilet Accessories are Owner FurnishedSoap Dispensers(SDISP): Ecolab, Digitizer Handsoap Dispenser.Paper Towel Dispenser(PTD):Toilet Paper Dispenser1. Tork, Intuition Hand Towel Roll Dispenser.OR2. Tork, Elevation H1 Matic Towel Dispenser.(TPD): Tork, Bath Tissue Jumbo Roll Twin Dispenser.DIVISION 11 - EQUIPMENTNOT USEDDIVISION 12 - FURNISHINGSSECTION 12493 – WINDOW SHADESIndicated on Drawings as:(Window Shades): Owner Furnished, MechoShade 5 manual roller shades.1. Fabric Color: EuroTwill Shade Cloth; No. 6012, “Charcoal”.DIVISION 13 - SPECIAL CONSTRUCTIONNOT USEDMaterial Identification Codes List 04-27-1100011-13
DIVISION 14 - CONVEYING SYSTEMSNOT USED-End of Materials Identification Codes List-Material Identification Codes List 04-27-1100011-14
<strong>Buffalo</strong> <strong>Wild</strong> <strong>Wings</strong>SECTION 00100 - BID SOLICITATION1.01 Bid Invitation and Submission for the above referenced project shall be by e-mail andthrough the Owner’s FTTP Web Site.1.02 Bids are to be received no later than 3:00 PM Central Standard Time on the date defined bythe Owner. LATE BIDS WILL NOT BE ACCEPTED FOR CONSIDERATION.1.03 Bidders agree in submitting a proposal that the bid will remain firm for a period not less thanninety (90) days from the bid due date stipulated above. Bids to receive consideration mustbe complete and cover the full scope of work described in the bid documents and mustinclude unit pricing (see attached). Substitutions for material and equipment listed in the biddocuments is not permitted. Clarifications and acknowledgement of Addenda shall be notedin the bid proposal.1.04 By submitting a bid each bidder represents and acknowledges the following:A. They have read and understand the bid documents and their bid is made in accordancetherewith. Bid shall acknowledge and record the bid documents issuance dated and index ofdrawings;B. Basis of payment is a LUMP SUM;C. Has visited the site (General Contractor and/or Subcontractor) and has familiarized themselveswith local conditions under which the work is to be performed. Discrepancies between existingconditions and bid documents shall be identified, written, and submitted to Owner forclarification prior to bid submission. Compensation for unidentified discrepancies shall be at theOwner's discretion for payment.D. Their bid is based upon the materials, systems and equipment described in the bid documentswithout exceptions (No substitutions will be accepted on material and equipment as listed in thebid documents).E. Their bid is based on a site specific schedule, from permit to Certificate of Occupancy, as statedin the Instructions to Bidders Document. No extension of the project's schedule is anticipatedand no extension of the contract is allowed without the specific written instructions of the Owner.The proposed construction time is firm and critical.F. Within seven (7) days after award of the contract, the successful bidder will submit aconstruction schedule and subcontractor list to the Owner. Owner retains the right to reject anysubcontractor bids as deemed necessary.G. Upon the start of construction, Contractor shall submit daily progress reports, and weeklyprogress photos (hard or digital photos), due on Thursday evenings.H. The Bid will identify the Project Manager and Superintendent for the job.1.05 Refer to Drawing Sheet G001 for Project Responsibility Matrix.1.06 All questions must be received in writing no less than seven days before bids are due.A. Bid proposals must be in accordance with the Owner provided Bid Template. See Budget BidTemplate issued for site specific bids.END OF SECTION04-27-11 BID SOLICITATION00100 -1
SECTION 00200 - INSTRUCTIONS TO BIDDERSINSTRUCTIONS TO BIDDERS –6709 Fayetteville RoadDurham, NCPART 1 - PRE-BID REQUIREMENTS1.01 INTENTA. The Owner/Architect has made every effort to set forth in the Bid Documents the completescope of the Work. Nevertheless, minor omissions and discrepancies shall not excuse theBidder from providing a price to totally complete the project in accordance with the intent ofthese documents.1. Bring any conflicts, omissions, or discrepancies to the attention of the Owner prior tosubmission of an executed bid form. These issues shall be communicated via fax oremail only. No verbal direction is allowed.2. After execution of the Contract, no extra charges will be allowed for items of work wheresuch are concluded to conform to normal construction practices and methods.3. The Contractor and subcontractors have read and understand the Bidding Documents andshall base their bids in accordance with these documents. If conflicts occur within thesedocuments, and without prior clarification, the bidders shall base his bid on the moststringent case of each conflict.1.02 CONFIRMATIONA. Inquiries: Notify the Owner if the meaning of the documents is in doubt, or if discrepanciesor omissions are noted. This notification shall be by written correspondence only. AnAddendum clarifying the issue in question will be sent to all Bidders.B. Site Inspection: Visit the location where the Work is to be performed, become thoroughlyfamiliar with all conditions affecting the work, and compare conditions with the BidDocuments. No consideration will be granted for any misunderstanding of existingconditions resulting from failure to visit the site.06-28-11 INSTRUCTIONS TO BIDDERS00200 -1
CONTRACT FORMSC. Read carefully and become familiar with the forms identified in the List of Contract Forms.1. Should the Owner elect to enter into an agreement to execute the Work, the listed formsprepared by <strong>Buffalo</strong> <strong>Wild</strong> <strong>Wings</strong>, Inc. shall be used. A copy of the Contract accompaniesthese Instructions to Bidders for review.1.03 LAWS AND REGULATIONSA. All applicable federal, state, and local laws and ordinances, as well as the rules andregulations of the jurisdiction where the work is to be executed, shall apply to the Contractthroughout. These will be deemed to be included in the Contract to the same extent asthough herein written, including, but not limited to the following:1. Rules and regulations issued by the City of Durham.2. Rules and regulations issued by the State of North Carolina.3. Rules and regulations issued by Health Department of Durham.4. Rules and regulations issued as part of a developer’s agreement.1.04 COMPLETION TIMEA. Evaluation of each Bid will include serious consideration of the time of completion. TheBidder shall be prepared to execute the Contract to accommodate the Owner's commitmentsand shall govern himself accordingly in completing the Bid Form.B. The Bidder is hereby advised that the Owner has made commitments to Durham based uponthe following construction schedule:1. To be Determined by Owners Project Manager - Start Construction.2. To be Determined by Owners Project Manager - Complete Construction.PART 2 - BID PROCEDURES2.01 BID DOCUMENTSA. You may view and order bid documents by going to the <strong>Buffalo</strong> <strong>Wild</strong> <strong>Wings</strong> Online PlanRoom at: www.DesignBidBuild.net/franz?<strong>Buffalo</strong><strong>Wild</strong><strong>Wings</strong>B. If it is your first time, please register and retain your login information for future access to the<strong>Buffalo</strong> <strong>Wild</strong> <strong>Wings</strong> Online Plan Room.C. After you have registered. Please use your email address and the password you created tolog into the Plan Room. Please enter the project password (This is casesensitive) Once you have selected the project, review the Bid Details for information onordering documents.06-28-11 INSTRUCTIONS TO BIDDERS00200 -2
D. To receive Bid Notices, Bid Addendums, Construction Bulletins, Shipped OrderConfirmations, and Electronic Downloads for this project from <strong>Buffalo</strong> <strong>Wild</strong> <strong>Wings</strong>, you mustplace the following email address in your list of Outlook Contacts: notice@designbidbuild.netNotifications are sent from this email address and not from <strong>Buffalo</strong> <strong>Wild</strong> <strong>Wings</strong>. If you do notdo this, your email server may block the receipt of these notifications. There is a ?Helpbutton that you can select for assistance using the Online Plan Room.E. If you still have problems, please contact Franz Reprographics by phone @ 763-503-3401.F. Trusted Site Settings: www.designbidbuild.net will need to be set as a trusted site. Go to‘Internet Options’, under ‘Tools’ and click on the ‘Security Tab’. Then go to the ‘TrustedSites’ option and click on ‘Sites’. Type: https://www.designbidbuild.net into the text field andclick ‘Add’. The name will then drop into the menu below. Repeat this for:http://designbidbuild.net when entering this address, uncheck “require serververification(https:) for all sites in this zone. Click ‘OK’ to leave2.02 PREPARATION OF BIDSA. The Bid shall be prepared using the Bid Form template forwarded electronically by <strong>Buffalo</strong><strong>Wild</strong> <strong>Wings</strong>, Inc.; no other forms will be considered.1. Bids shall be submitted electronically, with hard copy to follow within 48 hrs. Email Bids toCarmen Conley - (bids@buffalowildwings.com)2. Bids shall include the Bidder's legal name, fully written.3. Oral, telegraphic, or other modifications will not be considered.4. Bids shall include a preliminary construction schedule.5. Bids shall include a list of qualifications and or exclusions.6. Bid period is approximately three (3) weeks.B. Bid Forms shall be sent for delivery prior to the date and time indicated in the Invitation toBid Letter.2.03 OWNER’S RESPONSE TO BIDSA. Submitted Bid Forms will be opened and read privately on the date indicated in the Invitationto Bid Letter. Notice of award will be made by the Owner after consideration of Bidsreceived.B. The Owner reserves the right to respond to the Bids as follows:1. Reject any or all Bids without explanation.2. Waive technicalities.3. Advertise for new bids.4. Proceed to do the work otherwise.C. The following Bids may be rejected as being informal:1. Bids that fail to meet the requirements of these instructions.2. Bids that are incomplete, conditional, or obscure.3. Bids that contain additions not called for, erasures, alterations, or other irregularities.4. Bids that contain abnormally high or abnormally low prices for any class or item of work.06-28-11 INSTRUCTIONS TO BIDDERS00200 -3
PART 3 - CONTRACT EXECUTION3.01 POST-BID SUBMITTALSA. After notification of selection for the award of a Contract, but prior to issuance of aConstruction Agreement, the Bidder shall submit the following to the Owner in writing.1. A designation of the work to be performed with the Bidder's own forces.2. Names of the manufacturers, products and the suppliers of principal items or systems ofmaterials and equipment proposed for the Work.3. Names of persons or entities proposed for the execution of principal portions of theWork.B. The Owner will notify the Bidder in writing if the Owner has reasonable objection to aSubcontractor proposed by the Bidder. If the Owner has reasonable objection to a proposedSubcontractor, the Bidder may, at the Bidder's option:1. Withdraw the bid.2. Submit an acceptable substitute subcontractor with an adjustment in the Bid to cover thedifference in cost.C. The Owner may accept the adjusted Bid Price or disqualify the Bidder. Persons and entitiesaccepted by the Owner must be used on the work for which they were proposed and shall notbe changed except with the written consent of the Owner.3.02 INSURANCE AND BONDSA. Insurance: Upon receipt of a written “Notice to Proceed”, the Bidder shall furnish to theOwner a certificate of insurance in compliance with the requirements of the following:1. General Conditions of the Contract.2. Special Conditions of the Contract.B. Performance and Payment Bonds (if required by Owner): Upon receipt of a ConstructionContract, the Bidder shall furnish to the Owner a Performance Bond and Labor & MaterialsPayment Bond, both for the full amount of the Contract.1. The bonds shall be provided by a properly qualified surety company.2. The cost of the Performance and Payment Bonds shall be indicated on the Bid Form andshall be included in the total proposed Contract Amount.3.03 LABOR FORCEA. Cooperation: The Bidder is advised that the Work may be performed within a buildingcurrently occupied by the public. The Bidder shall assure the Owner that he will providelabor that can work without unduly disturbing the public and ongoing operations within thebuilding.06-28-11 INSTRUCTIONS TO BIDDERS00200 -4
B. Non-Discrimination: The Bidder is advised that the Owner will not tolerate anydiscrimination on the basis of age, gender, race, national origin, or sexual orientation by theBidder or Subcontractors.END OF BID INSTRUCTIONS06-28-11 INSTRUCTIONS TO BIDDERS00200 -5
<strong>Buffalo</strong> <strong>Wild</strong> <strong>Wings</strong>SECTION 00220 - SUBSURFACE INVESTIGATIONPART 1 - GENERAL1.01 GENERALA. Geotechnical Investigation (Subsurface Soils Tests) for the project site has been performed and areport of that investigation has been completed. A copy of the investigation report is containedwithin Section 00221.1.02 SUBSURFACE INFORMATIONA. Log of borings indicates materials penetrated at specific locations. Owner and/or Architectassume no responsibility for any conclusions or interpretations made by Contractor related toinformation included in the Report. Should Contractor require additional information concerningsub-surface conditions, he may without cost to Owner, make additional investigations. Shouldadditional investigations produce information different from that in Soil Report, notify Owner inwriting.1.03 REQUIREMENTA. Contractor read and otherwise become completely familiar with contents of Soil Report, includingbut not limited to its recommendations for preparation of subsoil, bases, sub-bases and fill andconstruction of building foundations, parking and paving. Provide building foundations incompliance with recommendations in Report. Should discrepancy be found between therequirements of Soil Report and the drawings and/or specifications, notify Owner in writing priorto beginning Work.PART 2 - PRODUCTSNot usedPART 3 - EXECUTIONNot usedEND OF SECTION04-27-11 SUBSURFACE INVESTIGATION00220 -1
<strong>Buffalo</strong> <strong>Wild</strong> <strong>Wings</strong>SECTION 01100 – SUMMARY OF WORKPART 1—GENERAL1.01 SUMMARY OF WORKA. Project Identification:1. Project: <strong>Buffalo</strong> <strong>Wild</strong> <strong>Wings</strong> Grill & Bar at 6709 Fayetteville Road, Durham, North Carolina.B. Contract Documents, prepared by the Architect, Design and Engineering, Inc.C. The Work consists of a total square footage as described in the Contract Documents.D. All Work shall be constructed in accordance with all applicable codes and regulations. Workshall be installed in accordance with generally accepted standards of construction and in strictaccordance with manufacturer’s printed instructions and specifications whether specificallydetailed in the Contract Documents or not.E. Contractor shall maintain Owner and Landlord required insurance and Workers’ Compensationat all times and furnish proof of same to Owner prior to start of construction.F. Work Not Included: The following will be provided by others:1. See the Comprehensive Equipment Schedule and Project Responsibility Matrix onDrawing G001, which designates responsibility for furnishing and installing the variousitems included in the Project, as well as final connections.1.02 WORK / SITE RESTRICTIONSA. Contractor shall comply with all building Owner’s standards.B. Contractor’s Use of Premises: During construction, Contractor shall have full use of the site.Contractor’s use of premises is limited only by Owner’s right to perform work or employ othercontractors on portions of Project and as follows: As described by Owner’s Project Manager.1. On-Site No Smoking Policy: As designated below, the Contractor will be responsible tomaintain a No Smoking Policy on site. This policy will include the Contractor’s personnel,subcontractors, material delivery personnel and all other field people on site. There will beno smoking permitted on site after the following time periods. This No Smoking Policy willbe strictly enforced.a. There will be no smoking on the roof area after the roofing materials are installed.b. There will be no smoking inside the building area after the building has beenenclosed. This will commence when the exterior openings have been enclosed andthe insulation and drywall installation begins.PART 2—PRODUCTSNot usedPART 3—EXECUTIONNot usedEND OF SECTION06-28-11 SUMMARY OF WORK01100 -1
<strong>Buffalo</strong> <strong>Wild</strong> <strong>Wings</strong>SECTION 01200 - PRICE AND PAYMENT PROCEDURESPART 1—GENERAL1.01 CONTRACT MODIFICATION PROCEDURESA. Upon Owner’s approval of a Proposal Request Form from the Contractor, the Owner will initiateand issue a Change Order, for all changes to Contract Sum or Contract Time. Contractor shallnot proceed with the additional Work without duly executed Change Order.1.02 PAYMENT PROCEDURESA. Submit a Schedule of Values with the first Application for Payment. In Schedule of Values,break down Contract Sum into at least one line item for each Specification Section. Correlatethe Schedule of Values with Contractor’s Construction Schedule.B. Submit one (1) copy of each application for payment to Owner according to the scheduleestablished in Owner/Contractor Agreement.1. Submit final Application for Payment after completion of Project closeout procedures withfinal release of liens and supporting documentation. Include consent of surety to finalpayment and insurance certificates.PART 2—PRODUCTSNot UsedPART 3—EXECUTIONNot UsedEND OF SECTION04-27-11 PRICE AND PAYMENT PROCEDURES01200 -1
<strong>Buffalo</strong> <strong>Wild</strong> <strong>Wings</strong>SECTION 01300 - ADMINISTRATIVE REQUIREMENTSPART 1—GENERAL1.01 PROJECT MANAGEMENT AND COORDINATIONA. Verify layout information shown on Drawings, in relation to property survey and existingbenchmarks, before laying out the Work.B. Coordinate construction to ensure efficient and orderly execution of each part of the WorkC. Three (3) Meetings will be held at Project site with the Owner or Architect. The first Meeting willbe held at commencement of Construction; the second Meeting will be roughly halfway throughConstruction; the third Meeting will be at the time of generation of the Punch List. Notify Ownerand Architect of Meeting dates. Each subcontractor or other entity concerned with currentprogress or involved with planning or coordination of future activities, shall attend.1. RFI will be generated by General Contractor for issues that will need clarification.1.02 CONSTRUCTION SCHEDULEA. Prepare a horizontal bar-chart Construction schedule, based on a Construction schedule whichwill be provided by the Owner. Provide a separate time bar for each activity and a vertical lineto identify the first workday of each week. Use same breakdown of Work indicated in theSchedule of Values. As Work progresses, mark each bar to indicate actual completion.1. Submit within 10 days after date established for Commencement of the Work.2. Coordinate each element with other activities. Show each activity in proper sequence.Indicate sequences necessary for completion of related Work.3. Indicate Substantial Completion and allow time for Owner’s procedures necessary forcertifying Substantial Completion.4. Schedule Distribution: Distribute copies to Owner, Architect, subcontractors, and partiesrequired to comply with dates.5. Updating: Revise the schedule after each meeting or activity where revisions have beenmade. Distribute revised copies to Owner, Architect, subcontractors, and parties requiredto comply with dates.1.03 SUBMITTAL PROCEDURESA. Coordinate submittal preparation with construction schedule, fabrication lead-times, othersubmittals, and activities that require sequential operations.1. No extension of Contract Time will be authorized due to failure to transmit submittals intime to permit processing sufficiently in advance of when materials are required in theWork.2. Structural Engineer/Architect will not accept submittals from sources other than theContractor.B. Prepare submittals by placing a permanent label on each for identification. Provide a space onthe label or beside title block to record review and approval markings and action taken. Includethe following information on the label:1. Project name.2. Date.3. Name and address of Contractor.4. Name and address of subcontractor or supplier.5. Number and title of appropriate Specification Section.6. Contractor’s certification that materials comply with specified requirements.C. Coordinate each submittal with other submittals and with Work that does not require submittals.04-27-11 ADMINISTRATIVE REQUIREMENTS01300 -1
<strong>Buffalo</strong> <strong>Wild</strong> <strong>Wings</strong>D. Product Data: Mark each copy to show applicable choices and options. Include the following:1. Data indicating compliance with specified standards and requirements.2. Notation of coordination requirements.3. For equipment data, include rated capacities, dimensions, weights, required clearances,and furnished specialties and accessories.E. Shop Drawings: Submit newly prepared information drawn to scale. Do not reproduce ContractDocuments or copy standard information. Submit four (4) blue or black line prints. StructuralEngineer/Architect will return two (2) copies. Include the following:1. Dimensions, profiles, methods of attachment, coordination with adjoining work, large scaledetails, and other information, as appropriate for the Work.2. Identification of products and materials.3. Notation of coordination requirements.4. Notation of dimensions established by field measurement.5. Identification of deviations from Contract Documents.F. Samples: Submit Samples finished as specified and identical with the material proposed.Include product name or name of manufacturer.G. Structural Engineer/Architect will review each submittal, mark as appropriate to indicate actiontaken, and return copies less those retained. Compliance with specified requirements remainsContractor’s responsibility.1. Structural Engineer to review all structural related submittals for all projects.2. Architect to review substitution requests for alternate products as applicable per project.H. Shop Drawings, sample and/or Product Data Submittals are required for the specificationsections identified on the schedules following this section.PART 2—PRODUCTSNot usedPART 3—EXECUTIONNot usedEND OF SECTION04-27-11 ADMINISTRATIVE REQUIREMENTS01300 -2
<strong>Buffalo</strong> <strong>Wild</strong> <strong>Wings</strong>SECTION 01400 - QUALITY REQUIREMENTSPART 1 – GENERAL1.01 SECTION REQUIREMENTSA. Quality control services include inspections, tests, and related actions including reports. Qualitycontrol services are further specified in other Sections of these Specifications and shall beperformed by independent testing agencies provided by Contractor or Owner, as specified.1. Unless otherwise indicated, quality-control services required by authorities havingjurisdiction will be provided by Owner.B. Contractor is responsible for scheduling inspections and tests.C. Retesting: Contractor shall pay for retesting where results of inspections and tests proveunsatisfactory and indicate noncompliance with requirements.D. Auxiliary Services: Cooperate with agencies performing inspections and tests. Provide auxiliaryservices as requested. Notify agency in advance of operations requiring tests or inspections, topermit assignment of personnel. Auxiliary services include the following:1. Access to the Work.2. Incidental labor and facilities to assist inspections and tests.3. Adequate quantities of materials that require testing, and assisting in taking samples.4. Facilities for storage and curing of test samples.5. Security and protection of samples and test equipment.E. Duties of Testing Agency: Testing agency shall cooperate with Architect and Contractor inperforming its duties. Agency shall provide qualified personnel to perform inspections and tests.1. Agency shall promptly notify Architect and Contractor of irregularities or deficienciesobserved in the Work during performance of its services.2. Agency shall not release, revoke, alter, or enlarge requirements of the Contract Documentsor approve or accept any portion of the Work.3. Agency shall not perform duties of Contractor.F. Submittals: Testing agency shall submit a certified written report of each inspection and test tothe following:1. Owner.2. Architect.3. Contractor.4. Authorities having jurisdiction, when authorities so direct.G. Report Data: Reports of each inspection, test, or similar service shall include at least thefollowing:1. Name, address, and telephone number of testing agency.2. Project title and testing agency's project number.3. Designation (number) and date of report.4. Dates and locations where samples were taken or inspections and field tests made.5. Names of individuals taking the sample or making the inspection or test.6. Designation of the product and test method.7. Complete inspection or test data including an interpretation of test results.8. Ambient conditions at the time of sample taking and testing.9. Comments or professional opinion on whether inspected or tested Work complies withrequirements.10. Recommendations on retesting or re-inspection.11. Name and signature of laboratory inspector.04-27-11 QUALITY REQUIREMENTS01400 -1
<strong>Buffalo</strong> <strong>Wild</strong> <strong>Wings</strong>H. Testing Agency Qualifications: Engage inspection and testing agencies that are prequalified ascomplying with the American Council of Independent Laboratories' "Quality Assurance Manual"and that specialize in the types of inspections and tests to be performed.1. Each testing agency shall be authorized by authorities having jurisdiction to operate in theState where Project is located.PART 2 - PRODUCTSNot usedPART 3 – EXECUTIONNot usedEND OF SECTION04-27-11 QUALITY REQUIREMENTS01400 -2
<strong>Buffalo</strong> <strong>Wild</strong> <strong>Wings</strong>PART 1—GENERAL1.01 SECTION REQUIREMENTSSECTION 01500 - TEMPORARY FACILITIES AND CONTROLSA. Standards: Comply with NFPA 241, "Standard for Safeguarding Construction, Alterations, andDemolition Operations"; ANSI A10 Series standards for "Safety Requirements for Constructionand Demolition"; and NECA Electrical Design Library's "Temporary Electrical Facilities."1. Electrical Service: Comply with NEMA, NECA, and UL standards and regulations fortemporary electric service. Install service to comply with NFPA 70.B. At the earliest possible time, when acceptable to Owner, change over from use of temporaryutility services to use of permanent utilities.C. Remove temporary facilities and controls before Substantial Completion. Personnel remainingafter Substantial Completion will be permitted to use permanent facilities, under conditionsacceptable to Owner.PART 2 – PRODUCTSNot usedPART 3 - EXECUTION3.01 TEMPORARY UTILITIESA. Provide temporary utility services, including electric power & lighting, water, power, fireprotection, gas & telephone to Project site for use during construction. Arrange for andcoordinate utility services with local utility companies.1. Contractor shall pay use charges for temporary utilities.B. Provide temporary heat for curing or drying of work, and for protection of new construction fromadverse effects of low temperatures. Use of gasoline-burning heaters and open-flame heaters isnot permitted.1. Maintain a minimum 50 degree F. temperature within the construction area until such timeas the permanent heating plant is installed, inspected and functional.3.02 CONSTRUCTION FACILITIESA. Provide field offices, storage trailers, and other support facilities as necessary for efficientprosecution of the Work.1. Temporary facilities located within the construction area or within 30 feet of building linesshall be of noncombustible construction.B. Contractor shall confirm with the Owner’s representative an acceptable location outside thebuilding to securely store materials and stage construction operations. Thence, the Contractorshall confine operations strictly within this area. Contractor shall keep storage and staging areaclean and neat at all times and shall not allow the accumulation of debris or trash.C. Provide temporary sanitary facilities for all construction personnel. Comply with regulations andhealth codes for type, number, location, and maintenance of facilities.D. Provide temporary enclosures for protection of construction and workers from exposure andinclement weather and for containment of heat.E. Install project identification and other signs in locations approved by Owner to inform the publicand persons seeking entrance to Project.04-27-11 TEMPORARY FACILITIES AND CONTROLS01500 -1
<strong>Buffalo</strong> <strong>Wild</strong> <strong>Wings</strong>F. Collect waste daily and, when containers are full, legally dispose of waste off-site.1. Contractor is responsible for maintaining a dumpster for waste generated by allsubcontractors (owner’s & contractor’s) & trades until the restaurant opens for business.Waste removal shall be scheduled on a regular basis.2. Handle hazardous, dangerous, or unsanitary waste materials in separate closed wastecontainers. Dispose of material according to applicable laws and regulations.G. Open flames are expressly prohibited without the knowledge of and prior consent of the owner’srepresentative.3.03 TEMPORARY CONTROLSA. Provide temporary fire protection per OSHA until permanent systems supply fire-protectionneeds.1. Provide adequate numbers and types of fire extinguishers.2. Store combustible materials in fire-safe containers in fire-safe locations.3. Prohibit smoking in hazardous fire-exposure areas.4. Supervise welding operations, combustion-type temporary heating units, and similarsources of fire ignition.B. Provide temporary barricades, warning signs, and lights to protect the public and constructionpersonnel from construction hazards per OSHA.1. Enclose construction areas with fences with lockable entrance gates, to preventunauthorized access per OSHA.C. Provide temporary environmental controls as required by authorities having jurisdictionincluding, but not limited to, dust control, noise control, and pollution control.END OF SECTION04-27-11 TEMPORARY FACILITIES AND CONTROLS01500 -2
<strong>Buffalo</strong> <strong>Wild</strong> <strong>Wings</strong>SECTION 01600 - PRODUCT REQUIREMENTSPART 1—GENERAL1.01 SECTION REQUIREMENTSA. Provide products of same kind from a single source. The term "product" includes the terms"material”, "equipment”, "system”, and similar terms.B. Deliver, store, and handle products according to manufacturer's written instructions, usingmeans and methods that will prevent damage, deterioration, and loss, including theft.1. Schedule delivery to minimize long-term storage and to prevent overcrowding Constructionspaces.2. Deliver in manufacturer's original sealed packaging with labels and written instructions forhandling, storing, protecting, and installing.3. Inspect products at time of delivery for compliance with the Contract Documents and toensure items are undamaged and properly protected.4. Store heavy items in a manner that will not endanger supporting construction.5. Store products subject to damage on platforms or pallets, under cover in a weather tightenclosure, with ventilation adequate to prevent condensation. Maintain temperature andhumidity within range required.C. Product Substitutions: Reasonable and timely requests for substitutions will be considered.Substitutions include products and methods of Construction differing from that required by theContract Documents and proposed by Contractor after award of Contract.1. Submit four (4) copies of each request for product substitution. Identify product to bereplaced and provide complete documentation showing compliance of proposedsubstitution with applicable requirements. Include a full comparison with the specifiedproduct, a list of changes to other Work required to accommodate the substitution, and anyproposed changes in Contract Sum or Contract Time should the substitution be accepted.2. Submit requests for product substitution in time to permit processing of request forsubsequent Submittals, if any, sufficiently in advance of when materials are required in theWork. Do not submit unapproved substitutions on Shop Drawings or other submittals.3. Architect & Owner will review the proposed substitution and notify Contractor of itsacceptance or rejection. Acceptance of substitution does not relieve the Contractor ofcoordinating all other items. The substitution affects at no additional cost to the Owner.PART 2—PRODUCTS2.01 PRODUCT OPTIONSA. Provide products that comply with the Contract Documents, are undamaged, and are new at thetime of installation.1. Provide products complete with accessories, trim, finish, and other devices andcomponents needed for a complete installation and the intended use and effect.B. Do not attach manufacturer's labels or trademarks, except for required nameplates, on surfacesexposed to view in occupied spaces or on the exterior. Do not remove labels from equipmentrequired to have labels attached.C. Select products as follows:1. Where only a single product or manufacturer is named, provide the item indicated. Nosubstitutions will be permitted.2. Where two or more product or manufacturers are named, provide one of the itemsindicated. No substitutions will be permitted.3. Where products or manufacturers are specified by name, accompanied by the term "orequal," provide the named item or comply with provisions concerning "productsubstitutions" to obtain approval for use of an unnamed product or manufacturer.4. Where a product is described with required characteristics, with or without naming a brand04-27-11 PRODUCT REQUIREMENTS01600 -1
<strong>Buffalo</strong> <strong>Wild</strong> <strong>Wings</strong>or trademark, provide a product that complies with those characteristics and other Contractrequirements.5. Where compliance with performance requirements is specified, provide products thatcomply and are recommended in writing by the manufacturer for the Application.6. Where compliance with codes, regulations, or standards is specified, select a product thatcomplies with the codes, regulations, or standards referenced.D. Unless otherwise indicated, architect will select color, pattern, and texture of each product frommanufacturer's full range of standard options.2.02 OWNER-FURNISHED PRODUCTSA. The following products will be furnished by Owner and shall be installed by Contractor as part ofthe Work:1. See the Comprehensive Equipment Schedule and Project Responsibility Matrix on theArchitectural Drawing G100.B. Contractor shall coordinate all delivery dates and installation requirements & verify quantities ofOwner-furnished items with the Owner prior to the start of Construction.PART 3—EXECUTIONNot usedEND OF SECTION04-27-11 PRODUCT REQUIREMENTS01600 -2
<strong>Buffalo</strong> <strong>Wild</strong> <strong>Wings</strong>PART 1—GENERAL1.01 SUMMARYA. Section Includes:1. Definitions of terms.2. Provisions of reference standards.1.02 DEFINITIONSSECTION 01620 - REFERENCESA. By Owner: Items that will be ordered, paid for and shipped to Project by Owner. Contractor toreceive, unload, unpack or uncrate, protect, move into place, install and connect these items asspecified or indicated in the Contract Documents.B. Provide: Furnish and install, including without limitation, labor, materials, equipment,transportation, services, and other items required to complete referenced tasks.C. Furnish: Pay for, deliver (or receive), unload, inspect, and store as specified or directed whileretaining care, custody and control until received for installation by others.D. Install: Receive, set or place in position, make required connections, adjust and test forsatisfactory performance and operation.E. Product: Materials, systems, and equipment incorporated in or to be incorporated in the Project.F. Herein: As used in the Contract Documents refers to the contents of a particular Section, of thecontents within parts of the Conditions of the Contract and Division 1 - General Requirements.G. Not In Contract (N.I.C.): Products not in the Contract, but which may require provisions in theconstruction for future installation by Others.H. Work: Construction and services required by Contract Documents, whether completed ofpartially completed, and includes labor, materials, equipment and services provided or to beprovided by Contractor to fulfill the Contractor’s obligations. The Work may constitute the wholeor a part of the Project.1.03 REFERENCE STANDARDSA. Reference Standards: For products or workmanship specified by association, trade, FederalStandards, or other reference standards, comply with requirements of the standard, exceptwhen more rigid requirements are specified or are required by governing regulations.B. Standard Dates: Where no specific date of standard is specified, use the most current issuedstandard that is in effect as of the Project Bid date.C. When required by individual Specification Sections or otherwise needed for proper performanceof Work, obtain a copy of the standard. Maintain a copy of standard at Site during submittals,planning, and progress of the affected work, until Substantial Completion.PART 2 PRODUCTSNot usedPART 3 EXECUTIONNot UsedEND OF SECTION04-27-11 REFERENCES01620 -1
<strong>Buffalo</strong> <strong>Wild</strong> <strong>Wings</strong>SECTION 01700 - EXECUTION REQUIREMENTSPART 1 – GENERAL1.01 CLOSEOUT SUBMITTALSA. Record Drawings: Maintain a set of Contract Drawings as Record Drawings. Mark to showinstallation that varies from the Work originally shown.B. Record Specifications: Maintain one copy of the Project Manual, including addenda, as RecordSpecifications. Mark to show variations in Work performed in comparison with the text of theSpecifications and modifications.C. Operation and Maintenance Data: Organize data into three-ring binders, with pocket folders forfolded sheet information. Mark identification on front and spine of each binder. Include thefollowing:1. Emergency instructions.2. Spare parts list.3. Copies of warranties.4. Wiring diagrams.5. Shop Drawings and Product Data.PART 2 – PRODUCTSNot usedPART 3 – EXECUTION3.01 EXAMINATION AND PREPARATIONA. Examine substrates and conditions for compliance with manufacturer's written requirementsincluding, but not limited to, surfaces that are sound, level, and plumb; substrates withininstallation tolerances; surfaces that are smooth, clean, and free of deleterious substances; andapplication conditions within environmental limits. Proceed with installation only afterunsatisfactory conditions have been corrected.B. Prepare substrates and adjoining surfaces according to manufacturer's written instructions,including, but not limited to, filler and primer application.C. Where Drawings indicate dimensions of existing construction verify by field measurement.Where fabricated products are to be fitted to other construction verify dimensions by fieldmeasurement before fabricating and, when possible, allow for fitting and trimming duringinstallation.3.02 CUTTING AND PATCHINGA. Do not cut structural members without prior written approval of Architect.B. For patching, provide materials whose installed performance will equal or surpass that ofexisting materials. For exposed surfaces, provide or finish materials to visually match existingadjacent surfaces to the fullest extent possible.3.03 INSTALLATIONA. Comply with manufacturer's written instructions for installation. Anchor each product securely inplace, accurately located and aligned. Clean exposed surfaces and protect from damage. Ifapplicable, prepare surfaces for field finishing.B. Comply with NFPA 70 for installation of electrically operated equipment and electricalcomponents and materials.04-27-11 EXECUTION REQUIREMENTS01700 -1
<strong>Buffalo</strong> <strong>Wild</strong> <strong>Wings</strong>3.04 FINAL CLEANINGA. Clean each surface or item as follows before requesting inspection for certification ofSubstantial Completion:1. Remove labels that are not permanent.2. Clean transparent materials, including mirrors. Remove excess glazing compounds.Replace chipped or broken glass.3. Clean exposed finishes to a dust-free condition, free of stains, films, and foreignsubstances. Leave concrete floors broom clean.4. Vacuum carpeted surfaces and clean quarry tile flooring & base.5. Clean according to tile & grout manufacturers’ specific recommendations.6. Wipe surfaces of mechanical and electrical equipment. Remove excess lubrication. Cleanplumbing fixtures. Clean light fixtures and lamps. Clean walk-in refrigeration units.7. Remove all construction debris, unused materials, etc. when project is turned over toOwner. Maintain the site in a clean condition during the course of construction. Sweeppaved areas; remove stains, spills, and foreign deposits. Rake grounds to a smooth, eventexturedsurface.3.05 PUNCH LISTA. At time of third Meeting (refer to Specification Section 01300) A copy of the Punch List will beprovided to the Contractor.3.06 CLOSEOUT PROCEDURESA. Request Substantial Completion inspection once the following are complete:1. Advise Owner of pending insurance changeover requirements.2. Submit Record Drawings and Specifications, maintenance manuals, warranties, andsimilar record information.3. Complete startup testing of systems and instruction of operation to Owner’s personnel.4. Remove temporary facilities and controls.5. Complete final cleanup.6. Complete Punch List Repairs.7. Obtain final inspections from authorities having jurisdiction.8. Obtain Certificate of Occupancy.9. Obtain Certificate of Capacity.10. Submit Consent of Surety to final payment.B. Arrange for each installer of equipment that requires operation and maintenance to provideinstruction to Owner's personnel. Include a detailed review of the following:1. Startup and shutdown.2. Emergency operations and safety procedures.3. Noise and vibration adjustments.4. Maintenance manuals.5. Spare parts, tools, and materials.6. Lubricants and fuels.7. Identification systems.8. Control sequences.9. Hazards.10. Warranties and bonds.C. Request inspection for certification of final acceptance, once the following are complete:1. Submit a copy of the Substantial Completion inspection list stating that each item has beencompleted or otherwise resolved for acceptance.04-27-11 EXECUTION REQUIREMENTS01700 -2
<strong>Buffalo</strong> <strong>Wild</strong> <strong>Wings</strong>D. Owner will re-inspect the Work on receipt of notice that the Work has been completed.1. If the Work has been satisfactorily completed, Owner will sign and date the punchlist coversheet. GC will fax/email a copy of this signed and dated cover sheet to the ConstructionManager prior to Opening. GC Superintendent is to remain at the job site through StoreOpening to provide Supervision of all Punchlist item completions, Vendor Installation andall adjustments as required by Store Personnel. Contractor shall guarantee all materialsand workmanship for one year beginning at date of Opening.END OF SECTION04-27-11 EXECUTION REQUIREMENTS01700 -3
<strong>Buffalo</strong> <strong>Wild</strong> <strong>Wings</strong>PART 1 GENERAL1.01 SECTION INCLUDESSECTION 02223 - MINOR DEMOLITION FOR REMODELINGA. Removal of designated construction.B. Disposal of materials.1.02 RELATED SECTIONSA. Section 01100 – Summary of Work: Work sequence and continued occupancy of the building.B. Section 01500 - Temporary Facilities and Controls: Temporary enclosures.C. Section 01700 - Execution Requirements: Closeout Submittals: Project record documents.1.03 REFERENCESA. American National Standards Institute:1. ANSI A10.6: “Safety Requirements for Construction and Demolition”.B. National Fire Protection Association:1. NFPA 241: “Safeguarding Construction, Alteration, and Demolition Operations”.1.03 REGULATORY REQUIREMENTSA. Conform to applicable code for demolition work, dust control, products requiring electricaldisconnection and re-connection.B. Obtain required permits from authorities.C. Do not close or obstruct egress from any building exit or site exit without specific approval fromthe Owner and municipal authority.D. Do not disable or disrupt building fire or life safety systems without 3 days' prior written notice toOwner and without specific approval from the municipal authority.E. Comply with hauling and disposal regulations of authorities having jurisdiction.F. Conform to applicable regulatory procedures when hazardous or contaminated materials arediscovered.1.04 QUALITY ASSURANCEA. Use adequate numbers of skilled workers who are thoroughly trained and experienced in thenecessary trades and who are completely familiar with the specified requirements and methodsneeded for proper performance of the work of this section.B. Comply with ANSI 10.6 and NFPA 241.1.05 SCHEDULINGA. Schedule work under the provisions of Section 01300.B. Schedule work to coincide with new construction and phasing.1.06 PROJECT CONDITIONSA. Conduct demolition to minimize interference with adjacent and occupied building areas.1. Conduct selective demolition and debris-removal operations to ensure minimuminterference with roads, streets, walks, walkways, parking lots, and other adjacentoccupied and used facilities.B. Cease operations immediately if structure appears to be in danger and notify Architect. Do notresume operations until directed.04-27-11 MINOR DEMOLITION FOR REMODELING02223 -1
<strong>Buffalo</strong> <strong>Wild</strong> <strong>Wings</strong>PART 2 PRODUCTSNot UsedPART 3 EXECUTION3.01 PREPARATIONA. Examine the areas and conditions under which work of this section will be performed. Correctconditions detrimental to timely and proper execution of the Work. Do not proceed untilunsatisfactory conditions are corrected.B. In company with the Owner, Architect and appropriate engineering disciplines, visit the site andverify the extent of selective demolition required.1. Carefully identify limits of selective demolition.2. Mark interface surfaces as required to enable workers to identify items to be removed anditems to be left intact.C. Provide, erect, and maintain temporary barriers at locations indicated and as otherwisedetermined to be necessary.D. Erect and maintain weatherproof closures for exterior openings.E. Erect and maintain temporary partitions to prevent spread of dust, odors, and noise to permitcontinued building occupancy.F. Protect existing materials that are not to be demolished.G. Prevent movement of structure; provide bracing and shoring.H. Notify affected utility companies before starting work and comply with their requirements.I. Mark location and termination of utilities.J. Provide appropriate temporary signage including signage for exit or building egress.3.02 DEMOLITIONA. Disconnect, remove, and identify designated utilities within demolition areas.B. Demolish in an orderly and careful manner. Protect existing supporting structural members.C. Remove demolished materials from site except where specifically noted otherwise. Do not burnor bury materials on site.D. Remove materials as demolition progresses. Upon completion of demolition, leave areas inclean condition.E. Remove temporary facilities.END OF SECTION04-27-11 MINOR DEMOLITION FOR REMODELING02223 -2
<strong>Buffalo</strong> <strong>Wild</strong> <strong>Wings</strong>PART 1 GENERAL1.01 SECTION INCLUDESA. Soil treatment for termite control.SECTION 02360 - SOIL TREATMENTB. Application below grade and at interior and exterior foundation perimeter.1.02 REFERENCESA. United States Environmental Protection Agency (EPA):1. EPA - Federal Insecticide, Fungicide, and Rodenticide Act.1.03 SUBMITTALSA. Submittal Procedures1. Product Data: Indicate toxicants to be used, composition by percentage, dilution schedule,and intended application rate.2. Assurance/Control Submittals:a. Certificates:1) Manufacturer's certificate that Products meet or exceed specified requirements.2) Certification that Products comply with EPA regulations for termiticides.3) Certification that Products conform to requirements of local authority havingjurisdiction.b. Qualification Documentation: Submit documentation of experience indicatingcompliance with specified qualification requirements.B. Closeout Submittals: Procedures for closeout submittals.1. Project Record Documents: Accurately record moisture content of soil before treatment,date and rate of application, areas of application, diary of meter readings andcorresponding soil coverage.2. Warranty: Submit manufacturer warranty with forms complete.1.04 QUALITY ASSURANCEA. Applicator Qualifications: Company specializing in performing the Work of this Section withminimum 5 years documented experience and licensed in accordance with regulations ofauthorities having jurisdiction for application of chemical toxicant.B. Regulatory Requirements: Conform to applicable code for application requirements, applicationlicensing, authority to use toxicant chemicals, and in accordance with EPA regulations.1.05 DELIVERY, STORAGE, AND HANDLINGA. Deliver products in manufacturer's original unopened containers with labels intact, identifyingProduct and manufacturer, application instructions, and EPA federal registration number.B. Do not store Products on site. Deliver Products to site at time of application.1.06 SITE CONDITIONSA. Take necessary precautions to prevent leaching, spillage, and wind drift or spray or dust ofmaterial. Do not drain or flush storage containers and application equipment outside treatedarea or into sewers or water courses.B. Environmental Requirements: Do not apply soil treatment to frozen or wet soils or during rain orsnow.04-27-11 SOIL TREATMENT02360 -1
<strong>Buffalo</strong> <strong>Wild</strong> <strong>Wings</strong>1.07 WARRANTYA. Special Warranty:1. Submit written warranty signed by soil treatment applicator and Contractor certifying thatapplied chemical toxicant treatment will prevent infestation of subterranean termites.a. State that application was made at concentration, rates, and methods as specified.b. State that if subterranean termite activity is discovered during warranty period,Contractor will retreat soil and repair damage caused by termite infestation at noadditional cost to the Owner.2. Cover against invasion or propagation of subterranean termites, damage to building orbuilding contents caused by termites; repairs to building or building contents so caused.3. Provide for inspection of Work annually; report in writing to designated Owner’srepresentative.4. Warranty Period: 5 years.PART 2 PRODUCTS2.01 MATERIALSA. EPA and local authority having jurisdiction approved chemical toxicant; water based emulsion,uniform composition, with synthetic dye to permit visual identification of treated soil, bearingFederal registration number of the EPA.B. Do not use fuel oil as diluent.C. Specially formulated to prevent infestation by termites.D. Solution containing one of the following chemical elements and concentrations:1. Permathrin: 0.5 percent in water emulsion.a. Dragnet FT, by FMC Corporation.b. Torpedo, by ICI Americas Corporation.2.02 MIX DILUTIONA. Dilute and mix toxicant chemical to manufacturer's published instructions.PART 3 EXECUTION3.01 EXAMINATIONA. Verification of Conditions: Verify that field measurements, surfaces, substrates and conditionsare as required, and ready to receive Work.1. Verify the soil surfaces are unfrozen, sufficiently dry to absorb toxicant, ready to receivetreatment.2. Verify final grading is complete.B. Report in writing to Owner prevailing conditions that will adversely affect satisfactory executionof the Work of this Section. Do not proceed with Work until unsatisfactory conditions have beencorrected.C. By beginning Work, Contractor accepts conditions and assumes responsibility for correctingunsuitable conditions encountered at no additional cost to the Owner.3.02 PREPARATIONA. Remove foreign matter, loosen, rake, and level soil to be treated, except previously compactedareas under slabs and foundations.3.03 APPLICATIONA. Apply toxicant within 12 hours before installation of vapor retardant under slab-on-grade.04-27-11 SOIL TREATMENT02360 -2
<strong>Buffalo</strong> <strong>Wild</strong> <strong>Wings</strong>B. Apply toxicant to soil at the following rates, using metered applicator:1. Under Floor Slabs-On-Grade:a. Soil or Unwashed Gravel: 1 gallon per 10 square feet.b. Washed Gravel or Other Course Absorbent Material: 1-1/2 gallons per 10 squarefeet.2. Both Sides of Foundation Wall:a. Concrete: 4 gallons per 10 lineal feet, to depth of 12 inches.b. Masonry: 4 gallons per 10 lineal feet for each foot of foundation depth.c. Foundation Penetrations: 2 gallons per lineal foot.C. Exterior Foundation: 4 gallons per 10 lineal feet of trench along outside edge of building.1. Dig trench 6 inches to 8 inches wide along outside of foundation to minimum depth of 12inches and apply toxicant.2. Mix toxicant with soil as it is being backfilled.D. Apply toxicant as a coarse spray; provide uniform distribution.E. Reapply toxicant to areas disturbed by subsequent excavation, landscape grading, or otherconstruction activities occurring after initial toxicant application.3.04 CONSTRUCTIONA. Interface with Other Work:1. Coordinate application of toxicant at foundation perimeter with finish grading andlandscaping work; avoid disturbance of treated soil.B. Post signs in areas of application to warn workers that toxicant has been applied to soil.Remove signs after areas are covered by other construction.3.05 FIELD QUALITY CONTROLA. Inspect and test soil areas where toxicant was applied to determine the presence of anyremaining termites before covering with subsequent construction.B. Reapply toxicant to areas where inspection or testing identifies the presence of termites. Usesame toxicant as for original treatment.3.06 CLEANINGA. Remove storage containers and application equipment from site immediately after application.END OF SECTION04-27-11 SOIL TREATMENT02360 -3
<strong>Buffalo</strong> <strong>Wild</strong> <strong>Wings</strong>SECTION 03300 - CAST- IN - PLACE CONCRETEPART 1 GENERAL1.01 SECTION INCLUDESA. Concrete formwork.B. Floors and slabs on grade.C. Concrete reinforcement.D. Joint devices associated with concrete work.E. Concrete curing.1.02 RELATED SECTIONSA. Section 01300 - Administrative Requirements.B. Section 01400 - Quality Requirements.C. Section 03351 - Concrete Integral Hardener and Sealer.D. Section 07900 - Joint Sealers.1.03 REFERENCESA. American Concrete Institute, (ACI):1. ACI 211.1 - Standard Practice for Selecting Proportions for Normal, Heavyweight, andMass Concrete; American Concrete Institute International.2. ACI 301 - Specifications for Structural Concrete for Buildings; American Concrete InstituteInternational.3. ACI 302.1R - Guide for Concrete Floor and Slab Construction; American Concrete InstituteInternational.4. ACI 304R - Guide for Measuring, Mixing, Transporting, and Placing Concrete; AmericanConcrete Institute International.5. ACI 305R - Hot Weather Concreting; American Concrete Institute International.6. ACI 306R - Cold Weather Concreting; American Concrete Institute International..7. ACI 308R - Guide to Curing Concrete; American Concrete Institute International.8. ACI 318 - Building Code Requirements for Reinforced Concrete and Commentary;American Concrete Institute International.B. American Society for Testing and Materials, (ASTM):1. ASTM A 185/A 185M - Standard Specification for Steel Welded Wire Reinforcement, Plain,for Concrete.2. ASTM A 615/A 615M - Standard Specification for Deformed and Plain Billet-Steel Bars forConcrete Reinforcement.3. ASTM C 33 - Standard Specification for Concrete Aggregates.4. ASTM C 39/C 39M - Standard Test Method for Compressive Strength of CylindricalConcrete Specimens.5. ASTM C 94/C 94M - Standard Specification for Ready-Mixed Concrete.6. ASTM C 143/C 143M - Standard Test Method for Slump of Hydraulic-Cement Concrete.7. ASTM C 150 - Standard Specification for Portland Cement.8. ASTM C 171 - Standard Specification for Sheet Materials for Curing Concrete.9. ASTM C 173/C 173M - Standard Test Method for Air Content of Freshly Mixed Concrete bythe Volumetric Method.10. ASTM C 260 - Standard Specification for Air-Entraining Admixtures for Concrete.11. ASTM C 309 - Standard Specification for Liquid Membrane-Forming Compounds forCuring Concrete.12. ASTM C 494/C 494M - Standard Specification for Chemical Admixtures for Concrete.04-27-11 CAST-IN-PLACE CONCRETE03300 -1
<strong>Buffalo</strong> <strong>Wild</strong> <strong>Wings</strong>13. ASTM C 618 - Standard Specification for Coal Fly Ash and Raw or Calcined NaturalPozzolan for Use in Concrete.14. ASTM C 685/C 685M - Standard Specification for Concrete Made by Volumetric Batchingand Continuous Mixing.15. ASTM C 1107 - Standard Specification for Packaged Dry, Hydraulic-Cement Grout(Nonshrink).16. ASTM D 994 - Standard Specification for Preformed Expansion Joint Filler for Concrete(Bituminous Type).17. ASTM D 1751 - Standard Specification for Preformed Expansion Joint Filler for ConcretePaving and Structural Construction (Nonextruding and Resilient Bituminous Types).18. ASTM E 1745 - Standard Specification for Plastic Water Vapor Retarders Used in Contactwith Soil or Granular Fill under Concrete Slabs.1.04 SUBMITTALSA. Refer to Section 01300 - Administrative Requirements, for submittal procedures.B. Mix Designs: Submit proposed mix design of each class of concrete to Construction Managerfor review prior to commencement of concrete operations.C. Project Record Documents: Accurately record actual locations of embedded utilities andcomponents that will be concealed from view upon completion of concrete work.1.05 QUALITY ASSURANCEA. Perform work of this section in accordance with ACI 301 and ACI 318.B. Source Limitations: Obtain each type or class of cementitious material of the same brand fromthe same manufacturer's plant, obtain aggregate from one source, and obtain admixturesthrough one source from a single manufacturer.C. Follow recommendations of ACI 305R when concreting during hot weather.D. Follow recommendations of ACI 306R when concreting during cold weather.PART 2 PRODUCTS2.01 FORMWORKA. Form Materials: Provide standard products with sufficient strength to withstand hydrostatichead without distortion in excess of permitted tolerances.1. Form Coating: Release agent that will not bond with, stain or adversely affect concrete orinterfere with application of coatings.2.02 REINFORCEMENTA. Comply with requirements as indicated on Structural Drawings.B. Reinforcing Bars: ASTM A 615, Grade 60, deformed.C. Plain-Steel Welded Wire Reinforcement: ASTM A 185, plain, fabricated from as-drawn steelwire into flat sheets.D. Reinforcement Accessories:1. Bar Supports: Bolsters, chairs, spacers, and other devices for spacing, supporting, andfastening reinforcing bars and welded wire reinforcement in place. Manufacture barsupports from steel wire, plastic, or precast concrete according to CRSI's "Manual ofStandard Practice".04-27-11 CAST-IN-PLACE CONCRETE03300 -2
<strong>Buffalo</strong> <strong>Wild</strong> <strong>Wings</strong>2.03 CONCRETE MATERIALSA. Cement: ASTM C 150, Type I - Normal and Type IA - Air-Entraining Portland type.B. Fine and Coarse Aggregates: ASTM C 33.C. Fly Ash: ASTM C 618, Class C or F.D. Calcined Pozzolan: ASTM C 618, Class N.E. Water: Clean and not detrimental to concrete.2.04 CHEMICAL ADMIXTURESA. Do not use chemicals that will result in soluble chloride ions in excess of 0.1 percent by weightof cement.B. Air Entrainment Admixture: ASTM C 260. Provide Daravair manufactured by W. R. Grace.C. Chemical Admixtures:1. Water Reducing: ASTM C 494/C 494M, Type A.2. Retarding: ASTM C 494/C 494M, Type B.3. Accelerating: ASTM C 494/C 494M, Type C.4. Water Reducing and Retarding: ASTM C 494/C 494M, Type D.5. Water Reducing and Accelerating: ASTM C 494/C 494M, Type E.6. Water Reducing, High Range: ASTM C 494/C 494M, Type F.7. Water Reducing, High Range and Retarding: ASTM C 494/C 494M, Type G.2.05 ACCESSORY MATERIALSA. Vapor Retarder: ASTM E 1745, Class C, not less than 10 mils thick. Include manufacturer'srecommended adhesive or pressure-sensitive joint tape.1. Acceptable Manufacturers:a. Raven Industries Inc.; Vapor Block VB10.b. Reef Industries, Inc.; Griffolyn Type- 65.c. Stego Industries, LLC; Stego Wrap, 10 mils.B. Non-Shrink Grout: ASTM C 1107; premixed compound consisting of non-metallic aggregate,cement, water reducing and plasticizing agents.1. Minimum Compressive Strength at 28 Days: 7000 psi.a. Conspec: “Enduro 50 Grout”.b. Euclid: "Euco N-S Grout".c. L & M: "Duragrout".d. Sonneborn: "Sonogrout 10k".e. Five Star Products, Inc.: "Five Star Grout".f. Vexcon Chemicals, Inc.: Certi-Vex Grout #1000.C. Moisture-Retaining Cover: ASTM C 171; regular curing paper, white curing paper, clearpolyethylene, white polyethylene, or white burlap-polyethylene sheet.D. Liquid Curing Compound: ASTM C 309, Type 1, clear or translucent.1. Provide curing compound that is compatible with floor finish adhesives.2.06 BONDING AND JOINTING PRODUCTSA. Joint Filler: Nonextruding, resilient asphalt impregnated fiberboard or felt, complying with ASTMD 1751, thickness as indicated on drawings and full depth of slab less 1/2 inch.B. Sealant and Primer: As specified in Section 07900.04-27-11 CAST-IN-PLACE CONCRETE03300 -3
<strong>Buffalo</strong> <strong>Wild</strong> <strong>Wings</strong>2.07 CONCRETE MIX DESIGNA. Prepare design mixtures for each type and strength of concrete, proportioned on the basis oflaboratory trial mixture or field test data, or both, according to ACI 301.1. Use a qualified independent testing agency for preparing and reporting proposed mixturedesigns based on laboratory trial mixtures.2. Take care in developing mix designs to minimize curling and effects of casting directly onvapor retarder.3. Develop concrete mix designs for slabs on grade to minimize curling and other effectsresulting from casting directly on vapor retarder sheet.B. Proportioning Normal Weight Concrete: Comply with ACI 211.1 recommendations.C. Admixtures: Add acceptable admixtures as recommended in ACI 211.1 and at ratesrecommended by manufacturer.D. Concrete Mix Properties:1. Structural Concrete:a. 28 day compressive strength: 3000 psi.b. Maximum aggregate size: 3/4 inch.c. Maximum slump: 3-5 inches.d. Maximum water/cement ratio: 0.5.2. Interior slab on grade:a. 28 day compressive strength: 4000 psi.b. Maximum aggregate size: 3/4 inch.c. Maximum slump: 3-5 inches.d. Maximum water/cement ratio: 0.5.3. Exterior concrete exposed to freeze-thaw cycles:a. 28 day compressive strength: 4000 psi.b. Maximum aggregate size: 3/4 inch.c. Maximum slump: 3-5 inches.d. Maximum water/cement ratio: 0.55.e. Entrained Air Content: 6±1%.4. Masonry Grout:a. 28 day compressive strength: 3000 psi.b. Maximum aggregate size: 3/8 inch.c. Maximum slump: 8-10 inches.2.08 MIXINGA. Ready-Mixed Concrete: Measure, batch, mix, and deliver concrete according toASTM C 94/C 94M, and furnish batch ticket information.B. Project Site Mixing: Measure, batch and mix in drum type batch mixer, according to ASTM C685. Mix each batch not less than 1-1/2 minutes and not more than 5 minutes.PART 3 EXECUTION3.01 EXAMINATIONA. Verify lines, levels, and dimensions before proceeding with work of this section.3.02 PREPARATIONA. Formwork: Comply with requirements of ACI 301. Design and fabricate forms to support allapplied loads until concrete is cured, and for easy removal without damage to concrete.B. Verify that forms are clean and free of rust before applying release agent.C. Coordinate placement of embedded items with erection of concrete formwork and placement ofform accessories.04-27-11 CAST-IN-PLACE CONCRETE03300 -4
<strong>Buffalo</strong> <strong>Wild</strong> <strong>Wings</strong>D. Where new concrete is to be bonded to previously placed concrete, prepare existing surface bycleaning with steel brush and applying bonding agent in accordance with manufacturer'sinstructions.E. Install No. 5 rebar dowels 24 inches on center where new concrete slabs abut existing concreteslabs. In locations where new concrete is doweled to existing work, drill holes in existingconcrete, insert steel dowels and pack solid with non-shrink grout.F. Install vapor retarder directly below interior slabs on grade. Lap joints minimum 6 inches andseal watertight by taping edges and ends and in accordance with manufacturers instructions.3.03 INSTALLING REINFORCEMENTA. Comply with CRSI's "Manual of Standard Practice" for placing reinforcement.1. Do not cut or puncture vapor retarder. Repair damage and reseal vapor retarder beforeplacing concrete.B. Clean reinforcement of loose rust and mill scale, earth, ice, and other foreign materials thatwould reduce bond to concrete.C. Accurately position, support, and secure reinforcement against displacement. Locate andsupport reinforcement with bar supports to maintain minimum concrete cover as indicated onstructural drawings. Do not tack weld crossing reinforcing bars.D. Set wire ties with ends directed into concrete, not toward exposed concrete surfaces.E. Install welded wire reinforcement in longest practicable lengths on bar supports spaced tominimize sagging. Lap edges and ends of adjoining sheets at least one mesh spacing. Offsetlaps of adjoining sheet widths to prevent continuous laps in either direction. Lace overlaps withwire.3.04 PLACING CONCRETEA. Place concrete in accordance with ACI 304R.B. Place concrete for floor slabs in accordance with ACI 302.1R.C. Ensure reinforcement, inserts, embedded parts, and formed construction joint devices will notbe disturbed during concrete placement.D. Repair underslab vapor retarder damaged during placement of concrete reinforcing. Repairwith vapor retarder material; lap over damaged areas minimum 6 inches and seal watertight.E. Separate slabs on grade from vertical surfaces with joint filler.F. Extend joint filler from bottom of slab to within 1/2 inch of finished slab surface. Conform toSection 07900 for finish joint sealer requirements.G. Install joint devices in accordance with manufacturer's instructions.H. Install construction joint devices in coordination with floor slab pattern placement sequence. Settop to required elevations. Secure to resist movement by wet concrete.I. Apply sealants in joint devices in accordance with Section 07900.J. Maintain records of concrete placement. Record date, location, quantity, air temperature, andtest samples taken.K. Place concrete continuously between predetermined expansion, control, and construction joints.L. Do not interrupt successive placement; do not permit cold joints to occur.M. Saw cut joints within 24 hours after placing. Use 3/16 inch thick blade.04-27-11 CAST-IN-PLACE CONCRETE03300 -5
<strong>Buffalo</strong> <strong>Wild</strong> <strong>Wings</strong>N. Screed floors level, maintaining surface flatness of maximum 1/4 inch in 10 ft.3.05 CONCRETE FINISHINGA. (CONC1) Unexposed Form Finish: Repair surface defects, including tie holes, immediatelyafter removing formwork. Rub down or chip off fins or other raised areas 1/4 inch or more inheight.C. (CONC2) Interior Concrete Slabs: Finish to requirements of ACI 302.1R, and as follows:1. Steel trowel surfaces that will receive carpeting, resilient flooring, and thin set ceramic tile.2. In areas with floor drains, maintain floor elevation at walls; pitch surfaces uniformly todrains at 1:100 nominal. Provide an 8 inch diameter slope area around all floor drains.E. (CONC3) Exterior Horizontal Concrete Surfaces: Apply a broom finish to exterior concretesidewalks, and ramps, and elsewhere as indicated.1. Immediately after float finishing, slightly roughen surface by brooming with fiber-bristlebroom perpendicular to main traffic route.2. Refer to Section 03351 for hardener / sealer applied to exterior concrete surfaces.F. Interior Curbs: Provide monolithic finish to interior curbs by stripping forms while concrete isstill green and by steel-troweling surfaces to a hard, dense finish with corners, intersections,and terminations slightly rounded.G. Equipment Bases and Foundations: Provide machine and equipment bases and foundationsas shown on Drawings. Steel-trowel surfaces to a hard, dense finish with corners, intersections,and terminations slightly rounded.1. Set anchor bolts for machines and equipment at correct elevations, complying withdiagrams or templates from manufacturer furnishing machines and equipment.3.06 CURING AND PROTECTIONA. Utilize curing methods that are compatible with floor finish installation recommendations andthat are approved by floor finish manufacturer and installer.B. Comply with requirements of ACI 308. Immediately after placement, protect concrete frompremature drying, excessively hot or cold temperatures, and mechanical injury.C. Maintain concrete with minimal moisture loss at relatively constant temperature for periodnecessary for hydration of cement and hardening of concrete.1. Normal concrete: Not less than 7 days.D. Surfaces Not in Contact with Forms:1. Start initial curing as soon as free water has disappeared and before surface is dry. Keepcontinuously moist for not less than three days by water-saturated sand, water-fog spray,or saturated burlap.2. Begin final curing after initial curing but before surface is dry.a. Moisture-retaining cover: Seal in place with waterproof tape or adhesive.b. Curing compound: Apply in two coats at right angles, using application raterecommended by manufacturer. Contractor verify compatibility with specified floorfinishes.3.07 FIELD QUALITY CONTROLA. An independent testing agency will perform field quality control tests, as specified in Section01400.B. Provide free access to concrete operations at project site and cooperate with appointed firm.C. Tests of concrete and concrete materials may be performed at any time to ensure conformancewith specified requirements.04-27-11 CAST-IN-PLACE CONCRETE03300 -6
<strong>Buffalo</strong> <strong>Wild</strong> <strong>Wings</strong>D. Compressive Strength Tests: ASTM C 39/C 39M. For each test, mold and cure three concretetest cylinders plus one field cured cylinder. Obtain test samples for every 100 cu yd or less ofeach class of concrete placed.E. Take one additional test cylinder during cold weather concreting, cured on job site under sameconditions as concrete it represents.F. Perform one slump test for each set of test cylinders taken, following procedures of ASTM C143/C 143M.3.08 DEFECTIVE CONCRETEA. Test Results: The testing agency shall report test results in writing to Architect and Contractorwithin 24 hours of test.B. Defective Concrete: Concrete not conforming to required lines, details, dimensions, tolerancesor specified requirements.C. Repair or replacement of defective concrete will be determined by the Owner’s ConstructionManager. The cost of additional testing shall be borne by Contractor when defective concrete isidentified.D. Do not patch, fill, touch-up, repair, or replace exposed concrete except upon express directionof Architect for each individual area.END OF SECTION04-27-11 CAST-IN-PLACE CONCRETE03300 -7
<strong>Buffalo</strong> <strong>Wild</strong> <strong>Wings</strong>PART 1 GENERAL1.01 SECTION INCLUDESSECTION 03351 - CONCRETE INTEGRAL HARDENER AND SEALERA. Integral hardener and sealer for exterior application as indicated on the Drawings andSchedules as (SC), Sealed Concrete.B. All components and accessories required for a complete installation.1.02 RELATED SECTIONSA. Section 03300 - Cast-in-Place Concrete.B. Section 07900 - Joint Sealers.1.03 REFERENCESA. ADA - Americans with Disabilities Act1. ADA Slip Fall Resistance TestsB. Federal VOC Standards for the Concrete Construction Industry.C. EPA - Environmental Protection Agency.1. Modified EPA Test Method 300.D. USDA - United States Department of Agriculture.E. American Association of State Highway and Transportation Officials1. AASHTO T 259 Modified - Crack Sealing CapabilitiesF. ASTM - American Society for Testing and Materials.1. ASTM C-666 (Concrete Durability Test)2. ASTM C-672 (Scaling Resistance)3. ASTM C-642 (Absorption)4. ASTM C-779 (Abrasion Resistance)5. ASTM E-274 (Skid Resistance)6. ASTM E-1155 (Floor Flatness)1.04 QUALITY ASSURANCEA. Comply with Section 01400, Quality Assurance.B. Manufacturer: Company specializing in Work of the Section with documented experience.Components to be by one manufacturer. Manufacturer to provide a list of installations of similarscope and level of quality.C. Installer: Companies specializing in Work of this Section with documented experience.D. Pre-Installation Conference: Conduct conference at project site. Review methods andprocedures related to installation including, but not limited to, the following:1. Inspect and discuss conditions of concrete and other preparatory work performed underother contracts.2. In addition to the Contractor and the installer, arrange for the attendance of installersaffected by the Work, The Owner's representative, the Architect.E. The Contractor to verify special conditions required for the installation of the system.F. The Contractor to notify the Architect of any discrepancies.G. Materials to comply with all applicable V.O.C. standardsH. Provide as a complete system. Refer to schedules.I. Discoloration and odors are unacceptable.04-27-11 CONCRETE INTEGRAL HARDENER AND SEALER03351 -1
<strong>Buffalo</strong> <strong>Wild</strong> <strong>Wings</strong>1.05 DELIVERY, STORAGE, AND HANDLINGA. Deliver materials in manufacturer's sealed packaging, including application instructions.1.06 PROJECT CONDITIONSA. Coordinate the work with concrete slab placement and curing.1.07 WARRANTYA. Provide manufacturer's standard written warranty.1. Repair defects from faulty materials or workmanship developed during the warranty period,or replace with new materials/components, at no expense to Owner.2. Length of warranty to be scheduled by the Owner from manufacturer's standard warranties.PART 2 PRODUCTS2.01 MANUFACTURERSA. (SC) Exterior Concrete Hardener / Sealer.1. Chemtec International; Product ChemTec One: www.concretesealer.net.2. Substitutions: Refer to Section 01600 - Product Requirements.PART 3 - EXECUTION3.01 EXAMINATIONA. Examine areas and conditions under which Work of this Section will be performed. Correctconditions detrimental to timely and proper completion of Work. Do not proceed untilunsatisfactory conditions are corrected.B. Examine substrates surfaces, with installer present, for compliance with requirements forinstallation tolerances and other conditions affecting performance.C. Beginning of installation indicates acceptance of existing conditions.3.02 PREPARATIONA. Surfaces to be treated to meet manufacturers product requirements.B. New Concrete: Clean surfaces to remove loose and foreign matter that could interfere withapplication or performance of products. Allow surfaces to dry completely before beginningapplication.1. The surfaces of the concrete to be clean and free of foreign material, such as grease andcoatings, that would prevent the product from penetrating into the concrete.2. Acid washing of concrete is unacceptable.3. Concrete to be completely dry before start of application.C. Existing Concrete:1. Clean all surfaces so that they are water permeable.2. Strip off coatings, sealers, paint or other contaminant that would prevent the process frompenetrating into the concrete.3. Acid washing of concrete is unacceptable.4. Concrete to be completely dry before start of application.D. Protect adjacent and underlying surfaces by masking or by other means.1. Protect asphaltic and mastic type surfaces from spillage and heavy overspray.3.03 INSTALLATIONA. Install at locations as indicated, to comply with final shop drawings, manufacturer's instructionsand recommendations for application and coverage.04-27-11 CONCRETE INTEGRAL HARDENER AND SEALER03351 -2
<strong>Buffalo</strong> <strong>Wild</strong> <strong>Wings</strong>B. Materials to be premixed and ready to use. Mixing and agitation to be in accordance withmanufacturer's written instructions.C. Method of application to be by pouring, pumping or spraying. Equipment to be recommended bymanufacturer.D. Test application: Contractor to treat an area and textures of the installation to establish physicaland visual effects of application and absorption level to establish coverage rates.E. Install when concrete surface temperatures comply with manufacturer's recommended minimumstandards.F. When the work cannot be completed in one application, location where application is stopped tobe noted and clearly marked.G. Application on exterior concrete surfaces.1. Substrates to be brushed, finished, and fully cured.2. Apply sealer in two applications at manufacturer's recommended rate with a minimum of 4to 6 hours between applications.3. Surface to be saturated with material.4. Puddle areas should be pushed over to dryer areas. Areas that dry prematurely to haveadditional formula brushed around surface until absorption is complete. Re-spraying isacceptable.3.04 CURINGA. Comply with manufacturer's recommendations. Allow a minimum period of 12 hours where nowater is allowed on the surface. Period of time starting after completion of last application.B. Flush surfaces with fresh water, approximately 24 hours after the last application has dried, toprevent any un-reacted material that may be on the surface from becoming slick at the first rain.D. Do not allow concrete to freeze for 24 hours after installation.E. Wait for a minimum of 48 hours prior to application of joint sealants, traffic paints, and/or asphaltoverlays.3.05 ADJUSTMENT AND CLEANINGA. Comply with manufacturer's recommendations.B. Immediately upon completion of installation, clean surfaces.C. Remove surplus materials, rubbish and debris resulting from installation upon completion ofwork and leave areas of installation in neat, clean condition.D. Dispose of waste properly per federal, state or local environmental regulations when required.3.06 PROTECTIONA. Protect installation throughout construction process until date of final completion.B. Provide protection for the installation, ensuring satisfactory operating condition at completion ofProject.END OF SECTION04-27-11 CONCRETE INTEGRAL HARDENER AND SEALER03351 -3
<strong>Buffalo</strong> <strong>Wild</strong> <strong>Wings</strong>PART 1 GENERAL1.01 SECTION INCLUDESA. Mortar for masonry.B. Grout for masonry.1.02 RELATED SECTIONSSECTION 04065 - MORTAR AND MASONRY GROUTA. Section 04810 - Unit Masonry Assemblies: Installation of mortar and grout.1.03 REFERENCESA. ACI 530/ASCE 5/TMS 402 - Building Code Requirements For Masonry Structures; AmericanConcrete Institute International.B. ACI 530.1/ASCE 6/TMS 602 - Specification for Masonry Structures; American Concrete InstituteInternational.C. ASTM C 143 - Test Method for Slump of Hydraulic Cement Concrete.D. ASTM C 144 - Standard Specification for Aggregate for Masonry Mortar.E. ASTM C 150 - Standard Specification for Portland Cement.F. ASTM C 207 - Standard Specification for Hydrated Lime for Masonry Purposes.G. ASTM C 270 - Standard Specification for Mortar for Unit Masonry.H. ASTM C 387 - Standard Specification for Packaged, Dry, Combined Materials for Mortar andConcreteI. ASTM C 404 - Standard Specification for Aggregates for Masonry Grout.J. ASTM C 476 - Standard Specification for Grout for Masonry.K. ASTM C 780 - Standard Test Method for Preconstruction and Construction Evaluation ofMortars for Plain and Reinforced Unit Masonry.L. ASTM C 1019 - Standard Test Method for Sampling and Testing Grout.1.04 QUALITY ASSURANCEA. Comply with provisions of ACI 530/ASCE 5/TMS 402 and ACI 530.1/ASCE 6/TMS 602, exceptwhere exceeded by requirements of the contract documents.1. Maintain one copy of each document on project site.B. Source Limitations for Mortar Materials: Obtain mortar ingredients of a uniform quality, fromsingle manufacturer for each cementitious component and from single source or producer foreach aggregate.1.05 DELIVERY, STORAGE, AND HANDLINGA. Maintain packaged materials clean, dry, and protected against dampness, freezing, and foreignmatter.1.06 FIELD CONDITIONSA. Maintain materials and surrounding air temperature to minimum 50 degrees F prior to, during,and 48 hours after completion of masonry work.B. Maintain materials and surrounding air temperature to maximum 90 degrees F prior to, during,and 48 hours after completion of masonry work.04-27-11 MORTAR AND MASONRY GROUT04065 -1
<strong>Buffalo</strong> <strong>Wild</strong> <strong>Wings</strong>PART 2 PRODUCTS2.01 MATERIALSA. Portland Cement: ASTM C 150, Type I - Normal; standard gray color.B. Packaged Dry Mortar: ASTM C 387, Type as indicated on the Drawings, using gray colorcement.C. Hydrated Lime: ASTM C 207, Type S.D. Mortar Aggregate: ASTM C 144.E. Grout Aggregate: ASTM C 404.F. Water: Clean and potable.2.02 MORTAR COLORA. Colored Mortar: Natural and synthetic iron oxides and chromium oxides, compounded for usein mortar mixes.1. Colors:a. LaFarge North America; “Santan”; color to match (FBR1) Face Brick. Refer to Section04810.b. Spec Mix; Color No. LM-9327-50 #930; color to match (CMU2) Rock Face Block.Refer to Section 04810.2. Mortar Locations:a. Locations of colored mortar: Used to match Face Brick and Rock Faced Block Units.b. Natural colored mortar for all other locations.2.03 MORTAR MIXESA. Mortar for Unit Masonry: ASTM C 270, Property Specification.1. Masonry below grade and in contact with earth: Type S.2. Engineered masonry: Type S.3. Exterior, loadbearing masonry: Type S.4. Exterior, non-loadbearing masonry: Type S.5. Interior, loadbearing and non-loadbearing masonry: Type S.2.04 MORTAR MIXINGA. Thoroughly mix mortar ingredients using mechanical batch mixer, in accordance with ASTM C270 and in quantities needed for immediate use.B. Maintain sand uniformly damp immediately before the mixing process.C. Do not use anti-freeze compounds to lower the freezing point of mortar.D. If water is lost by evaporation, re-temper only within two hours of mixing.E. Use mortar within two hours after mixing at temperatures of 90 degrees F, or two-and-one-halfhours at temperatures under 50 degrees F.2.04 GROUT MIXESA. Grout for Engineered Masonry, Bond Beams, Lintels, and Corefill: Comply with ASTM C 476.1. Use grout type as indicated below:a. Fine grout for spaces with smallest horizontal dimension of 2 inches or less.b. Coarse grout for spaces with smallest horizontal dimension greater than 2 inches.2. Proportion grout in accordance with ASTM C 476,for specified 28-day compressivestrength, 3000 psi.3. Provide grout with a slump of 8 inches as measured according to ASTM C 143/C 143M.04-27-11 MORTAR AND MASONRY GROUT04065 -2
<strong>Buffalo</strong> <strong>Wild</strong> <strong>Wings</strong>2.05 GROUT MIXINGA. Thoroughly mix grout ingredients in quantities needed for immediate use in accordance withASTM C 476 for fine and coarse grout.B. Add admixtures in accordance with manufacturer's instructions; mix uniformly.C. Do not use anti-freeze compounds to lower the freezing point of grout.PART 3 EXECUTION3.01 PREPARATIONA. Apply bonding agent to existing concrete surfaces.B. Plug clean-out holes for grouted masonry with block masonry units. Brace masonry to resistwet grout pressure.3.02 INSTALLATIONA. Install mortar and grout to requirements of section(s) in which masonry is specified.B. Work grout into masonry cores and cavities to eliminate voids.C. Do not install grout in lifts greater than 16 inches without consolidating grout by rodding.D. Do not displace reinforcement while placing grout.E. Remove excess mortar from grout spaces.3.03 GROUTINGA. Low-Lift Grouting:1. Limit height of grout pours to 60 inches.2. Limit height of fresh masonry to 60 inches above each grout pour.3. Pour grout only after vertical and horizontal reinforcing is secured in place usingreinforcement positioners. Prevent displacement of bars as grout is poured.4. Place grout for each pour continuously and consolidate immediately; do not interrupt poursfor more than 1-1/2 hours.5. Stop grout pour 1 ½” below the top of masonry unit to form a key with the next pour, exceptat tops of walls.3.04 FIELD QUALITY CONTROLA. An independent testing agency will perform field tests, in accordance with provisions of Section01400.B. Test and evaluate mortar in accordance with ASTM C 780 procedures.1. Test frequency: Two tests for first 10,000 units laid. If acceptable, continue testing at twotests for every 50,000 units laid.C. Test and evaluate grout in accordance with ASTM C 1019 procedures.1. Test frequency: Three samples for every 50 cubic yards or once per week.END OF SECTION04-27-11 MORTAR AND MASONRY GROUT04065 -3
<strong>Buffalo</strong> <strong>Wild</strong> <strong>Wings</strong>PART 1 GENERAL1.01 SECTION INCLUDESA. Concrete Block.B. Clay Facing Brick.C. Reinforcement and Anchorage.D. Flashings.E. Accessories.1.02 RELATED SECTIONSSECTION 04810 - UNIT MASONRY ASSEMBLIESA. Section 03300 - Cast-In-Place Concrete: Reinforcing steel for grouted masonry.B. Section 04065 - Mortar and Masonry Grout.1.03 REFERENCESA. ACI 530/ASCE 5/TMS 402 - Building Code Requirements for Masonry Structures; AmericanConcrete Institute International.B. ACI 530.1/ASCE 6/TMS 602 - Specification For Masonry Structures; American ConcreteInstitute International.C. ASTM A 82/A 82M - Standard Specification for Steel Wire, Plain, for Concrete Reinforcement.D. ASTM A 153/A 153M - Standard Specification for Zinc Coating (Hot-Dip) on Iron and SteelHardware.E. ASTM C 90 - Standard Specification for Loadbearing Concrete Masonry Units.F. ASTM C 216 - Standard Specification for Facing Brick (Solid Masonry Units Made From Clay orShale).G. ASTM C 954 - Specification for Steel Drill Screws.H. ASTM D 226 - Standard Specification for Asphalt-Saturated Organic Felt Used in Roofing andWaterproofing.I. ASTM E 119 - Test Methods for Fire Tests of Building Construction and Materials.1.04 QUALITY ASSURANCEA. Comply with provisions of ACI 530/ASCE 5/TMS 402 and ACI 530.1/ASCE 6/TMS 602, exceptwhere exceeded by requirements of the contract documents.1.05 DELIVERY, STORAGE, AND HANDLINGA. Store masonry units on elevated platforms in a dry location. If units are not stored in anenclosed location, cover tops and sides of stacks with waterproof sheeting, securely tied. Ifunits become wet, do not install until they are dry.B. Store masonry accessories, including metal items, to prevent corrosion and accumulation of dirtand oil.1.06 ENVIRONMENTAL REQUIREMENTSA. Maintain materials and surrounding air temperature to minimum 40 degrees F prior to, during,and 48 hours after completion of masonry work.04-27-11 UNIT MASONRY ASSEMBLIES04810 -1
<strong>Buffalo</strong> <strong>Wild</strong> <strong>Wings</strong>B. Maintain materials and surrounding air temperature to maximum 90 degrees F prior to, during,and 48 hours after completion of masonry work.1.07 PROJECT CONDITIONSA. Protection of Masonry: During construction, cover tops of walls, projections, and sills withwaterproof sheeting at end of each day's work. Cover partially completed masonry whenconstruction is not in progress.B. Do not apply uniform floor or roof loads for at least 12 hours and concentrated loads for at leastthree days after building masonry walls or columns.C. Stain Prevention: Prevent grout, mortar, and soil from staining the face of masonry to be leftexposed or painted. Immediately remove grout, mortar, and soil that come in contact with suchmasonry.PART 2 PRODUCTS2.01 MASONRY UNITS - GENERALA. Defective Units: Referenced masonry unit standards may allow a certain percentage of units tocontain chips, cracks, or other defects exceeding limits stated in the standard. Do not use unitswhere such defects will be exposed in the completed Work.B. Fire-Resistance Ratings: Where indicated, provide units that comply with requirements for fireresistanceratings indicated as determined by testing according to ASTM E 119, by equivalentmasonry thickness, or by other means, as acceptable to authorities having jurisdiction.2.02 CONCRETE MASONRY UNITSA. (CMU1) Standard Concrete Block: Comply with referenced standards and as follows:1. Load-Bearing Units: ASTM C 90, normal weight.a. Hollow block, as indicated.b. Provide special shapes for lintels, corners, jambs, movement joints, headers, bonding,and other special conditions as indicated or required.B. (CMU2): Integral Colored Rock Faced Concrete Block: Comply with referenced standards andas follows:1. Load-Bearing Units: ASTM C 90, normal weight.a. Hollow block, as indicated.b. Provide special shapes for lintels, corners, jambs, movement joints, headers, bonding,and other special conditions as indicated or required.2. Manufacturer: Amcon Block and Precast, Inc., St. Cloud, MN 56304. Tel: 888-251-6030.www.amconblock.com3. Color: Custom BWW Blend # RF-526.4. Colored Mortar: Refer to Section 04065 – Mortar and Masonry Grout.2.02 BRICK UNITSA. (FBR1) Face Brick: ASTM C 216, Type FBS, Grade SW.1. Size: Actual; 3-5/8 inches wide by 2-1/4 inches high by 7-5/8 inches long.2. Special shapes: Molded units as required by conditions indicated, unless standard unitscan be sawn to produce equivalent effect.3. Manufacturer: Sioux City Brick and Tile Company, Sioux City, Iowa 51102.Tel: 712-258-7571. www.siouxcitybrick.com4. Color and Texture: Toasted Fine Art Velour.5. Colored Mortar: Refer to Section 04065 – Mortar and Masonry Grout.2.03 MORTAR AND GROUT MATERIALSA. Mortar and grout: As specified in Section 04065.04-27-11 UNIT MASONRY ASSEMBLIES04810 -2
<strong>Buffalo</strong> <strong>Wild</strong> <strong>Wings</strong>2.04 REINFORCEMENT AND ANCHORAGEA. Manufacturers of Joint Reinforcement and Anchors:1. Dur-O-Wal: www.dur-o-wal.com2. Heckmann Building Products, Inc: www.heckmannbuildingprods.com3. Hohmann & Barnard, Inc: www.h-b.com4. Masonry Reinforcing Corporation of America: www.wirebond.com5. Substitutions: See Section 01600 - Product Requirements.B. Reinforcing Steel: As indicated on the Drawings.C. Wire Positioners: Provide 9 gage wire unless noted otherwise.1. Acceptable Manufacturers and Products:a. Dur-O-Wal: D/A 811 and D/A 816.b. Hohmann & Barnard, Inc: RB and RB-Twin.c. Masonry Reinforcing Corporation of America: No. 3401 and No. 3402.D. Joint Reinforcement: Single wythe, truss type; ASTM A 82/A 82M steel wire, hot dipgalvanized after fabrication to ASTM A 153/A 153M, Class B; 0.1483 inch side rods with 0.1483inch cross rods; width as required to provide not more than 1 inch and not less than 1/2 inch ofmortar coverage on each exposure.E. Wall Ties: Corrugated formed sheet metal, 7/8 inch wide by 0.05 inch thick, hot dip galvanizedto ASTM A 153/A 153M, Class B, sized to provide not more than 1 inch and not less than 1/2inch of mortar coverage from masonry face.F. Masonry Veneer Anchors: 2-piece anchors that permit differential movement betweenmasonry veneer and structural backup, hot dip galvanized to ASTM A 153/A 153M, Class B.1. Anchor plates: Not less than 0.075 inch thick, designed for fastening to structural backupthrough sheathing by two fasteners.2. Wire ties: triangular shape, 0.1875 inch thick.3. Vertical adjustment: Not less than 2 inches.G. Stainless-Steel Drill Screws for Steel Studs: Proprietary fastener consisting of carbon-steeldrill point and 300 Series stainless-steel shank, complying with ASTM C 954 exceptmanufactured with hex washer head and neoprene or EPDM washer, No. 10 diameter by lengthrequired to penetrate steel stud flange with not less than three exposed threads.1. Acceptable Manufacturers and Products:a. Dayton Superior Corporation, Dur-O-Wal Division; Stainless Steel SX Fastener.b. ITW Buildex; Scots long life Teks.2.05 THRU-WALL FLASHINGA. Thru-Wall Flashing: Copper-Laminated Flashing, 3-oz./sq. ft. copper sheet bonded between 2layers of glass-fiber cloth. Use only where flashing is fully concealed in masonry.1. Acceptable Manufacturers and Products:a. Advanced Building Products Inc.; Copper Fabric Flashing. www.abpnow.comb. Dayton Superior Corporation, Dur-O-Wal Division; Copper Fabric Thru-Wall Flashing.www.dur-o-wal.comc. Hohmann & Barnard, Inc.; H & B C-Fab Flashing. www.h-b.com2.06 ACCESSORIESA. Joint Filler: Closed cell polyvinyl chloride; oversized 50 percent to joint width; self expanding; 4inch wide by maximum lengths available.B. Building Paper: ASTM D 226, Type I ("No.15") asphalt felt.C. Weeps: Cotton rope.04-27-11 UNIT MASONRY ASSEMBLIES04810 -3
<strong>Buffalo</strong> <strong>Wild</strong> <strong>Wings</strong>D. Cavity Mortar Diverter: Semi-rigid polyethylene or polyester mesh blocks, sized to fill bottom ofwall cavity and suspend mortar droppings above weep/cavity vents to allow cavity drainage.1. Provide system manufactured by Mortar Net or CavClear.E. Cleaning Solution: Non-acidic, not harmful to masonry work or adjacent materials.PART 3 EXECUTION3.01 EXAMINATIONA. Verify that field conditions are acceptable and are ready to receive masonry.B. Verify that related items provided under other sections are properly sized and located.C. Verify that built-in items are in proper location, and ready for roughing into masonry work.3.02 PREPARATIONA. Direct and coordinate placement of metal anchors supplied for installation under other sections.B. Provide temporary bracing during installation of masonry work. Maintain in place until buildingstructure provides permanent bracing.3.03 COURSINGA. Establish lines, levels, and coursing indicated. Protect from displacement.B. Maintain masonry courses to uniform dimension. Form vertical and horizontal joints of uniformthickness.C. Concrete Masonry Units:1. Bond: Running.2. Coursing: One unit and one mortar joint to equal 8 inches.3. Mortar Joints: 3/8”, Concave.D. Brick Units:1. Bond: Running.2. Coursing: Three units and three mortar joints to equal 8 inches.3. Mortar Joints: 3/8”, Concave.3.04 PLACING AND BONDINGA. Lay solid masonry units in full bed of mortar, with full head joints, uniformly jointed with otherwork.B. Lay hollow masonry units with face shell bedding on head and bed joints.C. Remove excess mortar and mortar smears as work progresses.D. Interlock intersections and external corners.E. Perform job site cutting of masonry units with proper tools to provide straight, clean, unchippededges. Prevent broken masonry unit corners or edges.3.05 WEEPS/CAVITY VENTSA. Install weeps in veneer walls at 24 inches on center horizontally above thru-wall flashing.B. Install cavity mortar diverter at base of cavity and at other flashing locations as recommendedby manufacturer to prevent mortar droppings from blocking weep/cavity vents.04-27-11 UNIT MASONRY ASSEMBLIES04810 -4
<strong>Buffalo</strong> <strong>Wild</strong> <strong>Wings</strong>3.06 REINFORCEMENT AND ANCHORAGE - GENERALA. Unless otherwise indicated on drawings or specified under specific wall type, install horizontaljoint reinforcement 16 inches on center.B. Lap joint reinforcement ends minimum 6 inches.3.07 REINFORCEMENT AND ANCHORAGE - SINGLE WYTHE MASONRYA. Install horizontal joint reinforcement 16 inches on center.3.08 REINFORCEMENT AND ANCHORAGE - MASONRY VENEERA. Stud Back-Up: Secure veneer anchors to stud framed back-up and embed into masonry veneerat maximum 16 inches on center vertically and 24 inches on center horizontally. Placeadditional anchors at perimeter of openings and ends of panels, so maximum spacing ofanchors is 8 inches on center.3.09 MASONRY FLASHINGSA. Whether or not specifically indicated, install masonry flashing to divert water to exterior at alllocations where downward flow of water will be interrupted.1. Extend flashing full width at such interruptions and at least 4 inches into adjacent masonryor turn up at least 4 inches to form watertight pan at non-masonry construction.2. Remove or cover protrusions or sharp edges that could puncture flashing.B. Extend flashing to within 1/4 inch of exterior face of masonry.3.10 LINTELSA. Install loose steel lintels over openings.3.11 CONTROL AND EXPANSION JOINTSA. Do not continue horizontal joint reinforcement through control and expansion joints.3.12 BUILT-IN WORKA. As work progresses, install built-in metal door frames and other items to be built into the workand furnished under other sections.B. Install built-in items plumb, level, and true to line.C. Bed anchors of metal door and glazed frames in adjacent mortar joints. Fill frame voids solidwith grout.1. Fill adjacent masonry cores with grout minimum 12 inches from framed openings.3.13 CLEANINGA. Remove excess mortar and mortar droppings.B. Replace defective mortar. Match adjacent work.C. Clean soiled surfaces with cleaning solution.3.14 PROTECTIONA. Without damaging completed work, provide protective boards at exposed external corners thatare subject to damage by construction activities.END OF SECTION04-27-11 UNIT MASONRY ASSEMBLIES04810 -5
<strong>Buffalo</strong> <strong>Wild</strong> <strong>Wings</strong>PART 1 GENERAL1.01 SECTION INCLUDESA. Structural steel framing members.B. Base plates.C. Grouting under base plates.1.02 RELATED SECTIONSA. Section 05210 - Steel Joists.SECTION 05120 - STRUCTURAL STEELB. Section 05310 - Steel Deck: Support framing for small openings in deck.C. Section 05500 - Metal Fabrications: Steel fabrications affecting structural steel work.1.03 REFERENCE STANDARDSA. AISC (MAN) - Steel Construction Manual; American Institute of Steel Construction, Inc.B. AISC S303 - Code of Standard Practice for Steel Buildings and Bridges; American Institute ofSteel Construction, Inc.C. AISC S348 - Specification for Structural Joints Using ASTM A325 or A490 Bolts.D. ASTM A 36/A 36M - Standard Specification for Carbon Structural Steel.E. ASTM A 53/A 53M - Standard Specification for Pipe, Steel, Black and Hot-Dipped, Zinc-Coated,Welded and Seamless.F. ASTM A 108: Specification for Steel Bar, Carbon, Cold-Finished.G. ASTM A 307 - Standard Specification for Carbon Steel Bolts and Studs, 60 000 PSI TensileStrength.H. ASTM A 325 - Standard Specification for Structural Bolts, Steel, Heat Treated, 120/105 ksiMinimum Tensile Strength.I. ASTM A 500: Specification for Cold-Formed Welded and Seamless Carbon Steel StructuralTubing in Rounds and ShapesJ. ASTM A 563 - Standard Specification for Carbon and Alloy Steel Nuts.K. ASTM A 992/A 992M - Standard Specification for Structural Steel Shapes.L. ASTM C 1107/C 1107M - Standard Specification for Packaged Dry, Hydraulic-Cement Grout(Nonshrink).M. ASTM E 164 - Standard Practice for Ultrasonic Contact Examination of Weldments.N. ASTM F 436 - Standard Specification for Hardened Steel Washers.O. ASTM F 959 - Standard Specification for Compressible-Washer-Type Direct Tension Indicatorsfor Use with Structural Fasteners.P. AWS A2.4 - Standard Symbols for Welding, Brazing, and Nondestructive Examination;American Welding Society.Q. AWS D1.1/D1.1M - Structural Welding Code - Steel; American Welding Society.R. SSPC-Paint 15 - Steel Joist Shop Primer; Society for Protective Coatings.S. UL (FRD) - Fire Resistance Directory; Underwriters Laboratories Inc.04-27-11 STRUCTURAL STEEL05120 -1
<strong>Buffalo</strong> <strong>Wild</strong> <strong>Wings</strong>1.04 SUBMITTALSA. See Section 01300 - Administrative Requirements, for submittal procedures.B. Shop Drawings:1. Indicate profiles, sizes, spacing, locations of structural members, cuts, openings,attachments, and fasteners.2. Indicate connections including connections not specifically detailed.3. Indicate cambers and loads.4. Indicate type, size, and length of bolts, distinguishing between shop and field bolts.Identify pre-tensioned and slip-critical high-strength bolted connections.5. Indicate welds by standard AWS A2.4 symbols, distinguishing between shop and fieldwelds, and show size, length, and type of each weld.C. Welders Certificates: Certify welders employed on the Work, verifying AWS qualification withinthe previous 12 months.1.05 QUALITY ASSURANCEA. Fabricate structural steel members in accordance with AISC "Steel Construction Manual."B. Comply with Section 10 of AISC "Code of Standard Practice for Steel Buildings and Bridges" forarchitecturally exposed structural steel.C. Maintain one copy of each document on site.D. Fabricator: Company specializing in performing the work of this section with a record ofsuccessful in-service performance.E. Erector: Company specializing in performing the work of this section with a record of successfulin-service performance.1.06 DELIVERY, STORAGE, AND HANDLINGA. Store materials to permit easy access for inspection and identification. Keep steel members offground and spaced by using pallets, dunnage, or other supports and spacers. Protect steelmembers and packaged materials from corrosion and deterioration.1. Do not store materials on structure in a manner that might cause distortion, damage, oroverload to members or supporting structures. Repair or replace damaged materials orstructures as directed.B. Store fasteners in a protected place in sealed containers.1.07 COORDINATIONA. Coordinate selection of shop primers with topcoats to be applied over them. Comply with paintand coating manufacturers' recommendations to ensure that shop primers and topcoats arecompatible with one another.B. Coordinate installation of anchorage items to be embedded in or attached to other constructionwithout delaying the Work. Provide setting diagrams, sheet metal templates, instructions, anddirections for installation.PART 2 PRODUCTS2.01 MATERIALSA. Steel Angles, Plates, Channels, S Shapes, M Shapes, and HP Shapes: ASTM A 36/A 36M.B. Steel W Shapes: ASTM A 992/A 992M.C. Cold-Formed Structural Tubing: ASTM A 500, Grade B. (Fy = 46 ksi)D. Pipe: ASTM A 53/A 53M, Grade B, Finish black and galvanized, as indicated. (Fy = 35 ksi)04-27-11 STRUCTURAL STEEL05120 -2
<strong>Buffalo</strong> <strong>Wild</strong> <strong>Wings</strong>E. Shear Stud Connectors: Fabricate from ASTM A 108 Grade 1015 bars.F. Structural Bolts and Nuts: Carbon steel, ASTM A 307, Grade A.G. High-Strength Structural Bolts, Nuts, and Washers: ASTM A 325 (ASTM A 325M), Type 1,medium carbon, plain.H. Anchor Rods: ASTM A 36.I. Welding Materials: AWS D1.1; type required for materials being welded.J. Non-Shrink Grout: ASTM C 1107; premixed compound consisting of non-metallic aggregate,cement, water reducing and plasticizing agents.1. Minimum Compressive Strength at 28 Days: 7000 psi.a. Conspec: “Enduro 50 Grout”.b. Euclid: "Euco N-S Grout".c. L & M: "Duragrout".d. Sonneborn: "Sonogrout 10k".e. Five Star Products, Inc.: "Five Star Grout".f. Vexcon Chemicals, Inc.: Certi-Vex Grout #1000.K. Shop and Touch-Up Primer: Fabricator's standard, complying with VOC limitations ofauthorities having jurisdiction.L. Touch-Up Primer for Galvanized Surfaces: Fabricator's standard, complying with VOClimitations of authorities having jurisdiction.2.02 FABRICATIONA. Structural Steel: Fabricate and assemble in shop to greatest extent possible. Fabricateaccording to AISC "Code of Standard Practice for Steel Buildings and Bridges" and AISC 360.1. Camber structural-steel members where indicated.2. Mark and match-mark materials for field assembly.3. Complete structural-steel assemblies, including welding of units, before starting shopprimingoperations.4. Fabricate connections for bolt, nut, and washer connectors.2.03 FINISHA. Prepare structural component surfaces in accordance with SSPC SP 7 and SP2 or SP3.B. Immediately after surface preparation, shop prime structural steel members. Do not primesurfaces that will be field welded, in contact with concrete, or high strength bolted with slipcriticalconnectors.2.04 SOURCE QUALITY CONTROLA. High-Strength Bolts: Provide testing and verification of shop-bolted connections in accordancewith AISC "Specification for Structural Joints Using ASTM A325..1. Visually inspect 100 percent of connections to ensure that all plies of connected parts arein complete contact.B. Welded Connections: Visually inspect all shop-welded connections and test 100 percent of fullpenetration welds using the following:1. Ultrasonic testing performed in accordance with ASTM E 164.PART 3 EXECUTION3.01 EXAMINATIONA. Verify that conditions are appropriate for erection of structural steel and that the work mayproperly proceed.04-27-11 STRUCTURAL STEEL05120 -3
<strong>Buffalo</strong> <strong>Wild</strong> <strong>Wings</strong>3.02 PREPARATIONA. Provide temporary shores, guys, braces, and other supports during erection to keep structuralsteel secure, plumb, and in alignment against temporary construction loads and loads equal inintensity to design loads. Remove temporary supports when permanent structural steel,connections, and bracing are in place unless otherwise indicated.3.02 ERECTIONA. Erect structural steel in compliance with AISC "Code of Standard Practice for Steel Buildingsand Bridges".B. Use carbon steel bolts only for temporary bracing during construction, unless otherwisespecifically permitted on drawings. Install high-strength bolts in accordance with AISC"Specification for Structural Joints Using ASTM A325.C. Do not field cut or alter structural members without approval of Architect.D. After erection, prime welds, abrasions, and surfaces not shop primed, except surfaces to be incontact with concrete.E. Grout solidly between column base plates and bearing surfaces, complying with manufacturer'sinstructions for nonshrink grout. Trowel grouted surfaces smooth, splaying neatly to 45degrees.3.03 TOLERANCESA. Maximum Variation From Plumb: 1/4 inch per story, non-cumulative.B. Maximum Offset From True Alignment: 1/4 inch.3.04 FIELD QUALITY CONTROLA. An independent testing agency will perform field quality control tests, as specified in Section01400.B. High-Strength Bolts: Provide testing and verification of field-bolted connections as stated inSection 05120, Article 2.04.C. Welded Connections: Visually inspect all field-welded connections and test welds as stated inSection 05120, Article 2.04.END OF SECTION04-27-11 STRUCTURAL STEEL05120 -4
<strong>Buffalo</strong> <strong>Wild</strong> <strong>Wings</strong>SECTION 05210 – STEEL JOISTSPART 1—GENERAL1.01 SECTION INCLUDESA. Open web steel joists.B. Joist accessories.1.02 RELATED SECTIONSA. Section 05120 – Structural Steel.B. Section 05310 - Steel Deck.1.03 REFERENCE STANDARDSA. American Welding Society, (AWS):1. AWS D1.1/D1.1M-02: Structural Welding Code – Steel.B. American Society for Testing and Materials, (ASTM):1. ASTM A 36/A 36M: Specification for Carbon Structural Steel.2. ASTM A 307: Specification for Carbon Steel Bolts and Studs, 60,000 PSI Tensile Strength.C. The Society for Protective Coatings, (SSPC):1. SSPC-Paint 15: Paint Specification No. 15: Steel Joist Shop Primer.2. SSPC-SP 2: Surface Preparation Specification No. 2: Hand Tool CleaningD. Steel Joist Institute, (SJI):1. SJI "Standard Specification, Load Tables, and Weight Tables for Steel Joists and JoistGirders,".2. SJI "Code of Standard Practice for Steel Joists and Joist Girders".1.04 SUBMITTALSA. See Section 01300 - Administrative Requirements, for submittal procedures.B. Shop Drawings: Show layout, designation, number, type, location, and spacing of joists.Include joining and anchorage details, bracing, bridging, extensions, joist accessories; spliceand connection locations and details; and attachments to other construction.1. Indicate locations and details of bearing plates to be embedded in other construction.2. Indicate welds by standard AWS A2.4 symbols, distinguishing between shop and fieldwelds, and show size, length, and type of each weld.C. Welders Certificates: Certify welders employed on the Work, verifying AWS qualification withinthe previous 12 months.D. Manufacturer Certificates: Signed by manufacturers certifying that joists comply withrequirements.E. Field quality-control test and inspection reports.1.05 QUALITY ASSURANCEA. Manufacturer Qualifications: A manufacturer certified by SJI to manufacture joists complyingwith applicable standard specifications and load tables of SJI "Specifications."1. Manufacturer's responsibilities include providing professional engineering services fordesigning special joists to comply with performance requirements.B. SJI Specifications: Comply with standard specifications in SJI's "Specifications" that areapplicable to types of joists indicated.C. Welding: Qualify procedures and personnel according to AWS D1.1/D1.1M, "Structural WeldingCode - Steel."04-27-11 STEEL JOISTS05210 -1
<strong>Buffalo</strong> <strong>Wild</strong> <strong>Wings</strong>1.06 DELIVERY, STORAGE, AND HANDLINGA. Deliver, store, and handle joists as recommended in SJI's "Specifications."B. Protect joists from corrosion, deformation, and other damage during delivery, storage, andhandling.PART 2—PRODUCTS2.01 MATERIALSA. Steel: Comply with SJI "Specifications" for web and steel-angle chord members.B. Steel Bearing Plates: ASTM A 36/A 36M.C. Carbon-Steel Bolts and Threaded Fasteners: ASTM A 307, Grade A, carbon-steel, hex-headbolts and threaded fasteners; carbon-steel nuts; and flat, unhardened steel washers.D. Welding Electrodes: Comply with AWS standards.2.02 K-SERIES STEEL JOISTSA. Manufacture steel joists of type indicated according to "Standard Specifications for Open WebSteel Joists, K-Series" in SJI "Specifications," with steel-angle top and bottom chord members,underslung ends, and parallel top chord.1. Joist Type: K-series steel joists.B. Comply with AWS requirements and procedures for shop welding, appearance, quality of welds,and methods used in correcting welding work.C. Provide holes in chord members for connecting and securing other construction to joists.D. Top-Chord Extensions: Extend top chords of joists with SJI Type S top-chord extensions whereindicated, complying with SJI "Specifications."E. Extended Ends: Extend bearing ends of joists with SJI Type R extended ends where indicated,complying with SJI "Specifications."F. Do not camber joists.G. Equip bearing ends of joists with manufacturer's standard beveled ends or sloped shoes if joistslope exceeds 1/4 inch per 12 inches.2.03 JOIST ACCESSORIESA. Bridging: Fabricate as indicated and according to SJI "Specifications." Furnish additionalerection bridging if required for stability.B. Fabricate steel bearing plates with integral anchorages of sizes and thicknesses as indicated.Shop prime paint.C. Supply miscellaneous accessories, including splice plates and bolts required by joistmanufacturer to complete joist installation.2.04 PRIMERSA. Primer: SSPC-Paint 15, or manufacturer's standard shop primer complying with performancerequirements in SSPC-Paint 15.04-27-11 STEEL JOISTS05210 -2
<strong>Buffalo</strong> <strong>Wild</strong> <strong>Wings</strong>2.05 CLEANING AND SHOP PAINTINGA. Clean and remove loose scale, heavy rust, and other foreign materials from fabricated joists andaccessories.B. Apply 1 coat of shop primer to joists and joist accessories to be primed to provide a continuous,dry paint film not less than 1 mil thick.PART 3—EXECUTION3.01 EXAMINATIONA. Examine supporting substrates, embedded bearing plates, and abutting structural framing forcompliance with requirements for installation tolerances and other conditions affectingperformance.1. Proceed with installation only after unsatisfactory conditions have been corrected.3.02 INSTALLATIONA. Do not install joists until supporting construction is in place and secured.B. Install joists and accessories plumb, square, and true to line; securely fasten to supportingconstruction according to SJI "Specifications," joist manufacturer's written recommendations,and requirements in this Section.1. Space, adjust, and align joists accurately in location before permanently fastening.2. Install temporary bracing and erection bridging, connections, and anchors to ensure thatjoists are stabilized during construction.3. Delay rigidly connecting bottom-chord extensions to columns or supports until dead loadshave been applied.C. Field weld joists to supporting steel bearing plates and framework. Coordinate weldingsequence and procedure with placement of joists. Comply with AWS requirements andprocedures for welding, appearance and quality of welds, and methods used in correctingwelding work.D. Bolt joists to supporting steel framework using carbon-steel bolts in locations indicated.E. Install and connect bridging concurrently with joist erection, before construction loads areapplied.F. Anchor ends of bridging lines at top and bottom chords if terminating at walls or beams.3.03 FIELD QUALITY CONTROLA. An independent testing agency will perform field quality control tests, as specified in Section01400.B. Field welds will be visually inspected according to AWS D1.1/D1.1M.C. Bolted connections will be visually inspected.D. Correct deficiencies in Work that test and inspection reports have indicated are not incompliance with specified requirements.E. Additional testing will be performed to determine compliance of corrected Work with specifiedrequirements.04-27-11 STEEL JOISTS05210 -3
<strong>Buffalo</strong> <strong>Wild</strong> <strong>Wings</strong>3.04 REPAIRS AND PROTECTIONA. Touchup Painting: After installation, promptly clean, prepare, and prime or re-prime fieldconnections, rust spots, and abraded surfaces of prime-painted joists, bearing plates, abuttingstructural steel, and accessories.1. Clean and prepare surfaces by hand-tool cleaning, SSPC-SP 2.2. Apply a compatible primer of same type as shop primer used on adjacent surfaces.END OF SECTION04-27-11 STEEL JOISTS05210 -4
<strong>Buffalo</strong> <strong>Wild</strong> <strong>Wings</strong>PART 1 GENERAL1.01 SECTION INCLUDESA. Roof deck.SECTION 05310 - STEEL DECKB. Supplementary framing for openings up to and including 10 inches.1.02 RELATED SECTIONSA. Section 05120 - Structural Steel.B. Section 05210 - Steel Joists: Support framing for openings larger than 18 inches.1.03 REFERENCE STANDARDSA. ASTM A 1008/A 1008M - Standard Specification for Steel, Sheet, Cold-Rolled, Carbon,Structural, High-Strength, Low Alloy, and High-Strength Low-Alloy with Improved Formability,Solution Hardened, and Bake Hardened.B. AWS D1.1/D1.1M - Structural Welding Code - Steel; American Welding SocietyC. AWS D1.3 - Structural Welding Code - Sheet Steel; American Welding Society.D. SSPC-Paint 15 - Steel Joist Shop Primer; The Society for Protective Coatings.E. UL (FRD) - Fire Resistance Directory; Underwriters Laboratories Inc.1.04 SUBMITTALSA. See Section 01300 - Administrative Requirements, for submittals procedures.B. Shop Drawings: Indicate deck plan, support locations, projections, openings, reinforcement,pertinent details, and accessories.C. Product Data: Provide deck profile characteristics, dimensions, structural properties, andfinishes.D. Certificates: Certify that products furnished meet or exceed specified requirements.E. Welders Certificates: Certify welders employed on the Work, verifying AWS qualification withinthe previous 12 months.1.05 QUALITY ASSURANCEA. Design deck layout, spans, fastening, and joints under direct supervision of a ProfessionalStructural Engineer experienced in design of this work and licensed in.B. Installer Qualifications: Company specializing in performing the work of this Section with arecord of successful in-service performance.1.06 DELIVERY, STORAGE, AND HANDLINGA. Protect steel deck from corrosion, deformation, and other damage during delivery, storage, andhandling.B. Stack steel deck on platforms or pallets and slope to provide drainage. Protect with awaterproof covering and ventilate to avoid condensation.04-27-11 STEEL DECK05310 -1
<strong>Buffalo</strong> <strong>Wild</strong> <strong>Wings</strong>PART 2 PRODUCTS2.01 MANUFACTURERSA. Steel Deck:1. United Steel Deck , Inc: www.njb-united.com.2. Nucor-Vulcraft Group: www.vulcraft.com.3. Wheeling Corrugating Co: www.wheelingcorrugating.com.4. Substitutions: See Section 01600 - Product Requirements.2.02 STEEL DECKA. Roof Deck: Wide Rib (Type B) Roof deck:1. Non-galvanized Steel Sheet: ASTM A 1008, Grade 3.2. Primer: Shop coat of manufacturer's standard primer paint over cleaned and phosphatizedsubstrate.3. Structural Properties:a. Section modulus: SDI minimum for type of deck shown on Drawings.b. Span Design: 3 span minimum.4. Minimum Metal Thickness, Excluding Finish: Refer to Drawings for gauge.5. Nominal Height: 1-1/2 inch.6. Profile: Wide Rib, Type B.7. Formed Sheet Width: 36 inch.8. Side Joints: Lapped, mechanically fastened. Provide #10 TEK fasteners.9. End Joints: Lapped, welded, 4” minimum end lap.2.03 ACCESSORY MATERIALSA. Welding Materials: AWS D1.1.B. Fasteners: Galvanized hardened steel, self tapping.C. Shop and Touch-Up Primer: SSPC-Paint 15, complying with VOC limitations of authoritieshaving jurisdiction.1. Primer Color: Gray.D. Flute Closures: Closed cell foam rubber, 1 inch thick; profiled to fit tight to the deck.2.04 FABRICATED DECK ACCESSORIESA. Sheet Metal Deck Accessories: Metal closure strips and cover plates, 22 gage thick sheet steel;of profile and size as indicated; finished same as deck.B. Roof Sump Pans: 14 gage sheet steel, flat bottom, sloped sides, recessed 1-1/2 inches belowroof deck surface, bearing flange 3 inches wide, sealed watertight.PART 3 EXECUTION3.01 EXAMINATIONA. Verify existing conditions prior to beginning work.3.02 INSTALLATIONA. Erect metal deck in accordance with SDI Design Manual and manufacturer's instructions. Alignand level.B. On steel supports provide minimum 1-1/2 inch bearing.C. Fasten deck to steel support members at ends and intermediate supports as indicated on theDrawings.D. Weld deck in accordance with AWS D1.3.04-27-11 STEEL DECK05310 -2
<strong>Buffalo</strong> <strong>Wild</strong> <strong>Wings</strong>E. At deck openings from 6 inches to 10 inches in size, provide 2 x 2 x 1/4 inch steel anglereinforcement. Place angles perpendicular to flutes; extend minimum two flutes beyond eachside of opening and fusion weld or mechanically attach to deck at each flute.F. Where deck changes direction, install 6 inch minimum wide sheet steel cover plates, of samethickness as deck. Fusion weld 12 inches on center maximum.G. At openings between deck and walls, columns, and openings, provide sheet steel closures andangle flashings to close openings.H. Close openings above walls and partitions perpendicular to deck flutes with single row of foamcell closures.I. Position roof drain pans with flange bearing on top surface of deck. Fusion weld at each deckflute.J. Immediately after welding deck and other metal components in position, coat welds, burnedareas, and damaged surface coating, with touch-up primer.3.03 FIELD QUALITY CONTROLA. Welded Connections: Visually inspect 100 percent of connections to ensure that all plies ofconnected parts are in complete contact.END OF SECTION04-27-11 STEEL DECK05310 -3
<strong>Buffalo</strong> <strong>Wild</strong> <strong>Wings</strong>PART 1 GENERAL1.01 SECTION INCLUDESSECTION 05400 - COLD FORMED METAL FRAMINGA. Formed steel stud exterior wall framing and bracing.1.02 RELATED REQUIREMENTSA. Section 04810 - Unit Masonry Assemblies.B. Section 05120 - Structural Steel.C. Section 05310 - Steel Deck.D. Section 09260 - Gypsum Board Assemblies: Lightweight, non-load bearing metal stud framing.1.03 REFERENCE STANDARDSA. AISI SG02-1 - North American Specification for the Design of Cold-Formed Steel StructuralMembers; American Iron and Steel InstituteB. AISI SG-971 - Specification for the Design of Cold-Formed Steel Structural Members; AmericanIron and Steel InstituteC. ASTM A 153/A 153M - Standard Specification for Zinc Coating (Hot-Dip) on Iron and SteelHardwareD. ASTM A 123/A 123M - Standard Specification for Zinc (Hot-Dip Galvanized) Coatings on Ironand Steel Products.E. ASTM A 653/A 653M - Standard Specification for Steel Sheet, Zinc-Coated (Galvanized) orZinc-Iron Alloy-Coated (Galvannealed) by the Hot-Dip Process.F. ASTM C 955 - Standard Specification for Load-Bearing (Transverse and Axial) Steel Studs,Runners (Tracks), and Bracing or Bridging for Screw Application of Gypsum Panel Products andMetal Plaster Bases.G. AWS D1.1/D1.1M - Structural Welding Code - Steel; American Welding Society.H. SSPC-Paint 20 - Zinc-Rich Primers (Type I, "Inorganic," and Type II, "Organic"); Society forProtective Coatings.1.04 SUBMITTALSA. See Section 01300 - Administrative Requirements, for submittal procedures.B. Product Data: Provide data on standard framing members; describe materials and finish,product criteria, limitations.C. Shop Drawings: Show layout, spacing, sizes, thicknesses, and types of cold-formed metalframing; fabrication; and fastening and anchorage details, including mechanical fasteners.Show reinforcing channels, opening framing, supplemental framing, strapping, bracing, bridging,splices, accessories, connection details, and attachment to adjoining work.D. Welders Certificates: Certify welders employed on the Work, verifying AWS qualification withinthe previous 12 months.1.05 QUALITY ASSURANCEA. Calculate structural properties of framing members in accordance with requirements of AISINorth American Specification for the Design of Cold-Formed Steel Structural Members.04-27-11 COLD FORMED METAL FRAMING05400 -1
<strong>Buffalo</strong> <strong>Wild</strong> <strong>Wings</strong>1.06 DELIVERY, STORAGE, AND HANDLINGA. Protect cold-formed metal framing from corrosion, deformation, and other damage duringdelivery, storage, and handling.B. Store cold-formed metal framing, protect with a waterproof covering, and ventilate to avoidcondensation.1.06 PROJECT CONDITIONSA. Verify that field measurements are as indicated on the drawings.B. Coordinate work of this section with the placement of components within the stud framingsystem.PART 2 PRODUCTS2.01 FRAMING SYSTEMA. Provide primary and secondary framing members, bridging, bracing, plates, gussets, clips,fittings, reinforcement, and fastenings as required to provide a complete framing system.2.02 FRAMING MATERIALSA. Studs and Track: ASTM C 955; studs formed to channel, "C", or "Sigma" shape with punchedweb; U-shaped track in matching nominal width and compatible height.1. Gage and depth: As indicated on the drawings.2. Galvanized in accordance with ASTM A 653/A 653M G90/Z275 coating.B. Joists and Purlins: Fabricated from ASTM A 653/A 653M steel sheet, with G90/Z275 hot dippedgalvanized coating.1. Gage and depth: As indicated on the drawings.2.03 ACCESSORIESA. Bracing, Furring, Bridging: Formed sheet steel, thickness determined for conditionsencountered; finish to match framing components.B. Plates, Gussets, Clips: Formed Sheet Steel, thickness determined for conditions encountered;finish to match framing components.C. Touch-Up Primer for Galvanized Surfaces: SSPC-Paint 20, Type I - Inorganic, complying withVOC limitations of authorities having jurisdiction.D. Sill Sealer: Closed-cell polyethylene foam, 1/4 inch thick, selected from manufacturer'sstandard widths to match width of bottom track or rim track members.2.04 FASTENERSA. Self-Drilling, Self-Tapping Screws, Bolts, Nuts and Washers: Hot dip galvanized per ASTM A153/A 153M.B. Anchorage Devices: Power actuated and Drilled expansion bolts.C. Welding: In conformance with AWS D1.1.2.05 SHOP FABRICATED ASSEMBLIESA. Shop fabricate metal framing to the greatest extent possible.B. Fabricate cold-formed metal framing and accessories plumb, square, and true to line, and withconnections securely fastened, according to referenced AISI's specifications and standards,manufacturer's written instructions, and requirements in this Section.1. Fabricate framing assemblies using jigs or templates.2. Cut framing members by sawing or shearing; do not torch cut.04-27-11 COLD FORMED METAL FRAMING05400 -2
<strong>Buffalo</strong> <strong>Wild</strong> <strong>Wings</strong>3. Fasten cold-formed metal framing members by welding, screw fastening, or riveting asstandard with fabricator. Wire tying of framing members is not permitted.a. Comply with AWS D1.3 requirements and procedures for welding, appearance andquality of welds, and methods used in correcting welding work.b. Locate mechanical fasteners and install according to Shop Drawings, with screwpenetrating joined members by not less than three exposed screw threads.4. Fasten other materials to cold-formed metal framing by welding, bolting, or screwfastening, according to Shop Drawings.C. Reinforce, stiffen, and brace framing assemblies to withstand handling, delivery, and erectionstresses. Lift fabricated assemblies to prevent damage or permanent distortion.PART 3 EXECUTION3.01 EXAMINATIONA. Verify that substrate surfaces are ready to receive work.3.02 INSTALLATION OF FRAMINGA. Install components in accordance with manufacturers' instructions and Drawings.B. Install cold-formed metal framing and accessories plumb, square, and true to line, and withconnections securely fastened.C. Install sealer gaskets to isolate the underside of wall bottom track or rim track and the top offoundation wall or slab at stud or joist locations.D. Install studs full length in one piece. Splicing of studs is not permitted.E. Install studs, brace, and reinforce to develop full strength and achieve design requirements.F. Do not bridge building expansion and control joints with cold-formed metal framing.Independently frame both sides of joints.G. Install insulation, specified in Section 07212 in built-up exterior framing members, such asheaders, sills, boxed joists, and multiple studs at openings, that are inaccessible on completionof framing work.H. Touch-up field welds and damaged galvanized surfaces with primer.3.03 TOLERANCESA. Maximum Variation from True Position: 1/8 inch.B. Maximum Variation of any Member from Plane: 1/8 inch.END OF SECTION04-27-11 COLD FORMED METAL FRAMING05400 -3
<strong>Buffalo</strong> <strong>Wild</strong> <strong>Wings</strong>SECTION 05500 - METAL FABRICATIONSPART 1 GENERAL1.01 SECTION INCLUDESA. Shop fabricated miscellaneous metal items.B. Custom stainless steel fabrications1.02 RELATED SECTIONSA. Section 03300 - Cast-in-Place Concrete: Placement of metal fabrications in concrete.B. Section 09900 - Paints and Coatings: Paint finish.1.03 REFERENCESA. ASTM A 36/A 36M - Standard Specification for Carbon Structural Steel.B. ASTM A 53/A 53M - Standard Specification for Pipe, Steel, Black and Hot-Dipped, Zinc-Coated,Welded and Seamless.C. ASTM A 123/A 123M - Standard Specification for Zinc (Hot-Dip Galvanized) Coatings on Ironand Steel Products.D. ASTM A 153/A 153M - Standard Specification for Zinc Coating (Hot-Dip) on Iron and SteelHardware.E. ASTM A 325 - Standard Specification for Structural Bolts, Steel, Heat Treated, 120/105 ksiMinimum Tensile Strength.G. ASTM A 325M - Standard Specification for Structural Bolts, Steel, Heat Treated 830 MPaTensile Strength (Metric).H. ASTM A 500 - Standard Specification for Cold-Formed Welded and Seamless Carbon SteelStructural Tubing in Rounds and Shapes.I. ASTM A 653/A 653M - Standard Specification for Steel Sheet, Zinc-Coated (Galvanized) orZinc-Iron Alloy-Coated (Galvannealed) by the Hot-Dip Process.J. ASTM A 666-03: Specification for Annealed or Cold-Worked Austenitic Stainless Steel Sheet,Strip, Plate, and Flat Bar.K. AWS A2.4 - Standard Symbols for Welding, Brazing, and Nondestructive Examination;American Welding Society.L. AWS D1.1/D1.1M - Structural Welding Code - Steel; American Welding Society.M. OSHA 29 CFR Standard 1910.27 - Fixed Ladders; Occupational Safety and Health Standards.N. SSPC-Paint 15 - Steel Joist Shop Primer; Society for Protective Coatings.O. SSPC-Paint 20 - Zinc-Rich Primers (Type I, "Inorganic," and Type II, "Organic"); Society forProtective Coatings.1.04 COORDINATIONA. Coordinate installation of anchorages. Furnish setting drawings, templates, and directions forinstalling anchorages, including sleeves, concrete inserts, anchor bolts, and items with integralanchors, that are to be embedded in concrete or masonry. Deliver such items to Project site intime for installation.04-27-11 METAL FABRICATIONS05500 -1
<strong>Buffalo</strong> <strong>Wild</strong> <strong>Wings</strong>PART 2 PRODUCTS2.01 METALS, GENERALA. Metal Surfaces, General: Provide materials with smooth, flat surfaces unless otherwiseindicated. For metal fabrications exposed to view in the completed Work, provide materialswithout seam marks, roller marks, rolled trade names, or blemishes.2.02 MATERIALS - STEELA. Steel Plates, Shapes and Bars: ASTM A 36/A 36M.B. Steel Tubing: ASTM A 500, Grade B cold-formed structural tubing.D. Steel Pipe: ASTM A 53/A 53M, standard weight, (Schedule 40), black finish.E. Galvanized Steel Sheet: ASTM A 653/A 653M, Structural Steel (SS), with G90/Z275 galvanizedcoating.F. Bolts, Nuts, and Washers: ASTM A 325 (ASTM A 325M), Type 1, galvanized to ASTM A 153/A153M where connecting galvanized components.G. Welding Materials: AWS D1.1; type required for materials being welded.H. Shop and Touch-Up Primer: SSPC-Paint 15, complying with VOC limitations of authoritieshaving jurisdiction.I. Touch-Up Primer for Galvanized Surfaces: SSPC-Paint 20, Type I - Inorganic, complying withVOC limitations of authorities having jurisdiction.2.02 FABRICATIONA. Shop Assembly: Preassemble items in the shop to greatest extent possible. Disassemble unitsonly as necessary for shipping and handling limitations. Use connections that maintainstructural value of joined pieces. Clearly mark units for reassembly and coordinated installation.B. Cut, drill, and punch metals cleanly and accurately. Remove burrs and ease edges to a radiusof approximately 1/32 inch unless otherwise indicated. Remove sharp or rough areas onexposed surfaces.C. Form exposed work with accurate angles and surfaces and straight edges.D. Form exposed connections with hairline joints, flush and smooth, using concealed fasteners orwelds where possible.E. Fabricate seams and other connections that will be exposed to weather in a manner to excludewater. Provide weep holes where water may accumulate.F. Cut, reinforce, drill, and tap metal fabrications as indicated to receive finish hardware, screws,and similar items.G. Exposed Mechanical Fastenings: Flush countersunk screws or bolts; unobtrusively located;consistent with design of component, except where specifically noted otherwise.H. Supply components required for anchorage of fabrications. Fabricate anchors and relatedcomponents of same material and finish as fabrication, except where specifically notedotherwise.2.03 FABRICATED ITEMSA. Exterior patio guardrail/fence: Galvanized steel tube and plate materials as indicated onDrawings.04-27-11 METAL FABRICATIONS05500 -2
<strong>Buffalo</strong> <strong>Wild</strong> <strong>Wings</strong>B. RTU roof reinforcement angle frames.C. Bent, welded steel bar brackets for toilet room lavatory countertops.D. Steel half-wall reinforcement posts and anchors.E. Steel Roof Access Ladder: Unless otherwise indicated fabricate steel ladder as follows.1. Stringers (Side rails): 3 inches by 3/8 inch steel bars with eased edges.2. Rungs: 3/4 inch diameter smooth steel rods at 12 inches on center. Fit rungs in centerlineof siderails; plug-weld and grind smooth and flush on outer rail faces.3. Brackets: 3 inches by 3/8 inch bent steel plate to form a “U” bracket welded to stringers. Inlocations as indicted on Drawings, but not more than 6 feet on center. Brackets to bebolted to wall with two bolts per bracket. Coordinate locations of blocking.4. Center line of rungs minimum 7 inches from wall.5. Width: 1’-8” inches between stringers.6. Finish: Factory prime painted. Field finished under Section 09900.7. Comply with applicable OSHA requirements for steel ladders.F. Keg Storage Fencing and Gates:1. Fence Fabric: Chain link fence fabric, 2 inch mesh, 9 gauge galvanized coated wire.2. Posts, Rails and Braces: Nominal 2 inch diameter galvanized steel pipe. Providegalvanized components for attaching fence fabric, top caps, 4” by 4” x 1/4” galvanized steelbase plates for posts and 5/8” stainless steel anchor bolts.3. Gates: Fabricate single swing gates as indicated on Drawings with forked type latch forpadlock, 3 hinges per gate and cane bolts. All components galvanized.4. Hardware: Padlock by Section 08710 Door Hardware.5. Accessories: Provide other components required for complete installation.G. Trash Enclosure Gates:1. Gate Frame: 2” x 2” x 1/8”, ASTM A500 structural steel tubing. Continuously weld tubeconnections and grind welds smooth.2. Corrugated Metal Panels: 18 gauge, 1-1/2” deep, galvanized steel roof deck.3. Steel Casters: Provide 4” diameter steel casters capable of carrying the gate load, 1 pergate. Casters to be welded to bottom of gates at locations indicated on Drawings.4. Hardware: Fabricate gate hinges in configuration as indicated on Drawings. 2 hinges pergate. Provide cane bolts welded to frame, 1 per gate.H. Steel Channel Support System: Unistrut P1001HS. As indicated on Structural Drawings forsupport of 1/2" diameter threaded rods. Refer to detail 7/S202.I. Fabricate loose steel lintels from steel angles and shapes of size indicated for openings andrecesses in masonry walls and partitions at locations indicated. Fabricate in single lengths foreach opening unless otherwise indicated. Weld adjoining members together to form a singleunit where indicated.J. Custom Stainless Steel Fabrications: Provide 18 gauge, Type 304 brushed stainless steel wallangles, wall channels, trim and base components as indicated on Drawings. Hem edges, roundoff corners and adhesively apply in locations as indicated.2.04 FINISHES - STEELA. Clean surfaces of rust, scale, grease, and foreign matter prior to finishing.B. Prime paint all steel items with one coat of fabricators standard shop primer.C. Galvanizing of non-structural Items: Galvanize after fabrication to ASTM A 123/A 123Mrequirements.04-27-11 METAL FABRICATIONS05500 -3
<strong>Buffalo</strong> <strong>Wild</strong> <strong>Wings</strong>2.05 FABRICATION TOLERANCESA. Squareness: 1/8 inch maximum difference in diagonal measurements.B. Maximum Offset Between Faces: 1/16 inch.C. Maximum Misalignment of Adjacent Members: 1/16 inch.D. Maximum Bow: 1/8 inch in 48 inches.E. Maximum Deviation From Plane: 1/16 inch in 48 inches.PART 3 EXECUTION3.01 EXAMINATIONA. Verify that field conditions are acceptable and are ready to receive work.3.02 PREPARATIONA. Clean and strip primed steel items to bare metal where site welding is required.3.03 INSTALLATIONA. Install items plumb and level, accurately fitted, free from distortion or defects.B. Provide for erection loads, and for sufficient temporary bracing to maintain true alignment untilcompletion of erection and installation of permanent attachments.C. Perform field welding in accordance with AWS D1.1.D. Obtain approval prior to site cutting or making adjustments not scheduled.E. After erection, prime welds, abrasions, and surfaces not shop primed or galvanized, exceptsurfaces to be in contact with concrete.F. Coordinate with other related trades and suppliers for acceptable dimensions and tolerances.G. Install ladders in accordance with manufacturers instructions using manufacturer suppliedbrackets and accessories.3.04 INSTALLATION OF BOLLARDSA. Anchor bollards in place with concrete footings. Center and align bollards. Place concrete inbollard and vibrate or tamp for consolidation, round off concrete at top of bollard. Support andbrace bollards in position until concrete has cured.END OF SECTION04-27-11 METAL FABRICATIONS05500 -4
<strong>Buffalo</strong> <strong>Wild</strong> <strong>Wings</strong>SECTION 06100 - ROUGH CARPENTRYPART 1 GENERAL1.01 SECTION INCLUDESA. Dimensional Framing Lumber.B. Roof and Wall Sheathing.C. Wood nailers and curbs for roofing and items installed on roof.D. Concealed wood blocking for support of equipment, toilet and bath accessories, wall cabinets,wood trim, and shelving.E. Miscellaneous wood nailers and furring strips.F. Preservative treatment of wood.G. Fire retardant treatment of wood.H. Fiber Cement Siding Panels, Soffit Panels and Trim.1.02 RELATED SECTIONSA. Section 06200 - Finish Carpentry.1.03 REFERENCESA. ASTM A 153/A 153M - Standard Specification for Zinc Coating (Hot-Dip) on Iron and SteelHardware.B. ASTM E 84 - Standard Test Method for Surface Burning Characteristics of Building Materials.C. AWPA C2 - Lumber, Timber, Bridge Ties and Mine Ties -- Preservative Treatment by PressureProcesses; American Wood-Preservers' Association.D. AWPA C20 - Structural Lumber -- Fire Retardant Treatment by Pressure Processes; AmericanWood-Preservers' Association.E. AWPA C27 - Plywood -- Fire-Retardant Treatment by Pressure Processes; American Wood-Preservers' Association.F. AWPA U1 - Use Category System: User Specification for Treated Wood; American Wood-Preservers' Association.G. PS 1 - Construction and Industrial Plywood; National Institute of Standards and Technology(Department of Commerce).H. DOC PS 2: Performance Standard for Wood-Based Structural-Use Panels.I. PS 20 - American Softwood Lumber Standard; National Institute of Standards and Technology(Department of Commerce).J. WWPA G-5 - Western Lumber Grading Rules; Western Wood Products Association.1.04 QUALITY ASSURANCEA. Lumber: Comply with PS 20 and approved grading rules and inspection agencies.B. Preservative-Treated Wood: Provide lumber and plywood marked or stamped by an ALSCaccreditedtesting agency, certifying level and type of treatment in accordance with AWPAstandards.04-27-11 ROUGH CARPENTRY06100 -1
<strong>Buffalo</strong> <strong>Wild</strong> <strong>Wings</strong>1.05 DELIVERY, STORAGE, AND HANDLINGA. Stack lumber flat with spacers between each bundle to provide air circulation. Provide for aircirculation around stacks and under coverings.PART 2 PRODUCTS2.01 GENERAL REQUIREMENTSA. Lumber fabricated from old growth timber is not permitted.2.02 DIMENSION LUMBERA. General:1. Grading Agency: Western Wood Products Association (WWPA).2. Sizes: Nominal sizes as indicated on drawings, S4S.3. Moisture Content: S-dry or MC19.B. Framing Lumber: 2” x 4” or larger; No. 2 Southern Pine, No. 2 Douglas Fir Larch or equivalent.C. Joists and Rafters: Select Grade, Southern Pine, Douglas Fir Larch or equivalent.D. Roof Edge Bevel Blocking:1. Provide redwood, cedar or pressure treated material.E. Miscellaneous Blocking, Furring, and Nailers:1. Lumber: S4S, No. 2 or Standard Grade.2. Boards: Standard or No. 3.2.03 CONSTRUCTION PANELSA. (SHTG-1) Wall Sheathing: The contractor has the option to use one of the following wallsheathing panels.1. Plywood Wall Sheathing: DOC PS 1, C-D, exposure 1, structural 1.2. Oriented Strand Board Wall Sheathing: DOC PS 2, exposure 1, structural 1.3. Nominal Thickness: 1/2 inch.B. (SHTG-2) Plywood Roof Sheathing: DOC PS 1, C-D, exterior, structural 1.1. Nominal Thickness: 3/4 inch.2. Edge Detail: Tongue and Groove.C. (SHTG-3) Concealed Plywood: DOC PS 1, C-C Plugged, exposure 1.1. Nominal Thickness: as indicated on drawings.D. (SHTG-4) Exposed Plywood: DOC PS 1, A-D, interior grade.1. Nominal Thickness: as indicated on drawings.E. (SHTG-5) Electrical Panel Boards: APA rated sheathing, fire retardant treated.1. Nominal Thickness: 3/4 inch.2.04 FIBER CEMENT SIDING AND TRIMA. Acceptable Manufacturers:1. James Hardie Building Products, Inc., Mission Viejo, CA; www.jameshardie.com2. Substitutions: Not permitted.04-27-11 ROUGH CARPENTRY06100 -2
<strong>Buffalo</strong> <strong>Wild</strong> <strong>Wings</strong>B. Materials:1. (FC SIDING) Siding Panels: HardiePanel Vertical Siding.a. Thickness: 5/16” thick.b. Panel Size: Provide panel sizes to minimize joints and to provide acceptable battenpattern.c. Texture: Smooth.d. Finish: Primed Finish for field painting under Section 09900.2. (FC SOFFIT) Soffit Panels: HardieSoffit.a. Thickness: 1/4" thick.b. Texture: Smooth.c. Finish: Primed Finish for field painting under Section 09900.3. (FC TRIM) Trim Boards: HardieTrim.a. Thickness: 1” thick.b. Texture: Smooth.c. Finish: Primed Finish for field painting under Section 09900.C. Installation: Install materials in strict accordance with manufacturer's written installationinstructions.2.05 ACCESSORIESA. Fasteners and Anchors:1. Metal and Finish: Hot-dipped galvanized steel per ASTM A 153/A 153M for exterior, highhumidity and preservative-treated wood locations, unfinished steel elsewhere.B. Metal Framing Connectors: Manufactured by The Simpson Co.1. Refer to Structural Drawings for specific components.C. Sill-Sealer Gaskets: Closed-cell neoprene foam, 1/4 inch thick, selected from manufacturer'sstandard widths to suit width of sill members indicated.D. Membrane Underlayment: 40 mil. thick, self-adhering sheet underlayment for high temperatureapplications.1. Grace Construction Products: Grace Ice and Water Shield HT.2. Location: Use at Entry Canopy Roof over sheathing.2.06 FACTORY WOOD TREATMENTA. Treated Lumber and Plywood: Comply with requirements of AWPA U1 - Use Category Systemfor wood treatments determined by use categories, expected service conditions, and specificapplications.B. (FT) Fire Retardant Treated Lumber:1. Interior Type A: AWPA Use Category UCFA, Commodity Specification H (Treatment C20for lumber and C27 for plywood), low temperature (low hygroscopic) type, chemicallytreated and pressure impregnated; capable of providing a maximum flame spread rating of25 when tested in accordance with ASTM E 84, with no evidence of significant combustionwhen test is extended for an additional 20 minutes.a. Kiln dry wood after treatment to a maximum moisture content of 19 percent for lumberand 15 percent for plywood.b. Treat rough carpentry items as indicated .c. Do not use treated wood in applications exposed to weather or where the wood maybecome wet.04-27-11 ROUGH CARPENTRY06100 -3
<strong>Buffalo</strong> <strong>Wild</strong> <strong>Wings</strong>C. (PT) Preservative Pressure Treated Lumber, Above Grade: AWPA Use Category UC3B,Commodity Specification A (Treatment C2) using waterborne preservative to 0.25 lb/cu ftretention.1. Kiln dry lumber after treatment to maximum moisture content of 19 percent.2. Treat lumber in contact with roofing, flashing, or waterproofing.3. Treat lumber in contact with masonry or concrete.PART 3 EXECUTION3.01 INSTALLATIONA. Set rough carpentry to required levels and lines, with members plumb, true to line, cut, andfitted. Fit rough carpentry to other construction; scribe and cope as needed for accurate fit.Locate furring, nailers, blocking, grounds, and similar supports to comply with requirements forattaching other construction.B. Provide blocking and framing as indicated and as required to support facing materials, fixtures,specialty items, and trim.C. Select fasteners of size that will not fully penetrate members where opposite side will beexposed to view or will receive finish materials. Make tight connections between members.Install fasteners without splitting wood; do not countersink nail heads, unless otherwiseindicated.D. Curb roof openings except where prefabricated curbs are provided. Form corners by alternatinglapping side members.E. Coordinate curb installation with installation of decking and support of deck openings.3.02 MEMBRANE UNDERLAYMENT INSTALLATIONA. Apply 1 layer of membrane underlayment over entire canopy area that is to receive aluminumcomposite panels. Lap joints 6 inches.3.03 SITE APPLIED WOOD TREATMENTA. Apply preservative treatment compatible with factory applied treatment at site-sawn cuts,complying with manufacturer's instructions.B. Allow preservative to dry prior to erecting members.END OF SECTION04-27-11 ROUGH CARPENTRY06100 -4
<strong>Buffalo</strong> <strong>Wild</strong> <strong>Wings</strong>SECTION 06200 - FINISH CARPENTRYPART 1 GENERAL1.01 SECTION INCLUDESA. Installation of finish millwork items furnished by Owner’s Millwork Vendor.B. Adjustable Shelf Hardware.C. Hardware and attachment accessories.1.02 RELATED SECTIONSA. Section 06110 - Rough Carpentry.B. Section 06410 - Custom Cabinets.C. Section 06415 - Countertops.D. Section 09260 - Gypsum Board Assemblies.E. Section 09900 - Paints and Coatings: Painting and finishing of millwork items.1.03 DELIVERY, STORAGE, AND HANDLINGA. Protect materials against weather and contact with damp or wet surfaces. Stack materials flatwith spacers between each bundle to provide air circulation. Provide for air circulation withinand around stacks and under temporary coverings.1.04 PROJECT CONDITIONSA. Environmental Limitations: Do not have materials delivered or install interior finish carpentrymaterials until building is enclosed and weatherproof, wet work in space is completed andnominally dry, and HVAC system is operating and maintaining temperature and relativehumidity at occupancy levels during the remainder of the construction period.PART 2 PRODUCTS2.01 WOOD-BASED COMPONENTSA. Wood fabricated from old growth timber is not permitted.2.02 LUMBER MATERIALSA. (WD1) Select White Maple: maximum moisture content of 6 percent; with vertical grain, ofquality suitable for transparent finish. Furnished by Millwork Vendor for installation under thisSection.B. (WD2) Southern Pine: No. 1, maximum moisture content of 6 percent; with vertical grain, ofquality suitable for intended use.2.03 ADJUSTABLE SHELF HARDWAREA. Standards for Adjustable Shelf Brackets: Knape & Vogt, No. KV87-36” – White.B. Adjustable Shelf Brackets: Knape & Vogt, No. KV187-18” – White.C. Accessories: Provide bracket manufacturers standard shelf rests as applicable for installationindicated on drawings. Finish: White.D. Shelves: Furnished by Millwork Vendor.04-27-11 FINISH CARPENTRY06200 -1
<strong>Buffalo</strong> <strong>Wild</strong> <strong>Wings</strong>2.04 SHEET MATERIALSA. Cork Board: 1/4 inch thick fine grained cork for adhesive application. Furnished by MillworkVendor.2.05 ADHESIVEA. Adhesive: Type recommended by AWI to suit application.2.06 FASTENERSA. Fasteners for Interior Finish Carpentry: Nails, screws, and other anchoring devices of type,size, material, and finish required for application indicated to provide secure attachment,concealed where possible.2.07 ACCESSORIESA. Lumber for Shimming, Blocking: Southern Pine.B. Primer: Alkyd primer sealer type.C. Wood Filler: Solvent base, tinted to match surface finish color.2.08 HARDWAREA. Refer to Drawings for special hardware items.B. Provide incidental hardware as required.2.09 FABRICATIONA. To greatest degree possible, shop assemble work for delivery to site, permitting passagethrough building openings.B. When necessary to cut and fit on site, provide materials with ample allowance for cutting.Provide trim for scribing and site cutting.C. Apply plastic laminate finish in full uninterrupted sheets consistent with manufactured sizes. Fitcorners and joints hairline; secure with concealed fasteners. Slightly bevel arises. Locatecounter butt joints minimum 2 feet from sink cut-outs.2.10 FACTORY FINISHINGA. Sand work smooth and set exposed nails and screws.B. On items to receive transparent finishes, use wood filler matching or blending with surroundingsurfaces and of types recommended for applied finishes.C. Finish work in accordance with WIC Manual of Millwork, Section 5, System #5 - CatalyzedPolyurethane, Clear.D. Seal and varnish exposed to view surfaces. Spray or brush apply.PART 3 EXECUTION3.01 EXAMINATIONA. Verify adequacy of backing and support framing.3.02 INSTALLATIONA. Install interior finish carpentry level, plumb, true, and aligned with adjacent materials. Useconcealed shims where necessary for alignment.B. Carefully scribe work abutting other components, with maximum gaps of 1/32 inch. Do not useadditional overlay trim to conceal larger gaps.04-27-11 FINISH CARPENTRY06200 -2
<strong>Buffalo</strong> <strong>Wild</strong> <strong>Wings</strong>C. Cope all inside corners, miter all outside corners.D. Countersink fasteners, apply wood filler in exposed fastener indentations. Sand work smoothand flush.3.03 INSTALLATION OF ADJUSTABLE SHELF HARDWAREA. Install standards for adjustable shelf brackets according to manufacturer's written instructions,spaced not more than 36 inches o.c. and within 6 inches of end of shelves. Fasten to framingmembers, blocking, or metal backing, or use toggle bolts or hollow wall anchors.B. Cut shelves to neatly fit openings with only enough gap to allow shelves to be removed andreinstalled. Install shelves, fully seated on cleats, brackets, and supports.C. Fasten shelves to brackets to comply with bracket manufacturer's written instructions.END OF SECTION04-27-11 FINISH CARPENTRY06200 -3
<strong>Buffalo</strong> <strong>Wild</strong> <strong>Wings</strong>SECTION 06410 - CUSTOM CABINETSPART 1 GENERAL1.01 SECTION INCLUDESA. Installation of custom cabinetry and millwork items furnished by Owner’s Millwork Vendor asfollows:1. Specially fabricated cabinet units.2. Adjustable cabinet shelving.3. Cabinet hardware.4. Factory finishing.1.02 RELATED SECTIONSA. Section 06415 - Countertops: Plastic laminate and solid surface countertops.1.03 REFERENCESA. ANSI A135.4 - American National Standard for Basic Hardboard.B. ANSI A208.1 - American National Standard for Particleboard.C. ANSI A208.2 - American National Standard for Medium Density Fiberboard for Interior Use.D. AWI/AWMAC (QSI) - Architectural Woodwork Quality Standards Illustrated; ArchitecturalWoodwork Institute and Architectural Woodwork Manufacturers Association of Canada.E. GSA CID A-A-1936 - Adhesive, Contact, Neoprene Rubber; Federal Specifications andStandards.F. HPVA HP-1 - American National Standard for Hardwood and Decorative Plywood; HardwoodPlywood & Veneer Association.G. NHLA G-101 - Rules for the Measurement & Inspection of Hardwood & Cypress; NationalHardwood Lumber Association.H. PS 1 - Construction and Industrial Plywood; National Institute of Standards and Technology(Department of Commerce).I. PS 20 - American Softwood Lumber Standard; National Institute of Standards and Technology(Department of Commerce).J. WI (MAN) - Manual of Millwork; Woodwork Institute.1.04 SUBMITTALSA. See Section 01300 - Administrative Requirements, for submittal procedures.B. Shop Drawings: Indicate materials, component profiles and elevations, assembly methods, jointdetails, fastening methods, accessory listings, hardware location and schedule of finishes.C. Product Data: Provide data for hardware accessories.D. Millwork Vendor is contracted direct by Owner. Millwork Vendor will submit shop drawings toGeneral Contractor for dimension verification.1.05 QUALITY ASSURANCEA. Perform work in accordance with AWI/AWMAC Architectural Woodwork Quality StandardsIllustrated, Custom quality, unless other quality is indicated for specific items.B. Manufacturer Qualifications: Company specializing in manufacturing the products specified inthis section with minimum three years of documented experience.04-27-11 CUSTOM CABINETS06410 -1
<strong>Buffalo</strong> <strong>Wild</strong> <strong>Wings</strong>1.06 DELIVERY, STORAGE, AND PROTECTIONA. Protect units from moisture damage.1.07 ENVIRONMENTAL REQUIREMENTSA. During and after installation of custom cabinets, maintain temperature and humidity conditionsin building spaces at same levels planned for occupancy.PART 2 PRODUCTS2.01 WOOD-BASED COMPONENTSA. Custom cabinetry and millwork items furnished by Owner’s Millwork Vendor.2.02 WOOD-BASED COMPONENTSA. Wood fabricated from old growth timber is not permitted.2.03 LUMBER MATERIALSA. Softwood Lumber: NIST PS 20; Graded in accordance with AWI/AWMAC ArchitecturalWoodwork Quality Standards Illustrated; average moisture content of 4-9 percent; species asfollows:1. Exposed Surfaces: Species Pine.2. Semi-Exposed Surfaces: Species Pine.3. Concealed Surfaces: Species Pine.B. Hardwood Lumber: NHLA; Graded in accordance with AWI/AWMAC Architectural WoodworkQuality Standards Illustrated, Grade III/Economy; average moisture content of 4-9 percent;species as follows:1. Exposed Surfaces: (WD1) Select White Maple.2. Concealed Surfaces: Poplar.2.04 PANEL MATERIALSA. Softwood Faced Plywood:1. Exposed Surfaces: NIST PS 1; APA A-A Grade, plain-sliced white pine face veneer,Interior rated adhesives, core of particleboard, medium density fiberboard, or engineeredcombination, thickness as indicated.2. Semi-Exposed Surfaces: NIST PS 1; APA A-B Grade, rotary cut Douglas fir face veneer,Interior rated adhesives, core of medium density fiberboard, engineered combination, fireretardanttreated particleboard, or veneer, thickness as indicated.3. Concealed Surfaces: NIST PS 1; APA B-B Grade, rotary cut Douglas fir face veneer,Interior rated adhesives, core of medium density fiberboard, engineered combination, fireretardanttreated particleboard, or veneer, thickness as required.B. Hardwood Faced Plywood: HPVA HP-1; graded in accordance with AWI/AWMAC ArchitecturalWoodwork Quality Standards Illustrated, core of veneer; type of glue recommended for specificapplication; thickness as required; face veneer as follows:1. Exposed Surfaces: (WD1) Select White Maple.C. Particleboard: ANSI A208.1; medium density industrial type as specified in AWI/AWMACArchitectural Woodwork Quality Standards Illustrated, composed of wood chips bonded withmoisture resistant adhesive under heat and pressure; sanded faces; thickness as required; usefor components indicated on drawings.04-27-11 CUSTOM CABINETS06410 -2
<strong>Buffalo</strong> <strong>Wild</strong> <strong>Wings</strong>D. Medium Density Fiberboard (MDF): ANSI A208.2; type as specified in AWI/AWMACArchitectural Woodwork Quality Standards Illustrated; composed of wood fibers pressurebonded with moisture resistant adhesive to suit application; sanded faces; thickness asrequired.E. Hardboard: AHA A135.4; Pressed wood fiber with resin binder, Class 1 - Tempered, 1/4 inchthick, smooth one side (S1S); use for drawer bottoms, dust panels, and other componentsindicated on drawings.2.05 LAMINATE MATERIALSA. Manufacturers:1. Wilsonart International; www.wilsonart.comB. Plastic Laminate: In accordance with AWI Quality Standards Illustrated, 0.039 inch PostForming quality.1. Color, Pattern, and Surface Textures:a. (PLAM1): Wilsonart # 1573-60, Frosty White, Matte.b. (PLAM3): Wilsonart # 1595-60, Black, MatteC. Laminate Backing Sheet: 0.020 inch Backing Sheet grade, undecorated plastic laminate.2.06 ACCESSORIESA. Adhesive: GSA CID A-A-1936 contact adhesive.B. Fasteners: Size and type to suit application and as indicated on the Drawings.C. Concealed Joint Fasteners: Threaded steel.D. Stainless steel legs: 6 inches long, NSF approved for food preparation areas.E. Grommets: Nominal 3 inch round, black, plastic material for cut-outs, supplied and installed byGC.2.07 HARDWAREA. Adjustable Shelf Supports: Standard side-mounted system using surface mounted metal shelfstandards and coordinated self rests, polished chrome finish, for nominal 1 inch spacingadjustments.1. Product: No. KV 255 and 256 manufactured by Knape & Vogt.B. Adjustable Shelf Supports: Standard back-mounted system using surface mounted metal shelfstandards and coordinated cantilevered shelf brackets, satin chrome finish, for nominal 1 inchspacing adjustments.1. Product: No. KV 187 and 87 manufactured by Knape & Vogt.C. Drawer and Door Pulls: "U" shaped wire pull, stainless steel with satin finish, 4 inch centers.D. Cabinet Locks: Keyed cylinder, master keyed, steel with chrome finish.E. Catches: Magnetic on all cabinets.F. Hinges: European style concealed type, steel with polished finish. Self-closing.G. Cup Dispensers: Install cup dispensers furnished by Owner’s Equipment Vendor.2.08 FABRICATIONA. Coordinate with Owner supplied components and equipment.B. Assembly: Shop assemble cabinets for delivery to site in units easily handled and to permitpassage through building openings.04-27-11 CUSTOM CABINETS06410 -3
<strong>Buffalo</strong> <strong>Wild</strong> <strong>Wings</strong>C. Cap exposed plastic laminate finish edges with material of same finish and pattern.D. Door Fronts: 3/4 inch thick; overlay style.E. Fitting: When necessary to cut and fit on site, provide materials with ample allowance forcutting. Provide matching trim for scribing and site cutting.F. Plastic Laminate: Apply plastic laminate finish in full uninterrupted sheets consistent withmanufactured sizes. Fit corners and joints hairline; secure with concealed fasteners. Locatecounter butt joints minimum 2 feet from sink cut-outs.G. Apply laminate backing sheet to reverse side of plastic laminate finished surfaces.H. Provide cutouts for plumbing fixtures. Verify locations of cutouts from on-site dimensions.Prime paint cut edges.I. Provide grommets in locations as indicated on cabinet drawings.J. Provide white melamine surface on interior surfaces of closed cabinets, unless otherwise notedon the Drawings.K. Provide plastic laminate surfaces on exposed surface of cabinets and interiors of open shelfcabinets normally exposed to view.L. Provide stainless steel legs on laminate casework located at food preparation areas as detailed.2.09 FACTORY FINISHINGA. Sand work smooth and set exposed nails and screws.B. For opaque finishes, apply wood filler in exposed nail and screw indentations and sand smooth.C. On items to receive transparent finishes, use wood filler matching or blending with surroundingsurfaces and of types recommended for applied finishes.D. Finish work in accordance with WIC Manual of Millwork, Section 5, System #5 - CatalyzedPolyurethane, Clear.E. Seal and varnish exposed to view surfaces. Spray or brush apply.PART 3 EXECUTION3.01 EXAMINATIONA. Verify adequacy of backing and support framing.B. Verify location and sizes of utility rough-in associated with work of this section.3.02 INSTALLATIONA. Set and secure custom cabinets in place, assuring that they are rigid, plumb, and level.B. Use fixture attachments in concealed locations for wall mounted components.C. Use concealed joint fasteners to align and secure adjoining cabinet units.D. Carefully scribe casework abutting other components, with maximum gaps of 1/32 inch. Do notuse additional overlay trim for this purpose.E. Secure cabinets to wall and floor using appropriate angles and anchorages.3.03 ADJUSTINGA. Adjust installed work.B. Adjust moving or operating parts to function smoothly and correctly.04-27-11 CUSTOM CABINETS06410 -4
<strong>Buffalo</strong> <strong>Wild</strong> <strong>Wings</strong>3.04 CLEANINGA. Clean casework, counters, shelves, hardware, fittings, and fixtures.END OF SECTION04-27-11 CUSTOM CABINETS06410 -5
<strong>Buffalo</strong> <strong>Wild</strong> <strong>Wings</strong>SECTION 06415 - COUNTERTOPSPART 1 GENERAL1.01 SECTION INCLUDESA. Installation of countertops for manufactured casework furnished by Owner’s Millwork Vendor.B. Wall-hung counters and vanity tops.1.02 REFERENCESA. ANSI A208.2 - American National Standard for Medium Density Fiberboard for Interior Use.B. ASTM E 84 - Standard Test Method for Surface Burning Characteristics of Building Materials.C. ISSFA-2 - Classification and Standards for Solid Surfacing Material; International Solid SurfaceFabricators Association.D. NEMA LD 3 - High-Pressure Decorative Laminates.1.03 SUBMITTALSA. See Section 01300 - Administrative Requirements, for submittal procedures.B. Shop Drawings: Indicate materials, component profiles and elevations, assembly methods, jointdetails, fastening methods, and schedule of finishes.C. Millwork Vendor is contracted direct by Owner. Millwork Vendor will submit shop drawings toGeneral Contractor for dimension verification.1.04 QUALITY ASSURANCEA. Installer Qualifications: Qualified installer for solid surface materials that is trained and certifiedby manufacturer for the installation of the specified products.PART 2 PRODUCTS2.01 COUNTERTOP ASSEMBLIESA. Countertops furnished by Owner’s Millwork Vendor.B. Plastic Laminate Countertops: High pressure decorative laminate sheet bonded to substrate.1. Laminate Sheet, Unless Otherwise Indicated: NEMA LD 3 Grade HGS, 0.048 inch nominalthickness.a. Surface Burning Characteristics: Flame spread 25, maximum; smoke developed 450,maximum; when tested in accordance with ASTM E 84.b. NSF approved for food contact.c. Finish: Matte or suede, gloss rating of 5 to 20.d. Surface Color and Pattern: (PLAM2) Wilsonart # 4884-38, Flame Soapstone,Standard finish.2. Laminate Backing Sheet: 0.020 inch Backing Sheet grade, undecorated plastic laminate.3. Back and End Splashes: Same material, same construction.B. Solid Surfacing Countertops: Solid surfacing sheet or plastic resin casting over continuoussubstrate.1. Flat Sheet Thickness: 1/2 inch, minimum.04-27-11 COUNTERTOPS06415 -1
<strong>Buffalo</strong> <strong>Wild</strong> <strong>Wings</strong>2. Solid Surfacing Sheet and Plastic Resin Castings: Complying with ISSFA-2 and NEMA LD3; acrylic or polyester resin, mineral filler, and pigments; homogenous, non-porous andcapable of being worked and repaired using standard woodworking tools; no surfacecoating; color and pattern consistent throughout thickness.a. NSF approved for food contact.b. Finish on Exposed Surfaces: Matte, gloss rating of 5 to 20.c. Color and Pattern: (SS1) Corian, Custom BWW color, #PDR AMG24-06-D.3. Other Components Thickness: 1/2 inch, minimum.4. Exposed Edge Treatment: Built up to minimum 1-1/4 inch thick; square edge.5. Back and End Splashes: Same sheet material, square top; minimum 4 inches high.6. Skirts: As indicated on drawings.2.02 ACCESSORY MATERIALSA. Medium Density Fiberboard for Supporting Substrate: ANSI A208.2.B. Adhesives: Chemical resistant waterproof adhesive as recommended by manufacturer ofmaterials being joined.2.03 FABRICATIONA. Fabricate tops, splashes and sills in the largest sections practicable, with top surface of jointsflush.1. Join lengths of tops using best method recommended by manufacturer.2. Fabricate to overhang fronts and ends of cabinets 1 inch except where top butts againstcabinet or wall.3. Prepare all cutouts accurately to size; replace tops having improperly dimensioned orunnecessary cutouts or fixture holes.B. Provide back/end splash wherever counter edge abuts vertical surface unless otherwiseindicated.1. Height: 4 inches, unless otherwise indicated.C. Solid Surfacing: Fabricate tops up to 144 inches long in one piece; join pieces with adhesivesealant in accordance with manufacturer's recommendations and instructions.D. Wall-Mounted Counters: Provide skirts, aprons, and brackets required and as indicated ondrawings.PART 3 EXECUTION3.01 EXAMINATIONA. Do not begin installation until substrates have been properly prepared.B. If substrate preparation is the responsibility of another installer, notify Construction Manager ofunsatisfactory preparation before proceeding.C. Verify that wall surfaces have been finished and mechanical and electrical services and outletsare installed in proper locations.3.02 PREPARATIONA. Clean surfaces thoroughly prior to installation.B. Prepare surfaces using the methods recommended by the manufacturer for achieving the bestresult for the substrate under the project conditions.3.03 INSTALLATIONA. Securely attach countertops to cabinets using concealed fasteners. Make flat surfaces level;shim where required.04-27-11 COUNTERTOPS06415 -2
<strong>Buffalo</strong> <strong>Wild</strong> <strong>Wings</strong>B. Attach plastic laminate countertops using screws with minimum penetration into substrate boardof 5/8 inch.C. Seal joint between back/end splashes and vertical surfaces with clear silicone sealant.3.04 CLEANING AND PROTECTIONA. Clean countertops surfaces thoroughly.B. Protect installed products until completion of project.C. Touch-up, repair or replace damaged products before Substantial Completion.END OF SECTION04-27-11 COUNTERTOPS06415 -3
<strong>Buffalo</strong> <strong>Wild</strong> <strong>Wings</strong>PART 1 GENERAL1.01 SECTION INCLUDESSECTION 06605 - FIBERGLASS REINFORCED PLASTIC PANELSA. Fiberglass reinforced polyester panel system for adhesive mounting.B. Moldings, adhesive, and joint sealants.1.02 REFERENCESA. ASTM E 84 - Standard Test Method for Surface Burning Characteristics of Building Materials.1.03 DELIVERY, STORAGE, AND HANDLINGA. Store products in manufacturer's unopened packaging until ready for installation.B. Store and dispose of solvent-based materials, and materials used with solvent-based materials,in accordance with requirements of local authorities having jurisdiction.1.04 PROJECT CONDITIONSA. Maintain environmental conditions (temperature, humidity, and ventilation) within limitsrecommended by manufacturer for optimum results. Do not install products underenvironmental conditions outside manufacturer's absolute limits.PART 2 PRODUCTS2.01 MANUFACTURERSA. Acceptable Manufacturer: Crane Composites, Inc., (Formerly Kemlite Company), Channahon,IL. www.cranecomposites.com2.02 PANEL SYSTEMA. Plastic Panel System: Factory finished panels, trim, sealant, and accessories.B. Fiberglass Reinforced Plastic Panels (FRP): 0.090 inch thick, USDA approved, texturedsurface wall panels with Class III/Class C fire rating when tested in accordance with ASTM E84.1. Product: Crane Composities, Glasbord-P, Embossed Class C Wall Panel.2. Flame Spread:
<strong>Buffalo</strong> <strong>Wild</strong> <strong>Wings</strong>PART 3 EXECUTION3.01 EXAMINATIONA. Do not begin installation until substrates have been properly prepared.B. If substrate preparation is the responsibility of another installer, notify Architect of unsatisfactorypreparation before proceeding.3.02 PREPARATIONA. Take panels out of cartons and allow to acclimatize to room conditions for at least 48 hours priorto installation.B. Prepare surfaces using the methods recommended by the manufacturer for achieving the bestresult for the substrate under the project conditions.C. Clean surfaces thoroughly prior to installation.D. Protect existing surfaces from damage due to installation.3.03 INSTALLATIONA. Install in accordance with manufacturer's written instructions.B. Use the adhesives recommended by the panel manufacturer unless prohibited by localregulations; obtain manufacturer's approval of alternative adhesives.C. Install panels continuous from floor to ceiling without horizontal joints.D. Install continuous bead of silicone sealant in each joint and trim groove and between trim andadjacent construction, maintaining 1/8 inch expansion space.E. Avoid contamination of panel faces with adhesives, solvents, or cleaners; clean as necessaryand replace if not possible to repair to original condition.F. Protect installed products until completion of project.G. Touch-up, repair or replace damaged products after Substantial Completion.H. Cove base to be installed on top of FRP with no bottom trim. Caulk top of cove to FRP withclear silicone.END OF SECTION04-27-11 FIBERGLASS REINFORCED PLASTIC PANELS06605 -2
<strong>Buffalo</strong> <strong>Wild</strong> <strong>Wings</strong>PART 1 GENERAL1.01 SECTION INCLUDESSECTION 07100 – SHEET MEMBRANE WATERPROOFINGA. Self-Adhering, Sheet Membrane Waterproofing.1.02 RELATED SECTIONSA. Section 03300 – Cast-in-place Concrete.B. Section 04810 – Unit Masonry Assemblies.1.03 REFERENCESA. American Society for Testing and Materials (ASTM):1. ASTM C 272: Test Method for Water Absorption of Core Materials for Structural SandwichConstructions.2. ASTM D 1227: Specification for Emulsified Asphalt used as a Protective Coating forRoofing.3. ASTM D 1621: Test Method for Compressive Properties of Rigid Cellular Plastics.4. ASTM D 1668: Specification for Glass Fabrics (Woven and Treated) for Roofing andWaterproofing.5. ASTM D 4258: Practice for Surface Cleaning Concrete for Coating.6. ASTM D 6135: Practice for Application of Self-Adhering Modified BituminousWaterproofing.B. National Roofing Contractors Association (NRCA):1. Waterproofing Manual.1.04 SUBMITTALSA. See Section 01300 - Administrative Requirements, for submittal procedures.B. Product Data: Manufacturer's specifications and technical data including the following:1. Manufacturer's written installation instructions.1.05 QUALITY ASSURANCEA. Source Limitations: Obtain primary waterproofing materials and primers through one sourcefrom a single manufacturer.B. Installer Qualifications: A firm that is acceptable to waterproofing manufacturer for installation ofwaterproofing required for this Project.1.06 DELIVERY, STORAGE, AND HANDLINGA. Packing and Shipping: Deliver products in original unopened packaging with legiblemanufacturer's identification.B. Storage and Protection: Comply with manufacturer's recommendations.1. Store in cool, dry place at temperature of not less than 40 degrees F., out of direct sunlight,and with adequate ventilation.1.07 PROJECT CONDITIONSA. Weather Limitations: Proceed with installation only when existing and forecasted weatherconditions permit waterproofing to be performed according to manufacturers' writteninstructions.B. Do not apply waterproofing to damp, frozen, dirty, or dusty surfaces unacceptable towaterproofing system manufacturer.04-27-11 SHEET MEMBRANE WATERPROOFING07100 -1
<strong>Buffalo</strong> <strong>Wild</strong> <strong>Wings</strong>PART 2 PRODUCTS2.01 MANUFACTURERSA. Acceptable Manufacturers for Waterproofing:1. W.R. Grace & Co.; Bituthene 3000. www.graceconstruction.com2. American Hydrotech, Inc.; VM 75. www.hydrotechusa.com3. Carlisle Coatings & Waterproofing Inc.; CCW MiraDRI 860/861. www.carlisle-cww.com4. Meadows, W. R., Inc.; SealTight Mel-Rol. www.wrmeadows.com2.02 SHEET MEMBRANE WATERPROOFINGA. (Waterproofing): Modified Bituminous Sheet of not less than 60-mil thick, self-adhering sheetconsisting of 56 mils of rubberized asphalt laminated to a 4-mil thick, polyethylene film withrelease liner on adhesive side and formulated for application with primer or surface conditioner.2.03 MISCELLANEOUS MATERIALSA. General: Furnish auxiliary materials recommended by waterproofing manufacturer for intendeduse and compatible with sheet waterproofing.1. Furnish liquid-type auxiliary materials that comply with VOC limits of authorities havingjurisdiction.B. Primer: Liquid waterborne primer recommended for substrate by manufacturer of sheetwaterproofing material.C. Surface Conditioner: Liquid, waterborne surface conditioner recommended for substrate bymanufacturer of sheet waterproofing material.D. Liquid Membrane: Elastomeric, two-component liquid, cold fluid applied, trowel grade or lowviscosity.E. Substrate Patching Membrane: Low-viscosity, two-component, asphalt-modified coating.F. Sheet Strips: Self-adhering, rubberized-asphalt sheet strips of same material and thickness assheet waterproofing.G. Mastic, Adhesives, and Tape: Liquid mastic and adhesives, and adhesive tapes recommendedby waterproofing manufacturer.H. Metal Termination Bars: Aluminum bars, approximately 1 by 1/8 inch thick, predrilled at 9-inchcenters.I. Protection Board: Fan folded, with a core of extruded-polystyrene board insulation faced one orboth sides with plastic film, nominal thickness 1/4 inch, with compressive strength of not lessthan 8 psi per ASTM D 1621, and maximum water absorption by volume of 0.6 percent perASTM C 272.1. Owens Corning's "Fanfold DWB.2. Dow Chemical Company's "Protection Board III.3. Comparable products from other manufacturers.04-27-11 SHEET MEMBRANE WATERPROOFING07100 -2
<strong>Buffalo</strong> <strong>Wild</strong> <strong>Wings</strong>PART 3 EXECUTION3.01 EXAMINATIONA. Examine substrates, with Installer present, for compliance with requirements for surfacesmoothness and other conditions affecting performance of work.1. Proceed with waterproofing application only after substrate construction and penetratingwork have been completed and unsatisfactory conditions have been corrected.2. Verify that concrete has cured and aged for minimum time period recommended bywaterproofing manufacturer.3. Verify that concrete is visibly dry and free of moisture.4. Proceed with installation only after unsatisfactory conditions have been corrected.3.02 SURFACE PREPARATIONA. Clean, prepare, and treat substrates according to manufacturer's written instructions. Provideclean, dust-free, and dry substrates for waterproofing application.B. Remove grease, oil, bitumen, form-release agents, paints, curing compounds, and othercontaminants or film-forming coatings from concrete.C. Remove fins, ridges, mortar, and other projections and fill honeycomb, aggregate pockets,holes, and other voids.D. Prepare, fill, prime, and treat joints and cracks in substrates. Remove dust and dirt from jointsand cracks according to ASTM D 4258.E. Corners: Prepare, prime, and treat inside and outside corners according to ASTM D 6135.1. Install membrane strips centered over vertical inside corners. Install 3/4-inch fillets of liquidmembrane on horizontal inside corners and as follows:a. At footing-to-wall intersections, extend liquid membrane each direction from corner orinstall membrane strip centered over corner.F. Prepare, treat, and seal vertical and horizontal surfaces at terminations and penetrationsthrough waterproofing and at drains and protrusions according to ASTM D 6135.3.03 APPLICATIONA. Comply with manufacturer's written recommendations unless more stringent requirements areindicated or required by Project conditions to ensure satisfactory performance of waterproofing.B. Install sheet waterproofing according to waterproofing manufacturer's written instructions andaccording to recommendations in ASTM D 6135.C. Apply primer to substrates at required rate and allow to dry. Limit priming to areas that will becovered by sheet waterproofing in same day. Re-prime areas exposed for more than 24 hours.D. Apply and firmly adhere sheets over area to receive waterproofing. Accurately align sheets andmaintain uniform 2-1/2-inch minimum lap widths and end laps. Overlap and seal seams andstagger end laps to ensure watertight installation.1. When ambient and substrate temperatures range between 25 and 40 deg F, install selfadhering,modified bituminous sheets produced for low-temperature application. Do notuse low-temperature sheets if ambient or substrate temperature is higher than 60 deg F.E. Apply continuous sheets over sheet strips bridging substrate cracks, construction, andcontraction joints.F. Seal exposed edges of sheets at terminations not concealed by metal counterflashing or endingin reglets with mastic.04-27-11 SHEET MEMBRANE WATERPROOFING07100 -3
<strong>Buffalo</strong> <strong>Wild</strong> <strong>Wings</strong>G. Repair tears, voids, and lapped seams in sheet waterproofing not complying with requirements.Slit and flatten fishmouths and blisters. Patch with sheet waterproofing extending 6 inchesbeyond repaired areas in all directions.H. Correct deficiencies in or remove sheet waterproofing that does not comply with requirements;repair substrates, reapply waterproofing, and repair sheet flashings.3.04 INSTALLATION OF PROTECTION BOARDA. Install protection board with butted joints over sheet waterproofing immediately after installation.Comply with waterproofing material manufacturer's written recommendations for attachingprotection board.3.05 PROTECTIONA. Protect waterproofing and protection board from damage during remainder of constructionperiod.END OF SECTION04-27-11 SHEET MEMBRANE WATERPROOFING07100 -4
<strong>Buffalo</strong> <strong>Wild</strong> <strong>Wings</strong>PART 1 GENERAL1.01 SECTION INCLUDESSECTION 07160 – BITUMINOUS DAMPPROOFINGA. Cold-applied, emulsified-asphalt dampproofing.B. Protection board.1.02 RELATED SECTIONSA. Section 03300 – Cast-in-place Concrete.B. Section 04810 – Unit Masonry Assemblies.1.03 REFERENCESA. American Society for Testing and Materials (ASTM):1. ASTM C 272: Test Method for Water Absorption of Core Materials for Structural.2. ASTM D 1227: Specification for Emulsified Asphalt used as a Protective Coating forRoofing.3. ASTM D 1621: Test Method for Compressive Properties of Rigid Cellular Plastics.4. ASTM D 1668: Specification for Glass Fabrics (Woven and Treated) for Roofing andWaterproofing.B. National Roofing Contractors Association (NRCA):1. Waterproofing Manual.1.04 SUBMITTALSA. See Section 01300 - Administrative Requirements, for submittal procedures.B. Product Data: Include recommendations for method of application, primer, number of coats,coverage or thickness and reinforcing. Submit manufacturer’s technical bulletins and MSDS.1.05 QUALITY ASSURANCEA. Source Limitations: Obtain primary dampproofing materials and primers through one sourcefrom a single manufacturer. Provide secondary materials recommended by manufacturer ofprimary materials.1.06 PROJECT CONDITIONSA. Weather Limitations: Proceed with installation only when existing and forecasted weatherconditions permit dampproofing to be performed according to manufacturers' writteninstructions.PART 2 PRODUCTS2.01 MANUFACTURERSA. Acceptable Manufacturers for Dampproofing:1. BASF Building Systems.2. Karnak Corporation.3. W.R. Meadows, Inc.4. Tamms Industries, Inc.04-27-11 BITUMINOUS DAMPPROOFING07160 -1
<strong>Buffalo</strong> <strong>Wild</strong> <strong>Wings</strong>2.02 COLD-APPLIED, EMULSIFIED ASPHALT DAMPPROOFINGA. (Dampproofing) Emulsified Bituminous Dampproofing: Non-fibered, water-based, non-sagasphaltic coating designed for spray application on damp substrate and conforming to ASTM D1227, Type III, Class 1.1. BASF: Hydrocide 600.2. W.R. Meadows: Sealmastic Emulsion Type I – Spray Grade.3. Karnak Corporation: 100AF Non-Fibered Emulsion Dampproofing.4. Tamms: Dehydratine 75.2.03 MISCELLANEOUS MATERIALSA. Emulsified-Asphalt Primer: ASTM D 1227, Type III, Class 1, except diluted with water asrecommended by manufacturer.B. Fiber Glass Fabric: ASTM D 1668, Type I.1. Karnak Corporation: No. 31 Fiberglass Membrane.2. Sonoshield Reinforcing Fabric by BASF Building Systems.3. Comparable products from other manufacturers complying with specified requirements.C. Patching Compound: Fibered mastic of type recommended by dampproofing manufacturer.D. Protection Board: Fan folded, with a core of extruded-polystyrene board insulation faced oneor both sides with plastic film, nominal thickness 1/4 inch, with compressive strength of not lessthan 8 psi per ASTM D 1621, and maximum water absorption by volume of 0.6 percent perASTM C 272.1. Owens Corning's "Fanfold DWB.2. Dow Chemical Company's "Protection Board III.3. Comparable products from other manufacturers.PART 3 EXECUTION3.01 EXAMINATIONA. Examine substrates, with Installer present, for compliance with requirements for surfacesmoothness and other conditions affecting performance of work.1. Proceed with dampproofing application only after substrate construction and penetratingwork have been completed and unsatisfactory conditions have been corrected.3.02 PREPARATIONA. Protection of Other Work: Mask or otherwise protect adjoining exposed surfaces from beingstained, spotted, or coated with dampproofing. Prevent dampproofing materials from enteringand clogging weep holes and drains.B. Clean substrates of projections and substances detrimental to work; fill voids, seal joints, andapply bond breakers if any, as recommended by prime material manufacturer.C. Apply patching compound for filling and patching tie holes, honeycombs, reveals, and otherimperfections.3.03 APPLICATIONA. Comply with manufacturer's written recommendations unless more stringent requirements areindicated or required by Project conditions to ensure satisfactory performance of dampproofing.1. Apply additional coats if recommended by manufacturer or if required to achieve coverageindicated.2. Allow each coat of dampproofing to cure 24 hours before applying subsequent coats.3. Allow 24 hours drying time prior to backfilling or coverage by other materials.04-27-11 BITUMINOUS DAMPPROOFING07160 -2
<strong>Buffalo</strong> <strong>Wild</strong> <strong>Wings</strong>B. Locations:1. Foundation Walls: Apply dampproofing to foundation walls where opposite side of wallfaces building interior and other locations indicated on drawings.a. Apply from finished grade line to 16 inches below building floor line.b. Extend 12 inches onto intersecting surfaces, but do not extend onto surfaces exposedto view when Project is completed.c. Install fiber glass fabric stripping at internal and external corners, changes in plane,construction joints, cracks, by embedding an 8 inch wide strip of fiber glass fabric in aheavy coat of dampproofing. Dampproofing coat for embedding fabric is in addition toother coats required.d. Coverage Rate: Apply 2 spray coats at not less than 1.5 gal./100 sq. ft. for first coatand 1 gal./100 sq. ft. for second coat.2. Cavity Walls: Apply dampproofing to provide continuous plane of protection on exteriorface of back-up surface on masonry and concrete cavity walls.a. Lap dampproofing at least 1/4 inch onto flashing, masonry reinforcement, veneer ties,and other items that penetrate applied surface.b. Coverage rate: Apply 1 spray coat at not less than 1 gal./100 sq. ft.3.04 INSTALLATION OF PROTECTION BOARDA. Install protection board over completed-and-cured dampproofing. Comply with dampproofingmaterial manufacturer's written recommendations for attaching protection board.1. Support protection board with spot application of adhesive of type recommended byprotection board manufacturer over cured coating.3.05 CLEANINGA. Remove dampproofing materials from surfaces not intended to receive dampproofing.END OF SECTION04-27-11 BITUMINOUS DAMPPROOFING07160 -3
<strong>Buffalo</strong> <strong>Wild</strong> <strong>Wings</strong>SECTION 07212 - BOARD AND BATT INSULATIONPART 1 GENERAL1.01 SECTION INCLUDESA. Batt insulation in exterior wall construction.B. Batt insulation for filling perimeter window and door shim spaces, crevices in exterior wall androof, and roof and miscellaneous stud spaces.C. Batt insulation for acoustic insulation in interior partitions.D. Board Insulation at roof.E. Board Insulation for exterior foundations.1.02 RELATED SECTIONSA. Section 05400 - Cold Formed Metal Framing: Supporting construction for batt insulation.B. Section 06100 – Rough Carpentry.C. Section 07260 – Air and Vapor Barriers.D. Section 07535 - Mechanically Attached Membrane Roofing.1.03 REFERENCESA. ASTM C 665 - Standard Specification for Mineral-Fiber Blanket Thermal Insulation for LightFrame Construction and Manufactured Housing.B. ASTM E 136 - Standard Test Method for Behavior of Materials in a Vertical Tube Furnace At750 Degrees C.C. ASTM C 578 – Standard Specification for Rigid, Cellular Polystyrene Thermal Insulation.D. ASTM C 1289 - Standard Specification for Faced Rigid Cellular Polyisocyanurate ThermalInsulation Board.E. ASTM D 1621 - Standard Test Method for Compressive Properties Of Rigid Cellular Plastics.F. ASTM D 1622 - Standard Test Method for Apparent Density of Rigid Cellular Plastics.G. ASTM E 84 - Standard Test Method for Surface Burning Characteristics of Building Materials.1.04 QUALITY ASSURANCEA. Source Limitations: Obtain each type of building insulation through one source from a singlemanufacturer.B. Verify that polyisocyanurate roof insulation is acceptable with roof membrane manufacturer.Refer to Section 07535.1.05 DELIVERY, STORAGE, AND HANDLINGA. Protect insulation materials from physical damage and from deterioration by moisture, soiling,and other sources. Store inside and in a dry location. Comply with manufacturer's writteninstructions for handling, storing, and protecting during installation.03/09/10 BOARD AND BATT INSULATION07212 -1
<strong>Buffalo</strong> <strong>Wild</strong> <strong>Wings</strong>PART 2 PRODUCTS2.01 BATT INSULATION MATERIALSA. (INSUL1) Batt Insulation: ASTM C 665; preformed mineral fiber batt; friction fit, conforming tothe following:1. Combustibility: Non-combustible, when tested in accordance with ASTM E 136, except forfacing, if any.2. Thickness: As indicated on Drawings for wall thickness.3. Facing: Unfaced.4. Manufacturers:a. CertainTeed Corporation: www.certainteed.comb. Johns Manville Corporation: www.jm.comc. Owens Corning Corp: www.owenscorning.com5. Substitutions: See Section 01600 - Product Requirements.2.02 BOARD INSULATION MATERIALSA. (INSUL2): Under Slab and Foundation Insulation: Extruded Polystyrene Board Insulation, 2”inch thick, unless noted otherwise, ASTM C 578, Type IV, 30 psi minimum compressivestrength, 1.60 lb/cu. ft., with a flame-spread of 5 and smoke-developed indexes of 45-75:1. Manufacturers:a. Diversifoam Products: Certifoam.b. Dow Chemical: Styrofoam.c. Owens Corning: Foamular LT30.B. (INSUL3): Roof Insulation: Polyisocyanurate board to ASTM C 1289, Type II, Class I, Grade2; rigid, closed cell type, with specially formulated organic/inorganic facers.1. Long Term Thermal Resistance (ASTM C518): R=6.0 per 1 inch of thickness.2. Board Size: 48”x48” and 48”x96”.3. Nominal Product Thickness: 4 inches unless noted otherwise.4. Compressive Strength (ASTM D1621): minimum 20 psi.5. Density (ASTM D1622): 2 pcf.6. Edges: Square.7. Dimensional Stability: less than 2 percent linear change.8. Flame Spread (ASTM E84): 25.9. Provide tapered insulation boards and thicknesses to create tapered areas as indicated onRoof Plan.10. Manufacturers and Products:a. Johns Manville: Enrgy 3 Roof Insulation Board. www.jm.comb. GAF Materials Corporation: EnergyGuard Roof Insulation Board. www.gaf.comc. Firestone Building Products: ISO 95+. www.firestonebpco.comd. Comparable products from other roofing insulation manufacturers that meet or exceedthe specified requirements and are acceptable to the roof membrane manufacturer.C. Mechanical Fasteners: Screw type, 6 ga. diameter, self-tapping, galvanized steel, sufficientlength to secure anchor system into place and to withstand all super-imposed loads: completewith 1 1/2 inch diameter 14 ga. thick galvanized steel discs.PART 3 EXECUTION3.01 EXAMINATIONA. Verify that substrate, adjacent materials, and insulation materials are dry and compatible.B. Verify substrate surfaces are flat, sound, free of honeycomb, oil, grease, fins, or otherirregularities.03/09/10 BOARD AND BATT INSULATION07212 -2
<strong>Buffalo</strong> <strong>Wild</strong> <strong>Wings</strong>3.02 DELIVERY AND STORAGEA. Deliver in original unopened packages and store in enclosed shelter; protect from damage andexposure to direct sunlight. Remove damaged or deteriorated materials from premises.3.03 BATT INSTALLATIONA. Install insulation in accordance with manufacturer's instructions.B. Trim insulation neatly to fit spaces. Insulate miscellaneous gaps and voids.C. Fit insulation tightly in cavities and tightly to exterior side of mechanical and electrical serviceswithin the plane of the insulation.3.04 BOARD INSTALLATIONA. Insulate interior face of exterior concrete foundation, including returns under floor slab asindicated on the drawings. Provide complete insulation membrane around entire buildingwhether specifically indicated or not.B. Mechanically fasten insulation boards to substrate at NRCA, UL or FM required spacing,whichever is more stringent.C. Apply insulation boards parallel to roof perimeter edges.D. Lay second layer of insulation with joints staggered from first layerE. Lay insulation boards with edges in moderate contact without forcing. Cut insulation to fit neatlyto perimeter blocking and around penetrations through roof.F. Apply no more insulation than can be sealed with membrane in same day.G. Keep insulation a minimum of 3 inches from heat emitting devices, and a minimum 2 inchesfrom sidewalls.H. Install after building embankment and granular cushion have been completed and vaporretarder is in place. Lay insulation in place, edges closely pressed together, against inside faceof foundation beam excavation; returned under floor slab as shown on the drawings. Pourconcrete to cover insulation.3.05 PROTECTION OF FINISHED WORKA. Do not permit installed insulation to be damaged prior to its concealment.3.06 CLEAN-UPA. Upon completion of work of this section, remove related debris from premises.END OF SECTION03/09/10 BOARD AND BATT INSULATION07212 -3
<strong>Buffalo</strong> <strong>Wild</strong> <strong>Wings</strong>PART 1 GENERAL1.01 SECTION INCLUDESSECTION 07240 – EXTERIOR INSULATION AND FINISH SYSTEMA. Exterior insulation and finish system (EIFS), Class PB.1.02 RELATED SECTIONSA. Section 01300 – Administration Requirements: for submittal procedures.B. Section 06100 – Rough Carpentry: for wall framing and sheathing.C. Section 07620 – Sheet Metal Flashing and Trim.D. Section 07920 – Joint Sealants: Expansion joint and perimeter sealants.1.03 SYSTEM DESCRIPTIONA. Water Drainable EIFS: A “nonload bearing, water drainage exterior wall cladding system thatconsists of a fluid applied water resistive coating applied over sheathing or concrete masonry,insulation board attached adhesively with notched trowel; an integrally reinforced base coat;and a textured protective finish coat,” as defined by ASTM C 1397.1.04 REFERENCESA. American Society for Testing and Materials (ASTM):1. ASTM C150 – “Spec for Portland Cement”.2. ASTM C578 – “Spec for Preformed, Cellular Polystyrene Thermal Insulation”.3. ASTM C 1397 – “Practice for Application of Class PB Exterior Insulation and FinishSystems”.4. ASTM C 1481: Guide for Use of Joint Sealants with Exterior Insulation and Finish Systems(EIFS).5. ASTM D 578-00: Specification for Glass Fiber Strands.6. ASTM D 1784-03: Specification for Rigid Poly(Vinyl Chloride) (PVC) Compounds andChlorinated Poly(Vinyl Chloride) (CPVC) Compounds.7. ASTM D 3273: Test Method for Resistance to Growth of Mold on the Surface of InteriorCoatings in an Environmental Chamber.8. ASTM D 3274: Test Method for Evaluating Degree of Surface Disfigurement of Paint Filmsby Microbial (Fungal or Algal) Growth or Soil and Dirt Accumulation.9. ASTM E84 – “Test Method for Surface Burning Characteristics of Building Materials.”B. EIFS Industry Members Association (EIMA) Standards:1. EIMA101.01 – Standard Test Method for Freeze-Thaw Resistance of Exterior Insulationand Finish Systems (EIFS), Class PB (Modified ASTM C67).2. EIMA 101.02 - Standard Test Method for Resistance to Water Penetration of ExteriorInsulation and Finish Systems (EIFS), Class PB, (Modified ASTM E 331).3. EIMA 101.03 – Standard Test Method for Determining Tensile Adhesion Strength of anExterior Insulation and Finish System (EIFS), and Components, Class PB (Modified ASTMC297).4. EIMA 101.86 – Standard Test Method for Resistance of Exterior Insulation and FinishSystems (EIFS), Class PB, to the Effects of Rapid Deformation (Impact).5. EIMA 105.01 – Standard Test Method for Alkali Resistance of Glass Fiber ReinforcingMesh for use in Exterior Insulation and Finish Systems (EIFS), Class PB.6. EIMA 300.01 – Standard Test Method for Determining Tensile Adhesion Properties ofSealants when used with Exterior Insulation and Finish Systems (EIFS), Class PB.7. EIMA- Class PB Details - Exterior Insulation and Finish System Class PB Details.8. EIMA Guideline Specification for Expanded Polystyrene (EPS) Insulation Board.12/28/10 EXTERIOR INSULATION AND FINISH SYSTEM07240 -1
<strong>Buffalo</strong> <strong>Wild</strong> <strong>Wings</strong>C. ICC Evaluation Service, Inc. (ICC-ES):1. ICC-ES AC12: Interim Criteria for Foam Plastic Insulation.2. ICC-ES AC24: Interim Criteria for Exterior Insulation and Finish System.3. ICC-ES AC219: Acceptance Criteria for Exterior Insulation and Finish System.1.05 PERFORMANCE REQUIREMENTSA. EIFS Performance: Provide a system to comply with the following:1. Bond Integrity: Free from bond failure within EIFS components or between system andsupporting wall construction, resulting from exposure to fire, wind loads, weather, or otherin-service conditions.2. Weathertightness: Resistant to water penetration from exterior into water-drainage EIFSand assemblies behind it or through them into interior of building that results indeterioration of thermal-insulating effectiveness or other degradation of EIFS andassemblies behind it, including substrates, supporting wall construction, and interior finish,and including a means that allows water entering into an EIFS assembly to drain to theexterior.B. Class PB EIFS: Provide EIFS having physical properties and structural performance thatcomply with the following:1. Abrasion Resistance: No cracking, checking, or loss of film integrity when tested perASTM D 968, Method A.2. Absorption - Freeze Resistance: No visible deleterious effects and negligible weight lossafter 60 cycles per EIMA 101.01.3. Accelerated Weathering: Five samples per ICC-ES AC219 showing no cracking, checking,crazing, erosion, rusting, blistering, peeling, delamination per ASTM G 153.4. Freeze -Thaw: No surface changes, cracking, checking, crazing, erosion, rusting,blistering, peeling, or delamination per ICC-ES AC219.5. Mildew Resistance of Finish Coat: No growth when tested per ASTM D 3273 andevaluated according to ASTM D 3274.6. Salt-Spray Resistance: No deleterious affects when tested according to ICC-ES AC219.7. Tensile Adhesion: No failure in EIFS, adhesive, base coat, or finish coat when tested perEIMA 101.03.8. Water Penetration: No water penetration into the plane of the base coat to expandedpolystyreneboard interface per EIMA 101.02.9. Water Resistance: No cracking, checking, crazing, erosion, rusting, blistering, peeling, ordelamination after testing for 14 days per ASTM D 2247.10. Wind-Driven-Rain Resistance: When applicable with stud framed wall substrates; resistwind-driven rain according to ICC-ES AC219.11. Impact Resistance: Tested per EIMA 101.86; and meeting or exceeding the following:12. Standard Impact Resistance: 25 to 49 inch-lb.13. High Impact Resistance: 90 to 150 inch-lb.14. Drainage: According to ICC-ES AC235.15. Structural Performance Testing: EIFS assembly and components to comply with ICC-ES AC219 when tested per ASTM E 330.1.06 SUBMITTALSA. See Section 01300 - Administrative Requirements, for submittal procedures.B. Installer’s Certification:1. List of at least 3 successfully completed EIFS projects of similar complexity, completedwithin the last 2 years.2. Installer’s approved and current Applicator’s Certificate.1.07 QUALITY ASSURANCEA. Installer Qualifications: Installer, certified in writing by EIFS manufacturer as qualified to installmanufacturer's system using trained workers.12/28/10 EXTERIOR INSULATION AND FINISH SYSTEM07240 -2
<strong>Buffalo</strong> <strong>Wild</strong> <strong>Wings</strong>B. Source Limitations: Obtain EIFS from single source from single EIFS manufacturer and fromsources approved by EIFS manufacturer as compatible with system components.C. Fire Test Response Characteristics: Provide EIFS and system components with the followingfire-test-response characteristics as determined by testing identical EIFS and systemcomponents per test method indicated below by UL or another testing and inspecting agencyacceptable to authorities having jurisdiction. Identify products with appropriate markings ofapplicable testing agency.1. Surface-Burning Characteristics: Provide insulation board, adhesives, base coats, andfinish coats with flame-spread index of 25 or less and smoke-developed index of 450 orless, per ASTM E 84.2. Radiant Heat Exposure: No ignition of EIFS when tested according to NFPA 268.3. Potential Heat: Acceptable level when tested according to NFPA 259.1.08 DELIVERY, STORAGE, AND HANDLINGA. Deliver products to site in manufacturer's original, unopened containers or packaging with labelsintact clearly identifying products.B. Inspect products for damage and notify manufacturer of any discrepancies. Do not usedamaged or unsatisfactory materials.C. Store materials inside under cover protected from weather, direct sunlight, surfacecontamination, aging, damaging temperatures, construction traffic and other causes.1. Do not store at less than 40 deg. F.2. Stack insulation board flat and off the ground.1.09 PROJECT CONDITIONSA. Weather Limitations: Comply with exterior insulation finish system manufacturer’s requirementsfor temperatures and environmental conditions before during and after application.1. Do not apply EIFS system unless the ambient temperature is above 40 deg. F and rising atthe time of installation and remains so for 24 hours following installation.2. Do not apply EIFS system materials to substrates whose temperature is below 40 deg. F.3. Do not apply EIFS system during inclement weather unless appropriate protection isemployed.1.10 COORDINATIONA. Coordinate installation of EIFS with related Work specified in other Sections to ensure that wallassemblies, including sheathing, flashing, trim, joint sealants, aluminum framing systems, anddoors, are protected against damage from the effects of weather, corrosion, moisture, and othercauses. Do not allow water to penetrate behind flashing and barrier coating of EIFS.PART 2 PRODUCTS2.01 MANUFACTURERSA. Acceptable Manufacturers and System:1. Dryvit System Inc.: (Outsulation MD System).2. Senergy, Inc.: (Senerflex Channeled Adhesive System).3. STO Corporation.: (StoTherm Essence Next).4. Parex Inc.: (Standard Water Master System).2.02 MATERIALSA. Compatibility: Provide water-resistive coating, adhesive, fasteners, board insulation, reinforcingmeshes, base- and finish-coat systems, sealants, and accessories that are compatible with oneanother and with substrates and approved for use by EIFS manufacturer for Project.12/28/10 EXTERIOR INSULATION AND FINISH SYSTEM07240 -3
<strong>Buffalo</strong> <strong>Wild</strong> <strong>Wings</strong>B. Water-Resistive Coatings: EIFS manufacturer's standard formulation and accessories for useas water/weather-resistive barriers, compatible with substrate, and complying with physical andperformance criteria of ICC-ES AC212.1. Sheathing Joint Tape: Type recommended by EIFS manufacturer for sealing jointsbetween and penetrations through sheathing.C. Drainage Strip/Track: Manufacturer’s standard PVC track or strip to provide drainage of system.Coordinate component selected with specific details indicated on Drawings.D. Insulation Adhesive: EIFS manufacturer's standard formulation designed for indicated use,compatible with substrate, and complying with the following:1. Factory-blended dry formulation of portland cement, dry polymer admixture, and fillersspecified for base coat.E. Insulation Board: Molded, rigid cellular polystyrene insulation board complying withASTM C 578, Type I; EIFS manufacturer's requirements; and EIMA's "EIMA GuidelineSpecification for Expanded Polystyrene (EPS) Insulation Board" for most stringent requirementsfor material performance and qualities of insulation, including dimensions and permissiblevariations, and the following:1. Aging: Before cutting and shipping, age insulation in block form by air drying for not lessthan six weeks or by another method approved by EIMA that produces equivalent results.2. Flame-Spread and Smoke-Developed Indexes: 25 and 450 or less, respectively, perASTM E 84.3. Dimensions: Provide insulation boards in thickness indicated, but not more than 4 inchesthick or less than thickness allowed by ASTM C 1397.4. Foam Shapes: Provide with profiles and dimensions indicated on Drawings.F. Reinforcing Mesh: Balanced, alkali-resistant, open-weave, glass-fiber mesh treated forcompatibility with other EIFS materials, made from continuous multi-end strands with retainedmesh tensile strength of not less than 120 lbf/in. per EIMA 105.01; complying with ASTM D 578and the following requirements for minimum weight:1. Standard-Impact Reinforcing Mesh: Not less than 4.0 oz./sq. yd.2. High-Impact Reinforcing Mesh: Not less than 15 oz./sq. yd.3. Detail Reinforcing Mesh: Not less than 4.0 oz./sq. yd.4. Corner Reinforcing Mesh: Not less than 7.2 oz./sq. yd.G. Base Coat Materials: EIFS manufacturer's standard mixture complying with the following:1. Formulation of portland cement complying with ASTM C 150, Type I, white or natural color;and manufacturer's standard 100% acrylic adhesive designed for use with portlandcement.2. Materials to be shipped pre-measured for job-site mixing.H. Tinted Base-Coat Primer (provide if required by manufacturer): EIFS manufacturer's standard100% acrylic primer for preparing base-coat surface for application of finish coat.1. Note: Primer to be tinted to closely match Finish Coat including custom colors.I. Finish-Coat Materials: EIFS manufacturer's standard 100% acrylic-based coating complyingwith the following:1. Factory-mixed formulation of polymer-emulsion binder, colorfast mineral pigments, soundstone particles, and fillers.2. Refer to EIFS Schedule at end of this Section for finish coat color and texture.J. Mildew Resistant Finish Additive: EIFS manufacturer's standard mildew resistance additive forthe EIFS system finish coat.Dryvit: “PMR Finish”.Comparable products from other specified EIFS manufacturers.K. Water: Potable.12/28/10 EXTERIOR INSULATION AND FINISH SYSTEM07240 -4
<strong>Buffalo</strong> <strong>Wild</strong> <strong>Wings</strong>L. Trim Accessories: Type as designated or required to suit conditions indicated and to complywith EIFS manufacturer's written instructions; manufactured from UV-stabilized PVC; andcomplying with ASTM D 1784.M. Sealant: Sealant and joint backing materials as specified under Section 07900 – Joint Sealers,(SLNT7), and complies with requirements for products and testing indicated in ASTM C 1481.1. Sealant Color: To match EIFS topcoat color.2.03 MIXINGA. General: Comply with EIFS manufacturer's requirements for combining and mixing materials.1. Do not introduce admixtures, water, or other materials except as recommended by EIFSmanufacturer.2. Mix materials in clean containers.3. Use materials within time period specified by EIFS manufacturer or discard.PART 3 EXECUTION3.01 EXAMINATIONA. Examine substrates, areas, and conditions, with Installer present, for compliance withrequirements for installation tolerances and other conditions affecting performance of EIFS.B. Examine roof edges, wall framing, flashings, openings, substrates, and junctures at otherconstruction for suitable conditions where EIFS will be installed.C. Proceed with installation only after unsatisfactory conditions have been corrected.1. Begin coating application only after surfaces are dry.2. Application of coating indicates acceptance of surfaces and conditions.3.02 PREPARATIONA. Protect contiguous work from moisture deterioration and soiling caused by application of EIFS.Provide temporary covering and other protection needed to prevent spattering of exterior finishcoats on other work.B. Protect EIFS, substrates, and wall construction behind them from inclement weather duringinstallation. Prevent penetration of moisture behind drainage plane of EIFS and deterioration ofsubstrates.C. Prepare and clean substrates to comply with EIFS manufacturer's written instructions to obtainoptimum bond between substrate and adhesive for insulation.1. Concrete Masonry Substrates: Provide clean, dry, neutral-pH substrate for insulationinstallation. Verify suitability of substrate by performing bond and moisture testsrecommended by EIFS manufacturer.3.03 EIFS INSTALLATION, GENERALA. Comply with ASTM C 1397 and EIFS manufacturer's written instructions for installation of EIFSas applicable to each type of substrate indicated.3.04 SUBSTRATE PROTECTION APPLICATIONA. Water-Resistive Coatings: Apply over substrates to protect substrates from degradation and toprovide water-/weather-resistive barrier.1. Tape and seal joints, exposed edges, terminations, and inside and outside corners ofsheathing unless otherwise indicated by EIFS manufacturer's written instructions.B. Flexible-Membrane Flashing: Install over sheathing, applied and lapped to shed water; seal atopenings, penetrations, terminations, and where indicated by EIFS manufacturer's writteninstructions to protect wall assembly from degradation. Prime substrates, if required, and installflashing to comply with EIFS manufacturer's written instructions and details.12/28/10 EXTERIOR INSULATION AND FINISH SYSTEM07240 -5
<strong>Buffalo</strong> <strong>Wild</strong> <strong>Wings</strong>3.05 TRIM INSTALLATIONA. Trim: Apply trim accessories at perimeter of EIFS, at expansion joints, at window sills, andelsewhere as indicated, according to EIFS manufacturer's written instructions. Coordinate withinstallation of insulation.1. Weep Screed/Track: Use at bottom termination edges, at window and door heads of waterdrainageEIFS unless otherwise indicated.2. Window Sill Flashing: Use at windows unless otherwise indicated.3. Expansion Joint: Use where indicated on Drawings.4. Casing Bead: Use at other locations.3.06 INSULATION INSTALLATIONA. Mesh Backwrap at Edge Conditions: Prior to installing insulation and before applying reinforcingmesh, fully wrap board edges with detail reinforcing mesh. Cover edges of board and extendencapsulating mesh not less than 2 inches over front, edge and back face of board as indicatedon Drawings.1. Treat exposed edges of insulation as follows:a. Except for edges forming substrates of sealant joints, encapsulate with base coat,reinforcing mesh, and finish coat.b. Encapsulate edges forming substrates of sealant joints within EIFS or between EIFSand other work with base coat and reinforcing mesh.B. Board Insulation: Adhesively attach insulation to substrate in compliance with ASTM C 1397,EIFS manufacturer's written application instructions, and the following:1. Apply adhesive to insulation by notched-trowel method in a manner that results in coatingthe entire surface of sheathing with adhesive once insulation is adhered to sheathing.a. NOTE: Apply the adhesive so that the ribbons run vertically when the insulation boardis placed on the wall.2. Press and slide insulation into place. Apply pressure over the entire surface of insulationto accomplish uniform contact, high initial grab, and overall level surface.3. Allow adhered insulation to remain undisturbed for period recommended by EIFSmanufacturer, but not less than 24 hours, before beginning rasping and sanding insulation,or applying base coat and reinforcing mesh.4. Apply insulation over dry substrates in courses with long edges of boards orientedhorizontally.5. Begin first course of insulation from a level base line and work upward.6. Stagger vertical joints of insulation boards in successive courses to produce running bondpattern. Locate joints so no piece of insulation is less than 12 inches wide or 6 incheshigh. Offset joints not less than 6 inches from corners of window and door openings andnot less than 4 inches from aesthetic reveals.a. Adhesive Attachment: Offset joints of insulation not less than 6 inches from horizontaland 4 inches from vertical joints in sheathing.7. Place insulation with adhesive channels aligned in the vertical position for drainage. Aligndrainage channels in insulation boards above and below.8. Interlock ends at internal and external corners.9. Abut insulation tightly at joints within and between each course to produce flush,continuously even surfaces without gaps or raised edges between boards. If gaps greaterthan 1/16 inch occur, fill with insulation cut to fit gaps exactly; insert insulation without usingadhesive or other material.10. Cut insulation to fit openings, corners, and projections precisely and to produce edges andshapes complying with details indicated.11. Rasp or sand flush entire surface of insulation to remove irregularities projecting more than1/16 inch from surface of insulation and to remove yellowed areas due to sun exposure; donot create depressions deeper than 1/16 inch.12/28/10 EXTERIOR INSULATION AND FINISH SYSTEM07240 -6
<strong>Buffalo</strong> <strong>Wild</strong> <strong>Wings</strong>12. Cut aesthetic reveals in outside face of insulation with high-speed router and bit configuredto produce grooves, rabbets, and other features that comply with profiles and locationsindicated. Do not reduce insulation thickness at aesthetic reveals to less than 3/4 inch.13. Install foam shapes and attach to sheathing or structure.14. Interrupt insulation for expansion joints where indicated.15. Form joints for sealant application by leaving gaps between adjoining insulation edges andbetween insulation edges and dissimilar adjoining surfaces. Make gaps wide enough toproduce joint widths indicated on Drawings after encapsulating joint substrates with basecoat and reinforcing mesh.16. Coordinate installation of flashing and insulation to produce wall assembly that does notallow water to penetrate behind flashing and EIFS protective-coating.C. Expansion Joints: Install at locations indicated, where required by EIFS manufacturer, and asfollows:1. At expansion joints in substrates behind EIFS.2. Where EIFS adjoin dissimilar substrates, materials, and construction, including other EIFS.3. At floor lines in multilevel framed construction.4. Where wall height or building shape changes.5. Where EIFS manufacturer requires joints in long continuous elevations.3.06 BASE COAT INSTALLATIONA. Base Coat: Apply to exposed surfaces of concrete, insulation and foam shapes, as applicable,in minimum thickness recommended in writing by EIFS manufacturer, but not less than 1/16-inch dry-coat thickness.B. Reinforcing Mesh: Embed type indicated below in wet base coat to produce wrinkle-freeinstallation with mesh continuous at corners and overlapped not less than 2 inches or otherwisetreated at joints to comply with ASTM C 1397 and EIFS manufacturer's written instructions. Donot lap reinforcing mesh within 8 inches of corners. Completely embed mesh, applyingadditional base-coat material if necessary, so reinforcing-mesh color and pattern are not visible.C. Install reinforcing mesh types where recommended by the manufacturer and as follows:1. Standard Mesh: Wall areas subject to normal impact and flat walls or walls with moderatecontours.2. High Impact Mesh: Wall areas as follows:a. Areas below 8’-0” in height or subject to touch.b. Areas where projects are located in Wind Debris Zones (120 mph or higher).c. Where specifically indicated on Drawings.3. Detail Mesh: Used over special shapes and irregular detail work, at the base of a wall, ataesthetic and expansion/control joints, around openings and projections.4. Corner Mesh: For clean, crisp arises, outside corners, prefabricated panel edges andadditional impact resistance.D. Double-Layer Reinforcing Mesh Application: Where indicated, apply second base coat andsecond layer of reinforcing mesh, overlapped not less than 2 inches to comply withASTM C 1397 and EIFS manufacturer's written instructions in same manner as first application.1. Do not apply until first base coat has cured.E. Additional Reinforcing Mesh: Apply strip reinforcing mesh around openings extending 4 inchesbeyond perimeter. Apply additional 9-by-12-inch strip reinforcing mesh diagonally at corners ofopenings (re-entrant corners). Apply 8-inch- wide strip corner reinforcing mesh at both insideand outside building corners.1. At aesthetic reveals, apply strip detail reinforcing mesh not less than 8 inches wide.2. Embed strip reinforcing mesh in base coat before applying first layer of reinforcing mesh.F. Foam Shapes: Fully embed detail reinforcing mesh in base coat.12/28/10 EXTERIOR INSULATION AND FINISH SYSTEM07240 -7
<strong>Buffalo</strong> <strong>Wild</strong> <strong>Wings</strong>G. Double Base-Coat Application: Where indicated, apply second base coat in same manner andthickness as first application except without reinforcing mesh. Do not apply until first base coathas cured.3.07 FINISH COAT INSTALLATIONA. Primer: Apply over dry base coat according to EIFS manufacturer's written instructions.B. Finish Coat: Apply over dry primed base coat, maintaining a wet edge at all times for uniformappearance, in thickness required by EIFS manufacturer to produce a uniform finish of colorand texture matching approved sample and free of cold joints, shadow lines, and texturevariations.1. Refer to EIFS Schedule at end of this Section for finish coat color and texture.3.08 INSTALLATION OF JOINT SEALANTSA. Sealant and installation of sealant as specified under Section 07900.1. Apply joint sealants after base coat has cured but before applying finish coat.3.09 FINAL INSPECTION/REVIEWA. General: Conduct inspections, and make repairs or replace unsatisfactory EIFS panels asrequired. Completed work exposed to view, to be uniform in texture and color without defects.B. Additional Requirements: in addition to above, in-place EIFS panels may be rejected for anyone of the following:1. Exceeding specified installation tolerances.2. Damaged during construction operations.3. Exposed-to-view surfaces which develop surface finish deficiencies.4. Exposed-to-view color and/or texture of surfaces which does not match other surfaces,adjacent or remote.5. Exposed-to-view color and texture of surfaces which does not match approved samplesand/or approved mock-up sample.3.12 EIFS SCHEDULEA. Refer to Exterior Finishes Schedule Drawing Sheet A100 for EIFS Key Note Locations.B. Colors and Textures indicated are those of Dryvit Systems, Inc. Provide comparable colors andtextures from other specified manufacturers with approved samples.(EIFS1): Key Note 18Color: # 401, “Pretzel”. Finish: Sandpebble.(EIFS2): Key Note 19:Color: Color to Match Sherwin Williams Color # SW6898, “Social Butterfly”, (C13).Finish: Sandpebble.Note: The following two colors are used together in an alternating 2’-0” pattern in locations asindicated on Drawings.(EIFS3): Key Note 20:Color: # 714, “Licorice”. Finish: Sandpebble.(EIFS4): Key Note 21:Color: # 310, “China White”. Finish: Sandpebble.12/28/10 EXTERIOR INSULATION AND FINISH SYSTEM07240 -8
<strong>Buffalo</strong> <strong>Wild</strong> <strong>Wings</strong>3.13 CLEANING AND PROTECTIONA. Remove temporary covering and protection of other work. Promptly remove coating materialsfrom window and door frames and other surfaces outside areas indicated to receive EIFScoatings.END OF SECTION12/28/10 EXTERIOR INSULATION AND FINISH SYSTEM07240 -9
<strong>Buffalo</strong> <strong>Wild</strong> <strong>Wings</strong>SECTION 07260 - AIR AND VAPOR BARRIERSPART 1 GENERAL1.01 SECTION INCLUDESA. Air Barriers: Materials to stop passage of air through exterior walls, joints between exteriorwalls and roof, and joints around frames of openings in exterior walls.WALL VAPOR BARRIERS: USE FOR NORTHERN CLIMATE STORES ONLY.B. Vapor Barriers: Material to control the water-vapor transmission in cold climates.1.02 RELATED SECTIONSA. Section 03300 - Cast-in-Place Concrete: for vapor retarder under slab.B. Section 07212 - Board and Batt Insulation.C. Section 07900 - Joint Sealers: Sealant materials and installation techniques.1.03 REFERENCESA. ASTM E 96/E 96M - Standard Test Methods for Water Vapor Transmission of Materials.B. ASTM E 1677 - Specification for an Air Retarder (AR) Material or System for Low-Rise FramedBuilding Walls.C. AATCC – American Association of Textile Chemists and Colorists.1. Test Method 127 Water Resistance: Hydrostatic Pressure Test1.04 QUALITY ASSURANCEA. Vapor Permeability (Perm): Measure in accordance with ASTM E 96 Procedure E.1.05 ENVIRONMENTAL REQUIREMENTSA. Maintain temperature and humidity recommended by the materials manufacturers before,during and after installation.PART 2 PRODUCTS2.01 MATERIALSA. Air Barrier: Spunbonded olefin, nonwoven, non-perforated:1. Tyvek(R) Water Resistant Barrier, Manufactured by DuPont Company, Wilmington, DE.a. Classification: ASTM E 1677, Type I; air leakage at 25 mph wind pressure less than0.06 cubic feet per minute per square foot.b. Water Vapor Transmission: 28 perms ASTM E 96, Method B.c. Water Penetration Resistance: Minimum 78.7 inches per AATCC Test Method 127.2. Sealing Tape: DuPont Tyvek Tape.WALL VAPOR BARRIERS: USE FOR NORTHERN CLIMATE STORES ONLY.B. Vapor Barrier: Walls; Polyethylene sheet, six (6) mil thickness.1. Vapor Barrier Tape: Pressure-sensitive adhesive tape of type recommended by vaporbarrier manufacturer for sealing joints and penetrations. 2" wide.04-27-11 AIR AND VAPOR BARRIERS07260 -1
<strong>Buffalo</strong> <strong>Wild</strong> <strong>Wings</strong>PART 3 EXECUTION3.01 EXAMINATIONA. Verify that surfaces and conditions are ready to accept the work of this section.3.02 AIR BARRIER INSTALLATIONA. Install materials in accordance with manufacturer's written instructions.B. Install air barrier materials and assemblies in conjunction with materials described in othersections to provide continuous sealed barrier in the exterior enclosure of the building.C. Over exterior surface of sheathing, behind facing brick, install sheet with fasteners asrecommended by sheet manufacturer.1. Note: Do not install air barrier over sheathing in areas that receive EIFS. In EIFS areas, aliquid water resistive barrier will be installed over sheathing as part of EIFS system. Referto Section 07240.D. Seal seams, edges, fasteners, and penetrations with tape.E. Extend into jambs of openings and seal corners with tape.WALL VAPOR BARRIERS: USE FOR NORTHERN CLIMATE STORES ONLY.3.02 VAPOR BARRIER INSTALLATIONA. Install vapor barrier on warm side (heating season) of insulation applied to exterior wallsbeneath gypsum board.1. Seal edges, joints, punctures and tears with tape.END OF SECTION04-27-11 AIR AND VAPOR BARRIERS07260 -2
<strong>Buffalo</strong> <strong>Wild</strong> <strong>Wings</strong>PART 1 GENERAL1.01 SECTION INCLUDESSECTION 07411 - PREFORMED METAL ROOF PANELSA. Standing Seam Metal Roofing and Wall System.B. Accessories and miscellaneous components.1.02 RELATED SECTIONSA. Section 05120 - Structural Steel: Roof framing and purlins.B. Section 06100 – Rough Carpentry: Roof sheathing.C. Section 07212 – Board and Batt Insulation: Board insulation under roof system.D. Section 07900 - Joint Sealers: Field-installed sealants.1.03 SYSTEM DESCRIPTIONA. Standing Seam Roof System: Standing seam metal roof system applied over # 30 roof felt over1” polyisocyanurate board insulation on 5/8” roof sheathing on metal roof deck.B. Standing Seam Canopy End Panel System: Standing seam metal roof system applied verticallyover # 30 roof felt on 5/8” plywood sheathing for canopy end panels.1.04 REFERENCESA. AAMA 621: Voluntary Specification for High Performance Organic Coatings on Coil CoatedArchitectural Hot Dipped Galvanized (HDG) and Zinc-Aluminum Coated Steel Substrates.B. ASTM D 226: Specification for Asphalt-Saturated Organic Felt Used in Roofing andWaterproofing.C. ASTM A 653/A 653M: Specification for Steel Sheet, Zinc-Coated (Galvanized) or Zinc-IronAlloy-Coated (Galvannealed) by the Hot-Dip Process.D. UL 580 - Standard for Tests for Uplift Resistance of Roof Assemblies.1.05 PERFORMANCE REQUIREMENTSA. Performance Requirements: Provide complete engineered system complying with specifiedrequirements and capable of remaining weathertight while withstanding anticipated movementof substrate and thermally induced movement of roofing system.B. Wind Uplift: System to comply with requirements for UL Classification 580 for UL classified 90rated assemblies.1.06 SUBMITTALSA. See Section 01300 - Administrative Requirements, for submittal procedures.B. Shop Drawings: Include layouts of roof panels, details of edge and penetration conditions,spacing and type of connections, flashings, underlayment, and special conditions.1. Show work to be field-fabricated or field-assembled.C. Warranty: Submit specified manufacturer's warranty and ensure that forms have beencompleted in Owner's name and are registered with manufacturer.1.07 QUALITY ASSURANCEA. Manufacturer Qualifications: Company specializing in the manufacture of roofing systemssimilar to those required for this project, with not less than 5 years of documented experience.04-27-11 PREFORMED METAL ROOF PANELS07411 -1
<strong>Buffalo</strong> <strong>Wild</strong> <strong>Wings</strong>1.08 DELIVERY, STORAGE, AND HANDLINGA. Store roofing panels on project site as recommended by manufacturer to minimize damage topanels prior to installation.1.09 COORDINATIONA. Coordinate sheet metal roofing with rain drainage work, flashing, trim, and construction ofsheathing, parapets, walls, and other adjoining work to provide a watertight, secure, andnoncorrosive installation.1.10 WARRANTYA. See Section 01780 - Closeout Submittals, for additional warranty requirements.B. Finish Warranty: Provide manufacturer’s special warranty covering failure of factory-appliedexterior finish on metal roof panels and agreeing to repair or replace panels that show evidenceof finish degradation, including significant fading, chalking, cracking, or peeling within specifiedwarranty period of 20 year period from date of Substantial Completion.C. Waterproofing Warranty: Provide manufacturer’s warranty for weathertightness of roofingsystem, including agreement to repair or replace roofing that fails to keep out water withinspecified warranty period of 5 years from date of Substantial Completion.PART 2 PRODUCTS2.01 MANUFACTURERSA. Acceptable Manufacturers and Products:1. Architectural Building Components: www.archmetalroof.com. Permaseam RoofingSystem.2. Petersen Aluminum Corporation: www.pac-clad.com. Snap Clad Roofing Panels.2.02 METAL PANELSA. Panel Material: G-90 galvanized steel sheet in compliance with ASTM A653.1. Gauge: 24 gauge.2. Profile: Standing seam, with minimum 1-3/4” inch seam height; concealed fastener systemfor field snap lock type installation.3. Texture: Smooth, not embossed.4. Length: Maximum possible length to minimize lapped joints.5. Width: 12 inch wide panels.6. Finish: 70% polyvinylidene flouride resin type “Kynar 500” or equivalent, AAMA 621.a. Color: Matte Black.2.03 ATTACHMENT SYSTEMA. Concealed System: Provide manufacturer's standard concealed anchor clips designed forspecific roofing system and engineered to meet performance requirements, includinganticipated thermal movement.1. Note: Roof system manufacturer to provide extended panel clips or bearing plates toaccommodate the 1” thick roof insulation and to allow direct fastening of system to plywoodsubstrate.2.04 ACCESSORIES AND MISCELLANEOUS ITEMSA. Miscellaneous Sheet Metal Items: Provide flashings, trim, moldings, closure strips, and otherexposed components of the same material, thickness, and finish as used for the roofing panels.Items completely concealed after installation may optionally be made of stainless or galvanizedsteel.B. Fasteners: Hot-dipped galvanized or stainless steel, furnished by metal panel manufacturer forspecific substrate.04-27-11 PREFORMED METAL ROOF PANELS07411 -2
<strong>Buffalo</strong> <strong>Wild</strong> <strong>Wings</strong>C. Roofing Felt: Type 30, asphalt saturated felt, non-perforated, conforming to ASTM D226.D. Roof Insulation: 1” thick, polyisocyanurate insulation board as specified under Section 07212 formechanical installation to plywood substrate.E. Sealants: As specified under Section 07900.1. Exposed sealant must cure to rubber-like consistency.2. Concealed sealant must be non-hardening type.2.05 FABRICATIONA. Panels: Fabricate panels and accessory items at factory, using manufacturer’s standardprocesses as required to achieve specified appearance and performance requirements.PART 3 EXECUTION3.01 EXAMINATIONA. Examine substrates, areas, and conditions, with Installer present, for compliance withrequirements for installation tolerances, substrate, and other conditions affecting performance ofthe Work.1. Examine solid roof sheathing to verify that sheathing joints are supported by framing orblocking, that tops of fasteners are flush with surface, and that installation is within flatnesstolerances required for finished roofing installation.2. Verify that substrate is sound, dry, smooth, clean, sloped for drainage, and completelyanchored, and that provision has been made for drainage, flashings, and penetrationsthrough sheet metal roofing.B. Proceed with installation only after unsatisfactory conditions have been corrected.3.02 PREPARATIONA. Coordinate roofing work with provisions for roof drainage, flashing, trim, penetrations, and otheradjoining work to assure that the completed roof will be free of leaks.B. Remove protective film from surface of roof panels immediately prior to installation. Strip filmcarefully, to avoid damage to prefinished surfaces.C. Separate dissimilar metals by applying a bituminous coating, self-adhering rubberized asphaltsheet, or other permanent method approved by roof panel manufacturer.D. Where metal will be in contact with wood or other absorbent material subject to wetting, sealjoints with sealing compound and apply one coat of heavy-bodied bituminous paint.3.03 INSTALLATIONA. General: Install roofing system in accordance with approved shop drawings and panelmanufacturer's instructions and recommendations, as applicable to specific project conditions.Anchor all components of roofing system securely in place while allowing for thermal andstructural movement.B. Standing Seam Roof System:1. Comply with insulation manufacturer's written instructions applicable to products andapplication indicated.2. Install roofing system clips and bearing plates to plywood substrate with approvedfasteners in accordance with manufacturer’s instructions to allow for thickness ofinsulations board.3. Mechanically fasten insulation board to plywood substrate with anchors and washers asrecommended by insulation manufacturer with edges butted tightly in both directions.Anchor clips should protrude through insulation joints for anchoring of roof panels.04-27-11 PREFORMED METAL ROOF PANELS07411 -3
<strong>Buffalo</strong> <strong>Wild</strong> <strong>Wings</strong>4. Roofing Felt: Install felt underlayment over insulation board under sheet metal roofing.Use adhesive for temporary anchorage to minimize use of mechanical fasteners undersheet metal roofing. Apply over entire roof surface, in shingle fashion to shed water, withlapped joints of not less than 2 inches.5. Install roof flashing, trim and moldings securely to substrate. Seal joints and laps incomponents for water tight seal. Install metal flashing to lap over sheet metal roofing toallow moisture to run over and off the material.6. Install roof panels securely in place in strict accordance with manufacturer’s instructionswith provisions for thermal and structural movement.C. Standing Seam Canopy End Panel System:1. Install roofing system clips and bearing plates to plywood substrate with approvedfasteners in accordance with manufacturer’s instructions.2. Roofing Felt: Install felt underlayment over plywood substrate under sheet metal roofing.Use adhesive for temporary anchorage to minimize use of mechanical fasteners undersheet metal roofing. Apply over entire vertical surface, in shingle fashion to shed water,with lapped joints of not less than 2 inches.3. Install roof flashing, trim and moldings securely to substrate. Seal joints and laps incomponents for water tight seal. Install metal flashing to lap over sheet metal roofing toallow moisture to run over and off the material.4. Install roof panels securely in place in strict accordance with manufacturer’s instructionswith provisions for thermal and structural movement.3.04 CLEANING AND PROTECTIONA. Clean exposed sheet metal work at completion of installation. Remove grease and oil films,excess joint sealer, handling marks, and debris from installation, leaving the work clean andunmarked, free from dents, creases, waves, scratch marks, or other damage to the finish.B. Do not permit storage of materials or roof traffic on installed roof panels. Provide temporarywalkways or planks as necessary to avoid damage to completed work. Protect roofing untilcompletion of project.C. Touch-up, repair, or replace damaged roof panels or accessories before date of SubstantialCompletion.END OF SECTION04-27-11 PREFORMED METAL ROOF PANELS07411 -4
<strong>Buffalo</strong> <strong>Wild</strong> <strong>Wings</strong>PART 1 - GENERAL1.01 SECTION INCLUDESSECTION 07424 - ALUMINUM COMPOSITE PANEL SYSTEMA. Aluminum composite panels including related flashing and accessory components.1.02 RELATED SECTIONSA. Section 06100 – Rough Carpentry: Canopy framing and sheathing.B. Section 07260 – Air Barriers.C. Section 07620 – Sheet Metal Flashing and Trim.D. Section 07900 – Joint Sealers.D. Section 08310 – Access Doors and Panels: for access panel in entry soffit.1.03 SYSTEM DESCRIPTIONA. System: Preformed and prefinished aluminum composite panel system with sub-girtframing/anchorage, clip angles fasteners and other accessories for secure anchorage tostructural subframe installed using a rout and return wet joint system.1.04 REFERENCESA. American Society for Testing and Materials (ASTM):1. ASTM B 209: Specification for Aluminum and Aluminum-Alloy Sheet and Plate.2. ASTM C 920: Specification for Elastomeric Joint Sealants.3. ASTM D 2244: Test Method for Calculation of Color Differences from InstrumentallyMeasured Color Coordinates.4. ASTM D 4214: Test Methods for Evaluating Degree of Chalking of Exterior Paint Films.B. Architectural Aluminum Manufacturer’s Association (AAMA):1. AAMA 620: Voluntary Specification High Performance Organic Coatings on Coil CoatedArchitectural Aluminum.C. Sheet Metal and Air Conditioning Contractors' National Association (SMACNA).1. Architectural Sheet Metal Manual.1.05 QUALITY ASSURANCEA. Manufacturer: Minimum 5 years of continuous experience manufacturing composite panels ofthe type specified, and capable of providing a list of 5 projects of comparable size.B. Fabricator/Installer: Certified by panel manufacturer, minimum 5 years of continuous experiencefabricating and installing composite panels of the type specified.C. Take field measurements prior to completion of shop fabricate and finishing.1.06 SUBMITTALSA. Product Data: For each type of product indicated. Include construction details, materialdescriptions, dimensions of individual components and profiles, and finishes for each type ofcomposite panel and accessory.B. Shop Drawings: Indicate fabrication and installation layouts of composite panels; details of edgeconditions, joints, panel profiles, corners, anchorages, attachment system, trim, flashings,closures, and accessories; and special details. Distinguish among factory, shop, and fieldassembledwork.C. Warranties: Samples of special warranties.04-27-11 ALUMINUM COMPOSITE PANEL SYSTEM07424 -1
<strong>Buffalo</strong> <strong>Wild</strong> <strong>Wings</strong>1.07 DELIVERY, STORAGE AND HANDLINGA. Store and handle panels according to manufacturer's written instructions.B. Deliver, composite panels, and other manufactured components so as not to be damaged ordeformed. Package composite panels for protection during transportation and handling.C. Unload, store, and erect composite panels in a manner to prevent bending, warping, twisting,and surface damage.D. Store metal-faced composite panels vertically, covered with suitable weathertight and ventilatedcovering. Store composite panels to ensure dryness, with positive slope for drainage of water.Do not store composite panels in contact with other materials that might cause staining, denting,or other surface damage. Do not allow storage space to exceed 120 deg F.E. Retain strippable protective covering on composite panel for period of panel installation.F. Protect installed panels from damage. Replace any panels damaged during storage andconstruction.1.08 PROJECT CONDITIONSA. Weather Limitations: Proceed with installation only when existing and forecasted weatherconditions permit assembly of composite panels to be performed according to manufacturer'swritten instructions and warranty requirements.B. Field Measurements: Verify locations of structural members and wall opening dimensions byfield measurements before composite panel fabrication and indicate measurements on ShopDrawings.1.09 COORDINATIONA. Coordinate composite panel assemblies with rain drainage work, flashing, trim, and constructionof studs, soffits, and other adjoining work to provide a watertight, secure, and noncorrosiveinstallation.1.10 WARRANTYA. Special Warranty: Manufacturer's standard form in which manufacturer agrees to repair orreplace components of composite panel assemblies that fail in materials or workmanship withinspecified warranty period.1. Failures include, but are not limited to, the following:a. Structural failures, including rupturing, cracking, or puncturing.b. Deterioration of metals and other materials beyond normal weathering.2. Warranty Period: Five (5) years from date of Substantial Completion.B. Special Warranty on Panel Finishes: Manufacturer's standard form in which manufactureragrees to repair finish or replace composite panels that show evidence of deterioration offactory-applied finishes within specified warranty period.1. Exposed Panel Finish: Deterioration includes, but is not limited to, the following:a. Color fading more than 5 Hunter units when tested according to ASTM D 2244.b. Chalking in excess of a No. 8 rating when tested according to ASTM D 4214.c. Cracking, checking, peeling, or failure of paint to adhere to bare metal.2. Finish Warranty Period: Twenty (20) years from date of Substantial Completion.04-27-11 ALUMINUM COMPOSITE PANEL SYSTEM07424 -2
<strong>Buffalo</strong> <strong>Wild</strong> <strong>Wings</strong>PART 2 - PRODUCTS2.01 MANUFACTURERSA. Acceptable Manufacturers and Products:1. Alcoa Architectural Products: Reynobond ACM. www.alcoaarchitecturalproducts.com2. Firestone Metal Products: Una-clad Series 1000UC Aluminum Composite Panel System.www.unaclad.com3. Mitsubishi Plastics Composites, Inc.: Alpolic Composite Metal Panels.www.alpolic-usa.com2.02 MATERIALSA. Aluminum Sheet: Coil-coated sheet, ASTM B 209, alloy as standard with manufacturer, withtemper as required to suit forming operations and structural performance required.1. Surface: Smooth, flat finish.2. Exposed Coil-Coated Finishes:a. Metallic Fluoropolymer: AAMA 620. 3-coat fluoropolymer finish with suspendedmetallic flakes containing not less than 70 percent PVDF resin by weight in both colorcoat and clear topcoat. Prepare, pre-treat, and apply coating to exposed metalsurfaces to comply with coating and resin manufacturers' written instructions.3. Concealed Finish: Apply pretreatment and manufacturer's standard white or light-coloredacrylic or polyester backer finish, consisting of prime coat and wash coat with a minimumtotal dry film thickness of 0.5 mil.B. Panel Sealants:1. Joint Sealant: ASTM C 920; elastomeric silicone sealant; of type, grade, class, and useclassifications required to seal joints in composite panels and remain weathertight; and asrecommended in writing by panel manufacturer.a. Sealant Color: Color to match panel color.2.03 MISCELLANEOUS METAL FRAMINGA. Panel System Subgrits: Provide galvanized steel of gauge and spacing required for panelsystem structural requirements, as recommended by panel manufacture and in accordance withapproved shop drawings. To avoid galvanic reaction, separate dissimilar metals.B. Fasteners for Miscellaneous Metal Framing: Of type, material, size, corrosion resistance,holding power, and other properties required to fasten miscellaneous metal framing members tosubstrates.2.04 COMPOSITE PANELSA. General: Provide factory-formed and assembled, aluminum faced composite panels fabricatedfrom two metal facings bonded, using no glues or adhesives, to solid, extruded thermoplasticcore; formed into profile for installation method indicated. Include attachment systemcomponents and accessories required for weathertight system.B. Aluminum Composite Panels: Formed with 0.020-inch thick, coil-coated aluminum sheetfacings.1. Panel Thickness: 4 mm.2. Core: Standard.3. Exterior Finish: 3-coat Metallic fluoropolymer.4. Color: Una-Clad “Silver Metallic”.a. Comparable color from the other specified composite panel manufacturer’s with colorsamples approved by Architect.04-27-11 ALUMINUM COMPOSITE PANEL SYSTEM07424 -3
<strong>Buffalo</strong> <strong>Wild</strong> <strong>Wings</strong>2.05 MISCELLANEOUS MATERIALSA. Wall Panel Accessories: Provide components required for a complete composite panelassembly including trim, clips, flashings, sealants, gaskets, fillers, closure strips, and similaritems. Match material and finish of composite panels for exposed items.B. Fasteners: Self-tapping screws, bolts, nuts, self-locking rivets and bolts, end-welded studs, andother suitable fasteners designed to withstand design loads.C. Flashing: Aluminum, same finish as for aluminum panel where exposed; secured withconcealed fastening method.2.06 FABRICATIONA. General: Fabricate and finish composite panels and accessories at the factory to greatest extentpossible, by manufacturer's standard procedures and processes. Comply with indicated profilesand with dimensional and structural requirements.B. Metal-Faced Composite Panels: Factory form panels in a continuous process with no glues oradhesives between dissimilar materials. Trim and square edges of sheets with no displacementof face sheets or protrusion of core material.1. Form panel lines, breaks, and angles to be sharp and true, with surfaces free from warpand buckle.2. Fabricate panels with sharply cut edges, with no displacement of face sheets or protrusionof core material.3. Fabricate panels with panel stiffeners, as required to comply with deflection limits, attachedto back of panels with structural silicone sealant or bond tape.4. Dimensional Tolerances:a. Panel Bow: 0.8 percent maximum of panel length or width.b. Squareness: 0.25 inch (5 mm) maximum.C. Sheet Metal Accessories: Fabricate flashing and trim to comply with recommendations inSMACNA's "Architectural Sheet Metal Manual" that apply to design, dimensions, metal, andother characteristics of item indicated.1. Form exposed sheet metal accessories that are without excessive oil canning, buckling,and tool marks and that are true to line and levels indicated, with exposed edges foldedback to form hems.D. System Type: Rout and Return Wet Joint System.PART - 3 EXECUTION3.01 EXAMINATIONA. Examine substrates, areas, and conditions, with Installer present, for compliance withrequirements for installation tolerances of composite panel supports, and other conditionsaffecting performance of the Work.1. Examine wall sheathing to verify that sheathing joints are supported by framing or blockingand that installation is within flatness tolerances required by composite panelmanufacturer.2. Verify that air barrier has been installed over sheathing or backing substrate to prevent airinfiltration or water penetration.B. Examine roughing-in for components and systems penetrating composite panels to verify actuallocations of penetrations relative to seam locations of panels before panel installation.C. Proceed with installation only after unsatisfactory conditions have been corrected.04-27-11 ALUMINUM COMPOSITE PANEL SYSTEM07424 -4
<strong>Buffalo</strong> <strong>Wild</strong> <strong>Wings</strong>3.02 PREPARATIONA. Miscellaneous Framing: Install subgirts, furring, and other miscellaneous wall panel supportmembers and anchorage according to composite panel manufacturer's written instructions andapproved Shop Drawings.3.03 INSTALLATIONA. Attachment System Installation: Install attachment system required to support metal-facedcomposite panels and to provide a complete weathertight wall system, including perimeterextrusions, tracks, drainage channels, panel clips, and anchor channels.1. Include attachment to supports, panel-to-panel joinery, panel-to-dissimilar-material joinery,and panel-system joint seals.B. Install composite panels according to manufacturer's written instructions in orientation, sizes,and locations indicated on Drawings. Install panels perpendicular to subgirts unless otherwiseindicated. Anchor panels and other components of the Work securely in place, with provisionsfor thermal and structural movement.1. Shim or otherwise plumb substrates receiving composite panels.2. Flash and seal composite panels at perimeter of all openings. Do not begin installation untilair barrier and flashings that will be concealed by panels are installed.3. Install flashing and trim as composite panel work proceeds.4. Provide weathertight escutcheons for pipe and conduit penetrating panels.C. Metal Protection: Where dissimilar metals will contact each other or corrosive substrates,protect against galvanic action as recommended by composite panel manufacturer.D. Joint Sealers: Install gaskets, joint fillers, and sealants where indicated and where required forweathertight performance of composite panel assemblies.1. Prepare joints and apply sealants to comply with requirements in Section 07900 JointSealers.E. Coordinate installation of composite panel system with installation of entry canopy accesspanel. Refer to Section 08310.3.04 ACCESSORY INSTALLATIONA. General: Install accessories with positive anchorage to building and weathertight mounting andprovide for thermal expansion. Coordinate installation with flashings and other components.1. Install components required for a complete composite panel assembly including trim,flashings, sealants, gaskets, fillers, closure strips, and similar items.B. Flashing and Trim: Comply with performance requirements, manufacturer's written installationinstructions, and SMACNA's "Architectural Sheet Metal Manual." Provide concealed fastenerswhere possible, and set units true to line and level as indicated. Install work with laps, joints,and seams that will be permanently watertight and weather resistant.1. Install exposed flashing and trim that is without excessive oil canning, buckling, and toolmarks and that is true to line and levels indicated, with exposed edges folded back to formhems. Install sheet metal flashing and trim to fit substrates and to result in waterproof andweather-resistant performance.2. Expansion Provisions: Provide for thermal expansion of exposed flashing and trim. Spacemovement joints at a maximum of 10 feet with no joints allowed within 24 inches of corneror intersection. Where lapped expansion provisions cannot be used or would not besufficiently weather resistant and waterproof, form expansion joints of intermeshing hookedflanges, not less than 1 inch deep, filled with mastic sealant (concealed within joints).04-27-11 ALUMINUM COMPOSITE PANEL SYSTEM07424 -5
<strong>Buffalo</strong> <strong>Wild</strong> <strong>Wings</strong>3.05 ERECTION TOLERANCESA. Installation Tolerances: Shim and align composite panel units within installed tolerance of 1/4inch in 20 feet, non-accumulative, on level, plumb, and location lines as indicated and within1/8-inch offset of adjoining faces and of alignment of matching profiles.3.06 CLEANINGA. Remove temporary protective coverings and strippable films, if any, as composite panels areinstalled unless otherwise indicated in manufacturer's written installation instructions. Oncompletion of installation, clean finished surfaces as recommended by panel manufacturer.Maintain in a clean condition during construction.B. After composite panel installation, clear weep holes and drainage channels of obstructions, dirt,and sealant.C. Replace composite panels that have been damaged or have deteriorated beyond successfulrepair by finish touchup or similar minor repair procedures.END OF SECTION04-27-11 ALUMINUM COMPOSITE PANEL SYSTEM07424 -6
<strong>Buffalo</strong> <strong>Wild</strong> <strong>Wings</strong>PART 1 GENERAL1.01 SECTION INCLUDESSECTION 07535 - MECHANICALLY ATTACHED MEMBRANE ROOFINGA. Mechanically-attached single-ply roofing, insulation and accessories, installed in accordancewith drawings and specifications approved by the roofing membrane manufacturer.B. Indicated on the drawings as: Membrane Roofing System.1.02 RELATED SECTIONSA. Section 05310 - Steel Deck.B. Section 06100 - Rough Carpentry.C. Section 07212 – Board and Batt Insulation for roof insulation board.1.03 REFERENCESA. ASTM D 471 - Standard Test Method for Rubber Property--Effect of Liquids.B. ASTM D 751 - Standard Test Methods for Coated Fabrics.C. ASTM D 1149 - Standard Test Method for Rubber Deterioration--Surface Ozone Cracking in aChamber.D. ASTM D 1204 - Standard Test Method for Linear Dimensional Changes of NonrigidThermoplastic Sheeting or Film at Elevated Temperature.E. ASTM D-2136 - Standard Test Method for Coated Fabrics - Low-Temperature Bend Test.F. FM P7825 - Approval Guide; Factory Mutual Research Corporation.G. UL (FRD) - Fire Resistance Directory; Underwriters Laboratories Inc.1.04 SUBMITTALSA. See Section 01300 - Administrative Requirements, for submittal procedures.B. Certification: Manufacturer's written approval of this specification and of any proposeddeviations from the specification or drawings or previously approved details. Themanufacturer's approval does not constitute a waiver of the requirements of this specification orthe drawings or approval of deviations not specifically itemized.1.05 QUALITY ASSURANCEA. Installer Qualifications: Roofing contractor certified by manufacturer.1.06 DELIVERY AND STORAGEA. Deliver materials with packaging labels indicating appropriate warnings, storage conditions, lotnumbers, and usage instructions.B. Store materials in their original undamaged packaging; maintain storage conditions inaccordance with the manufacturer's requirements.1.07 WARRANTYA. See Section 01700 - Execution Requirements, for additional warranty requirements.B. Provide manufacturer's standard "Total System" material and labor, 10-year warranty.04-27-11 MECHANICALLY ATTACHED MEMBRANE ROOFING07535 -1
<strong>Buffalo</strong> <strong>Wild</strong> <strong>Wings</strong>PART 2 PRODUCTS2.01 MANUFACTURERA. Acceptable Manufacturer: Duro-Last Roofing, Inc. 525 Morley Drive, Saginaw, MI 48601, 800-248-0280. www.duro-last.com2.02 ROOFING SYSTEMA. Duro-Last 5-Foot Tab, Mechanically-Attached.1. Classified by Underwriters Laboratories as a Class A roofing material for use inconstruction of Class A roofing assemblies.2. Meet test requirements for FM Class 1A fire and I-60 wind resistance.B. Membrane: Scrim-reinforced, thermoplastic based sheet, bearing UL label on the packaging.1. Thickness: 0.40 inch, nominal, when measured in accordance with ASTM D 751.2. Sheet Length: As required to avoid end seams.3. Color: White.4. Breaking Strength: 350 lbf, when tested in accordance with ASTM D 751, Grab Method.5. Tear strength (ASTM D 751, Procedure B), 8 x 8 inch sample: 100 lbf.6. Brittleness test (ASTM D 2136, at minus 40 deg C): Pass.7. Dimensional stability, percent change max. (ASTM D 1204 B: 1 hr at 212 deg F, W: 6 hrsat 176 deg F): Plus/minus 0.1 percent.8. Water absorption (ASTM D 471) 158 degrees F for 7 days: Plus 1.0 percent maximumweight change9. Ozone resistance of reinforced membrane: No cracking when tested in accordance withASTM D 1149, for 70 hr at 100 degrees F.2.03 ACCESSORY MATERIALSA. Flashing: Same membrane as specified above.B. Bonding Adhesive:1. Contact cement to adhere membrane and flashings to various substrates e.g., insulationsurfaces, masonry surfaces, plywood, concrete, or metal.2. It is not acceptable to use bonding adhesive in the seams.C. Perimeter Sheets: As specified in Part 3.D. Sealant: Use for water cut-off mastic, pitch-box sealer, and to seal membrane to metal.E. Cut-Edge Sealant: Use to seal exposed cut edges of reinforced membrane.F. Seam Cleaner: Use to remove contaminants from the surface of the membrane where hot-airwelding is to occur.G. Insulation: Polyisocyanurate board that is accepted and warranted in writing by membranemanufacturer for use in a mechanically attached system. Refer to Section 07212 forrequirements.1. R-Value: 30.H. Mechanical Fasteners: Type and spacing as required by roofing manufacturer; supplied byroofing manufacturer.I. Two-Way Air Vents: Manufacturer's standard vents.J. For vent stacks, pipes, drains, and corners: Prefabricated pipe boots and inside and outsidecorners provided by manufacturer.04-27-11 MECHANICALLY ATTACHED MEMBRANE ROOFING07535 -2
<strong>Buffalo</strong> <strong>Wild</strong> <strong>Wings</strong>K. Roof Walkway Pads: Duro-Last Roof Trak II Walkway Pad. Heat weld to membrane inaccordance with manufacturer's instructions.1. Color: Gray.PART 3 EXECUTION3.01 GENERALA. Do not deviate from this specification without written approval of the manufacturer. Shoulddeviations or changes occur without the manufacturer's approval, the project will not be eligiblefor warranty coverage.3.02 EXAMINATIONA. Verify that surfaces to be bonded to are dry, clean and free of debris. Suitable surfaces aresmooth, solid masonry, wood, and metal, plus insulation board fastened to the specificmanufacturer's recommendations for receiving mechanically fastened roofing membranes andaccepted by roofing system manufacturer for mechanically fastened application.B. Verify that positive roof slope exists in all areas.C. Verify that rooftop mechanical units are to have their condensation lines piped to drains or offthe roof.D. Verify that rooftop grease units will have approved grease containment systems or a regularlyscheduled maintenance program.E. Correct unsuitable conditions before proceeding with installation. Commencing installationsignifies acceptance by the installer of the substrate.3.03 SUBSTRATE PREPARATIONA. Prior to the start of work, make the substrate smooth and free of debris, sharp edges, and othersurface irregularities that will be detrimental to the installation.B. Correct unevenness and joint gaps greater than 1/4 inch in the membrane substrate as they cancause inconsistent membrane welds. When such conditions occur fill with appropriate andproperly secured insulation or material approved by manufacturer's technical reviewdepartment.C. Flashing Substrates: Verify that the substrate is smooth and free of sharp edges and othersurface irregularities that will be detrimental to 100-percent adhesion of the flashing membrane.3.04 FASTENERS - GENERALA. Install fasteners with a depth-sensing screw gun to prevent overdriving or underdriving, unlessotherwise approved or required by project conditions.3.05 INSULATION INSTALLATIONA. Handle and secure insulation boards so as to not damage or rupture the facer and surface. Cutout damaged areas and replace with structurally sound insulation, properly secured in place.B. Install boards with the longest dimension perpendicular to the direction of the membrane seamsand with end joints staggered. Butt boards as closely as possible with no gaps over 1/4 inch.C. Mechanically attach boards:1. Use fastener pattern and spacing in accordance with manufacturer's instructions.2. Provide additional fasteners as necessary to conform to the substrate surface geometry.D. Tapered Insulation: Install tapered boards under a layer of flat insulation boards; maintainsmooth transition at changes of slope.1. Provide tapered insulation boards and thicknesses to create tapered areas as indicated onRoof Plan.04-27-11 MECHANICALLY ATTACHED MEMBRANE ROOFING07535 -3
<strong>Buffalo</strong> <strong>Wild</strong> <strong>Wings</strong>E. Insulation must have and approved nonstyrene facer or provide a slip sheet between insulationand membrane.3.06 MEMBRANE INSTALLATIONA. Membrane Attachment: Space fasteners in accordance with manufacturer's standard andapproved submittals.B. Perimeter Sheets: Install perimeter sheets and full-sheet in accordance with fastener patternspecified by manufacturer. Install fasteners along the edge of the membrane through theinsulation, and into the roof deck.C. Field Sheets:1. Unroll membrane on the area to be covered.2. Install fasteners along the leading edge of the membrane, as illustrated in membranemanufacturer's details, through the insulation, and into the roof deck.3. Lap adjoining rolls of membrane over the fastened edge of the installed membrane by 6inches in accordance with standard details for fastener location and specific deck typepenetration requirements.3.07 FASTENING PATTERNSA. Meet the requirements of the membrane manufacturer for fastener type, spacing and pattern.3.08 SEALING OF MEMBRANEA. Lap Splices: Overlap and hot-air weld membrane without any contaminants (adhesive, dirt,debris, etc.) in the seam.1. Automatic hot-air welder and hand-held welder.2. Use hand-held welders for small work and repairs.3. Use automatic hot-air welders for field seaming.4. Caulk cut edges by applying Cut-Edge Sealant from a squeeze bottle.B. Welding of Membrane After Exposure:1. Remove visible dirt and debris with a clean cloth and water. If necessary, use a detergentcleaner (e.g. Fantastik or 409) followed by a water rinse.2. With a clean scrub pad saturated with manufacturer recommended seam cleaner,aggressively agitate the seaming area.3. Follow the standard hot-air welding procedure with an approximate 20 percent reduction inspeed.4. Final weld strength may not be achieved for several days.3.09 FLASHINGS, EXPANSION JOINTS, DRAINS, AND WALKWAYSA. Flashing: Flash perimeters as shown in manufacturer standard detail drawings. Do not coverweep holes or any form of through-wall drainage.1. Mechanically fasten all flashing at the top, under or through counter flashing, with approvedfasteners and with an approved HT termination detail as shown in detail drawings.2. Install pipe flashings in accordance with membrane manufacturer's details. Do not flash tolead.B. Two-Way Air Vents: Install two-way air vents at a rate of one for every 1,000 square feet ofdeck. Install vents centered between rows of fastening tabs.C. Roof Drains: Install in accordance with membrane manufacturer's details.1. Properly secure all bolts to provide 100-percent continuous compression of the clampingring.2. Do not run field seams through drains.3. Clean or replace existing drains as required to achieve manufacturer's recommendedclamping detail; remove old lead and packings.04-27-11 MECHANICALLY ATTACHED MEMBRANE ROOFING07535 -4
<strong>Buffalo</strong> <strong>Wild</strong> <strong>Wings</strong>D. Roof Walkway Pads: Install pads in accordance with roofing manufacturer's instructions.1. Prepare dirty or weathered membrane:a. Remove any visible dirt and debris with a clean rag and water.b. For heavily contaminated surface, scrubbing with a detergent cleaner (i.e. Fantastik or409) followed by a water rinse may be necessary.2. Install roof walkway pads forming a direct path, in lines parallel to the building faces, fromthe roof access hatch to each piece of rooftop mechanical equipment.3. Position walkway pad and cut to desired length.4. Whenever possible, do not cover membrane seams with walkway pad. When installedadjacent to a seam, keep the pad a minimum of 2 inches from the edge of the seam on thebottom sheet of the completed lap and a minimum of 6 inches from the edge of the seamwhen located on the top sheet of a completed lap.5. When covering seams is unavoidable, the lap seam should be completed in accordancewith manufacturer's specifications and thoroughly probed with any deficiencies repairedprior to pad installation.6. In circumstances where drainage around the walkway pad is a concern, shorter walkwaypad lengths spaced with a 2 inch gap may be desired.7. Weld perimeter of walkway pad to the membrane following standard welding procedures.Periodic breaks in the weld of 1 to 2 inches are required on the low slope edge of the padto prevent the accumulation of water under the pad.3.10 FIELD QUALITY CONTROLA. Ensure that metal work shall be secured in a manner approved by roofing manufacturer, or inaccordance with SMACNA guidelines, to prevent damage from buckling, or wind exposure. Allmetal work that is part of the waterproofing envelope shall be sealed, structurally sound, andappropriately anchored to prevent leakage.B. Tests:1. Seam Tests: Probe the entire lap edge of each seam with an approved seam probing tool(Sears cotter-pin extractor) after seam has cooled completely to verify seam consistency.Probing before the seam area has cooled will damage the membrane.2. Destructive Seam Tests: Test 3 inch wide area of seam weld to verify good peel strength.A properly welded seam will have membrane delamination from scrim prior to weld failure.Perform the following destructive tests on welds:a. First seam of each working day.b. First seam after the automatic hot-air welder has been allowed to cool down.c. After any extreme changes in weather conditions.C. Manufacturer's Field Service: Upon completion of the installation, the manufacturer'srepresentative shall make an inspection to ascertain that the roofing membrane system hasbeen installed according to manufacturer's approved specifications and details.D. Warranty Inspection: Provide manufacturer's inspection for acceptance for warranty.E. Rejection of Defective Work: Areas having excessive patching as a result of damage to themembrane or faulty installation may be rejected by membrane manufacturer or the Architect;replace the membrane completely in these areas.END OF SECTION04-27-11 MECHANICALLY ATTACHED MEMBRANE ROOFING07535 -5
<strong>Buffalo</strong> <strong>Wild</strong> <strong>Wings</strong>PART 1 GENERAL1.01 SECTION INCLUDESSECTION 07620 - SHEET METAL FLASHING AND TRIMA. Fabricated sheet metal items, including scuppers, flashings, counterflashings, reglets, gutters,downspouts, and coping caps.B. Miscellaneous flashing work not specified as work of other sections.1.02 RELATED SECTIONSA. Section 04810 - Unit Masonry Assemblies: Thru-wall masonry flashing.B. Section 07535 - Mechanically Attached Membrane Roofing: Roofing system.C. Section 07720 - Roof Accessories: Roof Hatch.D. Section 07900 - Joint Sealers.E. Section 09900 - Paints and Coatings.1.03 REFERENCE STANDARDSA. AAMA 2605 - Voluntary Specification, Performance Requirements and Test Procedures forSuperior Performing Organic Coatings on Aluminum Extrusions and Panels.B. ASTM A 653/A 653M - Standard Specification for Steel Sheet, Zinc-Coated (Galvanized) orZinc-Iron Alloy-Coated (Galvannealed) by the Hot-Dip Process.C. ASTM D 4586 - Standard Specification for Asphalt Roof Cement, Asbestos-Free.D. SMACNA (ASMM) - Architectural Sheet Metal Manual; Sheet Metal and Air ConditioningContractors' National Association.1.04 QUALITY ASSURANCEA. Perform work in accordance with SMACNA Architectural Sheet Metal Manual requirements andstandard details, except as otherwise indicated.1.05 DELIVERY, STORAGE, AND HANDLINGA. Stack material to prevent twisting, bending, and abrasion, and to provide ventilation. Slopemetal sheets to ensure drainage.B. Prevent contact with materials that could cause discoloration or staining.C. Protect pre-finished surfaces from damage.PART 2 PRODUCTS2.01 SHEET MATERIALSA. (SHT MET1) Pre-Finished Galvanized Steel: ASTM A 653/A 653M, with G90/Z275 zinccoating; minimum 0.02 inch thick base metal, shop pre-coated with PVDF coating.1. PVDF (Polyvinylidene Fluoride) Coating: Superior Performance Organic Finish, AAMA2605; multiple coat, thermally cured fluoropolymer finish system.2. Color: Color to match Una-Clad “Silver Metallic”.B. (SHT MET2) Galvanized Steel: ASTM A 653/A 653M, with G90/Z275 zinc coating; minimum0.02 inch thick base metal.04-27-11 SHEET METAL FLASHING AND TRIM07620 -1
<strong>Buffalo</strong> <strong>Wild</strong> <strong>Wings</strong>2.02 ACCESSORIESA. Fasteners: Galvanized steel, with soft neoprene washers.B. Primer: Zinc chromate type.C. Protective Backing Paint: Zinc alkyd.D. Sealant: (SLNT6) specified in Section 07900.E. Bituminous Plastic Cement: ASTM D 4586, Type I. Verify compatibility with roofing membrane2.03 REGLETSA. Reglets: Recessed and surface mounted types for concrete and unit masonry applications; 26gauge galvanized steel.1. Recessed Reglet: Type MA reglet with Springlok Flashing.2. Surface Mounted Reglet: Type SM reglet with Springlok Flashing and 7/8” diameter,stainless steel washers with neoprene facing.B. Acceptable Manufacturers and Product:1. Fry Reglet Corporation: Springlok Reglets and Flashing System.2.04 FABRICATIONA. Form sections true to shape, accurate in size, square, and free from distortion or defects.B. Form pieces in longest possible lengths.C. Hem exposed edges on underside 1/2 inch; miter and seam corners.D. Form material with flat lock seams, except where otherwise indicated. At moving joints, usesealed lapped, bayonet-type or interlocking hooked seams.E. Fabricate corners from one piece with minimum 18 inch long legs; seam for rigidity, seal withsealant.F. Fabricate vertical faces with bottom edge formed outward 1/4 inch (6 mm) and hemmed to formdrip.G. Fabricate flashings to allow toe to extend 2 inches over roofing gravel. Return and brake edges.2.05 SCUPPER FABRICATIONA. Scuppers: Fabricate to dimensions and configurations shown on the Drawings.B. Seal metal joints.2.06 MULTI-PIPE ROOF PENETRATIONSA. Fabricate hooded sheet metal enclosure at multiple roof penetrations. Do not use pitch pockets.1. Fabricate enclosure of proper size to accommodate pipes, insulation and necessary workclearances.2. Pipe penetrations shall be through the side of the exterior of the enclosure and shall occura minimum of 8 inches above the roof membrane.3. Provide sloping sheet metal top on enclosure with hemmed drip edges on all sides andextended overhang a minimum of 6 inches on the side where pipe penetrations occur.4. Coordinate with Section 06100 for required curbing.PART 3 EXECUTION3.01 EXAMINATIONA. Verify roof openings, curbs, pipes, sleeves, ducts, and vents through roof are solidly set, regletsin place, and nailing strips located.04-27-11 SHEET METAL FLASHING AND TRIM07620 -2
<strong>Buffalo</strong> <strong>Wild</strong> <strong>Wings</strong>B. Verify roofing termination and base flashings are in place, sealed, and secure.3.02 PREPARATIONA. Install starter and edge strips, and cleats before starting installation.B. Back paint concealed metal surfaces with protective backing paint to a minimum dry filmthickness of 15 mil.3.03 INSTALLATIONA. Secure flashings in place using concealed fasteners. Use exposed fasteners only wherepermitted.B. Apply plastic cement compound between metal flashings and felt flashings.C. Fit flashings tight in place. Make corners square, surfaces true and straight in planes, and linesaccurate to profiles.D. Seal metal joints watertight.3.04 SCHEDULEA. Scuppers and Downspouts: 20 gauge.B. Coping, Cap, Parapet, Sill and Ledge Flashings: 24 gauge.C. Counterflashing at Roofing Terminations (over roofing base flashings): 24 gauge.D. Counterflashing at Curb-Mounted Roof Items: 24 gauge.E. Hook strips and keepers: 22 gauge.F. Other sheet metal work: 24 gauge.END OF SECTION04-27-11 SHEET METAL FLASHING AND TRIM07620 -3
<strong>Buffalo</strong> <strong>Wild</strong> <strong>Wings</strong>PART 1 GENERAL1.01 SECTION INCLUDESSECTION 07720 - ROOF ACCESSORIESA. Roof hatches, ladder post and safety railing.1.02 RELATED SECTIONSA. Section 05310 - Steel Deck.B. Section 07535 – Mechanically Attached Membrane Roofing.C. Section 09900 – Painting and Coatings.1.03 DELIVERY, STORAGE, AND HANDLINGA. Store products in manufacturer's unopened packaging until ready for installation.B. Store products under cover and elevated above grade.PART 2 PRODUCTS2.01 ROOF HATCHESA. Manufacturers - Roof Hatches: Bilco Co.: www.bilco.com1. Product: Bilco Type S Roof Hatch.B. Roof Hatch: Factory-assembled steel frame and cover, complete with operating and releasehardware.1. Style: Provide flat metal covers unless otherwise indicated.2. Mounting: Provide frames and curbs suitable for mounting conditions indicated on thedrawings.3. Size(s):a. For Ladder Access: Single leaf; 2’-6” x 3’-0”.C. Frames/Curbs: One-piece curb and frame with integral cap flashing to receive roof flashings;extended bottom flange to suit mounting.1. Material: Galvanized steel, 14 gage, 0.0747 inch thick.2. Finish: Factory prime paint.3. Insulation: 1 inch rigid fiber board, located on outside face of curb.4. Curb Height: 12 inches from finished surface of roof, minimum.D. Metal Covers: Flush, insulated, hollow metal construction.1. Capable of supporting 40 psf live load.2. Material: G-90, galvanized steel; outer cover 14 gage, 0.0747 inch thick, liner 22 gage,0.03 inch thick.3. Finish: Factory prime paint.4. Insulation: Concealed 1 inch rigid glass fiber.5. Gasket: Neoprene, continuous around cover perimeter.E. Hardware: Steel, zinc coated and chromate sealed, unless otherwise indicated or required bymanufacturer.1. Lifting Mechanisms: Compression or torsion spring operator with shock absorbers thatautomatically opens upon release of latch; capable of lifting covers despite 10 psf load.2. Hinges: Heavy duty pintle type.3. Hold open arm with vinyl-coated handle for manual release.4. Latch: Upon closing, engage latch automatically and reset manual release.5. Manual Release: Pull handle on interior.6. Locking: Padlock hasp on interior.04-27-11 ROOF ACCESSORIES07720 -1
<strong>Buffalo</strong> <strong>Wild</strong> <strong>Wings</strong>F. Telescoping Safety Post:1. Bilco, LadderUp telescoping safety post. Bilco Model LU-1, steel with black powder coatfinish.G. Safety Railing: Bilco Model Bil-Guard Hatch Railing System., OSHA approved, mounted onside and front of hatch curb.PART 3 EXECUTION3.01 EXAMINATIONA. Do not begin installation until substrates have been properly prepared.B. If substrate preparation is the responsibility of another installer, notify Architect of unsatisfactorypreparation before proceeding.3.02 INSTALLATIONA. Install in accordance with manufacturer's instructions, in manner that maintains roofing weatherintegrity.B. Finished installation shall meet approval of roofing installer.END OF SECTION04-27-11 ROOF ACCESSORIES07720 -2
<strong>Buffalo</strong> <strong>Wild</strong> <strong>Wings</strong>SECTION 07900 - JOINT SEALERSPART 1 GENERAL1.01 SECTION INCLUDESA. Sealants and joint backing.1.02 RELATED SECTIONSA. Section 07260 - Air Barriers.B. Section 07620 - Sheet Metal Flashing and Trim.C. Section 07535 - Mechanically Attached Membrane Roofing: Sealants required in conjunctionwith roofing.D. Section 08800 - Glazing: Glazing sealants and accessories.1.03 REFERENCESA. ASTM C 834 - Standard Specification for Latex Sealants.B. ASTM C 920 - Standard Specification for Elastomeric Joint Sealants.C. ASTM C 1193 - Standard Guide for Use of Joint Sealants.D. ASTM C 1330 - Standard Specification for Cylindrical Sealant Backing for Use with Cold LiquidApplied Sealants.E. SCAQMD 1168 - South Coast Air Quality Management District Rule No.1168; www.aqmd.gov.1.04 QUALITY ASSURANCEA. Manufacturer Qualifications: Company specializing in manufacturing the Products specified inthis section with minimum three years documented experience.B. Applicator Qualifications: Company specializing in performing the work of this section withminimum three years experience.1.05 ENVIRONMENTAL REQUIREMENTSA. Maintain temperature and humidity recommended by the sealant manufacturer during and afterinstallation.1.06 COORDINATIONA. Coordinate the work with all sections referencing this section.1.07 WARRANTYA. See Section 01700 - Execution Requirements, for additional warranty requirements.B. Correct defective work within a five year period after Date of Substantial Completion.C. Warranty: Include coverage for installed sealants and accessories which fail to achieve airtightseal, exhibit loss of adhesion or cohesion, or do not cure.04-27-11 JOINT SEALERS07900 -1
<strong>Buffalo</strong> <strong>Wild</strong> <strong>Wings</strong>PART 2 PRODUCTS2.01 MANUFACTURERSA. Silicone Sealants:1. Bostik, Inc: www.bostik-us.com2. Dow Corning Corp: www.dowcorning.com3. GE Plastics: www.geplastics.com4. Pecora Corporation: www.pecora.com5. Substitutions: See Section 01600 - Product Requirements.B. Polyurethane Sealants:1. Bostik, Inc: www.bostik-us.com2. Pecora Corporation: www.pecora.com3. BASF Construction Chemicals, Inc: www.chemrex.com4. Tremco, Inc: www.tremcosealants.com5. Substitutions: See Section 01600 - Product Requirements.C. Butyl Sealants:1. Bostik, Inc: www.bostik-us.com2. Pecora Corporation: www.pecora.com3. Tremco, Inc: www.tremcosealants.com4. Substitutions: See Section 01600 - Product Requirements.D. Acrylic Emulsion Latex Sealants:1. Bostik, Inc: www.bostik-us.com2. Pecora Corporation: www.pecora.com3. BASF Construction Chemicals, Inc: www.chemrex.com4. Tremco, Inc: www.tremcosealants.com5. Substitutions: See Section 01600 - Product Requirements.2.02 SEALANTSA. Sealants and Primers - General: Provide only products having lower volatile organic compound(VOC) content than required by the more stringent of the South Coast Air Quality ManagementDistrict Rule No.1168.B. (SLNT1) General Purpose Exterior Sealant: Polyurethane; ASTM C 920, Grade NS, Class 25,Uses M, G, and A; single component.1. Color: Standard colors matching finished surfaces.2. Applications: Use for:a. Control, expansion, and soft joints in masonry.b. Joints between concrete and other materials.c. Joints between metal frames and other materials.d. Other exterior joints for which no other sealant is indicated.C. (SLNT2) General Purpose Interior Sealant: Acrylic emulsion latex; ASTM C 834, Type OP,Grade NF single component, paintable.1. Applications: Use for:a. Interior wall and ceiling control joints.b. Joints between door and window frames and wall surfaces.c. Other interior joints for which no other type of sealant is indicated.04-27-11 JOINT SEALERS07900 -2
<strong>Buffalo</strong> <strong>Wild</strong> <strong>Wings</strong>D. (SLNT3) Sanitary/Tile Sealant: ASTM C 920, Uses I, M and A; single component silicone,mildew resistant.1. Color: White, Black and Clear.2. Applications: Use for:a. Joints between plumbing fixtures and floor and wall surfaces, White.b. Joints between kitchen and bath countertops and wall surfaces, Clear.c. Control joints in tile installations in toilet rooms and kitchen, Black.E. (SLNT4) Concrete Paving Joint Sealant: Polyurethane, self-leveling; ASTM C 920, Class 25,Uses T, I, M and A; single component.1. Applications: Use for:a. Joints in concrete sidewalks and vehicular paving.F. (SLNT5) Butyl Sealant: ASTM C 920, Grade NS, Class 12-1/2, Uses NT, M, A, G, O; singlecomponent, solvent release, non-skinning, non-sagging.1. Applications: Use for:a. Seam sealant for masonry flashing.b. Bedding sealant for thresholds and sills.G. (SLNT6) Low Modulus Silicone Sealant: ASTM C 920, Grade NS, Class 25, Uses NT, A, G,M, O; single component, solvent curing, non-sagging, non-staining, fungus resistant, nonbleeding.1. Color: Clear.2. Movement Capability: Plus and minus 25 percent.3. Service Temperature Range: -65 to 180 degrees F.4. Shore A Hardness Range: 15 to 35.5. Applications: Use for:a. Air barrier perimeter.b. Exterior sheet metal joints.H. (SLNT7) Ultra-Low Modulus Silicone Sealant: ASTM C 920, Type S, Grade NS,Class 100/50, for Use NT, Silicone rubber based, 1 part neutral cure elastomeric sealant.1. Color: To match EIFS.2. Movement Capability: Plus 100 percent to minus 50 percent movement.3. Accepable Manufacturers and Products:a. Dow Corning Corporation: 790 Building Sealant.b. General Electric Company: GE SilPrufc. Tremco Construction Division: Spectrem 1.4. Applications: Use for:a. Perimeter and internal joints in EIFS System.2.03 JOINT SEALANT BACKINGA. General: Provide sealant backings of material that are nonstaining; are compatible with jointsubstrates, sealants, primers, and other joint fillers; and are approved for applications indicatedby sealant manufacturer based on field experience and laboratory testing.B. Sealant Backer Rod: ASTM C 1330, Type C (closed-cell material with a surface skin), and ofsize and density to control sealant depth and otherwise contribute to producing optimum sealantperformance.C. Bond-Breaker Tape: Polyethylene tape or other plastic tape recommended by sealantmanufacturer for preventing sealant from adhering to rigid, inflexible joint-filler materials or jointsurfaces at back of joint. Provide self-adhesive tape where applicable.04-27-11 JOINT SEALERS07900 -3
<strong>Buffalo</strong> <strong>Wild</strong> <strong>Wings</strong>2.03 ACCESSORIESA. Primer: Non-staining type, recommended by sealant manufacturer to suit application.B. Joint Cleaner: Non-corrosive and non-staining type, recommended by sealant manufacturer;compatible with joint forming materials.PART 3 EXECUTION3.01 EXAMINATIONA. Verify that substrate surfaces are ready to receive work.B. Verify that joint backing and release tapes are compatible with sealant.3.02 PREPARATIONA. Remove loose materials and foreign matter which might impair adhesion of sealant.B. Clean and prime joints in accordance with manufacturer's instructions.C. Perform preparation in accordance with manufacturer's instructions and ASTM C 1193.D. Protect elements surrounding the work of this section from damage or disfigurement.3.03 INSTALLATIONA. Perform work in accordance with sealant manufacturer's requirements for preparation ofsurfaces and material installation instructions.B. Perform installation in accordance with ASTM C 1193.C. Measure joint dimensions and size joint backers to achieve width-to-depth ratio, neckdimension, and surface bond area as recommended by manufacturer, except where specificdimensions are indicated.D. Install bond breaker where joint backing is not used.E. Install sealant free of air pockets, foreign embedded matter, ridges, and sags.F. Apply sealant within recommended application temperature ranges. Consult manufacturer whensealant cannot be applied within these temperature ranges.G. Tool joints concave.3.04 CLEANINGA. Clean adjacent soiled surfaces.3.05 PROTECTION OF FINISHED WORKA. Protect sealants until cured.END OF SECTION04-27-11 JOINT SEALERS07900 -4
<strong>Buffalo</strong> <strong>Wild</strong> <strong>Wings</strong>SECTION 08110 – HOLLOW METAL DOORS AND FRAMESPART 1 GENERAL1.01 SECTION INCLUDESA. Non-fire rated steel doors and frames.1.02 RELATED SECTIONSA. Section 08211 - Flush Wood Doors.B. Section 08380 - Traffic Doors.C. Section 08710 - Door Hardware.1.03 REFERENCESA. ANSI A250.6 - Hardware on Standard Steel Doors (Reinforcement--Application).B. ANSI A250.8 - SDI-100 Recommended Specifications for Standard Steel Doors and Frames.C. ANSI A250.11 - Recommended Erection Instructions for Steel Frames.D. ASTM A 366/A 366M - Standard Specification for Commercial Steel (CS) Sheet, Carbon, (0.15Maximum Percent) Cold-Rolled.E. ASTM A 569/A 569M - Standard Specification for Steel, Carbon (0.15 Maximum Percent), Hot-Rolled Sheet and Strip Commercial.F. ASTM A 591/A 591M - Standard Specification for Steel Sheet, Electrolytic Zinc-Coated, for LightCoating Weight (Mass) Applications.G. ASTM A 653/A 653M - Standard Specification for Steel Sheet, Zinc-Coated (Galvanized) orZinc-Iron Alloy-Coated (Galvannealed) by the Hot-Dip Process.H. ASTM A 1008/A 1008M - Standard Specification for Steel, Sheet, Cold-Rolled, Carbon,Structural, High-Strength Low-Alloy and High-Strength Low-Alloy with Improved Formability.I. ASTM A 1011/A 1011M - Standard Specification for Steel, Sheet and Strip, Hot-Rolled, Carbon,Structural, High-Strength Low-Alloy and High-Strength Low-Alloy with Improved Formability.J. ASTM C 1036-01: Specification for Flat Glass.K. DHI A115.1G - Installation Guide for Doors and Hardware; Door and Hardware Institute.L. NFPA 80 - Standard for Fire Doors and Fire Windows; National Fire Protection Association.M. SDI 105 - Recommended Erection Instructions for Steel frames; Steel Door Institute.N. SDI 113 - Test Procedure and Acceptance Criteria for Apparent Thermal Performance of SteelDoor and Frame Assemblies; Steel Door Institute.1.04 SUBMITTALSA. See Section 01300 - Administrative Requirements, for submittal procedures.B. Door and Frame Schedule: Prepared by the Door and Frame Supplier, indicating a listing ofeach hollow metal door and frame component for each door opening. Schedule includes framesize, throat dimension, door size and type.1. Organization: Door and Frame Schedule to be organized to follow the same numberingorder as Door Schedule on Drawings.2. Door and Frame Schedule to be coordinated with Hardware Schedule for Hollow MetalDoors and Frames.04-27-11 HOLLOW METAL DOORS AND FRAMES08110 -1
<strong>Buffalo</strong> <strong>Wild</strong> <strong>Wings</strong>1.05 QUALITY ASSURANCEA. Manufacturer Qualifications: Provide all products from a single manufacturer who is a memberof the Steel Door Institute.B. Manufacture products only after receipt of approved hardware schedule and templates.1.06 DELIVERY, STORAGE, AND HANDLINGA. Upon delivery, inspect all materials for damage; notify shipper and supplier if damage is found.B. Protect products from moisture, construction traffic, and damage.C. Store vertically under cover. Do not use non-vented plastic or canvas shelters. Shouldwrappers become wet, remove immediately.D. Place units on 4 inch high wood sills or in a manner that will prevent rust or damage. Provide1/4 inch space between doors to promote air circulation.PART 2 PRODUCTS2.01 DOOR AND FRAME SUPPLIERA. Hollow metal doors and frames are to be furnished by the General Contactor through Twin CityHardware as part of the current BWW Door and Hardware Package.2.02 MANUFACTURERSTwin City Hardware Company723 Hadley Avenue NorthOakdale, MN 55128651-735-2200A. Ingersoll Rand, Steelcraft.2.03 MATERIALSA. Steel Sheet for Doors and Frames:1. Cold rolled steel: ASTM A 1008/A 1008M, Designation CS.2. Hot rolled steel: Pickled and oiled, ASTM A 1011/A 1011M, Designation CS Type B.3. Galvanized steel: Hot-dipped, ASTM A 653/A 653M, with G60/Z180 coating, minimum.B. Steel Sheet for Anchors and Accessories: Electrolytically deposited zinc coated steel; ASTM A591/A 591M, coating 40Z (12G), minimum.C. Accessory Materials:1. Rubber Door Silencers: Furnish three at each single leaf door frames and two at each pairsof doors.D. Glazing: Comply with requirements in Section 08800 Glazing.2.04 HOLLOW METAL FRAMESA. General: Comply with requirements of ANSI/SDI A250.8.B. Exterior Frames: Fabricate frames from metallic-coated steel sheet assembled with amechanical interlock joint, face miter seam “closed and tight”. Weld face seam and full web offrame (T-3). Grind and dress smooth weld area. Apply zinc rich primer over grinding area.1. Sheet Thickness: 14 gauge.2. Material and Finish: Zinc-alloy-iron coating (galvannealed) to a minimum coating weight ofA60 to comply with ASTM A 653.3. Galvanize internal members and reinforcements.04-27-11 HOLLOW METAL DOORS AND FRAMES08110 -2
<strong>Buffalo</strong> <strong>Wild</strong> <strong>Wings</strong>C. Interior Frames: Fabricate from cold rolled steel sheet assembled with a mechanical interlockjoint, face miter seam “closed and tight”. Weld face seam of frame (T-2). Grind and dresssmooth weld area. Apply zinc rich primer over grinding area.1. Sheet Thickness: 16 gauge.D. Traffic Doors Frames: Fabricate from cold rolled steel sheet assembled with a mechanicalinterlock joint, face miter seam “closed and tight”. Weld face seam of frame (T-2). Grind anddress smooth weld area. Apply zinc rich primer over grinding area.1. Sheet Thickness: 14 gauge.2. Configuration: Fabricate without stop and with added reinforcement for traffic doorhardware.E. Frame Finish: Shop prime for field painting under Section 09900.F. Finished work to be smooth and free from warps and buckles.G. Silencers: Glynn-Johnson, 64 Silencer. Furnish 3 at single door strike jambs, 2 at head of pairdoors.H. Provide floor clips for frames. Provide jamb anchors spaced not over 30" on center for frames.Furnish temporary spreader bars and bracing.2.05 HOLLOW METAL DOORSA. Exterior Flush Steel Doors: Comply with ANSI/SDI A250.8, Level III, Model 2,Extra HeavyDuty, seamless design, Full Flush Door.1. Face Sheet Thickness: 16 gauge.2. Thickness: 1-3/4 inch.3. Core: Polystyrene.Note: Provide Polystyrene core for exterior doors and Mechanical Room door, (Type 6).5. Fabricate with watertight top closure and construct to receive weatherstripping as specifiedunder Section 08700.6. Material and Finish: Zinc-alloy-iron coating (galvannealed) to a minimum coating weight ofA60 to comply with ASTM A 653. Shop prime for field painting under Section 09900.B. Interior Flush Steel Doors: Comply with ANSI/SDI A250.8, Level II, Model 2, Heavy Duty,seamless design, Full Flush Doors.1. Face Sheet: 16 gauge.2. Thickness: 1-3/4 inch.3. Core: Impregnated kraft honeycomb core.4. Material and Finish: Cold rolled steel sheet complying with ASTM A 1008. Shop prime forfield painting under Section 09900.5. Glazing Stops: Construct removable glazing stops of 16 gauge steel. Factory fit and installstops. Form neat hairline joints. Install stops using screws not over 16" on center with atleast two screws per piece.2.06 LOUVERSA. Metal Louvers: Provide manufacturers standard 12” high by 18” wide metal louver in Officedoor, in location as indicated on Drawings.1. Shop prime louver for field painting under Section 09900.2.07 GLAZINGA (GL5): One-Way Mirror Glass 1/4 inch thick; ASTM C1036, Type I, Class 2, q3 quality, Style B,clear tempered glass with a reflective coating one side.1. Provide glass for Office door in location as indicated on Drawings.04-27-11 HOLLOW METAL DOORS AND FRAMES08110 -3
<strong>Buffalo</strong> <strong>Wild</strong> <strong>Wings</strong>PART 3 EXECUTION3.01 EXAMINATIONA. Verify that project conditions are suitable before beginning installation of frames.B. Correct unsatisfactory condition before preceding with installation.3.02 INSTALLATIONA. Install frames plumb, level, rigid, and in true alignment as recommended in ANSI A250.11 andDHI A115.1G.B. Install doors plumb and in true alignment and fasten to achieve the maximum operationaleffectiveness and appearance of the unit. Maintain clearances specified in ANSI A250.8 andNFPA 80 whichever is more restrictive.C. Fill welded wrap-around frames in masonry construction with grout as masonry is laid-up.Brace or fasten frame in such a way to prevent pressure of the grout from deforming frame.1. Mix grout to provide 4 inch maximum consistency and hand trowel into place.2. Do not use grout mixed to thin "pumpable" consistency.D. If additives are used in masonry or plaster work during cold weather, field coat the inside ofsteel frames with a bituminous compound to prevent corrosion.E. Install doors plumb and in true alignment and fasten to achieve the maximum operationaleffectiveness and appearance of the unit. Maintain clearances specified. Shim as indicated inDHI A115.1G and SDI 122.F. Install hardware in accordance with hardware manufacturer's recommendations and templates.Consult DHI A115.1G and ANSI A250.6 as necessary.G. Install door silencers shortly before substantial completion.3.03 ADJUST AND CLEANA. Adjust doors for proper operation, free from binding or other defects.B. Clean and restore soiled surfaces. Remove scraps and debris, and leave site and a cleancondition.END OF SECTION04-27-11 HOLLOW METAL DOORS AND FRAMES08110 -4
<strong>Buffalo</strong> <strong>Wild</strong> <strong>Wings</strong>SECTION 08211 - FLUSH WOOD DOORSPART 1 GENERAL1.01 SECTION INCLUDESA. Flush wood doors; non-rated.1.02 RELATED SECTIONSA. Section 06200 - Finish Carpentry.B. Section 08110 – Hollow Metal Doors and Frames.C. Section 08710 - Door Hardware.D. Section 09900 – Paints and Coatings: for field finishing of doors.1.03 REFERENCESA. AWI/AWMAC (QSI) - Architectural Woodwork Quality Standards Illustrated; ArchitecturalWoodwork Institute and Architectural Woodwork Manufacturers Association of Canada.B. ANSI A208.1: Particleboard.C. DHI-A115-W: Wood Door Hardware Standards, Hardware Preparation.D. DHI-WDHS-3: Recommended Locations for Architectural Hardware for Wood Flush Doors.1.04 SUBMITTALSA. See Section 01300 - Administrative Requirements for submittal procedures.B. Product Data: Indicate door core materials and construction; veneer species, type andcharacteristics.C. Shop Drawings: Illustrate door opening criteria, elevations, sizes, types, swings, undercutsrequired, special beveling, special blocking for hardware, factory machining criteria, factoryfinishing criteria, identify cutouts for glazing.1.05 QUALITY ASSURANCEA. Perform work in accordance with AWI Architectural Woodwork Quality Standards Illustrated,Section 1300, Custom Grade.B. Manufacturer: Company specializing in manufacturing the products specified in this sectionwith minimum three years of documented experience.1.06 DELIVERY, STORAGE, AND PROTECTIONA. Package, deliver and store doors in accordance with specified quality standard.B. Accept doors on site in manufacturer's packaging. Inspect for damage.C. Protect doors with resilient packaging sealed with heat shrunk plastic. Do not store in damp orwet areas; or in areas where sunlight might bleach veneer. Seal top and bottom edges withtinted sealer if stored more than one week. Break seal on site to permit ventilation.1.07 PROJECT CONDITIONSA. Coordinate the work with door opening construction, door frame and door hardware installation.B. Environmental Limitations: Do not deliver or install doors until spaces are enclosed and weathertight, wet work in spaces is complete and dry, and HVAC system is operating and maintainingambient temperature and humidity conditions at occupancy levels during the remainder of theconstruction period.04-27-11 FLUSH WOOD DOORS08211 -1
<strong>Buffalo</strong> <strong>Wild</strong> <strong>Wings</strong>1.08 WARRANTYA. See Section 01700 - Execution Requirements for additional warranty requirements.B. Provide warranty for the following term:1. Interior Doors: Life of installation.C. Include coverage for delamination of veneer, warping beyond specified installation tolerances,defective materials, and telegraphing core construction.PART 2 PRODUCTS2.01 WOOD DOOR SUPPLIERA. Wood doors are to be furnished by the General Contactor through Twin City Hardware as partof the current BWW Door and Hardware Package.2.02 MANUFACTURERSTwin City Hardware Company723 Hadley Avenue NorthOakdale, MN 55128651-735-2200A. Wood Veneer Faced Doors:1. Lynden Door Inc: www.lyndendoor.com2.03 DOOR CONSTRUCTION, GENERALA. WDMA I.S.1-A Performance Grade: Heavy Duty.B. Particleboard-Core Doors:1. Particleboard: ANSI A208.1, Grade LD-2, made with binder containing no ureaformaldehyderesin.2.04 VENEERED-FACED DOORS FOR TRANSPARENT FINISHA. (Wood Doors): Interior 1-3/4” Solid-Core Doors:1. Grade: Premium, with Grade A faces.2. Species: Select White Maple.3. Cut: Plain sliced (flat sliced).4. Match between Veneer Leaves: Book match.5. Assembly of Veneer Leaves on Door Faces: Running match.6. Exposed Vertical Edges: Same species as faces.7. Core: Particleboard.8. Construction: 5 or 7 ply. Stiles and rails are bonded to core, then entire unit abrasiveplaned before veneering.2.05 DOOR CONSTRUCTIONA. Fabricate doors in accordance with door quality standard specified.B. Cores Constructed with Stiles and Rails: Provide solid blocks at lock edge for hardwarereinforcement.C. Fit door edge trim to edge of stiles after applying veneer facing.D. Factory machine doors for hardware other than surface-mounted hardware, in accordance withhardware requirements and dimensions.E. Factory fit doors for frame opening dimensions identified on shop drawings, with edgeclearances in accordance with specified quality standard. Doors to be field finished.04-27-11 FLUSH WOOD DOORS08211 -2
<strong>Buffalo</strong> <strong>Wild</strong> <strong>Wings</strong>F. Provide edge clearances in accordance with AWI Quality Standards Illustrated Section 1700.2.06 FIELD FINISHING - WOOD VENEER DOORSA. Refer to Section 09900 for field finishing of wood doors.PART 3 EXECUTION3.01 EXAMINATIONA. Verify existing conditions before starting work.B. Verify that opening sizes and tolerances are acceptable.C. Do not install doors in frame openings that are not plumb or are out-of-tolerance for size oralignment.3.02 INSTALLATIONA. Install doors in accordance with manufacturer's instructions and specified quality standard.B. Trim door height by cutting bottom edges a maximum of 3/4 of an inch (19 mm).C. Use machine tools to cut or drill for hardware.D. Coordinate installation of doors with installation of frames and hardware.3.03 INSTALLATION TOLERANCESA. Conform to specified quality standard for fit and clearance tolerances.B. Conform to specified quality standard for maximum diagonal distortion.C. Maximum Vertical Distortion (Bow): 1/8 inch measured with straight edge or taut string, top tobottom, over an imaginary 36 by 84 inches surface area.D. Maximum Width Distortion (Cup): 1/8 inch measured with straight edge or taut string, edge toedge, over an imaginary 36 by 84 inches surface area.3.04 ADJUSTINGA. Adjust doors for smooth and balanced door movement.B. Adjust closers for full closure.END OF SECTION04-27-11 FLUSH WOOD DOORS08211 -3
<strong>Buffalo</strong> <strong>Wild</strong> <strong>Wings</strong>SECTION 08310 - ACCESS DOORS AND PANELSPART 1 GENERAL1.01 SECTION INCLUDESA. Access panel and frame units, non-fire-rated, in ceiling and soffit locations.1.02 RELATED SECTIONSA. Section 07424 - Aluminum Composite Panel System.B. Section 07240 - Exterior Insulation Finish System: Openings in exterior EIFS surfaces.C. Section 09260 - Gypsum Board Assemblies: Openings in drywall ceilings and walls.D. Section 09900 - Paints and Coatings: Field paint finish.PART 2 PRODUCTS2.01 MANUFACTURERSA. Access Panel Manufacturers:1. Milcor Inc: www.milcorinc.com.2. Acudor Products Inc: www.acudor.com3. Karp Associates, Inc: www.karpinc.com4. Substitutions: See Section 01600 - Product Requirements.2.02 ACCESS PANEL UNITSA. (AP) Access Panels:1. Milcor Style DW with drywall flange.2. Milcor Style K with plaster type flange for EIFS.3. Milcor Style ME with exposed flange.4. Comparable products from the other specified manufacturers.B. Sizes: As indicated on the drawings.C. Hardware:1. Hinge: 175 degree stainless steel piano hinge with removable pin.2. Lock: Screw driver slot for quarter turn cam lock.D. Finish: Manufacturer’s standard prime coat, to be field painted under Section 09900.2.03 ACCESS PANEL AT ENTRY CANOPYA. (AP) Entry Canopy Access Panel: Steel access panel with 1 inch deep recessed door forinstallation in ceiling of entry canopy. Door panel infill to be plywood filler and aluminumcomposite panel to match finish of canopy.1. Acudor Model No. AT-5020.2. Milcor Model No. 3205-030.B. Sizes: 24 inch x 24 inch.C. Hardware:1. Lock: Screw driver slot for quarter turn cam lock.D. Finish:1. Galvanized, hot dipped finish.2.04 FABRICATIONA. Weld, fill, and grind joints to ensure flush and square unit.04-27-11 ACCESS DOORS AND PANELS08310 -1
<strong>Buffalo</strong> <strong>Wild</strong> <strong>Wings</strong>PART 3 EXECUTION3.01 EXAMINATIONA. Verify that rough openings for door and frame are correctly sized and located.3.02 INSTALLATIONA. Install units in accordance with manufacturer's instructions.B. Install frames plumb and level in openings. Secure rigidly in place.C. Position units to provide convenient access to the concealed work requiring access.D. Provide shimming as necessary so that plaster screed is positioned to match thickness ofsurrounding finish system.E. Installation of surface mounted wall unit through adhered roofing membrane: Set flange incontinuous sealant. Provide weatherstrip on all edges and aluminum rain drip applied to topedge.F. Installation of panels in EIFS as applicable: Install prior to finish coat of EIFS.3.03 INSTALLATION OF ENTRY CANOPY ACCESS PANELA. Install units in accordance with manufacturer's instructions.B. Securely fasten access panel in wood frame opening. Set frame at height so that aluminumcomposite panel infill will be flush with finished composite panel system of canopy.C. Adhesively apply backer sheet of plywood and composite panel sheet in door recess.Composite panel should set flush with canopy finish.D. Coordinate installation of access panel with installation of composite panel system. Refer toSection 07424 Aluminum Composite Panel System for specific panel system installed atcanopy.END OF SECTION04-27-11 ACCESS DOORS AND PANELS08310 -2
<strong>Buffalo</strong> <strong>Wild</strong> <strong>Wings</strong>SECTION 08380 - TRAFFIC DOORSPART 1 GENERAL1.01 SECTION INCLUDESA. Double-acting, self-closing traffic doors.1.02 RELATED SECTIONSA. Section 08110 – Hollow Metal Doors and Frames: Traffic door frames.PART 2 PRODUCTS2.01 TRAFFIC DOOR SUPPLIERA. Traffic Doors in this section to be furnished by the General Contactor through Twin CityHardware as part of the current BWW Door and Hardware Package.2.02 MANUFACTURERSTwin City Hardware Company723 Hadley Avenue NorthOakdale, MN 55128651-735-2200A. Chase Industries, Inc., 800-543-4455, www.chasedoors.com.2.03 TRAFFIC DOORSA. (TD) Traffic Door: Chase Model # SC-3018 solid core traffic door.1. Core: 3/4” thick, 7-ply plywood.2. Door Faces: Plastic laminate.a. Black: Formica Black 909-58, Dining/Public side of door.b. White: Formica White 949-58, Kitchen side of door.3. Hardware: Chase “E” series stainless steel adjustable gravity close hardware system.4. Vision Panel: 9 x 14 inches, clear acrylic glazing with black rubber molding. Center windowat 60” above floor.5. Impact Plates: 18” high, 18ga stainless steel impact plates both sides of door. Impactplates to set flush with door edge trim.6. Edge Trim: 18ga stainless steel channel edge trim, all sides of door.PART 3 EXECUTION3.01 EXAMINATIONA. Verify that door frames are plumb, secured to substrate and ready for installation of door.3.02 INSTALLATIONA. Install traffic doors with necessary hardware and accessories in accordance with manufacturer'swritten installation instructions.B. Install doors plumb and level and properly aligned in door frame.3.03 ADJUSTINGA. Lubricate and adjust doors for smooth operation and proper closing.END OF SECTION04-27-11 TRAFFIC DOORS08380 -1
<strong>Buffalo</strong> <strong>Wild</strong> <strong>Wings</strong>PART 1 GENERAL1.01 SECTION INCLUDESA. Aluminum storefront framing.B. Aluminum window framing.C. Aluminum doors and frames.SECTION 08410 – METAL FRAMED STOREFRONTSD. Door hardware for aluminum doors less cylinders.1.02 RELATED SECTIONSA. Section 07900 - Joint Sealers: Perimeter sealant and back-up materials.B. Section 08710 - Door Hardware: for additional hardware items provided under Owner’s Doorand Hardware Package.C. Section 08800 - Glazing: Glass and glazing accessories.1.03 REFERENCE STANDARDSA. AAMA CW-10 - Care and Handling of Architectural Aluminum From Shop to Site; AmericanArchitectural Manufacturers Association.B. ASTM B 209 - Standard Specification for Aluminum and Aluminum-Alloy Sheet and Plate.C. ASTM B 209M - Standard Specification for Aluminum and Aluminum-Alloy Sheet and Plate[Metric].D. ASTM B 221 - Standard Specification for Aluminum and Aluminum-Alloy Extruded Bars, Rods,Wire, Profiles, and Tubes.E. ASTM B 221M - Standard Specification for Aluminum and Aluminum-Alloy Extruded Bars, Rods,Wire, Profiles, and Tubes [Metric].F. ASTM E 283 - Standard Test Method for Determining the Rate of Air Leakage Through ExteriorWindows, Curtain Walls, and Doors Under Specified Pressure Differences Across theSpecimen.G. ASTM E 330 - Standard Test Method for Structural Performance of Exterior Windows, Doors,Skylights and Curtain Walls by Uniform Static Air Pressure Difference.H. ASTM E 331 - Standard Test Method for Water Penetration of Exterior Windows, Skylights,Doors, and Curtain Walls by Uniform Static Air Pressure Difference.I. BHMA A 156 – Standards for Builders Hardware.J. SSPC-Paint 12: Paint Specification No. 12: Cold-Applied Asphalt Mastic (Extra Thick Film).1.04 PERFORMANCE REQUIREMENTSA. General Performance: Design and construct framing systems and associated systems tocomply with performance requirements specified and applicable building code requirements forthis Project without failure due to defective manufacture, fabrication, installation, or other defectsin construction.B. Design and size components to withstand the following load requirements without damage orpermanent set, when tested in accordance with ASTM E 330, using loads 1.5 times the designwind loads and 10 second duration of maximum load.1. Positive Design Wind Load: 25 lbf/sq ft.2. Negative Design Wind Load: 25 lbf/sq ft.04-27-11 METAL-FRAMED STOREFRONTS08410 -1
<strong>Buffalo</strong> <strong>Wild</strong> <strong>Wings</strong>3. Member Deflection: Limit member deflection to flexure limit of glass in any direction, withfull recovery of glazing materials.C. Movement: Accommodate movement between storefront and perimeter framing and deflectionof lintel, without damage to components or deterioration of seals.D. Air Infiltration: Limit air infiltration through assembly to 0.06 cu ft/min/sq ft of wall area,measured at a reference differential pressure across assembly of 6.24 psf as measured inaccordance with ASTM E 283.E. Water Leakage: None, when measured in accordance with ASTM E 331 with a test pressuredifference of 2.86 lbf/sq ft.F. System Internal Drainage: Drain to the exterior by means of a weep drainage network anywater entering joints, condensation occurring in glazing channel, and migrating moistureoccurring within system.G. Air and Vapor Seal: Maintain continuous air barrier and vapor retarder throughout assembly,primarily in line with inside pane of glass and inner sheet of infill panel and heel bead of glazingcompound.H. Expansion/Contraction: Provide for expansion and contraction within system componentscaused by cycling temperature range of 170 degrees F. over a 12 hour period without causingdetrimental effect to system components, anchorages, and other building elements.1. Estimated spacing of vertical mullion movement joints: 20 feet.1.05 SUBMITTALSA. See Section 01300 - Administrative Requirements, for submittal procedures.B. Shop Drawings: Indicate dimensions, description of materials and finishes, general construction,specific modifications, component connections, anchorage methods, hardware, and installationprocedures.C. Warranty: Submit manufacturer warranty and ensure forms have been completed in Owner'sname and registered with manufacturer.1.06 QUALITY ASSURANCEA. Manufacturer Qualifications: Company specializing in manufacturing aluminum glazing systemswith minimum five years of documented experience.B. Installer Qualifications: Manufacturer's authorized installers who are trained and approved forinstallation of the following systems required for this Project.1.07 DELIVERY, STORAGE, AND HANDLINGA. Handle products of this section in accordance with AAMA CW-10.B. Protect finished aluminum surfaces with wrapping. Do not use adhesive papers or sprayedcoatings that bond to aluminum when exposed to sunlight or weather.1.08 FIELD CONDITIONSA. Do not install sealants when ambient temperature is less than 40 degrees F. Maintain thisminimum temperature during and 48 hours after installation.1.09 WARRANTYA. See Section 01700 - Closeout Submittals, for additional warranty requirements.B. Correct defective Work within a five year period after Date of Substantial Completion.C. Provide five year manufacturer warranty against excessive degradation of exterior finish.Include provision for replacement of units with excessive fading, chalking, or flaking.04-27-11 METAL-FRAMED STOREFRONTS08410 -2
<strong>Buffalo</strong> <strong>Wild</strong> <strong>Wings</strong>PART 2 PRODUCTS2.01 MANUFACTURERSA. Acceptable Manufacturers and Products:1. Vistawall Architectural Products; Series 3000T: www.vistawall.com2. Kawneer North America; Product Trifab 451/451T: www.kawneer.com3. United States Aluminum Corp; FT451: www.usalum.com2.02 MATERIALSA. Extruded Aluminum: ASTM B 221 (ASTM B 221M).B. Sheet Aluminum: ASTM B 209 (ASTM B209M).C. Fasteners: Stainless steel.D. Exposed Flashings: 0.032 inch thick aluminum sheet; finish to match framing members.E. Perimeter Sealant: Type A specified in Section 07900.F. Glass: As specified in Section 08800.G. Glazing Gaskets: Type to suit application to achieve weather, moisture, and air infiltrationrequirements.H. Glazing Accessories: As specified in Section 08800.I. Bituminous Paint: Cold-applied asphalt-mastic paint complying with SSPC-Paint 12requirements except containing no asbestos, formulated for 30-mil thickness per coat.2.03 ALUMINUM FRAMING SYSTEMA. Framing Members: Manufacturer's standard extruded or formed aluminum framing members ofthickness required and reinforced as required to support imposed loads.1. Construction: Thermally broken.2. Glazing System: Retained mechanically with gaskets on four sides.3. Glazing Plane: Center glazed to accept 1/4" and 1” insulated glass.4. Profile: 2” x 4-1/2”.5. Finish: Clear Anodized Finish; AAMA 611, AA-M12C22A41, Class I.2.04 ALUMINUM SWING DOORSA. Exterior Doors: Nominal 2” deep, medium stile aluminum doors, with 3/16” wall thickness andnominal 3-1/2" wide stiles, 6" nominal top rail and actual 10" high bottom rail. Door units to befabricated complete with hardware as indicated in Hardware Schedule.1. Doors to be glazed with the following glass units: Refer to Section 08800 for glass units.a. 1/4 inch clear tempered glass units, (GL1), in interior doors.b. 1 inch insulated, clear glass units, (GL2), in exterior doors and transom.2. Glazing Stops: Non-removable from the exterior side, snap-in type, square, extrudedaluminum sections with vinyl or neoprene glazing inserts. Form neat hairline joints.3. Finish: Same as storefront.B. Acceptable Manufacturers and Products:1. Vistawall Architectural Products; MS-375 Rugged Medium Stile Door.2. Kawneer North America; 350 Heavy Wall Door.3. United States Aluminum Corp; Durafront Series 800 Medium Stile Door.2.05 DOOR HARDWAREA. Refer to Hardware Schedule at the end of this section.04-27-11 METAL-FRAMED STOREFRONTS08410 -3
<strong>Buffalo</strong> <strong>Wild</strong> <strong>Wings</strong>B. Hinges: BHMA 156.1, butt type, ball bearing, non-removable pin on exterior outswinging doors.1. Hinge Size: 2 inch doors / 4-1/2 inches x 4-1/2 inches.2. Finish: US26D for interior doors and US32D for exterior doors.C. Exit Devices: BMHA 156.3, Grade 1.1. Provide on exterior pairs of doors.2. Keyed lock cylinder on outside of door by Section 08710.3. Keyed dogging cylinders by Section 08710.3. Finish: US26D.4. Manufacturer: Von Duprin 99 Series with concealed vertical rods.D. Push/Pull Set: BHMA 156.6.1. Provide on each interior door and provide pull on exterior of exterior pair of doors.2. Finish: US32D.3. Note: Coordinate and match Pull design on projects that have existing mall hardwaredesign and finish.E. Closers: Universal mounting and multi-sized modern surface type with full cover, sized forindividual door sizes and locations, (unless other types are required by special conditions.1. Provide 110 degree arm.2. Provide with cushion stop for exterior doors.3. Finish: AL.F. Weatherstripping: Wool pile, continuous and replaceable; provide on all exterior doors.1. Finish: AL.G. Sill Sweep Strips: Resilient seal type, of neoprene; provide on all exterior doors.1. Finish: AL.H. Threshold: ADA compliant extruded aluminum, one piece per door opening, ribbed surface;provide on all exterior doors.1. Finish: AL.2.06 FABRICATIONA. Fabricate components with minimum clearances and shim spacing around perimeter ofassembly, yet enabling installation and dynamic movement of perimeter seal.B. Accurately fit and secure joints and corners. Make joints flush, hairline, and weatherproof.C. Prepare components to receive anchor devices. Fabricate anchors.D. Coat concealed metal surfaces that will be in contact with cementitious materials or dissimilarmetals with bituminous paint.E. Arrange fasteners and attachments to conceal from view.F. Reinforce components internally for door hardware.G. Reinforce framing members for imposed loads.H. Finishing: Apply factory finish to all surfaces that will be exposed in completed assemblies.1. Touch-up surfaces cut during fabrication so that no natural aluminum is visible incompleted assemblies, including joint edges.PART 3 EXECUTION3.01 EXAMINATIONA. Verify dimensions, tolerances, and method of attachment with other work.B. Verify that wall openings and adjoining air and vapor seal materials are ready to receive work ofthis section.04-27-11 METAL-FRAMED STOREFRONTS08410 -4
<strong>Buffalo</strong> <strong>Wild</strong> <strong>Wings</strong>3.02 INSTALLATIONA. Install framing system in accordance with manufacturer's instructions.B. Attach to structure to permit sufficient adjustment to accommodate construction tolerances andother irregularities.C. Provide alignment attachments and shims to permanently fasten system to building structure.D. Align assembly plumb and level, free of warp or twist. Maintain assembly dimensionaltolerances, aligning with adjacent work.E. Provide thermal isolation where components penetrate or disrupt building insulation.F. Install sill flashings. Turn up ends and edges; seal to adjacent work to form water tight dam.G. Coordinate attachment and seal of perimeter air and vapor barrier materials.H. Pack fibrous insulation in shim spaces at perimeter of assembly to maintain continuity of thermalbarrier.I. Set thresholds in bed of mastic and secure.J. Install operable door units level and plumb, securely anchored, and without distortion. Adjustweather-stripping contact and hardware movement to produce proper operation.K. Install hardware using templates provided.L. Install glass in accordance with Section 08800, using glazing method required to achieveperformance criteria.M. Install perimeter sealant in accordance with Section 07900.N. Touch-up minor damage to factory applied finish; replace components that cannot besatisfactorily repaired.O. Where aluminum will contact concrete or masonry, protect against corrosion by painting contactsurfaces with bituminous paint.3.03 TOLERANCESA. Maximum Variation from Plumb: 0.06 inches every 3 ft non-cumulative or 1/16 inches per 10 ft,whichever is less.B. Maximum Misalignment of Two Adjoining Members Abutting in Plane: 1/32 inch.3.04 ADJUSTINGA. Adjust operating hardware for smooth operation.3.05 CLEANINGA. Remove protective material from pre-finished aluminum surfaces.B. Wash down surfaces with a solution of mild detergent in warm water, applied with soft, cleanwiping cloths. Take care to remove dirt from corners. Wipe surfaces clean.C. Remove excess sealant by method acceptable to sealant manufacturer.04-27-11 METAL-FRAMED STOREFRONTS08410 -5
<strong>Buffalo</strong> <strong>Wild</strong> <strong>Wings</strong>3.06 HARDWARE SCHEDULEGROUP 1: Interior Entry Vestibule Doors – Door No. 023 pair Hinges BB81 4-1/2 x 4-1/2 PBB or Comparable2 Pull 535B 8” CTC Hiawatha2 Push Bar 1081 LBP Hiawatha2 Closer 1461 x 110 degree LCNRefer to Section 08710 – Door Hardware for Balance of Hardware for Group 1 providedby Hardware Supplier. Floor Stops.GROUP 2: Exterior Entry and Dining “B” (Patio) Doors – Door No.s 01 and 153 pair Hinges BB81 4-1/2 x 4-1/2 NRP PBB or Comparable1 Exit Device CD3347NL (Concealed Vertical Rods) Von Duprin1 Exit Device CD3347EO(Concealed Vertical Rods) Von Duprin2 Offset Pull 658 8” CTC Hiawatha2 Closer 1461 x cush arm stop x 110 degree LCN1 set Weatherstrip Reese2 Door Sweep 323 x 36” Reese1 Threshold S245A x 72” ReeseRefer to Section 08710 – Door Hardware for Balance of Hardware for Group 2 providedby Hardware Supplier. Cylinders and Floor Stops.GROUP 14: Bar (Patio) Door – Door No. 191-1/2 pair Hinges BB81 4-1/2 x 4-1/2 NRP PBB or Comparable1 Exit Device CD33EO Von Duprin1 Pull 535B 8” CTC Hiawatha1 Closer 1461 x cush arm stop x 110 degree LCN1 set Weatherstrip Reese1 Door Sweep 323 x 36” Reese1 Threshold S245A x 36” ReeseRefer to Section 08710 – Door Hardware for Balance of Hardware for Group 14 providedby Hardware Supplier. Cylinder and Floor Stop.END OF SECTION04-27-11 METAL-FRAMED STOREFRONTS08410 -6
<strong>Buffalo</strong> <strong>Wild</strong> <strong>Wings</strong>SECTION 08710 - DOOR HARDWAREPART 1 GENERAL1.01 SECTION INCLUDESA. Commercial door hardware furnished by General Contractor from Owner’s Door and HardwareSupplier.B. Aluminum Door Hardware: Hardware for manual aluminum doors, except cylinders and doorstops, are furnished and installed under Section 08410. Installation of cylinders and door stopsunder the work of this Section.C. Installation of Owner Furnished construction and permanent cores.D. Installation of hardware components.1.02 RELATED SECTIONSA. Section 05500 - Metal Fabrications: Custom Fabricated Gates.B. Section 08110 – Hollow Metal Doors and Frames.C. Section 08211 - Flush Wood Doors.D. Section 08410 - Metal-Framed Storefronts: Hardware for aluminum doors.1.03 OWNER FURNISHED MATERIALSA. Owner Furnished Cores and Keys: Construction and permanent interchangeable cores andkeys will be provided By Owner for installation by General Contractor.1. Coordinate delivery of cores to project site with Owner.B. Padlocks: Owner will provide padlocks for gates, coolers and roof hatch.1.04 REFERENCESA. American National Standards Institute, (ANSI) and Builders Hardware ManufacturersAssociation:1. ANSI/BHMA A156, Door Hardware Standards.2. ICC/ANSI A117.1, Accessible and Usable Buildings and Facilities.B. Door and Hardware Institute, (DHI).C. National Fire Protection Agency (NFPA):1. NFPA 70, National Electrical Code.2. NFPA 80, Fire Doors and Fire Windows.3. NFPA 101, Life Safety Code.4. NFPA 252, Standard Methods of Fire Tests of Door Assemblies.D. Underwriters Laboratories, (UL):1. UL, "Building Materials Directory".1.05 SUBMITTALSA. See Section 01300 - Administrative Requirements, for submittal procedures.B. Hardware Schedule: Prepared by the Hardware Supplier, indicating a listing of each hardwarecomponent for each door opening.1. Organization: Hardware Schedule to be organized to follow the same numbering order asDoor Schedule on Drawings.2. Hardware schedule to be coordinated with Door and Frame Schedule for Hollow MetalDoors and Frames and Wood Doors.04-27-11 DOOR HARDWARE08710 -1
<strong>Buffalo</strong> <strong>Wild</strong> <strong>Wings</strong>1.06 QUALITY ASSURANCEA. Hardware Supplier Qualifications: Company specializing in supplying commercial doorhardware.B. Installer Qualifications: Workers trained and approved to install commercial door hardware andelectrified door hardware as required.C. Regulatory Requirements:1. Comply with accessibility requirements of Americans with Disabilities Act (ADA),"Accessibility Guidelines for Buildings and Facilities (ADAAG)" and ANSI A117.1.2. Comply with NFPA 101 for means of egress doors.3. Electrified Door Hardware: Listed and labeled as defined in NFPA 70, Article 100, by atesting agency acceptable to authorities having jurisdiction.D. Fire-Rated Door Assemblies: Provide door hardware for assemblies complying with NFPA 80that are listed and labeled by a testing and inspecting agency acceptable to authorities havingjurisdiction, for fire ratings indicated, based on testing according to NFPA 252.1.07 DELIVERY, STORAGE, AND HANDLINGA. Package hardware items individually; label and identify each package with door opening code tomatch hardware schedule.1. Include basic installation instructions, mounting diagram and applicable wiring diagrams.B. Inventory door hardware on receipt at project site and provide secure lock-up for door hardwaredelivered to Project site.1.08 COORDINATIONA. Coordinate the work with other directly affected sections involving manufacture or fabrication ofinternal reinforcement for door hardware.B. Distribute door hardware templates for doors, frames, and other work specified to be factoryprepared for installing door hardware.C. Electrical System Roughing-in: Coordinate layout and installation of electrified door hardwarewith connections as required.D. Coordinate Owner's keying requirements during the course of the Work.PART 2 PRODUCTS2.01 HARDWARE SUPPLIERA. Hardware components in this section are to be furnished by the General Contactor throughTwin City Hardware as part of the current BWW Door and Hardware Package.Twin City Hardware Company723 Hadley Avenue NorthOakdale, MN 55128651-735-22002.02 DOOR HARDWARE - GENERALA. Door hardware for each door to comply with requirements of this section and door HardwareGroups indicated in Part 3, Hardware Schedule.B. Provide hardware components that are new, free from scratches, mars and other defects.Furnish hardware complete with accessories of proper size and design required for the purposeintended, including screws, shields, and other anchorage devices necessary for completeinstallation.04-27-11 DOOR HARDWARE08710 -2
<strong>Buffalo</strong> <strong>Wild</strong> <strong>Wings</strong>2.03 DOOR HARDWARE COMPONENTS AND FINISHESA. Hinges: BHMA 156.1, butt type, ball bearing, non-removable pin on exterior outswinging doors.1. Manufacturer: PBB.2. Hinge Size: 1-3/4 inch doors / 4-1/2 inches x 4-1/2 inches.3. Spring Hinge: Self-closing hinges, BHMA 156.17, 4-1/2 inches x 4-1/2 inches.4. Finish: US26D for interior doors and US32D for exterior doors.B. Lock and Latch Sets: Cylindrical Locks, BHMA A156.2, Grade 1, prepared to accept “Insta-Key”interchangeable cores.1. Manufacturer: Schlage; ND Series.2. Lever Handle Trim Design: Schlage “Rhodes”.3. Finish: US26D.4. Manufacturer: Schlage; AL Series.5. Lever Handle Trim Design: Schlage “Saturn”.6. Finish: US26D.C. Cylinders: BHMA 156.2, Grade 1, prepared to accept “Insta-Key” interchangeable cores.1. Manufacturer: Schlage.2. Finish: US26D.D. Exit Alarm Locks: BMHA 156.3, Grade 1.1. Manufacturer: Von Duprin; Guard – X, Series 2670.2. Finish: US28.E. Panic Exit Devices: BMHA 156.3, Grade 1. Rim exit device with exit alarm, weatherized.1. Manufacturer: Detex; Value Series, V40.2. Finish: Black Anodized Aluminum.F. Push/Pull Sets: BHMA 156.6.1. Manufacturer: Hiawatha.2. Finish: US32D.G. Closers: Universal mounting and multi-sized modern surface type with full cover, sized forindividual door sizes and locations, (unless other types are required by special conditions.1. Manufacturer: LCN.2. Provide 110 degree arm.3. Provide with cushion stop for exterior doors.4. Finish: AL.5. Maximum force to operate doors shall not exceed 8.5 pounds for exterior doors and 5pounds for interior doors. Fire rated doors to be set to minimum operating force to allowpositive latching when closed.H. Flush Bolts: BHMA 156.16, manual flush bolt, 12 inch long rod length.1. Manufacturer: Ives.2. Finish: US26D.I. Double Coat Hooks: Brushed aluminum double wardrobe hook.1. Manufacturer: Ives.2. Finish: US92, aluminum clear coated.J. Hinge Pin Stops:1. Manufacturer: Ives.2. Finish: US15, satin nickel plated.K. Wall Stops: Concave design, with dry wall anchor.1. Manufacturer: Don-Jo Manufacturing.2. Finish: US32D.04-27-11 DOOR HARDWARE08710 -3
<strong>Buffalo</strong> <strong>Wild</strong> <strong>Wings</strong>L. Floor Stops:1. Manufacturer: Ives.2.. Models:a. 446PA28, US28, Aluminum.b. FS18S, no finish.M. Door Viewers: Solid Brass one way viewers.1. Manufacturer: Ives.2. Finish: US26D.N. Kick Plates/Armor Plates: BHMA 156.6, 0.050" thick, BHMA 630, Type 304 stainless steelplates.1. Manufacturer: Hiawatha.2. Finish: US32D.O. Weatherstripping: Wool pile, continuous and replaceable; provide on all doors.1. Manufacturer: Reese.2. Finish: AL.P. Sill Sweep Strips: Resilient seal type, of neoprene; provide on all exterior doors.1. Manufacturer: Reese.2. Finish: AL.Q. Thresholds: ADA compliant extruded aluminum, one piece per door opening, ribbed surface;provide on all exterior doors.1. Manufacturer: Reese/Hiawatha.2. Finish: AL.R. Rain Drips: Mill aluminum drip cap continuous over full width of door frame head with 2-1/2”projection.1. Manufacturer: Reese.2. Finish: AL.2.04 DOOR SIGNAGEA. Special Signage: When required, provide vinyl self-adhesive signage reading, "NOT AN EXIT".Font shall be non-serif, 2 inches minimum in height, red letters on white background. Complywith the requirements of the local code authority.2.05 KEYINGA. Door Locks: Master keyed.1. Include construction keying.B. Supply keys in the following quantities:1. Six master keys.2. Two construction keys.3. Two change keys for each lock.4. Two removable core control keys.PART 3 EXECUTION3.01 EXAMINATIONA. Verify that doors and frames are ready to receive work and dimensions are as indicated onmounting diagrams.B. Verify that electric power is available to power operated devices and of the correctcharacteristics.04-27-11 DOOR HARDWARE08710 -4
<strong>Buffalo</strong> <strong>Wild</strong> <strong>Wings</strong>3.02 INSTALLATIONA. Install hardware in accordance with manufacturer's instructions and applicable codes.B. Use templates provided by hardware item manufacturer.C. Mounting heights for hardware from finished floor to center line of hardware item: Asrecommended by the Builders' Hardware Manufacturers Association and DHI.3.03 INSTALLATION OF FINISH HARDWAREA. Install hardware according to hardware supplier’s written installation instructions, mountingdrawings and wiring diagrams included in hardware packages using experienced personnel.Maintain fire rating on labeled openings as applicable.B. Completely fit hardware before final coat of paint or other finish is applied, and then remove untilfinal finish coat is applied. Perform mortises and cutting neatly, and conceal evidence of cuttingin finished work. Permanently install hardware after finishing operations are complete and dry.Protect from scratching or other damage.3.04 ADJUSTING AND CLEANINGA. Adjust and check each operating item of door hardware and each door to ensure properoperation or function of every unit. Replace units that cannot be adjusted to operate asintended. Adjust door control devices to compensate for final operation of heating andventilating equipment and to comply with referenced accessibility requirements.B. Clean operating items as necessary to restore proper function and finish.C. Clean adjacent surfaces soiled by door hardware installation.3.05 PROTECTION OF FINISHED WORKA. Provide final protection and maintain conditions that ensure that door hardware is withoutdamage or deterioration at time of Substantial Completion.3.06 HARDWARE SCHEDULEGROUP 1: Interior Entry Vestibule Doors – Door No. 022 Floor Stops 446FS28 IvesRefer to Section 08410 – Metal Framed Storefronts for Balance of Hardware for Group 1provided by Storefront Manufacturer.GROUP 2: Exterior Entry and Dining “B” (Patio) Doors – Door Nos. 01 and 151 Rim Cylinder Schlage2 Mortise Cylinders for cylinder dogging Schlage2 Floor Stops 446FS28 IvesRefer to Section 08410 – Metal Framed Storefronts for Balance of Hardware for Group 2provided by Storefront Manufacturer.04-27-11 DOOR HARDWARE08710 -5
<strong>Buffalo</strong> <strong>Wild</strong> <strong>Wings</strong>GROUP 3: Restroom Doors – Door Nos. 03 and 071-1/2 pair Hinges BB81 4-1/2 x 4-1/2 PBB1 Pull/Plate 535B 8” CTC x 200D 3.5” x 15” Hiawatha1 Push Plate 200F 4” x 16” Hiawatha1 Closer 1461 x hold open x 110 degree LCN1 Kick Plate B3E 10” x 34” Hiawatha1 Wall Stop 1407 DONGROUP 4: Office – Door No. 101-1/2 pair Hinges BB81 4-1/2 x 4-1/2 PBB1 Lockset ND80BD Rhodes x less core SchlageI/C core by Owner1 Closer 1461 x 110 degree LCN1 Kick Plate B3E 10” x 34” Hiawatha1 Wall Stop 1407 DON1 Security Window 10” x 10” in door AIR1 Metal Louver 18” x 12” in door AIRGROUP 5: Not UsedGROUP 6: Exterior Service Doors - Door Nos. 11 and 141-1/2 pair Hinges 4B51 4-1/2 x 4-1/2 NRP PBB1 Exit Alarm Lock 2670 x less core Von Duprin1 Rim Cylinder 80-129 Schlage1 Closer 1461 Cush x 110 degree LCN1 Viewer 698B Ives1 Armor Plate KP 36” x 40” Hiawatha1 set Weatherstrip DS75 x 4070 Reese1 Door Sweep 377A x 42” Reese1 Threshold S245A x 42” Reese1 Rain Drip R201A x 46” ReeseGROUP 7: Restroom Stall Doors – Door Nos. 4, 5, 6, and 81 Hinges BB81 4-1/2 x 4-1/2 PBB2 Spring Hinge SP81 4-1/2 x 4-1/2 PBB1 Latchset AL40 Saturn x Privacy Schlage2 Hinge Pin Stop 69F15 Ives1 Wall Stop 1407 DON1 Dbl. Coat Hook 582A92 IvesNote: Provide (2) two additional dbl. coat hooks for Purse Shelf in Women’s Restroom.GROUP 8: Rear Vestibule (Interior) - Door No. 131-1/2 pair Hinges BB81 4-1/2 x 4-1/2 PBB1 Lockset ND80BD Rhodes x less core SchlageI/C core by Owner1 Closer 1461 x 110 degree LCN2 Hinge Pin Stop 69F15 Ives1 Kick Plate B3E 10” x 34” HiawathaGROUP 9: Mechanical Room – Door No. 183 pair Hinges BB81 4-1/2 x 4-1/2 NRP PBB1 Lockset ND80BD Rhodes x less core SchlageI/C core by Owner04-27-11 DOOR HARDWARE08710 -6
<strong>Buffalo</strong> <strong>Wild</strong> <strong>Wings</strong>1 Closer 1461 x 110 degree LCN1 Flush Bolt FB458 12” Ives1 Threshold 425S x 72” HiawathaGROUP 10: Patio Gates – Door Nos. 16 and 171 Panic Device V40xEBxWx36” Detex1 Mortise Cylinder 80-102 x less core SchlageBalance of Hardware by Gate Manufacturer2 Hinges Steel Weld-on Barrel HingesGROUP 11: Traffic Doors – Door Nos. 9 and 12All Mounting Hardware by Door ManufacturerGROUP 12: Coat Hooks – Bar Stool Area8 Dbl. Coat Hook 582A92 IvesGROUP 13: Padlocks – Keg Storage, Trash & Chemical Enclosure & Roof Hatch6 Padlocks By Owner Insta-KeyGROUP 14: Bar (Patio) Door – Door No. 191 Mortise Cylinder for cylinder dogging Schlage1 Floor Stop 446FS28 IvesRefer to Section 08410 – Metal Framed Storefronts for Balance of Hardware for Group 14provided by Storefront Manufacturer.END OF SECTION04-27-11 DOOR HARDWARE08710 -7
<strong>Buffalo</strong> <strong>Wild</strong> <strong>Wings</strong>SECTION 08800 - GLAZINGPART 1 GENERAL1.01 SECTION INCLUDESA. Clear tempered glass.B. Insulated spandrel glass for windows.C. Clear insulated glass for entrances storefronts and windows.D. Un-framed tempered glass mirrors.E. Tinted window film.1.02 RELATED SECTIONSA. Section 01700 – Execution Requirements: for final cleaning of glass and mirrors.B. Section 07900 - Joint Sealers: Sealant and back-up material.C. Section 08110 – Hollow Metal Doors and Frames: for one-way mirror glass provided underHardware Package.D. Section 08410 - Metal-Framed Storefronts.E. Section 10810 – Toilet Accessories: for framed mirrors.1.03 REFERENCESA. 16 CFR 1201 - Safety Standard for Architectural Glazing Materials.B. ANSI Z97.1 - American National Standard for Safety Glazing Materials Used in Buildings,Safety Performance Specifications and Methods of Test.C. ASTM C 864 - Standard Specification for Dense Elastomeric Compression Seal Gaskets,Setting Blocks, and Spacers.D. ASTM C 920 - Standard Specification for Elastomeric Joint Sealants.E. ASTM C 1036 - Standard Specification for Flat Glass.F. ASTM C 1048: Specification for Heat-Treated Flat Glass - Kind HS, Kind FT Coated andUncoated Glass.G. ASTM C 1193 - Standard Guide for Use of Joint Sealants.H. ASTM C 1503: Specification for Silvered Flat Glass Mirror.I. ASTM E 2190: Specification for Insulating Glass Unit Performance and EvaluationJ. GANA (SM) - FGMA Sealant Manual; Glass Association of North America.1.04 PERFORMANCE REQUIREMENTSA. Installed glazing systems shall withstand normal thermal movement and wind and impact loads(where applicable) without failure, including loss or glass breakage attributable to the following:defective manufacture, fabrication, or installation; failure of sealants or gaskets to remainwatertight and airtight; deterioration of glazing materials; or other defects in construction.1.05 QUALITY ASSURANCEA. Safety Glazing Labeling: Where safety glazing labeling is indicated, permanently mark glazingwith certification label. Label shall indicate manufacturer's name, type of glass, thickness, andsafety glazing standard with which glass complies.04-27-11 GLAZING08800 -1
<strong>Buffalo</strong> <strong>Wild</strong> <strong>Wings</strong>1.06 ENVIRONMENTAL REQUIREMENTSA. Do not install glazing when ambient temperature is less than 50 degrees F.PART 2 PRODUCTS2.01 MANUFACTURERSA. Acceptable Manufacturers and Fabricators for Glass:1. AFG Industries, Inc: www.afgglass.com.2. Guardian Industries Corporation: www.guardian.com.3. PPG Industries, Inc: www.ppg.com.4. Oldcastle Glass: www.oldcastle.com5. Viracon: www.viracon.com.6. Substitutions: Refer to Section 01600 - Product Requirements.2.02 MONOLIHIC GLASSA. (GL1): Tempered Glass: ASTM C1048, Condition A uncoated, Type I, Class 1, q3 quality,horizontally tempered, clear float glass.1. 1/4" thick; clear, tempered.2.03 MIRROR GLASSA. (GL4): Tempered Mirror Glass: ASTM C1048, Condition A uncoated, Type I, Class 1, q3 quality,horizontally tempered, clear float glass before silver coating is applied.1. 1/4" thick; Mirror glazing quality, tempered,2. Refer to drawings for locations for un-framed mirrors in Women’s Restroom and Back Barareas.B. (GL5): One-way Mirror Glass: Refer to Section 08110 – Steel Doors and frames for one-wayglass installed in steel door provided by Twin City Hardware under current Hardware Package.2.04 INSULATED GLASSA. (GL2): Insulated Glass Units: 1 inch thick unit constructed of 1/4 inch clear exterior light, 1/2inch air space, and 1/4 inch clear interior light. Low-emissivity coating on No. 2 surface. Bothlights heat strengthened (tempered where necessary to comply with safety code requirements).1. Visible transmittance: 70 percent.2. Outside reflectance: 10 percent.3. Nighttime winter U-value: 0.29 BTU/hour/square foot. Maximum.4. Summer U-value: 0.26 BTU/hour/square foot. Maximum.5. Shading coefficient: 0.43. Maximum.6. Relative heat gain: 90 BTU/hour/square foot.7. Acceptable products:a. Viracon: VE1-2M.b. Comparable products of other specified manufacturers that meet or exceedperformance characteristics of specified glass.B. (GL3): Insulated Spandrel Glass Units: 1 inch thick unit constructed of 1/4 inch clear exteriorlight with ceramic frit on No. 2 surface, 1/2 inch air space, and 1/4 inch clear interior light. Bothlights heat strengthened (tempered where necessary to comply with safety code requirements).1. Ceramic Frit Color: Black.2.05 TINTED WINDOW FILMA. Manufacturers and Product:1. (TF1): 3M Sun Control Window Films.a. Product: Prestige Series, PR 70.b. Manufacturer: 3M Corporation; Renewable Energy Division; www.3m.comc. Contact: John Aguzino, 1-800-229-1566.04-27-11 GLAZING08800 -2
<strong>Buffalo</strong> <strong>Wild</strong> <strong>Wings</strong>B. Locations: Interior Entry Aluminum Door # 02, Patio Aluminum Doors # 15 and # 19; applied tointerior surface of glass after signage is installed.2.06 GLAZING COMPOUNDSA. Manufacturers:1. Dow Corning Corp: www.dowcorning.com.2. GE Plastics: www.geplastics.com.3. Pecora Corporation: www.pecora.com.4. Substitutions: Refer to Section 01600 - Product Requirements.B. Butyl Sealant: Single component; ASTM C 920, Grade NS, Class 12-1/2, Uses M and A; ShoreA hardness of 10 to 20; black color; non-skinning.C. Silicone Sealant: Single component; neutral curing; capable of water immersion without loss ofproperties; non-bleeding, non-staining; ASTM C 920, Type S, Grade NS, Class 25, Uses M, A,and G; cured Shore A hardness of 15 to 25; color as selected.D. Coordinate compatibility of silicone sealants specified in section 07900 with sealants used forinsulated glass edge seals.2.07 GLAZING ACCESSORIESA. Setting Blocks: Neoprene, 80 to 90 Shore A durometer hardness, ASTM C 864 Option I.Length of 0.1 inch for each square foot of glazing or minimum 4 inch x width of glazing rabbetspace minus 1/16 inch x height to suit glazing method and pane weight and area.B. Spacer Shims: Neoprene, 50 to 60 Shore A durometer hardness, ASTM C 864 Option I.Minimum 3 inch long x one half the height of the glazing stop x thickness to suit application, selfadhesive on one face.C. Glazing Tape: Preformed butyl compound with integral resilient tube spacing device; 10 to 15Shore A durometer hardness; coiled on release paper; size as required; black color.D. Glazing Gaskets: Resilient silicone extruded shape to suit glazing channel retaining slot; ASTMC 864 Option I; Black color.E. Glazing Clips: Manufacturer's standard type.F. Mirror Mastic: An adhesive setting compound, asbestos-free, produced specifically for settingmirrors and certified by both mirror manufacturer and mastic manufacturer as compatible withglass coating and substrates on which mirrors will be installed.G. Mirror Clips: Manufacturers standard top and bottom mirror clips fabricated to mechanicallyfasten mirrors to wall surface and allow for removal of mirrors.PART 3 EXECUTION3.01 EXAMINATIONA. Verify that openings for glazing are correctly sized and within tolerance.B. Verify that surfaces of glazing channels or recesses are clean, free of obstructions that mayimpede moisture movement, weeps are clear, and ready to receive glazing.3.02 PREPARATIONA. Clean contact surfaces with solvent and wipe dry.B. Prime surfaces scheduled to receive sealant.C. Install sealants in accordance with ASTM C 1193 and FGMA Sealant Manual.D. Install sealant in accordance with manufacturer's instructions.04-27-11 GLAZING08800 -3
<strong>Buffalo</strong> <strong>Wild</strong> <strong>Wings</strong>3.03 INSTALLATION - EXTERIOR/INTERIOR DRY METHOD (GASKET GLAZING)A. Place setting blocks at 1/4 points with edge block no more than 6 inches from corners.B. Rest glazing on setting blocks and push against fixed stop with sufficient pressure on gasket toattain full contact.C. Install removable stops without displacing glazing gasket; exert pressure for full continuouscontact.3.04 INSTALLATION - EXTERIOR DRY METHOD (TAPE AND GASKET SPLINE GLAZING)A. Cut glazing tape to length; install on glazing pane. Seal corners by butting tape and sealingjunctions with butyl sealant.B. Place setting blocks at 1/4 points with edge block no more than 6 inches from corners.C. Rest glazing on setting blocks and push against fixed stop with sufficient pressure to attain fullcontact.D. Install removable stops without displacing glazing spline. Exert pressure for full continuouscontact.E. Trim protruding tape edge.3.05 INSTALLATION - INTERIOR DRY METHOD (TAPE AND TAPE)A. Install Owner supplied 1/4 inch logo glass as indicated on the Drawings.B. Cut glazing tape to length and set against permanent stops, projecting 1/16 inch (1.6 mm)above sight line.C. Place setting blocks at 1/4 points with edge block no more than 6 inches from corners.D. Rest glazing on setting blocks and push against tape for full contact at perimeter of pane or unit.E. Place glazing tape on free perimeter of glazing in same manner described above.F. Install removable stop without displacement of tape. Exert pressure on tape for full continuouscontact.G. Knife trim protruding tape.3.06 MIRROR INSTALLATIONA. General: Install mirrors to comply with mirror manufacturer's written instructions and withreferenced GANA publications. Mount mirrors accurately in place in a manner that avoidsdistorting reflected images.B. Wall-Mounted Mirrors: Install mirrors with mastic and/or mirror clips as applicable. Attachmirror hardware securely to mounting surfaces with mechanical fasteners installed with anchorsor inserts as applicable. Install fasteners so heads do not impose point loads on backs ofmirrors.1. Mirror Clips: Place a felt or plastic pad between mirror and each clip to prevent spalling ofmirror edges. Locate clips so they are symmetrically placed and evenly spaced.2. Install mastic as follows:a. Apply mastic to comply with mastic manufacturer's written instructions for coverage andto allow air circulation between back of mirrors and face of mounting surface.b. After mastic is applied, align mirrors and press into place while maintaining a minimumair space of 1/8 inch between back of mirrors and mounting surface.C. Refer to Drawings for wood trim mirror frames.04-27-11 GLAZING08800 -4
<strong>Buffalo</strong> <strong>Wild</strong> <strong>Wings</strong>3.07 TINTED WINDOW FILM INSTALLATIONA. Application: Apply window film using manufacturer’s trained and certified installers in strictaccordance with manufacturer’s written installation instructions.B. Instruction: Instruct Owner's personnel in proper cleaning of window surface after installation inaccordance with manufacturers instructions.3.08 CLEANINGA. Remove glazing materials from finish surfaces.B. Remove labels after Work is complete.C. Clean glass and adjacent surfaces.END OF SECTION04-27-11 GLAZING08800 -5
<strong>Buffalo</strong> <strong>Wild</strong> <strong>Wings</strong>PART 1 GENERAL1.01 SECTION INCLUDESA. Metal furring and lathing.SECTION 09220 – PORTLAND CEMENT PLASTER (STUCCO)B. Portland cement plaster system (Stucco).C. Smooth and special rendered surface finish.1.02 RELATED SECTIONSA. Section 06100 - Rough Carpentry.B. Section 07260 - Air Barriers.C. Section 07920 - Joint Sealers.D. Section 09260 - Gypsum Board Assemblies.E. Section 09900 - Paints and Coatings.1.03 SUBMITTALSA. See Section 01300 - Administrative Requirements, for submittal procedures.B. Product Data: Submit data on plaster materials, characteristics and limitations of productsspecified.C. Maintenance Data: Include maintenance procedures, recommended maintenance materials,and suggested schedule for cleaning.D. Samples: Submit two samples, 12 x 12 inch in size illustrating finish color and texture to matchexisting material.1.04 REFERENCESA. ASTM C150 – Portland CementB. ASTM C206 – Finishing Hydrated LimeC. ASTM C932 – Bonding Compounds for adhering plaster to concrete or concrete unit masonryD. ASTM C926 – Standard specification for application of Portland Cement based PlasterE. ASTM C897 – Aggregate for Job-Mixed Portland Cement Based PlastersF. ASTM C1063 – Specifications for installation of lathing and furring to receive interior andexterior Portland Cement PlasterG. PCA (Portland Cement Association) – Portland Cement Plaster (Stucco) ManualH. ACI (American Concrete Institute) ACI 524R – “Guide to Portland Cement Plastering”1.05 QUALITY ASSURANCEA. Perform work in accordance with PCA Plaster (Stucco) Manual and applicable manufacturer’sperformance guidelines.1.06 SYSTEM DESCRIPTIONA. Fabricate vertical elements to limit finish surface to 1/180 deflection under lateral point load of100 lbs.04-27-11 PORTLAND CEMENT PLASTER (STUCCO)09220 -1
<strong>Buffalo</strong> <strong>Wild</strong> <strong>Wings</strong>B. Fabricate horizontal elements to limit finish surface to 1/240 deflection under superimposeddead load and wind uplift loads.1.07 QUALIFICATIONSA. Applicator: Company specializing in performing the work of this section with a minimum of threeyears experience and / or approved by manufacturer.1.08 MOCKUPA. Provide mockup of plaster system with accessories.B. Construct mockup, 4 feet long by 4 feet wide, illustrating surface finish and color to matchexisting.C. Locate where directed by Owner.D. Mockup may remain as part of the Work.1.09 PROJECT CONDITIONSA. Comply with ASTM C926 requirementsB. Do not apply plaster when substrate or ambient air temperature is less than 40° F or above100°F for 48 hours before, during and after stucco applications and until materials can be fullycured.C. Apply stucco to clean, adequately prepared surfaces free from dust, dirt or other deleterioussubstances.D. Provide adequate protection from contaminates and the weather for substrates prior toapplication of stucco and for stucco coat applications. Maintain in place until stucco isadequately cured.E. Protect stucco surfaces from uneven and excessive evaporation during hot, dry or windyweather. Use procedures required by climatic conditions including moist curing, providingcoverings and providing barriers to deflect sunlight and wind.F. Take necessary care to identify and protect adjacent surfaces from damage from stuccoapplication and promptly remove all droppings.PART 2 PRODUCTS2.01 MANUFACTURERA. This specification is written on the basis of using the products of Degussa Wall Systems /Senergy, Such is intended to establish minimum quality standards, not to limit competitivebidding. Products with equal or superior characteristics by other manufacturers will beconsidered under conditions of the Specifications.2.02 PLASTER BASE MATERIALSA. Cement: ASTM C150, Type 1 Portland.B. Lime: Special finishing hydrated lime, ASTM C-206, Type S.C. Aggregate: Natural or manufactured sand, in accordance with ASTM C897.D. Water: Clean, fresh, potable and free of mineral or organic matter which can affect plaster.E. Bonding Agent: ASTM C932; type recommended by manufacturer for bonding plaster toconcrete masonry surfaces.F. Plaster Sand: Must be clean and free from deleterious amounts of loam, clay, silt, soluble saltsand organic matter. Sampling and testing must comply with ASTM C144.04-27-11 PORTLAND CEMENT PLASTER (STUCCO)09220 -2
<strong>Buffalo</strong> <strong>Wild</strong> <strong>Wings</strong>G. Senergy STUCCOBASE Concentrate: Factory-blended stucco mixture of Portland cement,reinforcing fibers, and proprietary ingredients for scratch and brown coats. Sampling and testingmust comply with ASTM 926 and ICC ESR-1094.H. Senergy ALPHA BASE COAT (A/ BC): 100% acrylic polymer base coat, site mixed withPortland cement. To attach and reinforce optional EPS shapes over face of dried stucco.I. Reinforcing Mesh: Open weaved, glass fiber reinforcing mesh for reinforcing optional EPSshapes.2.03 PLASTER FINISH MATERIALSA. Cement: As specified for plaster base coat, pure white color.B. Lime: As specified for plaster base coat.C. Color Pigment: Synthetic type, color "Pure White".D. Water: Clean, fresh, potable and free of mineral or organic matter which can affect plaster.E. Primer (if needed): Senergy STUCCO PRIME: 100% acrylic based primer for stucco.F. Finish: Senergy SENERFLEX: Factory mixed formulation of 100% acrylic polymers andaggregate, integrally pigmented and formulated for specific textures. Color to be determined.2.04 FURRING AND LATHINGA. Metal Lath at Walls: ASTM C841 and C847; flat diamond self furring mesh with ASTM A653AG60 hot dip, galvanized zinc coating, 3.4 lb/sq. yd. of weight to suit application.B. Metal Lath at Soffits: ASTM C841 and C847; Flat Diamond non-furred and non-backed meshwith ASTM A653A G60 hot dip, galvanized coating, 3.4 lb/sq. yd.C. Casing Bead: Formed zinc; minimum 26 gage thick; depth governed by plaster thickness;maximum possible lengths; expanded metal flanges, with square edges.D. Corner Bead: Formed zinc; minimum 26 ga. thick; depth governed by plaster thickness;maximum possible lengths; expanded metal flanges, with bull nosed edge.E. Base Screed: Formed zinc; minimum 26 gage thick; depth governed by plaster thickness;maximum possible lengths; expanded metal flanges, with beveled edge.F. Corner Mesh: Formed zinc; minimum 26 ga. thick; expanded flanges shaped to permitcomplete embedding in plaster; minimum 2 inches wide; galvanized finish.G. Anchorage Accessories: Tie wire, nails, staples, or other approved metal supports, of type andsize to suit application, and to rigidly secure lath and associated metal accessories in place,galvanized, complying with ASTM C1063.2.05 CEMENT PLASTER MIXESA. Mix and proportion cement plaster in accordance with ASTM C926.B. Mix and proportion Senergy STUCCOBASE in accordance with manufacturer’s instructions.C. Finish Coat: Mix Senergy SENERFLEX to ensure a homogeneous consistency. Add water asneeded.D. Mix only as much plaster as can be used prior to initial set.E. Mix materials dry, to uniform color and consistency, before adding water.F. Add air entrainment admixtures to all coats to provide 5-7 percent entrainment.G. Protect mixtures from freezing, frost, contamination, and evaporation.04-27-11 PORTLAND CEMENT PLASTER (STUCCO)09220 -3
<strong>Buffalo</strong> <strong>Wild</strong> <strong>Wings</strong>H. Do not re-temper mixes after initial set has occurred.PART 3 EXECUTION3.01 EXAMINATIONA. Verify surfaces and site conditions are ready to receive work under this Section.B. Masonry: Verify joints are cut flush and surface is ready to receive work of this Section. Verifyno bituminous or water repellent coatings exist on masonry surface.3.02 PREPARATIONA. Dampen masonry surfaces to reduce excessive suction.3.03 INSTALLATION - LATHING MATERIALSA. Apply metal lath taut, with long dimension perpendicular to supports.B. Lap ends minimum 2 inch. Secure end laps with tie wire where they occur between supports.C. Lap sides of diamond mesh lath minimum 2 inches.D. Place 4 inch wide strips of metal lath centered over junctions of dissimilar backing materials.Secure rigidly in place.E. Attach metal lath to supports using fastening method recommended by manufacturer to suitback-up material.F. Place strip mesh diagonally at corners of lathed openings. Secure rigidly in place.G. Continuously reinforce internal angles with corner mesh, return metal lath 3 inches from cornerto form the angle reinforcement; fasten at perimeter edges only.3.04 INSTALLATION - ACCESSORIESA. All openings, plaster edges or where plaster edges terminate, and provide plaster screeds. Usevented screed at soffit perimeter and where indicated on drawings.B. Place corner bead at external wall corners; fasten at outer edges of lath only.C. Place casing beads at terminations of plaster finish. Butt and align ends. Secure rigidly inplace.3.05 CONTROL AND EXPANSION JOINTSA. Establish control and expansion joints with back to back casing beads, as located in drawings.Set both beads over 6 inch wide strip of building wrap tape for air seal continuity.3.06 PLASTERINGA. Apply Portland cement plaster (stucco) in a three-coat application over metal lath with thicknessnot less than 7/8" in locations as indicated on drawings. Scratch, brown and finish coat shall beapplied as follows:1. First (Scratch) Coat: Shall be applied to metal reinforcement with sufficient material andpressure so that it is shoved through the metal reinforcement to completely embed thereinforcement.a. Thickness of scratch coat shall be approximately 3/8". Before scratch coat hashardened, it shall be evenly scratched with a standard scratcher to provide goodmechanical key for the second or brown coat.b. Scratch coat shall be continuously moist cured for not less than 48 hours afterapplication.04-27-11 PORTLAND CEMENT PLASTER (STUCCO)09220 -4
<strong>Buffalo</strong> <strong>Wild</strong> <strong>Wings</strong>2. Second (Brown) Coat: Shall be applied not sooner than 48 hours after application ofscratch coat. Before applying the brown coat, the surfaces of scratch coat shall bedampened evenly to obtain uniform suction (or fogged as environmental conditions (hot,dry, sunny days) dictate to properly cure).a. Thickness of brown coat shall be a minimum of 3/8" total thickness and shall beapplied in two applications or coats, one immediately following the other.b. Surface shall be brought to a true, even surface by floating or rodding and leftrough, ready to receive finish coat (for acrylic finishes: wood float or darbying thesurface and fill all voids for uniform surface).c. Brown coat shall be continuously moist for 48 hours after application and thenallowed to dry.3. Finish coat: Shall be laid out to permit completion of an entire surface in one operation.If this is impracticable, the plastering shall be carried to some natural breaking point asapproved by the Owner.a. Finish coat shall be applied not sooner than 5 days after the application ofpreceding coat. Before applying finish coat, the surface of preceding coat shall bedampened evenly to obtain uniform suction.b. Primer (if needed): Senergy STUCCOPRIME: Apply STUCCOPRIME to theSenergy STUCCOBASE with either an airless sprayer, roller or brush at rate of175 – 275 s.f. per gallon.c. Acrylic Finish Coat: Senergy SENERFLEX: Apply finish directly toSTUCCOBASE or STUCCOPRIME with a clean stainless steel trowel. Maintain awet edge on finish by applying and texturing continually over the wall surface.Work finish to corners, joints or natural breaks and do not allow material to set upwithin an uninterrupted wall area. Float finish to achieve final texture.3.07 TOLERANCESA. Maximum Variation from True Flatness: 1/8 inch in 10 feet.3.08 CLEAN-UPA. Upon completion of the work of this Section, remove related debris from premises.END OF SECTION04-27-11 PORTLAND CEMENT PLASTER (STUCCO)09220 -5
<strong>Buffalo</strong> <strong>Wild</strong> <strong>Wings</strong>SECTION 09260 - GYPSUM BOARD ASSEMBLIESPART 1 GENERAL1.01 SECTION INCLUDESA. Metal framing.B. Metal framing components for suspended gypsum board ceilings.C. Standard gypsum board.D. Mold resistant gypsum board.E. Cement backer board.F. Joint treatment and accessories.1.02 RELATED SECTIONSA. Section 05400 - Cold Formed Metal Framing: Exterior wall wind-load-bearing metal studframing and related soffit framing.B. Section 06100 – Rough Carpentry: Exterior load bearing wood stud framing and sheathing.C. Section 07212 – Board and Batt Insulation: for fiberglass insulation used as acoustic insulation.1.03 REFERENCESA. ANSI A108.11 - American National Standard for Interior Installation of Cementitious BackerUnits.B. ANSI A118.9 - American National Standard Specifications for Cementitious Backer Units.C. ASTM A 641 - Specification for Zinc-Coated (Galvanized) Carbon Steel Wire.D. ASTM A 653/A 653M - Standard Specification for Steel Sheet, Zinc-Coated (Galvanized) orZinc-Iron Alloy-Coated (Galvannealed) by the Hot-Dip Process.E. ASTM C 36/C 36M - Standard Specification for Gypsum Wallboard.F. ASTM C 475/C 475M - Standard Specification for Joint Compound and Joint Tape for FinishingGypsum Board.G. ASTM C 645 - Standard Specification for Nonstructural Steel Framing Members.H. ASTM C 754 - Standard Specification for Installation of Steel Framing Members to ReceiveScrew-Attached Gypsum Panel Products.I. ASTM C 840 - Standard Specification for Application and Finishing of Gypsum Board.J. ASTM C 1002 - Standard Specification for Steel Self-Piercing Tapping Screws for theApplication of Gypsum Panel Products or Metal Plaster Bases to Wood Studs or Steel Studs.K. ASTM C 1396/C 1396M - Standard Specification for Gypsum Board.L. ASTM D 3273 - Standard Test Method for Resistance to Growth of Mold on the Surface ofInterior Coatings in an Environmental Chamber.M. ASTM E 72 - Standard Test Methods of Conducting Strength Tests of Panels for BuildingConstruction.N. GA-600 - Fire Resistance Design Manual; Gypsum Association.04-27-11 GYPSUM BOARD ASSEMBLIES09260 -1
<strong>Buffalo</strong> <strong>Wild</strong> <strong>Wings</strong>1.04 QUALITY ASSURANCEA. Perform in accordance with ASTM C 840. Comply with requirements of GA-600 for fire-ratedassemblies.B. Applicator Qualifications: Company specializing in performing gypsum board application andfinishing.PART 2 PRODUCTS2.01 METAL FRAMING MATERIALSA. Non-Loadbearing Framing System Components: ASTM C 645; galvanized sheet steel, of sizeand properties necessary to comply with ASTM C 754 for the spacing indicated, with maximumdeflection of wall framing of L/240 at 5 psf.1. Exception: The minimum metal thickness and section properties requirements of ASTM C645 are waived provided steel of 40 ksi minimum yield strength is used, the metal iscontinuously dimpled, the effective thickness is at least twice the base metal thickness, andmaximum stud heights are determined by testing in accordance with ASTM E 72 usingassemblies specified by ASTM C 754.2. Studs: "C" shaped with flat or formed webs with knurled faces.3. Runners: U shaped, sized to match studs.4. Insulation Furring: Z shaped for use with board insulation, 1 1/2 inch.B. Partition Head To Structure Connections: Provide track fastened to structure with legs ofsufficient length to accommodate deflection, for friction fit of studs cut short and fastened asindicated on drawings.C. Partition Head to Structure Connections: Provide mechanical anchorage devices thataccommodate deflection using slotted holes, screws and anti-friction bushings, preventingrotation of studs while maintaining structural performance of partition.1. Structural Performance: Maintain lateral load resistance and vertical movement capacityrequired by applicable code, when evaluated in accordance with AISI North AmericanSpecification for the Design of Cold-Formed Steel Structural Members.2. Material: ASTM A 653/A 653M steel sheet, SS Grade 50/340, with G60/Z180 hot dippedgalvanized coating.2.02 SUSPENDED CEILING COMPONENTSA. Hanger Wire: ASTM A 641/A 641M, Class 1 zinc coating, soft temper, 12 gauge wire.B. Flat Hangers: Steel sheet, 1 by 3/16 inch.C. Tie Wire: ASTM A 641/A 641M, Class 1 zinc coating, soft temper, 18 gauge wire.D. Ceiling Channels: 0.0312-inch, (20 Gauge) base metal thickness, with minimum 1/2-inch wideflanges.1. Depth: 2-1/2 inch.E. Furring Channels: Hat-Shaped, 2-9/16 inch wide with 1-1/4 inch face.1. Minimum Base Metal Thickness: 0.0179 inch, (25 Gauge).2. Depth: 7/8 inch or 1-1/2 inch, as indicated on Drawings.2.03 GYPSUM BOARD MATERIALSA. Acceptable Manufacturers:1. G-P Gypsum Corporation: www.gp.com.2. National Gypsum Company: www.nationalgypsum.com.3. USG Corporation: www.usg.com.4. Substitutions: See Section 01600 - Product Requirements.04-27-11 GYPSUM BOARD ASSEMBLIES09260 -2
<strong>Buffalo</strong> <strong>Wild</strong> <strong>Wings</strong>B. Gypsum Board - All Types: Complying with applicable requirements of ASTM C 1396/C 1396M.C. (GYB1) Standard Gypsum Board: Not UsedD. (GYB2) Mold and Moisture-Resistant Gypsum Board: With moisture and mold-resistant coreand surfaces to comply with ASTM D 3273.1. Thickness: 5/8 inch.2. Long Edges: Tapered.3. Manufacturers and Products:a. USG Corporation: Sheetrock Brand “Mold Tough” Gypsum Panels.b. National Gypsum Company: XP Gypsum Board.c. G-P Gypsum Corporation: “Mold-Guard Gypsum Board.2.04 CEMENT BACKER BOARDA. (GYB5) Cement Backer Board: ANSI A118.9, aggregated Portland cement panels with glassfiber mesh embedded in front and back surfaces.1. Thickness: 5/8 inch.2. Manufacturers and Products:a. USG Corporation: Durock.b. National Gypsum: Permabase.3. Location: At Kitchen and Toilet walls. Refer to Wall Types.2.05 ACCESSORIESA. Corner Beads: Galvanized steel.B. Edge Trim: Vinyl tape style beads and as detailed.C. Control Joint: Zinc, v-groove with tape flanges.D. Joint Materials: ASTM C 475 and as recommended by gypsum board manufacturer for projectconditions.1. Ready-mixed vinyl-based joint compound.2. Chemical hardening type compound.E. Joint Tape:1. Standard Paper Tape: 2 inch wide.a. Interior Gypsum Wallboard except specific products indicated below that requirefiberglass tape.2. Fiberglass Tape: self-adhesive, glass-fiber mesh. Sheetrock Brand Fiberglass DrywallTape or comparable.a. Interior Mold and Moisture Resistant Gypsum Board.b. Cement Backer Board.F. Screws: ASTM C 1002; self-piercing tapping type; cadmium-plated for exterior locations.G. Anchorage to Substrate: Tie wire, nails, screws, and other metal supports, of type and size tosuit application; to rigidly secure materials in place.PART 3 EXECUTION3.01 EXAMINATIONA. Verify that project conditions are appropriate for work of this section to commence.3.02 FRAMING INSTALLATIONA. Metal Framing: Comply with ASTM C 754 and manufacturer's instructions.04-27-11 GYPSUM BOARD ASSEMBLIES09260 -3
<strong>Buffalo</strong> <strong>Wild</strong> <strong>Wings</strong>B. Studs: Space studs at 16 inches on center unless otherwise indicated.1. Partitions Terminating at Structure: Attach extended leg top runner to structure, maintainclearance between top of studs and structure, and brace both flanges of studs withcontinuous bridging.2. Partitions Terminating at Structure: Attach top runner to structure, maintain clearancebetween top of studs and structure, and connect studs to track using specified mechanicaldevices in accordance with manufacturer's instructions; verify free movement of top of studconnections; do not leave studs unattached to track.C. Openings: Reinforce openings as required for weight of doors or operable panels, using notless than double 20 gauge studs at jambs.D. Standard Wall Furring: Install at masonry walls scheduled to receive gypsum board, not morethan 4 inches from floor and ceiling lines and abutting walls. Secure in place on alternatechannel flanges at maximum 24 inches on center.E. Blocking: Install blocking for support of plumbing fixtures, toilet partitions, wall cabinets, toiletaccessories, and equipment. Comply with Section 06100 and Drawings for wood blocking.3.03 ACOUSTIC ACCESSORIES INSTALLATIONA. Acoustic Batt Insulation: Place tightly within spaces, around cut openings, behind and aroundelectrical and mechanical items within partitions, and tight to items passing through partitions.1. Refer to Section 07212 for batt insulation (INSUL1).B. Acoustic Sealant: Install in accordance with manufacturer's instructions.1. Place one bead continuously on substrate before installation of perimeter framingmembers.2. In non-fire-rated construction, seal around all penetrations by conduit, pipe, ducts, andrough-in boxes.3. Refer to Section 07900 for (SLNT2) sealant.C. Install acoustical treatment at interior partitions where indicated on the Drawings.3.04 BOARD INSTALLATIONA. Comply with ASTM C 840 and manufacturer's instructions. Install to minimize butt end joints,especially in highly visible locations.B. Single-Layer Non-Rated: Install gypsum board in most economical direction, with ends andedges occurring over firm bearing.C. Cement Backing Board: Install over framing members in locations as indicated on drawings,and in accordance with ANSI A108.11 and manufacturer's instructions.D. Installation on Framing: Use screws for attachment of all gypsum board.3.05 INSTALLATION OF TRIM AND ACCESSORIESA. Control Joints: Place control joints consistent with lines of building spaces and as indicated.1. Not more than 30 feet apart on walls over 50 feet long and in accordance with theDrawings.B. Corner Beads: Install at external corners, using longest practical lengths.C. Edge Trim: Install at locations where gypsum board abuts dissimilar materials and as indicated.04-27-11 GYPSUM BOARD ASSEMBLIES09260 -4
<strong>Buffalo</strong> <strong>Wild</strong> <strong>Wings</strong>3.06 FINISHING GYPSUM BOARDA. General: Tape and finish gypsum board surfaces, joints, interior angles, edge trim, controljoints, penetrations, fastener heads, surface defects, and elsewhere as required to preparegypsum board surfaces for final finish. Promptly remove residual joint compound from adjacentsurfaces.1. Apply materials strictly according to manufacturer's recommendations.2. Pre-fill open joints edges, and damaged surface areas.3. Apply joint tape over gypsum board joints, except those with trim having flanges notintended for tape.4. Finish joints to achieve uniformly smooth, true and satisfactory surface to receive paint orother scheduled finish material.5. Sand each coat, keeping sanding to a minimum to avoid raising nap on drywall board.B. Levels Gypsum Board Finish: as specified under ASTM C 840, and as summarized below:1. Level 0: (No Finish); Taping, finishing, and trim accessories, (cornerbeads, etc.) are notrequired.2. Level 1: (Tape set in compound); At joints and interior angles, embed the tape in the jointcompound. Panel surfaces must be free of excess joint compound, but tool marks andridges are acceptable.3. Level 2: (1 coat ); At joints and interior angles, embed the tape in the joint compound andimmediately apply the joint compound over the tape. Apply one coat of the joint compoundon fastener heads, and flanges of trim accessories. Panel surfaces must be free of excessjoint compound, but tool marks and ridges are acceptable.4. Level 3: (2 coat); At joints and interior angles, embed the tape in the joint compound andimmediately apply the joint compound over the tape. Apply one additional coat of the jointcompound over the tape. Apply two separate coats of the joint compound over fastenerheads and flanges of trim accessories. Panel surfaces and the joint compound must besmooth and free of tool marks and ridges.5. Level 4: (3 coat); At joints and interior angles, embed the tape in the joint compound andimmediately apply the joint compound over the tape. Apply two additional separate coats ofthe joint compound over flat joints. Apply one additional coat of the joint compound overinterior angles. Apply three separate coats of the joint compound over fastener heads andflanges of trim accessories. Panel surfaces and the joint compound must be smooth andfree of tool marks and ridges. "Drywall primer" must be applied to surfaces before applyingfinal decoration.6. Level 5: (Skim coat); Finish must be equal to Level 4 (embedding coat and three finishcoats) plus a skim coat over the entire gypsum board surface. Surfaces must be smoothand free of tool marks and ridges.a. Note: Level 5 is considered a high-quality gypsum board finish and is recommendedfor areas that will receive glossy paint or that are subject to severe lighting conditions.3.07 GYPSUM BOARD FINISH LEVEL SCHEDULEA. Level 1: Above finished ceilings concealed from view.B. Level 2: Utility areas and areas behind cabinetry.C. Level 4: Walls and ceilings scheduled to receive paint finish.END OF SECTION04-27-11 GYPSUM BOARD ASSEMBLIES09260 -5
<strong>Buffalo</strong> <strong>Wild</strong> <strong>Wings</strong>PART 1 GENERAL1.01 SECTION INCLUDESA. Cersmic Wall, Floor and Base Tile.B. Quarry Tile Floor and Base Tile.C. Mortar and Grout Materials.D. Accessory Materials.1.02 RELATED SECTIONSA. Section 07900 - Joint Sealers.SECTION 09300 - TILEB. Section 08710 - Hardware: Thresholds at doors.C. Section 09260 - Gypsum Board Assemblies: for wall substrate materials.1.03 REFERENCE STANDARDSA. ANSI A108 Series/A118 Series/A136.1 - American National Standard Specifications for theInstallation of Ceramic Tile (Compendium).1. ANSI A108.1a - American National Standard Specifications for Installation of Ceramic Tilein the Wet-Set Method, with Portland Cement Mortar.2. ANSI A108.1b - American National Standard Specifications for Installation of Ceramic Tileon a Cured Portland Cement Mortar Setting Bed with Dry-Set or Latex Portland CementMortar.3. ANSI A108.1c - Specifications for Contractors Option: Installation of Ceramic Tile in theWet-Set Method with Portland Cement Mortar or Installation of Ceramic Tile on a CuredPortland Cement Mortar Bed with Dry-Set or Latex Portland Cement Mortar.4. ANSI A108.5 - American National Standard Specifications for Installation of Ceramic Tilewith Dry-Set Portland Cement Mortar or Latex-Portland Cement Mortar.5. ANSI A108.6 - American National Standard Specifications for Installation of Ceramic Tilewith Chemical Resistant, Water Cleanable Tile-Setting and -Grouting Epoxy.6. ANSI A108.9 - American National Standard Specifications for Installation of Ceramic Tilewith Modified Epoxy Emulsion Mortar/Grout.7. ANSI A108.10 - American National Standard Specifications for Installation of Grout inTilework.8. ANSI A118.4 - American National Standard Specifications for Latex-Portland CementMortar.9. ANSI A118.7 - American National Standard Specifications for Polymer Modified CementGrouts for Tile Installation.10. ANSI A118.8 - American National Standard Specifications for Modified Epoxy EmulsionMortar/Grout.B. TCA (HB) - Handbook for Ceramic Tile Installation; Tile Council of North America, Inc.1.04 SUBMITTALSA. See Section 01300 - Administrative Requirements, for submittal procedures.B. Maintenance Data: Include recommended cleaning methods, cleaning materials, stain removalmethods, and polishes and waxes.1.05 QUALITY ASSURANCEA. Maintain one copy of TCA Handbook and ANSI A108 Series/A118 Series on site.B. Installer Qualifications: Company specializing in performing tile installation, with minimum of 5years of documented experience.04-27-11 TILE09300 -1
<strong>Buffalo</strong> <strong>Wild</strong> <strong>Wings</strong>1.06 FIELD CONDITIONSA. Maintain ambient and substrate temperature of 50 degrees F during installation of mortarmaterials.1.07 EXTRA MATERIALSA. Provide 10 sq. ft of each size, color, and surface finish of tile specified.B. Provide 1 gallon of each floor cleaner.1. Epoxy grout haze cleaner: Legsolve-it.2. Heavy grout and stain remover: Texspar and Texspar Plus.3. Floor cleaner/sealer: Floorshine R20.PART 2 PRODUCTS2.01 TILE SUPPLIER2.01 TILEA. Tile components in this section are to be furnished by the General Contactor through RBC Tile& Stone.RBC Tile & Stone1820 Berkshire Lane NorthPlymouth, MN 55441763-559-5531A. Ceramic Floor, Wall and Base Tile: (CT)1. (CT-1): 12” x 12” Floor and Wall Tile, Back Bay Iron Range, RBC # EQCP96-1212, Sparta.2. (CT-2): 6” x 12” Cove Base Tile, BWW Super Black Textured, RBC # BW9235-COVE12,Black.3. (CT2a): 1” x 6” Cove Base Out Corner, BWW Super Black Textured, RBC # BW9235-COVE12OC, Black.5. (CT-3): 4” x 4” Black Accent Tile, Back Bay BWW Accent #1, RBC # BB10890-44, Black.4. (CT-4): 4” x 4” Yellow Accent Tile, Back Bay BWW Accent #2, RBC # BB10380-44, Yellow.B. Quarry Tile Floor and Base Tile: (QT)1. (QT1): 6” x 6” Quarry Tile with abrasive surface, RBC # OT10A-66, Red.2. (QT2): 6” x 6” Quarry Tile Cove Base, RBC # 10-Q3565, Red.3. (QT2a): 6” x 6” Quarry Tile Cove Right Corner, RBC # 10-QCR3565, Red.4. (QT2b): 6” x 6” Quarry Tile Cove Left Corner, RBC # 10-QCL3565, Red.2.02 MORTAR MATERIALSA. Manufacturers:1. Bostik USA- Hydroment, 800-726-7845.B. Mortar Bond Coat Materials:1. Latex-Portland Cement type: ANSI A118.4.a. Hydroment – Single Flex Modified Thinset – Gray.2.03 GROUT MATERIALSA. Manufacturers:1. Bostik USA – Hydroment, 800-726-7845.B. Standard Grout: Polymer modified cement grout, sanded, as specified in ANSI A118.7.1. Hydroment Standard Sanded Grout.2. Color: Char Black, H139S-25.3. Location: Use for all Ceramic Tile.04-27-11 TILE09300 -2
<strong>Buffalo</strong> <strong>Wild</strong> <strong>Wings</strong>C. Epoxy Grout: as specified in ANSI A118.3, water-cleanable, high heat and chemical resistantmodified epoxy emulsion grout; use for floor and base applications in food preparation, bar andother areas as indicated on drawings.1. Hydroment Ezpoxy Grout.2. Color: Char Black, HY9300-404.3. Location: Use for all Quarry Tile.2.04 ACCESSORY MATERIALSA. Waterproof Membrane System: complying with ANSI A118.10 and ANSI A118.12.1. Laticrete: 9235 Waterproof Membrane System.2. Bostik USA: Hydroment Black Top 90210.B. Cement Backer Board: As specified in Section 09260.C. (T2) Trim:Transition Strips: use with carpet and tile.1. Schluter Systems, Reno-TK; Finish: Brushed Aluminum.D. (T3) Trim: Wall Corner Protection: use with tile in restrooms.1. Schluter Systems, Rondec RO 80 EB, brushed stainless finish.E. Cleaning Materials:1. Legge System: Walter G Legge Company, 444 Central Ave., Peekskill, NY 10566; 800-345-3443; www.leggesystems.coma. Cementitious grout haze cleaner: Legge Grout Stripper.b. Epoxy grout haze cleaner: Legsolve-it.c. Heavy grout and stain remover: Texspar and Texspar Plus.d. Floor cleaner/sealer: Floorshine R20.PART 3 EXECUTION3.01 EXAMINATIONA. Verify that wall surfaces are smooth and flat within the tolerances specified for that type of work,are dust-free, and are ready to receive tile.B. Verify that sub-floor surfaces are dust-free and free of substances that could impair bonding ofsetting materials to sub-floor surfaces.C. Verify that required floor-mounted utilities are in correct location.3.02 PREPARATIONA. Protect surrounding work from damage.B. Vacuum clean surfaces and damp clean.C. Seal substrate surface cracks with filler. Level existing substrate surfaces to acceptableflatness tolerances.D. Prepare substrate surfaces for adhesive installation in accordance with adhesive manufacturer'sinstructions.3.03 INSTALLATION - GENERALA. Install tile and thresholds and grout in accordance with applicable requirements of ANSI A108.1through A108.13, manufacturer's instructions, and TCA Handbook recommendations.B. Lay tile to pattern indicated. Do not interrupt tile pattern through openings.C. Place thresholds at exposed tile edges.D. Cut and fit tile to penetrations through tile, leaving sealant joint space. Form corners and basesneatly. Align floor, base, and wall joints.04-27-11 TILE09300 -3
<strong>Buffalo</strong> <strong>Wild</strong> <strong>Wings</strong>E. Place tile joints uniform in width, subject to variance in tolerance allowed in tile size. Make jointswatertight, without voids, cracks, excess mortar, or excess grout.F. Form internal angles square and external angles bullnosed.G. Install thresholds where indicated.H. Sound tile after setting. Replace hollow sounding units.I. Keep expansion joints free of adhesive or grout. Apply sealant to joints.J. Allow tile to set for a minimum of 48 hours prior to grouting.K. Grout tile joints.L. Clean tile using Legge system grout haze cleaning materials suitable for the grout type. Mixcleaning materials and apply in accordance with manufacturer's instructions using rotaryscrubber and wet/dry vacuum.M. Apply sealant to junction of tile and dissimilar materials and junction of dissimilar planes.3.04 INSTALLATION - FLOORS - THIN-SET METHODSA. Over interior concrete substrates, install in accordance with TCA Handbook Method F113, drysetor latex-portland cement bond coat, with standard grout, unless otherwise indicated below.1. Where waterproofing membrane is indicated, install in accordance with TCA HandbookMethod F122 with epoxy grout.2. Where epoxy grout is indicated, but not epoxy bond coat, install in accordance with TCAHandbook Method F115.3.05 INSTALLATION - WALL AND BASE TILEA. Install wall corner protection at outside corners of tiled walls in Restrooms.B. Over cement backer units on studs, install in accordance with TCA Handbook Method W244.1. Where adjacent floors are installed with waterproof membrane, wrap membrane 4 inchesup wall, behind base, and out from wall surface 16” unless noted otherwise. Use same tileinstallation method as for the floor.2. Use epoxy grout for base where adjacent floor installation uses epoxy grout.3.06 CLEANINGA. Clean tile and grout surfaces.B. Apply floor cleaner/sealer.3.07 PROTECTIONA. Do not permit traffic over finished floor surface for 4 days after installation.B. Provide two layers of kraft paper over all tile and grout on floors. Tape down and stagger seamsby half the width on second layer.END OF SECTION04-27-11 TILE09300 -4
<strong>Buffalo</strong> <strong>Wild</strong> <strong>Wings</strong>SECTION 09511 - SUSPENDED ACOUSTICAL CEILINGSPART 1 GENERAL1.01 SECTION INCLUDESA. Suspended metal grid ceiling system.B. Acoustical units.C. Egg Crate Ceiling Panel.1.02 REFERENCESA. ASTM A 641, Specification for Zinc-Coated (Galvanized) Carbon Steel Wire.B. ASTM C 635 - Standard Specification for the Manufacture, Performance, and Testing of MetalSuspension Systems for Acoustical Tile and Lay-in Panel Ceilings.C. ASTM C 636 - Standard Practice for Installation of Metal Ceiling Suspension Systems forAcoustical Tile and Lay-in Panels.D. ASTM E 580 - Standard Practice for Application of Ceiling Suspension Systems for AcousticalTile and Lay-in Panels in Areas Requiring Seismic Restraint.E. ASTM E 1264 - Standard Classification for Acoustical Ceiling Products.1.03 COORDINATIONA. Coordinate layout and installation of acoustical panels and suspension system with otherconstruction that penetrates ceilings or is supported by them, including light fixtures, HVACequipment, fire-suppression system, and partition assemblies.PART 2 PRODUCTS2.01 ACOUSTICAL UNITSA. Manufacturers:1. USG Corporation: www.usg.com.B. Acoustical Units - General: ASTM E 1264, Class A.C. (ACT1) Acoustical Panels: Vinyl faced gypsum board, with the following characteristics:1. Manufacturer and Product: USG ClimaPlus Vinyl, Stipple 3270.2. Size: 24 x 48 inches.3. Thickness: 1/2 inches.4. Composition: Vinyl facing bonded to smooth gypsum board.5. Edge: Square.6. Surface Color: White.7. Surface Pattern: Fine textured, non-perforated.D. (ACT2) Acoustical Panels: Vinyl faced gypsum board, with the following characteristics:1. Manufacturer and Product: USG ClimaPlus Vinyl, Stipple 3260.2. Size: 24 x 24 inches.3. Thickness: 1/2 inches.4. Composition: Vinyl facing bonded to smooth gypsum board.5. Edge: Square.6. Surface Color: White.7. Surface Pattern: Fine textured, non-perforated.04-27-11 SUSPENDED ACOUSTICAL CEILINGS09511 -1
<strong>Buffalo</strong> <strong>Wild</strong> <strong>Wings</strong>E. (ACT3) Acoustical Panels: Mineral fiber, ASTM E 1264 Type III, with the followingcharacteristics:1. Manufacturer and Product: USG, Radar ClimaPlus 2210.2. Size: 24 x 24 inches.3. Thickness: 5/8 inches.4. Composition: Wet felted.5. Edge: Square.6. Surface Color: White.7. Surface Pattern: Non-directional fissured.F. (ACT4) Acoustical Panels: Mineral fiber, ASTM E 1264 Type III, with the followingcharacteristics:1. Manufacturer and Product: USG, Radar ClimaPlus 2210.2. Size: 24 x 24 inches.3. Thickness: 5/8 inches.4. Composition: Wet felted.5. Edge: Square.6. Surface Color: Flat Black, No. 205.7. Surface Pattern: Non-directional fissured.2.02 SUSPENSION SYSTEMSA. (GRID1) Ceiling Suspension System: for (ACT1) and (ACT2); Light Duty grid system meetingrequirements of ASTM C 635 when suspended at 4'-0" o.c. Exposed tee-grid, double web,aluminum system with 15/16" wide bottom flange.1. Finish on Suspension System: Baked enamel.a. Colors: White.2. Edge Molding: Angle type wall molding with nominal 2" mounting flange by 1" face flangeand hemmed edges. Factory match suspension system finish.3. Hold Down Clips: Manufacturer’s standard.4. Acceptable Manufacturer’s and Products:a. USG; Donn AX Suspension System.B. (GRID2) Ceiling Suspension System: for (ACT3) and (ACT4); Intermediate Duty grid systemmeeting requirements of ASTM C 635 when suspended at 4'-0" o.c. Exposed tee-grid, doubleweb, hot-dipped galvanized, cold rolled steel system with 15/16" wide bottom flange.1. Finish on Suspension System: Baked enamel.a. Colors: White and Black No. 205, in locations to match panel color.2. Edge Molding: Angle type wall molding with 1" mounting flange by 2" face flange andhemmed edges. Factory match suspension system finish.3. Hold Down Clips: Manufacturer’s standard.4. Acceptable Manufacturer’s and Products:a. USG; Donn DX/DXL Double Web Grid System.2.03 EGG CRATE CEILING PANELA. Egg Crate Ceiling Panel: 1/2” x 1/2" x 3/8” thick, styrene plastic egg crate panel. 24” x 24”panel, Color Black.B. Manufacturers and Products:1. SLP Lighting; Tel. 800-248-0224; www.slplighting.com; TC500 black styrene eggcratelouver, 2 x 2.2. Intersource Specialties Company; 888-782-5011; www.intersourceco.com; Thincell TC –2 x 2 black styrene.3. Ridout Plastics Co, Inc.; 800-474-3688; www.eplastics.com; # B/EGG - .375 x 2 x 4 sheet,Black Styrene.4. Comparable products from other manufactures meeting specified requirements.04-27-11 SUSPENDED ACOUSTICAL CEILINGS09511 -2
<strong>Buffalo</strong> <strong>Wild</strong> <strong>Wings</strong>2.04 ACCESSORIESA. Support Channels and Hangers: Galvanized steel; size and type to suit application and ceilingsystem flatness requirement specified.B. Wire Hangers: Zinc-Coated, Carbon-Steel Wire: ASTM A641, Class 1 zinc coating, soft temper.C. Touch-up Paint: Type and color to match suspension system units.PART 3 EXECUTION3.01 EXAMINATIONA. Verify existing conditions before starting work.B. Verify that layout of hangers will not interfere with other work.3.02 INSTALLATION - SUSPENSION SYSTEMA. Install suspension system in accordance with ASTM C 636, ASTM E 580, and manufacturer'sinstructions and as supplemented in this section.B. Rigidly secure system, including integral mechanical and electrical components, for maximumdeflection of 1:360.C. Locate system on room axis according to reflected plan.D. Install after major above-ceiling work is complete. Coordinate the location of hangers with otherwork.E. Hang suspension system independent of walls, columns, ducts, pipes and conduit. Wherecarrying members are spliced, avoid visible displacement of face plane of adjacent members.F. Where ducts or other equipment prevent the regular spacing of hangers, reinforce the nearestaffected hangers and related carrying channels to span the extra distance.G. Do not support components on main runners or cross runners if weight causes total dead loadto exceed deflection capability.H. Support fixture loads using supplementary hangers located within 6 inches of each corner, orsupport components independently.I. Do not eccentrically load system or induce rotation of runners.J. Perimeter Molding: Install at intersection of ceiling and vertical surfaces and at junctions withother interruptions.1. Use longest practical lengths.2. Overlap and rivet corners.3.03 INSTALLATION - ACOUSTICAL UNITSA. Install acoustical units in accordance with manufacturer's instructions.B. Fit acoustical units in place, free from damaged edges or other defects detrimental toappearance and function.C. Fit border trim neatly against abutting surfaces.D. Install units after above-ceiling work is complete.E. Install acoustical units level, in uniform plane, and free from twist, warp, and dents.F. Cutting Acoustical Units:1. Make field cut edges of same profile as factory edges.04-27-11 SUSPENDED ACOUSTICAL CEILINGS09511 -3
<strong>Buffalo</strong> <strong>Wild</strong> <strong>Wings</strong>G. Where round obstructions occur, provide preformed closures to match perimeter molding.H. Install hold-down clips on panels within 20 ft of public entrance and exit exterior doors.3.04 ERECTION TOLERANCESA. Maximum Variation from Flat and Level Surface: 1/8 inch in 10 feet.B. Maximum Variation from Plumb of Grid Members Caused by Eccentric Loads: 2 degrees.3.05 CLEANINGA. Clean exposed surfaces of acoustical panel ceilings, including trim, edge moldings, andsuspension system members.1. Comply with manufacturer's written instructions for cleaning and touchup of minor finishdamage.B. Remove and replace ceiling components that cannot be successfully cleaned and repaired topermanently eliminate evidence of damage.END OF SECTION04-27-11 SUSPENDED ACOUSTICAL CEILINGS09511 -4
<strong>Buffalo</strong> <strong>Wild</strong> <strong>Wings</strong>SECTION 09650 - RESILIENT FLOORINGPART 1 GENERAL1.01 SECTION INCLUDESA. Vinyl base.1.02 REFERENCESA. ASTM F 1861 - Standard Specification for Resilient Wall Base.PART 2 PRODUCTS2.01 MATERIALSA. (RB) Resilient Base; ASTM F 1861, Type TV, vinyl, thermoplastic; top set Style A, covedbase.1. Height: 6 inch.2. Thickness: 0.125 inch thick.3. Color: Black.4. Manufacturers:a. BurkeMercer Flooring Products: www.burkemercer.comb. Johnsonite, Inc: www.johnsonite.comc. Roppe Corp: www.roppe.comd. Armstrong: www.ceilings.come. VPI: www.vpicorp.com2.02 ACCESSORIESA. Resilient Base Adhesive: As recommended by material manufacturer for specific material,location and intended use.1. VPI No. 600 Acrylic Copolymer Wall Base Adhesive or comparable product from the otherspecified base manufacturers.PART 3 EXECUTION3.01 EXAMINATIONA. Verify that surfaces are smooth and flat and are ready to receive vinyl base.3.02 INSTALLATION - BASEA. Fit joints tightly and make vertical. Maintain minimum dimension of 18 inches between joints.B. Miter internal corners. At external corners, use pre-molded units. At exposed ends, use premoldedunits.C. Install base on solid backing. Bond tightly to wall and floor surfaces.D. Scribe and fit to door frames and other interruptions.3.03 CLEANINGA. Immediately after installation, remove excess adhesive from floor, base, and wall surfaceswithout damage.END OF SECTION04-27-11 RESILIENT FLOORING09650 -1
<strong>Buffalo</strong> <strong>Wild</strong> <strong>Wings</strong>PART 1 GENERAL1.01 SECTION INCLUDESSECTION 09666 - SPECIALTY FLOORINGA. Specialty resilient vinyl flooring with heat welded seams and cove base.1.02 SUBMITTALSA. See Section 01300 - Administrative Requirements, for submittal procedures.B. Product Data: Submit manufacturer's product data and installation instructions for watertightapplication.C. Maintenance Data: Include maintenance procedures, recommended maintenance materials,and suggested schedule for cleaning.D. Manufacturer installation instructions for watertight applications along with required accessories.1.03 REFERENCESA. ASTM G-21 Bacteria & Mildew Resistance ExcellentB. ASTM D-751 Breaking Strength (md) 405#C. ASTM D-751 Breaking Strength (cmd) 723#D. ASTM D-2407 Coefficient of Friction (avg) Dry.88E. ASTM D-695 Compressive Strength @ 20% Deformation 641 psiF. ASTM D-751 Elongation (md) 76.5%G. ASTM D-751 Elongation (cmd) 88.5%H. ASTM E-648 Critical Radiant Flux 1.052/cm2I. ASTM E-648 Burn Distance 12 cmJ. Shore A Hardness 80-85 avgK. ASTM D-751 Tear Strength (md) 76.5#L. ASTM D-751 Tear Strength (cmd) 84#M. NFSI UWT-101A Coefficient of Friction Standard >.061.04 QUALITY ASSURANCEA. Contractor will assure the compliance with 2.03 Job Conditions to allow for proper installation.B. Comply with governing codes and regulations.C. Use installers experienced in heat welding Protect-All flooring and approved by manufacturer.D. Manufacturer's product warranty shall be for a minimum of 10 years coverage.04-27-11 SPECIALTY FLOORING09666 -1
<strong>Buffalo</strong> <strong>Wild</strong> <strong>Wings</strong>PART 2 PRODUCTS2.01 MANUFACTURERA. Oscoda Plastics: 5585 N. Huron Ave. P.O. Box 189 Oscoda, MI 487502.02 MATERIALSPhone 800.544.9538Fax 989.739.1494e-mail: sales@oscodaplastics.comwww.oscodaplastics.comA. (SPFL): Specialty Flooring: Protect-All® Specialty Flooring as Manufactured by OscodaPlastics®, Inc.1. Protect-All® Specialty Flooring by Oscoda Plastics®, Inc. Sheets 5' x 5' or 5' x 8' x 1/4”thick in color chosen from manufacturer's samples.a. Finish: Matte finish.b. Color: Light Gray.2. Accessories:a. Protect-All® # 127 / # 139 Epoxy Adhesive.b. Protect-All Seam Welding Rod.c. Protect-All® 6” Cove Base and Preformed Corners.d. Protect-All® Aluminum Cove Base Cap.e. Stainless Steel Drain Rings As Provided By Protect-All®.f. Sealant provided by Protect-All®.g. Other installation materials as required and supplied by Oscoda Plastics®, Inc.2.03 VERIFICATION OF JOB CONDITIONSA. Proper substrate.1. Assure that the substrate material / system is suitable for installation of flooring asindicated by manufacturer.2. Follow recommendations for the use of curing compounds in concrete sub floors.3. If required, the installer will verify complete removal of existing finishes to the extent thatproper adhesion will occur.4. Verify a clean and dry surface to accept adhesive.5. Use only Portland based patching / filling compounds.6. Assure that the levelness and smoothness of surface is in compliance with manufacturerguidelines.7. Verify that concrete sub-floor surfaces are ready for resilient flooring installation by testingfor moisture emission rate and alkalinity in accordance with ASTM F 710; obtaininstructions if test results are not within limits recommended by resilient flooringmanufacturer and adhesive materials manufacturer. Reference ASTM F 710 - StandardPractice for Preparing Concrete Floors to Receive Resilient Flooring.B. Environmental Conditions.1. The contractor and installer of product shall be responsible for providing and maintaining aproper installation environment.2. Installation area must be enclosed and watertight with all walls, wall finishes, doors andfloor penetrations in place.3. Proper acclimation of flooring material is required prior to installation. Minimum of 48 hours.4. Assure confinement of space during installation and curing of adhesives to prevent othertrades from damaging the product or compromising the adhesion.5. Maintain a constant temperature during installation and throughout the curing of adhesives.6. Provide a secure area to store materials for installation.04-27-11 SPECIALTY FLOORING09666 -2
<strong>Buffalo</strong> <strong>Wild</strong> <strong>Wings</strong>C. Proper Drain and Other Floor Penetration Elevations.1. All drains to be installed level and 1/8” above surface of sub-floor.2. When “dishing” of drain area is specified, the “dish” should not be less than 12” in diameterand more than 1” in depth. Drain to be 1/8” above floor surface.3. All other penetrations should be installed 1/8” above surface and provide accommodationfor proper sealant.4. Penetrations not terminating at floor surface shall be a minimum of 6” above the surface offloor and be installed in such a way as to not interfere with the installation of the flooring orthe base material and allow adequate space for sealant to be applied to the entireperimeter.PART 3 EXECUTION3.01 INSTALLATIONA. Install specialty flooring per manufacturer's installation requirements and recommendations.Assure proper conditions for successful performance and installation.B. Follow manufacturer recommendations for laying out sheets.C. Flooring shall be cut to within 1/8” of penetrations.D. Adhere the floor material using manufacturer's recommended adhesive for the particularsubstrate type / job conditions and in compliance with spread rate and proper trowel size. Rollfloor into adhesive with 100# roller per manufacturer directions.E. Install stainless steel drain rings around all drains and other surface penetrations. Rings are tobe routed into floor surface and mounted flush with top of flooring. Secure drain rings usingstainless steel fasteners and lead anchors that will properly anchor the ring to the substrate.F. Install cove base as recommended by manufacturer with proper adhesive and top sealant.Heat-weld all seams.G. Install aluminum cove base cap fastening to wall a minimum of 8” on center using non -corrosive fasteners that are compatible to secure to wall type.H. Heat-weld all field material seams using manufacturer's welding rod using proper tools andinstallation methods as approved by manufacturer.I. Transitions in doorways will have stainless steel transitions as provided by manufacturer andwill be routed flush with surface of sheet and fastened 6” on center using stainless steelfasteners and lead anchors.J. All exposed edges are to be sealed with manufacturer's recommended sealant to assure awater tight seal.3.02 CLEANINGA. Sweep-clean the floor after installation and clear area of scrap materials. Installer shall providetwo copies of manufacturer cleaning recommendations for contractor and owner use.END OF SECTION04-27-11 SPECIALTY FLOORING09666 -3
<strong>Buffalo</strong> <strong>Wild</strong> <strong>Wings</strong>SECTION 09680 - CARPETPART 1 GENERAL1.01 SECTION INCLUDESA. Carpet, direct-glued.B. Carpet base.C. Accessories.1.02 RELATED SECTIONSA. Section 09300 - Tile: for metal floor transitions from carpet to tile.1.03 REFERENCESA. CRI 104 - Standard for Installation of Commercial Textile Floorcovering Materials; Carpet andRug Institute.1.04 QUALITY ASSURANCEA. Installer Qualifications: Company specializing in installing carpet with minimum three yearsexperience.1.05 ENVIRONMENTAL REQUIREMENTSA. Store materials in area of installation for minimum period of 24 hours prior to installation.B. Maintain minimum 70 degrees F ambient temperature 24 hours prior to, during and 24 hoursafter installation.C. Ventilate installation area during installation and for 72 hours after installation.PART 2 PRODUCTS2.01 CARPET MATERIALSA. (CPT1): Carpet: Custom Carpet for <strong>Buffalo</strong> <strong>Wild</strong> <strong>Wings</strong>.1. Mohawk, Broadloom, BWW 50545-37907.B. (Carpet Base): 6” high carpet base with hemmed top edges. Provide lengths required to carpetvendor.1. Mohawk, Broadloom, Spectrum V, BC246; Color: XJ7234, Black.2.02 ACCESSORIESA. Sub-Floor Filler: Type recommended by carpet manufacturer.B. Adhesives:1. Seam Adhesive: Recommended by manufacturer.2. Contact Adhesive: For concrete substrate as recommended by carpet manufacturer.PART 3 EXECUTION3.01 EXAMINATIONA. Verify carpet backing and installation method used in the existing areas to be patched andmatched. Notify Architect if installation method varies from that specified.B. Verify that sub-floor surfaces are dust-free and free of substances which would impair bondingof adhesives to sub floor surfaces.04-27-11 CARPET09680 -1
<strong>Buffalo</strong> <strong>Wild</strong> <strong>Wings</strong>3.02 PREPARATIONA. Concrete substrate:1. Remove sub-floor ridges and bumps.2. Apply, trowel, and float filler to achieve smooth, flat, hard surface. Prohibit traffic until filleris cured.3. Clean substrate.3.03 INSTALLATION - GENERALA. Install carpet in accordance with manufacturer's instructions and CRI 104.B. Verify carpet match before cutting to ensure minimal variation between dye lots.C. Lay out carpet:1. Locate seams in area of least traffic, out of areas of pivoting traffic, and parallel to maintraffic.2. Do not locate seams perpendicular through door openings.3. Align run of pile in same direction as anticipated traffic and in same direction on adjacentpieces.4. Locate change of color or pattern between rooms under door centerline.5. Provide monolithic color, pattern, and texture match within any one area.D. Install carpet tight and flat on subfloor, well fastened at edges, with a uniform appearance.E. Coordinate with installation of metal floor Transition Strip, (T2), as specified under Section09300 – Tile.3.04 DIRECT-GLUED CARPETA. Double cut carpet seams, with accurate pattern match. Make cuts straight, true, and unfrayed.Apply seam adhesive to cut edges of woven carpet immediately.B. Apply adhesive to floor uniformly at rate recommended by manufacturer. After sufficient opentime, press carpet into adhesive.C. Apply seam adhesive to the base of the edge glued down. Lay adjoining piece with seamstraight, not overlapped or peaked, and free of gaps.D. Roll with appropriate roller for complete contact of adhesive to carpet backing.E. Trim carpet neatly at walls and around interruptions.F. Complete installation of edge strips, concealing exposed edges.3.05 CARPET BASE INSTALLATIONA. Adhesively apply carpet base with hemmed edges up, to wall surface after floor carpet isinstalled. Fit joints tightly together.3.06 CLEANINGA. Remove excess adhesive from floor and wall surfaces without damage.B. Clean and vacuum carpet surfaces.END OF SECTION04-27-11 CARPET09680 -2
<strong>Buffalo</strong> <strong>Wild</strong> <strong>Wings</strong>SECTION 09720 - WALL COVERINGPART 1 GENERAL1.01 SECTION INCLUDESA. Installation of sheet linoleum wall covering in prefabricated panels.B. Panels prefabricated furnished by Owner's vendor.1.02 ENVIRONMENTAL REQUIREMENTSA. Do not apply materials when surface and ambient temperatures are outside the temperatureranges required by the adhesive or wall covering product manufacturer.B. Maintain these conditions 24 hours before, during, and after installation of adhesive and wallcovering.PART 2 PRODUCTS2.01 MANUFACTURERA. Forbo Flooring.2.02 MATERIALSA. (WC1): Forbo Marmoleum, Linoleum Wall Covering, conforming to the following:1. Pattern: Marmoleum Real.2. Color: #2939, Black.3. Adhesive: Type recommended by wall covering manufacturer to suit application tosubstrate.4. Substrate: 1/4 inch thick hardboard. Wall covering sheet mounted to substrate by Owner’sMillwork Vendor, installation by GC.A. (T4) Trim: Corner Guard; 1-1/2” x 1-1/2” x length as required, PVC corner guard.1. Color: Black.2. Locations: Outside corners of WC1 panels.3. Furnished by Owner’s Millwork Vendor, installation by GC.PART 3 EXECUTION3.01 EXAMINATIONA. Verify that substrate surfaces are prime painted and ready to receive work, and conform torequirements of the wall covering manufacturer.3.02 INSTALLATIONA. Install wallcovering panels with adhesive and hidden mechanical fasteners.B. Horizontal seams are not acceptable.C. Do not seam within 2 inches of internal corners or within 6 inches of external corners.3.03 CLEANINGA. Clean wall coverings of excess adhesive, dust, dirt, and other contaminants.B. Reinstall wall plates and accessories removed prior to work of this section.END OF SECTION04-27-11 WALL COVERING09720 -1
<strong>Buffalo</strong> <strong>Wild</strong> <strong>Wings</strong>SECTION 09900 - PAINTS AND COATINGSPART 1 GENERAL1.01 SECTION INCLUDESA. Surface preparation.B. Field application exterior and interior painting systems.1.02 RELATED SECTIONSA. Section 04810 - Face Brick (FBR) for paint color match.B. Section 05120 - Structural Steel: Shop-primed items.C. Section 05210 - Metal Joists: Shop-primed items.D. Section 05310 - Metal Deck: Shop-primed items.E. Section 05500 - Metal Fabrications: Shop-primed items.F. Section 06100 - Rough Carpentry: Factory primed Fiber Cement Siding and Trim.G. Section 07240 - (EIFS1) for paint color match.H. Section 08211 - Flush Wood Doors: Field finished wood doors.I. Section 09900 - Gypsum Board Assemblies.1.03 REFERENCESA. U.S. Environmental Protection Agency (EPA):40 CFR 59, Subpart D - National Volatile Organic Compound Emission Standards forArchitectural Coatings.B. American Society for Testing and Materials (ASTM):1. ASTM D 16 - Standard Terminology for Paint, Related Coatings, Materials, andApplications.2. ASTM D523: Standard Test Method for Specular Gloss.C. Master Painters Institute (MPI): www.paintinfo.comD. Painting and Decorating Contractors of America (PDCA):1. PDCA P4: Responsibilities for Inspection and Acceptance of Surfaces Prior to Painting andDecorating.1.04 DEFINITIONSA. Paint: Paint system materials, including primers, emulsions, enamels, stains, sealers and fillers,and other applied materials whether used as primer, intermediate or finish coats, and of variousdegrees of opacity or sheen.B. Sheen: Specular gloss of paint finish as determined in accordance with The Master PaintersInstitute (MPI), Guide for use in Defining Gloss and Sheen Levels.1. Flat: refers to a lusterless or matte finish; MPI Classification “Gloss Level 1”.a. Gloss range below 5 units when measured at an 60-degree meter.b. Gloss range below 10 units when measured at an 85-degree meter.2. Eggshell: refers to low-sheen finish; MPI Classification “Gloss Level 2”.a. Gloss range below 10 units when measured at an 60-degree meter.b. Gloss range between 10 and 35 when measured at a 85-degree meter.3. Satin: refers to low-sheen finish; MPI Classification “Gloss Level 4”.a. Gloss range between 20 and 35 when measured at a 60-degree meter.b. Gloss range 35 units minimum when measured at an 85-degree meter.04-27-11 PAINTS AND COATINGS09900 -1
<strong>Buffalo</strong> <strong>Wild</strong> <strong>Wings</strong>4. Semigloss: refers to medium-sheen finish; MPI Classification “Gloss Level 5”.a. Gloss range between 35 and 70 when measured at a 60-degree meter.5. Full Gloss: refers to high-sheen finish; MPI Classification “Gloss Level 6”.a. Gloss range between 70 and 85 when measured at a 60-degree meter.C. Paint System (PS#): Two or more coats of paint, generally consisting of a prime coat and oneor more coats of finish paint.1. Paint system includes surface preparation and required pre-treatment.D. Color (C#): Identified by a number after an abbreviation "C".1.05 SUBMITTALSA. See Section 01300 - Administrative Requirements, for submittal procedures.B. Color Samples: Submit for approval (2) two paper-backed samples, standard draw-down type,of each color and sheen combination indicated. Samples will be reviewed for sheen as well asfor color.1. Clear or semi-transparent wood finishes if specified: Submit on wood specified, as acomplete system with stain if any.C. Product Data: For each paint system indicated. Include primers and miscellaneous materials.1. Material List: An inclusive list of required coating materials.a. Indicate each material and cross-reference specific coating, finish system, andapplication.b. Identify each material by manufacturer's catalog number and general classificationand color number.2. Manufacturer's Information: Manufacturer's technical information, including label analysisand instructions for handling, storing, and applying each coating material.1.06 QUALITY ASSURANCEA. Applicator's Qualifications: Firm experienced in application or installation of systems similar incomplexity to those required for this Project.B. Regulatory Requirements: Products must meet current local and federal VOC requirements.C. Product Identification: Provide manufacturer's product identification on product containers sameas that on final material list. In addition, provide color identification, analysis of contents,instructions for application and for reducing (if applicable) on containers.1.07 DELIVERY, STORAGE, AND PROTECTIONA. Deliver products to site in sealed and labeled containers; inspect to verify acceptability.B. Container Label: Include manufacturer's name, type of paint, brand name, lot number, brandcode, coverage, surface preparation, drying time, cleanup requirements, color designation, andinstructions for mixing and reducing.C. Paint Materials: Store at minimum ambient temperature of 45 degrees F and a maximum of 90degrees F, in ventilated area, and as required by manufacturer's instructions.1.08 PROJECT CONDITIONSA. Environmental Requirements: Comply with manufacturer's recommendations for conditionsunder which paint systems can be applied, and the following:1. Maintain ambient temperature above 50 degrees F. during and 72 hours after installation.2. Apply water-borne paints when the temperature of surfaces to be painted and surroundingair temperature is between 50 degrees F. and 90 degrees F.3. Apply solvent-thinned paints only when the temperature of surfaces to be painted and thesurrounding air temperature is between 45 degrees F. and 95 degrees F.04-27-11 PAINTS AND COATINGS09900 -2
<strong>Buffalo</strong> <strong>Wild</strong> <strong>Wings</strong>4. Do not apply paint in precipitation, fog or mist, when relative humidity exceeds 85 percent,or at temperatures less than 5 degrees F. above dew point, or to damp or wet surfaces.B. Do not apply paint systems in areas where dust is being generated.C. Do not apply coatings until moisture content of surface is within limitations recommended bypaint manufacturer. Test with a moisture meter.D. Provide minimum lighting level of 80 ft candles measured mid-height at substrate surface.1.09 EXTRA MATERIALSA. See Section 01600 - Product Requirements, for additional provisions.B. Extra Materials: Furnish (1) one gallon of each color for all major substrates for use by Owner.1. Label each container with substrate and color in addition to the manufacturer's label.2. Before Substantial Completion of Work, deliver extra materials to Project and store wheredirected.PART 2 PRODUCTS2.01 MANUFACTURERSA. Primers and Paints: Sherwin Williams Co. www.sherwin-williams.comB. Transparent Finishes: Minwax Co. www.minwax.com2.02 COLORSA. All color numbers are from Sherwin Williams unless noted otherwise.1. (C1): Color to match Ralph Lauren NA-36, “Steeple Chase”, Satin,SW: Color Accents Custom Formula:(B1)2Y41, (W1)10/32, (N1)2Y13+1, (R2)9/32, (Y3)41+012. (C2): SW #6328, “Fireweed”, Satin3. (C3): SW #6683, “Bee”, Satin4. (C4): SW #6991, “Black”, Flat5. (C5): SW #6991, “Black Magic”, Satin6. (C6): SW #7006, “Extra White”, Satin7. (C7): SW #6683, “Bee”, Gloss8. (C8): SW #6991, “Black Magic”, Semi-Gloss9. (C9): SW #7055, “Enduring Bronze”, Semi-GlossColor to match Face Brick (FBR1) color, refer to Section 04810.10. (C10): SW #6117, “Smoky Topaz”, Semi-GlossColor to match (EIFS1) color, refer to Section 07240.11. (C11): SW #7055, “Enduring Bronze”, Semi-Gloss Epoxy.12. (C12): SW #7006, “Extra White”, Semi-Gloss Epoxy13. (C13): SW #6898, “Social Butterfly”, Satin, Color match for (EIFS2).14. (C14): Clear Finish, Polyurethane Satin, Wood Doors.2.03 MATERIALSA. Material Compatibility: Provide primers, and finish-coat materials that are compatible with oneanother, with factory-applied primers and with the substrates indicated under conditions ofservice and application, as demonstrated by manufacturer based on testing and field experience.B. Material Quality: Provide manufacturer's specified paint material of the various coating typesthat are factory formulated and recommended by manufacturer for application indicated. Paintmaterial containers not displaying manufacturer's product identification are not acceptable.04-27-11 PAINTS AND COATINGS09900 -3
<strong>Buffalo</strong> <strong>Wild</strong> <strong>Wings</strong>C. Volatile Organic Compound (VOC) Content:1. Provide coatings that comply with the most stringent requirements specified in thefollowing:a. 40 CFR 59, Subpart D--National Volatile Organic Compound Emission Standards forArchitectural Coatings.2. Determination of VOC Content: Testing and calculation in accordance with 40 CFR 59,Subpart D (EPA Method 24), exclusive of colorants added to a tint base and water addedat project site; or other method acceptable to authorities having jurisdiction.2.04 MIXINGA. Mix and thin materials according to manufacturer's instructions without modification. Usepremixed paints insofar as possible. Thin only as permitted by manufacturer's label instructions,and avoid unnecessary thinning.B. Primer Tint: Tint each undercoat a lighter shade to simplify identification of each coat whenmultiple coats of same material are applied. Tint undercoats to match the color of the finishcoat, but provide sufficient differences in shade of undercoats to distinguish each separate coat.2.05 ACCESSORY MATERIALSA. Accessory Materials: Sealers, turpentine, paint thinners and other materials not specificallyindicated but required to achieve the finishes specified; commercial quality.B. Patching Material: Latex filler.C. Fastener Head Cover Material: Latex filler.PART 3 EXECUTION3.01 EXAMINATIONA. Verification of Conditions: Examine substrates, areas, and conditions, with Applicator present,for compliance with requirements for paint application. Comply with procedures specified inPDCA P4.1. Proceed with paint application only after unsatisfactory conditions have been corrected andsurfaces receiving paint are thoroughly clean and dry.2. Start of painting will be construed as Applicator's acceptance of surfaces and conditionswithin a particular area.B. Coordination of Work: Examine factory finished and primed surfaces to be painted, and verifycompatibility of existing material with paint to be applied.1. Report incompatible or unsuitable materials immediately that may potentially affect properapplication.3.02 PREPARATIONA. Protection: Protect surfaces not being painted concurrently, or surfaces not to be painted,property of Owner, and finished Work of other trades.1. Remove device plates, hardware, light fixture trim, escutcheons, and similar removableitems before painting. Reinstall items after final coat of paint has dried.2. Apply masking over UL labels and other items that cannot be removed before paintingsurface.3. Cover floors and fixed equipment with drop cloths.4. Remove protective coverings and masking when painting of surfaces is complete.3.03 PREPARATION OF NEW SURFACESA. General:1. Clean and prepare surfaces according to paint manufacturer's written instructions forspecific substrate.04-27-11 PAINTS AND COATINGS09900 -4
<strong>Buffalo</strong> <strong>Wild</strong> <strong>Wings</strong>2. Mildew Removal: Remove mildew by scrubbing with solution of tetra-sodium phosphateand bleach. Rinse with clean water and allow surface to dry.3. Apply paint only to surfaces which are thoroughly dry, clean, and free of dust and properlyprepared to receive intended finish.B. Concrete: Remove dirt, scale, powder, laitance, parting compounds, oil and grease. For cast-inplacework, allow at least 14 days (after forms are removed) before starting work.1. Removal of stains caused by weathering or corroding metals: Wash with sodiummetasilicate solution after thoroughly wetting with potable water and allow to dry. Removeoil and grease with a solution of tri-sodium phosphate; rinse well and allow to dry.2. Filling surface pock marks and air holes: Fill with an approved exterior latex base primeand fill material. Thoroughly brush or rub over surface. Let dry for not less than 24 hoursbefore painting.3. Do not paint surfaces if moisture content or alkalinity of surfaces to be painted exceedsthat permitted in manufacturer's written instructions.C. Concrete Masonry Units: Remove dirt, loose mortar, scale, efflorescence or powder.1. Removal of stains caused by weathering or corroding metals: Wash with sodiummetasilicate solution after thoroughly wetting with potable water and allow to dry.2. Thoroughly brush or rub specified block filler over concrete masonry units to fill all pockmarks, air holes and other surface imperfections. Rub excess filler off surfaces and allowfiller to dry for not less than 24 hours before painting.3. Do not paint surfaces if moisture content or alkalinity of surfaces to be painted exceedsthat permitted in manufacturer's written instructions.D. Unprimed Steel and Iron Surfaces: Remove oil, grease, dirt, loose mill scale, rust, and otherforeign substances. Use solvent or mechanical cleaning methods that comply with SSPC'srecommendations. Where heavy coatings of scale are evident, remove by hand wire brushing orsandblasting; clean by washing with solvent. Immediately apply prime coat.E. Shop Primed Steel and Iron Surfaces: Touch up bare areas and shop-applied prime coats thathave been damaged. Sand and scrape to remove loose primer and rust. Feather edges to maketouch-up patches inconspicuous. Clean surfaces with solvent. Prime bare steel surfaces.F. Galvanized Surfaces: Remove grease and oil residue from galvanized sheet metal fabricatedfrom coil stock by mechanical methods to produce clean, lightly etched surfaces that promoteadhesion of subsequently applied paints.G. Aluminum: Remove surface contamination by steam, high pressure water, or solvent washing.Apply specified primer.H. Fiber Cement Siding and Trim: Sand factory primed surfaces, as necessary to remove surfacedefects. Wipe off surfaces to remove dust and dirt.1. Fill voids and nail holes with putty after installation. Sand filler smooth, level with surface.2. Prime cut edges and cutouts with specified primer. Touch-up bare spots in factory primeras necessary.I. Wood Products to Receive Paint Finish: Wipe off dust and minor grit prior to prime andsubsequent coats. Spot coat knots, pitch streaks, and sappy sections with sealer. Prior to itsinstallation, apply backprime to exterior and interior woodwork as specified. Fill nail holes andfine cracks after primer has dried, sand filler smooth, level with surface.J. Wood Products to Receive Clear Finish: Sand, as necessary to remove surface defects, andremove dust.1. After stain is applied, set and fill exposed fastener heads with matching color filler. Sandsmooth and level with surface, when dry.2. Back-prime non-exposed surfaces with sealer.3. Note: Seal top and bottom edges of wood doors with 2 coats of sealer.04-27-11 PAINTS AND COATINGS09900 -5
<strong>Buffalo</strong> <strong>Wild</strong> <strong>Wings</strong>K. Gypsum Wallboard: Fill minor irregularities in gypsum board surface with joint compound. Sandsmooth, level with surface, when dry. Avoid raising nap of paper. Remove dust prior to painting.L. Mechanical and Electrical Work: Prepare metal surfaces as specified for steel, galvanizedmetal, aluminum, as applicable to type of material scheduled to be painted.3.04 APPLICATIONA. Apply materials according to manufacturer's instructions. Apply each coat at rate recommendedby manufacturer for the type of surface and with a dry film thickness not less than thatrecommended.B. Apply each coat to uniform appearance. If undercoats or other conditions show throughtopcoat, apply additional coats until cured film has a uniform paint finish, color, and appearance.C. Do not apply finishes to surfaces that are not dry. Allow applied coats to dry before next coat isapplied.D. Vacuum clean surfaces of loose particles. Use tack cloth to remove dust and particles just priorto applying next coat.3.05 FINISHING MECHANICAL AND ELECTRICAL WORKA. Mechanical and Electrical: Use paint systems defined for the substrates to be finished.1. Paint all insulated and exposed pipes, conduit, boxes, insulated and exposed ducts,hangers, brackets, collars and supports, mechanical equipment, and electrical equipmentoccurring in finished areas to match background surfaces, unless otherwise indicated.2. Paint shop-primed items occurring in finished areas.3.06 CLEANING AND PROTECTIONA. At end of each workday, remove rubbish, empty cans, rags, and other discarded materials fromProject site.B. After completing paint application, clean spattered surfaces. Remove spattered paints bywashing, scraping, or other methods. Do not scratch or damage adjacent finished surfaces.C. Protect work of other trades against damage from paint application. Correct damage to work ofother trades by cleaning, repairing, replacing, and refinishing, and leave in an undamagedcondition.D. At completion of construction activities of other trades, touch up and restore damaged ordefaced painted surfaces.3.07 PAINTING SCHEDULES - GENERALA. Painting schedules outline the primary paint systems required. For substrates and conditionsnot scheduled, provide paint systems recommended by paint manufacturers. Submit proposedpaint material product data for approval.B. Location and colors related to paint systems specified herein are indicated on Drawings.C. Do Not Paint or Finish the Following Items:1. Items fully factory-finished unless specifically noted.2. Fire rating labels, equipment serial number and capacity labels.04-27-11 PAINTS AND COATINGS09900 -6
<strong>Buffalo</strong> <strong>Wild</strong> <strong>Wings</strong>3.08 PAINT SYSTEMS SCHEDULE Indicated as (PS#)EXTERIOR PAINT SYSTEMSPS-1: Concrete and Concrete Block; Epoxy Semi-Gloss Finish.Primer: 1 coat, SW: “Loxon” Block Surfacer, A24W200.Finish: 2 coats, SW: Pro Industrial High-Bild Catalyzed Epoxy, Semi-Gloss, B71 Series.PS-2: Fiber Cement Siding; Epoxy Semi-Gloss Finish.Primer: 1 coat, SW: “Loxon” Concrete & Masonry Primer, A24W8300.Finish: 2 coats, SW: Pro Industrial High-Bild Catalyzed Epoxy, Semi-Gloss, B71 Series.PS-3: Fiber Cement Siding; Satin Finish.Primer: 1 coat, SW: “Loxon” Concrete & Masonry Primer, A24W8300.Finish: 2 coats, SW: Pro Industrial Zero VOC Acrylic, Eg-Shel, B66-660.PS-4: Steel / Galvanized Steel; Semi-Gloss Finish.Primer: 1 coat, SW: Pro Industrial “Pro-Cryl” Universal Primer, B66-310.Finish: 2 coats, SW: Pro Industrial Zero VOC Acrylic, Semi-Gloss, B66-650.PS-5: Steel / Galvanized Steel; Gloss Finish.Primer: 1 coat, SW: Pro Industrial “Pro-Cryl” Universal Primer, B66-310.Finish: 2 coats, SW: Pro Industrial Zero VOC Acrylic, Gloss, B66-600.PS-6: Steel / Galvanized Steel; Epoxy Semi-Gloss Finish.Primer: 1 coat, Pro Industrial “Pro-Cryl” Universal Primer, B66-310.Finish: 2 coats, SW: Pro Industrial High-Bild Catalyzed Epoxy, Semi-Gloss, B71 Series.PS-7: Exterior Wood Sheathing; Epoxy Semi-Gloss Finish.Primer: 1 coat, SW: Multi-Purpose Latex Primer, B51-8000.Finish: 2 coat, SW: Pro Industrial High-Bild Catalyzed Epoxy, Semi-Gloss, B71 Series.Exterior Paint System Notes:1. Gas Piping: Paint exterior gas piping that runs on face of walls or exposed to view, thecolor of the surrounding substrate. Paint gas piping on roof, (C7) “Bee” unless localcode requires another color.INTERIOR PAINT SYSTEMSPS-15: Gypsum Board; Satin Finish.Primer: 1 coat, ProMar 200 Interior Latex Primer, B28W8200.Finish: 2 coats, SW: ColorAccents Interior Latex Satin, Y38T-154.PS-16: HM Frames and Doors; Satin Finish.Primer: 1 coat, Pro Industrial “Pro-Cryl” Universal Primer, B66-310.Finish: 2 coats, SW: ColorAccents Interior Latex Satin, Y38T-154.PS-17: Steel, Dry Fall, Flat Finish.Primer: 1 coat, SW: Pro Industrial “Pro-Cryl” Universal Primer, B66-310.Finish: 2 coats, SW: Low VOC Waterborne Acrylic Dry Fall, Flat Back, B42B00081.PS-18: Wood, Paint, Satin Finish.Primer: 1 coat, SW: Multi-Purpose Latex Primer, B51-8000.Finish: 2 coats, SW: ColorAccents Interior Latex Satin, Y38T-154.PS-19: Wood, Clear, Satin Finish.Finish: 3 coats, Minwax: “Polycrylic” Water-Based Protective Finish, Satin.END OF SECTION04-27-11 PAINTS AND COATINGS09900 -7
<strong>Buffalo</strong> <strong>Wild</strong> <strong>Wings</strong>PART 1 GENERAL1.01 SECTION INCLUDESSECTION 09960 - FIELD APPLIED HIGH PERFORMACE COATINGA. Field Applied, High Performance Paint System.1.02 REFERENCESA. Architectural Aluminum Manufacturer’s Association (AAMA):1. AAMA 2605: Voluntary Specification, Performance Requirements and Test Procedures forSuperior Performing High Performance Organic Coatings on Aluminum Extrusions andPanels.B. American Society for Testing and Materials (ASTM):1. ASTM D1400: Standard Test Method for Nondestructive Measurement of Dry FilmThickness of Nonconductive Coatings Applied to a Nonferrous Metal Base.2. ASTM D1654: Standard Test Method for Evaluation of Painted or Coated SpecimensSubjected to Corrosive Environments.3. ASTM D2244: Standard Practice for Calculation of Color Tolerances and Color Differencesfrom Instrumentally Measured Color Coordinates.4. ASTM D4214: Standard Test Methods for Evaluating the Degree of Chalking of ExteriorPaint Films.C. The Society for Protective Coatings (SSPC):1. SSPC-SP 1: Joint Surface Preparation Standard SSPC-SP 1: Solvent Cleaning.1.03 SYSTEM DESCRIPTIONA. Air dried, fluoropolymer paint system, field applied over an existing aluminum storefront anddoors.1. System to include labor and materials for surface cleaning, preparation, and application ofthe field applied high performance paint system.1.04 SUBMITTALSA. Product Data: Provide manufacturer's published product data on all exterior coating productsincluding physical properties and performance characteristics.B. Samples for Verification: For field applied paint system in color and gloss of finish coatindicated.1. Submit (2) samples approximately 4” x 6” on aluminum substrate.C. Manufacturer's Application Instructions: Indicate special surface preparation procedures, andsubstrate conditions requiring special attention.D. Manufacturer's maintenance instructions.1.05 QUALITY ASSURANCEA. Exterior coating materials shall be applied evenly in accordance with manufacturer's directionsand written specifications.1. Finish surfaces to conform to AAMA 2605, 4.2. "Coating shall be visibly free from flowlines, streaks, blisters or other surface imperfections in the dry-film state on exposedsurfaces when observed at a distance of 10 feet from the metal surface and inspected atan angle of 90 degrees to the surface".2. The coating shall be applied to meet the dry-film thickness specification of themanufacturer and per AAMA 2605, 4.3.B. All work is subject to acceptance by the Owner. The Contractor will be required to correct Workthat does not comply with the specifications and the Manufacturer’s requirements.04-27-11 FIELD APPLIED HIGH PERFORMACE COATING09960 -1
<strong>Buffalo</strong> <strong>Wild</strong> <strong>Wings</strong>A. Applicator Qualifications: Coating manufacturer's approved Applicator who is equipped andtrained for application of the specified coating system required for this Project, with a record ofsuccessful in-service performance.1. Pre-qualified Applicator: Stuart Dean Company, Inc. www.stuartdean.com2. Other proposed applicators for the work of this section must submit a successful record ofcompletion for projects of the same scale and nature, including the type of coating systemspecified herein, to be considered qualified for approval.1.06 REGULATORY REQUIREMENTSA. Conform to applicable federal, state, and local regulatory requirements.B. Products must meet current local and federal VOC requirements.C. Flammable Liquids: Observe regulations regarding flammable liquids such as posting "NoSmoking" signs. Allow no open flames, welding, or other ignition sources in the work area.D. Conform to all applicable laws, codes, and regulations for disposal of all materials, debris, andcontainers.1.07 DELIVERY, STORAGE, AND HANDLINGA. Deliver products to site in Manufacturer's original sealed containers with labels intact andlegible.1. Container labels shall include manufacturer's name, type of material, brand name, lotnumber, brand code and color designation.B. Store materials at minimum ambient temperature of 45° F and a maximum of 90° F, inventilated area and as required by manufacturer's storage instructions.1. Store flammable materials to protect from fire hazards and spontaneous combustion.C. Remove all materials and empty containers from the area of work at the close of each day.1.08 ENVIRONMENTAL REQUIREMENTSA. Do not apply coatings to wet or damp surfaces, or when relative humidity is outside the rangerequired by the product manufacturer or when rain is imminent.B. Minimum Application Temperatures: 50° F. unless required otherwise by manufacturer'sinstructions. Minimum temperature to be maintained at a minimum of 24 hours prior to and 48hours following application.1.09 WARRANTYA. Coating Warranty: Coating Applicator's warranty in which Applicator agrees to repair finish orreplace coated items that demonstrate deterioration of field applied finish within warranty periodindicated.1. Exposed Coating: Deterioration includes but is not limited to:a. Color fading in excess of 5 Delta E Hunter units per ASTM D 2244.b. Peeling, checking, or cracking of coating adhesion to metal.c. Chalking in excess of a No. 8 per ASTM D 4214, when tested per Method D 659.d. Corrosion of substrate in excess of a No. 6 on cut edges and a No. 8 on fieldsurfaces, when measured per ASTM D 1654.2. Warranty Period: 10 years from date of Substantial Completion.PART 2 PRODUCTS2.01 MANUFACTURERSA. Acceptable Manufacturers: PPG Industries, Inc. www.coraflon.com04-27-11 FIELD APPLIED HIGH PERFORMACE COATING09960 -2
<strong>Buffalo</strong> <strong>Wild</strong> <strong>Wings</strong>2.02 MATERIALSA. Fluoropolymer Coating, AAMA 2605: Field applied, two component fluoropolymer finishconsisting of a 100 percent FEVE resin component and an aliphatic isocyanate curing agentcomponent.1. Product: PPG, Coraflon ADS.2. Color: No. ADS9833030, “Anodized Aluminum”.3. Dry Film Thickness, ASTM D 1400: 2.0-5.0 mil primer coat plus 1.5-2.0 mil color coat, 3.5mil total, minimum thickness.4. Properties: Product designed for field application containing uniformly dispersed pigmentsin a homogeneous coating with good flow properties; capable of air-drying or curing free ofdiscoloration.B. Materials shall not be altered except for reducing in accordance with the recommendations ofthe manufacturer.2.03 PAINT SCHEDULEA. (PS30): Existing Aluminum Storefront and Doors:1. Prime Coat: PPG Bonding Primer.2. Finish Topcoat: PPG Coraflon ADS - high performance, fluoropolymer, VOC complianttopcoat finish system.a. Color (C20): No. ADS9833030, “Anodized Aluminum”.PART 3 EXECUTION3.01 EXAMINATIONA. Verification of Conditions: Examine substrates, areas, and conditions, with Applicator present,for compliance with requirements for paint application.1. Proceed with paint application only after unsatisfactory conditions have been corrected andsurfaces receiving paint are thoroughly clean and dry.2. Start of painting will be construed as Applicator's acceptance of surfaces and conditions.3.02 PREPARATION - SURFACES TO RECEIVE PAINT FINISHA. Existing Surface Appointments: Remove or mask hardware, fixtures, trim, escutcheons, andother fittings prior to preparing surfaces or finishing. Store and protect from damage andreinstall after completion of the work.B. Surfaces: Clean all exterior surfaces to be coated of all dirt, dust, oil, grease, oxidized, looseand scaling paint, mildew, rust on metal and other foreign matter. Do not apply coating overexisting joint sealants. To the extent possible, apply the coating system into the joint slot wheresealants have been removed before the application of new joint sealants as applicable.C. Prepare substrate in accordance with manufacturer's application instructions.1. Solvent clean, per SSPC SP-1, substrate to remove any contamination that may bepresent.2. Abrade substrate to remove gloss and to obtain a minimum surface profile of 1.0 mil foradhesion of the paint system by hand sanding with 80 – 120 grit sandpaper.a. Care should be taken not to abrade the surface too aggressively as surface defectsmay be visible when coated.3.03 APPLICATIONA. Apply products in accordance with manufacturer's application instructions.B. Do not apply finishes to surfaces that are not clean and dry. Allow applied coats to dry asrequired before next coat is applied.C. Batch-mix multiple containers of a single color to assure a continuous balance of ingredients.04-27-11 FIELD APPLIED HIGH PERFORMACE COATING09960 -3
<strong>Buffalo</strong> <strong>Wild</strong> <strong>Wings</strong>D. Prior to coating, solvent wipe substrate to remove dust and residual contamination. Apply primerfollowing cleaning as quickly as possible.E. Primer: Apply one coat of Coraflon ADS PVDF Bonding ADS510/ADS512 @ 2.0 – 5.0 milsDFT. Allow primer to cure 6 to 8 hours minimum @ 72° F before applying topcoat.F. Topcoat: Apply one coat Coraflon ADS topcoat @ 1.5 – 2.0 mils DFT. per instructions on therespective products technical data bulletin.G. Full cure of applied coating will be achieved in three to five days.3.04 FIELD QUALITY CONTROLA. Inspect field work upon initial completion. Correct all non complying work as required.3.05 PROTECTIONA. Protect all adjacent materials and surfaces including landscaping from damage during workincluding cleaning, preparation, and application of exterior coating materials. Notify Sitemanager of any on-site or adjacent property such as parked vehicles, bicycles, landscaping, etc,which may be damaged from coating operations. Provide protection of grade-level horizontalsurface to the greatest extent possible.B. Replace all materials in like kind that are damaged during work of this section.C. Touch-up and restore damaged or defaced coated surfaces that occur as a result of the work ofthis section.3.06 CLEANINGA. At end of each workday, remove rubbish, empty cans, rags, and other discarded materials fromProject site.B. After completing coating application, remove spills and overspray from adjacent surfaces.C. Legally dispose of debris in accordance with local, state, and federal regulations.END OF SECTION04-27-11 FIELD APPLIED HIGH PERFORMACE COATING09960 -4
<strong>Buffalo</strong> <strong>Wild</strong> <strong>Wings</strong>SECTION 10010 – MISCELLANEOUS SPECIALTIESPART 1 GENERAL1.01 SECTION INCLUDESA. Fire Department Lock Box.B. Pre-cast Concrete Splash Blocks.C. Anti-Graffiti Film.1.04 SUBMITTALSA. See Section 01300 - Administrative Requirements, for submittal procedures.B. Product Data: Submit product data for each product specified.PART 2 PRODUCTS2.01 RECESSED FIRE DEPARTMENT LOCK BOXA. Fire Department Lock Box: Recessed mounted, heavy duty key box and recessed mounting kit.1. Acceptable Manufacturer: Knox Company; Phoenix, AZ; www.knoxbox.com2. Model: 3200 Series with, recessed mounting kit (RMK).3. Color: Dark Bronze.2.01 SURFACE MOUNTED FIRE DEPARTMENT LOCK BOXA. Fire Department Lock Box: Surface mounted, heavy duty key box.1. Acceptable Manufacturer: Knox Company; Phoenix, AZ; www.knoxbox.com2. Model: 3200 Series.3. Color: Dark Bronze.2.02 PRECAST CONCRETE SPLASH BLOCKSA. Provide precast concrete splash blocks at downspout locations as indicated on Drawings or asdirected by Owner’s Site Representative.1. Provide splash blocks comparable to the following units: Standard concrete color.a. Aristone Designs; Splash Block SB37. 37” x 18-1/2” x 5”. Tel: 800-369-8118.www.aristonedesigns.com/watercat/scuppers.htm2.03 ANTI-GRAFFITI WINDOW FILMA. Anti-Graffiti Window Film: Clear, 4 mil. thick, polyester window film with acrylic abrasionresistant coating to be applied to exterior surface of glass.Locations:a. Exterior glass on entry storefront, exterior aluminum doors, and aluminum windows,as indicated on Drawings.b. Restroom Mirrors.B. Acceptable Manufacturer and Product:1. Product: 3M, “Scotchgard” Anti-Graffiti Window Protective Film; No. AG-4.2. Manufacturer: 3M Building Safety Solutions Department; 3M Center Building; St. Paul, MN.Tel: 800-480-1704. www.3m.com04-27-11 MISCELLANEOUS SPECIALTIES10010 -1
<strong>Buffalo</strong> <strong>Wild</strong> <strong>Wings</strong>PART 3 EXECUTION3.01 INSTALLATION GENERALA. Install specialties according to manufacturer's instructions. Locate as indicated on Drawings.B. Install specialties plumb, true and square, in a neat, rigid, and substantial manner.C. After installation, clean surfaces.3.02 FIRE DEPARTMENT LOCK BOXA. Recessed Mounting Kit: Install recessed mounting kit shell in masonry wall where indicated onDrawing according to manufacturer's recommended installation instructions.B. Fire Department Lock Box: Install Lock Box inside RMK shell according to manufacturer'sinstallation instructions.A. Surface mount fire department lock box where indicated on Drawings according tomanufacturer's installation instructions and at height above grade according to local FireMarshal.3.02 ANTI-GRAFFITI WINDOW FILMA. Application: Apply window film in strict accordance with manufacturers written installationinstructions. Refer to Drawings for exact locations of installation.B. Instruction: Instruct Owner's personnel in proper cleaning of window surface after installation inaccordance with manufacturers instructions.END OF SECTION04-27-11 MISCELLANEOUS SPECIALTIES10010 -2
<strong>Buffalo</strong> <strong>Wild</strong> <strong>Wings</strong>SECTION 10210 - WALL LOUVERSPART 1 GENERAL1.01 SECTION INCLUDESA. Exterior Wall Louvers and accessories.1.02 RELATED SECTIONSA. Section 05400 - Cold-Formed Metal Framing: Prepared exterior wall opening.B. Section 06100 – Rough Carpentry: Prepared exterior wall opening.C. Section 07900 - Joint Sealers.1.03 REFERENCESA. AMCA 511 - Certified Ratings Program for Air Control Devices; Air Movement and ControlAssociation International, Inc.B. ASTM B 209 - .Specification for Aluminum and Aluminum-Alloy Sheet and Plate.1.04 SUBMITTALSA. See Section 01300 - Administrative Requirements, for submittal procedures.B. Product Data: Provide data describing design characteristics, maximum recommended airvelocity, design free area, materials and finishes.1.05 QUALITY ASSURANCEA. Manufacturer Qualifications: Company specializing in manufacturing products of the typespecified in this section, with minimum three years of documented experience.1.06 PROJECT CONDITIONSA. Coordinate work of this section with installation of mechanical ductwork.1.07 WARRANTYA. See Section 01780 - Closeout Submittals, for additional warranty requirements.B. Provide twenty year manufacturer warranty against distortion, metal degradation, and failure ofconnections.PART 2 PRODUCTS2.01 MANUFACTURERSA. Wall Louvers:1. Airline Louvers, Nystrom Building Products; Product LSA4W38: www.nystrom.com.B. Comparable products from the following manufacturers:1. The Airolite Company: www.airolite.com.2. Construction Specialties, Inc: www.c-sgroup.com.3. Substitutions: See Section 01600 - Product Requirements.04-27-11 WALL LOUVERS10210 -1
<strong>Buffalo</strong> <strong>Wild</strong> <strong>Wings</strong>2.02 LOUVERSA. Louvers: Factory fabricated and assembled, complete with frame, mullions, and accessories;AMCA Certified under AMCA 511.1. Wind Load Resistance: Design to resist positive and negative wind load of 25 psf withoutdamage or permanent deformation.B. Stationary Louvers: Horizontal blade, extruded aluminum construction.1. Free Area: 54 percent, minimum.2. Blades: Straight.3. Frame: 4 inches deep, channel profile; corner joints mitered and mechanically fastened,with continuous recessed caulking channel each side.4. Metal Thickness: Frame 0.081 inch; blades 0.081 inch.5. Finish: Manufacturer’s standard prime coat finish for field painting under Section 09900.6. Types: Verify with Mechanical Drawings.a. (LVR1): Intake Louversb. (LVR2): Exhaust Louvers7. Screens: Provide insect screens at intake louvers and bird screens at exhaust louvers.2.03 MATERIALSA. Sheet Aluminum: ASTM B 209.B. Bird Screen: Interwoven wire mesh of steel, 0.063 inch diameter wire, 1/2 inch open weave,diagonal design.C. Insect Screen: 18 x 16 size aluminum mesh.2.04 ACCESSORIESA. Screen Frame: Frame of same material as louver, with reinforced corners; removable, screwattached; installed on inside face of louver frame.B. Fasteners and Anchors: Stainless steel.C. Flashings: Of same material as louver frame, formed to required shape, single length in onepiece per location.D. Sealant: A type, as specified in Section 07900.PART 3 EXECUTION3.01 EXAMINATIONA. Verify that prepared openings and flashings are ready to receive work and opening dimensionsare as instructed by the louver manufacturer.B. Verify that field measurements are as indicated.3.02 INSTALLATIONA. Install louver assembly in accordance with manufacturer's instructions.B. Install louvers level and plumb.C. Install flashings and align louver assembly to ensure moisture shed from flashings and diversionof moisture to exterior.D. Secure louver frames in openings with concealed fasteners.E. Install perimeter sealant and backing rod in accordance with Section 07900.04-27-11 WALL LOUVERS10210 -2
<strong>Buffalo</strong> <strong>Wild</strong> <strong>Wings</strong>3.04 CLEANINGA. Strip protective finish coverings.B. Clean surfaces and components.END OF SECTION04-27-11 WALL LOUVERS10210 -3
<strong>Buffalo</strong> <strong>Wild</strong> <strong>Wings</strong>SECTION 10263 - CORNER GUARDSPART 1 GENERAL1.01 SECTION INCLUDESA. Surface-mounted wall corner guards.1.02 RELATED SECTIONSA. Section 09260 - Gypsum Board Assemblies.B. Section 09720 - Wall Covering.PART 2 PRODUCTS2.01 SURFACE MOUNTED CORNER GUARDSA. (WCG1) Wall Corner Guard: 2” x 2” x 48” long, 16 gauge, 304 stainless steel with radiused topedge.1. Locations and configuration as indicated on the Drawings.2.02 ACCESSORIESA. Provide appropriate adhesive and accessories as required to properly complete corner guardinstallation.PART 3 EXECUTION3.01 EXAMINATIONA. Verify that walls are in proper condition to receive installation of corner guards.1. Surface mounted corner guards must be installed after wall finishes have been completed.3.02 INSTALLATIONA. Install corner guards in compliance with manufacturer's written installation instructions.B. Surface Mounted Corner Guards: Fasten directly to finished wall surfaces using adhesive.END OF SECTION04-27-11 CORNER GUARDS10263 -1
<strong>Buffalo</strong> <strong>Wild</strong> <strong>Wings</strong>SECTION 10445 – DOOR AND ROOM SIGNSPART 1 GENERAL1.01 SECTION INCLUDESA. Wall mounted handicap restroom signs.B. Door mounted restroom signs.1.02 REFERENCESA. ATBCB ADAAG - Americans with Disabilities Act Accessibility Guidelines; US Architectural andTransportation Barriers Compliance Board.PART 2 PRODUCTS2.01 SIGN SUPPLIERA. Door and Room Signs in this section to be furnished by the General Contactor through TwinCity Hardware as part of the current BWW Door and Hardware Package.2.02 SIGN UNITSTwin City Hardware Company723 Hadley Avenue NorthOakdale, MN 55128651-735-2200A. Handicap Restroom Wall Signs:1. (SIGN1): 6” x 9”, Handicap Wall Sign, black sign with engraved white letters andsymbols and Braille coding. Product # SG 2521B, Women.2. (SIGN2): 6” x 9”, Handicap Wall Sign, black sign with engraved white letters andsymbols and Braille coding. Product # SG 2511B, Men.3. Provide international and accessible symbols for men and women on toilet room signage.4. Mount center line of sign 60 inches above finished floor adjacent to the latch side of therestroom doors.B. Restroom Door Signs:1. (SIGN3): 4” x 16”, Door Sign, black sign with engraved white letters. Product # SG 2025B,“Women”.2. (SIGN4): 4” x 16”, Door Sign, black sign with engraved white letters. Product # SG 2015B,“Men”.3. Mount on restroom doors in location as indicated on Drawings.C. Mounting Tape: Double sided foam mounting tape.PART 3 EXECUTION3.01 EXAMINATIONA. Verify that surfaces to receive signs have been finished, and that finishes are dry and correctlycured.3.02 INSTALLATIONA. Install room and door signs in accordance with manufacturer's printed installation instructions.B. Install signs with double sided mounting tape in locations as indicated on Drawings.C. Locate signs in accordance with approved ADAAG requirements.END OF SECTION04-27-11 SIGNS10445 -1
<strong>Buffalo</strong> <strong>Wild</strong> <strong>Wings</strong>PART 1 GENERAL1.01 SECTION INCLUDESA. Locker units with hinged doors.1. Indicated on Drawings as: (Lockers).1.02 RELATED SECTIONSSECTION 10500 - LOCKERSA. Section 06100 - Rough Carpentry: Wood blocking and nailers.1.03 REFERENCE STANDARDSA. ASTM A 653/A 653M - Standard Specification for Steel Sheet, Zinc-Coated (Galvanized) orZinc-Iron Alloy-Coated (Galvannealed) by the Hot-Dip Process.1.04 DELIVERY, STORAGE, AND HANDLINGA. Protect locker finish and adjacent surfaces from damage.PART 2 PRODUCTS2.01 MANUFACTURERSA. Lockers:1. ASI Storage Solutions Inc; Product Specialty Traditional Wall Mount: www.asilockers.com2. Substitutions: See Section 01600 and equipment cutsheets.2.02 MATERIALSA. Sheet Steel: ASTM A 653/A 653M SS Grade 33/230, with G60/Z180 coating, stretcher leveled;to the following minimum thicknesses:1. Body and Shelf: 24 gage, 0.024 inch.2. Door Frame: 16 gage, 0.060 inch.3. Hinges: 16 gage.B. Accessories for Locker: 45" coat rod mounted under lockers.2.03 LOCKER UNITSA. Width: 12 inches.B. Depth: 18 inches.C. Height: 12 inches.D. Configuration: Double tier. 2 units high, 4 units wide.E. Mounting: Surface mounted.F. Ventilation Method: Door louvers.G. Frames: Formed channel shape, welded and ground flush, welded to body, resilient gasketsand latching for quiet operation.H. Number Plates: Provide rectangular shaped aluminum plates. Form numbers 1/2 inch high ofblock font style, in contrasting color.I. Form recess for operating handle and locking device.J. Finish edges smooth without burrs.04-27-11 LOCKERS10500 -1
<strong>Buffalo</strong> <strong>Wild</strong> <strong>Wings</strong>2.04 FINISHINGA. Clean, degrease, and neutralize metal; prime and finish with one coat of baked enamel paint.1. Color: Gray #25.PART 3 EXECUTION3.01 INSTALLATIONA. Install in accordance with manufacturer's instructions.B. Install lockers plumb and square.C. Mount bottom of lockers at 60 inches a.f.f.C. Secure lockers with anchor devices to suit substrate materials. Minimum Pullout Force: 100 lb.D. Install accessories.3.02 CLEANINGA. Clean locker interiors and exterior surfaces.END OF SECTION04-27-11 LOCKERS10500 -2
<strong>Buffalo</strong> <strong>Wild</strong> <strong>Wings</strong>SECTION 10523 - FIRE EXTINGUISHERS AND CABINETSPART 1 GENERAL1.01 SECTION INCLUDESA. Fire Extinguishers.B. Fire Extinguisher Cabinets.C. Mounting Brackets.1.02 REFERENCESA. NFPA 10 - Standard for Portable Fire Extinguishers; National Fire Protection Association.B. UL (FPED) - Fire Protection Equipment Directory; Underwriters Laboratories Inc..1.03 PERFORMANCE REQUIREMENTSA. Conform to NFPA 10.B. Provide extinguishers classified and labeled by Underwriters Laboratories Inc. for the purposespecified and indicated.1.04 SUBMITTALSA. See Section 01300 - Administrative Requirements, for submittal procedures.B. Product Data: Fire Extinguisher Cabinets: Include roughing-in dimensions, details showingmounting methods, relationships of box and trim to surrounding construction, door hardware,cabinet type, trim style, and panel style.C. Maintenance Data: Include test, refill or recharge schedules and re-certification requirements.1.05 COORDINATIONA. Coordinate size and locations of fire extinguisher cabinets with wall depths.PART 2 PRODUCTS2.01 MANUFACTURERSA. Fire Extinguishers, Cabinets and Accessories:1. JL Industries, Inc. www.jlindustries.com.2. Larsen's Manufacturing Co. www.larsensmfg.com.3. Amerex Corporation. www.amerex-fire.com.4. Substitutions: See Section 01600 - Product Requirements.2.02 FIRE EXTINGUISHERSAWall Mounted Portable Fire Extinguishers: UL listed and bearing a UL label for type, rating, andclassification and pressure indicating gauge as follows:B. (FE1): Multi-Purpose Dry Chemical1. UL Rating: 4A-80B:C.2. Capacity: 10 lbs.3. Manufacturer’s standard steel container. Red powder coat finish.C. (FE2): Class K Wet Chemical1. UL Rating: 2A:K.2. Capacity: 1.8 gallon/ 6 Liter.3. Manufacturer’s standard stainless steel container.04-27-11 FIRE EXTINGUISHERS AND CABINETS10523 -1
<strong>Buffalo</strong> <strong>Wild</strong> <strong>Wings</strong>2.03 FIRE EXTINGUISHER CABINETSA. (FE1 CAB): Cabinet Mounted Portable Fire Extinguishers: Type (FE1) extinguisher.B. Cabinet Configuration: Semi-recessed.1. Trim: Returned to wall surface, with 2-1/2 inch projection, 1-3/4 inch wide rolled face.2. Form cabinet enclosure with right angle inside corners and seams. Form perimeter trimand door stiles. Weld, fill, and grind components smooth.3. Metal: Formed primed steel sheet; 0.036 inch thick base metal.4. Door: 0.036 inch thick, reinforced for flatness and rigidity; latch. Hinge doors for 180degree opening with continuous piano hinge. Provide nylon catch.5. Door Glazing: Full glass, clear, 1/8 inch thick heat strengthened. Set in resilient channelgasket glazing.6. Cabinet Mounting Hardware: Appropriate to cabinet. Pre-drill for anchors.7. Finish of Cabinet Exterior Trim and Door: Manufacturer’s standard finish to accept fieldpainting under Section 09900.8. Finish of Cabinet Interior: White enamel.2.04 ACCESSORIESA. Wall Brackets: Provide metal wall brackets with strap and fasteners, of proper size for type andcapacity of extinguishers, and as required for installation conditions. Extinguisher hooks are notacceptable to hang extinguishers.PART 3 EXECUTION3.01 INSTALLATIONA. Install fire extinguishers, cabinets and mounting brackets in accordance with manufacturer’swritten instructions, in locations indicated on the drawings and in compliance with requirementsof authorities having jurisdiction.B. Cabinets: Install fire extinguisher cabinets in locations and at mounting heights indicated.1. Fasten cabinets to structure, square and plumb.2. Remove temporary protective coverings and strippable films and clean interior and exteriorsurfaces.C. Brackets: Fasten mounting brackets to structure, square and plumb. Hang fire extinguishers onbrackets and use straps to prevent free swinging.1. Mounting Height: Typically mount bracket at 48” A.F.F. If mounted unit projects greaterthan 4” out from face of wall, mount bottom of unit no greater than 27” A.F.F.3.02 SCHEDULESA. Field locate extinguishers: Maximum travel distance to extinguisher from any point in thebuilding of 75 feet.B. Check, recharge and reuse existing extinguishers that are functional. Furnish new extinguishersas required.C. Add extinguishers as required by local fire authority.END OF SECTION04-27-11 FIRE EXTINGUISHERS AND CABINETS10523 -2
<strong>Buffalo</strong> <strong>Wild</strong> <strong>Wings</strong>SECTION 10536 - AWNINGSPART 1 GENERAL1.01 SECTION INCLUDESA. Awnings furnished as part of the overall exterior signage package.1. Aluminum framing and fittings.2. Indicated on Drawings as: (Fabric Awnings).1.02 REFERENCESA. ASTM B 210 - Standard Specification for Aluminum and Aluminum-Alloy Drawn SeamlessTubes.B. ASTM B 210M - Standard Specification for Aluminum and Aluminum-Alloy Drawn SeamlessTubes (Metric).1.03 DESIGN REQUIREMENTSA. Awning materials, assembly and attachments to resist snow loads, positive and negative winddesign loads of 40 lb/sq ft at any point without damage or permanent set.PART 2 PRODUCTS2.01 MANUFACTURERSA. Acceptable Manufacturers for Awnings:1. Lawrence Sign, 945 Pierce Butler Route, St. Paul, MN 55104: 651-488-6711, 800-998-8901.2. Federal Heath: 1128 Beville Road, Suite E, Daytona Beach, FL 32114: 386-255-1901,ext. 225.2.02 ALUMINUM FRAMING SYSTEMA. Framing: Rectangular and square, tubing, conforming to ASTM B 210 (ASTM B 210M).B. Fittings: Elbows, T-shapes, wall brackets; cast aluminum.C. Mounting: Brackets and flanges, with aluminum inserts for embedding into masonry.D. Splice Connectors: Concealed spigot; cast aluminum.E. Exposed Fasteners: Flush countersunk stainless steel screws or bolts; consistent with designof system.F. Finish: Mill Finish or clear anodized.2.03 COVERING MATERIALSA. Sunbrella by Glen Raven Custom Fabrics. 336-221-2211. www.sunbrella.com.B. Solution Dyed Acrylic: 9.25 oz/sq yd, resistant to ultra-violet and color degradation, mildew andwater resistant1. Sunbrella Fabric No. 4608/6008 “Jet Black” with 8” x 8” squares in Pantone #116 coatedyellow. Refer to Drawings for exact configuration.C. Lacing: Woven nylon.2.04 FABRICATION - FRAMINGA. Fit and shop assemble components in largest practical sizes, for delivery to site.B. Fabricate components with joints tightly fitted and secured.04-27-11 AWNINGS10536 -1
<strong>Buffalo</strong> <strong>Wild</strong> <strong>Wings</strong>C. Exposed Fastenings: Unobtrusively located; consistent with design of component, exceptwhere specifically noted otherwise.D. Supply components required for anchorage of framing. Fabricate anchors and relatedcomponents of same material and finish as framing, except where specifically noted otherwise.2.05 FABRICATION - COVERINGA. Manufacture covering in one piece wherever possible, sized and configured to suit framing.B. Form covering heading of triple thickness 2 inches wide, double fold bottom hem 2 inches wide.C. Prepare covering with grommets for attachment to framing 6 inches on center.D. Turn seam edges and lock stitch.PART 3 EXECUTION3.01 EXAMINATIONA. Verify that wall substrate anchors are acceptable and are ready to receive work.3.02 PREPARATIONA. Supply items required to be embedded in masonry with setting templates, to appropriateSections.3.03 INSTALLATION - FRAMINGA. Install in accordance with manufacturer's written instructions.B. Install components plumb and level, accurately fitted, free from distortion or defects.3.04 INSTALLATION - COVERINGA. Install covering over framing members, stretched taut without creases or folds.B. Attach covering and fasten securely.END OF SECTION04-27-11 AWNINGS10536 -2
<strong>Buffalo</strong> <strong>Wild</strong> <strong>Wings</strong>SECTION 10810 - TOILET ACCESSORIESPART 1 GENERAL1.01 SECTION INCLUDESA. Toilet Accessories.B. Installation of Owner Furnished accessories.1.02 RELATED SECTIONSA. Section 06100 – Rough Carpentry for wood blocking.B. Section 07900 – Joint Sealers.C. Section 08800 – Glazing for un-framed glass mirrors.D. Section 09260 - Gypsum Board Assemblies.E. Section 09300 - Tile.1.03 REFERENCESA. ATBCB ADAAG - Americans with Disabilities Act Accessibility Guidelines; US Architectural andTransportation Barriers Compliance Board.B. ASTM A 240/A 240M - Standard Specification for Chromium and Chromium-Nickel StainlessSteel Plate, Sheet, and Strip for Pressure Vessels and for General Applications.1.04 DELIVERY, STORAGE, AND HANDLINGA. Factory-apply strippable protective vinyl coating to sight-exposed surfaces after finishing ofproducts; ship products in manufacturer's standard protective packaging.B. Storage and Protection: Store products in manufacturer's protective packaging until installation.1.05 WARRANTYA. See Section 01700 - Execution Requirements, for additional warranty requirements.B. Manufacturer's standard warranty against defects in product workmanship and materials.PART 2 PRODUCTS2.01 TOILET ACCESSORY SUPPLIERA. Toilet accessories in this section that are not indicated as Owner Furnished to be furnished bythe General Contactor through Twin City Hardware as part of the current BWW Door andHardware Package.2.02 MANUFACTURERSTwin City Hardware Company723 Hadley Avenue NorthOakdale, MN 55128651-735-2200A. ASI-American Specialties, Inc.; 441 Saw Mill River Road, Yonkers NY 10701.www.americanspecialties.com2.03 MATERIALSA. Stainless Steel Sheet: ASTM A 240/A 240M, Type 304, 18-8 alloy.04-27-11 TOILET ACCESSORIES10810 -1
<strong>Buffalo</strong> <strong>Wild</strong> <strong>Wings</strong>2.04 TOILET ACCESSORIESA. The following toilet accessories are to be furnished by the General Contactor through Twin CityHardware as part of the current Hardware Package.B. (MIR1) Framed Mirrors: 1/2” x 1/2" x 1/2", 20 gauge, stainless steel channel framed mirror with1/4" thick tempered mirror glass.1. ASI Model 0620.2. Size: 24” w. x 36” h.3. Comparable product from the other acceptable manufacturers.C. (SND) Sanitary Napkin Disposal: 22 gauge, 304 stainless steel cabinet with access door andremovable waste container. 1.5 gal. capacity.1. ASI Model 0473-A.2. Comparable product from the other acceptable manufacturers.D. (GB) Grab Bars: ASI Series 3200.1. (GB1): 18” long.2. (GB2): 36” long.3. (GB3): 42” long.E. (DCS) Diaper Changing Station: Koala, Model KD-200, wall mounted, horizontal.2.05 OWNER FURNISHED TOILET ACCESSORIESThe following items are furnished by the Owner for Contractor installation:A. (SDISP) Soap Dispensers: Ecolab, Digitizer Handsoap Dispenser.B. (PTD) Paper Towel Cabinet:1. Tork, Intuition Hand Towel Roll Dispenser.OR2. Tork, Elevation H1 Matic Towel Dispenser.C. (TPD) Toilet Paper Holder: Tork, Bath Tissue Jumbo Roll Twin Dispenser.PART 3 EXECUTION3.01 EXAMINATIONA. Verification of Conditions:1. Prepared openings are sized and located in accordance with shop drawings.2. Reinforcement and anchoring devices are correct type and are located in accordance withshop drawings.B. Installer's Examination:1. Beginning construction activities of this section before unacceptable conditions have beencorrected is prohibited.2. Beginning construction activities of this section indicates installer's acceptance ofconditions.3.02 INSTALLATIONA. Install toilet accessories in locations as indicated on Drawings.B. Install toilet accessories plumb and level in accordance with shop drawings and manufacturer'swritten installation instructions.C. Locate toilet accessories at heights as indicated on Drawings and in accordance withAmericans with Disabilities Act (ADA).04-27-11 TOILET ACCESSORIES10810 -2
<strong>Buffalo</strong> <strong>Wild</strong> <strong>Wings</strong>3.03 CLEANINGA. Remove manufacturer's protective vinyl coating from sight-exposed surfaces 24 hours beforefinal inspection.B. Clean surfaces in accordance with manufacturer's recommendations.END OF SECTION04-27-11 TOILET ACCESSORIES10810 -3
<strong>Buffalo</strong> <strong>Wild</strong> <strong>Wings</strong>SECTION 12493 - WINDOW SHADESPART 1 GENERAL1.01 SECTION INCLUDESA. Manually operated roller shades, furnished and installed by Owner.1. Indicated on Drawings as: (Window Shades).1.02 SYSTEM DESCRIPTIONA. Manually operated, roller shade system designed, developed and manufactured as a totallyintegrated unit complete with supports, operating system, fascia components, and fabric shadecloth.1. Mounting: Ceiling mount, regular roll with fascia.1.03 REFERENCESA. American Society for Testing and Materials (ASTM):1. ASTM E84, "Test Method for Surface Burning Characteristics of Building Materials".B. National Fire Protection Association, (NFPA):1. NFPA 701 – Standard Methods of Fire Tests for Flame Resistant Textiles and Films.1.04 SUBMITTALSA. See Section 01300 - Administrative Requirements, for submittal procedures.B. Product Data: Submit the following.1. Manufacturer's written installation instructions.C. Warranty: Copy of twenty-five year fit-for-use warranty on shade cloth and mechanicalcomponents.1.05 QUALITY ASSURANCEA. Installer Qualifications: Manufacturer's qualified installers experienced in the installation ofspecified components similar in complexity to those required for this Project.B. Shade Cloth: Shade cloth must be FR rated under NFPA-701 Vertical Burn Test and be Classrated in accordance with ASTM E-84.1.06 DELIVERY, STORAGE AND HANDLINGA. Delivery: Deliver products in original unopened packaging with legible manufacturer'sidentification.B. Storage: Store materials in a cool dry place. Protect from damage and from the elements.1.07 PROJECT CONDITIONSA. Environmental Requirements:1. Maintain ambient temperature above 60 degrees F during and at all times after installation.1.08 WARRANTYA. If any component of the hardware or shade cloth system fails in normal operation, it shall berepaired or replaced under the terms of a factory return warranty for a period of twenty-five (25)years. Operating chain is not included in this warranty.PART 2 PRODUCTS2.01 MANUFACTURERSA. MechoShade Systems, Inc.; as distributed by Tegan Marketing, Inc. 763-475-1340 or 800-510-5836.04-27-11 WINDOW SHADES12493 -1
<strong>Buffalo</strong> <strong>Wild</strong> <strong>Wings</strong>2.02 MATERIALSA. Manually Operated Roller Shade System: MechoShade 5 consisting of the followingcomponents:1. Brackets and operating assembly consisting of 1/8" steel and molded Delrin. Bead chaindrive operated Delrin drive bracket.2. Stainless Steel Chain: 90 lb. test, and hold-down brackets.3. Provide upper and lower stop limits.4. Shade Mounting System: extruded 6063T6 aluminum tube with a wall thickness of .100"with asymmetrically shaped channels in which a matching snap-on vinyl spline can bemounted.a. Spline and shade to be easily removable and replaceable without disassembling thehardware.b. Attachment of the shade band shall not be with adhesives or staples.5. Shades to be full width of windows as indicated. Splitting shades within one window will notbe allowed.a. Provide lift assist mechanism for shades in excess of 5 pounds.b. Provide shade cloth clearance of 1/4" on idle end and 9/16" on the drive end.B. Shade Fabric: EuroTwill Shade Cloth; Series 6000.1. Fabric Color: No. 6012, “Charcoal”.2. Fabric to pass Class I Flame Spread per ASTM E-84 and large or small Vertical BurnRequirements of NFPA 701.2.03 ACCESSORIESA. Aluminum Fascia Units: Manufacturer's standard “L” shaped, snap-on, extruded aluminumfascia units as follows:1. MechoShade SnapLoc Fascia, for regular roll installation mounted on front of shade roll.2. End Caps: Provide pre-finished end caps where mounting conditions expose outside ofroller shade brackets.3. Fascia Finish: Both fascia units and end caps as applicable to be factory finished.a. Color: Clear anodized to match window frames.B. Chain Tension Pulley: Manufacturer's standard chain tension pulley.1. Color: Clear anodized.C. Provide mounting brackets and other components required for complete installation.2.04 FABRICATIONA. Fabricate shades square with a snap-on spline for mechanical fastening directly to mountingtube. Staples and tape are not allowed.B. Provide a weighted hembar, heat sealed within the shade. No loose hembar will be allowed.C. Cut shade cloth by means of an edge-sealing hot-knife.D. Fabricate shade system with set stop positions at upper and lower limit points.PART 3 EXECUTION3.01 EXAMINATIONA. Verification of Conditions: Examine areas and conditions under which Work is to be performedand identify conditions detrimental to proper and timely completion.1. Do not proceed until unsatisfactory conditions have been corrected in a manner acceptableto installer.2. Beginning the installation indicates the installer accepts the substrate.04-27-11 WINDOW SHADES12493 -2
<strong>Buffalo</strong> <strong>Wild</strong> <strong>Wings</strong>3.02 INSTALLATIONA. Coordinate with General Contractor for access to site and installation of window shades.A. Install shade units in accordance with manufacturer’s written installation instructions.B. Install shades regular roll, with shade and fascia level and square on front and back of shade.C. Place lower shade limit so the shade stops 1 inch above window sill. Place upper limit at thepoint the hem bar meets the roll.D. Shade fabric to hang flat without buckling or distortion. The edges, when trimmed, should hangstraight without curling or raveling.D. Mount chain tension pulley on window sill.3.03 ADJUSTINGA. Adjust and balance system for smooth operation.B. Instruct the Owner’s personnel on the proper operating procedures and maintenance of thesystem.3.04 CLEANINGA. Clean all visible surfaces and repair or replace any damaged items.B. Remove all debris caused by this installation.END OF SECTION04-27-11 WINDOW SHADES12493 -3
SECTION 15010 – MECHANICAL GENERAL CONDITIONSPART 1. - GENERAL1.1 SUMMARYA. General and Supplementary conditions within Division 0 and 1 are hereby incorporatedand become part of these Specifications, covering all work in Division 15000, Mechanical.B. Before submitting a proposal on the project, the Contractor shall visit the site andfamiliarize themselves with the conditions and limitations affecting Division 15000 work.No additional costs to the Owner shall be allowed for items verifiable during site visits.C. Contractor shall provide sufficient workers and materials to keep pace with theconstruction schedule. Contractor shall place orders for equipment such that job progressis not slowed due to late delivery and shall confirm delivery dates with suppliers.D. The Contractor shall provide office space and storage for materials and equipmentsupplied as required. Location shall be as directed by the General Contractor or theArchitect.E. Upon completion of the work shown and specified under Division 15000 and prior to finalclose out of the Project, the Contractor shall verify in writing that all systems are 100%complete and operating properly. This notification shall include copies of allSubcontractor notifications. Any system not operating properly at final inspection shall beimmediately repaired and demonstrated to the Engineer.F. Rebates or credits provided by utility companies or equipment manufacturers shall bedirectly credited to the Owner.1.2 MECHANICAL PLANSA. The Mechanical Drawings and Specifications shall form a set of Plans for the mechanicalwork. Neither the Drawings nor the Specifications shall be complete without the other.Any item shown on the Drawings or specified in the Specifications shall be considered asshown and specified on both.B. Any questions regarding the intent of the Drawings or Specifications shall be brought tothe Engineer’s attention as soon as possible. If direction from the Engineer cannot beobtained due to time or communication limitations, the greater quantity, higher quality orcondition most favorable to the Owner shall be assumed. Contractor shall provide alllabor, materials, equipment, and miscellaneous items necessary for a complete andoperational mechanical installation, as shown on the Drawings and called for in theseSpecifications.C. Drawings:1. Contractor shall become familiar with Architectural, Structural and ElectricalDrawings and Specifications. Coordinate all shafts, chases, furred spaces,suspended ceilings, locations of equipment, etc.2. Mechanical Contractor shall coordinate routing of all piping and ductwork withinsoffits provided by the General Contractor. The Mechanical Contractor shallprovide all soffiting required to cover installations not coordinated or specificallyapproved by the Architect and Engineer.06/25/09 MECHANICAL GENERAL CONDITIONS15010-1
3. Mechanical Drawings are diagrammatic and are intended to show approximatelocation only. Placement of mechanical equipment and devices shall not interferewith locations or clearances of other trades’ materials or equipment.4. Dimensions given on the Drawings shall take precedence over scaleddimensions. Dimensions, whether given in figures or scaled, shall be verified inthe field.5. Contractor shall verify that the equipment to be furnished under Contract will fitwithin the available space.6. Notify the Architect and Engineer of any discrepancies between Electrical,Architectural and Mechanical Drawings.7. Verify items such as door swings, window locations, casework, etc., beforeinstalling any mechanical equipment or devices. All devices conflicting with othertrade’s work due to lack of coordination shall be relocated at no additional cost tothe Owner.D. The following terms used in the Drawings and Specifications shall be defined as follows:1. Contractor: Shall mean Mechanical Contractor or any of their Subcontractors.2. Work: Shall mean labor and/or materials of the Mechanical Contractor or any oftheir Subcontractors.3. Furnish: Shall mean purchase, submit for Engineer approval, coordinate withContract Documents and deliver to site in new, undamaged condition.4. Install: Shall mean to schedule for delivery, deliver or have delivered to the site,store as directed, protect from damage, set in place, make all necessary finalconnections, test as required and turn over to the Owner in full operatingcondition.5. Provide: Shall mean furnish and install.6. Connect: Shall mean to bring mechanical service and/or low voltage controlwiring to equipment, make all final connections, provide all necessarymiscellaneous materials required and do final check out to ensure properequipment connections.E. CAD and Drawing Files:1. Mechanical CAD drawings by Engineer of Record for this Project are instrumentsof Engineer of Record for use solely with respect to this Project. During thecourse of the implementation of the Project, and with Engineer of Recordapproval, copies may be obtained of CAD drawings for the preparation of ShopDrawings. These CAD drawings shall not be used on other projects, for additionsto this Project, or for completion of this Project by others. Any revisions,additions and/or deletions to these CAD drawings, either intentional orunintentional, shall be made at the full risk of the person(s) making suchrevisions, additions and/or deletions. Such person(s) shall hold harmless andindemnify Engineer of Record of any and all responsibilities and liabilities.2. CAD drawings files of Architectural floor plans, elevations, sections, etc, shall berequested directly from the Architect.06/25/09 MECHANICAL GENERAL CONDITIONS15010-2
3. The cost for mechanical CAD drawing files, provided in AutoCAD, will be $50.00per sheet payable directly to Engineer of Record CAD files will be sent via emailonly.1.3 COORDINATION OF DRAWINGSA. Contractor shall submit a ¼-inch scale drawing to the Engineer indicating placement of allmechanical and electrical systems and equipment. Indicate proposed locations of allmajor equipment and materials, including but not limited to service equipment, exteriorwall and foundation penetrations, fire-rated wall and floor penetrations, sizes and locationof required concrete pads and bases, and mechanical/electrical equipment room layouts.This effort will require each trade to closely work together to produce a ¼=1’-0” set ofcoordination drawings for each area of the building.B. Coordinate scheduling and sequencing required for movement and positioning of largeequipment into the building with all other Contractors to minimize impact on their work.C. This Contractor shall provide any and all input required to complete these drawings.1.4 MATERIALS AND EQUIPMENTA. Materials:1. All materials shall be new and of the type and quality specified herein.2. Specific materials and equipment specified is intended to establish a minimumstandard of required quality. Where specified materials and equipment fail tomeet minimum standards of existing federal, state and local codes andordinances, the governing codes and ordinances shall prevail.3. The Contractor shall provide all minor miscellaneous materials necessary for thecomplete mechanical installation.4. For materials and equipment specified by description only, the Contractor shallprovide materials or equipment suitable for the purpose intended. These shall bein conformance with all governing codes, these Specifications and normal tradepractice.5. For materials or equipment specified by manufacturer’s name and catalognumber, the Contractor shall provide the item specified. The Contractor maysubmit materials and equipment for prior approval to the Engineer.6. Supply materials and equipment to the site in original packages, containers orcrates insofar as is practical. It shall be the Contractor’s responsibility to scheduledeliveries in accordance with the overall Project schedule. The Contractor shallclosely coordinate all deliveries with other Contractors.7. Provide for proper receipt, handling, storage, and protection from the elementsfor all materials and equipment to be used on this Project so as to effectivelyprevent damage or deterioration. Materials or equipment sustaining damage orundue deterioration from any cause whatsoever shall be replaced or repaired byContractor as required by the Engineer.06/25/09 MECHANICAL GENERAL CONDITIONS15010-3
8. The Contractor shall properly protect all equipment from damage duringconstruction. Thoroughly clean all fixtures, equipment and other suppliedmaterials. Make all necessary repairs and apply touch up paint as required priorto final inspection and contract close out.9. All materials and equipment shall be listed by Underwriters’ Laboratories, Inc.(UL). Materials and Equipment shall meet the UL requirements of each standardin every case where such a standard has been established for that particular typeof material. Equipment shall be UL listed as an entire assembly or system.B. Prior Approvals1. All requests for prior approvals must be received by the Engineer at least sevenworking days prior to bid date. Applications for prior approval shall be consideredonly from Contractors submitting bids on the Project. Contractors shall determinewhether materials receiving prior approval are actually in accordance with detailsof the Specifications.2. The Contractor shall be responsible for all deficiencies that may exist from theuse of substituted products or equipment, including all additional labor andmaterials required to complete the work. All dimensions and characteristics ofsubstituted products shall be verified and coordinated with all affected trades andSubcontractors. Any required changes or modifications to the work of any othertrade or Subcontractor incurred due to using accepted substituted products shallbe coordinated and performed by this Contractor at no additional cost to theOwner.1.5 WORKMANSHIP AND CONSTRUCTION PROCEDURESA. Installation of all materials specified herein shall be performed in a neat and workmanlikemanner by workers experienced and skilled in the trade. Only the best qualityworkmanship will be accepted.B. The Contractor shall regularly clean their work area of debris. Removal of all Contractorgenerated debris and rubbish caused by their work shall be at the Contractor’s expense.C. Coordination:1. Contractor shall give careful consideration to work of other Contractors on theProject and shall organize work as detailed in the Contractor’s ¼=1’-0”coordination drawings so as to not interfere with or delay the work of othertrades.2. Contractor shall consult all Architectural, Structural and Electrical Drawings andSpecifications that apply for correlating information.3. Conflicts or interference with work of other trades shall be brought to theattention of the Engineer, in writing, before installation.4. Should the Contractor not follow above procedures and install work thatinterferes with work of other trades, the Contractor shall make all necessarychanges as directed by Engineer to eliminate the interference or conflict at theContractor’s expense.06/25/09 MECHANICAL GENERAL CONDITIONS15010-4
1.6 LICENSES, CODES AND FEESA. The Contractor shall be a licensed Contractor in the State of which project is beingconstructed. The Contractor shall employ all Licensed Professional Tradesmen requiredfor each type of work covered under these Drawings and Specifications.B. The Contractor shall procure all necessary certificates and permits and pay all requiredfees. The Contractor shall pay all fees and installation charges by the utility company forthe permanent services.C. Codes and Ordinances: All work and materials shall meet the requirements of national,state and local codes and ordinances, in every respect. This requirement shall not relievethe Contractor from meeting the requirements of Drawings and Specifications that maybe in excess of all codes and ordinances and not contrary to them. Following is a partiallist of governing codes and/or standards.1. WBC: Wisconsin Building Code2. WMC: Wisconsin Mechanical Code3. NFPA 101: Life Safety Code4. UPC: Uniform Plumbing Code5. NFPA NEC: National Electric Code6. UFC: Uniform Fire Code7. Building Facility Association, ANSI: Handicapped Code8. Applicable Federal Regulations9. International Building Code10. International Plumbing Code11. International Mechanical Code12. International Fire Code13. Occupational Safety & Health Act (OSHA)14. American Standards Association15. Underwriters Laboratories (UL)16. Contractor’s National AssociationD. Inspections: Regular inspections shall be requested by the Contractor to meet all stateand local requirements. Contractor shall furnish a certificate of final inspection andapproval from all enforcement agencies to the Owner.1.7 OPERATION AND MAINTENANCE MANUALSA. The Contractor shall deliver two sets of Operation and Maintenance (O&M) manuals tothe Engineer prior to final close out. O&M manuals shall consist of approved shopdrawings, manufacturer’s bulletins, equipment manuals, a list of manufacturers withtelephone numbers for all equipment that contains replaceable parts and all other datacovering the care, maintenance and operation of each piece of furnished equipment.O&M manuals shall be neatly bound in 3-ring binders, contain an index and section tabsand be labeled with the Project name.B. Name, address, and telephone number of each Contractor and subcontractor installingequipment and systems, local representative for each item of equipment and eachsystem. Table of contents shall correspond to the Specifications with the Section tabsheets placed before the respective Shop Drawings and operation and maintenanceinstructions.1. Warranties for more than 1 year shall be included in appropriate section.06/25/09 MECHANICAL GENERAL CONDITIONS15010-5
2. A maintenance and lubrication schedule shall include each motor, function,control location, fuse location, belt sizes type of lubricant, and rate of lubricationin accordance with manufacturer.3. A filter maintenance schedule shall include filter size and quantity for each unit,located by room number.1.8 OPERATING INSTRUCTIONS AND TESTINGA. The Contractor shall fully instruct the Owner in the operation of mechanical equipmentprior to final close out. Contractor shall provide, without additional expense Owner,services of competent instructors who will give full instruction in the care, adjustment,operation and maintenance of all mechanical systems provided by this Contractor toOwner’s permanent employees. Instructor shall be thoroughly familiar with all parts of theinstallation that they are to give instructions and shall be trained in operating theory, aswell as in practical operation and maintenance work. Factory trained instructors shall beemployed wherever they are available. Instruction shall be given during regular workweek and at a time just prior to the time the equipment is accepted and turned over toOwner for regular operation.B. The Contractor or his representative shall provide a minimum of two (2) days instructionperiod for Owner’s personnel.C. Contractor shall test all equipment installed under this Specification and shalldemonstrate its proper operation to the Engineer. No equipment shall be tested oroperated for any purpose until it has been fully prepared, connected and made ready fornormal operation. Damage to equipment due to improper or ill-timed operation or testingshall be repaired, at Contractor’s expense, before final inspection and acceptance.1.9 WARRANTYA. The Contractor shall guarantee all materials and equipment to be free of defects that maydevelop in any part of their work, caused by faulty workmanship, material or equipmentfailures, for a minimum of one year from the date of final acceptance of the work or for aslong as normal equipment manufacturer warranties are in effect from the date of finalacceptance of the work.B. During the guarantee period, notification by letter, personal contact or telephoneconversation of a problem with any mechanical system, shall cause the Contractor torespond within one week, making repairs or corrections as necessary. After all repairsand corrections are complete, the Contractor shall notify the Engineer.C. The Contractor shall agree to provide 24 hour service on call for emergency.PART 2. - PRODUCTSNot UsedPART 3. - EXECUTIONNot UsedEND OF SECTION 1501006/25/09 MECHANICAL GENERAL CONDITIONS15010-6
SECTION 15050 - BASIC MATERIALS AND METHODSPART 1. - GENERAL1.1 SUMMARYA. Work included under this division shall consist of furnishing labor and materialsnecessary for the installation of the work called for under the Mechanical, Fire SprinklerProtection, Temperature Control and Mechanical Test & Balance contracts as listed inthe Instruction to Bidders, as specified, and as shown on Drawings to provide a complete,operable and approved system.1.2 REFERENCESA. The following is a partial list of related standards:1. Air Conditioning and Refrigeration Institute (ARt).2. American National Standard Institute (ANSI).3. American Society of Heating, Refrigerating, and Air Conditioning Engineers, Inc.(ASHRAE).4. American Society of Mechanical Engineers (ASME).5. American Society of Sanitary Engineers (ASSE).6. American Society for Testing and Materials (ASTM).7. Amencan Water Works Association (AWWA).8. Air Moving and Conditioning Association (AMCA).9. Cast Iron Soil pipe institute (CISPI).10. Manufacturer’s Standardization Society (MSS of the Valve and Fittings Industry,Inc.).11. National Electrical Manufacturers Association (NEMA).12. National Fire Protection Association (NFPA).13. Plastic Pipe Institute (PPI).14. Sheet Metal and Air Conditioning Contractors National Association (SMACNA).15. Steel Tank Institute (STI).1.3 QUALITY ASSURANCEA. Where equipment is specified by manufacturer, brand name or catalog number, this shallestablish the standard of quality and style of the product to be provided under theContract.B. Where two or more units of the same kind of equipment are required, they shall beproducts of a single manufacturer. Mixing and matching of various manufacturer’s like orsimilar components shall not be permitted.C. The Contractor shall field verify and inspect existing buildings for connections to existingsystems, equipment, and materials designated, on Drawings or in Specifications, to beused.D. The Contractor shall have full responsibility of component parts of the mechanical systemto ensure that new equipment, integrated with existing equipment and systems, willperform and operate in accordance with requirements of the Specifications withoutexcessive or unusual service or maintenance requirements.E. The Contractor shall be responsible for verifying locations of such things as piping,ductwork, equipment, door swings, heights of cabinets and counters, etc., prior to theinstallation of any mechanical equipment. Installed mechanical work that interferes with06/25/09 BASIC MATERIALS AND METHODS15050-1
the work of other trades shall be relocated by the Mechanical Contractor at no additionalcost to the Owner.F. Contractors shall coordinate with all other trades and install their systems in the spaceprovided/coordinated within the structure. Install systems and materials for ease ofmaintenance. Equipment arrangements shall provide at least the minimum clearances asrecommended by equipment manufacturer to facilitate proper maintenance and servicingof system. Deviations in minimum clearance requirements shall be permitted only uponprior written authorization from the Architect/Engineer.PART 2.- PRODUCTS2.1 FIRE BARRIER PENETRATION SEALING SYSTEMS:A. Approved Supplier: Specialty Building Products or prior approved equivalent.B. Approved Manufacturers: 3M, Transco Products, Nelson Flameseal Systems, Tremco,Inc. or prior approved equivalent.C. Fire stopping materials shall conform to local building code requirements and shall betested according to UL 1479 and ASTME-814 for through-penetration fire stop systems.D. Fire stopping materials shall be furnished by a supplier who specializes in the selectionand furnishing of fire stopping materials for building systems.E. Contractor shall submit all fire stopping methods to Local Authorities for approval.Provide copies of all approved fire stopping methods to the Engineer. Seal allpenetrations and sleeves through floors and fire walls with high temperature, fire ratedsealant. Fire stop material shall be equal to 3M brand Fire Barrier Penetration System. Inlieu of type system described above, modular component system equal to ProSet SystemInc. or approved equal may be utilized. Install the appropriate concrete or woodpenetration system as required by code.2.2 WALL, FLOOR, AND CEILING OPENINGSA. General Requirements:1. Contractor shall be responsible for exact sizes and locations of any chasesand/or openings required for mechanical work.B. Chases and Openings:2.3 SLEEVES1. General Contractor shall leave chases and openings in walls, floors, ceilings, andpartitions where shown on Drawings or otherwise necessary to receivemechanical work. It is this contractor’s responsibility to coordinate sizes andlocations prior to framing or pouring.A. General Requirements:1. Provide sleeves in conjunction with water tight piping passing through concreteor masonry walls, partitions, and slabs.06/25/09 BASIC MATERIALS AND METHODS15050-2
2. Sleeves shall extend 3” beyond the full thickness of walls and slabs and shall beat least 2 pipe diameters larger than or 2” larger than ducts piping passingthrough. Where piping with covering is installed, a minimum of I” shall beprovided between outside of pipe covering and inside surface of the sleeve.B. Duct Sleeves:1. Material: Except as otherwise indicated, duct sleeves shall be constructed ofminimum 22 gauge galvanized iron.2. Vertical Sleeves: Vertical duct sleeves through floors shall have space betweenduct and sleeve packed with an approved fire stop material flush with top ofsleeve to make a fire rated and watertight joint. Insulated duct shall have foamedrubber insulation full length within sleeves.3. Placement: Set sheet metal sleeves for ductwork passing through floors abovegrade. Sleeve shall extend 3-inch above finished floor elevation. Sleeve shall besupported in place before floor is poured and shall be caulked to make awaterproof joint between floor and sleeve. Where more than one duct is passingthrough a floor slab above grade and one floor opening for all ducts is provided,sleeve shall be same size as the overall opening.4. Interior Sleeves: Ductwork through walls shall have soundproof packing in nonratedwall sleeves and an approved fire stop material in fire rated wall sleeves.Ducts passing through corridor walls not containing fire dampers shall besleeved.5. Exterior Sleeves: Ductwork passing through exterior walls shall be sleeved andcaulked watertight. Exterior ductwork shall be so installed as to pitch away fromwall penetration a minimum of ¼-inch per foot.6. Fire Rated Wall and Floor Openings: Ductwork passing through fire rated wallsand floors shall be provided with an Underwriters’ Laboratories listed duct andsleeve assembly. Duct and sleeve assembly shall meet or exceed fire rating ofwall and floor through which the duct passes.C. Pipe sleeves1. Exterior Walls: Sleeves shall be standard weight steel pipe. Install sleeves inexterior walls and floors below grade with approved caulking between sleevesand piping to make it waterproof. Plastic sleeves shall not be used.2. Floors: Sleeves shall be standard weight steel pipe Vertical pipe sleeves throughfloors shall have space between pipe and sleeve packed with an approved firestop material flush with top of sleeve to make a watertight and fire rated joint.3. Interior Sleeves: Sleeves shall be standard weight steel pipe. Piping throughwalls of adjacent rooms shall have soundproof packing in non-rated walls and anapproved fire stop material in fire rated walls.4. Fire Rated Wall and Floor Openings: Piping passing through fire rated walls andfloors shall be provided with an Underwriter’s Laboratories, Inc. listed pipe andpipe sleeve assembly. Pipe and pipe sleeve assembly shall meet or exceed firerating of wall and floor which the pipe passes through.06/25/09 BASIC MATERIALS AND METHODS15050-3
2.4 ACCESS PANELSA. The Contractor shall provide means of access for all equipment, smoke/fire dampers, firedamper, valves and fittings specified. Furnish wall and ceiling access panels as requiredto the General Contractor for installation. Access doors and panels required within ratedseparations shall carry the appropriate rating. Conform to Division 8 access panelspecifications.PART 3. – EXECUTION3.1 EXAMINATIONA. Verification of Conditions:3.2 PREPARATION1. On-Site Review: Contractor shall visit site to become thoroughly acquainted withexisting conditions of site and services.2. Existing Active Services: When encountered during construction, Contractor shallprotect, brace or support pneumatic tubing, existing active sewers, water, gas,ductwork, or other services, where required, for proper execution of Work.3. Inactive Services: If encountered during construction, Contractor, as appropriate,shall cap or plug inactive pipes, ducts, and temperature control tubing or wiring atno additional cost to Owner.4. Responsibility: Liability for repairs or replacement of damaged or defectivematerials, including, but not limited to, property damage resulting fromnegligence or other causes, shall be the Contractor’s sole responsibility untilwork has been accepted by Architect/Engineer and Owner.A. Protection: After delivery, and before and after installation, equipment shall be protectedagainst theft or damage.1. Contractor shall protect plumbing fixtures, metal heating enclosures and otherequipment and all baked enamel or glazed surfaces from damage by covering orcoating as recommended in Bulletin, “Handling and Care of Enameled Cast IronPlumbing Fixtures”, issued by Plumbing Fixture Manufacturers Association or byother methods approved by Architect/Engineer.2. Coat polished or plate metal parts with Vaseline immediately after installation.Protect equipment outlets, pipe and conduit openings with temporary plugs, capsor burlap as required to prevent filling with construction dirt.3.3 EXCAVATION AND BACKFILLA. Excavation: Contractor shall perform excavation boring, drilling, back filling andcompaction at required depth for installation of work indicated or specified.1. Excavated material not required or not suitable for backfilling shall be removedfrom site.2. Protect excavation by grading and pumping to keep space clear of water duringconstruction.06/25/09 BASIC MATERIALS AND METHODS15050-4
3. Provide shoring and sheeting as necessary for protection of work and safety ofpersonnel. Protect bottom of excavation from frost.4. Excavation in rock shall be 8-inch below invert of pipe to be installed and shall bebackfilled to a depth of 8-inch with clean, washed sand before pipe installation.5. Excavation terminating in unstable or organic material at pipe invert elevationshall be continued to 30-inch below pipe invert elevation and backfilled with pitrun gravel to pipe invert. Soil boring reports are available for inspection atArchitect’s office.6. Pipe installation in backfilled areas shall not occur until backfill is 2 feet abovepipe invert, at which time backfill shall be excavated to proper depth, pipeinstalled, and backfill replaced as specified.7. All lines are to be properly capped to prevent the entrance of dirt or any otherforeign matter. All debris and water shall be removed from the trench prior to finalinstallation. Properly protect piping or ductwork until backfilling can be performed.Inspection of all installations by Local Inspection Authorities shall be completedprior to backfilling.B. Backfilling Under Floors and Slabs: Backfill areas below concrete slabs on grade inhorizontal layers not to exceed 8-inch in depth and compact with approved equipmentuntil dry density is not less than 95 percent of Standard Proctor Density.1. Backfill material shall be pit run gravel or coarse sand free of rubbish, compactedand leveled to receive slab. If natural earth is of similar structure with samematerial as specified above, no additional material will be required. Fill to raisesub-grades to required elevation shall be accomplished as specified above.2. Areas not below concrete or asphalt slabs and footings shall be backfilled withsuitable excavated material, free of debris and rubbish.3. Carefully backfill to a point 6” above piping or ductwork and thoroughly tamp.Complete backfilling in 8” lifts and compact each layer to 98% standard proctordensity. Restore surface to its original condition, i.e. grass, concrete, blacktop,etc.4. Contractor shall pay costs for testing of compacted backfill by an approvedtesting laboratory when tests are requested by Architect/Engineer.C. Back filling Outside: Backfill excavations below finished grades with materials similar tothat removed in excavation, free from rubbish or other unsuitable material. Place backfilland compact as required to prevent settling.1. Backfilling shall be done to finished grades indicated on Drawings. If no finishedgrading is done in excavated areas, Contractor shall backfill to existing gradesand restore surface to original condition.2. Compaction over ditches less than 3 feet in width and around walls and columnsshall be done by the use of mechanical hand compactors.3. Contractor shall pay costs for testing of compacted backfill by an approvedtesting laboratory when tests are requested by Architect/Engineer.06/25/09 BASIC MATERIALS AND METHODS15050-5
D. Pavement, Curb, and Sidewalk Replacement:1. Contractor shall be responsible for the replacement of existing Street pavement,curbs and sidewalks removed or damaged by Contractor or relatedsubcontractors.2. Make necessary arrangements to perform such repairs and pay incurred costs inconnection with said repairs, including amount in Bid.3.4 CUTTING AND PATCHINGA. Cutting and patching shall be held to practical minimum consistent with good constructionpractice by properly locating and leaving sleeves and boxes, or notifying GeneralContractor of openings, where required, as construction progresses. All cutting andpatching shall be done with the prior approval of the Architect/Engineer.1. Necessary cutting and patching of walls, floors, partitions and ceilings, asrequired for the proper installation of work under this Contract, shall be the soleresponsibility of this Contractor. Perform cutting and patching in such a manneras to leave no visible trace and to return the part affected to the condition ofundisturbed work. Cutting and patching shall be performed by individualsexperienced, skilled, and licensed for the particular type of work involved. Inferiorwork will not be accepted.B. Pavements: Cutting of pavements shall be accomplished by saw cutting a minimum of½-inch deep prior to jack hammering. Contractor shall bore below pavement whereindicated on Drawings or where required by Architect/Engineer.C. Existing Conditions: Patch pavements to match existing conditions. Labor and materialsrequired to replace and rebuild parts cut or injured shall be furnished and installed by thisContractor.3.5 INSTALLATIONA. Connection to Equipment Specified: Provide material and labor required to connect to themechanical system of fixtures and equipment having mechanical connections and whichare specified in other Sections or Divisions of the Specifications or furnished byOwner/Vendor.1. Provide piping supply connections with shut-off valves.2. Ductwork connections to equipment, diffusers, and appurtenances shall be madewith flexible ductwork unless a solid connection is indicated.3. Drainage connections shall be properly trapped and vented.B. The Mechanical Contractor shall provide concrete pads for all floor mounted equipment.Pads shall be 4” thick and extend a minimum of 2” beyond equipment.C. Floor, Wall and Ceiling Plates:1. Where uncovered exposed pipes pass through floors, walls or ceilings in finishedrooms and inside casework, fit with approved type chrome plated metal plate.2. Plastic escutcheon plates shall not be permitted.06/25/09 BASIC MATERIALS AND METHODS15050-6
D. Mechanical Systems Painting: Exposed supporting iron and steel work, bare pipe, fittings,hangers, and supports shall be wire brushed, washed with mineral spirits to remove dirtand grease, and painted with one coat of metal primer followed by two finish coats ofbattleship gray paint.E. Concealed Equipment location: Location of motor operated equipment, furnished underthis Contract, installed above ceiling shall be identified by placing a color coded thumbtack (or adhesive applied dot) in the ceiling directly below item noted. Identification colorsshall be as follows:1. Exhaust Fans: Green2. Air Handling Units: Blue3. Control Valves: Yellow4. Shut-off Valves: OrangeF. Chlorination of Domestic Water Lines: Contractor shall clean entire domestic watersystem in building, shall disinfect system in strict accordance with governing codes andState Health Department Requirements, and shall flush entire system clean with potablewater.1. The piping system shall be flushed with clean, potable water until no dirty waterappears at the points of outlet.2. The system or part thereof shall be filled with a water-chlorine solution containingat least 50 parts per million of chlorine, and the system or part thereof shall bevalved off and allowed to stand for 24 hours.3. The system or part thereof shall be filled with a water-chlorine solution containingat least 200 parts per million of chlorine and allowed to stand for 3 hours.4. Following the allowed standing time, the system shall be flushed with cleanpotable water until no chlorine remains in the water coming from the system.5. Contractor shall provide written certification to Architect/Engineer thatchlorination and flushing of domestic water system has been completed.G. Filtration: At time of substantial completion, and prior to turning equipment over to Owner,Contractor shall install a complete set of unused, clean filters in each type of unitsupplying filtered air to the building.3.6 PIPE IDENTIFICATIONA. Exposed Piping: Bare and insulated, exposed new piping in Mechanical Rooms, andunfinished rooms shall be identified with labels, painted on using metal stencils. Stencilsshall have 1-inch high letters and shall include a directional arrow 3-inch long by 1/2-inchwide, indication direction of flow. Color of stenciling shall be black lettering on a yellowbackground.1. Labels shall be located at each change in direction of pipe runs and at intervalsnot to exceed 20 feet.2. Setmark snap-on pipe markers by Seton Nameplate Corporation or snap-on pipemarkers by W. H. Brady Company, which are similar to above stencil descriptionshall be acceptable.06/25/09 BASIC MATERIALS AND METHODS15050-7
B. Concealed Piping: Bare and insulated new piping running in ceilings and soffits shall beidentified with labels painted on using metal stencils. Each stencil shall have 1-inch highletters and shall include a directional arrow 3-inch long by 1/2-inch wide. indicatingdirection of flow. Color of stenciling shall be black lettering on a yellow background.1. Labels shall be located at each change in direction of pipe runs and at intervalsnot to exceed 20 feet.2. Labels shall be located on each side of wall, partition and floor penetrations.3. Setmark snap-on pipe markers by Seton Nameplate Corporation or snap-on pipemarkers by W. H. Brady Company, which are similar to above stencil descriptionshall be acceptable.C. Pipe Markers: Contractor shall label the piping as follows:1. Condensate Drain CD2. Domestic Cold Water CW3. Domestic Hot Water HW4. Natural Gas G5. Fire Sprinkler FIRED. Mechanical Room Piping Paint Schedule: Mechanical Contractor shall paint piping inmechanical rooms to match the following schedule (based on Devoe Paint ProtectiveColor Guide):3.7 CLEANINGSystem Color DevoeFire Equipment Safety Red R-1,3 06Natural Gas Safety Blue R-1 08Domestic Hot Water Dark Green R-1,3 Custom MixedDomestic Cold Water Dark Green C-i ,3ii1. Piping shall also have labels and flow directional arrows.2. Color Chart: Mechanical Contractor shall prepare and submit a minimum of 3color charts for approval prior to beginning painting of boiler room piping. Paintcolor selection numbers listed are Devoe and are listed for reference.3. Mechanical Room Piping: Paint in accordance with Specification Section 09900,Painting.A. Housekeeping, Cleaning and Storage: Remove from the building and site, scrap material,temporary building, packaging material, miscellaneous debris, and dirt on a regularschedule, or as required, and in accordance with Architect direction, to maintain buildingin a reasonably clean, workable condition during construction.1. Cutting oil and steel shavings shall be caught in a suitable container to ensurefinal finish material in building will not be marred or damaged.2. Upon completion of work and before final inspection, Contractor shall removeplaster, paint, rust, stickers, and shipping tags from installed equipment.3. Clean foreign matter from installed equipment and remove dirt and debris, inconnection with work, from building.06/25/09 BASIC MATERIALS AND METHODS15050-8
3.8 PRE-OPERATIONAL SYSTEM CLEANOUTA. Pre-Cleaning Chemicals: New piping systems and appurtenances shall be cleaned with aone percent solution of Ferrosol 345, neutral pH cleaner, or approved equal, to removeany iron deposits, oil-based coatings, mill scale and construction residues.1. Follow manufacturers’ directions regarding equipment.END OF SECTION 1505006/25/09 BASIC MATERIALS AND METHODS15050-9
SECTION 15150 - PIPING MATERIALS AND METHODSPART 1. - GENERAL1.1 SUMMARYA. All piping materials and methods of construction and workmanship shall be provided asper the requirements of local codes and regulations.B. Lead pipes solders, flux, etc., are not allowed.C. The contractor is responsible for verifying all invert elevations with respect to buildingfinished floor elevations and site provisions.PART 2. - PRODUCTS2.1 PIPINGA. Below Grade Sanitary, Vent and Waste1. Bell and spigot cast iron piping and fittings ASTM A-74 with neoprenecompression joints.2. Hub less cast iron pipe and joint system, with stainless steel bands or MG castiron couplings, CISPI 301 -69T.B. Above Grade Sanitary, Vent and Waste1. Bell and spigot cast iron piping and fittings ASTM A-74 with neoprenecompression joints.2. Hub less cast iron pipe and joint system, with stainless steel bands or MG castiron couplings, CISPI 301-69T.3. ABS Schedule 40, ASTM D2661. Pipe and corresponding fitting installed percode limitations.C. Above Grade Domestic Water Piping (3” and smaller)1. Type “L” seamless hard temper copper tubing with wrought copper fittings, using95/5 solder or brazing.D. Natural Gas Piping1. Inside Building:a. Schedule 40 black steel with threaded fittings, ASTM A 53.b. Type L seamless soft copper, ASTM B 88 and copper fittings. Copperpiping shall not be used if the gas contains more than an average of 0.3grains of hydrogen sulfide per 100 standard cubic of gas.c. Flexible Gas Piping System: Gastite System by TiteFlex (or Wardflex,approved equal) Plastic coated, 304 stainless steel flexible tubing.Installation of flexible gas piping must be performed by qualified installer06/25/09 PIPING MATERIALS AND METHODS15150-1
2.2 VALVES2. In Ceiling Air Plenum:who has successfully completed the manufacturer’s training. Systemmust be installed with all of the flexible gas piping manufacturer’s valves,regulators, fittings, etc. The contractor must obtain specific localinspectors approval prior to installing the system.a. Schedule 40 black steel with standard weld butt fittings.b. Type L seamless soft copper and copper fittings. Copper piping shall notbe used if the gas contains more than an average of 0.3 grains ofhydrogen sulfide per 100 standard cubic of gas.c. All welded or brazed connections in air plenum ceilings and concealedspaces. Use no valves, threads, unions or connectors in these locations.Concealed gas piping in solid partitions shall be inside a Schedule 40black steel pipe sleeve capped at both ends and vented outside thebuilding.3. Exterior Underground:a. PE (polyethylene) plastic and shall be marked “gas” and “ASTM D 2513”and shall be used with factory assembled steel riser.b. Type L seamless soft copper, ASTM B 88 shall be used with factoryassembled steel riser. Copper piping shall not be used if the gascontains more than an average of 0.3 grains of hydrogen sulfide per 100standard cubic of gas.4. Exterior Aboveground:a. Schedule 40 black steel with threaded fittings, ASTM A 53.A. Acceptable Valve Manufacturers:1. Apollo, Powell, or approved equal, Crane, Jenkins, Watts, Mueller, (Powell)numbers shown).B. Gate Valves —Domestic Water Piping2 inches and Smaller: All bronze; #1 842, solder end.1. 4” and Larger: I .B.B.T; #1793, flanged.C. Check Valves —Domestic Water Piping1. 2-1/2 inches and Smaller: All bronze; #1 825, solder end.D. Ball Valves —Domestic Water Piping (use in lieu of gate valves only)1. All bronze, Watts #B-6000.E. Globe Valves —Domestic Water Piping1. 2-1/2 inches and Smaller—All Bronze; #1873, solder end.06/25/09 PIPING MATERIALS AND METHODS15150-2
2.3 BACKFLOW PREVENTERSA. Acceptable backflow pre-venter Manufacturers:1. Clayton “CIa-Va Series “RP” or approved equal.B. Provide strainer with blow off valve immediately upstream from backflow.C. Extend drain piping to safe-waste over floor drain.2.4 GAS VALVESA. Acceptable Manufacturers:1. DeZurik or approved equal.B. 2” and Smaller: No. 955 or DeZurik No. 425.C. 2-1/2” and Larger: Lubricated plug cock or DeZurick No. 425 Provide extended stems toaccommodate insulation on insulated piping.D. Provide a natural gas pressure regulator equal to Maxitrol to reduce gas pressure to anacceptable limit at gas fired equipment. See plans for gas company meter outletpressure. See mechanical equipment schedule for required capacities and operationalmanuals for pressure limits. Provide with code approved pressure limiting device or pipepressure regulating valve relief vent individually to the outside. Verify with the local codeauthorities.E. Gas Solenoid Valves: Asco #K3A415, approved UL rated automatic gas shutoff valves.Normally closed, 24 volt with manual reset, sized to match gas piping service toequipment.2.5 MISCELLANEOUS VALVES:A. Solenoid Valve for Domestic Cold Water:1. Acceptable Manufactures: Gold, Jefferson, Burkert, Honeywell, W.E. Anderson.2. Gould Valve CD, or approved equal. Type M-3V, NPT, Full Port, 24 Volt,Normally open, UL listed.B. Drain Valves- Domestic Water Piping1. ¾“ hose bib, Chicago #151, rough brass.2. Equal to Apollo Series 78-1 00 ball valve, 600 pound, bronze body, chromeplated brass ball and blow-out proff brass stem, reinforced Teflon seals andseats and %“ hose thread outlet with cap.3. Domestic water drains shall be equipped with vacuum breakers.C. Thermostatic Mixing Valve: Leonard Model No. TM-186-8015-PRV, 1” inlets, 1¼” outlet.High-low manifold temperature control thermostatic controller with inlet checkstops. Wallsupport, outlet ball valve adjustable high temperature limit stop, removable cartridge withstrainer, stainless steel piston and liquid fill thermal motor with bellows element mounted06/25/09 PIPING MATERIALS AND METHODS15150-3
out of water. Provide volume control shutoff valve, bimetal dial thermometer, brass pipe,fittings, and unions mounted to exposed cabinet panel; bottom supplies; top outlet. ½”bypass; minimum 1.0” gpm @ 10 psi drop and set at 40 gpm @ 10 psi drop; 120°Fdischarge temperature. Other acceptable manufacturers: Lawler, Bradley.PART 3. – EXECUTION3.1 A. Slope water piping 1” per 40’ and arrange to drain at all low points.B. All storm and sanitary piping sloped 1/8” per foot unless noted otherwise or if required tomeet inverts. Notify engineer of any changes.C. All underground sewer pipe within 10 feet of buried water supply piping shall beconstructed in accordance with State and/or Local Code.D. Provide all appropriate sanitary piping fittings, wyes and bends. No double-wye fittings forsanitary drainage in horizontal position shall be used.E. Vent pipes passing through roofs shall terminate at least 12” above the roof line.F. Above grade plastic drain and vent piping horizontal and vertical runs cannot exceed 35feet. Solvent welds shall be done with a contrasting primer to the color of the pipe andcement. Plastic piping shall not be installed in air plenum spaces including parkinggarage area.G. Contractor shall provide all sleeves required through footings, foundation walls and floors.Underground services shall be sleeved with schedule 40 PVC sleeving. Sleeve to be (1)size larger than the pipe it serves. Extend sleeves 0-3” beyond penetration. Coordinatewith Structural Engineer.H. Provide shut-off valves as required by Code and good installation practice for the properisolation of equipment. All branch take offs shall have isolation shut off valves. Provideextended stem valves where required for insulation. Except as otherwise specified orshown on plans, valves 2-1/2 inch and smaller shall have screwed end connections andvalves 3 inch and larger shall have flange end construction. Install manual drain valves atevery low point of each water piping system.I. Mechanical formed tees connections as created by T-Drill or approved equal shall beformed in a continuous operation consisting of drilling a pilot hole and drawing out thesurface to form a collar having a height of not less than three times the thickness of thetube wall. Branch tube shall not obstruct the flow in the main line tube. All joints shall bebrazed in accordance with the Copper Development Association. Soft soldered joints willnot be permitted. Mechanical formed connections shall be listed by the InternationalPlumbing Code, B.O.C.A., l.A.M.P.O., S.B.C.C., ASME Code for Pressure Piping andshall be acceptable to governing authorities.J. All threaded nozzle fixtures to have atmospheric vacuum breakers.K. Installation of cross connection control devices and related valves shall maintain 1 ‘-6”clear from wall or other obstructions, no more than 5’-O” above floor or closer than 2’-O”from floor.06/25/09 PIPING MATERIALS AND METHODS15150-4
L. Pipe Supports:1. Hangers shall adequately support the piping system and shall be installed toallow for expansion and contraction. Insulation shall be continuous and jacketsshall be sealed tight at hangers. Provide neoprene rubber or rubber coated padwhere un-insulated pipes rest on hangers.2. For multi-level wood floor construction allow for wood shrinkage and movement.Provide clearance for piping near wood construction. Provide expansion joints onvertical sanitary and storm stacks equal to Josam model #26200. For horizontaltake-offs from stacks use no-hub connections and on the inlet side and seal oftraps provide slip joints. All mechanical joints shall be accessible.M. Provide escutcheon plates at all wall, floor, or ceiling piping penetrations. This includes allmechanical piping systems. Escutcheon plates shall match the finish of the surroundingarea.N. Exposed PVC venting through roof shall be painted at the discretion of the Architect.O. Provide a dielectric coupling at all connections of dissimilar metals. Provide adequateclearance for insulation and for access to valves. All piping shall be concealed and shallmaintain proper clearances for ceilings, ducts, walls, lighting, etc. except that piping maybe exposed in mechanical areas. At all fixture and equipment connections where nipplesare necessary between copper fixtures and tubing, such nipples shall be full size brassnipples with brass or copper adapters.P. Provide shut-off valve for all gas fired equipment. Locate valve in an easily accessiblelocation.Q. Gas Piping on Roof:1. Piping on roof shall be supported on polyethylene, high U.V. resistant Quick“Pipe” Blocks manufactured by Nelson-Olsen Inc. (Erico, E-Z Sleeper Block) orapproved equal. Piping and blocking shall be installed to allow for expansion andcontraction.2. Exposed steel gas piping shall be properly cleaned and shall be painted with onecoat of red primer and two (2) coats of oil paint “Silver Gray” color. This paintingis not necessary on galvanized surfaces.R. Viega Pro-Press system maybe used for copper piping, sizes 1/2”- 4” diameter, up to 200psi operating pressure and 250°F for joining copper tubing.S. Provide 1/2” ethafoam on all above grade vertical piping to all pipes and slab movementat wood floor penetrations.END OF SECTION 1515006/25/09 PIPING MATERIALS AND METHODS15150-5
SECTION 15200 – INSULATIONPART 1. - GENERAL1.1 SUMMARYA. Insulation shall be applied to clean dry piping and ductwork.PART 2. - PRODUCTS2.1 A. Materials.1. All insulation shall have composite (insulation, jacket, and/or facing and adhesiveused to adhere the facing or jacket to the insulation), fire and smoke hazardratings as tested by Procedure ASTM E-84, NFPA 225 and U/LI 723 notexceeding Flame Spread 25 and Smoke Developed 50.2. Jacket and Facing Descriptions.B. Ductwork.C. Piping.a. All purpose vapor barrier jackets.b. VB vapor barrier, white kraft bonded to 1 mil aluminum foil, reinforcedwith glass yarn. Water vapor permeability 0.02 perms.c. FSK reinforced foil and paper (Foil Scrim Kraft). Aluminum foil (minimum0.75 mu thick) reinforced with fiberglass yard mesh and laminated to 40lbs. chemically treated fire resistant Kraft UL rated.1. External rigid board insulation shall be equal to Owens Corning 703 Series withFRK or ASJ (All Service Jacket) vapor barrier facing, 3 pound density fiberglasscomplete with non-combustible foil faced vapor barrier. Entire system shall be ULlisted.a. 0.030 thick PVC preformed jackets with seams made for welding.b. 0.024 thick stucco embossed, smooth or corrugated pattern equal toChilders Products Company.2. Fiberglass blanket shall be 1 pound density, with factory applied type FSK jacket.Conductivity shall be 0.26 average maximum at mean temperature of 75°F.3. Provide galvanized steel shields at all pipe hangers on insulated piping excepthot water heating piping where pipes bear directly on the clevis. Shields shall be16 gauge for pipes 4” and larger diameter and 20 gauge for smaller pipes.1. Piping shall be insulated with Manville (IMCOA, Owens-Corning, Knauf) “FLAMESAFE” fiber glass insulation, or approved equal. The insulation shall have anaverage thermal conductivity not exceeding 0.22 BTU in. per sq. ft. per °F. hourat mean temperature of 75°F.06/25/09 INSULATION15200-1
2. Exposed areas shall be furnished with factory applied “FLAME SAFE” All-Purpose Vapor barrier jacket.3. Concealed areas with factory applied “FLAME SAFE” VB (Vapor Barrier Jacketor All-Purpose Jacket).4. Fittings, valve bodies and flanges for pipe size 4” and smaller shall be providedwith PVC jackets over fiberglass inserts.5. Armstrong (Rubatex, Halstead) Armaflex II flame retardant elastomeric thermalinsulation, installed according to manufacturer’s recommendations and asallowed by Local Codes, shall be suitable for pipe temperatures between -40°and 2200.PART 3. – EXECUTION3.1 GENERALA. Provide continuous vapor barrier over all seams.B. Apply insulation in thickness and type as follows or per applicable state energy code,whichever is greater:1. No external insulation for ductwork installed in areas open to the structure.2. Return Air Ducts: 3/4“ acoustical lining for all return ductwork within 10’-0” of anyfan.3. Supply air ducts: 1” thickness glass fiberboards extended ten feet from handlingunit discharge. 1” thickness glass fiber blanket may be used in lieu of board inconcealed locations.4. Exhaust air ducts within 10 feet of exterior wall penetration: 1½” inch thicknessglass fiberboards. 1½” thickness glass fiber blanket may be used in lieu of boardin concealed locations.5. All ductwork in concealed plenum areas shall be insulated with 2” foil faced rigidboard or wrap fiberglass insulation for ducts less than 1 square foot, larger that Isquare foot shall be insulated with 1½”.6. All individual room exhaust run outs shall be insulated with 1” wrapped insulation.C. Kitchen Exhaust Ductwork.D. Piping.1. See drawings for kitchen exhaust ductwork insulation requirements.1. On cold water piping all seam edges shall be additionally sealed with vaporbarrier adhesive and ends wrapped with vapor barrier tape overlapped theadjacent jacket06/25/09 INSULATION15200-2
2. Underground Piping, Direct Buried Outside Domestic and Fire Sprinkler WaterService, Sanitary and Storm Sewer:a. Styrofoam Brand as manufactured by Dow Chemical Company orapproved equal. Product shall consist 1” extruded polystyrene closedcells, high moisture resistant, rigid foam. Insulation shall be two halfsections for installation purposes. Insulated pipe shall be encased andsleeved with PVC Schedule 40 jacket at least 2” larger than the insulatedpipe.b. Flat Styrofoam rigid board installed over piping. See detail on plan.3. Domestic Water Piping:a. Domestic re-circulating shall be insulated with 1” fiberglass.b. Apply fiberglass insulation in thickness as follows or per applicable StateEnergy Code, whichever is greater:(1) 1/2” thru 1” ½”(2) 11/4” thru 2” 1”(3) 2 1/2” and larger 1½”c. Pipe insulation not required for vertical risers located within insulatedinterior wall.4. All existing piping that may be exposed as a result of new work shall be reinsulated to match existing.END OF SECTION 1520006/25/09 INSULATION15200-3
SECTION 15300 - FIRE SPRINKLER SYSTEM (PERFORMANCE BASED)PART 1. - GENERAL1.1 SUMMARYA. The Contractor for the fire protection installation must be a qualified Fire ProtectionContractor regularly engaged in the installation of automatic fire sprinkler systems.Provide a fire protection technician certified with the National Institute of CertifiedEngineering Technicians (NICET level IV), to certify direct and supervise the work or ifrequired by governing authorities, a registered professional engineer.B. Codes and Standards:1. NFPA compliance: Install fire protection systems in accordance with the latestedition of NFPA 13 “Standard for the installation of Sprinkler Systems.”2. UL Compliance: Provide fire protection products in accordance with pre approvalguide UL standards; provide UL label on each product.3. Fire Department/Marshal Compliance: Install fire protection systems inaccordance with local and/or state regulations of fire department or fire marshal.4. Latest applicable State and Local Codes.5. City Water Department Compliance: The water service connection and sprinklersystem valve assembly shall comply with all City Water DepartmentRequirements.6. Obtain all required approvals and permits. Permits shall be obtained from the cityor municipality in which the system will be installed. If permits are not issued bythe city or municipality, a permit shall be obtained from the State Fire Marshal.C. Description of Work1. The Contractor is responsible for verifying with State, City and Localmunicipalities any and all code requirements related to the fire sprinkler system.2. Verify need, if applicable, to provide fire sprinkler protection in wood constructionceiling space with local inspectors. It is the sole responsibility of the Contractor toreview all construction documents and verify with local inspectors the need forany special coverage, dry fire sprinkler protection for unheated spaces, pressureand flow requirements prior to submitting a bid. VERIFY EXISTING SITECONDITIONS INCLUDING SERVICE SIZE AVAILABLE AND PRESSURE.PROVIDE FIRE PUMP INCLUDING ALL ELECTRICAL AS REQUIRED. ANALTERNATE PRICE FOR THIS ITEM SHALL BE PROVIDED. IF UPON FINALCALCULATIONS THE PUMP IS NOT NECESSARY, THE ALTERNATE PRICEWILL NOT BE ACCEPTED. Additional compensation will not be allowed formodification to the bid documents to meet any additional code requirements.3. Provide all labor and materials and perform all operations required in connectionwith the installation of the fire extinguishing systems.4. For fire alarm system, provide audio/visual devices and connect to local and offsitealarms. Provide all wiring and make all connections. Provide auto-dialer andmake connection to outgoing telephone point-of-connection. Coordinate with06/25/09 FIRE SPRINKLER SYSTEM (PERFORMANCE BASED)15300-1
Division 16 to determine if a Fire Alarm and Detection system is specified. If so,coordinate system connections.5. If applicable, Contractor shall verify kitchen exhaust hood fire suppressionrequirements with general contractor and kitchen design consultant. Contractorshall provide all water supply piping, sprinkler heads if required, valves, backflowprotection, supervisory switches and related wiring.D. Submittal and Approvals1. Prepare drawings of fire protection systems indicating pipe sizes, pipe locations, headlayouts and type, fittings, shutoff values, equipment, fire department connections, etc.The design, hydraulic calculations and subsequent drawings shall reflect all modificationsand extensions to existing piping equipment and head layout. Indicate elevations, slopes,floor and wall penetrations, drains, etc.2. Submit to all Agencies having jurisdiction for approval. Submit to Owner insurance carrierfor approval if required. AFTER THE DOCUMENTS HAVE BEEN APPROVED BY ALLREVIEWING AGENCIES, SUBMIT THE APPROVED COPIES BEARING STAMPSAND/OR SIGNATURES OF FIRE MARSHAL OR AGENCY HAVING JURISDICTIONTO THE ARCHITECT FOR THEIR USE, BEFORE PROCEEDING WITHINSTALLATION.3. Submit pipe and sprinkler head layout, (shop drawings), to the Architect for their approvalprior to installing any material. Allow ten (10) working days for review by the Architect.PART 2. - PRODUCTS2.1 A. The following is a general guideline on types of sprinkler heads and their recommendedusage. Final design will need to be approved by local inspector and coordinated withArchitect and Owner.1. Decorative lobbies: Fully concealed sprinkler heads with only ceiling plate visible.Cover plate shall be factory finished in white.2. In all spaces with finished ceilings: Recessed chrome plated sprinkler.3. All areas where piping will be exposed without finished ceilings: Exposedsprinklers, brass finish.4. High areas with/finished ceilings: Exposed sprinklers, chrome finish withmatching escutcheon.5. Areas exposed to high humidity or weather: Corrosion-proof (polyester coated)sprinklers with matching escutcheon.6. Extended coverage where possible, on concealed piping in areas with finishedceilings. Concealed type in decorative lobbies. Recessed in all other areas withfinished ceilings, on concealed piping: Extended coverage sprinklers to beconcealed with white cover plates in finished areas. Sidewall, recessed, whitewith white escutcheon for concealed piping and upright or pendent sprinklers withbrass finish in areas with exposed piping.7. Decks, canopies, small unheated interior spaces and attics: Dry type sprinklerspendent, recessed concealed or horizontal sidewall, or fast response.06/25/09 FIRE SPRINKLER SYSTEM (PERFORMANCE BASED)15300-2
PART 3. - EXECUTION3.1 A. The design of the sprinkler system shall be dictated by the building construction andusage and as specified herein. Piping shall be concealed above suspended ceilings.1. The design and method of installation of the fire protection work shall be inaccordance with Uniform Fire Code, UBC, International Building CodeStandards, National Fire Protection Association Standards and National FireProtection Association Standards that contain reference to or supplementarymaterial on sprinkler systems along with the requirements of the Owner’sinsurance authority, the State, and the Fire Department.2. The sprinkler systems shall be hydraulically calculated. Calculations shallconform to NFPA and UBCS 9-1.B. Coordination:1. The Contractor shall coordinate with the existing conditions, all other, buildingcomponents, all new construction, and make all necessary modifications to thepipe routing before submitting for approval. Provide hydraulic calculations for allareas of the building including supplemental hydraulic calculations for allmodification.a. Additional compensation will not be allowed for modifications to the biddocuments for additional sprinklers, coordination, or for additionalhydraulic calculations.b. Sprinkler head locations and all pipe routing shall be coordinated with allmechanical and electrical equipment and all structural and architecturalcomponents to avoid obstructions. All head locations shall becoordinated with architectural reflective ceiling plan.c. The Contractor shall carefully review all of the bid documents from alldisciplines (architectural, structural, kitchen equipment, electrical andmechanical) and design the sprinkler systems to properly protect allareas of the facility.d. The sprinkler system shall be installed in a manner that is aestheticallyunobtrusive, with all sprinkler heads symmetrically aligned and centeredin lay-in ceiling tile. System shall not interfere with existing equipmentand building components (clocks, speakers, lights, etc.), and is not to besubject to damage by the building occupants.END OF SECTION 1530006/25/09 FIRE SPRINKLER SYSTEM (PERFORMANCE BASED)15300-3
SECTION 15400 - PLUMBING SPECIALTIESPART 1. - GENERAL1.1 SUMMARYA. Contractor shall provide all labor and materials to provide a complete plumbing and fuelsystem for all fixtures and equipment shown on drawings. Contractor shall rough-in andmake final connections to all fixtures and appliances supplied by others.B. Contractor shall thoroughly review the manufacturer’s installation instructions prior toinstalling any piece of equipment or its associated service, (domestic drains, water piping,etc.). Any conflicts between the manufacturer’s installation instructions and the plans orspecification shall be brought to the engineer at once for clarification. Contractor will notreceive additional money for installations requiring modifications due to these conflicts.C. All plumbing systems shall meet State and Local codes as well as ADA requirementsregardless of information shown within the documents.D. Gas Service: Make arrangements with the local gas company and pay all costs and feesfor firm gas service including gas meter with shut off valve on each side of the meter.Verify exact location of gas meter and provide a gas shut off valve at the first accessiblepoint within the building. Provide a gas pressure regulator and shut off valve in an easilyaccessible location at each appliance or unit of equipment as required and identify valve.Vent gas pressure regulators per code. Coordinate with all gas firing equipment includingequipment supplied by others for gas pressure compatibility with the gas company.Contractor to provide gas company with a list of gas fired equipment and requirements.Coordinate gas pipe locations with all other trades.E. Water Service:1. Connect to Landlord provided 2” domestic water connection as shown on theplans. Provide backflow prevention at the Landlord connection. Provide shutoffvalves at the connection point if not provided, (existing), by the Landlord. Verifythe exact location of the Landlord connection in the field.F. Sanitary Service:1. Sanitary: Provide sanitary piping to Landlord provided sanitary main as shownon plans. Verify the exact location of the Landlord main prior to installing anypiping.G. Grease Waste Connection:1. Provide grease waste connection to the grease interceptor located outside of thebuilding. Provide piping back from the grease interceptor to the Landlordprovided waste connection. Provide all vent piping for grease interceptor. Referto plans for the location of the grease interceptor.06/25/09 PLUMBING SPECIALTIES15400-1
PART 2. - PRODUCTS2.1 A. Miscellaneous Plumbing Equipment:1. Cleanouts:a. Floor cleanouts in finished areas shall be equal to Josam (Sioux Chief,Wade, Smith, Watts, Ancon, Zurn) Series 56000, with Nikaloy top.Provide carpet marker for carpeted floors. In unfinished areas, useSeries 56000 floor cleanout with cast iron top. Install cleanouts at thebottom of all stacks, as indicated on drawings and as required by code.b. Bottom of stacks in unfinished areas shall be provided with a cleanoutthat has a plug with a seating flange, lead gasket and four square lugsfor plug removal.c. Access cover for wall cleanouts in finished rooms shall be equal toJosam Series 58600 stainless steel round cover with screw.d. Clean-out plug or cover plates in walls shall not face public corridors orpublic areas.2. Roof Jacks:a. Terminate all vents stacks 12” above roof in a frost-proof galvanized roofjack. Use lead top on cast iron and vinyl top on PVC vent pipe.b. All vents thru roof shall be 3” unless otherwise noted.3. Floor Drains:a. Approved Manufacturers: Josam, Wade, J.R. Smith, Zum.b. Floor drains located at ground level, utility rooms, etc. shall be Wade1310 cast iron, adjustable, clamping collar, seepage openings with satinbronze strainer with extended rim for safe waste application.c. Floor drains: Safe waste use at non-traffic areas shall be Wade W1100cast iron, adjustable, clamping collar, seepage openings with satinbronze strainer with extended rim for safe waste application.d. Floor drains used with trap primer shall be same as FD only drain castingtapped for trap primer.e. Floor drains finished concrete shall be Wade WI 100 cast iron, adjustablewith flange, clamping collar, seepage openings and 5 inch diameternickel bronze strainer.4. Trench drain:a. Approved Manufacturers: AcoPolymer Products, Josam, Zurn, Jay R.Smith.b. Smith/Aco Polymer Products 9930 Series Enviro-Flo Drain system with a9870-430-ssm, class C, locking, heavy duty stainless steel grate. Providepre-cast, pre-sloped and interlocking trench drain channels made from06/25/09 PLUMBING SPECIALTIES15400-2
polyester resins and formulated aggregate with recesses for grating lockdownsmolded into the channel walls to keep the grates from moving.c. Provide heavy cast iron, rectangular bar pattern grates in a steel framewith flat bar anchors and nailing clips. Provide the number of gratingsections shown on the Drawings. Provide the steel frames to the GeneralContractor for setting in the poured concrete trench. Provide a non trafficarea drain in the bottom of the poured concrete trench as shown andschedules on the Drawings.d. Trench drain and grates are provided by the General Contractor. Providea no traffic area drain in the bottom of the poured concrete trench asshown on the drawings.5. Floor Sinks:a. Approved Manufacturers: Wade 2370 cast iron deep sump floor drainwith 1/2” primer tap, square top and square loose set ductile iron gatewith anti-tilt lugs.6. Shock Arrestors:a. Approved Manufacturers: Josam, Zurn, Sioux Chief.b. Josam Absorbatron II 75000-S with wrought copper shell. Provide whererequired by Code, on flush valve systems and on the piping to anylaundry unit or dishwasher. Size as required.7. Trap Primers: (Provide as called out on plans)a. Approved Manufacturers: J.R. Smith, PPP, MIFAB, Sioux Chief orapproved equal, Zurn, Wade, J.R. Smith, Josam.b. Zurn automatic trap primer Z-1022 all bronze body with integral vacuumbreaker, non-liming internal operating assembly, strainer and gasketedbronze cover.PART 3. - EXECUTION3.1 GENERALA. Provide shut off valve on all branch piping take offs. Locate as close as possible to mainin an accessible location.B. Rough-in and make final connections for kitchen food service equipment furnished underanother division of the specifications. Refer to schedule on drawings for specificrequirements. Furnish cast brass “P’ traps with cleanouts and water supplies with loosekey stops for all equipment. All exposed water piping shall be chrome plated brass.Where vent piping must be run exposed, install it within stainless steel sleeves.C. Rough-in and make final connections for all equipment in addition to equipment specifiedin this section. Coordinate with supplier to obtain correct location and sizes prior to roughin.06/25/09 PLUMBING SPECIALTIES15400-3
D. Avoid installing sanitary waste piping over any food preparation equipment and foodstorage area or provide protection from drips with a functional water-tight safe pan.E. Contractor shall coordinate all floor joist headers required for piping installation. Headersshall be done at contractor’s expense.END OF SECTION 1540006/25/09 PLUMBING SPECIALTIES15400-4
SECTION 15440 - PLUMBING FIXTURESPART 1. - GENERAL1.1 SUMMARYA. Contractor shall provide all labor and materials to provide a complete plumbing and fuelsystem for all fixtures and equipment shown on drawings. Contractor shall rough-in andmake final connections to all fixtures and appliances supplied by others.B. Contractor shall thoroughly review the manufacturer’s installation instructions prior toinstalling any piece of equipment or its associated services, (domestic drains, waterpiping, etc.). Any conflicts between the manufacturer’s installation instructions and theplans or specification shall be brought to the engineer at once for clarification. Contractorwill not receive additional money for installations requiring modifications due to theseconflicts.C. All plumbing systems shall meet State and Local codes as well as ADA requirementsregardless of information shown within the documents.PART 2. - PRODUCTS2.1 A. Miscellaneous Plumbing Equipment:1. Carriers for wall hung water closets, urinals and lavatories:a. Provide commercial grade carrier of approved style. Verify with GeneralContractor for type of wall construction and space prior to orderingcarriers.2. Fittings, Trim and Accessories:a. Install stop and escutcheon for each supply pipe, trap and escutcheonfor each waste pipe and vacuum breaker supplied with hose attachmentsor integral with flush valve, or where water connection is below spill lineof fixture.b. Install laminar flow, non splash on discharge of each faucet exceptwhere hose connection is specified.3. Water Closet Seats:a. Public: Church seat, #295C elongated seat, solid plastic, open front,external stainless steel check hinges, molded-in bumpers and withoutcover.B. Plumbing Fixture General Requirements: In addition to the drawing fixture specificationthe following is to be used as a guide and to list equal manufacturers.1. Plumbing fixtures American Standard or Kohler white fixtures. All fixtures shall beof same manufacturer.2. Water closet seats all white Beneke, Olsonite or Church combination selfsustaining and check hinge of stainless steel.06/25/09 PLUMBING FIXTURES15440-1
3. Janitors Receptors, Sterns-Williams or Fiat. Supply fitting: Speakman, T & SBrass or Chicago.4. Faucets (Non-metering) Speakman, American Standard, Chicago, or T & SBrass or Kohler.5. Lavatory Drains to be Speakman S-3440, open type 1-1/4” tailpiece, P.O. withflat strainers, or approved equal T & S Brass or Chicago.6. Stops to be Frost, Chicago or T & S Brass flexible riser, 3/8” IPS angle type,loose key, chrome plated cast brass with escutcheons with set screws.7. Chrome plated, cast brass “P’ traps with cleanout, 17 gauge outlet tube, andescutcheon tube with set screw to be Frost, Chicago or T & S Brass.8. Trim of proper configuration to allow wheelchair accessibility shall be provided onall lavatories designated for handicapped use. Provide ADA drain and supplyprotection.9. Flush valves shall be Zurn Exposed Z6000 Model for 1” water closets andExposed 26003 Model for ¾” urinals with flow options WS-1 low consumption.ADA compliant with non-hold open and no leak handle fixture, high backpressure vacuum breaker, one piece hex couple nut, adjustable tailpiece, spudcoupling and flange for top spud connection, or approved equal Sloan Royal.10. WaIl mounted fixtures to be supported by suitable adjustable carriers havingvandal proof trim, short foot bolted to concrete floor slab with 5/16” machine boltsand Phillips concrete fasteners in a rigid manner.a. Lavatories: Wade W-520 or equal.b. Urinals: Wade W-400 or equal.c. Sinks - Laundry Tubs: Wade W-520 or equal.d. Verify carrier type with fixture manufacturer.11. Zurn, Wade, Smith or Josam carriers as above described shall be acceptable forwall hung lavatories and sinks.12. Zurn carriers with neo-seal gaskets made from expanded, close-celled neoprene,shall be provided for water closets and urinals, or approved equal Wade, Smithor Josam.13. All exposed metal for fixtures in finished areas, exposed to view, shall be heavychromium plated red brass, pipe, fittings and valves.14. All fixture valves shall have bronze stems, renewable bronze seats andrenewable discs. Supplies to all fixtures provided with stop valves. All trapsequipped with cleanout plugs. Install vacuum breakers or approved backsiphonage, back flow prevention to prevent back flow as required.06/25/09 PLUMBING FIXTURES15440-2
PART 3. - EXECUTION3.1 A. All exposed piping and valves shall be chrome plated brass. Traps shall include chromeplated cast brass with clean-outs. Standard PVC traps for non-food service plumbingfixtures may be installed in non-rated walls. All water supplies to each fixture shall havechrome stop valves. Floor mounted water closets shall be connected using a cast ironfloor flange and ring putty or gaskets. Wax gaskets are not acceptable for wall hungfixtures. Provide adequate supports and reinforcing for all wall hung fixtures, valves andshower heads. Install all fixtures rigid, plumb and true.B. Grout and caulk all fixtures with water and mildew resistant white epoxy silicone equal toHydroment or Dow Corning No. 786. Grout shall not exceed 1/4” width and shall beinstalled flush with finished wall or floor.C. All fixture installation dimensions shall be determined from the Architectural documents.Plumbing fixture colors to be selected by Architect.D. P-Traps and water supplies insulate per ADA, and ANSI.E. Controls for flushing water closets shall be mounted on the wide or most accessible sideof the water closet.F. Provide locking style valves in any lines serving an emergency eyewash or shower.END OF SECTION 1544006/25/09 PLUMBING FIXTURES15440-3
SECTION 15700 - HEATING, VENTILATING AND AIR CONDITIONINGPART 1. – GENERAL1.1 A. Contractor shall thoroughly review the manufacturer’s installation instructions prior toinstalling any piece of equipment or its associated service, (gas, hot or chilled waterpiping, flues, etc.). Any conflicts between the manufacturer’s installation instructions andthe plans or specification shall be brought to the engineer at once for clarification.Contractor will not receive additional money for installations requiring modifications dueto these conflicts.PART 2. - PRODUCTS2.1 A. Approved Manufacturers:1. Roof Top Equipment: Trane (furnished by Owner’s Vendor).2. Make-up Air Equipment: Accurex (furnished by Owner’s Vendor).3. Exhaust Fans: Accurex (furnished by Owner’s Vendor).B. Roof Top Unit (RTU) Trane1. General.a. Install a single package combination, DX mechanical cooling system andgas fired heating system, complete with magnetic starters and automaticcontrols as scheduled.b. The equipment shall be shipped completely factory assembled, precharged,piped and wired internally ready for field connections.2. Roof Mounting Curb.a. Furnish and install a steel roof mounting curb. It shall mate to the bottomperimeter of the equipment.b. Assemble the mounting curb, provide rigid insulation and counterflashing as recommended by the manufacturer.c. Provide sheet metal supply and return duct drops at roof penetration.3. Cooling System:a. The unit shall have cooling capacities as scheduled at ARI conditions.b. The units shall have direct drive hermetic compressors. The compressorshall have overload protection, internal pressure relief, low ambientlockout control and crankcase heater. Each refrigerant circuit shall haveindependent thermostatic expansion devices, service pressure ports andrefrigerant line filter dryers.15700-1
4. Heating System:a. Two stage gas heating section shall have inputs and outputs asscheduled.b. Cylindrical tube and drum heat exchanger shall be constructed ofaluminized steel. Power burner shall have electric direct spark ignition,100% safety shut off electronic flame sensing controls, flame inspectionglass window, pre-purging and combustion air adjustment. All controlsshall be listed for operation at low outdoor air temperatures. System shallbe equipped with dual limit safety controls and rated and testedaccording to D.O.E., F.T.C and A.G.A.5. Cabinet:6. Fans:a. Shall be of zinc coated, galvanized steel with a baked-on outdoor enamelpaint finish. Base section and cabinet panels where conditioned air ishandled shall be fully insulated to prevent sweating and minimize sound.a. FC centrifugal conditioned air blower shall be belt driven and be capableof delivering capacities as scheduled on the drawings,. Blower shall bestatically and dynamically balanced.b. Propeller type condenser fans shall discharge vertically and be directdriven. Fan motors shall be totally enclosed with ball bearings,permanently lubricated, inherently protected and equipped with rainshield. Fans shall have a safety guard.7. Air Filtersa. Throwaway 2” pleated high efficiency filters.8. Temperature Controls:a. Provide a programmable thermostat with 7-day program clock. Duringunoccupied periods, the RTU fan and heating section shall be energizedas necessary to maintain temperature, outside dampers will be closed.b. The mechanical contractor is responsible for all control wiring.9. Provide the following options:a. Economizerb. Single point power with non fused disconnect and factory wired GFIoutlet.c. Condenser coil guardsd. Through the bottom electrical connectionse. Five year compressor warranty15700-2
C. Direct Fired Make-Up Air Unit (MUA or SF-1) Accurex1. Install direct fired make-up air heaters as scheduled. Units shall be ETL or ULlisted.2. Units shall be factory assembled and shipped as a complete packaged assemblyand shall include the following:a. Gas Burner designed to operate with an air velocity of 2,850 FPM acrossnon-clogging stainless steel air baffles. Burner to be designed to operateat 100% thermal efficiency throughout the life of the equipment.Turndown of the burner shall be a minimum of 25:1. Entire width ofburner burns at all times. Burner section shall have adjustable profileplates for field adjustment of air velocity over the burner. Provideintermittent ignition assembly.b. Forward curved, double width, double inlet blower mounted on a solidsteel shaft with self aligning 100,000 hour bearings.c. Equipment casing to be 16 gauge, G90 galvanized steel around anintegral support frame of structural angle. All panels shall be removablefor easy access. Provide an observation port for the main and pilotflames. All controls, gas valves and modulating controls shall bemounted in a vestibule with access doors outside of the air stream.d. Gas train shall be constructed to meet State Codes, ANSI and IRIrequirements. Gas train shall be selected to operate at 14” W.C. psigpressure. Regulators to be approved for non-vented service.e. Temperature controller shall be a ductstat mounted integral to the unit.f. Provide the following controls:(1) Airflow switch(2) Electronic Flame Safety Relay(3) High Temperature Limit Switch(4) Starter Interlock(5) High Gas Pressure Switch(6) Low Gas Pressure Switch(7) Adjustable Low Limit(8) Auxiliary Circuit to shut the unit down on a flame failure(9) Adjustable burner on/off economizer intake air ductstat(10) Remote panel complete with operating lights to indicate bloweron and burner on, and discharge air temperature adjustment,summer-off-winter selector switch.(11) Audible alarm to signal safety shut-down(12) Shunt trip circuit breaker in source electrical panelg. Provide motorized outside air damper that complies with the damperspecification in Section 15800.h. Unit shall have single point power connection with a fused disconnect.Provide filter section with cleanable aluminum filter.END OF SECTION 1570015700-3
SECTION 15800 - DUCTWORK MATERIALS AND METHODSPART 1. - GENERAL1.1 SUMMARYA. All above ground ductwork material and construction shall be galvanized steel, installedin accordance with the Standards described in the latest edition of the ASHRAE(American Society of Heating, Refrigeration and Air Conditioning Engineers) Guide andData Book, SMACNA (Sheet Metal and Air Conditioning Contractor’s NationalAssociation) and Local governing mechanical codes.B. Changes in direction, elevation or shape shall be made by gradual methods such asradiused elbows of diverging or converging reducing fittings. Changes in dimension shallnot exceed 20° diverging angle. Elbow radii shall be at least equal to the width of the ductin the plane of the bend.PART 2. – PRODUCTS2.1 A. Approved Manufacturers:1. Registers, Grilles and Diffusers and Terminal Air Devices: Anemostat, Titus,Price, J & J, Krueger, Tuttle and Bailey, Cames, Lima, Nailor, Metalaire, Agitair,Reliable Metal, Connor, Air Devices, Inc.2. Louvers: Cesco, Air Balance, Arrow United, Louvers & Dampers, Inc., Safe-Air.3. Fire and Smoke Dampers: Prefco, Ruskin, Greenheck, Cesco, United Air,American Warming, Safe-Air, Nailor, Acme.B. Registers, Grilles and Diffusers: Unless indicated, otherwise wall and ceiling R, C, D’sshall be white; floor registers shall have plain aluminum finish. Color finishes shall beapproved by the Architect.1. See drawings for grilles and diffusers schedule.C. Dampers.1. Where dampers separate outdoors from indoors, they shall meet the followingstandards: Use no damper blade that is wider than 6 inches. Construct damperframes from at least 16 gauge, hot dipped galvanized steel. Fit each blade withdouble sided, inflatable, field replaceable, extruded vinyl edge seals that lock intoslots in the blade. Size each blade to fit tightly between flexible, compressible,metal jamb seals. Set nylon bearings in stainless steel sleeves. Use hexagonalshafts for positive blade control. Conceal damper linkage inside the frames andout of the air stream. The entire assembly shall not rattle or vibrate. A closeddamper shall not leak more than 6 SCFM per square foot of face area whentested in accordance with AMCA Standard 500 for a damper selected at 2000FPM and tested at 4 inches of water column pressure across the face.06/25/09 DUCTWORK MATERIALS AND METHODS15800-1
PART 3. – EXECUTION3.1 GENERALA. Kitchen exhaust ductwork to be 16 gauge steel with liquid tight weld. Duct to slope 2%towards hood or an approved grease collector. Provide cleanouts as required, per Code.Installation of kitchen exhaust ductwork shall comply with NFPA, State and Local Codes.B. Ductwork behind registers arid grilles shall be painted out flat black.C. Provide a minimum of 2” wide flexible connectors to all ducted equipment less than 2000CFM and 4” wide on 2000 CFM and greater.D. Flexible Ductwork.1. The flexible duct shall be of semi-rigid construction capable of maintaining theshaping required by job conditions without subsequent sagging or droop. Ductconnections to equipment outlet collars shall be made in accordance with theduct manufacturer’s recommendations. Maximum flexible air duct length not toexceed 5’-0”.2. Flexible air duct shall be externally insulated with 1/2” thick 3/4 lb. densityfiberglass wrapped around twice to 1” thick complete with non-combustible vaporbarrier and UL listed.3. Ductwork and insulation shall be UL listed as Flexible Air Ducts ConnectionClass I, and meet all NFPA 90A and 90B requirements.4. Insulated flexible duct shall be equal to Thermaflex M-KE.5. No flexible ductwork connections shall be allowed in exposed ceiling areas.E. Access Doors.1. Where motorized dampers, fire dampers, control equipment are installed inductwork, provide suitable sized, gasketed doors in ducts. Doors shall beprovided with Ventlok #220 door pull and #90 sash type latches. Use spongerubber to felt gasketing material on door openings. Access doors in insulatedductwork shall be double wall construction with 1” insulation between wall.F. Air Control Devices.1. Provide splitter dampers on all main ducts and where shown on the drawings.Provide Ventlok #690 or approved equal, self-locking splitter assembly on eachdamper.2. Provide Clevepak (or approved equal) Type DESC damper extractor with spincollarat all branch take offs.3. Provide a balancing damper to each diffuser.4. In all inaccessible areas, provide balancing damper within reach at each diffuseror register.END OF SECTION 1580006/25/09 DUCTWORK MATERIALS AND METHODS15800-2
SECTION 15976 – AUTOMATIC CONTROL SEQUENCESPART 1 - GENERAL1.1 RELATED DOCUMENTSA. Drawings and general provisions of Contract, including General and Supplementary Conditionsand Division-1 Specification sections, apply to work of this section.1.2 DESCRIPTION OF WORKA. Control sequences are hereby defined as the manner and method by which automatictemperature controls function. Requirements for each type of operation are specified in thissection.B. Operating equipment, devices, and system components required for automatic temperaturecontrol systems are specified in other Division-15 Temperature Control Systems sections of thesespecifications.PART 2 - PRODUCTSNot applicable.PART 3 - EXECUTION3.1 AIR HANDLING SYSTEMSA. General. Provide automatic control for the air handling systems as described herein and shownon the drawings.1. Each supply air system which introduces outdoor air shall have a freeze protectionthermostat installed in the unit discharge. The thermostat shall have a 20 foot longaveraging element, auxiliary contacts and manual reset feature. If a system undergoes afreeze-stat trip (temperature falls to 34°F), its valves, dampers, and humidifiers shallrevert to their unoccupied positions.2. Packaged Roof Top Units will be fitted with smoke detectors, provided by the vendor, inthe return and supply ductwork to shut down the systems upon detection of smoke.B. Control Sequences.1. RTU-1 and RTU-2a. Occupied Hours: Packaged Roof Top Units shall cycle or stage compressors andgas heat to maintain the space temperature set point. The units shall becontrolled by Vendor furnished programmable thermostat(s) and remotetemperature sensors, (shown on plans). Outside air damper: Refer to ‘c’ below.b. Unoccupied Hours: Packaged Roof Top Units shall cycle or stage compressorsand natural gas heating to maintain the off hours temperature set points. Outsideair damper to be closed.c. Ventilation: The vendor furnished CO2 sensor will sample the air in the diningareas and thus determine the number of people present. Upon a signal from the15976-1AUTOMATIC CONTROL SEQUENCES
2. RTU-3CO2 sensor, the outside air damper will modulate between the scheduledminimum and maximum outside air position to satisfy the CO2 sensor asscheduled on the plans.d. Economizer Mode: The unit shall be equipped with a differential enthalpycontrolled economizer. The sensor will measure both temperature and enthalpy.When the conditions are such that the outside air is suitable to provide “freecooling” the outside air damper shall modulate to maintain a supply airtemperature between 55 and 59 degrees F.a. a. Occupied Hours: Packaged Roof Top Unit shall cycle or stage compressorsand gas heat to maintain the space temperature set point. The units shall becontrolled by Vendor furnished programmable thermostat(s) and remotetemperature sensors, (shown on plans). Outside air damper shall be open to theminimum position as scheduled.b. Unoccupied Hours: Packaged Roof Top Units shall cycle or stage compressorsand natural gas heating to maintain the off hours temperature set points. Outsideair damper shall be closed.c. Economizer Mode: The unit shall be equipped with a differential enthalpycontrolled economizer. The sensor will measure both temperature and enthalpy.When the conditions are such that the outside air is suitable to provide “freecooling” the outside air damper shall modulate to maintain a supply airtemperature between 55 and 59 degrees F.3. EF-1 and MUA-1(SF-1)4. EF-25. EF-3a. MUA-1 (SF-1) and EF-1 shall be energized by a manual switch on the Fan and LightControl Panel.b. MUA-1 (SF-1) shall be shunt trip controlled via circuit breaker in sourceelectrical panel. Provide control wiring from auxiliary contact at hood firesuppression control block to shunt trip mechanism at circuit breaker inelectrical panel.a. The exhaust fan will be controlled by a time switch. The exhaust fan shall runcontinuously when the morning staff arrives and will be de-activated at the end ofthe business day. Verify the exact hours of operation with the <strong>Buffalo</strong> <strong>Wild</strong> <strong>Wings</strong>Project Manager.a. Refer to Electrical Plans for control.END OF SECTION 1597615976-2AUTOMATIC CONTROL SEQUENCES
SECTION 15990 - TESTING AND BALANCINGPART 1. - GENERAL1.1 SUMMARYA. Test all piping systems as required by code and governing agencies. Certificates ofApproval shall be furnished to Owner that all tests have been completed.B. All domestic water piping systems shall be disinfected in accordance to State and LocalCodes. A 50 ppm water-chlorine solution must be allowed to stand in the potable waterdistribution system for at least 24 hours before flushing and returning to service.PART 2. - PRODUCTSNot UsedPART 3. - EXECUTION3.1 GENERALA. When the work has been completed, balance the air flow from each diffuser and registerin accordance with the recommendations of the diffuser manufacturer, selling dampers,controls and/or other volume control devices in such a manner as to produce the air flowrate indicated on the drawings. Test to the satisfaction of the Engineer to insure forsatisfactory operation of all equipment.B. Submit five (5) copies of certified Test and Balance Report to the Engineer for approval.Submittal shall include certified Test and Balance Reports and shop drawing(s)identifying all air terminal devices as listed in the Test and Balance Report and theequipment as it is identified on the Mechanical Plans.C. Test and start-up all equipment supplied under this contract. Provide all reportsnecessary to assure the Engineer and Owner that all functions of each piece ofequipment have been thoroughly evaluated and deemed operable as designed.D. Plumbing:1. Defects: Contractor shall be responsible for defects which develop in the systemscaused by faulty workmanship, material or equipment and shall replace any suchfaulty workmanship, material or equipment during a period of 1 year from date offinal acceptance. Acceptance of the work shall not waive the guarantee.2. Approval: Inspect and test plumbing work for approval by Architect/ Engineer or adesignated representative.3. Tests: Tests shall be made in the presence of the Architect/Engineer or adesignated representative. Tests shall be made, at Contractor’s expense, and acertification furnished to the Architect/Engineer stating that satisfactory testshave been made.4. Piping: Tests of piping systems, except final test of complete systems, shall bemade before piping is covered or connected to fixtures and equipment. Tests06/25/09 TESTING AND BALANCING15990-1
E. Cooling:required shall not be less than as specified in the following paragraphs, unlessdesignated otherwise in specific sections.a. Storm and sanitary, waste and vent piping, inside the building shall betested with air at 5 psi gauge pressure and shall hold this pressure for 15minutes without addition of more air. Provide final test with fixtures inplace with 1” W.G. air pressure.b. Test Domestic water piping, tanks, valves and fittings with hydraulicpressure of 100 psig for a period of 24 hours.c. Test natural gas piping per NFPA Chapter 54, National Fuel Gas Code.1) For meter outlet pressure 14” W.C. or less, the piping shall betested at a pressure of 10 psig maximum.2) For meter outlet pressure above 14” W.C. the piping shall betested at a pressure of 50 percent greater than the maximum,but not less than 25 psi.d. Heating/cooling water piping and shall hold 150 psi gauge for 1 hourwithout leaks or additional water.1. System Guarantee: Contractor shall guarantee that the installation shall operatewith complete noiseless circulation of cooling media through piping system andequipment.2. Defects: Contractor shall be responsible for defects which develop in the systemscaused by faulty workmanship, material or equipment and shall replace any suchfaulty workmanship, material or equipment during a period of one year from dateof final acceptance. Acceptance of the work shall not waive the guarantee.3. Tests: In the presence of the Architect/Engineer, or his duly representative, thecooling system shall be tested at 80 psi hydrostatic pressure and proved droptight. Tests shall be complete before piping is connected to equipment orcovered.F. Ventilation: Contractor shall guarantee complete uniform circulation of air throughventilated spaces without objectionable noise. Contractor shall assume responsibility forand shall replace any faulty workmanship, material or equipment during a period of 1year from date of final acceptance.END OF SECTION 1599006/25/09 TESTING AND BALANCING15990-2
SECTION 16010 - GENERAL CONDITIONSPART 1. - GENERAL1.1 SUMMARYA. General and Supplementary conditions within Division 0 and 1 are hereby incorporatedand become part of these Specifications, covering all work in Division 16000, Electrical.B. Before submitting a proposal on the project, the Contractor shall visit the site andfamiliarize themselves with the conditions and limitations affecting Division 16000 work.No additional costs to the Owner shall be allowed for items verifiable during site visits.C. Contractor shall provide sufficient workers and materials to keep pace with theconstruction schedule. Contractor shall place orders for equipment such that job progressis not slowed due to late delivery and shall confirm delivery dates with suppliers.D. The Contractor shall provide office space and storage for materials and equipmentsupplied as required. Location shall be as directed by the General Contractor or theArchitect/Engineer.E. Upon completion of the work shown and specified under Division 16000 and prior to finalclose out of the Project, the Contractor shall verify in writing that all systems are 100%complete and operating properly. This notification shall include copies of allSubcontractor notifications. Any system not operating properly at final inspection shall beimmediately repaired and demonstrated to the Engineer.F. Rebates or credits provided by utility companies or equipment manufacturers shall bedirectly credited to the Owner.1.2 ELECTRICAL PLANSA. The Electrical Drawings and Specifications shall form a set of Plans for the electricalwork. Neither the Drawings nor the Specifications shall be complete without the other.Any item shown on the Drawings or specified in the Specifications shall be considered asshown and specified on both.B. Any questions regarding the intent of the Drawings or Specifications shall be brought tothe Engineer’s attention as soon as possible. If direction from the Engineer cannot beobtained due to time or communication limitations, the greater quantity, higher quality orcondition most favorable to the Owner shall be assumed. Contractor shall provide alllabor, materials, equipment, and miscellaneous items necessary for a complete andoperational electrical installation, as shown on the Drawings and called for in theseSpecifications.C. Drawings:1. Contractor shall familiarize themselves with Architectural, Structural andMechanical Drawings and Specifications. Coordinate all shafts, chases, furredspaces, suspended ceilings, locations of equipment, etc.2. Electrical Contractor shall coordinate routing of all conduit and wire within soffitsprovided by the General Contractor. The Electrical Contractor shall provide allsoffiting required to cover installations not coordinated or specifically approved bythe Architect and Engineer.GENERAL CONDITIONS16010-1
3. Electrical Drawings are diagrammatic and are intended to show approximatelocation only. Placement of electrical equipment and devices shall not interferewith locations or clearances of other trades’ materials or equipment.4. Dimensions given on the Drawings shall take precedence over scaleddimensions. Dimensions, whether given in figures or scaled, shall be verified inthe field.5. Contractor shall verify that the equipment to be furnished under Contract will fitwithin the available space.6. Notify the Architect and Engineer of any discrepancies between Electrical,Architectural and Mechanical Drawings.7. Verify items such as door swings, window locations, casework, etc., beforeinstalling any electrical equipment or devices. All devices conflicting with andother trades work due to lack of coordination shall be relocated at no additionalcost to the Owner.D. The following terms used in the Drawings and Specifications shall be defined as follows:1. Contractor: Shall mean Electrical Contractor or any of their Subcontractors.2. Work: Shall mean labor and/or materials of the Electrical Contractor or any oftheir Subcontractors.3. Furnish: Shall mean purchase, submit for Engineer approval, coordinate withContract Documents and deliver to site in new, undamaged condition.4. Install: Shall mean to schedule for delivery, deliver or have delivered to the site,store as directed, protect from damage, set in place, make all necessary finalconnections, test as required and turn over to the Owner in full operatingcondition.5. Provide: Shall mean furnish and install.6. Connect: Shall mean to bring electrical service and/or line voltage control wiringto equipment, make all final connections, provide all necessary miscellaneousmaterials required and do final check out to ensure proper equipmentconnections.E. CAD and Drawing Files:1. Electrical CAD drawings prepared by of Barr Engineering and <strong>Buffalo</strong> <strong>Wild</strong><strong>Wings</strong>, Inc. for this Project are instruments of for use solely with respect to thisProject. During the course of the implementation of the Project, and withapproval by either party, copies may be obtained of CAD drawings for thepreparation of Shop Drawings. These CAD drawings shall not be used on otherprojects, for additions to this Project, or for completion of this Project by others,unless both <strong>Buffalo</strong> <strong>Wild</strong> <strong>Wings</strong>, Inc and Barr Engineering Company providewritten permission to do so. Any revisions, additions and/or deletions to theseCAD drawings, either intentional or unintentional, shall be made at the full risk ofthe person(s) making such revisions, additions and/or deletions. Such person(s)shall hold harmless and indemnify Barr Engineering Company of any and allresponsibilities and liabilities.2. CAD drawings files of Architectural floor plans, elevations, sections, etc, shall berequested directly from the Architect.1.3 COORDINATION OF DRAWINGSA. Coordinate scheduling and sequencing required for movement and positioning of largeequipment into the building with all other Contractors to minimize impact on their work.B. This Contractor shall provide any and all input required to complete these drawings.GENERAL CONDITIONS16010-2
1.4 MATERIALS AND EQUIPMENTA. Materials:1. All materials shall be new and of the type and quality specified herein.2. Specific materials and equipment specified is intended to establish a minimumstandard of required quality. Where specified materials and equipment fail tomeet minimum standards of existing federal, state and local codes andordinances, the governing codes and ordinances shall prevail.3. The Contractor shall provide all minor miscellaneous materials necessary for thecomplete mechanical installation.4. For materials and equipment specified by description only, the Contractor shallprovide materials or equipment suitable for the purpose intended. These shall bein conformance with all governing codes, these Specifications and normal tradepractice.5. For materials or equipment specified by manufacturer’s name and catalognumber, the Contractor shall provide the item specified. The Contractor maysubmit materials and equipment for prior approval to the Engineer.6. Supply materials and equipment to the site in original packages, containers orcrates insofar as is practical. It shall be the Contractor’s responsibility to scheduledeliveries in accordance with the overall Project schedule. The Contractor shallclosely coordinate all deliveries with other Contractors and the Engineer.7. Provide for proper receipt, handling, storage, and protection from the elementsfor all materials and equipment to be used on this Project so as to effectivelyprevent damage or deterioration. Materials or equipment sustaining damage orundue deterioration from any cause whatsoever shall be replaced or repaired byContractor as required by the Engineer.8. The Contractor shall properly protect all equipment from damage duringconstruction. Thoroughly clean all fixtures, equipment and other suppliedmaterials. Make all necessary repairs and apply touch up paint as required priorto final inspection and contract close out.9. All materials and equipment shall be listed by Underwriters’ Laboratories, Inc.(UL). Materials and Equipment shall meet the UL requirements of each standardin every case where such a standard has been established for that particular typeof material. Equipment shall be UL listed as an entire assembly or system.B. Prior Approvals1. All requests for prior approvals must be received by the Engineer at least sevenworking days prior to bid date. Applications for prior approval shall be consideredonly from Contractors submitting bids on the Project. Contractors shall determinewhether materials receiving prior approval are actually in accordance with detailsof the Specifications.2. The Contractor shall be responsible for all deficiencies that may exist from theuse of substituted products or equipment, including all additional labor andmaterials required to complete the work. All dimensions and characteristics ofsubstituted products shall be verified and coordinated with all affected trades andSubcontractors. Any required changes or modifications to the work of any othertrade or Subcontractor incurred due to using accepted substituted products shallbe coordinated and performed by this Contractor at no additional cost to theOwner.GENERAL CONDITIONS16010-3
1.5 SUBMITTALSA. Within fifteen days after the award of the Contract, the Electrical Contractor shall submitshop drawings on all major electrical equipment to the Architect for approval. ShopDrawings shall be submitted by the Electrical Contractor, not their Subcontractors. Theseshop drawings shall cover such items as lighting fixtures, lamps, disconnects, fuses,starters, switchgear, devices, plates, panels, contactors, etc. The Contractor shallthoroughly review each item for compliance with these Specifications making anynecessary corrections prior to submittal. Each shop drawing set shall be stamped, signedand dated indicating Contractor review. If the Contractor fails to properly review shopdrawings, the Contractor shall reimburse the Engineer for all additional reviews on a timeand material basis. No equipment shall be released for shipment or installed prior to finalapproval by the Engineer.B. The Engineer will review all Shop Drawings submitted and will retain one copy for recordfile.C. Approval Stamp: This review is to verify general conformance with the design concept ofthe Project and substantial compliance with the information provided in the ContractDocuments. This review does not in any way relieve the Contractor or their suppliers oftheir responsibility to provide all materials and equipment as specified, in quantities,quality and dimensions required. Submittals will be reviewed with the following actions:1. “No Exception Taken” indicates that the Submittal appears to conform to thedesign concept of the Work and that the Contractor, at his discretion, may withfabrication and/or procurement and installation.2. “Reviewed as Noted” indicates that the Submittal, after noted corrections aremade, appears to conform to the design concept of the Work and that theContractor, at his discretion, may proceed with fabrication and/or procurementand installation, if the corrections are accepted by the Contractor without andincrease in Contract Sum or Time.3. “Revised and Resubmit” indicates that the noted revisions are such that acorrected copy of the Submittal is required for review to confirm that the notedrevisions have been understood and made. The Contractor, at his discretion,may proceed with fabrication and/or procurement and installation after submittinga corrected copy and verifying with the reviewer that the corrected copy isacceptable, if the corrections are accepted by the Contractor without an increasein the Contract Sum or Time.4. “Rejected” indicates that the Submittal does not appear to conform to thespecifications, a resubmission is required and fabrication or procurement is notauthorized.D. If the Engineer rejects (Revised and Resubmit or Rejected) the same section two timesthe engineer shall be compensated for additional reviews. Compensation will beincorporated by Change Order and will be deducted from the Contractor’s application forpayment. Contractor is responsible for all delays caused by the resubmittal process.E. Provide samples of materials or equipment proposed to be furnished, if requested.Samples shall become the property of the Architect/Engineer and will be returned onlywhen accompanied by a written request to do so.GENERAL CONDITIONS16010-4
F. Record Drawings: The Contractor shall provide and maintain an “As Built” set of bluelineson site, neatly notating routing, location or other field changes to the ContractDocuments. Upon Project completion and prior to final close out, turn the “As Built”drawings over to the Owner. Provide a detailed transmittal indicating each sheet andother information turned over to the Owner and acquire their representative’s signature.This information shall be included at the project close out.1.6 WORKMANSHIP AND CONSTRUCTION PROCEDURESA. Installation of all materials specified herein shall be performed in a neat and workmanlikemanner by workers experienced and skilled in the trade. Only the best qualityworkmanship will be accepted.B. The Electrical Contractor shall regularly clean their work area of debris. Removal of allElectrical Contractor generated debris and rubbish caused by their work shall be at theContractor’s expense.C. Coordination:1. Electrical Contractor shall give careful consideration to work of other Contractorson the Project and shall organize work as detailed in the Contractor’s ¼”coordination drawings so as to not interfere with or delay the work of othertrades.2. Electrical Contractor shall consult all Architectural, Structural and MechanicalDrawings and Specifications that apply for correlating information.3. Conflicts or interference with work of other trades shall be brought to theattention of the Engineer, in writing, before installation.4. Should the Electrical Contractor not follow above procedures and install work thatinterferes with work of other Contractors, the Electrical Contractor shall make allnecessary changes as directed by Engineer to eliminate the interference orconflict at the Electrical Contractor’s expense.D. Protection of Equipment:1. Until final acceptance of the work by the Owner, the Contractor shall beresponsible for the safety, good condition, and protection from damage of allmaterials and equipment installed.2. Switchboards, panelboards, motor starters and other electrical componentsstored or installed on-site shall be covered with plywood and polyethylene or anequivalent to protect them from any damage due to site conditions or from workby other trades.3. If, during shipment or installation, the finish of equipment becomes chipped orscratched, the Contractor shall touch up or refinish surfaces to match originalfinish.E. Live Work: All electrical equipment shall be de-energized prior to any work beingperformed. If it is necessary to work on any equipment live due to job conditions,precautions shall be taken to protect authorized personnel from accidentally coming incontact with live parts. Contractor shall have adequate personnel on site along with aback up plan to recover from an unscheduled outage.1.7 LICENSES, CODES AND FEESA. The Contractor shall be a licensed Contractor in the State of which project is beingconstructed. The Contractor shall employ all Licensed Professional Tradesmen requiredfor each type of work covered under these Drawings and Specifications.GENERAL CONDITIONS16010-5
B. The Contractor shall procure all necessary certificates and permits and pay all requiredfees. The Contractor shall pay all fees and installation charges by the utility company forthe permanent services.C. Codes and Ordinances: All work and materials shall meet the requirements of national,state and local codes and ordinances, in every respect. This requirement shall not relievethe Contractor from meeting the requirements of Drawings and Specifications that maybe in excess of all codes and ordinances and not contrary to them. Following is a partiallist of governing codes and/or standards.1. Occupational Safety & Health Act (OSHA)2. Underwriters Laboratories (UL)3. State and Local Building Codes4. State Board of Health5. State Industrial Commission6. State and Local Fire Codes and Regulations7. National Electric Code8. State and Local Electrical Installation Codes9. Local Power Company Regulations and RequirementsD. Inspections: Regular inspections shall be requested by the Electrical Contractor to meetall state and local requirements. Contractor shall furnish a certificate of final inspectionand approval from all enforcement agencies to the Owner.1.8 OPERATION AND MAINTENANCE MANUALSA. The Electrical Contractor shall deliver two sets of Operation and Maintenance (O&M)manuals to the Engineer prior to final close out. O&M manuals shall consist of approvedshop drawings, manufacturer’s bulletins, equipment manuals, a list of manufacturers withtelephone numbers for all equipment that contains replaceable parts and all other datacovering the care, maintenance and operation of each piece of furnished equipment.O&M manuals shall be neatly bound in 3-ring binders, contain an index and section tabsand be labeled with the Project name.B. Name, address, and telephone number of Electrical Contractor and each associatedSubContractor installing equipment and systems, local representative for each item ofequipment and each system. Table of contents shall correspond to the Specificationswith the Section tab sheets placed before the respective Shop Drawings and operationand maintenance instructions. Warranties for more than 1 year shall be included inappropriate section.1.9 OPERATING INSTRUCTIONS AND TESTINGA. The Contractor shall fully instruct the Owner in the operation of electrical equipment priorto final close out. Contractor shall provide, without additional expense to Owner, servicesof competent instructors who will give full instruction in the care, adjustment, operationand maintenance of all electrical systems provided by this Contractor to Owner’spermanent employees. Instructor shall be thoroughly familiar with all parts of theinstallation that they are to give instructions and shall be trained in operating theory, aswell as in practical operation and maintenance work. Factory trained instructors shall beemployed wherever they are available. Instruction shall be given during regular workweek and at a time just prior to the time the equipment is accepted and turned over toOwner for regular operation.GENERAL CONDITIONS16010-6
B. The Electrical Contractor or his representative shall provide a minimum of up to eighthours instruction period for Owner’s personnel, which shall be recorded on DVR with twodisks being provided to the Owner..C. Electrical Contractor shall test all equipment installed under this Specification and shalldemonstrate its proper operation to the Engineer. No equipment shall be tested oroperated for any purpose until it has been fully prepared, connected and made ready fornormal operation. Damage to equipment due to improper or ill-timed operation or testingshall be repaired, at Electrical Contractor’s expense, before final inspection andacceptance.1.10 WARRANTYA. The Electrical Contractor shall guarantee all materials and equipment to be free ofdefects that may develop in any part of their work, caused by faulty workmanship,material or equipment failures, for a minimum of one year from the date of finalacceptance of the work or for as long as normal equipment manufacturer warranties arein effect from the date of final acceptance of the work.B. During the guarantee period, notification by letter, personal contact or telephoneconversation of a problem with any electrical system, shall cause the Contractor torespond within one week, making repairs or corrections as necessary. After all repairsand corrections are complete, the Contractor shall notify the Engineer.C. The Electrical Contractor shall agree to provide 24 hour service on call for emergency.1.11 TEMPORARY POWERA. The Electrical Contractor shall provide all necessary temporary power and lighting toallow other Contractors and Subcontractors to perform their work. Prior to submitting abid for this Project, contact the General Contractor to determine the type of equipment tobe used in the performance of the work. The Electrical Bid shall include all labor andmaterials required to provide and maintain a complete temporary power and lightingsystem throughout the course of the project. A minimum of 20 footcandles shall beprovided for work being performed within the strucuture. The Electrical Contractor shallcoordinate all electrical requirements with other Contractors. Temporary power shallconsist of a minimum of 200A with all required ground fault protection. PART 2. -PRODUCTSPART 2. - PRODUCTSNot UsedPART 3. - EXECUTIONNot UsedEND OF SECTION 16010GENERAL CONDITIONS16010-7
SECTION 16030 - CUTTING AND PATCHINGPART 1. - GENERAL1.1 GENERAL REQUIREMENTSA. The Contractor shall be responsible for all cutting, drilling, removal, patching andrefinishing of walls, ceilings and floors as required to provide a complete electrical systemas shown on the Drawings and as called for in these Specifications.B. All cutting and patching shall be done with the prior approval of the Architect/Engineer.Patching to match existing finishes shall be performed by the proper trades such asconcrete finishers, sheetrockers, tapers, painters, etc.C. No welding or use of a cutting torch shall be permitted without the specific prior approvalof the Engineer.PART 2. - PRODUCTSNot UsedPART 3. - EXECUTION3.1 CUTTING, DRILLING AND PATCHINGA. All holes in masonry or concrete shall be drilled by use of a core drill.B. Cutting: Chases and trenches required for the installation of electrical raceways and/orother electrical apparatus shall be saw cut prior to removal of existing materials. Allcutting shall be straight and level.C. Drilling: Impact rotary hammers shall not be used. Approval shall be obtained from theArchitect and Structural Engineer prior to performing any core drilling. Upon completion ofinstallation, seal excess openings with non-shrinking grout or compound.D. Sleeves: Wall sleeves required for electrical work shall be provided by this Contractor.Adequate fastening arrangements shall be employed in setting sleevesE. Patching: All surfaces disturbed during installation of the electrical system shall be fullyrestored to their original condition. Patching shall be performed by workers experienced,skilled, and licensed for that particular type of work involved. Inferior work will not beaccepted.F. Grouting/Caulking: Contractor shall be responsible for grouting airtight, openingsadjacent to raceways and other electrical openings to seal against passage of air, smoke,or vapors. Maintain ratings of fire rated partitions with 3M or equal fire rated caulking.END OF SECTION 16030CUTTING AND PATCHING16030-1
SECTION 16050 - BASIC MATERIALS AND METHODSPART 1. - GENERAL1.1 GENERAL REQUIREMENTSA. Unless noted otherwise in this Specification or on the Drawings, all materials shall benew and in their original packages. All materials shall comply with this Specification andat a minimum all applicable codes and standards as listed in Section 16010.B. Nameplates shall identify equipment by name and source of power. They shall be aminimum of 1 1/4” x 3”, or larger if necessary for wording. Lettering shall be a minimum of3/16” in height. Black lettering on white nameplate shall be used.C. All distribution equipment, such as disconnects, starters and panels, shall be obtainedfrom one manufacturer.D. The Electrical Contractor shall be responsible for verifying locations of such things aspiping, ductwork, equipment, door swings, heights of cabinets and counters, etc., prior tothe installation of all electrical equipment. Installed electrical work that interferes with thework of other trades shall be relocated by the Electrical Contractor at no additional cost tothe Owner.E. Electrical Contractor shall paint all exposed electrical equipment, such asconduit/raceway, meter sockets and panels, to match adjacent finishes. Refer toArchitectural Specifications for method to be used.F. Switched receptacles, where shown, shall be modified by removing split wiring tab andconnected so that only the lower portion is switched.G. All receptacles and outlets located in block walls shall be mounted so that only one blockis cut.H. Receptacles and outlets located on opposite sides of a common wall shall not bemounted in the same stud space. At least one stud shall separate devices. Where thisrequirement is not practical, such as in back to back floor plans where devices must beback to back, the use of 3M MPP-45 moldable Puddy Pad shall be used in sufficientthickness to match the hour rating of the wall. Back to back boxes are not acceptable.I. All switches, receptacles and outlets installed within rated assemblies shall befirestopped to maintain rating of assemblies.J. Circuit numbers shown are for reference only within noted panel. Contractor shall neatlyidentify correct circuit numbers on the as-built drawings.K. Where required, the Contractor shall provide GFI devices or GFI breakers per the NEC.PART 2. - PRODUCTSNot UsedBASIC MATERIALS AND METHODS16050-1
PART 3. - EXECUTION3.1 GENERAL REQUIREMENTSA. Provide nameplates on all equipment such as disconnects, starters and panels.B. Identify all pull and junction boxes with circuit or feeder numbers and source of powerusing black permanent marker.C. Each panelboard shall be provided with a typed circuit directory. Clearly describe loadsand areas served. Handwritten directories will not be accepted. Provide Owner withMicrsoft Word compatible electronic file containing all circuit directories.D. The Electrical Contractor shall perform saw cutting, trenching, backfilling, compaction andpatching required for underground raceway systems shown or specified.E. Electrical Contractor shall verify the location of all fixtures and devices with the Architectprior to installation.F. Provide access panels where junction boxes or pull boxes are installed in inaccessiblelocations. All access panels shall be approved by the Engineer and Architect prior toinstallation.G. All receptacles and outlets located in block walls shall be mounted so that only one blockis cut.H. Electrical Contractor shall submit all fire stopping methods to the local authorities forapproval. Provide copies of all approved fire stopping methods to the Engineer. All firestopping shall be reviewed and approved by Local Authorities prior to installation.END OF SECTION 16050BASIC MATERIALS AND METHODS16050-2
SECTION 16111 - CONDUITS AND FITTINGSPART 1. - GENERAL1.1 SUMMARYA. Section Includes: Provide raceways wherever required by the Drawings andSpecifications.PART 2. - PRODUCTS2.1 MANUFACTURERSA. Steel Conduit and Fittings: Galvanized steel by recognized manufacturers of racewaysystems of type and sizes required.B. Non-Metallic Conduit: High impact PVC (Polyvinyl Chloride) Schedule 40 rated for 90-degree C wire, Underwriters’ Laboratories (UL) listed in accordance with Article 347 ofthe National Electric Code (NEC) for underground and exposed use. PVC conduit shallbe Schedule 80 for under roadway or vehicle crossing area.C. The following manufacturers are approved for conduit:1. Alfex2. Allied3. Canon4. Republic5. Sealtight6. Triangle7. VAW of America8. YoungstownD. The following manufactures are approved for conduit fittings:2.2 CONDUITS1. Appleton2. CH3. Kellems4. OZ Red Dot5. T&BA. Minimum Size: Conduit shall be sized according to the Drawings, with no conduit smallerthan ½-inch trade size. If not sized on the Drawings, the NEC shall be used to determinethe size based on the number and size of conductors required with THHN/THWNinsulation. The Engineer shall approve all calculated conduit sizes and method ofinstallation prior to installation.CONDUITS AND FITTINGS16111-1
B. Type: Conduit shall be rigid galvanized steel. In lieu of rigid galvanized steel the followingconduits may be used only as specified herein:2.3 CONDUIT FITTINGS1. Intermediate Steel Conduit may be used in all locations.2. Electric Metallic Tubing (EMT): May be used in dry locations for wiring below 600volts in all interior spaces not in direct contact with earth or where exposed toweather using steel watertight compression fittings and backstraps. EMT shallnot be installed in concrete slabs or in soil.3. Flexible Metal Conduit: Flexible metal conduit (FMC) or liquid tight flexible metalconduit (LFMC) shall be permitted only in the following locations:a. Flexible metal conduit may be used in masonry wall construction for‘fishing’ of circuitry. Liquid tight flexible metal conduit (LFMC) shall beused for final connections to equipment such as motors, fixed equipment,electric heating equipment, food service equipment, etc. LFMC shall beused in lengths no longer than thirty-six.. FMC ‘fished’ in masonryconstruction shall not be run horizontally and shall transition to EMT assoon as practical when leaving the wall construction from its vertical run.b. Fittings shall be steel set screw type for smaller sizes and steel, clamptype for larger sizes.c. LFMC shall have fully sized and insulated grounding conductor within theconduit.d. Concealed within equipment cabinets if approved by Architect/Engineer.4. Rigid Non-Metallic Conduit: May be used only where run in soil or in concreteslabs on grade unless otherwise noted on Drawings or specified herein.a. Conduit entries into pole bases or concrete pads shall be rigidgalvanized steel. Conduits emerging out of floor slab-on-grade shall berigid galvanized steel.b. All non-metallic conduits shall have a grounding conductor sized inaccordance with Table 250-95 of the NEC, but not less than #12AWG.Contractor shall increase conduit size to accommodate the groundingconductor.5. Metalclad Cable (MC): MC cable may be used for light fixture connections inaccessible ceiling and within casework where permitted by code. All MC cableshall have fully rated and insulated grounding conductor. MC cable shall not beused in walls or non accessible ceilings.A. Rigid Galvanized Steel Conduit and Intermediate Metal Conduit:1. Couplings, locknuts and bushings shall be threaded type. Threadless couplingsshall not be used without prior approval of Engineer.2. Locknuts shall be of the conduit type.3. Bushings shall consist of an insulating insert molded or locked into metallic bodyfitting. Bushings made entirely of metal or non-metallic material are not permitted.4. Where conduit is installed in concrete, Erickson-type and set-screw couplingsmay be used to complete a conduit run. Set-screw fittings shall be approved forconcrete installation and shall be case-hardened steel with hex head and cuppoint to firmly set in conduit wall for positive ground.5. Threaded cast iron type sealing fittings shall be used. Fittings used to preventpassage of water vapor shall be continuous drain type. Fittings in concealed workshall be installed in a flush steel box with blank coverplate having the same finishas that of other electrical plates in room.CONDUITS AND FITTINGS16111-2
B. EMT:1. For conduit 2-inch and smaller, fillings shall be concrete tight compression glandtype only, with threaded outer nut or set-screw type. Fittings shall be malleablesteel type, cast fittings of any kind are not acceptable.2. For conduit over 2-inch, connectors shall be set-screw type with two screws eachand couplings shall be set-screw type with four screws each. Set-screws shall becase-hardened steel with hex head and cup point to firmly set in wall of conduitfor positive ground.3. Indent type connectors shall not be permitted.4. Fittings made of pot metal Die cast or pressure-cast zinc alloy shall not bepermitted.C. Flexible Metal: Multiple point type threading into internal wall of conduit convolutions orset screw type. Material shall be only steel or malleable iron.D. Liquid-Tight Flexible Metal: Type incorporating a threaded grounding cone, a steel orplastic compression ring, and a gland for tightening. Connectors shall have insulatedthroats. Material shall be only steel or malleable iron.E. Direct Burial Rigid Non-Metallic Conduit: Fittings as recommended by conduitmanufacturer for bonding with solvent cement.2.4 FIRE STOPSA. General Requirements: Conduits and conduit sleeves that penetrate fire rated walls orpartitions shall be sealed with Hevi-Duty/Nelson, Type CLK, non-sagging adhesivesealant or equal manufactured by 3M. All firestopping products shall be installed byexperienced workers, familiar with the proper application and installation of appropriateU.L fire stopping design rating systems. Prior to installation, the Contractor shall submitfire stopping manufacturer’s appropriate conduit and conduit sleeve penetration systemdesign criteria and UL approved number for each type of UL fire stopping design ratingsystem used on the project.PART 3. - EXECUTION3.1 CONDUIT ARRANGEMENT AND SUPPORTA. General Requirements:1. Conduits shall be concealed within floor, ceiling or wall building construction,unless specifically noted or otherwise specified. Conduits shall only be installedexposed only in mechanical rooms and electric rooms and for connections atmotors, utilization equipment, and exposed ceilings.. Conduits in exposedceilings shall be laid out parallel or pendicular to basic building lines and shall bepainted to match exposed ceiling.2. Conduit systems shall be complete with fittings and accessories to make systemcomplete and electrically continuous from outlet to outlet and to cabinets andjunction boxes. Conduits shall form a neat appearing, mechanically firmassembly, adhering to NECA standards of installation and good electricalpractice. Conduit ends shall be reamed before installation and shall be cappedduring construction period. Route exposed conduits and conduit aboveaccessible ceilings parallel and perpendicular to walls and adjacent piping withelbows, offsets, and bends uniform and symmetrical.CONDUITS AND FITTINGS16111-3
3. Conduits shall not obstruct head room, walkways or doorways.4. Conduits shall be secured to cabinets, junction boxes, pull boxes and outletboxes by bonding type locknuts. Rigid and IMC conduit installations shall have alocknut on outside of enclosure and locknut and bushing on inside of enclosure.EMT installations may have a single locknut on inside of enclosure, wrench tight.Conduit connections shall not be made to junction box covers.5. Provide a pull wire in empty conduits, consisting of one No. 12 steel or copperwire or heavy duty nylon cord for small conduits and nylon rope for largeconduits.6. Arrange conduit supports to prevent distortion of alignment by wire pullingoperations. Conduit shall be fastened using straps or clamps, lay-in adjustablehangers, clevis hangers or bolted split galvanized hangers secured to structurewith machine screws, expansion sleeves or lead anchors. Spring steel typesupports or fasteners shall be permitted for concealed 1/2-inch EMT only. Chain,wire or perforated straps shall not be used to support or fasten conduit.7. Conduit support spacing shall be provided as required by the NEC, but in nocase shall the maximum spacing of supports exceed six feet for conduits smallerthan 1-inch trade size and 10 feet for conduits 1-inch trade size and larger.8. Group conduits in parallel runs where practical using conduit racks constructed ofsteel channel with conduit straps/damps or trapeze hangers with U-bolts or otherapproved fasteners.9. Fasteners shall be sized and designed for intended use. Fasteners, in solidmasonry or concrete, shall be steel or malleable iron concrete inserts, 1/4-inchminimum diameter steel expansion anchors embedded not less than 1 1/8-inchesor 1/4-inch minimum diameter power set fasteners with depth of penetration atleast three inches. Hollow masonry anchors shall be toggle bolts, hollow wallfasteners, or concrete block anchors. Sheetmetal screws shall be used on metalstuds and wood screws used on wood construction. Attachment by wood plugsor wood blocking is not permitted.3.2 CONDUIT INSTALLATIONA. General Requirements: All raceways shall be installed in accordance with the NECAStandard of Installation:1. Cut conduit square using a saw or pipe cutter; de-burr cut ends.2. Bring conduit to shoulder of fittings and couplings and fasten securely.3. Use conduit hubs or sealing locknuts for fastening conduit to cast boxes and forfastening conduit to sheetmetal boxes in damp or wet locations.4. Install no more than equivalent of four 90-degree bends between boxes forpower circuits and two 90-degree bends for low voltage and communicationscircuits.5. Avoid moisture traps where possible. Where unavoidable, provide junction boxwith drain fitting at conduit low point. Outdoor conduits shall be graded aminimum of six inches per one-hundred feet with no traps.6. Coordinate all conduits with other trades. Consult with Mechanical Contractorbefore installing conduits for electrical feeders so that conflicts between locationsof conduit runs, piping, and ductwork will be adjusted prior to installation. Ingeneral, large pipe mains and air ducts shall be given priority in available space.Conduit runs shall be installed so as to maintain, wherever practical, a minimumseparation of three inches from water and waste piping and six inches fromsteam piping.7. Provide sealing fittings, to prevent passage of water vapor, where conduits passfrom warm to cold locations.8. Drilling, cutting, and patching required for conduit installation shall be asdescribed in Section 16012.CONDUITS AND FITTINGS16111-4
B. Conduits in New Masonry Walls: Conduits shall be installed during wall construction or“fished in”. No conduit shall be channeled in without special permission of ArchitectC. Horizontal Runs in Walls: No conduit shall run horizontally in concrete block or brick wallswithout approval of Architect/Engineer. Horizontal runs shall be made in floor or ceilingconstruction.D. Conduits on Equipment: Conduits shall not be mounted on ductwork, ventilation units orother such mechanical equipment, except where necessary to make connections toelectrical devices that are part of or mounted on such equipment. Where raceways mustbe run on equipment, care shall be taken not to cover access doors, controls, removablepanels, etc., or otherwise hinder the normal maintenance and repair of the equipment.E. Conduit Through Roofs: Route conduit through roof openings for piping and ductworkwhere possible; otherwise, route through roof jack with pitch pocket.F. Conduits Through Exterior Walls: Where conduit systems pass through exterior walls orfootings below grade, entrance shall be made watertight by providing pipe sleeves in wallwith 1/2-inch minimum clearance around conduit and caulking with oakum or anapproved non-hardening type caulking compound. Alternate acceptable method is bymeans of a conduit entrance seal, O.Z./Gedney Company, Type “FSK’ or as approved byEngineer. Seal conduit stubs as above and, in addition, inside of conduit shall be sealedwatertight with an approved non-hardening type caulking compound packed aroundwires.G. Conduits Above Furred or Suspended Ceilings: Branch circuit conduits and conduitsfeeding ceiling lighting shall not be supported by suspended ceiling lighting fixtures,mechanical piping or air conditioning ducts. Branch circuit conduits may be fastened toceiling support members with fasteners designed for that purpose.H. Conduit Sleeves: Same material as conduits required in the area. Both ends of sleevesshall have bushings.3.3 GROUTING AND FIRE STOPSA. General Requirements:3.4 CONDUIT STUB-UPS1. Contractor shall be responsible for grouting airtight any openings adjacent toraceways and other openings to seal against passage of air, smoke or vapors.2. Contractor shall seal around each conduit or conduit sleeve penetrating fire ratedwalls or partitions with sealant specified. Interior conduit sleeves in walls orpartitions shall be sealed to provide a complete fire rated installation inaccordance with sealant manufacturer’s instructions.3. All firestopping products shall be installed by experienced workers, familiar withthe proper application and installation of appropriate UL fire stopping designrating systems. Contractor shall submit fire stopping manufacturer’s appropriateconduit and conduit sleeve penetration system design criteria and UL approvednumber for each type of UL fire stopping design rating system used on theproject prior to installation.A. Stubbed Up Through Floor Slabs: Where conduit is called to be stubbed up at anexposed location, a rigid conduit threaded coupling shall be installed flush with finishfloor. Provide a recessed pipe plug, flush with floor, in each stub-up.CONDUITS AND FITTINGS16111-5
3.5 EMPTY CONDUITSA. Identification: Empty conduits installed for future use or for use by others shall havemarkers and identification at terminations. Empty raceway boxes shall be marked withthe system named in a visible place on the exposed coverplate.END OF SECTION 16111CONDUITS AND FITTINGS16111-6
SECTION 16112 - OUTLET BOXESPART 1. -GENERAL1.1 SUMMARYA. Section Includes: Provide outlet boxes of heavy gauge galvanized steel, of knockouttype, wherever required by the Drawings and Specifications.PART 2. - PRODUCTS2.1 MANUFACTURERSA. Acceptable Manufacturers: Recognized Manufacturers of electric outlet boxes,manufactured in accordance with the latest edition of the National Electric Code (NEC)and industry standards.2.2 MATERIALSA. Ceiling Boxes: 4-inch octagonal ceiling boxes shall be used, except as otherwisespecified. For additional wire space 4 1 1/16 square boxes may be used. Outlet boxes forfixtures shall be complete with fixture studs.B. Wall Boxes: 4-inch square wall boxes shall be used with one or two device raised cover.Raised covers or tile rings shall be flush with finished walls. Locations with a singledevice may use 2-inch by 4-inch by 2 ½” (deep) device box.1. Boxes in plastered walls shall be standard 4 inch square boxes with appropriateplaster rings.2. Boxes in brick, exposed concrete block, glazed tile and wood paneled walls shallbe 4-inch square having a raised cover with straight sides not less than 1-inch. 411/16- inch square box may be used for additional wire space. Where thicknessof masonry or more than two gangs are required 3 ¾-inch high masonry boxesmay be used.3. Straight through and sectional switch boxes shall be used.PART 3. - EXECUTION3.1 INSTALLATIONA. General Requirements:1. Boxes shall not be recessed back-to-back on opposite sides of wall, offset aminimum of six inches. Through wall boxes shall not be used.2. Boxes shall be roughed-in to provide a neat appearance. Centerlines of boxesshall be aligned vertically and horizontally. Boxes shall be symmetrically locatedwith the major architectural features when they occur between doors andwindows and in wood panels.3. Adjust horizontal position of boxes such that bottom of box is located on top ofmasonry coarse and vertical centerline is either on a masonry course or centeredon a masonry unit. Contractor shall coordinate with other trades so boxes areinstalled with no unsightly joints around them.4. Boxes shall be installed such that the front of box is flush with finished wall,boxes more than 1/4 inch back from finished wall shall not be acceptable.OUTLET BOXES16112-1
5. Boxes in finished ceiling construction shall be supported by structural buildingmembers or when necessary to bar hangers or steel channels supported byeither structural building members or ceiling framing channels. Exposed boxesshall be secured to structure by toggle bolts, wood screws or lead anchors.6. Contractor shall coordinate height and location of boxes with other trades so asnot to conflict with other work or equipment It shall be the Electrical Contractor’sresponsibility to move boxes that conflict with others at no additional cost toOwner.END OF SECTION 16112OUTLET BOXES16112-2
SECTION 16113 - PULL AND JUNCTION BOXESPART 1. - GENERAL1.1 SUMMARYA. Section Includes: Provide pull boxes as required to facilitate the pulling of wires or whenmore than four quarter bends occur in any conduit run. No attempt has been made toshow all necessary boxes on Drawings.PART 2. - PRODUCTS2.1 MATERIALSA. Type:1. Pull and junction boxes shall be sized and installed to meet requirements ofArticle 370 of the latest edition National Electric Code (NEC).2. Provide galvanized code-gauge sheet steel junction and pull boxes.PART 3. - EXECUTION3.1 INSTALLATIONA. General Requirements: Locate pull and junction boxes shall be located so as to beaccessible after building is finished. Pull and junction boxes shall not be placed in anyfinished spaces without prior approval of Architect/Engineer. No boxes shall be installedabove plaster ceilings without prior approval of Architect/Engineer.1. Pull boxes installed above lay-in ceiling tiles shall be within twenty-four inches ofceiling for accessibility and shall not conflict with removal of ceiling tiles.2. Pull boxes shall be within twenty-four inches where installed above accesspanels.3.2 CONDUCTORS IN PULL BOXESA. General Requirements: Conductors shall be of sufficient length within pull boxes to neatlyinstall and organize conductors without excess.3.3 IDENTIFICATIONA. Pull Boxes: Pull boxes shall be identified as to type of system in box as follows:1. Stencil coverplate with 1/2-inch black letters in non-finished areas.2. Identify with a tag inside of box in finished areas.3. Paint boxes red and stencil “FIRE ALARM” for all boxes used for fire alarm anddetection systems.B. Conductors: Identify in a permanent neat and legible manner all conductors or cableswithin box by means of tags, pressure sensitive tape or cable ties.END OF SECTION 16113PULL AND JUNCTION BOXES16113-1
SECTION 16117- SAFETY SWITCHESPART 1. - GENERAL1.1 SUMMARYA. Section Includes: Provide safety switches wherever required by the Drawings andSpecifications.1.2 SUBMITTALS1. Every effort has been expended to provide an accurate list of mechanicalequipment motors as shown on the drawings and the Equipment Schedule.However, the Contractor shall verify motor horsepower sizes on site beforeinstalling switches or selecting fuses.A. Shop Drawings: Provide Shop Drawings in accordance with Section 16010.PART 2. - PRODUCTS2.1 MANUFACTURERSA. Acceptable Manufacturers: All safety switches shall be of one manufacturer as follows orapproved equal.2.2 MATERIALSA. Type:1. Cutler-Hammer2. General Electric3. Siemens4. Square D1. Safety switches shall be fused. Non-fusible switches may be used in lieu offusible where allowed by the National Electrical Code (NEC).2. Safety switches shall be NEMA HD (heavy duty) type, horsepower rated, and ofampere sizes shown on Drawings or as required by the NEC. Safety switchesshall have NEMA I enclosures, except in wet locations or where indicated asweatherproof, in which case a NEMA 3R enclosure shall be used. Locations onroof or outside shall be considered wet locations.3. Fusible safety switches shall contain Class R fuse provisions to reject fuses,except Class R type.4. Safety switches shall contain padlocking provisions and defeater screwmechanisms. Provide interlock contacts where so specified.5. Safety switches shall be rated 250 volts where used on 120/208 volt or 120/240volt systems.6. Switches rated 30 amperes through 100 amperes shall have lugs listed for 60-degree C or 75-degree C conductors. Switches rated over 100 amperes shallhave Iugs listed for 75 degrees C.END OF SECTION 16117SAFETY SWITCHES16117-1
SECTION 16118 - FUSESPART 1. - GENERAL1.1 SUMMARYA. Provide all labor, materials, and accessories as required to protect feeders and branchcircuits for panels, motors, and electrical appliances wherever required by the Drawingsand Specifications or by applicable provisions of the National Electric Code (NEC).PART 2. - PRODUCTS2.1 MANUFACTURERSA. Acceptable Manufacturers: All fuses shall be of one manufacturer as follows:2.2 FUSE TYPES1. Bussman2. Littlefuse3. ShawmutA. 600 Ampere and Below (Bussman model numbers used to set the minimum standard formaterial and equipment):1. All fuses shall have 300,000 amperes RMS interrupting rating.2. Fuses shall be Underwriters’ Laboratories Class R current limiting, dual elementtime delay, rejection type.3. Fuses shall be Bussman LPN-RK_SP.B. 601 Ampere and Above (Bussman model numbers used to set the minimum standard formaterial and equipment):1. All fuses shall have 200,000 amperes RMS interrupting rating.2. Fuses shall be Underwriter’ Laboratories Class L current limiting, time delay,pure silver link type.3. Fuses shall be Bussman KRP-C_SP.PART 3. - EXECUTION3.1 FUSE INSTALLATIONA. General Requirements:1. Provide fuses in all fusible switches2. Provide all fuses of ampere ratings required by the NEC to protect feeders andequipment.END OF SECTION 16118FUSES16118-1
SECTION 16120 - WIRE AND CABLE (600 VOLTS AND BELOW)PART 1. - GENERAL1.1 SUMMARYA. Section Includes: Provide and connect 600 volt and below wire and cable.B. Wiring Sizing: Wire sizes indicated on Drawings are for copper conductors. Conductorsizes are specified by American Wire Gage (AWG) numbers, except where conductorcross sections in MCM is indicated. Unless noted otherwise conductors smaller than 12AWG shall not be used for branch circuits.C. In Conduit: Unless otherwise noted on Drawings, electric system conductors shall beinstalled in conduit. Conduit fill requirements of the National Electric Code (NEC) shall notbe exceeded.D. Metalclad Cable: MC Cable may be used in accessible ceilings and in casework, wherepermitted by Code. Ensure that any use of MC cable is properly used and supported inaccordance with NEC 330. All MC cable shall have a fully rated, insulated, internalgrounding conductor.1.2 CONDUCTORS FOR COMMUNICATION AND OTHER SYSTEMSA. General Requirements: Refer to specific communication system Sections for conductorrequirements.B. Conductors not installed in raceway shall be plenum rated.1.3 QUALITY ASSURANCEA. Regulatory Requirements: Provide and connect wire and cable to NEMA, ICBA andUnderwriters’ Laboratories (UL) standards.PART 2. - PRODUCTS2.1 MANUFACTURERSA. Acceptable Manufacturers: All wire and cable and accessories shall be as follows:2.2 CONDUCTORS1. Building Wire/Cable: Recognized manufactures of electrical building wire.2. Plastic Tape: AMP, Eagle or 3M.3. Spring Wire Connectors: Heyco, Ideal, 3M or T&B.4. Split-Bolt Connectors: Bumdy, O-Z/Gedney, Square D, or T&B.5. Solderless Crimp Pressure Connectors: Bumdy, Ideal T&B or 3M.6. Twist-on Wire Connectors: Buchanan, Ideal or 3M7. Vingl Electric Insulation Tape: Permacel, Tomic or 3M.A. Copper Conductors: Conductors shall be soft, annealed 98% copper, electricallycontinuous and free from short circuits or grounds.B. Aluminum Conductors: Aluminum conductors shall not be used on this Project.WIRE AND CABLE16120-1
2.3 SOLID AND STRANDEDA. General Requirements:2.4 INSULATION1. Wires shall be solid or stranded for sizes 10 AWG and smaller.2. Wires shall be stranded for sizes 8 AWG and larger.A. Voltage Class: Insulation, unless otherwise noted, shall be 600 volt.B. Insulation Type: Conductor insulation shall be as follows:1. Service, Feeder, and Branch Circuit Conductors: Type THHN/THWN with atemperature rating of 75 degrees C.C. Color Code: Wire and cable color shall be in accordance with the latest edition of theNEC. On larger cables, where factory color coding is not available, marking tape shall beused to identify each phase and neutral conductors. A minimum length of six inches shallbe color coded at each end and in all pull boxes. For modifications and additions toexisting wiring systems, color coding shall match existing wiring systems.2.5 CONNECTORS AND TERMINATIONSA. Conductors 8 AWG and Smaller: Use solderless crimp or indent type pressureconnectors with insulating covers for copper wire splices and taps for 8 AWG. For 10AWG and smaller, use insulated spring wire connectors with plastic caps. Strictly complywith the number, size and combination of conductors as listed on manufacturer’spackaging.B. Conductors 6 AWG and Larger: Use split bolt connectors for copper wire splices andtaps, 6 AWG and larger. Tape uninsulated conductors and connectors with electricaltape.2.6 CONTROL WIRINGA. General Requirements:1. Control conductors shall be 14 AWG or larger, if provided under this divisionWiring provided under Division 15, shall be #18 AWG or larger.2. Conductors shall be sized large enough so that voltage drop under in-rushconditions will not adversely affect operation of the controls.WIRE AND CABLE16120-2
PART 3. - EXECUTION3.1 GENERAL WIRING METHODSA. General Requirements:1. Provide 12 AWG or larger conductors for power and lighting circuits.2. Provide 10 AWG conductors for 20 ampere, 120 volt branch circuit home runslonger than 100 feet and for 20 ampere. All 120v circuits shall have dedicatedneutral conductors.3. Place an equal number of conductors for each phase of a circuit in sameraceway or cable.4. Conductors shall be tested to be continuous and free from shorts and grounds.5. Neatly install, organize, and lace wiring inside boxes, equipment, andpanelboards.6. Conductor lengths for parallel circuits shall be equal.7. Provide a minimum of twelve inches of slack conductor at each outlet.3.2 WIRING INSTALLATION IN RACEWAYSA. General Requirements:1. Pull all conductors into a raceway at the same time. Use Underwriters’Laboratories (UL) listed wire pulling lubricant for pulling No. 4 AWG and largerwires.2. Completely and thoroughly swab raceway system before installing conductors.3. Control and communication conductors shall be installed in separate, dedicatedraceway systems.3.3 WIRING CONNECTIONS AND TERMINATIONSA. General Requirements:1. Splices shall only occur in accessible junction boxes. Splices in conductorsinstalled below grade are not permitted2. Wires shall be thoroughly cleaned prior to installing Iugs and connectors.3. Splices, taps and terminations shall be made to carry full ampacity of conductorswithout perceptible temperature rise.4. Spare conductors shall be terminated with electrical tape and tagged “spare”END OF SECTION 16120WIRE AND CABLE16120-3
SECTION 16140 - WIRING DEVICESPART 1. - GENERAL1.1 SUMMARYA. Section Includes: Provide all labor, materials and accessories as required to install andconnect wiring devices wherever required by Drawings and Specifications.1.2 SUBMITTALSA. Shop Drawings: Provide Shop Drawings in accordance with Section 16010.PART 2. - PRODUCTS2.1 MANUFACTURERSA. Acceptable Manufacturers:2.2 DEVICE COLOR1. All wiring devices shall be of one manufacturer as follows (Leviton and Hubbellcatalog numbers are used to specify required type and quality):a. Arrow-Hartb. Eaglec. General Electricd. Hubbelle. Levitonf. Pass & Seymourg. Slaterh. Sierra2. All wall plates shall be of one manufacturer as follows:a. Arrow Hartb. Levitonc. Sierr2d. SlaterA. General Requirements: Unless noted otherwise, all wiring devices and wall plates shallbe coordinated with the Architect.2.3 SWITCHESA. General Requirements: Switches for lighting loads shall be 20 amp, 120 volt, quiet toggletype and side wired.B. Switches shall be equal to the following:1. 20 amp, 120/277 volt, single pole Leviton #1221-2X2. 20 amp, 120/277 volt, 3-way Leviton #1223-2X3. 20 amp, 120/277 volt, 4-way Leviton #1224-2XC. Switches controlling over nine amps shall be 20 amp rated.WIRING DEVICES16140-1
2.4 CONVENIENCE OUTLETSA. General Requirements: Duplex receptacles shall be 20 amp, 125 volt, 3-wire, groundingtype, quickwire push-in and side or back and side wired. All receptacles shall be installedwith the ground slot down. Provide GFI receptacles where shown or required by theNational Electrical Code (NEC) and install with ground slot down.B. Receptacles shall be equal to the following:1. 20 amp, 125 volt, GFI Leviton #M1636-X (NEMA 5-20R)2. 20 amp, 125 volt Leviton #BR20-X (NEMA 5-20R)C. Special receptacles shall be equal to the following:2.5 DEVICE PLATES1. 20 amp, 250 volt Leviton #5821-X (NEMA 6-20R)2. 30 amp, 125/250 volt, 3-pole, 4-wire, grounding Leviton #278 (NEMA 14-30R)3. 50 amp, 125/250 volt, 3-pole, 4-wire, grounding Leviton #279 (NEMA 14-50R)A. General Requirements: Device plates shall be provided for all devices shown on theDrawings or called for in the specifications. Device plates in finished and unfinished areasshall be nylon, unless noted otherwise. Multiple device plates shall be constructed of asingle plate. No sectional plates will be accepted.B. Special Screws: Where so indicated, device plates shall be complete with specialtamperproof spanner oval head screw. Furnish Owner with three special screw drivers forthe spanner head screws.C. Engraved Plates: Engraved plates shall have letters as required, 1/8-inch minimum letterheight and black filling. Printed tape or glued on plates are not acceptable. The followingplates shall be engraved:1. Wall plates so indicated on Drawings.2. Switch wall plates controlling any lights which are out of sight of switches.3. Switch wall plates controlling motors and other utilization equipment.PART 3. - EXECUTION3.1 INSTALLATION OF DEVICESA. General Requirements: Device height shall be as follows, except where noted otherwiseon the Drawings:B. Switches, receptacles and outlets shall be mounted at the following heights, measuredfrom device center to floor, unless noted otherwise.1. Receptacle 18”2. Telephone outlet 18”3. Telephone outlet, wall 54”4. Switch 48”C. The Contractor shall coordinate the mounting height of all special receptacles with theArchitect, Owner, Mechanical Contractor and equipment suppliers.WIRING DEVICES16140-2
D. Where locations shown or mounting heights specified for devices conflict with othertrades or building finishes, the Contractor shall coordinate exact requirements prior toinstallation and install only after the approval of all involved.E. Provide spacers as required between outlet boxes and devices so that each device isflush with the finished wall. Plate screws shall not be used to stabilize device.F. Location:3.2 MOVING DEVICES1. Switches near doors shall be located on side opposite the hinges (verify doorswings with Architectural Drawings before installation) and close to door trim.Edge of switch plate shall be within six inches of door frame.A. The Owner, through the Architect/Engineer, reserves the right to move any device adistance of ten feet in any direction from the location shown on the Drawings without anincrease in Contract amount. This requirement shall only apply to devices beforeinstallation.B. In the event that an outlet shown on the Drawings will not be able to serve the specifiedpiece of equipment, the outlet shall be relocated as required, with no increase in contractamount.END OF SECTION 16140WIRING DEVICES16140-3
SECTION 16150 - ELECTRICAL CONNECTIONSPART 1. - GENERAL1.1 SUMMARYA. Section Includes: Provide circuits, including final connections unless noted otherwise, toeach item of electrically powered equipment wherever required by the Drawings andSpecifications.1.2 CONNECTIONSA. Motors: Connect as indicated on drawings.B. Kitchen Equipment: Connect as called for in the Electrical Equipment Schedule.Equipment locations, conduit rough-ins and dimensions shall be obtained from thekitchen equipment suppliers’ Shop Drawings prior to conduit installation.C. Do not scale Electrical Drawings for rough-in dimensions.PART 2. - PRODUCTSNot UsedPART 3. - EXECUTION3.1 CONDUIT STUB-UPSA. General Requirements: Provide a rigid conduit coupling installed flush with finished floorfor conduit stub-ups through floor to equipment or machinery. Rigid conduit shall be runup to equipment as required. Provide a recessed pipe plug in flush coupling for futureconnections where noted to be capped flush with finished floor.END OF SECTION 16150ELECTRICAL CONNECTIONS16150-1
SECTION 16450 - GROUNDING SYSTEMPART 1. - GENERAL1.1 SUMMARYA. Section Includes: Provide labor, materials, equipment and accessories for the followingWork:1.2 QUALITY ASSURANCE1. Electric Service Ground: Provide grounding of secondary service neutrals at thesupply side of the service disconnecting means in accordance with the NationalElectric Code (NEC).a. Provide grounding of the metallic conduit system, cabinets, non-currentcarrying parts of equipment and neutral service conductor at the serviceentrance.2. Equipment Ground: Provide solid interconnections to form a continuouspermanent and effective equipment grounding medium between the entireconduit system, switch boxes, cabinets, motor frames and other permanentlyinstalled electrical equipment:a. Feeder and Branch Circuits: Provide an insulated grounding conductor,sized per the NEC, but not less than #12 AWG.1) All EMT conduits2) All PVC conduits3) All flexible metal conduits and liquid-tight flexible metal conduits3. Metal Piping: Bond interior metal piping systems to the services equipmentenclosure, the grounded conductor at the service or to the grounding electrodeconductor.4. Communication System Grounding: Provide grounding for each communicationsystem.A. Regulatory Requirements: Provide grounding systems to comply with the requirements ofthe NEC. Coordinate with the local electrical inspector.B. Tests: Measure ground grid resistance with earth test megger. Provide additional groundrods and conductors as required until resistance to ground meets NEC and local coderequirements.PART 2. - PRODUCTS2.1 MATERIALSA. Grounding System: Except as otherwise indicated, provide electrical grounding systemswith assembly of materials including, but not limited to, cables/wires, connectors,terminals, grounding rods/electrodes, bonding jumpers, and additional accessoriesneeded for complete installation. Where materials or components are not indicated,provide products meeting the requirements of NEC, UL, IEEE, and established industrystandards for applications indicated.GROUNDING SYSTEM16450-1
1. Conductors: Copper cable, stranded of size per the NEC unless otherwise notedon Drawings.2. Bonding Jumper Braid: Copper braided tape, constructed of 30 gauge barecopper wires and properly sized for indicated applications.3. Connectors, Terminals, and Clamps: Burdy, Keamey, T & B, Penn-Union, orapproved equal.4. Ground Rods: Copper clad steel, ½” diameter, a minimum of three 10 feet inlength and 10’ apart.PART 3. - EXECUTION3.1 INSTALLATIONA. General Requirements: Grounding and bonding shall comply with the requirements of theNEC and shall be coordinated with the local electrical inspector. This, however, shall notbe construed as relieving the Contractor from meeting any requirements of the Drawingsand Specifications that may exceed code requirements.3.2 GROUNDING ELECTRODEA. General Requirements: Grounding electrode shall be the metal water piping system ofthe building. Water piping system electrode shall be supplemented by the followingadditional electrodes:1. Metal Frame of Building: Metal frame of building in those buildings with a metalframe system.3.3 MAIN BONDING JUMPERA. General Requirements: Connect secondary service neutral and grounding electrodeconductor to equipment grounding bus in service equipment.3.4 FEEDER AND BRANCH CIRCUITSA. General Requirements: Provide an insulated grounding conductor, sized in accordancewith the NEC, within all PVC conduits, within all flexible metallic conduits and within allEMT conduits .3.5 CONDUITS, BOXES, CABINETS AND PANELBOARDSA. General Requirements:1. Ground all metallic conduit systems. Establish ground continuity by providingstandard couplings, connectors, fittings and jumpers at all grounding type wiringdevices, motor and ground terminals.2. Ground wires shall be grounded to each pull box, junction box, outlet box,cabinets and other enclosures through which the ground wires pass, except forspecial isolated grounding systems.GROUNDING SYSTEM16450-2
3. Provide lugs in each box and enclosure for ground wire termination whererequired.3.6 MISCELLANEOUS EQUIPMENTA. Motors and Starters: Provide lugs in motor terminal boxes and starter housings forground wire termination and provide interconnecting ground wire.B. Receptacles: Provide a ground wire from receptacle and light switch green groundterminals to outlet box ground screws.C. Lighting Fixtures: Provide a green ground wire with power wires from fixture throughflexible conduit to first outlet box for all fixtures connected with flexible conduit.D. Electrical Equipment: Provide a ground lug for termination of green ground conductor forall Fixed electrical equipment.3.7 COMMUNICATION GROUNDINGA. General Requirements:1. Provide grounding at telephone and CATV backboards.END OF SECTION 16450GROUNDING SYSTEM16450-3
SECTION 16470 - PANELBOARDSPART 1. - GENERAL1.1 SUMMARYA. Section Includes: Provide panelboards wherever required by the Drawings andSpecifications.1.2 SYSTEM DESCRIPTIONA. Circuit Numbers: Circuit numbers shown on Drawings shall be used for reference only.Actual connections shall be in accordance with phasing of cabinet, load balance andcommon neutral requirements.B. Contractor shall contact local power utility anc coordinate all service requirements andpay all associated fees and charges.1.3 SUBMITTALSA. Shop Drawings: Provide Shop Drawings in accordance with Section 16010.1.4 QUALITY ASSURANCEA. Regulatory Requirements: Construct panelboards to NEMA and Underwriters’Laboratories (UL) standards.PART 2. - PRODUCTS2.1 MANUFACTURERSA. Acceptable Manufacturers: All panelboards shall be as follows:2.2 COMPONENTS1. AMP (Cutler-Hammer Components)2. Cutler-Hammer3. EMI (Cutler-Hammer Components)4. General Electric5. Siemens-ITE6. Square D7. States ElectricA. General Requirements: Panelboards shall be dead front safety type and shall be ULlisted.B. Enclosures: Enclosures shall be constructed of code grade steel with concealed trimclamps and hinges. Panel front shall be lockable with all panels throughout the Projectkeyed alike. Provide two keys for each panel.C. Lugs: Solderless lugs only shall be provided in mains, unless otherwise noted on theDrawings and/or the Panelboard Schedule. Main lugs shall be suitable for both 60-degree- C and 75-degree-conductors. Main and neutral lugs shall be compression type.Provide sufficient number of lugs to individually terminate each conductor.PANELBOARDS16470-1
D. Bussing: Provide bussing made from 98% electrolytic copper or 55% conductivityaluminum and independently supported without dependence upon circuit breakers.E. Gutters: Provide oversized gutters for feed through, where indicated or required. Wheredouble tugs are not permitted by local code authorities, provide suitable pull box or gutteradjacent to panels for connections. Feeder wiring shall be capable of accepting a damponammeter.F. Molded Case Circuit Breakers: Provide circuit breakers as follows:1. Bolt-in type.2. Multi-pole breakers shall be common trip and reset, with one handle.3. Rated for 10,000 amperes for 120/208 volt systems minimum, in lighting andappliance panelboards. Rated for 22,000 amperes, minimum, for all distributionpanelboards. Refer to drawings if higher ratings are required.4. Contain HACR label when feeding heating, air conditioning or refrigeration loads.G. Fusible Switches: Provide quick-made, quick break fusible switches (QMB or equal).H. Special Panelboard Requirements:1. The following shall be provided as specified:a. Panelboards with wireways above or below the panelboard shall haveconduit enclosures of the same size and finish as the panelboards withremovable, screw attached, front covers.b. Panelboards with double tubs shall have separate individualized frontsfor each tub.c. Provide lock-offs over required breaker handles as noted.d. Provide GFI breakers as noted.e. Breakers serving equipment under the kitchen exhaust hood shall beshunt-trip for emergency shut-down.PART 3. - EXECUTION3.1 INSTALLATIONA. General Requirements:3.2 SPARE CONDUITS1. Feeder and branch circuit conduits shall meet the cabinet squarely and shall bearranged to facilitate training of conductors to their respective terminals.2. Top of panelboard tubs shall be 6’-6” above finished floor.A. General Requirements: Provide three 3/4-inch empty conduits from each flush mountedpanelboard to ceiling space or area above panelboard for future panel connections.Empty conduits shall be capped or turned horizontally (Parrallel to floor)..3.3 IDENTIFICATIONA. Panel Identification: Panelboards shall be labeled per Section 16000.Provideidentification plates on front exterior of panleboards.PANELBOARDS16470-2
B. Circuit Identification:1. Circuit Breaker Panelboards: Provide typed directories identifying all circuits withclear plastic cover mounted in a card holder. Room numbers or names used forcircuit identification shall correspond to nameplates installed on room doors byGeneral Contractor or as selected by Owner and shall be verified as these maynot be the same as room titles on Drawings. Provide Owner with electronic file ofcircuit directories in Microsoft Word compatible format.END OF SECTION 16470PANELBOARDS16470-3
SECTION 16500 - LIGHTINGPART 1. - GENERAL1.1 SUMMARYA. Section Includes: Install fixtures shown on Drawings.PART 2. - PRODUCTSNot UsedPART 3. - EXECUTION3.1 INSTALLATIONA. General Requirements:3.2 FIXTURE MOUNTING1. Remove manufacturer labels from exterior of fixtures, do not remove any UL ormaximum wattage labels .2. Install Fixtures when the work of other trades in the area is substantiallycomplete, to avoid damage or defacement after installation. Fixtures shall not beinstalled on ceilings until ceiling finishes are complete, except fixtures may beinstalled on exposed T-bar ceilings after T-bars are installed and before tileinstallation.3. Coordinate fixture locations with the ceiling installation and install fixtures in auniform pattern to tiles or exposed grids. Fixtures shall be symmetrically spacedwith rows in alignment and parallel with the building features. Measurementsshall be taken from the Architectural Drawings.4. Directional fixtures shall be properly aimed and aligned as directed by the Ownerrepresentative.A. General Requirements:1. Surface fixtures, other than fluorescent type, shall be securely fastened to outletbox.2. Recessed fixtures, except those installed within an exposed grid type ceiling,shall be supported from building structural members or from concealed steelframing channels 1-1/2 inches or larger. No recessed fixtures shall be supportedfrom ceiling tiles.3. Individually mounted fluorescent fixtures shall be supported within 12 inches ofeach end of fixture.3.3 SUPPORTS AND FASTENINGA. For Fixtures Not In Exposed T-Bar Grid Ceilings: Fixture supports, or outlet boxes usedto support fixtures, shall be securely fastened to building structural members or toconcealed steel ceiling framing channels 1-1/2 inches or larger. Fixture hanging rodsshall be of adequate dimensions to support fixture and shall be not less than 3/8 inchdiameter. Fixture supports shall be fastened to structure as shown on drawing details.B. For Fixtures in Exposed T-Bar Grid Ceilings: Fixtures shall be supported as follows:LIGHTING16500-1
1. Recessed fixtures designed expressly for lay-in mounting shall be installed in thatmanner. Grid system shall be supported from structure as required by ceilingsystem installer.2. Provide flexible metal conduit or MC cable connections for all recessed typefixtures in lay-in ceilings with sufficient length to permit fixture to be lifted out.Maximum flexible conduit shall not exceed six feet. One to four fixtures may beserved by a single common outlet box, securely fastened to structure or ceilingsupport members and within 30 inches of ceiling tile.3. Provide fixture retainers or clips for each fixture installed in exposed gridsuspended ceilings in accordance with IBC and state building codes.3.4 SPECIAL FIXTURE COORDINATIONA. Storage and Mechanical/Electrical Rooms: Contractor shall verify actual fixture locationswith Architect. Fixture locations shall be revised as required to clear all equipment, ducts,and piping.END OF SECTION 16500LIGHTING16500-2