Installation Guide - DATAQ Instruments
Installation Guide - DATAQ Instruments
Installation Guide - DATAQ Instruments
Create successful ePaper yourself
Turn your PDF publications into a flip-book with our unique Google optimized e-Paper software.
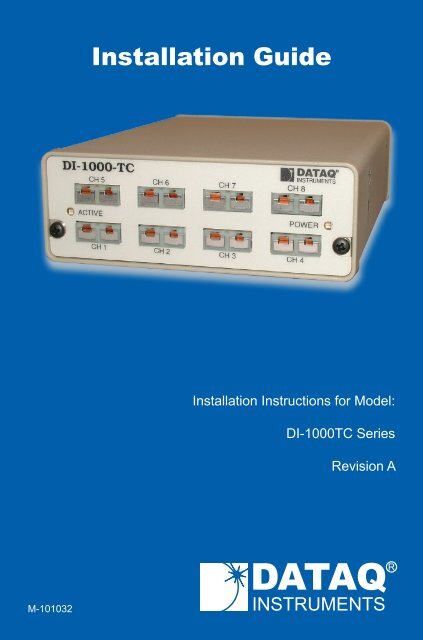
<strong>Installation</strong> <strong>Guide</strong><strong>Installation</strong> Instructions for Model:DI-1000TC SeriesRevision AM-101032
Hardware and Software <strong>Installation</strong> <strong>Guide</strong>DI-1000TC Series <strong>Installation</strong> with WinDaq ®Acquisition and Playback Software and PalmDaqSoftwareSYSTEM REQUIREMENTSHardwareOperating SystemDisk Space*Serial port products are not supported in Vista.Intel or compatible PCWindows 2000, XP, or Vista*40MB plus space for recorded dataThis installation guide explains how to install all <strong>DATAQ</strong> <strong>Instruments</strong>DI-1000TC Series products to your personal computer. In orderto connect a DI-1000TC to your PC, you will need to purchase anadapter. The DI-1000-USB adapter provides a USB connectionto your PC. The DI-1000-232F adapter provides a Serial Portconnection to your PC. The DI-1000-232M adapter provides a SerialPort connection to your PDA. Follow the installation instructionsfor the adapter you purchased. Only one adapter is required wheninstalling multiple units in a daisy chain.Table of ContentsSection A: DI-1000-232F <strong>Installation</strong> ................................................ 3Section B: DI-1000-USB <strong>Installation</strong> ................................................ 4Section C: DI-1000-232M <strong>Installation</strong> .............................................. 7Section D: Installing Multiple Devices in a Daisy Chain ................... 8Section E: DI-1000 Configuration Software ................................... 11Section F: Documentation and Support ......................................... 11
Section A: DI-1000-232F <strong>Installation</strong>You MUST purchase an adapter in order to connect your DI-1000TC toyour computer. The DI-1000-232F is designed to connect your DI-1000TCthrough your PCs RS-232 Serial Port.NOTE: This adapter is not supported in Windows Vista.If you are installing multiple units please read Section D: InstallingMultiple Devices in a Daisy Chain before continuing.1.2.3.4.5.6.7.8.9.10.11.Connect the DI-1000-232F adapter to your computer’s Serial Portusing the supplied cable.Connect the DI-1000TC to the DI-1000-232F adapter using a standardCAT-5 Ethernet cable.Connect and apply power to the DI-1000TC.Insert the WinDaq Resource CD into your CD-ROM drive and run theinstallation software (if the Windows Autoplay feature is enabled, theinstallation software will start automatically).Select the radio button “Install Software for all other products” andclick OK.Select “WINDAQ/Lite, WWB, and Software Development Kit” andclick OK.Select “DI-1000 Series” and click OK.Select “PC (using WINDAQ/Lite),” “PDA (using PalmDaq),” or“both” depending on how you may acquire data and click OK.The Welcome! dialog box allows the user to cancel the installation.Click OK to continue installation or Cancel to abort.Select “RS-232” and click OK.Hardware and Software <strong>Installation</strong> <strong>Guide</strong>Specify the COM port number (typically COM1) your instrument isconnected to and click OK. If you do not enter this correctly, you mayrun WinDaq Lite Data Acq Setup from your WinDaq Program Groupto change it.
Hardware and Software <strong>Installation</strong> <strong>Guide</strong>12.13.14.15.16.17.Read the license agreement and either “Accept and Continue” or “Donot accept and stop.”Select a destination directory.Specify a Windows Group Name.Select the Baud Rate. You should not need to change the Baud Rate -all DI-1000TC modules come pre-configured from the factory. If youdo not enter this correctly, you may run WinDaq Lite Data Acq Setupfrom your WinDaq Program Group to change it.If the software finds a previous version, you will be prompted to createbackups. The installation program also allows you to cancel here.You should now see the Done! dialog box. <strong>Installation</strong> is complete. Toexit the installation program click OK.Section B: DI-1000-USB <strong>Installation</strong>You MUST purchase an adapter in order to connect your DI-1000TC toyour computer. The DI-1000-USB is designed to connect your DI-1000TCthrough your PCs USB Port. If you are installing multiple units please readSection D: Installing Multiple Devices before continuing. USB instrumentsrequire driver installation before they can communicate with your PC.1.2.3.Insert the WinDaq Resource CD into your CD-ROM drive. If theWindows Autoplay feature is enabled, the installation software willstart - exit out of the installation software.Connect the DI-1000-USB adapter to your computer’s USB Port usingthe supplied cable.The Windows “Found New Hardware Wizard” runs. Click throughthe defaults. When completed, the “Found New Hardware Wizard”will run again - and again you should click through the defaults untilyou exit the Wizard. The DI-1000-USB requires two drivers to beinstalled, a Serial Port and a USB driver. This will look like twoinstruments are installed when there is only one.
Hardware and Software <strong>Installation</strong> <strong>Guide</strong>NOTE: If you receive the Microsoft-issued warning that the software “hasnot passed Windows Logo testing to verify its compatibility with WindowsXP” click Continue Anyway. You may see this warning twice − once foreach driver (USB and Serial Port).4.5.6.7.Connect the DI-1000TC to the DI-1000-USB adapter using a patchcable.Connect and apply power to the DI-1000TC.Access the Windows Device Manager and locate the Ports (COM &LPT) icon and click the small “+” sign to expand the menu and see allthe devices installed.Note the COM number that has been assigned to your device and closethe Device Manager.
Hardware and Software <strong>Installation</strong> <strong>Guide</strong>8.9.10.11.12.13.14.15.16.17.18.19.20.21.Insert the WinDaq Resource CD into your CD-ROM drive and run theinstallation software (if the Windows Autoplay feature is enabled, theinstallation software will start automatically).Select the radio button “Install Software for all other products” andclick OK.Select “WINDAQ/Lite, WWB, and Software Development Kit” andclick OK.Select “DI-1000 Series” and click OK.Select “PC (using WINDAQ/Lite),” “PDA (using PalmDaq),” or“both” depending on how you may acquire data and click OK.The Welcome! dialog box allows the user to cancel the installation.Click OK to continue installation or Cancel to abort.Select “USB” and click OK.Specify the COM port number your instrument is connected to (steps6 and 7 above) and click OK. If you do not enter this correctly, youmay run WinDaq Lite Data Acq Setup from your WinDaq ProgramGroup to change it.Read the license agreement and either “Accept and Continue” or “Donot accept and stop.”Select a destination directory.Specify a Windows Group Name.Select the Baud Rate. You should not need to change the Baud Rate -all DI-1000TC modules come pre-configured from the factory. If youdo not enter this correctly, you may run WinDaq Lite Data Acq Setupfrom your WinDaq Program Group to change it.If the software finds a previous version, you will be prompted to createbackups. The installation program also allows you to cancel here.You should now see the Done! dialog box. <strong>Installation</strong> is complete. Toexit the installation program click OK.
Section C: DI-1000-232M <strong>Installation</strong>Hardware and Software <strong>Installation</strong> <strong>Guide</strong>You MUST purchase an adapter in order to connect your DI-1000TC toyour PDA. The DI-1000-232M is designed to connect your DI-1000TC toyour PDA. You do not need to connect your DI-1000TC to your PC.1.2.3.4.5.6.7.8.9.10.11.12.13.Insert the WinDaq Resource CD into your CD-ROM drive and run theinstallation software (if the Windows Autoplay feature is enabled, theinstallation software will start automatically).Select the radio button “Install Software for all other products” andclick OK.Select “WINDAQ/Lite, WWB, and Software Development Kit” andclick OK.Select “DI-1000 Series” and click OK.Select “PDA (using PalmDaq),” or “both” depending on how you mayacquire data and click OK.The Welcome! dialog box allows the user to cancel the installation.Click OK to continue installation or Cancel to abort.Select “RS-232” and click OK.Specify a COM port number and click OK. If you do not enterthis correctly, you may run WinDaq Lite Data Acq Setup from yourWinDaq Program Group to change it. You will only need to change itif you decide to acquire data to your PC.Read the license agreement and either “Accept and Continue” or “Donot accept and stop.”Select a destination directory.Specify a Windows Group Name.Select the Baud Rate. You should not need to change the Baud Rate -all DI-1000TC modules come pre-configured from the factory. If youdo not enter this correctly, you may run WinDaq Lite Data Acq Setupfrom your WinDaq Program Group to change it.If the software finds a previous version, you will be prompted to createbackups. The installation program also allows you to cancel here.
Hardware and Software <strong>Installation</strong> <strong>Guide</strong>14.You should now see the Done! dialog box. Click OK to exit theinstallation program.15. HotSync your PDA to your PC to install the software to your PDA.Section D: Installing Multiple Devices in a Daisy ChainUp to 8 DI-1000TC instruments (64 channels max) may be daisy-chainedtogether to form a distributed synchronous network.1.2.3.4.5.6.7.8.9.10.Connect the first instrument in the chain to your adapter (DI-1000-USB or DI-1000-232) and install it using the appropriate installationinstructions. This is the “Master” instrument.Run the DI-1000 Configuration Software found in the WindowsProgram Group specified during installation. The default is Start >Programs > WinDaq > DI-1000 Config.Click on Configure > Setup in the DI-1000 Config menu.Enter “1” in the text boxes for Address, Previous Device, andMaster.Use the chart below to select a Baud Rate.# of <strong>Instruments</strong> in Chain Suggested Baud Rate1-4 96005-8 19200Click on Write to configure the instrument.Disconnect the instrument from the adapter.Connect and power the next instrument in the chain.Enter “2” for Address. Enter “1” for Previous Device and Master.This device is “Slave 1.” Enter the same Baud Rate entered in Step 5.Repeat steps 7 and 8 for each device. Increment Address andPrevious Device by one for each subsequent instrument. Mastershould always be “1” and the Baud Rate should be the same for eachdevice.
Hardware and Software <strong>Installation</strong> <strong>Guide</strong>11.12.13.14.15.16.After the setup is complete for all devices in the chain, connect the“Master” unit to the adapter.Insert a standard CAT-5 cable to one of the RS-485/422 ports on theback of the “Master” instrument. It does not matter which port youinsert the cable into.Connect the other end of the CAT-5 cable to one of the RS-485/422ports on the back of the “Slave 1” instrument. It does not matter whichport you insert the cable into.Connect each instrument in order by Address (assigned in step 9) inthe same manner.Power each instrument using one of the Power jacks on the rear ofeach instrument. Power may be daisy-chained in the same manner asthe CAT-5 cables (four instruments max for each power supply).Once all units have been connected and powered you must change theTarget in the Shortcut Properties in WinDaq Software to reflect thenumber of “Slave” devices in your network.a.b.c.d.Right-click on the WinDaq Lite Data Acq DI-1000TC programin the Windows startup menu and select Properties. Defaultis Start > Programs > WinDaq > WinDaq Lite Data Acq DI-1000TC.Click on the Shortcut tab.Change “-N0” to “-Nx” at the end of the Target text box where xis the number of “Slave” units installed in the daisy chain (totalnumber of instruments minus 1). See the screen shot on page 10for reference.Click OK to close the Properties dialog box.Your distributed synchronous data acquisition system for thermocouplemeasurements is installed and ready to run.
Hardware and Software <strong>Installation</strong> <strong>Guide</strong>10
Section E: DI-1000 Configuration SoftwareHardware and Software <strong>Installation</strong> <strong>Guide</strong>Use the DI-1000 Configuration software to change baud rate, COM portdesignation, Address ID, set the thermocouple type, or calibrate theinstrument. This utility is installed when installing WinDaq software and islocated in the program menu group designated during installation (defaultis Start > Programs > WinDaq > DI-1000 Config).Although your device comes from the manufacturer calibrated, youcan verify or even change calibration using the DI-1000 ConfigurationSoftware. You should verify your calibration about once a year.See the DI-1000 Configuration software help files for more informationregarding specific functions.Section F: Documentation and SupportFull Hardware documentation is available from the Windows ProgramGroup designated during installation (default is Start > Programs >WINDAQ > Documentation > DI-xxx Hardware Manual).A Fast Start guide with multimedia demonstrations is available afterinstallation from the Windows Program Group designated duringinstallation (default is Start > Programs > WINDAQ > Documentation >Multimedia Fast Start <strong>Guide</strong> to WinDaq Software) or from your hard driveat C:\Windows\Help\Multimedia Fast Start <strong>Guide</strong> to WinDaq Software.pdf.Context-sensitive Help is available in all software programs. Highlight amenu item and press F1 for help regarding that menu item or click on theHelp menu item to access the help files.Support Forum: http://support.dataq.comE-mail: support@dataq.comPhone: 330-668-1444 Monday through Friday 8AM to 5PM EST11
<strong>DATAQ</strong> <strong>Instruments</strong>, Inc.241 Springside DriveAkron, Ohio 44333 U.S.A.Telephone: 330-668-1444Fax: 330-666-5434www.dataq.comDesigned and manufactured in theUnited States of AmericaCopyright © 2007 by <strong>DATAQ</strong> <strong>Instruments</strong>, Inc.<strong>DATAQ</strong> <strong>Instruments</strong>’ hardware and software products are not designed to beused in the diagnosis and treatment of humans, nor are they to be used as criticalcomponents in any life-support systems whose failure to perform can reasonably beexpected to cause significant injury to humans.<strong>DATAQ</strong>, the <strong>DATAQ</strong> logo, and WinDaq are registered trademarks of <strong>DATAQ</strong> <strong>Instruments</strong>,Inc. All rights reserved.


