AUTOMATIC SWING DOOR - DORMA International
AUTOMATIC SWING DOOR - DORMA International
AUTOMATIC SWING DOOR - DORMA International

You also want an ePaper? Increase the reach of your titles
YUMPU automatically turns print PDFs into web optimized ePapers that Google loves.
<strong>DORMA</strong>ED400Surface AppliedTools Required:ScrewdriversSmall Straight (Flat Blade) - for Terminal Block wiring#2 Phillips (Crosspoint) - for various #8, #10, and #14 screwsWrenches / Sockets7/16" - for #1/4-20 Hex Head bolts attaching header to jambs9/16" - for adjustments of hardstops (2 wrenches needed)Allen Wrenches1/4” - for top and bottom pivotElectric Drill with the following drill bits -3/8” - for attaching rivenuts to jambs9/64"(or #28) - for installing sensors5/32" (or #22) - for installing #10 sheet metal screws into adjacent storefront &Bottom pivot13/64" (or #7) - for installing #14 sheet metal screws into adjacent storefront1/4" - for clearance holes in jambsImpact Drill with the following masonry bits -1/4" - for #10 screw anchors5/16" - for #14 screw anchorsLevel - suggested 4' minimumStep Ladder - 4' or 6'Tape MeasureRubber mallet or Hammer - for arm attachmentCaulking and Application GunElectrical Wire Strippers /Cutters - for sensor wiringSuggested Fasteners Required - (Not supplied)Jamb Attachment Screws -#14 X 2-1/2" PHSMS (Pocket Jambs)#14 X 3" FHSMS (Tube Jambs)Optional Anchors for masonryThreshold Attachment Screws#10 X 1-1/2" FHSMSOptional Anchors for masonryHeader Attachment Screws#14 X 1-1/2" HHSMS#14 Flat WasherConstruction Shims - for squaring door frame in opening<strong>DORMA</strong> <strong>AUTOMATIC</strong>S, Inc. 924 Sherwood DriveToll-Free: 877-367-6211Lake Bluff, IL 60044Fax: 877-423-7999E-mail: automatics@dorma-usa.comDL2609-010AUG. 2006Subject to change without notice2
<strong>DORMA</strong>ED400Surface AppliedSection A: Mount the operatorHeaderAEnd BracketPush Arm (Outswing)OperatorPull Arm (Inswing)(Reveal: 0”)Pull Arm (Inswing)(Reveal: 0”-6”)EXTERIORELEVATIONSingle door, LHSingle door, RHLeft HandIN SwingRight HandIN SwingRight HandOUT SwingLeft HandOUT SwingAs Viewed from EXTERIOR<strong>DORMA</strong> <strong>AUTOMATIC</strong>S, Inc. 924 Sherwood DriveToll-Free: 877-367-6211Lake Bluff, IL 60044Fax: 877-423-7999E-mail: automatics@dorma-usa.comDL2609-010AUG. 2006Subject to change without notice4
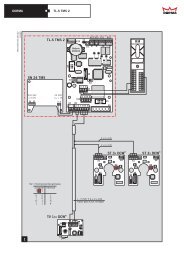
<strong>DORMA</strong>ED400Surface AppliedSection B: Connecting the Controller and Sensors (BEA)1 2 3 4 5GREEN (N.O.)WHITE (COM)BLACK (GND)RED (+24VDC)APPROACHSENSOR(Eagle)Magnetic Lock(Optional - See Section J)B<strong>SWING</strong> AREAPRESENCESENSOR(DK-12) ORBODY GUARDData+Data-NCNOCOM24V24V1 2 3 4 5 6 7BLUEBROWNGREENWHITEBLACKREDextraextraMOUNTED TO THE HEADERMI(Optional) Inhibit Safety Scanner (Superscan)MOUNTED TO <strong>SWING</strong> OF <strong>DOOR</strong> (Safety)JP2 default fromfactory is active.1 2 3 4 5 6 7 8Recycle Safety Scanner (Superscan)MOUNTED TO APPROACH OF <strong>DOOR</strong> (Approach)RED (+24VDC)BLACK (-24 VDC)WHITE (COM)GREEN (N.O.)extraTHIADBYJP2 default fromfactory is active.TX1 2 3 4 5 6 7 8GND24VRED (+24VDC)BLACK (-24 VDC)WHITE (COM)GREEN (N.O.)BROWNWHITEJumper MUST be installedif an optional smokedetector is not present.SMOKEDETECTOR(Optional)RXBeam (Optional)GND24VOUTPUTBROWNWHITEGREEN **WARNING:THIS LINE PULLS UP TO 24 V IF THE LIGHT BEAM IS BROKEN.(Current Sourcing)- Recommend BEA SBK-111Please see Manufacturer’s User Guidesfor further instructions.8Follow the installation and adjustment instructions accompanying the sensorsto be installed. Insure compliance with BHMA/ANSI Standards.<strong>DORMA</strong> <strong>AUTOMATIC</strong>S, Inc. 924 Sherwood DriveToll-Free: 877-367-6211Lake Bluff, IL 60044Fax: 877-423-7999E-mail: automatics@dorma-usa.comDL2609-010AUG. 2006Subject to change without notice8
<strong>DORMA</strong>ED400 ControllerSurface AppliedSection B: Connecting the Controller and Sensors (Bircher Reglomat)APPROACHSENSOR(IMPULSE)YELLOW (N.O.)GREEN(COM)BROWN (GND)WHITE (+24VDC)Magnetic Lock(Optional - See Section J)BextraextraMIInhibit Safety Scanner (Topscan)MOUNTED TO <strong>SWING</strong> OF <strong>DOOR</strong> (Safety)WHITE (+24VDC)BROWN (N.O.)GREEN (-24 VDC)YELLOW (COM)THADBYRecycle Safety Scanner (Topscan)MOUNTED TO APPROACH OF <strong>DOOR</strong> (Approach)TXGND24VWHITE (+24VDC)BROWN (N.O.)GREEN (-24 VDC)YELLOW (COM)BROWNWHITEJumper MUST be installedif an optional smokedetector is not present.SMOKEDETECTOR(Optional)9RXBeam (Optional)GND24VOUTPUTBROWNWHITEGREEN ** WARNING:THIS LINE PULLS TO 24 V IF THE LIGHT BEAM IS BROKEN.UP(Current Sourcing)- Recommend BEA SBK-111Please see Manufacturer’s User Guidesfor further instructions.Follow the installation and adjustment instructions accompanying the sensorsto be installed. Insure compliance with BHMA/ANSI Standards.<strong>DORMA</strong><strong>AUTOMATIC</strong>S, Inc. 924 Sherwood Drive Toll-Free: 877-367-6211Lake Bluff, IL 60044 Fax: 877-423-7999E-mail: automatics@dorma-usa.com9DL2609-010AUG. 2006Subject to change without notice
TXD<strong>DORMA</strong>ED400Surface AppliedSection B: Connecting the Controller and SensorsSYNC TXDGNDRXDENC#1 Endcap2-1/8” 0 1”SYNC TXDGNDRXDBPGMBreakout0 3/32”ENCPGMBreakout#6-32 x ½”OR#2 Header Bottom(Phillips screwdriver required).10Recommended Locations for Mode Switch.10a Place Mode Switch in opening and fasten.Power, Mode Switch & Sensor Wire harness installation.SYNC GNDRXDENCPGMBreakoutNote: Use provided wireties to fix wiring outof the way after wiring is complete.120 VAC11Grounding NoteGround wire attached viagreen screw to headerGreenMICROPROCESSOR CONTROL115 VAC 60 Hz 2A<strong>DORMA</strong> <strong>AUTOMATIC</strong>SPhone: 877-367-6211Motor: 4A slow blowLine: 2A fast actingCONTROLLERTXDSYNC GNDRXDENCRedBlackGround ScrewAttachmentPGMTHIS OPERATOR CONTROLLER MUST BEADJUSTED TO MEET ANSI STANDARDSBY <strong>DORMA</strong> TRAINED PERSONNELBreakoutBlackWhiteIncomingPower115VACGROUND WIRE ATTACHEDFROM BRACKET TO HEADERMotor#8 ScrewStar WasherWire Terminal12 Ground Wire installation.<strong>DORMA</strong> <strong>AUTOMATIC</strong>S, Inc. 924 Sherwood DriveToll-Free: 877-367-6211Lake Bluff, IL 60044Fax: 877-423-7999E-mail: automatics@dorma-usa.com10DL2609-010AUG. 2006Subject to change without notice
MICROPROCESSOR CONTROL115 VAC 60 Hz 2A<strong>DORMA</strong> <strong>AUTOMATIC</strong>SPhone: 877-367-6211Motor: 4A slow blowLine: 2A fast actingTHIS OPERATOR CONTROLLER MUST BEADJUSTED TO MEET ANSI STANDARDSBY <strong>DORMA</strong> TRAINED PERSONNELRXD<strong>DORMA</strong>ED400Surface Applied - PushSection D: Mount the Push Arm1-1/2”Unit Width(= Door width + 2 3/4")1-3/8”SYNC TXDGNDENCPGMBreakout2“4”16”2”Incoming 120VAC(opposite pivot)DL = Reveal + “13-3/8”For Reveals greater than 6”, use the supplied arm extensionApproximately 106"6"13 Installation of Surface Applied - Push Application.<strong>DORMA</strong> <strong>AUTOMATIC</strong>S, Inc. 924 Sherwood DriveToll-Free: 877-367-6211Lake Bluff, IL 60044Fax: 877-423-7999E-mail: automatics@dorma-usa.com12DL2609-010AUG. 2006Subject to change without notice
MICROPROCESSOR CONTROL115 VAC 60 Hz 2A<strong>DORMA</strong> <strong>AUTOMATIC</strong>SPhone: 877-367-6211Motor: 4A slow blowLine: 2A fast actingTHIS OPERATOR CONTROLLER MUST BEADJUSTED TO MEET ANSI STANDARDSBY <strong>DORMA</strong> TRAINED PERSONNELRXD<strong>DORMA</strong>ED400Surface Applied - PullSection E: Mount the Pull Arm (For Reveals up to 6”)Unit Width(= Door width + 2 3/4 ")5-1/2”1-3/8”SYNC TXDGNDENCPGMBreakout1-5/32“11”23-17/32”Incoming 115VAC(opposite pivot)ENote: For installation with reveals up to 6”.6"6"2"19 Installation of Surface Applied - Pull Application.<strong>DORMA</strong> <strong>AUTOMATIC</strong>S, Inc. 924 Sherwood DriveToll-Free: 877-367-6211Lake Bluff, IL 60044Fax: 877-423-7999E-mail: automatics@dorma-usa.com16DL2609-010AUG. 2006Subject to change without notice
GNDRXDGNDRXDGNDRXD<strong>DORMA</strong>ED400Surface Applied - PullSection E: Mount the Pull ArmSYNC TXDENCPGMBreakout1”5/ 32 "5/ 32 "2023-17/32”Securely mount close end of slide channel to door (Ref. Figure #17 for dims).Open door & glide slide block into track. Secure other end of track.#10 x 1-1/2” FHSMSESYNC TXDENCPGMBreakout217/16 FL Washer 59/64”OD3/8 Lock Washer3/8”-16 x 3/4”Hex Head Bolt(9/16” socket required)Rotate pinion to the Front Hard-Stop using operator as specified in Section C.Mount arm in fully-open position.Against BackHardstopStandard of95 forexpected90 opening 95SYNC TXDENCPGMBreakout22Open door and attach arm to slide track. Power down door & allow to shut.Install slide channel endcaps.<strong>DORMA</strong> <strong>AUTOMATIC</strong>S, Inc. 924 Sherwood DriveToll-Free: 877-367-6211Lake Bluff, IL 60044Fax: 877-423-7999E-mail: automatics@dorma-usa.com17DL2609-010AUG. 2006Subject to change without notice
<strong>DORMA</strong>ED400Surface Applied - PullSection E: Mount the Pull ArmReduce OpenAngleIncrease OpenAngle23aHardstop Adjust(Optional) Remove Jamb Bracketand End Cap to access Hardstop AdjustmentsTwo 9/16” wrenches requiredNOTE: Controller sets open and closing angle, adjusthardstops to prevent forced collisionsEHardstop Note1 Electronic Stop - this is set by thecontroller and acts as the backstop duringdoor operation. It is always set at lessthan the angle for the Physical Hardstop.Set around 3 to 5 less than the PhysicalHardstop.23b122 Physical Hardstop - this is set physically asspecified above in Figure 23a. In the eventof a forced collision, this would set themaximum opening angle of the door;typically 95 for a 90 opening.<strong>DORMA</strong> <strong>AUTOMATIC</strong>S, Inc. 924 Sherwood DriveToll-Free: 877-367-6211Lake Bluff, IL 60044Fax: 877-423-7999E-mail: automatics@dorma-usa.com18DL2609-010AUG. 2006Subject to change without notice
<strong>DORMA</strong>ED400Surface AppliedSection F: Basic Set-UpThe purpose of the initial setup is to bring the ED400to a point where it can open the door. If the doorpanel is to be mounted, please refer to Section B.Preparation for Initial setupBasic Requirements• All cables are connected.• Swing area is clear of obstacles• Mode switch in position "OFF".• Controller must have “Low Energy Switch” in“OFF” position.• Power connected.Start-Up• Turn selector knob to “TYPE”.• Turn selector knob to “BCK STP”.• Turn dial knob so that display shows “90”.This is your back stop in degrees.NOTE: If the door is to be set to an angleoother than 90, measure the angle the doorwill open to and input that value in the stepabove.• Turn selector knob to “LEARN”.F• Turn dial knob to select “Low Energy”,“Power Assist”, or “Full Power”. Thecorresponding 3 letter codes are “LE”,“PA”, and “FUP”.The example above shows “Full Power”.NOTE: for “Low Energy” operation, turnthe Low Energy swith to “ON”.• Turn selector knob to “MOUNT”.• Turn dial knob so that display shows“ALL”. This will cause a full learn cycle.• Turn mode switch from “OFF” to the “ON”position.OFF ON• The controll box display will show “ALL”,indicating that a learn cycle is in progress.• Turn dial knob to select Push Mount “PSH” orPull Mount “PUL”.<strong>DORMA</strong> <strong>AUTOMATIC</strong>S, Inc. 924 Sherwood DriveToll-Free: 877-367-6211Lake Bluff, IL 60044Fax: 877-423-7999E-mail: automatics@dorma-usa.comThe door will stay closed for 10 seconds tolet you get into position to catch it at thedesired Back Stop.19DL2609-010AUG. 2006Subject to change without notice
<strong>DORMA</strong>ED400Surface AppliedSection F: Basic Set-Up• The door will begin to open slowly. Stop thedoor at the desired Back Stop position until itbegins to close back to latch position.• Turn the selector knob to “RUN”.Please let the door close. Stand clear.Let go of the door andMOVE OUT OF THE WAY!• The door will now SLAM open to 45, to measure it’sinertia.oSensors are disabled,during learn cycle!STAND CLEAR!• When the controller has learned all of it’s selfadjustments,the display will show “rdY”.• The door will now cycle open and closecontinuously. The door has reduced obstacledetection, DO NOT INTERFERE WITH <strong>DOOR</strong>!• If you are satisfied with the door’s operation,turn the mode switch to the “OFF” position andallow the door to close completely.OFFNOTE: If door motion is undesireable or ifadjustments need to be made to meet ANSIguidelines, refer to Section G to make additionalchanges (Open Speed, Back Check angle,Deceleration, Close Delay, CLosing Speed, etc.)• The display will show the present stateof the opener.CODEC L dO P nP. A.O P dC L rC. O bO. O bA L LC y CSTATESClosedDoor is at Latch-StopOpening Opener is opening to Back-StopPowerAssistOpenedCloserDESCRIPTIONUser may open door with opener’sassistanceOpener is holding door at Back-StopActs as a passive closer, letting useropen door manually, closing the doorClosing Opener reacted to obstacle duringObstacle closing cycleOpen Opener reacted to obstacle duringObstacle opening cycleLearning Opener is learningCycler s t ResetOpener is going through a learningcycleOpener is being resetNOTE: If there is an exception to it’s operation, itwill show a code for it. If an exception code isdisplayed, see ED400 Controller Manual for an explanation.• Test the opener’s operation with the sensors.• Test that the door meets ANSI standards.• FOR ADDITIONAL SET-UP OPTIONS, SEE THE ED400CONTROLLER MANUAL. (www.dorma-usa.com)The door is now ready for normaloperation.F<strong>DORMA</strong> <strong>AUTOMATIC</strong>S, Inc. 924 Sherwood DriveToll-Free: 877-367-6211Lake Bluff, IL 60044Fax: 877-423-7999E-mail: automatics@dorma-usa.com20DL2609-010AUG. 2006Subject to change without notice
<strong>DORMA</strong>ED400Surface AppliedSection G: Customized Set-UpThe purpose of the customized set-up is to change thedefault ED400 settings. This can be done during orafter a completed learn cycle.Parameters• Open speed to Back-Check• Back-Check angle• Deceleration through Back-Check• Back-Stop angle• Close Delay• Closing speed to Latch-Check• Latch-Check angle• Closing speed through Latch-CheckOpen Speed to Back-Check (example)• Turn selector knob to “OPN SPD”.• The display will show the code andthe value.• Using the example to the right, and the table below,make parameter changes as desired. When finished,return the selector knob to “RUN”, or do another“LEARN” Cycle if the door’s motion has been poorlyaffected.• For further Set-Up options contained in “MONITOR”,“MON SEL”, “MISC ADJ”, and “MISC SEL”, pleaseconsult the ED400 Controller Manual. It can befound at the <strong>DORMA</strong> website: www.dorma-usa.com .• Turn the dial knob to select the desired speedin DEGREES/SECOND.GSelectorOPN SPDBCK-CHKBCK SPDBCK STPHOLDOPN DLYCLS SPDLCH-CHKCodeMeaningOpen Speed increment/decrement Opening speed to Back-Check /sBack-Check increment/decrement Back-Check angle °Back-Speed increment/decrement Opening speed to Back-Stop, or Off /sBack-Stop increment/decrement Back-Stop angleHold OpenDelayincrement/decrement Time at Back-Stop sClose Speed increment/decrement Max closing speed to Latch-Check /sLatch-Check“Dial” Knob Function DISPLAY UNITSincrement/decrementLatch-Check angle°°°°°RESETTING THE CONTROLLER• To RESET the controller, turn the selector knob to “MISC SEL” and turn the dial knob until “rst” is displayed.Now turn the selector knob to “MISC ADJ”, and turn the dial knob from “ON”, ONE click clockwise to “OFF”.The controller has now been reset.<strong>DORMA</strong> <strong>AUTOMATIC</strong>S, Inc. 924 Sherwood DriveToll-Free: 877-367-6211Lake Bluff, IL 60044Fax: 877-423-7999E-mail: automatics@dorma-usa.com21DL2609-010AUG. 2006Subject to change without notice
<strong>DORMA</strong>ED400Surface AppliedSection H: Setting Up Simultaneous DoorsThe purpose of the this setup is to synchronize twoside-by-side doors for simultaneous operation. Thisoperator is not compatible with over-rebated doors.Connecting the Controllers• Connect the grounds of the two controllers together.• Connect the motion sensor to both controllers inparallel.• Connect the presence sensor to both controllers inparallel, except for the Data Line.• Let each controller power it’s presence sensors(either controller can power the motion sensor).• Connect a single program switch to both doors inparallel.• Connect the RXD line of each controller to the TXDline of the other controller.• If you use the “Fire” input, connect the Fire sensorto both controllers.• If you use the “Breatout” input, connect the Breakoutswitch to both controllers.• Connect both controllers to the same AC power source.• Program the two controllers identically (Refer toSections F and G).(Continued on following page)MotionSensorHeaderPresenceSwingPresenceApproachPresenceSafetyBeam+24VTRIGGERCOM+24VHEADERDATACOM+24V<strong>SWING</strong>COM+24VAPPR.COM+24VBEAMCOMCONTROLLER1HeaderPresenceSwingPresenceApproachPresenceSafetyBeam+24VTRIGGERCOM+24VHEADERDATACOM+24V<strong>SWING</strong>COM+24VAPPR.COM+24VBEAMCOMCONTROLLER2HModeSwitchOFFGNDH.O.OFFGNDH.O.FiresensorBreakoutSwitchak - outGNDH.O.Breakout.GNDH.O.RXDTXDGNDFIREGNDH.O.Breakout.RXD GNDTXDGND<strong>DORMA</strong> <strong>AUTOMATIC</strong>S, Inc. 924 Sherwood DriveToll-Free: 877-367-6211Lake Bluff, IL 60044Fax: 877-423-7999E-mail: automatics@dorma-usa.com22DL2609-010AUG. 2006Subject to change without notice
<strong>DORMA</strong>ED400Surface AppliedSection H: Setting Up Simultaneous Doors• Run a “Learn” cycle on both controllers. It’seasier if they are done seperately.If it’s desired that the doors open and/orclose differently, continue on this side of thepage. If not, skip to the top of the column tothe right.• Turn selector knob to “LEARN”.• Turn dial knob so that display shows“ALL”. This will cause a full learn cycle.• Open one of the doors and allow it to close.As it’s closing, flip the program switch from“OFF” to “ON”.OFFON• The door that was closed will start a LearnCycle, and the one that you opened willfinish closing and then start a Learn Cycle.This will give you a chance to stop the firstdoor at Back-Stop, and then walk to thesecond door and stop it at Back-Check when itgets there.• When both openers are ready, trigger anautomatic opening, and, as the doors are opening,block one of doors. Turn ON/OFF/HO switch to“OFF” position, then back to “ON”HSection I: Setting Up Semi-Independent Doors (Double Egress)The purpose of the this setup is to synchronize twoside-by-side doors for semi-independent operation.This means that the doors will open and close at thesame time, but will react to obstacles independently.Connecting the Controllers• Program the two controllers identically(for coordinated doors - one must close first -increase slightly the Closing Delay of the controllerfor the door that must close last)• Connect the grounds of the two controllerstogether.• Connect one door’s presence sensor to thecontroller for that door.• Connect the motion sensor to both controllers inparallel• Let each controller power its presence sensors(either controller can power the motion sensor)• Connect a single program switch to both controllersin parallel.• Power the controllers from the same AC powersource.MotionSensorHeaderPresenceSwingPresenceApproachPresenceSafetyBeamModeSwitch+24VTRIGGERCOM+24VHEADERDATACOM+24V<strong>SWING</strong>COM+24VAPPR.COM+24VBEAMCOMOFFGNDH.O.CONTROLLER1HeaderPresenceSwingPresenceApproachPresenceSafetyBeam+24VTRIGGERCOM+24VHEADERDATACOM+24V<strong>SWING</strong>COM+24VAPPR.COM+24VBEAMCOMOFFGNDH.O.ICONTROLLER2• When they start moving again, block the other one.Turn ON/OFF/HO switch to “OFF” position, thenback to “ON”.This will let each opener tell the other of havingdetected an obstacle, so that each will know ofthe presence of a second door. Knowing that, theopeners will extend the Hold-Open time after anobstacle, to ensure that both doors remain insynchronization afterwards.<strong>DORMA</strong> <strong>AUTOMATIC</strong>S, Inc. 924 Sherwood DriveToll-Free: 877-367-6211Lake Bluff, IL 60044Fax: 877-423-7999E-mail: automatics@dorma-usa.com23DL2609-010AUG. 2006Subject to change without notice
<strong>DORMA</strong>ED400Surface AppliedSection J: Magnetic LocksThe purpose of the this section is to setup an electriclock. The controller may power an electric strikethrough a relay or access control device.Connecting a Magnetic Lock• If the installation has a 24 Vdc electric strike plate(electric lock), the controller is able to power itdirectly. (See Figure 1)• For DC locks of other voltages, you will need aseperate power supply. (See Figure 2)• For AC locks, you will need a seperate transformerand a relay. (See Figure 3)Figure 1Figure 2• The “Open Delay” must be set per manufacturer’sspecification.• The controller drives the electric lock from when itreceives a valid trigger (at Latch-Stop), while waitingto open (because of a non-zero Open Delay, or becausethe swing area is occupied), and until some time afterthe door has begun to open. It also drives it if the doorreaches Latch-Stop, as it is retriggered.• The LOCK LED lights up while the controller drives anelectric lock, whether or not a lock is actually present.`NOTE: For wiring locations on controller,see Section B, Figure 8.Figure 3J+24VLOCKCOM24 VdcRelay24 VdcElectriclock+24VLOCKCOM12 VdcElectriclock+24VLOCKCOM24 VdcRelayVacElectriclockControllerController-+12 VdcSupplyControllerTransformerSection K: Final check•Test all sensors along with door operation to ensure they are working properly.•Provide safety list similar to that provided by AAADM.•Make sure that all electrical wiring is connected correctly and away from moving parts.Phillips Flat Head Machine Screw1/4”-20 UNC, 1/2” long24Place and fasten removable cover (Phillips screwdriver required).K<strong>DORMA</strong> <strong>AUTOMATIC</strong>S, Inc. 924 Sherwood DriveToll-Free: 877-367-6211Lake Bluff, IL 60044Fax: 877-423-7999E-mail: automatics@dorma-usa.com24DL2609-010AUG. 2006Subject to change without notice
<strong>DORMA</strong>Section L: Technical DataOperatorLine InputPower supply for external sensorsFuseAmbient TemperatureED400Surface Applied100 to 125V AC, 60 Hz, 2 A max.24 V DC, 0.8 A2 A fast blow77 °F(25 °C)Adjustments min. max.Opening time to Back-Check 2.0 s 7 sClosing time to Latch-Check 2.5 s 7 sDelay beforeOpening 0 s 3 sDelay beforeClosing 1 s 25 sBack-Stop Angle 60° 120°Back-Check-Angle 50° 120°Latch-Check-Angle 10° 30°Wall-Mask-Angle 60° 115°Extra Power Hold Torque 40 ft-lb 240 ft-lbDoor min. max.Door height 84" 102"Door weight 60 lbs (27 kg) 320 lbs (145 kg)Door mount - single SA (Surfaced Applied Mounting)Door width 37" 51“Door mount - pair SA (Surfaced Applied Mounting)Door width 62" 98"Controller Technical DataPower inputConnectorLine InputFuseDC power out2-piece terminal block100 to 125Vac, 60 Hz, 2 A max.2 A, fast (5mm x 20mm)24 Vdc, 800 mA out, always on,short circuit protected, not regulatedControl inputsConnector 2-piece terminal blocksActive low inputs:Open-Trigger (radar or push plate)Presence, jamb mounted sensorSafety Side, door mounted sensorApproach Side, door mounted sensorHold-OpenOffSafety Beam SensorPolarityActive thresholdInactive thresholdClosed contact currentOpen circuit voltageESD protectionOvervoltage protectionSmoke (Kill) link input:PolarityClosed contact currentESD protectionOvervoltage protectionIndicatorsactive low or closed contact toground< 0.8 Vdc> 2.0 Vdc10 mA surge, 1 mA steadystate5 V±5 KV, human body model±5 Vdc or 5 Vac, continuous,with respect to GNDnormally closed contact toGND2 mA±5 KV, human body model±5 Vdc continuous, withrespect to GND1 LED/Sensor, 3-Digit DisplayTerminal Designations1-8 +24V9 Electric Strike -Output10 Data (Zone) -Output11 Trigger (radar or push plate) -Input12 Presence (jamb mounted sensor) -Input13 Safety Side (door mounted sensor) -Input14 Approach Side (door mounted sensor) -Input15 Safety Beam -Input16 Kill (Smoke) link -Input17-24 GNDProgram switch3 Hold Open - Input2 GND1 OFF - InputBreakout1 Breakout Switch -(N.C.)2 GNDMotor1 M+2 M-Power Input1 Neut.2 Earth Ground3 Hot 100 to 125 VAC, 60 Hz, 2 A max.L<strong>DORMA</strong> <strong>AUTOMATIC</strong>S, Inc. 924 Sherwood DriveToll-Free: 877-367-6211Lake Bluff, IL 60044Fax: 877-423-7999E-mail: automatics@dorma-usa.com25DL2609-010AUG. 2006Subject to change without notice
<strong>DORMA</strong>ED400Surface AppliedSection L: Technical DataOperation Instructions1. Program SwitchONHOLD OPENOFFED400 MUST BE SET UP WITHINBHMA/ANSI STANDARDSLSwitch is in position:HOLD OPENONOFFContinuous Open OperationThe door opens to the full openingposition and remains in thisposition.When an activation signal isdetected from the motion detectorthe door opens to the full openingposition. After the hold open delayexpires the door closeses.The door stops immediately whenthe switch is placed in this positionand closes slowly under springpower.The closing speed is limited. Theuser may open the door manually.Restart after power failureWhen the power is turned ON, the ED400 goes back tonormal operation.2. Care and MaintenancePrior to first use and periodically thereafter, but atleast once a year, the system must be checked andmaintained by a qualified, knowledgeable technician.During the cleaning operation the Program Switchmust be either in the OFF or HOLD OPEN position toavoid automatic movements of the door wings.Always disconnect the appliance before servicing.The entire swing door assembly (Aluminum, Glass,Covers) can be cleaned with a moist towel andcommon commercial cleaners. The safety sensors areto be cleaned with a dry, soft, non-abrasive towel.The floor area near the swing door panel, includingthe threshold must be kept clean.3. Self Help Troubleshooting of ProblemsIf the door does not open or close, check thefollowing:- Is the line power in order?- Is the Program Switch in the proper position?- Is the safety sensor path clear and clean?- Is the door blocked by obstacles?If all of the above check out OK call a qualified ServiceTechnician.<strong>DORMA</strong> <strong>AUTOMATIC</strong>S, Inc. 924 Sherwood DriveToll-Free: 877-367-6211Lake Bluff, IL 60044Fax: 877-423-7999E-mail: automatics@dorma-usa.com25DL2609-010AUG. 2006Subject to change without notice