
You also want an ePaper? Increase the reach of your titles
YUMPU automatically turns print PDFs into web optimized ePapers that Google loves.
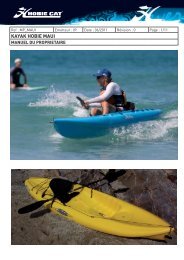
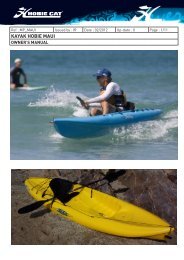
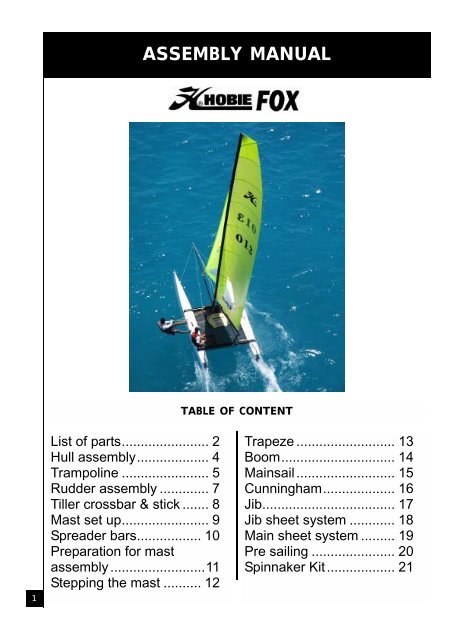
<strong>ASSEMBLY</strong> <strong>MANUAL</strong>TABLE OF CONTENT1List of parts....................... 2Hull assembly................... 4Trampoline ....................... 5Rudder assembly ............. 7Tiller crossbar & stick ....... 8Mast set up....................... 9Spreader bars................. 10Preparation for mastassembly .........................11Stepping the mast .......... 12Trapeze .......................... 13Boom.............................. 14Mainsail.......................... 15Cunningham................... 16Jib................................... 17Jib sheet system ............ 18Main sheet system ......... 19Pre sailing ...................... 20Spinnaker Kit.................. 21
LIST OF PARTSTools necessary :⇒ 2 spanners - No. 17⇒ 1 pair of universal pliersIt is advisable to have at least 2 people to assemblethe <strong>Hobie</strong> Fox .LIST OF PARTSHulls (2)Front crossbarRear crossbarMastBoomTrampoline & rodRigging bagWire bagDaggerboards (2)Ropes bagRudder assemblies (2)Tiller crossbarTiller extensionMainsail + battens (7)JibSpinnaker kit + spinnaker (optional)CAUTION - DANGERALUMINIUM MAST - STAY AWAY OFELECTRICAL WIRES2
LIST OF PARTS213WIRES :459106 71. Shrouds2. Bridles3. Spreader diamond wires4.5. Jib halyard + forestay6.7. Trapeze wires8. Spreader assembly9. Stay adjuster cover10. Jib furler8ROPES :All ropes are labelled with ref. numberand name. Please check carefully beforeusing.123 451. Righting line (white)2. Trapeze shock cord3. Jib sheet (yellow)4. cunningham line (red)5. Mainshjeet (black and yellow)6. Jib halyard rope7. Jib luff tensioner line8. Rotation line9. Jib sheet tangle preventor6 7893
HULL ASSEMBY1Position the hulls in parallel with the innersides facing the ground.Lift the right hull. One person straddles the hull tohold it in place. The other person applies the siliconesealant (for waterproofing) around the screw holes..Take the front crossbar (with dolphin striker).2Place it in its support so that the trampolinetrack faces the rear of the boat. Insert the twobolts. Pass your hand through the inspection port toposition the nuts and washers onto the screwsphoto). Fasten loosely.Lift the left hull, and follow the same steps as for theright hull. Do not fully tighten the screws.***Respect same order for the washers as assembledat the delivery***3Apply silicone sealant around the screw holesat the back of the hulls. Place the rear crossbaron the right side. Insert the bolts, washers andnuts as shown for the front crossbar. Do the samething for the left side.Once the frame has been mounted, tighten all thebolts fully and then install the lock nuts.NB : it is advisable to check the fastening of the bolts after the firsttrip out onto the water, and recheck these at regular intervals.4
TRAMPOLINE <strong>ASSEMBLY</strong>1 Unfold the trampoline and insert thefront sealed edge part of the trampolineinto the trampoline track of thefront crossbar.NB: To ease feeding the trampoline into thetrack and hull cut-outs liquid soap may beused. Be sure to wash off before sailing.2 Insert the right and left-hand rear cornersof the trampoline into the correspondingcut-outs in the hull. Pull backevenly.3When the trampoline is pulled all theway to the back of the boat insert thefibreglass-lacing rod into the rear flap.4 Commence lacing and tensioning thetrampoline. The lacing line ties off andstarts on the rod at the rear left. Pass itaround the far left lacing post and backaround the rod in the first cut out. Now bringthe line once more around the 1 st lacing postand lead to the 2 nd lacing post. The line thenpassed around the lacing rod and is led backto the 2 nd lacing post. Pass it behind the lineand head towards the 3 rd lacing post. Continueall the way across in the same manner.5
TRAMPOLINE <strong>ASSEMBLY</strong>5When the trampoline is tensionedevenly tie off the lacing at the righthand rear corner.NB : The trampoline must be tight.6
RUDDER <strong>ASSEMBLY</strong>1Identify the right rudder from the left rudder(green sticker = right ; red sticker = left)Take the left rudder, place the washers as shown inthe photo, then align the rudder casting onto thegudgeon.2insert the rudder pin, and do not forget to put inthe two split rings: one on top and one at thebottom of the rudder pin.3Repeat the procedure for the right rudder assembly.7
TILLER CROSSBAR - STICK1Take the tiller crossbar and insert the rightside into the right rudder arm and the left sideinto the left rudder arm.2Take the yoke connection of the tiller extensionand fix it into the middle of the tiller crossbar3Then fix the tiller head into the yoke connectionas shown on the photo.8
MAST SET UPTrapeze wiresTrapeze wires1Place the mast onto two supports or padding.Unroll the trapeze wires and fix them using the 6 mmbow shackle to the upper hole on the mast tang (twoon each side).ForestayShroudsUnroll the shrouds and the forestay wire (with2the jib halyard block) and fix them to the lowerhole of the mast tang using the 8 mm bow shackle.The shrouds go onto each side of the forestay.IMPORTANT : Do not forget to attach the jib halyardrope to the small single block at the end of3the jib halyard wire. Tie off the jib halyard wireand rope near the base of the mast.NB: If you have chosen the optional spinnaker kit, fitthe spinnaker halyard now, passing it behind the halyardyoke and around the pulley. Both ends then goover the shrouds and trapeze wires. One end of thehalyard passes between the spreader arm and braceon the starboard side of the mast. Secure both endsnear the base of the mast.9
SPREADER BARSUnroll the diamond wires. Unwind the top of the1large turnbuckle all the way – leave 6 or sothreads so it does not come apart.Attach the thimble at the bottom of the diamond wire tothe top of the turnbuckle.NB: It is a good idea to equalise the length of the twosides of the diamond wire by adjusting the small turnbuckle.Assemble the spreaders onto the spreader2roots on the mast using the clevis pins and splitrings. The spreader brace (the longest part) isfixed to the front of the mast and the spreader arm(shortest) to the back.Slide the diamond Wires into the slots at the3end of the spreaders. Ensure the plastic disk (jibprotection) is mounted above the spreader. Securethe diamond wire with the cotter pins provided.Advice: Cover all split rings and pins on the spreaderbars with ducting or amalgamating tape. Wrap sometape on the wire above the disk to prevent it riding upthe wire.4Attach the terminal fork ends to the diamondtangs mounted just below the shroud tang.Tape these pins up as well.Wind in the desired tension. Make sure that all lockingnuts are tightened after tension/rake is set.10
PREPARATION FOR MAST <strong>ASSEMBLY</strong>1 Lay the mast on top of the boat withthe sail track to the bottom and themast base toward the bows.NB: place padding under the mast to preventscratching.2 Lay the shroud wires and trapeze wiresdown each side of the mast. Secure thetrapeze wires temporarily near the baseof the mast.3 Ensure that the shroud anchor pins aresealed, tight and pointing at 90° to thecentreline of the hull. Attach the twisttoggles to the anchor pins using the clevispins and rings. If you have the optional spinnakerkit use the 6-mm bow shackles providedinstead of the clevis pins.Attach the stay adjusters to the twist toggleswith the clevis pins and rings.Attach both shrouds into the top hole of therespective stay adjusters. This is only a temporaryposition for raising the mast.4Attach the bridle wires to the bowtangs.Now, attach the jib furler to the bridle wires.11NB: Ensure that the hole in the furler housingis facing towards the front crossbar.Now also is a good time to roll some lineonto the furler drum. Leave enough line unfurledto reach the front crossbar mountedfurler cleat.
STEPPING THE MASTPlace the mast foot on the1mast base and place the pin init. This prevents the mast fromleaving its base when lifted.Check that the wires are not tangled.Then, with one person on the trampoline, the2second person lifts the mast by the top andmoves down the mast until the person on thetrampoline can take the mast on their shoulder.Then this person pushes his feet against the rearcrossbar and pushes the mast forward with theweight of his body.The first person is to push the mast up as far as possible,walking ahead on the trampoline as the mast israised.The second person can3now take the forestay,make sure it is not tangledand pin it into one of thetop holes of the furler mountedstay adjuster.Once the mast is secure remove the bolt from4 the base of the mast and stow it in a secureplace. You will need the bolt later for safe loweringof the mast.5Now you can affix the cunninghamblocks to the bracketson each side of the mast.NB: FOR THE FIRST FEW TIMES YOURAISE THE MAST IT IS RECOMMENDEDYOU USE 3 PEOPLE FOR EXTRA SAFETY.12
TRAPEZE1Release the trapeze wires from the base of the mast. The crew’s trapeze has the clamcleat swaged tothe wire. The skipper’s trapeze has the small block swaged on. Ensure that the crews trapeze wire is positionedin front of the shroud.Attach the trapeze handles and kits to the trapeze wires.CREW TRAPEZESKIPPER TRAPEZE2Pass the trapeze shock cords (the crews is slightly longer than the skippers) underneath the trampolineand up through the grommets at the side of the trampoline. Attach to the trapeze system as shown in thephotographs.13
BOOM1Connect the boom to the mast using the hingevertex, clevis pin and split ring.Tie one end of the rotation line to the front of the2clamcleat on top of the boom. Pass the otherend of the line through the end of the rotationarm on the mast. Take the line back through the clamcleatand fit a plastic ball stopper at the end.14
MAINSAIL1* Always point your <strong>Hobie</strong> into the wind before raising the sails. *Unfold the mainsail on a clean surface and insert each batten into its respective pocket. The battens arenumbered from 1 to 7. Number 1 goes at the top and number 7 at the bottom of the sail. Secure the battens inthe pockets with the batten ties – as shown in the photographs.2Undo the halyard rope, which is attached to themast. Pass the end through the hole in theheadboard and tie off with a figure «8» knot.Feed the luff of the mainsail into the opening of3the mast track ensuring that the hook is on oneside of the mast and the halyard on the otherside. Ensure that the halyard inside the track stays insidethe track.Raise the sail by pulling the halyard and feeding thesail into the opening. When the sail is all the way upturn the mast slightly so that the hook will engage inthe halyard lock when you pull down on the sail. Insertthe bottom part of the luff into the lower section of themast track. Roll up the halyard and place it in thetrampoline pocket.4Attach the clew of the mainsail to the shackle onthe boom outhaul car assembly.15
CUNNINGHAMShackle the cunningham blocks into the grommet of the mainsail tack. Take the cunningham line and1feed as follows : (NB : the line must go through the inside of the rotation arm)- Start from the cunningham block ont the left side of the mast. Feed the rope into the cleat around thesheave- push the cord up through the first sheave of the left block from back to front- take the rope back down, thread it through the left sheave at the base of the mast from front to back- take it up through the second sheave of the left block from back to front- take it back down and through the single block,- take it back up into the first sheave of the right hand block from front to back- take it back down through the sheave at the right of the mast base from back to front- take it up through the second sheave in the right block from front to back- finally thread the line through the cunningham block and in the cleat.Attach each end of the cunningham line to the shrouds.2Take the righting line from the rope bag. Attach it to the dolphin striker post under the front crossbar(photo). Pass it under the trampoline through the grommet at the base of the mast. Fold up the end ofthe line and stow it in the trampoline pocket at the base of the mast.16
JIB2Shackle the two clew blocks tothe clew plate using the 4mmbow shackle provided.Unroll the jib and open the1zipper on the luff. Using the4mm bow shackle connectthe tack to the stay adjuster.Shackle the jib head to the jib3halyard. Then position the jiband the halyard line againstthe forestay.Close the zipper ensuring that thehalyard line remains inside the zipper.As you pull down on the halyardline close the zipper as the sail is rai-4sed.Once the jib is fully raised, take the jib luff tensionerline and secure it to the bottom holes in6the stay adjuster.Now pass the line through the small pulley at the end ofthe jib halyard, then back down through the cleat on the tack ofthe jib.Now remove the jib halyard line and stow it in the trampoline po-17
JIB SHEET1Take the jib sheet (yellow) push one end down through the holeat the front of the jib car plate and tie off with a figure «8» knot.2Take the other end of the sheet and pass itthrough the corresponding jib clew block and thenback down through the fairlead on the jib car.Pass the sheet line behind the3mast (but above the cunninghamlines) and duplicate processfor the other jib car and clewblock.18
MAIN SHEET SYSTEM1Your mainsheet system has been preassembledfor you. If you have problems askyour dealer.Shackle the2boom block tothe boom blockhanger.Shackle the mainsheetratchet block3to the top of themain traveller car.Thread the tail of the main sheet through the4swivel cleat assy on the rear beam, throughthe sheaves on the traveller car, down throughthe eyestrap on the rear of the beam and tie afigure «8» knot in the end.19
PRE-SAILING1Install the drain plugs – do not overtighten, handtight is sufficient. Overtightening may cause thedrain plug flange to distort and cause leakage.Tension the rig. This can be accomplished by havingyour assistant hang from the trapeze or you2can use mainsheet tension on one side at a timeso that you can adjust the shroud position in the sidestay adjusters.3Fit the daggerboards into the daggerboards wells.The daggerboard roller shock cord should be tightenough to prevent the daggerboard from slippingdown.4It is recommended that beach rollers be used tomove your <strong>Hobie</strong> Fox. This will save your backand the bottom of the boat.5Always wash traveller with fresh water after use insalty water.Always wear your <strong>Hobie</strong> buoyancy vest, look out foroverhead power lines and HAVE LOTS OF FUN!20
SPINNAKER KITYour spinnaker kit includes 4 ratchet blocks. Fit the two1«ratchamatic» blocks to the 6mm bow shackles at the bottomof the stay adjusters. Fit the two blocks with the «on/off» switch to the eyestraps on the front crossbar.2Attach the spinnaker pole to the tang on thefront crossbeam.Now attach the spinnakerpole bridles3and the mid polesupport wires to the smallhole in the bow tang.Use the small length of 3mm line to hold up4and induce some pre-bend into the pole. Enoughtension must be used as to take theslack out of the mid pole support wires.One end of the tack line ties off at the eyestrap5at the front tip of the pole. Lead the linethrough one of the sister blocks and back outthrough the block at the pole tip. Then take the lineover all the bridles and wires to the trampoline andtie off to the spinnaker tack.21
SPINNAKER KITUntie the spinnaker halyard from6the base of the mast. Taking theend of the piece that runsthrough the spreaders lead it throughthe block at the inner end of the pole.Then pass it through the sister blockand lead it back to the swivel camcleat on the front crossbar. Put a plasticball stopper on this end.NB: The tack line, sister blocks andthis end of the halyard should hang belowall the wires.7Tie the other end of the spinnaker halyard to the head of the spinnaker.The spinnaker sheet (red) can now be rigged as per the schematic.8Tie both ends of the spinnaker sheet to the clew of the spinnakerusing either bowline knots or figure «8» knots.NB: ensure that the spinnaker sheet runs through the ratchet blocks in theright direction.9Stow the spinnaker in the spinnaker bag on thetrampoline.10If the wind is not too strong a trial spinnaker setand drop is recommended on the beach beforeyou try it on the water.11Go do the «wild thing».22
Spi SheetSPINNAKER KITSCHEMATIC OF FOXSPINNAKER SET UPHeadSpi halyardTackClewTack line23
CAUTION / SAFETY TIPSCAUTION / SAFETY TIPS♦♦♦♦♦♦♦♦♦♦♦♦Whether on land or on the water, watch for overhead power lines.Contact with power lines can cause serious injury or death.DO NOT sail while under the influence of alcohol and/or drugsOnly sail in conditions in which you feel comfortable and where you feelconfident that you can safely sail the boat. Never go out in conditionsbeyond your ability.Everyone on board should wear a life jacket at all times.If you are in the water, remain in contact with the boat, even if it is capsized.A sailboat can drift away faster than a person can swim.Never sail without a righting line.Wear appropriate clothes. Wear a wet suit or dry suit in cold weather orcold water conditions.Learn the right of way rules and when in doubt, give way to others.When not sailing, always keep the boat pointed into the wind whether inthe water of on the beach.Read the instruction manual carefully.Make sure everyone on the boat reads and understands these safetyinstructions.ALWAYS check that the drain plugs are screwed in before launching yourcatamaran♦ ALWAYS HAVE FUN !!24