
You also want an ePaper? Increase the reach of your titles
YUMPU automatically turns print PDFs into web optimized ePapers that Google loves.
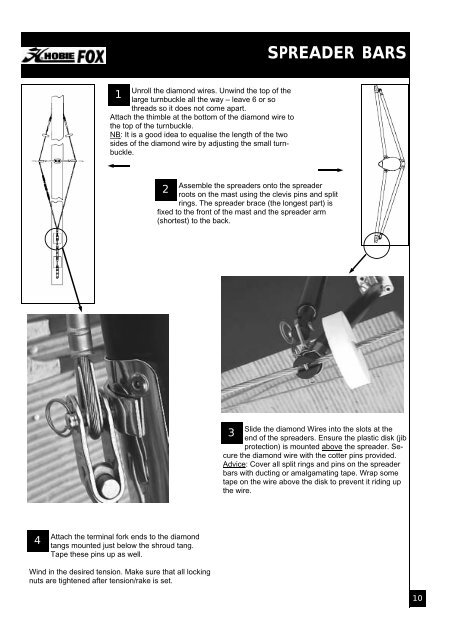
SPREADER BARSUnroll the diamond wires. Unwind the top of the1large turnbuckle all the way – leave 6 or sothreads so it does not come apart.Attach the thimble at the bottom of the diamond wire tothe top of the turnbuckle.NB: It is a good idea to equalise the length of the twosides of the diamond wire by adjusting the small turnbuckle.Assemble the spreaders onto the spreader2roots on the mast using the clevis pins and splitrings. The spreader brace (the longest part) isfixed to the front of the mast and the spreader arm(shortest) to the back.Slide the diamond Wires into the slots at the3end of the spreaders. Ensure the plastic disk (jibprotection) is mounted above the spreader. Securethe diamond wire with the cotter pins provided.Advice: Cover all split rings and pins on the spreaderbars with ducting or amalgamating tape. Wrap sometape on the wire above the disk to prevent it riding upthe wire.4Attach the terminal fork ends to the diamondtangs mounted just below the shroud tang.Tape these pins up as well.Wind in the desired tension. Make sure that all lockingnuts are tightened after tension/rake is set.10