VISION UNIT - Mitutoyo America Corporation
VISION UNIT - Mitutoyo America Corporation
VISION UNIT - Mitutoyo America Corporation
- No tags were found...
You also want an ePaper? Increase the reach of your titles
YUMPU automatically turns print PDFs into web optimized ePapers that Google loves.
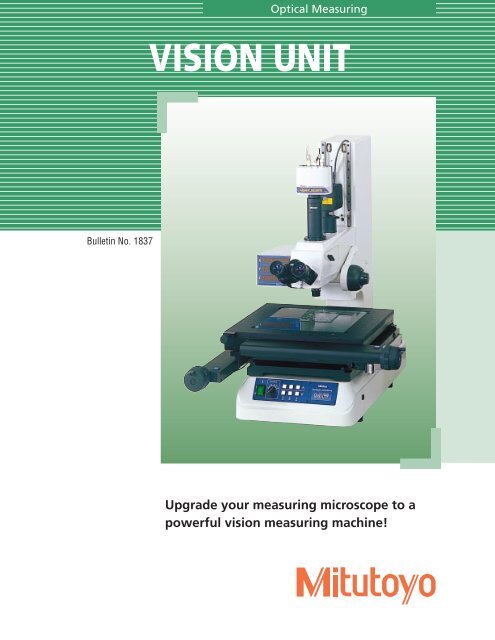
SYSTEM CONFIGURATIONCCDcameraStandard component0.5xTVAdapterFocusPilot* 2C-mount* 1Adapter BFoot switch<strong>Mitutoyo</strong>measuring microscopesMF-A series, MF-UA series<strong>Mitutoyo</strong>measuring microscopesTM321/322/331, TF series,MF-A* 3 /MF-UA seriesMeasuring microscopemade by othermanufacturersNikon, Olympus, or Topcon digital scaleand measuring microscope with TV port.Software: QSPAK ®(For Vision Unit)Brightnesscontrol switchpanel(rear panel)Counter cableCounteror RS-232COutput unit* 1 RS-232C Cable* 1RS-232C cableCommon optional accessoriesExternal lightcontrol cable(For the MF-A series only)Ring fiberIllumination system(For the MF-A series only)LaserprinterCalibration chartSpecial table* 1 Not included in the Vision Unit. Differs according to the specifications of the measuring microscope.* 2 The focus pilot ® is a focal-point detection unit allowing highly accurate and highly reproducible focal-point detection.* 3 Supports only the microscope unit with the built-in image forming lens with a magnification of 1X. Check the specifications of the microscope unit.6
SpecificationsMeasuring unitOptical systemWith <strong>Mitutoyo</strong> microscope: 0.5X (0.5X built-in TV adapter)With other maker’s microscope: 1X (CCD camera directly attached)Image detection system high-sensitivity 1/3” CCD color cameraCCD camera outer dimensions 3.94” W x 2.28” D x 3.60” H (100(W) x 58(D) x 91.5(H) mm)Mass of CCD camera.88 lbs. (0.4 kg)Monitor magnification/ With <strong>Mitutoyo</strong> microscope: approximately 63 x /.12”x.09” (3.1 x 2.3 mm)image rangeWith other maker’s microscope: approximately 126 x /.06”x.05”(With use of objective lens 3x) (1.57 x 1.17mm)Resolution.000004” (0.0001mm)Axial length measuring Depending on the accuracy of the measuring microscopeaccuracy* 1(Measuring condition 20°C)Repeatability* 2Depending on the accuracy of the measuring microscope(Measuring condition 20°C) Ref.: Repeatability of 1 screen (<strong>Mitutoyo</strong>’s standard sample is used)3X objective lens is used: 3σ=±2.5µm or less10X objective lens is used: 3σ=±1.0µm or less* 1 “Measuring accuracy” means a difference between an actual measured value in a vision measurement and a true value.* 2 “Repeatability within a screen” means the dispersion of measured values when different positions within the same screen aremeasured repeatedly.Data processorCPUCRT displayOSSoftwareMaximum powerconsumptionPentium IV/256 MB17 inch/SVGA colorMS-Windows XP ProfessionalQSPAK460WApplicable models <strong>Mitutoyo</strong>’s TM321/322/331,TF series, MF-A/UA series (Notcompatible with MF-U or MF-H100)*Digital scale made by Nikon,Olympus, or Topcon (Equipped withcounter with RS-232C output) andMeasuring microscope with TV port(An optional accessory provided by the maker, such as C-mount orRS-232C cable is needed.)• MS-Windows2000 SP2 and MS-Excel are registered trademarks ofMicrosoft <strong>Corporation</strong> of the U.S.A.Dimensions3.94" (100) 2.28" (58)1.26" (32)Unit: inch (mm)8.37" (212.5)3.60" (91.5)AdapterunitOrder No.359-670 (for MF-A)359-675 (for MF-UA)ø1.77" (45)Optional softwareFORMPAK-QVFORMPAK-QV allows contour analysis and contour tolerancingagainst the nominal value, from the data acquired usingQSPAK.• Contour tolerancing function• Fine contour analysis function• Report generation functionCAD Import & ExportOperability has been greatly improved, and the time required tocreate a part program has been greatly reduced, by importingthe CAD data (DXF, IGES), as generated in the product-designstage, to QSPAK. The measurement result from the QSPAK canbe converted to CAD data.Features• The nominal value of each measuringitem is entered automatically.• The graphics window can be used tocalculate elements.• Graphics data can be output in aspecified CAD data format.Contour tolerancing screenFine contour analysis screen7
Note:All our product details, in particular the illustrations, drawings,dimension and performance details and other technicalspecifications contained in this publication are to be consideredto be approximate average values. To this extent, we reservethe right to make changes in design, technical data, dimensionsand weight. Our specified standards, similar technical rulesand technical specifications, descriptions and illustrations of theproducts are correct at the time of printing. The current versionof our general terms and conditions also apply. Only offers whichwe have submitted can be considered to be definitive.©2005 <strong>Mitutoyo</strong> <strong>America</strong> <strong>Corporation</strong>, Aurora IL We reserve the right to change specifications and prices without notice. 0105-39 • Printed in USA •␣ March 2005


