Kawasaki 19.2V Cordless Drill - Alltrade Tools
Kawasaki 19.2V Cordless Drill - Alltrade Tools
Kawasaki 19.2V Cordless Drill - Alltrade Tools
- No tags were found...

Create successful ePaper yourself
Turn your PDF publications into a flip-book with our unique Google optimized e-Paper software.
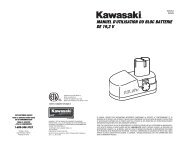
REMOVING/ATTACHING BATTERY PACKREMOVE BATTERY PACK:1. Press both release buttons on either side ofthe <strong>Cordless</strong> <strong>Drill</strong> to release the battery pack.2. Pull battery pack free of <strong>Cordless</strong> <strong>Drill</strong>.ATTACH BATTERY PACK:1. Align the raised portion of the battery packwith the groove in the battery compartmentof the <strong>Cordless</strong> <strong>Drill</strong>.2. Press the battery pack into place. Make surethe latches are securely fastened. Do not usethe <strong>Cordless</strong> <strong>Drill</strong> if the battery pack is notseated properly.CHARGERRELEASEBUTTONBefore using battery charger, please read carefully allinstructions and cautionary markings on battery charger, battery pack andproduct using battery.When the battery pack requires recharging, a 3-5 hour charge allows the tool tooperate at full power. A charging indicator light on the charger will illuminate toshow that charging is taking place.CHARGE BATTERY PACK:1. Make sure the triggeron the <strong>Cordless</strong> <strong>Drill</strong>is in the “OFF” positionand remove the batterypack from the <strong>Cordless</strong> <strong>Drill</strong>.2. Plug 120V AC Adapterinto household outletand into side of batterycharger. Insert batterypack into battery charger.When the battery is placed inthe charger, the red LEDindicator light will remain on.CHARGING BATTERY PACKBATTERYCHARGERBATTERY PACK120V ACADAPTERLED LIGHT3. When fully charged, reattach battery pack onto <strong>Cordless</strong> <strong>Drill</strong>, making certainlatches fasten securely. <strong>Cordless</strong> <strong>Drill</strong> will not operate properly if the batterypack is not seated properly.The charger will not automatically turn “OFF” when thebattery pack is fully charged. The charging indicator light will remain “ON”until the charger is disconnected from the electrical outlet.Use only the charger which accompanied your product or direct replacement aslisted in this manual. Do not substitute any other charger. Use only <strong>Alltrade</strong>approved chargers with your product.Do not disassemble charger.Do not use charger if it has been damaged, left outdoors in the rain, snow, wetor damp environments, or immersed in liquid.The battery pack and charger heat during charging. Place the charger on a flat,non-flammable surface away from flammable materials with at least four inches ofclearance to allow proper air circulation around the charger and battery pack.ASSEMBLYBe aware that this tool is always in an operating conditionbecause it does not have to be plugged into an electrical outlet. Always turnthe switch “OFF” and remove the battery pack before changing bits.1112