AL-1630-EDPB Operation Guide - car alarm
AL-1630-EDPB Operation Guide - car alarm
AL-1630-EDPB Operation Guide - car alarm

Create successful ePaper yourself
Turn your PDF publications into a flip-book with our unique Google optimized e-Paper software.
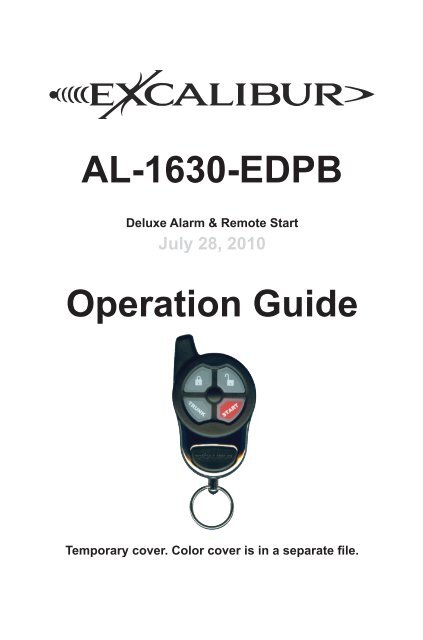
<strong>AL</strong>-<strong>1630</strong>-<strong>EDPB</strong>Deluxe Alarm & Remote StartJuly 28, 2010<strong>Operation</strong> <strong>Guide</strong>Temporary cover. Color cover is in a separate file.
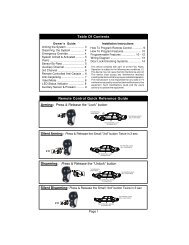
Table Of ContentsTransmitter Overview 3The Transmitter 3Transmitter Functions 3Other Remote Start Features 6Low Battery/Low Temp Automatic Starting 6Turbo Timer Feature 6Pit-Stop Feature 7Manual Transmission Starting 7Security System Features 7Last Door Arming 7Automatic Rearming 7Pre-Warn Detection 8When The System Triggers 8Using The Valet Switch 8Emergency Override 8Valet Modes 8SecureCode 9The Status Light 9Anti-Carjacking Protection 10Programming Transmitters11Programming Features 12User Programmable Features 12Installer Programmable Features 16Programmable Features Matrix 19This device complies with FCC Rules part 15. <strong>Operation</strong> is subject to the followingtwo conditions, (1) This device may not cause harmful interference and, (2) Thisdevice must accept any interference that may be received, including interferencethat may cause undesired operation.The manufacturer is not responsible for any radio or TV interference caused byunauthorized modifications to this equipment. Such modifications could void theuser’s authority to operate the equipment.2
Transmitter Functions (cont’d)TRUNK RELEASE / CHANNEL 2: Press the “TRUNK” button for 3seconds.• The system will disarm and the trunk willopen (if equipped).REMOTE START: Press and release the “START” button twicewithin 5 seconds. (see user feature #21 for additional options)x2• the parking lights will flash once and thestatus light will flash rapid green.• the system will turn on the ignitions andproceed to start the engine.• Once the engine is running, the parkinglights will turn on and stay on and the statuslights will flash slow green.• If the engine stalls, the system will make up to 3 more attempts.• Each time you park, set the climate controls to give you the desired interior temperaturewhen you use the remote start. The engine will run for the preset run time(see user feature #22).• Run Time Extender: Press the “START” button one time during remote start torestart the engine run timer.NOTE: This can only be used once per remote start cycle. If using an ECHO 2-way upgrade,The controller will give you “run time expiration” warning (2 chirps) 1 minute before theremote start cycle ends.• If you decide not to drive your vehicle, you can turn off the remote start using thesame method to turn it on (Default = press “START” twice in 5 seconds)NOTE: If user feature #21 is programmed for 1 press, the 1st press = Run Time Extender soan additional press is required.• Upon entering the vehicle during remote start mode, turn the ignition key to the“ON/RUN” position (NOT START!!). When you press the brake pedal, the remotestart will turn off allowing the ignition key to take over.CHANNEL 3: Press and hold the “TRUNK” & “START“ buttons for 3seconds.• YOUR SYSTEM will activate the channel 3output.4
Transmitter Functions (cont’d)CHANNEL 4 (IF EQUIPPED): Press and hold the “LOCK” &“TRUNK” buttons for 3 seconds.• YOUR SYSTEM Will activate the channel 4output.CHANNEL 5 (IF EQUIPPED): Press and hold the “UNLOCK” &“START“ buttons for 3 seconds• YOUR SYSTEM Will activate the channel 5output.PANIC: Press and hold the “LOCK” or “UNLOCK” button for 3seconds.OR• The siren/horn will sound, the parkinglights will flash, and the doors willlock or unlock depending which button ispressed.SILENT ARM / DISARM: Press and release the “TRUNK” buttontwice in 5 seconds.x2• the parking lights will flash, and thedoors will lock/ARM or unlock/Disarm dependingon the current system status.5
Transmitter Functions (cont’d)SENSOR BYPASS: Press and release the “TRUNK” button within 5seconds of locking/arming the <strong>alarm</strong> system.12• the system will give one chirp to indicatethe sensor is bypassed.AUXILIARY FUNCTIONS 1-4:The actual operation of these functions will vary from <strong>car</strong> to <strong>car</strong>. They are designedto operate extra functions like automatic sliding doors or motorized hatches. Aux 1-4are virtual outputs only available when this system is integrated with the vehicle’s datanetwork. Consult with your installer to find out if any of these functions are availablethen confirm each operation and write them below.- Auxiliary 1 Function (___________________): To activate this function, pressand release the “trunk” and “start” buttons simultaneously).- Auxiliary 2 Function (___________________): To activate this function, pressand release the “lock” and “trunk” buttons simultaneously).- Auxiliary 3 Function (___________________): To activate this function, pressand release the “unlock” and “start” buttons simultaneously).- Auxiliary 4 Function (___________________): To activate this function,press and release the “unlock” and “trunk” buttons simultaneously).Other Remote Start FeaturesLow Battery/Low Temp Automatic StartingThis feature will automatically start the engine should the vehicle battery dropbelow 11 volts or the interior temperature drop to 15 (or 32) degrees fahrenheit. Thisfeature is very useful when the vehicle is parked for a long period of time in coldclimates. You must activate these features each time you park your <strong>car</strong> to use them.• Turn the ignition switch “on”, then “off” (engine not running), and within 7 secondspress the valet switch twice. If there is a 2 second delay without additional presses,the horn will honk 3 times activating low voltage start mode.• To activate low temp starting, enter low voltage start mode as described abovebut, before the horn honks, press the valet switch 1 time (15 degrees) or 2 times (32degrees) within 5 seconds. The horn will honk to confirm your selection.NOTE: When low temp start mode is activated, low voltage start is also activated.These features will operate once every two hours until the ignition key is turned “ON”.Turbo Timer FeatureIt is typically recommended that vehicles equipped with turbocharged engines allowthe engine to idle after driving to cool the turbocharger. When this Installer ProgrammableFeature (#4) is enabled, the system will automatically keep the engine runningas follows:• With the engine running, hold the brake pedal and engage the parking brake.6 When the brake pedal is released, the system will keep the engine running for
The Status Light (cont’d)flash a number of times to indicate exactly which zone(s), has been violated. It willstore the last 2 violated circuits and continually repeat the flash pattern until the systemis disarmed and the vehicle’s ignition key is turned ON.2 FLASHES: Hood trigger3 FLASHES: Door trigger4 FLASHES: Sensor port triggerREMOTE START STATUS (GREEN LIGHT):OFF: The remote start is off and in standby mode.ON CONSTANT: The remote start is in valet mode.FLASHING SLOW: The engine was started successfully and is running.FLASHING FAST: The remote start sequence has begun and is in process of startingthe vehicle’s engine.REMOTE START DIAGNOSTICS (GREEN LIGHT):The remote start system can also indicate which zone caused the last remotestart cycle was ended. To see this indicator, place the system into <strong>alarm</strong> valet mode.Immediately after the chirp, the GREEN status light will flash to indicate what causedremote start to end.1 FLASH: Run time expired.2 FLASHES: Brake pedal was pressed.3 FLASHES: Engine stalled or a bad tach signal.4 FLASHES: Received transmitter command to stop.5 FLASHES: Gear selector was moved from park(or the parking brake was released).6 FLASHES: The <strong>alarm</strong> was triggered or low battery voltage.COMBINATION INDICATIONS:This indication reflect combinations of functions involving the security system ANDremote start.SLOWLY <strong>AL</strong>TERNATES GREEN/RED: System is in full valet mode.SOLID GREEN W/ RED FLASH: System is in remote start valet w/ the <strong>alarm</strong> armed.SOLID RED W/ GREEN FLASH: System is in <strong>alarm</strong> valet w/ remote start activated.FAST <strong>AL</strong>TERNATES GREEN/RED: Alarm armed w/ remote start activated.SLOW FLASHING GREEN W/ 1-4 RED FLASHES: Zone violation recall duringremote start mode.SLOW FLASHING RED W/ 1 GREEN FLASH: System is armed and ready to remotestart in manual transmission mode.Anti-Carjacking ProtectionThe system hass three separate Anti-Carjacking protection features which areprogrammable. Once activated, the user has 53 seconds to cancel the Anti-Carjackingprotection process by pressing the Valet Switch once. If Anti-Carjacking is notcancelled, 53 seconds after being activated the siren will begin to chirp for 7 secondsto alert the user that the system is about to enter into an <strong>alarm</strong> condition. The ValetSwitch may still be pressed once during this period to cancel the Anti-Carjackingprocess.If the Anti-Carjacking process is not cancelled before the 60 seconds, the systemwill enter an <strong>alarm</strong> condition. 30 seconds after this occurs, or should the ignition beturned off in the meantime, the stater interrupt will engage. It will not respond to thetransmitter at this time, nor will the system reset. It can only be disengaged by:10
Anti-Carjacking Protection (cont’d)Step 1 Turning the vehicle’s ignition off.Step 2 Turning the ignition back on.Step 3 Within 5 seconds, perform an Emergency Override using the Valet Switch. Ifthe SecureCode has been customized, the correct number of Valet Switch pressesmust be madeThe three types of Anti-Carjacking protection features are:Ignition Activated Anti-Carjacking activates every time the vehicle’s ignition isturned on. The Valet Switch must be pressed within 60 seconds of activating to cancelAnti-Carjacking. This is User Programmable Feature #17.Door Anti-Carjacking activates when a door is opened after the vehicle is startedand the engine is running. The Valet Switch must be pressed within 60 seconds afteractivation to cancel Anti-Carjacking. This is User Programmable Feature #18.Transmitter Anti-Carjacking is activated by pressing and holding the “CH3” button(1-way transmitter: “trunk & “start”) for 3 seconds, while the vehicle’s ignition is on.The Valet Switch must be pressed within 60 seconds after this is done to cancel Anti-Carjacking. This is User Programmable Feature #19.Programming TransmittersStandard Programming: This method to program additional or replacement transmittersdoes not affect the Unauthorized Transmitter Alert (UTA) feature. Before youbegin, have all transmitters which are to operate the system at hand.Step 1 Then, turn the ignition “on”.Step 2 Within 5 seconds of Step 1, press the Valet Switch 5 times. The siren/horn willbriefly sound, confirming that the system is ready to learn a transmitter code.Step 3 Press the “lock” button on each transmitter one at a time. The system willchirp the siren/horn once to confirm that each was learned. If a code is not receivedwithin 10 seconds of Step 2, the learning process will automatically exit.If the Unauthorized Transmitter Alert feature is on, programming a transmitter to thesystem will activate the “UTA” warning and the extended Status Light indication. Forthe next 48 hours, the siren/horn will sound a brief series of chirps every time thevehicle’s ignition key is turned on.Special Programming procedure to turn on the UTA feature: Using this methodto program transmitters or optional controllers, and to turn on the Unauthorized TransmitterAlert feature.Follow the same steps as the Standard Programming, but on any transmitter/controllerbeing programmed instead of pressing the “lock” button, press the “lock” andthe “unlock” buttons together. This action turns on the Unauthorized TransmitterAlert feature and at the same time programs the transmitter or controller to operatethe system.Once the Unauthorized Transmitter Alert feature is turned on, the warning willsound for 48 hours after any transmitter programming. This feature can only beturned off again by sending the system back to Omega for a reset.11
Programming FeaturesStep 1 Turn the ignition key “ON”, then “OFF”Step 2 Within 5 seconds of step 1, press the valet switch 5 times to access userfeatures (10 times to access installer features).~ The siren/horn will sound and the status light will turn on.Step 3 Within 10 seconds of step 2, press the valet switch the number of times correspondingwith the desired feature’s number.~ The siren/horn will chirp, the status lights, and the parking lights will flash equalto the selected feature.Step 4 Change the feature by pressing the transmitter button that corresponds withthe desired setting. The siren/horn will chirp to correspond with the chosen setting.User Programmable FeaturesFeature #1 - SecureCodeDEFAULT - 1 PressSecureCode is a unique patented feature which allows you to custom select thenumber of Valet Switch presses in two stages, instead of a single “1 press”, whichwould be required in order to perform an Emergency Override. If any of the three anti<strong>car</strong>jackingfeatures are utilized, a customized SecureCode would also be required toturn it off once it is fully activated. The SecureCode operation is described on page 9.To custom program a new SecureCode:Step 1 Follow Steps 1 to 4 in the previous “Programming Features” section to access“feature #1”.Step 2 Within 10 seconds slowly press and release the transmitter’s “arm/lock”button the number of times equal to the desired SecureCode for stage 1, allow thesystem to respond to each transmitter button press with a siren chirp before pressingthe button again. A few seconds after the final button press, the system will chirp thehorn/siren confirming the total number for stage 1.Step 3 Configure stage 2 of the SecureCode by pressing and releasing the “disarm/unlock” button the number of times desired for the stage 2. The system willconfirm as it did for stage 1.Feature #2 - Last Door ArmingOff(press “arm/lock” button to program) - DEFAULTOn w/o doors locking (press “disarm/unlock” button to program)On w/ doors locking (press “trunk” button to program)“Last Door Arming” has the system automatically arm itself every time you exit thevehicle (the complete operation is described on page 7).Feature #3 - Automatic RearmingOff(press “arm/lock” button to program) - DEFAULTOn w/o doors locking (press “disarm/unlock” button to program)On w/ doors locking (press “trunk” button to program)Enhanced auto rearm (press “start” button to program)“Automatic Rearming”, described on page 7, rearms the <strong>alarm</strong> if accidentally disarmed.Options are to have Automatic Rearming operate with or without also lockingthe doors when the system does rearm. Enhanced auto rearm allows you to cancelthe rearming sequence by pressing unlock a 2nd time after disarming.12
User Programmable Features (cont’d)Feature #4 - Starter Interrupt FunctionsAlarm Only (press “arm/lock” button to program) - DEFAULTOff(press “disarm/unlock” button to program)Automatic(press “trunk” button to program)Alarm & Anti-Grind (press “start” button to program)Alarm Only - The Starter Interrupt is operable whenever the <strong>alarm</strong> is armed.Off - Completely eliminates the Starter Interrupt output.Automatic - This will cause the Starter Interrupt output to automatically engage 90seconds after the ignition switch is turned “off”, and after disarming the system.Alarm & Anti-Grind - This setting engages starter interrupt when the <strong>alarm</strong> is armedAND when the system is in remote start mode.Feature #5 - Ignition Activated OverrideOff (press “disarm/unlock” button to program) - DEFAULTOn (press “arm/lock” button to program)This feature allows an activated system to be overridden and disarmed by simplyturning the ignition switch on within 10 seconds of the system’s activation. After 10seconds, the Emergency Override must be performed.Feature #6 - Doors Lock With Ignition OnOn (press “arm/lock” button to program) - DEFAULTOff (press “disarm/unlock” button to program)This feature configures the system to automatically lock the vehicle’s doorsevery time that the ignition switch is turned on.Feature #7 - Doors Unlock With Ignition OffOn (all doors will unlock)* (press “start” button to program) - DEFAULTOff(press “arm/lock” button to program)Driver’s Door Only*(press “disarm/unlock” button to program)All Doors Except Driver’s Door* (press “trunk” button to program)This feature controls the unlock operations when the ignition key is turned off.*Driver’s door unlocking must be configured when the system is installed!Feature #8 - Open Door Bypass of Ignition LockingOn (press “arm/lock” button to program) - DEFAULTOff (press “disarm/unlock” button to program)This feature cancels the automatic locking or unlocking of the vehicle’s doors if one ofthe doors is open when the ignition switch is turned on or off.Feature #9 - Confirmation ChirpsOn(press “arm/lock” button to program) - DEFAULTOff(press “disarm/unlock” button to program)Chirps Except In Valet Mode (press “trunk” button to program)Chirps in Valet Mode Only (press “start” button to program)This feature removes the system’s arming and disarming confirmation chirps forparticular functions.13
User Programmable Features (cont’d)Feature #10 - Confirmation Chirp VolumeMedium High (press “trunk” button to program) - DEFAULTLow (softest) (press “arm/lock” button to program)Medium Low (press “disarm/unlock” button to program)High (loudest) (press “start” button to program)This feature allows the choice of four different volume levels of the system’s confirmationchirps which is demonstrated as you change the setting.Feature #11 - Alarm Duration30 Seconds (press “arm/lock” button to program) - DEFAULT60 Seconds (press “disarm/unlock” button to program)90 Seconds (press “trunk” button to program)120 Seconds (press “start” button to program)This feature allows four choices of the Alarm Duration. Caution: You should alwayscheck and determine if there are any local anti-noise or nuisance ordinances inyour area, to avoid the possibility of receiving a violation citation.Feature #12 - Parking Light Illumination Upon DisarmOn (press “arm/lock” button to program) - DEFAULTOff (press “disarm/unlock” button to program)This feature affects the parking light operation when the system is disarmed. Whenthis feature is turned on, the parking lights flash twice, and then turn back on for externalillumination for 30 seconds unless the ignition key is turned on during that time. Ifthis feature is turned off, the parking lights flash twice only, and do not illuminate.Feature #13 - 2nd Channel Also Disarms SystemOn (press “arm/lock” button to program) - DEFAULTOff (press “disarm/unlock” button to program)“2nd channel” is most commonly used for trunk release, in which case the <strong>alarm</strong>should also disarm. This feature, turned on, configures the system to disarm whenthe 2nd channel is used.Feature #14 - 3 or 45 Second Arming Delay3 Seconds (press “arm/lock” button to program) - DEFAULT15 Seconds (press “disarm/unlock” button to program)30 Seconds (press “trunk” button to program)45 Seconds (press “start” button to program)This determines how long the system waits to arm the trigger zones.Feature #15 - Steady Siren or Pulsed HornSteady Siren (press “arm/lock” button to program) - DEFAULTPulsed Horn Low (press “disarm/unlock” button to program)Pulsed Horn Medium (press “trunk” button to program)Pulsed Horn High (press “start” button to program)This feature selects the operation of the primary siren output when the <strong>alarm</strong> is triggered.It can be configured for 3 pulse speeds if the output is used to honk the horn.14
User Programmable Features (cont’d)Feature #16 - Alarm Functions BypassOff (press “disarm/unlock” button to program) - DEFAULTOn (press “arm/lock” button to program)This feature converts the system into a strictly Keyless Entry/Remote Start System byeliminating all antitheft <strong>alarm</strong>-oriented operations and features.Feature #17 - Ignition Activated Anti-Carjacking ProtectionOff (press “disarm/unlock” button to program) - DEFAULTOn (press “arm/lock” button to program)This form of Anti-Carjacking is initiated by the ignition key being turned on. The Anti-Carjacking protection, and the three ways to initiate it are described on page 10.Feature #18 - Door Activated Anti-Carjacking ProtectionOff (press “disarm/unlock” button to program) - DEFAULTOn (press “arm/lock” button to program)This form of Anti-Carjacking is initiated by a door being opened. The Anti-Carjackingprotection, including the three ways to initiate it are described on page 10.Feature #19 - Remote Activated Anti-Carjacking ProtectionOff (press “disarm/unlock” button to program) - DEFAULTOn (press “arm/lock” button to program)This form of Anti-Carjacking is initiated by activating the 3rd channel from thetransmitter. The Anti-Carjacking protection, including the three ways to initiate it aredescribed on page 10.Feature #20 - Open Door Warning Upon ArmingOff (press “disarm/unlock” button to program) - DEFAULTOn (press “arm/lock” button to program)When this feature is turned on, if one of the vehicle’s doors is open at the time thatthe system is armed via the transmitter, the siren will chirp 3 times and the parkinglights will flash 3 times instead of once.Feature #21 - Remote Start ActivationPress “start” button 2 times (press “arm/lock” button to program) - DEFAULTPress “start” button 1 time (press “disarm/unlock” button to program)Press Lock & Unlock (press “II” button to program)This feature changes how the remote start feature is activated using the transmitter.Feature #22 - Remote Start Run Time10 Minutes (press “disarm/unlock” button to program) - DEFAULT5 Minutes (press “arm/lock” button to program)15 Minutes (press “trunk” button to program)20 Minutes (press “start” to program)This feature sets the period of time that the engine will run when remote started. Ifthe engine is not stopped by a transmitter command or a safety circuit violation, theengine will automatically stop upon the expiration of the selected time period.Feature #23 - Steady/Flashing Lights During Remote StartSteady (press “arm/lock” button to program) - DEFAULTFlashing (press “disarm/unlock” button to program)This feature configures the systems’s operation of the vehicle’s parking lights whenthe engine is running during remote start.15
Installer Programmable FeaturesThis group of Installer Programmable Features are all accessed as a group in the second level offeatures’ programming. These features have a direct affect upon the system’s operations relatedto the installation and vehicle type AND SHOULD ONLY BE CHANGED BY THE INST<strong>AL</strong>LER!!!Feature #1 - Doorlocking Functions0.8 Second Outputs (press “arm/lock” button to program) - DEFAULT3 Second Outputs (press “disarm/unlock” button to program)Double Pulse Unlock Output (press “II” button to program)Total Closure Lock Output (press “III” button to program)This single feature gives the installer several needed options, to match the system’s doorlockingoutputs to suite different vehicle requirements. The total closure setting provides a 28 second lockpulse and a 0.8 second unlock pulse.Feature #2 - Light Relay FunctionsDome Light Output (press “arm/lock” button to program) - DEFAULTDoor Lock(press “disarm/unlock” button to program)Ignition Output (press “trunk” button to program)Accessory Output (press “start” button to program)The system has two built-in relays, which can be programmed to perform several different functions.The primary function of this relay, is to operate the vehicle’s dome, or interior lighting aspart of the system’s operations. Optionally, if desired or needed, this relay can be programmed tobe a door lock relay, or as medium-capacity ignition or accessory outputs (10A max), if needed forremote starting use.Feature #3 - Horn Relay FunctionsHorn Output (press “arm/lock” button to program) - DEFAULTDoor Unlock (press “disarm/unlock” button to program)Trunk Release (press “trunk” button to program)Pulse After Start (press “start” button to program)The primary function of this second relay, is to operate the vehicle’s existing horn; either inconjunction with the electronic siren, or in place of the siren. Using both the siren and the horncreates an extremely effective security system. Optionally, if desired or needed, this relay can beprogrammed as a door unlock, trunk release, or pulse after start relay.Feature #4 - Turbo TimerOff(press “arm/lock” button to program) - DEFAULTRun 1 Minute (press “disarm/unlock” button to program)Run 2 Minutes (press “II” button to program)Run 3 Minutes (press “III” button to program)This feature, the operation of which is described on page 9, when turned onconfigures the system to automatically keep the engine running briefly after it is turned off. Thisoperation is designed specifically for vehicles having turbocharged engines (the user may temporarilybypass the feature if desired). This feature should only be programmed by the installer,and the operation of this feature depends on the correct connection of the safety wire to thevehicle’s parking brake.Feature #5 - Manual Transmission ModeOff (press “disarm/unlock” button to program) - DEFAULTOn (press “arm/lock” button to program)This feature changes the parameters of the system’s remote start operation to be suitable formanual transmission-equipped vehicles via a “setup” procedure which must be followed upon exitingthe vehicle to ensure the transmission is in neutral.16
Installer Programmable Features (cont’d)Feature #6 - Engine Detection MethodTachless Hi (press “arm/lock” button to program) - DEFAULTTachless Lo (press “disarm/unlock” button to program)Tach Wire (press “trunk” button to program)Data Tach (press “start” button to program)Crank Only (press “lock” & “unlock” to program)This feature selects the method in which the remote start monitors the engine’s running conditionin remote start mode.“Tachless Hi” sensitivity mode has an associated base starter output time duration (see installerfeature #5) and monitors the vehicle’s voltage level to determine if the engine is running. This settinglooks for a voltage increase of 0.3v after cranking.“Tachless Lo” sensitivity mode operates like the “Tachless Hi” setting but looks for a voltageincrease of 0.5v after cranking.“Tach Wire” Before this setting is programmed, refer to the “Violet/White wire” section of theinstallation manual for proper wiring connection and the Tach Learn Procedure. It will crank theengine for up to 3 seconds or until a tach signal is detected.“Data Tach” mode operates just like the “Tach Wire” setting except it takes its reading from theD2D data port instead of using the Violet/White wire. Before using, make sure this function is supportedby the Databus Interface module.“Crank Only” AKA “blind start” is similar to the “Tachless” settings however, it only makes onestart attempt and does not monitor engine running conditions. This is useful for many “push-tostart”vehicles.Feature #7 - Extended Starter Cranking Time0.75 Second (press “arm/lock” button to program) - DEFAULT1.00 Second (press “disarm/unlock” button to program)1.5 Seconds (press “trunk” button to program)2.25 Seconds (press “start” button to program)This feature determines the crank time of the 1st start attempt when in “Tachless” mode. If theengine doesn’t start on the first attempt, it will retry up to 3 more times extending the crank time byan additional 0.2 second with each attempt..Feature #8 - PINK/WHITE (IGN #2)Wire FunctionIgnition (press “arm/lock” button to program) - DEFAULTAccessory (press “disarm/unlock” button to program)Starter (press “trunk” button to program)This feature changes the operation of the unit’s large PINK/WHITE output wire. This featureshould only be programmed by the installer.Feature #9 - Arm, Disarm or Additional ChannelsArm / Disarm(press “arm/lock” button to program) - DEFAULTArm / Channel 5 (press “disarm/unlock” button to program)Channel 4 / Disarm (press “trunk” button to program)Channel 4 / Channel 5 (press “start” button to program)The system has outputs designed for arming and/or disarming a factory-equipped security system.These wires may be used instead to provide further system outputs, which are remotely operatedby the transmitter. These outputs are in addition to the 2nd channel and 3rd channel outputs.As shown in the programming assignment, the arm, disarm, channel 4 and channel 5 are programmableas various combinations. For example, if the disarm output is needed, but not the armoutput, then channel 4 may be made available for use.17
Installer Programmable Features (cont’d)Feature #10 Gasoline Or Diesel EngineGasoline(press “lock” button to program) - DEFAULTDiesel 15 Sec. Delay (press “unlock” button to program)Diesel 20 Sec. Delay (press “trunk” button to program)Diesel 30 Sec. Delay (press “start” button to program)This feature changes the system’s timing of the ignition and starter output sequence for gas ordiesel engines. Gasoline: the starter output will occur 3 seconds after the ignitions turn on. Whenin “Tachless” mode, the engine running status is determined 10 seconds after starting. Diesel:the starter output will occur 15, 20, or 30 seconds after the ignitions turn on (allows for glow plugwarming). When in “Tachless” mode, the engine running status will be determined 40 secondsafter cranking.Feature #11 Remote Start Lock ControlOff(press “lock” button to program) - DEFAULTLock After Start(press “unlock” button to program)Unlock before start(press “trunk” button to program)Unlock Before+Lock After Start (press “start” button to program)This feature allows for OEM <strong>alarm</strong>/lock control in relation to remote start operations thus eliminatingextra wiring.Feature #12 Low Temp Crank Extender0ms (Off) (press “lock” button to program)200ms (press “unlock” button to program) - DEFAULT300ms (press “trunk” button to program)400ms (press “start” button to program)When the vehicle’s interior temperature is below freezing, this feature adds extra crank time to thebase timing (see installer feature #7). It applies to tachless modes only (installer feature #6)Feature #13 Data Port ProtocolADS (iData) (press “unlock” button to program)D2D (Trilogix) (press “lock” button to program) - DEFAULTThis feature determines which data protocol is used on the data ports. Choose this based on theinterface module being used. NOTE: When a BLADE is inserted, this feature automaticallyswitches to the ADS protocol.Feature #14 Lock On PrewarnOn (press “lock” button to program) - DEFAULTOff (press “unlock” button to program)By default, if the prewarn zone is triggered, the system will automatically lock the doors to combatunauthorized entry from lock picking. If this causes conflict with OEM vehicle functions, you canturn it off.18
Programmable Features MatrixUser Feature Programming: Ignition on, off, press valet 5 times# Feature Lock Button Unlock button Trunk button ”START” button1 Secure Code 1, 0 (default)2 Last Door Arming Off On w/o lock On w/ Lock3 Automatic Rearming Off On w/o lock On w/ Lock Enhanced Rearm4 Starter Interrupt Functions Alarm Off Automatic Alarm+Anti-Grind5 Ignition Override On Off6 Lock w/ Ignition On On Off7 Unlock w/ Ignition Off Off Unlock #1 Unlock #2 Unlock #1 & #28 Open Door Bypass For Ign. Locks On Off9 Confirmation Chirps On Off Except Valet mode Valet Mode Only10 Chirp Volume Low Med Low Med Loud Loud11 Alarm Cycle 30 sec 60 90 12012 Lights Upon Disarm On Off13 Disarm Upon Trunk Release On Off14 Arming Delay 3 sec 15 30 4515 Siren Output Steady Pulse Horn Lo Pulse Horn Med Pulse Horn Hi16 Alarm Functions Bypass On Off17 Ignition Anti-<strong>car</strong>jack On Off18 Door Anti-<strong>car</strong>jack On Off19 Remote Anti-<strong>car</strong>jack On Off20 Open Door Warning On Arm On Off21 Remote Start Activation Start x 2 Start x 1 Lock+Unlock22 Remote Start Run Time 5 min 10 min 15 min 20 min23 Remote Start Light Flash Steady FlashingInstaller Feature Programming: Ignition on, off, press valet 10 times1 Doorlock pulse 0.8 sec 3 sec Double unlock Total closure2 Light Relay Functions Dome light Lock Ignition Acc3 Horn Relay Functions Horn Unlock Trunk Release Pulse after Start4 Turbo Timer Off 1 min 2 min 3 min5 Manual Transmission On Off6 Engine detectionTachless Hi Tachless Lo Tach Wire DatatachCrank Only (press Lock + Unlock)7 Crank Time 0.7 sec 1 sec 1.5 sec 2.25 sec8 Pink/White Ignition Wire Function Ignition Accessory Start9 Arm/Disarm/Additional Ch. Arm/Disarm Arm/Ch 5 Ch4/Disarm Ch 4/Ch 510 Gas or Diesel Engine GasDiesel(15 sec. Delay)Diesel(20 sec. Delay)Diesel(30 sec. delay)11 Remote Start Lock control Off Lock after start Unlock before start Both12 Low Temp Crank Extender 0ms 200ms 300ms 400ms13 Data Port Protocol D2D (Trilogix) ADS (iData)14 Lock on prewarn On Off19
Back CoverColor cover is in aseparate file.