Linux for ARM on TS-72XX User's Guide - Technologic Systems
Linux for ARM on TS-72XX User's Guide - Technologic Systems
Linux for ARM on TS-72XX User's Guide - Technologic Systems
You also want an ePaper? Increase the reach of your titles
YUMPU automatically turns print PDFs into web optimized ePapers that Google loves.
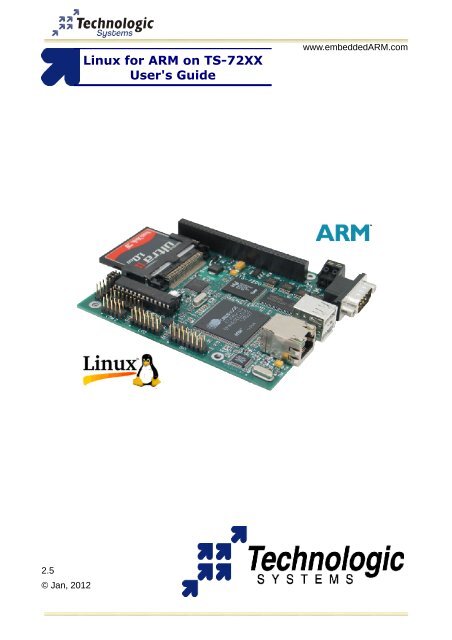
LINUX FOR <str<strong>on</strong>g>ARM</str<strong>on</strong>g> ON <strong>TS</strong>-<strong>72XX</strong><str<strong>on</strong>g>Linux</str<strong>on</strong>g> <str<strong>on</strong>g>for</str<strong>on</strong>g> <str<strong>on</strong>g>ARM</str<strong>on</strong>g> <strong>on</strong> <strong>TS</strong>-<strong>72XX</strong><strong>User's</strong> <strong>Guide</strong>www.embedded<str<strong>on</strong>g>ARM</str<strong>on</strong>g>.com2.5© Jan, 2012© Jan, 2012 www.embedded<str<strong>on</strong>g>ARM</str<strong>on</strong>g>.com 1
LINUX FOR <str<strong>on</strong>g>ARM</str<strong>on</strong>g> ON <strong>TS</strong>-<strong>72XX</strong>Feedback and Update to this ManualTo help our customers make the most of our products, we are c<strong>on</strong>tinually making additi<strong>on</strong>al andupdated resources available <strong>on</strong> the <strong>Technologic</strong> <strong>Systems</strong> website (www.embedded<str<strong>on</strong>g>ARM</str<strong>on</strong>g>.com).These include manuals, applicati<strong>on</strong> notes, programming examples, and updated software andfirmware. Check in periodically to see what's new!When we are prioritizing work <strong>on</strong> these updated resources, feedback from customers (and prospectivecustomers) is the number <strong>on</strong>e influence. If you have questi<strong>on</strong>s, comments, or c<strong>on</strong>cerns about yourEmbedded Computer, please let us know at support@embedded<str<strong>on</strong>g>ARM</str<strong>on</strong>g>.com.Limited Warranty<strong>Technologic</strong> <strong>Systems</strong> warrants this product to be free of defects in material and workmanship <str<strong>on</strong>g>for</str<strong>on</strong>g> aperiod of <strong>on</strong>e year from date of purchase.During this warranty period <strong>Technologic</strong> <strong>Systems</strong> will repair or replace the defective unit in accordancewith the following process:A copy of the original invoice must be included when returning the defective unit to <strong>Technologic</strong><strong>Systems</strong>, Inc.This limited warranty does not cover damages resulting from lightning or other power surges, misuse,abuse, abnormal c<strong>on</strong>diti<strong>on</strong>s of operati<strong>on</strong>, or attempts to alter or modify the functi<strong>on</strong> of the product.This warranty is limited to the repair or replacement of the defective unit. In no event shall <strong>Technologic</strong><strong>Systems</strong> be liable or resp<strong>on</strong>sible <str<strong>on</strong>g>for</str<strong>on</strong>g> any loss or damages, including but not limited to any lost profits,incidental or c<strong>on</strong>sequential damages, loss of business, or anticipatory profits arising from the use orinability to use this product.Repairs made after the expirati<strong>on</strong> of the warranty period are subject to a repair charge and the cost ofreturn shipping. Please, c<strong>on</strong>tact <strong>Technologic</strong> <strong>Systems</strong> to arrange <str<strong>on</strong>g>for</str<strong>on</strong>g> any repair service and to obtainrepair charge in<str<strong>on</strong>g>for</str<strong>on</strong>g>mati<strong>on</strong>.FCC Advisory StatementThis equipment generates, uses, and can radiate radio frequency energy and if not installed and usedproperly (that is, in strict accordance with the manufacturer’s instructi<strong>on</strong>s), may cause interference toradio and televisi<strong>on</strong> recepti<strong>on</strong>. It has been type tested and found to comply with the limits <str<strong>on</strong>g>for</str<strong>on</strong>g> a Class Acomputing device in accordance with the specificati<strong>on</strong>s in Subpart J of Part 15 of FCC Rules, whichare designed to provide reas<strong>on</strong>able protecti<strong>on</strong> against such interference when operated in acommercial envir<strong>on</strong>ment. Operati<strong>on</strong> of this equipment in a residential area is likely to causeinterference, in which case the owner will be required to correct the interference at his own expense.If this equipment does cause interference, which can be determined by turning the unit <strong>on</strong> and off, theuser is encouraged to try the following measures to correct the interference:• Reorient the receiving antenna.• Relocate the unit with respect to the receiver.• Plug the unit into a different outlet so that the unit and receiver are <strong>on</strong> different branch circuits.• Ensure that mounting screws and c<strong>on</strong>nector attachment screws are tightly secured.• Ensure that good quality, shielded, and grounded cables are used <str<strong>on</strong>g>for</str<strong>on</strong>g> all data communicati<strong>on</strong>s.If necessary, the user should c<strong>on</strong>sult the dealer or an experienced radio/televisi<strong>on</strong> technician <str<strong>on</strong>g>for</str<strong>on</strong>g>additi<strong>on</strong>al suggesti<strong>on</strong>s. The following booklets prepared by the Federal Communicati<strong>on</strong>s Commissi<strong>on</strong>(FCC) may also prove helpful:• How to Identify and Resolve Radio-TV Interference Problems (Stock No. 004-000-000345-4)• Interface Handbook (Stock No. 004-000-004505-7)These booklets may be purchased from the Superintendent of Documents, U.S. Government PrintingOffice, Washingt<strong>on</strong>, DC 20402.© Jan, 2012 www.embedded<str<strong>on</strong>g>ARM</str<strong>on</strong>g>.com 2
LINUX FOR <str<strong>on</strong>g>ARM</str<strong>on</strong>g> ON <strong>TS</strong>-<strong>72XX</strong>TABLE OF CONTEN<strong>TS</strong>Updating the JFFS Image......................................................................................................... 23Updating the YAFFS Image...................................................................................................... 235.2 Flash Memory Cards......................................................................................................... 24Compact Flash.......................................................................................................................... 24SD Card..................................................................................................................................... 24USB Flash Drives...................................................................................................................... 24Updating the EXT2 Image........................................................................................................ 255.3 Network File System - NFS...............................................................................................26Setting Up an NFS File System............................................................................................... 266 <strong>TS</strong>-KERNEL AND DRIVERS DEVELOPMENT.............................................................. 276.1 Compiling the <strong>TS</strong>-Kernel ................................................................................................. 27Different <strong>TS</strong>-Kernel 2.4 Release Versi<strong>on</strong>s...............................................................................28Kernel 2.6 support.................................................................................................................... 286.2 Real Time Extensi<strong>on</strong> <str<strong>on</strong>g>for</str<strong>on</strong>g> <strong>TS</strong>-Kernel................................................................................. 28Installing the Real Time envir<strong>on</strong>ment..................................................................................... 28Running the Real Time <strong>TS</strong>-Kernel........................................................................................... 29Building the Real Time <strong>TS</strong>-Kernel and RTAI........................................................................... 296.3 Serial.................................................................................................................................. 30COM1 and COM2 ..................................................................................................................... 30RS-485 Support <strong>on</strong> COM2........................................................................................................ 30<strong>TS</strong>-7260 2TTLCOM Opti<strong>on</strong>....................................................................................................... 30<strong>TS</strong>-7300 Serial Ports................................................................................................................. 316.4 CAN Bus............................................................................................................................ 32Loading the Lincan driver........................................................................................................ 32Testing the CAN network......................................................................................................... 326.5 Video.................................................................................................................................. 326.6 Ethernet............................................................................................................................. 336.7 USB WiFi 802.11g D<strong>on</strong>gle................................................................................................. 336.8 USB Mouse and Keyboard............................................................................................... 337 APPLICATION DEVELOPMENT.................................................................................... 347.1 GNU Tools......................................................................................................................... 347.2 Development <strong>on</strong> the Target with Debian <str<strong>on</strong>g>Linux</str<strong>on</strong>g>............................................................... 347.3 Development <strong>on</strong> the Host with a Cross Toolchain......................................................... 34Cygwin Hello World walkthrough............................................................................................ 357.4 Programming IO Devices................................................................................................. 357.5 Applicati<strong>on</strong>s Debugging................................................................................................... 36Low Level Debugging with RedBoot...................................................................................... 36<str<strong>on</strong>g>Linux</str<strong>on</strong>g> - GDB............................................................................................................................... 37<str<strong>on</strong>g>Linux</str<strong>on</strong>g> – GDB Client/Server Debugger..................................................................................... 37Using Other Debuggers........................................................................................................... 377.6 Java.................................................................................................................................... 387.7 Using Eclipse IDE............................................................................................................. 387.8 Graphical User Interfaces.................................................................................................38Qt/Embedded............................................................................................................................ 38Xfree.......................................................................................................................................... 387.9 Sample Applicait<strong>on</strong>s......................................................................................................... 38DIO............................................................................................................................................. 38A/D C<strong>on</strong>verter........................................................................................................................... 39© Jan, 2012 www.embedded<str<strong>on</strong>g>ARM</str<strong>on</strong>g>.com 4
LINUX FOR <str<strong>on</strong>g>ARM</str<strong>on</strong>g> ON <strong>TS</strong>-<strong>72XX</strong>TABLE OF CONTEN<strong>TS</strong>8 FURTHER REFERENCE.................................................................................................418.1 Using the <strong>Technologic</strong> <strong>Systems</strong> Website........................................................................418.2 Recommended Readings................................................................................................. 418.3 Using the <strong>TS</strong>-7000 Mailing List........................................................................................ 418.4 Using the <strong>Technologic</strong> <strong>Systems</strong> FTP Server...................................................................428.5 Useful Data Sheets .......................................................................................................... 428.6 Where to go <str<strong>on</strong>g>for</str<strong>on</strong>g> additi<strong>on</strong>al help....................................................................................... 428.7 Hardware/Software Customizati<strong>on</strong>.................................................................................. 428.8 About <strong>Technologic</strong> <strong>Systems</strong> Inc. .................................................................................... 43Our Values................................................................................................................................. 43Additi<strong>on</strong>al Manufacturer (<strong>Technologic</strong> <strong>Systems</strong>) features:..................................................43APPENDIX A: DOCUMENT HISTORY............................................................................... 44APPENDIX B: MEMORY AND REGISTER MAP............................................................... 45APPENDIX C: DOWNLOADS - SCHEMATICS AND MECHANICAL DRAWING.............47APPENDIX D: <strong>TS</strong>-<str<strong>on</strong>g>ARM</str<strong>on</strong>g> SBC FEATURE MATRIX..............................................................48APPENDIX E: CONTACT TECHNOLOGIC SYSTEMS.....................................................49© Jan, 2012 www.embedded<str<strong>on</strong>g>ARM</str<strong>on</strong>g>.com 5
LINUX FOR <str<strong>on</strong>g>ARM</str<strong>on</strong>g> ON <strong>TS</strong>-<strong>72XX</strong>INTRODUCTION1 INTRODUCTION1.1 About this ManualThis manual is a brief introducti<strong>on</strong> to the use of <str<strong>on</strong>g>Linux</str<strong>on</strong>g> <strong>on</strong> a <strong>Technologic</strong> <strong>Systems</strong>' (<strong>TS</strong>)<str<strong>on</strong>g>ARM</str<strong>on</strong>g>-based Single Board Computer (SBC) – <strong>TS</strong>-<strong>72XX</strong> series. Many technical questi<strong>on</strong>sare answered within this document This manual is not meant as a general tutorial <strong>on</strong><str<strong>on</strong>g>Linux</str<strong>on</strong>g> (or <str<strong>on</strong>g>Linux</str<strong>on</strong>g> Development), but is designed specifically to cover issues related to using<str<strong>on</strong>g>Linux</str<strong>on</strong>g> <strong>on</strong> <strong>Technologic</strong> <strong>Systems</strong>' <str<strong>on</strong>g>ARM</str<strong>on</strong>g> SBCs.<strong>Technologic</strong> <strong>Systems</strong>' <str<strong>on</strong>g>ARM</str<strong>on</strong>g> products offer a different set of tools than the x86 products.This manual documents the basic knowledge needed to work with the <str<strong>on</strong>g>ARM</str<strong>on</strong>g> products.!WarningThis document was created to be used with the <strong>TS</strong>-7200, <strong>TS</strong>-7250 and <strong>TS</strong>-7260boards (<strong>TS</strong>-<strong>72XX</strong> series) and c<strong>on</strong>tains secti<strong>on</strong>s specific to these products <strong>on</strong>ly,such as the sec<strong>on</strong>d chapter. However, most of the remaining secti<strong>on</strong>s will still beuseful guidelines <str<strong>on</strong>g>for</str<strong>on</strong>g> other <strong>TS</strong>-<str<strong>on</strong>g>ARM</str<strong>on</strong>g> computers (<strong>TS</strong>-7300, <strong>TS</strong>-7400, etc).If your project demands rapid applicati<strong>on</strong> development, <strong>Technologic</strong> <strong>Systems</strong> does offersoftware engineering services. We also offers custom hardware design. Please c<strong>on</strong>tact us<str<strong>on</strong>g>for</str<strong>on</strong>g> more in<str<strong>on</strong>g>for</str<strong>on</strong>g>mati<strong>on</strong>.1.2 <strong>TS</strong>-<strong>72XX</strong> SeriesThe <strong>TS</strong>-<strong>72XX</strong> series Single Board Computers (SBC's) run <strong>on</strong> a 200 MHz <str<strong>on</strong>g>ARM</str<strong>on</strong>g>9 processorwith power as low as 1/2 Watt. Low board complexity, low comp<strong>on</strong>ent count, and lowpower/heat makes <str<strong>on</strong>g>for</str<strong>on</strong>g> an extremely reliable embedded engine. The <strong>TS</strong>-<strong>72XX</strong> SBC's areavailable in thousands of c<strong>on</strong>figurati<strong>on</strong>s, many of which are Commercial off the Shelf(CO<strong>TS</strong>) and available to ship today.The EP9302 processor from Cirrus is the highly integrated 200Mhz <str<strong>on</strong>g>ARM</str<strong>on</strong>g>9 processor thatthe <strong>TS</strong>-<strong>72XX</strong> SBC's are built around and includes an <strong>on</strong>-chip 10/100 ethernet, USB, serial,and Flash/SDRAM c<strong>on</strong>troller. For example, <strong>on</strong> the <strong>TS</strong>-7200 model there is 32 Mb ofMicr<strong>on</strong> SDRAM running at 66 Mhz and 8 Mb Intel Strata flash <strong>on</strong>-board. A supplementalPLD provides glue logic, watchdog timer, Compact Flash IDE, and 8 bit PC/104 support.Integer CPU per<str<strong>on</strong>g>for</str<strong>on</strong>g>mance is about 20% faster than our 133 Mhz x86 offerings.Even with the standard power c<strong>on</strong>sumpti<strong>on</strong> of 2 Watts, the <strong>TS</strong>-<strong>72XX</strong> SBC’s run withoutfans or heat sinks in the temperature range of -20° to +70°C. Extended Temperature -40°to +85°C is also standard, but CPU clock must be decreased to about 166MHz <str<strong>on</strong>g>for</str<strong>on</strong>g> highertemperatures. Digital Signal Processing (DSP) is enabled through a standard 5 channel,12bit A/D c<strong>on</strong>verter (Opti<strong>on</strong>al 8 channel, 12 bit A/D c<strong>on</strong>verter), 20 DIO lines and 2standard serial ports.The 8/16 bit PC/104 interface enables additi<strong>on</strong>al functi<strong>on</strong>ality through <strong>Technologic</strong><strong>Systems</strong>’ broad product line of PC/104 peripheral daughter boards. The <strong>TS</strong>-7KV addsvideo, CAN, Com Ports, and A/D c<strong>on</strong>versi<strong>on</strong>. The <strong>TS</strong>-ETH10 allows the additi<strong>on</strong> ofEthernet ports. The <strong>TS</strong>-CAN adds CAN c<strong>on</strong>nectivity. The <strong>TS</strong>-Modem boards add bothwired and cell ph<strong>on</strong>e capabilities.The <strong>TS</strong>-<strong>72XX</strong> rugged <str<strong>on</strong>g>ARM</str<strong>on</strong>g>9 SBC's have found their way into many embeddedapplicati<strong>on</strong>s. Customers are using the <strong>TS</strong>-<strong>72XX</strong> series SBC's in: energy generati<strong>on</strong>,manufacturing process c<strong>on</strong>trol, traffic management, printing system management,communicati<strong>on</strong> infrastructure, website hosting, data gathering and laboratory testequipment. We use a <strong>TS</strong>-7200 to host our complete website and to prepare and test yourSBC prior to shipping.© Jan, 2012 www.embedded<str<strong>on</strong>g>ARM</str<strong>on</strong>g>.com 6
LINUX FOR <str<strong>on</strong>g>ARM</str<strong>on</strong>g> ON <strong>TS</strong>-<strong>72XX</strong>STARTUP2 STARTUP!WarningThis chapter is <strong>on</strong>ly applicable to the <strong>TS</strong>-<strong>72XX</strong> computers.2.1 C<strong>on</strong>sole and Power UpThe <strong>TS</strong>-<strong>72XX</strong> SBCs have no video c<strong>on</strong>troller or keyboard interface. This was d<strong>on</strong>e tokeep the board size small and the cost low. COM1 is typically used as a c<strong>on</strong>sole port tointerface the <strong>TS</strong>-<strong>72XX</strong> to a standard terminal emulati<strong>on</strong> program <strong>on</strong> a Host PC.An ANSI terminal or a PC running a terminal emulator is required to communicate withyour Embedded PC. Simply c<strong>on</strong>nect an ANSI terminal (or emulator) to COM1 (DB9female c<strong>on</strong>nector) using a null modem cable (this is included in the <strong>TS</strong>-<str<strong>on</strong>g>ARM</str<strong>on</strong>g> DevelopmentKit), using serial parameters of 115,200 baud, 8 data bits, no parity, no flow c<strong>on</strong>trol, 1 stopbit (8N1), and make sure jumper JP2 is installed. If you are running <str<strong>on</strong>g>Linux</str<strong>on</strong>g>, the minicomprogram works well, Windows users can run the Hyperterm applicati<strong>on</strong>. <strong>Technologic</strong><strong>Systems</strong> offers a null modem cable with both 25 pin and 9 pin c<strong>on</strong>nectors at each end aspart number CB7-05. Some systems also require the 10-pin header to 9-pin Sub-Dadapter which is P/N: RC-DB9.The c<strong>on</strong>sole can be changed to COM2 by installing JP4 (with JP2 also installed). If yourapplicati<strong>on</strong> does not require a c<strong>on</strong>sole or both COM ports are required, then removing thejumper JP2 easily disables all c<strong>on</strong>sole output.C<strong>on</strong>nect a regulated 5VDC, (1A minimum) power source using the included 2 screwterminal strip/c<strong>on</strong>nector. Please note the polarity printed <strong>on</strong> the board. The bootmessages, by default, are all displayed <strong>on</strong> COM1 at 115200 baud.2.2 Boot SequenceThe boot sequence has four distinct stages:1. <strong>TS</strong>-BOOTROM messages2. RedBoot ROM m<strong>on</strong>itor messages3. <str<strong>on</strong>g>Linux</str<strong>on</strong>g> Kernel messages4. Login promptsAfter applying 5VDC power, the board mounted LED will blink, followed immediately bythe display of <strong>TS</strong>-BOOTROM messages and RedBoot messages. RedBoot, if notinterrupted by the user within <strong>on</strong>e sec<strong>on</strong>d, loads the <str<strong>on</strong>g>Linux</str<strong>on</strong>g> kernel from flash and boots tothe <strong>on</strong>-board flash chip.!WarningEnsure that JP5 is removed when booting from the default flash file-system.Special scripts look <str<strong>on</strong>g>for</str<strong>on</strong>g> it and, when found, run special test programs that will useup system resources.2.3 <strong>TS</strong>-BOOTROMUp<strong>on</strong> power up, the board executes proprietary <strong>Technologic</strong> <strong>Systems</strong> boot-code, thenimmediately executes RedBoot. The <strong>TS</strong>-BOOTROM is stored in flash memory and is usedto per<str<strong>on</strong>g>for</str<strong>on</strong>g>m the first hardware c<strong>on</strong>figurati<strong>on</strong>, such as the EP9301 initializati<strong>on</strong> and <strong>TS</strong>-<strong>72XX</strong>hardware specifics, and to load the eCos/RedBoot system. The <strong>TS</strong>-BOOTROM serves asreusable way of initializing and checking hardware in a way that it is not necessary torewrite the code <str<strong>on</strong>g>for</str<strong>on</strong>g> every desirable OS. Some of the <strong>TS</strong>-BOOTROM c<strong>on</strong>figurati<strong>on</strong> tasksinclude:✔initializes the processor© Jan, 2012 www.embedded<str<strong>on</strong>g>ARM</str<strong>on</strong>g>.com 7
LINUX FOR <str<strong>on</strong>g>ARM</str<strong>on</strong>g> ON <strong>TS</strong>-<strong>72XX</strong>STARTUP✔✔✔✔turns off the watchdog timerc<strong>on</strong>figures the serial UART to 115200 bpsinitializes and tests SDRAM and FLASHloads and runs RedBoot from flashThere is an intermediate boot loader code <strong>on</strong> the <strong>TS</strong>-<strong>72XX</strong> SBCs which use the NANDflash technology, named <strong>TS</strong>-NANDBOOT. It is needed because the EP9301 processorcan't handle NAND devices. Then, the <strong>TS</strong>-NANDBOOT c<strong>on</strong>tains specific routines to readthe NAND flash memory and load the <strong>TS</strong>-BOOTROM.2.4 eCos/RedBootRedBoot is a feature rich boot-ROM m<strong>on</strong>itor, that allows manipulati<strong>on</strong> of the <strong>on</strong>-boardflash, JFFS and YAFFS images, loading and executi<strong>on</strong> of a kernel or executable fromeither tftp (trivial ftp), http or flash, and gdb debugging stubs. From RedBoot, <strong>on</strong>e can loadand execute any standal<strong>on</strong>e binary. Most comm<strong>on</strong>ly, a <str<strong>on</strong>g>Linux</str<strong>on</strong>g> kernel or a Windows CEbinary is used. One can also write applicati<strong>on</strong>s within the eCos envir<strong>on</strong>ment and loadthem with RedBoot.Using RedbootBy default, a pre-existing RedBoot script is executed <strong>on</strong> initializati<strong>on</strong> time, if notinterrupted by the user within <strong>on</strong>e sec<strong>on</strong>d. The default script instructs RedBoot to load the<str<strong>on</strong>g>Linux</str<strong>on</strong>g> kernel from the flash, and instructs the <str<strong>on</strong>g>Linux</str<strong>on</strong>g> kernel to use the JFFS/YAFFS image<strong>on</strong> the flash chip <str<strong>on</strong>g>for</str<strong>on</strong>g> its root file system. One can view the RedBoot defaults <str<strong>on</strong>g>for</str<strong>on</strong>g> the board,as well as the default script, by entering at the RedBoot command prompt (Ctrl+C within<strong>on</strong>e sec<strong>on</strong>d after power up):RedBoot> fc<strong>on</strong>fig -lRun script at boot: trueBoot script:.. fis load vmlinux.. exec -c "c<strong>on</strong>sole=ttyAM0,115200 root=/dev/mtdblock1"Boot script timeout (100ms resoluti<strong>on</strong>): 1Use BOOTP <str<strong>on</strong>g>for</str<strong>on</strong>g> network c<strong>on</strong>figurati<strong>on</strong>: falseGateway IP address: 192.168.0.11Local IP address: 192.168.0.50Local IP address mask: 255.255.255.0Default server IP address: 192.168.0.11dns_ip: 192.168.0.11Network hardware address [MAC]: 0x00:0xD0:0x69:0x4F:0x34:0xA5GDB c<strong>on</strong>necti<strong>on</strong> port: 9000Force c<strong>on</strong>sole <str<strong>on</strong>g>for</str<strong>on</strong>g> special debug messages: falseNetwork debug at boot time: falseThe defaults can be changed by simply entering “fc<strong>on</strong>fig” at the RedBoot prompt andanswering the prompts. A final chance to write or discard the changes to the board will begiven by RedBoot. Also, the main RedBoot commands can be viewed by entering “help” atthe prompt, and further in<str<strong>on</strong>g>for</str<strong>on</strong>g>mati<strong>on</strong> about a single command can be viewed by typing“help ”.Loading and execute kernel from RedBootRedBoot can load a kernel or executable via the serial c<strong>on</strong>sole, a tftp server, http server,or directly from flash.iImportantThe <str<strong>on</strong>g>Linux</str<strong>on</strong>g> kernel must be loaded into memory address 0x00218000.© Jan, 2012 www.embedded<str<strong>on</strong>g>ARM</str<strong>on</strong>g>.com 8
LINUX FOR <str<strong>on</strong>g>ARM</str<strong>on</strong>g> ON <strong>TS</strong>-<strong>72XX</strong>STARTUPFLASHLoading the kernel from flash is d<strong>on</strong>e automatically by RedBoot in the default script withthe following command:RedBoot> fis load zimage -b 0x00218000One can see where in flash the kernel is and where in memory it will be loaded to bytyping “fis list”, which shows the various areas of flash RedBoot is aware of. The followingis a typical output of “fis list”:Name FLASH addr Mem addr Length Entry point(reserved) 0x60000000 0x60000000 0x00620000 0x00000000RedBoot0x60620000 0x60620000 0x00040000 0x00000000vmlinux0x60660000 0x00218000 0x00160000 0x00218000RedBoot c<strong>on</strong>fig 0x607C0000 0x607C0000 0x00001000 0x00000000FIS directory 0x607E0000 0x607E0000 0x00020000 0x00000000From the above example, the kernel executable labeled vmlinux is stored at flash address0x60660000, and will be loaded into memory address 0x00218000.It is possible to write a new kernel loaded by the user in memory to flash, therebyoverwriting the pre-existing kernel stored in flash. First, <strong>on</strong>e must delete the existingkernel image file from flash, then write the new loaded <strong>on</strong>e to disk. The followingcommands accomplish this:fis delete fis create -b 0x00218000 -l 0x160000 Note that the delete command specified , which refers to the name of thefis entry to delete. The create command specified , which is the nameof the executable loaded into memory. If the name of the downloaded executable isdifferent, please specify that name when doing a create command.HTTPPrior to loading a new kernel into RebBoot using HTTP, make sure you have c<strong>on</strong>figuredRedBoot with a network c<strong>on</strong>figurati<strong>on</strong> that can reach the network. You may use theRedBoot "fc<strong>on</strong>fig" command to set network parameters.Get to the RedBoot prompt by hitting Ctrl+C key immediately after power <strong>on</strong> and type thefollowing command:load -v -r -b 0x00218000 -m http -h For example:load -v -r -b 0x00218000 -m http -h 67.40.67.44/ftp/ts7kv/vmlinuxts7200ts9.binIf RedBoot gives you an error about not understanding the "m http" opti<strong>on</strong>, you have anolder versi<strong>on</strong> of RedBoot and must instead load the kernel via a local TFTP server.TFTPTo load a kernel from a simple TFTP server, the following command is needed:load -r -b 0x00218000 -h For example:load –b 0x00218000 –h 192.168.0.1 vmlinuxExecuting the Kernel and Booting the Root File SystemNow that a kernel has been loaded into memory, it can be executed. This is accomplishedwith the following command:exec -c "”For example:© Jan, 2012 www.embedded<str<strong>on</strong>g>ARM</str<strong>on</strong>g>.com 9
LINUX FOR <str<strong>on</strong>g>ARM</str<strong>on</strong>g> ON <strong>TS</strong>-<strong>72XX</strong>STARTUPexec -c “c<strong>on</strong>sole=ttyAM0,115200 ip=dhcp root=/dev/mtdblock1”The “exec” command executes the loaded kernel image, passing to the kernel thearguments specified via the “-c” switch. In the previous example, kernel messages aresent out <strong>on</strong> the first serial port (note that ttyAM0 is used instead of the familiar ttyS0) at115200 baud and the root file-system is <strong>on</strong> the first mtdblock of the flash chip.On the <strong>TS</strong>-7200 modem, to load the root file system from the Compact Flash card, thefollowing command should be used instead:exec -c “c<strong>on</strong>sole=ttyAM0,115200 ip=dhcp root=/dev/hda1”To load a NFS Root file system from a NFS server, use the following command:exec -c “c<strong>on</strong>sole=ttyAM0,115200 ip=dhcp nfsroot=:Booting to an initrd Image from RedBootOne may want to instruct the kernel to use an initrd image during the <str<strong>on</strong>g>Linux</str<strong>on</strong>g> initializati<strong>on</strong>.This might be useful in situati<strong>on</strong> additi<strong>on</strong>al hardware support or system c<strong>on</strong>figurati<strong>on</strong> inneeded prior to root file system load. Using RedBoot, an initrd image can be loadedthrough three main steps:1. Load the initrd.gz image into memory (memory locati<strong>on</strong> used is 0x0080_0000 or0x00600000, <str<strong>on</strong>g>for</str<strong>on</strong>g> example)load -h -r -b 2) Load the kernel into memory (Follow previous intructi<strong>on</strong>s <str<strong>on</strong>g>for</str<strong>on</strong>g> kernel loading)3) Using the “exec” comannd, instruct RedBood to execute the Kernel and initrd, <str<strong>on</strong>g>for</str<strong>on</strong>g>example:exec -r 0x0080_0000 -b 0x00218000 -c "c<strong>on</strong>sole=ttyAM0,115200root=/dev/ram0 init=/linuxrc rw"2.5 Logging InAfter the desired <str<strong>on</strong>g>Linux</str<strong>on</strong>g> Kernel is loaded and executed through RedBoot, the file systemloads and networking, logging, Apache web server, etc. are all started. When the loginprompt is displayed, type “root” to login, with no password. A Bash login prompt will thenappear. At this point, you are ready to enjoy your <strong>TS</strong>-<strong>72XX</strong> SBC running <str<strong>on</strong>g>Linux</str<strong>on</strong>g>.2.6 ShutdownUse the “shutdown –h now“ command to halt the <str<strong>on</strong>g>Linux</str<strong>on</strong>g> system when running fromCompact Flash, SD or USB memory card to avoid a potentially lengthy file system check<strong>on</strong> the next boot, since the file system running is EXT2 <str<strong>on</strong>g>for</str<strong>on</strong>g>matted.On the other hand, the JFFS/YAFFS file systems are highly tolerant of power cycles whilethe file systems are mounted. There<str<strong>on</strong>g>for</str<strong>on</strong>g>e, the “shutdown” command is not required whenthe root file system is JFFS/YAFFS, but is still recommended.© Jan, 2012 www.embedded<str<strong>on</strong>g>ARM</str<strong>on</strong>g>.com 10
LINUX FOR <str<strong>on</strong>g>ARM</str<strong>on</strong>g> ON <strong>TS</strong>-<strong>72XX</strong>LINUX FOR <str<strong>on</strong>g>ARM</str<strong>on</strong>g> OPERATING SYSTEM SUPPORT3 LINUX FOR <str<strong>on</strong>g>ARM</str<strong>on</strong>g> OPERATING SYSTEM SUPPORTThe <str<strong>on</strong>g>ARM</str<strong>on</strong>g> processor (the EP9302) comes from Cirrus and the plat<str<strong>on</strong>g>for</str<strong>on</strong>g>m is very similar tothe Cirrus EDB9302 evaluati<strong>on</strong> board. Cirrus has str<strong>on</strong>gly promoted running <str<strong>on</strong>g>Linux</str<strong>on</strong>g> <strong>on</strong> thischip and has d<strong>on</strong>e most of the legwork in creating a patch set to the <str<strong>on</strong>g>Linux</str<strong>on</strong>g> 2.4 kernels, butwe have also had to modify the <str<strong>on</strong>g>Linux</str<strong>on</strong>g> Kernel (<strong>TS</strong>-Kernel) so it can support the 8MB <strong>on</strong>boardFlash chip (via mtd drivers), the compact flash IDE driver, and the A/D c<strong>on</strong>verter. Ifyou want to use <str<strong>on</strong>g>Linux</str<strong>on</strong>g> and aren't tied to the x86 architecture, the <strong>TS</strong>-<strong>72XX</strong> boards can bevery cost-effective.The <strong>TS</strong>-<strong>72XX</strong> SBCs are shipped standard with thecompact <strong>TS</strong>-<str<strong>on</strong>g>Linux</str<strong>on</strong>g> embedded operating systeminstalled in the <strong>on</strong>-board Flash memory. The fullfeaturedDebian <str<strong>on</strong>g>Linux</str<strong>on</strong>g> can also be used with an NFSroot file system or larger Flash drives, such asCompact Flash cards, SD cards and USB flashdrives. The <strong>TS</strong>-Kernel used is based up<strong>on</strong> the versi<strong>on</strong>2.4.26, patched and compiled <str<strong>on</strong>g>for</str<strong>on</strong>g> the Cirrus EP9301<str<strong>on</strong>g>ARM</str<strong>on</strong>g>920T processor, and is real-time capablethrough RTAI.The root file system used by the <str<strong>on</strong>g>Linux</str<strong>on</strong>g> OS can be any of the following:✔✔✔3.1 <strong>TS</strong>-KernelJFFS/YAFFS file system image in the <strong>on</strong>-board Flash (RedBoot should include theopti<strong>on</strong> root=/dev/mtdblock1 to instruct the kernel to boot here)EXT2 file system image in the Compact Flash card (RedBoot should include the opti<strong>on</strong>root=/dev/hda)NFS root, via Ethernet port (RedBoot should include the opti<strong>on</strong> root=/dev/nfsnfsroot=: ip=dhcp)In order to support the <str<strong>on</strong>g>Linux</str<strong>on</strong>g> Kernel <strong>on</strong> <strong>TS</strong>-<strong>72XX</strong> <str<strong>on</strong>g>ARM</str<strong>on</strong>g> SBCs, <strong>Technologic</strong> <strong>Systems</strong> addedmodificati<strong>on</strong>s to the <str<strong>on</strong>g>Linux</str<strong>on</strong>g> Kernel <str<strong>on</strong>g>for</str<strong>on</strong>g> the EP9301 and EDB9301 plat<str<strong>on</strong>g>for</str<strong>on</strong>g>m shipped by CirrusLogic, manufacturer of the processor. The <str<strong>on</strong>g>Linux</str<strong>on</strong>g> Kernel used is based up<strong>on</strong> the versi<strong>on</strong>2.4.26, and additi<strong>on</strong>al patches are applied to the main 2.4.26 source tree so that thekernel will support <str<strong>on</strong>g>ARM</str<strong>on</strong>g> processors (RMK patches), the Cirrus EP9301 processor and,finally, <strong>TS</strong>-<strong>72XX</strong> hardware specifics. The final <str<strong>on</strong>g>Linux</str<strong>on</strong>g> Kernel is a <strong>Technologic</strong> <strong>Systems</strong>specific source, there<str<strong>on</strong>g>for</str<strong>on</strong>g>e called <strong>TS</strong>-Kernel.<strong>TS</strong>-Kernel modificati<strong>on</strong>s include drivers <str<strong>on</strong>g>for</str<strong>on</strong>g> the Compact Flash IDE, <str<strong>on</strong>g>for</str<strong>on</strong>g> the extra A/Dc<strong>on</strong>verter chip, <str<strong>on</strong>g>for</str<strong>on</strong>g> the NAND flash memory devices, MTD drives and YAFFS file system,framebuffer driver <str<strong>on</strong>g>for</str<strong>on</strong>g> video interface, sec<strong>on</strong>d ethernet driver <str<strong>on</strong>g>for</str<strong>on</strong>g> <strong>TS</strong>-7300, driver support<str<strong>on</strong>g>for</str<strong>on</strong>g> the SJA1000 CAN c<strong>on</strong>troller <strong>on</strong> <strong>TS</strong>-CAN1, drivers <str<strong>on</strong>g>for</str<strong>on</strong>g> the SD Card interface, etc.<strong>Technologic</strong> <strong>Systems</strong> is c<strong>on</strong>stantly improving the <strong>TS</strong>-Kernel so that it will support new<str<strong>on</strong>g>ARM</str<strong>on</strong>g> SBCs and PC/104 peripheral boards. Complete <strong>TS</strong>-Kernel source code is providedat <strong>Technologic</strong> <strong>Systems</strong> web site, allowing developers to implement modificati<strong>on</strong>s andcompile their own kernels.NoteThe <strong>TS</strong>-Kernel supports the Real-Time Applicati<strong>on</strong> Interface (RTAI project),making the embedded operating system capable of handling applicati<strong>on</strong>s withhard real-time restricti<strong>on</strong>s.For further in<str<strong>on</strong>g>for</str<strong>on</strong>g>mati<strong>on</strong> <strong>on</strong> the real-time extensi<strong>on</strong> and kernel development procedures,refer to the development secti<strong>on</strong> of this manual.© Jan, 2012 www.embedded<str<strong>on</strong>g>ARM</str<strong>on</strong>g>.com 11
LINUX FOR <str<strong>on</strong>g>ARM</str<strong>on</strong>g> ON <strong>TS</strong>-<strong>72XX</strong>LINUX FOR <str<strong>on</strong>g>ARM</str<strong>on</strong>g> OPERATING SYSTEM SUPPORT3.2 <strong>TS</strong>-<str<strong>on</strong>g>Linux</str<strong>on</strong>g>NoteIt is also possible to run the 2.6 versi<strong>on</strong> of the <str<strong>on</strong>g>Linux</str<strong>on</strong>g> Kernel <strong>on</strong> <strong>TS</strong>-<strong>72XX</strong> SBCs.However, this development is not officially supported by <strong>Technologic</strong> <strong>Systems</strong> yet.C<strong>on</strong>tact <strong>Technologic</strong> <strong>Systems</strong> if your soluti<strong>on</strong> requires 2.6 kernel versi<strong>on</strong>.<strong>TS</strong>-<str<strong>on</strong>g>Linux</str<strong>on</strong>g> is a compact <str<strong>on</strong>g>Linux</str<strong>on</strong>g> distributi<strong>on</strong>, based <strong>on</strong> Busybox, ideal <str<strong>on</strong>g>for</str<strong>on</strong>g> small footprintsystems and used as a dem<strong>on</strong>strati<strong>on</strong> OS <strong>on</strong> the <strong>TS</strong>-<strong>72XX</strong> computers. There<str<strong>on</strong>g>for</str<strong>on</strong>g>e, the <strong>TS</strong>-<strong>72XX</strong> SBCs come with <strong>TS</strong>-<str<strong>on</strong>g>Linux</str<strong>on</strong>g> installed by default in the <strong>on</strong>-board flash. RedBoot is alsoc<strong>on</strong>figured to load the <strong>TS</strong>-<str<strong>on</strong>g>Linux</str<strong>on</strong>g> from <strong>on</strong>-board flash by default.The use of <strong>TS</strong>-<str<strong>on</strong>g>Linux</str<strong>on</strong>g> is very similar to other comm<strong>on</strong> <str<strong>on</strong>g>Linux</str<strong>on</strong>g> systems. A experienced <str<strong>on</strong>g>Linux</str<strong>on</strong>g>user should find no problems when using <strong>TS</strong>-<str<strong>on</strong>g>Linux</str<strong>on</strong>g>. The initializati<strong>on</strong> and c<strong>on</strong>figurati<strong>on</strong>processes are all managed by the files located in the “/etc” directory. Devices entries arein the “/dev”, while libraries and kernel modules are inside “/lib”. Network services such asFTP and Telnet servers are also available. Even an HTTP server comes installed bydefault with <strong>TS</strong>-<str<strong>on</strong>g>Linux</str<strong>on</strong>g> and is loaded during initializati<strong>on</strong> time.Most of the <str<strong>on</strong>g>Linux</str<strong>on</strong>g> utilities you would expect are present <strong>on</strong> the <strong>TS</strong>-<str<strong>on</strong>g>Linux</str<strong>on</strong>g> distributi<strong>on</strong>. Intotal there are over 120 utilities installed <strong>on</strong> the file system. Many of the basic utilities areimplemented using Busybox. BusyBox combines tiny versi<strong>on</strong>s of many comm<strong>on</strong> UNIXutilities into a single small executable The utilities in BusyBox generally have feweropti<strong>on</strong>s than their full-featured GNU cousins; however, the opti<strong>on</strong>s that are includedprovide the expected functi<strong>on</strong>ality and behave very much like their GNU counterparts.BusyBox provides a fairly complete envir<strong>on</strong>ment <str<strong>on</strong>g>for</str<strong>on</strong>g> any small or embedded system.NoteIn order to keep the distributi<strong>on</strong> small, <strong>TS</strong>-<str<strong>on</strong>g>Linux</str<strong>on</strong>g> has small support <str<strong>on</strong>g>for</str<strong>on</strong>g> the GNUtools. There<str<strong>on</strong>g>for</str<strong>on</strong>g>e, a C/C++ development envir<strong>on</strong>ment is not installed. If the user'smain target is development, the Debian <str<strong>on</strong>g>Linux</str<strong>on</strong>g> distributi<strong>on</strong> is highly recommendedA cross-compile envir<strong>on</strong>ment based <strong>on</strong> a PC is also an opti<strong>on</strong> <str<strong>on</strong>g>for</str<strong>on</strong>g> development.3.3 Debian <str<strong>on</strong>g>Linux</str<strong>on</strong>g>The Debian is a full-featured and powerful <str<strong>on</strong>g>Linux</str<strong>on</strong>g> distributi<strong>on</strong> mostly based up<strong>on</strong> GNUtools. It includes everything necessary to easily run <str<strong>on</strong>g>Linux</str<strong>on</strong>g> and develop <str<strong>on</strong>g>Linux</str<strong>on</strong>g> applicati<strong>on</strong>s.In additi<strong>on</strong>, various original <str<strong>on</strong>g>Linux</str<strong>on</strong>g> utilities and installati<strong>on</strong> tools are available to makesystem utilizati<strong>on</strong> and packages updating easy. The Debian <str<strong>on</strong>g>Linux</str<strong>on</strong>g> is ported to <str<strong>on</strong>g>ARM</str<strong>on</strong>g>processors and runs with <strong>TS</strong>-<strong>72XX</strong> SBCs. With Debian <str<strong>on</strong>g>Linux</str<strong>on</strong>g>, experienced <str<strong>on</strong>g>Linux</str<strong>on</strong>g> usershave a complete <str<strong>on</strong>g>Linux</str<strong>on</strong>g> system to take full advantage of their knowledge, and new usershave an easy envir<strong>on</strong>ment to get started with the <str<strong>on</strong>g>Linux</str<strong>on</strong>g> world.<strong>Technologic</strong> <strong>Systems</strong> makes use of Debian <str<strong>on</strong>g>Linux</str<strong>on</strong>g> as a development distributi<strong>on</strong>. Forexample, the 256 MB Compact Flash card is pre-installed with Debian. Al<strong>on</strong>g with thebasic core utilities, some developer tools have been installed, including a native arm gcctoolchain, <str<strong>on</strong>g>for</str<strong>on</strong>g> C/C++ applicati<strong>on</strong> development. In additi<strong>on</strong>, the Perl interpreter and a widevariety of network services are available, such as FTP, Telnet, SSH and Apache HTTPservers. One can also use the Debian <str<strong>on</strong>g>Linux</str<strong>on</strong>g> distributi<strong>on</strong> via an NFS root file system or anUSB flash memory device.apt-getWhen using the Debian <str<strong>on</strong>g>Linux</str<strong>on</strong>g> file system, adding new packages and removing undesired<strong>on</strong>es is d<strong>on</strong>e all through Debian's package management. “apt“, “dpkg“, all behave asexpected. With Debian, <strong>on</strong>e can easily install and remove software packages. For a quickdem<strong>on</strong>strati<strong>on</strong> of how easy it is to remove and install programs with Debian, try thefollowing commands:apt-get install hexedit© Jan, 2012 www.embedded<str<strong>on</strong>g>ARM</str<strong>on</strong>g>.com 12
LINUX FOR <str<strong>on</strong>g>ARM</str<strong>on</strong>g> ON <strong>TS</strong>-<strong>72XX</strong>LINUX FOR <str<strong>on</strong>g>ARM</str<strong>on</strong>g> OPERATING SYSTEM SUPPORThexedit /etc/passwd^C (hit CTRL+C to safely exit)apt-get remove hexeditapt-get install installs a package name, while apt-get remove removes the namedpackage. Visit the Debian home-page <str<strong>on</strong>g>for</str<strong>on</strong>g> further in<str<strong>on</strong>g>for</str<strong>on</strong>g>mati<strong>on</strong>, since a full in-depthdiscussi<strong>on</strong> <strong>on</strong> Debian is outside the scope of this document.✔http://www.debian.orgNote<strong>Technologic</strong> <strong>Systems</strong> supports newer versi<strong>on</strong>s of the Debian <str<strong>on</strong>g>Linux</str<strong>on</strong>g> distributi<strong>on</strong>,such as the 3.0, named Sarge. For newer Debian <str<strong>on</strong>g>Linux</str<strong>on</strong>g> support with your <strong>TS</strong>-<strong>72XX</strong> SBC, c<strong>on</strong>tact <strong>Technologic</strong> <strong>Systems</strong>.3.4 <strong>TS</strong>-<str<strong>on</strong>g>ARM</str<strong>on</strong>g> <str<strong>on</strong>g>Linux</str<strong>on</strong>g> CDThe <strong>TS</strong>-<str<strong>on</strong>g>ARM</str<strong>on</strong>g> <str<strong>on</strong>g>Linux</str<strong>on</strong>g> CD is an useful resource <str<strong>on</strong>g>for</str<strong>on</strong>g> <strong>TS</strong>-<strong>72XX</strong> users and developers. Itc<strong>on</strong>tains the supporting files <str<strong>on</strong>g>for</str<strong>on</strong>g> <str<strong>on</strong>g>Linux</str<strong>on</strong>g>, including the <strong>TS</strong>-Kernel source code, sampleapplicati<strong>on</strong>s, cross toolchain tarballs, <str<strong>on</strong>g>Linux</str<strong>on</strong>g> distributi<strong>on</strong>s, manuals, and other <str<strong>on</strong>g>Linux</str<strong>on</strong>g> utilitiesand binaries of interest. The files menti<strong>on</strong>ed <strong>on</strong> the <str<strong>on</strong>g>Linux</str<strong>on</strong>g> <str<strong>on</strong>g>for</str<strong>on</strong>g> <str<strong>on</strong>g>ARM</str<strong>on</strong>g> <strong>User's</strong> <strong>Guide</strong> are allincluded <strong>on</strong> this CD. The following is the directory structure of the CD:✔✔✔✔✔✔✔✔✔✔✔✔✔✔✔root dir: <str<strong>on</strong>g>Linux</str<strong>on</strong>g> <str<strong>on</strong>g>for</str<strong>on</strong>g> <str<strong>on</strong>g>ARM</str<strong>on</strong>g> <strong>on</strong> <strong>TS</strong>-<strong>72XX</strong> manuals in PDF <str<strong>on</strong>g>for</str<strong>on</strong>g>mat/binaries: various binary packages <str<strong>on</strong>g>for</str<strong>on</strong>g> <str<strong>on</strong>g>ARM</str<strong>on</strong>g>, including Java, QtEmbedded, RTAI, etc/binaries/ts-bitstreams: default <strong>TS</strong>-Bitstreams <str<strong>on</strong>g>for</str<strong>on</strong>g> FPGAs/binaries/ts-images: <str<strong>on</strong>g>ARM</str<strong>on</strong>g> binaries of file systems images and other/binaries/ts-kernels: compiled <strong>TS</strong>-Kernels <str<strong>on</strong>g>for</str<strong>on</strong>g> <strong>TS</strong>-<strong>72XX</strong> SBCs/binaries/ts-modules: other drivers (<str<strong>on</strong>g>Linux</str<strong>on</strong>g> Kernel modules) <str<strong>on</strong>g>for</str<strong>on</strong>g> <strong>TS</strong>-<strong>72XX</strong> SBCs/binaries/ts-scripts: some <str<strong>on</strong>g>Linux</str<strong>on</strong>g> shell scripts used with the <strong>TS</strong>-<strong>72XX</strong> SBCs/binaries/ts-utils: some useful utilities distributed within a <str<strong>on</strong>g>Linux</str<strong>on</strong>g> distributi<strong>on</strong>/cross-toolchains: pre-compiled GNU toolchain binaries <str<strong>on</strong>g>for</str<strong>on</strong>g> cross plat<str<strong>on</strong>g>for</str<strong>on</strong>g>mdevelopment with C/C++/distributi<strong>on</strong>s: binaries of linux distributi<strong>on</strong>s ready to install and run <strong>on</strong> <strong>TS</strong>-<strong>72XX</strong> SBCs/docs: various documents related to <str<strong>on</strong>g>Linux</str<strong>on</strong>g> <str<strong>on</strong>g>for</str<strong>on</strong>g> <str<strong>on</strong>g>ARM</str<strong>on</strong>g> <strong>on</strong> <strong>TS</strong>-<strong>72XX</strong> series, including datasheets and technical articles/manuals: all the hardware manuals <str<strong>on</strong>g>for</str<strong>on</strong>g> the <strong>TS</strong>-<strong>72XX</strong> series, including schematics/pictures: <strong>TS</strong>-<strong>72XX</strong> product views and related pictures/samples: source code and <str<strong>on</strong>g>ARM</str<strong>on</strong>g> binaries of some samples ready to compile and run/sources: source code of <strong>TS</strong>-Kernel and other related <str<strong>on</strong>g>Linux</str<strong>on</strong>g> <str<strong>on</strong>g>for</str<strong>on</strong>g> <str<strong>on</strong>g>ARM</str<strong>on</strong>g> packagesThe <strong>TS</strong>-<str<strong>on</strong>g>ARM</str<strong>on</strong>g> <str<strong>on</strong>g>Linux</str<strong>on</strong>g> CD is included in the <strong>TS</strong>-<str<strong>on</strong>g>ARM</str<strong>on</strong>g> Development Kit and also can bedownloaded through <strong>Technologic</strong> <strong>Systems</strong> website at:✔http://www.embeddedarm.com/linux/<str<strong>on</strong>g>ARM</str<strong>on</strong>g>.htmNoteNotice that the FTP server is frequently updated and will always c<strong>on</strong>tain the latestversi<strong>on</strong> of the <strong>TS</strong>-<str<strong>on</strong>g>ARM</str<strong>on</strong>g> <str<strong>on</strong>g>Linux</str<strong>on</strong>g> CD c<strong>on</strong>tent. ftp://ftp.embeddedarm.com© Jan, 2012 www.embedded<str<strong>on</strong>g>ARM</str<strong>on</strong>g>.com 13
LINUX FOR <str<strong>on</strong>g>ARM</str<strong>on</strong>g> ON <strong>TS</strong>-<strong>72XX</strong>LINUX FOR <str<strong>on</strong>g>ARM</str<strong>on</strong>g> OPERATING SYSTEM SUPPORT3.5 <strong>TS</strong>-<str<strong>on</strong>g>ARM</str<strong>on</strong>g> Development KitThe <strong>TS</strong>-<str<strong>on</strong>g>ARM</str<strong>on</strong>g> Development Kit <str<strong>on</strong>g>for</str<strong>on</strong>g> the <strong>TS</strong>-7200 Single Board Computer includes allequipment necessary to boot into the operating system of choice and start working. Thedevelopment kit is highly recommended <str<strong>on</strong>g>for</str<strong>on</strong>g> a quick start <strong>on</strong> applicati<strong>on</strong> development.The <strong>TS</strong>-<str<strong>on</strong>g>ARM</str<strong>on</strong>g> Development Kit c<strong>on</strong>tains a 256 or 512 MB Flash drive (Compact Flash <str<strong>on</strong>g>for</str<strong>on</strong>g>7200, USB <str<strong>on</strong>g>for</str<strong>on</strong>g> 7250 and 7260) which includes:✔✔✔✔✔a self-hosting <str<strong>on</strong>g>ARM</str<strong>on</strong>g> installati<strong>on</strong> of the Debian <str<strong>on</strong>g>Linux</str<strong>on</strong>g> 2.0 distributi<strong>on</strong> compiled <str<strong>on</strong>g>for</str<strong>on</strong>g> <str<strong>on</strong>g>ARM</str<strong>on</strong>g>gcc 2.95.4 and gcc 3.0 compiler with full tool-chainBuild tools and source <str<strong>on</strong>g>for</str<strong>on</strong>g> JFFS/YAFFS file system in <strong>on</strong>-board NAND Flash.Hardware test routines source code and other example source codeDebian package system: apt-get, tasksel, dselectThe development kit additi<strong>on</strong>ally includes:✔✔✔✔✔✔✔USB Compact Flash reader <str<strong>on</strong>g>for</str<strong>on</strong>g> <strong>TS</strong>-72005 VDC regulated power supply (internati<strong>on</strong>al versi<strong>on</strong>s available)NULL modem cableAdapter cable from 10-pin header to DB9Various cables <str<strong>on</strong>g>for</str<strong>on</strong>g> c<strong>on</strong>necti<strong>on</strong> DIO, LCD, Keypad, etc.Development CD with complete <strong>TS</strong>-Kernel source, manuals, example code, etc.Printed supporting documentati<strong>on</strong> <str<strong>on</strong>g>for</str<strong>on</strong>g> <strong>TS</strong>-<strong>72XX</strong>'s Hardware, <str<strong>on</strong>g>Linux</str<strong>on</strong>g> <str<strong>on</strong>g>for</str<strong>on</strong>g> <str<strong>on</strong>g>ARM</str<strong>on</strong>g> andDevelopment Kit.NoteSingle Board Computer is not included <strong>on</strong> the Development Kit (sold separately).© Jan, 2012 www.embedded<str<strong>on</strong>g>ARM</str<strong>on</strong>g>.com 14
LINUX FOR <str<strong>on</strong>g>ARM</str<strong>on</strong>g> ON <strong>TS</strong>-<strong>72XX</strong>CONFIGURING AND USING LINUX4 CONFIGURING AND USING LINUXThis secti<strong>on</strong> provides basic and general in<str<strong>on</strong>g>for</str<strong>on</strong>g>mati<strong>on</strong> <strong>on</strong> how to c<strong>on</strong>figure and use <str<strong>on</strong>g>Linux</str<strong>on</strong>g> <str<strong>on</strong>g>for</str<strong>on</strong>g><str<strong>on</strong>g>ARM</str<strong>on</strong>g> <strong>on</strong> <strong>TS</strong>-<strong>72XX</strong> SBCs. The following in<str<strong>on</strong>g>for</str<strong>on</strong>g>mati<strong>on</strong> is intended to be useful <str<strong>on</strong>g>for</str<strong>on</strong>g> both <strong>TS</strong>-<str<strong>on</strong>g>Linux</str<strong>on</strong>g> and Debian <str<strong>on</strong>g>Linux</str<strong>on</strong>g> users. However, some of the menti<strong>on</strong>ed utilities may not beavailable in the compact <strong>TS</strong>-<str<strong>on</strong>g>Linux</str<strong>on</strong>g> distributi<strong>on</strong>.This secti<strong>on</strong> is not intended to be a complete <str<strong>on</strong>g>Linux</str<strong>on</strong>g> Utilities tutorial. For furtherin<str<strong>on</strong>g>for</str<strong>on</strong>g>mati<strong>on</strong>, find the proper <str<strong>on</strong>g>Linux</str<strong>on</strong>g> documentati<strong>on</strong> widely available <strong>on</strong> the Internet.4.1 Basic CommandsSome very basic commands <str<strong>on</strong>g>for</str<strong>on</strong>g> <strong>on</strong>e beginner user to start using <str<strong>on</strong>g>Linux</str<strong>on</strong>g> are:✔✔✔✔✔✔pwd: in<str<strong>on</strong>g>for</str<strong>on</strong>g>ms the current directoryls: lists current directory c<strong>on</strong>tentscd: changes directoryman: accesses the system's manual pages of a given commandcat: displays the entire c<strong>on</strong>tent of a given filevi: <str<strong>on</strong>g>Linux</str<strong>on</strong>g> most comm<strong>on</strong> file editor (reading further documentati<strong>on</strong> is recommended)The most comm<strong>on</strong> file handling commands are “cp”, “mv”, “rm”, “mkdir”. Help in<str<strong>on</strong>g>for</str<strong>on</strong>g>mati<strong>on</strong>is provided by supplying “--help” to any given command, <str<strong>on</strong>g>for</str<strong>on</strong>g> example “cp –help”.4.2 Users and PasswordsThe <strong>TS</strong>-<strong>72XX</strong> SBCs come by default with the root user c<strong>on</strong>figured with no password. Noadditi<strong>on</strong>al user is added. All the existing users and groups can be viewed in the“/etc/passwd” and “/etc/group” files. The following utilities can be used <str<strong>on</strong>g>for</str<strong>on</strong>g> users andgroups management:✔✔✔✔✔passwd: changes password <str<strong>on</strong>g>for</str<strong>on</strong>g> the logged usergroupadd: add a group of usersuseradd: add a userchmod: change access permissi<strong>on</strong>s <str<strong>on</strong>g>for</str<strong>on</strong>g> files and directorieschown: change owner of files4.3 System Log and In<str<strong>on</strong>g>for</str<strong>on</strong>g>mati<strong>on</strong>Generally, all the log files of the <str<strong>on</strong>g>Linux</str<strong>on</strong>g> OS are stored <strong>on</strong> the “/var/log/” directory. There<str<strong>on</strong>g>for</str<strong>on</strong>g>e,important system messages such as the kernel boot or some applicati<strong>on</strong>s (HTTP server)outputs can be viewed by inspecting the log files. In additi<strong>on</strong>, <strong>on</strong>e can make use of the“dmesg” command to get the latest kernel messages. This might be useful whendeveloping device drivers or watching kernel status.Further utilities provide useful <str<strong>on</strong>g>Linux</str<strong>on</strong>g> envir<strong>on</strong>ment in<str<strong>on</strong>g>for</str<strong>on</strong>g>mati<strong>on</strong>, such as:✔✔✔✔✔uname: prints system in<str<strong>on</strong>g>for</str<strong>on</strong>g>mati<strong>on</strong> such as kernel versi<strong>on</strong> and system datehostname: prints the hostname of the systemprintenv: prints the user's envir<strong>on</strong>ment variablewhoami: prints the current logged user namewho: prints the current logged usersFurther <str<strong>on</strong>g>Linux</str<strong>on</strong>g> system in<str<strong>on</strong>g>for</str<strong>on</strong>g>mati<strong>on</strong> of the currently running processes and running Kernelmay be obtained through the files at the /proc virtual file system.© Jan, 2012 www.embedded<str<strong>on</strong>g>ARM</str<strong>on</strong>g>.com 15
LINUX FOR <str<strong>on</strong>g>ARM</str<strong>on</strong>g> ON <strong>TS</strong>-<strong>72XX</strong>CONFIGURING AND USING LINUX4.4 Initializati<strong>on</strong> ScriptsAfter the “exec” command <strong>on</strong> RedBoot, the Kernel boots and drivers are loaded. Then, theinitializati<strong>on</strong> process reads the file “/etc/inittab”. The inittab file will call“/etc/rc.d/rcS.sysinit” as part of the system initializati<strong>on</strong>. The run level then defaults to 3,which will run the “/etc/rcS” script and call all the scripts linked in the “/etc/rc3.d/” directoryin numerical order. For example, the following are the initializati<strong>on</strong> scripts <str<strong>on</strong>g>for</str<strong>on</strong>g> run level 3found at <strong>TS</strong>-<str<strong>on</strong>g>Linux</str<strong>on</strong>g>:/etc/rc.d/rc3.d# lsS10Network S11portmap S20inetd S30telnetd S40apacheChanging the run level or re-invoking the initializati<strong>on</strong> scripts is possible through the “init”command. A “halt” or “reboot” command will change the run level to 0 or 6 and executethe “/etc/rc0.d” scripts or “etc/rc6.d” scripts respectively.4.5 Network SetupThe main utilities <str<strong>on</strong>g>for</str<strong>on</strong>g> network c<strong>on</strong>figurati<strong>on</strong> under <str<strong>on</strong>g>Linux</str<strong>on</strong>g> are:✔✔✔ifc<strong>on</strong>fig: prints network settings and c<strong>on</strong>figures ethernet interfacesifup: turns given network interface upifdown: turns given network interface downEntering “ifc<strong>on</strong>fig” shows the current ethernet settings. These utilities require a networkdevice as parameter. On <str<strong>on</strong>g>Linux</str<strong>on</strong>g>, the ethernet devices are generally named eth0, eth1, etc.There<str<strong>on</strong>g>for</str<strong>on</strong>g>e, the command “ifup eth0” or “ifc<strong>on</strong>fig eth0 up” brings up the <strong>on</strong>-board ethernetinterface <strong>on</strong> <strong>TS</strong>-<strong>72XX</strong> SBCs.To c<strong>on</strong>figure the network, <strong>on</strong>e needs to manage the proper c<strong>on</strong>figurati<strong>on</strong> files. On <strong>TS</strong>-<str<strong>on</strong>g>Linux</str<strong>on</strong>g> systems, these files are located in the “/etc/sysc<strong>on</strong>fig/” directory. “/etc/network/” isused <str<strong>on</strong>g>for</str<strong>on</strong>g> Debian <str<strong>on</strong>g>Linux</str<strong>on</strong>g>. By default, <str<strong>on</strong>g>Linux</str<strong>on</strong>g> systems <strong>on</strong> <strong>TS</strong>-<strong>72XX</strong> boards are c<strong>on</strong>figured toassign the IP 192.168.0.50 to the <strong>on</strong>-board ethernet interface.Setting Up the networking with <strong>TS</strong>-<str<strong>on</strong>g>Linux</str<strong>on</strong>g>To c<strong>on</strong>figure the network when booting to the <strong>TS</strong>-<str<strong>on</strong>g>Linux</str<strong>on</strong>g> image <strong>on</strong> the flash chip, the files in“/etc/sysc<strong>on</strong>fig/” must be edited. Network interfaces are c<strong>on</strong>figured <strong>on</strong> a file per interfacebasis. The first Ethernet device, eth0, is c<strong>on</strong>trolled by the file “/etc/sysc<strong>on</strong>fig/ifcfg-eth0”. Anexample of “ifcfg-eth0” is shown below:DEVICE=eth0 #Name of ethernet interfaceIPADDR=192.168.0.50 #IP address of this ethernet interfaceNETMASK=255.255.255.0 #Used with NETWORK to determine local IPsNETWORK=192.168.0.0 #Used with NETMASK to determine local IPsBROADCAST=192.168.0.255 #Broadcast IP <str<strong>on</strong>g>for</str<strong>on</strong>g> system wide messagesBOOTPROTO=static #Static IP (change “static” to “DHCP”)ENABLE=yes #Load device <strong>on</strong> bootThe TCP/IP network settings are c<strong>on</strong>figured in the file ‘/etc/sysc<strong>on</strong>fig/network_cfg’, here isa listing:NETWORKING=yes #Enable networking <strong>on</strong> startupGATEWAY=“192.168.0.1” #Gateway <str<strong>on</strong>g>for</str<strong>on</strong>g> internet accessGW_DEV=eth0 #Default gatewayHOSTNAME=ts7200 #Host name of this computerBOOTPROTO=noFORWARD_IPV4=noDEFRAG_IPV4=noThe TCP/IP name resoluti<strong>on</strong> server is c<strong>on</strong>figured in ‘/etc/resolv.c<strong>on</strong>f’. Here is a listing:© Jan, 2012 www.embedded<str<strong>on</strong>g>ARM</str<strong>on</strong>g>.com 16
LINUX FOR <str<strong>on</strong>g>ARM</str<strong>on</strong>g> ON <strong>TS</strong>-<strong>72XX</strong>CONFIGURING AND USING LINUXNameserver 192.168.0.1 #Name server <str<strong>on</strong>g>for</str<strong>on</strong>g> domain name lookupsThose lines starting with a # symbol are comments. As the above example shows, eth0 isgiven the static address of 192.168.0.50. If <strong>on</strong>e wishes eth0 to obtain its IP from a DHCPserver, then change the line BOOTPROTO=static to BOOTPROTO=dhcpSetting Up the networking with DebianTo c<strong>on</strong>figure the network interfaces when booting into Debian <str<strong>on</strong>g>Linux</str<strong>on</strong>g>, edit the file“/etc/network/interfaces”. A typical interfaces file would c<strong>on</strong>tain the following:auto lo eth0# The loopback interfaceiface lo inet loopback# The first network cardauto eth0#iface eth0 inet dhcpiface eth0 inet staticaddress 192.168.0.50netmask 255.255.255.0gateway 192.168.0.1Those lines starting with a # symbol are comments. The line “auto lo eth0” means both theloopback interface and the first ethernet interface will be started automatically by theDebian networking scripts. The above example shows that eth0 would be assigned thestatic address of 192.168.0.50, using 192.168.0.1 as the default gateway. If <strong>on</strong>e was tocomment out those lines, and then uncomment the line iface eth0 inet dhcp, then eth0would use a dhcp client to obtain it's IP and other relevant network in<str<strong>on</strong>g>for</str<strong>on</strong>g>mati<strong>on</strong>.4.6 Network ServicesNoteIn order to test the default network settings with both <strong>TS</strong>-<str<strong>on</strong>g>Linux</str<strong>on</strong>g> and Debian <str<strong>on</strong>g>Linux</str<strong>on</strong>g>,open a web browser and use the embedded Apache web server by entering thedefault IP 192.168.0.50, or simple “ping” or “telnet” to 192.168.0.50.<str<strong>on</strong>g>Linux</str<strong>on</strong>g> is a well known OS suitable <str<strong>on</strong>g>for</str<strong>on</strong>g> network applicati<strong>on</strong>s. As such, <str<strong>on</strong>g>Linux</str<strong>on</strong>g> offers a widerange of networking services which fully integrates the embedded systems to the externalworld and provides c<strong>on</strong>nectivity opti<strong>on</strong>s <str<strong>on</strong>g>for</str<strong>on</strong>g> the end-users. <strong>TS</strong>-<str<strong>on</strong>g>Linux</str<strong>on</strong>g> and specially Debian<str<strong>on</strong>g>Linux</str<strong>on</strong>g> include soluti<strong>on</strong>s <str<strong>on</strong>g>for</str<strong>on</strong>g> the main network services, including Telnet (telnet utility),HTTP, FTP (ftp utility), SSH (ssh/scp utilities), NFS and Mail.Some of these services can be started, restarted or stopped by management scriptslocated at the “/etc/init.d” directory. For example, the following command will restart theapache server:/etc/init.d/apache restartAlso, the “/etc/inet.c<strong>on</strong>f” file is used to c<strong>on</strong>figure the initializati<strong>on</strong> and parameters of othernetwork services.4.7 Setting Data and TimeThe <str<strong>on</strong>g>Linux</str<strong>on</strong>g> Kernel keeps the date and time of the day internally. In order to synchr<strong>on</strong>ize theKernel/System time with an official and precise time source, <strong>on</strong>e can use either the RealTime Clock (RTC) hardware or an NTP time server. System clock synchr<strong>on</strong>izati<strong>on</strong> can bed<strong>on</strong>e during or after boot time with the help of the following commands:✔✔✔date: prints or sets the system date and timentpdate: sets the system time according to a remote time serverhwclock: sets the system time according to the RTC (if available)© Jan, 2012 www.embedded<str<strong>on</strong>g>ARM</str<strong>on</strong>g>.com 17
LINUX FOR <str<strong>on</strong>g>ARM</str<strong>on</strong>g> ON <strong>TS</strong>-<strong>72XX</strong>CONFIGURING AND USING LINUX✔cal: displays a calendarOn the Debian distributi<strong>on</strong>, the “/etc/init.d/hwclockfirst.sh” and “/etc/init.d/ntpdate” scriptsprovide system clock synchr<strong>on</strong>izati<strong>on</strong> services.4.8 C<strong>on</strong>figuring and loading kernel modulesKernel modules are binaries that can be inserted into the <str<strong>on</strong>g>Linux</str<strong>on</strong>g> Kernel during executi<strong>on</strong>time. It is useful in order to load needed kernel features and services <strong>on</strong> demand. Forexample, <strong>on</strong>e can turn <strong>on</strong> the support <str<strong>on</strong>g>for</str<strong>on</strong>g> a USB flash memory card by inserting the properUSB modules into the kernel. The main utilities used to handle kernel modules are:✔✔✔✔4.9 Memorylsmod: lists the loaded kernel modulesinsmod: insert a given module into the kernelmodprobe: insert a given module and its dependencies into the kernelmodinfo: provides in<str<strong>on</strong>g>for</str<strong>on</strong>g>mati<strong>on</strong> about a kernel moduleThere are some useful utilities to check RAM memory and storage memory status:✔✔✔✔df: shows storage memory usagedu: shows the total size of a given locati<strong>on</strong>free: shows RAM memory usagetop: provides running processes and RAM memory utilizati<strong>on</strong> in<str<strong>on</strong>g>for</str<strong>on</strong>g>mati<strong>on</strong>4.10 <strong>TS</strong>-UtilitiesBesides the standard <str<strong>on</strong>g>Linux</str<strong>on</strong>g> set of utilities, the <strong>TS</strong>-<str<strong>on</strong>g>Linux</str<strong>on</strong>g> and Debian <str<strong>on</strong>g>Linux</str<strong>on</strong>g> distributi<strong>on</strong>sinclude <strong>Technologic</strong> <strong>Systems</strong> proprietary utilities which per<str<strong>on</strong>g>for</str<strong>on</strong>g>m <strong>TS</strong>-<strong>72XX</strong> hardwarespecific and auxiliary operati<strong>on</strong>s. Some of the <strong>TS</strong>-Utilities are:✔✔✔✔✔✔✔✔✔✔✔✔✔✔✔✔✔✔bootload: <str<strong>on</strong>g>Linux</str<strong>on</strong>g>-based bootloader that enables booting of another Kernelbusybox: compiled busybox <str<strong>on</strong>g>for</str<strong>on</strong>g> <str<strong>on</strong>g>ARM</str<strong>on</strong>g> with lots of <str<strong>on</strong>g>Linux</str<strong>on</strong>g> utilitiespeek8: reads 1 byte from the given memory locati<strong>on</strong>poke8: writes the given 1 byte to the given memory locati<strong>on</strong>peek16: reads 2 bytes from the given memory locati<strong>on</strong>poke16: writes the given 2 bytes to the given memory locati<strong>on</strong>peek32: reads 4 bytes from the given memory locati<strong>on</strong>poke32: writes the given 4 bytes to the given memory locati<strong>on</strong>ts7xxxctl: c<strong>on</strong>figures the hardware and turns <strong>on</strong>/off parts of the <strong>TS</strong>-<strong>72XX</strong> and EP9301jbi: programs the <strong>on</strong>-board CPLD through the JTAG interface using the DIO2 headerjp: returns status of a given jumperhammer: blinks the <strong>on</strong>-board red ledload_7kv: loads a hardware core (bitstream file) to the <strong>TS</strong>-7KV FPGAload_7300: loads a hardware core (bitstream file) to the <strong>TS</strong>-7300 FPGAbitblt-demo-ts7kv: per<str<strong>on</strong>g>for</str<strong>on</strong>g>ms bit blitting demo operati<strong>on</strong>s using the <strong>TS</strong>-7KV videobitblt-demo-ts7300: per<str<strong>on</strong>g>for</str<strong>on</strong>g>ms bit blitting demo operati<strong>on</strong>s using the <strong>TS</strong>-7300 videotsbootrom-update: updates the EEPROM with various bootroms opti<strong>on</strong>ssdlock: handles SD Card security issues as password lock and write-protected mode© Jan, 2012 www.embedded<str<strong>on</strong>g>ARM</str<strong>on</strong>g>.com 18
LINUX FOR <str<strong>on</strong>g>ARM</str<strong>on</strong>g> ON <strong>TS</strong>-<strong>72XX</strong>CONFIGURING AND USING LINUXbootload: <str<strong>on</strong>g>Linux</str<strong>on</strong>g> Bootloader<strong>Technologic</strong> <strong>Systems</strong> has developed a <str<strong>on</strong>g>Linux</str<strong>on</strong>g> applicati<strong>on</strong> "bootload" that allows arbitrarybooting of <str<strong>on</strong>g>Linux</str<strong>on</strong>g> and other OS kernels within <str<strong>on</strong>g>Linux</str<strong>on</strong>g> itself. The "bootload" program allows<strong>on</strong>e to use the full facilities of <str<strong>on</strong>g>Linux</str<strong>on</strong>g> to retreive kernel files. Doing so also allows the use ofstandard shell scripts <str<strong>on</strong>g>for</str<strong>on</strong>g> the programmatic selecti<strong>on</strong> of appropriate kernels, <str<strong>on</strong>g>Linux</str<strong>on</strong>g> initrd's,and kernel command line arguments <str<strong>on</strong>g>for</str<strong>on</strong>g> maximum flexibility.The “bootload” program is mostly implemented as a <str<strong>on</strong>g>Linux</str<strong>on</strong>g> user-space program using C.However, it requires a kernel module "bootloader.o" to be installed using "insmod" prior toinvocati<strong>on</strong>. No kernel patches or in-source modificati<strong>on</strong>s are required though:insmod -f bootloader.oThe <strong>Technologic</strong> <strong>Systems</strong>' versi<strong>on</strong> of <str<strong>on</strong>g>Linux</str<strong>on</strong>g> uses a special device driver at/dev/misc/bootloader to accomodate the hooks needed by the "bootload" program to allow<str<strong>on</strong>g>Linux</str<strong>on</strong>g> to act as a bootloader and boot other <str<strong>on</strong>g>Linux</str<strong>on</strong>g> kernels and operating systems.Command usage in<str<strong>on</strong>g>for</str<strong>on</strong>g>mati<strong>on</strong> <str<strong>on</strong>g>for</str<strong>on</strong>g> the “bootload” program follows:$ bootload –helpUsage: bootload [OPTION] FILE<str<strong>on</strong>g>Linux</str<strong>on</strong>g> to <str<strong>on</strong>g>Linux</str<strong>on</strong>g> bootloader - (re)boots a <strong>TS</strong>-7xxx board to anotherkernel, OSimage, or raw executable by replacing the running <str<strong>on</strong>g>Linux</str<strong>on</strong>g> kernel.General opti<strong>on</strong>s:-c, --cmdline=CMD Use CMD as the <str<strong>on</strong>g>Linux</str<strong>on</strong>g> kernel boot args-r, --initrd=FILE Use FILE <str<strong>on</strong>g>for</str<strong>on</strong>g> <str<strong>on</strong>g>Linux</str<strong>on</strong>g> initial ramdisk-s, --initrdsz=SZ Only read SZ bytes from the initrd file-b, --base=ADDR Load the image at ADDR instead of 0x218000--versi<strong>on</strong> Print versi<strong>on</strong> and copyright in<str<strong>on</strong>g>for</str<strong>on</strong>g>mati<strong>on</strong>-h, --help This helpWhen FILE is -, reads from standard input.Report bugs to Some "<strong>on</strong>e-line" examples of usage:# Boot a compressed kernel image:bunzip -c vmlinux.bin.bz2 | bootload -# Reboot a kernel, but pass the 1MB running ramdisk to the new:mount -o remount,ro /dev/rd/0 / bootload -c \"c<strong>on</strong>sole=ttyAM0,115200 root=/dev/ram0" -r /dev/rd/0 -s 0x100000# Boot <strong>on</strong>e of 2 kernels based <strong>on</strong> the state of DIO line #7:if dio_data_get 7; then bootload vmlinux.backup.bin; else \bootload vmlinux.bin; fitsbootrom-update: Changing/Updating the <strong>TS</strong>-BOOTROMThe tsbootrom-update is a <str<strong>on</strong>g>Linux</str<strong>on</strong>g> utility used to update the <strong>on</strong>board EEPROM bootupfirmware <strong>on</strong> the, allowing the board to per<str<strong>on</strong>g>for</str<strong>on</strong>g>m different types of boot processes. Forexample, with the <strong>TS</strong>-7400, should you wish to actually load the kernel and initrd from anSD card, the default <strong>TS</strong>-FLASHBOOT bootup program, which boots from NAND flash,must be replaced with <strong>TS</strong>-SDBOOT using the tsbootrom-update utility. Usage andcommand line help <str<strong>on</strong>g>for</str<strong>on</strong>g> this command follows:Usage: tsbootrom-update [OPTION] ...Updates <strong>TS</strong>-BOOTROM bootup program stored <strong>on</strong> EEPROM© Jan, 2012 www.embedded<str<strong>on</strong>g>ARM</str<strong>on</strong>g>.com 19
LINUX FOR <str<strong>on</strong>g>ARM</str<strong>on</strong>g> ON <strong>TS</strong>-<strong>72XX</strong>CONFIGURING AND USING LINUXGeneral opti<strong>on</strong>s:-n Do not actually write EEPROM-s, --sdbootWrite <strong>TS</strong>-SDBOOT bootup program-f, --flashboot Write <strong>TS</strong>-FLASHBOOT bootup program-u, --burninboot Write <strong>TS</strong>-BURNINBOOT bootup program-p, --spiflashboot Write <strong>TS</strong>-SPIFLASHBOOT bootup program-b, --blastboard Write to blast board EEPROM instead of SBC-h, --helpThis helpEEPROM security block opti<strong>on</strong>s:-m, --mac=XWrite X as ethernet MAC address-l, --verifylen=N Checksum includes first N 512 byte sectors-d, --device=FILE Use FILE to re-compute checksum value-V, --verifydat=N Use N as pre-computed checksum value-L, --lockdat=X Use X <str<strong>on</strong>g>for</str<strong>on</strong>g> the SD unlock data token fromprevious "sdlock --set" command-k, --verifylock Do not boot to an unlocked SD card-c, --noc<strong>on</strong>sole Disable serial c<strong>on</strong>sole bootup messagesGet MAC address from /var/ts-<strong>TS</strong>-producti<strong>on</strong> specific opti<strong>on</strong>s:-a, --alloc-macproducti<strong>on</strong>/macThe <strong>TS</strong> bootup programs will by default print a banner message <strong>on</strong> bootup to the serialport displaying its build date, etc. If you wish to use all serial ports <str<strong>on</strong>g>for</str<strong>on</strong>g> your applicati<strong>on</strong> anddo not wish to have a serial c<strong>on</strong>sole, the tsbootrom-update program can be used tosilence early bootstrap banner messages so as to not c<strong>on</strong>fuse any potential externaldevice UART#0 may be c<strong>on</strong>nected to.Other bootstrap programs are available <str<strong>on</strong>g>for</str<strong>on</strong>g>-pay from <strong>Technologic</strong> <strong>Systems</strong> should youneed them and custom <strong>on</strong>es may be designed <str<strong>on</strong>g>for</str<strong>on</strong>g> volume customers. For instance, the<strong>TS</strong>-ETHBOOT bootup program may be used to completely boot <str<strong>on</strong>g>Linux</str<strong>on</strong>g> from the networkwithout NAND flash or SD card installed.sdlock: SD flash card security features<strong>Technologic</strong> <strong>Systems</strong> provides a "sdlock" <str<strong>on</strong>g>Linux</str<strong>on</strong>g> command which can be used tomanipulate SD card hardware-en<str<strong>on</strong>g>for</str<strong>on</strong>g>ced password locks and set the card's permanentwrite-protect feature. Using a password protected SD card is a great way to ensuresoftware security and/or to make sure your <strong>TS</strong>-<strong>72XX</strong> SBC based product cannot be usedin an unintended matter <strong>on</strong>ce deployed.Usage: sdlock [OPTION] ...C<strong>on</strong>trols SD card lock and permanent write-protect features.General opti<strong>on</strong>s:-p, --password=PASS-c, --clear-s, --set-u, --unlock-e, --erase-w, --wprot-h, --helpUse PASS as passwordRemove password lockSet password lockUnlock temporarilyErase entire device (clears password)Enable permanent write protectThis helpWhen the <strong>TS</strong>-<strong>72XX</strong> SBC is c<strong>on</strong>figured with the <strong>TS</strong>-SDBOOT bootup firmware, the SDunlock password can be stored in <strong>on</strong>board EEPROM <str<strong>on</strong>g>for</str<strong>on</strong>g> automatic unlocking and bootingof password protected SD cards. By default, <strong>TS</strong>-SDBOOT will still boot unlocked cards,but this behavior can be changed with the "--verifylock" opti<strong>on</strong> to the "tsbootrom-update"© Jan, 2012 www.embedded<str<strong>on</strong>g>ARM</str<strong>on</strong>g>.com 20
LINUX FOR <str<strong>on</strong>g>ARM</str<strong>on</strong>g> ON <strong>TS</strong>-<strong>72XX</strong>CONFIGURING AND USING LINUXcommand described above-- with the "--verifylock" opti<strong>on</strong> the <strong>TS</strong>-<strong>72XX</strong> SBC will <strong>on</strong>ly bootlocked SD cards.<strong>TS</strong>-SDBOOT c<strong>on</strong>tains several features <str<strong>on</strong>g>for</str<strong>on</strong>g> high security. One feature is the ability to storea checksum of the SD card <strong>on</strong> the board to verify be<str<strong>on</strong>g>for</str<strong>on</strong>g>e bootup. If the checksum fails,the bootup firmware will refuse to boot the inserted SD card. <strong>TS</strong>-SDBOOT can also verifyan arbitrary number of sectors of the SD flash card be<str<strong>on</strong>g>for</str<strong>on</strong>g>e allowing bootup. If the storedCRC does not match the actual CRC, the board will refuse to boot and blink the red LEDc<strong>on</strong>tinuously.Another feature is the ability to boot a password protected SD card. With this, it ispossible to make an SD unreadable to any device except the <strong>TS</strong>-<strong>72XX</strong> SBC to which it isassigned. Although not directly a functi<strong>on</strong> of <strong>TS</strong>-SDBOOT, an SD card can also be madepermanently write-protected through a software command. The combinati<strong>on</strong> of thesefeatures allows product designers several opti<strong>on</strong>s <strong>on</strong> the security of their software and oftheir deployed <strong>TS</strong>-<strong>72XX</strong> SBC based devices.The various SD commands that manipulate the password lock are marked as "opti<strong>on</strong>al" inthe SD card specificati<strong>on</strong>. This means that not all SD card vendors may implement themin their devices. If they are not implemented, you will not be able to set the SD lock withthe "sdlock" command.4.11 <strong>TS</strong>-ScriptsBesides the standard <str<strong>on</strong>g>Linux</str<strong>on</strong>g> set of utilities, the <strong>TS</strong>-<str<strong>on</strong>g>Linux</str<strong>on</strong>g> and Debian <str<strong>on</strong>g>Linux</str<strong>on</strong>g> distributi<strong>on</strong>sinclude <strong>Technologic</strong> <strong>Systems</strong> proprietary utilities which per<str<strong>on</strong>g>for</str<strong>on</strong>g>m <strong>TS</strong>-<strong>72XX</strong> hardwarespecific and auxiliary operati<strong>on</strong>s. Some of the <strong>TS</strong>-Utilities are:✔✔✔✔ts7kvfb: script that loads the framebuffer driver and linux c<strong>on</strong>sole <str<strong>on</strong>g>for</str<strong>on</strong>g> <strong>TS</strong>-7KVloadUSBmodules.sh: loads modules <str<strong>on</strong>g>for</str<strong>on</strong>g> USB flash memory cards supportloadUSB.sh: mounts the USB flash card and changes root file system to itts7xxx.subr: various shell functi<strong>on</strong>s to handle hardware, including bits and peekpokets7xxx.subr: Shell Functi<strong>on</strong>s <str<strong>on</strong>g>for</str<strong>on</strong>g> Hardware AccessThe ts7xxx.subr shell functi<strong>on</strong>s enable c<strong>on</strong>trol to some of the <strong>TS</strong>-<strong>72XX</strong> hardware functi<strong>on</strong>swithout having to write/compile C code. These shell functi<strong>on</strong>s allow you to access variousfuncti<strong>on</strong>s such as DIO, ADCs and so <str<strong>on</strong>g>for</str<strong>on</strong>g>th from the command line or in your own shellscripts.There are two new commands added to the provided <strong>TS</strong> busybox to support these shellfuncti<strong>on</strong>s. These commands are "peekpoke" which is used to provide direct access tomemory, and ADCread, which will provide a c<strong>on</strong>tinuous stream of analog to digitalreadings (either <strong>on</strong> <strong>on</strong>e channel or all channels) to stdout in text <str<strong>on</strong>g>for</str<strong>on</strong>g>mat. Both of thesecommands provide more info <strong>on</strong> what opti<strong>on</strong>s are available if you type them without anyarguments.✔ dio_dir_get : get the current directi<strong>on</strong> (0=input,1=output) of DIO #n (n in 0..15)✔dio_dir_set : set the directi<strong>on</strong> of DIO #n to the specified directi<strong>on</strong>(0=input,1=output)✔ dio_data_get : get the current value (0=Low,1=High) of DIO #n✔✔✔✔dio_data_set : set the current value (0=Low,1=High) of DIO #n (specified pinshould be set to be an output already)usb_init: call this functi<strong>on</strong> to turn the USB ports <strong>on</strong> and initialize themusb_off: call this functi<strong>on</strong> to turn off the USB portsusb_numports: prints the number of USB ports <strong>on</strong> the board. this may be greater then✔ the actual number of physical ports. the first port is port 0© Jan, 2012 www.embedded<str<strong>on</strong>g>ARM</str<strong>on</strong>g>.com 21
LINUX FOR <str<strong>on</strong>g>ARM</str<strong>on</strong>g> ON <strong>TS</strong>-<strong>72XX</strong>CONFIGURING AND USING LINUX✔✔✔✔✔✔✔✔✔✔usb_port_devexists : prints '1' if something is plugged into the specified port, or'0' otherwise.eth_off: turns off the ethernet port and phyeth_<strong>on</strong>: turns <strong>on</strong> the ethernet port and phyled0 : sets the state of the green LED (0=OFF,1=ON)led1 : sets the state of the red LED (0=OFF,1=ON)cpu_speed_max: set the CPU and bus speed to their maximum (normal) values, e.g.200Mhz/100Mhz.cpu_speed_166: set the CPU speed to 166Mhz and the bus speed to 66Mhz.cpu_speed_42: set the CPU speed and bus speed to 41.5Mhz. This is the slowestspeed that Ethernet will work at.cpu_speed_min: set the CPU and bus speed to their minimum values (14.7456Mhz)temp_read: returns the current Celsius temperature reading from the TMP124 chip.© Jan, 2012 www.embedded<str<strong>on</strong>g>ARM</str<strong>on</strong>g>.com 22
LINUX FOR <str<strong>on</strong>g>ARM</str<strong>on</strong>g> ON <strong>TS</strong>-<strong>72XX</strong>STORAGE DEVICES AND FILE SYSTEMS5 STORAGE DEVICES AND FILE SYSTEMSThis secti<strong>on</strong> describes the storage memory devices and the file system types used with<strong>TS</strong>-<strong>72XX</strong> SBCs. Occasi<strong>on</strong>ally, <strong>on</strong>e may wish to boot into <strong>on</strong>e device and access the other.This requires knowing what those devices are and where they are.5.1 On-board Flash File <strong>Systems</strong>The <strong>on</strong>-board flash c<strong>on</strong>tains a custom-made JFFS or YAFFS <str<strong>on</strong>g>for</str<strong>on</strong>g>matted file system image.JFFS2 is a compressed, Journaling Flash File System, <str<strong>on</strong>g>for</str<strong>on</strong>g> the NOR Strata Flash memory<strong>on</strong> <strong>TS</strong>-7200. The YAFFS file system is used <str<strong>on</strong>g>for</str<strong>on</strong>g> the <strong>on</strong>-board flash <strong>on</strong> the <strong>TS</strong>-7250 and<strong>TS</strong>-7260, which utilize NAND flash technology.The NOR and the NAND flash devices are divided in three partiti<strong>on</strong>s. The first is a 16KBsized partiti<strong>on</strong> that c<strong>on</strong>tains the <strong>TS</strong>-BOOTROM. The last partiti<strong>on</strong>, which occupies 2MB-3MB, c<strong>on</strong>tains the eCos/RedBoot system and the <str<strong>on</strong>g>Linux</str<strong>on</strong>g> Kernel. The remaining space inthe middle partiti<strong>on</strong> is either <str<strong>on</strong>g>for</str<strong>on</strong>g> the JFSS or the YAFFS image used as the root filesystem. The following shows how a 8MB NOR chip is recognized by the <str<strong>on</strong>g>Linux</str<strong>on</strong>g> KernelMTD system <strong>on</strong> a <strong>TS</strong>-7200:<strong>TS</strong>-7200 flash: Found 1 x16 devices at 0x0 in 16-bit bankIntel/Sharp Extended Query Table at 0x0031Creating 3 MTD partiti<strong>on</strong>s <strong>on</strong> "<strong>TS</strong>-7200 flash":0x00000000-0x00020000 : "<strong>TS</strong>-BOOTROM"0x00020000-0x00620000 : "<str<strong>on</strong>g>Linux</str<strong>on</strong>g>"0x00620000-0x00800000 : "RedBoot"In both NOR and NAND cases, the <str<strong>on</strong>g>Linux</str<strong>on</strong>g> block device entry corresp<strong>on</strong>ding to the <strong>on</strong>boardflash is the “/dev/mtdblock”. There<str<strong>on</strong>g>for</str<strong>on</strong>g>e, the following command can be used tomount the flash file system if you are not booted to the <strong>on</strong>-board flash:mount /dev/mtdblock/1 /mntUpdating the JFFS ImageThe JFFS2 image can be created <strong>on</strong> your host computer, with binaries created via a crosscompiler, then placed in a directory structure <strong>on</strong> the host computer. A new JFFS2 imagecan be c<strong>on</strong>structed from that directory structure with the following command:mkfs.jffs2 -p6291456 -e131072 -o /path/to/new_jffs.imgPre-made JFFS images can be found in the Developer's CD or <strong>on</strong> <strong>Technologic</strong> <strong>Systems</strong>'web-site. The JFFS image file can then be copied over to the Single Board Computer andthen written to the flash chip by using the following command:dd if=/path/to/new_jffs.img of=/dev/mtdblock/1Updating the YAFFS ImageTo update the YAFFS image, erase the file system completely (either with “rm -fr” or“eraseall /dev/mtd/1”) and extract your new image <strong>on</strong>to the mounted file system. This way,YAFFS will auto-discover the bad sectors as you are extracting and work-around them.The first step is to set up an NFS root file system and boot to it. Then, erase the sec<strong>on</strong>dpartiti<strong>on</strong> of your <strong>on</strong>-board flash using the char device, not the block device.eraseall /dev/mtd/1Mount the sec<strong>on</strong>d partiti<strong>on</strong> of your <strong>on</strong>-board flash and extract the new filesystem:mount /dev/mtdblock/1 /mnttar xzvf /path/to/7250_root_fs.tar.gz -C /mntUnmount the sec<strong>on</strong>d partiti<strong>on</strong> of your <strong>on</strong>-board flash and reboot:© Jan, 2012 www.embedded<str<strong>on</strong>g>ARM</str<strong>on</strong>g>.com 23
LINUX FOR <str<strong>on</strong>g>ARM</str<strong>on</strong>g> ON <strong>TS</strong>-<strong>72XX</strong>STORAGE DEVICES AND FILE SYSTEMSumount /mntshutdown -r nowNoteThe YAFFS file system runs <strong>on</strong> the <strong>TS</strong>-<strong>72XX</strong> boards that feature NAND chips with512 byte page size, enabling up to 128 MB of <strong>on</strong>-board flash. The YAFFS2 filesystem supports the new NAND technology, with 2k page size, hence it will beinstalled <strong>on</strong> <strong>TS</strong>-<strong>72XX</strong> boards that are c<strong>on</strong>figured with 128-256 MB of flash.5.2 Flash Memory CardsCompact FlashThe <str<strong>on</strong>g>for</str<strong>on</strong>g>mat of the CF must be in EXT2 <str<strong>on</strong>g>for</str<strong>on</strong>g> proper operati<strong>on</strong> with <str<strong>on</strong>g>Linux</str<strong>on</strong>g> as a root filesystem. The CF card is seen as the Primary Master IDE device, otherwise known as“/dev/hda”. The following command dem<strong>on</strong>strates mounting the Compact Flash card tothe currently running system:mount /dev/ide/host0/bus0/target0/lun0/part1 /mntSD CardSD Card sockets are available <strong>on</strong> the <strong>TS</strong>-7260 and <strong>TS</strong>-7300 models. <strong>Technologic</strong><strong>Systems</strong> has written a binary <str<strong>on</strong>g>Linux</str<strong>on</strong>g> driver module and a set of generic, OS-independentread/write routines <str<strong>on</strong>g>for</str<strong>on</strong>g> accessing the SD flash inside of an <str<strong>on</strong>g>ARM</str<strong>on</strong>g> object (.o) file. After theSD Card module is loaded, the device entry “/dev/sdcard0” is used to mount into the filesystem.mount -t ext2 /dev/sdcard0/disc0/part3 /mntBy default, the SD Card driver will be loaded during bootup time. However, in some casesthe driver may not be loaded if a SD Card is not present in the socket. There<str<strong>on</strong>g>for</str<strong>on</strong>g>e, it isnecessary to call insmod <str<strong>on</strong>g>for</str<strong>on</strong>g> SD Card driver inserti<strong>on</strong>. For example, In order to use asec<strong>on</strong>d SD Card <strong>on</strong> the <strong>TS</strong>-7300, the following command could be used to load the drivermodule prior to mount the filesystem:insmod sdcard.o -o sdcard1 io=0x72000020 name="sdcard1"After plugging the card into the socket and inserting the sec<strong>on</strong>d SD Card driver, the deviceentry will appear at /dev/sdcard1” and the proper mount command can be used.USB Flash DrivesUSB Flash drives can supply additi<strong>on</strong>al storage that behaves very much like a CF cardexcept that a Compact Flash card can be the root drive whereas a USB drive can not bethe root file system without using an initrd and appropriate kernel. Drivers are available inthe <str<strong>on</strong>g>Linux</str<strong>on</strong>g> distributi<strong>on</strong> to support USB Flash Drives.After booting into the <strong>TS</strong>-<str<strong>on</strong>g>Linux</str<strong>on</strong>g> OS, <strong>on</strong>e can 'boot' into the Debian OS hosted <strong>on</strong> a USBthumb-drive with two scripts found <strong>on</strong> the <strong>TS</strong>-<str<strong>on</strong>g>Linux</str<strong>on</strong>g> distributi<strong>on</strong>. First, invoke“/usr/bin/loadUSBModules.sh”, then run the script “/usr/bin/loadUSB.sh” to change rootinto the Debian OS <strong>on</strong> the USB thumb-drive to take full advantage of such things as theDebian Arm toolchain.The script “loadUSBModules.sh” loads the following Kernel modules, in the rightsequence: usbcore, pcipool, usb-ohci, usb-ohci-ep93xx, scsi_mod, sd_mod, usb-storage.In additi<strong>on</strong>, it is possible to use an initial ram disk and a kernel that supports USBinternally to boot to the USB file system <strong>on</strong> system initializati<strong>on</strong> time. The kernel is loadedand then the initial ram disk script loads the USB modules and “pivot_root” to the USB filesystem.© Jan, 2012 www.embedded<str<strong>on</strong>g>ARM</str<strong>on</strong>g>.com 24
LINUX FOR <str<strong>on</strong>g>ARM</str<strong>on</strong>g> ON <strong>TS</strong>-<strong>72XX</strong>STORAGE DEVICES AND FILE SYSTEMSFor those who simply wish to load in the correct device drivers to access the USB thumbdrivewhen booted into the <str<strong>on</strong>g>Linux</str<strong>on</strong>g> OS, invoke the “/usr/bin/loadUSBModules.sh” script, andthen use the following command to mount the file system:mount /dev/scsi/host0/bus0/target0/lun0/part1 /mnt/NoteThe <strong>TS</strong>-7200 always needs to be powered-off be<str<strong>on</strong>g>for</str<strong>on</strong>g>e swapping Compact Flashcards. USB Flash drives and SD cards can be hot swapped.Updating the EXT2 ImageTo create a CF/SD/USB flash card image from scratch, <strong>on</strong>e must <str<strong>on</strong>g>for</str<strong>on</strong>g>mat the entirememory card as ext2, then unpack the file system (the Development Debian file system<str<strong>on</strong>g>for</str<strong>on</strong>g> NFS root or memory cards, <str<strong>on</strong>g>for</str<strong>on</strong>g> example). Latest versi<strong>on</strong>s of our pre-made Debianinstall can be found <strong>on</strong> our website or <strong>on</strong> the <strong>TS</strong>-<str<strong>on</strong>g>ARM</str<strong>on</strong>g> CD.This should all be d<strong>on</strong>e from the host PC running <str<strong>on</strong>g>Linux</str<strong>on</strong>g>. The walk-through below assumesthe memory card is plugged into the USB d<strong>on</strong>gle and the memory card has been assignedto /”dev/sda”:fdisk /dev/ide/host0/bus0/target0/lun0/disc1) d (to delete existing partiti<strong>on</strong>s. Repeat <str<strong>on</strong>g>for</str<strong>on</strong>g> all partiti<strong>on</strong>s)2) n (<str<strong>on</strong>g>for</str<strong>on</strong>g> new partiti<strong>on</strong>)3) p (<str<strong>on</strong>g>for</str<strong>on</strong>g> Primary partiti<strong>on</strong>)4) 1 (make the new partiti<strong>on</strong> primary number 1)5) hit the enter key <str<strong>on</strong>g>for</str<strong>on</strong>g> the default starting cylinder6) hit the enter key again <str<strong>on</strong>g>for</str<strong>on</strong>g> the default last cylinder7) p (to print out the partiti<strong>on</strong> table)8) If the first partiti<strong>on</strong> does not have a star in the boot field, then enter 'a' at the promptand then '1' to make the first partiti<strong>on</strong> bootable.9) To commit these changes to the disk, enter 'w' to write out the new partiti<strong>on</strong> table to thedisk.Now that the memory card has been partiti<strong>on</strong>ed, it must be <str<strong>on</strong>g>for</str<strong>on</strong>g>matted. The followingcommand will <str<strong>on</strong>g>for</str<strong>on</strong>g>mat the first partiti<strong>on</strong> <strong>on</strong> the memory card as an ext2 file-system.mkfs.ext2 /dev/sda1All that is left is to mount the memory card and unpack the tar file of the DevelopmentDebian File System.mount /dev/sda1 /mnttar -C /mnt -xvjf /path/to/debian-file-system.tar.bz2The filename may change as updates are made and posted <strong>on</strong> the CD or <strong>on</strong> the website.A simple fsck will ensure file-system integrity.fsck /dev/sda1NoteCompact Flash and SD Cards must use EXT2 <str<strong>on</strong>g>for</str<strong>on</strong>g>mat <str<strong>on</strong>g>for</str<strong>on</strong>g> file system. USB drivescan use other <str<strong>on</strong>g>for</str<strong>on</strong>g>mats, such as VFAT.© Jan, 2012 www.embedded<str<strong>on</strong>g>ARM</str<strong>on</strong>g>.com 25
LINUX FOR <str<strong>on</strong>g>ARM</str<strong>on</strong>g> ON <strong>TS</strong>-<strong>72XX</strong>STORAGE DEVICES AND FILE SYSTEMS5.3 Network File System - NFSNFS uses the Ethernet c<strong>on</strong>necti<strong>on</strong> to mount the root file system <str<strong>on</strong>g>for</str<strong>on</strong>g> the SBC as anexported directory <strong>on</strong> a <str<strong>on</strong>g>Linux</str<strong>on</strong>g> host PC. This bypasses the need to download any files fromthe host to the SBC, because any file needed <strong>on</strong> the SBC is just copied to the exporteddirectory <strong>on</strong> the host system and is instantly available to the embedded PC. Mounting theroot file system via NFS allows the developer to use the editors, compilers, etc. from thesingle board computer.Mounting NFS roots requires that the ”portmap” daem<strong>on</strong> is running be<str<strong>on</strong>g>for</str<strong>on</strong>g>e executing themount command. The following example dem<strong>on</strong>strates mounting an NFS file systemhosted <strong>on</strong> a server at 192.168.0.1portmap &mount -t nfs 192.168.0.1:/path/to/nfsroot /mntSetting Up an NFS File SystemTo mount the root file system via NFS, Prepare the exported root directory <strong>on</strong> the NFSserver:1) Download the pre-made Debian tarfile from our website or the <strong>TS</strong>-<str<strong>on</strong>g>ARM</str<strong>on</strong>g> <str<strong>on</strong>g>Linux</str<strong>on</strong>g> CD toyour <str<strong>on</strong>g>Linux</str<strong>on</strong>g> host machine.2) Untar NFS root package to a directory <strong>on</strong> the host machine.tar -C /path/to/nfsroot -xvjf /path/to/debian-file-system.tar.bz23) Export the directory by adding the following line to the file “/etc/exports”/path/to/nfsroot 192.168.0.0/255.255.255.0(rw,no_root_squash,insecure)Note: The IP mask in the above example will <strong>on</strong>ly allow NFS c<strong>on</strong>necti<strong>on</strong>s from computershaving an IP starting with 192.168.0. Substitute the appropriate parameters <str<strong>on</strong>g>for</str<strong>on</strong>g> your localnetwork.4) Restart NFS so the directory is available <str<strong>on</strong>g>for</str<strong>on</strong>g> export. Typically, this would be:/etc/init.d/nfs-server restart5) Modify the /path/to/nfsroot/etc/fstab file <strong>on</strong> your host system <str<strong>on</strong>g>for</str<strong>on</strong>g> your local networksettings.Add: "192.168.0.1:/path/to/nfsroot / nfs exec,dev,suid 1 1"Comment out: "/dev/hda1 / ext2 defaults 1 1"6) Load the kernel from Redboot with the following command line opti<strong>on</strong>s:fis load vmlinuxexec –c “c<strong>on</strong>sole=ttyAM1,115200 ip=dhcpnfsroot=192.168.0.1:/path/to/nfsroot”© Jan, 2012 www.embedded<str<strong>on</strong>g>ARM</str<strong>on</strong>g>.com 26
LINUX FOR <str<strong>on</strong>g>ARM</str<strong>on</strong>g> ON <strong>TS</strong>-<strong>72XX</strong><strong>TS</strong>-KERNEL AND DRIVERS DEVELOPMENT6 <strong>TS</strong>-KERNEL AND DRIVERS DEVELOPMENTThis secti<strong>on</strong> explains how to c<strong>on</strong>figure and compile the <strong>TS</strong>-Kernel. In additi<strong>on</strong>, usefulin<str<strong>on</strong>g>for</str<strong>on</strong>g>mati<strong>on</strong> about <strong>TS</strong>-<strong>72XX</strong> driver support is provided.6.1 Compiling the <strong>TS</strong>-Kernel<strong>Technologic</strong> <strong>Systems</strong> provides the <strong>TS</strong>-Kernel source code <str<strong>on</strong>g>for</str<strong>on</strong>g> <str<strong>on</strong>g>Linux</str<strong>on</strong>g> Kernels that areshipped with <strong>TS</strong>-<strong>72XX</strong> boards. Please visit our website to download the appropriate <strong>TS</strong>-Kernel source or use the <strong>TS</strong>-<str<strong>on</strong>g>ARM</str<strong>on</strong>g> <str<strong>on</strong>g>Linux</str<strong>on</strong>g> CD. The officially supported <strong>TS</strong>-Kernel is basedup<strong>on</strong> the versi<strong>on</strong> 2.4.26 and patches <str<strong>on</strong>g>for</str<strong>on</strong>g> the <str<strong>on</strong>g>ARM</str<strong>on</strong>g> architecture and <str<strong>on</strong>g>for</str<strong>on</strong>g> the Cirrus EP9301processor. A unique versi<strong>on</strong> number follows the name of the <strong>TS</strong>-Kernel in order to identifyTehcnologic <strong>Systems</strong> releases. For example:$ uname -sr<str<strong>on</strong>g>Linux</str<strong>on</strong>g> 2.4.26-ts11In order to compile the kernel from a n<strong>on</strong> <str<strong>on</strong>g>ARM</str<strong>on</strong>g> host machine, a cross compiler is required.<strong>Technologic</strong> <strong>Systems</strong> offers some pre-compiled cross compilers, such as Dan Keegel'sCrossTool. To compile the kernel, simply edit the top level Makefile and ensure that theCROSS_COMPILER variable is equal to your system's cross compiler prefix to gcc. Forexample:CROSS_COMPILE=/usr/local/opt/crosstool/armlinux/gcc3.3.4glibc2.3.2/bin/arm-linux-The next step is <strong>TS</strong>-Kernel c<strong>on</strong>figurati<strong>on</strong>. The user can enable/disable the compilati<strong>on</strong> ofthe <strong>TS</strong>-Kernel features by typing:make menu_c<strong>on</strong>figOpti<strong>on</strong>ally, <strong>Technologic</strong> <strong>Systems</strong> provides default c<strong>on</strong>figurati<strong>on</strong> files <str<strong>on</strong>g>for</str<strong>on</strong>g> the most comm<strong>on</strong><strong>TS</strong>-<strong>72XX</strong> SBCs inside the <strong>TS</strong>-Kernel source tree: The “-ts10” release c<strong>on</strong>tains thefollowing default c<strong>on</strong>figurati<strong>on</strong> files:# pwd/usr/src/ts-kernel/linux24/arch/arm/def-c<strong>on</strong>figs# ls ts*ts7200 ts7250 ts7250_2k ts7260 ts7300To c<strong>on</strong>figure the <strong>TS</strong>-Kernel <str<strong>on</strong>g>for</str<strong>on</strong>g> the default <strong>TS</strong>-7200 setup, the following can be used:make ts7200_c<strong>on</strong>figmake oldc<strong>on</strong>figGenerally, the next compilati<strong>on</strong> steps include dependencies processing, kernel imagecreati<strong>on</strong> and kernel modules compilati<strong>on</strong>:make depmake vmlinuxmake modules INSTALL_MOD_PATH=/lib/modulesThe last step is modules installati<strong>on</strong>:make modules_installThe resulting modules and vmlinux files can be placed <strong>on</strong>to the flash chip, compact flashcard or NFS root directory, as described be<str<strong>on</strong>g>for</str<strong>on</strong>g>e. RedBoot can be c<strong>on</strong>figured to load thenew kernel into the <strong>TS</strong>-<strong>72XX</strong> SBC.© Jan, 2012 www.embedded<str<strong>on</strong>g>ARM</str<strong>on</strong>g>.com 27
LINUX FOR <str<strong>on</strong>g>ARM</str<strong>on</strong>g> ON <strong>TS</strong>-<strong>72XX</strong><strong>TS</strong>-KERNEL AND DRIVERS DEVELOPMENTDifferent <strong>TS</strong>-Kernel 2.4 Release Versi<strong>on</strong>s✔✔✔✔ts8: Added framebuffer support <str<strong>on</strong>g>for</str<strong>on</strong>g> <strong>TS</strong>-7KVts9: Added driver supprot <str<strong>on</strong>g>for</str<strong>on</strong>g> <strong>TS</strong>-7260 (tsuart serial driver)ts10: Added framebuffer support <str<strong>on</strong>g>for</str<strong>on</strong>g> <strong>TS</strong>-7300 and Added driver supprot <str<strong>on</strong>g>for</str<strong>on</strong>g> <strong>TS</strong>-7300(tsuart73 serial driver, sdcard driver, open_eth ethernet driver)ts11: Minor bugs fixed and support <str<strong>on</strong>g>for</str<strong>on</strong>g> <strong>TS</strong>-7400 addedIn order to avoid c<strong>on</strong>fusi<strong>on</strong> and versi<strong>on</strong> incompatibility problems with kernel modules,<strong>Technologic</strong> <strong>Systems</strong> has decided to use release dates <str<strong>on</strong>g>for</str<strong>on</strong>g> versi<strong>on</strong> c<strong>on</strong>trol instead ofsequential numbers, which are no l<strong>on</strong>ger used. The ts11 versi<strong>on</strong> is the latest <strong>on</strong>e.Kernel 2.6 supportThe Kernel 2.6 is not officially supported by <strong>Technologic</strong> <strong>Systems</strong>. Some customers andusers are using Kernel 2.6 with <strong>TS</strong>-<strong>72XX</strong> boards though. One can find further in<str<strong>on</strong>g>for</str<strong>on</strong>g>mati<strong>on</strong>al<strong>on</strong>g with installati<strong>on</strong> instructi<strong>on</strong>s and packages through the <strong>TS</strong>-<strong>72XX</strong> mailing list.6.2 Real Time Extensi<strong>on</strong> <str<strong>on</strong>g>for</str<strong>on</strong>g> <strong>TS</strong>-KernelReal time systems are special applicati<strong>on</strong>s that have to respect specific timingrequirements and must be precise in their periodicity (small jitter) and/or be very fast inserving real time events such as interrupts or IO signals (small latency). Hard real timeapplicati<strong>on</strong>s require latency and jitter accuracy of less than 10us (microsec<strong>on</strong>ds).The Adaptative Domain Envir<strong>on</strong>ment <str<strong>on</strong>g>for</str<strong>on</strong>g> Operating <strong>Systems</strong> (Adeos) implements a layerbetween the hardware and the OS that allows multiple OSs sharing the same hardwarewhile running simultaneously. A software pipeline is used to service interrupts anddispatch them to the proper destinati<strong>on</strong>; <strong>on</strong>e of its applicati<strong>on</strong>s is real time. Real TimeApplicati<strong>on</strong> Interface (RTAI) is a set of kernel modules that provide real time services suchas interprocess communicati<strong>on</strong>; and an API <str<strong>on</strong>g>for</str<strong>on</strong>g> real time applicati<strong>on</strong> development. RTAIservices run under the Adeos kernel, so it is necessary to build and run Adeos first. TheAdeos kernel is based <strong>on</strong> the <str<strong>on</strong>g>Linux</str<strong>on</strong>g> kernel, providing the ability to make it fullypreemptable.<strong>Technologic</strong> <strong>Systems</strong> provides Adeos/RTAI soluti<strong>on</strong>s integrated with the <strong>TS</strong>-Kernel. RTAIsource code and compiled RT-<strong>TS</strong>-Kernel and RTAI packages are available through<strong>Technologic</strong> <strong>Systems</strong> website or the <strong>TS</strong>-<str<strong>on</strong>g>ARM</str<strong>on</strong>g> <str<strong>on</strong>g>Linux</str<strong>on</strong>g> CD. The RTAI versi<strong>on</strong> used is themagma/vulcano 3.2.Installing the Real Time envir<strong>on</strong>mentBe<str<strong>on</strong>g>for</str<strong>on</strong>g>e loading and running the real time kernel, you should copy the necessary files to thefile system in use <strong>on</strong> the target. These files include the <str<strong>on</strong>g>Linux</str<strong>on</strong>g> modules <str<strong>on</strong>g>for</str<strong>on</strong>g> the new kernel,RTAI service modules, test files and documentati<strong>on</strong>.<strong>Technologic</strong> <strong>Systems</strong> provides a tarball c<strong>on</strong>taining the full RTAI compiled envir<strong>on</strong>ment <str<strong>on</strong>g>for</str<strong>on</strong>g>the "ts9-rt" RT-<strong>TS</strong>-Kernel (patched with Adeos). The file "/binaries/rtai-3.2-magmacompiled.tar.gz"is distributed with the <strong>TS</strong>-<str<strong>on</strong>g>ARM</str<strong>on</strong>g> <str<strong>on</strong>g>Linux</str<strong>on</strong>g> CD. Change directory to "/usr" anduntar this file to create the "realtime" directory with the RTAI envir<strong>on</strong>ment:tar zxvf rtai-3.2-magma-compiled.tar.gz -C /usrThe RTAI services are provided through the modules inside the "modules" directory. Use"insmod -f" to install the RTAI services. The "ts9-rt" kernel modules can be installed usingthe "/binaries/ts-modules/rt-tskernelmodules-2.4.26-ts9.tar.gz" file available <strong>on</strong> the CD.The "testsuite" directory c<strong>on</strong>tains RTAI sample applicati<strong>on</strong>s. In order to salve save storagememory, <strong>on</strong>e can remove the documentati<strong>on</strong> directory.© Jan, 2012 www.embedded<str<strong>on</strong>g>ARM</str<strong>on</strong>g>.com 28
LINUX FOR <str<strong>on</strong>g>ARM</str<strong>on</strong>g> ON <strong>TS</strong>-<strong>72XX</strong><strong>TS</strong>-KERNEL AND DRIVERS DEVELOPMENTRunning the Real Time <strong>TS</strong>-Kernel<strong>Technologic</strong> <strong>Systems</strong> provides compiled real time <strong>TS</strong>-Kernels <str<strong>on</strong>g>for</str<strong>on</strong>g> the <strong>TS</strong>-<strong>72XX</strong> SBCs.Those can found <strong>on</strong> the <strong>TS</strong>-<str<strong>on</strong>g>ARM</str<strong>on</strong>g> <str<strong>on</strong>g>Linux</str<strong>on</strong>g> CD, in the “binaries/ts-kernels” directory. Forexample, the “rt-vmlinux-7200-ts9.bin” is a compiled <strong>TS</strong>-Kernel versi<strong>on</strong> “ts9”, patched withAdeos and c<strong>on</strong>figured <str<strong>on</strong>g>for</str<strong>on</strong>g> <strong>TS</strong>-7200.After selecting the proper compiled real time <strong>TS</strong>-Kernel, you can load it using Redboot’s“load” command and then execute the kernel by using “exec” command, as described inthe RedBoot secti<strong>on</strong>.Building the Real Time <strong>TS</strong>-Kernel and RTAIIt may be of interest to build your own real time <strong>TS</strong>-Kernel and RTAI system from sourcecode <str<strong>on</strong>g>for</str<strong>on</strong>g> your specific <strong>TS</strong>-<strong>72XX</strong> SBC. <strong>Technologic</strong> <strong>Systems</strong> provides the following filesthrough the <strong>TS</strong>-<str<strong>on</strong>g>ARM</str<strong>on</strong>g> <str<strong>on</strong>g>Linux</str<strong>on</strong>g> CD in order to help with that:✔✔✔/source/rt-tskernel-2.4.26-tsX-adeos.patch: Adeos patch <str<strong>on</strong>g>for</str<strong>on</strong>g> <strong>TS</strong>-Kernel/source/rtai-3.2-magma-src.tar.gz: RTAI source tree used by <strong>TS</strong>/source/rtai-examples-src.tar.gz: some RTAI sample applicati<strong>on</strong>s and example codeOnce you have a <strong>TS</strong>-Kernel source tree installed and the proper cross-compileenvir<strong>on</strong>ment c<strong>on</strong>figured, you can clean and patch your kernel using the Adeos patch:cd /path/to/ts-kernel-directorymake distcleanpatch -p1 < /path/to/rt-tskernel-2.4.26-tsX-adeos.patchThis is install the Adeos files and modificati<strong>on</strong>s to the <strong>TS</strong>-Kernel, enabling it to be usedwith RTAI <strong>on</strong> a real time system.After the patch is successfully applied, the next step is kernel c<strong>on</strong>figurati<strong>on</strong>. You can stilluse the default ts-kernel c<strong>on</strong>figurati<strong>on</strong> files <str<strong>on</strong>g>for</str<strong>on</strong>g> <strong>TS</strong>-<strong>72XX</strong> SBCs. Make sure to select theAdeos Support to builtin opti<strong>on</strong> (not as a module), in the General Setup secti<strong>on</strong> of thekernel c<strong>on</strong>figurati<strong>on</strong>. This will enable the Adeos system to be compiled inside the <strong>TS</strong>-Kernel. Save your c<strong>on</strong>figurati<strong>on</strong> and proceed with the comm<strong>on</strong> steps <strong>on</strong> kernelcompilati<strong>on</strong>:make oldc<strong>on</strong>figmake depmake vmlinuxmake modulesmake modules_install INSTALL_MOD_PATH=/lib/modulesAfter you have suceed in the real time <strong>TS</strong>-Kernel building process, the next step is RTAIsystem compilati<strong>on</strong>. For that, install the supplied RTAI source file and c<strong>on</strong>figure it:tar zxvf rtai-3.2-magma-src.tar.gz -C /path/to/rtaicd /path/to/rtaimake ARCH=arm CROSS_COMPILE=/path/to/cross-compile/bin/arm-linux-An RTAI c<strong>on</strong>figurati<strong>on</strong> envir<strong>on</strong>ment will show up. Make sure to provide the correct Adeos<strong>TS</strong>-Kernel build directory you used when filling the “<str<strong>on</strong>g>Linux</str<strong>on</strong>g> Build” opti<strong>on</strong>. C<strong>on</strong>figure theRTAI system regarding the features and services you want. Finally, save and exit thec<strong>on</strong>figurati<strong>on</strong> system to strat the compilati<strong>on</strong>. The final step is the RTAI installati<strong>on</strong>:make installThis is will install the RTAI modules and envir<strong>on</strong>ment to the c<strong>on</strong>figured installati<strong>on</strong>directory, which must be copied to the root file system in use by your <strong>TS</strong>-<strong>72XX</strong> SBC.© Jan, 2012 www.embedded<str<strong>on</strong>g>ARM</str<strong>on</strong>g>.com 29
LINUX FOR <str<strong>on</strong>g>ARM</str<strong>on</strong>g> ON <strong>TS</strong>-<strong>72XX</strong><strong>TS</strong>-KERNEL AND DRIVERS DEVELOPMENT6.3 SerialThe <strong>TS</strong>-Kernel c<strong>on</strong>tains drivers <str<strong>on</strong>g>for</str<strong>on</strong>g> all the <strong>on</strong>-board serial drivers. Driver's source code isalso available within the <strong>TS</strong>-Kernel source tree.COM1 and COM2The <str<strong>on</strong>g>Linux</str<strong>on</strong>g> devices <strong>on</strong> the filesystem that should be used with the COM1 and COM2 serialports are /dev/ttyAM0 and /dev/ttyAM1, respectively. Any <str<strong>on</strong>g>Linux</str<strong>on</strong>g> terminal emulator, asminicom, can be used with these ports. Simple echo and cat commands can also be usedin order to test these ports:cat < /dev/ttyAM1echo > /dev/ttyAM1RS-485 Support <strong>on</strong> COM2A special ioctl command has been added to the <str<strong>on</strong>g>Linux</str<strong>on</strong>g> kernel's serial code to turn off and<strong>on</strong> the automatic RS-485 feature. The header files needed to be included from the <str<strong>on</strong>g>Linux</str<strong>on</strong>g>kernel source tree <strong>on</strong> an applicati<strong>on</strong> source code are “linux/ts_sbc.h” and “linux/include/asm/ioctls.h”. These header files can be found in the <strong>TS</strong>-Kernel source tree. The followingsnippet of code dem<strong>on</strong>strates the use of this ioctl.#include #include #define TIOC_SBCC485 _IOW('T',0x70,int) /*<strong>TS</strong> R<strong>TS</strong>/485 mode Clear*/#define TIOC_SBCS485 _IOW('T',0x71, int) /*<strong>TS</strong> R<strong>TS</strong>/485 mode Set */#define AUTO485FD 1#define R<strong>TS</strong>MODE 2#define AUTO485HD 4mcr = AUTO485FD;//mcr = AUTO485HD; //<str<strong>on</strong>g>for</str<strong>on</strong>g> half duplexioctl (fd, TIOC_SBCS485, &mcr);//write() and read() from fdioctl (fd, TIOC_SBCC485, &mcr);//further reads() and writes() may not behave<strong>TS</strong>-7260 2TTLCOM Opti<strong>on</strong>The <strong>TS</strong>-7260 has 3 serial ports at RS232 levels (COM1, COM2 and COM3 headers) bydefault. When the 2TTLCOM opti<strong>on</strong> is enabled, extra 2 serial ports appears at the DIO2header, using TTL levels, and the COM3 will also use TTL levels.The “tsuart.o” module implements <strong>TS</strong>-Kernel support <str<strong>on</strong>g>for</str<strong>on</strong>g> the COM3 port and the 2 extraTTL serial ports. It is distributed inside the <strong>TS</strong>-Kernel tree, “ts9” versi<strong>on</strong>. The inserti<strong>on</strong> ofthe “tsuart.o” module inside the <strong>TS</strong>-Kernel causes the creati<strong>on</strong> of the device entries“/dev/tty<strong>TS</strong>0”, “/dev/tty<strong>TS</strong>1” and “/dev/tty<strong>TS</strong>2” <str<strong>on</strong>g>for</str<strong>on</strong>g> COM3, COM4 and COM5, respectively.An special file at the /proc virtual file system, “/proc/driver/tsuart/com3ttl”, is available inorder to c<strong>on</strong>trol the COM3 signal level. The user can set COM3 to TTL levels as follows:echo "1" > /proc/driver/tsuart/com3ttlThe user can set COM3 to RS-232 levels as follows:echo "0" > /proc/driver/tsuart/com3ttl© Jan, 2012 www.embedded<str<strong>on</strong>g>ARM</str<strong>on</strong>g>.com 30
LINUX FOR <str<strong>on</strong>g>ARM</str<strong>on</strong>g> ON <strong>TS</strong>-<strong>72XX</strong><strong>TS</strong>-KERNEL AND DRIVERS DEVELOPMENTtransmissi<strong>on</strong> is in, at most <strong>on</strong>e 0xFF will be sent and then the driver will start skippinginvalid msBs. As a result, the first byte of data sent after the 0xFF sequence with theupper 7 bits clear will be c<strong>on</strong>sidered the new msB.Normally these synchr<strong>on</strong>izati<strong>on</strong> methods should not be necessary, as the port, whenopened, is synchr<strong>on</strong>ized such that the first byte read and written will be c<strong>on</strong>sidered themsB. However <str<strong>on</strong>g>for</str<strong>on</strong>g> debugging, diagnostic use, or recovery from applicati<strong>on</strong> errors thesefeatures may be useful.6.4 CAN BusThe <str<strong>on</strong>g>Linux</str<strong>on</strong>g> device driver <str<strong>on</strong>g>for</str<strong>on</strong>g> a Philips SJA1000 CAN C<strong>on</strong>troller was developed using theOCERA framework <str<strong>on</strong>g>for</str<strong>on</strong>g> CAN, which is composed of LINCAN, VCA, CAN/CANOpenM<strong>on</strong>itor and CANOpen Device. LINCAN is a generic <str<strong>on</strong>g>Linux</str<strong>on</strong>g> device driver implementati<strong>on</strong>that supports many boards, including <strong>TS</strong>-CAN1, <strong>TS</strong>-7KV and <strong>TS</strong>-732. It is an evoluti<strong>on</strong> ofother CAN open source projects <str<strong>on</strong>g>for</str<strong>on</strong>g> <str<strong>on</strong>g>Linux</str<strong>on</strong>g>.Loading the Lincan driverThe Lincan driver is included in the <strong>TS</strong>-Kernel modules, versi<strong>on</strong> “ts9”, as a kernel modulenamed “lincan.o”. Also, it is available through the <strong>Technologic</strong> <strong>Systems</strong> website or the <strong>TS</strong>-<str<strong>on</strong>g>ARM</str<strong>on</strong>g> <str<strong>on</strong>g>Linux</str<strong>on</strong>g> CD.The Lincan driver implements a plug and play system. So, the driver is able to detect thehardware, I/O address and IRQ line being used. To take advantage of the implementedplug and play feature, load the driver into the kernel by executing the command below:cd /path/to/lincan/modules/insmod lincan.o hw=tscan1 #<str<strong>on</strong>g>for</str<strong>on</strong>g> <strong>TS</strong>-CAN1insmod lincan.o hw=ts7kv #<str<strong>on</strong>g>for</str<strong>on</strong>g> <strong>TS</strong>-7KVinsmod lincan.o hw=ts732 #<str<strong>on</strong>g>for</str<strong>on</strong>g> <strong>TS</strong>-7326.5 VideoAfter the Lincan driver is installed, the respective device entries will appear <strong>on</strong> the <str<strong>on</strong>g>Linux</str<strong>on</strong>g>filesystem at /dev/can*.Testing the CAN networkYou can use the testing tools available at "/path/to/lincan/binutils" directory. For example,to set up your CAN hardware to listen to messages from a working CAN network, use thefollowing command:cd /path/to/lincan/binutils./readcan /dev/can0To send messages out to a CAN network, you can use the sendburst tool. For example, tosend out #3 can messages with identifiers #1 <strong>on</strong> each #1 sec<strong>on</strong>d of period, do:./sendburst --help./sendburst -d /dev/can0 -w1 -b3 -i1<strong>Technologic</strong> <strong>Systems</strong> provides a framebuffer driver that handles the <strong>TS</strong>-VIDCORE videointerface <strong>on</strong> the <strong>TS</strong>-7KV or <strong>TS</strong>-7300. The video registers are properly managed inside thedriver so other <str<strong>on</strong>g>Linux</str<strong>on</strong>g> Kernel's layers can interact with the <strong>TS</strong>-VIDCORE using theFramebuffer Device API. The driver enables video interacti<strong>on</strong> from user space using theentries at /dev/fb. The <str<strong>on</strong>g>Linux</str<strong>on</strong>g> Framebuffer driver is integrated in the official <strong>TS</strong>-Kernelrelease, versi<strong>on</strong> higher than ts9.6.6 EthernetDriver support <str<strong>on</strong>g>for</str<strong>on</strong>g> the fast <strong>on</strong>-board EP9301 MAC core is compiled inside the <strong>TS</strong>-Kernel.The <strong>TS</strong>-Kernel also supports the 10/100 OpenMAC ethernet core, from opencores.org,© Jan, 2012 www.embedded<str<strong>on</strong>g>ARM</str<strong>on</strong>g>.com 32
LINUX FOR <str<strong>on</strong>g>ARM</str<strong>on</strong>g> ON <strong>TS</strong>-<strong>72XX</strong><strong>TS</strong>-KERNEL AND DRIVERS DEVELOPMENTthrough a kernel module. Source code is available <str<strong>on</strong>g>for</str<strong>on</strong>g> both MAC interfaces through the<strong>TS</strong>-Kernel source tree.The OpenMAC is integrated <strong>on</strong> the <strong>TS</strong>-7300 <strong>on</strong>-board FPGA and the “openeth.o” is theethernet driver that must be loaded in order to support the OpenMAC core with the <strong>TS</strong>-Kernel, vesri<strong>on</strong> “ts-10”. After loading the “openeth.o” module, the “eth1” <str<strong>on</strong>g>Linux</str<strong>on</strong>g> networkinterface must be used al<strong>on</strong>g with the “ifc<strong>on</strong>fig” command in order to c<strong>on</strong>figure theOpenMAC ethernet interface.6.7 USB WiFi 802.11g D<strong>on</strong>gleThe <strong>TS</strong>-Kernel supports USB WiFi 802.11g devices based <strong>on</strong> the zd1211 chipset. Themodule binary is available at:✔ftp://ftp.embeddedarm.com/ts-arm-sbc/ts-7200-linux/binaries/ts-modules/wirelesszd1211/zd_b.oIn order to bring up a wireless network, <strong>on</strong>e needs to load the required modules, useifc<strong>on</strong>fig to brings wlan0 up and then use iwc<strong>on</strong>fig to associate the interface to a wirelessprovider. The following command sequence can be used:insmod usbcoreinsmod pcipoolinsmod usb-ohciinsmod usb-ohci-ep93xxinsmod scsi_modinsmod sd_modinsmod zd_b.oifc<strong>on</strong>fig wlan0 upiwc<strong>on</strong>fig wlan0 essid ifc<strong>on</strong>fig wlan0 Other <str<strong>on</strong>g>Linux</str<strong>on</strong>g> tools <str<strong>on</strong>g>for</str<strong>on</strong>g> wireless networking can be used, such as iwlist, iwgetid, iwpriv,iwspy. They all are available through the <strong>TS</strong>-<str<strong>on</strong>g>ARM</str<strong>on</strong>g>-<str<strong>on</strong>g>Linux</str<strong>on</strong>g>-CD and <strong>TS</strong> ftp server.6.8 USB Mouse and KeyboardIn order to use a USB Keyboard and a USB Mouse with your <strong>TS</strong>-<strong>72XX</strong> SBC, it isnecessary to load the following modules into the running kernel:insmod pcipool.oinsmod usbcore.oinsmod usb-ohci.oinsmod usb-ohci-ep93xx.oinsmod input.oinsmod hid.oinsmod keybdev.oinsmod mousedev.o© Jan, 2012 www.embedded<str<strong>on</strong>g>ARM</str<strong>on</strong>g>.com 33
LINUX FOR <str<strong>on</strong>g>ARM</str<strong>on</strong>g> ON <strong>TS</strong>-<strong>72XX</strong>APPLICATION DEVELOPMENT7 APPLICATION DEVELOPMENTThis secti<strong>on</strong> introduces the basics of applicati<strong>on</strong> development with <strong>TS</strong>-<strong>72XX</strong> <str<strong>on</strong>g>ARM</str<strong>on</strong>g>computers. It is possible to develop using just the embedded system or by using a hostPC and cross-compilati<strong>on</strong> tools.7.1 GNU Tools<str<strong>on</strong>g>Linux</str<strong>on</strong>g> applicati<strong>on</strong> development generally means development using the GNU tools set.The GNU project provides a wide range of development utilities, such as compilers, buildtools and libraries. The Debian <str<strong>on</strong>g>Linux</str<strong>on</strong>g> distributi<strong>on</strong> provided by <strong>Technologic</strong> <strong>Systems</strong> as afull featured development <str<strong>on</strong>g>Linux</str<strong>on</strong>g> OS, c<strong>on</strong>tains a native GNU installati<strong>on</strong> <str<strong>on</strong>g>for</str<strong>on</strong>g> <str<strong>on</strong>g>ARM</str<strong>on</strong>g>, enablingembedded applicati<strong>on</strong> development using <strong>on</strong>ly the embedded plat<str<strong>on</strong>g>for</str<strong>on</strong>g>m. The mostcomm<strong>on</strong>ly used development tools are:✔✔✔✔gcc: gnu c compilerg++: gnu c++ compilesld: gnu linkermake: tool <str<strong>on</strong>g>for</str<strong>on</strong>g> the compilati<strong>on</strong> process automati<strong>on</strong>As an alternative, it is possible to use a cross compile toolchain, enabling binarygenerati<strong>on</strong> <str<strong>on</strong>g>for</str<strong>on</strong>g> the <str<strong>on</strong>g>ARM</str<strong>on</strong>g> architecture from a x86 host architecture, <str<strong>on</strong>g>for</str<strong>on</strong>g> example.7.2 Development <strong>on</strong> the Target with Debian <str<strong>on</strong>g>Linux</str<strong>on</strong>g>The typical way of doing Embedded <str<strong>on</strong>g>Linux</str<strong>on</strong>g> development is actually <strong>on</strong> the board itself.Since the <strong>TS</strong>-<strong>72XX</strong> <str<strong>on</strong>g>ARM</str<strong>on</strong>g>9 CPU is a PC-class processor in everything but powerc<strong>on</strong>sumpti<strong>on</strong> and per<str<strong>on</strong>g>for</str<strong>on</strong>g>mance, it has no problem running real PC-class operatingsystems such as <str<strong>on</strong>g>Linux</str<strong>on</strong>g>. By running the full versi<strong>on</strong> of <str<strong>on</strong>g>Linux</str<strong>on</strong>g> (and not scaled-downmicroc<strong>on</strong>troller project OS's such as uc<str<strong>on</strong>g>Linux</str<strong>on</strong>g>), the <strong>TS</strong>-<strong>72XX</strong> SBCs can run the entire suiteof applicati<strong>on</strong>s c<strong>on</strong>tained in the Debian <str<strong>on</strong>g>Linux</str<strong>on</strong>g> distributi<strong>on</strong> including the compilers. Sincealmost every open source program available <str<strong>on</strong>g>for</str<strong>on</strong>g> <str<strong>on</strong>g>Linux</str<strong>on</strong>g> is c<strong>on</strong>tained within the Debian<str<strong>on</strong>g>Linux</str<strong>on</strong>g> binary distributi<strong>on</strong>, <strong>on</strong>e rarely has to compile the large code-bases that wouldotherwise have <str<strong>on</strong>g>for</str<strong>on</strong>g>ced integrators to a complicated cross-compilati<strong>on</strong> envir<strong>on</strong>ment due tothe limited RAM/Mhz of the embedded computer. All too often, open-source projects d<strong>on</strong>ot anticipate the possibility of cross-compilati<strong>on</strong> in their build systems, leaving issues <str<strong>on</strong>g>for</str<strong>on</strong>g>the system integrator to resolve.The default Debian <str<strong>on</strong>g>Linux</str<strong>on</strong>g> distributi<strong>on</strong> provided by <strong>Technologic</strong> <strong>Systems</strong> c<strong>on</strong>tains compilersand everything needed <str<strong>on</strong>g>for</str<strong>on</strong>g> developing applicati<strong>on</strong>s in C, C++, PERL, PHP, and SH. Java,BASIC, TCL, Pyth<strong>on</strong> and others are also available <str<strong>on</strong>g>for</str<strong>on</strong>g> Debian, but not installed by default.More in<str<strong>on</strong>g>for</str<strong>on</strong>g>mati<strong>on</strong> <strong>on</strong> using and c<strong>on</strong>figuring Debian <str<strong>on</strong>g>Linux</str<strong>on</strong>g> can be found at:✔http://www.debian.orgOne can still use cross-compilers hosted <strong>on</strong> just about any plat<str<strong>on</strong>g>for</str<strong>on</strong>g>m if there is a specificneed. See the next secti<strong>on</strong> <str<strong>on</strong>g>for</str<strong>on</strong>g> more in<str<strong>on</strong>g>for</str<strong>on</strong>g>mati<strong>on</strong> <strong>on</strong> Cross Toolchains.7.3 Development <strong>on</strong> the Host with a Cross ToolchainWhile the Debian <str<strong>on</strong>g>Linux</str<strong>on</strong>g> includes a suite of compiler tools, including a native arm gcc ccompiler, you may wish to use your desktop PC <str<strong>on</strong>g>for</str<strong>on</strong>g> compiling and development. CrossTool0.28 or greater now supports Cygwin. <strong>Technologic</strong> <strong>Systems</strong> provides pre-made versi<strong>on</strong>sof crosstool <str<strong>on</strong>g>for</str<strong>on</strong>g> both <str<strong>on</strong>g>Linux</str<strong>on</strong>g> and Cygwin. They can be found <strong>on</strong> the Arm Development CDor <strong>on</strong> the <strong>Technologic</strong> <strong>Systems</strong>' web-site.To install the <str<strong>on</strong>g>Linux</str<strong>on</strong>g> binaries, unpack the tar file at the root of your system as the root user.To install the Cygwin binaries, unpack the tar file at the root of your Cygwin envir<strong>on</strong>ment.Be sure to include the path of the crosstool binaries in the PATH envir<strong>on</strong>ment variable orin the proper Makefile. For example, the pre-made <str<strong>on</strong>g>Linux</str<strong>on</strong>g> crosstool binaries are located at“/usr/local/opt/crosstool/arm-linux/gcc-3.3.2-glibc-2.3.2/bin/”© Jan, 2012 www.embedded<str<strong>on</strong>g>ARM</str<strong>on</strong>g>.com 34
LINUX FOR <str<strong>on</strong>g>ARM</str<strong>on</strong>g> ON <strong>TS</strong>-<strong>72XX</strong>APPLICATION DEVELOPMENTCygwin Hello World walkthroughThis is a quick dem<strong>on</strong>strati<strong>on</strong> <strong>on</strong> using Windows and Cygwin to create your own helloworld applicati<strong>on</strong> using <str<strong>on</strong>g>Linux</str<strong>on</strong>g> tools. It is assumed that either the Cygwin crosstool tar filehas been unpacked to the root of the Cygwin envir<strong>on</strong>ment or has been built from scratch.Naturally, it is assumed that Cygwin has been installed <strong>on</strong> your Windows PC.1) Create hello-world.cThis can be d<strong>on</strong>e with any editor, either using Vim from within Cygwin, or using notepadfrom within Windowsinclude int main (void){printf (“Hello World!\n”);return 0;}2) Ensure that the CrossTool binaries are in your systems path:export PATH=$PATH:/opt/crosstool/arm-unknownlinux-gnu/gcc-3.3.2-glibc-2.3.2/bin3) Create the hello executable:arm-unknown-linux-gnu-gcc -Wall -o hello helloworld.c4) Verify that the resulting hello binary is an <str<strong>on</strong>g>ARM</str<strong>on</strong>g> binary file, using the file command:file hello5) Run inetd <strong>on</strong> the SBC:inetd6) Copy over the hello binary to the SBC via ftp:ftp 192.168.0.50 (be sure to use the IP that matches your setup)Log in with user root with no passwordenter “binary” to ensure binary transfersenter “put hello”7) On the SBC, change the permissi<strong>on</strong>s of the hello binary to become executable:cd /rootchmod +x ./hello8) Run the binary./hello7.4 Programming IO DevicesWhen programming <str<strong>on</strong>g>Linux</str<strong>on</strong>g> applicati<strong>on</strong>s that handle hardware devices <strong>on</strong> the <strong>TS</strong>-<strong>72XX</strong>, it isimportant to understand the Memory Map of the EP9301 processor and additi<strong>on</strong>alhardware features. Each hardware device or functi<strong>on</strong>al comp<strong>on</strong>ent has its reservedmemory address space, where the specific management registers are located.Device drivers implementati<strong>on</strong> is mostly reading and writing operati<strong>on</strong>s to specific memoryregisters. This is accomplished from the Kernel space through straight access to thephysical memory. The resulting device driver provides high level procedures to the user sothat <strong>on</strong>e is able to talk to the hardware without knowing memory map, bits and such. <str<strong>on</strong>g>Linux</str<strong>on</strong>g>applicati<strong>on</strong>s run in a protected and separate envir<strong>on</strong>ment where they can do no damageto either the kernel or other applicati<strong>on</strong>s running simultaneously. This protectedenvir<strong>on</strong>ment does not allow arbitrary manipulati<strong>on</strong> of hardware registers by default.It is also possible to talk to hardware devices from user space. In doing so, <strong>on</strong>e does nothave to be aware of the <str<strong>on</strong>g>Linux</str<strong>on</strong>g> Kernel development process. The special “/dev/mem”device implements a way to access the physical memory from the protected user space,allowing readings and writings to any specific memory register. Applicati<strong>on</strong>s may be© Jan, 2012 www.embedded<str<strong>on</strong>g>ARM</str<strong>on</strong>g>.com 35
LINUX FOR <str<strong>on</strong>g>ARM</str<strong>on</strong>g> ON <strong>TS</strong>-<strong>72XX</strong>APPLICATION DEVELOPMENTallowed temporary access through memory space windows granted by the mmap()system call applied to the /dev/mem device node. For instance, to set up access to theGPIO registers at 0x12c00000, the following snippet of C code is provided as an example:#include #include #include #include {}int fd = open("/dev/mem", O_RDWR|O_SYNC);char *gpioregs;gpioregs = (char *)mmap(0, 4096, PROT_READ|PROT_WRITE,MAP_SHARED, fd, 0x12c00000);gpioregs[0] = 0xff; /* directi<strong>on</strong>s register set to all outputs */gpioregs[2] = 0x12; /* output 1 to DIO_01 & DIO_4, all else 0 */Some notes about the preceding code:✔✔✔✔Make sure to open using O_SYNC, otherwise you may get a cachable MMU mappingwhich unless you know what you're doing, probably is not what you want when dealingwith hardware registers.mmap() must be called <strong>on</strong>ly <strong>on</strong> pagesize (4096 byte) boundaries and size must at leasthave pagesize granularity.mmap() of /dev/mem is <strong>on</strong>ly allowed <str<strong>on</strong>g>for</str<strong>on</strong>g> processes with UID 0 (root)More in<str<strong>on</strong>g>for</str<strong>on</strong>g>mati<strong>on</strong> <strong>on</strong> mmap() and open() system calls can be had by running "manmmap" or "man open" from most any <str<strong>on</strong>g>Linux</str<strong>on</strong>g> shell prompt.✔ When working with char * types to registers, make sure to compile with the "-mcpu=arm9" opti<strong>on</strong> otherwise the wr<strong>on</strong>g <str<strong>on</strong>g>ARM</str<strong>on</strong>g> opcodes will be used and your bytereads/writes may be turned into 32-bit reads and writes7.5 Applicati<strong>on</strong>s DebuggingThere are two main methods <str<strong>on</strong>g>for</str<strong>on</strong>g> debugging <strong>on</strong> the <strong>TS</strong>-<strong>72XX</strong> SBC: Debugging from arunning <str<strong>on</strong>g>Linux</str<strong>on</strong>g> OS with gdb, or from RedBoot (be<str<strong>on</strong>g>for</str<strong>on</strong>g>e the <str<strong>on</strong>g>Linux</str<strong>on</strong>g> kernel is executed)Low Level Debugging with RedBootTo provide simple, direct access to the <strong>TS</strong>-<strong>72XX</strong> hardware, RedBoot has an integrateddebugger that can per<str<strong>on</strong>g>for</str<strong>on</strong>g>m standard low-level debugger functi<strong>on</strong>s. It can be used to viewor set values in memory using the “dump” and “memfill” commands. For example, thecommanddump -b 0x80840020shows that the first byte is filled with zeros, indicating that both the green and red led areturned off. The -b refers to a locati<strong>on</strong> in memory to display.mfill -b 0x80840020 -p 0x03 -l 0x04will result in the both the green and red LEDs being turned <strong>on</strong>. The -b, again, refers to alocati<strong>on</strong> in memory. The -p indicates the pattern to write into memory, and the -l refers tothe length of the data being written out.To verify that the write was successful,dump -b 0x80840020shows the first byte being having a value of 0x03 (bits 0 and 1 being set).© Jan, 2012 www.embedded<str<strong>on</strong>g>ARM</str<strong>on</strong>g>.com 36
LINUX FOR <str<strong>on</strong>g>ARM</str<strong>on</strong>g> ON <strong>TS</strong>-<strong>72XX</strong>APPLICATION DEVELOPMENT<str<strong>on</strong>g>Linux</str<strong>on</strong>g> - GDBThe GNU debugger is a sophisticated open source debugger. It can be used with Java, C,C++, or even Fortran. Please see the GNU Debugger Documentati<strong>on</strong> homepage <str<strong>on</strong>g>for</str<strong>on</strong>g> morein<str<strong>on</strong>g>for</str<strong>on</strong>g>mati<strong>on</strong>. The following quickly walks through debugging a sample hello worldapplicati<strong>on</strong>. The source code in this example is:int squareit(int n){int x;x = n * n;return x;}main ( ){int i;<str<strong>on</strong>g>for</str<strong>on</strong>g> (i = 0; i < 4; i++){printf("number %d\t", i);printf("number squared: %d\n", squareit(i));}return 0;};Boot to the Compact Flash card, login as root, “apt-get install vim” (<str<strong>on</strong>g>for</str<strong>on</strong>g> a text editor), “aptgetinstall gdb” (ensure that the debugger is installed). Write the above source code into“helloworld.c”, then compile it:gcc -g -o hello helloworld.c (compile the source with debugging symbols)gdb ./hello(gdb) list 1 (shows the source code)(gdb) break 6 (sets a breakpoint at line number 6... this line would be return x; fromthe squareit functi<strong>on</strong>)(gdb) run (start the program)(gdb) c (c<strong>on</strong>tinue past the break point)(gdb) set x=0 (this time, the return value is set to 0 instead of 1)(gdb) c (c<strong>on</strong>tinue and you'll see displayed <strong>on</strong> the screen “number 1 number squared0”)quit (exit gdb)<str<strong>on</strong>g>Linux</str<strong>on</strong>g> – GDB Client/Server DebuggerTO-DOUsing Other DebuggersOther <str<strong>on</strong>g>Linux</str<strong>on</strong>g>-capable debuggers will work with the <strong>TS</strong>-<strong>72XX</strong>. Please refer to yourdebugger's manual <str<strong>on</strong>g>for</str<strong>on</strong>g> both installati<strong>on</strong> and use.7.6 JavaThere are many opti<strong>on</strong>s to enable Java <strong>on</strong> your <strong>TS</strong>-<strong>72XX</strong> <str<strong>on</strong>g>Linux</str<strong>on</strong>g> box. Many <strong>TS</strong> customersare using the JamVM. JamVM is a compact Java Virtual Machine, suitable <str<strong>on</strong>g>for</str<strong>on</strong>g> embeddedsystems, that c<strong>on</strong><str<strong>on</strong>g>for</str<strong>on</strong>g>ms to the JVM specificati<strong>on</strong> versi<strong>on</strong> 2.In order to run Java via JamVM <strong>on</strong> your <strong>TS</strong>-<str<strong>on</strong>g>ARM</str<strong>on</strong>g> <str<strong>on</strong>g>Linux</str<strong>on</strong>g> system you will need to obtain and© Jan, 2012 www.embedded<str<strong>on</strong>g>ARM</str<strong>on</strong>g>.com 37
LINUX FOR <str<strong>on</strong>g>ARM</str<strong>on</strong>g> ON <strong>TS</strong>-<strong>72XX</strong>APPLICATION DEVELOPMENTcompile the Jikes/JamVM/GNUClasspath combo:✔✔✔http://jamvm.source<str<strong>on</strong>g>for</str<strong>on</strong>g>ge.nethttp://jikes.source<str<strong>on</strong>g>for</str<strong>on</strong>g>ge.nethttp://www.gnu.org/software/classpathJikes is required when Java compilati<strong>on</strong> is required <strong>on</strong> the embedded system, otherwise<strong>on</strong>ly JamVM is enough to have a Java-run-envir<strong>on</strong>ment system.Another way to install JamVM is through the Debian apt-get tool, making use of theJamVM compilled packages <str<strong>on</strong>g>for</str<strong>on</strong>g> Debian:apt-get install jikesapt-get install jamvmapt-get install jikes-classpath7.7 Using Eclipse IDETO-DO7.8 Graphical User InterfacesQt/EmbeddedIt is possible to build advanced graphical user interface (GUI) applicati<strong>on</strong>s <strong>on</strong> top of asingle <strong>TS</strong>-7300 SBC or the set <strong>TS</strong>-7KV plus a <strong>TS</strong>-<strong>72XX</strong> SBC by using the QT/EmbeddedFree libraries and the <str<strong>on</strong>g>Linux</str<strong>on</strong>g> Framebufer driver. The development using Qt/Embedded isbased <strong>on</strong> C/C++ <str<strong>on</strong>g>Linux</str<strong>on</strong>g> tools.To learn how to program GUI applicati<strong>on</strong> using the Qt/Embedded API, please refer to theQT/Embedded specific documentati<strong>on</strong>.XfreeTO-DO7.9 Sample Applicait<strong>on</strong>s<strong>Technologic</strong> <strong>Systems</strong> provides some sample applicati<strong>on</strong>s with source code.DIOThe following is a C sample code that implements a butt<strong>on</strong> <strong>on</strong> DIO pin 1. When the butt<strong>on</strong>is pressed, the LED starts blinking:#include#include#include#include#include#includeint main(int argc, char **argv){volatile unsigned int *PEDR, *PEDDR, *PBDR, *PBDDR, *GPIOBDB;int i;unsigned char state;unsigned char *start;© Jan, 2012 www.embedded<str<strong>on</strong>g>ARM</str<strong>on</strong>g>.com 38
LINUX FOR <str<strong>on</strong>g>ARM</str<strong>on</strong>g> ON <strong>TS</strong>-<strong>72XX</strong>APPLICATION DEVELOPMENTint fd = open("/dev/mem", O_RDWR | O_SYNC);start = mmap(0, getpagesize(), PROT_READ|PROT_WRITE, MAP_SHARED,fd, 0x80840000);PBDR = (unsigned int *)(start + 0x04); //port bPBDDR = (unsigned int *)(start + 0x14); //port b directi<strong>on</strong>PEDR = (unsigned int *)(start + 0x20); //port e dataPEDDR = (unsigned int *)(start + 0x24); //port e directi<strong>on</strong>GPIOBDB = (unsigned int *)(start + 0xC4); // debounce <strong>on</strong> port b*PBDDR = 0xf0; //upper nibble output, lower nibble input*PEDDR = 0xff; //all output (just 2 bits)*GPIOBDB = 0x01; //enable debounce <strong>on</strong> bit 0state = *PBDR; // read initial statewhile (state & 0x01) { // wait until butt<strong>on</strong> goes lowstate = *PBDR; // remember bit 0 is pulled up with 4.7k ohm}// blink 5 times, sleep 1 sec<strong>on</strong>d so it's visible<str<strong>on</strong>g>for</str<strong>on</strong>g> (i = 0; i < 5; i++) {*PEDR = 0xff;sleep(1);*PEDR = 0x00;sleep(1);}close(fd);return 0;}A/D C<strong>on</strong>verterThe following is sample <str<strong>on</strong>g>Linux</str<strong>on</strong>g> C code <str<strong>on</strong>g>for</str<strong>on</strong>g> initiating and printing an ADC c<strong>on</strong>versi<strong>on</strong> <strong>on</strong>channel 1.#include#include#include#include#include#includeint main(int argc, char **argv){volatile unsigned short * complete;volatile unsigned char * lsb, * msb, * c<strong>on</strong>trol;int res;int fd = open("/dev/mem", O_RDWR | O_SYNC);assert(fd != -1);lsb = c<strong>on</strong>trol = (unsigned char *)mmap(0, getpagesize(),PROT_READ|PROT_WRITE, MAP_SHARED, fd, 0x10c00000);msb = lsb + 1;complete = (unsigned short *)mmap(0, getpagesize(),PROT_READ|PROT_WRITE, MAP_SHARED, fd, 0x10800000);// Initiate c<strong>on</strong>versi<strong>on</strong>, channel #1, unipolar, 5V*c<strong>on</strong>trol = 0x41;// Wait <str<strong>on</strong>g>for</str<strong>on</strong>g> completi<strong>on</strong>© Jan, 2012 www.embedded<str<strong>on</strong>g>ARM</str<strong>on</strong>g>.com 39
LINUX FOR <str<strong>on</strong>g>ARM</str<strong>on</strong>g> ON <strong>TS</strong>-<strong>72XX</strong>APPLICATION DEVELOPMENTwhile ((*complete & 0x80) != 0);// Print result <strong>on</strong> a scale from 0 to 2^12 - 1res = *lsb;res |= *msb
LINUX FOR <str<strong>on</strong>g>ARM</str<strong>on</strong>g> ON <strong>TS</strong>-<strong>72XX</strong>FURTHER REFERENCE8 FURTHER REFERENCE8.1 Using the <strong>Technologic</strong> <strong>Systems</strong> WebsiteThe official <strong>Technologic</strong> <strong>Systems</strong> website c<strong>on</strong>tains useful in<str<strong>on</strong>g>for</str<strong>on</strong>g>mati<strong>on</strong> <strong>on</strong> hardware andsoftware support. The latest products releases, including SBCs and PC/104 PeripheralBoards, and updated news and documentati<strong>on</strong> are available.✔http://www.embedded<str<strong>on</strong>g>ARM</str<strong>on</strong>g>.comSoftware package updates and further software documentati<strong>on</strong> can be found at the <str<strong>on</strong>g>Linux</str<strong>on</strong>g><str<strong>on</strong>g>for</str<strong>on</strong>g> <str<strong>on</strong>g>ARM</str<strong>on</strong>g> webpage. Most of the files menti<strong>on</strong>ed in this manual are available there:✔http://www.embeddedarm.com/linux/<str<strong>on</strong>g>ARM</str<strong>on</strong>g>.htm8.2 Recommended ReadingsFor those who are new to <str<strong>on</strong>g>Linux</str<strong>on</strong>g>, it will be beneficial to own and work within a full featureddesktop <str<strong>on</strong>g>Linux</str<strong>on</strong>g> OS. Comm<strong>on</strong>ly, those new to <str<strong>on</strong>g>Linux</str<strong>on</strong>g> use distributi<strong>on</strong>s such as Redhat'sFedora, Mandrake <str<strong>on</strong>g>Linux</str<strong>on</strong>g>, or Suse. For those who are unwilling to install a <str<strong>on</strong>g>Linux</str<strong>on</strong>g> OS <strong>on</strong>totheir system, Knoppix is recommended. Knoppix is a Live-CD that boots into <str<strong>on</strong>g>Linux</str<strong>on</strong>g>, andwhile offering a feature rich <str<strong>on</strong>g>Linux</str<strong>on</strong>g> OS, it w<strong>on</strong>'t touch the hard-drive unless told to. Forthose with are familiar with <str<strong>on</strong>g>Linux</str<strong>on</strong>g> but not familiar with programming in <str<strong>on</strong>g>Linux</str<strong>on</strong>g>, the followingweb-sites and books are excellent resources:✔http://www.ibm.com/developerworksFull of tutorials and articles <str<strong>on</strong>g>for</str<strong>on</strong>g> <str<strong>on</strong>g>Linux</str<strong>on</strong>g> programming. For example, they have an excellentset of tutorials <strong>on</strong> programming threads in <str<strong>on</strong>g>Linux</str<strong>on</strong>g>✔http://www.kernelnewbies.orgGood starting point <str<strong>on</strong>g>for</str<strong>on</strong>g> those who are new to <str<strong>on</strong>g>Linux</str<strong>on</strong>g> kernel development.✔http://www.m<strong>on</strong>tavista.comM<strong>on</strong>ta Vista is a global leader in embedded <str<strong>on</strong>g>Linux</str<strong>on</strong>g> development. They offer their ownOperating System, as well as their set of universal development tools (including IDEs).M<strong>on</strong>ta Vista tools are plat<str<strong>on</strong>g>for</str<strong>on</strong>g>m independent, and work well <str<strong>on</strong>g>for</str<strong>on</strong>g> a Windows <strong>on</strong>lyenvir<strong>on</strong>ment.✔<str<strong>on</strong>g>Linux</str<strong>on</strong>g> Device Drivers, 2nd Editi<strong>on</strong> By Alessandro Rubini & J<strong>on</strong>athan CorbetHighly recommended book <str<strong>on</strong>g>for</str<strong>on</strong>g> those who wish to learn the fundamentals to device driverdevelopment in <str<strong>on</strong>g>Linux</str<strong>on</strong>g>8.3 Using the <strong>TS</strong>-7000 Mailing ListThe <strong>TS</strong>-7000 Yahoo mailing list is a self help group <str<strong>on</strong>g>for</str<strong>on</strong>g> the <strong>Technologic</strong> <strong>Systems</strong> <strong>TS</strong>-7000series of <str<strong>on</strong>g>ARM</str<strong>on</strong>g> based single board computers running the <str<strong>on</strong>g>Linux</str<strong>on</strong>g> <str<strong>on</strong>g>for</str<strong>on</strong>g> <str<strong>on</strong>g>ARM</str<strong>on</strong>g> OS. The groupaims to help other users with hardware and software issues relating to the use of the <strong>TS</strong>-7000 series. Further supporting in<str<strong>on</strong>g>for</str<strong>on</strong>g>mati<strong>on</strong> <strong>on</strong> <strong>Technologic</strong> <strong>Systems</strong> hardware andsoftware, extra sample codes and useful tips & tricks <str<strong>on</strong>g>for</str<strong>on</strong>g> <str<strong>on</strong>g>ARM</str<strong>on</strong>g> <str<strong>on</strong>g>Linux</str<strong>on</strong>g> can be found in theYahoo Group <str<strong>on</strong>g>for</str<strong>on</strong>g> <strong>TS</strong>-7000 series. This is a great place to get in<str<strong>on</strong>g>for</str<strong>on</strong>g>mati<strong>on</strong> from experiencedembedded engineers using <strong>TS</strong>-7000 boards in a wide variety of embedded applicati<strong>on</strong>s.This group has no official ties with <strong>Technologic</strong> <strong>Systems</strong>, although <strong>Technologic</strong> <strong>Systems</strong>engineers do c<strong>on</strong>tribute.✔http://groups.yahoo.com/group/<strong>TS</strong>-7000/8.4 Using the <strong>Technologic</strong> <strong>Systems</strong> FTP Server<strong>Technologic</strong> <strong>Systems</strong> makes a wide variety of supporting files <str<strong>on</strong>g>for</str<strong>on</strong>g> <strong>TS</strong>-<strong>72XX</strong> SBC's and<str<strong>on</strong>g>Linux</str<strong>on</strong>g> <str<strong>on</strong>g>for</str<strong>on</strong>g> <str<strong>on</strong>g>ARM</str<strong>on</strong>g> available <str<strong>on</strong>g>for</str<strong>on</strong>g> downloading through its FTP server.© Jan, 2012 www.embedded<str<strong>on</strong>g>ARM</str<strong>on</strong>g>.com 41
LINUX FOR <str<strong>on</strong>g>ARM</str<strong>on</strong>g> ON <strong>TS</strong>-<strong>72XX</strong>FURTHER REFERENCE✔ftp://ftp.embeddedarm.com8.5 Useful Data Sheets✔✔Getting Started with <strong>TS</strong>-<str<strong>on</strong>g>Linux</str<strong>on</strong>g>(http://www.embeddedarm.com/documentati<strong>on</strong>/software/arm-tslinux-ts72xx.pdf)<str<strong>on</strong>g>Linux</str<strong>on</strong>g> <str<strong>on</strong>g>for</str<strong>on</strong>g> <str<strong>on</strong>g>ARM</str<strong>on</strong>g> <strong>on</strong> <strong>TS</strong>-7000 <strong>User's</strong> <strong>Guide</strong>(http://www.embeddedarm.com/documentati<strong>on</strong>/software/arm-linux-ts72xx.pdf)✔ <strong>TS</strong>-7200 Data Sheet(http://www.embeddedarm.com/documentati<strong>on</strong>/ts-7200-datasheet.pdf)✔ <strong>TS</strong>-7250 Data Sheet(http://www.embeddedarm.com/documentati<strong>on</strong>/ts-7250-datasheet.pdf)✔ <strong>TS</strong>-7260 Data Sheet(http://www.embeddedarm.com/documentati<strong>on</strong>/ts-7260-datasheet.pdf)✔ <strong>TS</strong>-7300 Data Sheet(http://www.embeddedarm.com/documentati<strong>on</strong>/ts-7300-datasheet.pdf)✔ <strong>TS</strong>-7400 Data Sheet(http://www.embeddedarm.com/documentati<strong>on</strong>/ts-7400-datasheet.pdf)✔✔✔EP9301 <strong>User's</strong> <strong>Guide</strong>(http://www.embeddedarm.com/documentati<strong>on</strong>/third-party/ts-7000_ep9301-ug.pdf)EP9301 Data Sheet(http://www.embeddedarm.com/documentati<strong>on</strong>/third-party/ts-7000_ep9302-ds.pdf)<strong>TS</strong>-7000 Yahoo Users' Group (http://groups.yahoo.com/group/ts-7000/)8.6 Where to go <str<strong>on</strong>g>for</str<strong>on</strong>g> additi<strong>on</strong>al help<strong>Technologic</strong> <strong>Systems</strong> makes available several engineers to provide free technical supportregarding the <strong>TS</strong>-<strong>72XX</strong> series hardware. To request support, call 480-837-5200 or emailto support@embedded<str<strong>on</strong>g>ARM</str<strong>on</strong>g>.com. For general <str<strong>on</strong>g>Linux</str<strong>on</strong>g> questi<strong>on</strong>s not specific to the <strong>TS</strong>-<strong>72XX</strong>boards (such as, "How to c<strong>on</strong>figure the Apache web server"), you may be referred to the<strong>TS</strong> professi<strong>on</strong>al services group, which is well equipped to research just about any level ofquesti<strong>on</strong> from kernel development to web server c<strong>on</strong>figurati<strong>on</strong>.Since <str<strong>on</strong>g>Linux</str<strong>on</strong>g> is open-source, support may also be received from the individualdevelopment communities throughout the internet. Several projects have internet postedFAQs, HOWTOs, and community supported mailing lists providing users of their authoredprograms free help.8.7 Hardware/Software Customizati<strong>on</strong>Should your embedded project approach quantites between 500-1000 boards per year, itmay be a good time to talk to <strong>TS</strong> engineer about specific hardware or softwarecustomizati<strong>on</strong>s that become available to you. There may be modificati<strong>on</strong>s we can do toreduce cost or add specific features to directly accomodate your specific requirements.Several opti<strong>on</strong>s are available:✔✔<strong>TS</strong> can load your software directly <strong>on</strong>to the boards you order. Often times this can saveyou from creating your own producti<strong>on</strong> and software loading process. This type ofservice is available no matter the quantity.CPLD's/FPGA's can be reprogrammed to include specific customer-specifiedfuncti<strong>on</strong>ality. For instance, a magic register your software can verify be<str<strong>on</strong>g>for</str<strong>on</strong>g>e enablingcertain features of your product or extra serial ports in the CPLD.© Jan, 2012 www.embedded<str<strong>on</strong>g>ARM</str<strong>on</strong>g>.com 42
LINUX FOR <str<strong>on</strong>g>ARM</str<strong>on</strong>g> ON <strong>TS</strong>-<strong>72XX</strong>FURTHER REFERENCE✔✔Simple daughter-boards can be designed. Often, a low-cost 2-layer compani<strong>on</strong> boardcan be created to add functi<strong>on</strong>ality to the board without actually changing the moreexpensive multi-layer <strong>TS</strong>-<strong>72XX</strong> circuit board.The <strong>TS</strong>-<strong>72XX</strong> board can be given new features and/or physical dimensi<strong>on</strong>s. This is themost expensive, but most powerful <str<strong>on</strong>g>for</str<strong>on</strong>g>m of customizati<strong>on</strong>. Often times, <strong>TS</strong> maysubsidize the development costs of a new board if it has general appeal to our broadercustomer base. Much of our CO<strong>TS</strong> product line was a joint development between <strong>TS</strong>and another company. Allowing <strong>TS</strong> to generally market a design is a great way toacheive ec<strong>on</strong>omies of scale (thereby reducing per-unit cost) and to ensure stock andcommercial-off-the-shelf (CO<strong>TS</strong>) status <str<strong>on</strong>g>for</str<strong>on</strong>g> your custom board.8.8 About <strong>Technologic</strong> <strong>Systems</strong> Inc.<strong>Technologic</strong> <strong>Systems</strong> has been developing embedded computing soluti<strong>on</strong>s <str<strong>on</strong>g>for</str<strong>on</strong>g> the OEMmarket over 20 years. Our commitment to excellent products, low prices and excepti<strong>on</strong>alcustomer support has allowed our business to flourish in a very competitive marketplace.We offer a wide variety of off-the-shelf PC/104 SBCs and peripherals that meets mostembedded project needs. Our engineers are also enthusiastic about new projects andtake pride in new designs that are <strong>on</strong> the cutting edge of the embedded marketplace.Custom designs are a large comp<strong>on</strong>ent of our business and, with our excepti<strong>on</strong>alembedded engineers, we can often engineer a custom soluti<strong>on</strong> at a price that competeswith an in-house design.Our Values✔✔✔✔✔✔Innovative Hardware and Software Engineering: Our engineers are <strong>on</strong> the cuttingedge of embedded design. Our elegant and smart hardware/software soluti<strong>on</strong>sdifferentiate our products.Real Ruggedness: <strong>Technologic</strong> <strong>Systems</strong> builds rugged computers because we knowhow important reliability and l<strong>on</strong>gevity are to embedded applicati<strong>on</strong>s. The internalelectr<strong>on</strong>ics of our product are very simple to manufacture and operate with hugemargins all around, and our thoughtful designs minimize the use of layers, vias, chips,solder points and exotic manufacturing technologies.Fair Prices: Our products and services are priced fairly and competively - we <strong>on</strong>lycharge you <str<strong>on</strong>g>for</str<strong>on</strong>g> what you really need, no unnecessary items like fancy cases or extrac<strong>on</strong>figurati<strong>on</strong> services.Open-Source Visi<strong>on</strong>: We provide complete <str<strong>on</strong>g>Linux</str<strong>on</strong>g> kernel source code, drivers andexamples <str<strong>on</strong>g>for</str<strong>on</strong>g> our hardware, al<strong>on</strong>g with schematics and data sheets. There is nomystery when using our products <str<strong>on</strong>g>for</str<strong>on</strong>g> development.Superior Support: Our engineers answer technical support calls, and all our productshave complete supporting documentati<strong>on</strong>.Extended Product Lifetime: <strong>Technologic</strong> <strong>Systems</strong> has never disc<strong>on</strong>tinued a productin more than 20 years of business.Additi<strong>on</strong>al Manufacturer (<strong>Technologic</strong> <strong>Systems</strong>) features:✔✔✔✔✔Engineers <strong>on</strong> free technical support.Each board undergoes many producti<strong>on</strong> tests and burn-in prior to shipment.Board customizati<strong>on</strong>s available with no minimum order.Factory loading of customer supplied software available.Readily available hardware and software professi<strong>on</strong>al services <str<strong>on</strong>g>for</str<strong>on</strong>g> hire.© Jan, 2012 www.embedded<str<strong>on</strong>g>ARM</str<strong>on</strong>g>.com 43
LINUX FOR <str<strong>on</strong>g>ARM</str<strong>on</strong>g> ON <strong>TS</strong>-<strong>72XX</strong>APPENDIX A: DOCUMENT HISTORYAPPENDIX A: DOCUMENT HISTORYDate of Revisi<strong>on</strong> NumberCommentsIssue/Revisi<strong>on</strong>Unknown 1.0 Old <str<strong>on</strong>g>Linux</str<strong>on</strong>g> <str<strong>on</strong>g>for</str<strong>on</strong>g> <str<strong>on</strong>g>ARM</str<strong>on</strong>g> Developer'sManualsMay 30, 2006 2.0 New and improved manualreleasedDec 13, 2006 2.1 Some TO-DO secti<strong>on</strong>scompleted, minor bugs fixed,new secti<strong>on</strong>s includedDec 22, 2006 2.2 Debian info added, <str<strong>on</strong>g>ARM</str<strong>on</strong>g> featurematrix updated, marketing infoaddedJul 05, 2007 2.3 Rename series to <strong>TS</strong>-<strong>72XX</strong>,minor correcti<strong>on</strong>sJul 08,2008 2.4 Fixed broken web linksJul 09, 2009 2.5 Updated mailing address, minorcorrecti<strong>on</strong>sSep 30, 2011 2.6 Example code fixesJan 30, 2012 2.7 Example command fix© Jan, 2012 www.embedded<str<strong>on</strong>g>ARM</str<strong>on</strong>g>.com 44
LINUX FOR <str<strong>on</strong>g>ARM</str<strong>on</strong>g> ON <strong>TS</strong>-<strong>72XX</strong>APPENDIX B: MEMORY AND REGISTER MAPAPPENDIX B: MEMORY AND REGISTER MAPAddress Regi<strong>on</strong>0xF000_0000 - 0xFFFF_FFFF0xE000_0000 - 0xEFFF_FFFF0xD000_0000 - 0xDFFF_FFFF0xC000_0000 - 0xCFFF_FFFF0x8084_0000 - 0x8084_00C80x8000_0000 - 0x800F_FFFF0x71C0_0000 - 0x71FF_FFFF0x7180_0000 - 0x71BF_FFFF0x7000_0000 - 0x70FF_FFFF0x7000_0000 - 0x7FFF_FFFF0x6000_0000 - 0x60FF_FFFF0x6000_0000 - 0x6FFF_FFFF0x3000_0000 - 0x3FFF_FFFF0x21C0_0000 - 0x21FF_FFFE0x2180_0000 - 0x21BF_FFFF0x2000_0000 - 0x2FFF_FFFF0x11C0_0000 - 0x11FF_FFFF0x1180_0000 - 0x11BF_FFFF0x1000_0000 - 0x1FFF_FFFF0x0001_0000 - 0x0000_FFFFFuncti<strong>on</strong>nCS0 (not used)SDRAM (<strong>TS</strong>-7250)SDRAM (not used)SDRAM (not used)GPIO c<strong>on</strong>trol registersAHB mapped registersCS7 PC/104 8/16 bit I/O (user selectable timing)CS7 PC/104 8/16 bit Memory (selectable timing)<strong>TS</strong>-9420 FlashCS7 (bit bus cycles)<strong>on</strong>-board Flash (<strong>TS</strong>-7200)CS6 (Flash)CS3 (not used)PC/104 16-bit I/OPC/104 16-bit MemoryCS2 (16-bit bus cycles)PC/104 8-bit I/OPC/104 8-bit MemoryCS1 (8-bit bus cycles)SDRAM regi<strong>on</strong>Register AddressFuncti<strong>on</strong>0x8090_0020Cirrus A/D lock register0x8090_0018Cirrus A/D channel select register0x8090_0008Cirrus A/D result register (RO)0x808D_0000 - 0x808D_FFFF UART2 c<strong>on</strong>trol registers0x808C_0000 - 0x808C_FFFF UART1 c<strong>on</strong>trol registers0x808A_0000 - 0x808A_FFFF SPI c<strong>on</strong>trol registers0x8084_0044LCD_EN, LCD_RS, LCD_WR directi<strong>on</strong> reg.(bits3-5)0x8084_0040LCD_EN, LCD_RS, LCD_WR data reg.(bits3-5)0x8084_0034 DIO_8 directi<strong>on</strong> register (bit 1)0x8084_0030 DIO_8 data register (bit 1)0x8084_0020 On-board LEDs register (bits 0, 1)0x8084_0018Port C directi<strong>on</strong> register(<strong>TS</strong>-7300) LCD_7 directi<strong>on</strong> register (bit 7)0x8084_0014DIO_0 thru DIO_7 directi<strong>on</strong> register (R/W)0x8084_0010LCD_0 thru LCD_7 directi<strong>on</strong> register (R/W)0x8084_0008Port C data register(<strong>TS</strong>-7250) 1000 mA driver output <strong>on</strong> DIO (bit 0)(<strong>TS</strong>-7300) LCD_7 data register (bit 7)0x8084_0004DIO_0 thru DIO_7 data register (R/W)0x8084_0000LCD_0 thru LCD_7 data register (R/W)0x8081_0000 - 0x8081_FFFF Timer C<strong>on</strong>trol registers0x8080_0000 - 0x8FFF_FFFF APB mapped registers0x800B_0000 - 0x800B_FFFF VIC 0 registers0x8006_0000 - 0x8006_FFFF SDRAM c<strong>on</strong>trol registers0x8002_0000 - 0x8002_FFFF USB registers0x8001_0000 - 0x8001_FFFF Ethernet MAC registers0x7220_0000 - 0x729F_FFFF (<strong>TS</strong>-7300) FPGA SDRAM regi<strong>on</strong>0x7210_0000 - 0x7200_FFFF (<strong>TS</strong>-7300) FPGA MAC core 32-bit registers© Jan, 2012 www.embedded<str<strong>on</strong>g>ARM</str<strong>on</strong>g>.com 45
LINUX FOR <str<strong>on</strong>g>ARM</str<strong>on</strong>g> ON <strong>TS</strong>-<strong>72XX</strong>APPENDIX B: MEMORY AND REGISTER MAPRegister AddressFuncti<strong>on</strong>0x7200_0044 - 0x7200_0047 (<strong>TS</strong>-7300) FPGA DIO2 <strong>TS</strong>-XDIO #2 registers0x7200_0040 - 0x7200_0043 (<strong>TS</strong>-7300) FPGA DIO2 <strong>TS</strong>-XDIO #1 registers0x7200_0030 - 0x7200_003A (<strong>TS</strong>-7300) FPGA Video core 16-bit registers0x7200_0020 - 0x7200_0027 (<strong>TS</strong>-7300) FPGA SD Card core 16-bit registers0x7200_0000 - 0x7200_001F (<strong>TS</strong>-7300) FPGA COM3-4-5-6-7-8 16-bit registers0x6000_0000(<strong>TS</strong>-7250) NAND Flash data register0x6040_0000 (<strong>TS</strong>-7250) NAND Flash c<strong>on</strong>trol register (bits 0-2)0x6080_0000 (<strong>TS</strong>-7250) NAND Flash Busy status (bit 5)0x23C0_0000 WDT Feed register (bits 0-2)0x2380_0000 WDT C<strong>on</strong>trol register (bits 0-2)0x2340_0000 PLD versi<strong>on</strong> (bits 0-2)0x2300_0000COM2 RS-485 c<strong>on</strong>trol register0x22C0_0000 COM2 RS-485 c<strong>on</strong>trol register (bits 0-2)0x2280_0000 JP6 (bit 0)0x2280_0000 Booting from <strong>TS</strong>-9420 (bit 1)0x2280_0000 <strong>TS</strong>-9420 present (bit 2)0x2240_0000 MAX197 A/D opti<strong>on</strong> present (bit 0)0x2240_0000 COM2 RS-485 opti<strong>on</strong> present (bit 1)0x2200_0000 Model Number (bits 0-2)0x21E0_0000 - 0x21E0_03FE PC/104 16-bit I/O (legacy support)0x2100_0000CF IDE 16-bit register0x13C0_0000 - 0x13C0_0001 (<strong>TS</strong>-7300) FPGA loader registers0x1340_0000 - 0x1340_0002 (<strong>TS</strong>-7260) Additi<strong>on</strong>al COM5 registers0x1300_0000 - 0x1300_0002 (<strong>TS</strong>-7260) Additi<strong>on</strong>al COM4 registers0x12C0_0000 - 0x12C0_0003 (<strong>TS</strong>-7260) DIO2 Header <strong>TS</strong>-XDIO registers0x12C0_0000 - 0x12C0_0001 (<strong>TS</strong>-7260) DIO2 Header Basic DIO registers0x1240_0000 - 0x1240_0002 (<strong>TS</strong>-7260) COM3 serial port registers0x1200_0000(<strong>TS</strong>-7260) Power Management register0x11E0_0000 - 0x11E0_03FF PC/104 8-bit I/O (legacy support)0x11A0_0000 - 0x11AF_FFFF PC/104 8-bit Memory (legacy support)0x1170_0000RTC R/W data register0x1100_0001 - 0x1100_0007 CF IDE 8-bit registers0x10F0_0000 - 0x10F0_0001 MAX197 A/D registers0x1080_0000MAX197 A/D busy bit (bit 7) (RO)0x1080_0000JP2-JP5 (bits 0,1,3,4) (RO)0x1080_0000COM1 DCD (bit 6) (RO)0x1080_0000Write Only index register0x1040_0006 - 0x1040_0007 CF AUX IDE 8-bit registers© Jan, 2012 www.embedded<str<strong>on</strong>g>ARM</str<strong>on</strong>g>.com 46
LINUX FOR <str<strong>on</strong>g>ARM</str<strong>on</strong>g> ON <strong>TS</strong>-<strong>72XX</strong>APPENDIX C: DOWNLOADS - SCHEMATICS AND MECHANICAL DRAWINGAPPENDIX C: DOWNLOADS - SCHEMATICS AND MECHANICAL DRAWING✔ <strong>TS</strong>-7200 schematic(http://www.embeddedarm.com/documentati<strong>on</strong>/ts-7200-schematic.pdf)✔ <strong>TS</strong>-7200 mechanical drawing(http://www.embeddedarm.com/documentati<strong>on</strong>/ts-7200-mechanical.pdf)✔<strong>TS</strong>-7200's download secti<strong>on</strong> (http://www.embeddedarm.com/epc/ts7200-spec-d.html)✔<strong>TS</strong>-7250 schematic(http://www.embeddedarm.com/documentati<strong>on</strong>/ts-7250-schematic.pdf)✔ <strong>TS</strong>-7250 mechanical drawing (http://www.embeddedarm.com/documentati<strong>on</strong>/ts-7250-mechanical.pdf)✔<strong>TS</strong>-7250's download secti<strong>on</strong> (http://www.embeddedarm.com/epc/ts7250-spec-d.html)✔ <strong>TS</strong>-7260 schematic(http://www.embeddedarm.com/documentati<strong>on</strong>/ts-7260-schematic.pdf)✔ <strong>TS</strong>-7260 mechanical drawing(http://www.embeddedarm.com/documentati<strong>on</strong>/ts-7260-mechanical.pdf)✔<strong>TS</strong>-7260's download secti<strong>on</strong> (http://www.embeddedarm.com/epc/ts7260-spec-d.htm)© Jan, 2012 www.embedded<str<strong>on</strong>g>ARM</str<strong>on</strong>g>.com 47
LINUX FOR <str<strong>on</strong>g>ARM</str<strong>on</strong>g> ON <strong>TS</strong>-<strong>72XX</strong>APPENDIX D: <strong>TS</strong>-<str<strong>on</strong>g>ARM</str<strong>on</strong>g> SBC FEATURE MATRIXAPPENDIX D: <strong>TS</strong>-<str<strong>on</strong>g>ARM</str<strong>on</strong>g> SBC FEATURE MATRIXFeature/Product <strong>TS</strong>-7200 <strong>TS</strong>-7250 <strong>TS</strong>-7260 <strong>TS</strong>-7300 <strong>TS</strong>-7400CPU200 MhzAMR920T200 MhzAMR920T200 MhzAMR920T200 MhzAMR920T200 MhzAMR920TCategory SBC SBC SBC SBC SoMPC/104 C<strong>on</strong>nector Yes Yes Yes Yes NoOn-board FPGA No No No Yes NoRAM 32 MB 32 MB 32 MB 32 MB 32 MBOpti<strong>on</strong>al RAM 64 MB 64 MB128 MB64 MB128 MB64 MB128 MB64 MB128 MBOn-board Flash 8 MB 32 MB 32 MB No 32 MBOpti<strong>on</strong>al <strong>on</strong>-boardFlash16 MB 64 MB128 MB64 MB128 MBPossibleC<strong>on</strong>tact us64 MB128 MB256 MB256 MB 256 MBStandard A/D Yes - 2 ch Yes - 5 ch Yes - 2 ch Yes - 1 ch Yes - 4chOpti<strong>on</strong>al A/D 8 ch 8 ch No No NoEthernet 10/100 - 1 10/100 - 1 10/100 - 1 10/100 - 2 10/100 - 1USB1.1 ports Yes - 2 Yes - 2 Yes - 2 Yes - 2 Yes - 2VGA Video Out No No No Yes NoIDE Compact Flash Yes No No No NoSD Card Interface No No Yes - Yes - 2 Yes - 11 <strong>on</strong> RevBDigital I/O 20 20 30 55 20<strong>TS</strong>-XDIO No No Yes - 1 Yes - 2 NoRS-485Opt.full/halfOpt.full/halfOpt.full/halfOpt.full/halfOpt.full/halfStandard COM Ports 2 2 3 10 3 TTLOpti<strong>on</strong>al COM Ports No No 2 Yes NoRS232 C<strong>on</strong>sole Yes Yes Yes Yes NoRTC Opt. Opt. Opt Opt. Opt.LCD Interface Yes Yes Yes Yes NoKeypad Interface Yes Yes Yes Yes No<strong>TS</strong>-<str<strong>on</strong>g>Linux</str<strong>on</strong>g> Yes Yes Yes Avail. YesDebian <str<strong>on</strong>g>Linux</str<strong>on</strong>g> Avail. CF Avail. USB Avail. SD Yes Avail. SD<str<strong>on</strong>g>Linux</str<strong>on</strong>g> Fast Bootup No No No 1.69 secs 1.1 secs<str<strong>on</strong>g>Linux</str<strong>on</strong>g> Bootloader Avail. Avail. Avail. Yes YesReal-Time RTAI Yes Yes Yes Yes YesJava Yes Yes Yes Yes YesUSB WiFi Support Opt. Opt. Opt. Opt. YesUSB Flash Support Opt. Opt. Opt. Opt. YesExtendedYes Yes Yes Yes YesTemperatureSwitching-Mode No No Yes No Avail.Power SupplyRoHS Compliance Opt. Opt. Opt. Yes YesQuantity 1 Pricing $149.00 $149.00 $179.00 $219.00 $129.00Quantity 100 Pricing $119.00 $119.00 $149.00 $189.00 $99.00© Jan, 2012 www.embedded<str<strong>on</strong>g>ARM</str<strong>on</strong>g>.com 48
LINUX FOR <str<strong>on</strong>g>ARM</str<strong>on</strong>g> ON <strong>TS</strong>-<strong>72XX</strong>APPENDIX E: CONTACT TECHNOLOGIC SYSTEMSAPPENDIX E: CONTACT TECHNOLOGIC SYSTEMS16525 East Laser DriveFountain Hills, AZ 85268TEL 1.480.837.5200FAX 1.480.837.5300www.embedded<str<strong>on</strong>g>ARM</str<strong>on</strong>g>.comsupport@embedded<str<strong>on</strong>g>ARM</str<strong>on</strong>g>.comCall us M<strong>on</strong>day-Friday, from 9 am to 5 pm, Ariz<strong>on</strong>a-USA time;or email us at any time.Our engineers answer tech support calls and are more than happy to talk to youabout your needs and help you find the best soluti<strong>on</strong> <str<strong>on</strong>g>for</str<strong>on</strong>g> your project.© Jan, 2012 www.embedded<str<strong>on</strong>g>ARM</str<strong>on</strong>g>.com 49


