Instruction Manual - Oakton Instruments
Instruction Manual - Oakton Instruments
Instruction Manual - Oakton Instruments

You also want an ePaper? Increase the reach of your titles
YUMPU automatically turns print PDFs into web optimized ePapers that Google loves.
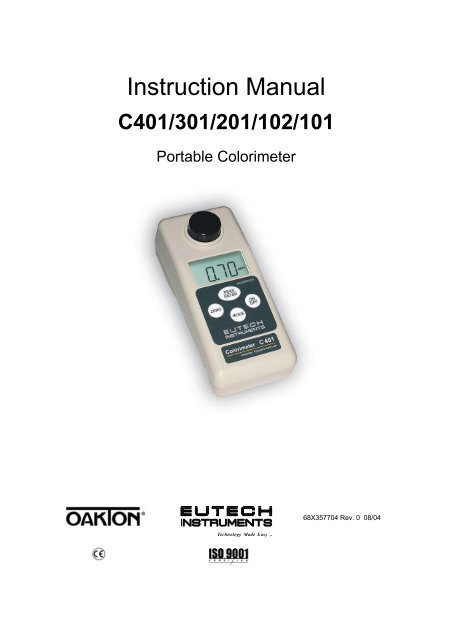
<strong>Instruction</strong> <strong>Manual</strong>C401/301/201/102/101Portable Colorimeter68X357704 Rev. 0 08/04Technology Made Easy ...
PrefaceThis manual functions in two ways: first as a step by step guide to helpyou operate the waterproof C401/301/201/102/101 Colorimeter; second, itserves as a handy reference guide.It contains basic instructions that you must follow during the operation,care and maintenance of the instrument. The safety protection provided bythis equipment may be impaired if it is used in a manner not described inthis manual. It is recommended that all operators should read this manualprior to working with this instrument.Eutech <strong>Instruments</strong>/ <strong>Oakton</strong> <strong>Instruments</strong> cannot accept any responsibilityfor damage or malfunction to the meter caused by improper use of theinstrument.The information presented in this manual is subject to change withoutnotice as improvements are made, and does not represent a commitmenton the part of Eutech <strong>Instruments</strong> Pte Ltd/ <strong>Oakton</strong> <strong>Instruments</strong>.Note: Eutech <strong>Instruments</strong> Pte Ltd/ <strong>Oakton</strong> <strong>Instruments</strong> reserves theright to make improvements in design, construction, and appearanceof our products without notice.Copyright © 2004 All rights reserved.Eutech <strong>Instruments</strong> Pte Ltd<strong>Oakton</strong> <strong>Instruments</strong>Rev. 0 08/04
TABLE OF CONTENTS1 INTRODUCTION .................................................................................................................. 11.1 UNPACKING C401/301/201/102/101 COLORIMETER AND ACCESSORIES ........................... 21.2 DISPLAY ............................................................................................................................ 31.3 KEYS AND FUNCTIONS....................................................................................................... 41.4 BATTERY INSTALLATION................................................................................................... 52 MEASUREMENT .................................................................................................................. 62.1 GENERAL INFORMATION.................................................................................................... 62.2 PREPARATION OF SAMPLE VIAL ........................................................................................ 72.3 MEASUREMENT PROCEDURE ............................................................................................. 72.4 CHLORINE, FREE & TOTAL (0 – 6PPM CL 2 ) ........................................................................ 92.4.1 Sample Collection ................................................................................................... 112.4.2 Sample Measurement .............................................................................................. 112.4.3 Interferences ........................................................................................................... 122.4.4 Correcting for dilution............................................................................................ 132.4.5 Accuracy Check / User Calibration ........................................................................ 132.4.6 Chemistry................................................................................................................ 142.5 CYANURIC ACID (5-90 PPM) ............................................................................................ 152.5.1 Sample Collection ................................................................................................... 172.5.2 Sample Measurement .............................................................................................. 172.5.3 Interferences ........................................................................................................... 172.5.4 Accuracy Check / User Calibration ........................................................................ 172.5.5 Chemistry................................................................................................................ 182.6 PH (5.9-8.2 PH UNITS) ..................................................................................................... 192.6.1 Sample Collection ................................................................................................... 212.6.2 Sample Measurement .............................................................................................. 212.6.3 Interferences ........................................................................................................... 212.6.4 Accuracy Check / User Calibration ........................................................................ 212.6.5 Chemistry................................................................................................................ 223 CALIBRATION.................................................................................................................... 233.1 CALIBRATION PROCEDURE .............................................................................................. 233.2 CHLORINE, FREE & TOTAL .............................................................................................. 243.3 CYANURIC ACID.............................................................................................................. 273.4 PH.................................................................................................................................... 303.5 RESTORING FACTORY CALIBRATION ............................................................................... 334 TROUBLESHOOTING GUIDE ......................................................................................... 355 ROUTINE MAINTENANCE .............................................................................................. 365.1 VIALS – HANDLING, CLEANING AND CARE ..................................................................... 366 ACCESSORIES .................................................................................................................... 377 SPECIFICATIONS .............................................................................................................. 388 WARRANTY ........................................................................................................................399 RETURN OF ITEMS ........................................................................................................... 39
IntroductionC401/301/201/102/1011 INTRODUCTIONThank you for selecting the waterproof portable C401/301/201/102/101Colorimeter. Depending on the model selected, the C401/301/201/102/101Colorimeter allows you to measure up to four parameters - namely the pH,Cyanuric acid, Free Chlorine and Total Chlorine of an aqueous sample inthe field. You have one of the following models:• C101: pH measurement• C102: Cyanuric Acid measurement• C201: Free Chlorine and Total Chlorine measurement• C301: Free Chlorine, Total Chlorine and pH measurement• C401: Free Chlorine, Total Chlorine, Cyanuric Acid and pHmeasurement1
IntroductionC401/301/201/102/1011.1 Unpacking C401/301/201/102/101 Colorimeter andAccessoriesThe table below indicates the items that you should find in yourColorimeter shipment.Item1. Field Portable C401/301/202/102/101Colorimeter with 4 “AAA”batteriesQuantity2. <strong>Instruction</strong> <strong>Manual</strong> 13. Instrument Carrying Case 14. Empty Vial 45. pH Indicator (Phenol Red) Reagent Kit (Only for C101, C301, C401) 16. Cyanuric Acid Reagent Kit (Only for C102, C401) 17. Free Chlorine DPD Reagent Kit (Only for C201, C301, C401) 18. Total Chlorine DPD reagent Kit (Only for C201, C301, C401) 1Remove C401/301/201/102/101 Colorimeter from the packing carton.Carefully inspect all items to ensure that no visible damage has occurredduring shipment. If the items you received do not match your order, pleasecontact your nearest distributor immediately.WARNING: Extra care should be taken when unpacking, opening, andhandling the sample vials. Surface scratches or finger smudges on the vialsurface may cause measurement errors. Handle these items by their capsonly.Batteries provided with the meter package are to be installed prior to use.See Section 1.4 Battery Installation on page 5.In the next page, Figure 1 depicts the meter. The three main componentsof the instrument are the sample well, the display, and the keypad. Thefollowing sections will describe the functionality of the display and thekeypad. The proper use of the instrument will be discussed in latersections.12
IntroductionC401/301/201/102/101Sample VialSample WellLiquid CrystalDisplayMeter IndexMarkingKeypadFigure 1: Parts of C401/301/201/102/101Colorimeter1.2 DisplayAll the LCD segments and annunciators that can appear on the display areshown in Figure 2. The display is used for reporting the colorimeterreading, communicate error messages and provide guidance for theoperation of the instrument.Calibration ModeAnnunciatorBattery IndicatorCALppmpHUnits ofMeasure14-segment Liquid Crystal DisplayFigure 2: Customized LCD when switched on3
IntroductionC401/301/201/102/1011.3 Keys and FunctionsThe keypad has four keys: ON/OFF, MODE, ZERO and READ/ENTER.KeysFunctionsON/OFF - Powers on and shuts off the meter. With the auto switch-off featurethe meter automatically shuts off 10 minutes after last key press.MODE - Selects the test to be performed.- Selects the calibration point in an incremental circular manner duringcalibration.ZERO - Blanks the instrument (sets the meter to zero) before chemicalreagent is added.- Initiates the calibration mode when used with the ON/OFF key.- Aborts the calibration process without saving.- Exits the calibration mode.READ /ENTER- Initiates the measurement of the sample after the chemical reagenthas been added.- Confirms the test selection.READENTERWATERPROOFZEROONOFFMODEFigure 3: C401/301/201/102/101 Keypad4
IntroductionC401/301/201/102/1011.4 Battery InstallationFour AAA-sized batteries are included in your meter’s packaging:1. Use a Philips screwdriver to remove the two screws holding thebattery cover. See Figure 4 : Battery Installation.2. Remove the battery cover.3. Insert the batteries. Follow the diagram inside the cover for correctpolarity.4. Replace the battery cover onto its original position using the twoscrews removed earlier.5. The meter is now ready to operate.Philips ScrewsBattery coverFour 'AAA'-sized batteriesFigure 4 : Battery InstallationNOTE: Dispose used batteries in accordance with your local regulations.5
MeasurementC401/301/201/102/1012 MEASUREMENT2.1 General InformationThe waterproof C401/301/202/102/101Colorimeter allows you to measureup to four parameters - namely the pH, Cyanuric acid, Free Chlorine andTotal Chlorine of a sample and reports the results in appropriate units(ppm or pH). Each specific measurement has its own range as listed in thespecifications.The meter will go through a power sequence as shown below.Meter’s Model Number Meter’s Revision Number Measurement Mode SelectionFigure 5: Power Up SequenceAn accurate colorimeter measurement depends on good measurementtechniques. Factors such as clean sample vials, positioning of vial in thesample well, covering the vial with the light shield cap, meter calibration,handling of meter, and others, have to be taken into consideration.NOTE: Do not pour liquid directly into the sample well of the instrument.Always use a vial. The instrument will only accurately measure the samplewhen vials sealed with the black caps are used. The black cap serves asboth seal and a light shield.NOTE: Do not attempt to clean the sample well. The optics may bedamaged.NOTE: This instrument is designed to measure solutions contained in thecustom made glass vials and therefore the use of other type of sample vialsor sample cells may result in inaccurate measurements.6
MeasurementC401/301/201/102/1012.2 Preparation of Sample Vial1. Obtain a clean and dry sample vial (Figure 6).2. Take care to handle the sample vial by the top.3. Rinse the vial with approximately 10 ml of the samplewater, capping the vial with the black screw cap and gentlyinverting it several times. Discard the used sample andrepeat the rinsing procedure two more times.4. Fill the rinsed vial with the remaining portion (approximately10 ml) of the grab sample up to the mark indicated in thevial. Cap the vial with the supplied black screw cap.Figure 6:Sample Vial5. Wipe the vial with a soft, lint-free cloth. Ensure that the outside of thevial is dry, clean and free from smudges.6. You are now ready to place the vial into the meter for measurement.2.3 Measurement Procedure1. Place C401/301/202/102/101Colorimeter on a flat and level surface.2. Place the sample vial inside the sample well and align the vial’s markwith the meter’s index mark. See Figure 8.Align index mark onthe sample vial withthe index mark onthe colorimeter andpush till it is fullysnapped inIMPORTANT:Place meter on a flatand level surface.DO NOT hold it onhands while operatingthe meter. It may lead toinaccurate readingsFigure 8: Sample vial index alignment to the meter's index mark3. Push the vial until it is fully snapped in.4. Turn on the meter by pressing the ON/OFF key. The display will7
MeasurementC401/301/201/102/101indicate the last test performed5. Select the desired test to be performed by pressing the MODE key.6. Press the READ/ENTER key to confirm your selection. The meter willdisplay [STbY] indicating it is ready to accept a measurement or ablanking.7. Press the ZERO key to perform the blanking of the meter. If the userchooses to skip this step, the meter will use the last value of theblank for the next calculation.8. Remove the sample vial used for blanking from the instrument andadd the appropriate reagent to it. Cap the vial and follow theappropriate instructions (including the time required to develop thecolor) for each type of reagents.9. Place the vial with the developed color into the sample well and alignthe ▼ mark on the vial with the ▲ mark on the instrument, and pressit down until it snaps fully into the optical holder.10. Press the READ/ENTER key. The meter will display the reading inappropriate units within 3 seconds.11. To repeat the measurement of the same sample, repeat steps 7-11.Ideally, step 7 should not be skipped, but the user may do so iftesting the same sample.8
Measurement: Chlorine, Free & TotalC401/301/201/102/1012.4 Chlorine, Free & Total (0 – 6ppm Cl 2 )• DPD method 1 for Free Chlorine - applicable to water, treated water,estuary water and seawater.• DPD method 1 for Total Chlorine - applicable to water, treatedwater, wastewater, estuary water and seawater.The DPD Method is USEPA accepted for reporting drinking wateranalyses (Free and Total Chlorine) and wastewater analyses 2 (TotalChlorine only).Note: 1 Adapted from “Standard methods for the Examination of Water andWastewater.”Note: 2 Procedure is equivalent to USEPA method 330.5 for wastewater andStandard Method 4500-Cl G for drinking water.1. Switch the meter on by pressing the ON/OFF key.2. Press the MODE key repeatedly until [CL – F] is displayed (for FreeChlorine determination) or [CL – T] is displayed (for Total Chlorinedetermination).3. Press the READ/ENTER key to confirm the desired test parameter.The meter will read [STbY] indicating it is in stand-by mode, waitingfor either blanking or measurement.READENTER4. Select a clean and dry vial, un-screw the cap and fill with samplewater to the line on the vial. Replace the cap, ensuring it is screwedon finger tight to the vial.5. Ensure the outside of the vial is clean, dry and absent of any marksor finger-prints. Gently push the vial fully into the sample well of theinstrument, whilst aligning the ▼ mark on the vial with the ▲ mark onthe meter.6. Press the ZERO key to initiate blanking of the meter. The display willshow [ZERo] while blanking is taking place.Note: The meter will store and use the last blanking (or zero) value, even if itis turned off, or if the batteries are removed.ZEROBlankingSampleppm9
Measurement: Chlorine, Free & TotalC401/301/201/102/1017. Remove the vial from the meter and add into it the content of oneDPD Free sachet (for Free Chlorine determination) or the content ofone DPD Total sachet (for Total Chlorine determination).8. Replace the cap, ensuring it is screwed on finger tight to the vial.Invert the vial repeatedly for approximately 20 seconds, until thepowder has dissolved.Note: A small amount of the powder may remain un-dissolved in the vial, butthis will not affect the measurement.Add content of one DPD Free sachet(for Free Chlorine determination) orone DPD Total sachet (for TotalChlorine determination).Invert vial approximately20 seconds until powderdissolves9. Gently push the vial back fully into the sample well of the meter,whilst again aligning the ▼ mark on the vial with the ▲ mark on themeter.10. For Free Chlorine determination, press the READ/ENTER key withintwo minutes from the time the DPD Free reagent was added to thevial.11. For Total Chlorine determination, wait for two minutes and then pressthe READ/ENTER key within four minutes from the time the DPDTotal reagent was added to the vial.12. The meter will flash either [CL-F] or [CL-T], depending on which testis being performed, whilst the measurement is taken. It will thendisplay the Chlorine concentration in parts per million (ppm) Cl 2 .FreeChlorineSampleREADENTERppm10
Measurement: Chlorine, Free & TotalC401/301/201/102/101Chlorine, Free & TotalMeasuring Hints & Tips2.4.1 Sample CollectionChlorine determination must take place as soon as possible after thesample is taken or else low results may be obtained.Plastic containers should not be used to collect the sample because thesemay have a high chlorine demand which will lead to low reading results. Itis advisable to wash the container with sample water before the sample iscollected.Avoid agitating the sample excessively as this may also result in lowresults.2.4.2 Sample MeasurementIf the pink color forms and then rapidly fades, this is an indication that thechlorine concentration may be very high. If this is the case, dilute thesample with de-ionized water and retest. Multiply the result by the dilutionfactor used.Example: if the sample was diluted 2:1 with de-ionized water (i.e. 1 partsample water to 1 part de-ionized water), the result is multiplied by 2 togive the true concentration of the original sample.Note: Results obtained by this method will not be as accurate as stated inthis manual because some chlorine will be lost in the dilution process.After use, the vial should be cleaned thoroughly to avoid contaminating thenext sample. Do not use household cleaners as these may have achlorine demand which will lead to low results on subsequent tests.After testing Total Chlorine give extra attention to cleaning the vial as anyresidual reagent will affect any subsequent Free Chlorine tests. It isadvisable to use separate vials for Free and Total Chlorine.11
Measurement: Chlorine, Free & TotalC401/301/201/102/1012.4.3 InterferencesAcidity:Greater than 250ppm CaCO3 may cause interference. To remove thisinterference, neutralise a separate sample to pH6-7 using 1N SodiumHydroxide. Record the volume used and add the same volume of 1NSodium Hydroxide to the sample before carrying out the above testprocedure. Use a multiplication factor to correct for the dilution of thesample.Alkalinity:Greater than 250ppm CaCO3 may cause interference. To remove thisinterference, neutralise a separate sample to pH6-7 using 1N SulphuricAcid. Note the volumes used and add the same volume of 1N SulphuricAcid to the sample before carrying out the above test procedure. Use amultiplication factor to correct for the dilution of the sample.Hardness:No effect at less than 2000ppm CaCO3.Monochloramine:Monochloramine will cause a gradual increase in the Free Chlorine resultover time. Take the test result within 1 minute of adding the reagentsachet to avoid these errors.Oxidants, including Bromine, Chlorine Dioxide, Iodine and Ozone:These will interfere with the test method at all levels. It is recommendedthat an alternative test method is used if these species are present.Oxidised Manganese or Oxidised Chromium:All levels will cause interference. To remove this interference:1. Test a 10ml sample as described in the above procedure.2. Adjust the pH of a separate 10ml sample to pH6-7 using 1N SodiumHydroxide or 1N Sulphuric Acid.3. Add 1 drop of 20% Potassium Iodide Solution; swirl to mix and thenwait 60 seconds.4. Add 3 drop of 5g/l Sodium Arsenite Solution and swirl to mix.5. Use this as the sample in the above test procedure and make a noteof the result. Use a multiplication factor to correct for the dilution ofthe sample.12
Measurement: Chlorine, Free & TotalC401/301/201/102/1016. Subtract the result obtained in step 5 from the result obtained in step1 to give the true result.2.4.4 Correcting for dilutionTo correct for any reagent added to the sample to neutralise it, a dilutioncorrection factor must be used:Final Volume ÷ Initial Sample Volume = Correction FactorThe final volume can be calculated by adding together the initial samplevolume and the volume of neutralising reagent used:Final Volume = Initial Sample Volume + Volume of Neutralising Reagent.The result from a test can then be multiplied by the Correction Factor togive the true result.If reagents are added from the supplied dropper bottles, then 25 drops isequal to 1ml.Example:50ml sample is neutralised using 50 drops of 1N Sulphuric Acid,and each drop is 0.04 ml.Initial Sample Volume = 50mlVolume of Neutralising Reagent added = 50drops X 0.04 ml= 2mlFinal Volume = 50ml + 2ml = 52mlCorrection Factor = 52/50 = 1.04A test result of 1.00ppm would then become 1.00ppm X 1.04 = 1.04ppm2.4.5 Accuracy Check / User CalibrationProducing chlorine standards is a difficult procedure that should only beattempted by trained laboratory staff. Details of preparation techniques arenot provided in this document.The prepared chlorine standard may be used to check the accuracy of themeter or to re-calibrate the meter. In almost all cases it is recommendedto use the default factory calibration.To check the accuracy of the meter: Prepare a standard in the range 0-6ppm (it is advisable to check a standard at near the concentration usuallytested for using the meter). Use this standard in place of the sample waterin the above test method. Repeat the measurement 5-7 times withdifferent sachets and average the results. The result obtained should beapproximately the value of the standard used (please refer to instrument’sspecifications for data on meter precision and accuracy).13
Measurement: Chlorine, Free & TotalC401/301/201/102/101To re-calibrate the meter: All instruments are factory calibrated and usercalibration is not recommended. However, if a Chlorine standard can beprepared, measured accurately and qualified by a different method(titration, for example) or another instrument of higher precision andaccuracy, then a Chlorine standard in the 4.1-5.0 ppm Cl 2 range can beused. Please refer to Section 3.2 Chlorine, Free & Total, for details.2.4.6 ChemistryChlorine exists in water as Un-Combined (Free) Chlorine and CombinedChlorine. The concentration of Free Chlorine can be determined directlyand the concentration of Combined Chlorine may be calculated bysubtracting the concentration of Free Chlorine from that of Total Chlorine.In the Free Chlorine test method Un-Combined Chlorine reacts directlywith DPD (N,N-diethyl-p-phenylenediamine) in a conditioned sample togive a pink color. In the Total Chlorine test method Combined Chlorinereacts with potassium iodide to form tri-iodide ions. The tri-iodide ions andthe Free Chlorine present react with DPD in a conditioned sample to givea pink color.The depth of the pink color produced is proportional to the concentration ofChlorine. The amount of 525nm light absorbed by the pink color isaccurately measured by the meter and then converted into the Chlorineconcentration.14
Measurement: Cyanuric AcidC401/301/201/102/1012.5 Cyanuric Acid (5-90 ppm)• For water and treated water1. Switch the meter on by pressing the ON/OFF key.2. Press the MODE key repeatedly until [CYNA] is displayed.3. Press the READ/ENTER key to confirm the test parameter. Themeter will read [STbY] indicating it is in stand-by mode, waiting foreither blanking or measurement.READENTER4. Select a clean and dry vial, un-screw the cap and fill with samplewater to the line on the vial. Replace the cap, ensuring it is screwedon finger tight to the vial.5. Ensure the outside of the vial is clean, dry and absent of any marksor finger-prints. Gently push the vial fully into the meter, whilstaligning the ▼ mark on the vial with the ▲ mark on the meter.6. Press the ZERO key to blank the meter to that vial; the meter willread [ZERo] whilst this is taking place.Note: The meter will store the last zero value it took between tests, even if itturns off or if the batteries are removed.ZEROBlankingSampleppm7. Remove the vial from the meter and un-screw the cap. Select aCyanuric Acid reagent sachet. Open the sachet and tip the contentsinto the vial.8. Replace the cap, ensuring it is screwed on finger tight to the vial.Shake the vial for 1 minute.Note: a small amount of the powder may remain un-dissolved in the vial, butthis will not affect the reading.15
Measurement: Cyanuric AcidC401/301/201/102/101Add content of oneCyanuric Acid sachetShake for1 minute9. Gently push the vial back fully into the sample well of the instrument,whilst again aligning the ▼ mark on the vial with the ▲ mark on themeter.10. Wait for two minutes and then press the READ/ENTER key withinfive minutes from when the sachet was added to the vial.11. The meter will flash [CYNA] whilst the measurement is taken. It willthen display the Cyanuric Acid concentration in parts per million(ppm).CyanuricAcidSampleREADENTERppm16
Measurement: Cyanuric AcidC401/301/201/102/101Cyanuric AcidMeasuring Hints & Tips2.5.1 Sample CollectionSamples may be collected in either plastic or glass bottles. It is advisableto wash the container with sample water before collecting the sample.Do not store the sample for more than 24 hours before conducting theanalysis.2.5.2 Sample MeasurementDue to the nature of the test method, concentrations less than 5 ppmCyanuric Acid are not detectable.Clean the vial immediately after taking and recording a reading. Do notleave the sample with added reagent into the vial for more than fewminutes after measurement. The test will cause the build up of a cloudylayer on the inside wall of the vial. It is important to thoroughly clean thevial after use to remove this layer because subsequent test results may beaffected.2.5.3 InterferencesSample Turbidity:Turbid samples should be filtered prior to analysis.2.5.4 Accuracy Check / User CalibrationA stock solution of 1000ppm Cyanuric Acid may be produced by dissolvingexactly 1g of Cyanuric Acid in 1 litre of de-ionised water (check the purityof the Cyanuric acid being used; if less than 100%, adjust the amountused accordingly).The stock solution may then be diluted to give a Cyanuric Acid standard.To do this take a portion of the stock solution and make up to 1 litre usingde-ionised water (for example, 50ml of stock solution will produce a50ppm standard).To check the accuracy of the meter: Prepare a standard in the range20-80 ppm (it is advisable to check a standard at near the concentrationusually tested for using the meter). Use this standard in place of thesample water in the above test method. The result obtained should beapproximately the value of the standard used (please refer to instrument’sspecifications for data on meter precision and accuracy).To re-calibrate the meter: All instruments are factory calibrated and usercalibration is not recommended. However, if a Cyanuric Acid standard can17
Measurement: Cyanuric AcidC401/301/201/102/101be accurately prepared, or measured by a different method or instrumentof higher precision and accuracy, then a Cyanuric Acid standard in the 66-75 ppm range can be used. Please refer to section 3.3 Cyanuric Acid fordetails.2.5.5 ChemistryCyanuric Acid is commonly used to stabilize the chlorine present inswimming pool water. With correct pool maintenance, Cyanuric Acidbuild-up is uncommon; however, if correct maintenance is not carried out,the levels may build up until potentially harmful.In the test method, the Cyanuric acid reacts with the sachet reagent, in aconditioned sample, to produce a suspended turbidity.The amount of turbidity produced is proportional to the concentration ofCyanuric Acid. The amount of 525nm light absorbed/scattered by theturbidity is accurately measured by the meter and then converted into theCyanuric Acid concentration.18
Measurement: pHC401/301/201/102/1012.6 pH (5.9-8.2 pH units)• For water and wastewater (Phenol Red Method)1. Switch the meter on by pressing the ON/OFF key.2. Press the MODE key repeatedly until [PH] is displayed.3. Press the READ/ENTER key to confirm the test parameter. Themeter will read [STbY] indicating it is in stand-by mode, waiting foreither blanking or measurement.READENTER4. Select a clean and dry vial, un-screw the cap and fill with samplewater to the line on the vial. Replace the cap, ensuring it is screwedon finger tight to the vial.5. Ensure the outside of the vial is clean, dry and absent of any marksor finger-prints. Gently place the vial fully into the sample well of theinstrument, whilst aligning the ▼ mark on the vial with the ▲ mark onthe meter.6. Press the ZERO key to blank the meter to that vial; the meter willread [ZERo] whilst this is taking place.Note: The meter will store the last zero value it took between tests, even if itturns off or if the batteries are removed.ZEROBlankingSamplepH7. Remove the vial from the meter and un-screw the cap. Select abottle of pH Indicator (Phenol Red) reagent. Unscrew the cap andholding the bottle vertically; gently squeeze 20 drops of reagent intothe contents into the vial. Replace the cap onto the reagent bottle.Take extra care not to over-tighten the cap.8. Replace the cap onto the vial, ensuring it is screwed on finger tight.Invert the vial several times to mix.19
Measurement: pHC401/301/201/102/101pHIndicatorPhenolRedAdd 20 drops of pH Indicator(Phenol Red) reagentInvert severaltimes to mix.9. Gently push the vial back fully into the sample well of the instrument,whilst again aligning the ▼ mark on the vial with the ▲ mark on themeter.10. Wait for 1 minute and then press the READ/ENTER key within 3minutes from when the time the reagent was added to the vial.11. The meter will flash [PH] whilst the measurement is taken. It will thendisplay the pH of the solution in pH units.pHSampleREADENTERpH20
Measurement: pHC401/301/201/102/101pH Measuring Hints & Tips2.6.1 Sample CollectionSamples may be collected in either plastic or glass bottles. It is advisableto wash the container with sample water before the sample is collected.For accurate results, analysis should be conducted as soon as possibleafter sample collection.2.6.2 Sample MeasurementThe amount of sample used and the amount of reagent added is critical toobtaining correct test results. Ensure that the reagent is added in aconsistent manner, with the dropper bottle being held vertically andsqueezed slowly. To increase the test accuracy, measure the 10mlsample and reagent using calibrated pipettes. Note: 20 drops of reagent =0.8ml.It is important to re-calibrate the meter to each new batch of reagent used,or if the reagent has not been used for more than a month. It is alsoimportant to occasionally check the results obtained with a colorless pH7.0buffer solution. If the result is outside the range pH6.9-7.1 re-calibrate themeter (please refer to section 3.4 pH).Due to the nature of the test method, a sample pH of less than 5.9 orgreater than 8.2 may result in false readings. Do not use this test methodto analyze samples with a pH outside of the specified range.2.6.3 InterferencesChlorine:Chlorine concentrations of greater than 6ppm may interfere. To removethis interference, add a crystal of Sodium Thiosulphate to the sample andmix, before adding the reagent.2.6.4 Accuracy Check / User CalibrationA colorless pH7.0 buffer (supplied) can be used to check the test accuracyand strength of reagent.To check the accuracy of the meter: Use a colorless pH7.0 buffer inplace of the sample water in the above test method. The result obtainedshould be in the range pH6.9-7.1 (please refer to instrument’sspecifications for data on meter precision and accuracy).To re-calibrate the meter: Please refer to section 3.4 pH for details.21
Measurement: pHC401/301/201/102/1012.6.5 ChemistryThe monitoring and control of the pH of water is important in manydifferent applications. This test method provides a quick and accuratemethod for measuring pH in the range pH5.9 - 8.2.A precise amount of phenol red indicator is added to a sample of water.The phenol red changes color from yellow at pH5.9 through to dark red atpH8.2.The amount of red color is related to its pH. The amount of 525nm lightabsorbed by the red color is accurately measured by the meter and thenconverted into the pH of the sample.22
CalibrationC401/301/201/102/1013 CALIBRATIONThe C401/301/201/102/101 Colorimeter was calibrated and tested prior toleaving the factory. Therefore, it is possible for you to use the instrumentdirectly out of the box. Re-calibration of the instrument is NOTrecommended particularly in the case of chemical tests of very unstableand/or difficult to prepare calibration solutions. However, the meter allowsyou to calibrate in one point for each chemical test fitted in the instrument.It is recommended to calibrate the pH at 7.0 pH units using the suppliedcolorless 7.0 pH buffer.For each of the chemical tests fitted in the instrument, the Colorimeterrequires only one standard solution for a complete calibration. Duringcalibration, the instrument performs several system self-diagnostics. Assuch, several warning messages will be displayed. If the instrumentdetects an irregularity with either the detector or the lamp, a warningmessage will be displayed during or upon exiting the calibration mode. Ifthis occurs, attempt to rectify the situation as indicated in Section 4Troubleshooting Guide. In any event, the instrument will continue to readthe concentration or pH, but with a decreased accuracy until the error isrectified.The meter has an auto exit feature whereby it will exits the calibrationmode if no key is pressed within 10 minutes or if there is an error duringcalibration.A light shield cap is added in the package as an optional accessory toshield off stray light during calibration and measurements.3.1 Calibration ProcedureThe standard calibration solutions are to be prepared in the rangesindicated in the specifications. Standard solutions should be measuredaccurately and qualified by a different method or another instrument ofhigher precision and accuracy.NOTE: Do not pour liquid directly into the sample well of the instrument.Always use a vial. The instrument will only accurately measure the samplewhen vials sealed with the black caps are used. The black cap serves asboth seal and a light shield.NOTE: Do not attempt to clean the sample well. The optics may bedamaged.NOTE: This instrument is designed to measure solutions contained in thecustom made glass vials and therefore the use of other type of sample vialsor sample cells may result in inaccurate measurements.23
Calibration: Chlorine, Free & TotalC401/301/201/102/1013.2 Chlorine, Free & Total1. Prepare a Chlorine standard in the 4.1-5.0 ppm Cl 2 range, measureand record the concentration value.2. Ensure the meter is switched off. Press and hold the ZERO keywhile switching the meter on by pressing the ON/OFF key. Themeter will momentarily flash the model number and then display theCAL annunciator at the top left corner of the screen indicating theinstrument is in calibration mode.3. Press the MODE key repeatedly until [CL-F] (for calibrating ChlorineFree), or [CL-T], (for calibrating Chlorine Total), is displayed.ONOFFZEROCALMODEPress Mode to selecttest parameter of“CL-F” for FreeChlorine or “CL -T”for Total Chlorine4. Press the READ/ENTER key to confirm the selected test. Themeter will display [bLNK] indicating it isCALwaiting for a blanking sample.NOTE: Blanking is compulsory during calibration; withoutblanking the meter will not continue with the calibrationprocedure.5. Select a clean vial, unscrew the cap and fill with deionised water tothe line on the vial. Replace the cap, ensuring it is screwed onfinger tight to the vial.6. Ensure the outside of the vial is clean, dry and absent of any marksor finger-prints. Gently push the vial fully into sample well of theinstrument, whilst aligning the ▼ mark on the vial with the ▲ markon the meter.7. Press the ZERO key to blank the meter to that vial; the meter willdisplay [ZERo] whilst this is taking place.8. Remove the blanking vial from the meter. The meter displays 4.1ppm, with the CAL annunciator on the top left corner.9. Use the MODE key repeatedly to select the concentration of theprepared calibration standard in the 4.1 - 5.0 ppm range.BlankingSampleZEROCALCALppmMODEPress Mode toselect calibrationpoint from 4.1 ppmto 5.0 ppm in anincremental circularmanner.24
Calibration: Chlorine, Free & TotalC401/301/201/102/10110. Select another clean vial, un-screw the cap and fill it with 10 ml ofthe prepared Chlorine standard (fill up to the line on the vial).11. Select a DPD Free sachet, or a DPD Total sachet, depending onthe selected test. Open the sachet and tip the contents into the vialcontaining the calibration standard.12. Replace the cap, ensuring it is screwed on finger tight tothe vial. Invert the vial repeatedly for approximately 20seconds, until the powder has dissolved.NOTE: a small amount of the powder may remain un-dissolved in thevial, but this will not affect the measurement.13. Insert the vial fully into the sample well of the meter, whilst againaligning the ▼ mark on the vial with the ▲ mark on the meter.14. For Free Chlorine calibration, press the READ/ENTER key withintwo minutes from the time the sachet was added to the vial. As forTotal Chlorine calibration, wait for two minutes before pressing theREAD/ENTER key and this has to be done within five minutes fromthe time the sachet was added to the vial.15. The meter will display [--Rd--] whilst the calibration standard isbeing measured and then displays [SAVE] to prompt for calibrationacceptance and saving of calibration data.FreeChlorineSample4.5 ppmCALppmREADENTER16. Press the READ/ENTER key. The meter now accept the calibrationvalue and momentarily display [HoLD] and CAL annunciator beforereturning to the beginning of the calibration as in step 4.17. To continue with another calibration, press the MODE key to selectthe desired calibration mode.18. To exit calibration mode, press ZERO key to return to themeasurement mode.READENTERMODEZEROPress Mode to selectanother calibration testPress ZERO to returnto measurement mode25
Calibration: Chlorine, Free & TotalC401/301/201/102/101NOTE: If you wish to abort the calibrationprocess, do NOT press the READ/ENTER key asin step 16. Press the ZERO key instead. Themeter will display [AbRT] and CAL annunciator tosignify that the calibration has been abortedwithout saving the calibration value. The meterwill then return to the beginning of the usercalibration as in step 4.CALNOTE: If an error occurs during calibration, the display will present an errormessage. Please refer to Section 4 Troubleshooting Guide for details.26
Calibration: Cyanuric AcidC401/301/201/102/1013.3 Cyanuric Acid1. Prepare a Cyanuric Acid standard solution in the 66 - 75 ppm rangeand record the concentration value.2. Ensure the meter is switched off. Press and hold the ZERO key whileswitching the meter on by pressing the ON/OFF key. The meter willmomentarily flash the model number and then display the CALannunciator at the top left corner of the screen indicating theinstrument is in calibration mode.3. Press the MODE key repeatedly until [CYNA] is displayed.ONOFFZEROCALMODEPress Mode toselect testparameter of“CYNA” forCyanuric Acid4. Press the READ/ENTER key to confirm the selected test. The meterwill display [bLNK] indicating it is waiting for ablanking sample.CALNote: blanking is compulsory during calibration; withoutblanking the meter will not continue with the calibrationprocedure.5. Select a clean vial, un-screw the cap and fill with de-ionised water tothe line on the vial. Replace the cap, ensuring it is screwed on fingertight to the vial.6. Ensure the outside of the vial is clean, dry and absent of any marksor finger-prints. Gently place the vial fully into sample well of theinstrument, whilst aligning the ▼ mark on the vial with the ▲ mark onthe meter.7. Press the ZERO key to blank the meter to that vial; the meter willdisplay [ZERo] whilst this is taking place.8. Remove the blanking vial from the meter.9. The meter displays 66 ppm, with the CAL annunciator on the top leftcorner.10. Use the MODE key repeatedly to select the concentration of theprepared calibration standard in the 66 - 75 ppm range.BlankingSampleZEROCALCALppmMODEPress Mode toselect calibrationpoint from 66ppm to 75 ppm inan incrementalcircular manner.27
Calibration: Cyanuric AcidC401/301/201/102/10111. Select another clean vial, un-screw the cap and fill it with 10 ml of theprepared Cyanuric Acid standard solution (fill up to the line on thevial).12. Select a Cyanuric Acid sachet. Open the sachet and tip the contentsinto the vial containing the calibration standard.13. Replace the cap, ensuring it is screwed on finger tightto the vial. Shake the vial for approximately oneminute, until the powder has dissolved.Shake for1 minuteNote: a small amount of the powder may remain un-dissolved in the vial, butthis will not affect the measurement.14. Insert the vial fully into the sample well of the meter, whilst againaligning the ▼ mark on the vial with the ▲ mark on the meter.15. Wait for two minutes, then press the READ/ENTER key within fiveminutes from the time the reagent was added to the vial.16. The meter will display [--Rd--] whilst the calibration standard is beingmeasured and then displays [SAVE] to prompt for calibrationacceptance and saving of calibration data.CyanuricAcidSample70 ppmCALppmREADENTER17. Press the READ/ENTER key. The meter will now accepts thecalibration value and momentarily display [HoLD] and CALannunciator before returning to the beginning of the calibration as instep 4.18. To continue with another calibration, press the MODE key to selectthe desired calibration mode.19. To exit the calibration mode, press the ZERO key to return to themeasurement mode.READENTERCALCALMODEPress Mode toselect anothercalibration testZEROPress ZERO toreturn tomeasurementmode28
Calibration: Cyanuric AcidC401/301/201/102/101NOTE: If you wish to abort this calibrationprocess, do NOT press the READ/ENTER key asin step 17. Press the ZERO key instead. Themeter will display [AbRT] and CAL annunciator tosignify that the calibration has been abortedwithout saving the calibration value. The meterwill then return to the beginning of the usercalibration as in step 4.CALNOTE: If an error occurs during calibration, the display will present an errormessage. Please refer to Section 4 Troubleshooting Guide for details.29
Calibration: pHC401/301/201/102/1013.4 pH1. Ensure at least 10 ml of clear pH7.0 buffer is available.2. Ensure the meter is switched off.3. Press and hold the ZERO key while switching the meter on bypressing the ON/OFF key. The meter will momentarily flash themodel number and then display the CAL annunciator at the top leftcorner of the screen indicating the instrument is in calibration mode.4. Press the MODE key repeatedly until [PH] is displayed.ONOFFZEROCALMODEPress Modeto select testparameter of“PH”5. Press the READ/ENTER key to confirm the selected test. The meterwill display [bLNK] indicating it is waiting for aCALblanking sample.Note: blanking is compulsory during calibration; withoutblanking the meter will not continue with the calibrationprocedure.6. Select a clean vial, un-screw the cap and fill with de-ionised water tothe line on the vial. Replace the cap, ensuring it is screwed on fingertight to the vial.7. Ensure the outside of the vial is clean, dry and absent of any marksor finger-prints. Gently push the vial fully into sample well of theinstrument, whilst aligning the ▼ mark on the vial with the ▲ mark onthe meter.8. Press the ZERO key to blank the meter to that vial; the meter willread [ZERo] whilst this is taking place.9. Remove the blanking vial from the meter.10. The meter displays 7.0 pH, with the CAL annunciator on the top leftcorner.BlankingSampleZEROCALpH30
Calibration: pHC401/301/201/102/10111. Select another clean vial, un-screw the cap and fill itwith 10 ml of the pH7.0 colorless buffer. (fill up to theline on the vial).Note: A proper calibration requires exactly 10 ml volume of pH7.0buffer.12. Select a bottle of pH Indicator (Phenol Red) reagent.Unscrew the cap and holding the bottle vertically; gentlysqueeze 20 drops of reagent into the contents into thevial. Replace the cap onto the reagent bottle. Be carefulnot to over-tighten the cap.pHIndicatorPhenolRed20 Drops10 mlof pH 7.013. Replace the cap onto the vial, ensuring it is screwed onfinger tight. Invert the vial several times to mix.14. Gently place the vial into the sample well of the instrument, whilstagain aligning the ▼ mark on the vial with the ▲ mark on the meter.15. Wait for one minute and then press the READ/ENTER key within 3minutes from when the time the reagent was added to the vial.16. The meter will display [--Rd--] whilst the calibration standard is beingmeasured and then displays [SAVE] to prompt for calibrationacceptance and saving of calibration data.CALpHSample7.0 pH pHREADENTER17. Press the READ/ENTER key. The meter will now accepts thecalibration value and momentarily display [HoLD] and CALannunciator before returning to the beginning of the calibration as instep 4.18. To continue with another calibration, press the MODE key to selectthe desired calibration mode.19. To exit the calibration mode, press the ZERO key to return to themeasurement mode.READENTERCALCALMODEPress Mode to selectanother calibration testZEROPress ZERO toreturn tomeasurement mode31
Calibration: pHC401/301/201/102/101NOTE: If you wish to abort this calibrationprocess, do NOT press the READ/ENTER key asin step 17. Press the ZERO key instead. Themeter will display [AbRT] and CAL annunciator tosignify that the calibration has been abortedwithout saving the calibration value. The meterwill then return to the beginning of the usercalibration as in step 4.CALNOTE: If an error occurs during calibration, the display will present an errormessage. Please refer to Section 4 Troubleshooting Guide for details.32
Restoring Factory CalibrationC401/301/201/102/1013.5 Restoring Factory CalibrationThe C401/301/201/102/101 Colorimeter allows you to reset the meterback to the factory default calibration values. This feature is extremelyuseful when there are errors in calibration or when you have newcalibration standards.1. With the meter switched off, press MODE and ON/OFF keyssimultaneously for about 2 seconds.2. The meter will momentarily flash the model number and [URST] (User-Reset) and then display [No].3. Use MODE key to select between [YES] or [No].• [YES] = To restore meter back to factory calibration values• [No] = To retain last calibrated values4. After selecting [YES] or [No], press READ/ENTER key.5. The meter will now flash the model number, the meter’s revisionnumber and enter the measurement selection mode.Figure 9 shows the sequence for restoring factory calibration values.33
Restoring Factory CalibrationC401/301/201/102/101Press MODE and ON/OFFkeys simultaneously andhold for 2 seconds beforereleasingMETER OFFMODEONOFFMODETo restore factorycalibrationREADENTERPress MODEkey to selectYES or NoREADENTERTo retain lastcalibration valueswithout retrievingfactory calibration.Meter’s Model NumberMeter’s Revision NumberMeasurement Selection ModeThe meter is now ready for measurementFigure 9: Restoring Factory Calibration34
Troubleshooting GuideC401/301/201/102/1014 TROUBLESHOOTING GUIDEThe C401/301/201/102/101 Colorimeter routinely performs selfdiagnostics,and will automatically generate messages to provide you withspecific diagnostic information. These messages are for your use and donot indicate a reduction in the performance of the instrument or a failure ofany component in the instrument, unless otherwise stated in this list.LCDMessageORUR*ERR0*ERR1*ERR2DescriptionWhen measured concentration(or pH value) is above themeasurement range (chemistrytest specific)When measured concentration(or pH value) is below themeasurement range (chemistrytest specific)Inappropriate signal torecognize the blank. Sampleabsorbance is less thanblanking or blanking too low toachieve specified resolution.Calibration Failure. Theabsorbance of the calibrationstandard is outside the rangeallowed for the selectedcalibration point.Excessive stray light detected.Corrective ActionsEnsure sample value is withinthe measurement range aslisted in the Specification tablein Section 7.Ensure sample value is withinthe measurement range aslisted in the Specification tablein Section 7.Ensure that blanking is donebefore the chemical reagent isadded. Repeat the blankingprocedure.Ensure calibration standard isaccurately prepared. Replacecalibration standard with aknown accurate value andrecalibrate.Ensure the vial is fully snappedin the sample well.*ERR3 Lamp Failure. LED is faulty. Return the unit for repair.Low battery indication. Thebatteries need to be replaced.Replace the batteries.* If an error message appears, take theappropriate corrective action and re-do thedesired procedure. If the problem persists,contact Eutech <strong>Instruments</strong> or your dealer.See Sections on Warranty and Return ofItems on page 39.35
Routine MaintenanceC401/301/201/102/1015 ROUTINE MAINTENANCEThe supplied carrying case is optimal for protecting the instrument. If youdo not plan on leaving the instrument in the supplied carrying case, whennot in use, ensure that the instrument has been turned off and that a cleansample vial fitted with a black cap has been placed in the sample well.This will ensure that a minimal amount of dust and/or debris will be able tosettle on the optics of the instrument.5.1 Vials – Handling, Cleaning and CareProper colorimetric measurement of a sample requires the use of a vialthat is free of marks, smudges, scratches and any bacterial growth.Therefore, sample vials must be handled with absolute care to avoidcontamination or damage, which might change the optical characteristicsof the glass. Scratches, fingerprints, and water droplets on the sample vialor inside the sample well can cause stray light interference leading toinaccurate readings.Cleaning the vial is accomplished by washing the interior and exterior ofthe vial in a detergent solution. Once cleaned, the vial should be rinsedthoroughly 8 to 10 times with clean distilled water to eliminate thepossibility of detergent buildup and streaking.Sample vials should always be handled from the top or by the cap to avoidfingerprints or smudges. After a vial has been filled with a sample andcapped, the outside surface should be wiped with a clean, lint-freeabsorbent cloth until it is dry. Cleaned and dried vials should be storedwith the black caps on. The vial can be stored in the carrying case. Duringnormal operation you may use any typical glass cleaner along with a lintfree cloth or tissue (Kimwipes®), to clean the outside of the vials.36
AccessoriesC401/301/201/102/1016 ACCESSORIESThe items shown below are recommended accessories and replacementparts for the instrument.Item DescriptionpH Colorimeter with sample vials, a 30 mlbottle, pH Indicator (Phenol Red) Reagent Kitand batteries in a rugged carrying caseCyanuric Acid Colorimeter with sample vials,Cyanuric Acid Reagent Kit and batteries in arugged carrying caseFree/ Total Chlorine Colorimeter with samplevials, Chlorine, Free (DPD) Reagent Kit,Chlorine, Total (DPD) Reagent Kit and batteriesin a rugged carrying caseFree/ Total Chlorine/ pH Colorimeter withsample vials, a 30 ml bottle, Chlorine, Free(DPD) Reagent Kit, Chlorine, Total (DPD)Reagent Kit, pH Indicator (Phenol Red)Reagent Kit and batteries in a rugged carryingcaseFree/ Total Chlorine/ pH/ Cyanuric AcidColorimeter with sample vials, a 30 ml bottle,Chlorine, Free (DPD) Reagent Kit, Chlorine,Total (DPD) Reagent Kit, pH Indicator (PhenolRed) Reagent Kit, Cyanuric Acid Reagent Kitand batteries in a rugged carrying caseSample Vials – pack of 3 vialsEutech<strong>Instruments</strong>Order Code.<strong>Oakton</strong><strong>Instruments</strong>Order Code.ECC101 35645-10ECC102 35645-12ECC201 35645-20ECC301 35645-30ECC401 35645-40ECTN100CUVKT35653-55pH Indicator (Phenol Red) Reagent Kit 94X377004 35645-60Cyanuric Acid Reagent Kit 94X377003 35645-62Chlorine, Free (DPD) Reagent Kit 94X377001 35645-64Chlorine, Total (DPD) Reagent Kit 94X377002 35645-6637
SpecificationsC401/301/201/102/1017 SPECIFICATIONSMeasurement MethodLight SourceWavelengthDetectorAbsorbance RangePhotometric PrecisionAutomatic Range SelectionResolutionAccuracyCalibration PointsDisplaySample CellsSample RequiredOperating Temperature RangeSample Temperature RangeOperating Humidity RangePower SupplyBattery LifePhotometricLight Emitting Diode (LED)525 nmSilicon photodiode0 – 2.5 Abs+/- 0.0015 Abs0 – 1.99 ppm (Free & Total Chlorine)2.0 – 6.0 ppm (Free & Total Chlorine)5.9 – 8.2 pH5 – 90 ppm (Cyanuric Acid)0.01 ppm (0 – 1.99 ppm; Free & Total Chlorine)0.1 ppm (2.0 – 6.0 ppm; Free & Total Chlorine)0.1 pH (5.9 – 8.2 pH)1 ppm (5 – 90 ppm; Cyanuric Acid)+/- 0.02 ppm (0 – 1.99 ppm; Free & Total Chlorine)+/- 0.2 ppm (2.0 – 6.0 ppm; Free & Total Chlorine)+/- 0.1 pH (5.9 – 8.2 pH)+/- 4 ppm; Cyanuric AcidUser selectable; 1 point per colorimetric test4-digit 14-segments customized liquid crystaldisplay with annunciatorsBorosilicate glass with screw caps, fill line andindexing markHeight x diameter: 51 x 25 mm ( 2 x 1 in)10 ml (0.33 oz)0 – 50°C (32°F to 122°F)0 – 50°C (32°F to 122°F)0-90% RH non-condensing at 30°C (86°F)4 AAA alkaline batteries> 3000 testsElectromagnetic Compliance(EMC)Emitted Interference - EN 61326Immunity to Interference - EN 61326Enclosure RatingIP67Insulation Rating Pollution degree 2WeightDimensionsInstrument: 200 g (7 oz)Instrument in carrying case: 1.25 kg (2.75 lb)Instrument: 6.8(W) x 15.5(L) x 4.6(H) cm;(2.7 x 6.1 x 1.8 in)Carrying case: 16(W) x 35(L) x 12(H) cm;(6.3 x 13.8 x 4.7 in)38
Warranty & Return Of ItemsC401/301/201/102/1018 WARRANTYThe C401/301/201/102/101 Colorimeter is supplied with a 2-year warrantyfrom manufacturing defects.If repair or adjustment is necessary and has not been the result of abuseor misuse within the designated period, please return – freight pre-paid –and correction will be made without charge. Eutech <strong>Instruments</strong>/ <strong>Oakton</strong><strong>Instruments</strong> will determine if the product problem is due to deviations orcustomer misuse.Out of warranty products will be repaired on a charged basis.ExclusionsThe warranty on your instrument shall not apply to defects resulting from:• Improper or inadequate maintenance by customer• Unauthorized modification or misuse• Operation outside of the environment specifications of the productsWaterproof Seal: Opening the instrument enclosure (excluding thebattery compartment) may void the warranty.9 RETURN OF ITEMSAuthorization must be obtained from our Customer Service Department orauthorized distributor before returning items for any reason. A “ReturnGoods Authorization” (RGA) form is available through our AuthorizedDistributor. Please include data regarding the reason the items are to bereturned. For your protection, items must be carefully packed to preventdamage in shipment and insured against possible damage or loss. Eutech<strong>Instruments</strong>/ <strong>Oakton</strong> <strong>Instruments</strong> will not be responsible for damageresulting from careless or insufficient packing. A restocking charge will bemade on all unauthorized returns.NOTE:Eutech <strong>Instruments</strong> Pte Ltd/ <strong>Oakton</strong> <strong>Instruments</strong> reserve the right to makeimprovements in design, construction, and appearance of products withoutnotice.39
For more information on Eutech <strong>Instruments</strong>/ <strong>Oakton</strong> <strong>Instruments</strong>’ products,contact your nearest distributor or visit our website listed below:<strong>Oakton</strong> <strong>Instruments</strong>P.O Box 5136,Vernon Hills, IL60061, USATel: (1) 888-462-5866Fax: (1) 847-247-2984E-mail:info@4oakton.comWeb-site:www.4oakton.comEutech <strong>Instruments</strong> Pte LtdBlk 55, Ayer Rajah Crescent,#04-16/24 Singapore 139949Tel: (65) 6778 6876Fax: (65) 6773 0836E-mail:marketing@eutechinst.comWeb-site:www.eutechinst.comDistributed by: