PC5132-433 install.pdf
PC5132-433 install.pdf
PC5132-433 install.pdf

Create successful ePaper yourself
Turn your PDF publications into a flip-book with our unique Google optimized e-Paper software.
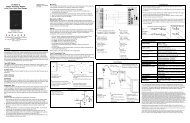
• W A R N I N G •This manual contains information on limitations regardingproduct use and function and information on the limitations as toliability of the manufacturer.InstallationManual<strong>PC5132</strong>-<strong>433</strong> NAVersion 4.2
FCC COMPLIANCE STATEMENTCAUTION: Changes or modifications not expressly approved by Digital Security Controls Ltd. could void your authority touse this equipment.This equipment generates and uses radio frequency energy and if not <strong>install</strong>ed and used properly, in strict accordance with themanufacturer’s instructions, may cause interference to radio and television reception. It has been type tested and found to comply withthe limits for Class B device in accordance with the specifications in Subpart “B” of Part 15 of FCC Rules, which are designed toprovide reasonable protection against such interference in any residential <strong>install</strong>ation. However, there is no guarantee that interferencewill not occur in a particular <strong>install</strong>ation. If this equipment does cause interference to television or radio reception, which can bedetermined by turning the equipment off and on, the user is encouraged to try to correct the interference by one or more of thefollowing measures:• Re-orient the receiving antenna• Relocate the alarm control with respect to the receiver• Move the alarm control away from the receiver• Connect the alarm control into a different outlet so that alarm control and receiver are on different circuits.If necessary, the user should consult the dealer or an experienced radio/television technician for additional suggestions. The user mayfind the following booklet prepared by the FCC helpful: “How to Identify and Resolve Radio/Television Interference Problems”. Thisbooklet is available from the U.S. Government Printing Office, Washington, D.C. 20402, Stock # 004-000-00345-4.This Class B digital apparatus meets all requirements of the Canadian interference-causing equipment regulations.Cet appareil numérique de la Classe B respecte toutes les exigences de règlement sur le matériel brouilleur du Canada.AVIS: L’étiquette de l’Industrie Canada identifie le matérielhomologué. Cette étiquette certifie que le matériel est conforme àcertaines normes de protection, d’exploitation et de sécurité desréseaux de télécommunications. Industrie Canada n’assure toutefoispas que le matériel fonctionnera à la satisfaction de l’utilisateur.Avant d’<strong>install</strong>er ce matériel, l’utilisateur doit s’assurer qu’il estpermis de le raccorder aux <strong>install</strong>ations de l’entreprise locale detélécommunication. Le matériel doit également être <strong>install</strong>é ensuivant une méthode acceptée de raccordement. L’abonné ne doit pasoublier qu’il est possible que la conformité aux conditions énoncéesci-dessus n’empêchent pas la dégradation du service dans certainessituations.Les réparations de matériel homologué doivent être effectuées par uncentre d’entretien canadien autorisé désigné par le fournisseur. Lacompagnie de télécommunications peut demander à l’utilisateur dedébrancher un appareil à la suite de réparations ou de modificationseffectuées par l’utilisateur ou à cause de mauvais fonctionnement.Pour sa propre protection, l’utilisateur doit s’assurer que tous les filsde mise à la terre de la source d’énergie électrique, les lignestéléphoniques et les canalisations d’eau métalliques, s’il y en a, sontraccordés ensemble. Cette précaution est particulièrement importantedans les régions rurales.AVERTISSEMENT: L’utilisateur ne doit pas tenter de faire cesraccordements lui-même; il doit avoir recours à un service d’inspectiondes <strong>install</strong>ations électriques, ou à un électricien, selon le cas.L’indice de charge (IC) assigné a chaque dispositif terminal indique,pour éviter toute surcharge, le pourcentage de la charge totale quipeut être raccordée à un circuit téléphonique bouclé utilisé par cedispositif. La terminaison du circuit bouclé peut être constituée den’importe quelle combinaison de dispositifs, pourvu que la sommedes indices de charge de l’ensemble des dispositifs ne dépasse pas100.L’Indice de charge de ce produit est 2.NOTICE: The Industry Canada label identifies certified equipment.This certification means that the equipment meets certain telecommunicationsnetwork protective, operational and safety requirements.Industry Canada does not guarantee the equipment willoperate to the user’s satisfaction.Before <strong>install</strong>ing this equipment, users should ensure that it ispermissible to be connected to the facilities of the local telecommunicationscompany. The equipment must also be <strong>install</strong>ed using anacceptable method of connection. The customer should be awarethat compliance with the above conditions may not prevent degradationof service in some situations.Repairs to certified equipment should be made by an authorizedCanadian maintenance facility designated by the supplier. Anyrepairs or alterations made by the user to this equipment, orequipment malfunctions, may give the telecommunications companycause to request the user to disconnect the equipment.User should ensure for their own protection that the electricalground connections of the power utility, telephone lines andinternal metallic water pipe system, if present, are connectedtogether. This precaution may be particularly important in ruralareas.CAUTION: Users should not attempt to make such connectionsthemselves, but should contact the appropriate electric inspectionauthority, or electrician, as appropriate.The Load Number (LN) assigned to each terminal device denotesthe percentage of the total load to be connected to a telephone loopwhich is used by the device, to prevent overloading. The terminationon a loop may consist of any combination of devices subject onlyto the requirement that the total of the Load Numbers of all thedevices does not exceed 100.The Load Number of this unit is 2.
Table of ContentsC O N T E N T SIntroduction 11.1 How to Use this Manual ........................................................................11.2 Specifications and Features .................................................................11.3 Compatible Wireless Devices ............................................................... 21.4 Batteries ................................................................................................2<strong>PC5132</strong>-<strong>433</strong> Set up & Wiring 32.1 Unpack the <strong>PC5132</strong> ..............................................................................32.2 Choose a Mounting Location for the <strong>PC5132</strong> ....................................... 32.3 Antennas ...............................................................................................32.4 Connect the <strong>PC5132</strong>-<strong>433</strong> Receiver ......................................................3Enrolling Wireless Devices 43.1 A Note about Electronic Serial Numbers .............................................. 43.2 Enrolling Wireless Devices....................................................................43.3 Enroll & Program Wireless Keys (WLS9X9-<strong>433</strong>) ...................................43.4 Identified Wireless Keys .......................................................................6Other Programming 74.1 Program Zones and Partitions ..............................................................74.2 Enable <strong>PC5132</strong>-<strong>433</strong> Supervision ..........................................................74.3 Enable Supervision of Wireless Zones .................................................84.4 Jamming Signal Detection ....................................................................84.5 <strong>PC5132</strong>-<strong>433</strong> Software Default ............................................................... 94.6 Deleting Wireless Devices ....................................................................9Testing & Mounting 105.1 Test the Reception of Wireless Devices .............................................. 105.2 Mount the <strong>PC5132</strong>-<strong>433</strong> and Wireless Devices ................................... 12Additional Notes 136.1 Trouble Conditions .............................................................................. 136.2 Jamming Signal Detection .................................................................. 136.3 Wireless Zone Low Battery Transmission ........................................... 13Troubleshooting 14Programming Worksheets 15Guidelines for Locating Smoke Detectors 20Index 21
Thank you for purchasing the <strong>PC5132</strong>-<strong>433</strong> Wireless Receiver. This productis the result of several years of development and will allow you to connectup to 32 wireless detection devices to the PC580, PC1555, and the Power seriescontrol panels.The <strong>PC5132</strong>-<strong>433</strong> uses <strong>433</strong> MHz. It provides several advantages:• supervisory transmissions are sent every 64 minutes• programmable supervisory window can be as long as 24 hours• diversity antenna arrangement for better RF receptionIn addition, the <strong>PC5132</strong>-<strong>433</strong> features:• 6 digit serial numbers for all wireless devices: These new serial numbersinclude hexadecimal digits. Please read Section 3.1 “A note on ElectronicSerial Numbers (ESN)” for more information on enrolling 6-digit devices.We are confident you will find the <strong>PC5132</strong>-<strong>433</strong> Wireless Receiver a unique and usefulcontrol panel enhancement.
IntroductionS E C T I O N 1This manual describes how to <strong>install</strong>, program and maintain the <strong>PC5132</strong>-<strong>433</strong>.Before you <strong>install</strong> the <strong>PC5132</strong>-<strong>433</strong> module, you should complete the following stepsin your system <strong>install</strong>ation:1. Plan the <strong>install</strong>ation and wiring of the security system (see your systemInstallation Manual).2. Install the control panel, and <strong>install</strong> and enroll at least one keypad to use forprogramming.3. Install and enroll any hardwired zone expander modules (PC5108) you plan to use.NOTE: PC5108 zone expander modules occupy zones in 2 groups of 4 (e.g., zones9-12 and zones 13-16). None of the zones assigned to a PC5108 module can beused for wireless devices.Program the <strong>PC5132</strong>-<strong>433</strong> from a system keypad or using downloading software ona remote computer (e.g. DLS-3). Read your system Installation Manual for moreinformation.1.1 How to Use this ManualRead this manual before you begin <strong>install</strong>ing the <strong>PC5132</strong>-<strong>433</strong>. To <strong>install</strong> and set up the<strong>PC5132</strong>-<strong>433</strong> and wireless devices, follow these steps. Refer to the sections listed below.1. Temporarily mount and wire the <strong>PC5132</strong>-<strong>433</strong> module (see Section 2).2. Enroll and program wireless devices (see Section 3).3. Complete zone and other programming on the system (see Section 4).4. Test the placement of all the wireless devices (see Section 5).5. Permanently mount the <strong>PC5132</strong>-<strong>433</strong> receiver and wireless devices (see Section 5).For additional information on trouble conditions, RF jamming signal detection andbattery replacement, see Section 6.For help with troubleshooting, see Section 7.1.2 Specifications and Features• Current Draw: 80 mA• Frequency: <strong>433</strong> MHz• Zones - receiver can receive signals from up to 32 wireless zones and 16wireless keys• Antenna - diversity design for enhanced performance• Supervisory - programmable supervisory window, 8 to 24 hours, in 15 minuteincrements• Location- can be wired up to 750 ft. / 230 m from the main panel with 22 gauge wire- connects to Keybus- for longer wire runs, thicker gauge wire must be used.• Compatibility: The <strong>PC5132</strong>-<strong>433</strong> v4.X can be connected to the followingpanels: PC501X, PC5020, PC1555, PC5801
I N T R O D U C T I O N1.3 Compatible Wireless DevicesPlease refer to the Instruction sheets of the following devices for more information.The <strong>PC5132</strong>-<strong>433</strong> v4.X can receive signals from the following devices:• WLS904P-<strong>433</strong> Motion Detector • WLS912-<strong>433</strong> Glass Break Detector• WLS906-<strong>433</strong> Smoke Detector • WLS907-<strong>433</strong> Door/Window Contact• WLS914-<strong>433</strong> Pet-Immune PIR • WLS909-<strong>433</strong> Wireless Key• WLS919-<strong>433</strong> Wireless Key • WLS925L-<strong>433</strong> Mini Door/Window Contact1.4 BatteriesThe wireless devices, with the exception of the WLS925L transmitter and theWLS919-<strong>433</strong> wireless key, are designed to use only Energizer Alkaline batteries (byEveready). For the WLS919-<strong>433</strong>, use only FDK CR2032 type lithium batteries.NOTE: Do not use other brands of batteries. Using any other brand may affect systemoperation.2
<strong>PC5132</strong>-<strong>433</strong> Set Up & WiringS E C T I O N 2This section describes how to set up and wire the <strong>PC5132</strong>-<strong>433</strong> module.2.1 Unpack the <strong>PC5132</strong>-<strong>433</strong>Check that the following parts are in your <strong>PC5132</strong>-<strong>433</strong> package:• <strong>PC5132</strong>-<strong>433</strong> PCB• Diversity antennae• <strong>PC5132</strong>-<strong>433</strong> plastic cabinet • Hardware for mounting the cabinet2.2 Choose a Mounting Location for the <strong>PC5132</strong>-<strong>433</strong>NOTE: Mount the <strong>PC5132</strong>-<strong>433</strong> receiver and wireless devices after you have doneplacement tests with the wireless devices (see sections 5.1 and 5.2).Find a place that is:• Dry• Central to the proposed placement of all wireless devices• As high as possible• Far from sources of interference, including: electrical noise (computers,televisions and electric motors in appliances and heating and airconditioning units); large metal objects like heating ducts and plumbingwhich may shield the antenna.Make sure that electrical wires will not run over the antenna(s) of the module whenit is mounted.When mounting the <strong>PC5132</strong>-<strong>433</strong> in a basement, place the module as high and asclose to the underside of the first floor as possible. The range of the module will bereduced if the unit is mounted below ground level.2.3 Installing the AntennasThe two antennas must be screwed into the terminals marked ANT1 and ANT2, not GND1and GND2. Also they must be <strong>install</strong>ed as indicated in the following two diagrams:Do not <strong>install</strong> the antennas as indicated in the following diagrams:If the antennas are <strong>install</strong>ed incorrectly the <strong>PC5132</strong>-<strong>433</strong> may notreliably receive signals from the transmitters.2.4 Connect the <strong>PC5132</strong>-<strong>433</strong> ReceiverCAUTION: Remove all power from the systemwhile connecting modules to the Keybus.Connect the <strong>PC5132</strong>-<strong>433</strong> to the four-wire Keybusof the control panel according to the followingdiagram.After you have completed the wiring, reconnectthe power to the security system.Now that you have wired the <strong>PC5132</strong>-<strong>433</strong>, you should enroll and program thewireless devices. See section 3 for instructions.3
Enrolling Wireless DevicesS E C T I O N 3This section describes how to enroll wireless devices (WLS904P-<strong>433</strong>, WLS906-<strong>433</strong>, WLS907-<strong>433</strong>, WLS912-<strong>433</strong>, WLS914-<strong>433</strong> and WLS925L-<strong>433</strong>), and wireless keys (WLS909-<strong>433</strong> andWLS919-<strong>433</strong>). For more information on these devices, read the instruction sheet included witheach device.3.1 A Note about Electronic Serial NumbersAn electronic serial number (ESN) is printed on the back of each wireless device. ESNsare used to enroll the wireless devices with the <strong>PC5132</strong>-<strong>433</strong> receiver.In order to reduce the occurrence of wireless devices with the same serial number, 6-digitserial numbers are now printed on the back of each wireless device. The 6-digit serialnumbers include hexadecimal digits. For instructions on programming hexadecimalnumbers, see your system Installation Manual, Section 4: How to Program.NOTE: 6-digit serial numbers are only supported on the following control panels:PC5020, PC501X, PC1555 and PC580 v2.0 and higher.The WLS904P-<strong>433</strong>, WLS906-<strong>433</strong>, WLS907-<strong>433</strong>, WLS912-<strong>433</strong>, WLS914-<strong>433</strong> andWLS925L-<strong>433</strong> devices have both a 5-digit and a 6-digit serial number printed onthem. When connecting the <strong>PC5132</strong>-<strong>433</strong> to a PC5010 v1.x panel, enter 5-digit serialnumbers only. When connecting the <strong>PC5132</strong>-<strong>433</strong> to a PC5020 or PC5015 v2.x andhigher, PC5010, PC1555, or PC580 panel enter the 6-digit serial number.3.2 Enrolling Wireless Devices1. At a system keypad, enter [✱][8][Installer’s code] to go to the <strong>install</strong>er’sprogramming section.2. Enter programming section [804].3. Enter the 2-digit number corresponding to the zone the device is to occupy([01] to [32]).NOTE: Hardwired and wireless devices cannot be assigned to the same zone. PC5108zone expander modules occupy zones in 2 groups of 4 (e.g. zones 9-12 and zones 13-16). None of the zones assigned to a PC5108 module may be used for wireless devices.For more information on zone assignment, consult your system Installation Manual.4. Enter the device’s ESN. Follow the instructions in section 3.1 above.5. Record the serial number and the assigned zone number in the programmingworksheets in the back of this manual.6. Continue with steps 3 - 5 until you have enrolled all wireless devices.7. To exit press [#]. The device is now enrolled on the system.NOTE: The devices will not work properly until you complete zone and partition programming(see section 4).3.3 Enroll & Program Wireless KeysFor wireless keys to work on the system, you need to enroll them and then program thefunction buttons. Wireless keys are not assigned to zones and require no zoneprogramming. You can enroll up to 16 wireless keys on the system.NOTE: Control units must have the ‘Arm/Disarm Bell Squawk’ feature enabled whenusing wireless key devices. The bell squawk must be heard outside of the home.4
W I R E L E S S D E V I C E S3.4 Identified Wireless KeysReporting by the system of openings/closings by individual wireless keys andcommand output [✱][7] activation by wireless key buttons may be supported oncertain control panels. To do this, the system will reserve access codes 17 – 32 forwireless keys 01-16 respectively. You must program one access code for eachwireless key (using [✱][5] access code programming) for this feature to workcorrectly.NOTE: Program these access codes on the system after you have connected the<strong>PC5132</strong>-<strong>433</strong> to the Keybus (see section 2.4).Refer to your system Installation Manual for information on access code programming.Opening/Closing By Wireless Key ReportingNOTE: The Identified Wireless Key Closing option is only available with the PC5020 orPC501X, PC1555, PC580 v2.0 and higher by turning section [015] option 4 off.To enable the reporting of openings and closings by identified wireless keys:• Make sure the control panel is v2.0 or higher• Program a valid access code for each key• Program a closing and opening reporting code for each key’s access code• Turn off the Quick Arm option in section [015] option [4] of the control panelprogrammingTo ensure that an unidentified wireless key cannot disarm the system, turn off section[017], option [1] (in the control panel programming). This option is available in controlpanels with software version 2.1 or higher.Command Output ActivationNOTE: The Identified Wireless Key Command Output Activation feature is only availablewith the PC5020, PC501X, PC1555 and PC580 v2.0 and higher.To enable command output activation by wireless keys, ensure that:• The control panel is v2.0 or higher• Program a valid access code for each key• Enable the PGM output attribute Requires Access Code for each PGMoutput programmed as [✱][7][1-4] in sections [141] to [154] ([501] to [514]for the PC5020).Now that you have enrolled all the wireless devices, you will need to program thesystem to work properly with the devices. See section 4 for more information.6
Other ProgrammingS E C T I O N 44.1 Program Zones and PartitionsNow that you have enrolled the wireless devices, you should complete all zoneprogramming on the system. Although the exact programming required variesdepending on which control panel the <strong>PC5132</strong>-<strong>433</strong> is connected to, you shouldcheck that the following programming areas are completed correctly for eachwireless zone:• Enable zones and/or assign zones to one or more partitions (programmingsections [202]-[205] or [202] to [265] for the PC5020).• Program the definition for each zone (programming sections [001]-[004]).• Enable the wireless zone attribute for each wireless zone (PC580, PC1555,PC501X v2.0, PC5020 v3.0 and higher only) (sections [101]-[132]).See your system Installation Manual, for more information on each of the aboveprogramming sections.4.2 Enable <strong>PC5132</strong>-<strong>433</strong> SupervisionThe control panel will supervise the <strong>PC5132</strong>-<strong>433</strong> receiver via the Keybus after at leastone device has been enrolled on the module (see section 3.2 “Enrolling WirelessDevices”).To activate module supervision, after you enroll the first device(s):1. Exit and then re-enter <strong>install</strong>er’s programming2. Enter programming section [902]. Wait approximately 1 minute.3. To exit press [#].The system will generate a General System Supervisory trouble if the module isremoved from the Keybus. If you need to remove the <strong>PC5132</strong>-<strong>433</strong> module from anexisting system, you will have to disable supervision of the <strong>PC5132</strong>-<strong>433</strong>.NOTE: Deleting all devices from the <strong>PC5132</strong>-<strong>433</strong> or defaulting the <strong>PC5132</strong>-<strong>433</strong> willcause a supervisory faultTo disable <strong>PC5132</strong>-<strong>433</strong> supervision:1. Disconnect the <strong>PC5132</strong>-<strong>433</strong> from the Keybus2. Enter [✱][8][Installer Code]3. Enter [902]. The control panel will clear all supervision and re-scan the system forconnected modules. The scan will take approximately one minute.4. To exit press [#].To review which modules the control panel is currently supervising:1. Enter [✱][8][Installer’s Code]2. Enter [903] to display all modules. On LED keypads, light [17] will indicatethat the <strong>PC5132</strong>-<strong>433</strong> is present on the system. On LCD keypads, scroll untilthe module name appears on the display.3. To exit press [#].7
O T H E R P R O G R A M M I N GIf the <strong>PC5132</strong>-<strong>433</strong> module does not show on the keypad, one of the followingconditions may be present:• the module is not connected properly to the Keybus• there is a problem with the Keybus wiring run• the module does not have enough power• no devices have been enrolled on the <strong>PC5132</strong>4.3 Enable Supervision of Wireless ZonesNOTE: (for PC5010 v1.x control panels only) In order for wireless zones to be supervised,you must enable Double End of Line (DEOL) supervision in the PC5010 controlpanel. For more information, refer to your Installation Manual.NOTE: (PC5020, PC501X, PC1555, PC580 v2.0 and higher only) For wireless supervisionto work, you must enable the wireless zone attribute on all wireless zones(sections [101] to [132], option [8] ON).Wireless Supervisory WindowEach wireless zone (WLS906-<strong>433</strong>,WLS904P-<strong>433</strong> or WLS925L-<strong>433</strong>) will send a supervisorysignal every 64 minutes. If the receiver does not receive a signal within the timeprogrammed for the Wireless Supervisory Window, it will generate a supervisory fault.To program the wireless supervisory window:1. Enter [✱][8][Installer Code] to enter Installer Programming.2. Enter [804] to enter the <strong>PC5132</strong>-<strong>433</strong> Module Programming.3. Enter section [81].4. Enter the time period for the supervisory window. The window is programmedin 15 minute increments. The default programming is 96 (x15minutes), whichis equal to 24 hours. Valid entries are (32) - (96), equal to 8 - 24 hours.5. To exit press [#].Disable/Enable Zone SupervisionAll wireless zones have supervision enabled by default. To disable supervision forany zone, enter the following at any system keypad:1. Enter [✱][8][Installer Code] to enter Installer Programming.2. Enter [804] to enter the <strong>PC5132</strong>-<strong>433</strong> Module Programming.3. Enter sections [82], [83], [84] and [85]. Enable or disable supervision foreach wireless zone by turning each relevant option on or off.4. To exit press [#].4.4 RF Jam Detect ZoneFor RF jamming detection to work, you must select an unused zone to be used as theRF Jam Detect zone. When the receiver detects an attempt to jam the RF signal, theRF Jam Detect zone will be violated and the system will generate a tamper signal.When the jamming signal is gone, the RF Jam Detect zone closes and the systemsends a tamper restore signal.To enable RF jamming detection:1. Enter [✱][8] [Installer’s Code].2. Enter programming section [804].3. Select an unused zone to be the RF Jam Detect zone. Enter the 2-digitnumber ([01] to [32]) of the RF Jam Detect zone on the keypad, then programthe serial number as [200000].8
O T H E R P R O G R A M M I N G4. Enter section [93]. Enter the 2-digit number of the RF Jam Detect zone ([01]to [32]) in the programming section.5. Disable supervision for the RF Jam detect zone by turning the relevant option off insection [82], [83], [84] or [85]. (See section 4.3 for more information.)6. RF jamming detection is now enabled. To exit Installer programming, press [#].NOTE: For UL Listed <strong>install</strong>ations, the RF Jam feature must be enabled - Section[804], subsection [90], Option [7] OFF.4.5 <strong>PC5132</strong>-<strong>433</strong> Software DefaultReturning the <strong>PC5132</strong>-<strong>433</strong> programming to factory default settings is a quick way toremove all the enrolled devices from the system and reset all the programming insection [804].NOTE: Performing this procedure will not change any programming sections except[804]. Resetting the control panel to factory default settings will not return the <strong>PC5132</strong>-<strong>433</strong> module to factory default settings.To restore the <strong>PC5132</strong>-<strong>433</strong> programming to the factory default settings:1. Enter [✱][8] [Installer’s Code].2. Enter programming section [996].3. Enter the Installer’s Code, followed by [996] again. The software for the<strong>PC5132</strong>-<strong>433</strong> will be restored to its factory default settings.4. To continue programming the unit, exit <strong>install</strong>er’s programming by pressing[#] and then re-enter <strong>install</strong>er’s programming by entering [✱][8] [Installer’sCode].For instructions on restoring the default programming of the control panel or anyother connected module, see your system Installation Manual.4.6 Deleting Wireless DevicesTo remove a wireless device from the system, follow the guideline for enrolling awireless device (see section 3.2). Program the ESN as [000000]. The wireless devicefor the zone will be removed.NOTE: You may need to remove power from the panel in order to clear troublescaused by deleted zones.Now that you have completed all <strong>PC5132</strong>-<strong>433</strong> related programming, you can testand mount the receiver and devices. See section 5 for more information.9
Testing & MountingS E C T I O N 55.1 Test the Reception of Wireless DevicesIt is very important to test the proposed placement of each wireless device before it ismounted. Following these steps will test the signal strength between the <strong>PC5132</strong>-<strong>433</strong>and the wireless devices.You can test all of the devices together (global placement testing) or test each deviceindividually. To test all the devices together, see ‘Testing All Wireless DevicesTogether’ below. To test wireless devices individually, see ‘Testing IndividualDevices’.After you have enrolled the wireless devices, you must exit and thenre-enter Installer’s Programming at least once before you can perform aplacement test.Testing All Wireless Devices Together:1. Temporarily put the WLS904P-<strong>433</strong>, WLS906-<strong>433</strong>, WLS907-<strong>433</strong>, WLS912-<strong>433</strong>,WLS914-<strong>433</strong> and WLS925L-<strong>433</strong> devices in the places you want to mount them.2. At a system keypad, enter [✱][8][Installer Code].3. Enable the Global Module Placement test by entering section [804]. Thenenter sub-section [90] and turn on option [8].4. Press [#] twice.5. Enter programming section [904], then enter [01].6. Activate one of the devices being tested until a result is displayed on thekeypad or sounded by the keypad or bell:WLS904P-<strong>433</strong>/WLS914-<strong>433</strong>: To perform a Placement Test on the WLS904P-<strong>433</strong>, remove the detector from the back plate and then replace it. Once thedetector is replaced on the back plate the LED on the detector will flashrapidly 5 times (4 times for the WLS914-<strong>433</strong>) to indicate that it has sent atransmission. The panel will show and/or sound the result of the placementtest on the keypad. To perform a 2 nd and 3 rd test, repeat this procedure.Carefully replace the backplate onto the detector, ensuring that “TOP” isfacing upward, or you may damage the tamper switch.NOTE: When you remove the detector from the backplate (tamper the unit), the detectorwill also be put into “Detector Walk Test” mode. While in Walk Test mode thedetector will activate the LED when motion is detected. The detector will also send asignal to the receiver 5 seconds after motion is detected, indicated by 5 rapid flashesby the LED. The LED will only work in this fashion for 10 motion detections after atamper/restore. Note that the panel will ignore these transmission signals with respectto a placement test. The only way in which the panel will acknowledge a placementtest is if the backplate has, each time, been removed and restored.WLS906-<strong>433</strong>: Remove the detector from its backplate, wait 5 seconds and reattachit, or hold a magnet near the raised line on the outer rim, then remove it.WLS907-<strong>433</strong>/WLS925L-<strong>433</strong>: Open the contact by moving the magnet awayfrom the unit. The keypad will show/sound the test result. After the first testresult has been generated (about 10 seconds) close the contact to generateanother test result. If the unit is attached to a door or a window, open andclose the door or window to activate the device.10
T E S T I N G & M O U N T I N GWLS909-<strong>433</strong>/WLS919-<strong>433</strong>: Press any function key at several different locations.WLS912-<strong>433</strong>: Press and hold the test mode tab for 5 seconds. Release the testmode tab. The keypad will display the test result.Read the test results at the keypad:Result LED Keypad LCD Keypad Buzzer/BellGood Light 1 On Steady “Good” 1 Beep/SquawkBad Light 3 On Steady “Bad” 3 Beeps/SquawksActivate the device until you get 3 ‘good’ results in a row.You may mount the WLS devices where results were good.Devices indicating a bad result must be moved to another location. You mayonly have to move the device a few inches to correct a bad result.Do not mount any device where a “bad” test result was indicated.7. Go to the next device to be tested and activate it until the test result isdisplayed/sounded.NOTE: Wait until the placement test of one device is shown/sounded before beginningto test the next device.Continue to test the devices until both the <strong>PC5132</strong>-<strong>433</strong> and the devices are in goodlocations. If several wireless devices produce ‘bad’ test results, you may need tomove the <strong>PC5132</strong>-<strong>433</strong> to a better location. (See section 2.2 for tips on finding alocation for the <strong>PC5132</strong>.)8. To exit the placement test and return to <strong>install</strong>er programming, press [#] twice.Testing Individual WLS904P-<strong>433</strong>, WLS906-<strong>433</strong>, WLS907-<strong>433</strong>,WLS912-<strong>433</strong>, WLS914-<strong>433</strong> and WLS925L-<strong>433</strong> Devices:1. Temporarily place the WLS904P-<strong>433</strong>, WLS906-<strong>433</strong> or WLS925L-<strong>433</strong> whereyou want to mount it.2. At a system keypad, enter [✱][8][Installer Code].3. Enter programming section [904].4 Enter the 2-digit zone number for the device to be tested.5. Activate the device being tested until a result is displayed on the keypad orsounded by the keypad or bell. (Same as step 5 in the Global Placement Testsection, previous page.)6. To test another device, press [#] once, then repeat steps 4 - 5. Continue totest the devices until both the <strong>PC5132</strong>-<strong>433</strong> and the devices are in goodlocations.If several wireless devices produce ‘bad’ test results, you may need to movethe <strong>PC5132</strong>-<strong>433</strong> to a better location. (See section 2.2 for tips on finding alocation for the <strong>PC5132</strong>.)7. To exit the placement test and <strong>install</strong>er programming, press [#] twice.Testing Individual Wireless Keys:You cannot use the individual device test described above to test WLS909-<strong>433</strong>/WLS919-<strong>433</strong> wireless keys. To ensure that the <strong>PC5132</strong>-<strong>433</strong> receiver is receivingtransmissions from these devices, use the function keys on the WLS909-<strong>433</strong>/WLS919-<strong>433</strong> at several different points in the <strong>install</strong>ation.11
5.2 Mount the <strong>PC5132</strong>-<strong>433</strong> and Wireless DevicesWhen you have tested reception of the <strong>PC5132</strong>-<strong>433</strong> with all the wireless devices (seesection 5.1) and you have a good mounting location, mount the <strong>PC5132</strong>:1. Pull the Keybus wires through the hole at the bottom of the cabinet.2. Mount the cabinet securely to the wall.Mount the DevicesIf you have conducted the placement test described in section 5.1 and got 3 ‘good’results in a row for each device, you can mount the wireless devices. See theInstallation Sheet for each device for mounting instructions.Now that your <strong>PC5132</strong>-<strong>433</strong> and wireless devices are mounted and working properly,read section 6 for information on potential wireless trouble conditions, RF jammingsignals, and battery replacement.12
Additional NotesS E C T I O N 66.1 Trouble ConditionsThe control panel always watches for possible trouble conditions. If a troublecondition occurs, the keypad “Trouble” light will turn on and the keypad will beep.Press [✱][2] to display the trouble conditions.The following trouble conditions apply to the <strong>PC5132</strong>-<strong>433</strong> and/or any enrolled devices.General System Tamper - This trouble is generated when the <strong>PC5132</strong>-<strong>433</strong>detects an RF Jamming condition.General System Supervisory - This trouble will be generated if the panel losescommunication with any module connected to the Keybus. The event buffer willlog a detailed description of the event.Device Low Battery - This trouble is generated when a wireless device exhibits alow battery condition. Press [7] one, two, or three times to view which devicesare experiencing battery failure. An LED keypad will indicate battery failureusing zone lights 1 to 8.Zone Tamper - This trouble is generated when an enrolled wireless device isremoved from its mounting location.Zone Fault - Each wireless zone will send a supervisory signal every 64 minutes. Ifthe receiver does not receive a signal within the time programmed for theWireless Supervisory Window, it will generate a zone fault.6.2 Jamming Signal DetectionThe <strong>PC5132</strong>-<strong>433</strong> receiver detects jamming signals that can prevent the receiver fromproperly receiving transmissions from enrolled devices. See section 4.4 “JammingSignal Detection” for information on jamming signal detection programming.NOTE: For UL Listed <strong>install</strong>ations, the RF Jam feature must be enabled - Section[804], subsection [90], Option [7] OFF.6.3 Wireless Zone Low Battery TransmissionWithin any transmission, the device will indicate the status of the battery. If a batteryis low, the system will indicate a Device Low Battery trouble.The system will delay reporting the event to the central station for the number of daysprogrammed for Zone Low Battery Transmission Delay in section [370]. This willprevent unnecessary reporting of the event if the user has been instructed on howto replace batteries.Replacing Batteries in Wireless Devices1. Remove the cover of the device from its back plate. This creates a tampercondition on the zone.2. Refer to the battery <strong>install</strong>ation instructions on the <strong>install</strong>ation sheet of eachcomponent. Be sure to note the proper orientation of the batteries as you <strong>install</strong>them.3. When the fresh batteries are in place, re-attach the cover to the back plate. Thetamper is restored and the zone sends a battery trouble restoral signal to the<strong>PC5132</strong>. The battery trouble is now clear and the device should function normally.NOTE: When batteries in one device need to be replaced, the batteries in all devicesmay need to be replaced at the same time.13
TroubleshootingS E C T I O N 71. When I enter the 2-digit zone number when adding a wirelessdevice, the keypad gives me a long beep.You cannot enter ESNs unless a <strong>PC5132</strong>-<strong>433</strong> wireless receiver is connected to theKeybus. See section 2 for instructions on setting up and wiring the <strong>PC5132</strong>-<strong>433</strong>module.2. I have entered the ESN for the device but when I violate thedevice, the zone does not show open on the keypad.Check the following:• Ensure the ESN has been entered correctly• Ensure that the zone is enabled for the partition (if partition programming isused).• Ensure that the wireless zone is not assigned to a zone used by PC5108modules, an on-board zone, or a keypad zone.• Ensure that the zone is programmed for something other than “NullOperation”, and that the wireless zone attribute is turned on.3. When I try a module placement test I get no result or ‘bad’results.Check the following (see sections 5.1 and 5.2 for more information on testingdevices):• Verify that you are testing the correct zone.• Verify that the correct ESN was entered when the device was enrolled.• Verify that the device is in range of the <strong>PC5132</strong>. Try testing the device in thesame room as the receiver.• Confirm that the <strong>PC5132</strong>-<strong>433</strong> is properly connected to the Keybus (seesection 2 for <strong>PC5132</strong>-<strong>433</strong> set up and wiring instructions).• Check that you are testing the zone correctly (see sections 5.1 and 5.2 fortesting instructions).• Check that the batteries are working and <strong>install</strong>ed correctly.• Look for large metal objects that may be preventing the signal from reachingthe <strong>PC5132</strong>.The device must be located where consistent ‘good’ results are obtained. If severaldevices show ‘bad’ results, move the receiver. See section 2.2 for tips on choosinga mounting location for the <strong>PC5132</strong>.4. The LED on the motion detector does not turn on when I walk infront of the unit.The LED is for walk test purposes only. See your Wireless PIR Instruction Sheet forwalk test instructions.14
Programming WorksheetsS E C T I O N 8[804] 5132--<strong>433</strong> Wireless Expansion Programming• 6-digit entry is required. See Section 3.1 “A note on Electronic SerialNumbers” for details on programming 6-digit serial numbers.Zone Serial NumbersDefault = 000000[17] Zone 17 l_____l_____l_____l_____l_____l_____l[01] Zone 1 l_____l_____l_____l_____l_____l_____l[16] Zone 16 l_____l_____l_____l_____l_____l_____l[32] Zone 32 l_____l_____l_____l_____l_____l_____l[02] Zone 2l_____l_____l_____l_____l_____l_____l[18] Zone 18 l_____l_____l_____l_____l_____l_____l[03] Zone 3l_____l_____l_____l_____l_____l_____l[19] Zone 19 l_____l_____l_____l_____l_____l_____l[04] Zone 4l_____l_____l_____l_____l_____l_____l[20] Zone 20 l_____l_____l_____l_____l_____l_____l[05] Zone 5 l_____l_____l_____l_____l_____l_____l[21] Zone 21 l_____l_____l_____l_____l_____l_____l[06] Zone 6 l_____l_____l_____l_____l_____l_____l[22] Zone 22 l_____l_____l_____l_____l_____l_____l[07] Zone 7 l_____l_____l_____l_____l_____l_____l[23] Zone 23 l_____l_____l_____l_____l_____l_____l[08] Zone 8l_____l_____l_____l_____l_____l_____l[24] Zone 24 l_____l_____l_____l_____l_____l_____l[09] Zone 9l_____l_____l_____l_____l_____l_____l[25] Zone 25 l_____l_____l_____l_____l_____l_____l[10] Zone 10 l_____l_____l_____l_____l_____l_____l[11] Zone 11 l_____l_____l_____l_____l_____l_____l[12] Zone 12 l_____l_____l_____l_____l_____l_____l[13] Zone 13 l_____l_____l_____l_____l_____l_____l[14] Zone 14 l_____l_____l_____l_____l_____l_____l[15] Zone 15 l_____l_____l_____l_____l_____l_____l[26] Zone 26 l_____l_____l_____l_____l_____l_____l[27] Zone 27 l_____l_____l_____l_____l_____l_____l[28] Zone 28 l_____l_____l_____l_____l_____l_____l[29] Zone 29 l_____l_____l_____l_____l_____l_____l[30] Zone 30 l_____l_____l_____l_____l_____l_____l[31] Zone 31 l_____l_____l_____l_____l_____l_____l15
P R O G R A M M I N G W O R K S H E E T SWireless Key Serial NumbersDefault = 000000[41] Key 01 l_____l_____l_____l_____l_____l_____l[42] Key 02 l_____l_____l_____l_____l_____l_____l[43] Key 03 l_____l_____l_____l_____l_____l_____l[44] Key 04 l_____l_____l_____l_____l_____l_____l[45] Key 05 l_____l_____l_____l_____l_____l_____l[46] Key 05 l_____l_____l_____l_____l_____l_____l[47] Key 07 l_____l_____l_____l_____l_____l_____l[48] Key 08 l_____l_____l_____l_____l_____l_____l[49] Key 09 l_____l_____l_____l_____l_____l_____l[50] Key 10 l_____l_____l_____l_____l_____l_____l[51] Key 11 l_____l_____l_____l_____l_____l_____l[52] Key 12 l_____l_____l_____l_____l_____l_____l[53] Key 13 l_____l_____l_____l_____l_____l_____l[54] Key 14 l_____l_____l_____l_____l_____l_____l[55] Key 15 l_____l_____l_____l_____l_____l_____l[56] Key 16 l_____l_____l_____l_____l_____l_____lWireless Key Function Key OptionsEntryKeyDescriptionEntryKeyDescription000 NullKey16[✱][0]Quick Exit0 1-02ForFuture Use17[✱][1]Reactivate Stay/Away s03StayArm18For Future Use04AwayArm19[✱][7][3]Command Output # 305[✱][9]No-Entry Arm20For Future Use06[✱][4]Chime ON/OFF21[✱][7][4]Command Output # 407[✱][6][---][4]System Tes t2 2-26 For Future Use0 8-12ForFuture Use27Disarm (OFF)13[✱][7][1]Command Output # 128For Future Use14ForFuture Use29Auxiliary Alarm15ForFuture Use30Panic Alarm16
P R O G R A M M I N G W O R K S H E E T SPartition 1 Wireless Key OptionsDefault = 00[59] Function Key 1 l____l____l Function Key 3 l____l____lFunction Key 2 l____l____lFunction Key 4 l____l____lPartition 2 Wireless Key Options[60] Function Key 1 l____l____l Function Key 3 l____l____lFunction Key 2 l____l____lFunction Key 4 l____l____lSupervision[81] Wireless Supervisory Window Default = 96l____l____lThe window is programmed in 15 minute increments. Thedefault programming is 96 (x 15minutes), which is equal to 24hours. Valid entries are (32) - (96), equal to 8 - 24 hours.[82] Zone Device Supervision Options (1-8)Default = ON Option ON Option OFFl________lOption 1 Zone 01 Supervision enabled Disabledl________lOption 2 Zone 02 Supervision enabled Disabledl________lOption 3 Zone 03 Supervision enabled Disabledl________lOption 4 Zone 04 Supervision enabled Disabledl________lOption 5 Zone 05 Supervision enabled Disabledl________lOption 6 Zone 06 Supervision enabled Disabledl________lOption 7 Zone 07 Supervision enabled Disabledl________l Option 8 Zone 08 Supervision enabled Disabled[83] Zone Device Supervision Options (9-16)Default = ON Option ON Option OFFl________l Option 1 Zone 09 Supervision enabled Disabledl________l Option 2 Zone 10 Supervision enabled Disabledl________lOption 3 Zone 11 Supervision enabled Disabledl________l Option 4 Zone 12 Supervision enabled Disabledl________l Option 5 Zone 13 Supervision enabled Disabledl________lOption 6 Zone 14 Supervision enabled Disabledl________l Option 7 Zone 15 Supervision enabled Disabledl________lOption 8 Zone 16 Supervision enabled Disabled17
P R O G R A M M I N G W O R K S H E E T S[84] Zone Device Supervision Options (17-24)Default = ON Option ON Option OFFl________lOption 1 Zone 17 Supervision enabled Disabledl________l Option 2 Zone 18 Supervision enabled Disabledl________l Option 3 Zone 19 Supervision enabled Disabledl________lOption 4 Zone 20 Supervision enabled Disabledl________l Option 5 Zone 21 Supervision enabled Disabledl________l Option 6 Zone 22 Supervision enabled Disabledl________l Option 7 Zone 23 Supervision enabled Disabledl________l Option 8 Zone 24 Supervision enabled Disabled[85] Zone Device Supervision Options (25-32)Default = ON Option ON Option OFFl________l Option 1 Zone 25 Supervision enabled Disabledl________l Option 2 Zone 26 Supervision enabled Disabledl________l Option 3 Zone 27 Supervision enabled Disabledl________l Option 4 Zone 28 Supervision enabled Disabledl________l Option 5 Zone 29 Supervision enabled Disabledl________l Option 6 Zone 30 Supervision enabled Disabledl________l Option 7 Zone 31 Supervision enabled Disabledl________lOption 8 Zone 32 Supervision enabled Disabled[90] Other OptionsDefault Option ON Option OFFOff Options 1-6 For Future UseOn Option 7 RF Jam Detect Disabled RF Jam Detect EnabledOff Option 8 Global Placement Test Individual Placement Test[91] Wireless Keys (1-8) Partition AssignmentsDefault = OFF Option ON Option OFFl________lOption 1 Wireless Key 01 on partition 2 On partition 1l________l Option 2 Wireless Key 02 on partition 2 On partition 1l________l Option 3 Wireless Key 03 on partition 2 On partition 1l________lOption 4 Wireless Key 04 on partition 2 On partition 118
P R O G R A M M I N G W O R K S H E E T Sl________lOption 5 Wireless Key 05 on partition 2 On partition 1l________lOption 6 Wireless Key 06 on partition 2 On partition 1l________l Option 7 Wireless Key 07 on partition 2 On partition 1l________l Option 8 Wireless Key 08 on partition 2 On partition 1[92] Wireless Keys (9-16) Partition AssignmentsDefault = OFF Option ON Option OFFl________l Option 1 Wireless Key 09 on partition 2 On partition 1l________l Option 2 Wireless Key 10 on partition 2 On partition 1l________lOption 3 Wireless Key 11 on partition 2 On partition 1l________l Option 4 Wireless Key 12 on partition 2 On partition 1l________l Option 5 Wireless Key 13 on partition 2 On partition 1l________lOption 6 Wireless Key 14 on partition 2 On partition 1l________l Option 7 Wireless Key 15 on partition 2 On partition 1l________lOption 8 Wireless Key 16 on partition 2 On partition 1RF Jamming Detection[93] RF Jam Detect ZoneDefault = 00l____l____l Select an unused zone that will be violated when a jammingsignal is detected. (Valid entries = 01 - 32, 00 = RF Jam detectdisabled.)P R O G R A M M I N G W O R K S HNOTE: For UL Listed <strong>install</strong>ations, the RF Jam feature must be enabled - Section[804], subsection [90], Option [7] OFF. E E19
Guidelines for Locating Smoke DetectorsA P S P E C E T N I D O I N X 9 AExperience has shown that all hostile fires in family living units generate smoke to a greater or lesserextent. Experiments using typical fires in family living units indicate that detectable quantities of smokeprecede detectable levels of heat in most cases. In existing homes, NFPA Standard 72 requires that asmoke detector be <strong>install</strong>ed outside each sleeping area and on each additional story of the family unit.On smooth ceilings, detectors may be spaced 9.1m (30 feet) apart as a guide. Other spacing may berequired depending on ceiling height, air movement, the presence of joists, uninsulated ceilings, etc.Consult National Fire Alarm Code NFPA 72, CAN/ULS-S553-M86 or other appropriate national standardsfor <strong>install</strong>ation recommendations.Do not locate smoke detectors at the top of peaked or gabled ceilings; the dead air space in theselocations may prevent the unit from detecting smoke.Avoid areas with turbulent air flow, such as near doors, fans or windows. Rapid air movement around thedetector may prevent smoke from entering the unit.Do not locate detectors in areas of high humidity.Do not locate detectors in areas where the temperature rises above 38 o C (100 o F) or falls below 5 o C (41 o F).Smoke detectors should always be <strong>install</strong>ed in accordance with NFPA 72, the National Fire Alarm Code.Smoke detectors should always be located in accordance with:• Paragraph 2-2.1.1.1 of NFPA 72:“Smoke detectors shall be <strong>install</strong>ed outside of each separatesleeping area in the immediate vicinity of the bedrooms and on each additional story of thefamily living unit, including basements and excluding crawl spaces and unfinished attics. In newconstruction, a smoke detector also shall be <strong>install</strong>ed in each sleeping room.”• Paragraph 2-2.1.1.2 of NFPA 72:“Split level arrangement. Smoke detectors are required whereshown. Smoke detectors are optional where a door is not provided between living room andrecreation room.”The Smoke Detector is designed to use Eveready Energizer E91 Alkaline Batteries. Donot use other brands of batteries with the Smoke Detector. Using brands other than theEveready Energizer will void UL approval, and may affect the system’s operation.20
IndexI N D E XAadddevice 4wireless key 5, 11antenna 3Bbatteriesreplacing 13buttonsprogramming 5CconnectKeybus 3receiver 3Ddefaultmodule 9panel 9delete device 9devices 2adding 4removing 9distance from controlpanel 1Eelectronic serialnumber 4enrolldevice 4<strong>PC5132</strong> 7wireless key 4ESN 4Ffactory default 9frequency 1function keys 5Gglobal placementtest 10Iindividual placementtest 11interference 3Jjamming signaldetection 8, 13KKeybus 3Llocationchoosing 3low batterydevices 13Mmountdevices 11<strong>PC5132</strong> 11Nnumberelectronic, serial 4Ppartition programming7wireless keys 5placement<strong>PC5132</strong> 3test 10power 3Rremovingdevice 9module 7RF jamming 9Sserial number 4slot numberwireless key 5supervisionDEOL 8device 8disable 7module 7window 8Ttestingdoor/windowcontact 10global 10individual 11motion detector 10,11<strong>PC5132</strong> 10placement 10trouble 13troubleshooting 14Wwireless keyaccess codes 6activating outputs 6arming/disarming 6enrolling 4identifying 6programming 4Zzoneadding 4attribute 7numbers 4programming 7wireless 721
LIMITED WARRANTYDigital Security Controls Ltd. warrants the original purchaserthat for a period of twelve months from the date ofpurchase, the product shall be free of defects in materialsand workmanship under normal use. During the warrantyperiod, Digital Security Controls Ltd. shall, at its option,repair or replace any defective product upon return of theproduct to its factory, at no charge for labour and materials.Any replacement and/or repaired parts are warranted forthe remainder of the original warranty or ninety (90) days,whichever is longer. The original owner must promptlynotify Digital Security Controls Ltd. in writing that thereis defect in material or workmanship, such written noticeto be received in all events prior to expiration of the warrantyperiod.International WarrantyThe warranty for international customers is the same asfor any customer within Canada and the United States,with the exception that Digital Security Controls Ltd. shallnot be responsible for any customs fees, taxes, or VATthat may be due.Warranty ProcedureTo obtain service under this warranty, please return theitem(s) in question to the point of purchase. All authorizeddistributors and dealers have a warranty program.Conditions to Void WarrantyThis warranty applies only to defects in parts and workmanshiprelating to normal use. It does not cover:• damage incurred in shipping or handling;• damage caused by disaster such as fire, flood, wind,earthquake or lightning;• damage due to causes beyond the control of DigitalSecurity Controls Ltd. such as excessive voltage, mechanicalshock or water damage;• damage caused by unauthorized attachment, alterations,modifications or foreign objects;• damage caused by peripherals (unless such peripheralswere supplied by Digital Security Controls Ltd.);• defects caused by failure to provide a suitable <strong>install</strong>ationenvironment for the products;• damage caused by use of the products for purposesother than those for which it was designed;• damage from improper maintenance;• damage arising out of any other abuse, mishandling orimproper application of the products.Digital Security Controls Ltd.’s liability for failure torepair the product under this warranty after a reasonablenumber of attempts will be limited to a replacement ofthe product, as the exclusive remedy for breach of warranty.Under no circumstances shall Digital SecurityControls Ltd. be liable for any special, incidental, or consequentialdamages based upon breach of warranty,breach of contract, negligence, strict liability, or any otherlegal theory. Such damages include, but are not limitedto, loss of profits, loss of the product or any associatedequipment, cost of capital, cost of substitute or replacementequipment, facilities or services, down time,purchaser’s time, the claims of third parties, includingcustomers, and injury to property.Disclaimer of WarrantiesThis warranty contains the entire warranty and shallbe in lieu of any and all other warranties, whetherexpressed or implied (including all implied warrantiesof merchantability or fitness for a particular purpose)And of all other obligations or liabilities on thepart of Digital Security Controls Ltd. Digital SecurityControls Ltd. neither assumes responsibility fornor authorizes any other person purporting to act onits behalf to modify or to change this warranty, norto assume for it any other warranty or liability concerningthis product.This disclaimer of warranties and limited warrantyare governed by the laws of the province of Ontario,Canada.WARNING: Digital Security Controls Ltd. recommendsthat the entire system be completely tested ona regular basis. However, despite frequent testing, anddue to, but not limited to, criminal tampering or electricaldisruption, it is possible for this product to failto perform as expected.
WARNING Please Read CarefullyNote to InstallersThis warning contains vital information. As the only individual in contactwith system users, it is your responsibility to bring each item in this warningto the attention of the users of this system.System FailuresThis system has been carefully designed to be as effective as possible.There are circumstances, however, involving fire, burglary, or othertypes of emergencies where it may not provide protection. Any alarmsystem of any type may be compromised deliberately or may fail tooperate as expected for a variety of reasons. Some but not all of thesereasons may be:■ Inadequate InstallationA security system must be <strong>install</strong>ed properly in order to provide adequateprotection. Every <strong>install</strong>ation should be evaluated by a securityprofessional to ensure that all access points and areas are covered.Locks and latches on windows and doors must be secure and operateas intended. Windows, doors, walls, ceilings and other building materialsmust be of sufficient strength and construction to provide thelevel of protection expected. A reevaluation must be done during andafter any construction activity. An evaluation by the fire and/or policedepartment is highly recommended if this service is available.■ Criminal KnowledgeThis system contains security features which were known to be effectiveat the time of manufacture. It is possible for persons with criminalintent to develop techniques which reduce the effectiveness of thesefeatures. It is important that a security system be reviewed periodicallyto ensure that its features remain effective and that it be updated orreplaced if it is found that it does not provide the protection expected.■ Access by IntrudersIntruders may enter through an unprotected access point, circumventa sensing device, evade detection by moving through an area of insufficientcoverage, disconnect a warning device, or interfere with orprevent the proper operation of the system.■ Power FailureControl units, intrusion detectors, smoke detectors and many othersecurity devices require an adequate power supply for proper operation.If a device operates from batteries, it is possible for the batteriesto fail. Even if the batteries have not failed, they must be charged, ingood condition and <strong>install</strong>ed correctly. If a device operates only by ACpower, any interruption, however brief, will render that device inoperativewhile it does not have power. Power interruptions of any lengthare often accompanied by voltage fluctuations which may damageelectronic equipment such as a security system. After a power interruptionhas occurred, immediately conduct a complete system test toensure that the system operates as intended.■ Failure of Replaceable BatteriesThis system’s wireless transmitters have been designed to provide severalyears of battery life under normal conditions. The expected batterylife is a function of the device environment, usage and type. Ambientconditions such as high humidity, high or low temperatures, orlarge temperature fluctuations may reduce the expected battery life.While each transmitting device has a low battery monitor which identifieswhen the batteries need to be replaced, this monitor may fail tooperate as expected. Regular testing and maintenance will keep thesystem in good operating condition.■ Compromise of Radio Frequency (Wireless) DevicesSignals may not reach the receiver under all circumstances which couldinclude metal objects placed on or near the radio path or deliberate jammingor other inadvertent radio signal interference.■ System UsersA user may not be able to operate a panic or emergency switch possiblydue to permanent or temporary physical disability, inability to reachthe device in time, or unfamiliarity with the correct operation. It isimportant that all system users be trained in the correct operation ofthe alarm system and that they know how to respond when the systemindicates an alarm.■ Smoke DetectorsSmoke detectors that are a part of this system may not properly alertoccupants of a fire for a number of reasons, some of which follow. Thesmoke detectors may have been improperly <strong>install</strong>ed or positioned.Smoke may not be able to reach the smoke detectors, such as when thefire is in a chimney, walls or roofs, or on the other side of closed doors.Smoke detectors may not detect smoke from fires on another level ofthe residence or building.Every fire is different in the amount of smoke produced and therate of burning. Smoke detectors cannot sense all types of firesequally well. Smoke detectors may not provide timely warningof fires caused by carelessness or safety hazards such as smokingin bed, violent explosions, escaping gas, improper storage of flammablematerials, overloaded electrical circuits, children playingwith matches or arson.Even if the smoke detector operates as intended, there may be circumstanceswhen there is insufficient warning to allow all occupantsto escape in time to avoid injury or death.■ Motion DetectorsMotion detectors can only detect motion within the designated areasas shown in their respective <strong>install</strong>ation instructions. They cannotdiscriminate between intruders and intended occupants. Motiondetectors do not provide volumetric area protection. They havemultiple beams of detection and motion can only be detected inunobstructed areas covered by these beams. They cannot detectmotion which occurs behind walls, ceilings, floor, closed doors,glass partitions, glass doors or windows. Any type of tamperingwhether intentional or unintentional such as masking, painting, orspraying of any material on the lenses, mirrors, windows or anyother part of the detection system will impair its proper operation.Passive infrared motion detectors operate by sensing changes intemperature. However their effectiveness can be reduced when theambient temperature rises near or above body temperature or ifthere are intentional or unintentional sources of heat in or near thedetection area. Some of these heat sources could be heaters, radiators,stoves, barbeques, fireplaces, sunlight, steam vents, lightingand so on.■ Warning DevicesWarning devices such as sirens, bells, horns, or strobes may notwarn people or waken someone sleeping if there is an interveningwall or door. If warning devices are located on a differentlevel of the residence or premise, then it is less likely that theoccupants will be alerted or awakened. Audible warning devicesmay be interfered with by other noise sources such as stereos,radios, televisions, air conditioners or other appliances, or passingtraffic. Audible warning devices, however loud, may not beheard by a hearing-impaired person.■ Telephone LinesIf telephone lines are used to transmit alarms, they may be out ofservice or busy for certain periods of time. Also an intruder may cutthe telephone line or defeat its operation by more sophisticated meanswhich may be difficult to detect.■ Insufficient TimeThere may be circumstances when the system will operate as intended,yet the occupants will not be protected from the emergencydue to their inability to respond to the warnings in a timelymanner. If the system is monitored, the response may not occur intime to protect the occupants or their belongings.■ Component FailureAlthough every effort has been made to make this system as reliableas possible, the system may fail to function as intended dueto the failure of a component.■ Inadequate TestingMost problems that would prevent an alarm system from operatingas intended can be found by regular testing and maintenance. Thecomplete system should be tested weekly and immediately after abreak-in, an attempted break-in, a fire, a storm, an earthquake, anaccident, or any kind of construction activity inside or outside thepremises. The testing should include all sensing devices, keypads,consoles, alarm indicating devices and any other operational devicesthat are part of the system.■ Security and InsuranceRegardless of its capabilities, an alarm system is not a substitutefor property or life insurance. An alarm system also is not a substitutefor property owners, renters, or other occupants to act prudentlyto prevent or minimize the harmful effects of an emergencysituation.
©2003 Digital Security Controls Ltd.Toronto, Canada1-800-387-3630 • www.dsc.comPrinted in Canada 29005043 Rev 004