Pololu - Pololu USB AVR Programmer User's Guide - Roboweb.net
Pololu - Pololu USB AVR Programmer User's Guide - Roboweb.net
Pololu - Pololu USB AVR Programmer User's Guide - Roboweb.net

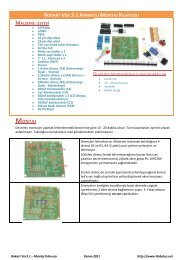
You also want an ePaper? Increase the reach of your titles
YUMPU automatically turns print PDFs into web optimized ePapers that Google loves.
<strong>Pololu</strong> <strong>USB</strong> <strong>AVR</strong> <strong>Programmer</strong> <strong>User's</strong> <strong>Guide</strong>© 2001–2011 <strong>Pololu</strong> Corporation• mega168: BlinkLED_m168.zip [http://www.pololu.com/file/download/BlinkLED_m168.zip?file_id=0J189] (9k zip)• mega328: BlinkLED_m328.zip [http://www.pololu.com/file/download/BlinkLED_m328.zip?file_id=0J190] (9k zip)If your device is not one of the above, you will need to download one of the above archives and modify themakefile to use your particular device.Unpack the archive on your Linux computer. Copy the file BlinkLED/linux/Makefile into the BlinkLED/directory. You will need to edit this file. Change all instances of “/dev/tty<strong>USB</strong>0” to the name of the programmingport device, usually /dev/ttyACM0. Additionally, it may be necessary to change the settings at the beginning toreflect the locations where the <strong>AVR</strong> utilities were installed.Note: You will probably want to edit BlinkLED.c slightly if the clock frequency of your <strong>AVR</strong> isnot 20 MHz. F_CPU should be defined as the clock frequency of your <strong>AVR</strong> in units of Hz. If youdo not make this change, the timing of delayms() will be off, but the LED will still blink.At this point, you should be ready to compile the example program and load it on to the <strong>AVR</strong>. Plug in theprogrammer and type make. You should see output like this:/usr/bin/avr-gcc -g -Os -Wall -mcall-prologues -mmcu=atmega168 -c -o BlinkLED.o BlinkLED.c/usr/bin/avr-gcc -g -Os -Wall -mcall-prologues -mmcu=atmega168 BlinkLED.o -o BlinkLED.obj/usr/bin/avr-objcopy -R .eeprom -O ihex BlinkLED.obj BlinkLED.hex/usr/bin/avrdude -c avrispv2 -p m168 -P /dev/ttyACM0 -eavrdude: <strong>AVR</strong> device initialized and ready to accept instructionsReading | ################################################## | 100% 0.08savrdude: Device signature = 0x1e9406avrdude: erasing chipavrdude: safemode: Fuses OKavrdude done. Thank you./usr/bin/avrdude -c avrispv2 -p m168 -P /dev/ttyACM0 -U flash:w:BlinkLED.hexavrdude: stk500_2_ReceiveMessage(): timeoutavrdude: <strong>AVR</strong> device initialized and ready to accept instructionsReading | ################################################## | 100% 0.03savrdude: Device signature = 0x1e9406avrdude: NOTE: FLASH memory has been specified, an erase cycle will be performedTo disable this feature, specify the -D option.avrdude: erasing chipavrdude: reading input file "BlinkLED.hex"avrdude: input file BlinkLED.hex auto detected as Intel Hexavrdude: writing flash (224 bytes):Writing | ################################################## | 100% 0.39savrdude: 224 bytes of flash writtenavrdude: verifying flash memory against BlinkLED.hex:avrdude: load data flash data from input file BlinkLED.hex:avrdude: input file BlinkLED.hex auto detected as Intel Hexavrdude: input file BlinkLED.hex contains 224 bytesavrdude: reading on-chip flash data:Reading | ################################################## | 100% 0.05savrdude: verifying ...avrdude: 224 bytes of flash verifiedavrdude: safemode: Fuses OK4. Getting Started in Linux Page 35 of 53