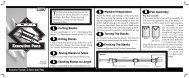
General Instructions 1. Cutting Blanks 2. Drilling Blanks ... - Woodcraft
General Instructions 1. Cutting Blanks 2. Drilling Blanks ... - Woodcraft
General Instructions 1. Cutting Blanks 2. Drilling Blanks ... - Woodcraft

You also want an ePaper? Increase the reach of your titles
YUMPU automatically turns print PDFs into web optimized ePapers that Google loves.
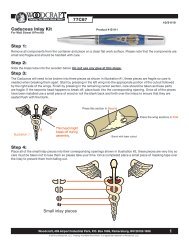
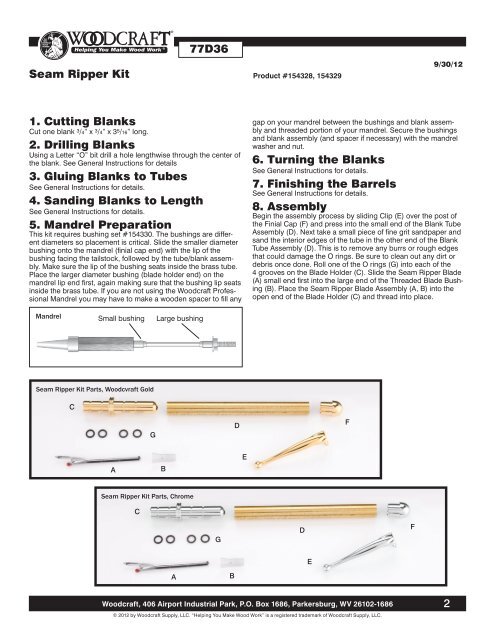
Seam Ripper Kit77D36Product #154328, 1543299/30/12<strong>1.</strong> <strong>Cutting</strong> <strong>Blanks</strong>Cut one blank 3 /4” x 3 /4” x 3 5 /16” long.<strong>2.</strong> <strong>Drilling</strong> <strong>Blanks</strong>Using a Letter “O” bit drill a hole lengthwise through the center ofthe blank. See <strong>General</strong> <strong>Instructions</strong> for details3. Gluing <strong>Blanks</strong> to TubesSee <strong>General</strong> <strong>Instructions</strong> for details.4. Sanding <strong>Blanks</strong> to LengthSee <strong>General</strong> <strong>Instructions</strong> for details.5. Mandrel PreparationThis kit requires bushing set #154330. The bushings are differentdiameters so placement is critical. Slide the smaller diameterbushing onto the mandrel (finial cap end) with the lip of thebushing facing the tailstock, followed by the tube/blank assembly.Make sure the lip of the bushing seats inside the brass tube.Place the larger diameter bushing (blade holder end) on themandrel lip end first, again making sure that the bushing lip seatsinside the brass tube. If you are not using the <strong>Woodcraft</strong> ProfessionalMandrel you may have to make a wooden spacer to fill anygap on your mandrel between the bushings and blank assemblyand threaded portion of your mandrel. Secure the bushingsand blank assembly (and spacer if necessary) with the mandrelwasher and nut.6. Turning the <strong>Blanks</strong>See <strong>General</strong> <strong>Instructions</strong> for details.7. Finishing the BarrelsSee <strong>General</strong> <strong>Instructions</strong> for details.8. AssemblyBegin the assembly process by sliding Clip (E) over the post ofthe Finial Cap (F) and press into the small end of the Blank TubeAssembly (D). Next take a small piece of fine grit sandpaper andsand the interior edges of the tube in the other end of the BlankTube Assembly (D). This is to remove any burrs or rough edgesthat could damage the O rings. Be sure to clean out any dirt ordebris once done. Roll one of the O rings (G) into each of the4 grooves on the Blade Holder (C). Slide the Seam Ripper Blade(A) small end first into the large end of the Threaded Blade Bushing(B). Place the Seam Ripper Blade Assembly (A, B) into theopen end of the Blade Holder (C) and thread into place.Mandrel Small bushing Large bushingSeam Ripper Kit Parts, Woodcvraft GoldCGDFABESeam Ripper Kit Parts, ChromeCGDFEAB<strong>Woodcraft</strong>, 406 Airport Industrial Park, P.O. Box 1686, Parkersburg, WV 26102-1686© 2012 by <strong>Woodcraft</strong> Supply, LLC. “Helping You Make Wood Work” is a registered trademark of <strong>Woodcraft</strong> Supply, LLC.2