CPS Spark⢠Quick Start Guide - Lake Local Schools
CPS Spark⢠Quick Start Guide - Lake Local Schools
CPS Spark⢠Quick Start Guide - Lake Local Schools

You also want an ePaper? Increase the reach of your titles
YUMPU automatically turns print PDFs into web optimized ePapers that Google loves.
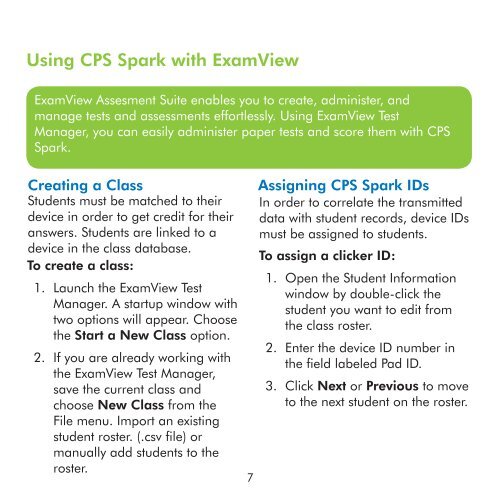
Using <strong>CPS</strong> Spark with ExamViewExamView Assesment Suite enables you to create, administer, andmanage tests and assessments effortlessly. Using ExamView TestManager, you can easily administer paper tests and score them with <strong>CPS</strong>Spark.Creating a ClassStudents must be matched to theirdevice in order to get credit for theiranswers. Students are linked to adevice in the class database.To create a class:1. Launch the ExamView TestManager. A startup window withtwo options will appear. Choosethe <strong>Start</strong> a New Class option.2. If you are already working withthe ExamView Test Manager,save the current class andchoose New Class from theFile menu. Import an existingstudent roster. (.csv file) ormanually add students to theroster.7Assigning <strong>CPS</strong> Spark IDsIn order to correlate the transmitteddata with student records, device IDsmust be assigned to students.To assign a clicker ID:1. Open the Student Informationwindow by double-click thestudent you want to edit fromthe class roster.2. Enter the device ID number inthe field labeled Pad ID.3. Click Next or Previous to moveto the next student on the roster.