NetPoint Configuration Guide
NetPoint Configuration Guide
NetPoint Configuration Guide

Create successful ePaper yourself
Turn your PDF publications into a flip-book with our unique Google optimized e-Paper software.
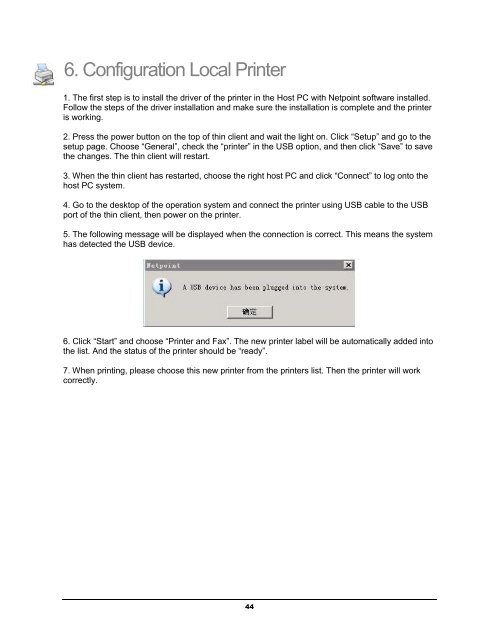
6. <strong>Configuration</strong> Local Printer1. The first step is to install the driver of the printer in the Host PC with Netpoint software installed.Follow the steps of the driver installation and make sure the installation is complete and the printeris working.2. Press the power button on the top of thin client and wait the light on. Click “Setup” and go to thesetup page. Choose “General”, check the “printer” in the USB option, and then click “Save” to savethe changes. The thin client will restart.3. When the thin client has restarted, choose the right host PC and click “Connect” to log onto thehost PC system.4. Go to the desktop of the operation system and connect the printer using USB cable to the USBport of the thin client, then power on the printer.5. The following message will be displayed when the connection is correct. This means the systemhas detected the USB device.6. Click “Start” and choose “Printer and Fax”. The new printer label will be automatically added intothe list. And the status of the printer should be “ready”.7. When printing, please choose this new printer from the printers list. Then the printer will workcorrectly.44