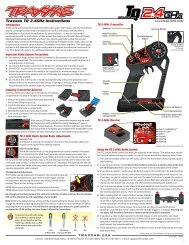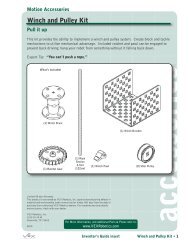
35401.1 PKZ Archer RTF BNF manual.indb - Robot MarketPlace
35401.1 PKZ Archer RTF BNF manual.indb - Robot MarketPlace
35401.1 PKZ Archer RTF BNF manual.indb - Robot MarketPlace

You also want an ePaper? Increase the reach of your titles
YUMPU automatically turns print PDFs into web optimized ePapers that Google loves.
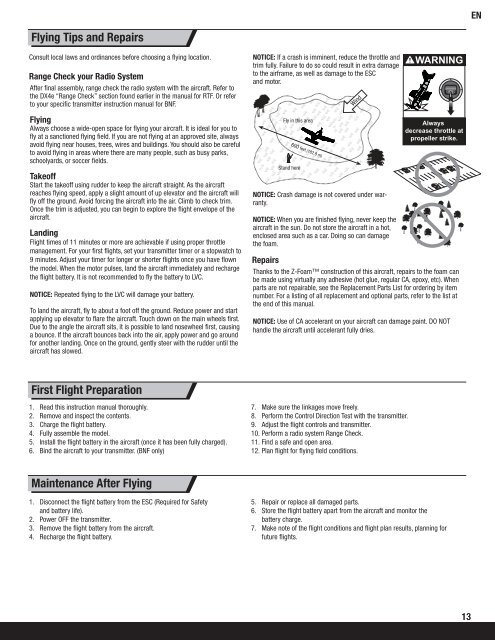
ENFlying Tips and RepairsConsult local laws and ordinances before choosing a fl ying location.Range Check your Radio SystemAfter fi nal assembly, range check the radio system with the aircraft. Refer tothe DX4e “Range Check” section found earlier in the <strong>manual</strong> for <strong>RTF</strong>. Or referto your specifi c transmitter instruction <strong>manual</strong> for <strong>BNF</strong>.FlyingAlways choose a wide-open space for fl ying your aircraft. It is ideal for you tofl y at a sanctioned fl ying fi eld. If you are not fl ying at an approved site, alwaysavoid fl ying near houses, trees, wires and buildings. You should also be carefulto avoid fl ying in areas where there are many people, such as busy parks,schoolyards, or soccer fi elds.TakeoffStart the takeoff using rudder to keep the aircraft straight. As the aircraftreaches fl ying speed, apply a slight amount of up elevator and the aircraft willfl y off the ground. Avoid forcing the aircraft into the air. Climb to check trim.Once the trim is adjusted, you can begin to explore the fl ight envelope of theaircraft.LandingFlight times of 11 minutes or more are achievable if using proper throttlemanagement. For your fi rst fl ights, set your transmitter timer or a stopwatch to9 minutes. Adjust your timer for longer or shorter fl ights once you have fl ownthe model. When the motor pulses, land the aircraft immediately and rechargethe fl ight battery. It is not recommended to fl y the battery to LVC.NOTICE: Repeated fl ying to the LVC will damage your battery.To land the aircraft, fl y to about a foot off the ground. Reduce power and startapplying up elevator to fl are the aircraft. Touch down on the main wheels fi rst.Due to the angle the aircraft sits, it is possible to land nosewheel fi rst, causinga bounce. If the aircraft bounces back into the air, apply power and go aroundfor another landing. Once on the ground, gently steer with the rudder until theaircraft has slowed.NOTICE: If a crash is imminent, reduce the throttle andtrim fully. Failure to do so could result in extra damageto the airframe, as well as damage to the ESCand motor.Fly in this areaStand here600 feet (182.8 m)NOTICE: Crash damage is not covered under warranty.NOTICE: When you are fi nished fl ying, never keep theaircraft in the sun. Do not store the aircraft in a hot,enclosed area such as a car. Doing so can damagethe foam.Alwaysdecrease throttle atpropeller strike.RepairsThanks to the Z-Foam construction of this aircraft, repairs to the foam canbe made using virtually any adhesive (hot glue, regular CA, epoxy, etc). Whenparts are not repairable, see the Replacement Parts List for ordering by itemnumber. For a listing of all replacement and optional parts, refer to the list atthe end of this <strong>manual</strong>.NOTICE: Use of CA accelerant on your aircraft can damage paint. DO NOThandle the aircraft until accelerant fully dries.WindFirst Flight Preparation1. Read this instruction <strong>manual</strong> thoroughly.2. Remove and inspect the contents.3. Charge the fl ight battery.4. Fully assemble the model.5. Install the fl ight battery in the aircraft (once it has been fully charged).6. Bind the aircraft to your transmitter. (<strong>BNF</strong> only)7. Make sure the linkages move freely.8. Perform the Control Direction Test with the transmitter.9. Adjust the fl ight controls and transmitter.10. Perform a radio system Range Check.11. Find a safe and open area.12. Plan fl ight for fl ying fi eld conditions.Maintenance After Flying1. Disconnect the fl ight battery from the ESC (Required for Safetyand battery life).2. Power OFF the transmitter.3. Remove the fl ight battery from the aircraft.4. Recharge the fl ight battery.5. Repair or replace all damaged parts.6. Store the fl ight battery apart from the aircraft and monitor thebattery charge.7. Make note of the fl ight conditions and fl ight plan results, planning forfuture fl ights.13