A Guide to repointing Stone and Brickwork
A Guide to repointing Stone and Brickwork
A Guide to repointing Stone and Brickwork
Create successful ePaper yourself
Turn your PDF publications into a flip-book with our unique Google optimized e-Paper software.
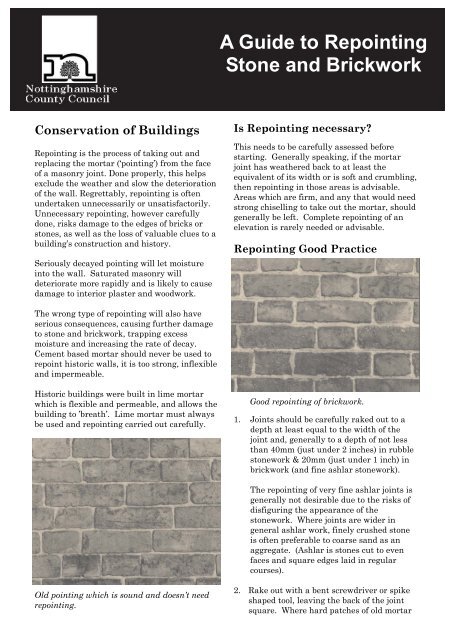
A <strong>Guide</strong> <strong>to</strong> RepointingS<strong>to</strong>ne <strong>and</strong> <strong>Brickwork</strong>Conservation of BuildingsRepointing is the process of taking out <strong>and</strong>replacing the mortar (‘pointing’) from the faceof a masonry joint. Done properly, this helpsexclude the weather <strong>and</strong> slow the deteriorationof the wall. Regrettably, <strong>repointing</strong> is oftenundertaken unnecessarily or unsatisfac<strong>to</strong>rily.Unnecessary <strong>repointing</strong>, however carefullydone, risks damage <strong>to</strong> the edges of bricks ors<strong>to</strong>nes, as well as the loss of valuable clues <strong>to</strong> abuilding’s construction <strong>and</strong> his<strong>to</strong>ry.Seriously decayed pointing will let moisturein<strong>to</strong> the wall. Saturated masonry willdeteriorate more rapidly <strong>and</strong> is likely <strong>to</strong> causedamage <strong>to</strong> interior plaster <strong>and</strong> woodwork.Is Repointing necessary?This needs <strong>to</strong> be carefully assessed beforestarting. Generally speaking, if the mortarjoint has weathered back <strong>to</strong> at least theequivalent of its width or is soft <strong>and</strong> crumbling,then <strong>repointing</strong> in those areas is advisable.Areas which are firm, <strong>and</strong> any that would needstrong chiselling <strong>to</strong> take out the mortar, shouldgenerally be left. Complete <strong>repointing</strong> of anelevation is rarely needed or advisable.Repointing Good PracticeThe wrong type of <strong>repointing</strong> will also haveserious consequences, causing further damage<strong>to</strong> s<strong>to</strong>ne <strong>and</strong> brickwork, trapping excessmoisture <strong>and</strong> increasing the rate of decay.Cement based mortar should never be used <strong>to</strong>repoint his<strong>to</strong>ric walls, it is <strong>to</strong>o strong, inflexible<strong>and</strong> impermeable.His<strong>to</strong>ric buildings were built in lime mortarwhich is flexible <strong>and</strong> permeable, <strong>and</strong> allows thebuilding <strong>to</strong> ’breath’. Lime mortar must alwaysbe used <strong>and</strong> <strong>repointing</strong> carried out carefully.Good <strong>repointing</strong> of brickwork.1. Joints should be carefully raked out <strong>to</strong> adepth at least equal <strong>to</strong> the width of thejoint <strong>and</strong>, generally <strong>to</strong> a depth of not lessthan 40mm (just under 2 inches) in rubbles<strong>to</strong>nework & 20mm (just under 1 inch) inbrickwork (<strong>and</strong> fine ashlar s<strong>to</strong>nework).The <strong>repointing</strong> of very fine ashlar joints isgenerally not desirable due <strong>to</strong> the risks ofdisfiguring the appearance of thes<strong>to</strong>nework. Where joints are wider ingeneral ashlar work, finely crushed s<strong>to</strong>neis often preferable <strong>to</strong> coarse s<strong>and</strong> as anaggregate. (Ashlar is s<strong>to</strong>nes cut <strong>to</strong> evenfaces <strong>and</strong> square edges laid in regularcourses).Old pointing which is sound <strong>and</strong> doesn’t need<strong>repointing</strong>.2. Rake out with a bent screwdriver or spikeshaped <strong>to</strong>ol, leaving the back of the jointsquare. Where hard patches of old mortar
LimeThis is available in 3 main types:1. Matured Lime PuttyPutty is is sold wet <strong>and</strong> in tubs, it is generallya high quality product, but expensive. It isusually sold ‘matured’ referring <strong>to</strong> the length oftime it has been since it was ‘slaked’. Thelonger matured the better, 6 months is theusual st<strong>and</strong>ard for a good quality lime. Limeputty should always be used for internalplasterwork <strong>and</strong> can be used for exteriormortars <strong>and</strong> renders. If used in a mortar it isadvisable <strong>to</strong> use a ‘pozzolan’ additive whichacts as a catalyst <strong>to</strong> help the mortar set <strong>and</strong>improve its durability. Pozzolans includematerials like Pulverised Fuel Ash (PFA),metakaolin Metastar 501, Trass fromGermany, <strong>and</strong> HTI (ceramic ‘high temperatureinsulation’). They should be added at a ratio of10% <strong>to</strong> the mortar just before use, as it willimmediately start off the setting process.2. Hydrated limeThis is the dry powder you are likely <strong>to</strong> be soldat the DIY s<strong>to</strong>re or local builder’s merchant. Itis commonly used in cement mortars as a‘plasticiser’ (WARNING: this does notconstitute a ‘lime mortar’). Hydrated lime canbe used for proper lime mortars (withoutcement) but we recommend that lime putty isused instead (see below). If Hydrated lime ischosen then for the best result the lime shouldbe converted <strong>to</strong> lime putty by the addition ofwater. Add the lime powder <strong>to</strong> water in asuitable clean bin <strong>and</strong> mix <strong>to</strong> achieve a thickcream. Keep for at least 24 hours before use asa putty – the longer it is left <strong>to</strong> ‘mature’ thebetter the lime will become (ensure the lime iscompletely covered by c.2cm of water). Use of apozzolan as indicated above is recommended.Good Practice for mixing lime puttyFor best <strong>and</strong> consistent results with either theLime putty (1) or Hydrated Lime (2) the s<strong>and</strong><strong>and</strong> lime putty should be thoroughly <strong>and</strong>evenly mixed beforeh<strong>and</strong> with just sufficientwater <strong>to</strong> achieve a plastic fatty consistency.Putty is best mixed in a paddle mixer, by h<strong>and</strong>on a board or in a bucket, but not a st<strong>and</strong>ardcement mixer. The mixture is called ‘coarsestuff’ <strong>and</strong> should be s<strong>to</strong>red in bins with airtightlids, or wet sacking cover, for a week beforeuse. It can be “knocked up” <strong>and</strong> gauged withthe pozzolan when required for the work.3. Naturally Hydraulic lime (NHL)Sometimes this is sold simply as ‘Hydrauliclime’ which makes it easily confused with‘Hydrated lime’ (see above). Hydraulic limewill always display NHL <strong>and</strong> a number on thebag. This refers <strong>to</strong> the clay content of the lime<strong>and</strong> is an indica<strong>to</strong>r of the level of chemical set.The chemical set is similar <strong>to</strong> the settingcharacteristics of cement but not as rapid. Itcan be used as a substitute for cement (bearingin mind the use of coarse s<strong>and</strong> referred <strong>to</strong>above), but it requires greater aftercare <strong>and</strong>attention <strong>to</strong> ensure it does not dry out before ithas fully set (see point 10 under ‘Good Practice’above). NHL 3.5 is a ‘moderately’ hydrauliclime appropriate for very exposed positions, formost re-pointing nothing stronger than a‘feebly’ hydraulic should be used (NHL1).Good practice for mixing Hydrauliclime mortarHydraulic lime of NHL 3.5 or less can be mixed<strong>and</strong> s<strong>to</strong>red for a short period before use. Thelower hydraulic limes (NHL 1-2) can be left forup <strong>to</strong> 4 hours <strong>and</strong> ‘knocked-up’ prior <strong>to</strong> use.This will aid the setting process. Moderatelyhydraulic mortars (NHL 3.5) should not be leftmore than an hour or two before use.Table highlighting the main points with respect <strong>to</strong> each type of lime.ProsConsLime Putty Hydrated Lime Hydraulic lime (NHL)• Good quality• Highly ‘breathable’• Flexible• Sacrificial• His<strong>to</strong>rically authentic• Expensive• Better mixed by h<strong>and</strong> orpaddle mixer• Cheap• Widely available• Can be turned in<strong>to</strong> putty• Poor quality• Should be converted <strong>to</strong>putty• Better mixed by h<strong>and</strong> orpaddle mixer• Quality acceptable• Easy <strong>to</strong> mix• Cheaper than putty• Inflexible• Less breathable• Less authentic
Mortar MixesAppropriate mixes will depend very much onthe type of s<strong>to</strong>ne or brick <strong>to</strong> be repointed.Suitable general guide mix is:1 : 3 lime <strong>to</strong> s<strong>and</strong>Water : must be clean.Gauging : measuring proportions of thematerials should be done accurately. Separatemeasuring containers should be used for limeputty <strong>and</strong> the s<strong>and</strong>.MixingLime putty: This is best mixed in a paddlemixer, by h<strong>and</strong> on a board or in a bucket, butnot a st<strong>and</strong>ard cement mixer.Hydraulic lime: can be mixed in a cementmixer.Water: the mix should not be made <strong>to</strong>o wet,enough water should be added <strong>to</strong> allow themortar <strong>to</strong> stick <strong>to</strong> an upturned wooden hawk.It should not be sloppy.Problems & remediesProblem Cause How <strong>to</strong> avoidMortar cracks Mortar <strong>to</strong>o wet Less water in mixMortar dried butnot hardened/setMortar was not compressed sufficientlyMortar dried out <strong>to</strong>o quicklyInsufficient pre-wetting of masonryWall not protected from wind <strong>and</strong>/or sunMortar damaged by frost before settingPress mortar tightly in<strong>to</strong> jointsPre-wet joints & protect afterwardsSpray joints thoroughly with waterone hour before, <strong>and</strong> 10 minutesbefore pointingAlways cover with Hessian <strong>and</strong>dampen if hot/windyNever point when frost is likelyTools for the jobBrick Pointers (left) or ‘pointing irons’ arenot widely available at DIY s<strong>to</strong>res but somebuilder’s merchants <strong>and</strong> a number of on-linesites sell them. They come in a variety ofwidths from 3/8 inch; ½ inch; 5/8 inch.Wooden hawks are useful but not easily found, they can be made byattaching a short piece of broom h<strong>and</strong>le <strong>to</strong> a 6 inch square board.Alternatives include a plastic plaster’s trowel or just a piece of wood.Churn brushes get their name from their use for cleaning out milkchurns. They are just right for ‘stippling’ the mortarjoints but are not widely available on the high street. Astiff bristled dust pan or scrubbing brush will suffice ifthe bristles are hard enough.long h<strong>and</strong>le churn brushMore detailed information on <strong>repointing</strong> can be obtained from:The Society for the Protection of the Ancient Buildings, 37 Spital Square, London E1 6DY.Ask for: SPAB Technical Leaflet No. 5 or the following by John Ashurst:‘Pointing S<strong>to</strong>ne <strong>and</strong> Brick Walling’ <strong>and</strong> ‘Mortars Plasters <strong>and</strong> Renders in Conservation’There are also a number of web sites with <strong>repointing</strong> advice:www.periodpropertyshop.co.uk/acatalog/Repointing.htmlwww.mikewye.co.uk/mikepointng.htmwww.womersleys.co.uk/pdfs/pointingwithfatlime.pdf


