

Product Manual - Zemic
Product Manual - Zemic
Product Manual - Zemic

Create successful ePaper yourself
Turn your PDF publications into a flip-book with our unique Google optimized e-Paper software.
<strong>Zemic</strong> Europe info@zemic.nl www.zemic.nl
<strong>Zemic</strong> Europe info@zemic.nl www.zemic.nl
Contents1.0 Introduction...32.0 Getting Started2.1 Keypad2.2 Display2.3 Safety2.4 Switching On or Off2.5 Charging the Battery...4...4...4...5...5...53.0 Flow Diagram...64.0 Wiring Schematics4.1 Test Loadcell or Loadcell Display4.2 50V Insulation Test4.3 Weighing System Measurement4.4 Weighing System Pre-calibration4.5 Source Milliamps...7...7...7...8...9...105.0 Test Loadcell...116.0 50V Insulation Test ...117.0 Weighing System Measurement7.1 Measure mVdc (and Measure Excitation Voltage)(and Measure Milliamps)7.2 Measure mVdc & Mass(and Measure Excitation Voltage)(and Measure Milliamps)...12...12...13<strong>Zemic</strong> Europe info@zemic.nl www.zemic.nl1
8.0 Weighing System Pre-calibration ...158.1 Sourcing mV (and Measure Excitation Voltage) ...15(and Measure Milliamps)8.2 Sourcing mV & Mass or Mass & mV...16(and Measure Excitation Voltage)(and Measure Milliamps)9.0 Source Milliamps ...189.1 Source mA...189.2 Source mA & Mass ...199.3 Source Mass & mA ...2010.0 Loadcell Display ...2211.0 Datalog ...2412.0 Datalogging Interface ...2613.0 Settings14.0 Maintenance14.1 Opening your Calibrator14.2 Changing the Batteries14.3 Resetting the Unit14.4 Changing the Fuses14.5 Battery Care14.6 Cleaning...26...29...29...29...30...30...30...3015.0 Technical Specifications ...3115.1 General...3115.2 Measuring...3115.3 Sourcing...3116.0 Accessories...3217.0 Other CALOG <strong>Product</strong>s ...32<strong>Zemic</strong> Europe info@zemic.nl www.zemic.nl2
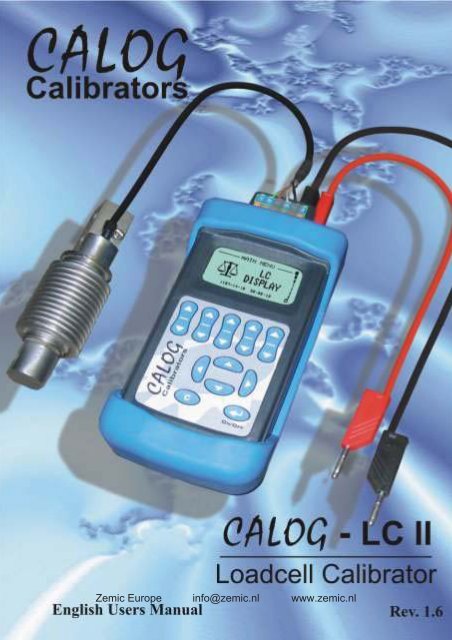
1.0 IntroductionCALOGThe - LC II is a hand-held precision calibrator specifically designed forloadcell testing including insulation breakdown and weighing systemmeasurement, electrical pre-calibration or simulation. This unit can also nowdisplay a loadcell value.Simply connect a loadcell (or strain gauges in a Wheatstone bridge) to the springterminals and press ‘test’... The back-lit graphic display will show four or six wire,zero balance, input and output resistance and bridge balance.Connect leads to the housing and screen and press ‘insulation test’ for a50 volt dc test to display bridge to shield, bridge to housing and shield to housinginsulation resistance in megohms.Now that we have the power of L-ion batteries it is possible to use the hand-heldcalibrator as a loadcell indicator for a reasonable period of time. For longerapplications, such as with a cattle scale, auxiliary power can be supplied via anexternal 12 volt battery, charger or car cigarette lighter socket. In order to displaymass, force, strain or torque from loadcells the unit allows you to set thesensitivity in mV/V, range, decimal points and units. Zero trim can offsetdeadweight and span trim is available to increase the reading accuracy with thehelp of calibrated weights. Selections of software options such as tare, peak holdand auto zero maintenance are included. The indicator can be used for one 350Ohm or three 1000 Ohm loadcells with a fixed 5 Volt DC excitation.For weighing system measurement connect the test leads to the loadcell output toshow millivolts. Alternatively include excitation measure or value and set up todisplay mass in a variety of selectable units. The loadcell transmitter outputmilliamps can also be selected for simultaneous display.Weighing systems electrical pre-calibration can be carried out by injectingmillivolts DC into the loadcell transmitter or indicator. By including excitationmeasurements or value and setting the sensitivity (mV/V) and units the maindisplay can be mass. Output milliamps can also be selected for display.Finally, the calibrator can simulate a loadcell transmitter by injecting milliamps intoa loadcell display or scada system. The display can be in mA or set to displaymass and output mA.CALOGNote : The - LC II is not suitable for AC or square wave pulse amplifiers.Excitation volts and millivolts are measured and sourced in DC only.<strong>Zemic</strong> Europe info@zemic.nl www.zemic.nl3
2.0 Getting Started2.1 KeypadThese keys change the desired output and are usedto set values in the menuUsed to change sub menu options.Used to step up or down in the main and sub menus.Enter menu selections or to turn on/off.Go back from run to sub menu to main menu.2.2 DisplayThe Main Menu (Icon Based)MenuA Submenu (Text Based)SubmenuMeasuring Millivolts (Power Bar Visible)Primary DisplayPower Bar<strong>Zemic</strong> Europe info@zemic.nl www.zemic.nl4
2.3 SafetyYour calibrator is not suitable for use in explosive atmospheres. Sparks at theterminals could cause ignition.Test leads with 4mm safety terminals are supplied with the unitElectric shock injury may result from improper use while connected to the mainspower supply.To ensure reliability of the unit please use anti-static equipment when workingwith the circuit boards.2.4 Switching On or OffPress and hold down the enter key for approx. 2 seconds to switch the unit on.Press and hold down the enter key for approx. 4 seconds to switch the unit off.2.5 Charging the Battery1. Connect the lead from the charger into the side ofyour calibrator.2. Plug the charger into a AC wall socket.The mains power icon will appear and the power barwill start scrolling if the pack requires charging.3. When the power bar stops scrolling, remove the charger from the unit andthe wall socket.A complete charge will take approximately 5 hours.4.The charging voltage can be between 8 - 15 VDC with the inner pin as +ve.This means that the CALOG can be charged from a DC source, such as acar cigarette lighter socket using a suitable cable.<strong>Zemic</strong> Europe info@zemic.nl www.zemic.nl5
3.0 Flow Diagram<strong>Zemic</strong> Europe info@zemic.nl www.zemic.nl6
4.0 Wiring SchematicsThis section shows examples of wiring configurations. These are also foundin the Help Menu.4.1 Test Loadcell and LC DisplayFrom one loadcell.For a 4-wire useterminals 2 to 5(no links)For a 6-wire useterminals 1 to 6MEASUREmVSOURCE++++MEASUREmASOURCE1 2 3 4 5 61. Sense +2. Excitation +3. Millivolt +4. Millivolt -5. Excitation -6. Sense -4.2 50V Insulation TestMEASUREmVSOURCE++++MEASUREmASOURCE1 2 3 4 5 61. Housing2. Excitation +3. Millivolt +4. Millivolt -5. Excitation -6. Shield<strong>Zemic</strong> Europe info@zemic.nl www.zemic.nl7
4.3 Weighing System MeasurementMeasure -5 - 35.00mVdcMeasure (0-20.000Vdc)Measure (0-24.000mA)mA--++MEASUREmVSOURCE++++MEASUREmASOURCECALOG+Ex+-mV-mV+Ex-Example: Weighing System MeasurementUsed for measuring loadcell output millivolts from existing operatingsystems. Connect mV measure from CALOG - LC II to loadcell output anddisplay mV. For mass display also measure excitation voltage (on senseterminals) or set a value for excitation with mV/V and units in the mA&masssubmenu. You can then display the loadcell mV as well as the gross masson the loadcell/s (not excluding tare weight). The mA measurement isoptional should you wish to see the mA output from the loadcell transmitter(LCT) whilst measuring mV or mass.Note : mA measure is isolated<strong>Zemic</strong> Europe info@zemic.nl www.zemic.nl8
4.4 Weighing System Pre-calibrationSource -5 - 50.000mVdcMeasure (0-20.000Vdc)Measure (0-24.000mA)mV +mV -mAUsed to test or precalibrateloadcelltransmitters or indicatorsExcitation can bemeasured or set on thekeypadMeasure excitation onLCT sense terminals for6-wire systemMEASUREmVSOURCE++-+++MEASUREmASOURCESense +Sense -+-Example: Weighing System Pre-calibrationUse for electrically pre-calibrating a loadcell system. In the simplest form inject thedesired mV after doing all your own calculations. However, the CALOG - LC II cando mV&mass (enter mV mass) or mass&mV (enter mass & display mV) bymeasuring the excitation (on the sense terminals) or set a value for excitation withmV/V and select units in the submenu.For example: mass&mV, 3 x 1000kg 2mV/V with measured excitation.Select sourcing, submenu select Source: mass&mV , Excitation: measure ,mV/V: 02,00 , Unit: kilogram=kg , Zero value: 00000 , Span value: 03000 ,Dec point: 00000 , mA measure: on .Connect mV leads from CALOG - LC II into the LCT with loadcell mVdisconnected. Connect leads from CALOG - LC II S+ & S- to same on LCT andconnect LCT mA in series through the CALOG - LC II mA measure terminals. Nowby entering a mass value you should get a corresponding value in mA. Adjust theLCT so that 00000kg = 04,000mA and 3000kg = 20,000mA for example.<strong>Zemic</strong> Europe info@zemic.nl www.zemic.nl9
++4.5 Source Milliamps0 to 24.000mAUsed to send milliampsignal to control room orto test or calibrate mAinput devicesIn source mA mode themilliamp output changesfrom measure mA tosource mA with 24V DCdriving voltage. Ensurereceiving end (SCADA,PLC, indicators, recorder,etc.) is a passive input.MEASUREmVSOURCE++-++MEASUREmASOURCE-SCADAmAControl RoomExample: Source MilliampsUse to send a mA signal to the control room or to test or calibrate milliamps inputdevices such as indicators, recorder or PLCs. In the simple mA mode you set avalue on the display using the value set keys, output is activated immediately.Loop error will flash if circuit open. Should you wish to set a mA value and displaythe mass equivalent then you must select mA&mass in the sub-menu and enterthe mA range, 0 (4)mA value, 20mA value, decimal point and units. If you wish toset the mass value and display the mA equivalent then select mass&mA and enterthe same sub-menu values as above.<strong>Zemic</strong> Europe info@zemic.nl www.zemic.nl10
5.0 Test LoadcellSelect TEST LOADCELL in the main menu.Connect 4 or 6 wire (no links sense/excitation)Press enter to continue, wait 30 secondsPress enter to return to the main menu.6.0 50V Insulation TestSelect TEST INSULATION in the main menu.Press enter to continue.Disconnect sense wires (if used) andconnect leads to housing and shield.Press enter to continue, wait 15 secondsPress enter to return to the main menu.<strong>Zemic</strong> Europe info@zemic.nl www.zemic.nl11
7.0 Weighing System MeasurementSelect MEASURE in the main menu then press the enter key.7.1 Measure mVdc (and Measure Excitation Voltage)(and Measure Milliamps)Measure ( left or right keys to change)Select mVormV & Mass (See 7.2)Excitation (left or right keys to change)On measures the excitation voltage(Measure at sense terminals)orOffmA Measure ( left or right keys to change)OfforOnMeasure mV onlyorMeasure mVMeasure excitation VMeasure mA<strong>Zemic</strong> Europe info@zemic.nl www.zemic.nl12
7.2 Measure mVdc & Mass (and Measure Excitation Voltage)(and Measure Milliamp)Used to display mV and mass from LC system for calibration. (For loadcell displaygo to LC Display)Measure ( left or right keys to change)Select mV & mass.Excitation ( left or right keys to change)Measure uses actual value of LC excitationin mass calculation (for high accuracy youmust measure on sense connection in six-wiresystem).Orxx.xxx V allows you to set theoretical valuefor excitation (max 15.000V)mV/VSet loadcell mV/V from data or nameplate.Unit ( left or right keys to change)kg, grams, tonne, oz, lb, or tonZero ValueSet low scale value.<strong>Zemic</strong> Europe info@zemic.nl www.zemic.nl13
Span ValueSet high scale value.Decimal Point ( left or right keys to change)Move decimal point to suit scalevalueMilliamps ( left or right keys to change)Select off if not requiredorSelect on to measure mA (in series) fromLC system amplifier.Press enter when selection completed<strong>Zemic</strong> Europe info@zemic.nl www.zemic.nl14
8.0 Weighing System Pre-calibrationSelect SOURCE mV in the main menu then press the enter key.8.1 Sourcing mVdc (and Measure Excitation Voltage)(and Measure Milliamps)Source ( left or right keys to change)mV. Sources and displays mV onlyormV & Mass. You enter mV and mass isalso displayed. (See 8.2)orMass & mV. You enter mass and mV isalso displayed. (See 8.2)Excitation ( left or right keys to change)On measures the excitation voltageorOffmA Measure ( left or right keys to change)OfforOn to measure mA (no 24V loop power)Press enter to source mVUse value set keys to change source mV value<strong>Zemic</strong> Europe info@zemic.nl www.zemic.nl15
8.2 Sourcing mV & Mass or Mass & mV(and Measure Excitation Voltage)(and Measure Milliamps)Source ( left or right keys to change)mV. Sources and displays mV only. (See 8.1)ormV & Mass. You enter mV & mass isalso displayed.orMass & mV. You enter mass & mV isalso displayed.Excitation ( left or right keys to change)Measure (from sense) to display anduse in mass calculationorxx.xxxV set to fixed value for display andmass calculationmV/VSet Loadcell mV/V from data or nameplateDecimal Point ( left or right keys to change)Select decimal point to suit scale.Zero ValueSet low system value for 0mV<strong>Zemic</strong> Europe info@zemic.nl www.zemic.nl16
Span valueSet high value.(If 3 x 1 000kg Loadcell = 3 000kg).Unit ( left or right keys to change)Select kg or lb, etc.mA measure (left or right keys to change)OfforOn to measure xx.xxx mA(from loadcell amplifier output,measure in series).Display for mV & massSet mV value and mass is also displayed.Display for mass & mVSet mass value and mV is also displayed.<strong>Zemic</strong> Europe info@zemic.nl www.zemic.nl17
9.0 Source MilliampsSelect Source mA in the main menu then press the enter key.9.1 Source mADisplay ( left or right keys to change)mA display onlyormA & Mass. (See 9.2)orMass & mA. (See 9.3)Range ( left or right keys to change)0-20mAor4-20mAFunction ( left or right keys to change)LinearorFloworValveMode ( left or right keys to change)IncrementorSteporAuto SteporRampMain Unit ( left or right keys to change)mAor%<strong>Zemic</strong> Europe info@zemic.nl www.zemic.nl18
Loop Power ( left or right keys to change)On (24V loop is active)orOff (Simulates mA)Press enter to source mAUse value set keys to change mA value thenpress enter to output new value (+ Steady)9.2 Source mA & MassDisplay ( left or right keys to change)mA. (See 9.1)ormA & Mass (to set mA value and displaymass)orMass & mA. (See 9.3)mA range ( left or right keys to change)0-20mAor4-20mADec Point ( left or right keys to change)Select required position for decimal pointO(4) mA value:Set to low scale value for 0 (or 4) mA<strong>Zemic</strong> Europe info@zemic.nl www.zemic.nl19
20 mA value:Set to full scale mass value for 20mALoop Power ( left or right keys to change)OnorOffUnit ( left or right keys to change)Select unit of mass required, eg. kgPress enterSet mA value and mass is also displayed.Use value set keys to change mA value thenpress enter to output new value (+ Steady)9.3 Source Mass & mADisplay ( left or right keys to change)mA. (See 9.1)ormA & Mass (See 9. 2)orMass & mA (to display mass and set mA value)mA range ( left or right keys to change)0-20mAor4-20mA<strong>Zemic</strong> Europe info@zemic.nl www.zemic.nl20
Dec Point ( left or right keys to change)Select required position for decimal pointO(4) mA value:Set to low scale value for 0 (or 4) mA20 mA value:Set to full scale mass value for 20mALoop ( left or right keys to change)On (24V loop is active)orOff (Simulates mA)Unit ( left or right keys to change)Select unit of mass required, eg. kgPress enterDisplay for mass & mASet mass value and mA is also displayed.Use value set keys to change mass value thenpress enter to output new value (+ Steady)<strong>Zemic</strong> Europe info@zemic.nl www.zemic.nl21
10.0 Loadcell DisplaySelect LC Display in the main menu then press the enter key.Display ( left or right keys to change)LC, will go to final Loadcell display screenorSetupWith Setup selected, press enter to enter the information belowConfigure ( left or right keys to change)4 Wireor6 WireExcitation Voltage ( left or right keys to change)Output, fixed 5 Vdc to LCorMeasure from external excitationorSet 00.00 to 20.000V, theoretical valuemV/VSet to sensitivity value on loadcellor datasheetDec imal Point(left or right keys to change)Display ZeroSet zero value<strong>Zemic</strong> Europe info@zemic.nl www.zemic.nl22
Display SpanSet span valueUnit ( left or right keys to change)Select unit of mass required, eg. KgIncrement (count by) (left or right keys to change)1or10or100Filter Band (left or right keys to set band value)0000 to 9999If sudden change greater than filter bandvalue display will follow actual value withoutdelay to band value.(use 0000 if you do not want this function)Filter TimeSet value for 1, 3, 5 or 10 secondsZero TrimUse to to tare off deadweightPress enter to trim zerowait 10 seconds to trimAfter Zero Trim completed goes to Span Trim<strong>Zemic</strong> Europe info@zemic.nl www.zemic.nl23
Span TrimPress enter, load test weights and key in value,press enter to trim span.After approx. 10 seconds the unit revertsback to the top of the LC Display Setup menu.Press enter to go to the display screen.11.0 DatalogThis menu allows the user to setup the CALOG - LC II so it may be used to datalogit’s Loadcell display values. Downloading is done via a SD card and the onboard USBport. Set Date & Time and format the SD Card in the Settings menu beforecontinuing.Please note: Do not remove the SD card whilst Dataloggingas this will corrupt any data logged on the SD cardBy: Use Left and right keys to select block offive characters and use the Set Value keys toscrollThis identifies who was responsible for thedataloggingTag: Use Left and right keys to select block offive characters and use the Set Value keys toscrollThis identifies the tag number, usuallyalso the plant location<strong>Zemic</strong> Europe info@zemic.nl www.zemic.nl24
Item: Use Left and Right keys to select blockof five characters and use the Set Value keysto scrollThis identifies the type of instrument,e.g. Cattle scaleStart time: Press enter and use upor down arrows and set value keys tochange year, month, day, hour, minuteand seconds.Press enter to set and return to datalogging menuStop time: Press enter and use upor down arrows and set value keys tochange year, month, day, hour, minuteand seconds.Press enter to set and return to datalogging menuInterval: Use set value keys to set loggingintervals H:MM:SS from 01 secondto 9H:59M:59SecNote: Write protect symbol on left ofscreen when datalogging must beis write protectedFor instant datalogging whilst in the LC Display mode, insert the SD cardand press enter to start and enter to stop.Note, that By, Tag, Item and Interval will be the same as selected inthe Datalog menu<strong>Zemic</strong> Europe info@zemic.nl www.zemic.nl25
12.0 Datalogging InterfaceAfter Datalogging is complete, the SD card can be removed from theCALOG - LC II and inserted into a card reader to download the logged data to a PC.Alternatively the .csv files can be downloaded directly from the CALOG via a USBcable plugged into the USB port. The SD card MUST remain inserted in thecalibrator.Once downloaded to a PC, the directory is the start date and time.Click once to list the files.Double click to open the .csv file (comma separated variables)Use a suitable program to read the .csv files such as Excel or Open Office.Display the file as a spreadsheet or graph.In Spreadsheet format the text will appear as:Name - Tag - Description - Date and Time - ValueENTER NAME HEREENTER NAME HEREENTER NAME HEREENTER NAME HEREENTER NAME HEREENTER NAME HEREENTER NAME HEREENTER NAME HEREENTER NAME HEREENTER NAME HEREENTER NAME HERE12345678901234 INSTRUMENT DESC 2010/09/29 07:06:59 1623 Kg12345678901234 INSTRUMENT DESC 2010/09/29 07:07:00 1623 Kg12345678901234 INSTRUMENT DESC 2010/09/29 07:07:01 1623 Kg12345678901234 INSTRUMENT DESC 2010/09/29 07:07:02 1623 Kg12345678901234 INSTRUMENT DESC 2010/09/29 07:07:03 1623 Kg12345678901234 INSTRUMENT DESC 2010/09/29 07:07:04 1623 Kg12345678901234 INSTRUMENT DESC 2010/09/29 07:07:05 1623 Kg12345678901234 INSTRUMENT DESC 2010/09/29 07:07:06 1623 Kg12345678901234 INSTRUMENT DESC 2010/09/29 07:07:07 1623 Kg12345678901234 INSTRUMENT DESC 2010/09/29 07:07:08 1623 Kg12345678901234 INSTRUMENT DESC 2010/09/29 07:07:09 1623 Kg13.0 SettingsThis section will let you customise the CALOG - LC II to your personal work style.Auto Power Off ( left or right keys to change)On: the unit switches off after 15 minutes ofinactivity,orOff: the unit will stay on until switched off orthe batteries run flat.<strong>Zemic</strong> Europe info@zemic.nl www.zemic.nl26
Language ( left or right keys to change)EnglishorGermanBacklight ( left or right keys to change)On: the backlight stays on constantly,orAuto: the backlight switches off after 30seconds of inactivity,orOff: the backlight stays off permanently.Sound ( left or right keys to change)On: the unit gives audible warnings andconfirmations,orOff: the unit is silent.ContrastPress the enter key to gain access to thecontrast screen.Use the left and right keys to change thedisplay contrast. When satisfied press enter.Set Date and TimePress Enter<strong>Zemic</strong> Europe info@zemic.nl www.zemic.nl27
Battery InformationPress the enter key to view the batterytype and voltage level.Type: shows the type of battery which is LIon.Bat Voltage: shows the present voltage inthe battery.Nom Voltage: shows the nominal voltage of thebattery. Press enter when you are satisfied.Unit informationPress enter to view the units serial number,model type, firmware version, the date it waslast calibrated and its current temperature.Ser Num: the unit’s serial number.Model: the hardware version of the unit.Firmware Ver: the software version of the unit.Cal Date: the last time the unit was calibrated.Temp: the current ambient temperature of theunit.Enter Access CodePress the enter key to gain access to theaccess code screen.Use the row of set value keys to change theaccess code, then press enter.(Used by the factory for calibration)<strong>Zemic</strong> Europe info@zemic.nl www.zemic.nl28
14.0 Maintenance14.1 Opening your CalibratorThere are a few cases in which you may have to open your calibrator.1. To change the battery pack.2. To change the fuse.In order to open it, place it face down on a flat, hard surface and unscrew thefour screws as shown. Then gently pull the two halves apart.Caution: be very careful not to tear the keypad ribbon or damage the electronics.14.2 Changing the BatteriesIf the battery pack fails you must order a new pack from your dealer. Use onlythe factory supplied lithium Ion battery pack as it contains a temperature sensor.Open the calibrator as shown above and then disconnect the old pack and replaceit with the new one. Be careful not to damage the electronics while the unit isopen, an anti-static mat and wrist band should be used.Do not force the connector.When you have finished, charge 5 hours.<strong>Zemic</strong> Europe info@zemic.nl www.zemic.nl29
14.3 Resetting the UnitThe unit may fail if it passes through a strong electro-magnetic field or issubjected to high voltages or current. In this event there is a reset switch withinthe unit that should restart it. Press the button through the small hole in thehousing (near the power connector) using a paper clip.14.4 Changing the FusesThe fuses may blow if over ranged. Open the unit to change the fuse.The 250mA input protection fuse, marked F1, can be found at the top left of thesub PCBTake the blown fuse out and replace it with a fuse of the same rating.See 17.0 Accessories for the part number.14.5 Battery CareYour calibrator is powered by rechargeable Lithium Ion batteries.1. The batteries can be recharged hundreds of times but will eventually fail.2. Only use dealer approved batteries that contain a temperature sensor.3. Do not store your calibrator in extreme heat, above 50ºC as the batteries maybecome unstable and rupture .14.6 CleaningDo not clean the unit while it is switched on. Do not use harsh abrasives orsolvents on the unit especially on the display window. The outside of the unitmay be safely wiped using a damp cloth. Do not attempt to clean the inside ofthis unit.<strong>Zemic</strong> Europe info@zemic.nl www.zemic.nl30
15.0 Technical Specifications15.1 GeneralPhysicalSize: 147X33X75mm without rubber boot, 155X43X85 with rubber boot.Weight: approx 480 gEnvironmental RangesWorking temperature: 0ºC to 35ºCStorage temperature (battery included): -10ºC to 50ºCHumidity: 0 to 85% (non-condensing)Battery PackType: Lithium Ion (LION) 2100mAH.Charge time: 5 hours.Battery run life: approximately 6 hours.<strong>Zemic</strong> Europe info@zemic.nl www.zemic.nl
17.0 AccessoriesThe following items can all be ordered from your dealer or purchased separately.ItemFuses 250 mA SMDRed Test LeadBlack Test LeadBattery Pack (LION)Charger (100 - 240VAC Mains)Charger (12VDC Car Lighter)Rubber BootPlastic Kit case, with foamPart NumberTPC 089HW 447HW 448BA 042HW 418 + Hw422RAL-CIGHW 033HW 180-A18.0 Other CALOG <strong>Product</strong>sCALOG - LOOP II: a milliamp based unit, for the installation and maintenance of allpowered and non-powered milliamp loops. SD card for datalogging.CALOG - TEMP: for measurement of thermocouple and Resistance TemperatureDetector(RTD). SD card for dataloggingCALOG- PRESSURE II: for measuring pressure in the ranges 0 - 3 bar, 0 - 30 bar, or0 - 100bar. Displays actual value or pressure trend. Contains all CALOG - LOOP IIfeatures.CALOG- PRO: the process unit which measure, sources and simulates milliamps,volts, counts and frequency.RALLYTIME GPS: a GPS synchronized rally control and timing device for motorsport. Now with radio and internet linked times. See www.rallytime.co.za<strong>Zemic</strong> Europe info@zemic.nl www.zemic.nl
<strong>Zemic</strong> Europe B.V. T: +31 76 50 39 480Leerlooierstraat 8 E: info@zemic.nl4871 EN Etten-Leur W: www.zemic.nlThe Netherlands<strong>Zemic</strong> Europe info@zemic.nl www.zemic.nl