

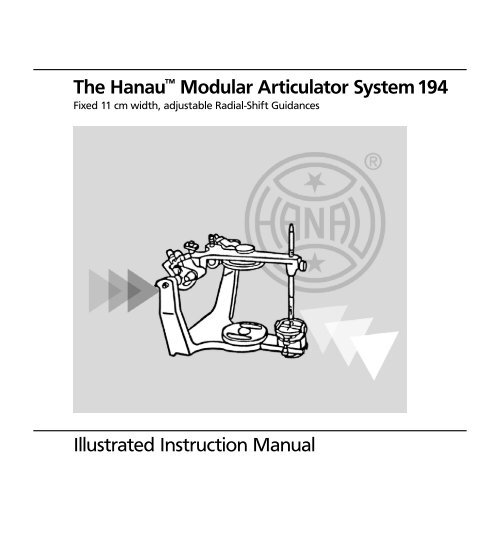
The Hanau™ Modular Articulator System 194 Illustrated ... - Whip Mix
The Hanau™ Modular Articulator System 194 Illustrated ... - Whip Mix
The Hanau™ Modular Articulator System 194 Illustrated ... - Whip Mix

Create successful ePaper yourself
Turn your PDF publications into a flip-book with our unique Google optimized e-Paper software.
<strong>The</strong> Hanau <strong>Modular</strong> <strong>Articulator</strong> <strong>System</strong> <strong>194</strong><br />
Fixed 11 cm width, adjustable Radial-Shift Guidances<br />
<strong>Illustrated</strong> Instruction Manual
A Study Case for Occlusal Analysis<br />
This instruction manual illustrates the preparation and adjustment of the<br />
Hanau <strong>Modular</strong> <strong>Articulator</strong> for complete denture prosthodontics.<br />
<strong>The</strong> Hanau Spring-Bow is used in this text to record and transfer the patient’s<br />
condyle/maxillary arch relation to the <strong>Modular</strong> <strong>Articulator</strong>.<br />
Hanau <strong>Modular</strong><br />
<strong>Articulator</strong> Hanau Spring-Bow facebow<br />
Master casts of the maxillary and mandibular edentulous arch are required.<br />
Stabilized baseplates with occlusal rims have also been prepared previously.<br />
Three interocclusal relation records are preferred. One centric relation; one<br />
right and one left lateral are required. If elected, an alternate straight protrusive<br />
may be substituted for the laterals.<br />
Lower Upper<br />
Master casts and occlusal rims.<br />
Centric Right & Left<br />
OR<br />
Centric & Protrusive<br />
Interocclusal relation records.<br />
3
4<br />
<strong>Illustrated</strong> Procedure<br />
1 Heat forks of bitefork and pierce into the upper wax rim.<br />
2 Lower occlusal rim & upper occlusal rim/bitefork assembly seated in patient’s<br />
mouth.<br />
3 Spring-bow application.<br />
Wax rim.<br />
Pierced and rigid.<br />
Stem at left.<br />
Do not distort occlusal surface.<br />
Earpiece.<br />
Orbitale.<br />
Bow.<br />
Bitefork stem.<br />
Transfer rod.
4 Remove the Spring-bow from patient.<br />
5 Attach anterior elevator to the Spring-bow transfer rod.<br />
Transfer rod.<br />
Anterior elevator.<br />
6 Disengage both centric latches and remove upper member.<br />
Centric latches.<br />
5
7 Set both condylar inclinations at 0 degree.<br />
8 Set right and left radial-shifts at 3 mm and Bennett angles at 6.<br />
9 Set incisal pin at mid-line, chisel end down as shown, and attach a<br />
mounting plate.<br />
6<br />
Loosen thumbscrews and rotate both guides<br />
to zero degree and re-tighten.<br />
Zero.<br />
Radial-shift at 3 mm,<br />
Tighten thumbscrew.<br />
Bennett angle at 6,<br />
Tighten thumbscrew.<br />
Lock.<br />
Mid-line.<br />
Incisal pin.<br />
Mounting plate.<br />
Chisel end.
10 Replace upper member and lock articulator in centric.<br />
11 Align adjustable incisal guide.<br />
12 Attach accessory cast support.<br />
Slide<br />
Rotate and lock both latches for centric.<br />
Secure thumbscrews.<br />
Latches.<br />
Chisel end.<br />
“Zero” indicating line.<br />
Zero flat.<br />
Large platform lockscrew.<br />
Small locknut.<br />
Cast support.<br />
7
13 Remove earpieces and suspend Spring-bow from condylar shafts<br />
on articulator.<br />
14 Elevate Spring-bow to align orbitale pointer at underside of<br />
mounting plate.<br />
15 Additional weight of stone cast is supported by the tee of cast support.<br />
8<br />
12 mm<br />
Condylar shaft.<br />
Earpiece hole.<br />
Suspension hole.<br />
Mounting plate.<br />
Underside.<br />
Orbitale pointer.<br />
Elevate.<br />
Support wax rim.<br />
Lock.
16 Seat and lute upper cast in the baseplate.<br />
17 Attach the upper cast to the mounting plate.<br />
Upper cast.<br />
Baseplate.<br />
Upper mounting plate.<br />
Stone or plaster.<br />
Upper cast.<br />
Incisal pin contact with guide.<br />
18 Loosen bitefork clamp “3” and remove bow, cast support and carefully – the<br />
bitefork.<br />
To prevent distortion of the occlusal<br />
surface, bitefork may remain until<br />
tooth set-up.<br />
Do not distort occlusal surface.<br />
9
19 Centric record compensation = thickness at second molar x 3.<br />
20 Turn articulator over and attach a mounting plate.<br />
21 Seat and lute lower cast in baseplate.<br />
Position and lute upper/lower rims in centric.<br />
10<br />
1mm at molar<br />
2mm at central<br />
3mm at incisal pin<br />
Lower pin 3 mm.<br />
Centric record.<br />
Mounting plate.<br />
Lower cast.<br />
Lower baseplate.<br />
Centric record.<br />
Upper baseplate.
22 Mount the lower in centric using stone or plaster.<br />
Close.<br />
Contact.<br />
Centric record.<br />
Check latches.<br />
23 Place articulator upright and remove centric relation record<br />
and dual-end pin.<br />
Centric record.<br />
Dual-end pin.<br />
24 Release both latches. Loosen left thumbscrews for inclination and<br />
radial-shift.<br />
Thumbscrew for condylar inclination.<br />
Thumbscrew for radial-shift.<br />
Release both latches.<br />
11
25 Place the right lateral relation record between the upper and lower rims.<br />
26 Hold rims in right record. Rotate left guidance to contact the superior<br />
surface with the condylar element.<br />
27 <strong>The</strong> left guidance has been rotated to contact the superior surface with the<br />
condyle.<br />
12<br />
Light<br />
pressure<br />
Rotate<br />
Rotate guide<br />
to contact<br />
In right<br />
lateral<br />
Upper bite rim.<br />
Right lateral.<br />
Lower bite rim.<br />
Tighten thumbscrew last.<br />
Element.<br />
Contact superior surface with condyle.
28 Slide the radial-shift to contact the medial of condylar element.<br />
29 <strong>The</strong> 6 degree left Bennett (radial-shift) has contacted the<br />
condylar element.<br />
6˚<br />
Slide radial-shift to<br />
contact.<br />
Slide<br />
In right<br />
lateral<br />
Tighten thumbscrew last.<br />
Element.<br />
Hold upper in right lateral.<br />
Radial-shift.<br />
Slide to contact 6˚ Bennett with condyle.<br />
30 Loosen right thumbscrews for inclination and radial-shift, place left lateral<br />
record between bite rims.<br />
Thumbscrew for radial-shift.<br />
Thumbscrew for condylar inclination.<br />
Left lateral record.<br />
13
31 Hold bite-rims in record. Rotate right guidance to contact the superior surface<br />
with the condylar element.<br />
32 Slide the radial-shift to contact the medial of condylar element.<br />
33 Remove left lateral record, lock in centric and replace incisal pin. Check<br />
alignment.<br />
14<br />
Rotate<br />
Correct if<br />
necessary<br />
Slide<br />
Tighten thumbscrew last.<br />
Lightly hold bite rims in left lateral.<br />
Rotate guide to contact element.<br />
Tighten thumbscrew last.<br />
Bite rims in left lateral record.<br />
Incisal pin.<br />
Alignment of chisel end.<br />
Platform screw.<br />
Loosen small locknut.
34 Six upper and six lower anteriors arranged for esthetics and phonetics.<br />
35 Loosen centric latches and protrude: lingual of upper to incisal of lower…<br />
36 Rotate adjustable incisal guide to contact central table with chisel end pin.<br />
Rotate<br />
Protrude and lift off.<br />
Chisel end contacting central table…<br />
<strong>The</strong>n tighten small locknut.<br />
15
37 Guide the upper cast to a right lateral, cusp-to-cusp relation and…<br />
38 Turn thumbscrew to elevate lateral wing to contact the corner of<br />
incisal pin.<br />
39 Thumb guide the upper cast into a left lateral cuspid-to-cuspid<br />
relation and…<br />
16<br />
Thumb<br />
pressure<br />
Elevate<br />
Thumb<br />
guide<br />
Incisal pin.<br />
Lift-off.<br />
Contact incisal pin.<br />
Lateral wing.<br />
Thumbscrew.<br />
Incisal pin lifts off lateral wing.
40 Raise the lateral wing to contact incisal pin, secure both wings with locknuts.<br />
Elevate<br />
Contact.<br />
Lateral wing.<br />
Locknut.<br />
41 Remaining teeth are set into occlusion and checked in working, balancing and<br />
protrusive.<br />
17
18<br />
Alternative Straight Protrusive Hanau Formula L = H/8 + 12<br />
(substitute for steps 24 through 32)<br />
42 Lock articulator in centric. Set both left and right radial-shift at 0 mm and lock<br />
with thumbscrew<br />
Radial-shift at 0 mm.<br />
Tighten thumbscrew.<br />
Locked in centric.<br />
43 Set both left and right Bennett angles at 30 degree. Loosen centric latches and<br />
thumbscrews for condylar inclination.<br />
Loosen thumbscrew.<br />
Loosen latches.<br />
Set at 30 degree.
44 Place the protrusive relation record between the upper and lower rims.<br />
45 Hold upper rim in record. Rotate both guidances to contact superior surface<br />
with condylar element.<br />
Rotate<br />
right<br />
and left<br />
guides to<br />
contact<br />
element.<br />
Upper bite rim.<br />
Protrusive relation record.<br />
Lower bite rim.<br />
Tighten thumbscrew last.<br />
Element.<br />
Upper rim.<br />
Protrusive record.<br />
46 <strong>The</strong> right and left Bennett has been rotated to contact the superior surface<br />
with the condyle. Lock thumbscrews.<br />
Tighten both screws.<br />
Contact superior surface with condyle.<br />
19
47 Adjust right and left Bennett angles to Hanau formula.<br />
48 Example.<br />
20<br />
Hanau Formula for Bennett angle:<br />
L = H/8 + 12<br />
H is horizontal condylar inclination (protrusive angle).<br />
L is the calculated Bennett angle.<br />
<strong>The</strong> right condylar inclination is 44 degree<br />
and is divided by 8 and accepted as 6 to<br />
which 12 is added, totaling 18 degree.<br />
44/8 + 12 = 18˚<br />
44˚ condylar inclination.<br />
49 <strong>The</strong> right Bennett angle is illustrated and is then adjusted to 18˚ and locked.<br />
Bennett angle at 18˚.<br />
Tighten thumbscrew.<br />
This completes the articulator adjustment. Record all of the settings for future<br />
reference.– right and left Bennett angles, right and left radial-shift, right and left<br />
condylar inclinations, the articulator serial number, and patient name and date,<br />
etc.
<strong>Articulator</strong> Care and Maintenance<br />
Your <strong>Whip</strong> <strong>Mix</strong> articulator is a precision instrument and requires care and<br />
maintenance. Periodic cleaning and lubricating as described below will assure<br />
prolonged life and dependable service from the instrument. Failure to follow<br />
these instructions will void your warranty.<br />
CLeAnIng<br />
Use a mild soap and water solution with the aid of a brush to dissolve<br />
accumulations of wax and to wash away carborundum grit. <strong>The</strong>n air dry and<br />
lubricate. DO NOT use strong detergents, alkalies, gasoline or naphtha as<br />
cleaning agents!<br />
LubrICATIOn<br />
Lubricate the working and bearing components with a thin film of sewing<br />
machine or high speed handpiece type oil. Wipe off excess oil to prevent<br />
accumulations of dust or grit. A thin coating of petroleum jelly must be applied<br />
to all articulator surfaces that will be contacted by the gypsum mounting<br />
material.<br />
Detail E<br />
Detail D<br />
Detail C<br />
Detail A<br />
Detail B<br />
21
22<br />
Lubrication points.<br />
A<br />
Oil<br />
Oil<br />
Oil<br />
Oil<br />
b<br />
C<br />
STOrAge<br />
Store the articulator in a clean, dry atmosphere free of plaster and<br />
carborundum dust; away from acids, alkalies or corrosive medicaments. Wait<br />
a full day after mounting casts before storing the articulator in a carrying case<br />
or corrugated carton. Moisture dissipation from the stone in an enclosed area<br />
causes alkalinity of the stone mixture which can damage the articulator surface.<br />
Oil<br />
D<br />
e<br />
Oil<br />
Mounting Plate thumbscrew, clean as<br />
necessary.<br />
Pull<br />
Unscrew<br />
Remove<br />
Clean and<br />
Replace<br />
Oil
WArrAnTy<br />
<strong>Whip</strong> <strong>Mix</strong> Corporation warrants the articulator system to be free from defects<br />
in material and/or workmanship for a period of one year. In the event of a<br />
defect, please notify the factory in writing of the defect prior to returning the<br />
instrument. <strong>Whip</strong> <strong>Mix</strong> Corporation will, at its option, either repair, replace or<br />
issue credit for such defects.<br />
Because <strong>Whip</strong> <strong>Mix</strong> Corporation is continually advancing the design of its products<br />
and manufacturing methods, it reserves the right to improve, modify or<br />
discontinue products at any time, or to change specifications or prices without<br />
notice and without incurring obligations.
<strong>Whip</strong> <strong>Mix</strong> Corporation<br />
361 Farmington Avenue<br />
Louisville, KY USA 40209<br />
Toll-Free: 800-626-5651<br />
Phone: 502-637-1451<br />
Fax: 502-634-4512<br />
www.whipmix.com<br />
<strong>Whip</strong> <strong>Mix</strong> and Hanau logo are registered trademarks and Hanau is a<br />
trademark of <strong>Whip</strong> <strong>Mix</strong> Corporation. © 2008 <strong>Whip</strong> <strong>Mix</strong> Corporation<br />
FN: 339637-F AD R1008


