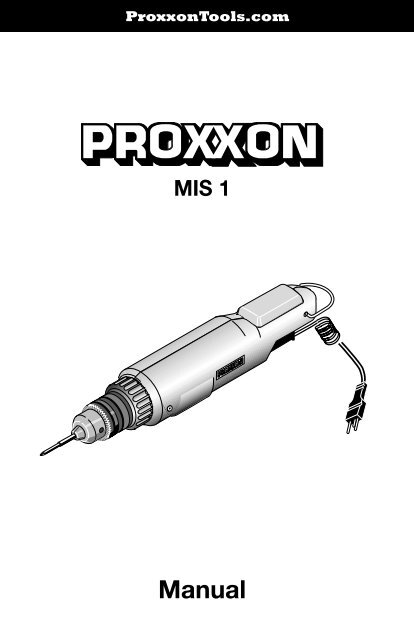
Manual - Proxxon Tools
Manual - Proxxon Tools
Manual - Proxxon Tools

You also want an ePaper? Increase the reach of your titles
YUMPU automatically turns print PDFs into web optimized ePapers that Google loves.
ForewordGeneral Safety RulesDear Customer,Before putting the machine into operation, read theenclosed safety rules and operating instructions!This manual comprises:Foreword . . . . . . . . . . . . . . . . . . . . . . . . . . . . . . . . . . . .4General Safety Rules . . . . . . . . . . . . . . . . . . . . . . . . . . .4Specific Safety Rules for Rotary <strong>Tools</strong> . . . . . . . . . . . . . . .5Safety regulations . . . . . . . . . . . . . . . . . . . . . . . . . . . . . .6Description of the machine . . . . . . . . . . . . . . . . . . . . . . .6Legend . . . . . . . . . . . . . . . . . . . . . . . . . . . . . . . . . . . . . .6Functional Description . . . . . . . . . . . . . . . . . . . . . . . . . .6Technical data . . . . . . . . . . . . . . . . . . . . . . . . . . . . . . . . .7Operation . . . . . . . . . . . . . . . . . . . . . . . . . . . . . . . . . . . .7Clamping, changing tools . . . . . . . . . . . . . . . . . . . . . . . .7Connecting the machine . . . . . . . . . . . . . . . . . . . . . . . . .7Accessories . . . . . . . . . . . . . . . . . . . . . . . . . . . . . . . . . .7Care and maintenance . . . . . . . . . . . . . . . . . . . . . . . . . .7Please note!Using this manual will• help you to understand the machine,• avoid malfunctions caused by faulty operation,• increase the lifetime of the machine.Always keep this manual close at hand.Do not operate the equipment unless you are fully familiarwith it. Follow the instructions.The manufacturer will not assume liability for safefunctioning• if the unit is used in a way which does not comply withthe usual modes of operation,• if it is used for purposes other than those mentioned inthese instructions,• if the safety regulations are not observed.No warranty claims can be lodged for damage resultingfrom• operating errors,• insufficient maintenance.Please observe the safety regulations for your own safety.Use only original spare parts.We reserve the right for technical modifications withoutprior notification.We wish you much success with your screwdriver MIS 1.Warning! Read and understand all instructions.Failure to follow all instructions listed below, may result inelectric shock, fire and/or serious personal injury.Save these instructions.Work Area:Keep your work area clean and well lit.Cluttered benches and dark areas invite accidents.Do not operate power tools in explosive atmospheres,such as in the presence of flammable liquids, gases, ordust. Power tools create sparks which may ignite the dustor fumes.Keep bystanders, children, and visitors away whileoperating a power tool. Distractions can cause you to losecontrol.Electrical Safety:Double Insulated tools are equipped with a polarized plug(one blade is wider than the other).This plug will fit in a polarized outlet only one way. If theplug does not fit fully in the outlet, reverse the plug. If itstill does not fit, contact a qualified electrician to install apolarized outlet.Do not change the plug in any way.Double Insulation eliminates the need for the three wiregrounded power cord and grounded power supplysystem.Avoid body contact with grounded surfaces such aspipes, radiators, ranges and refrigerators. There is anincreased risk of electric shock if your body is grounded.Do not expose power tools to rain or wet conditions.Water entering a power tool will increase the risk ofelectric shock.Do not abuse the cord. Never use the cord to carry thetools or pull the plug from an outlet. Keep cord away fromheat, oil, sharp edges or moving parts. Replace damagedcords immediately. Damaged cords increase the risk ofelectric shock.When operating a power tool outside, use an outdoorextension cord marked "W-A" or "W."These cords are rated for outdoor use and reduce the riskof electric shock.Personal Safety:Stay alert, watch what you are doing and use commonsense when operating a power tool. Do not use tool whiletired or under the influence of drugs, alcohol, ormedication. A moment of inattention while operatingpower tools may result in serious personal injury.Dress properly. Do not wear loose clothing or jewelry.Contain long hair. Keep your hair, clothing, and glovesaway from moving parts. Loose clothes, jewellry, or longhair can be caught in moving parts.- 4 -
Avoid accidental starting. Be sure switch is off beforeplugging in.Carrying tools with your finger on the switch or plugging intools that have the switch on invites accidents.Remove adjusting keys or wrenches before turning the toolon. A wrench or a key that is left attached to a rotating partof the tool may result in personal injury.Do not overreach. Keep proper footing and balance at alltimes. Proper footing and balance enables better control ofthe tool in unexpected situations.Use safety equipment. Always wear eye protection.Dust mask, non-skid safety shoes, hard hat, or hearingprotection must be used for appropriate conditions.Tool Use and Care:Use clamps or other practical way to secure and supportthe workpiece to a stable platform.Holding the work by hand or against your body is unstableand may lead to loss of control.Do not force tool. Use the correct tool for your application.The correct tool will do the job better and safer at the ratefor which it is designed.Do not use tool if switch does not turn it on or off.Any tool that cannot be controlled with the switch isdangerous and must be repaired.Disconnect the plug from the power source before makingany adjustments, changing accessories, or storing the tool.Such preventive safety measures reduce the risk of startingthe tool accidentally.Store idle tools out of reach of children and other untrainedpersons. <strong>Tools</strong> are dangerous in the hands of untrainedusers.Maintain tools with care. Keep cutting tools sharp andclean.Properly maintained tools, with sharp cutting edges areless likely to bind and are easier to control.Check for misalignment or binding of moving parts,breakage of parts, and any other condition that may affectthe tools operation. If damaged, have the tool servicedbefore using. Many accidents are caused by poorlymaintained tools.Use only accessories that are recommended by themanufacturer for your model.Accessories that may be suitable for one tool, maybecome hazardous when used on another tool.ServiceTool service must be performed only by qualified repairpersonnel. Service or maintenance performed byunqualified personnel could result in a risk of injury.When servicing a tool, use only identical replacementparts. Follow instructions in the Maintenance section ofthis manual.Use of unauthorized parts or failure to follow MaintenanceInstructions may create a risk of electric shock or injury.Certain cleaning agents such as gasoline, carbontetrachloride, ammonia etc. may damage plastic parts.Specific Safety Rules for Rotary <strong>Tools</strong>Hold tool by insulated gripping surfaces when performingan operation where the cutting tool may contact hiddenwiring or its own cord.Contact with a "live" wire will make exposed metal parts ofthe tool "live" and shock the operator. If cutting intoexisting walls or other blind areas where electrical wiringmay exist is unavoidable, disconnect all fuses or circuitbreakers feeding this worksite.Accessories must be rated for at least the speedrecommended on the tool warning label. Wheels and otheraccessories running over rated speed can fly apart andcause injury.Always disconnect the power cord from the power sourcebefore making any adjustments or attaching anyaccessories.You may unexpectedly cause tool to start leading toserious personal injury.Be aware of the switch location, when placing the tooldown or when picking the tool up.You may accidentally activate the switch.Always wear safety goggles and dust mask. Use the toolonly in ventilated area.Using personal safety devices and working in safeenvironment reduces risk of injury.After changing the bits or making any adjustments, makesure the collet nut and any other adjustment devices aresecurely tightened.Loose adjustment device can unexpectedly shift, causingloss of control, loose rotating components will be violentlythrown.Do not reach in the area of the spinning bit.The proximity of the spinning bit to your hand may notalways be obvious.Allow brushes to run at operating speed for at least oneminute before using wheel. During this time no one is tostand in front or in line with the brush.Loose bristles or wires will be discharged during the run intime.Wire and bristle brushes must never be operated at speedsgreater than 15,000/min. Direct the discharge of thespinning wire brush away from you.- 5 -
Small particles and tiny wire fragments may be dischargedat high velocity during the "cleaning" action with thesebrushes and may become embedded in your skin. Bristlesor wires will be discharged from the brush at high speeds.Carefully handle both the tool and individual grindingwheels to avoid chipping or tracking. Install a new wheel iftool is dropped while grinding. Do not use a wheel thatmay be damaged.Fragments from a wheel that bursts during operation willfly away at great velocity possibly striking you orbystanders.Never use dull or damaged bits. Sharp bits must behandled with care.Damaged bits can snap during use. Dull bits require moreforce to push the tool, possibly causing the bit to break.Use clamps to support workpiece whenever practical.Never hold a small workpiece in one hand and the tool inthe other hand while in use. Allow for sufficient spacebetween your hand and the spinning bit.Round material such as dowel rods, pipes or tubing have atendency to roll while being cut, and may cause the bit to"bite" or jump toward you. Clamping a small workpieceallows you to use both hands to control the tool.Inspect your workpiece before cutting. When cuttingirregularly shaped workpieces, plan your work so it will notslip and pinch the bit and be torn from your hand.For example, if carving wood, make sure there are no nailsor foreign objects in the workpiece. Nails or foreign objectscan cause the bit to jump.Never start the tool when the bit is engaged in the material.The bit cutting edge may grab the material causing loss ofcontrol of the cutter.Avoid bouncing and snagging the wheel, especially whenworking corners, sharp edges etc. This can cause loss ofcontrol and kick-back.The direction of feed with the bit into the material whencarving, routing or cutting is very important. Always feedthe bit into the material in the same direction as the cuttingedge is exiting from the material (which is the samedirection as the chips are thrown).Feeding the tool in the wrong direction, causes the cuttingedge of the bit to climb out of the work and pull the tool inthe direction of this feed.If the workpiece or bit becomes jammed or bogged down,turn the tool off by the switch. Wait for all moving parts tostop and unplug the tool, then work to free the jammedmaterial.If the switch of the tool is left on, the tool could restartunexpectedly causing serious personal injury.Do not leave a running tool unattended, turn power off.Only when tool comes to a complete stop it is safe to put itdown.Do not grind or sand near flammable materials.Sparks from the wheel could ignite these materials.Do not touch the bit or collet after use.After use the bit and collet are too hot to be touched bybare hands.Regularly clean the tool’s air vents by compressed air.Excessive accumulation of powdered metal inside themotor housing may cause electrical failures.Do not allow familiarity gained from frequent use of yourrotary tool to become commonplace. Always rememberthat a careless fraction of a second is sufficient to inflictsevere injury.Do not alter or misuse tool.Any alteration or modification is a misuse and may result inserious personal injury.This product is not intended for use as a dental drill or inmedical applications.Serious personal injury may result.When using steel saws, cutoff wheels, high speed cuttersor tungsten carbide cutters, always have the work securelyclamped. Never attempt to hold the work with one handwhile using any of these accessories.The reason is that these wheels will grab if they becomeslightly canted in the groove, and can kick-back causingloss of control resulting in serious injury. Your second handshould be used to steady and guide the hand holding thetool. When a cutoff wheel grabs, the wheel itself usuallybreaks. When the steel saw, high speed cutters or tungstencarbide cutters grab, it may jump from the groove and youcould lose control of the tool.Description of the machineLegendFig. 11 Tool insert2 Toothed rim chuck3 Torque adjustment ring4 Tumbler switch for cw and ccw rotation5 Machine hanger6 Power cable7 Drill chuck keyFunctional DescriptionThe PROXXON Micro screwdriver MIS 1 is an ideal tool forsensitive screwing for watch makers, opticians, jewellers,precision mechanics and model makers.The machine is equipped with:– Toothed rim drill chuck with a clamping diameter of upto 6 mm, also for 1/4" normal bits.– Three-step planetary gear for correct screwing speed of150 rpm.– Conveniently positioned tumbler switch for clockwiseand counter-clockwise rotation.– Sensitive friction clutch.– Adjustable in five steps from 0.25 to 1.0 Nm.– Step 6 = clutch OFF up to a torque of 2.0 Nm.- 6 -
Technical dataVoltage:12 to 18 VPower consumption:40 WattSpeed:150 rpmGear ration 93:1Friction clutch5-step, 0, 25 to1, 0 NmNoise:≤ 70 dB (A)Torque with the friction clutch switched off (step 6)2 NmWeight:400gRecommended accessoriesThe machine should be used with the supplied power packor a similar rated one with a power of min. 1 A and anoutput voltage of 12 V! We recommend PROXXON powerunits.OperationClamping, changing toolsWarning!Disconnect the machine from the powerpack beforechanging tools.Insert the drill chuck key 2 (Fig. 2) into the drill chuck (1)and turn in direction "A" to open the chuck.Insert the tool (3) into the drill chuck until it bottoms andturn the drill chuck key in direction 'B´ to clamp the tool.Adjusting the torqueTurn the adjustment ring 1 (Fig. 3) to the desired torquevalue:Step 1 ~ 0,35 NmStep 5 ~ 1,0 NmStep 6 ~ 2 Nm (clutch OFF)Connecting the machineInsert the plug (Fig. 4) into the socket on the PROXXONpower pack.Working with the machineDanger of injury!Replace worn tools in due time.Adjust the correct torque for the work on the adjustmentring (Fig. 3).Note:Torques which must be strictly observed should bedetermined with a torque wrench.Attach the screwdriver to the screw or nut and hold it asshown in Fig. 5 or 6. Operate the tumbler switch "A" or "B"(Fig. 5 and 6)Always clamp the tools securely.Press A = clockwise rotationPress B = counter-clockwise rotationAccessories(included): 13 burnished inserts with 3,5 mm shankCare and maintenanceAfter use:Warning!When finished using the machine, unplug it and removeany dust clinging to vent slits.Clean the unit thoroughly, removing all dust with a brush ora soft cloth. Ensure all ventilation slots are free fromobstruction.Warning!Turn switch OFF and always remove plug from powersource before making any adjustments or repairs.If any part is missing or damaged, do not plug the tool inuntil the missing or damaged part is replaced, andassembly is complete. To avoid electrical shock, use onlyidentical replacement parts when servicing doubleinsulated tools.All electrical or mechanical repairs should be done only byqualified service technicians.When servicing use only PROXXON replacement parts.Use of any other parts may create a hazard or causeproduct damage.Any attempt to repair or replace electrical parts on this toolmay create a hazard unless repair is done by a qualifiedservice technician.Repair service is available at your PROXXON servicecenter (You find the address at address at the back of thismanual).- 7 -