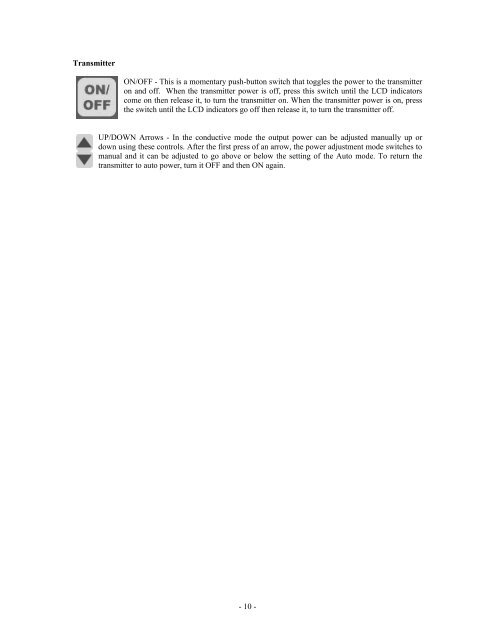
TransmitterON/OFF - This is a momentary push-button switch that toggles the power to the transmitteron and off. When the transmitter power is off, press this switch until the LCD indicatorscome on then release it, to turn the transmitter on. When the transmitter power is on, pressthe switch until the LCD indicators go off then release it, to turn the transmitter off.UP/DOWN Arrows - In the conductive mode the output power can be adjusted manually up ordown using these controls. After the first press of an arrow, the power adjustment mode switches tomanual and it can be adjusted to go above or below the setting of the Auto mode. To return thetransmitter to auto power, turn it OFF and then ON again.- 10 -
SECTION IV: VISUAL AND AUDIBLE INDICATORSThe information display areas for the receiver and the transmitter are large and easy to understand. Inaddition, the receiver has audible indicators as well, to facilitate operation in heavy traffic areas.ReceiverAll visual indicators for the receiver are on the LCD display, which has six general areas to displayinformation to the user: a Battery Indicator, a Gain Indicator, a Frequency/Mode Indicator, a DirectionIndicator, a Numeric Display and a Volume Indicator.BATTERY INDICATOR - The "Battery" symbol indicates the receiver's battery status. When all 3segments inside the battery symbol are present, the battery is fully charged. When only the 2 bottomsegments are present, the battery has a medium charge. When only the bottom segment is present,the battery has a low charge and should be replaced. If there are no segments present, the battery isextremely low and you should replace it immediately.GAIN INDICATOR - The "(Auto)" legend next to the "GAIN" legend indicates that the gain is in theautomatic mode. In this mode the receiver adjusts its sensitivity as a function of the strength of thedetected signal. No bar graph is shown in this mode.If the "(Auto)" legend is not visible the receiver is operating in the manual gain mode, and therefore ameans to show the user the gain setting is necessary. The bar graph indicates the relative strength ofthe gain, with each bar roughly representing one tenth of the full scale available. It takesapproximately 2 presses of the UP arrow to add one bar to the graph, and approximately 2 presses ofthe DOWN arrow to delete one bar from the graph.FREQUENCY/MODE INDICATOR - This LCD area consists of 4 icons:"SONDE", "33 kHz", "82 kHz", and the "Passive Arrow". These icons are used bythemselves or in various combinations to indicate different operating modes, asshown in the following table.SONDE 33 kHz 82 kHz PASSIVE ARROWC, IC, I at 33 kHz Off On Off OffC, IC, I at 82 kHz Off Off On OffSonde at 33 kHz On On Off OffSonde at 82 kHz On Off On OffPassive 50/60 Off Off Off OnPassive Cathodic (*) On Off On OffSonde at 512 Hz On Off Off Off(*) <strong>Model</strong>s with Passive Cathodic support do not support sondesNote: C = conductive mode, IC = inductive clamp mode, I = inductive mode, See SECTION I:OPERATING MODES, for a description of these modes.DIRECTION INDICATOR - The arrows and center bar in this indicator tell the operator in which directionto move the receiver in order to be directly over the target (see also "Alternate Directional Indication"Section). The direction indicator does NOT work in the Sonde operating mode.Right Arrow - Receiver should be moved to the right to get closer to the target.Left Arrow - Receiver should be moved to the left to get closer to the target.Both Arrows and Bar - Receiver is placed directly over the target. This is also accompaniedby a beeping sound.- 11 -