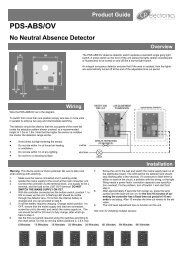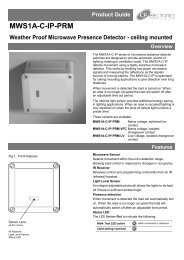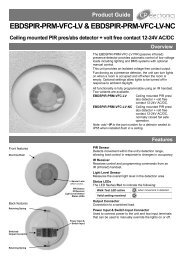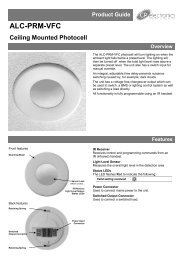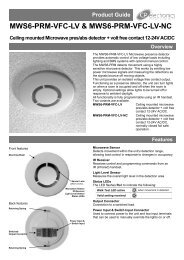
EBDSPIR-PRM-VFC & EBDSPIR-PRM-VFC-NC
EBDSPIR-PRM-VFC product guide - CP Electronics
EBDSPIR-PRM-VFC product guide - CP Electronics
- No tags were found...

You also want an ePaper? Increase the reach of your titles
YUMPU automatically turns print PDFs into web optimized ePapers that Google loves.
Basic programming<br />
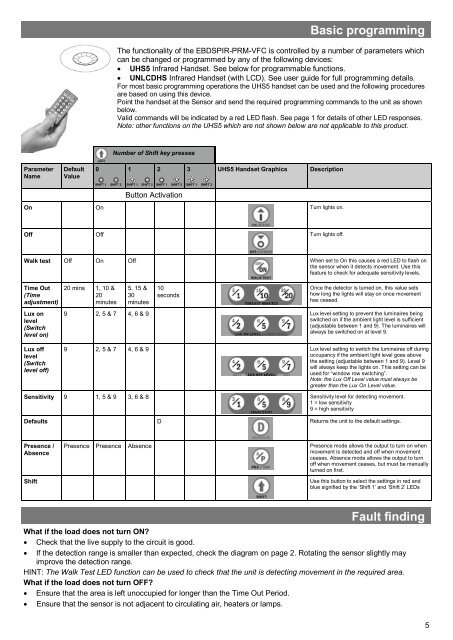
The functionality of the <strong>EBDSPIR</strong>-<strong>PRM</strong>-<strong>VFC</strong> is controlled by a number of parameters which<br />
can be changed or programmed by any of the following devices:<br />
UHS5 Infrared Handset. See below for programmable functions.<br />
UNLCDHS Infrared Handset (with LCD). See user guide for full programming details.<br />
For most basic programming operations the UHS5 handset can be used and the following procedures<br />
are based on using this device.<br />
Point the handset at the Sensor and send the required programming commands to the unit as shown<br />
below.<br />
Valid commands will be indicated by a red LED flash. See page 1 for details of other LED responses.<br />
Note: other functions on the UHS5 which are not shown below are not applicable to this product.<br />
Parameter<br />
Name<br />
Default<br />
Value<br />
Number of Shift key presses<br />
0 1 2 3 UHS5 Handset Graphics Description<br />
SHIFT 1 SHIFT 2 SHIFT 1 SHIFT 2 SHIFT 1 SHIFT 2 SHIFT 1 SHIFT 2<br />
Button Activation<br />
On On Turn lights on.<br />
Off Off Turn lights off.<br />
Walk test Off On Off When set to On this causes a red LED to flash on<br />
the sensor when it detects movement. Use this<br />
feature to check for adequate sensitivity levels.<br />
Time Out<br />
(Time<br />
adjustment)<br />
Lux on<br />
level<br />
(Switch<br />
level on)<br />
Lux off<br />
level<br />
(Switch<br />
level off)<br />
20 mins 1, 10 &<br />
20<br />
minutes<br />
5, 15 &<br />
30<br />
minutes<br />
10<br />
seconds<br />
Once the detector is turned on, this value sets<br />
how long the lights will stay on once movement<br />
has ceased.<br />
9 2, 5 & 7 4, 6 & 9 Lux level setting to prevent the luminaires being<br />
switched on if the ambient light level is sufficient<br />
(adjustable between 1 and 9). The luminaires will<br />
always be switched on at level 9.<br />
9 2, 5 & 7 4, 6 & 9 Lux level setting to switch the luminaires off during<br />
occupancy if the ambient light level goes above<br />
the setting (adjustable between 1 and 9). Level 9<br />
will always keep the lights on. This setting can be<br />
used for “window row switching”.<br />
Note: the Lux Off Level value must always be<br />
greater than the Lux On Level value.<br />
Sensitivity 9 1, 5 & 9 3, 6 & 8 Sensitivity level for detecting movement.<br />
1 = low sensitivity<br />
9 = high sensitivity<br />
Defaults D Returns the unit to the default settings.<br />
Presence /<br />
Absence<br />
Shift<br />
Presence Presence Absence Presence mode allows the output to turn on when<br />
movement is detected and off when movement<br />
ceases. Absence mode allows the output to turn<br />
off when movement ceases, but must be manually<br />
turned on first.<br />
Use this button to select the settings in red and<br />
blue signified by the ‘Shift 1’ and ‘Shift 2’ LEDs<br />
Fault finding<br />
What if the load does not turn ON?<br />
Check that the live supply to the circuit is good.<br />
If the detection range is smaller than expected, check the diagram on page 2. Rotating the sensor slightly may<br />
improve the detection range.<br />
HINT: The Walk Test LED function can be used to check that the unit is detecting movement in the required area.<br />
What if the load does not turn OFF?<br />
Ensure that the area is left unoccupied for longer than the Time Out Period.<br />
Ensure that the sensor is not adjacent to circulating air, heaters or lamps.<br />
5