AUTUMN
1SflouO
1SflouO

You also want an ePaper? Increase the reach of your titles
YUMPU automatically turns print PDFs into web optimized ePapers that Google loves.
| contents page | news | events | advertisers’ index | contact |<br />
Metal AM part development<br />
builds are oriented and supported in<br />
Materialise Magics SG+, which costs<br />
an additional $15-20,000. As a result,<br />
independent designers are stuck with<br />
a disjointed process, which requires<br />
costly iterations and lots of communication<br />
with the service bureau who’s<br />
preparing the part to be built.<br />
Regardless, at this point in the<br />
process, it didn’t make sense to<br />
redesign the seatmast clamp area to<br />
reduce supports. Martijn’s build had<br />
a very high likelihood of completing<br />
successfully, and it was time to put it<br />
to the test. It worked!<br />
Post-processing<br />
After printing it, Layerwise did a<br />
bunch of post-processing before<br />
sending the part to me. This included:<br />
Stress relief<br />
First, the entire build plate was stress<br />
relieved. Layerwise’s stress relief<br />
process is proprietary, but a typical<br />
process [1] would involve putting the<br />
build plate in a furnace and bringing<br />
it to 600°C over a period of an hour,<br />
then holding it there for three hours<br />
before turning it off. In theory the<br />
furnace is either argon purged or<br />
vacuumed, but in practice it may<br />
contain small amounts of oxygen too.<br />
Layerwise says that the vast majority<br />
of the stress relief that they do is<br />
performed in a vacuum, but argon is<br />
typically used on prototype parts.<br />
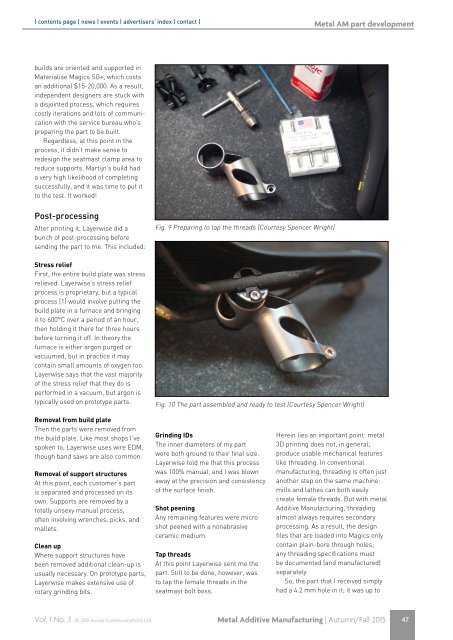
Fig. 9 Preparing to tap the threads (Courtesy Spencer Wright)<br />
Fig. 10 The part assembled and ready to test (Courtesy Spencer Wright)<br />
Removal from build plate<br />
Then the parts were removed from<br />
the build plate. Like most shops I’ve<br />
spoken to, Layerwise uses wire EDM,<br />
though band saws are also common.<br />
Removal of support structures<br />
At this point, each customer’s part<br />
is separated and processed on its<br />
own. Supports are removed by a<br />
totally unsexy manual process,<br />
often involving wrenches, picks, and<br />
mallets.<br />
Clean up<br />
Where support structures have<br />
been removed additional clean-up is<br />
usually necessary. On prototype parts,<br />
Layerwise makes extensive use of<br />
rotary grinding bits.<br />
Grinding IDs<br />
The inner diameters of my part<br />
were both ground to their final size.<br />
Layerwise told me that this process<br />
was 100% manual, and I was blown<br />
away at the precision and consistency<br />
of the surface finish.<br />
Shot peening<br />
Any remaining features were micro<br />
shot peened with a nonabrasive<br />
ceramic medium.<br />
Tap threads<br />
At this point Layerwise sent me the<br />
part. Still to be done, however, was<br />
to tap the female threads in the<br />
seatmast bolt boss.<br />
Herein lies an important point: metal<br />
3D printing does not, in general,<br />
produce usable mechanical features<br />
like threading. In conventional<br />
manufacturing, threading is often just<br />
another step on the same machine:<br />
mills and lathes can both easily<br />
create female threads. But with metal<br />
Additive Manufacturing, threading<br />
almost always requires secondary<br />
processing. As a result, the design<br />
files that are loaded into Magics only<br />
contain plain-bore through holes;<br />
any threading specifications must<br />
be documented (and manufactured)<br />
separately.<br />
So, the part that I received simply<br />
had a 4.2 mm hole in it; it was up to<br />
Vol. 1 No. 3 © 2015 Inovar Communications Ltd<br />
Metal Additive Manufacturing | Autumn/Fall 2015 47