Fig. 6
Fig. 6
Fig. 6

You also want an ePaper? Increase the reach of your titles
YUMPU automatically turns print PDFs into web optimized ePapers that Google loves.
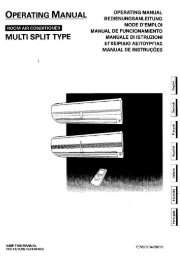
OPERATING MANUAL<br />
ROOM AIR CONDITIONER<br />
MULTI SPLIT TYPE<br />
KEEP THIS MANUAL<br />
FOR FUTURE REFERENCE<br />
OPERATING MANUAL<br />
BEDIENUNGSANLEITUNG<br />
MODE D’EMPLOI<br />
MANUAL DE FUNCIONAMIENTO<br />
MANUALE DI ISTRUZIONI<br />
ΕΓ�ΕΙΡΙ∆Ι� ΛΕΙΤ�ΥΡΓΙΑΣ<br />
MANUAL DE INSTRUÇÕES<br />
P/N9373420019<br />
English<br />
Deutsch<br />
Français<br />
Español<br />
Italiano<br />
EλληvIkά<br />
Português
CONTENTS<br />
SAFETY PRECAUTIONS .................................... En-1<br />
FEATURES AND FUNCTIONS ........................... En-2<br />
NAME OF PARTS ................................................ En-3<br />
PREPARATION .................................................... En-5<br />
OPERATION ........................................................ En-6<br />
TIMER OPERATION ............................................ En-9<br />
SLEEP TIMER OPERATION .............................. En-10<br />
SAFETY PRECAUTIONS<br />
En-1<br />
DANGER!<br />
CAUTION!<br />
ADJUSTING THE DIRECTION OF<br />
AIR CIRCULATION ............................................ En-11<br />
SWING OPERATION ......................................... En-12<br />
MANUAL AUTO OPERATION .......................... En-12<br />
CLEANING AND CARE ..................................... En-13<br />
TROUBLESHOOTING ....................................... En-16<br />
OPERATING TIPS .............................................. En-17<br />
Instructions relating to heating (*) are applicable only to “HEAT & COOL MODEL” (Reverse Cycle).<br />
● Before using the appliance, read these “PRECAUTIONS” thoroughly and operate in the correct way.<br />
● The instructions in this section all relate to safety; be sure to maintain safe operating conditions.<br />
● “DANGER”, “WARNING” and “CAUTION” have the following meanings in these instructions:<br />
This mark indicates procedures which, if improperly performed, are most likely to<br />
DANGER!<br />
result in the death of or serious injury to the user or service personnel.<br />
This mark indicates procedures which, if improperly performed, might lead to the<br />
WARNING! death or serious injury of the user.<br />
This mark indicates procedures which, if improperly performed, might possibly result<br />
CAUTION! in personal harm to the user, or damage to property.<br />
● Do not attempt to install this air conditioner by yourself.<br />
● This unit contains no user-serviceable parts. Always consult authorized service personnel<br />
for repairs.<br />
● When moving, consult authorized service personnel for disconnection and installation<br />
of the unit.<br />
● Do not become excessively chilled by staying for lengthy periods in the direct cooling<br />
airflow.<br />
● Do not insert fingers or objects into the outlet port or intake grilles.<br />
● Do not start and stop air conditioner operation by disconnecting the power supply<br />
cord and so on.<br />
● Take care not to damage the power supply cord.<br />
● In the event of a malfunction (burning smell, etc.), immediately stop operation, turn<br />
off the circuit breaker, and consult authorized service personnel.<br />
● If the power supply cord of this appliance is damaged, it should only be replaced by<br />
the authorized service personnel, since special purpose tools and specified cord are<br />
required.<br />
● Provide occasional ventilation during use.<br />
● Do not direct air flow at fireplaces or heating apparatus.<br />
● Do not climb on, or place objects on, the air conditioner.<br />
● Do not hang objects from the indoor unit.<br />
● Do not set flower vases or water containers on top of air conditioners.<br />
● Do not expose the air conditioner directly to water.<br />
● Do not operate the air conditioner with wet hands.<br />
● Do not pull power supply cord.<br />
● Turn off power source when not using the unit for extended periods.<br />
● Check the condition of the installation stand for damage.<br />
● Do not place animals or plants in the direct path of the air flow.<br />
● Do not drink the water drained from the air conditioner.<br />
● Do not use in applications involving the storage of foods, plants or animals, precision<br />
equipment, or art works.<br />
*● Connection valves become hot during Heating; handle with care.<br />
● Do not apply any heavy pressure to radiator fins.<br />
● Operate only with air filters installed.<br />
● Do not block or cover the intake grille and outlet port.<br />
● Ensure that any electronic equipment is at least one metre away from either the indoor<br />
or outdoor units.<br />
● Avoid installing the air conditioner near a fireplace or other heating apparatus.<br />
● When installing the indoor and outdoor units, take precautions to prevent access by<br />
infants.<br />
● Do not use inflammable gases near the air conditioner.
FEATURES AND FUNCTIONS<br />
Instructions relating to heating (*) are applicable only to “HEAT & COOL MODEL” (Reverse Cycle).<br />
AUTOMATIC OPERATION<br />
*● HEAT & COOL MODEL (REVERSE CYCLE)<br />
Merely press the START/STOP button, and the unit will<br />
begin automatic operation in either the Heating, Cooling,<br />
Dry or Monitor modes as appropriate, in accordance<br />
with the thermostat setting and the actual temperature<br />
of the room.<br />
● COOLING MODEL<br />
Merely press the START/STOP button, and the unit will<br />
begin automatic operation in the Cooling or Dry mode<br />
as appropriate, in accordance with the thermostat setting<br />
and the actual temperature of the room.<br />
SLEEP TIMER<br />
*● HEAT & COOL MODEL (REVERSE CYCLE)<br />
When the SLEEP timer button is pressed during Heating<br />
mode, the air conditioner’s thermostat setting is gradually<br />
lowered during the period of operation; during Cooling<br />
mode, the thermostat setting is gradually raised during<br />
the period of operation. When the set time is reached,<br />
the unit automatically turns off.<br />
● COOLING MODEL<br />
When the SLEEP timer button is pressed during Cooling<br />
mode, the thermostat setting is gradually raised during<br />
the period of operation. When the set time is reached,<br />
the unit automatically turns off.<br />
WIRELESS REMOTE CONTROL UNIT<br />
The WIRELESS REMOTE CONTROL UNIT allows convenient<br />
control of air conditioner operation.<br />
SWING OPERATION<br />
The Air Flow Direction Louvers swings automatically up and<br />
down so that the air speeds to every nook and corner of<br />
your room.<br />
REMOVABLE INTAKE GRILLE<br />
The indoor unit’s INTAKE GRILLE can be removed for easy<br />
cleaning and maintenance.<br />
MILDEW-RESISTANT FILTER<br />
The AIR FILTER has been treated to resist mildew growth,<br />
thus allowing cleaner use and easier care.<br />
SUPER QUIET OPERATION<br />
When the FAN CONTROL button is used to select QUIET,<br />
the unit begins super-quiet operation; the indoor unit’s airflow<br />
is reduced for quieter operation.<br />
AIR CLEANING FILTER<br />
The Air Cleaning Filter (Model UTR-FA05-1) and Deodorant<br />
filter (Model UTR-FA05-2) use an electrostatic principle to<br />
clean the air of fine particulate matter such as tobacco smoke<br />
and plant pollen.<br />
En-2
NAME OF PARTS<br />
Instructions relating to heating (*) are applicable only to “HEAT & COOL MODEL” (Reverse Cycle).<br />
<strong>Fig</strong>. 1<br />
<strong>Fig</strong>. 5<br />
D<br />
E<br />
D<br />
E<br />
<strong>Fig</strong>. 6<br />
H<br />
I<br />
J<br />
O<br />
Q<br />
En-3<br />
<strong>Fig</strong>. 7<br />
C<br />
F<br />
F<br />
9<br />
0<br />
A<br />
K<br />
L<br />
M<br />
P<br />
R<br />
N<br />
S<br />
3<br />
B<br />
U<br />
V<br />
W<br />
T<br />
<strong>Fig</strong>. 8<br />
1<br />
<strong>Fig</strong>. 2<br />
4<br />
<strong>Fig</strong>. 3<br />
8<br />
<strong>Fig</strong>. 4<br />
* HEAT & COOL MODEL (REVERSE CYCLE)<br />
COOLING MODEL<br />
OPENATION<br />
TIMER<br />
SWING<br />
X<br />
Y<br />
Z<br />
[<br />
\<br />
To facilitate explanation, the accompanying illustration<br />
has been drawn to show all possible indicators;<br />
in actual operation, however, the display will only<br />
show those indicators appropriate to the current operation.<br />
5<br />
6<br />
7<br />
2
<strong>Fig</strong>. 1 Indoor Unit<br />
1 Operating Control Panel (<strong>Fig</strong>. 2)<br />
2 MANUAL AUTO button<br />
3 Remote Control Signal Receiver<br />
4 Indicator Lamps (<strong>Fig</strong>. 3)<br />
5 OPERATION Indicator Lamp (red)<br />
● Lights when unit is operating.<br />
*● The lamp will flash slowly when the defrosting<br />
operation (See page 17).<br />
*● The lamp will flash quickly (1 second on, 1<br />
second off) when the selected operating<br />
mode can not be used (See page 18).<br />
6 TIMER Indicator Lamp (green)<br />
● If the TIMER indicator lamp flashes when<br />
the timer is operating, it indicates that a<br />
fault has occurred with the timer setting<br />
(See Page 17 Auto Restart).<br />
7 SWING Indicator Lamp (orange)<br />
8 Intake Grille (<strong>Fig</strong>. 4)<br />
9 Air Filter<br />
0 Air Flow Direction Louver<br />
A Right-Left Louver<br />
(behind Air Flow Direction Louver)<br />
B Drain Hose<br />
C Air Cleaning Filter<br />
<strong>Fig</strong>. 5 Outdoor Unit<br />
D Intake Port<br />
E Outlet Port<br />
F Pipe Unit<br />
<strong>Fig</strong>. 6 Remote Control Unit<br />
H SLEEP button<br />
I MASTER CONTROL button<br />
J SET TEMP./SET TIME buttons ( )<br />
K Signal Transmitter<br />
L TIMER button<br />
M FAN CONTROL button<br />
N START/STOP button<br />
O AIR FLOW DIRECTION button<br />
P SWING LOUVER button<br />
Q TIME ADJUST button<br />
R ACL button<br />
Rear side (<strong>Fig</strong>. 7)<br />
S TEST RUN<br />
● Touch the two metal contacts with a metallic<br />
object to send the signal to perform<br />
a test run.<br />
● Perform a test run only when installing the<br />
air conditioner. If the signal to perform a<br />
test run is received during normal operation,<br />
the air conditioner’s thermostat will<br />
malfunction.<br />
● If the signal to perform a test run is received<br />
during normal operation, the unit<br />
will switch to the test operation mode and<br />
the indoor unit’s OPERATION and TIMER<br />
indicator lamps will flash simultaneously.<br />
● To stop the test operation mode, press the<br />
START/STOP button to stop the air conditioner.<br />
T Remote Control Unit Display (<strong>Fig</strong>. 8)<br />
U Transmit Indicator<br />
V Clock Display<br />
W Operating Mode Display<br />
X Timer Mode Display<br />
Y Fan Speed Display<br />
Z Temperature Set Display<br />
[ Timer Set Indicator<br />
\ Temperature Set Indicator<br />
En-4
PREPARATION<br />
Turn on the Power<br />
Turn on the circuit breaker.<br />
Load Batteries (R03/LR03 × 2)<br />
1<br />
2<br />
3<br />
En-5<br />
Press and slide the battery compartment lid on the reverse<br />
side to open it.<br />
Slide in the direction of the arrow while pressing the mark.<br />
Insert batteries.<br />
Be sure to align the battery polarities ( ) correctly.<br />
Close the battery compartment lid.<br />
Set the Current time<br />
1<br />
2<br />
3<br />
Press the TIME ADJUST button (<strong>Fig</strong>. 7 Q).<br />
Use the tip of a ball-point pen or other small object to press the button.<br />
Use the SET TIME buttons (<strong>Fig</strong>. 6 J) to adjust<br />
the clock to the current time.<br />
button: Press to advance the time.<br />
button: Press to reverse the time.<br />
(Each time the buttons are pressed, the time will be advanced/reversed in<br />
one-minute increments; hold the buttons depressed to change the time<br />
quickly in ten-minute increments.)<br />
Press the TIME ADJUST button again.<br />
This completes the time setting and starts the clock.<br />
To Use the Remote Control Unit<br />
● The remote control unit must be pointed at signal receiver (<strong>Fig</strong>. 1 3) to operate<br />
correctly.<br />
● Operating range: About 7 meters.<br />
● When a signal is properly received by the air conditioner, a beeping sound will<br />
be heard.<br />
● If no beep is heard, press the remote control unit button again.<br />
Remote Control Unit Holder<br />
Screws<br />
Insert<br />
Press in<br />
1 Mount the Holder. 2 Set the Remote Control<br />
Unit.<br />
Slide up<br />
Pull out<br />
3 To remove the Remote<br />
Control Unit (when use at<br />
hand).<br />
CAUTION!<br />
● Take care to prevent infants from<br />
accidentally swallowing batteries.<br />
● When not using the remote control unit<br />
for an extended period, remove the<br />
batteries to avoid possible leakage and<br />
damage to the unit.<br />
● If leaking battery fluid comes in contact<br />
with your skin, eyes, or mouth, immediately<br />
wash with copious amounts of<br />
water, and consult your physician.<br />
● Dead batteries should be removed<br />
quickly and disposed of properly, either<br />
by placing in a public battery collection<br />
receptacle, or by returning to appropriate<br />
authority.<br />
● Do not attempt to recharge dry batteries.<br />
Never mix new and used batteries, or<br />
batteries of different types.<br />
Batteries should last about one year<br />
under normal use. If the remote control<br />
unit’s operating range becomes appreciably<br />
reduced, replace the batteries and<br />
press the ACL button with the tip of a<br />
ballpoint pen or other small object.
OPERATION<br />
Instructions relating to heating (*) are applicable only to “HEAT & COOL MODEL” (Reverse Cycle).<br />
To Select Mode Operation<br />
1<br />
2<br />
Press the START/STOP button (<strong>Fig</strong>.6 N).<br />
The indoor unit’s OPERATION indicator lamp (red) (<strong>Fig</strong>. 3 5) will light.<br />
The air conditioner will start operating.<br />
Press the MASTER CONTROL button (<strong>Fig</strong>.6 I) to select<br />
the desired mode.<br />
Each time the button is pressed, the mode will change in the following<br />
order:<br />
sAUTO sCOOL s DRY<br />
*HEAT t<br />
FANt<br />
About three seconds later, the entire display will reappear.<br />
To Set the Thermostat<br />
Press the SET TEMP. buttons (<strong>Fig</strong>. 6 J).<br />
button: Press to raise the thermostat setting.<br />
button: Press to lower the thermostat setting.<br />
*●Thermostat setting range: HEAT & COOL MODEL (REVERSE CYCLE)<br />
AUTO .................................. 18 to 30 °C<br />
Heating ............................... 16 to 30 °C<br />
Cooling/Dry ........................ 18 to 30 °C<br />
The thermostat cannot be used to set room temperature during the FAN mode<br />
(the temperature will not appear on the remote control unit’s display).<br />
●Thermostat setting range: COOLING MODEL<br />
AUTO .................................. Standard temperature setting ± 2 °C<br />
Cooling/Dry ........................ 18 to 30 °C<br />
FAN ..................................... 17 to 30 °C<br />
(During use of FAN mode, if the thermostat is set at 17 °C or lower, the display will<br />
show ”--” and the fan will operate continuously, regardless of the room temperature.)<br />
About three seconds later, the entire display will reappear.<br />
The thermostat setting should be considered a standard value, and may differ<br />
somewhat from the actual room temperature.<br />
To Set the Fan Speed<br />
Press the FAN CONTROL button (<strong>Fig</strong>. 6 M).<br />
Each time the button is pressed, the fan speed changes in the following order:<br />
sAUTO sHIGH<br />
sMED sLOW<br />
sQUIET<br />
About three seconds later, the entire display will reappear.<br />
Example: When set to COOL<br />
Example: When set to 26 °C<br />
En-6
OPERATION<br />
Instructions relating to heating (*) are applicable only to “HEAT & COOL MODEL” (Reverse Cycle).<br />
When set to AUTO:<br />
* Heating : Fan operates so as to optimally circulate warmed air.<br />
However, the fan will operate at very low speed when the temperature<br />
of the air issued from the indoor unit is low.<br />
Cooling : As the room temperature approaches that of the thermostat setting,<br />
the fan speed becomes slower.<br />
* Fan: HEAT & COOL MODEL (REVERSE CYCLE)<br />
The fan alternately turns on and off; when on, the fan runs at the low<br />
fan speed.<br />
The fan will operate at very low setting during Monitor operation and<br />
at the start of the Heating mode.<br />
Fan: COOLING MODEL<br />
The fan will operate at the optimum speed in accordance with the<br />
room temperature in the vicinity of the indoor unit.<br />
Example: When set to AUTO<br />
When set to QUIET:<br />
SUPER QUIET operation begins. The indoor unit’s airflow will be reduced for quieter<br />
operation.<br />
● SUPER QUIET operation cannot be used during Dry mode. (The same is true<br />
when dry mode is selected during AUTO mode operation.)<br />
● During Super Quiet operation, *(Heating and) Cooling performance will be reduced<br />
somewhat.<br />
To Stop Operation<br />
Press the START/STOP button.<br />
The OPERATION indicator lamp (red) (<strong>Fig</strong>. 3 5) will go out.<br />
About Mode Operation<br />
*AUTO (AUTO CHANGEOVER): HEAT & COOL MODEL (REVERSE CYCLE)<br />
● When AUTO CHANGEOVER operation is selected, the air conditioner selects the<br />
appropriate operation mode (Cooling or Heating) in response to your room’s<br />
temperature.<br />
● When AUTO CHANGEOVER operation first selected, the fan will operate at very<br />
low speed for about one minute, during which time the unit detects the room<br />
conditions and selects the proper operating mode.<br />
● When the air conditioner has adjusted your room’s temperature to near the thermostat<br />
setting, it will begin monitor operation. In the monitor operation mode,<br />
the fan will operate at low speed. If the room temperature subsequently changes,<br />
the air conditioner will once again select the appropriate operation (Heating, Cooling)<br />
to adjust the temperature to the value set in the thermostat. (The monitor<br />
operation range is ±2 °C relative to the thermostat setting.)<br />
● If the mode automatically selected by the unit is not what you wish, see page 6<br />
and select one of the mode operation (HEAT, COOL, DRY, FAN).<br />
En-7<br />
Example: When set to QUIET
AUTO: COOLING MODEL<br />
● Depending on the room temperature at the time operation begins, the operating<br />
mode will be switched automatically as shown in the accompanying table.<br />
Also, depending on the operating mode, the room temperature setting will cause<br />
the “standard” temperature to be set as shown.<br />
Actual Room Operating Mode Thermostat Setting<br />
Temperature (standard setting)<br />
30 °C or above → Cooling → 27 °C<br />
27 to 30 °C → Cooling → 26 °C<br />
25 to 27 °C → Dry → 24 °C<br />
23 to 25 °C → Dry → 22 °C<br />
Below 23 °C → Dry → 20 °C<br />
The operating mode and standard thermostat settings are selected automatically<br />
when operation begins.<br />
● When automatic operation is initiated, the fan will run at very low speed for about<br />
one minute while the unit detects and selects the proper operating mode.<br />
● Once the operating mode has been set, the mode will not change even if the<br />
room temperature changes.<br />
● If the START/STOP button is pressed to recommence operation within two hours<br />
after stopping automatic operation, the unit will begin operating from the same<br />
mode as before.<br />
*Heating:<br />
● Use to warm your room.<br />
● When Heating mode is selected, the air conditioner will operate at very low fan<br />
speed for about 3 to 5 minutes, after which it will switch to the selected fan setting.<br />
This period of time is provided to allow the indoor unit to warm up before<br />
beginning full operation.<br />
● When the room temperature is very low, frost may form on the outside unit, and<br />
its performance may be reduced. In order to remove such frost, the unit will<br />
automatically enter the defrost cycle from time to time. During Automatic Defrosting<br />
operation, the OPERATION indicator lamp (red) will flash, and the heat<br />
operation will be interrupted.<br />
Cooling:<br />
● Use to cool your room.<br />
Dry:<br />
● Use for gently cooling while dehumidifying your room.<br />
● You cannot heat the room during Dry mode.<br />
● During Dry mode, the unit will operate at low speed; in order to adjust room<br />
humidity, the indoor unit’s fan may stop from time to time. Also, the fan may<br />
operate at very low speed when detecting room humidity.<br />
● The fan speed cannot be changed manually when Dry mode has been selected.<br />
Fan:<br />
● Use to circulate the air throughout your room.<br />
* During Heating mode:<br />
Set the thermostat to a temperature setting<br />
that is higher than the current room<br />
temperature. The Heating mode will not<br />
operate if the thermostat is set lower than<br />
the actual room temperature.<br />
During Cooling/Dry mode:<br />
Set the thermostat to a temperature setting<br />
that is lower than the current room<br />
temperature. The Cooling and Dry modes<br />
will not operate if the thermostat is set<br />
higher than the actual room temperature<br />
(in Cooling mode, the fan alone will operate).<br />
*During Fan mode:<br />
HEAT & COOL MODEL (REVERSE CYCLE)<br />
You can not use the unit to heat and cool<br />
your room.<br />
During Fan mode: COOLING MODEL<br />
● Fan operation begins when room temperature<br />
in the vicinity of the air conditioner<br />
rises above the set thermostat<br />
temperature; when the temperature<br />
drops, fan operation stops.<br />
● If the air emitted feels too cool, raise<br />
the thermostat setting.<br />
En-8
TIMER OPERATION<br />
Before using the timer function, be sure that the Remote Control Unit is set to the correct current time (See page 5).<br />
To Use the ON timer or OFF timer<br />
1<br />
2<br />
3<br />
En-9<br />
Press the START/STOP button (<strong>Fig</strong>. 6 N)<br />
(if the unit is already operating, proceed to step 2).<br />
The indoor unit’s OPERATION indicator lamp (red) (<strong>Fig</strong>. 3 5) will light.<br />
Press the TIMER button (<strong>Fig</strong>. 6 L) to select the OFF<br />
timer or ON timer operation.<br />
Each time the button is pressed the timer function changes in the following<br />
order:<br />
sRESET<br />
sOFF<br />
sON<br />
PROGRAM(OFF → ON, OFF ← ON) t<br />
The indoor unit’s TIMER indicator lamp (green) (<strong>Fig</strong>. 3 6) will light.<br />
Use the SET TIME buttons (<strong>Fig</strong>. 6 J) to adjust the desired<br />
OFF time or ON time.<br />
Set the time while the time display is flashing (the flashing will continue<br />
for about five seconds).<br />
button: Press to advance the time.<br />
button: Press to reverse the time.<br />
About five seconds later, the entire display will reappear.<br />
To Use the PROGRAM timer<br />
1<br />
2<br />
3<br />
Press the START/STOP button (<strong>Fig</strong>. 6 N)<br />
(if the unit is already operating, proceed to step 2).<br />
The indoor unit’s OPERATION indicator lamp (red) (<strong>Fig</strong>. 3 5) will light.<br />
Set the desired times for OFF timer and ON timer.<br />
See the section “To Use the ON timer or OFF timer” to set the desired<br />
mode and times.<br />
About three seconds later, the entire display will reappear.<br />
The indoor unit’s TIMER indicator lamp (green) (<strong>Fig</strong>. 3 6) will light.<br />
Press the TIMER button (<strong>Fig</strong>. 6 L) to select the PRO-<br />
GRAM timer operation (either OFF → ON or OFF ← ON<br />
will display).<br />
The display will alternately show “OFF timer” and “ON timer”, then change<br />
to show the time setting for the operation to occur first.<br />
● The PROGRAM timer will begin operation. (If the ON timer has been<br />
selected to operate first, the unit will stop operating at this point.)<br />
About five seconds later, the entire display will reappear.<br />
About the PROGRAM timer<br />
● The PROGRAM timer allows you to integrate OFF timer and ON timer operations<br />
in a single sequence. The sequence can involve one transition from OFF timer to<br />
ON timer, or from ON timer to OFF timer, within a twenty-four hour period.<br />
● The first timer function to operate will be the one set nearest to the current time.<br />
The order of operation is indicated by the arrow in the Remote Control Unit’s<br />
display (OFF → ON, or OFF ← ON).<br />
● One example of PROGRAM timer use might be to have the air conditioner automatically<br />
stop (OFF timer) after you go to sleep, then start (ON timer) automatically<br />
in the morning before you arise.<br />
To Cancel the Timer<br />
Use the TIMER button to select “TIMER<br />
RESET”.<br />
The air conditioner will return to normal<br />
operation.<br />
To Change the Timer Settings<br />
Perform steps 2 and 3.<br />
To Stop Air Conditioner Operation<br />
while the Timer is Operating<br />
Press the START/STOP button.<br />
To Change Operating Conditions<br />
If you wish to change the operating<br />
conditions (Mode, Fan Speed, Thermostat<br />
Setting), after making the timer setting,<br />
wait until the entire display reappears, then<br />
press the appropriate buttons to change<br />
the operating condition desired.<br />
To Cancel the Timer<br />
Use the TIMER button to select “TIMER<br />
RESET”.<br />
The air conditioner will return to normal<br />
operation.<br />
To Change the Timer Settings<br />
1. Follow the instructions given in the section<br />
“To Use the ON Timer or OFF Timer” to select<br />
the timer setting you wish to change.<br />
2. Press the TIMER button to select either<br />
OFF → ON or OFF ← ON.<br />
To Stop Air Conditioner Operation<br />
while the Timer is Operating<br />
Press the START/STOP button.<br />
To Change Operating Conditions<br />
If you wish to change operating conditions<br />
(Mode, Fan Speed, Thermostat Setting),<br />
after making the timer setting wait until the<br />
entire display reappears, then press the<br />
appropriate buttons to change the operating<br />
condition desired.
SLEEP TIMER OPERATION<br />
Instructions relating to heating (*) are applicable only to “HEAT & COOL MODEL” (Reverse Cycle).<br />
Unlike other timer functions, the SLEEP timer is used to set the length of time until air conditioner operate is stopped.<br />
To Use the SLEEP timer<br />
While the air conditioner is operating or stopped, press the<br />
SLEEP button (<strong>Fig</strong>. 6 H).<br />
Both the indoor unit’s OPERATION indicator lamp (red) (<strong>Fig</strong>. 3 5) and the TIMER<br />
indicator lamp (green) (<strong>Fig</strong>. 3 6) will light.<br />
To Change the Timer Settings<br />
Press the SLEEP button (<strong>Fig</strong>. 6 H) once again and set the time<br />
using the SET TIME buttons (<strong>Fig</strong>. 6 J).<br />
Set the time while the Timer Mode Display is flashing (the flashing will continue for<br />
about five seconds).<br />
button: Press to advance the time.<br />
button: Press to reverse the time.<br />
About five seconds later, the entire display will reappear.<br />
About the SLEEP timer<br />
To Cancel the Timer:<br />
Use the TIMER button to select “TIMER<br />
RESET”.<br />
The air conditioner will return to normal<br />
operation.<br />
To Stop the Air Conditioner During<br />
Timer Operation:<br />
Press the START/STOP button.<br />
To prevent excessive warming or cooling during sleep, the SLEEP timer function automatically modifies the thermostat setting<br />
in accordance with the time setting. When the set time has elapsed, the air conditioner completely stops.<br />
*During Heating operation:<br />
When the SLEEP timer is set, the thermostat setting is<br />
automatically lowered 1 °C every thirty minutes. When the<br />
thermostat has been lowered a total of 4 °C, the thermostat<br />
setting at that time is maintained until the set time has elapsed,<br />
at which time the air conditioner automatically turns off.<br />
SLEEP timer setting<br />
30<br />
minutes<br />
1 °C<br />
1 hour<br />
1 hour<br />
30 minutes<br />
2 °C 3 °C 4 °C<br />
Set time<br />
During Cooling/Dry operation:<br />
When the SLEEP timer is set, the thermostat setting is automatically<br />
raised 1 °C every sixty minutes. When the thermostat<br />
has been raised a total of 2 °C, the thermostat setting at<br />
that time is maintained until the set time has elapsed, at which<br />
time the air conditioner automatically turns off.<br />
SLEEP timer setting<br />
1 hour<br />
Set time<br />
1 °C<br />
2 °C<br />
En-10
ADJUSTING THE DIRECTION OF AIR CIRCULATION<br />
Instructions relating to heating (*) are applicable only to “HEAT & COOL MODEL” (Reverse Cycle).<br />
Vertical (up-down) direction of airflow is adjusted by pressing the Remote Control Unit’s AIR FLOW DIRECTION button. Horizontal<br />
(right-left) airflow direction is adjusted manually, by moving the Air Flow Direction Louvers.<br />
Whenever making horizontal airflow adjustments, start air conditioner operation and be sure that the vertical air direction<br />
louvers are stopped.<br />
Vertical Air Direction Adjustment<br />
Press the AIR FLOW DIRECTION button (<strong>Fig</strong>. 6 O).<br />
Each time the button is pressed, the air direction range will change as follows:<br />
Types of Air flow Direction Setting:<br />
1,2,3 : During Cooling/Dry modes<br />
4,5,6 : During Heating mode<br />
The remote Control Unit’s display does<br />
not change.<br />
En-11<br />
3 2 1 6 5 4<br />
● Use the air direction adjustments within the ranges shown above.<br />
● The vertical airflow direction is set automatically as shown, in accordance with<br />
the type of operation selected.<br />
During Cooling/Dry modes : Horizontal flow 1<br />
* During Heating mode : Downward flow 5<br />
● During AUTO mode operation, for the first minute after beginning operation,<br />
airflow will be horizontal 1; the air direction cannot be adjusted during this period.<br />
Right-Left Adjustment<br />
Adjust the Right-Left louvers.<br />
● Move the Right-Left louvers to adjust air flow in the direction you prefer.<br />
Right-Left Louvers<br />
knob<br />
1<br />
2<br />
3<br />
4<br />
5<br />
6<br />
DANGER!<br />
Never place fingers or foreign objects inside<br />
the outlet ports, since the internal fan operates<br />
at high speed and could cause personal<br />
injury.<br />
● Always use the remote control unit’s<br />
AIR FLOW DIRECTION button to adjust<br />
the vertical airflow louvers. Attempting<br />
to move them manually could result in<br />
improper operation; in this case, stop<br />
operation and restart. The louvers<br />
should begin to operate properly again.<br />
● During use of the Cooling and Dry<br />
modes, do not set the Air Flow Direction<br />
Louvers in the Heating range (4 -<br />
6) for long periods of time, since water<br />
vapor may condense near the outlet<br />
louvers and drops of water may drip<br />
from the air conditioner. During the<br />
Cooling and Dry modes, if the Air Flow<br />
Direction Louvers are left in the heating<br />
range for more than 30 minutes,<br />
they will automatically return to position<br />
3.<br />
● When used in a room with infants, children,<br />
elderly or sick persons, the air<br />
direction and room temperature<br />
should be considered carefully when<br />
making settings.
SWING OPERATION<br />
Begin air conditioner operation before performing this procedure.<br />
To select SWING Operation<br />
Press the SWING LOUVER button (<strong>Fig</strong>. 6 P).<br />
The SWING indicator lamp (orange) (<strong>Fig</strong>. 3 7) will light.<br />
In this mode, the Air Flow Direction Louvers will swing automatically to direct the<br />
airflow both up and down.<br />
To Stop SWING Operation<br />
Press the SWING LOUVER button (<strong>Fig</strong>. 6 P) once again.<br />
The SWING indicator lamp (orange) (<strong>Fig</strong>. 3 7) will go out.<br />
Airflow direction will return to the setting before swing was begun.<br />
About Swing Operation<br />
● The range of swing is relative to the currently set airflow<br />
direction.<br />
● If the swing range is not as desired, use the Remote Control<br />
Unit’s AIR FLOW DIRECTION button to change the<br />
range of swing.<br />
MANUAL AUTO OPERATION<br />
● During Cooling/Dry modes, if SWING Operation is continued<br />
at the lowest (downward) range for more than 30<br />
minutes, the unit will automatically switch the swing range<br />
to the horizontal flow range to prevent the condensation<br />
of moisture on the outlet.<br />
● The SWING operation may stop temporarily when the air<br />
conditioner’s fan is not operating, or when operating at<br />
very low speeds.<br />
Use the MANUAL AUTO operation in the event the Remote Control Unit is lost or otherwise unavailable.<br />
How To Use the Main Unit Controls<br />
Press the MANUAL AUTO button (<strong>Fig</strong>. 2 2) on the main unit<br />
control panel.<br />
To stop operation, press the MANUAL AUTO button once again.<br />
(Controls are located inside the intake grille.)<br />
● When the air conditioner is operated<br />
with the controls on the Main unit, it<br />
will operate under the same mode as<br />
the AUTO mode selected on the Remote<br />
Control Unit (see page 7).<br />
● The fan speed selected will be “AUTO”<br />
and the thermostat setting will be<br />
standard.<br />
En-12
CLEANING AND CARE<br />
En-13<br />
CAUTION!<br />
Cleaning the Intake Grille<br />
● Before cleaning the air conditioner, be sure to turn it off and disconnect the power supply cord.<br />
● Be sure the intake grille (<strong>Fig</strong>. 1 8) is installed securely.<br />
● When removing and replacing the air filters, be sure not to touch the heat exchanger, as personal<br />
injury may result.<br />
1. Remove the intake grille.<br />
1 Place your fingers at both lower ends of the grille<br />
panel, and lift forward; if the grille seems to catch<br />
partway through its movement, continue lifting upward<br />
to remove.<br />
2 Pull past the intermediate catch and open the Intake<br />
Grille wide so that it become horizontal.<br />
Intake Grille<br />
2 2<br />
1<br />
Knob<br />
2. Clean with water.<br />
Remove dust with a vacuum cleaner; wipe the unit with<br />
warm water, then dry with a clean, soft cloth.<br />
3. Replace the intake grille.<br />
1 Pull the knobs all the way.<br />
2 Hold the grille horizontal and set the left and right<br />
mounting shafts into the bearings at the top of the<br />
panel.<br />
Intake Grille<br />
1<br />
Intake Grille<br />
2<br />
1<br />
Intake Grille<br />
Mounting<br />
shaft<br />
Mounting shaft<br />
Bearing<br />
Knob<br />
Mounting<br />
shaft<br />
Knob<br />
Cleaning the Air Filter<br />
1. Open the intake grille, and remove the air<br />
filter.<br />
Lift up the air filter’s handle, disconnect the two lower<br />
tabs, and pull out.<br />
Air filter handle<br />
Hooks (two places)<br />
2. Remove dust with a vacuum cleaner or by<br />
washing.<br />
After washing, allow to dry thoroughly in a shaded place.<br />
3. Replace the air filter and close the intake<br />
grille.<br />
1 Align the sides of the air filter with the panel, and push<br />
in fully, making sure the two lower tabs are returned<br />
properly to their holes in the panel.<br />
Hooks (two places)<br />
2 Close the intake grille.<br />
(For purposes of example, the illustration shows the unit<br />
without intake grille installed.)<br />
● Dust can be cleaned from the air filter either with a vacuum<br />
cleaner, or by washing the filter in a solution of mild detergent<br />
and warm water. If you wash the filter, be sure to<br />
allow it to dry thoroughly in a shady place before reinstalling.<br />
● If dirt is allowed to accumulate on the air filter, air flow<br />
will be reduced, lowering operating efficiency and increasing<br />
noise.<br />
● During periods of normal use, the air filters should be<br />
cleaned every two weeks.
Air Cleaning Filter Installation<br />
1. Open the intake grille and remove the air<br />
filters.<br />
Intake Grille<br />
Intake Grille<br />
2 2<br />
1<br />
Mounting<br />
shaft<br />
Knob<br />
2. Install the air cleaning filter set (set of 2).<br />
1 Set the air cleaning filter into the air cleaning filter<br />
frame.<br />
Air cleaning filter set<br />
Air cleaning filter frame<br />
Air cleaning filter<br />
2 Engage the latch at both ends of the filter with the<br />
two hooks at the rear of the air cleaning filter frame.<br />
Take care that the air cleaning filter does not project beyond<br />
the frame.<br />
3 Engage the four fixing locations at the top and bottom<br />
of the air cleaning filter frame with the hooks of<br />
the air filter.<br />
Rear of the filter<br />
Hooks (two places at the rear)<br />
1<br />
Latches (two places)<br />
Fixing location, hooks (four places)<br />
3. Install the two air filters and close the<br />
intake grille.<br />
Intake Grille<br />
Intake Grille<br />
Intake Grille<br />
1 1<br />
2<br />
Mounting<br />
shaft<br />
Knob<br />
● When air cleaning filters are used, the effect will increased<br />
by setting the fan speed to “High”.<br />
2<br />
1<br />
2<br />
Mounting shaft<br />
Bearing<br />
Knob<br />
En-14
CLEANING AND CARE<br />
Replacing dirty Air cleaning filters<br />
Please purchase the separately sold replacement air cleaning<br />
filters and install them.<br />
1. Open the intake grille and remove the air<br />
filters.<br />
En-15<br />
Intake Grille<br />
Intake Grille<br />
2 2<br />
1<br />
Mounting<br />
shaft<br />
Knob<br />
2. Replace them by two new air cleaning<br />
filters.<br />
1 Remove the old air cleaning filters in reverse order of<br />
their installation.<br />
2 Install in the same way as for installation of the air<br />
cleaning filter set.<br />
1<br />
3. Install the two air filters and close the<br />
intake grille.<br />
Intake Grille<br />
Intake Grille<br />
Intake Grille<br />
1 1<br />
2<br />
Mounting<br />
shaft<br />
Knob<br />
2<br />
1<br />
In regard to the Air cleaning filters<br />
2<br />
Mounting shaft<br />
Bearing<br />
Knob<br />
● The air cleaning filters are disposable filters. (They can<br />
not be washed and reused.)<br />
However, the filter frame is used again.<br />
Air cleaning filter<br />
Air cleaning filter frame<br />
● For storage of the air cleaning filters, avoid places with<br />
high temperatures and high humidity, and use the filters<br />
as soon as possible after the package has been opened.<br />
(The air cleaning effect decreases when the filters are left<br />
in the opened package.)<br />
● Generally, the filters should be exchanged about every<br />
three months.
TROUBLESHOOTING<br />
Instructions relating to heating (*) are applicable only to “HEAT & COOL MODEL” (Reverse Cycle).<br />
In the event of a malfunction (burning smell, etc.), immediately stop operation, disconnect the<br />
WARNING! Power Supply Plug or turn off the circuit breaker, and consult authorized service personnel.<br />
Merely turning off the unit’s power switch will not completely disconnect the unit from the power<br />
source. Always be sure to turn off your circuit breaker to ensure that power is completely off.<br />
Before requesting service, perform the following checks:<br />
NORMAL<br />
FUNCTION<br />
Symptom<br />
Doesn’t operate immediately:<br />
Noise is heard:<br />
Smells:<br />
Mist or steam are<br />
emitted:<br />
Airflow is weak or stops:<br />
Water is produced from<br />
the outdoor unit:<br />
Problem<br />
● If the unit is stopped and then immediately started again, the compressor<br />
will not operate for about 3 minutes, in order to prevent<br />
fuse blowouts.<br />
● Whenever the power supply plug is disconnected and then reconnected<br />
to a power outlet, the protection circuit will operate for about<br />
3 minutes, preventing unit operation during that period.<br />
● During operation and immediately after stopping the unit, the<br />
sound of water flowing in the air conditioner’s piping may be<br />
heard. Also, noise may be particularly noticeable for about 2 to 3<br />
minutes after starting operation (sound of coolant flowing).<br />
● During operation, a slight squeaking sound may be heard. This is<br />
the result of minute expansion and contraction of the front cover<br />
due to temperature changes.<br />
*● During Heating operation, a sizzling sound may be heard occasionally.<br />
This sound is produced by the Automatic Defrosting operation.<br />
● Some smell may be emitted from the indoor unit. This smell is<br />
the result of room smells (furniture, tobacco, etc.) which have<br />
been taken into the air conditioner.<br />
● During Cooling or Dry operation, a thin mist may be seen emitted<br />
from the indoor unit. This results from the sudden Cooling of<br />
room air by the air emitted from the air conditioner, resulting in<br />
condensation and misting.<br />
*● During Heating operation, the outdoor unit’s fan may stop, and<br />
steam may be seen rising from the unit. This is due to the Automatic<br />
Defrosting operation.<br />
*● When Heating operation is started, fan speed is temporarily very<br />
low, to allow internal parts to warm up.<br />
*● During Heating operation, if the room temperature rises above<br />
the thermostat setting, the outdoor unit will stop, and the indoor<br />
unit will operate at very low fan speed. If you wish to warm the<br />
room further, set the thermostat to a higher setting.<br />
*● During Heating operation, the unit will temporarily stop operation<br />
(between 7 and 15 minutes) as the Automatic Defrosting mode<br />
operates. During the Automatic Defrosting operation, the OPERA-<br />
TION indicator lamp will flash.<br />
● The fan may operate at very low speed during Dry operation or<br />
when the unit is monitoring the room’s temperature.<br />
● During SUPER QUIET operation, the fan will operate at very low speed.<br />
● In the monitor AUTO operation, the fan will operate at very low speed.<br />
*● During Heating operation, water may be produced from the outdoor<br />
unit due to the Automatic Defrosting operation.<br />
See Page<br />
—<br />
—<br />
17<br />
—<br />
—<br />
17<br />
—<br />
17<br />
7<br />
7<br />
7<br />
17<br />
En-16
TROUBLESHOOTING<br />
CHECK ONCE<br />
MORE<br />
Instructions relating to heating (*) are applicable only to “HEAT & COOL MODEL” (Reverse Cycle).<br />
In Event of Power Interruption<br />
En-17<br />
Symptom<br />
Doesn’t operate at all:<br />
Poor Cooling (or *Heating)<br />
performance:<br />
The unit operates<br />
differently from the<br />
remote control unit’s<br />
setting:<br />
Items to check<br />
● Has the circuit breaker been turn off?<br />
● Has there been a power failure?<br />
● Has a fuse blown out, or a circuit breaker been tripped?<br />
● Is the timer operating?<br />
● Is the air filter dirty?<br />
● Are the air conditioner’s intake grille or outlet port blocked?<br />
● Did you adjust the room temperature settings (thermostat) correctly?<br />
● Is there a window or door open?<br />
● In the case of Cooling operation, is a window allowing bright sunlight<br />
to enter? (Close the curtains.)<br />
● In the case of Cooling operation, are there heating apparatus and<br />
computers inside the room, or are there too many people in the<br />
room?<br />
● Is the unit set for SUPER QUIET operation?<br />
● Are the Remote Control Unit’s batteries dead?<br />
● Are the Remote Control Unit’s batteries loaded properly?<br />
See Page<br />
If the problem persists after performing these checks, or if you notice burning smells, or the TIMER indicator Lamp (<strong>Fig</strong>. 3 6)<br />
flashes, immediately stop operation, turn off the circuit breaker, and consult authorized service personnel.<br />
OPERATING TIPS<br />
Operation and Performance<br />
*Heating Performance<br />
● This air conditioner operates on the heat-pump principle,<br />
absorbing heat from outdoor air and transferring that heat<br />
indoors. As a result, the operating performance is reduced<br />
as outdoor air temperature drops. If you feel that insufficient<br />
heating performance is being produced, we recommend<br />
you use this air conditioner in conjunction with<br />
another kind of heating appliance.<br />
● Heat-pump air conditioners heat your entire room by<br />
recirculating air throughout the room, with the result that<br />
some time may be required after first starting the air conditioner<br />
until the room is heated.<br />
*When Indoor and Outdoor Temperatures are High<br />
When both indoor and outdoor temperatures are high during<br />
use of the heating mode, the outdoor unit’s fan may stop<br />
at times.<br />
AUTO Restart<br />
● The air conditioner power has been interrupted by a<br />
power failure. The air conditioner will then restart automatically<br />
in its previous mode when the power is restored.<br />
● Operated by setting before the power failure.<br />
*Microcomputer-controlled Automatic Defrosting<br />
● When using the Heating mode under conditions of low<br />
outdoor air temperature high humidity, frost may form<br />
on the outdoor unit, resulting in reduced operating performance.<br />
In order to prevent this kind of reduced performance, this<br />
unit is equipped with a Microcomputer-controlled Automatic<br />
Defrosting function. If frost forms, the air conditioner<br />
will temporarily stop, and the defrosting circuit will<br />
operate briefly (for about 7 to 15 minutes).<br />
During Automatic Defrosting operation, the OPERATION<br />
indicator lamp (red) will flash slowly.<br />
● If a power failure occurs during TIMER operation, the timer<br />
will be reset and the unit will begin (or stop) operation at<br />
the new time setting. In the event that this kind of timer<br />
fault occurs the TIMER Indicator Lamp (green) will flash<br />
(see page. 4).<br />
● Use of other electrical appliances (electric shaver, etc.) or<br />
nearby use of a wireless radio transmitter may cause the<br />
air conditioner to malfunction. In this event, temporarily<br />
disconnect the Power Supply Plug, reconnect it, and then<br />
use the remote control unit to resume operation.<br />
—<br />
9<br />
—<br />
7<br />
5
OPERATING TIPS<br />
Multi-type Air conditioner<br />
This indoor unit can be connected to a multi-type outdoor unit. The multi-type air conditioner allows multiple indoor units to<br />
be operated in multiple locations. The indoor units may be operated simultaneously, in accordance with their respective<br />
output.<br />
Simultaneous Use of Multiple Units<br />
Instructions relating to inverter ( ❖ ) are applicable only to “INVERTER MODEL”.<br />
● When using a multi-type air conditioner, the multiple<br />
indoor units can be operated simultaneously, but when<br />
two or more indoor units of the same group are operated<br />
simultaneously, the heating and cooling efficiency<br />
will be less than when a single indoor unit is used alone.<br />
Accordingly, when you wish to use more than one indoor<br />
unit for cooling at the same time, the use should<br />
be concentrated at night and other times when less output<br />
is required. In the same way, when multiple units<br />
are used simultaneously for heating, it is recommended<br />
that they be used in conjunction with other auxiliary<br />
space heaters, as required.<br />
● Seasonal and outdoor temperature conditions, the structure<br />
of the rooms and the number of persons present<br />
may also result in differences of operating efficiency.<br />
We recommend that you try various operating patterns<br />
in order to confirm the level of heating and cooling output<br />
provided by your units, and use the units in the way<br />
that best matches your family's lifestyle.<br />
● If you discover that one or more units delivers a low<br />
level of cooling or heating during simultaneous operation,<br />
we recommend that you stop simultaneous operation<br />
of the multiple units.<br />
❖ ● Operation cannot be done in the following different operating<br />
modes.<br />
If the indoor unit is instructed to do an operating mode<br />
that it cannot perform, the OPERATION indicator lamp<br />
(red) on the indoor unit will flash (1 second on, 1 second<br />
off) and the unit will go into the standby mode.<br />
Heating mode and cooling mode (or dry mode)<br />
Heating mode and fan mode<br />
Notice<br />
❖ ● Operation can be done in the following different operating<br />
modes.<br />
Cooling mode and dry mode<br />
Cooling mode and fan mode<br />
Dry mode and fan mode<br />
❖ ● The operating mode (heating mode or cooling (dry)<br />
mode) of the outdoor unit will be determined by the operating<br />
mode of the indoor unit that was operated first.<br />
If the indoor unit was started in fan mode, the operating<br />
mode of the outdoor unit will not be determined.<br />
For example, if indoor unit (A) was started in fan mode<br />
and then indoor unit (B) was then operated in heating<br />
mode, indoor unit (A) would temporarily start operation<br />
in fan mode but when indoor unit (B) started operating<br />
in heating mode, the OPERATION indicator lamp<br />
(red) for indoor unit (A) would begin to flash (1 second<br />
on, 1 second off) and it would go into standby mode.<br />
Indoor unit (B) would continue to operate in heating<br />
mode.<br />
Instructions relating to heating (*) are applicable only to “HEAT & COOL MODEL” (Reverse Cycle).<br />
*● During use of the heating mode, the outdoor unit will<br />
occasionally commence the defrost operation for brief<br />
periods. During the defrosting operation, if the user sets<br />
the indoor unit for heating again, the defrosting mode<br />
will continue, and the heating operation will begin after<br />
completion of defrosting, with the result that some time<br />
may be required before warm air is emitted.<br />
*● During use of the heating mode, the top of the indoor<br />
unit may become warm, but this is due to the fact that<br />
coolant is circulated through the indoor unit even when<br />
it is stopped; it is not a malfunction.<br />
En-18