HP 8590 E & L Series Spectrum Analyzers and HP 8591C Cable TV ...
HP 8590 E & L Series Spectrum Analyzers and HP 8591C Cable TV ...
HP 8590 E & L Series Spectrum Analyzers and HP 8591C Cable TV ...

You also want an ePaper? Increase the reach of your titles
YUMPU automatically turns print PDFs into web optimized ePapers that Google loves.
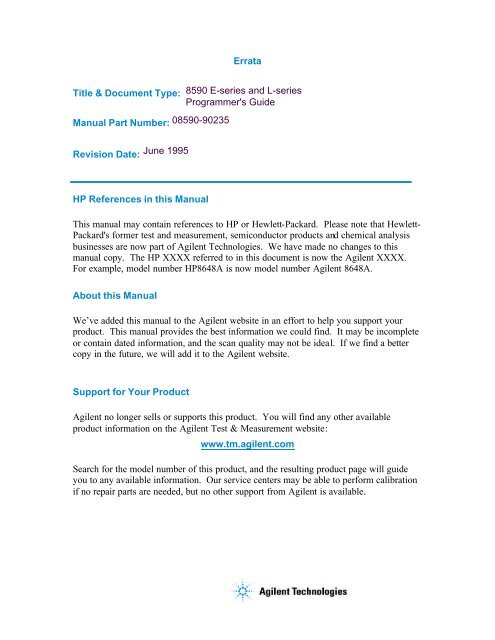
Title & Document Type:<br />
Manual Part Number:<br />
Revision Date:<br />
<strong>HP</strong> References in this Manual<br />
Errata<br />
This manual may contain references to <strong>HP</strong> or Hewlett-Packard. Please note that Hewlett-<br />
Packard's former test <strong>and</strong> measurement, semiconductor products <strong>and</strong> chemical analysis<br />
businesses are now part of Agilent Technologies. We have made no changes to this<br />
manual copy. The <strong>HP</strong> XXXX referred to in this document is now the Agilent XXXX.<br />
For example, model number <strong>HP</strong>8648A is now model number Agilent 8648A.<br />
About this Manual<br />
We’ve added this manual to the Agilent website in an effort to help you support your<br />
product. This manual provides the best information we could find. It may be incomplete<br />
or contain dated information, <strong>and</strong> the scan quality may not be ideal. If we find a better<br />
copy in the future, we will add it to the Agilent website.<br />
Support for Your Product<br />
Agilent no longer sells or supports this product. You will find any other available<br />
product information on the Agilent Test & Measurement website:<br />
www.tm.agilent.com<br />
Search for the model number of this product, <strong>and</strong> the resulting product page will guide<br />
you to any available information. Our service centers may be able to perform calibration<br />
if no repair parts are needed, but no other support from Agilent is available.
Programmer’s Guide<br />
<strong>HP</strong> <strong>8590</strong> E-<strong>Series</strong> <strong>and</strong> L-<strong>Series</strong><br />
<strong>Spectrum</strong> <strong>Analyzers</strong> <strong>and</strong><br />
<strong>HP</strong> <strong>8591C</strong> <strong>Cable</strong> <strong>TV</strong> Analyzer<br />
Did HEWLETT<br />
PACKARD<br />
<strong>HP</strong> Part No. 0<strong>8590</strong>-90235 Supersedes: 5962-5023<br />
Printed in USA June 1995
Notice.<br />
The information contained in this document is subject to change without notice.<br />
Hewlett-Packard makes no warranty of any kind with regard to this material, including<br />
but not limited to, the implied warranties of merchantability <strong>and</strong> fitness for a particular<br />
purpose. Hewlett-Packard shall not be liable for errors contained herein or for incidental or<br />
consequential damages in connection with the furnishing, performance, or use of this material.<br />
@ Copyright Hewlett-Packard Company 1992, 1993, 1994, 1995<br />
All Rights Reserved. Reproduction, adaptation, or translation without prior written permission<br />
is prohibited, except as allowed under the copyright laws.<br />
1400 Fountaingrove Parkway, Santa Rosa CA, 95403-1799, USA
Certification<br />
Hewlett-Packard Company certifies that this product met its published specifications at the<br />
time of shipment from the factory. Hewlett-Packard further certifies that its calibration<br />
measurements are traceable to the United States National Institute of St<strong>and</strong>ards <strong>and</strong><br />
Technology, to the extent allowed by the Institute’s calibration facility, <strong>and</strong> to the calibration<br />
facilities of other International St<strong>and</strong>ards Organization members.<br />
Regulatory Information<br />
The Calibration Guide shipped with your instrument contains the regulatory information.<br />
Warranty<br />
This Hewlett-Packard instrument product is warranted against defects in material <strong>and</strong><br />
workmanship for a period of one year from date of shipment. During the warranty period,<br />
Hewlett-Packard Company will, at its option, either repair or replace products which prove to<br />
be defective.<br />
For warranty service or repair, this product must be returned to a service facility designated by<br />
Hewlett-Packard. Buyer shall prepay shipping charges to Hewlett-Packard <strong>and</strong> Hewlett-Packard<br />
shall pay shipping charges to return the product to Buyer. However, Buyer shall pay all<br />
shipping charges, duties, <strong>and</strong> taxes for products returned to Hewlett-Packard from another<br />
country.<br />
Hewlett-Packard warrants that its software <strong>and</strong> firmware designated by Hewlett-Packard for<br />
use with an instrument will execute its programming instructions when properly installed on<br />
that instrument. Hewlett-Packard does not warrant that the operation of the instrument, or<br />
software, or firmware will be uninterrupted or error-free.<br />
LIMITATION OF WARRANTY<br />
The foregoing warranty shall not apply to defects resulting from improper or inadequate<br />
maintenance by Buyer, Buyer-supplied software or interfacing, unauthorized modification or<br />
misuse, operation outside of the environmental specifications for the product, or improper<br />
site preparation or maintenance.<br />
NO OTHER WARRANTY IS EXPRESSED OR IMPLIED. HEWLETT-PACKARD SPECIFICALLY<br />
DISCLAIMS THE IMPLIED WARRANTIES OF MERCHANTABILITY AND FITNESS FOR A<br />
PARTICULAR PURPOSE.<br />
EXCLUSIVE REMEDIES<br />
THE REMEDIES PROVIDED HEREIN ARE BUYER’S SOLE AND EXCLUSIVE REMEDIES.<br />
HEWLETT-PACKARD SHALL NOT BE LIABLE FOR ANY DIRECT, INDIRECT, SPECIAL,<br />
INCIDENTAL, OR CONSEQUENTIAL DAMAGES, WHETHER BASED ON CONTRACT, TORT,<br />
OR ANY OTHER LEGAL THEORY.<br />
. . .<br />
III
Assistance<br />
Product maintenance agreements <strong>and</strong> other customer assistance agreements are available for<br />
Hewlett-Rzckard products. For any assistance, contact your nearest Hewlett-Rzckard Sales <strong>and</strong><br />
Service Office.<br />
Safety Notes<br />
The following safety notes are used throughout this manual. Familiarize yourself with each of<br />
the notes <strong>and</strong> its meaning before operating this instrument.<br />
Caution Caution denotes a hazard. It calls attention to a procedure that, if not<br />
correctly performed or adhered to, would result in damage to or destruction<br />
of the instrument. Do not proceed beyond a caution sign until the indicated<br />
conditions are fully understood <strong>and</strong> met.<br />
Warning Warning denotes a hazard. It calls attention to a procedure which, if not<br />
correctly performed or adhered to, could result in injury or loss of life.<br />
Do not proceed beyond a warning note until the indicated conditions are<br />
fully understood <strong>and</strong> met.<br />
iv<br />
Instruction The instruction documentation symbol. The product is marked with this<br />
Manual symbol when it is necessary for the user to refer to the instruction in the<br />
manual.
General Safety Considerations<br />
Caution Before switching on this instrument, make sure that the line voltage selector<br />
switch is set to the voltage of the power supply <strong>and</strong> the correct fuse is<br />
installed.<br />
Warning This is a Safety Class I product (provided with a protective earthing<br />
ground incorporated in the power cord). The mains plug shall only be<br />
inserted in a socket outlet provided with a protective earth contact. Any<br />
interruption of the protective conductor, inside or outside the instrument,<br />
is likely to make the instrument dangerous. Intentional interruption is<br />
prohibited.<br />
Warning The opening of covers or removal of parts is likely to expose dangerous<br />
voltages. Disconnect the instrument from all voltage sources while it is<br />
being opened.<br />
Warning The power cord is connected to internal capacitors that may remain live<br />
for 10 seconds after disconnecting the plug from its power supply.<br />
Warning These servicing instructions are for use by qualified personnel only.<br />
To avoid electrical shock, do not perform any servicing unless you are<br />
qualified to do so.<br />
V
How to Use This Guide<br />
This guide uses the following conventions:<br />
Front-Panel Key] This represents a key physically located on the instrument.<br />
Sof tkq” This indicates a “softkey,” a key whose label is determined by the instrument’s<br />
firmware.<br />
Screen Text This indicates text displayed on the instrument’s screen.<br />
vi
<strong>HP</strong> <strong>8590</strong> D-<strong>Series</strong> <strong>and</strong> E-<strong>Series</strong> <strong>Spectrum</strong> Analyzer<br />
Documentation Description<br />
In addition to the programmer’s guide, the following guides are shipped with your spectrum<br />
analyzer:<br />
The Calibration Guide for your <strong>Spectrum</strong> Analyzer<br />
w Tells you how to test your spectrum analyzer to determine if the spectrum analyzer meets<br />
its specifications.<br />
<strong>HP</strong> <strong>8590</strong> E-<strong>Series</strong> <strong>and</strong> L-<strong>Series</strong> <strong>Spectrum</strong> Analyzer User’s Guide<br />
� Tells you how to make measurements with your spectrum analyzer.<br />
� Describes the spectrum analyzer features.<br />
� Tells you what to do in case of a failure.<br />
<strong>HP</strong> <strong>8590</strong> E-<strong>Series</strong> <strong>and</strong> L.-<strong>Series</strong> <strong>Spectrum</strong> Analyzer Quick Reference Guide<br />
w Describes how to make a simple measurement with your spectrum analyzer.<br />
� Briefly describes the spectrum analyzer functions.<br />
w Lists all the programming comm<strong>and</strong>s.<br />
<strong>HP</strong> <strong>8591C</strong> <strong>Cable</strong> <strong>TV</strong> Analyzer Documentation Description<br />
In addition to the programmer’s guide, the following guides are shipped with your cable <strong>TV</strong><br />
analyzer:<br />
<strong>HP</strong> <strong>8590</strong> E-<strong>Series</strong> <strong>Spectrum</strong> <strong>Analyzers</strong> <strong>and</strong> <strong>HP</strong> 8591 C <strong>Cable</strong> <strong>TV</strong> Analyzer Calibration Guide<br />
w Tells you how to test your spectrum analyzer to determine if the spectrum analyzer meets<br />
its specifications.<br />
<strong>HP</strong> <strong>8591C</strong> <strong>Cable</strong> <strong>TV</strong> Analyzer User’s Guides<br />
<strong>Cable</strong> <strong>TV</strong> Measurements<br />
w Tells you how to make cable <strong>TV</strong> measurements with your analyzer.<br />
w Describes the cable <strong>TV</strong> analyzer mode features.<br />
<strong>Spectrum</strong> Analyzer Reference<br />
w Tells you how to make measurements using the spectrum analyzer mode.<br />
w Describes the spectrum analyzer mode features.<br />
� Tells you what to do in case of a failure.<br />
<strong>HP</strong> <strong>8591C</strong> <strong>Cable</strong> <strong>TV</strong> Analyzer Getting Started <strong>and</strong> Quick Reference Guide<br />
w Describes how to make a simple measurement with your spectrum analyzer.<br />
w Briefly describes the cable <strong>TV</strong> <strong>and</strong> spectrum analyzer functions.<br />
w Provides a quick reference for cable <strong>TV</strong> <strong>and</strong> spectrum analyzer softkeys.<br />
vii
Contents<br />
1. Preparing for Use<br />
What You’ll Learn in This Chapter . . . . . . . . . . . . . . . . . . . . . .<br />
Connecting Your <strong>Spectrum</strong> Analyzer to a Computer . . . . . . . . . . . . .<br />
Configuring Your Computer System . . . . . . . . . . . . . . . . . . . . .<br />
Connecting the Computer to the <strong>Spectrum</strong> Analyzer . . . . . . . . . . . . .<br />
For the <strong>HP</strong>-IB Interface . . . . . . . . . . . . . . . . . . . . . . . . .<br />
For the RS-232 Interface . . . . . . . . . . . . . . . . . . . . . . . . .<br />
The Test Program . . . . . . . . . . . . . . . . . . . . . . . . . . . . .<br />
<strong>HP</strong>-IB Connections for the <strong>HP</strong> 9000 <strong>Series</strong> 200 Technical Computers . . . . . . .<br />
Equipment . . . . . . . . . . . . . . . . . . . . . . . . . . . . . . . .<br />
Interconnection Instructions . . . . . . . . . . . . . . . . . . . . . . . .<br />
Test Program . . . . . . . . . . . . . . . . . . . . . . . . . . . . . . .<br />
<strong>HP</strong>-IB Connections for the <strong>HP</strong> 9000 <strong>Series</strong> 300 Technical Computers . . . . . . .<br />
Equipment . . . . . . . . . . . . . . . . . . . . . . . . . . . . . . . .<br />
Interconnection Instructions . . . . . . . . . . . . . . . . . . . . . . . .<br />
Test Program . . . . . . . . . . . . . . . . . . . . . . . . . . . . . . .<br />
<strong>HP</strong>-IB Connections for the <strong>HP</strong> Vectra Personal Computer . . . . . . . . . . . .<br />
Equipment . . . . . . . . . . . . . . . . . . . . . . . . . . . . . . . .<br />
Interconnection Instructions . . . . . . . . . . . . . . . . . . . . . . . .<br />
Test Program . . . . . . . . . . . . . . . . . . . . . . . . . . . . . . .<br />
RS-232 Connections for the <strong>HP</strong> Vectra or IBM PC/AT Personal Computer . . . .<br />
Equipment . . . . . . . . . . . . . . . . . . . . . . . . . . . . . . . .<br />
Interconnection Instructions . . . . . . . . . . . . . . . . . . . . . . . .<br />
Test Program . . . . . . . . . . . . . . . . . . . . . . . . . . . . . . .<br />
Printing or Plotting . . . . . . . . . . . . . . . . . . . . . . . . . . . . .<br />
Printing Using an <strong>HP</strong>-IB Interface . . . . . . . . . . . . . . . . . . . . . .<br />
Equipment . . . . . . . . . . . . . . . . . . . . . . . . . . . . . . .<br />
Interconnection <strong>and</strong> Printing Instructions . . . . . . . . . . . . . . . . . .<br />
Plotting Using an <strong>HP</strong>-IB Interface . . . . . . . . . . . . . . . . . . . . . .<br />
Equipment . . . . . . . . . . . . . . . . . . . . . . . . . . . . . . .<br />
Interconnection <strong>and</strong> Plotting Instructions . . . . . . . . . . . . . . . . . .<br />
Printing Using an RS-232 Interface . . . . . . . . . . . . . . . . . . . . .<br />
Equipment . . . . . . . . . . . . . . . . . . . . . . . . . . . . . . .<br />
Interconnection <strong>and</strong> Printing Instructions . . . . . . . . . . . . . . . . . .<br />
Plotting Using an RS-232 Interface . . . . . . . . . . . . . . . . . . . . .<br />
Equipment . . . . . . . . . . . . . . . . . . . . . . . . . . . . . . .<br />
Interconnection <strong>and</strong> Plotting Instructions . . . . . . . . . . . . . . . . . .<br />
Printing after Plotting or Plotting after Printing . . . . . . . . . . . . . . .<br />
Printing Using a Parallel Interface . . . . . . . . . . . . . . . . . . . . .<br />
Equipment . . . . . . . . . . . . . . . . . . . . . . . . . . . . . . .<br />
Interconnection <strong>and</strong> Printing Instructions . . . . . . . . . . . . . . . . . .<br />
Plotting to an <strong>HP</strong> LaserJet Printer . . . . . . . . . . . . . . . . . . . . .<br />
Equipment . . . . . . . . . . . . . . . . . . . . . . . . . . . . . . .<br />
Interconnection <strong>and</strong> Plotting Instructions . . . . . . . . . . . . . . . . . .<br />
Printing after Plotting or Plotting after Printing . . . . . . . . . . . . . . .<br />
If There Is a Problem . . . . . . . . . . . . . . . . . . . . . . . . . . . .<br />
l-l<br />
l-l<br />
l-l<br />
l-2<br />
l-2<br />
l-2<br />
l-2<br />
l-3<br />
l-3<br />
l-3<br />
l-4<br />
1-5<br />
1-5<br />
1-5<br />
l-6<br />
l-7<br />
l-7<br />
l-7<br />
1-8<br />
l-9<br />
l-9<br />
l-9<br />
l-10<br />
l-11<br />
l-11<br />
l-11<br />
l-11<br />
1-14<br />
1-14<br />
1-14<br />
1-16<br />
1-16<br />
1-16<br />
1-18<br />
1-18<br />
1-18<br />
1-19<br />
l-20<br />
l-20<br />
l-20<br />
l-22<br />
l-22<br />
l-22<br />
l-23<br />
l-24<br />
Contents-l
2. Writing a Program<br />
What You’ll Learn in This Chapter . . . . . . . . . . . . . . . . . . . . . . 2-l<br />
Writing Your First Program . . . . . . . . . . . . . . . . . . . . . . . . . . 2-2<br />
Composing the Program . . . . . . . . . . . . . . . . . . . . . . . . . . 2-2<br />
Program Example for the <strong>HP</strong>-IB Interface . . . . . . . . . . . . . . . . . . 2-2<br />
Program Example for the RS-232 Interface . . . . . . . . . . . . . . . . . 2-3<br />
Modifying the Program . . . . . . . . . . . . . . . . . . . . . . . . . . . . 2-4<br />
Program Example for the <strong>HP</strong>-IB Interface . . . . . . . . . . . . . . . . . . 2-4<br />
Program Example for the RS-232 Interface . . . . . . . . . . . . . . . . . 2-5<br />
Enhancing the Program with Variables . . . . . . . . . . . . . . . . . . . . 2-6<br />
Program Example for the <strong>HP</strong>-IB Interface . . . . . . . . . . . . . . . . . . 2-6<br />
Program Example for the RS-232 Interface . . . . . . . . . . . . . . . . . 2-7<br />
Getting Information from the <strong>Spectrum</strong> Analyzer . . . . . . . . . . . . . . . 2-8<br />
Program Example for the <strong>HP</strong>-IB Interface . . . . . . . . . . . . . . . . . . 2-8<br />
Program Example for the RS-232 Interface . . . . . . . . . . . . . . . . . 2-9<br />
Programming Guidelines . . . . . . . . . . . . . . . . . . . . . . . . . . . 2-10<br />
3. Programming Topics<br />
What You’ll Learn in This Chapter . . . . . . . . . . . . . . . . . . . . . . 3-l<br />
Controlling Trace Data with a Computer . . . . . . . . . . . . . . . . . . .<br />
Reading Trace Data . . . . . . . . . . . . . . . . . . . . . . . . . . . .<br />
Program Example for the <strong>HP</strong>-IB Interface . . . . . . . . . . . . . . . . . .<br />
Program Example for the RS-232 Interface . . . . . . . . . . . . . . . . .<br />
Saving Trace Data . . . . . . . . . . . . . . . . . . . . . . . . . . . . . .<br />
Program Example for the RS-232 Interface . . . . . . . . . . . . . . . . .<br />
Reading Trace Data from a Computer Disk . . . . . . . . . . . . . . . . . .<br />
Program Example for the <strong>HP</strong>-IB Interface . . . . . . . . . . . . . . . . . .<br />
Program Example for the RS-232 Interface . . . . . . . . . . . . . . . . .<br />
3-2<br />
3-2<br />
3-2<br />
3-3<br />
3-4<br />
3-5<br />
3-6<br />
3-6<br />
3-6<br />
Saving <strong>and</strong> Recalling Instrument States . . . . . . . . . . . . . . . . . . . . 3-7<br />
Saving the <strong>Spectrum</strong> Analyzer’s State . . . . . . . . . . . . . . . . . . . . 3-7<br />
Program Example for the <strong>HP</strong>-IB Interface . . . . . . . . . . . . . . . . . . 3-8<br />
Program Example for the RS-232 Interface . . . . . . . . . . . . . . . . .<br />
Returning the <strong>Spectrum</strong> Analyzer to its Former State . . . . . . . . . . . . .<br />
3-10<br />
3-12<br />
Program Example for the <strong>HP</strong>-IB Interface . . . . . . . . . . . . . . . . . . 3-12<br />
Program Example for the RS-232 Interface . . . . . . . . . . . . . . . . .<br />
Measuring Harmonic Distortion . . . . . . . . . . . . . . . . . . . . . . . .<br />
3-13<br />
3-15<br />
Program Example for the <strong>HP</strong>-IB Interface . . . . . . . . . . . . . . . . . . 3-15<br />
Program Example for the RS-232 Interface . . . . . . . . . . . . . . . . .<br />
Different Formats for Trace Data Transfers . . . . . . . . . . . . . . . . . .<br />
3-18<br />
3-20<br />
P Format . . . . . . . . . . . . . . . . . . . . . . . . . . . . . . . . . 3-20<br />
Example of Using the P Format . . . . . . . . . . . . . . . . . . . . . . 3-21<br />
B Format . . . . . . . . . . . . . . . . . . . . . . . . . . . . . . . . . 3-22<br />
Example of Using the B Format . . . . . . . . . . . . . . . . . . . . . . 3-22<br />
A-Block Format . . . . . . . . . . . . . . . . . . . . . . . . . . . . . . 3-24<br />
Example of Using the A-Block Format . . . . . . . . . . . . . . . . . . . 3-24<br />
I-Block Format . . . . . . . . . . . . . . . . . . . . . . . . . . . . . . . 3-25<br />
Example of Using the I-Block Format . . . . . . . . . . . . . . . . . . . 3-25<br />
M Format t . . . . . . . . . . . . . . . . . . . . . . . . . . . . . . . . . 3-26<br />
Example of Using the M Format . . . . . . . . . . . . . . . . . . . . . 3-27<br />
Contents-2
4. Creating <strong>and</strong> Using Downloadable Programs<br />
What You’ll Learn in This Chapter . . . . . . . . . . . . . . . . . . . . . . 4-l<br />
WhatisaDLP? . . . . . . . . . . . . . . . . . . . . . . . . . . . . . . 4-l<br />
WhyUseaDLP?. . . . . . . . . . . . . . . . . . . . . . . . . . . . . . 4-l<br />
Creating a DLP . . . . . . . . . . . . . . . . . . . . . . . . . . . . . . . 4-2<br />
‘Ib Use a User-Defined Function within a DLP . . . . . . . . . . . . . . . . 4-3<br />
Example . . . . . . . . . . . . . . . . . . . . . . . . . . . . . . . . 4-3<br />
To Use a User-Defined Variable within a DLP . . . . . . . . . . . . . . . . 4-4<br />
Example . . . . . . . . . . . . . . . . . . . . . . . . . . . . . . . . 4-4<br />
To Use a User-Defined Trace within a DLP . . . . . . . . . . . . . . . . . . 4-5<br />
Example . . . . . . . 4-5<br />
To Enter Values’into a*DLP 1 : 1 1 1 1 1 1 1 : 1 1 1 1 1 1 1 : . . . . . . . 4-6<br />
Example . . . . . . . . . . . . . . . . . . . . . . . . . . . . . . . . 4-6<br />
To Enter Values into a DLP by Using a Softkey . . . . . . . . . . . . . . . 4-6<br />
Example . . . . . . . . . . . . . . . . . . . . . . . . . . . . . . . . 4-6<br />
To Create a Modular DLP . . . . . . . . . . . . . . . . . . . . . . . . . . 4-7<br />
Example . . . . . . . . . . . . . . . . . . . . . . . . . . . . . . . . 4-7<br />
Executing a DLP . . . . . . . . . . . . . . . . . . . . . . . . . . . . . . . 4-9<br />
To Execute a DLP by Using a Softkey . . . . . . . . . . . . . . . . . . . . 4-9<br />
Example . . . . . . . . . . . . . . . . . . . . . . . . . . . . . . . . 4-9<br />
To Execute the DLP within a Program . . . . . . . . . . . . . . . . . . . 4-9<br />
Example . . . . . . . . . . . . . . . . . . . . . . . . . . . . . . . . 4-9<br />
StoringDLPsonaRAMCard . . . . . . . . . . . . . . . . . . . . . . . . . 4-10<br />
‘IbStoreDLPsonaRAMCard . . . . . . . . . . . . . . . . . . . . . . . 4-10<br />
Example . . . . . . . . . . . . . . . . . . . . . . . . . . . . . . . . 4-10<br />
To Load DLPs from a Memory Card into Analyzer Memory . . . . . . . . . . 4-11<br />
Example . . . . . . . . . . . . . . . . . . . . . . . . . . . . . . . . 4-11<br />
Determining the Amount of Memory Needed for a DLP . . . . . . . . . . . . 4-12<br />
‘lb Determine Available Analyzer Memory . . . . . . . . . . . . . . . . . . 4-12<br />
Example . . . . . . . . . . . . . . . . . . . . . . . . . . . . . . . . 4-12<br />
To Determine the Amount of Space on a RAM Card . . . . . . . . . . . . . 4-12<br />
Example . . . . . . . . . . . . . . . . . . . . . . . . . . . . . . . . 4-13<br />
To Delete a DLP from <strong>Spectrum</strong> Analyzer Memory . . . . . . . . . . . . . . 4-14<br />
Example . . . . . . . . . . . . . . . 4-14<br />
To Erase the DLP’frbm a RAM’&rd : : : : : : . . . . . . . . . . . . . . . 4-14<br />
Example . . . . . . . . . . . . . . . . . . . . . . . . . . . . . . . . 4-14<br />
Using the DLP Editor . . . . . . . . . . . . . . . . . . . . . . . . . . . . 4-15<br />
To Connect the External Keyboard to the <strong>Spectrum</strong> Analyzer . . . . . . . . . 4-15<br />
‘lb Access the DLP Editor . . . . . . . . . . . . . . . . . . . . . . . . . . 4-16<br />
‘IbCreateaDLP . . . . . . . . . . . . . . . . . . . . . . . . . . . . . . 4-17<br />
To Modify the DLP . . . . . . . . . . . . . . . . . . . . . . . . . . . . . 4-18<br />
To Modify a Catalog Item . . . . . . . . . . . . . . . . . . . . . . . . . . 4-19<br />
DLP Programming Guidelines . . . . . . . . . . . . . . . . . . . . . . . . . 4-20<br />
To Make the DLP More Readable . . . . . . . . . . . . . . . . . . . . . . 4-20<br />
ToFindProblemsinaDLP . . . . . . . . . . . . . . . . . . . . . . . . . 4-20
5. Programming Comm<strong>and</strong>s<br />
What You’ll Learn in This Chapter . . . . . . . . . . . . . . . . . . . . . .<br />
Syntax Conventions . . . . . . . . . . . . . . . . . . . . . . . . . . . . .<br />
ABORT Abort . . . . . . . . . . . . . . . . . . . . . . . . . . . . . . .<br />
ABS Absolute . . . . . . . . . . . . . . . . . . . . . . . . . . . . . . .<br />
ACP Adjacent Channel Power . . . . . . . . . . . . . . . . . . . . . . . .<br />
ACPBW Channel B<strong>and</strong>width . . . . . . . . . . . . . . . . . . . . . . . .<br />
ACPCONTM Continuous Sweep Measurement . . . . . . . . . . . . . . . .<br />
ACPE Adjacent Channel Power Extended . . . . . . . . . . . . . . . . . .<br />
ACPGR Adjacent Channel Power Graph On or Off . . . . . . . . . . . . . .<br />
ACPGRAPH Compute the Adjacent Channel Power Graph . . . . . . . . . .<br />
ACPMK Adjacent Channel Power Marker On or Off. . . . . . . . . . . . . .<br />
ACPPAR ACP Manual or Auto . . . . . . . . . . . . . . . . . . . . . . .<br />
ACPSNGLM Single Sweep Measurement . . . . . . . . . . . . . . . . . . .<br />
ACPSP Channel Spacing . . . . . . . . . . . . . . . . . . . . . . . . . .<br />
ACTDEF Active Function Definition . . . . . . . . . . . . . . . . . . . . .<br />
AC<strong>TV</strong>F Active Function . . . . . . . . . . . . . . . . . . . . . . . . . .<br />
ADD Add . . . . . . . . . . . . . . . . . . . . . . . . . . . . . . . . .<br />
AMB Trace A Minus Trace B . . . . . . . . . . . . . . . . . . . . . . . .<br />
AMBPL Trace A Minus Trace B Plus Display Line . . . . . . . . . . . . . .<br />
AMPCOR Amplitude Correction . . . . . . . . . . . . . . . . . . . . . . .<br />
AMPLEN Amplitude Correction Length . . . . . . . . . . . . . . . . . . .<br />
ANLGPLUS Analog Plus . . . . . . . . . . . . . . . . . . . . . . . . . .<br />
ANNOT Annotation . . . . . . . . . . . . . . . . . . . . . . . . . . . .<br />
APB Trace A Plus Trace B . . . . . . . . . . . . . . . . . . . . . . . . .<br />
AT Attenuation . . . . . . . . . . . . . . . . . . . . . . . . . . . . . .<br />
AUNITS Amplitude Units . . . . . . . . . . . . . . . . . . . . . . . . . .<br />
AUTO Auto Couple . . . . . . . . . . . . . . . . . . . . . . . . . . . . .<br />
AVG Average . . . . . . . . . . . . . . . . . . . . . . . . . . . . . . .<br />
AXB Exchange Trace A <strong>and</strong> Trace B . . . . . . . . . . . . . . . . . . . .<br />
BAUDRATE Baud Rate of <strong>Spectrum</strong> Analyzer . . . . . . . . . . . . . . . .<br />
BITBit . . . . . . . . . . . . . . . . . . . . . . . . . . . . . . . . . .<br />
BITF Bit Flag . . . . . . . . . . . . . . . . . . . . . . . . . . . . . . .<br />
BLANK Blank Trace . . . . . . . . . . . . . . . . . . . . . . . . . . . .<br />
BML Trace B Minus Display Line . . . . . . . . . . . . . . . . . . . . . .<br />
BTC Transfer Trace B to Trace C . . . . . . . . . . . . . . . . . . . . . .<br />
BXC Trace B Exchange Trace C . . . . . . . . . . . . . . . . . . . . . . .<br />
CAL Calibration . . . . . . . . . . . . . . . . . . . . . . . . . . . . . .<br />
CAT Catalog . . . . . . . . . . . . . . . . . . . . . . . . . . . . . . . .<br />
CF Center Frequency . . . . . . . . . . . . . . . . . . . . . . . . . . .<br />
C<strong>HP</strong> Channel Power . . . . . . . . . . . . . . . . . . . . . . . . . . . .<br />
C<strong>HP</strong>GR Channel Power Graph On or Off . . . . . . . . . . . . . . . . . . .<br />
CLRAVG Clear Average . . . . . . . . . . . . . . . . . . . . . . . . . . .<br />
CLRBOX Clear Box . . . . . . . . . . . . . . . . . . . . . . . . . . . .<br />
CLRDSP Clear Display . . . . . . . . . . . . . . . . . . . . . . . . . . .<br />
CLRW Clear Write . . . . . . . . . . . . . . . . . . . . . . . . . . . . .<br />
CLS Clear Status Byte . . . . . . . . . . . . . . . . . . . . . . . . . . .<br />
CMDERRQ Comm<strong>and</strong> Error Query . . . . . . . . . . . . . . . . . . . . .<br />
CNF Confidence Test . . . . . . . . . . . . . . . . . . . . . . . . . . . .<br />
CNTLA Auxiliary Interface Control Line A . . . . . . . . . . . . . . . . .<br />
CNTLB Auxiliary Interface Control Line B . . . . . . . . . . . . . . . . . .<br />
CNTLC Auxiliary Interface Control Line C . . . . . . . . . . . . . . . . . .<br />
CNTLD Auxiliary Interface Control Line D . . . . . . . . . . . . . . . . .<br />
CNTLI Auxiliary Interface Control Line Input . . . . . . . . . . . . . . . .<br />
COMBComb . . . . . . . . . . . . . . . . . . . . . . . . . . . . . . . .<br />
Contents-4<br />
5-l<br />
5-2<br />
5-29<br />
5-31<br />
5-33<br />
5-35<br />
5-37<br />
5-38<br />
5-40<br />
5-42<br />
5-43<br />
5-44<br />
5-46<br />
5-47<br />
5-49<br />
5-54<br />
5-55<br />
5-57<br />
5-60<br />
5-62<br />
5-64<br />
5-65<br />
5-67<br />
5-68<br />
5-69<br />
5-71<br />
5-72<br />
5-73<br />
5-75<br />
5-76<br />
5-78<br />
5-80<br />
5-82<br />
5-83<br />
5-84<br />
5-85<br />
5-86<br />
5-89<br />
5-93<br />
5-95<br />
5-97<br />
5-98<br />
5-99<br />
5-101<br />
5-102<br />
5-103<br />
5-104<br />
5-105<br />
5-106<br />
5-107<br />
5-108<br />
5-109<br />
5-110<br />
5-111
COMPRESS Compress Trace . . . . . . . . . . . . . . . . . . . . . . . .<br />
CONCAT Concatenate . . . . . . . . . . . . . . . . . . . . . . . . . . .<br />
CONTS Continuous Sweep . . . . . . . . . . . . . . . . . . . . . . . . .<br />
CORREK Correction Factors On . . . . . . . . . . . . . . . . . . . . . . .<br />
COUPLE Couple . . . . . . . . . . . . . . . . . . . . . . . . . . . . . .<br />
CRT<strong>HP</strong>OS Horizontal Position of CRT Display . . . . . . . . . . . . . . . .<br />
CR<strong>TV</strong>POS Vertical Position of CRT Display . . . . . . . . . . . . . . . . . .<br />
CTA Convert to Absolute Units . . . . . . . . . . . . . . . . . . . . . . .<br />
CTM Convert to Measurement Units . . . . . . . . . . . . . . . . . . . .<br />
DA Display Address . . . . . . . . . . . . . . . . . . . . . . . . . . . .<br />
DATEMODE Date Mode . . . . . . . . . . . . . . . . . . . . . . . . . .<br />
DEMOD Demodulation . . . . . . . . . . . . . . . . . . . . . . . . . . .<br />
DET Detection Mode . . . . . . . . . . . . . . . . . . . . . . . . . . . .<br />
DISPOSE Dispose . . . . . . . . . . . . . . . . . . . . . . . . . . . . .<br />
DIV Divide . . . . . . . . . . . . . . . . . . . . . . . . . . . . . . . .<br />
DL Display Line . . . . . . . . . . . . . . . . . . . . . . . . . . . . . .<br />
DN Down . . . . . . . . . . . . . . . . . . . . . . . . . . . . . . . . .<br />
DONE Done . . . . . . . . . . . . . . . . . . . . . . . . . . . . . . . .<br />
DOTDENS Dot Density . . . . . . . . . . . . . . . . . . . . . . . . . . .<br />
DRAWBOX Draw Box . . . . . . . . . . . . . . . . . . . . . . . . . . .<br />
DSPLY Display . . . . . . . . . . . . . . . . . . . . . . . . . . . . . . .<br />
DT Define Terminator . . . . . . . . . . . . . . . . . . . . . . . . . . .<br />
EE Enable Entry . . . . . . . . . . . . . . . . . . . . . . . . . . . . .<br />
EK Enable Knob . . . . . . . . . . . . . . . . . . . . . . . . . . . . . .<br />
ENTER Enter From <strong>HP</strong>-IB . . . . . . . . . . . . . . . . . . . . . . . . .<br />
EP Enter Parameter Function . . . . . . . . . . . . . . . . . . . . . . .<br />
ERASE Erase . . . . . . . . . . . . . . . . . . . . . . . . . . . . . . .<br />
EXP Exponent. . . . . . . . . . . . . . . . . . . . . . . . . . . . . . .<br />
FA Start Frequency . . . . . . . . . . . . . . . . . . . . . . . . . . . .<br />
FB Stop Frequency . . . . . . . . . . . . . . . . . . . . . . . . . . . .<br />
FFT Fast Fourier Transform . . . . . . . . . . . . . . . . . . . . . . . .<br />
FFTAUTO Marker to Auto FFT . . . . . . . . . . . . . . . . . . . . . . .<br />
FFTCLIP FFl’ Signal Clipped . . . . . . . . . . . . . . . . . . . . . . . .<br />
FFTCONTS FFT Continuous Sweep . . . . . . . . . . . . . . . . . . . . .<br />
FFTMKR FFT Markers . . . . . . . . . . . . . . . . . . . . . . . . . . .<br />
FFTMM FFT Marker to Midscreen . . . . . . . . . . . . . . . . . . . . . .<br />
FFTMS FFT Marker to FFT Stop Frequency . . . . . . . . . . . . . . . . .<br />
FFTOFFFFTOff . . . . . . . . . . . . . . . . . . . . . . . . . . . . . .<br />
FFTPCTAM FFT Percent Amplitude Modulation . . . . . . . . . . . . . . .<br />
FFTPCTAMR FFT Percent Amplitude Modulation Readout . . . . . . . . . .<br />
FFTSNGLS FFT Single Sweep . . . . . . . . . . . . . . . . . . . . . . . .<br />
FFTSTAT FFT Status . . . . . . . . . . . . . . . . . . . . . . . . . . . .<br />
FFTSTOP FFT Stop Frequency . . . . . . . . . . . . . . . . . . . . . . .<br />
FMGAIN FM Gain . . . . . . . . . . . . . . . . . . . . . . . . . . . . .<br />
FOFFSET Frequency Offset . . . . . . . . . . . . . . . . . . . . . . . . .<br />
FORMAT Format Card . . . . . . . . . . . . . . . . . . . . . . . . . . .<br />
FS Full Span. . . . . . . . . . . . . . . . . . . . . . . . . . . . . . . .<br />
FUNCDEF Define Function . . . . . . . . . . . . . . . . . . . . . . . . .<br />
GATEGate . . . . . . . . . . . . . . . . . . . . . . . . . . . . . . . .<br />
GATECTL Gate Control . . . . . . . . . . . . . . . . . . . . . . . . . . .<br />
GC Gate Preset . . . . . . . . . . . . . . . . . . . . . . . . . . . . . .<br />
GD Gate Delay. . . . . . . . . . . . . . . . . . . . . . . . . . . . . . .<br />
GDRVCLPAR Clear Pulse Parameters . . . . . . . . . . . . . . . . . . . .<br />
GDRVGDEL Gate Delay for the Frequency Window . . . . . . . . . . . . .<br />
GDRVGLEN Gate Length for the Frequency <strong>and</strong> Time Windows . . . . . . .<br />
5-112<br />
5-114<br />
5-116<br />
5-117<br />
5-118<br />
5-119<br />
5-120<br />
5-121<br />
5-123<br />
5-124<br />
5-127<br />
5-128<br />
5-129<br />
5-131<br />
5-133<br />
5-135<br />
5-137<br />
5-138<br />
5-140<br />
5-141<br />
5-143<br />
5-145<br />
5-146<br />
5-148<br />
5-149<br />
5-151<br />
5-152<br />
5-153<br />
5-156<br />
5-158<br />
5-160<br />
5-164<br />
5-166<br />
5-167<br />
5-168<br />
5-169<br />
5-170<br />
5-171<br />
5-172<br />
5-173<br />
5-174<br />
5-176<br />
5-177<br />
5-179<br />
5-180<br />
5-182<br />
5-183<br />
5-184<br />
5-186<br />
5-187<br />
5-188<br />
5-189<br />
5-190<br />
5-191<br />
5-193<br />
Contents-5
Contents.6<br />
GDRVGT Window Gate Control . . . . . . . . . . . . . . . . . . . . . . . 5-194<br />
GDRVGTIM Gate Trigger to Marker Position for the Time Window . . . . . . 5-196<br />
GDRVPRI Pulse Repetition Interval . . . . . . . . . . . . . . . . . . . . . 5-198<br />
GDRVPWID Pulse Width . . . . . . . . . . . . . . . . . . . . . . . . . . 5-200<br />
GDRVRBW Couple Resolution B<strong>and</strong>width to Pulse Width . . . . . . . . . . . 5-202<br />
GDRVREFE Enter Reference Edge . . . . . . . . . . . . . . . . . . . . . 5-204<br />
GDRVST Couple Sweep Time to Pulse Repetition Interval . . . . . . . . . . 5-206<br />
GDRVSWAP Update the Time or Frequency Window . . . . . . . . . . . . . 5-208<br />
GDRVSWDE Delay Sweep for Time Window . . . . . . . . . . . . . . . . . 5-209<br />
GDRVSWP Sweep Time for the Time Window . . . . . . . . . . . . . . . . 5-211<br />
GDRVUTIL Gate Utility . . . . . . . . . . . . . . . . . . . . . . . . . . 5-213<br />
GDRVVBW Couple Video B<strong>and</strong>width to Gate Length . . . . . . . . . . . . . 5-215<br />
GETPLOT Get Plot . . . . . . . . . . . . . . . . . . . . . . . . . . . . . 5-217<br />
GETPRNT Get Print . . . . . . . . . . . . . . . . . . . . . . . . . . . . 5-219<br />
GL Gate Length . . . . . . . . . . . . . . . . . . . . . . . . . . . . . . 5-221<br />
GP Gate Polarity . . . . . . . . . . . . . . . . . . . . . . . . . . . . . .<br />
5-222<br />
GRGraph . . . . . . . . . . . . . . . . . . . . . . . . . . . . . . . . . 5-223<br />
GRAT Graticule . . . . . . . . . . . . . . . . . . . . . . . . . . . . . . 5-224<br />
HAVE Have . . . . . . . . . . . . . . . . . . . . . . . . . . . . . . . . 5-225<br />
HD Hold Data Entry . . . . . . . . . . . . . . . . . . . . . . . . . . . . 5-228<br />
HN Harmonic Number . . . . . . . . . . . . . . . . . . . . . . . . . . . 5-229<br />
HNLOCK Harmonic Number Lock . . . . . . . . . . . . . . . . . . . . . . 5-230<br />
HNUNLK Unlock Harmonic Number . . . . . . . . . . . . . . . . . . . . 5-233<br />
IBInputB. . . . . . . . . . . . . . . . . . . . . . . . . . . . . . . . .<br />
5-234<br />
ID Identify . . . . . . . . . . . . . . . . . . . . . . . . . . . . . . . . 5-235<br />
IF THEN ELSE ENDIF If Then Else Endif . . . . . . . . . . . . . . . . . . 5-236<br />
INT Integer . . . . . . . . . . . . . . . . . . . . . . . . . . . . . . . . 5-239<br />
INZ Input Impedance . . . . . . . . . . . . . . . . . . . . . . . . . . . 5-241<br />
IP Instrument Preset . . . . . . . . . . . . . . . . . . . . . . . . . . . .<br />
5-242<br />
KEYCLR Key Clear. . . . . . . . . . . . . . . . . . . . . . . . . . . . . 5-246<br />
KEYCMD Key Comm<strong>and</strong> . . . . . . . . . . . . . . . . . . . . . . . . . . 5-247<br />
KEYDEF User-Defined Key Definition . . . . . . . . . . . . . . . . . . . . 5-251<br />
KEYENH Key Enhance. . . . . . . . . . . . . . . . . . . . . . . . . . . 5-255<br />
KEYEXC Key Execute . . . . . . . . . . . . . . . . . . . . . . . . . . . 5-260<br />
KEYLBL Key Label . . . . . . . . . . . . . . . . . . . . . . . . . . . . 5-261<br />
LBLabel . . . . . . . . . . . . . . . . . . . . . . . . . . . . . . . . . 5-263<br />
LF Base B<strong>and</strong> Instrument Preset . . . . . . . . . . . . . . . . . . . . . . 5-267<br />
LG Logarithmic Scale . . . . . . . . . . . . . . . . . . . . . . . . . . . 5-268<br />
LIMIDEL Delete Limit-Line ‘lhble . . . . . . . . . . . . . . . . . . . . . . 5-269<br />
LIMIDISP Limit Line Display . . . . . . . . . . . . . . . . . . . . . . . . . 5-270<br />
LIMIFAIL Limits Failed . . . . . . . . . . . . . . . . . . . . . . . . . . .<br />
5-272<br />
LIMIFT Select Frequency or Time Limit Line . . . . . . . . . . . . . . . . 5-274<br />
LIMIHI Upper Limit . . . . . . . . . . . . . . . . . . . . . . . . . . . . 5-275<br />
LIMILINE Limit Lines . . . . . . . . . . . . . . . . . . . . . . . . . . . 5-276<br />
LIMILO Lower Limit . . . . . . . . . . . . . . . . . . . . . . . . . . . .<br />
5-279<br />
LIMIMIRROR Mirror Limit Line . . . . . . . . . . . . . . . . . . . . . . . 5-280<br />
LIMIMODE Limit-Line Entry Mode . . . . . . . . . . . . . . . . . . . . . 5-281<br />
LIMIREL Relative Limit Lines . . . . . . . . . . . . . . . . . . . . . . . 5-283<br />
LIMISEG Enter Limit-Line Segment for Frequency . . . . . . . . . . . . . . 5-285<br />
LIMISEGT Enter Limit-Line Segment for Sweep Time . . . . . . . . . . . . 5-288<br />
LIMITEST Enable Limit Line Testing . . . . . . . . . . . . . . . . . . . . 5-291<br />
LINFILL Line Fill . . . . . . . . . . . . . . . . . . . . . . . . . . . . . 5-293<br />
LN Linear Scale . . . . . . . . . . . . . . . . . . . . . . . . . . . . . . 5-295<br />
LOAD Load . . . . . . . . . . . . . . . . . . . . . . . . . . . . . . . . 5-296<br />
LOG Logarithm . . . . . . . . . . . . . . . . . . . . . . . . . . . . . . 5-298
LSPAN Last Span . . . . . . . . . . . . . . . . . . . . . . . . . . . . .<br />
MDS Measurement Data Size . . . . . . . . . . . . . . . . . . . . . . . .<br />
MDU Measurement Data Units . . . . . . . . . . . . . . . . . . . . . . .<br />
MEAN Trace Mean . . . . . . . . . . . . . . . . . . . . . . . . . . . . .<br />
MEANTH Trace Mean Above Threshold . . . . . . . . . . . . . . . . . . .<br />
MEASOFF Measurement Off . . . . . . . . . . . . . . . . . . . . . . . .<br />
MEASURE Measure Mode . . . . . . . . . . . . . . . . . . . . . . . . .<br />
MEM Memory Available . . . . . . . . . . . . . . . . . . . . . . . . . .<br />
MENU Menu . . . . . . . . . . . . . . . . . . . . . . . . . . . . . . .<br />
MERGE Merge Two Traces . . . . . . . . . . . . . . . . . . . . . . . . .<br />
MF Marker Frequency Output . . . . . . . . . . . . . . . . . . . . . . .<br />
MIN Minimum . . . . . . . . . . . . . . . . . . . . . . . . . . . . . . .<br />
MINH Minimum Hold . . . . . . . . . . . . . . . . . . . . . . . . . . . .<br />
MINPOS Minimum Position . . . . . . . . . . . . . . . . . . . . . . . . .<br />
MIRROR Mirror Image . . . . . . . . . . . . . . . . . . . . . . . . . . .<br />
MKA Marker Amplitude . . . . . . . . . . . . . . . . . . . . . . . . . .<br />
MKACT Activate Marker . . . . . . . . . . . . . . . . . . . . . . . . . .<br />
MKAC<strong>TV</strong> Marker As the Active Function . . . . . . . . . . . . . . . . . .<br />
MKBW Marker B<strong>and</strong>width . . . . . . . . . . . . . . . . . . . . . . . . .<br />
MKCF Marker to Center Frequency . . . . . . . . . . . . . . . . . . . . .<br />
MKCONT Marker Continue . . . . . . . . . . . . . . . . . . . . . . . . .<br />
MKD Marker Delta. . . . . . . . . . . . . . . . . . . . . . . . . . . . .<br />
MKDLMODE Marker Delta Display Line Mode . . . . . . . . . . . . . . . .<br />
MKF Marker Frequency . . . . . . . . . . . . . . . . . . . . . . . . . .<br />
MKFC Marker Counter . . . . . . . . . . . . . . . . . . . . . . . . . . .<br />
MKFCR Marker Counter Resolution . . . . . . . . . . . . . . . . . . . . .<br />
MKMIN Marker Minimum . . . . . . . . . . . . . . . . . . . . . . . . . .<br />
MKN Marker Normal . . . . . . . . . . . . . . . . . . . . . . . . . . . .<br />
MKNOISE Marker Noise . . . . . . . . . . . . . . . . . . . . . . . . . .<br />
MKOFF Marker Off . . . . . . . . . . . . . . . . . . . . . . . . . . . .<br />
MKP Marker Position . . . . . . . . . . . . . . . . . . . . . . . . . . . .<br />
MKPAUSE Marker Pause . . . . . . . . . . . . . . . . . . . . . . . . . .<br />
MKPK Marker Peak . . . . . . . . . . . . . . . . . . . . . . . . . . . .<br />
MKPX Marker Peak Excursion . . . . . . . . . . . . . . . . . . . . . . .<br />
MKREAD Marker Readout . . . . . . . . . . . . . . . . . . . . . . . . .<br />
MKRL Marker to Reference Level . . . . . . . . . . . . . . . . . . . . . .<br />
MKSP Marker to Span . . . . . . . . . . . . . . . . . . . . . . . . . . .<br />
MKSS Marker to Step Size . . . . . . . . . . . . . . . . . . . . . . . . .<br />
MKSTOP Marker Stop . . . . . . . . . . . . . . . . . . . . . . . . . . .<br />
MKTBL Marker %ble . . . . . . . . . . . . . . . . . . . . . . . . . . .<br />
MKTRACE Marker Trace . . . . . . . . . . . . . . . . . . . . . . . . . .<br />
MKTRACK Marker Track . . . . . . . . . . . . . . . . . . . . . . . . . .<br />
MKTYPE Marker Type . . . . . . . . . . . . . . . . . . . . . . . . . . .<br />
ML Mixer Level . . . . . . . . . . . . . . . . . . . . . . . . . . . . . .<br />
MOD Modulo . . . . . . . . . . . . . . . . . . . . . . . . . . . . . . .<br />
MODE Mode . . . . . . . . . . . . . . . . . . . . . . . . . . . . . . . .<br />
MOV Move . . . . . . . . . . . . . . . . . . . . . . . . . . . . . . . .<br />
MPY Multiply . . . . . . . . . . . . . . . . . . . . . . . . . . . . . . .<br />
MS1 Mass Storage Is . . . . . . . . . . . . . . . . . . . . . . . . . . . .<br />
MXM Maximum . . . . . . . . . . . . . . . . . . . . . . . . . . . . . .<br />
MXMH Maximum Hold . . . . . . . . . . . . . . . . . . . . . . . . . . .<br />
M4 Marker Zoom. . . . . . . . . . . . . . . . . . . . . . . . . . . . . .<br />
NDB Number of dB . . . . . . . . . . . . . . . . . . . . . . . . . . . .<br />
NDBPNT N dB Points<br />
NDBPNTR N dB Points B<strong>and</strong>width’ : : : 1 : : : : : : : : : : : : : : : : :<br />
5-301<br />
5-302<br />
5-304<br />
5-306<br />
5-307<br />
5-309<br />
5-310<br />
5-312<br />
5-313<br />
5-315<br />
5-317<br />
5-319<br />
5-32 1<br />
5-322<br />
5-323<br />
5-325<br />
5-327<br />
5-328<br />
5-329<br />
5-330<br />
5-331<br />
5-332<br />
5-334<br />
5-336<br />
5-338<br />
5-339<br />
5-341<br />
5-342<br />
5-344<br />
5-346<br />
5-347<br />
5-349<br />
5-351<br />
5-352<br />
5-354<br />
5-356<br />
5-357<br />
5-358<br />
5-359<br />
5-360<br />
5-362<br />
5-363<br />
5-364<br />
5-365<br />
5-367<br />
5-369<br />
5-370<br />
5-372<br />
5-374<br />
5-375<br />
5-377<br />
5-378<br />
5-380<br />
5-381<br />
5-383<br />
Contents-7
Contents.8<br />
NRL Normalized Reference Level . . . . . . . . . . . . . . . . . . . . . . 5-384<br />
OA Output Active Function Value . . . . . . . . . . . . . . . . . . . . . . 5-386<br />
OBW Occupied B<strong>and</strong>width . . . . . . . . . . . . . . . . . . . . . . . . . 5-387<br />
OBWPCT Occupied B<strong>and</strong>width Percent . . . . . . . . . . . . . . . . . . . 5-389<br />
OL Output Learn String . . . . . . . . . . . . . . . . . . . . . . . . . . 5-390<br />
ONCYCLE On Cycle . . . . . . . . . . . . . . . . . . . . . . . . . . . . 5-391<br />
ONDELAY On Delay . . . . . . . . . . . . . . . . . . . . . . . . . . . . 5-393<br />
ONEOS On End of Sweep . . . . . . . . . . . . . . . . . . . . . . . . . 5-395<br />
ONMKR On Marker . . . . . . . . . . . . . . . . . . . . . . . . . . . . 5-397<br />
ONMKRU On Marker Update . . . . . . . . . . . . . . . . . . . . . . . . 5-399<br />
ONPWRUP On Power Up . . . . . . . . . . . . . . . . . . . . . . . . . . 5-401<br />
ONSRQ On Service Request . . . . . . . . . . . . . . . . . . . . . . . . . 5-402<br />
ONSWP On Sweep . . . . . . . . . . . . . . . . . . . . . . . . . . . . . 5-404<br />
ONTIME On Time . . . . . . . . . . . . . . . . . . . . . . . . . . . . . 5-406<br />
OP Output Parameter . . . . . . . . . . . . . . . . . . . . . . . . . . . 5-408<br />
OUTPUT Output to Remote Port or Parallel Port . . . . . . . . . . . . . . . 5-409<br />
PA Plot Absolute . . . . . . . . . . . . . . . . . . . . . . . . . . . . . 5-412<br />
PARSTAT Parallel Status . . . . . . . . . . . . . . . . . . . . . . . . . . 5-414<br />
PCTAM Percent AM . . . . . . . . . . . . . . . . . . . . . . . . . . . . 5-416<br />
PCTAMR Percent AM Response . . . . . . . . . . . . . . . . . . . . . . . 5-418<br />
PDPenDown.. . . . . . . . . . . . . . . . . . . . . . . . . . . . . . 5-419<br />
PDA Probability Distribution of Amplitude . . . . . . . . . . . . . . . . . 5-420<br />
PDF Probability Distribution of Frequency . . . . . . . . . . . . . . . . . 5-422<br />
PEAKS Peaks . . . . . . . . . . . . . . . . . . . . . . . . . . . . . . . 5-424<br />
PKDLMODE Peak Table Delta Display Line Mode . . . . . . . . . . . . . . 5-428<br />
PKPOS Peak Position . . . . . . . . . . . . . . . . . . . . . . . . . . . . 5-430<br />
PKRES Peak Result . . . . . . . . . . . . . . . . . . . . . . . . . . . . 5-43 1<br />
PKSORT Peak Sort . . . . . . . . . . . . . . . . . . . . . . . . . . . . . 5-433<br />
PKTBL Peak ‘Iable . . . . . . . . . . . . . . . . . . . . . . . . . . . . . 5-434<br />
PKZMOK Peak Zoom Okay . . . . . . . . . . . . . . . . . . . . . . . . . 5-436<br />
PKZOOM Peak Zoom . . . . . . . . . . . . . . . . . . . . . . . . . . . . 5-437<br />
PLOT Plot . . . . . . . . . . . . . . . . . . . . . . . . . . . . . . . . . 5-439<br />
PLTPRT Plot Port . . . . . . . . . . . . . . . . . . . . . . . . . . . . . 5-441<br />
POWERON Power-On State . . . . . . . . . . . . . . . . . . . . . . . . . 5-442<br />
PP Preselector Peak . . . . . . . . . . . . . . . . . . . . . . . . . . . . 5-443<br />
PR Plot Relative . . . . . . . . . . . . . . . . . . . . . . . . . . . . . . 5-444<br />
PREAMPG External Preamplifier Gain . . . . . . . . . . . . . . . . . . . 5-445<br />
PREFX Prefix . . . . . . . . . . . . . . . . . . . . . . . . . . . . . . . 5-446<br />
PRINT Print . . . . . . . . . . . . . . . . . . . . . . . . . . . . . . . . 5-447<br />
PRNTADRS Print Address . . . . . . . . . . . . . . . . . . . . . . . . . 5-449<br />
PRNPRT Print Port . . . . . . . . . . . . . . . . . . . . . . . . . . . . . 5-450<br />
PSTATE Protect State . . . . . . . . . . . . . . . . . . . . . . . . . . . 5-451<br />
PUPenUp . . . . . . . . . . . . . . . . . . . . . . . . . . . . . . . . 5-452<br />
PURGE Purge File . . . . . . . . . . . . . . . . . . . . . . . . . . . . . 5-453<br />
PWRBW Power B<strong>and</strong>width . . . . . . . . . . . . . . . . . . . . . . . . . 5-454<br />
PWRUPTIME Power Up Time . . . . . . . . . . . . . . . . . . . . . . . . 5-456<br />
RB Resolution B<strong>and</strong>width . . . . . . . . . . . . . . . . . . . . . . . . . 5-457<br />
RCLS Recall State . . . . . . . . . . . . . . . . . . . . . . . . . . . . . 5-459<br />
RCLT Recall Trace . . . . . . . . . . . . . . . . . . . . . . . . . . . . . 5-460<br />
REL<strong>HP</strong>IB Release <strong>HP</strong>-IB . . . . . . . . . . . . . . . . . . . . . . . . . . 5-462<br />
REPEAT UNTIL Repeat Until . . . . . . . . . . . . . . . . . . . . . . . . 5-463<br />
RESETRL Reset Reference Level . . . . . . . . . . . . . . . . . . . . . . 5-465<br />
RETURN Return . . . . . . . . . . . . . . . . . . . . . . . . . . . . . . 5-466<br />
REV Revision . . . . . . . . . . . . . . . . . . . . . . . . . . . . . . . 5-467<br />
RL Reference Level . . . . . . . . . . . . . . . . . . . . . . . . . . . . 5-468
RLPOS Reference-Level Position . . . . . . . . . . . . . . . . . . . . . .<br />
RMS Root Mean Square Value . . . . . . . . . . . . . . . . . . . . . . . .<br />
ROFFSET Reference Level Offset . . . . . . . . . . . . . . . . . . . . . .<br />
RQS Service Request Mask . . . . . . . . . . . . . . . . . . . . . . . . .<br />
SAVEMENU Save Menu . . . . . . . . . . . . . . . . . . . . . . . . . .<br />
SAVES Save State . . . . . . . . . . . . . . . . . . . . . . . . . . . . .<br />
SAVET Save Trace . . . . . . . . . . . . . . . . . . . . . . . . . . . . .<br />
SAVRCLF Save or Recall Flag . . . . . . . . . . . . . . . . . . . . . . . .<br />
SAVRCLN Save or Recall Number . . . . . . . . . . . . . . . . . . . . . .<br />
SAVRCLW Save or Recall Data . . . . . . . . . . . . . . . . . . . . . . .<br />
SEGDEL Segment Delete . . . . . . . . . . . . . . . . . . . . . . . . . .<br />
SENTER Segment Entry for Frequency Limit Lines . . . . . . . . . . . . .<br />
SENTERT Segment Entry for Sweep Time Limit Lines . . . . . . . . . . . .<br />
SER Serial Number . . . . . . . . . . . . . . . . . . . . . . . . . . . .<br />
SETDATE Set Date . . . . . . . . . . . . . . . . . . . . . . . . . . . . .<br />
SETTIME Set Time . . . . . . . . . . . . . . . . . . . . . . . . . . . . .<br />
SMOOTH Smooth Trace . . . . . . . . . . . . . . . . . . . . . . . . . .<br />
SNGLS Single Sweep . . . . . . . . . . . . . . . . . . . . . . . . . . . .<br />
SPSpan . . . . . . . . . . . . . . . . . . . . . . . . . . . . . . . . . .<br />
SPEAKER Speaker . . . . . . . . . . . . . . . . . . . . . . . . . . . . .<br />
SPZOOM Span Zoom . . . . . . . . . . . . . . . . . . . . . . . . . . . .<br />
SQLCH Squelch . . . . . . . . . . . . . . . . . . . . . . . . . . . . . .<br />
SQR Square Root. . . . . . . . . . . . . . . . . . . . . . . . . . . . . .<br />
SRCALC Source Leveling Control . . . . . . . . . . . . . . . . . . . . . .<br />
SRCAT Source Attenuator . . . . . . . . . . . . . . . . . . . . . . . . .<br />
SRCNORM Source Normalization . . . . . . . . . . . . . . . . . . . . . .<br />
SRCPOFS Source Power Offset . . . . . . . . . . . . . . : . . . . . . . .<br />
SRCPSTP Source Power-Level Step Size . . . . . . . . . . . . . . . . . . .<br />
SRCPSWP Source Power Sweep . . . . . . . . . . . . . . . . . . . . . . .<br />
SRCPWR Source Power . . . . . . . . . . . . . . . . . . . . . . . . . . .<br />
SRCTK Source Tracking . . . . . . . . . . . . . . . . . . . . . . . . . .<br />
SRCTKPK Source Tracking Peak . . . . . . . . . . . . . . . . . . . . . .<br />
SRQ Force Service Request . . . . . . . . . . . . . . . . . . . . . . . . .<br />
SS Center Frequency Step Size . . . . . . . . . . . . . . . . . . . . . . .<br />
ST Sweep Time . . . . . . . . . . . . . . . . . . . . . . . . . . . . . .<br />
STB Status Byte Query . . . . . . . . . . . . . . . . . . . . . . . . . . .<br />
STDEV St<strong>and</strong>ard Deviation of Trace Amplitudes . . . . . . . . . . . . . . .<br />
STOR Store . . . . . . . . . . . . . . . . . . . . . . . . . . . . . . . .<br />
SUB Subtract . . . . . . . . . . . . . . . . . . . . . . . . . . . . . . .<br />
SUM Sum of Trace Amplitudes . . . . . . . . . . . . . . . . . . . . . . .<br />
SUMSQR Sum of Squared Trace Amplitudes . . . . . . . . . . . . . . . . .<br />
SWPCPL Sweep Couple . . . . . . . . . . . . . . . . . . . . . . . . . .<br />
SYNCMODE Synchronize Mode . . . . . . . . . . . . . . . . . . . . . . .<br />
TA Transfer A . . . . . . . . . . . . . . . . . . . . . . . . . . . . . . .<br />
TB Transfer B . . . . . . . . . . . . . . . . . . . . . . . . . . . . . . .<br />
TDF Trace Data Format . . . . . . . . . . . . . . . . . . . . . . . . . .<br />
TEXT Text . . . . . . . . . . . . . . . . . . . . . . . . . . . . . . .<br />
TH Threshold . . . . . . . . . . . . . . . . . . . . . . . . . . . . . . .<br />
TIMEDATE Time Date . . . . . . . . . . . . . . . . . . . . . . . . . . .<br />
TIMEDSP Time Display . . . . . . . . . . . . . . . . . . . . . . . . . . .<br />
TITLE Title . . . . . . . . . . . . . . . . . . . . . . . . . . . . . . . .<br />
TM Trigger Mode . . . . . . . . . . . . . . . . . . . . . . . . . . . . .<br />
TO1 Third-Order Intermodulation Measurement . . . . . . . . . . . . . . .<br />
TOIR Third-Order Intermodulation Response . . . . . . . . . . . . . . . . .<br />
TRA/TRB/TRC Trace Data Input <strong>and</strong> Output . . . . . . . . . . . . . . . . .<br />
5-470<br />
5-471<br />
5-472<br />
5-473<br />
5-475<br />
5-476<br />
5-477<br />
5-479<br />
5-480<br />
5-482<br />
5-483<br />
5-485<br />
5-488<br />
5-491<br />
5-492<br />
5-493<br />
5-494<br />
5-496<br />
5-497<br />
5-499<br />
5-500<br />
5-501<br />
5-502<br />
5-504<br />
5-506<br />
5-508<br />
5-510<br />
5-511<br />
5-513<br />
5-515<br />
5-517<br />
5-519<br />
5-520<br />
5-524<br />
5-526<br />
5-528<br />
5-529<br />
5-531<br />
5-534<br />
5-536<br />
5-537<br />
5-538<br />
5-540<br />
5-542<br />
5-543<br />
5-544<br />
5-549<br />
5-550<br />
5-551<br />
5-552<br />
5-553<br />
5-554<br />
5-556<br />
5-558<br />
5-559<br />
Contents-9
Figures<br />
l-l. Connecting the <strong>HP</strong> 9000 <strong>Series</strong> 200 Computer to the <strong>Spectrum</strong> Analyzer . . .<br />
l-2. Connecting the <strong>HP</strong> 9000 <strong>Series</strong> 300 Computer to the <strong>Spectrum</strong> Analyzer . . .<br />
l-3. Connecting the <strong>HP</strong> Vectra Personal Computer to the <strong>Spectrum</strong> Analyzer . . .<br />
l-4. Connecting the Personal Computer to the <strong>Spectrum</strong> Analyzer . . . . . . . . .<br />
3-l. Measurement Unit Range <strong>and</strong> Trace Amplitudes . . . . . . . . . . . . . . .<br />
4-l. Determining the Number of Records . . . . . . . . . . . . . . . . . . . .<br />
4-2. Connecting the External Keyboard to the <strong>Spectrum</strong> Analyzer . . . . . . . . .<br />
4-3. Accessing the DLP Editor . . . . . . . . . . . . . . . . . . . . . . . . .<br />
4-4. Entering a DLP . . . . . . . . . . . . . . . . . . . . . . . . . . . . . .<br />
4-5. Selecting a Catalog Item . . . . . . . . . . . . . . . . . . . . . . . . . .<br />
5-l. Comm<strong>and</strong> Syntax Figure . . . . . . . . . . . . . . . . . . . . . . . . . .<br />
5-2. Using the CLRBOX Comm<strong>and</strong> . . . . . . . . . . . . . . . . . . . . . . . .<br />
5-3. Using the DRAWBOX Comm<strong>and</strong> . . . . . . . . . . . . . . . . . . . . . . .<br />
5-4. Harming Filter Window . . . . . . . . . . . . . . . . . . . . . . . . . .<br />
5-5. Uniform Filter Window . . . . . . . . . . . . . . . . . . . . . . . . . .<br />
5-6. Flat Top Filter Window . . . . . . . . . . . . . . . . . . . . . . . . . . .<br />
5-7. Using the MENU Comm<strong>and</strong> . . . . . . . . . . . . . . . . . . . . . . . . .<br />
5-8. Display Units . . . . . . . . . . . . . . . . . . . . . . . . . . . . . . .<br />
5-9. Frequency <strong>and</strong> Amplitude of the Peaks . . . . . . . . . . . . . . . . . . .<br />
B-l. <strong>HP</strong>-IB Connector . . . . . . . . . . . . . . . . . . . . . . . . . . . . . .<br />
C-l. RS-232 Connector . . . . . . . . . . . . . . . . . . . . . . . . . . . . .<br />
C-2. <strong>HP</strong> 245426 25-pin to g-pin Full H<strong>and</strong>shaking Connection . . . . . . . . . . .<br />
C-3. <strong>HP</strong> 24542U g-pin to g-pin Full H<strong>and</strong>shaking Connection . . . . . . . . . . .<br />
C-4. 25-pin to g-pin 3-Wire Connection . . . . . . . . . . . . . . . . . . . . .<br />
C-5. g-pin to g-pin 3-Wire Connection . . . . . . . . . . . . . . . . . . . . . .<br />
C-6. 25-pin to g-pin ThinkJet Printer Connection . . . . . . . . . . . . . . . . .<br />
C-7. <strong>HP</strong> C2932A g-pin to g-pin LaserJet Printer Connection . . . . . . . . . . . .<br />
C-8. 25-pin to g-pin Modem Connection . . . . . . . . . . . . . . . . . . . . .<br />
C-9. <strong>HP</strong>-GL Plotter Connection . . . . . . . . . . . . . . . . . . . . . . . . .<br />
l-3<br />
l-5<br />
l-7<br />
l-9<br />
3-26<br />
4-13<br />
4-15<br />
4-16<br />
4-17<br />
4-19<br />
5-2<br />
5-99<br />
5-141<br />
5-162<br />
5-163<br />
5-163<br />
5-314<br />
5-413<br />
5-426<br />
B-l<br />
C-l<br />
c-3<br />
c-3<br />
c-3<br />
c-4<br />
c-4<br />
c-5<br />
C-6<br />
C-6<br />
Contents-l 1
Xhbles<br />
l-l. Setting of <strong>HP</strong> ThinkJet Printer Mode Switches . . . . . . . . . . . . . . . .<br />
3-l. Measurement Units . . . . . . . . . . . . . . . . . . . . . . . . . . . .<br />
3-2. Summary of the Trace Data Formats . . . . . . . . . . . . . . . . . . . .<br />
4-l. Cataloging a RAM Card . . . . . . . . . . . . . . . . . . . . . . . . . . .<br />
5-l. Syntax Elements . . . . . . . . . . . . . . . . . . . . . . . . . . . . . .<br />
5-2. Characters <strong>and</strong> Secondary Keywords (Reserved Words) . . . . . . . . . . . .<br />
5-3. Summary of Compatible Comm<strong>and</strong>s . . . . . . . . . . . . . . . . . . . . .<br />
5-4. Functional Index . . . . . . . . . . . . . . . . . . . . . . . . . . . . .<br />
5-5. <strong>Spectrum</strong>,AnaIyzer Settings, ACPPAR is Set to Automatic . . . . . . . . . . .<br />
5-6. Character Set . . . . . . . . . . . . . . . . . . . . . . . . . . . . . . .<br />
5-7. Label Functions . . . . . . . . . . . . . . . . . . . . . . . . . . . . . .<br />
5-9. <strong>Spectrum</strong> Analyzer Status Byte (Option 024) . . . . . . . . . . . . . . . . .<br />
5-9. <strong>Spectrum</strong> Analyzer Status Byte (Option 041, 043) . . . . . . . . . . . . . .<br />
5-9. <strong>Spectrum</strong> Analyzer Status Byte . . . . . . . . . . . . . . . . . . . . . . .<br />
5-10. Status Byte Definition . . . . . . . . . . . . . . . . . . . . . . . . . . .<br />
5-l 1. Programming Comm<strong>and</strong>s That Exit The Windows Display Mode . . . . . . . .<br />
C-l. Setting of Thinkjet Printer Mode Switches . . . . . . . . . . . . . . . . . .<br />
C-2. Setting of RS-232 Switches . . . . . . . . . . . . . . . . . . . . . . . . .<br />
C-3. Setting the Baud Rate . . . . . . . . . . . . . . . . . . . . . . . . . . .<br />
Contents-l 2<br />
l-11<br />
3-27<br />
3-28<br />
4-13<br />
5-3<br />
5-5<br />
5-9<br />
5-11<br />
5-45<br />
5-265<br />
5-266<br />
5-414<br />
5-415<br />
5-52 1<br />
5-522<br />
5-595<br />
c-4<br />
c-5<br />
c-5
Preparing for Use<br />
What You’ll Learn in This Chapter<br />
This chapter tells you how to connect a computer to your spectrum analyzer via the<br />
Hewlett-Packard Interface Bus (<strong>HP</strong>-IB) or the RS-232 Interface <strong>and</strong> how to connect a printer<br />
or a plotter. The remainder of the chapter covers procedures to follow if a problem is<br />
encountered.<br />
Connecting Your <strong>Spectrum</strong> Analyzer to a Computer<br />
The spectrum analyzer works with many popular computers. However, the steps required to<br />
connect your spectrum analyzer to a specific computer depend on the computer you are using.<br />
Before turning to the interconnection instructions for your computer, please read the following<br />
general information.<br />
Configuring Your Computer System<br />
Every computer system has a specific configuration. Your system configuration might include<br />
a printer, external disk drive, or plotter. Whenever you add another piece of equipment (for<br />
example, your spectrum analyzer), you may need to reconfigure your computer system so that<br />
the computer knows where <strong>and</strong> how to send information to the newly added device.<br />
Some computers do not require configuring when a spectrum analyzer is connected; others<br />
require a simple modification. The most common modification is changing the configuration<br />
information stored on the computer’s operating system disk. A few computers require the<br />
insertion of an add-on board, or “card.” Refer to your computer documentation if your system<br />
needs these modifications.<br />
All of the test programs for <strong>HP</strong>-IB <strong>and</strong> RS-232 interfaces are written using the BASIC language<br />
of the computer under consideration. If you have never entered or run a BASIC program, refer<br />
to your computer documentation.<br />
1<br />
Preparing for Use l-1
Connecting the Computer to the <strong>Spectrum</strong> Analyzer<br />
For the <strong>HP</strong>-IB Interface<br />
Refer to Appendix B for a detailed description of the <strong>HP</strong>-IB interface.<br />
Appendix B contains instructions for connecting the spectrum analyzer’s <strong>HP</strong>-IB interface to<br />
either an <strong>HP</strong> 9000 <strong>Series</strong> 200, or a <strong>Series</strong> 300 computer, or to an <strong>HP</strong> Vectra PC equipped with<br />
an <strong>HP</strong> 82300B BASIC Language Processor. If your computer is not listed, but it supports an<br />
<strong>HP</strong>-IB interface, there is a good possibility that it can be connected to the spectrum analyzer.<br />
Consult your computer documentation to determine how to connect external devices on the<br />
bus.<br />
For the BS-232 Interface<br />
Refer to Appendix C for a detailed description of the RS-232 interface.<br />
Appendix C contains instructions for connecting the spectrum analyzer’s RS-232 interface to<br />
an <strong>HP</strong> Vectra PC or IBM PC/AT or compatible computers. If your computer is not listed, but it<br />
supports a st<strong>and</strong>ard RS-232 interface, there is a good possibility that the spectrum analyzer may<br />
be connected to the computer. Consult your computer documentation to determine how to<br />
connect external devices to your computer’s RS-232 connector.<br />
There are two types of RS-232 devices: data terminal equipment (DTE) <strong>and</strong> data<br />
communication equipment (DCE). Types of DTE devices include display terminals. DCE<br />
equipment includes modems <strong>and</strong>, generally, other computer RS-232 devices. The spectrum<br />
analyzer RS-232 port is the DTE-type. Connections from the computer (DCE) to the spectrum<br />
analyzer (DTE) are shown in Appendix C.<br />
The Test Program<br />
To test the system configuration, a simple test program is provided for each computer listed.<br />
After you have connected your computer <strong>and</strong> spectrum analyzer, you should enter <strong>and</strong> run<br />
the test program on your computer to make sure the computer is sending instructions to the<br />
spectrum analyzer through the interface cable. If the interface is working <strong>and</strong> the program is<br />
entered correctly, a statement is displayed on the computer screen.<br />
Note The listed computer <strong>and</strong> spectrum analyzer equipment includes the minimum<br />
components necessary to establish communication between your spectrum<br />
analyzer <strong>and</strong> computer. If you are using application software, check with your<br />
software supplier for specific computer hardware <strong>and</strong> memory requirements.<br />
Note Using an interface cable other than the one listed with your computer’s<br />
interconnection instructions may prevent proper communication between the<br />
spectrum analyzer <strong>and</strong> computer.<br />
Pressing f-1 removes the spectrum analyzer from remote mode <strong>and</strong> enables front-panel<br />
control.<br />
l-2 Preparing for Use
<strong>HP</strong>-IB Connections for the <strong>HP</strong> 9000 <strong>Series</strong> 200 Technical<br />
Computers<br />
Equipment<br />
� <strong>HP</strong> 9816, 9826, or 9836 <strong>Series</strong> 200 technical computer<br />
w <strong>HP</strong> <strong>8590</strong> <strong>Series</strong> spectrum analyzer with Option 041<br />
� <strong>HP</strong> 10833 (or equivalent) <strong>HP</strong>-IB cable<br />
Interconnection Instructions<br />
Connect the spectrum analyzer to the computer using the <strong>HP</strong>-IB cable. Figure l-l shows an<br />
<strong>HP</strong> 9836 computer connected to the spectrum analyzer.<br />
Figure l-l. Connecting the <strong>HP</strong> 9000 <strong>Series</strong> 200 Computer to the <strong>Spectrum</strong> Analyzer<br />
Preparing for Use l-3
Test Program<br />
To test the connection between the computer <strong>and</strong> the spectrum analyzer, turn on your<br />
spectrum analyzer <strong>and</strong> follow the instructions below.<br />
1. Your <strong>HP</strong> 9000 <strong>Series</strong> 200 computer may have either a soft-loaded or built-in language<br />
system. If your language system is built-in, remove any disks from the drives <strong>and</strong> turn on<br />
the computer.<br />
2. If your language is soft-loaded, install the BASIC language disk into the proper drive. Turn<br />
the computer power on. After a few seconds, the BASIC READY message appears; the<br />
computer is now ready for use.<br />
For further information on loading BASIC on your system, consult your BASIC manual.<br />
8. Check the <strong>HP</strong>-IB address of the spectrum analyzer: press @ZiZ], More 1 of 3 ,<br />
ANALYZER ADDRESS . The usual address for the spectrum analyzer is 18. If necessary, reset<br />
the address of the spectrum analyzer: press L-1, Mare 2 of 3 , A??ALYZElt ADDRESS ,<br />
18, (Hz) (or enter the appropriate address).<br />
4. Enter the following program, then press IRUN) on the computer. If you need help entering<br />
<strong>and</strong> running the program, refer to your computer <strong>and</strong> software documentation.<br />
The program shows that the computer is able to send instructions to, <strong>and</strong> read information<br />
from, the spectrum analyzer.<br />
10 PRINTER IS 1<br />
20 Analyzer=718<br />
30 CLEAR Analyzer<br />
40 OUTPUT Analyzer;"IP;SNGLS;"<br />
50 OUTPUT Analyzer;"CF 300MZ;TS;"<br />
60 OUTPUT Analyzer;"CF?;"<br />
70 ENTER Analyzer;A<br />
80 PRINT "CENTER FREQUENCY = ";A;"Hz";<br />
90 END<br />
The program tells the spectrum analyzer to perform an instrument preset <strong>and</strong> enter<br />
single-sweep mode. Next, the program sets the center frequency to 300 MHz <strong>and</strong> takes a<br />
sweep.<br />
The program then queries the center frequency value <strong>and</strong> tells the computer to display<br />
CENTERFREQUENCY= 3.OE+8Hz.<br />
If the computer does not display the center frequency, refer to “If There is a Problem” at the<br />
end of this chapter.<br />
1-4 Preparing for Use
<strong>HP</strong>-IB Connections for the <strong>HP</strong> 9000 <strong>Series</strong> 300 Technical<br />
Computers<br />
Equipment<br />
� <strong>HP</strong> 98580A, 98581A, 98582A, or 98583A <strong>Series</strong> 300 technical computer<br />
� <strong>HP</strong> <strong>8590</strong> <strong>Series</strong> spectrum analyzer with Option 041<br />
� <strong>HP</strong> 10833 (or equivalent) <strong>HP</strong>-IB cable<br />
Interconnection Instructions<br />
Connect the spectrum analyzer to the computer using the <strong>HP</strong>-IB cable as shown in Figure l-2.<br />
Figure 1-2. Connecting the <strong>HP</strong> 9000 <strong>Series</strong> 300 Computer to the <strong>Spectrum</strong> Analyzer<br />
cul3le<br />
Preparing for Use 1-5
Test Program<br />
To test the connection between the computer <strong>and</strong> the spectrum analyzer, turn on your<br />
spectrum analyzer <strong>and</strong> follow the instructions below.<br />
1. Your <strong>HP</strong> 9000 <strong>Series</strong> 300 computer may have either a soft-loaded or built-in language<br />
system. If your language system is built-in, remove any disks from the drives <strong>and</strong> turn on<br />
the computer.<br />
2. If your language is soft-loaded, install the BASIC language disk into the proper drive. Turn<br />
the computer power on. After a few seconds, the BASIC READY message appears; the<br />
computer is now ready for use.<br />
For further information on loading BASIC on your system, consult your BASIC manual.<br />
Check the <strong>HP</strong>-IB address of the spectrum analyzer: press @K@, More 1 of 3 ,<br />
ANALYZER ADDRESS . The usual address for the spectrum analyzer is 18. If necessary, reset<br />
the address of the spectrum analyzer: press (ml, More 1 of 3 , ANALYZER ADDRESS ,<br />
1Hz) (or enter the appropriate address).<br />
4. Enter the following program, then press IRUN) on the computer. If you need help entering<br />
<strong>and</strong> running the program, refer to your computer <strong>and</strong> software documentation.<br />
The program shows that the computer is able to send instructions to, <strong>and</strong> read information<br />
from, the spectrum analyzer.<br />
10 PRINTER IS 1<br />
20 Analyzer=718<br />
30 CLEAR Analyzer<br />
40 OUTPUT Analyzer ; ; SNGLS ; ”<br />
50 OUTPUT Analyzer ; “CF 300MZ ; TS ; ”<br />
60 OUTPUT Analyzer ; “CF? ; I’<br />
70 ENTER Analyzer;A<br />
80 PRINT “CENTER FREQUENCY = ;A; “Hz” ;<br />
90 END<br />
The program tells the spectrum analyzer to perform an instrument preset <strong>and</strong> enter<br />
single-sweep mode. Next, the program sets the center frequency to 300 MHz <strong>and</strong> takes a<br />
sweep.<br />
CENTERFREQUENCY= 3.OE+8Hz.<br />
If the computer does not display the center frequency, refer to “If There is a Problem” at the<br />
end of this chapter.<br />
1-6 Preparing for Use
<strong>HP</strong>-IB Connections for the <strong>HP</strong> Vectra Personal Computer<br />
Equipment<br />
w <strong>HP</strong> Vectra personal computer, with option <strong>HP</strong> 82300B, the <strong>HP</strong> BASIC Language Processor<br />
� <strong>HP</strong> <strong>8590</strong> <strong>Series</strong> spectrum analyzer with Option 041<br />
� <strong>HP</strong> 10833 (or equivalent) <strong>HP</strong>-IB cable<br />
Interconnection Instructions<br />
Connect the spectrum analyzer to the computer using the <strong>HP</strong>-IB cable as shown in Figure l-3.<br />
/ \<br />
Figure 1-3. Connecting the <strong>HP</strong> Vectra Personal Computer to the <strong>Spectrum</strong> Analyzer<br />
cul30e<br />
Preparing for Use l-7
Test Program<br />
To test the connection between the computer <strong>and</strong> the spectrum analyzer, turn on your<br />
spectrum analyzer <strong>and</strong> follow the instructions below.<br />
1. Refer to the <strong>HP</strong> 82300 Language Processor documentation to install the language processor<br />
board in your computer <strong>and</strong> load the BASIC programming language into your computer.<br />
2. Check the <strong>HP</strong>-IB address of the spectrum analyzer: press Cm], More I of 3 ,<br />
ANALYZER ADDRESS . The usual address for the spectrum analyzer is 18. If necessary, reset<br />
the address of the spectrum analyzer: press [CONFIG), Mare 1 of 3 , ANALYZER ADDRESS ,<br />
18 IHz) (or enter the appropriate address).<br />
3. Enter the following program, then press (KjJ on the computer. If you need help entering<br />
<strong>and</strong> running the program, refer to your computer <strong>and</strong> software documentation.<br />
The program shows that the computer is able to send instructions to, <strong>and</strong> read information<br />
from, the spectrum analyzer.<br />
10 PRINTER IS 1<br />
20 Analyzer=718<br />
30 CLEAR Analyzer<br />
40 OUTPUT Analyzer ; “IP ; SNGLS ; ”<br />
50 OUTPUT Analyzer;"CF 3OOMZ;TS;"<br />
60 OUTPUT Analyzer;"CF?;"<br />
70 ENTER Analyzer;A<br />
80 PRINT "CENTER FREQUENCY = ";A;"Hz";<br />
90 END<br />
The program tells the spectrum analyzer to perform an instrument preset <strong>and</strong> enter<br />
single-sweep mode. Next, the program sets the center frequency to 300 MHz <strong>and</strong> takes a<br />
sweep. The program then queries the center frequency value <strong>and</strong> tells the computer to display<br />
CENTERFREQUENCY= 3.OE+8 Hz.<br />
If the computer does not display the center frequency, refer to “If There is a Problem” at the<br />
end of this chapter.<br />
l-8 Preparing for Use
RS-232 Connections for the <strong>HP</strong> Vectra or IBM PC/AT Personal<br />
Computer<br />
Equipment<br />
� <strong>HP</strong> Vectra or IBM PC/AT personal computer<br />
� <strong>HP</strong> <strong>8590</strong> <strong>Series</strong> spectrum analyzer with Option 043<br />
w<br />
� <strong>HP</strong> 24542U g-pin to g-pin RS-232 cable for computers with a g-pin female RS-232 port<br />
Note Refer to Appendix C for information on wiring cables.<br />
Interconnection Instructions<br />
1. Connect the spectrum analyzer to the computer using the RS-232 cable as shown in<br />
Figure l-4.<br />
\<br />
Figure 1-4. Connecting the Personal Computer to the <strong>Spectrum</strong> Analyzer<br />
2. Turn on the spectrum analyzer <strong>and</strong> the computer.<br />
cu129e<br />
Preparing for Use 1.9
Test Program<br />
The program shown below is written to work with computers using BASICA (version 2.0<br />
or later) or GW BASIC. To test the interconnection, first load the BASIC language for your<br />
computer <strong>and</strong> specify a communications buffer of 4096 bytes. Use the following comm<strong>and</strong>:<br />
BASICA/C:4096<br />
Set the spectrum analyzer baud rate to 9600, to match the baud rate set up for the computer<br />
port in the test program. In line 20, the “9600” indicates 9600 baud for the computer port.<br />
Press the following keys to set the baud rate: c-1, More 1 of 3 , BAUD RATE , 9600, (Hz).<br />
Enter the following test program. The program shows that the computer is able to send<br />
instructions to, <strong>and</strong> read information from, the spectrum analyzer.<br />
10 'File = TESTPGM<br />
20 OPEN "COMl:9600,N,8,1" AS #l<br />
30 PRINT #l,"IP;"<br />
40 PRINT #l,"SNGLS;"<br />
50 PRINT #l,"CF 300MZ;TS;"<br />
60 PRINT #l,"CF?;"<br />
70 INPUT #l,CENTER<br />
80 PRINT,"CENTER FREQ = ";CENTER;"Hz"<br />
90 END<br />
When you have entered the program, type:<br />
SAVE "TESTPGM"<br />
When you are ready to run the program, turn on the spectrum analyzer <strong>and</strong> run your program.<br />
The program tells the spectrum analyzer to perform an instrument preset <strong>and</strong> enter single<br />
sweep mode. Next, the program sets the center frequency to 300 MHz <strong>and</strong> takes a sweep.<br />
The program then queries the center frequency value <strong>and</strong> tells the computer to display<br />
CENTERFREQUENCY= 3.OE+8Hz.<br />
If the computer does not display the center frequency, refer to “If There is a Problem” at the<br />
end of this chapter.<br />
l-10 Preparing for Use
Printing or Plotting<br />
You may wish to obtain a permanent record of data displayed on the spectrum analyzer screen.<br />
This can be done using the lcopvl key of the spectrum analyzer, <strong>and</strong> a printer or plotter.<br />
Note The <strong>HP</strong> 7470A plotter does not support 2 plots per page. If you use an<br />
<strong>HP</strong> 7470A plotter with an <strong>HP</strong> <strong>8590</strong> <strong>Series</strong> spectrum analyzer, you can select one<br />
plot per page or four plots per page, but not 2 plots per page.<br />
Printing Using an <strong>HP</strong>-IB Interface<br />
Equipment<br />
w <strong>HP</strong> <strong>8590</strong> <strong>Series</strong> spectrum analyzer equipped with Option 041<br />
� <strong>HP</strong> 10833 (or equivalent) <strong>HP</strong>-IB cable<br />
w Printer with <strong>HP</strong>-IB Interface, choose one of the following:<br />
I <strong>HP</strong> 2225 ThinkJet<br />
� <strong>HP</strong> 3630A PaintJet<br />
� <strong>HP</strong> 500 <strong>Series</strong>* DeskJet<br />
� <strong>HP</strong> 310* Portable DeskJet<br />
� <strong>HP</strong> LaserJet<br />
� MX-80 Epson<br />
� LQ-570 Epson<br />
* Some models support color printing<br />
Interconnection <strong>and</strong> Printing Instructions<br />
1. Turn off the printer <strong>and</strong> the spectrum analyzer.<br />
2. Connect the printer to the spectrum analyzer using the <strong>HP</strong>-IB cable. The <strong>HP</strong> ThinkJet<br />
printer’s mode switches must be set correctly for use with the spectrum analyzer. Refer to<br />
‘Iable l-l for the correct settings.<br />
able l-l. Setting of <strong>HP</strong> ThinkJet Printer Mode Switches<br />
Setting<br />
down<br />
down<br />
u p<br />
down<br />
down<br />
UP<br />
down<br />
down<br />
Comments<br />
Printer performs a carriage return only.<br />
Printer performs a line feed only.<br />
Sets the printer to skip paper perforations<br />
Sets the printer for a paper length of 11 inches.<br />
Sets the printer to <strong>HP</strong> MODE.<br />
Sets the printer to USASCII.<br />
Preparing for Use l-1 1
Note Because <strong>HP</strong>-IB cables can be connected together, more than one instrument can<br />
communicate on the <strong>HP</strong>-IB. This means that both a printer <strong>and</strong> a plotter can<br />
be connected to the spectrum analyzer (using two <strong>HP</strong>-IB cables). Each device<br />
must have its own <strong>HP</strong>-IB address.<br />
Note Because the spectrum analyzer cannot print with two controllers (the computer<br />
<strong>and</strong> the spectrum analyzer) connected, the computer must be disconnected<br />
from the <strong>HP</strong>-IB. In most cases, it is sufficient to simply turn the computer OFF.<br />
3.<br />
4.<br />
5.<br />
6.<br />
Turn on the spectrum analyzer <strong>and</strong> printer.<br />
On the spectrum analyzer, press @Gi?Q Print Conf fg ,
. Press RF MX80 SML LAG if the spectrum analyzer is connected to<br />
a MX-80 Epson or other compatible g-pin print-head printer.<br />
Pressing this key to underline SML will print two printouts to a<br />
labels if desired. See step 7<br />
Pressing this key to underline LRG will print only one printout to a<br />
softkey<br />
. Press RF LfJ57G SML LRG if the spectrum analyzer is connected to<br />
a LQ-570 Epson or other compatible 24-pin print-head printer.<br />
Pressing this key to underline SML will print two printouts to a<br />
page <strong>and</strong> will print softkey labels if desired. See step 7<br />
Pressing this key to underline LRG will print only one printout to a<br />
page <strong>and</strong> will not print the softkey labels.<br />
softkey labels to be printed with the spectrum analyzer display printout,<br />
press PRT MEW ON OFF so that ON is underlined. Note that this function does not work<br />
when EF MX80 SML LRG or El? Lq570 SML LRG are pressed to underline LRG.<br />
8. Press Previous Menu, CDPY DEV PRMT PLT (PRNT should be underlined), then IcoPv].<br />
Preparing for Use l-13
Plotting Using an <strong>HP</strong>-IB Interface<br />
Note The <strong>HP</strong> 7470A plotter does not support 2 plots per page. If you use an<br />
<strong>HP</strong> 7470A plotter with an <strong>HP</strong> <strong>8590</strong> <strong>Series</strong> spectrum analyzer, you can select one<br />
plot per page or four plots per page, but not 2 plots per page.<br />
Equipment<br />
w <strong>HP</strong> <strong>8590</strong> <strong>Series</strong> spectrum analyzer with Option 041.<br />
w <strong>HP</strong> 10833 (or equivalent) <strong>HP</strong>-IB cable.<br />
� Any of the following plotters:<br />
� <strong>HP</strong> 7440A ColorPro plotter with <strong>HP</strong>-IB<br />
� <strong>HP</strong> 7445A plotter with <strong>HP</strong>-IB<br />
� <strong>HP</strong> 7550A/B plotter with <strong>HP</strong>-IB<br />
Interconnection <strong>and</strong> Plotting Instructions<br />
1. Turn off the plotter <strong>and</strong> the spectrum analyzer.<br />
2. Connect the plotter to the spectrum analyzer using the <strong>HP</strong>-IB cable.<br />
Note Because <strong>HP</strong>-IB cables can be connected together, more than one instrument can<br />
communicate on the <strong>HP</strong>-IB. This means that both a printer <strong>and</strong> a plotter can<br />
be connected to the spectrum analyzer (using two <strong>HP</strong>-IB cables). Each device<br />
must have its own <strong>HP</strong>-IB address.<br />
Note Because the spectrum analyzer cannot plot with two controllers (the computer<br />
<strong>and</strong> the spectrum analyzer) connected, the computer must be disconnected<br />
from the <strong>HP</strong>-IB.<br />
3. Turn on the spectrum analyzer <strong>and</strong> the plotter.<br />
4. On the spectrum analyzer, press @%FiZj, Plot Canf ig , Plt Port GonSig ,<br />
PLT PDRT <strong>HP</strong>IB PAR (so that <strong>HP</strong>IB is underlined).<br />
5. The plotter usually resides at the fifth device address. To set the plotter address, press<br />
PLUTTRR ADDRESS , 5, (Hz), to enter the address 5 for the plotter.<br />
1-14 Preparing for Use
6. With PLTS/PG 1 2 4 , you can choose a full-page, half-page, or quarter-page plot. Press<br />
PLTS/PC 1 2 4 to underline the number of plots per page desired.<br />
7. If two or four plots per page are chosen, a function is displayed that allows you to select<br />
the location on the paper for the plotter output. If two plots per page are selected, then<br />
PLT Cl PLT [I _<br />
Lac _ _ function is displayed. If four plots per page are selected, then LOC _ _ is<br />
displayed. Press the softkey until the rectangular marker is in the desired section of the<br />
softkey label. The upper <strong>and</strong> lower sections of the softkey label graphically represent where<br />
on the page the plotter output will be located.<br />
Note For a multi-pen plotter, the pens of the plotter draw the different components<br />
of the screen as follows:<br />
Pen Description<br />
Number<br />
1 Draws the annotation <strong>and</strong> graticule.<br />
2 Draws trace A.<br />
3 Draws trace B.<br />
4 Draws trace C <strong>and</strong> the display line.<br />
5 Draws user-generated graphics <strong>and</strong> the lower-limit line.<br />
6 Draws the upper-limit line.<br />
8. Press Previous Menu, COPY PINT PLT (PLT should be underlined), then Icopvl.<br />
Note Once the address of the printer <strong>and</strong> plotter have been entered, the spectrum<br />
There is no need to reenter them when the spectrum analyzer is turned off <strong>and</strong><br />
on.<br />
Preparing for Use l-15
Printing Using an RS-232 Interface<br />
Equipment<br />
w <strong>HP</strong> <strong>8590</strong> <strong>Series</strong> spectrum analyzer with Option 043.<br />
w One of the following cables:<br />
� <strong>HP</strong> 245426 g-pin to 25-pin RS-232 cable<br />
� <strong>HP</strong> 24542U g-pin (f) to g-pin (f) RS-232 cable<br />
I <strong>HP</strong> C2932A g-pin (f) to g-pin (m) RS-232 cable (for use with LaserJet 4P <strong>and</strong> 4Plus)<br />
� Printer with RS-232 Interface, choose one of the following:<br />
I <strong>HP</strong> 500 <strong>Series</strong>* DeskJet<br />
� <strong>HP</strong> 2225 ThinkJet<br />
� <strong>HP</strong> 3630A PaintJet<br />
� MX-80 Epson<br />
� LQ-570 Epson<br />
� <strong>HP</strong> LaserJet<br />
* Some models support color printing<br />
Interconnection <strong>and</strong> Printing Instructions<br />
1. Turn off the spectrum analyzer <strong>and</strong> the printer.<br />
Note The RS-232 interface allows only one device (either the printer or the plotter)<br />
to be connected to the spectrum analyzer. Refer to the Appendix C for more<br />
information on RS-232 protocol <strong>and</strong> cable wiring.<br />
2. Connect the printer using an RS-232 cable.<br />
3. Turn on the spectrum analyzer <strong>and</strong> printer.<br />
4. Press (j-1, Print Cunfig , Pm Pdrt Gunfig , PRI? PORT SER PAR (so that SER is<br />
underlined).<br />
5. To set the baud rate to 9600 baud, press BAUD RATE, 9600, (Hz). lb set the baud rate to<br />
1200 baud, press: BAUD RATE, 1200, @.<br />
Note Some of the programs in this manual utilize 1200 baud. If your system uses the<br />
RS-232 h<strong>and</strong>shake lines, you can use 9600 baud for all of the programs.<br />
6. Press (ZF@, Print Config.<br />
1-16 Preparing for Use
7. Select the configuration for your printer by pressing the appropriate key. Note that the<br />
softkey is activated when the key title is underlined.<br />
Set Colr Printer<br />
Set 3tW Printer<br />
Press this key to print in color if the spectrum analyzer is connected<br />
to a Hewlett-Packard color printer, then select the appropriate<br />
printer.<br />
Selecting any Hewlett-Packard printer results in three printouts per<br />
page prior to formfeeding the page.<br />
One printout per page can be achieved by manually formfeeding<br />
each printout.<br />
Press this key to print in black <strong>and</strong> white, then press one of the<br />
following keys to select the appropriate printer mode.<br />
. Press <strong>HP</strong> B%W PRINTER if the spectrum analyzer is connected to a<br />
Hewlett-Packard printer.<br />
Selecting any Hewlett-Packard printer results in three printouts<br />
per page prior to formfeeding the page.<br />
One printout per page can be achieved by manually formfeeding<br />
each printout.<br />
. Press RP R%W DJ540 if the spectrum analyzer is connected to a<br />
Hewlett-Packard DeskJet 540 printer.<br />
. Press EP MX80 SML LRG if the spectrum analyzer is connected to<br />
a MX-80 Epson or other compatible g-pin print-head printer.<br />
Pressing this key to underline SML will print two printouts to a<br />
page <strong>and</strong> will print softkey labels if desired. See step 8.<br />
Pressing this key to underline LRG will print only one printout to a<br />
page <strong>and</strong> will not print the softkey labels.<br />
. Press EP Lq570 SML LRG if the spectrum analyzer is connected to<br />
a LQ-570 Epson or other compatible 24-pin print-head printer.<br />
Pressing this key to underline SML will print two printouts to a<br />
page <strong>and</strong> will print softkey labels if desired. See step 8.<br />
Pressing this key to underline LRG will print only one printout to a<br />
page <strong>and</strong> will not print the softkey labels.<br />
8. If you want the softkey labels to be printed with the spectrum analyzer display printout,<br />
press PRT MEMU GM OFF so that ON is underlined. Note that this function does not work<br />
when KP MX80 LRG or EP Lq570 LRG is pressed.<br />
g. Press Previous Menu, COPY DEV PRMT PLT (PRNT should be underlined), then m.<br />
Preparing for Use l-1 7
Plotting Using an RS-232 Interface<br />
Equipment<br />
� <strong>HP</strong> <strong>8590</strong> <strong>Series</strong> spectrum analyzer with Option 043.<br />
� <strong>HP</strong> 245426 9-25 pin RS-232 cable<br />
� <strong>HP</strong> C2932A 9-9 pin RS-232 cable (for use with LaserJet 4P <strong>and</strong> 4Plus)<br />
� Any of the following Plotters:<br />
� <strong>HP</strong> 7440A ColorPro plotter with an RS-232 interface.<br />
� <strong>HP</strong> 7445A plotter with an RS-232 interface.<br />
� <strong>HP</strong> 7550A/E? plotter with an RS-232 interface.<br />
Interconnection <strong>and</strong> Plotting Instructions<br />
1. Turn off the spectrum analyzer.<br />
Note The RS-232 interface allows only one device (either the printer or the plotter)<br />
to be connected to the spectrum analyzer. Refer to the Programmer’s Guide for<br />
more information on RS-232 protocol <strong>and</strong> cable wiring.<br />
2. Connect the plotter using an RS-232 cable.<br />
3. Turn on the spectrum analyzer <strong>and</strong> the plotter.<br />
4. Press (j-J,<br />
underlined).<br />
Plot &dig, Pit Port Config, PLT PORT SER PAR (so that SER is<br />
5. lb set the baud rate to 1200 baud, press: BAUD RATE, 1200, [Hz).<br />
& Press CCONFIG], Plot &&kg. You can choose a full-page, half-page, or quarter-page plot<br />
with the PLTSIPC 1 2 4 softkey. Press PLTS/PG 1 2 4 to underline the number of plots<br />
per page desired.<br />
7. If two or four plots per page are chosen, a function is displayed that allows you to select<br />
the location on the paper of the plotter output. If two plots per page are selected, then<br />
PLT Cl PLT U _<br />
LOC - - function is displayed. If four plots per page are selected, then LOC _ _ is<br />
displayed. Press the softkey until the rectangular marker is in the desired section of the<br />
softkey label. The upper <strong>and</strong> lower sections of the softkey label graphically represent where<br />
on the page the plotter output will be located.<br />
l-18 Preparing for Use
Note For a multi-pen plotter, the pens of the plotter draw the different components<br />
of the screen as follows:<br />
Description<br />
Draws the annotation <strong>and</strong> graticule.<br />
Draws trace A.<br />
Draws trace B.<br />
Draws trace C <strong>and</strong> the display line.<br />
Draws user-generated graphics <strong>and</strong> the lower-limit line.<br />
Draws the upper-limit line.<br />
8. Press Previous Menu, COPY DEV PRMT PLT (so that PLT is underlined), then Icopvl.<br />
Printing after Plotting or Plotting after Printing<br />
Pressing lcopvl without changing COPY PRNT PLT produces the function last entered (a<br />
print or a plot).<br />
. To print after doing a plot, press @5iKJ, COPY DEV PRRT PLT (so that PRNT is underlined),<br />
then [copvl.<br />
. To plot after printing, press @GiKJ COPY DEV PRNT PLT (so that PLT is underlined), <strong>and</strong><br />
[copvl.<br />
Preparing for Use 1-19
Printing Using a Parallel Interface<br />
Equipment<br />
w <strong>HP</strong> <strong>8590</strong> <strong>Series</strong> spectrum analyzer equipped with Option 041 or 043.<br />
� <strong>HP</strong> C295OA parallel printer cable.<br />
� Printer with parallel interface, choose one of the following:<br />
� <strong>HP</strong> 310* Portable DeskJet<br />
� <strong>HP</strong> 3630A PaintJet<br />
II <strong>HP</strong> 500 <strong>Series</strong>* DeskJet<br />
1 <strong>HP</strong> LaserJet<br />
� LQ-570 Epson<br />
� MX-80 Epson<br />
* Some models support color printing<br />
Interconnection <strong>and</strong> Printing Instructions<br />
1.<br />
2.<br />
3.<br />
4.<br />
5.<br />
Turn off the printer <strong>and</strong> the spectrum analyzer.<br />
Connect the printer to the spectrum analyzer using the parallel printer cable.<br />
Turn on the spectrum analyzer <strong>and</strong> printer.<br />
On the spectrum analyzer, press @GFiFJ, Print Cmfig, Pm Port &Wig ,<br />
PRN PORT <strong>HP</strong>fB PAR (for Option 041, so that PAR is underlined) or PRN PORT SER PAR (for<br />
Option 043, so that PAR is underlined).<br />
Select the configuration for your printer by pressing the appropriate key. Note that the<br />
softkey is activated when the key title is underlined.<br />
Set Colr Prirrter<br />
l-20 Preparing for Use<br />
Press this key to print in color if the spectrum analyzer is connected<br />
to a Hewlett-Packard color printer, then select the appropriate<br />
printer.<br />
Selecting any Hewlett-Packard printer results in three printouts per<br />
page prior to formfeeding the page.<br />
One printout per page can be achieved by manually formfeeding<br />
each printout.
Set B%W Printer<br />
Press this key to print in black <strong>and</strong> white, then press one of the<br />
following keys to select the appropriate printer mode.<br />
. Press <strong>HP</strong> B%W PRINTER if the spectrum analyzer is connected to a<br />
Hewlett-Packard printer.<br />
Selecting any Hewlett-Packard printer results in three printouts<br />
per page prior to formfeeding the page.<br />
One printout per page can be achieved by manually formfeeding<br />
each printout.<br />
� Press I@ B%W DJS40 if the spectrum analyzer is connected to a<br />
Hewlett-Packard DeskJet 540 printer.<br />
. Press EP MX8D SML LRG if the spectrum analyzer is connected to<br />
a MX-80 Epson or other compatible g-pin print-head printer.<br />
Pressing this key to underline SML will print two printouts to a<br />
page <strong>and</strong> will print softkey labels if desired. See step 7<br />
Pressing this key to underline LRG will print only one printout to a<br />
page <strong>and</strong> will not print the softkey labels.<br />
� Press RF LQ570 SML LRG if the spectrum analyzer is connected to<br />
a LQ-570 Epson or other compatible 24-pin print-head printer.<br />
Pressing this key to underline SML will print two printouts to a<br />
page <strong>and</strong> will print softkey labels if desired. See step 7<br />
Pressing this key to underline LRG will print only one printout to a<br />
page <strong>and</strong> will not print the softkey labels.<br />
6. If you want the softkey labels to be printed with the spectrum analyzer display printout,<br />
press PRT MEMU ON OFF so that ON is underlined. Note that this function does not work<br />
when EP MX8G SML LRG or EF LQ570 SML LRG are pressed to underline LRG.<br />
7. Press Previous Menu, CDPY DEV PRNT PLT (PRNT should be underlined), then IcoPv].<br />
Preparing for Use 1-21
Plotting to an <strong>HP</strong> LaserJet Printer<br />
Equipment<br />
w <strong>HP</strong> <strong>8590</strong> <strong>Series</strong> spectrum analyzer with RS-232 or Parallel Interface<br />
w <strong>HP</strong> 245426 g-pin to 25-pin RS-232 cable<br />
� <strong>HP</strong> C2932A g-pin (f) to g-pin (m) RS-232 cable (for use with LaserJet 4P <strong>and</strong> 4Plus)<br />
� <strong>HP</strong> C2950A parallel printer cable<br />
w Any of the following <strong>HP</strong> LaserJets:<br />
� <strong>HP</strong> LaserJet III<br />
� <strong>HP</strong> LaserJet IIIP<br />
I <strong>HP</strong> LaserJet 4<br />
� <strong>HP</strong> LaserJet 4L<br />
� <strong>HP</strong> LaserJet 4P<br />
� <strong>HP</strong> LaserJet 4Plus<br />
Interconnection <strong>and</strong> Plotting Instructions<br />
1. Turn off the spectrum analyzer.<br />
Note The RS-232 or parallel interface allow only one device (either the printer or the<br />
plotter) to be connected to the spectrum analyzer. Refer to the Programmer’s<br />
Guide for more information on protocol <strong>and</strong> cable wiring.<br />
2. Connect the <strong>HP</strong> LaserJet to the analyzer.<br />
3. Turn on the analyzer <strong>and</strong> the <strong>HP</strong> LaserJet printer.<br />
4. Press [ZKZ].<br />
5. Press CDPY DEV PlXNT PLT so that PLT is underlined.<br />
6. Press (-1, Plot Config . You can choose a full-page, half-page, or quarter-page plot<br />
with the PLTSjPG 1 2 4 softkey. Press PLTS/PG 1 2 4 to underline the number of plots<br />
per page desired.<br />
7. If two or four plots per page are chosen, a function is displayed that allows you to select<br />
the location on the paper of the plotter output. If two plots per page are selected, then<br />
PLT Cl PLT c3 _<br />
LOC - - function is displayed. If four plots per page are selected, then LOC I I is<br />
displayed. Press the softkey until the rectangular marker is in the desired section of the<br />
softkey label. The upper <strong>and</strong> lower sections of the softkey label graphically represent where<br />
on the page the plotter output will be located.<br />
8. Press PLT->L.JT ON OFF so that ON is underlined.<br />
9. Then press Icopv).<br />
l-22 Preparing for Use
Printing after Plotting or Plotting after Printing<br />
Pressing [copvl without changing COPY DEV PRNT PLT produces the function last entered (a<br />
print or a plot).<br />
w To print after doing a plot, press (CONFIG), COPY DEV PRNT PLT (so that PRNT is underlined),<br />
then IcoPv].<br />
� To plot after printing, press (W), COPY DEV PRNT PLT (so that PLT is underlined), <strong>and</strong><br />
IcoPv].<br />
Preparing for Use 1-23
If There Is a Problem<br />
This section offers suggestions to help get your computer <strong>and</strong> spectrum analyzer working as a<br />
system. The test programs provided in this chapter let you know if the connection between the<br />
computer <strong>and</strong> the spectrum analyzer interconnection is working properly.<br />
If the test program does not run, try the following suggestions:<br />
1. You may need to modify the program syntax to work with your computer. Refer to your<br />
BASIC manual for correct syntax.<br />
2. The program must be executed correctly. Refer to your computer manual for information<br />
about program execution.<br />
3. Check your program for errors.<br />
If the test program runs on the computer, but the spectrum analyzer does not respond, try the<br />
following suggestions:<br />
1.<br />
2.<br />
3.<br />
4.<br />
5.<br />
6.<br />
Make sure the spectrum analyzer is turned on. If the spectrum analyzer has power, the<br />
green indicator light above the line switch is on.<br />
Make sure the interface cable is connected securely. Check the interface cable for defects.<br />
Make sure the correct cable is used.<br />
If you are using an <strong>HP</strong>-IB interface, the spectrum analyzer must be set to the correct address<br />
setting. Press (??%KJ More 1 of 3 , ANALYZER ADDRESS .<br />
If you are using the RS-232 interface, check the spectrum analyzer baud rate. Refer to<br />
Appendix C for information about setting the baud rate on the spectrum analyzer.<br />
If a program in user memory is suspected of causing problems, use (ZZiZ], More 1 of 3 ,<br />
Dispose User Mem , ERASE DLP MEM , ERASE DLP MEM . (ERASE DLP MEM requires a<br />
double key press.) ERASE DLP MEM erases all user programs, variables, personalities (which<br />
are usually in the form of downloadable programs), <strong>and</strong> user-defined traces that are in<br />
spectrum analyzer memory.<br />
If you wish to reset the spectrum analyzer configuration to the state it was in when it was<br />
originally shipped from the factory, use DEFAULT COfFfG . To access I&FAULT CONFfG ,<br />
press C-1, More 1 of 3, DEFAULT GOEFIG , DEFAULT CONFIG . (DEFAULT CONFIG<br />
requires a double key press.)<br />
If you suspect your computer is causing the problems, check it by running a program that you<br />
know works. If your system still has problems, contact the sales <strong>and</strong> service office nearest you.<br />
Your salesperson will either be able to help solve the problem or refer you to someone who can.<br />
l-24 Preparing for Use
Writing a Program<br />
What You’ll Learn in This Chapter<br />
This chapter introduces spectrum analyzer programming. The first section of this chapter,<br />
“Writing Your First Program, n helps you write your first spectrum analyzer program <strong>and</strong><br />
introduces programming fundamentals. The second section, “Getting Information from the<br />
<strong>Spectrum</strong> Analyzer, n shows how to get data out of the spectrum analyzer. A summary at the<br />
end of this chapter reviews the programming guidelines introduced.<br />
If the computer is not connected to the spectrum analyzer, follow the instructions in Chapter 1,<br />
“Preparing for Use. ”<br />
A general knowledge of the BASIC programming language <strong>and</strong> the spectrum analyzer is<br />
recommended before reading this chapter. Refer to your software documentation manuals for<br />
more information about BASIC. For reference, Chapter 5 of this manual provides spectrum<br />
analyzer comm<strong>and</strong>s in alphabetical order.<br />
Note All programming examples in this chapter for the <strong>HP</strong>-IB interface are written<br />
in <strong>HP</strong> BASIC 4.0, using an <strong>HP</strong> 9000 <strong>Series</strong> 200 computer. For the RS-232<br />
interface, examples are written in GW BASIC, using an <strong>HP</strong> Vectra personal<br />
computer or compatible controller.<br />
2<br />
Writing a Program 2-l
Writing Your First Program<br />
When the spectrum analyzer has been connected to a computer via <strong>HP</strong>-IB or RS-232 interface,<br />
the computer can be used to send instructions to the spectrum analyzer. These instructions tell<br />
the spectrum analyzer such things as frequency span, resolution b<strong>and</strong>width, <strong>and</strong> sweep mode.<br />
If a properly selected sequence of instructions is sent to the spectrum analyzer, a measurement<br />
is made. Sequences of coded instructions are called programs.<br />
Composing the. Program<br />
Most spectrum analyzer programs contain several common statements, or “comm<strong>and</strong>s,” that<br />
address the spectrum analyzer, preset it, <strong>and</strong> select its sweep mode. As an example, we will<br />
write a short program that executes only these common comm<strong>and</strong>s.<br />
The following programs are for the <strong>HP</strong>-IB <strong>and</strong> the RS-232 interfaces. Note the quotation marks<br />
that contain spectrum analyzer comm<strong>and</strong>s in each line. Also note the semicolons at the end of<br />
each line, inserted at the end of each set of spectrum analyzer comm<strong>and</strong>s within the quotation<br />
marks. Using semicolons makes programs easier to read, prevents comm<strong>and</strong> misinterpretation,<br />
<strong>and</strong> is recommended by IEEE St<strong>and</strong>ard 728.<br />
Note In comm<strong>and</strong>s where quotation marks occur, the computer recognizes data as<br />
character data <strong>and</strong> not BASIC programming language comm<strong>and</strong>s.<br />
Program Example for the <strong>HP</strong>-IB Interface<br />
05 !File: "IBPROGl"<br />
20 CLEAR Analyzer<br />
30 OUTPUT Analyzer;"IP;"<br />
40 OUTPUT Analyzer;"SNGLS;TS;"<br />
50 LOCAL 7<br />
60 END<br />
Line 10 of our program assigns a variable called “Analyzer” to our spectrum analyzer at address<br />
718. This instruction is followed by the <strong>HP</strong> BASIC CLEAR comm<strong>and</strong>, which resets the spectrum<br />
analyzer on the <strong>HP</strong>-IB. With these two program lines, we have set up a clear communication<br />
path between the computer <strong>and</strong> the spectrum analyzer.<br />
Line 30 introduces the instrument preset (IP) comm<strong>and</strong>, which corresponds to the key<br />
on the spectrum analyzer. The IP comm<strong>and</strong> sets all of the analog parameters of the spectrum<br />
Note All softkey functions on the spectrum analyzer have corresponding<br />
programming comm<strong>and</strong>s. As you continue programming, you will learn the<br />
comm<strong>and</strong> names that correspond to the front-panel keys <strong>and</strong> softkeys.<br />
Line 40 activates the single-sweep mode. Most remotely controlled measurements require<br />
control of the sweep. Once SNGLS has activated the single-sweep mode, take sweep (TS)<br />
starts <strong>and</strong> completes one full sweep. TS maintains absolute control over the sweep, which is<br />
necessary for accurate computer data transfer <strong>and</strong> reduced program execution time.<br />
Before we end the program, we return the spectrum analyzer to front-panel control with line<br />
50, LOCAL 7. The LOCAL comm<strong>and</strong> corresponds to the (LOCAL) key on the front panel<br />
of the spectrum analyzer. (LOCAL 7 comm<strong>and</strong>s everything on the bus to go to local mode.)<br />
2-2 Writing a Program
Finally, in line 60, we end the program with the END comm<strong>and</strong>. (If you forget to include the<br />
END comm<strong>and</strong>, the computer will give an error message.)<br />
Enter the program lines, press (RUN) on the computer, <strong>and</strong> watch the spectrum analyzer display<br />
as it completes each instruction.<br />
Program Example for the RS-232 Interface<br />
10 'File = 232PROGl<br />
20 OPEN "COMl: 9600,N,8,1" AS #1<br />
30 PRINT #1 "IP*"<br />
40 PRINT #l:"SNkLS;TS;"<br />
50 END<br />
Line 20 of the program opens the RS-232 COMl: line, identifies it as #l, <strong>and</strong> sets the RS-232<br />
parameters as follows:<br />
9600 baud<br />
no parity<br />
8 bits/character<br />
1 stop bit<br />
Line 30 of the program introduces the instrument preset (IP) comm<strong>and</strong>, which corresponds to<br />
the [PRESET) key on the spectrum analyzer. The IP comm<strong>and</strong> sets all of the analog parameters<br />
of the spectrum analyzer to known values <strong>and</strong> provides a good starting point for every<br />
measurement.<br />
Note All softkey functions on the spectrum analyzer have corresponding<br />
programming comm<strong>and</strong>s. As you continue programming, you will learn the<br />
comm<strong>and</strong> names that correspond to the front-panel keys <strong>and</strong> softkeys.<br />
Line 40 activates the single-sweep mode. Most remotely controlled measurements require<br />
control of the sweep. Once SNGLS has activated the single-sweep mode, take sweep (TS) starts<br />
<strong>and</strong> completes one full sweep. The TS comm<strong>and</strong> maintains absolute control over the sweep,<br />
which is necessary for accurate computer data transfer <strong>and</strong> reduced program execution time.<br />
Finally, in line 50, end the program with the END comm<strong>and</strong>.<br />
Make sure that the spectrum analyzer baud rate is 9600 via the BAUII RATE softkey. Enter the<br />
program lines, then press (RUN) on the computer. Watch the spectrum analyzer display as it<br />
completes each instruction.<br />
Note When using an <strong>HP</strong> 9000 <strong>Series</strong> 200 or 300 computer, END comm<strong>and</strong>s are<br />
necessary. Refer to your BASIC manual to determine END statement<br />
requirements for your specific computer.<br />
Writing a Program 2-3
Modifying the Program<br />
Remote operation of the spectrum analyzer is similar to manual operation. Remote<br />
measurements are executed by comm<strong>and</strong>s that correspond to front-panel keys <strong>and</strong> softkeys.<br />
The first chapter in the spectrum analyzer operating manual shows you how to make a simple<br />
measurement using the calibration signal. We can add instructions to our program so that it<br />
will make the same measurement. (Because the manual process closely resembles that of<br />
the program, you may want to review the chapter entitled “Making a Measurement” in the<br />
<strong>HP</strong> <strong>8590</strong> E-<strong>Series</strong> <strong>and</strong> L.-S&es <strong>Spectrum</strong> <strong>Analyzers</strong> User’s Guide.)<br />
By inserting a few lines into the initial program, we can set functions such as the center<br />
frequency <strong>and</strong> span, <strong>and</strong> we can activate a marker to find a signal’s frequency <strong>and</strong> amplitude.<br />
Program Example for the <strong>HP</strong>-IB Interface<br />
First, we set the center frequency to 300 MHz. The CF comm<strong>and</strong> corresponds to the center<br />
frequency function, CEnTER FREQ . (All spectrum analyzer comm<strong>and</strong>s, such as CF, are<br />
described in Chapter 5.)<br />
Insert the following program line between lines 40 <strong>and</strong> 50:<br />
41 OUTPUT Analyzer;"CF 300MZ;"<br />
Next, we set the span to 200 MHz with the SP comm<strong>and</strong>. Add the following program line:<br />
42 OUTPUT. Analyzer;"SP 200MZ;"<br />
Because we are controlling the sweep, we must update the spectrum analyzer display screen<br />
with the following program line:<br />
43 OUTPUT Ana1yzer;"T.S;"<br />
When the program is executed, the spectrum analyzer takes one full sweep before executing<br />
line 41. Line 41 changes the center frequency to 300 MHz, <strong>and</strong> line 42 changes the span to<br />
200 MHz.<br />
Enter the following program line to place a marker at the highest peak on the trace with a<br />
MKPK HI comm<strong>and</strong>:<br />
44 OUTPUT Analyzer:"MKPK HI;"<br />
The completed program is shown below:<br />
05 !File: "IBPROG2"<br />
10 Analyzer=718<br />
20 CLEAR Analyzer<br />
30 OUTPUT Analyzer;"IP;"<br />
40 OUTPUT Analyzer;"SNGLS;TS;"<br />
41 OUTPUT Analyzer;"CF 300MZ;”<br />
42 OUTPUT Analyzer;"SP 200MZ;"<br />
43 OUTPUT Analyzer;"TS;"<br />
44 OUTPUT Analyzer;"MKPK HI;"<br />
50 LOCAL 7<br />
60 END<br />
Run the program to make the measurement. Watch the spectrum analyzer display as it<br />
completes each instruction. Notice that the program executes the instructions faster than is<br />
possible from the front panel.<br />
2-4 Writing a Program
When a certain measurement is repeated often, a computer program can save time. In<br />
addition, the computer is less likely to make an error than an operator manually entering the<br />
same instructions from the front panel.<br />
Program Example for the RS-232 Interface<br />
First, we set the center frequency to 300 MHz. The CF comm<strong>and</strong> corresponds to the center<br />
frequency function, Cm FREQ . (All spectrum analyzer comm<strong>and</strong>s, such as CF, are<br />
described in Chapter 5.)<br />
Insert the following program lines between lines 40 <strong>and</strong> 50 of the previous program.<br />
41 PRINT #l,"CF 300MZ;"<br />
Next, set the span to 200 MHz with the SP comm<strong>and</strong>. Add the following program line:<br />
42 PRINT #l,"SP 200MZ;"<br />
Because we are controlling the sweep, we must update the spectrum analyzer display with the<br />
following program line:<br />
43 PRINT #l,"TS;"<br />
When the program is executed, the spectrum analyzer takes one full sweep before executing<br />
line 41. Line 41 changes the center frequency to 300 MHz. Line 42 changes the span to<br />
200 MHz.<br />
Enter the following program line to place a marker at the highest peak on the trace:<br />
44 PRINT #l,"MKPK HI;"<br />
The completed program is shown below:<br />
10 'File = 232PROG2<br />
20 OPEN "COMl:9600,N,8,1" AS #1<br />
30 PRINT #l,"IP;"<br />
40 PRINT #l,"SNGLS;TS;"<br />
41 PRINT #l,"CF 300MZ;"<br />
42 PRINT #l,"SP 200MZ;"<br />
43 PRINT #l,"TS;"<br />
44 PRINT Xl,"MKPK HI;"<br />
50 END<br />
Run the program to make the measurement. Watch the spectrum analyzer display as it<br />
completes each instruction. When a certain measurement is repeated often, a computer<br />
program can save time. Also, the computer is much less likely to make an error than an<br />
operator manually entering the same instructions from the front panel.<br />
Writing a Program 2-5
Enhancing the Program with Variables<br />
In the last program, specific center frequency <strong>and</strong> span values were set. By modifying the<br />
program, we can cause different values to be set each time the program is run.<br />
Program Example for the <strong>HP</strong>-IB Interface<br />
In the following program, the exclamation point (!) allows the words that follow to be ignored<br />
by the computer. Thus, they serve as comments in the program.<br />
10 !FILE: “VARIO”<br />
20 REAL C,freq,S-pan !define the variables<br />
30 Analyzer=718<br />
40 CLEAR Analyzer<br />
50 OUTPUT Analyzer;“IP;SNGLS;TS;”<br />
60 !ask for the desired center frequency:<br />
70 INPUT “CENTER FREQUENCY (MHz) ?I’, C-f req<br />
80 !ask for the desired span:<br />
90 INPUT “SPAN(MHz)?” ,S,pan<br />
100 !send the center frequency <strong>and</strong> span to the<br />
110 !analyzer <strong>and</strong> take a sweep to update the<br />
120 !analyzer screen:<br />
130 OUTPUT Analyzer; “CF “;C-freq; “MZ; ‘I<br />
140 OUTPUT Analyzer ; “SP I’ ; S-pan; “MZ ; ‘I<br />
150 OUTPUT Analyzer ; “TS ; ‘I<br />
160 !find the signal peak with peak search:<br />
170 OUTPUT Analyzer ; “MKPK HI ; I’<br />
180 LOCAL 7<br />
190 END<br />
Three modifications are made to the previous program so it includes center frequency <strong>and</strong> span<br />
variables. First, using the <strong>HP</strong> BASIC REAL comm<strong>and</strong>, we define two variables, C-freq <strong>and</strong><br />
S-pan. The frequency <strong>and</strong> span parameters are stored in these variables. (Refer to line 20.)<br />
Second, using the <strong>HP</strong> BASIC INPUT comm<strong>and</strong>, we prompt the user to enter the desired center<br />
frequency <strong>and</strong> span. The center frequency <strong>and</strong> span values are entered on the computer;<br />
because the measurement units will be entered by the program, the user does not enter them.<br />
(See lines 70 to 140.)<br />
Third, we modify the output parameter statements so that the values stored in C-freq <strong>and</strong><br />
S-pan are sent to the spectrum analyzer. (See lines 130 to 140.)<br />
A sweep is taken after the parameters are sent to the spectrum analyzer, to ensure that the<br />
spectrum analyzer screen is updated before the marker is placed on the highest signal peak.<br />
2-6 Writing a Program
Program Example for the RS-232 Interface<br />
In the following program, the apostrophe (‘) allows the words that follow to be ignored by the<br />
computer. Thus, they serve as comments in the program.<br />
10 ‘File = 232PROG3<br />
20 OPEN "COMl:9600,N,8,1" AS #1<br />
30 PRINT #l,"IP;"<br />
40 PRINT #l,"SNGLS;TS;"<br />
50 'Ask for the center frequency <strong>and</strong> span<br />
60 PRINT "INPUT THE CENTER FREQUENCY (MZ) ";<br />
70 INPUT CENTER<br />
80 PRINT "INPUT THE SPAN (MZ) 'I;<br />
90 INPUT SPAN<br />
100 'Send center freq <strong>and</strong> span to spectrum analyzer<br />
110 'take a sweep to update screen<br />
120 PRINT #l,"CF ";CENTER;"MZ;"<br />
130 PRINT #l,"SP ";SPAN;"MZ;"<br />
140 PRINT #l,"TS;"<br />
150 'find the signal peak with peak search<br />
160 PRINT #l,"MKPK HI;"<br />
170 END<br />
Three modifications are made to the previous program in order to include center frequency <strong>and</strong><br />
span variables. First, we use two variables, CENTER <strong>and</strong> SPAN, to store the frequency <strong>and</strong><br />
span parameters.<br />
Second, using the BASIC INPUT comm<strong>and</strong>, we ask the computer operator to enter the desired<br />
center frequency <strong>and</strong> span. (See lines 70 <strong>and</strong> 90 in previous program example). Next, we<br />
modify the output parameter statements so that the values stored in the CENTER <strong>and</strong> SPAN<br />
variables are sent to the spectrum analyzer. (See lines 120 <strong>and</strong> 130.) A sweep is taken after the<br />
parameters are sent to the spectrum analyzer, to ensure that the spectrum analyzer screen is<br />
updated before the marker is placed on the highest signal peak.<br />
Writing a Program 2-7
Getting Information from the <strong>Spectrum</strong> Analyzer<br />
The first part of this chapter demonstrated techniques for setting spectrum analyzer<br />
parameters. This section demonstrates a technique for getting information out of the spectrum<br />
analyzer.<br />
For example, in the second program of this chapter, we placed a marker at the highest peak<br />
of a trace <strong>and</strong> the value of the marker could be read in the upper right-h<strong>and</strong> corner of the<br />
spectrum analyzer display. In the following program, we will add some comm<strong>and</strong>s that will<br />
read the marker’s frequency <strong>and</strong> amplitude value <strong>and</strong> return those values to the computer.<br />
Program Example for the <strong>HP</strong>-IB Interface<br />
10 ! FILE : “MKR”<br />
20 REAL A-mpmarker,F,reqmarker !define variables<br />
30 Analyzer=718<br />
40 OUTPUT Analyzer ; “IP ; ‘I<br />
50 !set the output format of the spectrum analyzer for<br />
60 !real numbers:<br />
70 OUTPUT Analyzer ; “TDF P ; ‘I<br />
80 ! set the spectrum analyzer parameters:<br />
90 OUTPUT Analyzer ; “SNGLS ; ‘I<br />
100 OUTPUT Analyzer ; “CF 300MZ ; ”<br />
110 OUTPUT Analyzer ; “SP 200MZ ; ‘I<br />
120 OUTPUT Analyzer ; “TS ; I’<br />
130 OUTPUT Analyzer ; “MKPK HI ; ‘I<br />
140 !ask the spectrum analyzer for the marker's<br />
150 !amplitude value:<br />
160 OUTPUT Analyzer ; “MKA? ; I’<br />
170 !send the amplitude value to the computer:<br />
180 ENTER Analyzer;A-mpmarker<br />
190 !ask the spectrum analyzer for the marker's<br />
200 !frequency value:<br />
210 OUTPUT Analyzer; “MKF? ; ‘I<br />
220 !send the frequency value to the computer:<br />
230 ENTER Analyzer;F,reqmarker<br />
240 !print the amplitude <strong>and</strong> frequency:<br />
250 PRINT “THE SIGNAL PEAK IS ” ;A,mpmarker ;<br />
260 PRINT ” dBm AT ” ; F-reqmarker/l .E+6; ” MHz”<br />
270 !set the spectrum analyzer to continuous sweep mode:<br />
280 OUTPUT Analyzer; “CONTS; ‘I<br />
290 LOCAL 7<br />
300 END<br />
First, using the <strong>HP</strong> BASIC REAL comm<strong>and</strong>, we define two variables, A-mpmarker <strong>and</strong><br />
F-reqmarker. The amplitude <strong>and</strong> frequency values of the marker are stored in these variables.<br />
(See line 20.)<br />
Second, we set the output format of the spectrum analyzer for real numbers with the spectrum<br />
analyzer’s trace data format (TDF) comm<strong>and</strong>. (See line 70.) As in our original program, we set<br />
the center frequency <strong>and</strong> span values. A sweep is taken <strong>and</strong> the marker is placed on the trace.<br />
Next, we ask the spectrum analyzer for the amplitude value of the marker. We have the<br />
spectrum analyzer send the marker amplitude value to the computer. Note that there can be<br />
only one spectrum analyzer query per programming line. We also ask the spectrum analyzer<br />
for the frequency value of the marker, <strong>and</strong> we have the spectrum analyzer send the marker<br />
frequency value to the computer. (See lines 100 through 230.)<br />
2-8 Writing a Program
Finally, we print the values on the computer screen:<br />
"THE SIGNAL PEAK IS . . . dBm AT . . . MHz"<br />
Before we end the program, we return the spectrum analyzer to continuous-sweep mode <strong>and</strong><br />
local control.<br />
Program Example for the RS-232 Interface<br />
10 'File = 232PROG4<br />
20 OPEN "COMl:9600,N,8,1" AS #l<br />
30 PRINT #l,"IP;"<br />
40 'Set the output format of the spectrum analyzer for<br />
50 'real numbers<br />
60 PRINT #l,"TDF P;"<br />
70 'set the spectrum analyzer's parameters<br />
80 PRINT #l,"SNGLS;"<br />
90 PRINT #l,"CF 300MZ;"<br />
100 PRINT #l,"SP 200MZ;"<br />
110 PRINT #l,"TS;"<br />
120 PRINT #l,"MKPK HI;"<br />
130 'ask the spectrum analyzer for the marker's<br />
140 'amplitude value<br />
150 PRINT #l "MKA'."<br />
160 'get the'ampli&rde from the spectrum analyzer<br />
170 INPUT #l,AMPMARKER<br />
180 'ask the spectrum analyzer for the marker's frequency value<br />
190 PRINT #1 "MKF'."<br />
200 'get the'freq&cy value from the spectrum analyzer<br />
210 INPUT #l,FREQMARKER<br />
220 'print the amplitude <strong>and</strong> frequency<br />
230 PRINT "THE SIGNAL PEAK IS ";AMPMARKER;<br />
240 PRINT " dbm AT ";FREQMARKER/lOOOOOO!;" MZ"<br />
250 'set the spectrum analyzer to continuous sweep mode<br />
260 PRINT #l,"CONTS;"<br />
270 END<br />
First, set the output format of the spectrum analyzer to real numbers with the spectrum<br />
analyzer’s trace data format (TDF) comm<strong>and</strong> (line 60).<br />
As in the original program, the center frequency <strong>and</strong> span values are set <strong>and</strong> a sweep is taken.<br />
Next, the marker is placed on the trace.<br />
Two additional variables are used for AMPMARKER <strong>and</strong> FREQMARKER. The amplitude <strong>and</strong><br />
frequency values of the marker are stored in these variables (lines 170 <strong>and</strong> 210). The program<br />
requests the amplitude <strong>and</strong> frequency values of the marker (lines 150 <strong>and</strong> 190). Note that<br />
there can be only one spectrum analyzer query per programming line.<br />
Finally, the amplitude <strong>and</strong> frequency values are displayed on the computer screen:<br />
"THE SIGNAL PEAK IS . . . dBM AT . . . MZ"<br />
Writing a Program 2-9
Programming Guidelines<br />
1. Perform the measurement manually, keeping track of the sequence of functions used.<br />
2. In the written program, execute an instrument preset (IP) <strong>and</strong> set single-sweep mode<br />
(SNGLS) before setting other spectrum analyzer functions.<br />
3. Use variables for function values. List variables at the beginning of the program,<br />
4. Activate spectrum analyzer functions in logical order. Place quotation marks around<br />
spectrum analyzer comm<strong>and</strong>s. Separate comm<strong>and</strong>s with semicolons.<br />
5. After setting spectrum analyzer functions, execute a take sweep (TS) comm<strong>and</strong> before<br />
reading data or activating markers.<br />
6. The spectrum analyzer can return only one value per programming line. Do not have more<br />
than one query per programming line.<br />
7. Use the exclamation point (!) to include comment lines when using <strong>HP</strong> BASIC. Use the<br />
apostrophe or REM to create comment lines when using GW BASIC. (The use of the<br />
exclamation point <strong>and</strong> the apostrophe to create comment lines are dependent on the<br />
your system.)<br />
2-l 0 Writing a Program
Programming Xbpics<br />
What You’ll Learn in This Chapter<br />
This chapter contains the following advanced programming techniques <strong>and</strong> topics.<br />
� An example of moving <strong>and</strong> saving trace data from the spectrum analyzer into the computer.<br />
� An example of how spectrum analyzer states are saved with the computer, then returned to<br />
the spectrum analyzer.<br />
� An example of reading trace data from a computer disk.<br />
� An example of saving <strong>and</strong> recalling instrument states.<br />
� An example of returning the spectrum analyzer to its former state.<br />
� An example of remotely measuring harmonic distortion.<br />
� A summary of using different formats for trace data transfers.<br />
Many of the programming suggestions discussed in Chapter 2, “Writing a Program,” have been<br />
incorporated into the programs in this chapter.<br />
Note Ail programming examples for the <strong>HP</strong>-IB interface in this chapter are written<br />
in <strong>HP</strong> BASIC 4.0. For the RS-232 interface, examples are written in GW BASIC.<br />
A general knowledge of the BASIC programming language is recommended before reading<br />
this chapter. (Refer to your software documentation manuals.) Chapter 5 of this manual,<br />
“Programming Comm<strong>and</strong>s,” defines spectrum analyzer comm<strong>and</strong>s alphabetically.<br />
3<br />
Programming Topics 3-l
Controlling Trace Data with a Computer<br />
Using sample programs, this section shows you how to read trace data <strong>and</strong> store the data with<br />
your computer.<br />
Reading Trace Data<br />
The following program, which has been annotated with comments, reads a trace from the<br />
spectrum analyzer <strong>and</strong> stores the trace data in a variable.<br />
Program Example for the <strong>HP</strong>-IB Interface<br />
10 !FILE: “IBPROG5”<br />
20 !create a 401 point trace array:<br />
30 REAL Trace,a(l:401)<br />
40 Analyzer=718<br />
50 OUTPUT Analyzer;“IP; ‘I<br />
60 !set the output format of the spectrum analyzer for<br />
70 !real numbers:<br />
80 OUTPUT Analyzer ; “TDF P ; I’<br />
90 !set the spectrum analyzer parameters:<br />
100 OUTPUT Analyzer; “SNGLS; ‘I<br />
110 OUTPUT Analyzer ; “CF 300MZ ; ‘I<br />
120 OUTPUT Analyzer ; “SP 200MZ ; ‘I<br />
130 OUTPUT Analyzer ; “TS ; ‘I<br />
140 OUTPUT Analyzer; “MKPK HI ; ‘I<br />
150 !move peak to center of spectrum analyzer screen:<br />
160 OUTPUT Analyzer ; “MKCF ; I’<br />
170 OUTPUT Analyzer ; “TS ; ‘I<br />
180 !ask the spectrum analyzer for trace data:<br />
190 OUTPUT Analyzer ; “TRA? ; ‘I<br />
200 !send the trace data to the computer:<br />
210 ENTER Analyzer;Trace-a(*)<br />
220 OUTPUT Analyzer ; “CONTS; I’<br />
230 LOCAL 7<br />
240 END<br />
Trace data can be read with the computer by making three changes to the program created in<br />
Chapter 2. First, we modify the program to create a 401-point trace array, called Trace-a, in<br />
which the trace data will be stored. Second, the program uses the TRA comm<strong>and</strong> to request<br />
trace A data. (The MKA <strong>and</strong> MKF comm<strong>and</strong>s from the previous program have been deleted.)<br />
Third, the spectrum analyzer sends trace A data to the variable, Trace-a.<br />
3-2 Programming Topics
Program Example for the RS-232 Interface<br />
10 'File = 232PROG5<br />
20 OPEN "COMl:9600,N,8,1" AS #l<br />
30 'create a 401-point trace array<br />
40 DIM TRCA(401)<br />
50 PRINT #1 "IP."<br />
60 'set outiut iormat of spectrum analyzer for real numbers<br />
70 PRINT #l,"TDF P;"<br />
80 ‘set spectrum analyzer parameters<br />
90 PRINT #l,"SNGLS;"<br />
100 PRINT #l,"CF 300MZ;"<br />
110 PRINT #l,"SP 200MZ;”<br />
120 PRINT #l,"TS;"<br />
130 PRINT tl "MKPK."<br />
140 'move peik to lenter of spectrum analyzer screen<br />
150 PRINT #l 3 "MKCF." ,<br />
160 PRINT #1 "TS."<br />
170 'ask spe&r& analyzer for trace data<br />
180 PRINT #l,"TRA?;"<br />
190 'retrieve trace data from spectrum analyzer<br />
200 FOR I=1 TO 401<br />
210 INPUT #l,TRCA(I)<br />
220 NEXT I<br />
230 'set continuous-sweep mode<br />
240 PRINT #l,"CONTS;"<br />
250 END<br />
Trace data can be read with the computer by making three changes to the program created<br />
in Chapter 2. First, we modify the program to create a 401-point trace array, called TRCA<br />
in which trace data will be stored (line 40). Second, the program uses the TRA comm<strong>and</strong> to<br />
request trace A data (line 180). (The MKA <strong>and</strong> MKF comm<strong>and</strong>s in the original program have<br />
been deleted.) Third, we will have the spectrum analyzer send the trace A data into the TRCA<br />
variable (line 210).<br />
Programming Topics 3-3
Saving Trace Data<br />
The trace data in the previous program can be stored on a computer disk by making three<br />
program modifications.<br />
10 !FILE: "IBPROGG"<br />
20 !create a 401 point trace array:<br />
30 REAL Trace,a(l:401)<br />
40 Analyzer=718<br />
50 OUTPUT Analyzer;"IP;"<br />
60 !set the output format of the spectrum analyzer for<br />
70 !real numbers:<br />
80 OUTPUT Analyzer;"TDF P;"<br />
90 !set the spectrum analyzer parameters:<br />
100 OUTPUT Analyzer;"SNGLS;"<br />
110 OUTPUT Analyzer;"CF 300MZ;"<br />
120 OUTPUT Analyzer;"SP 200MZ;"<br />
130 OUTPUT Analyzer;"TS;"<br />
140 OUTPUT Analyzer;"MKPK HI;"<br />
150 !move peak to center of spectrum analyzer screen:<br />
160 OUTPUT Analyzer;"MKCF;"<br />
170 OUTPUT Analyzer;"TS;"<br />
180 !ask the spectrum analyzer for trace data:<br />
190 OUTPUT Analyzer;"TRA?;"<br />
200 !send the trace data to the computer:<br />
210 ENTER Analyzer;Trace-a(*)<br />
220 !create file to store trace<br />
230 !file is 13 records long:<br />
240 CREATE BDAT "DATA-A",13<br />
250 !assign path for the file:<br />
260 ASSIGN @File TO "DATA-A"<br />
270 !send trace data to the file:<br />
280 OUTPUT OFile;Trace,a(*)<br />
290 OUTPUT Analyzer;"CONTS;"<br />
300 LOCAL 7<br />
310 !close file:<br />
320 ASSIGN @File TO *<br />
330 END<br />
First, using the CREATE comm<strong>and</strong>, we create an empty file on the disk for storing the trace.<br />
The file is 13 records long. (To determine the number of records, the 401-point trace is<br />
multiplied by 8 bytes per point, the storage required for real numbers, then divided by 256<br />
bytes per record. The result is rounded to the next largest integer.)<br />
Next, we assign an input <strong>and</strong> an output path to the file DATA-A. Then, we send the trace data<br />
to the file. (See lines 260 through 280.) Finally, in line 320, we close the file.<br />
Note If a program containing the CREATE comm<strong>and</strong> is run twice, the computer will<br />
report an error the second time because the file already exists. To prevent this<br />
error, place an exclamation mark before the CREATE comm<strong>and</strong> to “comment<br />
out” the line after the first run. (See line 240.)<br />
3-4 Programming Topics
Program Example for the RS-232 Interface<br />
10 'File = 232PROG6<br />
20 OPEN "COMl:9600,N,8,1" AS #l<br />
30 'create a 401-point trace array<br />
40 DIM TRCA(401)<br />
50 PRINT #l,"IP;"<br />
60 'set output format of spectrum analyzer for real numbers<br />
70 PRINT #l,"TDF P;"<br />
80 'set spectrum analyzer parameters<br />
90 PRINT #l "SNGLS."<br />
100 PRINT #;,"CF 3;OMZ;"<br />
110 PRINT tl,"SP 200MZ;"<br />
120 PRINT #1 "TS."<br />
130 PRINT #l:"MKPK;"<br />
140 'move peak to center of spectrum analyzer screen<br />
150 PRINT #1 "MKCF."<br />
160 PRINT #l:"TS;"'<br />
170 'ask spectrum analyzer for trace data<br />
180 PRINT #1 "TRA'."<br />
190 'input the t&e data to the BASIC program<br />
200 FOR I=1 TO 401<br />
210 INPUT #l,TRCA(I) 'data input in dBm<br />
220 NEXT I<br />
230 'create file to store trace on disk<br />
240 OPEN "TRACEA" FOR OUTPUT AS #2<br />
250 'print the trace data to the disk<br />
260 FOR I=1 TO 401<br />
270 PRINT #2,TRCA(I)<br />
280 NEXT I<br />
290 'put spectrum analyzer into continuous-sweep mode<br />
300 PRINT tl , "CONTS." ,<br />
310 END<br />
Using the OPEN comm<strong>and</strong>, we create an empty file on the disk for storing the trace <strong>and</strong> assign<br />
an input <strong>and</strong> an output path to the file TRACEA. Then we send the trace data to the file. (See<br />
lines 260 through 280.)<br />
Lines 20 through 220 of 232PROG6 are identical to the previous program, 232PROG5.<br />
Programming Topics 3-5
Reading Trace Data from a Computer Disk<br />
If we want to return trace data to the spectrum analyzer for later viewing, we must work<br />
the “saving” process in reverse. The following program reads a trace previously stored on a<br />
computer disk <strong>and</strong> stores the trace in an array variable.<br />
Program Example for the <strong>HP</strong>-IB Interface<br />
10 !FILE: "IBPROG7"<br />
20 !create a 401-point trace array:<br />
30 REAL Trace-a(l:401)<br />
40 !assign path to the file with the<br />
50 !trace in it:<br />
60 ASSIGN @File TO "DATA-A"<br />
70 !enter trace into variable Trace-a:<br />
80 ENTER QFile;Trace-a(*)<br />
90 !close file:<br />
100 ASSIGN OFile TO *<br />
110 END<br />
First, in line 30, the program creates a 401-point trace array. Then, in line 60, the program<br />
assigns a path to the trace file. Finally, in line 80, the program sends the trace data to the<br />
variable Trace-N *).<br />
Program Example for the RS-232 Interface<br />
10 'File = 232PROG7<br />
20 OPEN "COMl:9600,N,8,1" AS #l<br />
30 'create a 401-point trace array<br />
40 DIM TRCA(401)<br />
50 'assign number to file with trace data in it<br />
60 OPEN "TRACEA" FOR INPUT AS #2<br />
70 'enter the trace into the array<br />
80 FOR I=1 TO 401<br />
90 INPUT #2,TRCA(I)<br />
100 NEXT I<br />
110 CLOSE<br />
120 END<br />
First, in line 40, the program creates a 401-point trace array. Then, in lines 60 through 100, the<br />
program reads the disk file TRACEA <strong>and</strong> stores data in the array variable TRCA.<br />
3-6 Programming Topics
Saving <strong>and</strong> Recalling Instrument States<br />
The spectrum analyzer’s control settings (or its “state”) can be saved with a computer <strong>and</strong><br />
retrieved later to streamline test sequences or repeat manual measurements. Control settings<br />
can be stored in one of eight state registers in the spectrum analyzer, in computer memory, or<br />
on a computer disk.<br />
The first program in this section demonstrates techniques for saving an instrument state, along<br />
with its current trace A data. The second program demonstrates how the state information <strong>and</strong><br />
the trace data is read from the computer <strong>and</strong> returned to the spectrum analyzer.<br />
If you wish to save states in the spectrum analyzer, see the descriptions of the save state<br />
(SAVES) <strong>and</strong> recall state (RCLS) comm<strong>and</strong>s in Chapter 5.<br />
Saving the <strong>Spectrum</strong> Analyzer’s State<br />
The following two programs read <strong>and</strong> store a trace from the spectrum analyzer.<br />
Programming Topics 3-7
Program Example for the <strong>HP</strong>-IB Interface<br />
10 !FILE: "IBPROG8"<br />
20 !define 202 character string:<br />
30 DIM Learn_string$[202]<br />
40 !create 401-point array to store trace:<br />
50 INTEGER Trace,a(l:401)<br />
60 Analyzer=718<br />
70 !set output format for two byte integers:<br />
80 OUTPUT Analyzer;"TDF B;"<br />
90 !ask spectrum analyzer for trace data:<br />
100 OUTPUT Analyzer;"TRA?;"<br />
110 !send trace to the computer:<br />
120 ENTER Analyzer USING "t,W";Trace,a(*)<br />
130 !get learnstring from spectrum analyzer:<br />
140 OUTPUT Analyzer;"OL;"<br />
150 ENTER Analyzer USING "#,202A";Learn_string$<br />
160 !create file to store trace:<br />
170 CREATE BDAT "STATE",4<br />
180 !assign path to the file:<br />
190 ASSIGN @File TO "STATE"<br />
200 !send trace to the file:<br />
210 OUTPUT QFile;Learn,string$,Trace_a(*)<br />
220 !return output format to default mode:<br />
230 OUTPUT Analyzer;"TDF P;"<br />
240 !close file:<br />
250 ASSIGN @File TO *<br />
260 END<br />
3-g Programming Topics
The <strong>HP</strong>-IB version stores the trace in the variable called Trace-a(*). The state of the spectrum<br />
analyzer is stored in the variable Learn-string& These two variables are then saved in a file<br />
called STATE. Finally, the file is stored on a disk.<br />
Using the data stored in STATE, the spectrum analyzer settings can be reset according to the<br />
saved state. Then, using the stored trace data, trace data can be viewed on the spectrum<br />
analyzer display.<br />
Line 30 gives the dimensions of the learn string using the <strong>HP</strong> BASIC DIM comm<strong>and</strong>. Learn<br />
strings for the spectrum analyzer require 202 bytes of storage space. Also see the output learn<br />
string (OL) comm<strong>and</strong>.<br />
Line 70 uses TDF B to format the output in binary. Binary provides the fastest data transfer<br />
<strong>and</strong> requires the least amount of memory to store data. Each data point is transferred in<br />
binary as two 8-bit bytes. The data points are in the internal representation of measurement<br />
data. (See “Different Formats for Trace Data Transfers” at the end of this chapter for more<br />
information about trace data formats.)<br />
When the trace <strong>and</strong> state data are sent from the spectrum analyzer to the computer, they<br />
must be formatted. Lines 120 <strong>and</strong> 150 format trace data with the <strong>HP</strong> BASIC USING comm<strong>and</strong>.<br />
In the formatting statement, I‘#” indicates that the statement is terminated when the last<br />
ENTER item is terminated. EOI (end-or-identify) <strong>and</strong> LF (line feed) are item terminators, <strong>and</strong><br />
early termination will result in an inaccurate learn string. “W” specifies word format. “202A”<br />
indicates the size of the learn string.<br />
Line 170 creates a file called STATE that is 4 records long. (lb determine the number of records<br />
for the computer in our example, the 401-point trace is multiplied by 2 bytes per point <strong>and</strong> the<br />
202-byte learn string is added to give 1004 bytes total. This total is divided by 256 bytes per<br />
record, resulting in 4 records.)<br />
Note If the program containing the CREATE comm<strong>and</strong> is run twice, the computer<br />
will report an error the second time because the file already exists. lb prevent<br />
this, place an exclamation mark before the CREATE comm<strong>and</strong> to “comment<br />
out” line 170 after the program has been executed.<br />
Programming Topics 3-9
Program Example for the RS-232 Interface<br />
10 'File = 232PROG8<br />
20 OPEN "COMl:9600,N,8,1" AS #I<br />
30 'Define 202-character string<br />
40 DIM LEARN$(202)<br />
50 'Create 802-character string to store trace data<br />
60 DIM TR1$(200>,TR2$(200>,TR3$(200)<br />
70 DIM TR4$(2OO>,TR5$(2>,TR6$(200)<br />
80 'ask spectrum analyzer for trace data in binary format<br />
90 PRINT #l,"TDF B; TRA?;"<br />
100 'enter trace data from spectrum analyzer<br />
110 TRl$=INPUT(200,#1) 'first 200 characters<br />
120 TR2$=INPUT(200,#1) 'second 200 characters<br />
130 TR3$=INPUT(200,#1) 'third 200 characters<br />
140 TR4$=INPUT(200,#1) 'fourth 200 characters<br />
150 TR5$=INPUT(2,#1) 'last two characters<br />
160 'ask for learn string from spectrum analyzer<br />
170 PRINT #l,"OL;"<br />
180 'get learn string from spectrum analyzer<br />
190 LEARN$=INPUT$(202,#1><br />
200 'create file to store trace on disk<br />
210 OPEN "TRACEA" FOR OUTPUT AS #2<br />
220 'change ASCII data to integers for disk storage<br />
230 'because ASCII 26 will put EOF on disk<br />
240 DEFINT X,Y,I 'integer variables<br />
250 DIM Xl(202),Yl(802) 'arrays for the data<br />
260 'first format the learn string<br />
270 FOR I= 1 TO 202<br />
280 'get ASCII character from string<br />
290 L2$=MID$(LEARN$,I,l)<br />
300 'make integer of ASCII value O-255<br />
310 Xl(I)=ASC(L2$)<br />
320 NEXT I<br />
330 'format the data strings<br />
340 T5=1 'set counter<br />
350 TRG$=TRl$ 'set string to be converted<br />
360 GOSUB 620 'do the conversion<br />
370 T5=201 'set counter<br />
380 TR6$=TR2$ 'set string to be converted<br />
390 GOSUB 620 'do conversion<br />
400 T5=401<br />
410 TR6$=TR3$<br />
420 GOSUB 620<br />
3-l 0 Programming Topics
430 T5=601<br />
440 TR6$=TR4$<br />
450 GOSUB 620<br />
460 'convert last two characters<br />
470 L2$=MID$(TRS$,l,l)<br />
480 Yl(80l)=ASC(L2$)<br />
490 L2$=MID$(TR5$,2,1)<br />
500 Y(802)=ASC(L2$)<br />
510 'data is now formatted, write to disk<br />
520 FOR I=1 TO 202<br />
530 PRINT #2,X1(1)<br />
540 NEXT I<br />
550 FOR I=1 TO 802<br />
560 PRINT #2,Yl(I)<br />
570 NEXT I<br />
580 'close the data file<br />
590 CLOSE<br />
600 GOT0 680<br />
610 'subroutine for converting data:<br />
620 FOR I=1 TO 200<br />
630 L2$=MID$(TRG$,I,l) 'get ASCII character<br />
640 Yl(T5)=ASC(L2$) 'set value in array<br />
650 T5=T5+1<br />
660 NEXT I<br />
670 RETURN 'done with conversion<br />
680 END<br />
The previous program reads a trace from the spectrum analyzer, then stores it in the variable<br />
called TRCA. The state of the spectrum analyzer is stored in the variable LEARNS. These two<br />
variables are then saved in a file called TRACEA. Finally, the file is stored on a disk.<br />
Using the data stored in TRCA, the spectrum analyzer settings can be reset according to the<br />
saved state. Then, using the stored trace data, trace data can be viewed on the spectrum<br />
analyzer display.<br />
Line 40 gives the dimensions of the learn string using the GW BASIC DIM comm<strong>and</strong>. Learn<br />
strings for the spectrum analyzer require 202 bytes of storage space. Refer to the output learn<br />
string (OL) comm<strong>and</strong> description in Chapter 5 for more information.<br />
Line 90 uses TDF B to format the output in binary. Binary provides the fastest data transfer<br />
<strong>and</strong> requires the least amount of memory to store data. Each data point is transferred in<br />
binary as two 8-bit bytes. The data points are in the internal representation of measurement<br />
data. (See “Different Formats for Trace Data Transfers” at the end of this chapter for more<br />
information about trace data formats.)<br />
When the trace <strong>and</strong> state data is sent from the spectrum analyzer to the computer, it must be<br />
formatted. Lines 270 through 320 format the trace data.<br />
Programming Topics 3-l 1
Returning the <strong>Spectrum</strong> Analyzer to its Former State<br />
The following programs read a trace stored in a file <strong>and</strong> load it into a variable.<br />
Program Example for the <strong>HP</strong>-IB Interface<br />
10 !FILE: "IBPROGS"<br />
20 !define 202 character string:<br />
30 DIM Learn,string$[202]<br />
40 !create 401 point array to store trace:<br />
50 INTEGER Trace,a(l:401)<br />
60 Analyzer=718<br />
70 !assign path to the file:<br />
80 ASSIGN @File TO "STATE"<br />
90 !get values for Learn-string$<br />
100 !<strong>and</strong> Trace-a(*) from disk:<br />
110 ENTER OFile;Learn-string$,Trace,a(*)<br />
120 !send learnstring to spectrum analyzer:<br />
130 OUTPUT Analyzer;"IP DONE;"<br />
140 ENTER Analyzer<br />
150 OUTPUT Analyzer;Learn-string$<br />
160 !set single sweep mode:<br />
170 OUTPUT Analyzer;"SNGLS;"<br />
180 !prepare spectrum analyzer for a trace from<br />
190 !the computer:<br />
200 OUTPUT Analyzer;"TRA #A";<br />
210 !send trace to the spectrum analyzer<br />
220 OUTPUT Analyzer USING "#,W";802,Trace-a(*)<br />
230 !view trace to see it was sent:<br />
240 OUTPUT Analyzer;"VIEW TRA;"<br />
250 !close file:<br />
260 ASSIGN @File TO *<br />
270 END<br />
The <strong>HP</strong>-IB program reads a trace stored in the file STATE, then loads it into the variable<br />
Trace-$ *).<br />
First, the settings of the spectrum analyzer that were stored in the variable LEARN$ are<br />
recalled. The spectrum analyzer state is changed to the same state as when the trace was<br />
stored. Then previously stored trace data is returned to the spectrum analyzer <strong>and</strong> the trace is<br />
viewed on the spectrum analyzer screen. Finally, line 220 uses the <strong>HP</strong> BASIC USING comm<strong>and</strong><br />
to format the trace data.<br />
3-l 2 Programming Topics
Program Example for the RS-232 Interface<br />
10 'File = 232PROG9<br />
20 OPEN "COMl:9600,N,8,1" AS #I<br />
30 DEFINT X,Y,I 'integer variable<br />
40 'define 202-character string<br />
50 DIM LEARN$(202),Xl(202)<br />
60 'create an 802-character string to store disk data<br />
70 DIM TR1$(200>,TR2$(200>,TR3$(200),TR4$(200)<br />
80 DIM TR5$(2>,TR6$(2OO>,Yl(802)<br />
90 'open disk file "TRACEA"<br />
100 OPEN "TRACEA" FOR INPUT AS #2<br />
110 'enter learn array from disk<br />
120 FOR I=1 TO 202<br />
130 INPUT #2,X1(1) 'get integer variable from disk<br />
140 NEXT I<br />
150 'enter trace data from disk<br />
160 FOR I=1 TO 802<br />
170 INPUT #2,Yl(I)<br />
180 NEXT I<br />
190 'close the disk file<br />
200 CLOSE #2<br />
210 'format the integer data into strings<br />
220 'for the spectrum analyzer. See 232PROG8 for explanation<br />
230 LEARN$="" 'null out the learn string<br />
240 FOR I=1 TO 202 'format learn string first<br />
250 LEARN$=LEARN$+CHR$(Xl(I))<br />
260 NEXT I<br />
270 'format the trace data<br />
280 12=1 'set the counter<br />
290 GOSUB 500 'do the conversion<br />
300 TRl$=TRG$ 'set the string<br />
310 12=201<br />
320 GOSUB 500 'do the conversion<br />
330 TR2$=TR6$<br />
340 12=401<br />
Programming Topics 3-13
350 GOSUB 500<br />
360 TR3$=TR6$<br />
370 12=601<br />
380 GOSUB 500<br />
390 TR4$=TR6$<br />
400 'format last two characters<br />
410 TR5$=""<br />
420 TR5$=TR5$+CHR$(Yl(80l))+CHR$(Y1(802))<br />
430 'write to spectrum analyzer<br />
440 PRINT #l,LEARN$<br />
450 'output trace data<br />
460 PRINT #l,"IB";TRl$;TR2$;TR3$;TR4$;TR5$;<br />
470 PRINT #l,"VIEW TRB;"<br />
480 GOT0 560 'end program<br />
490 'subroutine for converting integer data to ASCII<br />
500 TR6$="" 'set the string to a null value<br />
510 FOR I=1 TO 200<br />
520 TRS$=TRS$+CHR$(Yl(IZ>)<br />
530 12=12+1<br />
540 NEXT I<br />
550 RETURN 'done with conversion<br />
560 END<br />
The RS-232 program, 232PROG9, reads a trace stored in the file TRACEA <strong>and</strong> loads it into the<br />
variable TRCA. This program assumes that trace data is stored on the disk from the previous<br />
program example, 232PROG8.<br />
First, the settings of the spectrum analyzer that were stored in the variable LEARN$ are<br />
recalled. The spectrum analyzer state is changed to the same state as when the trace was<br />
stored. Then previously stored trace data is returned to the spectrum analyzer <strong>and</strong> the trace is<br />
viewed on the spectrum analyzer screen.<br />
3-14 Programming Topics
Measuring Harmonic Distortion<br />
The harmonic distortion program presented here illustrates how the spectrum analyzer can<br />
be directed by a computer to make a complete measurement. Measuring the percent of total<br />
harmonic distortion is tedious when performed manually: it involves tuning to the fundamental<br />
<strong>and</strong> to each harmonic of interest, recording the amplitude of each signal, converting these<br />
amplitudes to linear units (volts), <strong>and</strong> calculating the result using a formula. The following<br />
program measures percent of total harmonic distortion automatically, quickly, <strong>and</strong> accurately.<br />
The program operates as if we were making the measurement manually.<br />
Note This program is designed to measure harmonics of a signal that is greater than<br />
20MHz.<br />
Program Example for the <strong>HP</strong>-IB Interface<br />
10 !FILE: “THD-TEST”<br />
20 ASSIGN QSa TO 718 ! assign IO path to spectrum analyzer<br />
30 Variables: ! define variables:<br />
40 REAL Fundamental,Fund-amptd-v,Fund-amptd-dbm<br />
50 REAL Prcnt,distort,Sum-sqr<br />
60 INTEGER Max-harmonic,I,Number<br />
70 !allow user to change the number of harmonics:<br />
80 Max-harmonic=4<br />
90 ALLOCATE REAL Harmonic-v(2:Max-harmonic)<br />
100 ALLOCATE REAL Harmonic-dbc(2:Max,harmonic)<br />
110 GOSUB Clearscreen ! clear the alpha screen<br />
120 !ask for the frequency of the fundamental:<br />
130 OUTPUT CRT USING “4/,lOX,K,3/“; "***HARMONIC DISTORTION***"<br />
140 OUTPUT CRT USING "lOX,K";"CONNECT SOURCE TO INPUT"<br />
150 OUTPUT CRT USING “10X ,K” ; ” ENTER FUNDAMENTAL FREQUENCY IN MHz”<br />
160 OUTPUT CRT USING “10X ,K”; “WHEN READY, PRESS ENTER ”<br />
170 INPUT Fundamental<br />
180 GOSUB Clearscreen ! clear the alpha screen<br />
190 Fundamental: ! write message on screen:<br />
200 DISP “MEASURING FUNDAMENTAL”<br />
210 !preset the spectrum analyzer, set single sweep mode, <strong>and</strong><br />
220 !take sweep:<br />
230 OUTPUT @Sa;“IP; SNGLS; TS;”<br />
240 !tune the spectrum analyzer to the fundamental freq <strong>and</strong> set<br />
250 ! 20 MHz span:<br />
260 OUTPUT OSa- “CF ‘I ; Fundamental; “MZ; ”<br />
270 OUTPUT BISai “SP 20MZ; TS; ‘I<br />
280 !put a marker on signal peak, move marker to<br />
290 !reference level:<br />
300 OUTPUT %a; “MKPK HI ; MKRL; TS; ”<br />
310 !find signal peak, activate signal track, <strong>and</strong><br />
320 !narrow span:<br />
Programming Topics 3-15
330 OUTPUT @Sa;"MKPK HI; TS;"<br />
340 OUTPUT OSa;"MKTRACK ON; SP IOOKZ; TS;"<br />
350 !turn off signal track:<br />
360 OUTPUT QSa;"MKTRACK OFF;"<br />
370 !find the peak of the signal; move peak to center<br />
380 !of screen:<br />
390 OUTPUT OSa;"AUNITS V;"! MAKE READOUT UNITS VOLTS<br />
400 !find peak of signal; send amplitude value to<br />
410 !computer<br />
420 !enter the amplitude of the fundamental:<br />
430 OUTPUT @Sa;"MKPK HI; MKA?;"<br />
440 ENTER OSa;Fund,amptd-v<br />
450 !send marker frequency to the computer, enter<br />
460 !frequency value:<br />
470 OUTPUT OSa;"MKF?;"<br />
480 ENTER OSa;Fundamental<br />
490 !make the fundamental frequency the center freq<br />
500 !step size:<br />
510 OUTPUT OSa;"MKSS;"<br />
520 !set the fundamental frequency units to MHz:<br />
530 Fundamental=Fundamental/l.E+6<br />
540 Harmonics: !measure the amplitudes of the harmonics:,<br />
550 FOR Number=2 TO Max-harmonic<br />
560 DISP "MEASURING HARMONIC #";Number<br />
570 OUTPUT @Sa;"SP 20MZ;" !set span to 20 MHz<br />
580 OUTPUT @Sa;"CF UP; TS;" !tune to next harmonic<br />
590 !take second sweep to allow spectrum analyzer to move to the<br />
600 !center frequency; find the signal peak; activate<br />
610 !signal track:<br />
620 OUTPUT @Sa;"TS;"<br />
630 OUTPUT @Sa;"MKPK HI; MKTRACK ON; SP IOOKZ; TS;"<br />
640 !turn off signal track:<br />
650 OUTPUT OSa;"MKTRACK OFF;"<br />
660 !find signal peak; send amplitude value to computer<br />
670 !enter the amplitude of the harmonic:<br />
680 OUTPUT OSa;"MKPK HI; MKA?;"<br />
690 ENTER QSa;Harmonic-v(Number)<br />
700 NEXT Number<br />
710 !set amplitude units to dBm:<br />
720 OUTPUT OSa;"AUNITS DBM;"<br />
730 !calculate the fundamental amplitude in dBm because<br />
740 !it was measured in volts:<br />
750 Fund,amptd_dbm=lO*LGT(Fund_amptd_v^2/.05)<br />
760 !calculate the sum of the squares of the amplitudes<br />
770 !of the harmonics; calculate amplitudes of<br />
780 !harmonics (dBm):<br />
790 Sum-sqr=O<br />
800 FOR I=2 TO Max-harmonic<br />
810 Sum,sqr=Sum,sqr+Harmonic,v(I)^2<br />
820 Harmonic-dbc(I)=20*LGT(Fund-amptd-v/Harmonic-v(1))<br />
830 NEXT I<br />
3-l 6 Programming Topics
840 !calculate the percent distortion:<br />
850 Prcnt,distort=SQR(Summ,sqr)/Fund~amptd,v*lOO<br />
860 GOSUB Clearscreen !clear the alpha screen:<br />
870 !Output,data:<br />
880 !send data to the screen of the computer:<br />
890 OUTPUT CRT USING "7/,lX,K"; "HARMONIC DISTORTION RESULTS"<br />
900 OUTPUT CRT USING "llX,K,DDDD.D,K";"FREQ = ";Fundamental;" MHz"<br />
910 OUTPUT CRT USING "llX,K,DDDD.D,K";"AMP = ";Fund-amptd-dbm;" dBm"<br />
920 OUTPUT CRT USING "llX,K,DDD.D,K";"2nd HARMONIC = -";Harmonic_dbc(2);" dBc"<br />
930 OUTPUT CRT USING ',llX,K,DDD.D,K";"3rd HARMONIC = -";Harmonic,dbc(3);" dBc"<br />
940 FOR I=4 TO Max-harmonic<br />
950 OUTPUT CRT USING "lOX,DD,K,DDD.D,K";I;"th HARMONIC = -";Harmonic,dbc(I) dBc"<br />
960 NEXT I<br />
970 OUTPUT CRT USING "llX,K,DDD.D,K";"TOTAL DISTORTION = ";Prcnt,distort;" %"<br />
980 !<br />
990 LOCAL 7<br />
1000 STOP<br />
1010 !<br />
1020 Clearscreen: !alpha clear subroutine<br />
1030 !the statement below presses the "CLR SCR" key on<br />
1040 !the keyboard:<br />
1050 OUTPUT KBD USING "# 3" B"*255 75<br />
1060 RETURN<br />
1070 END<br />
The program prompts the user to connect a source to the spectrum analyzer INPUT <strong>and</strong> enter<br />
the source frequency. It sets the spectrum analyzer center frequency to the value of the<br />
source, or fundamental, frequency. It measures <strong>and</strong> records the frequency <strong>and</strong> amplitude of<br />
the fundamental, then measures <strong>and</strong> records the amplitude of the second, third, <strong>and</strong> fourth<br />
harmonics. These values are used to compute percent of harmonic distortion. The result of the<br />
harmonic distortion percentage computation, plus harmonic amplitudes in dBc (decibels relative<br />
to the carrier), are displayed on the computer display. Extensive annotation has been added<br />
(after the exclamation points) to help clarify the program.<br />
If necessary, change the number of harmonics in line 80.<br />
Programming Topics 3-17
Program Example for the RS-232 Interface<br />
IO 'File = THDTEST<br />
20 OPEN "COMl:9600,N,8,1" AS #I<br />
30 'allow user to change the number of harmonics<br />
40 MAXHARMONIC=<br />
50 DIM HARMONICV(lO>,HARMONICDBC(lO)<br />
60 'clear the screen<br />
70 CLS<br />
80 'ask for the frequency of the fundamental<br />
90 PRINT "******* HARMONIC DISTORTION *******"<br />
100 PRINT<br />
110 PRINT "CONNECT SOURCE TO ANALYZER INPUT, THEN"<br />
120 PRINT "ENTER FREQUENCY OF THE FUNDAMENTAL IN MHZ"<br />
130 PRINT<br />
140 INPUT FUNDAMENTAL<br />
150 CLS<br />
160 'print measuring fundamental on screen<br />
170 PRINT "MEASURING FUNDAMENTAL"<br />
180 'preset the spectrum analyzer, set single-sweep <strong>and</strong><br />
185 'take sweep<br />
190 PRINT #l,"IP;SNGLS;TS;"<br />
200 PRINT #I "DONE."<br />
210 INPUT #(DONE ,<br />
220 'tune the spectrum analyzer to the fundamental freq <strong>and</strong> set<br />
225 '20 MHz span<br />
230 PRINT #l,"CF ";FUNDAMENTAL;"MHZ"<br />
240 PRINT #l,"SP 20MZ;TS;"<br />
250 PRINT #l,"DONE;"<br />
260 INPUT #l,DONE<br />
270 'put a marker on signal peak, move marker to<br />
275 'reference level<br />
280 PRINT #l,"MKPK HI;MKRL;TS;"<br />
290 'find signal peak, activate signal track, <strong>and</strong><br />
295 'narrow span<br />
300 PRINT #l,"MKPK HI;TS;"<br />
310 PRINT #l,"MKTRACK 0N;SP 1OOKZ;TS;"<br />
320 PRINT #I "DONE."<br />
330 INPUT #(DONE ,<br />
340 'turn off signal track<br />
350 PRINT #l,"MKTRACK OFF;"<br />
360 'find peak of signal, move peak to center of screen<br />
370 'make units in volts<br />
380 PRINT #l,"AUNITS V;"<br />
390 'find peak of signal, send amplitude value to<br />
395 'computer<br />
400 PRINT #l,"MKPK HI;MKA?;"<br />
410 INPUT #l,FUNDAMPTDV<br />
420 'send marker frequency to computer, enter frequency<br />
425 'value<br />
430 PRINT #l,"MKF?;"<br />
440 INPUT #l,FUNDAMENTAL<br />
450 'make the fundamental frequency the center freq<br />
455 'step size<br />
3-16 Programming Topics
460 PRINT #l,"MKSS;"<br />
470 'set the fundamental frequency units to MHZ<br />
480 FUNDAMENTAL=FUNDAMENTAL/lOOOOOO!<br />
490 FOR NUMBER = 2 TO MAXHARMONIC<br />
500 PRINT "MEASURING HARMONIC # ";NUMBER<br />
510 'set span <strong>and</strong> tune to next harmonic<br />
520 PRINT #l,"SP 20MZ;"<br />
530 PRINT #l,"CF UP;TS;"<br />
540 PRINT #l,"DONE;"<br />
550 INPUT #l,DONE<br />
560 'take a second sweep to allow spectrum analyzer to move to<br />
570 'the center frequency, find the signal peak,<br />
575 'activate the signal track<br />
580 PRINT #I "TS."<br />
590 PRINT #l:"MK;K HI;MKTRACK 0N;SP 100KZ;TS;"<br />
600 PRINT #l,"MKTRACK OFF;"<br />
610 'find signal peak, send amplitude value to computer<br />
620 'enter amplitude of harmonic<br />
630 PRINT #l,"MKPK HI;MKA?;"<br />
640 INPUT #l,HARMONICV(NUMBER)<br />
650 NEXT NUMBER<br />
660 'set amplitude units to dBm<br />
670 PRINT #l,"AUNITS DBM;"<br />
680 'calculate the fundamental amplitude in dBm because<br />
690 'it was measured in volts<br />
700 FUNDAMPTDDBM=lO*(LOG(FUNDAMPTDV-2/.05)/2.3026)<br />
710 'calculate the sum of the squares of the amplitudes<br />
720 'of the harmonics, calculate amplitudes of<br />
725 'harmonics (dBm)<br />
730 SUMSQR=O<br />
740 FOR I=2 TO MAXHARMONIC<br />
750 SUMSQR=SUMSQR+HARMONICV(I)-2<br />
760 HARMONICDBC(I>=20*(LOG(FUNDAMPTDV/HARMONICV(I))/2.3O26)<br />
770 NEXT I<br />
780 'calculate the percent distortion<br />
790 PRCNTDISTORT=SQR(SUMSQR)/FUNDAMPTDV*lOO<br />
800 CLS<br />
810 'output the data<br />
820 PRINT “******* HARMONIC DISTORTION RESULTS *******”<br />
830 PRINT "FREQUENCY = ";FUNDAMENTAL;"MHZ"<br />
840 PRINT “AMPLITUDE = ” ; FUNDAMPTDDBM; ” dbc”<br />
850 FOR I=2 TO MAXHARMONIC<br />
860 PRINT “HARMONIC # ‘I; I; ‘I = -‘I ; HARMONICDBC(1) ; ‘I dbm”<br />
870 NEXT I<br />
880 PRINT "TOTAL DISTORTION = ";PRCNTDISTORT;" %"<br />
890 END<br />
The RS-232 program prompts the operator to connect a source to the spectrum analyzer INPUT<br />
<strong>and</strong> enter the source frequency. It sets the spectrum analyzer center frequency to the value of<br />
the source, or fundamental, frequency. It measures <strong>and</strong> records the frequency <strong>and</strong> amplitude<br />
of the fundamental, then measures <strong>and</strong> records the amplitude of the second, third, <strong>and</strong> fourth<br />
harmonics. These values are used to compute percent of harmonic distortion. The results of<br />
the harmonic distortion percentage computation, plus harmonic amplitude in dBc (decibels<br />
relative to the carrier), are displayed on the computer display.<br />
If necessary, change the number of harmonics in line 40.<br />
Programming Topics 3-19
Different Formats for Trace Data Transfers<br />
Two different ways to format trace data using the TDF comm<strong>and</strong> were introduced earlier in<br />
this chapter (TDF P <strong>and</strong> TDF B). This section describes all the available trace data formats.<br />
The <strong>HP</strong> <strong>8590</strong> <strong>Series</strong> spectrum analyzer provides five formats for trace data transfers: real<br />
number (P) format, binary (B) format, A-block format, I-block format, <strong>and</strong> measurement units<br />
(M) format.<br />
P Format<br />
The P format allows you to receive or send trace data in a real-number format. This is the<br />
default format when the instrument is powered up. Numbers are in dBm, dBmV, dBpV, volts,<br />
or watts. The AUNITS comm<strong>and</strong> can be used to specify the amplitude units. Real-number data<br />
may be an advantage if you wish to use the data later in a program. However, data transfers<br />
using P format tend to be slow <strong>and</strong> take up a lot of memory (compared to binary format, the P<br />
format can take up to four times the amount of memory). Data is transferred as ASCII type.<br />
Although the spectrum analyzer can send the trace data to the computer as real numbers, the<br />
trace data cannot be sent back to the spectrum analyzer without changing the trace data to<br />
measurement units (integers). See the following example.<br />
3-20 Programming Topics
Example of Using the P Format<br />
This example sends trace datatothe computer <strong>and</strong> backtothe spectrum analyzer using P<br />
format.<br />
Note The spectrum analyzer mustbeinthelog amplitude scale to use the TDF P<br />
format.<br />
1 REAL Trace_data(l:401) Declare an array for trace data.<br />
10 OUTPUT 718;"IP;CF 300MHZ;SP 20MHZ;SNGLS;TS;" Zzke a measurement sweep.<br />
20 OUTPUT 718;"TDF P;TRA?;" Activate the P format, output<br />
trace A data.<br />
30 ENTER 718;Trace_data(*) The computer receives trace A<br />
40 OUTPUT 718;"VIEW TRA;MOV TRA,O;"<br />
50 OUTPUT 718*"RL'*"<br />
' * ,<br />
60 DISP "PRESS CONTINUE WHEN READY"<br />
70 PAUSE<br />
80 ENTER 718;RefJevel<br />
90 MAT Trace-data=Trace-data-(Ref-level)<br />
100 MAT Trace,data=Trace-data*(lOO)<br />
110 MAT Trace,data=Trace_data+(8000)<br />
120 OUTPUT 718m"TRA I).<br />
130 OUTPUT 718ITrace_data(*)<br />
140 LOCAL 718<br />
150 END<br />
data from the spectrum analyzer<br />
lb v&f@ that the trace data is<br />
transferred back to the spectrum<br />
analyzq set trace A to zeros.<br />
Determine the amplitude of the<br />
reference level. The amplitude<br />
of the reference level is used to<br />
change the integers sent to the<br />
spectrum analyzer into real numbers.<br />
Get the refsrence level.<br />
These lines change the real trace<br />
data (stored in Trace-data) into<br />
integers (in measurem.ent units).<br />
Sends the trace data back to the<br />
spectrum analyzer in measurement<br />
units.<br />
The trace data is sent to the computer in parameter units. A parameter unit is a st<strong>and</strong>ard<br />
scientific unit. For the TDF P format, the parameter unit depends on the current amplitude<br />
units (dBm, dBmV, dBpV, V, W). Use the AUNITS comm<strong>and</strong> to change the units.<br />
For more detailed information about the P format, see the description for TDF in Chapter 5.<br />
Programming Topics 3-21
B Format<br />
The B format allows you to receive or send trace data in a binary format. The B format<br />
provides the fastest data transfer <strong>and</strong> requires the least amount of memory to store data.<br />
Each data point is transferred in binary as two 8-bit bytes. The data points are in the internal<br />
representation of measurement units (0 to 8000). Unlike the A-block format, the B format does<br />
not send a header. An end-or-identify (EOI) is sent with the last byte of data.<br />
Example of Using the B Format<br />
This example sends trace data from the spectrum analyzer in B format. The trace data format<br />
must be changed to A-block format to return the trace data to the spectrum analyzer. See<br />
following example.<br />
Note It is not possible to return data to the spectrum analyzer using binary format.<br />
You must use either A-block or I-block format to return the trace data to the<br />
spectrum analyzer.<br />
10 INTEGER Tra_binary(l:401)<br />
Tra3inary stores the trace data.<br />
20 ASSIGN QSa TO 718;FORMAT OFF<br />
30 OUTPUT OSa;"IP;CF 300MZ;SP 20MZ;SNGLS;TS;" T&kesameasurenwntsweep.<br />
40 OUTPUT @Sa;"MDS W;TDF B;TRA?;"<br />
Outputs trace A data.<br />
50 ENTER OSa;Tra,binary(*)<br />
60 OUTPUT @Sa*"TDF , A*" J<br />
Changes the trace data format to Ablock<br />
format.<br />
70 OUTPUT 6Sa;"MOV TRA,O;"<br />
lb ve@fy that the trace data is sent<br />
back to the spectrum analyq move<br />
all zeros into trace A.<br />
80 DISP "PRESS CONTINUE WHEN READY"<br />
90 PAUSE<br />
100 OUTPUT @Sa USING "#,K,W";"TRA#A",802<br />
110 OUTPUT OSa;Tra,binary(*)<br />
120 OUTPUT OSa;"VIEW TRA;"<br />
130 LOCAL 718<br />
140 END<br />
Prepares the spectrum analyzer for<br />
the trace data.<br />
Transfers the trace data back to the<br />
spectrum analyzevz<br />
The result is transmitted as binary information. The MDS comm<strong>and</strong> can be used to change the<br />
data format from two 8-bit bytes to one 8-bit byte. For more detailed information about the B<br />
format <strong>and</strong> the MDS comm<strong>and</strong>, see the descriptions for TDF <strong>and</strong> MDS in Chapter 5.<br />
Binary data can be converted to dBm or volts. For example, use the following equation to<br />
change the trace data (in measurement units) to a real logarithmic number (dBm):<br />
dBm = ((trace data - 8000) x 0.01) + reference level(in dBm)<br />
To change the trace data (in measurement units) to linear data (volts):<br />
3-22 Programming Topics<br />
volts =<br />
reference level<br />
8000 ><br />
x trace data
The following programming converts binary data to dBm.<br />
10<br />
20<br />
30<br />
40<br />
50<br />
60<br />
70<br />
80<br />
90<br />
100<br />
110<br />
120<br />
130<br />
140<br />
150<br />
160<br />
170<br />
180<br />
190<br />
200<br />
210<br />
220<br />
! 859X binary data to real numbers<br />
Sa=718<br />
ASSIGN (OSa,bin TO Sa;FORMAT OFF<br />
INTEGER Trace-a(l:401)<br />
OUTPUT Sa;"AUNITS DBM;"<br />
OUTPUT Sa*"RL?*"<br />
ENTER Sa;Ref-Ik<br />
PRINT Ref-lev<br />
OUTPUT Sa;"TDF B;TRA?;"<br />
ENTER OSa-bin;Trace-a(*)<br />
! now the spectrum analyzer has all the data<br />
! to determine the measured trace data<br />
REAL Trace_a_real(l:401)<br />
MAT Trace-a= Trace-a-(8000) ! Results in below ref<br />
! level<br />
MAT Trace-a-real= Trace,a*(.Ol)! now in hundredths of db<br />
! below ref lev<br />
MAT Trace-a-real= Trace-a-real+(Ref-lev)<br />
FOR I=1 TO 401<br />
PRINT Trace-a-real(I)<br />
NEXT I<br />
END<br />
The following programming converts binary data to volts.<br />
10<br />
20<br />
30<br />
40<br />
50<br />
60<br />
70<br />
80<br />
90<br />
100<br />
110<br />
120<br />
130<br />
140<br />
150<br />
160<br />
170<br />
180<br />
! 859X binary data to real numbers (linear)<br />
Sa=718<br />
ASSIGN (QSa-bin TO Sa;FORMAT OFF<br />
INTEGER Trace-a(l:401)<br />
OUTPUT Sa*"AUNITS V*"<br />
OUTPUT SaI"RL?;" '<br />
ENTER Sa;Ref-lev<br />
Ref-lev-factor=Ref_lev/8000<br />
OUTPUT Sa;"TDF B;TRA?;"<br />
ENTER OSa,bin;Trace,a(*)<br />
! now the spectrum analyzer has all the data<br />
! to determine the measured trace data<br />
REAL Trace,a,real(l:401)<br />
MAT Trace-a-real= Trace-a*(Ref,lev,factor)<br />
FOR I=1 TO 401<br />
PRINT Trace-a-real(I)<br />
NEXT I<br />
END<br />
Programming Topics 3-23
A-Block Format<br />
The A-block format is similar to binary format in that each data point is sent as two 8-bit bytes<br />
(this, too, is in the internal representation of measurement data). A-block format also transfers<br />
a four-byte header before the 401 points of trace data. These bytes are the ASCII character<br />
“f’, “A”, <strong>and</strong> two-byte number representing the length of the trace data, followed by the data<br />
bytes.<br />
Example of Using the A-Block Format<br />
This example sends trace data from the spectrum analyzer to the computer <strong>and</strong> back to the<br />
spectrum analyzer in A-block format.<br />
10 INTEGER Tra_binary(l:401)<br />
20 DIM Header$[4]<br />
30 OUTPUT 718;"IP;CF 300MZ;SP 20MZ;SNGLS;TS;"<br />
40 OUTPUT 718;"MDS W;TDF A;TRA?;"<br />
Declare an array for trace<br />
data.<br />
Declare a string for the #,<br />
A, MSB length, <strong>and</strong> LSB<br />
length heao!.ex<br />
llxke a mxxzsurem.ent sweep.<br />
Send trace A to the computer<br />
in A-block format.<br />
50 ENTER 718 USING "#,4A,401(W)";Header$,Tra_binary(*) The computer receives the<br />
header <strong>and</strong> the trace data.<br />
60 PRINT "PRESS CONTINUE TO RETURN DATA TO THE ANALYZER"<br />
70 PAUSE<br />
80 OUTPUT 718;"IP;TS;VIEW TRA;" View trace A.<br />
90 OUTPUT 718e"TDF A-"<br />
100 OUTPUT 71; USING' The spectrum anulgzer re-<br />
"#,K,W,40l(W)"; "TRA#A",802,Tra_binary(*),";" wives the trace data from<br />
the computex<br />
110 END<br />
The transferred trace data consists of #A, a two-byte number representing the most significant<br />
byte (MSB) length <strong>and</strong> the least significant byte (LSB) length, <strong>and</strong> the data bytes. Depending on<br />
the terminal you are using, the data bytes may appear as symbols instead of numbers. Consult<br />
your computer documentation to determine the numeric value of the data bytes.<br />
For more detailed information about the A-block format <strong>and</strong> the MDS comm<strong>and</strong>, see the<br />
descriptions for TDF <strong>and</strong> MDS in Chapter 5.<br />
3-24 Programming Topics
I-Block Format<br />
Note<br />
The I-block format is not recommended for use with the RS-232 interface<br />
(Option 043).<br />
The I-block format transfers data points as two 8-bit bytes in the internal representation of<br />
measurement data. In addition to transferring trace data, I-block format also transfers the<br />
characters I‘#” <strong>and</strong> “I”. These characters indicate that the trace data is in I-block format. The<br />
I-block format allows the spectrum analyzer to accept up to 401 points of trace data when<br />
using I-block format. Fewer than 401 points of trace data can be specified, <strong>and</strong> the spectrum<br />
analyzer will accept data until an EOI signal is sent to it. Therefore, returning the trace data to<br />
the spectrum analyzer requires an important instruction, END. (See following example.)<br />
Example of Using the I-Block Format<br />
This example sends trace data from the spectrum analyzer to the computer <strong>and</strong> back to the<br />
spectrum analyzer in I-block format.<br />
10 INTEGER Tra_binary(l:401)<br />
20 DIM Header$[Z]<br />
30 OUTPUT 718;"IP;CF 300MZ;SP 20MZ;SNGLS;TS;"<br />
40 OUTPUT 718;"TDF I;TRA?;"<br />
50 ENTER 718 USING "#,2A,40l(W)";Header$,Tra,binary(*)<br />
60 PRINT "PRESS CONTINUE TO RETURN DATA TO THE ANALYZER"<br />
70 PAUSE<br />
80 OUTPUT 718;"IP;TS;VIEW TRA;"<br />
90 OUTPUT 718;"TDF I;"<br />
100 OUTPUT 718 USING "#,K,W,401(W)";"TRA#I",<br />
Tra-binary(*)<br />
110 END<br />
Dec.kzre an array for trace<br />
data.<br />
Declare an array for #, I<br />
header:<br />
llzke a mxxsurement sweep.<br />
Send trace A data in Iblock<br />
format.<br />
The computer receives the<br />
header <strong>and</strong> trace A data.<br />
View trace A.<br />
The trace data is returned<br />
to the spectrum analyzer<br />
The END statement in line 100 sends the spectrum analyzer the last data byte stored in the<br />
array <strong>and</strong> sets the <strong>HP</strong>-IB EOI line “true,” as required by the I-block format.<br />
The transferred trace data consists of #I, followed by data bytes until the EOI line is set true.<br />
For more detailed information about the I-block format <strong>and</strong> the MDS comm<strong>and</strong>, see the<br />
descriptions for TDF <strong>and</strong> MDS in Chapter 5.<br />
Programming Topics 3-25
M Format<br />
The M format is for sending trace data only. It formats the trace data in the internal format<br />
used by the spectrum analyzer, also known as measurement units.<br />
Refer to Figure 3-1. The displayed amplitude of each element falls on one of 8000 vertical<br />
points with 8000 equal to the reference level. For log scale data, each point is equal to 0.01 dB.<br />
The peak of the signal in Figure 3-l is equal to -20 dBm, or two divisions below the reference<br />
level. In measurement units, it is equal to 6000 (8000 - 2000 = 6000). In linear mode, each<br />
point has a resolution of [reference level in volts divided by SOOO]. The range of internal data<br />
is -32,768 to +32,767. In practice however, the range limits can be reached during trace math<br />
operations only.<br />
+32,767 -<br />
8160- Y 4<br />
8000 -<br />
O-<br />
-32,768-<br />
LOG<br />
10 DB/<br />
3-26 Programming Topics<br />
J<br />
\y<br />
ii5<br />
I /<br />
Figure 3-1. Measurement Unit Range <strong>and</strong> Trace Amplitudes<br />
7<br />
cull9e
Index<br />
Number<br />
1<br />
‘Ihble 3-1. Measurement Units<br />
Description<br />
A number within the range of 8161 to 32,767 measurement units is obtainable<br />
with trace math operations only.<br />
The area from 8000 (reference level) to 8160 (1.6 dB above reference level)<br />
represents the amount a trace element’s amplitude can exceed the top graticule<br />
<strong>and</strong> still be valid.<br />
The area from 0 to 8000 represents the displayed range for trace amplitude<br />
data. The range of 0 to 8000 varies according to the amplitude scale of the<br />
spectrum analyzer as follows:<br />
� In 10 dB/division, the range is from 0 to 8000.<br />
� In 5 dB/div, the range is from 4000 to 8000.<br />
w In 2 dB/div, the range is from 8000 to 6000.<br />
� In 1 dB/div, the range is from 8000 to 7000.<br />
A number within the range of 0 to -32,768 measurement units is obtainable<br />
with trace math operations only.<br />
Example of Using the M Format<br />
This example sends trace data from the spectrum analyzer to the computer in M format.<br />
10 INTEGER A(l:401) Llimension array A.<br />
30 OUTPUT 718;"IP;CF 300MZ;SP 20MZ;SNGLS;TS;" lbkeawz.easurewwntsweep.<br />
40 OUTPUT 718;"TDF M;TRA?;" Send trace A data in Mformat.<br />
50 ENTER 718;A(*) The computer receives the trace data.<br />
60 PRINT A(*) Print trace data.<br />
70 END<br />
Note All trace math functions are done using measurement units. See lkble 5-4 for a<br />
list of all trace math functions. See the description for the AMB comm<strong>and</strong> in<br />
Chapter 5 for an example of trace math subtraction in measurement units.<br />
The result is in measurement units (-32768 to +32767). For more detailed information about<br />
the M format, see the description for TDF in Chapter 5.<br />
‘Ihble 3-2 summarizes the different trace data formats.<br />
Programming Topics 3-27
Trace<br />
Data<br />
Format<br />
TDF P<br />
TDF B<br />
TDF A<br />
TDF I<br />
TDF M<br />
Description<br />
Real Number<br />
Format<br />
Binary Format<br />
A-Block Data<br />
Format<br />
I-Block Data<br />
Format<br />
Measurement<br />
Data Format<br />
3-26 Programming Topics<br />
‘Ihble 3-2. Summary of the Trace Data Formats<br />
Remarks<br />
<strong>Spectrum</strong> analyzer must be in log scale to use TDF P. To send the<br />
trace data back to the spectrum analyzer, the data must be<br />
converted to measurement units.<br />
Fastest format for trace data transfers. Use the A-block format to<br />
send data back to the spectrum analyzer.<br />
Trace data preceded by “#, n “A,” <strong>and</strong> a two-byte number. To use<br />
the A-block format for sending data, you must provide the<br />
number of data bytes.<br />
Trace data preceded by “#, ” <strong>and</strong> “I. ” This format is not<br />
recommended for use with an RS-232 interface. Unlike using the<br />
A-block format, you do not provide the number of data bytes<br />
when sending data.<br />
TDF M cannot be used to send trace data back to the spectrum<br />
analyzer.
Creating <strong>and</strong> Using Downloadable Programs<br />
What You’ll Learn in This Chapter<br />
This chapter provides fundamental information about downloadable programs (DLPs).<br />
This chapter contains the following sections:<br />
w Creating a DLP.<br />
� Executing a DLP<br />
� Storing DLPs on a RAM card.<br />
� Determining the amount of memory needed for a DLP.<br />
� Using the DLP editor.<br />
� DLP programming guidelines.<br />
What is a DLP?<br />
A DLP is a sequence of programming comm<strong>and</strong>s used to perform a specific operation. You<br />
can define a DLP that is made up of several user-defined functions, user-defined variables,<br />
<strong>and</strong> user-defined traces, then store the DLP in analyzer memory or on a RAM card. Some<br />
comm<strong>and</strong>s used to create DLPs are FUNCDEF, VARDEF, ACTDEF, TRDEF, <strong>and</strong> KEYDEF.<br />
Why Use a DLP?<br />
A DLP provides an easy way to execute programming comm<strong>and</strong>s without the use of an<br />
external controller. Almost any instruction that the analyzer can execute over the interface<br />
bus or with front-panel operation can be executed in a DLP DLPs can have decision making<br />
capabilities. In addition, DLPs have the ability to control other instruments over the instrument<br />
bus. DLPs remain in analyzer memory even when the spectrum analyzer power is turned<br />
off; the DLPs are stored in the battery-backed RAM of the analyzer memory <strong>and</strong> can be used<br />
repeatedly, whenever needed.<br />
4<br />
Creating <strong>and</strong> Using Downloadable Programs 4-l
Creating a DLP<br />
This section contains information about how to create a DLI? This section contains the<br />
following procedures:<br />
w Use a user-defined function within a DLP.<br />
w Use a user-defined variable within a DLI?<br />
� Use a user-defined trace within a DLl?<br />
� Enter values into a DLP,<br />
� Create a modular DLl?<br />
4-2 Creating <strong>and</strong> Using Downloadable Programs
‘lb Use a User-Defined Function within a DLP<br />
A user-defined function is created by using the FUNCDEF comm<strong>and</strong>.<br />
1. Begin the user-defined function definition by using the FUNCDEF comm<strong>and</strong>, the label<br />
(function name) for the function you are creating, a comma, <strong>and</strong> then a delimiter. See line<br />
10 of the example.<br />
Use unique names (unique from the analyzer programming comm<strong>and</strong>s) for the label.<br />
lb avoid confusion with the internal variables used by the spectrum analyzer, it is<br />
recommended that you use an underscore as the second character of the label.<br />
2. Enter in the programming comm<strong>and</strong>s that you want the function to perform. See lines<br />
20 <strong>and</strong> 30 of the example. Be sure to use semicolons to separate <strong>and</strong> terminate each<br />
programming comm<strong>and</strong>.<br />
Terminating the end of each program line with a semicolon will suppress BASIC’s carriage<br />
return <strong>and</strong> line feed. This saves memory since the carriage returns <strong>and</strong> line feeds won’t be<br />
stored in the FUNCDEF.<br />
3. End the FUNCDEF definition by specifying the same delimiter that was used in step 1. See<br />
line 40 of the example. The delimiters are used to enclose the programming comm<strong>and</strong>s for<br />
the function.<br />
To avoid problems with the FUNCDEF definition, you should remember the following:<br />
w A FUNCDEF does not return a value to a calling context like functions do in some languages.<br />
� Loading functions into analyzer memory requires space in the analyzer’s memory. If you<br />
are creating a large DLP, you should see “Determining the Amount of Memory Needed for a<br />
DLP” in this chapter for information on how to determine the amount of available analyzer<br />
memory <strong>and</strong> the size of the DLl?<br />
w Limit the number of characters between the delimiters in the FUNCDEF declaration to a<br />
maximum of 2047 characters. If the function is too large, you may need to segment it into<br />
several functions. See “To Create a Modular DLP” in this chapter for more information.<br />
� Ensure that the comm<strong>and</strong>s within the function are spelled correctly, that the syntax for the<br />
comm<strong>and</strong> is correct, <strong>and</strong> that each comm<strong>and</strong> is properly terminated with a semicolon.<br />
w Keep the program lines short. If necessary, divide the spectrum analyzer programming<br />
comm<strong>and</strong>s into several lines. See the example.<br />
H See the description for the FUNCDEF comm<strong>and</strong> in Chapter 5 for a list of programming<br />
comm<strong>and</strong>s that cannot be used within a FUNCDEF definition.<br />
Example<br />
Executing the following programming lines creates a downloadable program called Z-OOM.<br />
Z-OOM presets the analyzer, sets the center frequency to 300 MHz, sets the span to 10 MHz,<br />
<strong>and</strong> places a marker on the highest signal. After executing the following lines, Z-OOM will be<br />
in spectrum analyzer memory.<br />
10 OUTPUT 718;"FUNCDEF Z-OOM,Q"; Begins the FUNCDEF d@nition. The “@”<br />
sign delimits the programming comm<strong>and</strong>s<br />
that are within the FUNCDEFcalled Z-OOM.<br />
The semicolon at the end of the line suppresses<br />
a carriage return <strong>and</strong> line feed.<br />
20 OUTPUT 718;"IP;CF 300MHZ;";<br />
Enters IP <strong>and</strong> CF 300 MH.. comm<strong>and</strong>s into<br />
z-OOM.<br />
30 OUTPUT 718;"SP 10MHZ;TS;MKPK HI;"; Enters the SP 10 MHz, TS, MKPK HI comm<strong>and</strong>s<br />
into Z-OOM.<br />
40 OUTPUT 718*"9*"<br />
3 ,<br />
Ends the FUNCDEF definition.<br />
50 LOCAL 718 Places the anal~.zer in local mode.<br />
60 END<br />
Creating <strong>and</strong> Using Downloadable Programs 4-3
To Use a User-Defined Variable within a DLP<br />
User-defined variables are variables that you create with the VARDEF or ACTDEF comm<strong>and</strong>s.<br />
User-defined variables remain in spectrum analyzer memory <strong>and</strong> retain their values until<br />
redefined, disposed of, or altered by MOV or math comm<strong>and</strong>s. Turning the spectrum analyzer<br />
off, then on or pressing @iZK) will reset the variables to values as specified in their<br />
declarations. Note that all user-defined variables are global in scope, any function can access<br />
any variable. All variables are of type REAL.<br />
Variables should be declared outside of functions so the MEM? comm<strong>and</strong> returns the correct<br />
value for available spectrum analyzer memory after the DLP is downloaded by an external<br />
controller.<br />
To use a user-defined variable within a DLP:<br />
1. Use the VARDEF comm<strong>and</strong> to declare the variable. You should declare the variable outside<br />
of the function definition.<br />
2. Begin the FUNCDEF definition.<br />
3. Use the variable within the function. If YOU want to disDlav the value of the variable, use<br />
the DSPLY comm<strong>and</strong>.<br />
4. End the FUNCDEF definition.<br />
Example<br />
10 OUTPUT 718;"VARDEF A,MP,O;";<br />
20 OUTPUT 718;"FUNCDEF A,MPFUNC,!";<br />
30 OUTPUT 718;"IP;SNGLS;";<br />
40 OUTPUT 718;"FA 275MHZ;FB 325MHZ;";<br />
50 OUTPUT 718;"TS;MKPK HI;";<br />
60 OUTPUT 718;"MOV A-MP,MKA;";<br />
70 OUTPUT 718;"PU;PA 60,180;TEXT IMARKER AMPLITUDE IS I;";<br />
80 OUTPUT 718;"DSPLY AwMP,3.1;TEXT %dBm%;";<br />
90 OUTPUT 718;"! ;"<br />
100 END<br />
Declares the variable called<br />
A-MP<strong>and</strong> initializes its<br />
value to zero.<br />
Begins the d@inition of<br />
a function called AJPFUNC.<br />
Does an instmcment preset,<br />
sets it to single-sweep<br />
mode.<br />
Sets the start <strong>and</strong> stop<br />
frequencies to 275 <strong>and</strong><br />
325 MHz, respectively.<br />
Puts a marker on the<br />
highest signal.<br />
Moves the marker amplitude<br />
value into A-MI?<br />
Displays the message “MARKER<br />
AMPLITUDE Is: ” then<br />
displatis the marker amplitude<br />
<strong>and</strong> dBm.<br />
Ends thejimction &$nition.<br />
The programming example above alters the variable A-MP that was defined with the VARDEF<br />
comm<strong>and</strong>. The math comm<strong>and</strong>s can be used to alter variable values. Examples of math<br />
comm<strong>and</strong>s are the ADD, DIV, SUB, <strong>and</strong> MPY. Refer to ‘lhble 5-4 in Chapter 5 for a complete list<br />
of the math comm<strong>and</strong>s.<br />
4-4 Creating <strong>and</strong> Using Downloadable Programs
To Use a User-Defined Trace within a DLP<br />
Like variables, you should define user-defined traces outside of functions. User-defined traces<br />
retain their values until redefined, disposed of, or altered by the MOV comm<strong>and</strong> or a math<br />
comm<strong>and</strong>. User-defined traces are global in scope. Unlike user-defined variables, the elements<br />
of user-defined traces are of type INTEGER.<br />
1. Use the TRDEF comm<strong>and</strong> to define a trace. Define the trace outside of the any functions.<br />
2. Initialize the elements of the trace to 0. (Optional.)<br />
3. Use the trace (you can use the trace within a function).<br />
4. ‘RI display the contents of the user-defined trace, move the contents of the user-defined<br />
trace into trace A, trace B, or trace C with the MOV comm<strong>and</strong> <strong>and</strong> then use the VIEW<br />
comm<strong>and</strong> to display the destination trace (trace A, trace B, or trace C).<br />
Example<br />
The following example demonstrates how to define a trace, move a value into the trace, move<br />
the trace to trace A, <strong>and</strong> view trace A.<br />
10 OUTPUT 718;"TRDEF T,RACEA,401;";<br />
20 OUTPUT 718;"MOV T,RACEA,O;";<br />
Dt@zes a 401 -point trace called “TBACEA. ”<br />
Initializes the trace values to zero.<br />
Use the TXACEA for a measur-t.<br />
130 OUTPUT 718;"FUNCDEF D-ISPTRACE,!"; Dtykes a function called DJPlXACE.<br />
140 OUTPUT 718;"MOV TRA,T-RACEA; "; Moves the contents of T-RACEA into trace<br />
150 OUTPUT 718;"VIEW TRA;";<br />
160 OUTPUT 718;"!; "<br />
170 END<br />
A.<br />
Displays trace A.<br />
Ends the FUNCDEF d@nition.<br />
Creating <strong>and</strong> Using Downloadable Programs 4-5
To Enter Values into a DLP<br />
To allow the spectrum analyzer user to enter a value into a user-defined variable with the<br />
analyzer front-panel keys use the active function definition comm<strong>and</strong> (ACTDEF).<br />
Example<br />
For example, if you want the user to enter the resolution b<strong>and</strong>width for use in the DLP, you<br />
would use the following:<br />
OUTPUT 718;"ACTDEF M-BW,%ENTER THE RESOLUTION Lets theuserenter the valueofthe<br />
BANDWIDTH#,SMHZ,STEP,!MOV RB,M-BW!;" resolution ban’dwidth with the frontpanel<br />
keys.<br />
Notice that like moving a value into a variable or a trace, the MOV comm<strong>and</strong> or another MATH<br />
comm<strong>and</strong> must be used to move the ACTDEF value into the RB comm<strong>and</strong>. See the comm<strong>and</strong><br />
description for ACTDEF in Chapter 5 for more information.<br />
To Enter Values into a DIP by Using a Softkey<br />
Use the KEYCMD comm<strong>and</strong> to assign the ACTDEF comm<strong>and</strong> to a softkey.<br />
Example<br />
For example, to assign the ACTDEF to softkey 2, your would use the following:<br />
OUTPUT 718;"KEYCMD 2, M-BW,";<br />
OUTPUT 718;"lKEYENH 2, 'RES BW',AC<strong>TV</strong>F MmBW,O,%;";<br />
4-6 Creating <strong>and</strong> Using Downloadable Programs
To Create a Modular DLP<br />
A modular DLP is a DLP that is made up of several user-defined functions. Within a modular<br />
DLP, there may be a main FUNCDEF which calls subordinate FUNCDEFs. A subordinate<br />
FUNCDEF is a user-defined function that usually performs only one task, <strong>and</strong> is called by<br />
another FUNCDEF.<br />
To create a modular DLP:<br />
1. Enter the file name that the DLP source code will be stored under, if desired.<br />
2. Enter the date of the last revision to the DLP, if desired.<br />
3. Enter the DLP author’s name, if desired.<br />
4. Begin the FUNCDEF definition for the subordinate FUNCDEF<br />
5. Enter in the programming comm<strong>and</strong>s that you want the FUNCDEF to perform.<br />
6. End the FUNCDEF definition.<br />
7. Repeat steps 4 through 6 for all the subordinate FUNCDEFs.<br />
8. Create a main FUNCDEF that calls the subordinate FUNCDEF.<br />
Creating a modular DLP instead of a DLP that is made up of only one FUNCDEF has the<br />
following advantages:<br />
� Because the number of characters for a FUNCDEF definition is limited to a maximum of 2047<br />
characters, you must change a large FUNCDEF into smaller FUNCDEFs if its size exceeds<br />
2047 characters.<br />
� Modular DLPs are easier to write, read, <strong>and</strong> find problems within the DLP<br />
It is also easier to read <strong>and</strong> find problems in a program that has a comments added to it. For<br />
example, adding the file name, the date of the last revision, <strong>and</strong> the author’s name help keep a<br />
consistent program structure <strong>and</strong> make it easier to modify the DLI? The following program is<br />
an example of a modular DLP with the recommended program structure.<br />
Example<br />
Notice that the program has a main FUNCDEF that calls the five subordinate FUNCDEF’s<br />
(SPANONE, S-PANTWO, S-PANTHREE, SPANFOUR, <strong>and</strong> C-HECK). Each of the five<br />
FUNCDEFs is called from the main FUNCDEF, E-XAMPLE. Line 560 assigns the DLP to softkey<br />
2, so the function can be executed by pressing (-1, User Menus , EX&MPLE .<br />
The example uses descriptive labels <strong>and</strong> flows in a logical fashion, making the DLP easier to<br />
underst<strong>and</strong>. In addition, the use of subordinate FUNCDEFs makes the DLP easier to modify<br />
because one FUNCDEF can be changed without having to modify the main FUNCDEF or other<br />
FUNCDEFs. For example, if the application requires the stop frequency of the last span to<br />
extend to 4 GHz, simply change the stop frequency (FB 11OMHZ) in SPANFOUR to a stop<br />
frequency of 4 GHz (FB 4GHZ).<br />
Creating <strong>and</strong> Using Downloadable Programs 4-7
File name<br />
Date <strong>and</strong> author's<br />
name<br />
Program Description<br />
Define variable<br />
Define trace<br />
DefineFUNCDEF<br />
DefineFUNCDEF<br />
DeAneFUNCDEF<br />
DefineFUNCDEF<br />
DeEneFUNCEDEF<br />
Define Main<br />
FUNCDEF<br />
10 !File name: EXAMPLE<br />
20 !Date: 9/l/88 Author: Jane Doe<br />
30 !Description of the program: This program checks for<br />
40 !signals above -50 dEim in the following frequency<br />
50 !spans: 10 to 12 MHz, 12 to 14 MHz,<br />
60 !I4 to 16 MHz, <strong>and</strong> 16 to 110 MHz. If a<br />
70 !signal is found, it autozooms to<br />
80 !I MHz span, records the signal<br />
90 !level, <strong>and</strong> displays the highest frequency<br />
100 !signal found in trace B.<br />
110 OUTPUT 7lB;"VARDEF P-DWER,O;"; ! Defines a variable named<br />
120 ! "P-OWER" <strong>and</strong> initialize it to zero.<br />
130 OUTPUT 7lB;"TRDEF S-AVE.401;"; ! Defines a trace.<br />
140 ! Subordinate FDNCDEFs:<br />
150 OUTPUT 7lB;~FGNCDEF S-PANONE.0"; !Defines a function.<br />
160 OUTPUT 7lB;"FA 1OMHZ;FB 12MHZ;"; !Set the start <strong>and</strong> stop<br />
170 ! frequencies.<br />
180 OUTPUT 71B*~~0*1~; , , Ends the function.<br />
190 OUTPUT 718;"FIJNCDEF S-PANTWD,O;"<br />
200 OUTPUT 719;"FA 12MHZ;FB 14MHZ;";<br />
210 OUTPUT 7ia-w-~~-<br />
220 DIJTPDT 7lB;"F;NCDEF S-PANTHREE.0";<br />
230 DUTPUT 7lB;"FA 14MHZ;FB IGMHZ;";<br />
240 OUTPUT 718*"0*".<br />
250 OUTPUT 7 18 I"&CDEF S-PANFDUR,cD";<br />
260 OUTPUT 718;"FA 16MHZ;FB IIOHHZ;";<br />
270 OUTF'UT 718*"0~"*<br />
280 OUTPUT 718 I VT&DEF c3zcK ,0” ;<br />
290 OUTPUT 7lS;"TS;MKPK HI;"; ! Places a marker on<br />
295 ! highest signal.<br />
300 OUTPUT 718;"IF MKA,GT,-50 THEN 'I; ! If the signal is higher<br />
310 OUTPUT 7lS;"MKTRACK ON;"; ! than -5OdBm, zoom to 1 MHz<br />
320 OUTPUT 71B;1SP IMHZ;"; ! span, center it <strong>and</strong> bring it<br />
330 DUTPUT 7lB;"MKTRACK 0FF;TS;"; ! to the reference level.<br />
340 OUTPUT 718;"'MKPK HI;MKCF;TS;"; ! Store it in a 4Ol-point<br />
350 OUTPUT 718;"RKRL;TS;"; ! trace previously defined as<br />
360 DIJTPUT 718;"MOV P-OWER,MKA;"; ! having the label, "S-AVE".<br />
370 OUTPUT 718;"MOV S-AVE,TRA;"; ! Save the control settings<br />
380 OUTPUT 7lS;"SAVES I;"; ! in register 1.<br />
390 OUTPUT 7lB;"ENDIF-I'* ! End the IF statement.<br />
400 OUTPUT 7ia-“o.fl-,<br />
I End the definition of C-HECK."<br />
410 ! Main FDNCDEF<br />
420 OUTPUT 718;"FUNCDEF E-XAMPLE,O"; ! Begins the main program.<br />
430 OUTPUT 7lS;"IP;SNGLS;MOV S-AVE,O;"; ! Places the analyzer in<br />
440 ! single-sweep mode <strong>and</strong> set all values in "S-AVE" to zero.<br />
450 OUTPUT 718;" REPEAT ";<br />
460 OUTPUT 718;" S-PANONE;C-HECK;";<br />
470 OUTPUT 718;t' S-PANTWD;C-HECK;"; ! Checks each span or a<br />
480 OUTPUT 7ia;” S-PANTHREE;C-HECK;"; ! signal greater than -50 dBm.<br />
490 OUTPUT 718;" S-PANFOUR;C-HECK;"; ! Repeat sequence until a<br />
500 OUTPUT 718;"UNTIL S-AVE[O],NE,O;"; ! non-zero value is found in<br />
510 OUTPUT 718;"MDV TRB,S-AVE;"; ! S-AVE. It then displays the located<br />
520 OUTPUT 718;"RCLS 1;BLANK TRA;VIEW TRB;"; ! signal in trace B,<br />
530 OUTPUT 7ia.l~0.lfl- ! <strong>and</strong> recalls the analyzer settings<br />
540 ! that exiited 6hen the signal<br />
550 ! was found. E-XAMPLE is assigned<br />
560 OUTPUT 7lS;"KEYDEF 2,E_XAMPLE,%EXAMPLE%;"; ! to softkey 2 so the<br />
570 END ! program may be executed from the front panel.<br />
4-8 Creating <strong>and</strong> Using Downloadable Programs
Executing a DLP<br />
This section contains information about how to execute a DLP This section contains the<br />
following procedures:<br />
� Execute the DLP by using a softkey.<br />
H Execute the DLP within a program.<br />
To Execute a DIP by Using a Softkey<br />
There are two ways to execute a DLP. You can execute the DLP by pressing a softkey that has<br />
been assigned a function as shown in this procedure, or execute the DLP within a program<br />
(shown in the following procedure).<br />
1. Use the KEYDEF comm<strong>and</strong> to assign the function that you created with the FUNCDEF<br />
comm<strong>and</strong> to a softkey.<br />
2. Press (j-J, User Menus to access the softkey.<br />
Example<br />
The following example uses the KEYDEF comm<strong>and</strong> to assigns the ZBOM function to softkey 1.<br />
10 OUTPUT 718;"KEYDEF 1, Z-OOM,%CAL SIGIZOOM%;"; Assigns thefunction Z-OOMto<br />
soflkey 1 <strong>and</strong> assigns sofikey 1<br />
the label “CAL SIG ZOOM. ”<br />
20 LOCAL 718<br />
30 END<br />
You can access CAL SIG 2DOM by pressing (-1, User Menus .<br />
lb Execute the DLP within a Program<br />
You can also execute the DLP within a program.<br />
w Use the name of the DLP within a program.<br />
Example<br />
The following programming line executes the Z-OOM function from an external controller.<br />
OUTPUT 718;"Z-0OM;"<br />
Creating <strong>and</strong> Using Downloadable Programs 4-9
Storing DLPs on a RAM Card<br />
If the spectrum analyzer has a memory card reader installed in it, you can store the DLP on a<br />
RAM card, <strong>and</strong>, at a later time, load the DLP into analyzer memory from the RAM card. This<br />
section contains the procedures for storing a DLP on a RAM card remotely, <strong>and</strong> loading the<br />
DLP from the RAM card into analyzer memory remotely.<br />
These procedures are all for remote operation; see the <strong>HP</strong> <strong>8590</strong> E-<strong>Series</strong> <strong>and</strong> L<strong>Series</strong> <strong>Spectrum</strong><br />
<strong>Analyzers</strong> User’s Guide for information about how to do these procedures by using the<br />
front-panel keys of the spectrum analyzer.<br />
To Store DLFs on a RAM Card<br />
Storing the DLP on the RAM card is a convenient way of backing-up the FUNCDEFs, VARDEFs,<br />
ACTDEFs, TRDEF, <strong>and</strong> KEYDEFs in spectrum analyzer memory, <strong>and</strong> transferring them from<br />
one spectrum analyzer to another.<br />
1. Install a RAM card into the memory card reader of the analyzer. Be sure the RAM card<br />
write-protect switch is not set to SAFE (write-protected).<br />
2. Use the MS1 comm<strong>and</strong> to select the memory card reader as the mass storage device.<br />
3. Use the STOR comm<strong>and</strong> to copy the contents of spectrum analyzer memory onto the RAM<br />
card.<br />
Example<br />
The following example sets the mass storage device to the memory card reader, <strong>and</strong> then stores<br />
the contents of analyzer memory on the RAM card.<br />
OUTPUT 718;"MSI CARD;STOR d,%dZ,OOM%,*;" Stores a copy of the contents of analyzer<br />
memory on the RAM card under the .file<br />
name of Z-OOM.<br />
Saving a DLP on a RAM card saves all FUNCDEFs, VARDEFs, ACTDEFs, TRDEF, <strong>and</strong> KEYDEFs<br />
in the spectrum analyzer memory. This means a DLP cannot be saved selectively if several<br />
DLPs are present in the analyzer memory at the time. You may want to delete the items in user<br />
memory that you do not wish to be saved on the RAM card. See the DISPOSE comm<strong>and</strong>.<br />
4-10 Creating <strong>and</strong> Using Oownloadable Programs
To Load DLPs from a Memory Card into Analyzer Memory<br />
Once a DLP has been stored on a RAM card, it can be loaded back into spectrum analyzer<br />
memory when desired. DLPs remain in spectrum analyzer memory until disposed of with the<br />
DISPOSE comm<strong>and</strong>, ERASE comm<strong>and</strong>, or ERASE DLP MEM.<br />
1. To load a DLP from a RAM or ROM card into analyzer memory, insert the memory card into<br />
the memory card reader.<br />
2. Use the MS1 comm<strong>and</strong> to select the memory card reader as the mass storage device.<br />
3. Use the LOAD comm<strong>and</strong> to copy the contents of the RAM card file into spectrum analyzer<br />
memory.<br />
Example<br />
The following example sets the mass storage device to the memory card reader, <strong>and</strong> then copies<br />
the contents of RAM card file called Z-OOM into spectrum analyzer memory.<br />
OUTPUT 718;"MSI CARD;LOAD %dZ-OOMX;" Loads a copy of Z-OOM from the RAM card<br />
into spectrum analyzer memory.<br />
Note that loading does not dispose of any DLPs which were in memory before the load was<br />
executed.<br />
Creating <strong>and</strong> Using Downloadable Programs 4.11
Determining the Amount of Memory Needed for a DLP<br />
FUNCDEFs, user-defined variables, user-defined traces, on event comm<strong>and</strong>s (for example,<br />
ONSRQ, ONEOS, <strong>and</strong> TRMATH), <strong>and</strong> user-defined softkeys all consume some amount of<br />
spectrum analyzer memory. If you write a large DLP, or if you have a several DLPs stored in<br />
spectrum analyzer memory, you may run out of spectrum analyzer memory that is available<br />
for storing the DLPs. Also, the storage space on a RAM card is finite. If you are creating large<br />
DLPs, you may need to determine the amount of spectrum analyze memory the DLP requires<br />
<strong>and</strong> delete unused items from spectrum analyzer memory. This section contains the procedures<br />
for the following:<br />
� Determining the available amount of spectrum analyzer memory or RAM card space.<br />
w Delete a DLP from spectrum analyzer memory or a RAM card.<br />
To Determine Available Analyzer Memory<br />
Because the amount of analyzer memory available for user-defined functions is limited, it may<br />
sometimes be necessary to determine the amount of analyzer memory available.<br />
w Use the MEM comm<strong>and</strong> to determine the available analyzer memory remotely.<br />
Example<br />
10 OUTPUT 718*"MEM'-"-8<br />
20 ENTER 718;iemor;'<br />
Lleternaines the available analyzer memory.<br />
Stores the available analyzer menzory value in the variable<br />
memory.<br />
30 PRINT "MEMORY = Mm,Memory Prints the amount of analyzer memory.<br />
40 END<br />
If you are sure that the amount of memory that a DLP requires will not exceed the amount<br />
of spectrum analyzer memory available, you can download the DLP into analyzer memory<br />
<strong>and</strong> then execute the previous program again. The amount of analyzer memory that the DLP<br />
requires is the difference between the value that MEM? returned before the DLP was loaded<br />
into analyzer memory <strong>and</strong> the value MEM? returned after the DLP was loaded into analyzer<br />
memory.<br />
If the amount of memory that a DLP requires could exceed the amount of spectrum analyzer<br />
memory available, you should delete any unnecessary variables, traces, or FUNCDEFs or on<br />
event comm<strong>and</strong>s from spectrum analyzer memory. See “To Delete a DLP from <strong>Spectrum</strong><br />
Analyzer Memory” for more information.<br />
To Determine the Amount of Space on a RAM Card<br />
‘lb save a DLP on a RAM card, it may be necessary to determine the amount of space available<br />
on the RAM card. To determine the amount of space on a RAM card, you must do the<br />
following:<br />
1. Catalog the memory card.<br />
2. Determine the total number of records for the RAM card. The total number of records on<br />
the RAM card is displayed when cataloging the card (see Figure 4-l). The number of records<br />
on the RAM card is determined by dividing the memory capacity of the RAM card by 256<br />
(because the records are 256 bytes long). For example, if the RAM card has a capacity of<br />
32K bytes (which is equal to 32 x 1024), the total number of records on the RAM card is 128<br />
(32,768 divided by 256).<br />
4-12 Creating <strong>and</strong> Using Downloadable Programs
3. Determine the number of records on the RAM card that are in use. The number of records<br />
stored on the RAM card can be determined by cataloging the card, finding the starting<br />
record address for the last catalog entry, adding the number of records used for the last<br />
catalog entry to the starting record address, <strong>and</strong> then subtracting one.<br />
4. Subtract the number of records stored (determined in step 3) from the total number of<br />
records available (determined in step 2) to determine the number of unused records on the<br />
RAM card.<br />
Example<br />
Figure 4-l shows that the number of records on the RAM card that are in use is 53 (35 + 19 -<br />
1 = 53), <strong>and</strong> the total number of records available are 128. The number of unused records on<br />
the RAM card is 75 (128 - 53 = 75).<br />
0 1<br />
47 REF\<br />
. 0 d0m ATTEN 10 dB<br />
PEAK<br />
dB/<br />
<strong>HP</strong>859X 128<br />
TRACE 10<br />
tTRANSD-3 TRACE 15<br />
tTRANSD-4 TRACE 20<br />
t-1 TRACE 25<br />
TRACE 30<br />
DSPLY 35<br />
14:11:28<br />
E. 14:14:07<br />
E 14:16:03<br />
14:17:23<br />
i 09:38:44<br />
12:54:56<br />
19 17:00:18<br />
OCT<br />
OCT<br />
OCT<br />
OCT<br />
OCT<br />
OCT<br />
FEB<br />
15, 1991<br />
15, 1991<br />
15, 1991<br />
15, 1991<br />
17, 1991<br />
17, 1991<br />
28, 1992<br />
SA SB<br />
SC FC<br />
CORR<br />
Index<br />
1 Total number of records.<br />
/<br />
UBW 1 MHz<br />
SPAN 6.500 8Hz<br />
SWP 130 msec<br />
Figure 4-1. Determining the Number of Records<br />
Table 4-1. Cataloging a RAM Card<br />
Description<br />
2 Number of records for the last catalog item.<br />
3 Starting record address for the last catalog entry.<br />
4 The last cataloa entrv.<br />
LOhD<br />
FILE<br />
DELETE<br />
FILE<br />
Exit<br />
Catalog<br />
Previous<br />
Menu<br />
RT<br />
Creating <strong>and</strong> Using Downloadable Programs 4-13
‘lb Delete a DIP from <strong>Spectrum</strong> Analyzer Memory<br />
w Use the DISPOSE comm<strong>and</strong> to delete the DLP item from spectrum analyzer memory.<br />
A FUNCDEF can be deleted from analyzer memory remotely by using the DISPOSE comm<strong>and</strong>.<br />
The DISPOSE comm<strong>and</strong> can also be used to remove softkey functions, user-defined variables,<br />
<strong>and</strong> user-defined traces. (See the description for the DISPOSE comm<strong>and</strong> in Chapter 5 for more<br />
information.)<br />
Example<br />
To remove the FUNCDEF called Z-OOM from analyzer memory, you would execute the<br />
following comm<strong>and</strong>:<br />
OUTPUT 718;"DISPOSE Z,OOM;";<br />
Use DISPOSE ALL to remove all FUNCDEFs, user-defined traces, limit-lines, <strong>and</strong> user-defined<br />
variables from analyzer memory. For example, OUTPUT 718 ; "DISPOSE ALL ; I' ; (ERASE DLP MEM<br />
is equivalent to DISPOSE ALL.)<br />
lb Erase the DLP from a RAM Card<br />
H Select the memory card as the mass storage device by using the MS1 comm<strong>and</strong>, <strong>and</strong> then use<br />
the PURGE comm<strong>and</strong> to delete a specific file from the RAM card.<br />
Example<br />
‘Ib delete the file called Z-OOM from the RAM card, you would execute the following<br />
comm<strong>and</strong>:<br />
OUTPUT 718;"MSI CARD;PURGE %dZ-OOMX;"<br />
4-14 Creating <strong>and</strong> Using Downloadable Programs
Using the DLP Editor<br />
The DLP editor functions allow you to create or modify a DLP with only an external keyboard<br />
connected to the spectrum analyzer (an external controller is not required). This section<br />
contains the following procedures:<br />
� Connect the external keyboard to the spectrum analyzer.<br />
� Access the DLP editor functions.<br />
�<br />
� Use the DLP editor functions to modify a DLP<br />
w Use the DLP editor functions to modify a catalog item.<br />
The external keyboard can also be used to enter screen titles <strong>and</strong> remote programming<br />
comm<strong>and</strong>s; see the <strong>HP</strong> <strong>8590</strong> E-<strong>Series</strong> <strong>and</strong> L&&es <strong>Spectrum</strong> Anulgwrs User’s Guide for more<br />
information.<br />
lb Connect the External Keyboard to the <strong>Spectrum</strong> Analyzer<br />
Caution The analyzer must be turned off before connecting an external keyboard to<br />
the spectrum analyzer. Failure to do so may result in loss of factory-installed<br />
correction constants.<br />
1.<br />
2.<br />
3.<br />
4.<br />
Turn off the spectrum analyzer.<br />
Connect an <strong>HP</strong> Cl405 Option 002 (or Option 003) cable from the spectrum-analyzer<br />
rear-panel connector EXT KEYBOARD to the <strong>HP</strong> C1405A Option ABA keyboard.<br />
Press m to turn the spectrum analyzer on.<br />
Place the template for the external keyboard on the external keyboard.<br />
SPECTRUM ANALYZER<br />
Figure 4-2. Connecting the External Keyboard to the <strong>Spectrum</strong> Analyzer<br />
You can now use the external keyboard to enter or modify a DLP with the DLP editor, enter a<br />
screen title, enter programming comm<strong>and</strong>s, or enter a prefix.<br />
Creating <strong>and</strong> Using Downloadable Programs 4-l 5
‘Ib Access the DLP Editor<br />
. Press (SAVE) or (RECALL), then INTERNAL CARD (so that INTERNAL is underlined),<br />
Catalog Internal , CATALOG ALL, <strong>and</strong> then Editor.<br />
Press IPause) on the external keyboard.<br />
Editor or m accesses the DLP editor. There are some differences between using Editor<br />
<strong>and</strong> IPause) however. Editor allows you to access all the DLP editor softkeys (EDIT LAST,<br />
EDIT CAT ITEM , APXD CAT ITEM , SAVE EDIT, <strong>and</strong> NEW EDIT ). With (Pause), you can only<br />
access EDIT LAST, SAVE EDIT , <strong>and</strong> NEW EDIT . m allows you to change between the DLP<br />
editor functions <strong>and</strong> the “keyboard entry” functions such as entering programming comm<strong>and</strong>s,<br />
screen title, <strong>and</strong> prefix.<br />
With the external keyboard connected to the spectrum analyzer, you can use the function keys<br />
(Fl through F6) of the external keyboard to accesses the softkeys of the spectrum analyzer. For<br />
example, you could press Fl to access the first softkey, F2 to access the second softkey, <strong>and</strong> so<br />
forth.<br />
/ie7<br />
REF . 0 dBm ATTEN 1 0 dB<br />
PEAK<br />
LOG<br />
240 6<br />
% S-PANONE<br />
S-PANFOUR<br />
E-XAMPLE<br />
S-PANTWO<br />
S-PANTHREE<br />
A-MPFUNC<br />
t9 182<br />
40<br />
KEYI<br />
KEY#l<br />
SA s B A-MP<br />
SC F C T-RACEA<br />
COR R S-AVE<br />
P-OWER<br />
CENTER 3.250 GHz<br />
RES BW 3.0 MHz VBW 1 MHz<br />
4-16 Creating <strong>and</strong> Using Downloadable Programs<br />
Figure 4-3. Accessing the DLP Editor<br />
SPAN 6.500 GHz<br />
SWP 130 mseo<br />
EDIT<br />
LAST<br />
EDIT CFIT<br />
ITEM<br />
APND CAT<br />
ITEM<br />
SAVE<br />
EDIT<br />
NEW<br />
EDIT<br />
Previous<br />
Menu<br />
RT
To Create a DLP<br />
1* Press HEW EDIT, NEW EDIT to enter an individual DLP item (FUNCDEF, VARDEF, or<br />
TRDEF) into the buffer of the DLP editor.<br />
2. Use the external keyboard keys to enter the DLP item. Because you are not using an<br />
external computer, the spectrum analyzer comm<strong>and</strong>s are entered without an OUTPUT or<br />
PRINT statement preceding them.<br />
While using the DLP editor, you may want to use the “typing keys.” The typing keys are the<br />
function keys F7 through F12. The typing keys automatically place the comm<strong>and</strong> mnemonic<br />
at the position of the cursor on the spectrum analyzer display. The comm<strong>and</strong>s accessed by<br />
the typing keys are shown at the bottom of the spectrum analyzer display; you can use<br />
the (Page] <strong>and</strong> (Page] keys of the external keyboard to access different comm<strong>and</strong><br />
mnemonics.<br />
3. When the DLP item has been entered <strong>and</strong> you want it executed, press SAVE EDIT.<br />
SAVE EDIT executes the contents of the DLP editor buffer as remote comm<strong>and</strong>s, <strong>and</strong> when<br />
executing a FUNCDEF, will result in the FUNCDEF present in spectrum analyzer memory<br />
under the name given for the user-defined function. If you do not want to save the DLP,<br />
press WEW EDIT, WEW EDIT to clear the screen.<br />
The buffer for the DLP editor is limited to 2500 characters, however, DLP items are limited to a<br />
maximum of 2047 characters.<br />
For example, if you use the DLP editor to enter the Z-OOM function, the spectrum analyzer<br />
display would look as follows:<br />
I FU<br />
Edit item memory size = 50 Total memory = 2500<br />
FUNCDEF Z-OOM>CIP:CF 300MHZ:SP 10MHZ:TS:MKPK HI:<br />
DEF nl ‘JARDEF I KEYDEF I I ELSE I E<br />
‘7 F8 F9 ::0 Fll<br />
Figure 4-4. Entering a DLP<br />
EDIT<br />
LAST<br />
SAVE<br />
EDIT<br />
NEW<br />
EDIT<br />
Exit<br />
Edit<br />
)IF: I<br />
‘12 L<br />
Creating <strong>and</strong> Using Downloadable Programs 4-17
lb Modify the DLP<br />
1. If necessary, press m to reenter the DLP editor.<br />
2. If the DLP is not displayed, press EDIT LAST to display the previous contents of the DLP<br />
editor.<br />
3. Use the external keyboard keys to edit the DLP. Because you are not using an external<br />
computer, the spectrum analyzer comm<strong>and</strong>s are entered without an OUTPUT or PRINT ’<br />
statement preceding them.<br />
4. When the DLP has been entered, press SAVE EDIT . SAVE EDIT executes the DLP in<br />
spectrum analyzer memory. If you do not want to execute the DLP, press NEW EDIT ,<br />
MEI4 EDIT to clear the screen.<br />
4-l 8 Creating <strong>and</strong> Using Downloadable Programs
‘lb Modify a Catalog Item<br />
1.<br />
2.<br />
3.<br />
4.<br />
5.<br />
6.<br />
Press (‘1 or m, then INTERNAL CARD (so that INTERNAL is underlined).<br />
Press Catalog Internal , CATALOG ALL , <strong>and</strong> then Editor. (You can use one of the other<br />
catalog softkeys instead of CATALOG ALL . For example, you could press CATALOG DLP if<br />
you wanted only the DLPs cataloged.)<br />
Use the large knob on the spectrum analyzer’s front panel to highlight the item that you<br />
want to edit. The user-defined functions, user-defined traces, <strong>and</strong> user-defined variable are<br />
listed by their label, <strong>and</strong> user-defined softkeys are listed by “KEY” followed by the key<br />
number.<br />
Press EDIT CAT ITEM . If there is already some text in the DLP editor, you need to press<br />
EDIT CAT ITEM again to clear the text from the DLP editor’s buffer.<br />
Use the external keyboard keys to edit the cataloged item. Because you are not using an<br />
external computer, the spectrum analyzer comm<strong>and</strong>s are entered without an OUTPUT or<br />
PRINT statement preceding them.<br />
When the catalog item has been edited, press SAVE EDIT. SAVE EDIT executes the DLP<br />
in spectrum analyzer memory, <strong>and</strong> will replace the catalog item. If you do not want to the<br />
changes to the catalog item, press HEW EDIT , NEW EDIT to clear the screen.<br />
You may find it useful to use APND CAT ITEM . APED GAT ITEM appends the catalog item to<br />
the text that is already in the DLP editor.<br />
sfl s<br />
SC F<br />
COR<br />
CENTER 3.250 GHz<br />
RES BW 3.0 MHz UBW 1 MHz<br />
Figure 4-5. Selecting a Catalog Item<br />
SPAN 6.500 GHz<br />
SWP 130 msec<br />
Editor<br />
DELETE<br />
FILE<br />
SELECT<br />
PREFIX<br />
Exit<br />
Catal<br />
Previous<br />
Menu<br />
RL<br />
Creating <strong>and</strong> Using Downloadable Programs 4-l 8
DLP Programming Guidelines<br />
This section contains some suggestions that can make it easier to write a DLP, read <strong>and</strong><br />
underst<strong>and</strong> the DLP code, <strong>and</strong> find problems in a DLP.<br />
lb Make the DLP More Readable<br />
Here are a few suggestions which help make any program, including a DLP, more readable:<br />
� Write short program lines. One or two comm<strong>and</strong>s per line.<br />
� Use st<strong>and</strong>ard indent format for looping <strong>and</strong> branching.<br />
� Use descriptive variable names <strong>and</strong> labels. ,<br />
� Add comments to the source code.<br />
� Make the program modular.<br />
lb Find Problems in a DLP<br />
More often than not, new programs do not work as they were intended to work. In DLPs,<br />
problems (also referred to as bugs) may appear in any of the following ways:<br />
� As an error message displayed on the analyzer screen.<br />
� The DLP does the unexpected. For example, it halts execution, or enters an infinite loop, or<br />
starts executing before its start-execution comm<strong>and</strong> occurs.<br />
� As an unexpected or out-of-range result or value is obtained.<br />
Some suggestions for find a problem in a DLP are as follows:<br />
� Follow the suggestions in “To make the DLP more readable. ”<br />
� Check that each function has matching delimiters, be careful with nested delimiters.<br />
� Check that the comm<strong>and</strong>s within the DLP are spelled correctly, contain spaces where<br />
indicated by the syntax diagram for the comm<strong>and</strong>, <strong>and</strong> are terminated by a semicolon.<br />
� You can use the DLP editor to inspect the contents of the DLP before you execute it. The<br />
DLP editor shows what characters the spectrum analyzer will use when executing the DLP.<br />
This can be helpful for finding omitted spaces.<br />
� Test FUNCDEFs individually. Comment out the calls to the other FUNCDEFs in the main<br />
FUNCDEF, if necessary.<br />
4-20 Creating <strong>and</strong> Using Downloadable Programs
If a DLP causes the spectrum analyzer not to respond normally (for example, the spectrum<br />
analyzer seems to be in an infinite loop or an error message is displayed), try one or all of the<br />
following suggestions:<br />
� Press [PRESET].<br />
� Press I-), More I of 3 , ERASE DLP MEM , ERASE DLP ME!! . (ERASE DLP MEM requires<br />
a double key press <strong>and</strong> deletes any DLPs from spectrum analyzer memory.)<br />
� Turn the spectrum analyzer off <strong>and</strong> then back on.<br />
If the spectrum analyzer is still not responding, you should do the following:<br />
� For a spectrum analyzer with Option 021 installed in it, execute the following program line:<br />
SEND 7;UNL MTA LISTEN 18 CMD 12 This semis a comm<strong>and</strong> to the spectrum analyzer<br />
instructing it to delete any DLA <strong>and</strong> uswd@rwd<br />
variables from spectrum analyzer memory.<br />
Note If the spectrum analyzer is not at address 18, change the number 18 in the<br />
previous program line to the spectrum analyzer’s current address.<br />
� For a spectrum analyzer with Option 023 installed in it, execute a break, <strong>and</strong> then press<br />
@GKZJ More i of 3 , ERASE DLP MEM , ERASE DLP MEN . (ERASE DLP MEM requires a<br />
double key press.)<br />
Creating <strong>and</strong> Using Downloadable Programs 4-21
Programming Comm<strong>and</strong>s<br />
What You’ll Learn in This Chapter<br />
This chapter is a reference for the <strong>HP</strong> <strong>8590</strong> <strong>Series</strong> spectrum analyzer comm<strong>and</strong> language. It is a<br />
comm<strong>and</strong> dictionary; comm<strong>and</strong>s are listed alphabetically.<br />
To find a programming comm<strong>and</strong> that performs a particular function, first refer to the<br />
functional index (‘lkble 5-4) where comm<strong>and</strong>s are categorized by function. Once the desired<br />
comm<strong>and</strong> is found in the functional index, refer to the description for the comm<strong>and</strong> in this<br />
chapter.<br />
This chapter includes the reference tables listed below:<br />
� ‘lhble 5-1, Syntax Elements.<br />
� ‘Ihble 5-2, Characters <strong>and</strong> Secondary Keywords (Reserved Words).<br />
� ‘Ihble 5-3, Summary of Compatible Comm<strong>and</strong>s.<br />
� Table 5-4, Functional Index.<br />
5<br />
Programming Comm<strong>and</strong>s 5-l
Syntax Conventions<br />
Comm<strong>and</strong> syntax is represented pictorially.<br />
CHARACTER OR REPEAT I NG<br />
COMMAND SECONDARY SYNTAX SYNTAX<br />
MNEMON I C KEYWORD ELEMENT ELEMENT<br />
RECOMMENDED OPT I ONAL<br />
PATH<br />
Figure 5-1. Comm<strong>and</strong> Syntax Figure<br />
TERMINATOR<br />
� Ovals enclose comm<strong>and</strong> mnemonics. The comm<strong>and</strong> mnemonic must be entered exactly as<br />
shown.<br />
w Circles <strong>and</strong> ovals surround secondary keywords or special numbers <strong>and</strong> characters. The<br />
characters in circles <strong>and</strong> ovals are considered reserved words <strong>and</strong> must be entered exactly as<br />
shown. See Iable 5-2.<br />
w Rectangles contain the description of a syntax element defined in ‘lhble 5-l.<br />
� A loop above a syntax element indicates that the syntax element can be repeated.<br />
w Solid lines represent the recommended path.<br />
� Dotted lines indicate an optional path for bypassing secondary keywords or using alternate<br />
units.<br />
� Arrows <strong>and</strong> curved intersections indicate comm<strong>and</strong> path direction.<br />
cul14e<br />
� Semicolons are the recommended comm<strong>and</strong> terminators. Using semicolons makes programs<br />
easier to read, prevents comm<strong>and</strong> misinterpretation, <strong>and</strong> is recommended by IEEE St<strong>and</strong>ard<br />
728.<br />
Note Uppercase is recommended for entering all comm<strong>and</strong>s unless otherwise noted.<br />
5-2 Programming Comm<strong>and</strong>s
Syntax Elements are shown in the syntax diagrams as elements within rectangles.<br />
Syntax Component<br />
analyzer comm<strong>and</strong><br />
‘Ihble 5-1. Syntax Elements<br />
DellnitionlRange<br />
Any spectrum-analyzer comm<strong>and</strong> in this chapter, with required parameters <strong>and</strong><br />
terminators.<br />
character S,! “#S%&‘()+ ,/0123456789: ;ABCDEFGHIJKLMNOPQRST<br />
LJVWXYZ[\)? -‘abcdefghijklmnopqrstuvwxyz(Charactersarea<br />
subset of data byte.)<br />
character & EOI 8-bit byte containing only character data <strong>and</strong> followed by end-or-identify (EOI)<br />
condition, where the EOI control llne on <strong>HP</strong>-IB is asserted to indicate the end of the<br />
transmission. END signifies the EOI condition.<br />
character string<br />
data byte<br />
data byte & EOI<br />
A list of characters.<br />
8-bit byte containing numeric or character data.<br />
8-bit byte containing numeric or character data followed by end-or-identify (EOI)<br />
condition, where the EOI control line on <strong>HP</strong>-IB is asserted to Indicate the end of the<br />
transmission. END signifies the EOI condition.<br />
delimiter -I\@=/-$%;!‘: w&z<br />
Matching characters that mark the beginning <strong>and</strong> end of a character string, or a list of<br />
user-defined functions or spectrum analyzer comm<strong>and</strong>s. Choose delimiting characters<br />
that are not used within the string they delimit.<br />
digit<br />
lsb length<br />
0123456789<br />
Represents the least significant byte of a two-byte word that describes the number of<br />
bytes returned or transmitted. See msb length.<br />
msb length Represents the most significant byte of a two-byte word that describes the number of<br />
bytes returned or transmitted. See lsb length.<br />
number Expressed as integer, decimal, or in exponential (E) form. Real Number Range: f<br />
1.797693134862315 x 1tio8, including 0.<br />
output termination<br />
Up to 15 signllicant figures allowed.<br />
Numbers may be as small as f 2.225073858507202 x 1O-3o8<br />
Integer Number Range: -32,768 through + 32,767<br />
Carriage return (CR) <strong>and</strong> line feed (LF), with end-or-identify (EOI) condition. ASCII<br />
codes 13 (carriage return) <strong>and</strong> 10 (line feed) is sent via <strong>HP</strong>-IB, then the end-or-identify<br />
control line on <strong>HP</strong>-IB sets to indicate the end of the transmission.<br />
predefined function AC<strong>TV</strong>F, AMPLEN, BITF, CNTLI, CORREK, DONE, HAVE, HN, LIMIFAIL, MEAN,<br />
MEANTH, MEM, MINPOS, MKBW, PEAKS, PKPOS, PWRBW, REV, RMS, SER, STB,<br />
STDEV, SUM, SUMSQR, TRCMEM, VARIANCE.<br />
A predellned function is an analyzer comm<strong>and</strong> that returns a number that can be<br />
operated on by other spectrum analyzer comm<strong>and</strong>s. Insert a predefined function into<br />
a comm<strong>and</strong> statement where predefined function appears in the comm<strong>and</strong> syntax<br />
chart.<br />
If a predefined function takes a parameter (for example, PKPOS TRA), it can be used<br />
only as the last parameter of an spectrum analyzer comm<strong>and</strong> that has two or more<br />
predelined functions as parameters. For example, MPY VAR,PKPOS TRB,HAVE CARD;<br />
is illegal, but MPY V-AR,DONE,HAVE CARD; is not.<br />
Programming Comm<strong>and</strong>s 5-3
Syntax Component<br />
predeflned variable<br />
trace element<br />
‘able 5-1. Syntax Elements (continued)<br />
Definition/Range<br />
The values of the following variables change depending on the current instrument<br />
settings. Each variable represents the value of the comm<strong>and</strong> function that has the<br />
same name as the variable.<br />
AMB, AMBPL, ANLGPLUS, ANNOT, AT, BAUDRATE, CF, CNTLA, CNTLB, CNTLC,<br />
CNTLD, COUPLE, CRT<strong>HP</strong>OS, CR<strong>TV</strong>POS, DATEMODE, DET, DL, DOTDENS, FA, FB,<br />
FMGAIN, FOFFSET, GATE, GATECTL, GD, GL, GP, GR, GRAT, INZ, LG, LIMIDISP,<br />
LIMIMODE, LIMIREL, LIMITEST, MEASURE, MENU, MF, MKA, MKACT, MKF, MKFCR,<br />
MKN, MKNOISE, MKP, MKPAUSE, MKPX, ML, MKTRACK, MODE, MSI, NRL,<br />
POWERON, PREAMPG, PRNTADRS, PSTATE, RB, RL, RLPOS, ROFFSET, SAVRCLN,<br />
SETDATE, SETTIME, SP, SQLCH, SRCALC, SRCAT, SRCNORM, SRCPOFS, SRCPSTP,<br />
SRCPSWP, SRCPWR, SRCTK, SS, ST, SWPCPL, SYNCMODE, TH, TIMEDATE, TIMEDSP,<br />
<strong>TV</strong>LINE, <strong>TV</strong>SFRM, <strong>TV</strong>SYNC, <strong>TV</strong>STND, VB, VBR, WINZOOM, ZMKCNTR, ZMKSPAN.<br />
Value contained in one trace point. Notated as TRA[N] where N specifies the point<br />
position ln the trace array. Values for N are 1 to 401 (for traces A, B, C) or 1 to 2047<br />
(for traces specified by TRDEF). The same values apply to trace B (TRB[N]), trace C<br />
(TRC[N]), <strong>and</strong> user-defined traces (LABEL[N]).<br />
trace range Values contained in trace segment. Multi-point segments are notated as TRA[N,M],<br />
where N <strong>and</strong> M are end points of a segment <strong>and</strong> specify point positions in trace array.<br />
Values for N or M are 1 to 401 (for traces A, B, C), or 1 to the length of a trace as<br />
specified by TRDEF. The same values apply to trace B (TRB[N,M]), trace C (TRC[N,M]),<br />
<strong>and</strong> user-defined traces (LABEL[N,M]). Single-point segments are notated the same as<br />
the trace element above.<br />
units<br />
user-defined function<br />
user-defined trace<br />
user-defined variable<br />
5-4 Programming Comm<strong>and</strong>s<br />
Represent st<strong>and</strong>ard scientific units.<br />
Frequency Units: GHZ or GZ, MHZ or MZ, KHZ or KZ, HZ<br />
Amplitude Units: DB, DM, DBMV, DBUV, V, MV, UV, W, MW, UW<br />
Time Units: SC, MS, US<br />
Current Units: A, MA, UA<br />
Impedance Units: OHM<br />
A label 2 to 11 characters long that is defined by the FUNCDEF comm<strong>and</strong>. Choice of<br />
characters is A through Z <strong>and</strong> the underscore (-). The underscore should be used as the<br />
second character of the label. Omitting the underscore, or using the underscore as<br />
other than the second character in a label, is not recommended.<br />
A label 2 to 11 characters long that is defined by the TRDEF comm<strong>and</strong>. Choice of<br />
characters is A through Z <strong>and</strong> the underscore(-). The underscore should be used as the<br />
second character of the label. Omitting the underscore, or using the underscore as<br />
other than the second character in a label, is not recommended.<br />
A label 2 to 11 characters long that is defined by the VARDEF or ACTDEF comm<strong>and</strong>.<br />
Choice of characters is A through Z <strong>and</strong> the underscore(-). The underscore should used<br />
as be the second character of the label. Omitting the underscore, or using the<br />
underscore as other than the second character in a label, is not recommended.
In the syntax diagrams, characters <strong>and</strong> secondary keywords are shown within circles or ovals.<br />
Characters <strong>and</strong> secondary keywords must be entered exactly as shown.<br />
a<br />
A<br />
ABSHZ<br />
AC<br />
ALL<br />
AM<br />
AMP<br />
AMPCOR<br />
AUTO<br />
AVG<br />
B<br />
BOTH<br />
BW<br />
CARD<br />
CNT<br />
COLOR<br />
d<br />
DB<br />
DBM<br />
DBMV<br />
DBUV<br />
DC<br />
DELTA<br />
DISP<br />
DLP<br />
DM<br />
DMY<br />
DN<br />
DUMP<br />
EDGE<br />
EP<br />
EQ<br />
EVEN<br />
EXT<br />
FADC<br />
FETCH<br />
FFT<br />
FIXED<br />
FLAT<br />
FLATTOP<br />
FMD<br />
Element<br />
‘lhble 5-2. Characters <strong>and</strong> Secondary Keywords (Reserved Words)<br />
Amplitude correction factors.<br />
Amp (unit) or A-block data field.<br />
Absolute Hz (unit).<br />
Alternating current.<br />
All.<br />
Amplitude modulation.<br />
Amplitude.<br />
Amplitude correction,<br />
Auto couple or set to automatic.<br />
Average.<br />
b-bit byte or binary format.<br />
Both odd <strong>and</strong> even frames trigger.<br />
Black <strong>and</strong> white.<br />
Memory card.<br />
Counter-lock.<br />
Color.<br />
Downloadable programs.<br />
Decibel (unit).<br />
Absolute decibel milliwatt (unit).<br />
Decibel millivolt (unit).<br />
Decibel microvolt (unit).<br />
Direct current.<br />
Delta.<br />
Display.<br />
Downloadable program.<br />
Absolute decibel milliwatt (unit).<br />
Day, month, year format.<br />
Decreases parameter one step size.<br />
Dump.<br />
Triggers on the edge of the trigger input.<br />
Description<br />
Pauses program for data entry from spectrum analyzer front panel.<br />
Equal to.<br />
Even video frame.<br />
External trigger.<br />
Fast analog-to-digital converter (ADC).<br />
Fetch.<br />
Fast Fourier transform.<br />
Fixed.<br />
Flat.<br />
Flat top filter window.<br />
Frequency modulation demodulator.<br />
Programming Comm<strong>and</strong>s 5-5
‘Ihble 5-2.<br />
Characters <strong>and</strong> Secondary Keywords (Reserved Words) (continued)<br />
Element Description<br />
FM Frequency modulation.<br />
FMV Frequency modulation detection.<br />
FREE Free run.<br />
FREQ or FRQ Frequency.<br />
GATE Gate.<br />
GE Greater than or equal to.<br />
GHZ Gigahertz (unit).<br />
GT Greater than.<br />
GZ Gigahertz (unit).<br />
HANNING Harming filter window.<br />
HI Highest.<br />
<strong>HP</strong>IB <strong>HP</strong>-IB.<br />
HZ Hertz (unit).<br />
I I-block data Eeld.<br />
i Display image file.<br />
[NIT Initialize.<br />
[NT Internal or integer.<br />
IP Instrument preset.<br />
[ST Inverse sweep time.<br />
K Free Eeld ASCII format with no terminator.<br />
KC Free field ASCII format with “CR” an “LF” terminator.<br />
KHZ Kilohertz (unit).<br />
KL Free field ASCII format with “CR” an “END” terminator.<br />
KZ Kilohertz (unit).<br />
1 Limit line.<br />
LAST Last state.<br />
LE Less than or equal to.<br />
LEVEL Level gating.<br />
LIMILINE Limit line.<br />
LINE Line trigger.<br />
LOAD15 Loads the values for the horizontal <strong>and</strong> vertical position of the spectrum analyzer.<br />
LOWER Lower limit line.<br />
LT Less than.<br />
M Measurement units.<br />
MA Milliamp (unit).<br />
MDY Month, day, year format.<br />
MHZ Megahertz (unit).<br />
MS Millisecond (unit).<br />
MTR Meter.<br />
MV Millivolts (unit).<br />
MW Milliwatt (unit).<br />
MZ Megahertz (unit).<br />
NE Not equal to.<br />
NEG Negative.<br />
NH Next highest peak.<br />
NL Next peak left.<br />
5-5 Programming Comm<strong>and</strong>s
NONE<br />
NR<br />
Element<br />
NRM or NORMAL<br />
NTSC or NTSClS<br />
OA<br />
ODD<br />
OFF<br />
ON<br />
P<br />
PAL or PAL15<br />
PALM<br />
PER<br />
PKAVG<br />
PKPIT<br />
POINT<br />
POS<br />
PSN<br />
RECALL<br />
RS232<br />
S<br />
SA<br />
SAVE<br />
SC<br />
SECAML<br />
SLOPE<br />
SMP<br />
SP<br />
SR<br />
STATE<br />
STEP<br />
STORE<br />
SWT<br />
t<br />
TG<br />
TRA<br />
TRB<br />
TRC<br />
<strong>TV</strong><br />
UA<br />
UNIFORM<br />
UP<br />
UPLOW<br />
UPPER<br />
us<br />
uv<br />
uw<br />
‘Ikble 5-2.<br />
Characters <strong>and</strong> Secondary Keywords (Reserved Words) (continued)<br />
No units.<br />
Next peak right.<br />
Normal.<br />
NTSC video format.<br />
Output amplitude.<br />
Odd video frame trigger.<br />
Turns off function.<br />
Turns on function.<br />
Parameter units.<br />
PAL video format.<br />
PAL-M video format.<br />
Period.<br />
Peak average.<br />
Peak pit.<br />
Point.<br />
Positive.<br />
Position.<br />
Recall operation.<br />
RS-232 interface.<br />
State.<br />
Signal analysis.<br />
Save operation.<br />
Seconds (unit).<br />
SECAM-L video format.<br />
Slope.<br />
Sample detection mode.<br />
Space.<br />
Stimulus response.<br />
State register.<br />
Step key ability.<br />
Store.<br />
Sweep time.<br />
Trace.<br />
Tracking generator.<br />
Trace A.<br />
Trace B.<br />
Trace C.<br />
<strong>TV</strong> trigger.<br />
Microamp (unit).<br />
Uniform filter window.<br />
Increases the parameter one step sire.<br />
Upper <strong>and</strong> lower limit lines.<br />
Upper limit line.<br />
Microseconds (unit).<br />
Microvolts (unit).<br />
Microwatt (unit).<br />
Description<br />
Programming Comm<strong>and</strong>s 5-7
V<br />
VERTICAL<br />
VID<br />
W<br />
YTF<br />
XTAL<br />
*<br />
0<br />
1<br />
50<br />
75<br />
?<br />
Element<br />
5-8 Programming Comm<strong>and</strong>s<br />
‘Ihble 5-2.<br />
Characters <strong>and</strong> Secondary Keywords (Reserved Words) (continued)<br />
Volts (unit).<br />
Vertical triggering.<br />
Video trigger.<br />
Watts or word (for MDS comm<strong>and</strong>).<br />
YIG-tuned filter.<br />
Crystal.<br />
Asterisk (used as a wildcard).<br />
Semicolon (ASCII code 59).<br />
Comma (ASCII code 44).<br />
Off (comm<strong>and</strong> argument).<br />
On (comm<strong>and</strong> argument).<br />
500.<br />
753.<br />
Description<br />
Returns a query response containing the value or state of the associated parameter. The<br />
query response is followed by a carriage-return/line-feed.
The alternate comm<strong>and</strong>s (listed in the left column of Table 5-3) provide compatibility with<br />
comm<strong>and</strong>s used by the <strong>HP</strong> 8566A/B, <strong>HP</strong> 8568A/B, <strong>and</strong> <strong>HP</strong> 70000 <strong>Series</strong> instruments. The<br />
equivalent comm<strong>and</strong>s for the <strong>HP</strong> <strong>8590</strong> <strong>Series</strong> spectrum analyzer are listed in the right column.<br />
able 5-3. Summary of Compatible Comm<strong>and</strong>s<br />
Alternate Description <strong>HP</strong> <strong>8590</strong> <strong>Series</strong><br />
Comm<strong>and</strong>s Comm<strong>and</strong><br />
Al Clear write trace A CLRW TRA<br />
A2 Max hold trace A MXMH TRA<br />
A3 Store <strong>and</strong> view trace A VIEW TRA<br />
A4 Store <strong>and</strong> blank trace A BLANK TRA<br />
Bl Clear write trace B CLRW TRB<br />
B2 Max hold trace B MXMH TRB<br />
B3 Store <strong>and</strong> view trace B VIEW TRB<br />
B4 Store <strong>and</strong> blank trace B BLANK TRB<br />
BL B - DL -> B BML<br />
Cl Trace A minus trace B off AMB OFF<br />
c2 Trace A minus trace B on AMB ON<br />
CA Coupled input attenuation AT AUTO<br />
CR Coupled resolution b<strong>and</strong>width RB AUTO<br />
cs Coupled step size SS AUTO<br />
CT Coupled sweep time ST AUTO<br />
cv Coupled video b<strong>and</strong>width VB AUTO<br />
El Peak search MKPK HI<br />
E2 Enter marker into center frequency MKCF<br />
E3 Enter marker delta into center frequency step size MKSS<br />
E4 Enter marker amplitude into reference level MKRL<br />
EM Erase graphics memory CLRDSP<br />
EX Exchange trace A <strong>and</strong> B AXB<br />
KSA dBm amplitude units AUNITS DBM<br />
KSB dBmV amplitude units AUNITS DBMV<br />
KSC dBpV amplitude units AUNITS DBUV<br />
KSD Volt amplitude units AUNITS V<br />
KSE Screen title TITLE<br />
KSG Video average on VAVG ON<br />
KSH Video average off VAVG OFF<br />
KSM Marker noise MKNOISE<br />
KS0 Marker value to span MKSP<br />
KS2 Reference level offset ROFFSET<br />
KSC Trace A plus trace B into trace A APB<br />
KSi Exchange trace B <strong>and</strong> C BXC<br />
KS1 Trace B into trace C BTC<br />
KSm Graticule off GRAT OFF<br />
KSn Graticule on GRAT ON<br />
K&J Annotation off ANNOT OFF<br />
KSP Annotation on ANNOT ON<br />
LO Display line off DL OFF<br />
Programming Comm<strong>and</strong>s 5-9
‘Ihble 5-3. Summary of Compatible Comm<strong>and</strong>s (continued)<br />
Alternate Description <strong>HP</strong> 8690 <strong>Series</strong><br />
Comm<strong>and</strong>s Comm<strong>and</strong><br />
5-l 0 Programming Comm<strong>and</strong>s<br />
Ml Marker off MKOFF<br />
M2 Marker normal MKN<br />
M3 Marker delta MKD<br />
MA Marker amplitude MKA?<br />
MC Marker count MKFC<br />
MT0 Marker track off MKTRACK OFF<br />
MT1 Marker track on MKTRACK ON<br />
01 Output format, in real number format TDF P<br />
02 Output format, in binary format, two bytes (word) per TDF B;MDS W<br />
element<br />
03 Output format, in measurement data format TDF M<br />
04 Output format, ln binary format, 1 byte per element TDF B;MDS B<br />
Rl Activates illegal comm<strong>and</strong> service request only RQS 32<br />
R2 Activates end-of-sweep, illegal comm<strong>and</strong> RQS 36<br />
R3 Activates broken hardware, illegal comm<strong>and</strong> RQS 40<br />
R4 Activates units-key pressed, illegal comm<strong>and</strong> RQS 34<br />
RC Recall state RCLS<br />
Sl Sweep continuous CONTS<br />
s2 Sweep single SNGLS<br />
sv Save state SAVES<br />
TO Threshold off TH OFF<br />
Tl Trigger mode free run TM FREE<br />
T2 Trigger mode line TM LINE<br />
T3 Trigger mode external TM EXT<br />
T4 Trigger mode video TM VID<br />
T7 Trigger mode level GATECTL LEVEL<br />
TS Trigger mode edge GATECTL EDGE
This functional index categorizes the programming comm<strong>and</strong>s by the type of function that the<br />
comm<strong>and</strong> performs. The functional index contains the following information: the programming<br />
comm<strong>and</strong> mnemonic, the softkey or front-panel key that corresponds to the comm<strong>and</strong>’s<br />
function, <strong>and</strong> a brief definition of the comm<strong>and</strong>. Once the desired comm<strong>and</strong> is found, refer<br />
to the alphabetical listing of comm<strong>and</strong>s later in this chapter for more information about the<br />
comm<strong>and</strong>.<br />
Function<br />
Category<br />
\MPLITUDE<br />
LUTO COUPLING<br />
WXILIARY<br />
:ONTROL<br />
‘Ihble 5-4. Functional Index<br />
Comm<strong>and</strong> Corresponding Description<br />
Key Function<br />
AT ATTEN AUTO UAN Specifies RF input attenuation.<br />
AUNITS Amptd Units Specifies amplitude units for input,<br />
output, <strong>and</strong> display.<br />
COUPLE * COUPLE AC DC * Selects direct-current (dc) coupling or<br />
alternating-current (ac) coupling.<br />
INZ INPVI’ 2 50R 75R Specifies the value of input impedance<br />
expected at the active input port.<br />
LG SCALE LOG LLN (when Specifies the vertical graticule divisions<br />
LOG is underlined) as logarithmic units, without changing<br />
the reference level.<br />
LN<br />
ML<br />
NRL<br />
PREAMPG<br />
ppt<br />
RESETRL<br />
RL<br />
ROFFSET<br />
AUTO<br />
CNTLA<br />
CNTLB<br />
CNTLC<br />
CNTLD<br />
CNTLI<br />
For <strong>HP</strong> 85943, <strong>HP</strong> 85953, or <strong>HP</strong> 8596E only.<br />
For <strong>HP</strong> 8592L, <strong>HP</strong> 85933, <strong>HP</strong> 85953, or <strong>HP</strong> 85963 only.<br />
SCALE LOG LIN (when LIN Specifies the vertical graticule divisions<br />
ls underlined)<br />
as linear units, without changing the<br />
reference level.<br />
UAX UXR LVL Specifies the maximum signal level that<br />
is applied to the input mixer for a signal<br />
that is equal to or below the reference<br />
level.<br />
Sets the normalized reference level.<br />
EXTERWAL PREABPG Subtracts a positive or negative<br />
preamplifier gain value from the<br />
displayed signal.<br />
PRESEL PEAK t Performs a preselector peak.<br />
Resets the reference level to its<br />
instrument preset level.<br />
REP LVL Specifies the amplitude value of the<br />
reference level.<br />
REF I.‘& OFFSET Offsets all amplitude readouts without<br />
affecting the trace.<br />
AUTO ALL Couples the active functions<br />
automatically.<br />
CNTL A 0 1 Sets the control line A of the auxiliary<br />
interface high or low.<br />
CNTL I3 0 I Sets the control line B of the auxiliary<br />
interface high or low.<br />
GNTL C 0 1 Sets the interface control line C of the<br />
auxiliary interface high or low.<br />
CNTL D 0 1 Sets the interface control line D of the<br />
auxiliary interface high or low.<br />
DISPLAY CNTL I Returns a “1” when the interface<br />
control line I of the auxlllary interface is<br />
high, <strong>and</strong> “0” if the line is low.<br />
Programming Comm<strong>and</strong>s 5-l 1
Function<br />
Category<br />
IUXILIARY<br />
:ONTROL<br />
,continued)<br />
MNDWIDTH<br />
For <strong>HP</strong> 8592L, <strong>HP</strong> 85933, or <strong>HP</strong> 85963 only.<br />
For Options 102, 103, or 301 only.<br />
For Options 010 or 011 only.<br />
For Option 130 only.<br />
5-12 Programming Comm<strong>and</strong>s<br />
‘Ihble 5-4. Functional Index (continued)<br />
Comm<strong>and</strong> Corresponding Description<br />
Key Function<br />
COMB* COMB GEN ON OFF * Turns on or off the comb generator.<br />
DEMODt DENOD GN OFFt, Turns the demodulator on or off, <strong>and</strong><br />
DENBDANFNt<br />
selects between AM, FM, or quasi-peak<br />
demodulation.<br />
FMGAINt FN GAIN t Sets the total FM frequency deviation<br />
for full screen demodulation.<br />
MEASURES Determines the type of measurement:<br />
signal analysis, stimulus response, or<br />
signal normalization.<br />
NRL Sets the normalized reference level.<br />
RLPOS Selects the position of reference level.<br />
SPEAKERt SPEAKER ON OFF t Turns on or off the internal speaker.<br />
sQLCHt SQUELCR t Sets the squelch level.<br />
SRCALC$ ALC Nl’R TNT XTAL $ or Selects internal or external leveling for<br />
ALC LNT EXT $<br />
the tracking generator.<br />
SRCATS SRC ATN NAN AUTO $ Attenuates the source output level.<br />
SRCNORM Subtracts trace B from trace A, adds the<br />
display line, <strong>and</strong> sends the result to<br />
trace A.<br />
SRCPOFSS SRC PWR OFFSET$ Offsets the source power level readout.<br />
SRCPSTPS SRC PWR STP SIZE $ Selects the source-power step size.<br />
SRCPSWPJ PWR SWP ON OFF’$ Selects sweep range of the source<br />
output.<br />
SRCPWR$ SW PWR ON OFFS Selects the source power level.<br />
SRCTKS MAN TIW ADJUST$ Adjusts tracking of source output with<br />
spectrum-analyzer sweep.<br />
SRCTKPKS TRACKING PEAK $ Adjusts tracking of source output with<br />
spectrum-analyzer sweep.<br />
SWPCPLS SUP CPLG SR SA$ Selects a stimulus-response (SR) or<br />
spectrum-analyzer (SA) auto-coupled<br />
sweep time.<br />
RB REX3 BW AUTO HAN , Specifies the resolution b<strong>and</strong>width.<br />
200 Ez ma BW 9,<br />
9 LHz EHI BW,<br />
120 LB2 EN1 BW<br />
VAVG VID AVG ON OFF Turns on or off video averaging.<br />
VB VII) BW AUT# NAN Specifies the video b<strong>and</strong>width.<br />
VBR VBW/RBW RATIO Specifies coupling ratio of video<br />
b<strong>and</strong>width to resolution b<strong>and</strong>width.
Function<br />
Category<br />
:ALIBRATION<br />
:OMMAND<br />
YRIGGER<br />
AMPCOR<br />
AMPLEN<br />
CAL<br />
CNF<br />
CORREK<br />
CRT<strong>HP</strong>OS<br />
CR<strong>TV</strong>POS<br />
ONCYCLE<br />
ONDELAY<br />
ONEOS<br />
ONMKR<br />
ONMKRU<br />
ONSRQ<br />
ONSWP<br />
ONTIME<br />
WAIT<br />
!ONFIGURATION BAUDRATE<br />
CAT<br />
DATEMODE<br />
DISPOSE<br />
FORMAT*<br />
PLTPRT<br />
PLTPRT<br />
POWERON<br />
‘Ihble 5-4. Functional Index (continued)<br />
Comm<strong>and</strong><br />
Corresponding<br />
Key Function<br />
Azip Cur functions<br />
Description<br />
Applies amplitude corrections at<br />
specified frequencies.<br />
Returns the number of<br />
frequency-amplitude correction factors<br />
that have been entered.<br />
ICAL) calibration functions Initiates self-calibration routines.<br />
CONF TEST Performs the confidence test.<br />
Returns a ” 1” lf the correction factors<br />
are on, a “0” if they are off.<br />
CRT HORE POSITIOK Specifies the horizontal position of the<br />
text <strong>and</strong> graticule on the spectrum<br />
analyzer’s display.<br />
CRT VERT POSITIOW Specifies the vertical position of the text<br />
<strong>and</strong> graticule on the spectrum analyzer’s<br />
display.<br />
BAUD RATE<br />
Catalog Card * ,<br />
Catalog Internal<br />
DATEHODE MDY BHY<br />
ERASE DLF MEN<br />
FOIWAT CARD *<br />
PLT PORT RPIB PAR<br />
PLT PORT SER PAR<br />
PDRER ON IP LAST<br />
An <strong>HP</strong> <strong>8590</strong>L or <strong>HP</strong> 8592L needs an Option 003 installed in it to use this comm<strong>and</strong>.<br />
Executes the list of analyzer comm<strong>and</strong>s<br />
periodically.<br />
Executes the list of analyzer comm<strong>and</strong>s<br />
after the time value has elapsed.<br />
Executes the list of analyzer comm<strong>and</strong>s<br />
after the end of the sweep.<br />
Performs the list of analyzer comm<strong>and</strong>s<br />
when the sweep reaches the marker<br />
position.<br />
Executes the list of analyzer comm<strong>and</strong>s<br />
whenever the value or the units of the<br />
active marker are changed.<br />
Executes the list of analyzer comm<strong>and</strong>s<br />
whenever a service request occurs.<br />
Executes the list of analyzer comm<strong>and</strong>s<br />
at the beginning of the sweep.<br />
Executes the list of analyzer comm<strong>and</strong>s<br />
at the specified time.<br />
Suspends all spectrum analyzer<br />
operation for the specified time<br />
duration.<br />
Specifies the baud rate of a spectrum<br />
analyzer with Option 043 installed in it.<br />
Returns the catalog information of<br />
either spectrum analyzer memory or the<br />
memory card.<br />
Allows you to set the format for<br />
displaying the real-time clock.<br />
Frees spectrum analyzer memory that<br />
was previously allocated for<br />
user-defined oper<strong>and</strong>s.<br />
Formats the memory card.<br />
Directs the plotter output to <strong>HP</strong>-IB or<br />
parallel ports for Option 041.<br />
Directs the plotter output to RS-232 or<br />
parallel ports for Option 043.<br />
Selects the spectrum analyzer’s power<br />
on state.<br />
Programming Comm<strong>and</strong>s 5-13
‘able 5-4. Functional Index (continued)<br />
Function Comm<strong>and</strong> Corresponding Description<br />
Category<br />
Key Function<br />
CONFIGURATION PREFX Change Prefix Specifies or changes the prefix used in<br />
[continued)<br />
save <strong>and</strong> recall operations.<br />
PRNPRT PRN PORT <strong>HP</strong>IB PAR Directs the printer output to <strong>HP</strong>-IB or<br />
parallel ports for Option 041.<br />
PRNPRT PRN PORT SER PAR Directs the printer output to RS-232 or<br />
parallel ports for Option 043.<br />
SETDATE SET DATE Sets the date of the real-time clock.<br />
SETTIME SET TINE Sets the time of the real-time clock.<br />
SYNCMODE SYNC NM NTSC , Selects either the horizontal <strong>and</strong> vertica<br />
DEF’ABLT SYNC,<br />
synchronizing constants, or the<br />
synchronization rate for the internal<br />
SYNC NRN PAL monitor.<br />
TIMEDATE<br />
Sets the time <strong>and</strong> date of the real-time<br />
clock.<br />
TIMEDSP TINNDATE ON OFF Turns on or off the display of the<br />
real-time clock.<br />
DISPLAY ANLGPLUS* ANALOG+ ON OFF * Turns the Analog+ display mode on or<br />
ANNOT ANNOTATN ON OFF Turns on or off the screen annotation.<br />
DA<br />
Off.<br />
Accesses the current address of the<br />
display list.<br />
DL DSP LINE ON OFF Defines the level of the display line in<br />
the active amplitude units <strong>and</strong> displays<br />
the display line on the spectrum<br />
analyzer screen.<br />
DOTDENS* ANALOG+ ON OFF * Sets the dot density value in the<br />
Analog+ display mode.<br />
DSPLY<br />
Displays the value of a variable on the<br />
spectrum analyzer screen.<br />
GRAT MAT OK OFF Turns on or off the graticule.<br />
HD HOLD or IHOLD) Disables data entry via the spectrum<br />
analyzer numeric keypad, knob, or step<br />
keys. The active function readout is<br />
blanked, <strong>and</strong> any active function is<br />
deactivated.<br />
MENU<br />
Displays speclfled menu on the spectrun<br />
analyzer screen.<br />
PREFX Change Prefix Specifies the prefix.<br />
TH TARESNLD ON OFF Clips signal responses below the<br />
threshold level.<br />
TITLE Change Title Activates the screen title mode.<br />
TREQUENCY CF CENTER FREQ Specifies center frequency.<br />
’ For Option 101 or 301 only.<br />
5-14 Programming Comm<strong>and</strong>s<br />
FA START FREQ Specifies the start frequency.<br />
FB STOP FREfJ Specifies the stop frequency.<br />
FOFFSET FNEQ OFFSET Specifies the frequency offset for all<br />
absolute frequency readouts such as<br />
center frequency.<br />
ss CF STEP &WI’0 NAN Specifies center-frequency step size.
Function<br />
Category<br />
;RAPHICS<br />
NFORMATION<br />
‘Ihble 5-4. Functional Index (continued)<br />
Comm<strong>and</strong> Corresponding Description<br />
Key Function<br />
CLRBOX Clears a rectangular area on the<br />
spectrum analyzer display.<br />
CLRDSP<br />
DA<br />
Erases user-generated graphics <strong>and</strong> text.<br />
Accesses the current address of the<br />
display list.<br />
DRAWBOX Draws a rectangular box on the<br />
spectrum analyzer display.<br />
DT<br />
Defines any character as a label<br />
terminator.<br />
GETPLOT (copy) Initiates output of the spectrum<br />
analyzer display to a plotter.<br />
GETPRNT ICOPYJ Initiates output of the spectrum<br />
analyzer display to a printer.<br />
GR<br />
LB<br />
PA<br />
PD<br />
PR<br />
PRINT<br />
PRNTADRS<br />
PU<br />
TEXT<br />
TRGRPH<br />
AC<strong>TV</strong>F<br />
BIT<br />
BITF<br />
CLS<br />
@Z5r) to a printer<br />
PRLNTER ADDRESS<br />
HAVE SHOW DPTTONS<br />
Graphs the given y coordinate while<br />
incrementing the z coordinate by 1.<br />
Writes text at the current pen position.<br />
Moves the pen to a vector location on<br />
the spectrum analyzer screen relative to<br />
the reference coordinates (0,O).<br />
Instructs the spectrum analyzer to plot<br />
vectors on the spectrum analyzer screen<br />
until a PU comm<strong>and</strong> is received.<br />
Moves the pen to a new plot location on<br />
the spectrum analyzer screen relative to<br />
the current coordinates in display units<br />
Prints screen data.<br />
Allows you to set the <strong>HP</strong>-IB address of<br />
the printer.<br />
Instructs the spectrum analyzer not to<br />
plot vectors on the spectrum analyzer<br />
screen until a PD comm<strong>and</strong> is received.<br />
Writes text on the analyzer screen at<br />
the current pen position.<br />
Graphs compressed trace.<br />
Returns a “0” if the given function is<br />
not active, a “1” lf it is active.<br />
Places the state of a bit in the<br />
destination.<br />
Returns the state of a bit.<br />
Clears all status bits.<br />
Returns a “0” if a device or option is not<br />
installed.<br />
ID SHOW OPTIONS Returns the spectrum analyzer model<br />
number.<br />
MDU<br />
OP<br />
PARSTAT<br />
PWRUPTIME<br />
Returns values for the spectrum<br />
analyzer’s baseline <strong>and</strong> reference level.<br />
Returns the coordinates of the<br />
lower-left <strong>and</strong> upper-right comers of<br />
the spectrum analyzer display.<br />
Returns parallel port status.<br />
Returns the number of milliseconds that<br />
have elapsed since the spectrum<br />
analyzer was turned on.<br />
Programming Comm<strong>and</strong>s 5-15
Function<br />
Cateccorv<br />
NFORMATION<br />
continued)<br />
NPUT <strong>and</strong> OUTPUT<br />
,IMIT LINES<br />
REV<br />
RQS<br />
SER<br />
SRQ<br />
STB<br />
EE<br />
EK<br />
ENTER<br />
EP<br />
DA<br />
DL<br />
OUTPUT<br />
REL<strong>HP</strong>IB<br />
TA<br />
TB<br />
I’DF<br />
lRA TRB TRC<br />
LIMIDEL<br />
LIMIDISP<br />
JMIFAIL<br />
JMIFT<br />
JMIHI<br />
JMILINE<br />
5-l 5 Programming Comm<strong>and</strong>s<br />
‘able 5-4. Functional Index (continued)<br />
Corresponding<br />
Key Function<br />
SHOW OPTIONS<br />
SNOW OPTIONS<br />
‘URGE LINITS<br />
Xl’ DLSP Y N AUTO<br />
Xl’ TEST ON OFF<br />
Description<br />
Returns the date code of the Ermware<br />
revision number in YYMMDD format.<br />
Sets a bit mask for service requests.<br />
Returns the serial number suffix of the<br />
spectrum analyzer.<br />
The SRQ comm<strong>and</strong> is used by an<br />
external controller to simulate<br />
interrupts from the spectrum analyzer.<br />
Returns to the controller the decimal<br />
equivalent of the status byte.<br />
Sends the controller the values entered<br />
on the spectrum analyzer numeric<br />
keypad by the operator.<br />
Allows data entry with the front-panel<br />
knob when the spectrum analyzer is<br />
under remote control.<br />
Allows the spectrum analyzer to receive<br />
data from other devices on the <strong>HP</strong>-IB.<br />
Sends values entered on the spectrum<br />
analyzer number keyboard to the<br />
present active function value.<br />
Returns the value of the active function.<br />
Transmits information to the controller<br />
that describes the state of the spectrum<br />
analyzer when the OL comm<strong>and</strong> is<br />
executed.<br />
Allows the spectrum analyzer to send<br />
data to other devices on the <strong>HP</strong>-IB.<br />
Releases spectrum analyzer control of<br />
the <strong>HP</strong>-IB.<br />
Returns trace A amplitude values from<br />
the analyzer to the controller.<br />
Transfers trace B amplitude values from<br />
the analyzer to the controller.<br />
Formats trace information for return to<br />
the controller.<br />
Controls trace data input or output.<br />
Deletes all segments in the current<br />
limit-line table.<br />
Controls when the limit line (or limit<br />
lines) are displayed.<br />
Returns a “0” if the last measurement<br />
sweep of trace A is equal to or within<br />
the limit-line bounds.<br />
Selects how the limit-line segments are<br />
placed on the spectrum analyzer<br />
display: according to frequency, or<br />
according to the sweep time setting of<br />
the spectrum analyzer.<br />
Allows you to specify a fixed trace aa<br />
the upper limit line.<br />
Outputs the current limit-line table<br />
deilnitions.
Function<br />
Category<br />
LIMIT LINES<br />
:continued)<br />
dARKER<br />
‘Ihble 5-4. Functional Index (continued)<br />
Comm<strong>and</strong> Corresponding Description<br />
Key Function<br />
LIMILO Allows you to specify a Axed trace as<br />
the lower limit line.<br />
LIMIMIRROR Reflects the current deilnition about the<br />
amplitude axis at the largest frequency<br />
or the largest sweep time in the<br />
definition.<br />
LIMIMODE Edit Wpper , Edit Lover, Determines whether the limit-line<br />
Edit Up/Lou ,<br />
entries are treated as upper amplitude<br />
values, lower amplitude values, upper<br />
Edit Plid/Delt <strong>and</strong> lower amplitude values, or<br />
mid-amplitude <strong>and</strong> delta values.<br />
LIMIREL LIWTS FIX REL Specifies the current limit lines as ilxed<br />
or relative.<br />
LIMISEG Edit Wpper , Edit Lower Adds new segments to the current<br />
frequency limit line in either the upper<br />
limit llne or the lower limit line.<br />
LIMISEGT Edit Upper, Edit Lower Adds new segments to the current<br />
sweep time limit line in either the upper<br />
limit line or the lower limit line.<br />
LIMITEST WI” TEST OH OFF Compares trace A with the current<br />
limit-line data.<br />
SEGDEL DELETE SEGMEKT Deletes the specified segment from the<br />
limit-line tables.<br />
SENTER Edit VP/LOU , Enters the limit-line data ln either the<br />
Edit Aid/Delt<br />
upper <strong>and</strong> lower limit-line tables or the<br />
mid <strong>and</strong> delta table for limit lines based<br />
on frequency.<br />
SENTERT Edit Up/Low , Enters the limit-line data in either the<br />
Edit Mid/Delt<br />
upper <strong>and</strong> lower limit-line table or the<br />
mid <strong>and</strong> delta table for limit lines based<br />
on sweep time.<br />
MDS Specifies measurement data size as byte<br />
or word.<br />
MF Returns the frequency (or time) of the<br />
on-screen active marker.<br />
MKA Specifies amplitude of the active marker<br />
MKACT SELECT 1 2 3 4 Specifies the active marker.<br />
MKAC<strong>TV</strong> IIARKER Cnmubex> 0% OFF Makes the current active marker the<br />
active function.<br />
MKBW N dB PTS OA OFF Returns the b<strong>and</strong>width at the specified<br />
power level relative to an on-screen<br />
marker (if present) or the signal peak (if<br />
no on-screen marker is present).<br />
MKCF MA= -> CF Sets the center frequency equal to the<br />
marker frequency <strong>and</strong> moves the<br />
marker to the center of the screen.<br />
MKCONT<br />
MKD<br />
MKDLMODE<br />
MKF<br />
MAIUEER A<br />
TBBLE ADL IIR?I<br />
Resumes the sweep after execution of a<br />
MKSTOP comm<strong>and</strong>.<br />
Activates the delta marker.<br />
Selects if the marker amplitude values<br />
are shown as relative to the reference<br />
level or relative to the display line.<br />
Specifies the frequency value of the<br />
active marker.<br />
Programming Comm<strong>and</strong>s 5-17
Function Comm<strong>and</strong><br />
Category<br />
rlARKER (continued) MKFC’<br />
MKFCR*<br />
MKMIN<br />
MKN<br />
MKNOISE<br />
MKOFF<br />
MKP<br />
MKPAUSE<br />
MKPK<br />
‘Ihble 5-4. Functional Index (continued)<br />
Corresponding<br />
Key Function<br />
NX COUNT ON OFF *<br />
CNT RES AUTO &IA% *<br />
MARKER -> MIN=<br />
MhRNER BORKAL<br />
MK NOTSE UK OFF<br />
NhRNER ALL OFF<br />
KK PAUSE ON OFF<br />
(PEAK SEARCH),<br />
NEXT PEAR ,<br />
NEXT PX RXGRT ,<br />
NEXT PI LEFT,<br />
MARKER ->PK-PK<br />
MKPX PEAK EXGURSN<br />
MKREAD MK READ F T I P<br />
MKRL MARKER -> REF LYL<br />
MKSP MhRNER A -> SPAN<br />
MKSS<br />
MKSTOP<br />
MKTBL<br />
MKTRACE<br />
MKTRACK<br />
MKTYPE<br />
M4<br />
PKDLMODE<br />
PKRES<br />
MARKER -Z CF STEP<br />
MK ThBLE ON OFF<br />
MK TIME BUT0 A3C<br />
KK TRACK ON OFF<br />
t4hRKER A<strong>HP</strong>TD<br />
PK HOBE ODL NRK<br />
Not available for an <strong>HP</strong> 8592L. An <strong>HP</strong> <strong>8590</strong>1, needs Option 013 installed in it.<br />
5-18 Programming Comm<strong>and</strong>s<br />
Description<br />
Turns on or off marker frequency<br />
counter.<br />
Sets the resolution of the marker<br />
frequency counter.<br />
Moves active marker to minimum signal<br />
detected.<br />
Activates <strong>and</strong> moves the marker to the<br />
specified frequency.<br />
Displays the average noise level at the<br />
marker.<br />
Turns off either the active marker or all<br />
the markers.<br />
Places the active marker at the given<br />
Z-coordinate.<br />
Pauses the sweep at the active marker<br />
for the duration of the delay period.<br />
Positions the active marker on a signal<br />
peak.<br />
Specifies the minimum signal excursion<br />
for the spectrum analyzer’s internal<br />
peak-identiftcation routine.<br />
Selects the type of active trace<br />
information displayed by the spectrum<br />
analyzer marker readout.<br />
Sets the reference level to the<br />
amplitude value of the active marker.<br />
Sets the start <strong>and</strong> stop frequencies to<br />
the values of the delta markers.<br />
Sets the center-frequency step-size to<br />
the marker frequency.<br />
Stops the sweep at the active marker.<br />
Turns on or off the marker table.<br />
Moves the active marker to a<br />
corresponding position in trace A, trace<br />
B, or trace C.<br />
Moves the signal with an active marker<br />
to the center of the spectrum analyzer<br />
display <strong>and</strong> keeps the signal peak at<br />
center screen.<br />
Changes the type of the current active<br />
marker.<br />
Activates a single marker on the trace<br />
<strong>and</strong> enables the knob to change the<br />
position of the marker. The active<br />
function is then set to span.<br />
Selects the signal peaks that are<br />
displayed in the peak table.<br />
Returns the x-axis coordinates of the<br />
peaks in the peak table.
‘Ihble 5-4. Functional Index (continued)<br />
Function Comm<strong>and</strong> Corresponding Description<br />
Category<br />
Key Function<br />
MARKER (continued) PKSORT PK SORT FRQ AI@ Selects how the signal peaks listed in<br />
the peak table are sorted: by decreasim<br />
amplitude or by ascending frequency.<br />
PKTBL PK TABLE ON OFF Turns on or off the peak table.<br />
YIATH (see also ABS Places the absolute value of the source<br />
l’race Math)<br />
values in the destination.<br />
ADD Adds the sources <strong>and</strong> sends the sum to<br />
the destination.<br />
AVG Averages the source <strong>and</strong> the destination<br />
BIT Returns the state of a bit.<br />
CTA Converts the source values from<br />
measurement units to the current<br />
absolute amplitude units <strong>and</strong> stores the<br />
result in the destination.<br />
CTM Converts the source values to<br />
measurement units <strong>and</strong> places the resuli<br />
in the destination.<br />
DIV Divides source 1 by source 2 <strong>and</strong> places<br />
the result in the destination.<br />
EXP Places the exponential of the source in<br />
the destination.<br />
INT Places the greatest integer that is less<br />
than or equal to the source value into<br />
the destination.<br />
LOG ‘lakes the logarithm (base 10) of the<br />
source, multiplies the result by the<br />
scaling factor, then stores it in the<br />
destination.<br />
MEAN Returns the mean value of the given<br />
trace ln measurement units.<br />
MEANTH Returns the mean value of the given<br />
trace above the threshold, in<br />
measurement units.<br />
MIN Compares source 1 <strong>and</strong> 2, point by<br />
point, <strong>and</strong> stores the lesser of the two in<br />
the destination.<br />
MINPOS Returns a value, which is the s-axis<br />
position (in display units) of the<br />
minimum amplitude value in trace A,<br />
trace B, trace C, or user-defined trace.<br />
MOD<br />
MPY<br />
MXM<br />
PDA<br />
PDF<br />
Stores the remainder from the division<br />
of source 1 by source 2 in the<br />
destination.<br />
Multiplies the sources, point by point,<br />
<strong>and</strong> places the results in the destination.<br />
Compares source 1 <strong>and</strong> source 2, point<br />
by point, sending the greater value of<br />
each comparison to the destination.<br />
Sums the probability distribution of<br />
amplitude in the destination trace with<br />
the amplitude distribution function of<br />
the source trace.<br />
Increments an element of the<br />
destination trace whenever the<br />
corresponding element of the source<br />
trace exceeds a threshold.<br />
Programming Comm<strong>and</strong>s 5-l 9
Function<br />
Category<br />
dATH (continued)<br />
dEASURE/USER<br />
RMS<br />
SQR<br />
STDEV<br />
SUB<br />
‘Ihble 5-4. Functional Index (continued)<br />
Comm<strong>and</strong><br />
Returns the root mean square value of<br />
the trace in measurement units.<br />
Places the square root of the source into<br />
the destination.<br />
Returns the st<strong>and</strong>ard deviation of the<br />
trace amplitude ln measurement units.<br />
Subtracts source 2 from source 1, point<br />
by point, <strong>and</strong> sends the difference to<br />
the destination.<br />
VARIANCE Returns the amplitude variance of the<br />
specified trace, in measurement units.<br />
ACP<br />
ACPBW<br />
ACPCONTM<br />
ACPE<br />
ACPGRAPH<br />
ACPPAR<br />
ACPSNGLM<br />
ACPSP<br />
C<strong>HP</strong><br />
FFT<br />
FFTAUTO<br />
FFTCLIP<br />
FFTCONTS<br />
FFTMKR<br />
5-20 Programming Comm<strong>and</strong>s<br />
Corresponding<br />
Key Function<br />
AD3 CIIAK POWER<br />
EIABIEL BABDl?DTH<br />
COET HEAS<br />
ADJ CM PTdR estd<br />
SINGLE WAS<br />
3IANNEI. SPACING<br />
XIAEMZL POKER<br />
vIARKER -> AUTO FFT<br />
:OETIBJuS FFT<br />
FFT WlRKERS<br />
Description<br />
Performs the adjacent channel power<br />
measurement.<br />
Allows you to specify the channel<br />
b<strong>and</strong>width used for the adjacent<br />
channel power (ACP), adjacent channel<br />
power extended (ACPE), <strong>and</strong> channel<br />
power (C<strong>HP</strong>) measurements.<br />
Changes the spectrum analyzer’s sweep<br />
mode to continuous sweep, <strong>and</strong> then<br />
performs the previous power<br />
measurement (occupied b<strong>and</strong>width,<br />
adjacent channel, or channel power) at<br />
the end of every sweep.<br />
Performs the adjacent channel power<br />
extended measurement.<br />
Computes <strong>and</strong> displays an adjacent<br />
channel power (ACP) graph.<br />
Determines if the spectrum analyzer<br />
settine used for the adjacent channel<br />
power (ACP), adjacent channel power<br />
extended (ACPE), channel power (C<strong>HP</strong>),<br />
or occupied b<strong>and</strong>width (OBW)<br />
measurement are set manually or<br />
automatically.<br />
Changes the spectrum analyzer’s sweep<br />
mode to single sweep, performs a take<br />
sweep (TS), <strong>and</strong> then performs the<br />
previous power measurement.<br />
Allows you to specify the frequency<br />
spacing between channels.<br />
Performs the channel power<br />
measurement.<br />
Performs a discrete fast Fourier<br />
transform on the source trace array <strong>and</strong><br />
stores the result in the destination array.<br />
Performs a fast Fourier transform (FFT)<br />
on the signal on which the marker is<br />
placed.<br />
Indicates if the FFT results are valid.<br />
Performs a fast Fourier transform (FFT)<br />
continuously on the current signal.<br />
Activates the FFT markers <strong>and</strong> displays<br />
the FFT annotation on the spectrum<br />
1 analyzer display.
Function<br />
Category<br />
MEASURE/USER<br />
Icontinued)<br />
FFTMM<br />
FFTMS<br />
FFTOFF<br />
FFTPCTAM<br />
lfdble 5-4. Functional Index (continued)<br />
Comm<strong>and</strong><br />
FFTPCTAMR<br />
FFTSNGLS<br />
FFTSTAT<br />
FFl’STOP<br />
MEASOFF<br />
NDB<br />
NDBPNT<br />
NDBPNTR<br />
OBW<br />
OBWPCT<br />
PCTAM<br />
Corresponding<br />
Key Function<br />
BARKER -> BID SCRIU<br />
MAXKER -> FFT STOP<br />
FFT OFF<br />
% AH 08 OFF (during an<br />
FFT measurement)<br />
SIIIGLE FFT<br />
MEAS OFF<br />
N d3 PTS ON OFF<br />
N dl3 PTS ON OFF<br />
OCGBPTRB BAADWDTR<br />
OCC BY % POWER<br />
% AM ON OFF<br />
Description<br />
Changes the FFT midscreen frequency<br />
of the spectrum analyzer to the<br />
frequency of the FFT marker.<br />
Changes the FFT stop frequency of the<br />
spectrum analyzer to the frequency of<br />
the FFT marker.<br />
Exits the fast Fourier transform (FFT)<br />
measurement <strong>and</strong> FFT settings.<br />
Turns the percent AM function on or<br />
Off.<br />
Returns the percent of amplitude<br />
modulation (AM).<br />
Changes the spectrum analyzer’s sweep<br />
mode to single sweep mode (if<br />
necessary), <strong>and</strong> then performs a fast<br />
Fourier transform (FIT) on trace A.<br />
Returns the status of the spectrum<br />
analyzer’s FFT measurement functions.<br />
Sets the FFT stop frequency of the FFT<br />
measurement.<br />
Turns off the current measurement,<br />
erases the display, <strong>and</strong> then displays the<br />
menu accessed by (MEAS/USER].<br />
Specifies the distance (in dB) from the<br />
signal peak for the N dB points<br />
measurement (NDBPNT).<br />
Turns on or off the N dB points<br />
measurement.<br />
Returns the b<strong>and</strong>width measured by the<br />
N dB points measurement (NDBPT).<br />
Performs the occupied b<strong>and</strong>width<br />
measurement using the value for<br />
occupied b<strong>and</strong>width percent (OBWPCT).<br />
Specifies the percent of total power that<br />
is to be used in calculating the occupied<br />
b<strong>and</strong>width (OBW).<br />
Turns on or off the percent AM<br />
measurement.<br />
PCTAMR Returns the percent AM measured by<br />
the percent AM measurement (PCTAM).<br />
PWRBW<br />
TO1 TOI OW OFF<br />
Computes the b<strong>and</strong>width around the<br />
trace center, which includes signals<br />
whose total power is a specified<br />
percentage of the total trace signal<br />
power.<br />
Turns on or off the third-order<br />
intermodulation (TOI) measurement.<br />
TOIR Returns the highest third-order<br />
intermodulation product measured by<br />
the third-order intermodulation<br />
measurement (TOI).<br />
AODE MODE SPEC’IRUH AHALYZER Returns a “0” if the mode of operation<br />
is spectrum analysis. A number other<br />
than “0” is returned if the operating<br />
mode (also called “personality”) is other<br />
than spectrum analysis.<br />
Programming Comm<strong>and</strong>s 5-21
‘Ihble 5-4. Functional Index (continued)<br />
Function Comm<strong>and</strong> Corresponding Description<br />
Category Key Function<br />
IPERATOR ENTRY DN El Reduces the active function by the<br />
applicable step size.<br />
‘LOTTER<br />
‘RESET<br />
‘RINTER<br />
‘ROGRAM FLOW<br />
EE Enables front-panel number entry.<br />
EK Enables front-panel knob control.<br />
EP Enter parameter from front panel.<br />
HD HOLD or [HOLD) Holds or disables entry <strong>and</strong> blanks<br />
active function readout.<br />
UP<br />
GETPLOT<br />
PLOT<br />
IP<br />
LF*<br />
POWERON<br />
RESETRL<br />
GETPRNT<br />
PRINT<br />
ABORT<br />
IF<br />
REPEAT<br />
RETURN<br />
WAIT<br />
0<br />
lcopyl<br />
Icopy) (to a plotter)<br />
piiisq<br />
POWER 01 IP LAST<br />
m<br />
lcopyl (to a printer)<br />
!ECALL or SAVE CAT Catalog Internal,<br />
Catalog Caxd t<br />
LOADt LOAD PILE t<br />
MS1 INTERNAL CARD<br />
PREFX Change Prefix<br />
For <strong>HP</strong> 8592L, <strong>HP</strong> 85933, <strong>HP</strong> 8595E, or <strong>HP</strong> 85963 only.<br />
Option 003 required for <strong>HP</strong> <strong>8590</strong>L or <strong>HP</strong> 8592L.<br />
5-22 Programming Comm<strong>and</strong>s<br />
Increases the active function by the<br />
applicable step size.<br />
Initiates output of the spectrum<br />
analyzer display to a plotter. (For use<br />
within a downloadable program.)<br />
Initiates output of the spectrum<br />
analyzer display to a plotter.<br />
Performs an instrument preset.<br />
Performs an instrument preset to the<br />
base b<strong>and</strong> (b<strong>and</strong> 0).<br />
Selects the state the spectrum analyzer<br />
will be in when it is turned on: IP<br />
(instrument preset) or LAST state.<br />
Resets the reference level to instrument<br />
preset value.<br />
Initiates output of the spectrum<br />
analyzer display to a printer. (For use<br />
within a downloadable program.)<br />
Initiates output of the spectrum<br />
analyzer display to a printer.<br />
Stops the execution all user-defined<br />
functions <strong>and</strong> readies the instrument for<br />
the next comm<strong>and</strong> received.<br />
IF/THEN/ELSE/ENDIF forms a decision<br />
<strong>and</strong> branching construct.<br />
REPEAT/UNTIL forms a looping<br />
construct.<br />
Stops the operation of a user-defined<br />
comm<strong>and</strong> <strong>and</strong> returns program<br />
operation to the point where the<br />
user-defined function was called.<br />
Suspends all spectrum analyzer<br />
operation for the specified time<br />
duration.<br />
Displays directory information from<br />
either the specified or the current mass<br />
storage device.<br />
Loads a file from the memory card.<br />
Allows you to specify the current mass<br />
storage device as the spectrum analyzer<br />
memory or a memory card.<br />
Specties the prefix.
Function<br />
Category<br />
RECALL or SAVE<br />
lPAN FS<br />
PSTATE<br />
PURGE<br />
RCLS<br />
RCLT<br />
SAVES<br />
SAVET<br />
SAVRCLF<br />
SAVRCLN<br />
SAVRCLW<br />
STOR’<br />
HNt<br />
HNLOCKt<br />
HNUNLKt<br />
LSPAN<br />
PKZMOK<br />
‘able 5-4. Functional Index (continued)<br />
Comm<strong>and</strong><br />
Corresponding Description<br />
Key Function<br />
SAV LOCK ON OFF Protects all of the spectrum analyzer’s<br />
user state <strong>and</strong> trace registers from bein]<br />
changed.<br />
DELETE FILE Deletes the specified file from the<br />
current mass storage device.<br />
INTERUAL -> STATE Recalls spectrum analyzer state data<br />
from one of the nine state registers in<br />
spectrum analyzer memory.<br />
The softkeys accessed by Recalls previously saved trace data,<br />
Tnternal -> Trace amplitude factors, or limit-line data<br />
from the trace registers in spectrum<br />
analyzer memory.<br />
STATE -> INTRUL Saves the currently displayed<br />
instrument state ln spectrum analyzer<br />
memory.<br />
The softkeys accessed by Saves the selected trace data <strong>and</strong> state<br />
Trace -> Intrnl information, amplitude correction<br />
factors, or limit-line tables in spectrum<br />
analyzer memory.<br />
~or~RECALL] Specifies either a save or recall<br />
operation.<br />
Specifies the number to append to the<br />
prefix for a save or recall operation, am<br />
initiates the transfer of data.<br />
Specilles the data to be transferred.<br />
STATE -> CARD *, Stores data on a RAM card.<br />
Trace -> Card*,<br />
ALL DLP -> CARD *<br />
FULL SPAN Sets the frequency span of the spectrun<br />
analyzer to full span.<br />
Returns the harmonic number of the<br />
current harmonic b<strong>and</strong> in which the<br />
spectrum analyzer is tuning.<br />
B<strong>and</strong> selection accessed by Forces the spectrum analyzer to use<br />
B<strong>and</strong> Luck t or<br />
only the selected harmonic b<strong>and</strong>.<br />
BKD LOCK OR UFFt<br />
BND LOCK OR OFF (OFF is Unlocks the harmonic b<strong>and</strong>.<br />
underlined)+<br />
LAST SPAN Changes the spectrum analyzer’s span tc<br />
the previous span setting.<br />
Returns a “0” if the peak zoom routine<br />
(PKZOOM) found only the spectrum<br />
analyzer’s local oscillator feedthrough,<br />
otherwise a “1” is returned.<br />
PKZOOM PEAK Z#DA Automatically tunes the spectrum<br />
analyzer to the signal with the highest<br />
amplitude level while narrowing the<br />
frequency span to the specified<br />
frequency span.<br />
Option 003 required for <strong>HP</strong> <strong>8590</strong>L or <strong>HP</strong> 8592L.<br />
For <strong>HP</strong> 8592L, <strong>HP</strong> 85933, <strong>HP</strong> 85953, or <strong>HP</strong> 85963 only.<br />
Programming Comm<strong>and</strong>s 5-23
‘Ihble 5-4. Functional Index (continued)<br />
Function Comm<strong>and</strong> Corresponding<br />
Category Key Function<br />
3PAN (continued) SP SPAN<br />
SWEEP CONTS<br />
Option 105 required.<br />
SPZGGM SPA2 2OOI<br />
GATE’<br />
GATECTL*<br />
GC*<br />
GD*<br />
GDRVCLPAR*<br />
GDRVGDEL*<br />
GDRVGLEN*<br />
GDRVGT’<br />
GDRVGTIM*<br />
GDRVPRI’<br />
GDRVPWID*<br />
5.24 Programming Comm<strong>and</strong>s<br />
Description<br />
Changes the total displayed frequency<br />
range symmetrically about the center<br />
frequency.<br />
Places a marker on the highest<br />
on-screen signal (if an on-screen marker<br />
is not present), turns on the signal track<br />
function, <strong>and</strong> activates the span<br />
function.<br />
SWEEP COlT SGL (CONT is Sets the spectrum analyzer to the<br />
underlined) continuous sweep mode.<br />
GATE ON OFF * Turns on or off the time-gating.<br />
GATE CTL EDGE LVL* Selects between the edge <strong>and</strong> the level<br />
mode for Option 105, the time-gated<br />
spectrum analysis capability.<br />
(PRESET) Presets Option 105, the time-gated<br />
spectrum analysis capability.<br />
GATE DELAY* Sets the delay time before the gate<br />
opens.<br />
CLEAR PARAH * Clears the pulse parameters (pulse<br />
width, pulse repetition interval, <strong>and</strong><br />
reference edge) for a time-gate<br />
measurement by setting the pulse<br />
parameters to 0.<br />
GATE DELAY � (when using For the frequency window only,<br />
the gate utility) GDRVGDEL sets the time delay from<br />
when the gate trigger occurs to when<br />
the gate is opened.<br />
GATE LBNGTH * Adjusts the gate length in both the time<br />
<strong>and</strong> frequency windows.<br />
GATE ON OFF * Turns on or off the gate in the<br />
frequency window.<br />
TRIG HER ON OFF * Activates the gate trigger marker, <strong>and</strong><br />
places it at the given value.<br />
ENTER PRI * Enters the specified value as the pulse<br />
repetition interval.<br />
EN+lYEX WIDTH * Enters the specified value as the pulse<br />
width.<br />
GDRVRBW* CPL RBW ON OFF � Couples or uncouples the resolution<br />
b<strong>and</strong>width to the specified pulse width.<br />
GDRVREFE * ENTER RRF EDGE* Allows you to enter the position (in<br />
time) for a reference edge.<br />
GDRVST* CPL SWF ON OFF * Couples or uncouples the sweep time to<br />
the pulse repetition interval.<br />
GDRVSWAP * UPDAm TIBRFREQ * Makes the window (either the time or<br />
frequency window) that is currently not<br />
the active window, the active window.<br />
GDRVSWDE’ Sk’EEE’ DELAY * Allows you to specify the delay from<br />
the edge of the gate trigger until the<br />
sweep is started in the time window.
Function<br />
Category<br />
3WEEP (continued)<br />
GDRVSWP*<br />
3YNCHRONIZATION DONE<br />
ltdble 5-4. Functional Index (continued)<br />
Corresponding<br />
Key Function<br />
T WINDOW SNP TINE*<br />
GDRVUTIL* GATE UTILYTY *<br />
3DRVVBW * CPL VBW ON DFF *<br />
3L*<br />
3P*<br />
ST<br />
l-S<br />
GATE LENGTH *<br />
EDGE POL POS NEG *<br />
SWP TIMB AUTO HAN<br />
rRACE AMB A- B -> A ON OFF<br />
Option 105 required.<br />
AMBPL NUFtNLI2E ON OFF<br />
4XB<br />
BLANK<br />
BML<br />
BTC<br />
BXC<br />
ZLRW<br />
DET<br />
:B<br />
MERGE<br />
A B<br />
BLANK A, BLANK B ,<br />
BLANK C<br />
B- DL -> B<br />
6 -> &<br />
6 c<br />
CLEAR WFIITE A,<br />
CLEAR WRITE B ,<br />
CLEAR NRTTE C<br />
DETECTOR PK SP HEG or<br />
DETECTOR SItI’ PK<br />
MINH NTN NOLD c<br />
MOV<br />
MXMH HAX HOLD A, NAX ROLD 3<br />
‘KPOS<br />
Description<br />
Specifies the sweep time for the time<br />
domain window of the gate utility.<br />
Turns on or off the gate utility.<br />
Couples or uncouples the video<br />
b<strong>and</strong>width to the gate length.<br />
Sets the length of time the gate is open.<br />
Sets the polarity (positive or negative)<br />
for the gate trigger.<br />
Specifies the time in which the spectrun<br />
analyzer sweeps the displayed<br />
frequency range.<br />
Allows you to determine when the<br />
spectrum analyzer has started to<br />
execute all comm<strong>and</strong>s prior to <strong>and</strong><br />
including DONE.<br />
Starts <strong>and</strong> completes one full sweep<br />
before the next comm<strong>and</strong> is executed.<br />
Subtracts trace B from trace A <strong>and</strong><br />
sends the result to trace A during every<br />
sweep of the spectrum analyzer.<br />
Subtracts trace B from trace A, adds thr<br />
display line value to the difference, <strong>and</strong><br />
sends the result to trace A during every<br />
sweep of the spectrum analyzer.<br />
Exchanges trace A <strong>and</strong> trace B.<br />
Blanks trace A, trace B, or trace C <strong>and</strong><br />
stops taking new data into the specified<br />
trace.<br />
Subtracts display line from trace B <strong>and</strong><br />
places the result in trace B.<br />
Transfers trace B into trace C.<br />
Exchanges trace B <strong>and</strong> trace C.<br />
Clears the specified trace <strong>and</strong> enables<br />
trace data acquisition.<br />
Selects the spectrum analyzer detection<br />
mode.<br />
Provides a method for putting values<br />
into trace B.<br />
Merges the source trace into the<br />
specified area of the destination trace.<br />
Updates trace C elements with minimum<br />
level detected.<br />
Copies the source values into the<br />
destination.<br />
Updates trace elements with maximum<br />
level detected.<br />
Returns a value, which is the index of<br />
the maximum value in trace A, trace B,<br />
trace C, or user-defined trace.<br />
Programming Comm<strong>and</strong>s 5-25
Function Comm<strong>and</strong><br />
Category<br />
rRACE (continued) TA<br />
I’RACE MATH (see<br />
tlso Math)<br />
TB<br />
TRA TRB TRC<br />
TRCMEM<br />
TRDEF<br />
TRDSP<br />
TRGRPH<br />
TRPRST<br />
TRSl’AT<br />
TWNDOW<br />
VAVG<br />
VIEW<br />
APB<br />
CLRAVG<br />
COMPRESS<br />
CONCAT<br />
FFT<br />
LINFILL<br />
MIRROR<br />
PEAKS<br />
SMOOTH<br />
SUM<br />
SUMSQR<br />
TRMATH<br />
XCH<br />
5-26 Programming Comm<strong>and</strong>s<br />
‘Ihble 5-4. Functional Index (continued)<br />
Corresponding<br />
Key Function<br />
Description<br />
Returns trace A data.<br />
Returns trace B data.<br />
Controls trace data input <strong>and</strong> output.<br />
Returns a nonnegative integer that<br />
indicates the total number of trace<br />
registers available for SAVET <strong>and</strong> RCLT.<br />
Creates a user-defined trace.<br />
Turns on or off the display of trace A, B,<br />
or C without clearing the trace<br />
(measurements can still be taken).<br />
Displays a compressed trace on the<br />
analyzer display.<br />
Sets the trace operations to their preset<br />
values.<br />
Returns the status of traces A, B, <strong>and</strong> C:<br />
clear write, blank, view, minimum hold,<br />
or maximum hold.<br />
Creates a window trace array for the<br />
fast Fourier transform (FFT) function.<br />
VID AVG ON OFF Enables the video-averaging function,<br />
which averages trace points to smooth<br />
the displayed trace.<br />
VIEW A, VIEW B, VIEW C Displays trace A, trace B, or trace C,<br />
<strong>and</strong> stops taking new data into the<br />
viewed trace.<br />
VID AVG ON OFF<br />
Adds trace A to trace B <strong>and</strong> sends the<br />
result to trace A.<br />
Restarts video averaging.<br />
Reduces the number of trace elements<br />
while retaining the relative frequency<br />
<strong>and</strong> amplitude characteristics of the<br />
trace data.<br />
Combines two traces.<br />
Calculates fast Fourier transform.<br />
Fills linear interpolated data into the<br />
specified trace data points of a<br />
destination trace.<br />
Displays the mirror image of a trace.<br />
Sorts signal peaks by frequency or<br />
amplitude, stores the results ln the<br />
destination trace, <strong>and</strong> returns the<br />
number of peaks found.<br />
Smooths the trace according to the<br />
number of points specified for the<br />
running average.<br />
Returns the sum of the amplitudes of<br />
the trace elements in measurement<br />
lullts.<br />
Returns the sum of the squares of the<br />
amplitude of each trace element.<br />
Executes a list of analyzer comm<strong>and</strong>s at<br />
the end of each sweep.<br />
Exchanges traces.
RIGGER<br />
Function<br />
Category<br />
JSER-DEFINED<br />
‘0ble 5-4. Functional Index (continued)<br />
Comm<strong>and</strong> Corresponding Description<br />
Key Function<br />
ONEOS Performs the comm<strong>and</strong> list at the end ol<br />
sweep.<br />
ONSWP Performs the comm<strong>and</strong> list at beginning<br />
of sweep.<br />
SNGLS @miFswp), Selects single-sweep mode.<br />
SWEEP CONT SGL (SGL is<br />
underlined)<br />
TM FREE RUN, LINE , VTDEU , Specifies trigger mode.<br />
TS<br />
<strong>TV</strong>LINE+<br />
<strong>TV</strong>SFRM’<br />
<strong>TV</strong>STND *<br />
<strong>TV</strong>SYNC*<br />
ABORT<br />
ACTDEF<br />
DISPOSE<br />
ERASE<br />
FUNCDEF<br />
KEYCLR<br />
KEYCMD<br />
KEYDEF<br />
KEYENH<br />
KEYEXC<br />
KEYLBL<br />
MEM<br />
MENU<br />
RETURN<br />
SAVEMENU<br />
’ Options 101 <strong>and</strong> 102, or Option 301 required.<br />
EXTERgAL, <strong>TV</strong> TRIG *<br />
<strong>TV</strong> LIKE # *<br />
<strong>TV</strong> TRTG ODD FLD *,<br />
<strong>TV</strong> TRIG EVER FLD � ,<br />
<strong>TV</strong> TRIG VERT IWT *<br />
<strong>TV</strong> St<strong>and</strong>ard *<br />
<strong>TV</strong> SYNC NEG PBS *<br />
ERASE DLP HE?4<br />
Begins a new sweep.<br />
Sets the line number of the horizontal<br />
line of video on which to trigger.<br />
Specifies type of video frame to trigger<br />
on.<br />
Selects the triggering for NTSC, PAL,<br />
PAL-M, <strong>and</strong> SECAM-L formats.<br />
Selects between negative <strong>and</strong> positive<br />
triggering for video frame formats.<br />
Aborts all user-defined functions.<br />
Creates a user-defined active function.<br />
Deletes user-deflned functions.<br />
Clears trace A <strong>and</strong> trace B, disposes of<br />
the contents of the user memory, <strong>and</strong><br />
resets the state reglsters <strong>and</strong> the<br />
spectrum analyzer to the instrument<br />
preset state.<br />
Defines a routine consisting of spectrum<br />
analyzer comm<strong>and</strong>s, assigns the routine<br />
a label, <strong>and</strong> stores the routine <strong>and</strong> its<br />
label in the user memory.<br />
Clears softkeys 1 through 6.<br />
Allows you define the function <strong>and</strong> label<br />
of a softkey. The softkey label is<br />
updated whenever a softkey is pressed.<br />
Assigns a label <strong>and</strong> user-defined<br />
function to a softkey.<br />
Allows you to activate inverse video<br />
mode or underline part or all of the<br />
softkey label.<br />
Executes the specified, previously<br />
defined softkey.<br />
Relabels a softkey without changing its<br />
function.<br />
Returns the amount of spectrum<br />
analyzer memory available.<br />
Selects <strong>and</strong> displays the softkey menus<br />
on the spectrum analyzer screen.<br />
Returns from user-defined function.<br />
Saves menu 1 under the specified menu<br />
number.<br />
Programming Comm<strong>and</strong>s 5-27
Function<br />
Category<br />
USER-DEFINED<br />
WINDOWS<br />
’ Not available for the <strong>HP</strong> <strong>8590</strong>L or <strong>HP</strong> 8592L.<br />
5.28 Programming Comm<strong>and</strong>s<br />
‘Ihble 5-4. Functional Index (continued)<br />
Comm<strong>and</strong> Corresponding Description<br />
Key Function<br />
TRDEF Declares a user-defined trace.<br />
USTATE Transmits information that has been<br />
stored in the analyzer by the user.<br />
VARDEF Creates a user-defined variable <strong>and</strong><br />
assigns it a value.<br />
WINNEXT m* Makes the window that is currently not<br />
the active window, active.<br />
WINOFF WINDDWS OFF * Turns off the windows display.<br />
WINON m)* Activates the windows display mode.<br />
WINZOOM (ZOOM-* Exp<strong>and</strong>s the size of the active window<br />
so that it fills the entire spectrum<br />
analyzer display.<br />
ZMKCNTR ZONE CKNTNR * Positions the zone marker at the<br />
specified frequency.<br />
ZMKPNL ZmIE PK LEFT * Places the zone marker at the next<br />
signal peak that is left of the zone<br />
marker’s current position.<br />
ZMKPNR ZONB PK RIGHT * Places the zone marker at the next peak<br />
to the rlght of the zone marker’s current<br />
position.<br />
ZMKSPAN ZONE SPAN * Allows you to change the width of the<br />
zone marker.
ABORT<br />
Abort<br />
Stops the execution all user-defined functions <strong>and</strong> readies the instrument for the next<br />
comm<strong>and</strong> received.<br />
Syntax<br />
ABORT<br />
Related Comm<strong>and</strong>s: ACTDEF, FUNCDEF, REPEAT/UNTIL, RETURN.<br />
Example<br />
In the example below, ABORT is in the function called D-LP.<br />
10 OUTPUT 718*"IP-"<br />
20 OUTPUT 718;"CLRDSP;"<br />
30 OUTPUT 718;"TRDSP TRA,OFF;"<br />
40 OUTPUT 718;"ANNOT 0FF;GRAT OFF;"<br />
50 OUTPUT 718;"VARDEF C-OUNT,O;"<br />
60 !<br />
70 OUTPUT 718;"FUNCDEF D-LP,Q";<br />
80 OUTPUT 718;"REPEAT;";<br />
90 OUTPUT 718;"ADD C,OUNT,C-OUNT,lOO;";<br />
100 OUTPUT 718;"PU,PA 100,lOO;PD;";<br />
110 OUTPUT 718;"DSPLY C-OUNT,4.0;";<br />
120 OUTPUT 718;"IF C_OUNT,EQ,300 THEN;ABORT;ENDIF;";<br />
130 OUTPUT 718;"UNTIL C_OUNT,EQ,400;";<br />
140 OUTPUT 718*"0*"*<br />
150 OUTPUT 718;"F;NCDEF S-HELL,@";<br />
160 OUTPUT 718;"D,LP;TEXT!INSIDE S-HELL!;@"<br />
170 !<br />
180 OUTPUT 718;"SBHELL;"<br />
190 END<br />
ABORT Abort<br />
Initializesspectrum analyzer<br />
Clears graphics from the spectrum<br />
analyzer display.<br />
Turns ofl trace A.<br />
Blanks annotation <strong>and</strong> graticule.<br />
Declares a user-&fined variable<br />
called C-OUNT<br />
Declares a user-d@inedfunction<br />
called D-LR<br />
Begins a repeat loop.<br />
Adds 100 to COUNT.<br />
Displays the valz~ of C-OlliNT.<br />
Aborts the function when<br />
COUNT is equal to 300.<br />
This is not executed because<br />
of the ABORT comm<strong>and</strong> in<br />
line 120.<br />
Ma&s end of D-LI?<br />
DQhtes second user-d@ined<br />
function called SHELL.<br />
Executes D-LP<strong>and</strong> displays<br />
message on display<br />
This calls the S-HELLjknction<br />
which in turn calls the<br />
D_LP function.<br />
Programming Comm<strong>and</strong>s 5-29
ABORT Abort<br />
Description<br />
If ABORT is encountered in a function that has been executed by pressing a softkey, the<br />
function is interrupted <strong>and</strong> front-panel control is returned.<br />
If the ABORT function is nested within one or more user-defined functions, ABORT stops the<br />
execution of all user-defined functions <strong>and</strong> readies the spectrum analyzer to act on the next<br />
comm<strong>and</strong> received.<br />
In comparison, the RETURN comm<strong>and</strong> also interrupts operation of a user-defined function, but<br />
RETURN returns the operation to the point at which the user-defined function was called. (See<br />
“RETURN” for more information.)<br />
5-30 Programming Comm<strong>and</strong>s
ABS<br />
Absolute<br />
Places the absolute value of the source values in the destination.<br />
Syntax<br />
Item<br />
User-de&ted trace<br />
User-defined variable<br />
7 d e s t i n a t i o n -<br />
b u s e r - d e f i n e d t r a c e d<br />
h trace range /<br />
b predefined v a r i a b l e /<br />
user-defined varioblej<br />
PredeEned variable A comm<strong>and</strong> that acts as a variable. Refer to Table 5-l.<br />
PrederIned function Function that returns a value. Refer to Table 5-l.<br />
Trace range A segment of trace A, trace B, trace C, or a user-defined trace.<br />
Number Anv real or inteeer number.<br />
Description/Default<br />
A trace defined by the TRDEF comm<strong>and</strong>.<br />
A variable defined by VARDEF or ACTDEF comm<strong>and</strong>s.<br />
J<br />
ABS Absolute<br />
Any valid trace name.<br />
Any valid variable<br />
name.<br />
Real number range.<br />
Prerequisite Comm<strong>and</strong>s: TRDEF when using user-defined trace. ACTDEF or VARDEF when<br />
using user-defined variable. TS when using trace data.<br />
Programming Comm<strong>and</strong>s 5-31
ABS Absolute<br />
Example<br />
10 OUTPUT 718;“IP;SNGLS;”<br />
20 OUTPUT 718;“VARDEF P,OINT,O;”<br />
30 OUTPUT 718;“ABS P-OINT,-2;”<br />
40 OUTPUT 718;“P_OINT?;“;<br />
50 ENTER 718;Second<br />
60 DISP Second<br />
70 END<br />
Description<br />
Initializes spectrum analyze?; stops sweeping.<br />
D@ines a variable, called P-OINT, <strong>and</strong> initializes it<br />
to 0.<br />
Places the absolute value of -2 into POINT<br />
Returns value of IWNT to computer<br />
Assigns value to computer variable, Second.<br />
Displays the absolute value (2).<br />
The source <strong>and</strong> the destination may be different lengths. The lengths of predefined traces<br />
(trace A, trace B, or trace C) is 401, while user-defined traces have a length of up to 2047, <strong>and</strong><br />
variables have a length of 1. When the source is longer than the destination, the source is<br />
truncated to fit. When the source is shorter than the destination, the last element is repeated<br />
to fill the destination.<br />
5-32 Programming Comm<strong>and</strong>s
ACP<br />
Adjacent Channel Power<br />
Performs the adjacent channel power measurement.<br />
Syntax<br />
ACP<br />
ACP Adjacent Channel Power<br />
Equivalent Softkey: AD3 CfiAN POWER.<br />
Related Comm<strong>and</strong>s: ACPPAR, ACPSP, ACPBW, ACPSNGLM, ACPCONTM, ACPGRAPH,<br />
ACPGR, ACPMK.<br />
Example<br />
OUTPUT 718;"ACP;" F&forms the adjacent channel power masurewsnt.<br />
Description<br />
ACP measures the power of the carrier <strong>and</strong> the power of the channels that are adjacent to the<br />
carrier, <strong>and</strong> then computes a power ratio for each of the adjacent channels, using the carrier<br />
power as a reference. ACP performs the adjacent channel power measurement using the values<br />
for channel spacing (ACPSP) <strong>and</strong> channel b<strong>and</strong>width (ACPBW).<br />
To use ACP:<br />
1. Set the center frequency to the carrier’s frequency.<br />
2. For best accuracy, set the reference level so that the carrier signal peak is within the first<br />
(top) division of the display graticule.<br />
3. Select the channel spacing with the ACPSP comm<strong>and</strong>.<br />
4. Select the channel b<strong>and</strong>width with the ACPBW comm<strong>and</strong>.<br />
5. If you want the spectrum analyzer settings to be set automatically, ensure that ACPPAR is<br />
set to 1. If you want to set the spectrum analyzer settings manually, set ACPPAR to 0. (See<br />
“ACPPAR” for more information about selecting the spectrum analyzer settings manually.)<br />
6. If the spectrum analyzer is in the continuous-sweep mode, use the single sweep comm<strong>and</strong><br />
(SNGLS) to select the single-sweep mode.<br />
7. Execute the ACP comm<strong>and</strong>.<br />
8. Query ACPERR to determine if there is a setup error for the ACP measurement. See the<br />
following table for more information about ACPERR.<br />
9. If no error occurred, query ACPPWRTX, ACPMAX, ACPLOWER, <strong>and</strong> ACPUPPER variables<br />
for the numeric results of the ACP measurement. See the following table for more<br />
information about these variables.<br />
10. If no error occurred, query trace A (TRA) for the trace results of the ACP measurement.<br />
Measurement Results: The results of the ACP comm<strong>and</strong> are stored in the variables <strong>and</strong> trace<br />
in the following table.<br />
XACP<br />
Programming Comm<strong>and</strong>s 5-33
ACP Adjacent Channel Power<br />
Variable<br />
or Trace<br />
ACP Measurement Results<br />
Description units<br />
1CPERR A variable that indicates if setup errors occurred for the ACP measurement. None<br />
If ACPERR is 0, no errors occurred. If ACPERR is greater than 0, an error<br />
occurred. An ACPERR value of 1 to 7 indicates that the frequency span,<br />
channel spacing, or the channel b<strong>and</strong>width are not set correctly. An<br />
ACPERR value of 1 to 7 indicates the following:<br />
KPPWRTX<br />
KPMAX<br />
KPLOWER<br />
LCPUPPER<br />
‘RA<br />
1 Frequency span < (2 x channel spacing + channel b<strong>and</strong>width).<br />
2 Channel b<strong>and</strong>width > 2 x channel spacing.<br />
3 Frequency span < (2 x channel spacing + channel b<strong>and</strong>width) <strong>and</strong><br />
channel b<strong>and</strong>width > 2 x channel spacing.<br />
4 Channel b<strong>and</strong>width < frequency span/loo.<br />
5 Frequency span < (2 x channel spacing + channel b<strong>and</strong>width) <strong>and</strong><br />
channel b<strong>and</strong>width < frequency span/loo.<br />
6 Channel b<strong>and</strong>width > 2 x channel spacing <strong>and</strong> channel b<strong>and</strong>width<br />
< frequency span/loo.<br />
7 Frequency span < (2 x channel spacing + channel b<strong>and</strong>width), channel<br />
b<strong>and</strong>width > 2 x channel spacing, <strong>and</strong> channel b<strong>and</strong>width < frequency<br />
span/loo.<br />
A variable that contains the total transmit b<strong>and</strong> carrier power. ACPPWRTX Determined by<br />
is calculated by the following: AUNITS comm<strong>and</strong><br />
Default unit is dBm.<br />
10 x b(Powe~carTier)<br />
A variable that contains the relative power level of the adjacent channel<br />
with the highest measured power level.<br />
A variable that contains the relative power level found in the lower<br />
adjacent channel. ACPLOWER is calculated by the following:<br />
P’-‘~e%wer channel<br />
10 x log( 1<br />
PoweTcarrier<br />
A variable that contains the relative power level found in the upper<br />
adjacent channel. ACPUPPER is calculated by the following:<br />
Power upper channel<br />
10 x log(<br />
1<br />
Power carrier<br />
TRA is trace A. Trace A contains the swept RF spectrum that was used to<br />
measure adjacent channel power.<br />
dB<br />
dB<br />
dB<br />
Determined by the<br />
trace data format<br />
(TDF) comm<strong>and</strong>.<br />
Restrictions<br />
Executing ACP exits the following functions: windows display mode (WINON), N dB point<br />
measurement (NDBPNT), the FFT menu measurements (FFTAUTO, FFTCONTS, FFTSNGLS),<br />
gate utility functions (GDRVUTIL), TO1 measurement (TOI), marker table (MKTBL), peak table<br />
(PKTBL), percent AM (PCTAM), or peak zoom (PKZOOM).<br />
AUNITS of W or V, will give incorrect results for ACPMAX, ACPLOWER, <strong>and</strong> ACPUPPER.<br />
5.34 Programming Comm<strong>and</strong>s
ACPBW<br />
Channel B<strong>and</strong>width<br />
ACPBW Channel B<strong>and</strong>width<br />
Allows you to specify the channel b<strong>and</strong>width used for the adjacent channel power (ACP),<br />
adjacent channel power extended (ACPE), <strong>and</strong> channel power (C<strong>HP</strong>) measurements.<br />
Syntax<br />
ACPBW<br />
Item Description/Default I Range<br />
Number Any real or integer number. Default unit is Hz. 1 kHz to 999.9 MHz.<br />
Equivalent Softkey: CHANNEL BAMDWDTH .<br />
Initial Value: 16 kHz.<br />
Preset Value: last value entered.<br />
Related Comm<strong>and</strong>s: ACP, ACPE, C<strong>HP</strong>.<br />
Example<br />
OUTPUT 718;"MOV ACPBW,lOOKHZ;" SpeciJies a 100 kHz integration b<strong>and</strong>width.<br />
OUTPUT 718."ACP*"<br />
9 8 F&forms the adjacent channel power measurement.<br />
Programming Comm<strong>and</strong>s 5-35
Description<br />
The value of ACPBW is used when calculating the results of the adjacent channel (ACP),<br />
adjacent channel extended (ACPE), or channel power (C<strong>HP</strong>) measurement. The value of<br />
ACPBW is also used when ACPPAR is set for automatic coupling the spectrum analyzer settings<br />
for the ACP, ACPE, or C<strong>HP</strong> measurement.<br />
Once you enter a value into ACPBW, that value is retained until you change it, or execute<br />
DISPOSE ALL. Pressing (FiZ5Fij or turning the spectrum analyzer off does not change the<br />
value of ACPBW.<br />
You can execute the ACPBW comm<strong>and</strong> two different ways. You can either execute the ACPBW<br />
comm<strong>and</strong> directly (for example, “ACPBW IOOKHZ; ‘I) or use the MOV comm<strong>and</strong> to move the value<br />
for the b<strong>and</strong>width into the ACPBW comm<strong>and</strong> (for example, “MOV ACPBW,lOOKHZ;“). If you use<br />
the MOV comm<strong>and</strong>, no text is displayed in the active function area during comm<strong>and</strong> execution.<br />
Query Response<br />
5-36 Programming Comm<strong>and</strong>s<br />
chonne I<br />
b<strong>and</strong>width<br />
/ \<br />
output<br />
termination +
ACPCONTM<br />
Continuous Sweep Measurement<br />
ACPCONTM Continuous Sweep Measurement<br />
Changes the spectrum analyzer’s sweep mode to continuous sweep, <strong>and</strong> then performs the<br />
previous power measurement (occupied b<strong>and</strong>width, adjacent channel, or channel power) at the<br />
end of every sweep.<br />
Syntax<br />
Equivalent Softkey: CONT MEAS .<br />
Related Comm<strong>and</strong>s: ACP, ACPSNGLM, C<strong>HP</strong>, CONTS, SNGLS, OBW.<br />
Example<br />
OUTPUT 718*"ACP*"<br />
OUTPUT 718;"ACP~ONTM;"<br />
Description<br />
I4qforrn.s the adjacent channel power measurenzent.<br />
Places the spectrum analyzer into continuous sweep mode so<br />
that the adjacent channel power measurement will be performed<br />
at the end of ever9 sweep.<br />
When ACPCONTM is executed, the numeric or graph results of adjacent channel (ACP), channel<br />
power (C<strong>HP</strong>), or occupied b<strong>and</strong>width (OBW) measurements are calculated at the end of every<br />
sweep. While in the continuous sweep measurement, you can change the channel spacing<br />
(ACPSP), channel b<strong>and</strong>width (ACPBW), or another spectrum analyzer setting <strong>and</strong> the numeric<br />
or graph results for the ACP, C<strong>HP</strong>, or OBW measurement will be automatically updated.<br />
If ACPCONTM is executed after the adjacent channel power extended comm<strong>and</strong> (ACPE), only<br />
the trace results for the top 80 dB are obtained; the numeric or ACP graph results of the ACPE<br />
measurement are not available in continuous sweep mode.<br />
Programming Comm<strong>and</strong>s 5-37
ACPE<br />
Adjacent Channel Power Extended<br />
Performs the adjacent channel power extended measurement.<br />
Syntax<br />
ACPE<br />
Equivalent Softkey: AKl CRAM PWR extd .<br />
Related Comm<strong>and</strong>s: ACPPAR, ACPSNGLM, ACPSP, ACPBW.<br />
Example<br />
OUTPUT 718;"ACPE;" &forms the adjacent channel power extended meamrewznt.<br />
Description<br />
ACPE performs the adjacent channel power measurement using the values for channel spacing<br />
(ACPSP) <strong>and</strong> channel b<strong>and</strong>width (ACPBW). ACPE is similar to ACP, but unlike ACP, ACPE<br />
measures the adjacent channel power over an extended dynamic range. The extended range is<br />
measured by taking two measurement sweeps, with the reference level for each sweep set to<br />
different values, <strong>and</strong> then combining the trace data.<br />
Executing ACPE places the spectrum analyzer in the single sweep measurement mode. The<br />
log scale is set to 13 dB/div, which provides an actual display range of 104 dB. If you execute<br />
the continuous sweep measurement comm<strong>and</strong> (ACPCONTM), only the trace results for the top<br />
80 dB are obtained; the numeric <strong>and</strong> ACP graph results of the ACPE measurement are not<br />
available.<br />
To use ACPE:<br />
1. Set the center frequency to the carrier’s frequency.<br />
2. For best accuracy, set the reference level so that the carrier signal peak is within the first<br />
(top) division of the display graticule.<br />
3. Select the channel spacing with the ACPSP comm<strong>and</strong>.<br />
4. Select the channel b<strong>and</strong>width with the ACPBW comm<strong>and</strong>.<br />
5. If you want the spectrum analyzer settings to be set automatically, ensure that ACPPAR is<br />
set to 1. If you want to set the spectrum analyzer settings manually, set ACPPAR to 0. See<br />
“ACPPAR” for more information about selecting the spectrum analyzer settings manually.<br />
6. If the spectrum analyzer is in the continuous-sweep mode, use the single sweep comm<strong>and</strong><br />
(SNGLS) to select the single-sweep mode.<br />
7. Execute the ACPE comm<strong>and</strong>.<br />
8. Query ACPERR to determine if there is a setup error for the ACP measurement. See the<br />
following table for more information about ACPERR.<br />
9. If no error occurred, query ACPPWRTX, ACPMAX, ACPLOWER, <strong>and</strong> ACPUPPER variables<br />
for the numeric results of the ACPE measurement. See the following table for more<br />
information about these variables.<br />
5.38 Programming Comm<strong>and</strong>s
ACPE Adjacent Channel Power Extended<br />
10. If no error occurred, query trace A (TRA) for the trace results of the ACPE measurement.<br />
Variable<br />
or Trace<br />
1CPERR<br />
KPPWRTX<br />
LCPMAX<br />
LCPLOWER<br />
k?PUPPER<br />
‘RA<br />
ACPE Measurement Results<br />
Description<br />
A variable that indicates if setup errors occurred for the ACPE<br />
measurement. If ACPERR is 0, no errors occurred. If ACPERR is greater<br />
than 0, an error occurred. An ACPERR value of 1 to 7 Indicates that the<br />
frequency span, channel spacing, or the channel b<strong>and</strong>width are not set<br />
correctly. An ACPERR value of 1 to 7 indicates the following:<br />
1 Frequency span < (2 x channel spacing + channel b<strong>and</strong>width).<br />
2 Channel b<strong>and</strong>width > 2 x channel spacing.<br />
3 Frequency span < (2 x channel spacing + channel b<strong>and</strong>width) <strong>and</strong><br />
channel b<strong>and</strong>width > 2 x channel spacing.<br />
4 Channel b<strong>and</strong>width < frequency span/loo.<br />
5 Frequency span < (2 x channel spacing + channel b<strong>and</strong>width) <strong>and</strong><br />
channel b<strong>and</strong>width < frequency span/loo.<br />
6 Channel b<strong>and</strong>width > 2 x channel spacing <strong>and</strong> channel b<strong>and</strong>width <<br />
frequency span/loo.<br />
7 Frequency span < (2 x channel spacing + channel b<strong>and</strong>width), channe:<br />
b<strong>and</strong>width > 2 x channel spacing, <strong>and</strong> channel b<strong>and</strong>width < frequency<br />
span/loo.<br />
A variable that contains the total transmit b<strong>and</strong> carrier power. ACPPWRTX<br />
is calculated by the following:<br />
lo X ~o.!7(Po~eTCarrie~)<br />
A variable that contains the relative power level of the adjacent channel<br />
with the highest measured power level.<br />
A variable that contains the relative power level found in the lower<br />
adjacent channel. ACPLOWER is calculated by the following:<br />
~~~~%wer channel<br />
10 x log( 1<br />
POWCT carrier<br />
A variable that contains the relative power level found ln the upper<br />
adjacent channel. ACPUPPER is calculated by the following:<br />
POW.3 upper channel<br />
10 x log(<br />
Power<br />
1<br />
carrier<br />
IRA is trace A. Trace A contains the swept RF spectrum that was used to<br />
neasure adjacent channel power.<br />
Vane<br />
units<br />
determined by<br />
IUNITS comm<strong>and</strong><br />
default unit is dBm.<br />
1B<br />
1B<br />
iB<br />
determined by the<br />
race data format<br />
TDF) comm<strong>and</strong>.<br />
Restrictions<br />
Executing ACPE exits the following functions: windows display mode (WINON), N dB point<br />
measurement (NDBPNT), the FFT menu measurements (FFTAUTO, FFTCONTS, FFTSNGLS),<br />
gate utility functions (GDRVUTIL), TO1 measurement (TOI), marker table (MKTBL), peak table<br />
(PKTBL), percent AM (PCTAM), or peak zoom (PKZOOM).<br />
AUNITS of W or V, will give incorrect results for ACPMAX, ACPLOWER, <strong>and</strong> ACPUPPER.<br />
Programming Comm<strong>and</strong>s 5-39
ACPGR<br />
Adjacent Channel Power Graph On or Off<br />
Determines if the adjacent channel power (ACP) graph function is enabled or disabled.<br />
Syntax<br />
Equivalent Softkey: ACPGWR ON OFF .<br />
Related Comm<strong>and</strong>s: ACP, ACPE.<br />
Example<br />
OUTPUT 718;"ACP;" F&yfoms the adjacent channel power measurement.<br />
OUTPUT 718;"MOV ACPGR,l;" l3~~bles the ACP graph function <strong>and</strong> creates a graph of<br />
ACP as a function of the frequency offset from the center<br />
freq=y.<br />
Description<br />
Setting ACPGR to 1, does the following:<br />
w Turns off the display of the ACP numeric results.<br />
w Generates a graph of the adjacent channel power ratio, for the selected channel b<strong>and</strong>width,<br />
as a function of frequency spacing from the center frequency.<br />
� Places the graph in trace C.<br />
� Adds the GRPH MKR ON OFF softkey to the menu.<br />
� If in continuous measurement mode, the ACP graph will be updated at the end of every<br />
sweep.<br />
5-40 Programming Comm<strong>and</strong>s
Setting the ACPGR to - 1, does the following:<br />
� Turns off the display of the ACP graph in trace C.<br />
� Calculates <strong>and</strong> displays the ACP numeric results.<br />
� Removes the GRPH MKR ON OFF softkey from the menu.<br />
� Turns off the ACP graph marker.<br />
ACPGR Adjacent Channel Power Graph On or Off<br />
� If in continuous measurement mode, the numeric results will be updated at the end of every<br />
sweep.<br />
When the graph is generated, the reference level represents an adjacent channel power ratio of<br />
0, <strong>and</strong> the horizontal center represents a frequency offset (<strong>and</strong> channel spacing) of 0 Hz. The<br />
results of ACPGR are not defined for frequency spacings where the graph is drawn below the<br />
bottom graticule line.<br />
Programming Comm<strong>and</strong>s 5-41
ACPGRAPH<br />
Compute the Adjacent Channel Power Graph<br />
Computes <strong>and</strong> displays an adjacent channel power (ACP) graph.<br />
Syntax<br />
Equivalent Softkey: none.<br />
Related Comm<strong>and</strong>s: ACP, ACPE.<br />
Example<br />
OUTPUT 718;"ACP;" Performs the adjacent channel power measurement.<br />
OUTPUT 718;"ACPGRAPH;" Creates a graph of ACP as a function of the frequency offset<br />
from the center-frequency.<br />
Description<br />
ACPGRAPH uses the ACP spectrum data that was obtained (in trace A) by the previous<br />
adjacent channel power or adjacent channel power extended measurement to generate the<br />
graph. (Use the ACP or ACPE comm<strong>and</strong> to perform the adjacent channel power measurement.)<br />
ACPGRAPH does the following:<br />
I Generates a graph of the adjacent channel power ratio, for the selected channel b<strong>and</strong>width,<br />
as a function of frequency spacing from the center frequency.<br />
� Places the graph in trace C. The units for all traces is determined by the trace data format<br />
(TDF) comm<strong>and</strong>.<br />
When the graph is generated, the reference level represents an adjacent channel power ratio of<br />
0, <strong>and</strong> the horizontal center represents a frequency offset (<strong>and</strong> channel spacing) of 0 Hz. The<br />
results of ACPGRAPH are not defined for frequency spacings where the graph is drawn below<br />
the bottom graticule line.<br />
5-42 Programming Comm<strong>and</strong>s
ACPMK<br />
Adjacent Channel Power Marker On or Off<br />
ACPMK Adjacent Channel Power Marker On or Off<br />
Determines if the graph marker function is enabled or disabled for the adjacent channel power<br />
(ACP) graph.<br />
Syntax<br />
Equivalent Softkey: GRPH ON OFF .<br />
Related Comm<strong>and</strong>s: ACPGR, ACPGRAPH, C<strong>HP</strong>GR, ACPSNGLM, ACPCONTM.<br />
Example<br />
OUTPUT 718;"ACP<br />
OUTPUT 718;"MOV<br />
OUTPUT 718;"MOV<br />
Description<br />
. II<br />
8<br />
&forms the adjacent channel power measurement.<br />
xacpmk<br />
ACPGR,l;" Enables the ACP graph function <strong>and</strong> creates a graph of<br />
ACP as a function of the frequency offset from the center<br />
freq-y.<br />
ACPMK,l;" Enables the ACP graph mm-km<br />
Setting ACPMK to 1, does the following for ACP graph:<br />
w Positions a reference marker on the trace for ACP graph at the center frequency position.<br />
w Positions a A marker on the trace at one channel spacing above the center frequency.<br />
� Displays numeric values for delta frequency, ACP ratio, <strong>and</strong> channel power at the marker<br />
position.<br />
Setting ACPMK to 1, does the following for channel power graph:<br />
w Positions a marker on the trace for channel power graph at center frequency position.<br />
� Displays numeric values for frequency <strong>and</strong> channel power at the marker position.<br />
Setting the ACPMK to -1, turns off the marker function.<br />
Programming Comm<strong>and</strong>s 5.43
ACPPAR<br />
ACP Manual or Auto<br />
Determines if the spectrum analyzer settings used for the adjacent channel power (ACP),<br />
adjacent channel power extended (ACPE), channel power (C<strong>HP</strong>), or occupied b<strong>and</strong>width (OBW)<br />
measurement are set manually or automatically.<br />
Syntax<br />
Equivalent Softkey: PARA?! AUTO MAN .<br />
Related Comm<strong>and</strong>s: ACP, ACPE, ACPSP, ACPBW, OBW, C<strong>HP</strong>, DET, ST, VB, RB, SS.<br />
Example<br />
OUTPUT 718;"MOV ACPPAR,l;" Sets theparametersfor the adjacent channel powerparameters<br />
automatically.<br />
Description<br />
When ACPPAR is set to 1, the spectrum analyzer settings for the ACP, ACPE, C<strong>HP</strong>, or OBW<br />
measurement are set by the spectrum analyzer. When ACPPAR is set to 1, the spectrum<br />
analyzer does the following before the measurement is performed:<br />
� Performs the trace preset (TRPRST) comm<strong>and</strong>.<br />
� Changes the trigger mode to free run.<br />
� Changes the detector mode to sample.<br />
� Changes the amplitude scale to 10 dB per division.<br />
� Sets the frequency span, resolution b<strong>and</strong>width, video b<strong>and</strong>width, center frequency step size,<br />
<strong>and</strong> sweep time based on the channel spacing (ACPSP) <strong>and</strong> channel b<strong>and</strong>width (ACPBW).<br />
See the following table for more information about the spectrum analyzer settings for each<br />
measurement.<br />
� ‘fakes a sweep.<br />
5-44 Programming Comm<strong>and</strong>s
ACPPAR ACP Manual or Auto<br />
‘able 5-5. <strong>Spectrum</strong> Analyzer Settings, ACPPAR is Set to Automatic<br />
Measurement Res Video Span Step Sweep<br />
B<strong>and</strong>width B<strong>and</strong>width Size Time<br />
Adjacent Channel Power Highest setting that does 10 x RB ACPSP Auto<br />
WJ’)<br />
not exceed 0.025 x<br />
(400 x ACPSP)<br />
(4OOxACPSP)<br />
ACPBW’ INT[< ~xACPSP+I.~XACPBW)~<br />
Channel Power (C<strong>HP</strong>) Highest setting that does 10 x RB 2 x ACPBW ACPSP Auto<br />
not exceed 0.025 x<br />
ACPBW’<br />
Occupied B<strong>and</strong>width Highest setting that does 10 x RB 3 x ACPSP ACPSP Auto<br />
VW<br />
not exceed 0.02 x<br />
ACPSP *<br />
* If Option 130 is not installed in the spectrum analyzer, the narrowest resolution b<strong>and</strong>width is limited to 1 kHz.<br />
When ACPPAR is set to 0, you must set the spectrum analyzer settings for the ACP, ACPE, C<strong>HP</strong>,<br />
or OBW measurement. You must ensure that trace A contains the RF spectrum to be measured,<br />
<strong>and</strong> that the frequency span, resolution b<strong>and</strong>width, video b<strong>and</strong>width, <strong>and</strong> the detector are set<br />
appropriately for the measurement. When ACPPAR is set to 0, the measurement comm<strong>and</strong>s<br />
(ACP, ACPE, OBW, C<strong>HP</strong>) do not take a sweep before making the measurement.<br />
You can execute the ACPPAR comm<strong>and</strong> two different ways. You can either execute the<br />
ACPPAR comm<strong>and</strong> directly (for example, “ACPPAR 1; ‘I) or use the MOV comm<strong>and</strong> to move<br />
the 1 or 0 into the ACPPAR comm<strong>and</strong> (for example, “MOV ACPPAR, 1; ‘I). If you use the MOV<br />
comm<strong>and</strong>, no text is displayed in the active function area during comm<strong>and</strong> execution.<br />
Query Response<br />
r manual 7<br />
A<br />
0<br />
/ �<br />
output<br />
termination ---)<br />
Programming Comm<strong>and</strong>s 5-45
ACPSNGLM<br />
Single Sweep Measurement<br />
Changes the spectrum analyzer’s sweep mode to single sweep, performs a take sweep (TS),<br />
<strong>and</strong> then performs the previous power measurement (occupied b<strong>and</strong>width, adjacent channel,<br />
adjacent channel power extended, or channel power).<br />
Syntax<br />
Equivalent Softkey: SINGLE MEAS.<br />
Related Comm<strong>and</strong>s: ACP, ACPCONTM, ACPE, C<strong>HP</strong>, CONTS, SNGLS, OBW.<br />
Example<br />
OUTPUT 718;"ACP;" Performs the adjacent channel power measurement.<br />
OUTPUT 718*"ACPSNGLM*"<br />
8 , Repeats the previous wzeasuremmt once.<br />
Description<br />
See the “ACP ” “ACPE, ” “C<strong>HP</strong>,” <strong>and</strong> “OBW” for more information about the measurement<br />
results of each measurement.<br />
5.46 Programming Comm<strong>and</strong>s
ACPSP<br />
Channel Spacing<br />
Allows you to specify the frequency spacing between channels.<br />
Syntax<br />
- channel spacing 7 -<br />
HZ<br />
ACPSP Channel Spacing<br />
Item Description/Default Range<br />
Number Any real or integer number. Default unit is Hz. 1 kHz to 999.9 MHz.<br />
Equivalent Softkey: CHANNEL SPACING,<br />
Initial Value: 25 kHz.<br />
Preset Value: last value entered.<br />
Related Comm<strong>and</strong>s: ACP, ACPE.<br />
Example<br />
OUTPUT 718;"MOV ACPSP,lOOKHZ;" Spec@.es 100 kHz frequency spacing between channels.<br />
OUTPUT 718;"ACP;" Performs the adjacent channel power wxmsurenz-ent.<br />
Description<br />
The value of ACPSP is used when calculating the results of the adjacent channel (ACP) or<br />
adjacent channel extended (ACPE) measurement. The value of ACPSP is also used when<br />
ACPPAR is set for automatic coupling of the spectrum analyzer settings for the ACP, ACPE,<br />
C<strong>HP</strong>, or OBW measurement.<br />
Once you enter a value into ACPSP, that value is retained until you change it, or execute<br />
DISPOSE ALL. Pressing (JZF] or turning the spectrum analyzer off does not change the<br />
value of ACPSP<br />
You can execute the ACPSP comm<strong>and</strong> two different ways. You can either execute the ACPSP<br />
comm<strong>and</strong> directly (for example, "ACPSP 1OOKHZ ; I’) or use the MOV comm<strong>and</strong> to move the<br />
frequency value into the ACPSP comm<strong>and</strong> (for example, ~~MOVACPSP,lOOKHZ;"). If you use the<br />
MOV comm<strong>and</strong>, no text is displayed in the active function area during comm<strong>and</strong> execution.<br />
Programming Comm<strong>and</strong>s 5-47
ACPSP Channel Spacing<br />
Query Response<br />
5-46 Programming Comm<strong>and</strong>s<br />
chonne I<br />
r spacing<br />
output<br />
termination ---)
ACTDEF<br />
Active Function Definition<br />
Creates a user-defined active function.<br />
Syntax<br />
ACTDEF<br />
function name<br />
/ \<br />
character<br />
text for active<br />
function readout<br />
/ \<br />
del imi ter character dei imi ter<br />
- preset value - u n i t s<br />
user-defined variable<br />
ACTDEF Active Function Definition<br />
XACTDEF<br />
Programming Comm<strong>and</strong>s 5-49
ACTDEF Active Function Definition<br />
Item Description/Default Range<br />
Character (function name) Any valid character. Use the function name as the remote 2 to 11 characters<br />
comm<strong>and</strong> name. long, A through Z <strong>and</strong><br />
the underscore (the<br />
underscore should be<br />
used as the second<br />
character of the<br />
label).<br />
Character (text for active Any valid character. The active function label is displayed in the<br />
function label) active function block (when the function is active).<br />
User-defined variable A variable defined by VARDEF or ACTDEF comm<strong>and</strong>s. Any valid variable<br />
name.<br />
Number Any real or integer number. Default value is 0, default unit is Real number range.<br />
none.<br />
Delimiter Matching characters marking the beginning <strong>and</strong> end of the list of - 1 \ @ = / ^ $ % ; ! ’ :<br />
spectrum analyzer comm<strong>and</strong>s. ” &<br />
Analyzer comm<strong>and</strong> Any valid spectrum analyzer comm<strong>and</strong>.<br />
User-deflned function A function defined by the FUNCDEF comm<strong>and</strong>. Any valid function<br />
name.<br />
Prerequisite Comm<strong>and</strong>: FUNCDEF when using a user-defined function. VARDEF when using<br />
a user-defined variable.<br />
Example 1<br />
10 DIM A$[1501<br />
20 OUTPUT 718;"ACTDEF M-BW,%MY BANDWIDTH%,5MHZ,STEP,@";<br />
30 OUTPUT 718;"MOV RB,M-BWO;";<br />
40 OUTPUT 718;"M,BW;"<br />
50 OUTPUT 718;"ACTDEF M-BW?;"<br />
60 ENTER 718;A$<br />
70 DISP A$<br />
80 END<br />
5-50 Programming Comm<strong>and</strong>s<br />
Dimensions array to hold<br />
query response.<br />
lk$ms a function called<br />
M-BW M-BWallows manipulation<br />
of the initial<br />
value of RES BW (5<br />
MHz) by the step keys<br />
<strong>and</strong> the knob. The resolution<br />
b<strong>and</strong>width will<br />
be rounded to the nearest<br />
allowable b<strong>and</strong>width,<br />
howevex The “@” symbol<br />
marks the end of the<br />
ACTDEF declaration.<br />
Activates the M-BWfunction.<br />
Queries the &fir&ion of<br />
the M-BWfunction.<br />
Displays the definition<br />
of the M-BWfunction.
Example 2<br />
ACTDEF Active Function Definition<br />
This example uses ACTDEF in a downloadable program that is created by the KEYDEF<br />
comm<strong>and</strong>. In this example, the ACTDEF function D-SPAN is assigned to softkey 1. When<br />
softkey 1 is pressed, ENTER FFT SPAN is displayed on the spectrum analyzer display. When a<br />
value is entered, the sweep time is changed to prepare the spectrum analyzer for making a fast<br />
Fourier transform measurement. (See “FFT” for more information about making a fast Fourier<br />
transform measurement.)<br />
OUTPUT 718;"KEYDEF l,D-SPAN,@ FFTISPANO;" Assigns D-SPAN to SOJ%<br />
key 1.<br />
OUTPUT 718;"ACTDEF D-SPAN,OENTER FFT SPANO,lOO,HZ,Q"; Defines the DSPANfunction.<br />
The D-SPAN function<br />
displays ENTER FFT<br />
SPAN on the spectrum analyzer<br />
display, <strong>and</strong> has<br />
an initial value of 100 Hz.<br />
OUTPUT 718;"MOV SP,O;";<br />
Thefrequency span must<br />
be zero to make a FFT<br />
OUTPUT 718;"DIV ST,200,D_SPAN;";<br />
OUTPUT 718;"@;"<br />
LOCAL 718<br />
measurement.<br />
Changes the spectrum anal<br />
yzer sweep time according<br />
to the value of D-SPAN.<br />
DSPANis divided by 200,<br />
which represents the number<br />
of buckets.<br />
Ends the ACTDEF declaration.<br />
After executing this example, the softkey label of softkey 1 is FFT SPBBS . Softkey 1 can be<br />
accessed by pressing (j-j, User Mems .<br />
Description<br />
With the ACTDEF comm<strong>and</strong>, you can create an active function that is similar to the active<br />
functions that are already provided by the spectrum analyzer. For example, CF, DL, AT, MKA,<br />
MKFCR, MKD, MKF, MKN, RB, SS, ST, TH, VAVG, VB, VBR are all active functions that are<br />
provided by the spectrum analyzer.<br />
The ACTDEF comm<strong>and</strong> consists of the function name, the text for the active function readout,<br />
the preset value, the unit, <strong>and</strong> the analyzer comm<strong>and</strong>s or user-defined function.<br />
Function name: The function name is the name that will be used to invoke the ACTDEF<br />
function. See line 40 of Example 1 for an example of invoking an ACTDEF function.<br />
Text for the active function readout: This is the text is displayed, when the ACTDEF<br />
function is active, in the active function readout area of the spectrum analyzer display.<br />
Preset value: The preset value is the value of the ACTDEF function until you change it.<br />
Executing an instrument preset (IP) resets the ACTDEF function’s value back to the preset<br />
value.<br />
Units: The ACTDEF function’s value can be manipulated in different ways depending on the<br />
units parameter that is specified. For example, if you select INT (integer) units, the value of the<br />
ACTDEF function can only be incremented or decremented by 1. For the INT unit, the step<br />
keys <strong>and</strong> the knob can be used to change the function’s value.<br />
Programming Comm<strong>and</strong>s 5-51
ACJTDEF Active Function Definition<br />
Refer to the following table for a description of the different unit parameter.<br />
Parameter<br />
INT<br />
STEP<br />
NONE<br />
HZ<br />
ABSHZ<br />
SEC<br />
DB<br />
DBM<br />
V<br />
Behavior of Unit Parameters for ACTDEF Comm<strong>and</strong><br />
Step<br />
Increment Value<br />
Integer, increment or<br />
decrement by 1 only<br />
Increment or decrement by<br />
1 only<br />
Not applicable<br />
Resolution b<strong>and</strong>width<br />
during zero-span mode;<br />
otherwise, 10% of span.<br />
1.5, 2, 3, 5, 7.5<br />
1.5, 2, 3, 5, 7.5<br />
dB per division<br />
dB per division<br />
1.5, 2, 3, 5, 7.5<br />
1<br />
.<br />
1<br />
Knob<br />
Increment Value<br />
Not applicable<br />
Resolution b<strong>and</strong>width,<br />
during zero-span mode;<br />
otherwise, 0.05% of span.<br />
1%<br />
1%<br />
1% of dB per division<br />
1% of dB per division<br />
1%<br />
None<br />
None<br />
None<br />
Frequency<br />
unit-Keys<br />
Frequency, in absolute Hz<br />
Time<br />
Relative amplitude<br />
Absolute amplitude<br />
Some of the unit parameters specify the units of the function value (Hz, seconds, dB, dBm, V).<br />
The STEP, INT, <strong>and</strong> NONE parameters are unitless values. The STEP unit parameter works<br />
the same as the INT unit parameter. When using the INT, STEP, <strong>and</strong> NONE parameters in<br />
an ACTDEF declaration, the value displayed on spectrum analyzer display for the ACTDEF<br />
function value is rounded to the nearest integer; however the actual value in spectrum<br />
analyzer memory is not rounded.<br />
Use the following guidelines when defining ACTDEF:<br />
� The function name used in the ACTDEF declaration must be unique. Do not use an existing<br />
Table 5-2 for a list of<br />
reserved words.<br />
� Limit the number of characters (between the delimiters) in the list of spectrum analyzer<br />
comm<strong>and</strong>s to a maximum of 2047 characters.<br />
Query Response<br />
There are two ways to query the ACTDEF comm<strong>and</strong>. Querying the ACTDEF function’s name<br />
returns the value of the ACTDEF function. For example, if the ACTDEF function’s name is<br />
TEST, executing OUTPUT 718;"TEST ? ; ‘I returns the value of ACTDEF function TEST in the<br />
following format:<br />
5-52 Programming Comm<strong>and</strong>s<br />
Volts
ACTDEF Active Function Definition<br />
Querying both “ACTDEF” <strong>and</strong> the ACTDEF function’s name returns the definition of the<br />
function. For example, execute OUTPUT 718 ; "ACTDEF TEST. 7 , * ” (TEST is the ACTDEF function’s<br />
name).<br />
user-defined text for active<br />
function nome function readout<br />
/ \ / \<br />
ACTDEF character character<br />
user-defined function<br />
,- r o u t i n e -\<br />
analyzer comn<strong>and</strong><br />
output<br />
’ t e r m i n a t i o n +<br />
QACTDEF<br />
Programming Comm<strong>and</strong>s 5-53
AC<strong>TV</strong>F<br />
Active Function<br />
Returns a “0” if the given function is not active. A “1” if it is active.<br />
Syntax<br />
AC<strong>TV</strong>F<br />
active function<br />
/ \<br />
character<br />
Prezef ined<br />
function path only<br />
Item Description/Default tinge<br />
Character Any valid character. Any active function<br />
name.<br />
Related Comm<strong>and</strong>s: Any active function (see the list of active functions in the description<br />
below), IP.<br />
Example<br />
OUTPUT 718;"RB IOOKHZ;" Makes resolution b<strong>and</strong>width the active function.<br />
OUTPUT 718;"AC<strong>TV</strong>F RB;" Lleterrnines if resolution b<strong>and</strong>width is the active function.<br />
ENTER 718;A Gets the response from the spectrum analyzer<br />
DISP A LXsplays response from the spectrum analyzer:<br />
Description<br />
The active functions are ACPBW, ACPSP, AT, BAUDRATE, CF, COUPLE, CRT<strong>HP</strong>OS, CR<strong>TV</strong>POS,<br />
DA, DET, DL, DOTDENS, FA, FB, FFTSTOP, FMGAIN, FOFFSET, GATECTL, GD, GL, GP, INZ,<br />
LG, MKA, MKD, MKFC, MKFCR, MKN, MKPAUSE, MKPX, ML, MODE, MSI, M4, NDB, NRL,<br />
PREAMPG, PRNTADRS, RB, RCLS, ROFFSET, RL, RLPOS, SAVES, SAVRCLN, SETDATE,<br />
SETTIME, SP, SQLCH, SRCALC, SRCAT, SRCPOFS, SRCPSTP, SRCPSWP, SRCPWR, SRCTK,<br />
SWPCPL, SS, ST, TH, TIMEDATE, <strong>TV</strong>SYNC, <strong>TV</strong>LINE, VAVG, VB, VBR, ZMKSPAN, ZMKCNTR<br />
<strong>and</strong> user-defined active function specified by the ACTDEF comm<strong>and</strong>.<br />
5-54 Programming Comm<strong>and</strong>s
ADD<br />
Add<br />
Adds the sources <strong>and</strong> sends the sum to the destination.<br />
Syntax<br />
ADD<br />
7 d e s t i n a t i o n -<br />
k u s e r - d e f i n e d t r a c e /<br />
k t r a c e range<br />
% p r e d e f i n e d v a r i a b l e I<br />
user-defined variable)<br />
,- source 1 ‘\ ,- source 2 -,<br />
‘+ u s e r - d e f i n e d t r a c e /<br />
Y trace range /<br />
Y p r e d e f i n e d v a r i a b l e /<br />
user-defined variable<br />
Item Description/Default<br />
User-defined trace A trace defined by the TRDEF comm<strong>and</strong>.<br />
/<br />
user-defined trace<br />
b trace range I<br />
predeflned v a r i a b l e I<br />
user-defined variable<br />
User-defined variable A variable deEned by VARDEF or ACTDEF comm<strong>and</strong>s.<br />
PredeEned variable A comm<strong>and</strong> that acts as a variable. Refer to Table 5-l.<br />
Predefined function Function that returns a value. Refer to Table 5-1.<br />
Trace range A segment of trace A, trace B, trace C, or a user-defined trace.<br />
Number Any real or integer number.<br />
ADD Add<br />
Range<br />
XADD<br />
Any valid trace name.<br />
Any valid variable<br />
name.<br />
Real number range.<br />
Prerequisite Comm<strong>and</strong>s: TRDEF when using user-defined trace. ACTDEF or VARDEF when<br />
using user-defined variable. TS when using trace data.<br />
Related Comm<strong>and</strong>s: AMBPL, APB, SUB.<br />
Programming Comm<strong>and</strong>s 5.55
ADD Add<br />
Example<br />
Add 38 MHz to the center frequency, then store the sum in a user-defined variable.<br />
10 OUTPUT 718;"IP;"<br />
20 OUTPUT 718;"CF 300MHZ;"<br />
30 OUTPUT 718;"VARDEF N,EW,O;"<br />
40 OUTPUT 718;"ADD N,EW,CF,38E6;"<br />
50 OUTPUT 718;"N,EW?;"<br />
60 ENTER 718;Freq<br />
70 DISP Freq<br />
80 END<br />
Description<br />
Initializes spectrum analyze<br />
Changes the centerj?equency.<br />
L?&nes a variable, N-m <strong>and</strong> initializes it to 0.<br />
Adds 38 MHz to the center frequency, then places<br />
the sum in NJX?<br />
Returns value of N-h’Wto the computer:<br />
Assigns value to variabh Freq.<br />
Displays Freq on computer display.<br />
The ADD comm<strong>and</strong> adds values of source 1 <strong>and</strong> source 2 (point by point), <strong>and</strong> sends the sum to<br />
the destination.<br />
Traces, user-defined traces, <strong>and</strong> trace ranges are added as 16-bit integers. Negative numbers<br />
are represented in two’s complement format. Single variables <strong>and</strong> numbers are treated as<br />
floating point numbers <strong>and</strong> must be within the real number range as defined in Table 5-1.<br />
The sources <strong>and</strong> destination may be different lengths. The length of predefined traces (trace A,<br />
trace B, or trace C) is 401. User-defined traces have a length of up to 2047, <strong>and</strong> variables have<br />
a length of 1. When sources differ in length, the last element of the shorter source is repeated<br />
for the addition process. After the addition, the last element is repeated if the destination<br />
is longer than the sum trace. When the sources are longer than the destination, they are<br />
truncated to fit.<br />
5-56 Programming Comm<strong>and</strong>s
AMB<br />
Trace A Minus Trace B<br />
AMB Trace A Minus Trace B<br />
Subtracts trace B from trace A <strong>and</strong> sends the result to trace A during every sweep of the<br />
spectrum analyzer.<br />
Syntax<br />
AMB OFF<br />
Preset State: AMB OFF.<br />
Related Comm<strong>and</strong>s: CLRW, CONTS, MXMH, SNGLS, TS, VAVG, VIEW.<br />
Restrictions: Not compatible with Analog+ display mode. See “ANLGPLUS” for more<br />
information.<br />
Equivalent Softkey: B - B -> A ON OFF .<br />
Example 1<br />
10 OUTPUT 718;"IP;" Initializes spectrum analyzer<br />
20 OUTPUT 718;"CLRW TRB;TS;VIEW TRB;AMB ON;" Displuys trace B <strong>and</strong> turns on the<br />
AMBjknction. If trace A <strong>and</strong> trace B<br />
contain exactly the same trace data,<br />
the result is trace data at 0 measurement<br />
units, at the bottom of the<br />
30 OUTPUT 718*"AMB'*"<br />
40 ENTER 718;ieply;'<br />
ON<br />
display.<br />
Queries the state of the AMBfunction.<br />
The query response is placed in a<br />
string variable.<br />
50 DISP Reply$ “ON” is displayed on the computer<br />
display.<br />
60 END<br />
Programming Comm<strong>and</strong>s 5-57
AMB Trace A Minus Trace B<br />
Example 2<br />
10 OUTPUT 718;"IP;SNGLS;"<br />
20 OUTPUT 718;"MOV TRA, 8000;"<br />
30 OUTPUT 718;"VIEW TRA;"<br />
40 OUTPUT 718;"MOV TRB,7000;"<br />
50 OUTPUT 718;"VIEW TRB;"<br />
60 OUTPUT 718;"AMB ON;"<br />
70 OUTPUT 718;"BLANK TRB;VIEW TRA;"<br />
80 END<br />
Example 3<br />
10 OUTPUT 718;"IP;SNGLS;RL 20DB;"<br />
20 OUTPUT 718;"MOV TRA,5000;"<br />
30 OUTPUT 718;"VIEW TRA;"<br />
40 OUTPUT 718;"MOV TRB,4000;"<br />
50 OUTPUT 718;"VIEW TRB;"<br />
60 OUTPUT 718;"DL ODB;"<br />
70 OUTPUT 718."BML-"<br />
9 2<br />
80 OUTPUT 718;"AMB ON;"<br />
90 OUTPUT 718;"BLANK TRB;VIEW TRA;"<br />
100 END<br />
5-58 Programming Comm<strong>and</strong>s<br />
Initializes spectrum analyzer<br />
.Each element of trace A is set to 8000 measurement<br />
units, which is equal to 0 dBm.<br />
Places trace A in the view mode.<br />
Each element of trace B is set to 7000 measurement<br />
units, which is equal to -10 dBm.<br />
Places trace B in the view mode.<br />
Subtracts trace B from trace A.<br />
The result is displayed at 1000 measurement<br />
units which is equal to -70 dBm.<br />
Initializes the spectrum analyzer <strong>and</strong> sets the<br />
reference level.<br />
Sets trace A to 5000 measurement units, which<br />
is equal to -10 dBm.<br />
Places trace A in the mew mode.<br />
Sets trace B to 4000 measuremtst units, which<br />
is equal to -20 dBm.<br />
Sets display line to 0 dBm, which is at 6000<br />
measurement units.<br />
Subtracts trace B minus display line. Result is<br />
4000 - 6000 = -2000 measurements units (ofl<br />
screen).<br />
Subtracts trace A minus modified trace B (5000<br />
-(-2000) = 7000 or 10 dBm. Notice that this has<br />
resulted in a subtraction of amplitude in dBm,<br />
-10 dBm -(-20 dBm) = 10 dBm.
Description<br />
AMB Trace A Minus Trace B<br />
The AMB comm<strong>and</strong> subtracts trace B from trace A (point by point), <strong>and</strong> sends the result to<br />
trace A. The AMB function remains in effect until it is turned off by executing “AMB OFF;“.<br />
The AMB comm<strong>and</strong> is a trace math comm<strong>and</strong> <strong>and</strong> subtracts trace B from trace A in<br />
measurement units (see “CTA” for information about measurement units). Because subtracting<br />
trace B from trace A can cause the result in trace A to be displayed off screen, the trace A<br />
minus trace B plus display line (AMBPL) comm<strong>and</strong> can be used. As shown in example 2, if the<br />
trace data value of trace A is 0 dBm (8000 measurement units), <strong>and</strong> trace B is -10 dBm (7000<br />
measurement units), the result of executing AMB is 1000 measurement units. If the AMBPL<br />
comm<strong>and</strong> is used instead of AMB, <strong>and</strong> the display line is set at -50 dBm (mid-screen), the<br />
result in trace A is kept at mid-screen.<br />
A common use of trace subtraction is to normalize one trace with respect to another. For<br />
example, traces are frequently subtracted to normalize the spectrum analyzer response when a<br />
tracking generator is used. In such applications, amplitude units in dBm should be subtracted.<br />
As shown in example 2, subtraction of measurement units is not equivalent to subtraction<br />
of amplitude units. Correct results are obtained if the display line is set to 0 dBm using DL,<br />
<strong>and</strong> BML is used to subtract the display line from trace B. See example 3 for an example of<br />
subtracting the display line from trace B.<br />
Query Response<br />
ON<br />
OFF<br />
002<br />
Programming Comm<strong>and</strong>s 5-59
AMBPL<br />
Trace A Minus Trace B Plus Display Line<br />
Subtracts trace B from trace A, adds the display line value to the difference, <strong>and</strong> sends the<br />
result to trace A during every sweep of the spectrum analyzer.<br />
Syntax<br />
Equivalent Softkey: NORMLIZE ON OFF .<br />
Preset State: AMBPL OFF.<br />
Related Comm<strong>and</strong>s: ADD, AMB, CONTS, CLRW, DL, MXMH, SNGLS, SUB, TS, VAVG, VIEW.<br />
Restrictions: Not compatible with Analog+ display mode. See “ANLGPLUS” for more<br />
information.<br />
Example<br />
10 OUTPUT 718;"IP;SNGLS;RL 20DB;"<br />
20 OUTPUT 718;"MOV TRA,5000;"<br />
30 OUTPUT 718;"VIEW TRA;"<br />
40 OUTPUT 718;"MOV TRB,4000;"<br />
50 OUTPUT 718;"VIEW TRB;"<br />
60 OUTPUT 718;"DL ODM;”<br />
70 OUTPUT 718;"AMBPL ON;"<br />
80 OUTPUT 718;"BLANK TRB;VIEW TRA;"<br />
90 END<br />
5-60 Programming Comm<strong>and</strong>s<br />
OFF<br />
ON<br />
/<br />
Initializes spectrum analym activates singlesweep<br />
mode.<br />
Sets trace A to 5000 meoxurement units, which<br />
is equal to -10 dBm.<br />
Sets trace B to 4000 measurement units, which<br />
is equal to -20 dBm.<br />
Sets display line to 0 dBm, which is at 6000<br />
measurement units.<br />
&forms trace A - trace B + display line. The<br />
result is 5000 - 4000 + 6000 = 7000 or 10 dBm.<br />
Note that this has resulted in a subtraction of<br />
amplitude in dBm, -10 dBm -(-20 dBm) = 10<br />
dBm.
Description<br />
AMBPL Trace A Minus Trace B Plus Display Line<br />
The AMBPL comm<strong>and</strong> subtracts trace B from trace A (point by point), adds the display line<br />
value to the difference, <strong>and</strong> sends the result to trace A. The AMBPL function remains in effect<br />
until it is turned off by executing “AMBPL OFF;“.<br />
A common use of trace subtraction is to normalize one trace with respect to another. For<br />
example, traces are frequently subtracted to normalize the spectrum analyzer response when a<br />
tracking generator is used. In such applications, amplitude units in dBm should be subtracted.<br />
To accomplish this, the display line should be set to 0 dBm using DL as shown in the example.<br />
To compare how you would use the AMB comm<strong>and</strong> to do the same operation, see examples 2<br />
<strong>and</strong> 3 for the AMB comm<strong>and</strong>.<br />
Query Response<br />
ON<br />
OFF<br />
002<br />
Programming Comm<strong>and</strong>s 5-61
AMPCOR<br />
Amplitude Correction<br />
Applies amplitude corrections at specified frequencies.<br />
Syntax<br />
HZ<br />
KHZ<br />
MHZ<br />
number<br />
Item Description/Default Range<br />
Number Any real or integer number. Default unit is Frequency: 0 to 1000 GHz Amplitude:<br />
dB. f327 dB.<br />
Equivalent Softkeys: the softkeys accessed by bp Car .<br />
Preset State: AMPCOR OFF.<br />
Related Comm<strong>and</strong>s: AMPLEN, AT, RL.<br />
Example<br />
Compensate for frequency-dependent amplitude inaccuracies at the input.<br />
10<br />
20<br />
30<br />
IGHZ,<br />
DIM A$[2001<br />
OUTPUT 718 ; "CF 1GHZ ; SP 200MHZ ; ‘I Sets center frequency <strong>and</strong> span.<br />
OUTPUT 718;"AMPCOR lOOMHZ,5DB, Stores frequency-amplitude pairs in spectrum<br />
-5DB,i.5GHZ,lODB;" analyzer Notice that j?equencies are in as-<br />
40 OUTPUT 718;"AMPCOR?;"<br />
50 ENTER 718;A$<br />
60 PRINT A$<br />
70 OUTPUT 718;"AMPCOR OFF;"<br />
5-62 Programming Comm<strong>and</strong>s<br />
cending order:<br />
Returns correction values to computer<br />
Displays the frequency-amplitude pairs.<br />
Turns off the amplitude correction constants.
80 OUTPUT 718;"AMPCOR?;"<br />
90 ENTER 718;A$<br />
100 PRINT A$<br />
110' END<br />
Description<br />
AMPCOR Amplitude Correction<br />
Because AMPCOR is ofi “0,O” is displayed.<br />
Use AMPCOR to compensate for frequency-dependent amplitude variations at the spectrum<br />
analyzer input. Up to 79 pairs of frequency-amplitude correction points can be entered. The<br />
frequency values entered must either be equal or in increasing order, or an error condition<br />
results. Whenever AMPCOR is on, the correction values are added to all measurement<br />
results. Executing “AMPCOR ON;” or entering frequency <strong>and</strong> amplitude corrections, turns<br />
on the amplitude correction factors. Performing an instrument preset (IP) or turning off<br />
the spectrum analyzer sets AMPCOR to OFF. (Setting AMPCOR to OFF does not change the<br />
frequency-amplitude correction factors that have been entered.)<br />
The values of the correction points are applied across the active measurement range. Between<br />
points, the correction values are interpolated. When measuring at frequencies outside the<br />
first <strong>and</strong> last correction points, these values are used as the correction value. If you do not<br />
want any amplitude correction outside of the first <strong>and</strong> last correction points, set the amplitude<br />
correction to 0 at the frequencies that are outside of the first <strong>and</strong> last correction values.<br />
With the Analog + display mode: When the Analog+ display mode is turned on, AMPCOR<br />
applies only one amplitude correction across the displayed frequency span. When the Analog+<br />
display mode is turned on, the amplitude correction for the current center frequency is used<br />
over the entire frequency span.<br />
Amplitude correction factors can be stored in spectrum analyzer memory with the SAVET or<br />
SAVRCLN comm<strong>and</strong>s, or on the memory card with the STOR or SAVRCLN comm<strong>and</strong>s. The<br />
amplitude correction factors can be edited <strong>and</strong> viewed with the Amp Cor softkey functions.<br />
Query Response<br />
AMPCOR? returns the frequency <strong>and</strong> amplitude correction pairs.<br />
frequency amp I i tude<br />
/ \<br />
In-<br />
Returned values are 0,O when AMPCOR is set to OFF<br />
Programming Comm<strong>and</strong>s 5-63
AMPLEN<br />
Amplitude Correction Length<br />
Returns the number of frequency-amplitude correction factors that have been entered.<br />
Syntax<br />
Related Comm<strong>and</strong>s: AMPCOR.<br />
Example<br />
OUTPUT 718;"AMPLEN?;"<br />
Description<br />
AMPLEN<br />
,+a v<br />
Xined<br />
function path only<br />
The absolute value of the number that AMPLEN? returns is the number of frequencyamplitude<br />
correction factors that have been entered. If no amplitude correction factors<br />
have been entered, AMPLEN? returns a 0. (See “AMPCOR” for more information about<br />
frequency-amplitude correction factors.)<br />
XAMPLEN<br />
AMPLEN returns the number of frequency-amplitude correction factors as a positive or<br />
negative number. If AMPLEN returns a positive number, the frequency-amplitude correction<br />
factors are turned on. If AMPLEN returns a negative number, the frequency-amplitude<br />
correction factors are turned off.<br />
Query Response<br />
AMPLEN can return a number from 80 to -80.<br />
5.64 Programming Comm<strong>and</strong>s<br />
number<br />
of correction factors<br />
output<br />
termination +<br />
QAMPLEN
ANLGPLUS<br />
Analog Plus<br />
Turns on or off the Analog+ display mode.<br />
Syntax<br />
Equivalent Softkey: ZWBLOG* ON OFF .<br />
Required Option: Option 101 or 301.<br />
Preset State: ANLGPLUS OFF<br />
Related Comm<strong>and</strong>s: DOTDENS.<br />
Example<br />
OUTPUT 718;"ANLGPLUS ON;" Turns on the Analog+ display mode.<br />
Description<br />
ON<br />
OFF<br />
/<br />
ANLGPLUS Analog Plus<br />
XANLCPLUS<br />
The Analog+ display mode enables the trace display to emulate an analog display. Emulating<br />
an analog display means that a dot density of up to 40 dots per trace element can be obtained<br />
instead of the usual one point per trace element.<br />
Restrictions: Analog+ display mode is only available with sweeptimes greater than 200 ms.<br />
Certain programming comm<strong>and</strong>s are not compatible with the Analog+ display mode. You<br />
should not use the Analog+ display mode with the following programming comm<strong>and</strong>s:<br />
AMB, AMBPL, AXB, BML, CLRW (TRB or TRC only), DEMOD, FFT, FF’IAUTO, FFTCONTS,<br />
FFTSNGLS, LIMITEST, MEANTH, MINH, MKFC, MKPAUSE, MKSTOP, MKTRACK, MXMH,<br />
ONMKR, PLOT, PP, SPZOOM, SRCTKPK, TH, TRDSP, VAVG, <strong>and</strong> VIEW.<br />
Some programming comm<strong>and</strong>s allow you to specify a destination trace for the trace results. If<br />
you are using the Analog+ display mode <strong>and</strong> you specify trace A as the destination trace, the<br />
trace results are moved into the 401 point trace <strong>and</strong> not into the dots on the display. The dots<br />
on the display remain unchanged. The programming comm<strong>and</strong>s that allow you to specify trace<br />
A as the destination trace are as follows: ABS, ADD, APB, AVG, COMPRESS, CONCAT, DIV,<br />
EXP, INT, LOG, MIN, MIRROR, MOD, MOV, MPY, MXM, PDA, PDF, PEAKS, SMOOTH, SQR, SUB,<br />
TRA, TWNDOW, XCH.<br />
Programming Comm<strong>and</strong>s 5-65
ANLGPLUS Analog Plus<br />
Query Response<br />
5.66 Programming Comm<strong>and</strong>s<br />
ON<br />
OFF<br />
output<br />
’ t e r m i n a t i o n --)<br />
(102
ANNOT<br />
Annotation<br />
Turns on or off the display annotation.<br />
Syntax<br />
‘.. . . . . .._. .’<br />
Equivalent Softkey: ANNOTATN ON OFF .<br />
Preset State: ANNOT ON.<br />
Related Comm<strong>and</strong>s: GRAT, TITLE.<br />
Example<br />
P i 0<br />
OFF<br />
ON<br />
?<br />
w<br />
10 OUTPUT 718 ; "ANNOT ON ; ‘I Turns on the annotation.<br />
20 OUTPUT 718;"ANNOT?;" Queries state of the annotation f&&ion.<br />
30 ENTER 718;Reply$ Places response in a variable.<br />
40 DISP Reply$ Displays response on the computer screen.<br />
50 END<br />
Description<br />
1<br />
/<br />
ANNOT Annotation<br />
The ANNOT comm<strong>and</strong> turns on or off all the words <strong>and</strong> numbers (annotation) on the spectrum<br />
analyzer display (except for the softkey labels).<br />
Query Response<br />
ON<br />
OFF<br />
output<br />
’ t e r m i n a t i o n +<br />
002<br />
Programming Comm<strong>and</strong>s 5-67
APB<br />
Trace A Plus Trace B<br />
Adds trace A to trace B <strong>and</strong> sends the result to trace A.<br />
Syntax<br />
APB<br />
Related Comm<strong>and</strong>s: CLRW, SNGLS, TS, VIEW.<br />
Example<br />
10 OUTPUT 718;"IP;SNGLS;"<br />
20 OUTPUT 718;"TS;"<br />
30 OUTPUT 718;"VIEW TRA;RL -2ODM;CLRW TRB;"<br />
40 OUTPUT 718;"TS;VIEW TRB;"<br />
50 OUTPUT 718."APB*"<br />
60 OUTPUT 718;"BLAiK TRB;VIEW TRA;"<br />
70 END<br />
Description<br />
Initializes spectrum <strong>and</strong>yzq changes<br />
to single-sweep mode.<br />
Updates the trace.<br />
Changes the refwence level.<br />
llzkes a measurement sweep.<br />
Activates APB comm<strong>and</strong>.<br />
Displays the result of APB<br />
The traces are added as 16-bit integers. Negative numbers are represented in two’s<br />
complement format. The two’s complement representation of a negative number is obtained by<br />
changing the 1s to OS in the binary representation of the number, <strong>and</strong> then binarily adding 1.<br />
5-66 Programming Comm<strong>and</strong>s
AT<br />
Attenuation<br />
Specifies the RF input attenuation.<br />
Syntax<br />
/- attenuation<br />
AT Attenuation<br />
Item Description/Default Range<br />
Number Any real or integer. Default units are dB. Input attenuator<br />
range of spectrum<br />
analvzer.<br />
Equivalent Softkey: ATTI$?J AUTO #AM is similar.<br />
Preset State: 10 dB.<br />
Step Increment: in 10 dB steps.<br />
Related Comm<strong>and</strong>s: AUTO, ML, RL.<br />
Example<br />
OUTPUT 7 18 ; “AT 40DB ; ” Sets the attenuation to 40 dR<br />
OUTPUT 7 18 ; “AT UP ; ” Increases the attenuation to 50 dR<br />
Description<br />
The AT comm<strong>and</strong> specifies the input attenuation in 10 dB steps. Normally, the input attenuator<br />
is coupled to the reference level. When a continuous wave signal is displayed with its peak at<br />
or below the reference level, the coupling keeps the mixer input level at or below the specified<br />
level (also see the comm<strong>and</strong> “ML”). The AT comm<strong>and</strong> allows less than the specified value at the<br />
mixer input.<br />
When the attenuation is increased with the AT comm<strong>and</strong>, the reference level does not change.<br />
If the attenuation is decreased from the coupled value using the AT comm<strong>and</strong>, the reference<br />
level will be decreased. When the reference level is changed using the RL comm<strong>and</strong>, the<br />
input attenuation changes to maintain a constant signal level on the screen if attenuation is<br />
auto-coupled. Using auto-coupling resets the attenuation value so that a continuous wave<br />
signal displayed at the reference level yields -10 dBm (or the specified mixer level) at the<br />
mixer input.<br />
The step keys, knob, <strong>and</strong> DN parameter do not allow an attenuation entry below 10 dB. Only<br />
direct entry of “AT ODB;” will achieve 0 dB attenuation.<br />
Programming Comm<strong>and</strong>s 5-69
AT Attenuation<br />
Caution Signal levels above + 30 dBm will damage the spectrum analyzer.<br />
Query Response<br />
5-70 Programming Comm<strong>and</strong>s<br />
termination +
AUNITS<br />
Amplitude Units<br />
Specifies the amplitude units for input, output, <strong>and</strong> display.<br />
Syntax<br />
Equivalent Softkey: Aruptd Units .<br />
Related Comm<strong>and</strong>s: CAL, DL, MKA, RL, TH.<br />
Example<br />
OUTPUT 718.“LN*”<br />
Changes spectrum analyzer to linear mode.<br />
OUTPUT 718 ; “AUNITS DBMV ; " Changes the linear amplitude units to DBMV<br />
OUTPUT 718.“AUNITS’.” * 9<br />
ENTER 718;&PIy$<br />
Queries current amplitude units.<br />
Puts response in a variable.<br />
DISP Reply$ Displays response on the computer screen.<br />
Description<br />
DBM<br />
DBMV<br />
AUNITS Amplitude Units<br />
The AUNITS comm<strong>and</strong> sets the amplitude readouts (reference level, marker, display line,<br />
<strong>and</strong> threshold) to the specified units. Different amplitude units can be set for log <strong>and</strong> linear<br />
amplitude scales.<br />
Query Response<br />
The query response returns the current amplitude units for the current amplitude scale.<br />
output<br />
’ t e r m i n a t o r +<br />
Programming Comm<strong>and</strong>s 5-71
AUTO<br />
Auto Couple<br />
Couples the active functions automatically.<br />
Syntax<br />
active<br />
r function<br />
Related Comm<strong>and</strong>s: AT, DL, HD, MKA, MKD, MKF, MKFCR, MKN, RB, SRCPSTP, SRCPSWP,<br />
SRCPWR, SS, ST, TH, VAVG, VB, VBR.<br />
Example<br />
OUTPUT 718."AT AUTO-" Couples the attenuation.<br />
OUTPUT 718;"HD;AUTO;" Couples all functions.<br />
OUTPUT 718*"AUTO-"<br />
9 2 Couples <strong>and</strong> deactivates a related function (if one was active), or<br />
couples all Jimctions (if rm functions were active).<br />
Description<br />
The result of the AUTO comm<strong>and</strong> depends on the active function it acts upon. The following<br />
are the functions that are affected by the AUTO parameter:<br />
AT<br />
DL<br />
MKA<br />
MKD<br />
MKF<br />
MKFCR<br />
MKN<br />
RB<br />
SRCPSTP<br />
SRCPSWP<br />
SRCPWR<br />
ss<br />
ST<br />
TH<br />
VAVG<br />
VB<br />
VBR<br />
couples attenuation to the reference level.<br />
turns off display of line but does not change the value of the display line.<br />
turns off marker.<br />
turns off marker.<br />
turns off marker.<br />
deactivates use of user-supplied counter resolution value, however, the value<br />
remains unchanged.<br />
turns off marker.<br />
couples resolution b<strong>and</strong>width to frequency span.<br />
sets source power step to 0 (it may value may be displayed at 10 however).<br />
turns off power sweep.<br />
turns off source power.<br />
couples step size to frequency span.<br />
couples sweep time to frequency span.<br />
turns off display of threshold, but does not change its value or prevent usage in<br />
peak searching.<br />
stops averaging.<br />
couples video b<strong>and</strong>width to resolution b<strong>and</strong>width.<br />
sets the video to b<strong>and</strong>width ratio to 0.3.<br />
Individual functions can be coupled by entering the keyword for the comm<strong>and</strong> before AUTO,<br />
(for example, “AT AUTO; “).<br />
AUTO has no effect if the active function is not in the above list.<br />
Executing “AUTO;” if no functions are active couples all functions. Executing “HD;AUTO;”<br />
couples all functions, turns off the reference position, <strong>and</strong> turns off normalization.<br />
5-72 Programming Comm<strong>and</strong>s
AVG<br />
Average<br />
Averages the source <strong>and</strong> the destination.<br />
Syntax<br />
AVG<br />
b u s e r - d e f i n e d t r a c e /<br />
predefined variable<br />
user-defined variable<br />
predefined function<br />
7 d e s t i n a t i o n -<br />
b u s e r - d e f i n e d t r a c e /<br />
\L trace range /<br />
h p r e d e f i n e d v a r i a b l e d<br />
user-defined variable/<br />
Item Description/Default<br />
User-defined trace A trace defined by the TRDEF comm<strong>and</strong>.<br />
user-defined varidble<br />
User-dehned variable A variable defined by VARDEF or ACTDEF comm<strong>and</strong>s.<br />
Predefined variable A comm<strong>and</strong> that acts as a variable. Refer to Table 5-l.<br />
Predefined function Function that returns a value. Refer to Table 5-l.<br />
Trace range A segment of trace A, trace B, trace C, or a user-defined trace.<br />
Trace element An element of trace A, trace B, trace C, or a user-defined trace.<br />
Number Any real or integer number.<br />
AVG Average<br />
Any valid variable<br />
name.<br />
1Real number range.<br />
Prerequisite Comm<strong>and</strong>s: TRDEF when using a user-defined trace. ACTDEF or VARDEF when<br />
using a user-defined variable. TS when using trace data.<br />
Related Comm<strong>and</strong>s: CLRAVG, TS.<br />
Programming Comm<strong>and</strong>s 5-73
AVG Average<br />
Example<br />
10 OUTPUT 718;"IP;"<br />
20 OUTPUT 718;"SNGLS;"<br />
30 OUTPUT 718;"DET POS;TS;"<br />
40 OUTPUT 718;"VIEW TRA;"<br />
50 OUTPUT 718;"DET SMP;"<br />
60 OUTPUT 718;"CLRW TRB;TS;"<br />
70 OUTPUT 718;"VIEW TRB;"<br />
80 OUTPUT 718;"AVG TRA,TRB,2;"<br />
90 OUTPUT 718;"BLANK TRB;"<br />
100 END<br />
Description<br />
Initializes spectrum analyzez<br />
Activates single-sweep mode.<br />
Activates the positive-peak detector <strong>and</strong> updates the<br />
trace.<br />
Stores results <strong>and</strong> displays trace A.<br />
Activates sample detection.<br />
Activates trace B <strong>and</strong> takes a sweep of trace B<br />
LXsplafys trace B<br />
Averages traces B <strong>and</strong> A with ratio of 2 <strong>and</strong> stores the<br />
result in trace A.<br />
Blanks trace B <strong>and</strong> displays result in trace A.<br />
The AVG comm<strong>and</strong> averages the source <strong>and</strong> the destination <strong>and</strong> then stores the result in the<br />
destination according to the following algorithm:<br />
Average = ((ratio - 1) x destination) + source<br />
ratio<br />
The results of AVG are invalid if the ratio is equal to zero.<br />
When the source is longer than the destination, the source is truncated to fit. When the source<br />
is shorter than the destination, the last element is repeated to fill the destination.<br />
5-74 Programming Comm<strong>and</strong>s
AXB<br />
Exchange Trace A <strong>and</strong> Trace B<br />
Exchanges trace A <strong>and</strong> trace B.<br />
Syntax<br />
AXB<br />
AXB Exchange Trace A <strong>and</strong> Trace B<br />
Equivalent Softkey: A
BAUDRATE<br />
Baud Rate of <strong>Spectrum</strong> Analyzer<br />
Specifies the baud rate of a spectrum analyzer with Option 043 (the RS-232 <strong>and</strong> parallel<br />
interface) installed in it.<br />
Syntax<br />
baud rate<br />
Item Description/Default<br />
Number Any valid integer number.<br />
Equivalent Softkey: BAUD ISATE .<br />
Option Required: Option 043.<br />
Example<br />
Range<br />
4 to 57600.<br />
The following example allows you to use a softkey to change the baud rate of the spectrum<br />
analyzer to 2400 baud. The softkey (key number 1) can be accessed by pressing C-1,<br />
user Menus .<br />
PRINT #l,“KEYDEF l,%BAUDRATE 24OO;%,$BAUDRATE12400$;”<br />
Description<br />
The BAUDRATE comm<strong>and</strong> changes the baud rate of the spectrum analyzer to one of the<br />
st<strong>and</strong>ard baud rates. The st<strong>and</strong>ard baud rates are as follows: 300, 1200, 2400, 4800, 9600,<br />
14400, 19200, 38400, <strong>and</strong> 57600. If you specify a baud rate other than one of the st<strong>and</strong>ard<br />
baud rates, the nearest st<strong>and</strong>ard baud rate will be used.<br />
XBAUDRATE<br />
To communicate with the computer, the baud rates of the spectrum analyzer <strong>and</strong> the computer<br />
must be the same. Because changing the baud rate of the spectrum analyzer within a<br />
program ends communication with the computer, you should only use BAUDRATE within a<br />
downloadable program or when using the external keyboard to enter programming comm<strong>and</strong>s.<br />
To reestablish communication with the computer, you must set the baud rate back to the baud<br />
rate of the computer.<br />
5.76 Programming Comm<strong>and</strong>s
Query Response<br />
baud rate<br />
/ \<br />
BAUDRATE Baud Rate of <strong>Spectrum</strong> Analyzer<br />
output<br />
t e r m i n a t i o n +<br />
Programming Comm<strong>and</strong>s 5-77
BIT<br />
Bit<br />
Places the state (“1” or “0”) of a bit in the destination.<br />
Syntax<br />
Item<br />
User-defined variable<br />
Predeiined variable<br />
Predeflned function<br />
Trace element<br />
Number (source)<br />
Number (bit number)<br />
I- source --\<br />
number<br />
b p r e d e f i n e d v a r i a b l e 1<br />
user-defined variable/<br />
$ predefined function I<br />
b t r a c e element /<br />
7 d e s t i n a t i o n 7<br />
,, predeflned v a r i a b l e<br />
buser-defined v a r i a b l e )<br />
L trace element /<br />
/<br />
7 bit number 7<br />
% p r e d e f i n e d v a r i a b l e I<br />
buser-defined variable)<br />
% predefined function I<br />
b trace element J<br />
Description/Default Range<br />
A variable defined by VARDEF or ACTDEF comm<strong>and</strong>s. Any valid variable<br />
name.<br />
A comm<strong>and</strong> that acts as a variable. Refer to Table 5-l.<br />
Function that returns a value. Refer to Table 5-l.<br />
An element of trace A, trace B, trace C, or a user-defined trace.<br />
Any valid integer number. 64-bit integer.<br />
Any valid integer number. 0 to 63.<br />
Prerequisite Comm<strong>and</strong>s: ACTDEF or VARDEF when using a user-defined variable.<br />
Related Comm<strong>and</strong>s: INT, STB.<br />
Example<br />
10 CLEAR 718<br />
20 OUTPUT 718;"IP;"<br />
30 OUTPUT 718;"VARDEF E-RROR,O;"<br />
40 OUTPUT 718;"BIT E-RROR,STB,S;"<br />
50 OUTPUT 718;"E_RROR?;"<br />
60 ENTER 718;Err<br />
70 IF NOT Err THEN DISP "NO 'I;<br />
80 DISP "ERROR PRESENT";<br />
90 END<br />
5-78 Programming Comm<strong>and</strong>s<br />
Clears <strong>HP</strong>-IB bus.<br />
Initializes spectrum analyzer<br />
Defines user-&fined variable EA?ROR <strong>and</strong> sets it<br />
equal to 0.<br />
Stores value of bit 5 of status byte in E-RROR.<br />
Returns value of E-RROR.<br />
Assigns value to computer variable, Err<br />
If Err equals zero, displays “NO’* on computer<br />
screen.<br />
Displays ‘
Description<br />
The BIT places either a “0” or a “ 1” in the destination. A “0” indicates the bit is off. A “ 1”<br />
indicates the bit is on.<br />
Specifying the bit number: When you specify the bit number, remember the following:<br />
BIT Bit<br />
� The bit number is limited from 0 to 63. If you enter a negative number for the bit number,<br />
the bit number defaults to 0. If you enter a number that is greater than 63, the bit number<br />
defaults to the remainder of the number divided by 64.<br />
� The least significant bit is bit 0. The most significant bit is bit 63.<br />
� Floating-point numbers are changed to a 64-bit integer before BIT is executed.<br />
The BIT comm<strong>and</strong> can be used to determine information about the status byte or a memory<br />
card inserted into the spectrum analyzer’s memory card reader. (See “HAVE” for more<br />
information about determining information about the memory card.)<br />
Programming Comm<strong>and</strong>s 5-79
BITF<br />
Bit Flag<br />
Returns the state (“ 1 n or “0”) of a bit.<br />
Syntax<br />
Item<br />
User-defined variable<br />
Predefined variable<br />
Predellned function<br />
Trace element<br />
Number (source)<br />
Number (bit number)<br />
BITF<br />
I \<br />
predefined variable<br />
% p r e d e f i n e d v a r i a b l e J<br />
*user-defined v a r i a b l e )<br />
predefined function /<br />
b trace element /<br />
/<br />
Description/Default<br />
A variable defined by VARDEF or ACTDEF comm<strong>and</strong>s.<br />
A comm<strong>and</strong> that acts as a variable. Refer to Table 5-l.<br />
Function that returns a value. Refer to Table 5-l.<br />
function path only<br />
An element of trace A, trace B, trace C, or a user-defined trace.<br />
Any valid integer number.<br />
Anv valid integer number.<br />
Range<br />
Any valid variable<br />
name.<br />
64-bit integer.<br />
0 to 63.<br />
Prerequisite Comm<strong>and</strong>s: ACTDEF or VARDEF when using a user-defined variable.<br />
Related Comm<strong>and</strong>s: BIT.<br />
5-90 Programming Comm<strong>and</strong>s
Example<br />
10 CLEAR 718<br />
20 OUTPUT 718;"IP;"<br />
30 OUTPUT 718;"BITF STB,5;"<br />
40 ENTER 718;Err<br />
50 IF NOT Err THEN DISP "NO 'I;<br />
60 DISP "ERROR PRESENT";<br />
70 END<br />
Description<br />
BITF Bit Flag<br />
Clears <strong>HP</strong>-IB bus.<br />
Initializes spectrum analyzer<br />
L3etermines the value of bit 5 of status byte.<br />
Assigns value to computer variable, Err:<br />
If Err equals zero, displays “NO ” on computer screen.<br />
L?ispla ys ‘
BLANK<br />
Blank Trace<br />
Blanks trace A, trace B, or trace C <strong>and</strong> stops taking new data into the specified trace.<br />
Syntax<br />
Equivalent Softkeys: BLANK A , BLAXK B , <strong>and</strong> BLANK C .<br />
Preset State: BLANK TRB, BLANK TRC.<br />
Related Comm<strong>and</strong>s: CLRW, MXMH, TRDSP, VIEW.<br />
Example<br />
OUTPUT 718;"BLANK TRA;"<br />
5-92 Programming Comm<strong>and</strong>s
BML<br />
Trace B Minus Display Line<br />
Subtracts display line from trace B <strong>and</strong> places the result in trace B.<br />
Syntax<br />
BML<br />
BML Trace B Minus Display Line<br />
Equivalent Softkey: B - DL -> B .<br />
Related Comm<strong>and</strong>s: BLANK, CLRW, SUB, TS.<br />
Restrictions: Not available with Analog+ display mode. See “ANLGPLUS” for more<br />
information.<br />
Example<br />
10 OUTPUT 718;"IP;SNGLS;" Initial&s spectrum analyzq activates single-sweep mode.<br />
20 OUTPUT 718;"BLANK TRA;" Blanks trace A.<br />
30 OUTPUT 718;"CLRW TRB;TS;" Clear-writes trace S; takes sweep.<br />
40 OUTPUT 718;"DL -7ODM;" Sets the display line to -70 dBm.<br />
50 OUTPUT 718;"BML;" Activates BML jimction.<br />
60 END<br />
Description<br />
The BML comm<strong>and</strong> subtracts the display line from trace B (point by point), <strong>and</strong> sends the<br />
difference to trace B.<br />
Programming Comm<strong>and</strong>s 5-83
BTC<br />
Transfer Trace B to Trace C<br />
Transfers trace B into trace C.<br />
Syntax<br />
BTC<br />
Equivalent Softkey: B -> C .<br />
Related Comm<strong>and</strong>s: BLANK, CLRW, SNGLS, TS, VIEW.<br />
Example<br />
10 OUTPUT 718;"IP;"<br />
20 OUTPUT 718*"SNGLS-"<br />
30 OUTPUT 718;"BLANK'TRA;"<br />
40 OUTPUT 718;"CF 300 MHZ;SP 1MHZ;"<br />
50 OUTPUT 718;"CLRW TRB;TS;"<br />
60 OUTPUT 718;"BTC;"<br />
70 OUTPUT 718;"BLANK TRB;VIEW TRC;"<br />
80 END<br />
Description<br />
Initializes spectrum analyzer:<br />
Activates single-sweep mode.<br />
Blanks trace A.<br />
Sets up measurement range.<br />
lbkes measurement sweep.<br />
Moves trace B to trace C.<br />
Displays result in trace C.<br />
The BTC comm<strong>and</strong> moves trace B into trace C, then stops updating trace C by placing it in<br />
the view mode. Trace B is unchanged by BTC. Trace B must contain a complete sweep of<br />
measurement information.<br />
5-84 Programming Comm<strong>and</strong>s<br />
XBTC
BXC<br />
Trace B Exchange Trace C<br />
Exchanges trace B <strong>and</strong> trace C.<br />
Syntax<br />
BXC<br />
Equivalent Softkey: B
CAL<br />
Calibration<br />
Initiates self-calibration routines.<br />
Syntax<br />
Example<br />
OUTPUT 7 18 ; “CAL FREq ; ” &forms the frequency correction routine.<br />
Description<br />
The CAL comm<strong>and</strong> controls calibration functions. CAL initiates action according to the CAL<br />
parameters. The various parameters correspond to spectrum analyzer softkeys as shown below.<br />
ON turns correction factors on <strong>and</strong> corresponds to CORRECT CM OFF (ON is underlined). (See<br />
also ’ CORREK. “)<br />
OFF turns correction factors off <strong>and</strong> corresponds to CORRECT ON OFF (OFF is underlined).<br />
(See also “CORREK.“)<br />
STORE moves the correction factors to an area of spectrum analyzer memory that is<br />
accessed when the spectrum analyzer is powered on. STORE corresponds to CAL STORE .<br />
The CAL STORE comm<strong>and</strong> cannot be executed if the correction data is not valid. Correction<br />
data is valid if CORRECT 01Q OFF (ON is underlined) causes CORR to be displayed on the<br />
spectrum analyzer display. Executing the CAL STORE comm<strong>and</strong> with invalid data generates<br />
an SRQ 110.<br />
FETCH recalls the correction factors from the “working” r<strong>and</strong>om-access memory. The<br />
“working” r<strong>and</strong>om-access memory is the section of memory that is accessed when the<br />
spectrum analyzer is turned on. CAL FETCH corresponds to CAL FETCIl .<br />
5-86 Programming Comm<strong>and</strong>s
Note Execute CAL STORE after successful completion of the self-calibration<br />
routines.<br />
CAL Calibration<br />
Connect a cable between CAL OUT <strong>and</strong> the spectrum analyzer input before<br />
running the CAL FREQ, CAL AMP, or CAL ALL correction routines.<br />
FREQ initiates the frequency correction routine <strong>and</strong> corresponds to CAL FREq .<br />
AMP initiates the amplitude correction routine <strong>and</strong> corresponds to CAL AWTD .<br />
ALL initiates frequency <strong>and</strong> amplitude correction routines. It corresponds to<br />
CAL FREq & AMPTD .<br />
Note fir an <strong>HP</strong> 8592L, <strong>HP</strong> 8593E, <strong>HP</strong> 85963 only: A cable must be connected<br />
between COMB OUT <strong>and</strong> the spectrum analyzer input to use the comb signal<br />
for CAL YTF.<br />
Fbr the <strong>HP</strong> 85953 only: Connect the cable between the CAL OUT connector<br />
<strong>and</strong> the spectrum analyzer input.<br />
YTF initiates the correction routine for the YIG-tuned filter. The CAL YTF comm<strong>and</strong><br />
corresponds to CAL YTF . (<strong>HP</strong> 8592L, <strong>HP</strong> 85933, <strong>HP</strong> 85953, or <strong>HP</strong> 85963 only.)<br />
DISP displays some of the correction factors on the spectrum analyzer display.<br />
DUMP returns correction factors to the controller.<br />
INIT sets the calibration data back to predetermined values. CAL INIT corresponds to<br />
DEFAULT CAL DATA . Before executing CAL INIT, you must set the spectrum analyzer’s<br />
center frequency -37 Hz to access this function. After CAL INIT has been performed, you<br />
should perform CAL YTF for an <strong>HP</strong> 8592L, <strong>HP</strong> 85933, <strong>HP</strong> 85953, or <strong>HP</strong> 85963.<br />
Note Before executing the CAL TG comm<strong>and</strong>, a cable must be connected between<br />
the tracking generator output <strong>and</strong> the spectrum analyzer input.<br />
TG performs the calibration routines if the tracking generator is installed (Option 010 or<br />
011). CAL TG corresponds to CAL TRK GEI .<br />
Refer to the <strong>HP</strong> <strong>8590</strong> E-<strong>Series</strong> <strong>and</strong> L-<strong>Series</strong> <strong>Spectrum</strong> <strong>Analyzers</strong> User’s Guide for more<br />
information about the self-calibration routines, including the correct instrument set-up for each<br />
routine.<br />
CAL DISP <strong>and</strong> CAL DUMP do not return all of the correction factors because the number<br />
of characters that can be displayed on the spectrum analyzer screen is limited. CAL DUMP<br />
only returns the correction factors (as ASCII values) that would be displayed on the spectrum<br />
analyzer screen. Refer to the Service Guide for your spectrum analyzer for more information<br />
about displaying calibration data <strong>and</strong> reinitializing calibration data.<br />
If the calibration data has been corrupted or is obviously inaccurate, use CAL FETCH to<br />
retrieve the calibration data that has previously been saved. If the calibration data fetched is<br />
corrupt, the following example can be used to set the calibration data back to predetermined<br />
values. Execute OUTPUT 718;"CF -37HZ;CAL INIT;", then perform the CAL AMP, CAL FREQ,<br />
or CAL ALL calibration routines. Use CAL STORE if the calibration routines have finished<br />
successfully.<br />
Programming Comm<strong>and</strong>s 5-87
CAL Calibration<br />
Note Using the default calibration data may cause the calibration routine to fail.<br />
If this occurs, execute “OUTPUT 718; CF -37HZ; ” before performing the CAL<br />
FREQ or CAL ALL calibration routines.<br />
The take sweep (TS) <strong>and</strong> DONE comm<strong>and</strong>s can be used to indicate that the correction routine<br />
has finished. Query the CORREK comm<strong>and</strong> to check that the calibration routines have finished<br />
successfully.<br />
5-88 Programming Comm<strong>and</strong>s
CAT<br />
Catalog<br />
Catalogs either spectrum analyzer memory or the memory card <strong>and</strong> returns the catalog<br />
information to the controller.<br />
Syntax<br />
CAT Catalog<br />
Equivalent Softkeys: the functions accessed by Catalog Internal or Catalog Card.<br />
Related Comm<strong>and</strong>s: LOAD, MSI, STOR.<br />
Example<br />
This example returns the catalog information for the states stored on the memory card. Catalog<br />
information is sent as individual catalog lines that are separated by a carriage return <strong>and</strong> a<br />
line feed. A carriage return, a line feed, <strong>and</strong> a line feed with an EOI (equivalent to a carriage<br />
return, a line feed, <strong>and</strong> a line feed) is asserted after the last item.<br />
10<br />
20<br />
30<br />
DIM User$ [2000] ,Catalog$ (1: 100) [80] Dimensions strings to store the catalog<br />
in$ormation. U.ser$ stores the entire<br />
string of catalog irlformation. Catalogs<br />
stores the catalog irlforrnation line by<br />
line (up to 80 lines <strong>and</strong> 100 characters<br />
end.<br />
INTEGER I,Pos,lf I <strong>and</strong> FbsJf are used to search through<br />
Users string.<br />
OUTPUT 718;“CAT s*,CARD;” The spectrum analyzer sends catalog information<br />
for all the states stored on the<br />
40 ENTER 718 USING ‘I#, -K” ;User$<br />
50 I=0<br />
60 WHILE LEN(User$) >l<br />
memory card.<br />
Reads the catalog iqforrnation into the<br />
Users string.<br />
Loops until the Use& string is empty.<br />
Programming Comm<strong>and</strong>s 5-88
CAT Catalog<br />
70 I=I+l<br />
80 Pas-lf=POS(User$,CHR$(lO)) Checks for line feeds. CHR$(IO) represents<br />
the line feed, the ASCII code for a<br />
line feed is “10. ”<br />
90 Catalog$(I)=User$Cl,Pos,lf -21 Extracts catalog line.<br />
100 OUTPUT CRT;Catalog$(I) Displays catalog line.<br />
120 User$=User$[Pos,lf+l]<br />
130 END WHILE<br />
140 END<br />
Description<br />
To use the CAT comm<strong>and</strong>, you must specify the type of information to be cataloged <strong>and</strong> either<br />
the spectrum analyzer memory or the memory card as the catalog source. After the spectrum<br />
analyzer has sent the catalog information to the controller, the spectrum analyzer sends two<br />
line feed characters to the controller.<br />
Specifying the type of information: The types of information that can be cataloged depend<br />
on the source. See the following sections, “Cataloging the Memory Card” <strong>and</strong> “Cataloging<br />
<strong>Spectrum</strong> Analyzer Memory” for more information.<br />
Specifying the source: You can specify the spectrum analyzer memory or the memory card as<br />
the source by specifying INT or CARD, respectively. If source (CARD or INT) is omitted, the<br />
default is the current mass storage device. See “MSI” for more information about setting the<br />
current mass storage device.<br />
Note When CAT is executed from a remote port, the catalog information is sent to<br />
the remote port.<br />
Cataloging the Memory Card<br />
When cataloging a memory card, you can specify the type of information to be cataloged<br />
by specifying the letter (a, d, 1, i, s, or t) that represents the data type. For example, if you<br />
execute “CAT l*,CARD;” all of the limit line files on the memory card will be returned. The<br />
letters correspond to the data types are as follows:<br />
a* Amplitude correction files.<br />
d* Downloadable programs.<br />
1* Limit line files.<br />
i* Display files.<br />
S* Saved spectrum analyzer state.<br />
t* Saved spectrum analyzer traces,<br />
The asterisk (*) character is interpreted as a wild card. The asterisk can be used with the data<br />
type to catalog all files of that data type, or alone to catalog all files on the memory card.<br />
CAT returns the directory information only if a file has been found.<br />
What is returned when the memory card is cataloged: When the memory card is the catalog<br />
source, the cataloged information is returned to the computer as a series of strings. Each string<br />
contains information about one file that has been saved on the memory card. The information<br />
is placed in specific fields within a string as shown in the following table.<br />
5.90 Programming Comm<strong>and</strong>s
Information<br />
File name<br />
File Type<br />
Data Type<br />
Start Record<br />
Length<br />
Time of creation<br />
Position within Description<br />
String<br />
1 through 10 Name of the file.<br />
11 through 16 ASCII or binary data (in LIF -2 format).<br />
CAT Catalog<br />
17 through 22 a = amplitude correction factors, d = downloadable program,<br />
1 = limit line, i = display files s = spectrum analyzer state, t = trace.<br />
23 through 30 Physical record number of the start of file.<br />
31 through 38 Number of records in the file.<br />
39 through 52 The time the file was created in year, month, day, hour, minute,<br />
second (YYMMDDHHMMSS) format.<br />
Each string is right-justified within its field, with spaces separating the fields.<br />
Cataloging <strong>Spectrum</strong> Analyzer Memory<br />
When cataloging analyzer memory, you can use “prefix”, “reg,” or “on” to specify the type of<br />
information to be cataloged.<br />
prefix* Catalogs the programs <strong>and</strong> variables in spectrum analyzer memory according to the<br />
current prefix. (Use Change Prefix or PREFX to change the current prefix.)<br />
reg* Catalogs the contents of the state <strong>and</strong> trace registers. The center frequency <strong>and</strong><br />
span of the state registers are displayed; the title <strong>and</strong> date of the trace registers are<br />
displayed.<br />
on* Catalogs the on event comm<strong>and</strong>s <strong>and</strong> their status. See the “Cataloging the on event<br />
comm<strong>and</strong>s n for more information.<br />
* Catalogs all the programs <strong>and</strong> variables stored in spectrum analyzer memory, but does<br />
not return the on event comm<strong>and</strong>s or the contents of the state <strong>and</strong> trace registers.<br />
Cataloging the on event comm<strong>and</strong>s: When the on event programming comm<strong>and</strong>s have not<br />
been set or an instrument preset has been performed, cataloging the on events displays the<br />
status of the on events as UNDEFINED. If the ONEOS, ONSWP, TRMATH, ONMKR, ONSRQ,<br />
<strong>and</strong> ONPWRUP comm<strong>and</strong>s have been set, “CAT on*;” displays their status as ACTIVE. When<br />
ONCYCLE, ONDELAY, or ONTIME have been set, “CAT on*;” returns the information shown in<br />
the following table.<br />
fro@--<br />
Comm<strong>and</strong><br />
ONCYCLE<br />
ONDELAY<br />
ONTIME<br />
Description of the Catalog On Event Response<br />
The entry for ONCYCLE displays the number of seconds left until the event occurs, followed<br />
by the number of seconds ONCYCLE was set for.<br />
The entry for ONDELAY displays either a positive or negative number. A positive number<br />
indicates the number of seconds left until the event occurs, a negative number indicates the<br />
amount of time that has passed (in seconds) since the event.<br />
The date (in year, month, <strong>and</strong> day format) <strong>and</strong> the time (in 24 hour format) that ONTIME is set<br />
for.<br />
Programming Comm<strong>and</strong>s 5-91
CAT Catalog<br />
If you want to catalog all user-defined variables, user-defined softkeys, or user-defined<br />
functions in spectrum analyzer, use the asterisk without “prefix,” “reg,” or “on” preceding the<br />
asterisk. For example “CAT *,INT; “.<br />
Cataloging spectrum analyzer (internal) memory returns the following information:<br />
� MS1 device (internal).<br />
H Bytes of spectrum analyzer memory used.<br />
� Total amount of spectrum analyzer memory (in bytes). This number includes the amount of<br />
spectrum analyzer memory in use <strong>and</strong> the amount of spectrum analyzer memory available.<br />
� Name of the stored data <strong>and</strong> the number of bytes used.<br />
Note The difference between the bytes of spectrum analyzer memory used <strong>and</strong> the<br />
total spectrum analyzer memory available is the amount of spectrum analyzer<br />
memory available.<br />
5-92 Programming Comm<strong>and</strong>s
CF<br />
Center Frequency<br />
Specifies the center frequency.<br />
Syntax<br />
c CF<br />
/ frequency value \<br />
number<br />
CF Center Frequency<br />
Item Description/Default Range<br />
Number Any real or integer number. Default unit is Hz. Frequency range of<br />
the spectrum analyzer.<br />
Equivalent Softkey: CEHTEH FREQ .<br />
Step Increment: If uncoupled, step size is determined by the SS comm<strong>and</strong>. If coupled, step<br />
size is 10% of span.<br />
Related Comm<strong>and</strong>s: HNLOCK, FA, FB, FOFFSET, FS, MKCF, MKSS, SP, SS.<br />
Note Although the spectrum analyzer allows entry of frequencies not in the specified<br />
frequency range, using frequencies outside the frequency span of the spectrum<br />
analyzer is not recommended <strong>and</strong> is not warranted to meet specifications.<br />
Example<br />
OUTPUT 718; “CF 300MHZ; ” Sets the center freqwncp to 300 hEliz.<br />
Programming Comm<strong>and</strong>s 5-93
CF Center Frequency<br />
Description<br />
The CF comm<strong>and</strong> specifies the value of the center frequency.<br />
Query Response<br />
5.94 Programming Comm<strong>and</strong>s
C<strong>HP</strong><br />
Channel Power<br />
Performs the channel power measurement.<br />
Syntax<br />
C<strong>HP</strong><br />
C<strong>HP</strong> Channel Power<br />
Equivalent Softkey: ClUNNEL PCIVER .<br />
Related Comm<strong>and</strong>s: ACPPAR, ACPCONTM, ACPSNGLM, ACPSP, ACPBW, C<strong>HP</strong>GR, ACPMK.<br />
Example<br />
OUTPUT 718*"C<strong>HP</strong>*"<br />
, , Flyforms the channel power rneasur~t.<br />
Description<br />
C<strong>HP</strong> measures the total power in the specified channel b<strong>and</strong>width (ACPBW). The power<br />
spectral density per Hz is also computed <strong>and</strong> displayed. This value is the average-power<br />
spectral density in the specified channel b<strong>and</strong>width.<br />
‘lb use C<strong>HP</strong>:<br />
1. Set the center frequency to the carrier’s frequency.<br />
2. For best accuracy, set the reference level so that the carrier signal peak is within the first<br />
(top) division of the screen graticule.<br />
3. Select the channel b<strong>and</strong>width with the ACPBW comm<strong>and</strong>.<br />
4. Select the channel spacing with the ACPSP comm<strong>and</strong>. (For the channel power<br />
measurement, ACPSP is only used to set the center frequency step size.)<br />
5. If you want the spectrum analyzer settings to be set automatically, ensure that ACPPAR is<br />
set to 1. If you want to set the spectrum analyzer settings manually, set ACPPAR to 0. See<br />
“ACPPAR” for more information about selecting the spectrum analyzer settings manually.<br />
6. If the spectrum analyzer is in the continuous-sweep mode, use the single sweep comm<strong>and</strong><br />
(SNGLS) to select the single-sweep mode.<br />
7. Execute the C<strong>HP</strong> comm<strong>and</strong>.<br />
8. Query ACPERR to determine if there is a setup error for the C<strong>HP</strong> measurement. See the<br />
following table for more information about ACPERR.<br />
9. If no error occurred, query the C<strong>HP</strong>WR variable for the numeric results of the C<strong>HP</strong><br />
measurement. See the following table for more information about C<strong>HP</strong>WR.<br />
10. If no error occurred, query trace A (TRA) for the trace results of the C<strong>HP</strong> measurement.<br />
Measurement Results: The results of the C<strong>HP</strong> comm<strong>and</strong> are stored in the variable <strong>and</strong> trace<br />
described in the following table.<br />
XC<strong>HP</strong><br />
Programming Comm<strong>and</strong>s 5-95
CEIP Channel Power<br />
CEIP Measurement Results<br />
Variable or Trace Description Units<br />
ACPERR A variable that indicates setup errors for the C<strong>HP</strong> measurement. The<br />
value of ACPERR indicates the following:<br />
� If no errors occurred, ACPERR is 0.<br />
� If ACPERR is 1, channel b<strong>and</strong>width > frequency span.<br />
� If ACPERR is 2, the channel b<strong>and</strong>width < frequency span/loo.<br />
C<strong>HP</strong>WR A variable that contains the channel power. Determinded by<br />
AUNITS comm<strong>and</strong>.<br />
Default unit is dBm.<br />
C<strong>HP</strong>SD A variable that contains the average channel power spectral density Determinded by<br />
per Hz. AUNITS comm<strong>and</strong>.<br />
Default unit is<br />
dBm/Hz .<br />
TRA TRA is trace A. Trace A contains the swept RF spectrum. Determined by the<br />
trace data format<br />
(TDF) comm<strong>and</strong>.<br />
Restrictions<br />
Executing ACPE exits the following functions: windows display mode (WINON), N dB point<br />
measurement (NDBPNT), the FFT menu measurements (FFTAUTO, FFTCONTS, FFTSNGLS),<br />
gate utility functions (GDRVUTIL), TO1 measurement (TOI), marker table (MKTBL), peak table<br />
(PKTBL), percent AM (PCTAM), or peak zoom (PKZOOM).<br />
5-96 Programming Comm<strong>and</strong>s
C<strong>HP</strong>GR<br />
Channel Power Graph On or Off<br />
Determines if the channel power graph function is enabled or disabled.<br />
Syntax<br />
Equivalent Softkey: PWkGRAPH ON OFF<br />
Related Comm<strong>and</strong>s: C<strong>HP</strong><br />
Example<br />
CElPGR Channel Power Graph On or Off<br />
10 OUTPUT 718; “C<strong>HP</strong>; ” Fkyforrns the channel power masurmt.<br />
20 OUTPUT 718;"MOV C<strong>HP</strong>GR,l;" Enables the power graph function <strong>and</strong> creates a graph of<br />
the channel power as a function of frequency.<br />
Description<br />
Setting C<strong>HP</strong>GR to 1, does the following:<br />
� Turns off the display of the channel-power numeric results.<br />
� Generates a graph of the channel power as a function of frequency.<br />
� Places the graph in trace C<br />
� Adds the GRPH MKR ON OFF softkey to the menu.<br />
� If in continuous measurement mode, the channel power graph will be updated at the end of<br />
every sweep.<br />
Setting the C<strong>HP</strong>GR to -1, does the following:<br />
� Turns off the display of the channel-power graph in trace C.<br />
� Calculates <strong>and</strong> displays the channel-power numeric results.<br />
� Removes the GRPH NKR ON OFF softkey from the menu.<br />
� Turns off the channel power graph marker.<br />
� If in continuous measurement mode, the numeric results will be updated at the end of every<br />
sweep.<br />
When the graph is generated, it represents the power in the channel b<strong>and</strong>width (set by the<br />
ACPBW comm<strong>and</strong>). The results of C<strong>HP</strong>GR are not defined for frequencies where the graph is<br />
drawn below the bottom graticule line.<br />
Programming Comm<strong>and</strong>s 5-97
CLRAVG<br />
Clear Average<br />
Restarts video averaging.<br />
Syntax<br />
CLRAVG<br />
Related Comm<strong>and</strong>s: AMB, CLRW, MINH, MXMH, VAVG.<br />
Example<br />
OUTPUT 718;"IP;" Initializes the spectrum analyzer:<br />
OUTPUT 718;"VAVG 100;"<br />
WAIT 30<br />
Initializes video averaging.<br />
OUTPUT 718*"CLRAVG-"<br />
, , Restarts wide0 averaging.<br />
Description<br />
The CLRAVG comm<strong>and</strong> restarts the VAVG comm<strong>and</strong> by resetting the number of averaged<br />
sweeps to one. The video averaging routine resets the number of sweeps, but does not stop<br />
video averaging. Use “VAVG OFF;” to stop video averaging.<br />
5-99 Programming Comm<strong>and</strong>s
CLRBOX<br />
Clear Box<br />
Clears a rectangular area on the spectrum analyzer display.<br />
Syntax<br />
CLRBOX Clear Box<br />
Item Description/Default Range<br />
Number Any valid integer number. For xl or x2, -40 to 471.<br />
For yl or y2, -22 tb 233.<br />
Related Comm<strong>and</strong>s: CLRDSP.<br />
Example<br />
The following programming line results in the spectrum analyzer display shown in Figure 5-2.<br />
OUTPUT 718;“CLRBOX 1,1,200,20O,A;” Clears the annotation <strong>and</strong> graticule from the<br />
rectangular area of 1,l to 200,200. -<br />
& REF . 0 dBm<br />
PEAK<br />
LOG<br />
2,<br />
WA SE<br />
SC FC<br />
CORR<br />
CENTE<br />
d Jl.Jl<br />
3.250 GHz<br />
ES BW 3.0 MHz<br />
ATTEN 1 0 dG<br />
SPECTRUM<br />
.:::I ANALY=ER<br />
.................................................<br />
....................................... . .........<br />
....................................... . .........<br />
......................................... .......<br />
t--++++~<br />
. . . . . . . . . . . . . . . . . . . . . . . . . . . . . . . . . . . . . . . . . . . . . . . . .<br />
More<br />
UBW 1 MHz<br />
SPAN 6.500 GHz<br />
SWP 130 mseo<br />
1 of<br />
RT<br />
3<br />
Figure 5-2. Using the CLRBOX Comm<strong>and</strong><br />
Programming Comm<strong>and</strong>s 5-99
CLRJSOX Clear Box<br />
Description<br />
lb use CLRBOX, you must specify the rectangular area of the box. You can also specify<br />
whether the annotation or trace planes are to be cleared.<br />
Specifying the rectangular area of the box<br />
You specify the rectangular area by specifying the coordinates of the lower left corner (xl, yl)<br />
<strong>and</strong> the upper right corner (x2, y2) of the rectangle in display units. (The cleared area includes<br />
the xl, yl, x2, <strong>and</strong> y2 coordinates).<br />
Specifying the annotation or trace plane<br />
You can specify whether the annotation or the traces are to be cleared by specifying an “A”<br />
for the annotation plane or a “T” for the trace plane. If you specify the annotation plane,<br />
everything but the trace display will be cleared. If you specify the trace plane, the trace<br />
display will be cleared. (The cleared trace display can be overwritten if the spectrum analyzer<br />
is in the clear-write mode, however.) If you do not specify the annotation or trace plane, both<br />
the annotation <strong>and</strong> trace planes are cleared.<br />
CLRBOX affects only the spectrum analyzer display <strong>and</strong> printing of the spectrum analyzer<br />
display. CLRBOX does not change the plot of the spectrum analyzer display; the area that is<br />
cleared by CLRBOX will still be plotted.<br />
5-100 Programming Comm<strong>and</strong>s
CLRDSP<br />
Clear Display<br />
Erases user-generated graphics <strong>and</strong> text,<br />
Syntax<br />
CLRDSP<br />
Related Comm<strong>and</strong>s: CLRBOX, DA, DRAWBOX, DSPLY, PA, PD, PR, PU, TEXT.<br />
Example<br />
CLRDSP Clear Display<br />
OUTPUT 718;"CLRDSP;BLANK TRA;BLANK TRB; Blanks the spectrum analyzer screen, ex-<br />
GRAT 0FF;TH 0FF;DL OFF;" cept for trace C <strong>and</strong> annotation.<br />
OUTPUT 718;"CLRW TRA;GRAT 0N;ANNOT ON;" Reinstates the display of trace A, the graticulq<br />
<strong>and</strong> the annotation.<br />
Description<br />
The CLRDSP comm<strong>and</strong> removes all user-created graphics <strong>and</strong> text from the spectrum analyzer<br />
screen <strong>and</strong> memory. CLRDSP also removes the graphics <strong>and</strong> text from the display list. See<br />
“DA” for more information about the display list.<br />
Programming Comm<strong>and</strong>s 5-101
CLRW<br />
Clear Write<br />
Clears the specified trace <strong>and</strong> enables trace data acquisition.<br />
Syntax<br />
Equivalentsoftkeys: CLl%R WRITE A, CLEAR WRITE B, <strong>and</strong> CLEAR WRITE C.<br />
Preset State: CLRW TRA.<br />
Related Comm<strong>and</strong>s: BLANK, DET, MINH, MXMH, VAVG, VIEW.<br />
Restrictions: CLRW TRB <strong>and</strong> CLRW TRC are not available with Analog+ display mode. See<br />
“ANLGPLUS” for more information.<br />
Example<br />
OUTPUT 718;"CLRW TRA;"<br />
Description<br />
The CLRW comm<strong>and</strong> places the indicated trace in the clear-write mode. Data acquisition begins<br />
at the next sweep. (See “TS” for more information about data acquisition.)<br />
5-102 Programming Comm<strong>and</strong>s<br />
XCLRW
CLS<br />
Clear Status Byte<br />
Clears all status bits.<br />
Syntax<br />
Related Comm<strong>and</strong>s: RQS, SRQ, STB.<br />
Example<br />
OUTPUT 7 18 - “CLS * ”<br />
, ,<br />
Description<br />
CLS<br />
CL!3 Clear Status Byte<br />
The CLS comm<strong>and</strong> clears all the status bits in the status byte. (See “SRQ” for more information<br />
on the status byte.)<br />
Programming Comm<strong>and</strong>s 5-l 03
CMDERRQ<br />
Comm<strong>and</strong> Error Query<br />
The CMDERRQ comm<strong>and</strong> returns the current buffer of illegal comm<strong>and</strong>s <strong>and</strong> then clears the<br />
illegal-comm<strong>and</strong> buffer from the spectrum analyzer.<br />
Syntax<br />
Example<br />
OUTPUT 718;"CMDERRQ;" Initiates the comm<strong>and</strong>.<br />
ENTER 718;A$ Gets the response from the spectrum anu1yze.x<br />
DISP A$ Llisplu~s the response<br />
Description<br />
Executing the CMDERRQ comm<strong>and</strong> does the following:<br />
w Returns the most recently stored illegal or unrecognized comm<strong>and</strong> characters.<br />
4 Returns up to 45 characters of an illegal comm<strong>and</strong> or comm<strong>and</strong>s.<br />
� Erases the illegal comm<strong>and</strong> buffer.<br />
Query Response<br />
5-104 Programming Comm<strong>and</strong>s<br />
unrecognized comm<strong>and</strong><br />
/ \
CNF<br />
Confidence ‘I&t<br />
Performs the confidence test.<br />
Syntax<br />
Equivalent Softkey: COhfF TEST .<br />
Example<br />
OUTPUT 718; “CNF; ”<br />
Description<br />
CNF<br />
CNF Confidence Test<br />
The CNF comm<strong>and</strong> initiates a confidence test of the resolution b<strong>and</strong>width, video b<strong>and</strong>width,<br />
<strong>and</strong> step gain.<br />
Note Connect a cable between CAL OUT <strong>and</strong> the spectrum analyzer input before<br />
executing the CNF comm<strong>and</strong>.<br />
XCNF<br />
Programming Comm<strong>and</strong>s 5-105
CNTLA<br />
Auxiliary Interface Control Line A<br />
Sets the control line A of the auxiliary interface high or low.<br />
Syntax<br />
CNTLA OFF<br />
Equivalent Softkey: CNTL A 0 1 .<br />
Related Comm<strong>and</strong>s: CNTLB, CNTLC, CNTLD, CNTLI.<br />
Example<br />
OUTPUT 718 ; "CNTLA ON; I’ Sets control line A high.<br />
OUTPUT 718;"CNTLA?;" Queries the state of control line A.<br />
ENTER 718;A$ Gets the response from the spectrum analyzix<br />
DISP A$ Displays the response.<br />
Description<br />
CNTLA ON sets control line A to high, CNTLA OFF sets it to low (the auxiliary interface<br />
connector outputs use transistor-transistor logic).<br />
Query Response<br />
5-l 06 Programming Comm<strong>and</strong>s<br />
ON<br />
/<br />
output<br />
’ t e r m i n a t i o n +<br />
XCNTLA
CNTLB<br />
Auxiliary Interface Control Line B<br />
Sets the control line B of the auxiliary interface high or low.<br />
Syntax<br />
Equivalent Softkey: CNTL B 0 1 .<br />
Related Comm<strong>and</strong>s: CNTLA, CNTLC, CNTLD, CNTLI.<br />
Example<br />
CNTLB Auxiliary Interface Control Line B<br />
OUTPUT 718 * 9 "CNTLB ON 9- ‘I Sets control line B high.<br />
OUTPUT 718."CNTLB'."<br />
* , Queries the state of control line B<br />
ENTER 718;i$<br />
Gets the response from the spectrum analyze7:<br />
DISP A$ Displays the response.<br />
Description<br />
CNTLB ON sets control line B to high, CNTLB OFF sets it to low (the auxiliary connector<br />
outputs use transistor-transistor logic).<br />
Query Response<br />
ON<br />
OFF<br />
OFF<br />
ON<br />
/<br />
output<br />
’ t e r m i n a t i o n -<br />
XCNTLB<br />
Programming Comm<strong>and</strong>s 5-107
CNTLC<br />
Auxiliary Interface Control Line C<br />
Sets the interface control line C of the auxiliary interface high or low.<br />
Syntax<br />
OFF<br />
Equivalent Softkey: CNTL C 0 1 .<br />
Related Comm<strong>and</strong>s: CNTLA, CNTLB, CNTLD, CNTLI.<br />
Example<br />
OUTPUT 718."CNTLC t ON*" #<br />
OUTPUT 718."CNTLC'." . 9<br />
Sets control line C high.<br />
Queries the state of control line C.<br />
ENTER 718;i$<br />
Gets the response from the spectrum anal~zxx<br />
DISP A$ Lhkplays the response.<br />
Description<br />
CNTLC ON sets control line C to high, CNTLC OFF sets it to low (the auxiliary interface<br />
connector outputs use transistor-transistor logic).<br />
Query Response<br />
5-l 08 Programming Comm<strong>and</strong>s<br />
ON<br />
OFF<br />
ON<br />
/
CNTLD<br />
Auxiliary Interface Control Line D<br />
Sets the interface control line D of the auxiliary interface high or low.<br />
Syntax<br />
Equivalent Softkey: CNTL D 0 1 .<br />
Related Comm<strong>and</strong>s: CNTLA, CNTLB, CNTLC, CNTLI.<br />
Example<br />
CNTLD Auxiliary Interface Control Line D<br />
OUTPUT 718 ; "CNTLD ON ; I' Sets control line D high.<br />
OUTPUT 718."CNTLD'." * , Queries the state of control line D.<br />
ENTER 718;i$<br />
Gets the response from the spectrum anal~zerz<br />
DISP A$ Displays the response.<br />
Description<br />
CNTLD ON sets control line D to high, CNTLD OFF sets it to low (the auxiliary connector<br />
outputs use transistor-transistor logic).<br />
Query Response<br />
Programming Comm<strong>and</strong>s 5-109
CNTLI<br />
Auxiliary Interface Control Line Input<br />
Returns a “ 1” when the interface control line I of the auxiliary interface is high, <strong>and</strong> “0” if the<br />
line input is low.<br />
Syntax<br />
Equivalent Softkey: DISPLAY CMTL I .<br />
Related Comm<strong>and</strong>s: CNTLA, CNTLB, CNTLC, CNTLD.<br />
Example<br />
f u n c t i o n p a t h o n l y<br />
OUTPUT 718; “CNTLI ; I1 Gets the status of control line I<br />
ENTER 718;A<br />
DISP A Displays status.<br />
5-110 Programming Comm<strong>and</strong>s<br />
XCNTL I
COMB<br />
Comb<br />
Turns on or off the comb generator.<br />
Syntax<br />
Equivalent Softkey: CO?!E! GEN ON OFF .<br />
Model Required: <strong>HP</strong> 8592L, <strong>HP</strong> 85933, or <strong>HP</strong> 85963.<br />
Example<br />
OUTPUT 718;"COMB ON;" Turns onthecombgenerator:<br />
Description<br />
To use the comb signal, a cable must be connected from the COMB OUT connector to the<br />
spectrum analyzer input.<br />
COMB Comb<br />
XCOMB<br />
Programming Comm<strong>and</strong>s 5-111
COMPRESS<br />
Compress Trace<br />
Reduces the number of trace elements while retaining the relative frequency <strong>and</strong> amplitude<br />
characteristics of the trace data.<br />
Syntax<br />
COMPRESS<br />
7 destination<br />
r algorithm 7<br />
Item Description/Default Range<br />
XCOMPRESS<br />
User-defined trace A trace defined by the TRDEF comm<strong>and</strong> Any valid trace name.<br />
Trace Range A segment of trace A, trace B, trace C, or a user-defined trace.<br />
Prerequisite Comm<strong>and</strong>s: TRDEF when using user-defined trace. TS when using trace data.<br />
5-l 12 Programming Comm<strong>and</strong>s
Example<br />
COMPRESS Compress Trace<br />
This example compresses trace B into “C-0MPTRAC” using the positive (POS) algorithm.<br />
10 OUTPUT 718."IP-"<br />
20 OUTPUT 718;"TR;EF C-OMPTRAC,lOO;"<br />
30 OUTPUT 718 ;“BLANK TRA; SNGLS;"<br />
40 OUTPUT 718;"CLRW TRB;TS;"<br />
50 OUTPUT 718;"COMPRESS C-OMPTRAC,TRB,POS;"<br />
60 OUTPUT 718;"BLANK TRB;"<br />
70 OUTPUT 718;"MOV TRA,C-OMPTRAC;"<br />
80 OUTPUT 718;"VIEW TRA;"<br />
90 END<br />
Description<br />
Initializes spectrum analyz4x<br />
Creates a trace called C-OMFTRACwith<br />
a length of 100 elements.<br />
Blanks trace A, activates single-sweep<br />
mode.<br />
Measures with trace B<br />
Compresses trace B into C-OMFTRAC.<br />
Blanks trace B<br />
Moves C-OMPTRAC into trace A.<br />
Displays the result.<br />
The COMPRESS comm<strong>and</strong> stores a compressed copy of the source trace into a smaller<br />
destination trace. The source trace is divided into the same number of intervals as there are<br />
points in the destination trace, <strong>and</strong> the data within each interval are compressed into the value<br />
for the corresponding destination trace point. The algorithm used to compress the data is given<br />
as an parameter to the comm<strong>and</strong>.<br />
The algorithms available are as follows:<br />
AVERAGE<br />
@W<br />
NORMAL<br />
NW<br />
The average of the points within an interval is used.<br />
NRM computes the compressed value of the interval by using a rosenfell<br />
algorithm. The rosenfell algorithm is a mathematical operation defined in<br />
spectrum analyzer firmware. The algorithm compresses a locally continuously<br />
rising or falling signal into the peak value detected in each interval. If the<br />
detected signal is not continuously rising or falling, then the data value<br />
alternates between minimum <strong>and</strong> maximum in the compressed interval.<br />
This shows the peak-to-peak noise variations. The rosenfell option is useful<br />
for accurately displaying noise, because peak detection can give misleading<br />
representation of noise.<br />
NEGATIVE The lowest value in each interval is used.<br />
(NW<br />
POSITIVE Specifying POS selects the highest point in the interval as the compressed<br />
(PW value.<br />
SAMPLE (SMP) Specifying SMP selects the last point in the interval as the compressed value.<br />
PEAK The PKAVG algorithm selects the difference between the peak <strong>and</strong> the average<br />
AVERAGE value of the interval as the compressed value.<br />
(PKAVG)<br />
PEAK PIT The PKPIT algorithm returns the difference between the positive <strong>and</strong> the<br />
(PKPIT) negative peaks within the interval.<br />
Programming Comm<strong>and</strong>s 5-l 13
CONCAT<br />
Concatenate<br />
Combines two traces.<br />
Syntax<br />
Item<br />
User-defined trace<br />
User-defined variable<br />
Predeflned variable<br />
PredeEned function<br />
Trace Range<br />
Number<br />
CONCAT<br />
,- source 1'\<br />
V u s e r - d e f i n e d t r a c e /<br />
v trace range /<br />
V p r e d e f i n e d v a r i a b l e /<br />
user-defined variable<br />
7 destination<br />
b u s e r - d e f i n e d t r a c e I<br />
b t r a c e range J<br />
,- source 2 .-\<br />
TRA<br />
TRB<br />
TRC<br />
+ u s e r - d e f i n e d t r a c e /<br />
b trace range /<br />
b p r e d e f i n e d v a r i a b l e /<br />
user-defined variable<br />
Description/Default R=ae<br />
/<br />
/<br />
/<br />
XCONCAT<br />
A trace defined by the TRDEF comm<strong>and</strong>. Any valid trace name.<br />
A variable defined by VARDEF or ACTDEF comm<strong>and</strong>s. Any valid variable<br />
name.<br />
A comm<strong>and</strong> that acts as a variable. Refer to Table 5-l.<br />
Function that return a value. Refer to ‘lbble 5-l.<br />
A segment of trace A, trace B, trace C, or a user-defined trace.<br />
Any real or integer number. Real number range. ,<br />
Prerequisite Comm<strong>and</strong>s: TRDEF when using a user-defined trace. ACTDEF or VARDEF when<br />
using a user-defined variable. TS when using trace data.<br />
Related Comm<strong>and</strong>s: MOV, VIEW.<br />
5-114 Programming Comm<strong>and</strong>s
Example<br />
10 OUTPUT 718;"IP;"<br />
20 OUTPUT 718;"SNGLS;"<br />
30 OUTPUT 718;"TS;VIEW TRA;"<br />
40 OUTPUT 718;"CLRW TRB;TS;"<br />
50 OUTPUT 718;"CONCAT TRC,TRA[1,200],TRB[201,4011;"<br />
60 OUTPUT 718;"BLANK TRA;BLANK TRB;"<br />
70 OUTPUT 718;"VIEW TRC;"<br />
80 END<br />
Description<br />
CONCAT Concatenate<br />
Initializes the spectrum analyzer:<br />
Activates the single-sweep mode.<br />
Stores <strong>and</strong> displays trace A.<br />
3zkes a measurement sweep<br />
with trace B<br />
Concatenates the last half of<br />
trace B to the Jirst half of<br />
trace A.<br />
Blanks trace A <strong>and</strong> trace B<br />
LXsplays the result.<br />
The CONCAT comm<strong>and</strong> concatenates source 2 to the end of source 1, then stores the result in<br />
the destination. If the destination length is less than the length of source 1 <strong>and</strong> source 2, the<br />
list is truncated. For example, executing “CONCAT TRA[l, 15],TRB[3,6],TRB[7,207];” results<br />
in trace A elements 1 to 4 being replaced by trace B elements 3 to 6, <strong>and</strong> trace A elements 5<br />
to 15 being replaced by trace B elements 7 to 17. Trace B elements 18 to 207 are ignored. If<br />
necessary, reduce trace lengths with the COMPRESS comm<strong>and</strong>.<br />
If the length of the destination is greater than the length of source 1 <strong>and</strong> source 2, the last<br />
value is repeated. For example, executing “CONCAT TRA[1,15],TRB[3,6],TRB[7,9];” results in<br />
trace A elements 1 to 4 being equal to trace B elements 3 to 6, trace A elements 5 <strong>and</strong> 6 being<br />
replaced by trace B elements 7 <strong>and</strong> 8, <strong>and</strong> trace A elements 7 to 15 being replaced by trace B<br />
element 9.<br />
Programming Comm<strong>and</strong>s 5-115
CONTS<br />
Continuous Sweep<br />
Sets the spectrum analyzer to the continuous sweep mode.<br />
Syntax<br />
CONTS<br />
Equivalent Softkey: SWEEP COMT SGL (when CONT is underlined).<br />
Preset State: CONTS.<br />
Related Comm<strong>and</strong>s: SNGLS, ST, TM.<br />
Example<br />
OUTPUT 718; “CONTS; ”<br />
Description<br />
The CONTS comm<strong>and</strong> sets the spectrum analyzer to continuous sweep mode. In the continuous<br />
sweep mode, the spectrum analyzer takes its next sweep as soon as possible after the current<br />
sweep (as long as the trigger conditions are met). A sweep may temporarily be interrupted by<br />
data entries made from the front panel or over the remote interface.<br />
5-l 16 Programming Comm<strong>and</strong>s
CORREK<br />
Correction Factors On<br />
Returns a “1” if the correction factors are on, a “0” if they are off.<br />
Syntax<br />
Equivalent Softkey: CORRECT ON OFF .<br />
Related Comm<strong>and</strong>s: CAL.<br />
Example<br />
OUTPUT 718;"CORREK;"<br />
ENTER 718;A<br />
DISP A<br />
Query Response<br />
1”<br />
r off I<br />
0<br />
r<br />
function path only<br />
output<br />
+ t e r m i n a t i o n +<br />
CORREK Correction Factors On<br />
XCORREK<br />
Programming Comm<strong>and</strong>s 5-l 17
COUPLE<br />
Couple<br />
Selects direct-current (dc) coupling or alternating-current (ac) coupling.<br />
Syntax<br />
Equivalent Softkey: COUPLE AG DC .<br />
Model Required: <strong>HP</strong> 85943, <strong>HP</strong> 85953, or <strong>HP</strong> 85963.<br />
Preset State: AC<br />
Related Comm<strong>and</strong>s: Il?<br />
Example<br />
OUTPUT 718;"COUPLE DC;"<br />
Description<br />
XCOUPLE<br />
Caution Do not use dc coupling if there is any dc voltage at the spectrum analyzer<br />
input. Do not exceed the power stated on the spectrum analyzer input. See<br />
the specifications for the spectrum analyzer in the Calibration Guide for your<br />
spectrum analyzer for more information.<br />
If there is no dc voltage at the spectrum analyzer input, dc coupling is useful for observing low<br />
frequency signals at the spectrum analyzer input. Use ac coupling when there is dc voltage at<br />
the spectrum analyzer input (ac coupling blocks the dc voltage <strong>and</strong> allows only the ac voltage<br />
at the spectrum analyzer input).<br />
When used as a predefined variable, COUPLE returns a “0” if COUPLE has been set to DC. A<br />
“ 1 * if COUPLE has been set to AC.<br />
Query Response<br />
5-l 18 Programming Comm<strong>and</strong>s<br />
OCOUPLE
CRT<strong>HP</strong>OS<br />
Horizontal Position of CRT Display<br />
CRT<strong>HP</strong>OS Horizontal Position of CRT Display<br />
Specifies the horizontal position of the text <strong>and</strong> graticule on the spectrum analyzer’s display.<br />
Syntax<br />
h o r i z o n t a l<br />
r p o s i t i o n<br />
Item Description/Default Range<br />
Number Any valid integer number. 1 to 34.<br />
Equivalent Softkey: CRT HORZ POSITIOf .<br />
Default Value: 10.<br />
Step Increment: by 1.<br />
Related Comm<strong>and</strong>s: CR<strong>TV</strong>POS, SYNCMODE.<br />
Example<br />
OUTPUT 718;"CRT<strong>HP</strong>OS 15;"<br />
Description<br />
XCRT<strong>HP</strong>OS<br />
The CRT<strong>HP</strong>OS comm<strong>and</strong> specifies the horizontal position of the information on the spectrum<br />
analyzer’s display. Each CRT<strong>HP</strong>OS number represents four screen pixels. (The spectrum<br />
analyzer display is 512 screen pixels wide by 256 screen pixels high.) Execute CAL STORE to<br />
store the current CRT<strong>HP</strong>OS value as the default value of the horizontal position.<br />
Query Response<br />
Programming Comm<strong>and</strong>s 5-119
CR<strong>TV</strong>POS<br />
Vertical Position of CRT Display<br />
Specifies the vertical position of the text <strong>and</strong> graticule on the spectrum analyzer’s display.<br />
Syntax<br />
CR<strong>TV</strong>POS<br />
v e r t i c a l<br />
Item Description/Default Range<br />
Number Any valid integer number. 10 to 58.<br />
Equivalent Softkey: CRT VERT POSITION .<br />
Default Value: 48.<br />
Step Increment: by 1.<br />
Related Comm<strong>and</strong>s: CRT<strong>HP</strong>OS, SYNCMODE.<br />
Example<br />
OUTPUT 718;"CR<strong>TV</strong>POS 50;"<br />
Description<br />
The CR<strong>TV</strong>POS comm<strong>and</strong> specifies the vertical position of the information on the spectrum<br />
analyzer’s display. Each CR<strong>TV</strong>POS number represents four screen pixels. (The spectrum<br />
analyzer display is 512 screen pixels wide by 256 screen pixels high.) Execute CAL STORE to<br />
store the current CR<strong>TV</strong>POS value as the default value of the vertical position.<br />
Query Response<br />
5-120 Programming Comm<strong>and</strong>s
CTA<br />
Convert to Absolute Units<br />
CE4 Convert to Absolute Units<br />
Converts the source values from measurement units to the current absolute amplitude units<br />
<strong>and</strong> then stores the result in the destination.<br />
Syntax<br />
CTA<br />
7 d e s t i n a t i o n ,- Source ‘7<br />
Item Description/Default<br />
b n u m b e r<br />
User-defined variable A variable defined by VARDEF or ACTDEF comm<strong>and</strong>s.<br />
Number Any valid integer number.<br />
Predefined variable A comm<strong>and</strong> that acts as a variable. Refer to Table 5-I.<br />
Predefined function Function that return a value. Refer to lhble 5-l.<br />
b p r e d e f i n e d v a r i a b l e /<br />
- u s e r - d e f i n e d variable)<br />
b p r e d e f i n e d f u n c t i o n /<br />
Prerequisite Comm<strong>and</strong>s: ACTDEF or VARDEF when using a user-defined variable.<br />
Related Comm<strong>and</strong>s: AUNITS, LG, LN, RL.<br />
Example<br />
10 OUTPUT 718;"VARDEF C-ONLV,O;"<br />
20 OUTPUT 718*"LG."<br />
30 OUTPUT 718;"RL'-10DB;"<br />
40 OUTPUT 718;"CTA C-ONLV, 8000;"<br />
50 OUTPUT 718;"RL -2ODB;"<br />
60 OUTPUT 718;"CTA C_ONLV,8000;"<br />
70 OUTPUT 718;"C_ONLV?;"<br />
80 ENTER 718;A<br />
90 DISP A<br />
100 END<br />
/<br />
Range<br />
XCTA<br />
Any valid variable<br />
name.<br />
-32,768 to +32,767.<br />
Declares a variable called C-ONLY;<br />
Puts the spectrum analyzer in log mode.<br />
Changes the reference level.<br />
Stores -10 in C-ONLY<br />
Changes the refwence level.<br />
Stores -20 in C-ONLY?<br />
Programming Comm<strong>and</strong>s 5-121
CTA Convert to Absolute Units<br />
Description<br />
The result of the CTA comm<strong>and</strong> depends on the reference level, the current amplitude units,<br />
<strong>and</strong> the amplitude scale (log or linear).<br />
Measurement units are the internal binary data representation of measured results. The<br />
internal binary data representation is 16-bit amplitude values that are stored in traces. The<br />
values range from -32,768 to 32,767. The value of 8000 corresponds to an amplitude equal<br />
to the reference level. In log mode, each count represents 0.01 dBm. A signal 0.01 dBm<br />
above the reference level is at 8001, <strong>and</strong> a signal 1.0 dBm below the reference level is at 8000<br />
minus 100, or 7900. In linear mode, 8000 is the reference level <strong>and</strong> 0 is the 0 volt level. If the<br />
reference level is at 80 mV, each count would represent 0.080 divided by 8000 or 10 pV, but a<br />
reference level of 2.4 volts would represent 2.4 divided by 8000 or 300 PV per count.<br />
5-122 Programming Comm<strong>and</strong>s
CTM<br />
Convert to Measurement Units<br />
CTM Convert to Measurement Units<br />
Converts the source values to measurement units <strong>and</strong> places the result in the destination.<br />
Syntax<br />
CTM<br />
Item Description/Default<br />
User-defined variable A variable defined by VARDEF or ACTDEF comm<strong>and</strong>s<br />
,- scJurce-\<br />
user-defined variable<br />
Number A number expressed in integer, decimal, or exponential form.<br />
Prerequisite Comm<strong>and</strong>s: ACTDEF or VARDEF when using a user-defined variable.<br />
Related Comm<strong>and</strong>s: AUNITS, CTA, LG, LN, RL.<br />
Example<br />
OUTPUT 718;"VARDEF A,MPV,O;" Lleclares a variable called A-MPV<br />
OUTPUT 718*"LG*"<br />
Pats the spectrum analyzer in log m.ook<br />
OUTPUT 718;"RL'-1ODB;"<br />
Changes the referent level.<br />
OUTPUT 718;"CTM A-MPV,-10;" Stores 8000 in AXPI?<br />
OUTPUT 718;"DSPLY A,MPV,13.5;" DispZuysAiWI?<br />
Description<br />
R-tfe<br />
XCTM<br />
Any valid variable<br />
name.<br />
Real number range.<br />
The result of the CTM comm<strong>and</strong> depends on the reference level, the current amplitude units,<br />
<strong>and</strong> the amplitude scale (log or linear).<br />
Measurement units are the 16-bit amplitude values stored in traces. The values range from<br />
-32,768 to 32,767. The value of 8000 corresponds to an amplitude equal to the reference level.<br />
In log mode, each count represents 0.01 dBm. A signal 0.01 dBm above the reference level is at<br />
8001, <strong>and</strong> a signal 1.0 dBm below the reference level is at 8000 minus 100, or 7900. In linear<br />
mode, 8000 is the reference level <strong>and</strong> 0 is the 0 volt level. If the reference level is at 80 mV,<br />
each count would represent 0.080 divided by 8000 or 10 pV, but a reference level of 2.4 volts<br />
would represent 2.4 divided by 8000 or 300 PV per count.<br />
Programming Comm<strong>and</strong>s 5.123
DA<br />
Display Address<br />
Accesses the current address of the display list.<br />
Syntax<br />
display<br />
Item Description/Default<br />
Number Any integer number.<br />
Preset State: 0.<br />
Related Comm<strong>and</strong>s: DSPLY, GR, LB, PA, PD, PR, PU, TEXT.<br />
Example<br />
Range<br />
0 to 16383.<br />
This example allows you to display a message on the spectrum analyzer display, blank the<br />
message, <strong>and</strong> then display another message on the spectrum analyzer display.<br />
OUTPUT 718;"VARDEF D-ADDRESS,O;"<br />
OUTPUT 718;"CLRDSP;"<br />
OUTPUT 718;"PUPA 100,180;TEXT %Measurement%;"<br />
OUTPUT 718;"MOV D,ADDRESS,DA;"<br />
OUTPUT 718;"PUPA 100,lOO;TEXT ISignal found%;"<br />
OUTPUT 718;"PUPA 100,lOO;TEXT %<br />
5.124 Programming Comm<strong>and</strong>s<br />
DQines a variable called D-ADDRESS.<br />
Erases the display list <strong>and</strong><br />
clears all text <strong>and</strong> graphics<br />
from the spectrum analyzer<br />
display.<br />
Displays “Measurement” on<br />
the spectrum analyzer display.<br />
The text is also added<br />
to the display list.<br />
Saves the value of the display<br />
address by moving the display<br />
address into D-ADDRESS.<br />
Displays text on the spectrum<br />
analyzer display. The text<br />
is also saved in the display<br />
list, <strong>and</strong> the display address<br />
is increased. (The display<br />
address is increased proportionally<br />
to the length of the<br />
displayed text.)<br />
You can add code for continuing<br />
the measurement here.<br />
%; " Blanks the message “Signal<br />
found” on the analyzer screen<br />
<strong>and</strong> adds the blank spaces to<br />
the display list.
OUTPUT 718;"MOV DA,D,ADDRESS;"<br />
OUTPUT 718;"PUPA 100,120;TEXT %Done%;"<br />
Description<br />
DA Display Address<br />
Restores the display address.<br />
LXspla ys the meSSage “‘Done”<br />
on the analyzer screen, <strong>and</strong><br />
replaces the text ‘Signalfound”<br />
<strong>and</strong> the blank spaces that were<br />
in the display list. The text<br />
‘Measurement77 remains on<br />
the spectrum analyzer display<br />
<strong>and</strong> in the display list.<br />
The DA comm<strong>and</strong> allows you to access the current address of the display list. The display list<br />
is a buffer that contains all of the text <strong>and</strong> graphics that have been displayed on the spectrum<br />
analyzer screen with the DSPLY, GR, LB, or TEXT comm<strong>and</strong>s.<br />
How the display list works: Every time you use a programming comm<strong>and</strong> to display text<br />
or graphics on the analyzer display, the text or graphics is also entered into the display list.<br />
While you can change or erase what is displayed on the analyzer screen, the list for screen<br />
graphics accumulates all of the text <strong>and</strong> graphics. For example, if you execute the following<br />
programming lines:<br />
OUTPUT 718;"PUPA 100,lOO;TEXT %Signal found%;"<br />
OUTPUT 718;"PUPA 100,lOO;TEXT % %; "<br />
OUTPUT 718;"PUPA 100,lOO;TEXT %Done%;"<br />
the text “Signal found” would be displayed on the analyzer screen, <strong>and</strong> then be erased by the<br />
blank spaces, <strong>and</strong> then “Done” would be displayed. The display list would save the text “Signal<br />
found, ” the blank spaces, <strong>and</strong> the text “Done, ” in separate (<strong>and</strong> sequential) locations in the<br />
display list.<br />
The display list is important because the contents of the display list are used to restore the<br />
screen text when the annotation or graticule is turned off <strong>and</strong> then turned back on, or when<br />
the screen display is plotted. When the screen text is restored on the spectrum analyzer<br />
display, or the screen display is plotted, the entire display list is used. Because the entire<br />
display list is used, there can be some text “flashing” on the spectrum analyzer display or the<br />
plot can contain unwanted text. The DA comm<strong>and</strong> can be used to avoid this situation.<br />
What the DA comm<strong>and</strong> does: The DA comm<strong>and</strong> allows you to save <strong>and</strong> then restore the<br />
current address of the display list, thus controlling where text is written in the display list. For<br />
example, if you want your program to display the messages “Signal found,” <strong>and</strong> “Done,” <strong>and</strong><br />
you want only the messages that are currently displayed on the spectrum analyzer screen to be<br />
stored in the display list, you would do the following:<br />
1. Save the display address in a variable.<br />
2. Execute the comm<strong>and</strong>s that display the first message on the spectrum analyzer display.<br />
When you want to change the message, you would do the following:<br />
1. Execute the comm<strong>and</strong>s that put blank spaces over the message (to clear the message from<br />
the analyzer display). You do not need to use blank spaces the clear the previous message<br />
if the number of characters in the new message is equal to or greater than the original<br />
message.<br />
2. Copy the display address from the variable back into DA (this recalls the previous display<br />
address).<br />
3. Execute the comm<strong>and</strong>s that display the new message on the spectrum analyzer display.<br />
Programming Comm<strong>and</strong>s 5-125
DA Display Address<br />
Note Assigning r<strong>and</strong>om values to the display address can have undesirable effects.<br />
Restrictions: You cannot alter earlier entries to the display list without rewriting all<br />
subsequent entries in the display list. For example, the display list, with three messages in it,<br />
could be represented as follows:<br />
Display List Contents: <br />
Display Address: T T T<br />
Because the display address is proportional to the length of the text, you could not change the<br />
second message without affecting the display address of the third message. In this case you<br />
should rewrite both the second <strong>and</strong> third message.<br />
Query Response<br />
5-l 26 Programming Comm<strong>and</strong>s<br />
display<br />
r address -,<br />
output<br />
termination +<br />
PDA
DATEMODE<br />
Date Mode<br />
DATEMODE Date Mode<br />
Allows you to set the format for displaying the real-time clock in either the month, day, year<br />
format or the day, month, year format.<br />
Syntax<br />
Equivalent Softkey: DATENODE MDY DMY .<br />
Example 1<br />
XDATEMODE<br />
OUTPUT 718;"DATEMODE DMY;" Sets the date mode to day, month, yearformat.<br />
OUTPUT 718;"DATEMODE?;" Queries the format of the display of the real-time clock.<br />
ENTER 718;A$<br />
DISP A$<br />
Example 2<br />
OUTPUT 718;"VARDEF T-EMP,O;"<br />
OUTPUT 718;"DATEMODE DMY;"<br />
OUTPUT 718;"MOV T,EMP,DATEMODE?;"<br />
OUTPUT 718;"T,EMP?;"<br />
ENTER 718;A<br />
DISP A<br />
Description<br />
Creates a variable.<br />
Sets the date mode to day, month, year format.<br />
Queries the format of the display of the real-time<br />
clock as a preo!@ned variable.<br />
Gets the result.<br />
When used as a predefined variable, DATEMODE returns a “0” if DATEMODE has been set to<br />
MDY. A U 1 n if DATEMODE has been set to DMY. See example 2.<br />
Query Response<br />
output<br />
’ termfnation +<br />
ODATEMODE<br />
Programming Comm<strong>and</strong>s 5-127
DEMOD<br />
Demodulation<br />
Turns the demodulator on or off, <strong>and</strong> selects between AM, FM, or quasi-peak demodulation,<br />
Syntax<br />
DEMOD<br />
Equivalent Softkey: DEKOD ON OFF is similar.<br />
Option Required: Option 102, 103, or 301.<br />
Related Comm<strong>and</strong>s: DET, FMGAIN, HAVE, MKPAUSE, SP, SPEAKER, SQLCH.<br />
Restrictions: Not available with Analog+ display mode. See “ANLGPLUS” for more<br />
information.<br />
Example<br />
This example demonstrates FM demodulation in a span greater than zero.<br />
10 OUTPUT 718;"IP;FA SOMHZ;" Sets start frequencjj.<br />
20 OUTPUT 718;"FB 11OMHZ;" Sets stop frequency.<br />
30 OUTPUT 718;"TS;MKPK HI;MKCF;" Places marker on the highest peak <strong>and</strong> brings the<br />
peak to center frequency.<br />
40 OUTPUT 718;"DEMOD 0N;DEMOD FM;" Turns on FM demodulation.<br />
50 OUTPUT 718;"MKPAUSE 500MS;” Turn on marker pause. The detector switches<br />
automatically to the FMV detector during the<br />
dwell time.<br />
60 END<br />
Description<br />
Execute “DEMOD ON;” to turn on the demodulator. “DEMOD AM;“, “DEMOD FM;“, or<br />
“DEMOD QPD;” selects the demodulation mode, but does not turn on the demodulator.<br />
For AM or FM demodulation in nonzero frequency spans, use MKPAUSE to set the dwell time of<br />
the marker.<br />
Quasi-peak demodulation (QPD) is available with Option 103. See the Option 103 Manual<br />
Supplement for more information about operating the quasi-peak detector remotely.<br />
5-l 28 Programming Comm<strong>and</strong>s
DET<br />
Detection Mode<br />
Selects the spectrum analyzer detection mode.<br />
Syntax<br />
Equivalent Softkey: DETECTOR PK SP NG or DETECTOR SMP PK.<br />
Preset State: DET POS.<br />
Related Comm<strong>and</strong>s: DEMOD, MEANTH, <strong>TV</strong>.<br />
Example<br />
10 OUTPUT 718;"IP;"<br />
20 OUTPUT 718;"SNGLS;"<br />
30 OUTPUT 718;"DET POS;TS;"<br />
40 OUTPUT 718;"VIEW TRA;"<br />
50 OUTPUT 718;"DET SMP;"<br />
60 OUTPUT 718;"CLRW TRB;TS;"<br />
70 OUTPUT 718;"VIEW TRB;"<br />
80 OUTPUT 718;"AVG TRA,TRB,2;"<br />
90 OUTPUT 718;"BLANK TRB;"<br />
100 END<br />
Description<br />
DET Detection Mode<br />
XDET<br />
Initializes the spectrum analy.zer<br />
Activates single-sweep mode.<br />
Activates the positive-peak detection of trace A.<br />
Stores results in trace A.<br />
Activates sample detection for trace I3<br />
Measures with trace B<br />
Stores results in trace B<br />
Averages trace A <strong>and</strong> B with a ratio of 2, <strong>and</strong> stores<br />
the results in trace A.<br />
Blanks trace rj leaving on1 y averaged results on screen.<br />
The DET comm<strong>and</strong> selects the type of spectrum analyzer detection (positive-peak, sample, or<br />
negative) <strong>and</strong> accesses service-diagnostic detection functions.<br />
POS enables positive-peak detection, which displays the maximum video signal detected<br />
over a number of instantaneous samples for a particular frequency.<br />
SMP enables sample detection, which uses the instantaneous video signal value. Video<br />
averaging <strong>and</strong> noise-level markers, when activated, activate sample detection<br />
automatically.<br />
NEG enables negative peak detection in sweep times of less than or equal to 200 ms. The<br />
negative peak detector is available with Option 101 or Option 301 only.<br />
Programming Comm<strong>and</strong>s 5-128
DET Detection Mode<br />
When used as a predefined variable, DET returns a number. The number that is returned<br />
corresponds to the DET parameter as shown in the following table.<br />
Query Response<br />
5-130 Programming Comm<strong>and</strong>s<br />
SMP 0<br />
POS 1<br />
NEG 49
DISPOSE<br />
Dispose<br />
DISPOSE Dispose<br />
Frees spectrum analyzer memory that was previously allocated for user-defined oper<strong>and</strong>s.<br />
Syntax<br />
Item Description/Default<br />
Jser-defined trace A trace defined by the TRDEF comm<strong>and</strong>.<br />
Jser-defined variable A variable defined by the VARDEF or ACTDEF comm<strong>and</strong>s.<br />
User-defined function A subroutine defined by the FUNCDEF comm<strong>and</strong>.<br />
Number Any valid softkey number.<br />
Range<br />
xdispose<br />
Any valid trace name.<br />
Any valid variable<br />
name.<br />
Any valid function<br />
name.<br />
1 to 6, 601 to 1200.<br />
Equivalent Softkey: DISPOSE ALL <strong>and</strong> DISPOSE USER REM are equivalent.<br />
Prerequisite Comm<strong>and</strong>s: TRDEF when using a user-defined trace. VARDEF or ACTDEF when<br />
using a user-defined variable.<br />
Related Comm<strong>and</strong>s: ERASE, KEYCMD, KEYDEF, KEYLBL, LIMIDEL, ONCYCLE, ONMKRU,<br />
ONPWRUP, ONDELAY, ONEOS, ONMKR, ONSRQ, ONSWP, ONTIME, TRMATH.<br />
Programming Comm<strong>and</strong>s 5-131
DISPOSE Dispose<br />
Example<br />
OUTPUT 718;"VARDEF T-EMP,lO;" D@.e.s a vam’able for use in a program. When the<br />
variable is no longer needed, it can be deleted using the<br />
DISPOSE comm<strong>and</strong><br />
OUTPUT 718;"DISPOSE T-EMP;" Deletes T-EMP from spectrum analyzer memory.<br />
Description<br />
Using the ONCYCLE, ONDELAY, ONEOS, ONMKR, ONMKRU, ONSRQ, ONSWP, ONTIME,<br />
TRMATH, TRDEF, VARDEF, FUNCDEF, ACTDEF, KEYDEF, KEYENH, or KEYCMD programming<br />
comm<strong>and</strong>s create a trace, variable, function, softkey, or “on-event” function that remains in<br />
the spectrum analyzer’s memory until you delete it with the DISPOSE comm<strong>and</strong>, or execute<br />
the ERASE comm<strong>and</strong>. With the DISPOSE comm<strong>and</strong>, you can select which item is to be deleted<br />
(for example, executing “DISPOSE ONMKR; ” would delete any ONMKR functions that you have<br />
created). Or, if you execute DISPOSE ALL, all of the traces, variables, functions, softkeys,<br />
<strong>and</strong> “on-event” functions that you have created will be deleted from spectrum analyzer<br />
memory. Executing “DISPOSE ALL;” or the ERASE comm<strong>and</strong> frees all available spectrum<br />
analyzer memory (except the state registers <strong>and</strong> predefined traces), to make the total available<br />
user-allotted memory the maximum size.<br />
5-132 Programming Comm<strong>and</strong>s
DIV<br />
Divide<br />
Divides source 1 by source 2 <strong>and</strong> places the result in the destination.<br />
Syntax<br />
Item<br />
User-defined trace<br />
User-defined variable<br />
DIV<br />
- dest inot ion<br />
u s e r - d e f i n e d t r a c e I<br />
L trace range /<br />
% p r e d e f i n e d v a r i a b l e /<br />
user-defined variable/<br />
Predeflned variable A comm<strong>and</strong> that acts as a variable. Refer to Table 5-l.<br />
Predefined function Function that returns a value. Refer to Table 5-l.<br />
Trace range A segment of trace A, trace B, trace C, or a user-defined trace.<br />
Number Any real or integer number.<br />
Description/Default<br />
A trace defined by the TRDEF comm<strong>and</strong>.<br />
A variable defined by VARDEF or ACTDEF comm<strong>and</strong>s.<br />
DIV Divide<br />
Range<br />
Any valid trace name.<br />
Any valid variable<br />
name.<br />
Real number range.<br />
Prerequisite Comm<strong>and</strong>s: TRDEF when using a user-defined trace. ACTDEF or VARDEF when<br />
using a user-defined variable. TS when using trace data.<br />
Related Comm<strong>and</strong>s: MPY, SNGLS, TS.<br />
Programming Comm<strong>and</strong>s 5-133
DIV Divide<br />
Example<br />
OUTPUT 718*"IP-"<br />
OUTPUT 718;"SNk;"<br />
OUTPUT 718."TS-"<br />
OUTPUT 718;& TRB,TRA,2;"<br />
OUTPUT 718;"VIEW TRB;"<br />
Description<br />
Initializes the spectrum analyzer<br />
Activates single-sweep mode.<br />
Updates trace information.<br />
Divides trace A &q two <strong>and</strong> places it in trace B<br />
D&plugs the result.<br />
Integer values are used when a trace is either the destination or one of the sources. If trace<br />
data is used both as the source <strong>and</strong> the destination, the DIV function is done with 32-bit<br />
arithmetic on 16-bit integer data. If a user-defined variable or predefined variable is used as<br />
either the source or the destination, the DIV function is done in floating-point format. If a real<br />
number is used as a source, but the destination is an integer value, the result is truncated.<br />
If a trace is used as a source, be sure the trace contains a complete sweep of measurement<br />
information before executing DIV.<br />
When the source is longer than the destination, the source is truncated to fit. When the source<br />
is shorter than the destination, the last element is repeated to fill the destination.<br />
The results of the DIV function are invalid if source 2 is equal to zero.<br />
5-134 Programming Comm<strong>and</strong>s
DL<br />
Display Line<br />
DL Display Line<br />
Defines the level of the display line in the active amplitude units <strong>and</strong> displays the display line<br />
on the spectrum analyzer screen.<br />
Syntax<br />
Item Description/Default Range<br />
Number Any real or integer number. Default units are dBm. Dependent on the<br />
reference level.<br />
Equivalent Softkey: l3SP LINE OM OFF .<br />
Preset State: DL OFF<br />
Step Increment: 1 major division.<br />
Related Comm<strong>and</strong>s: AUNITS, AUTO, LG, LN, NRL, RL, ROFFSET, TH.<br />
Example<br />
OUTPUT 718;"AUNITS DBM;" Changes the active amplitude units to dBm.<br />
OUTPUT 718;"DL ON;" Turns on the displa?/ line.<br />
OUTPUT 718;"DL -5DM;" Changes display line to -5 dBm.<br />
Description<br />
Activating video trigger mode activates the display line. The AUTO comm<strong>and</strong> <strong>and</strong> “DL OFF; ”<br />
turn off the display line. See “AUNITS” for more information on changing the active amplitude<br />
units.<br />
Programming Comm<strong>and</strong>s 5-135
DL Display Line<br />
Query Response<br />
5-136 Programming Comm<strong>and</strong>s
DN<br />
Down<br />
Reduces the active function by the applicable step size.<br />
Syntax<br />
( DN<br />
Related Comm<strong>and</strong>s: See the list of active functions listed in the description for DN.<br />
Example<br />
OUTPUT 718;“SS 1MHZ;CF 1GHZ;DN;” Setscenterfrequency to 1 GHz.<br />
OUTPUT 718;“SP 40MHZ;MKPK;DN;” Decreases the frequency span.<br />
Description<br />
Before executing DN, be sure that the function to be decreased is the active function. For<br />
example, the second line of the programming example decreases the span, because marker<br />
peak (MKPK) is not an active function.<br />
DN Down<br />
The active functions are ACPBW, ACPSP, AT, CF, CRT<strong>HP</strong>OS, CR<strong>TV</strong>POS, DL, DOTDENS, FA,<br />
FB, FMGAIN, GD, GL, LG, MKA, MKD, MKFCR, MKN, MKPAUSE, MKPX, ML, NDB, NRL, RB,<br />
RCLS, ROFFSET, RL, RLPOS, SAVES, SAVRCLN, SETDATE, SETTIME, SP, SQLCH, SRCALC,<br />
SRCAT, SRCPOFS, SRCPSWP, SRCPWR, SRCTK, SS, ST, TH, <strong>TV</strong>LINE, VB, VBR, <strong>and</strong> user-defined<br />
active function specified by the ACTDEF comm<strong>and</strong>.<br />
XDN<br />
Programming Comm<strong>and</strong>s 5-137
DONE<br />
Done<br />
Allows you to determine when the spectrum analyzer has separated the spectrum analyzer<br />
comm<strong>and</strong>s <strong>and</strong> has started to execute all comm<strong>and</strong>s prior to <strong>and</strong> including DONE. The<br />
spectrum analyzer returns a value of “1” when all comm<strong>and</strong>s in a comm<strong>and</strong> string entered<br />
before DONE have been started.<br />
Syntax<br />
Related Comm<strong>and</strong>s: TS.<br />
Example<br />
DONE<br />
f u n c t i o n p a t h o n l y<br />
OUTPUT 718;"IP;SNGLS;CF lGHZ;SP 1GHZ;DONE;" Because TS does not precede the DONE<br />
comm<strong>and</strong> in this line, the center frequenxy<br />
<strong>and</strong> span values are set before<br />
DONE returns a “1. ” Functions coupled<br />
to Sl: such as R& have not been<br />
changed, <strong>and</strong> there is no trace data associated<br />
with the new frequency settings.<br />
ENTER 718;Done<br />
DISP Done<br />
Example 2<br />
OUTPUT 718;"IP;SNGLS;CF lGHZ;SP 1GHZ;TS;DONE;" Because the take sweep (TS) must<br />
be completed before the DONE comm<strong>and</strong><br />
is executed, the autocoupled<br />
functions <strong>and</strong> trace data have been<br />
changed before the DONE comm<strong>and</strong><br />
is executed.<br />
ENTER 718;Done Stores 1 in computer variable, called<br />
DorE<br />
DISP Done<br />
5-138 Programming Comm<strong>and</strong>s<br />
XDONE
Description<br />
DONE Done<br />
As shown by the example, if a take sweep (TS) precedes the DONE comm<strong>and</strong>, DONE is<br />
executed after all the preceding comm<strong>and</strong>s have been completed. Use a take sweep (TS) to<br />
ensure all previous comm<strong>and</strong>s have completed before DONE returns a “ 1. ”<br />
Query Response<br />
Programming Comm<strong>and</strong>s 5.139
DOTDENS<br />
Dot Density<br />
Sets the dot density value in the Analog+ display mode.<br />
Syntax<br />
Item Description/Default Range<br />
Number Any valid integer number. 1 to 40.<br />
Equivalent Softkey: BNfiOG+ ON OFF .<br />
Option Required: Option 101 or 301.<br />
Preset State: 15.<br />
Related Comm<strong>and</strong>s: ANLGPLUS.<br />
Example<br />
OUTPUT 718;"ANLGPLUS ON;" Turns on the Analog+ display mode.<br />
OUTPUT 718;"DOTDENS 40;" Sets the dot density to 40.<br />
Description<br />
d o t<br />
XDOTDENS<br />
The dot density value can be set from 1 to 40 dots per trace element. This comm<strong>and</strong> is specific<br />
to the Analog+ display mode; see “ANLGPLUS” for more information about the Analog+<br />
display mode.<br />
Query Response<br />
5.140 Programming Comm<strong>and</strong>s<br />
output<br />
termination -
DRAWBOX<br />
Draw Box<br />
Draws a rectangular box on the spectrum analyzer display.<br />
Syntax<br />
DRAWBOX<br />
‘.w....<br />
Related Comm<strong>and</strong>s: CLRDSP.<br />
Example<br />
DRAWBOX Draw Box<br />
XDRAWBOX<br />
For xl or x2, -40 to 471.<br />
For yl or y2, -22 to 233.<br />
For x thickness, 1 to x2 - xl, for<br />
y thickness, 1 to y2 - yl.<br />
The following programming line results in the spectrum analyzer display shown in Figure 5-3.<br />
OUTPUT 718;"DRAWBOX 1,1,200,200,10,5;" Draws a box from 1,1 to 200,200. The box<br />
has horizontal boro!ers that are 10 display<br />
units wide, <strong>and</strong> a vertical borders that are<br />
5 display units wide.<br />
47<br />
REF .0 dBm ATTEN 1 0 dB<br />
PEAK<br />
LOG<br />
%<br />
WA s<br />
SC F<br />
COR<br />
...................................... . ........<br />
...............................................<br />
...................................... . ........<br />
...............................................<br />
CENT 3.250 GHz SPAN 6.500 GHi<br />
S BW 3.0 MHz VBW 1 MHz SWP 130 msec<br />
Figure 5-3. Using the DRAWBOX Comm<strong>and</strong><br />
SPECTRUM<br />
ANALYZER<br />
More<br />
1 of 3<br />
RT<br />
Programming Comm<strong>and</strong>s 5-141
DRAWBOX Draw Box<br />
Description<br />
You must specify the rectangular area <strong>and</strong> the thickness of the horizontal <strong>and</strong> vertical borders<br />
of the box.<br />
Specifying the rectangular area: You specify the rectangular area by specifying the<br />
coordinates of the lower left corner (xl, yl), <strong>and</strong> the upper right corner (x2, y2) of the<br />
rectangle in display units. If you select a value of x2 that is equal to xl, the result will be a<br />
vertical line instead of a box, <strong>and</strong> the border will be on the right side of the line. If y2 is equal<br />
to yl, a horizontal line will be drawn instead of a box, <strong>and</strong> the border will be below the line.<br />
Specifying the border thickness: The value of x thickness allows you to specify the width<br />
of the horizontal borders, <strong>and</strong> the value of y thickness allows you to specify the width of the<br />
vertical borders. If you select a thickness value that is equal to or greater than half of x2<br />
minus xl or greater than half of y2 minus yl, the result will be a solid box.<br />
DRAWBOX affects only the spectrum analyzer display <strong>and</strong> printing of the spectrum analyzer<br />
display. DRAWBOX does not change the plot of the spectrum analyzer display; the rectangular<br />
box drawn by DRAWBOX will not be plotted. The rectangular box can be erased by executing<br />
CLRDSP.<br />
5142 Programming Comm<strong>and</strong>s
DSPLY<br />
Display<br />
Displays the value of a variable on the spectrum analyzer screen.<br />
Syntax<br />
predefined v a r i a b l e /<br />
*user-defined vorioble)<br />
% p r e d e f i n e d functton /<br />
b trace element /<br />
DSPIX Display<br />
field decimal<br />
“Field width” specifies the number of digits displayed, including sign <strong>and</strong> decimal point. (Places<br />
to the right of the decimal point are limited by the decimal places field.) For example, the<br />
number 123.45 has a field width of 7 (even though the sign is not displayed) <strong>and</strong> 2 decimal<br />
places.<br />
Number<br />
Item<br />
Number (field width or<br />
decimal places)<br />
User-defined variable<br />
Any real or integer number.<br />
Any integer number.<br />
Description/Default<br />
A variable defined by VARDEF or ACTDEF comm<strong>and</strong>s.<br />
Predeflned variable A comm<strong>and</strong> that acts as a variable. Refer to ‘lhble 5-I.<br />
PredeEned function Function that returns a value. Refer to Table 5-1.<br />
Trace element An element of trace A. trace B. trace C. or a user-defined trace.<br />
Prerequisite Comm<strong>and</strong>s: ACTDEF or VARDEF when using a user-defined variable.<br />
Related Comm<strong>and</strong>s: DA, PA, PD, PR, PU.<br />
Range<br />
XDSPLY<br />
Real number range.<br />
Integer number range.<br />
Any valid variable<br />
name.<br />
Programming Comm<strong>and</strong>s 5-143
DSPLY Display<br />
Example<br />
OUTPUT 718;"CF BOOMHZ;” Sets center frequencz/ to 300 MHz<br />
OUTPUT 718;"PU;PA 50,lSO;DSPLY CF, Center frequency is displayed to three oT.ecirnal<br />
13.3;" places in a field width of 13.<br />
Description<br />
The DSPLY comm<strong>and</strong> displays the value of a variable anywhere on the spectrum analyzer<br />
display. Use the PU, PR, <strong>and</strong> PA comm<strong>and</strong>s to position the variable on the screen. (You do not<br />
have to specify the PU or PD comm<strong>and</strong>s; DSPLY can display the data independent of PU or PD<br />
comm<strong>and</strong>s.)<br />
The coordinates given relate to the lower left corner of the first character. For example,<br />
“PU;PA 50,lOO;DSPLY CF,13.3;” would display the center frequency with the first digit to<br />
the right <strong>and</strong> above the point represented by 50, 100. (Position the pen before executing the<br />
DSPLY comm<strong>and</strong>.)<br />
If the number to be displayed is larger than the field width, the number is displayed in<br />
scientific notation.<br />
The DSPLY comm<strong>and</strong> also places the value of the variable in the display list. See “DA” for<br />
more information about the display list.<br />
5-144 Programming Comm<strong>and</strong>s
DT<br />
Define Terminator<br />
DT Define Terminator<br />
Defines any character as a label terminator. The label terminator is only used with the LB<br />
comm<strong>and</strong>.<br />
Syntax<br />
character<br />
Item Description/Default Rtae<br />
Character Any valid character.<br />
Related Comm<strong>and</strong>s: LB.<br />
Example<br />
OUTPUT 718; “DTQ; ”<br />
OUTPUT 718; “CF GOOMHZ; ”<br />
OUTPUT 718;“PU;PA 100,lOO;LB CAL OUT 2ND HARMONICORL ODM;”<br />
Description<br />
XDT<br />
Lk@ws the “@” symbol<br />
as the text terminator:<br />
Sets center frequency to<br />
600 MHz.<br />
Displuys the label “CAL,<br />
OUT 2ND HARMONIC”<br />
on the spectrum analyzer<br />
screen then executes the<br />
RL comm<strong>and</strong>.<br />
The DT comm<strong>and</strong> is used by the LB comm<strong>and</strong> to separate text from spectrum analyzer<br />
comm<strong>and</strong>s.<br />
Programming Comm<strong>and</strong>s 5-145
EE<br />
Enable Entry<br />
Sends the controller the values entered on the spectrum analyzer numeric keypad by the<br />
operator.<br />
Syntax<br />
Related Comm<strong>and</strong>s: RQS.<br />
Example<br />
<<br />
EE<br />
The following example works with both RS-232 <strong>and</strong> <strong>HP</strong>-IB interfaces; however, the address<br />
(718) must be changed for RS-232 operation.<br />
The program polls the spectrum analyzer for its status byte.<br />
10 PRINTER IS 1 Outputs to the computer screen.<br />
20 DISP "Enter new value with spectrum analyzer<br />
number pad <strong>and</strong> terminate with units key"<br />
30 OUTPUT 718;"RQS 2;CF EE;"<br />
40 REPEAT<br />
50 OUTPUT 718;"STB?;"<br />
60 ENTER 718;A<br />
70 UNTIL BIT(A,l)=l<br />
80 DISP<br />
90 OUTPUT 718;"?;"<br />
100 ENTER 718;New,value<br />
110 PRINT "You entered the value of 'I;<br />
New-value<br />
120 OUTPUT 718;"HD;"<br />
130 END<br />
5-146 Programming Comm<strong>and</strong>s<br />
XEE<br />
Sets up SRQ mask, then uses the<br />
enable entry mode.<br />
Rd?s the spectrum analyzer until<br />
entry is complete.<br />
Asks the spectrum analyzer for<br />
status byte.<br />
Does REPEAT UNTIL loop until<br />
user presses a terminating key.<br />
Asks for ermy.<br />
Displays value.<br />
Turns oflenable entry mode
Description<br />
Unlike enter parameter (EP), EE does not terminate the entry mode when the operator<br />
completes an entry.<br />
The EE comm<strong>and</strong> is used generally in the following sequence of events:<br />
EE Enable Entry<br />
1. A program loop prevents the controller from using the entered value until the operator<br />
signals that the entry is complete.<br />
2. The operator makes a data entry, which is stored in the spectrum analyzer internal data<br />
register.<br />
3. The operator indicates completion of the entry.<br />
4. The controller reads the value of the entry <strong>and</strong> continues to the next program step.<br />
Programming Comm<strong>and</strong>s 5-147
EK<br />
Enable Knob<br />
Allows data entry with the front-panel knob when the spectrum analyzer is under remote<br />
control.<br />
Syntax<br />
Example<br />
1 PRINTER IS 1<br />
10 OUTPUT 718;"MKN;EK;"<br />
( EK<br />
20 PRINT "USE KNOB TO PLACE MARKER"<br />
30 PRINT "PRESS CONTINUE WHEN DONE"<br />
40 PAUSE<br />
100 END<br />
Description<br />
Activates a marker <strong>and</strong> enables the front-panel<br />
knob.<br />
While the program pauses, the operator positions<br />
a marker on a signal that needs further<br />
analysis.<br />
Prompts user<br />
The operator positions a marker on a signal that<br />
needs further analysis.<br />
Insert analysis program here.<br />
With the EK comm<strong>and</strong>, the knob is functional, but other front-panel functions remain<br />
inoperative. Moving the knob changes the active function. If no function is active, moving the<br />
knob has no effect.<br />
5-148 Programming Comm<strong>and</strong>s<br />
XEK
ENTER<br />
Enter From <strong>HP</strong>-IB<br />
Allows the spectrum analyzer to receive data from other devices on the <strong>HP</strong>-IB.<br />
Syntax<br />
Number<br />
ENTER<br />
Item<br />
User-defined variable<br />
- <strong>HP</strong>-IB address<br />
predefined variable /<br />
user-defined variable/<br />
Any valid integer number.<br />
Description/Default<br />
A variable defined by VARDEF or ACTDEF comm<strong>and</strong>s.<br />
Predefined variable A comm<strong>and</strong> that acts as a variable. Refer to Table 5-l.<br />
Predefined function Function that returns a value. Refer to Table 5-l.<br />
f<br />
ENTER Enter From <strong>HP</strong>-IB<br />
format<br />
/ \<br />
Trace element An element of trace A, trace B, trace C, or a user-defined trace.<br />
R-fle<br />
oto 30.<br />
Prerequisite Comm<strong>and</strong>s: ACTDEF or VARDEF when using a user-defined variable.<br />
Related Comm<strong>and</strong>s: FUNCDEF, OUTPUT, REL<strong>HP</strong>IB.<br />
Required Options: Option 041.<br />
Example<br />
Any valid variable<br />
name.<br />
Note The plotter is at address 5 <strong>and</strong> the spectrum analyzer is at address 18. (The<br />
program is only valid for <strong>HP</strong> 9000 <strong>Series</strong> 200 <strong>and</strong> 300 computers.)<br />
The example uses the spectrum analyzer to send the ASCII code for OP; (output parameter)<br />
to the plotter. The ENTER comm<strong>and</strong> is used to receive the coordinates from the plotter.<br />
Program lines 110 to 140 display the coordinates on the spectrum analyzer screen. Softkey<br />
1 is programmed to display the plotter coordinates. Softkey 1 can be accessed by pressing<br />
(MEAS/USERj, User Menus .<br />
Programming Comm<strong>and</strong>s 5-149
ENTER Enter From <strong>HP</strong>-IB<br />
Note Disconnect the computer before pressing softkey 1 or execute ABORT 7,<br />
LOCAL 7 from the computer. To execute the P-OP function, the spectrum<br />
analyzer must be the only controller on the <strong>HP</strong>-IB.<br />
10 OUTPUT 718;"VARDEF P-ONEX,l,VARDEF P-ONEY,l;"<br />
20 OUTPUT 718;"VARDEF PmTWOX,l;VARDEF PmTWOY,l;"<br />
30 OUTPUT 718;"FUNCDEF P-OP,Q";<br />
40 OUTPUT 718;"OUTPUT 5,B,79;";<br />
50 OUTPUT 718;"OUTPUT 5,B,80;";<br />
60 OUTPUT 718;"OUTPUT 5,B,59;";<br />
70 OUTPUT 718;"ENTER 5,K,P,ONEX;";<br />
80 OUTPUT 718;"ENTER 5,K,P,ONEY;";<br />
90 OUTPUT 718;"ENTER S,K,P-TWOX;";<br />
100 OUTPUT 718;"ENTER 5,K,P_TWOY;";<br />
110 OUTPUT 718;"PU;PA 200,190;DSPLY P-ONEX,l0.2;";<br />
120 OUTPUT 718;"PU;PA 200,180;DSPLY P-ONEY,l0.2;";<br />
130 OUTPUT 718;"PU;PA 200,170;DSPLY P,TWOX,l0.2;";<br />
140 OUTPUT 718;"PU;PA 200,160;DSPLY P,TWOY,l0.2;";<br />
150 OUTPUT 718;"REL<strong>HP</strong>IB;";<br />
160 OUTPUT 718;"@;"<br />
170 OUTPUT 718;"KEYDEF l,P,OP,!DSP OP;!;"<br />
180 END<br />
Description<br />
Declares the variables used to<br />
hold the plotter coordinates.<br />
Declares the variables used to<br />
hold the plotter- coordinates.<br />
D&nes a function called P-OI?<br />
Sends ASCII co& for “0”.<br />
Sends ASCII code for “P”.<br />
Seno!s ASCII code for “; “.<br />
Gets plotter coordinates from<br />
plotter:<br />
Gets Y coordinutefrom plot&x<br />
Gets Xcoordinutefrom plotter:<br />
Gets Y coordinate from plotter<br />
Displays coordinate on spectrum<br />
analyzer screen.<br />
Displays coordinate on spectrum<br />
analyzer screen.<br />
Displays coordinate on spectrum<br />
anulyz47.r screen.<br />
Displays coordinate on spectrum<br />
analyzer screen.<br />
Releases spectrum analyzer control<br />
of the <strong>HP</strong>-IR<br />
Marks the end of the function,<br />
P-OR<br />
Assigns the P-OP function to<br />
sojtkey 1.<br />
Use the ENTER comm<strong>and</strong> to request data from an <strong>HP</strong>-IB device. The ENTER comm<strong>and</strong> causes<br />
the spectrum analyzer to assume controller capabilities on <strong>HP</strong>-IB. The REL<strong>HP</strong>IB comm<strong>and</strong> may<br />
be used to disable these capabilities. The returned data is formatted according to the format<br />
specified in the format field:<br />
K: Free field. ASCII real number format.<br />
B: One-byte binary.<br />
W: One-word (2 bytes) binary.<br />
6-150 Programming Comm<strong>and</strong>s
EP<br />
Enter Parameter Function<br />
EP Enter Parameter Function<br />
Sends values entered on the spectrum analyzer number keyboard to the present active function<br />
value. EP must be invoked each time a new value is entered.<br />
Syntax<br />
( EP<br />
Related Comm<strong>and</strong>s: See the list of active functions listed in the description for El?<br />
Example<br />
OUTPUT 718;"ST;EP;" The sweep time can be entered by using the front-panel kegs.<br />
Description<br />
The EP comm<strong>and</strong> allows the user to enter a value manually through the numeric keypad.<br />
When the value is terminated by a unit or CENTER) key on the spectrum analyzer, the spectrum<br />
analyzer will be ready to execute more remote comm<strong>and</strong>s.<br />
Note Because the EP comm<strong>and</strong> uses the current active function, confirm that the<br />
desired function is active before executing the EP comm<strong>and</strong>.<br />
The active functions are ACPBW, ACPSP, AT, BAUDRATE, CF, CRT<strong>HP</strong>OS, CR<strong>TV</strong>POS, DL,<br />
DOTDENS, FA, FB, FFTSTOP, FMGAIN, FOFFSET, GD, GL, LG, MKA, MKD, MKFCR, MKN,<br />
MKPAUSE, MKPX, ML, M4, NDB, NRL, PREAMPG, PRNTADRS, RB, RCLS, ROFFSET, RL,<br />
RLPOS, SAVES, SAVRCLN, SETDATE, SETTIME, SP, SQLCH, SRCAT, SRCPOFS, SRCPSTP,<br />
SRCPSWP, SRCPWR, SRCTK, SS, ST, TH, TIMEDATE, <strong>TV</strong>LINE, VB, VBR, <strong>and</strong> user-defined<br />
active function specified by the ACTDEF comm<strong>and</strong>.<br />
XEP<br />
Programming Comm<strong>and</strong>s 5-l 51
ERASE<br />
Erase<br />
Clears trace A <strong>and</strong> trace B, disposes of the contents of the user memory, <strong>and</strong> resets the state<br />
registers <strong>and</strong> the spectrum analyzer to the instrument preset state.<br />
Syntax<br />
Related Comm<strong>and</strong>s: DISPOSE, ONCYCLE, ONDELAY, ONEOS, ONMKR, ONPWRUP, ONSRQ,<br />
ONSWP, ONTIME, PSTATE, TRDEF, TRMATH, VARDEF.<br />
Example<br />
OUTPUT 718*"ERASE*"<br />
# ,<br />
Description<br />
The ERASE comm<strong>and</strong> erases all of the user memory by performing a DISPOSE ALL, moving<br />
zeros into the trace elements of trace B, <strong>and</strong> performing an instrument preset (IP). If PSTATE is<br />
set to OFF, ERASE clears the state registers also. All user-defined functions, traces, variables,<br />
softkeys, <strong>and</strong> on-event algorithms are erased. (The on-event algorithms are ONCYCLE,<br />
ONDELAY, ONEOS, ONMKR, ONMKRU, ONSRQ, ONSWP, ONTIME, <strong>and</strong> TRMATH.)<br />
5-152 Programming Comm<strong>and</strong>s
EXP<br />
Exponent<br />
Places the exponential of the source in the destination. The EXP comm<strong>and</strong> is useful for<br />
converting log values to linear values.<br />
Syntax<br />
Item<br />
User-defined trace<br />
User-defined variable<br />
EXP<br />
7 d e s t i n a t i o n -<br />
b u s e r - d e f i n e d t r a c e /<br />
h trace range I<br />
b p r e d e f i n e d v a r i a b l e I<br />
user-defined variable<br />
DescriotionlDefault<br />
A trace deflned by the TRDEF comm<strong>and</strong>.<br />
scaling factor<br />
A variable defined by VARDEF or ACTDEF comm<strong>and</strong>s.<br />
Predeflned variable A comm<strong>and</strong> that acts as a variable. Refer to Table 5-l.<br />
Predetied function Function that returns a value. Refer to Table 5-1.<br />
Trace range A segment of trace A, trace B, trace C, or a user-defined trace.<br />
Trace element An element of trace A, trace B, trace C, or a user-defined trace.<br />
Number Any real or integer number.<br />
EXP Exponent<br />
XEXP<br />
Any valid trace name.<br />
Any valid variable<br />
name.<br />
Real number range.<br />
Prerequisite Comm<strong>and</strong>s: TRDEF when using a user-defined trace. ACTDEF or VARDEF when<br />
using a user-defined variable. TS when using trace data.<br />
Related Comm<strong>and</strong>s: FUNCDEF, LOG.<br />
Programming Comm<strong>and</strong>s 5-l 53
EXP Exponent<br />
Example 1<br />
This example converts the marker amplitude to power units.<br />
10 OUTPUT 718;"IP;" Initializes the spectrum analyzer<br />
20 OUTPUT 718;"SNGLS;" Activates the single-sweep mode.<br />
30 OUTPUT 718;"VARDEF P-MW,O;" Initializes variable P..MW to 0.<br />
40 OUTPUT 718;"TS;MKPK HI;" Fino!s highest peak of sweep.<br />
50 OUTPUT 718;"EXP P-MW,MKA,lO;" Divides the marker amplitude by 10, raises the<br />
value of the marker amplitude to the power of 10,<br />
60 OUTPUT 718;"P,MW?;"<br />
70 ENTER 718;Number<br />
80 DISP Number;"mW"<br />
90 END<br />
Example 2<br />
<strong>and</strong> stores the results in P-MN?<br />
Returns the value of PM to computer<br />
Assigns value to computer variable.<br />
Displays result on the computer screen.<br />
This example finds the natural exponential of anumber <strong>and</strong> uses the LOG comm<strong>and</strong> to return<br />
the original source value of the EXP function.<br />
10 OUTPUT 718;"VARDEF E,XP,O;" Dejlnes a variable called E-XI?<br />
20 OUTPUT 718;"EXP E,XP,2,2.30259;" Fino!s the natural exponential of 2.<br />
30 OUTPUT 718;"E,XP?;" Returns the natural exponent of 2.<br />
40 ENTER 718;Value<br />
50 PRINT Value<br />
60 OUTPUT 718;"LOG E-XP,E,XP,2.30259;"<br />
70 OUTPUT 718;"E_XP?;"<br />
80 ENTER 718;Logvalue<br />
90 PRINT Logvalue<br />
100 OUTPUT 718;"VARDEF E-XPY,O;"<br />
110 OUTPUT 718;"EXP E-XPY,-5,2.30259;"<br />
120 OUTPUT 718;"E_XPY?;"<br />
130 ENTER 718;Value2<br />
140 PRINT Value2<br />
150 OUTPUT 718;"LOG E,XPY,E-XPY,2.30259;"<br />
160 OUTPUT 718;"E_XPY?;"<br />
170 ENTER 718;Logval<br />
180 PRINT Logval<br />
190 END<br />
5-154 Programming Comm<strong>and</strong>s<br />
Prints the value of the exponential.<br />
Uses the log function on the exponential<br />
value.<br />
The log of the exponential value is approximately<br />
2.<br />
Prints value.<br />
Declares a variable called E-XPY<br />
Finds the natural exponential of -5.<br />
Returns the value of the natural exponential<br />
of -5.<br />
Prints the value of the exponential.<br />
Uses the log function on the exponential<br />
value.<br />
The log of the exponential value is approximately<br />
-5.
Description<br />
EXP Exponent<br />
The EXP comm<strong>and</strong> first divides the source by the scaling factor, then uses the quotient as an<br />
exponent of 10:<br />
10source/scaling factor is placed into the destination.<br />
The EXP comm<strong>and</strong> can be used to evaluate a natural exponential function by using 2.30259<br />
as the scaling factor. Because EXP <strong>and</strong> LOG are inverse functions, the EXP comm<strong>and</strong> has<br />
a scaling factor that may be used to “undo” the scaling factor of the LOG comm<strong>and</strong>. (See<br />
example 2.)<br />
When the source is longer than the destination, the source is truncated to fit. When the source<br />
is shorter than the destination, the last element is repeated to fill the destination.<br />
See “LOG” for more information on the scaling factor.<br />
Programming Comm<strong>and</strong>s 5-155
FA<br />
Start Frequency<br />
Specifies the start frequency.<br />
Syntax<br />
Item Description/Default R-e<br />
Number Any real or integer number. Default unit is Hz. Frequency range of<br />
the spectrum analyzer.<br />
Equivalent Softkey: START FREQ .<br />
Step Increment: Frequency span divided by 10.<br />
Related Comm<strong>and</strong>s: CF, FB, FOFFSET, FS, HNLOCK, HNUNLK, MKF, SI?<br />
Example<br />
OUTPUT 718;"FA 88MHZ;FB 108MHZ;" Sets the start frequency to 88MH2, the stop frequency<br />
to 108 MHz<br />
OUTPUT 718*"FA'-"<br />
* ,<br />
ENTER 718;l&eq<br />
Returns the start frequency.<br />
Stores the response from the spectrum analyzer<br />
DISP Freq Displays the frequency on the computer screen.<br />
5-l 56 Programming Comm<strong>and</strong>s
Description<br />
FA Start Frequency<br />
The FA comm<strong>and</strong> specifies the start frequency value. The start frequency is equal to the center<br />
frequency minus the span divided by two (FA = CF - SP/2).<br />
Note Changing the start frequency changes the center frequency <strong>and</strong> span. Rx- the<br />
<strong>HP</strong> 8592L, <strong>HP</strong> 8593E, <strong>HP</strong> 8595E, <strong>HP</strong> 85963 only: The start frequency may be<br />
limited by the harmonic b<strong>and</strong>, if harmonic b<strong>and</strong> locking is used.<br />
Query Response<br />
Programming Comm<strong>and</strong>s 5-157
FB<br />
Stop Frequency<br />
Specifies the stop frequency.<br />
Syntax<br />
Item Description/Default Range<br />
Number Any real or integer number. Default unit is Hz. Frequency range of<br />
the spectrum analyzer.<br />
Equivalent Softkey: STOP FREQ .<br />
Step Increment: Frequency span divided by 10.<br />
Related Comm<strong>and</strong>s: CF, FA, FOFFSET, FS, HNLOCK, MKF, SI?<br />
Example<br />
OUTPUT 718;"FA 88MHZ;FB 108MHZ;" Sets the start frequency to 88 MHz?, the stop frequency<br />
to 108 MHk<br />
OUTPUT 718."FB'."<br />
* #<br />
ENTER 718;keq<br />
Returns the stop jkequency.<br />
Stores the response from the spectrum analyzex<br />
DISP Freq Displays the frequency on the computer screen.<br />
5-l 58 Programming Comm<strong>and</strong>s
Description<br />
FB Stop Frequency<br />
The FB comm<strong>and</strong> specifies the stop frequency value. The stop frequency is equal to the center<br />
frequency plus the span divided by two (FA = CF + SP/2).<br />
Note Changing the stop frequency changes the center frequency <strong>and</strong> span. fir the<br />
<strong>HP</strong> 8592L, <strong>HP</strong> 85933, <strong>HP</strong> 8595E, or <strong>HP</strong> 8596E only: The stop frequency may be<br />
limited by the harmonic b<strong>and</strong>, if harmonic b<strong>and</strong> locking is used.<br />
Query Response<br />
o u t p u t<br />
termination ---)<br />
Programming Comm<strong>and</strong>s 5-159
FFT<br />
Fast Fourier Transform<br />
Performs a discrete fast Fourier transform on the source trace array <strong>and</strong> stores the result in the<br />
destination array.<br />
Syntax<br />
FFT<br />
- destination<br />
user-defined trace<br />
,- window -\<br />
user-defined trace user-defined trace<br />
Item I Description/Default<br />
User-defined trace A trace defined by the TRDEF comm<strong>and</strong>.<br />
I Range<br />
Any valid trace name.<br />
Prerequisite Comm<strong>and</strong>s: TWNDOW.<br />
Related Comm<strong>and</strong>s: MKREAD, TWNDOW.<br />
Restrictions: Not available with Analog+ display mode. See “ANLGPLUS” for more<br />
information.<br />
Example<br />
OUTPUT 718."IP*SNGLS*"<br />
OUTPUT 718;"CFy300MHk;TS;MKPK HI;MKTRACK ON;"<br />
OUTPUT 718;"CONTS;SP 200KHZ;RB IOOKHZ;"<br />
OUTPUT 718;"MKTRACK 0FF;SP OHZ;"<br />
OUTPUT 718;"MKPK HI;MKRL;LN;SNGLS;"<br />
OUTPUT 718;"ST 800MS;TS;"<br />
OUTPUT 718;"TWNDOW TRB,FLATTOP;"<br />
5-160 Programming Comm<strong>and</strong>s<br />
Initializes spectrum anulyxer:<br />
Tunes center frequency to the carrier<br />
<strong>and</strong> decreoxes span.<br />
Changes resolution b<strong>and</strong>width to capture<br />
modulation.<br />
Reduces span to zero Hz to demodulate<br />
carrier<br />
Changes to linear amplitude scale,<br />
Sets sweep time to correspond to<br />
modulation frequ&ncy, the executes<br />
FFT function.<br />
The TWNDOW must be defiined before<br />
using the F~jknction.
OUTPUT 718;"FFT TRA,TRA,TRB;VIEW TRA;"<br />
OUTPUT 718;"MKPK HI;"<br />
OUTPUT 718."MKD."<br />
OUTPUT 718;"MKPi NR;"<br />
OUTPUT 718;"MKREAD FFT;"<br />
OUTPUT 718."MKF'."<br />
, * ,<br />
ENTER 718;A<br />
DISP A<br />
Description<br />
FFT F&t Fourier Transform<br />
Executes the FFTjimction with the<br />
trace window function.<br />
Finds the highest signal.<br />
Activates the marker deltajim%ion.<br />
Finds the next peak to the right.<br />
Selects the FFl’ marker to display<br />
the marker delta value as a frequency<br />
instead of time value.<br />
Finds the dz@rence between the two<br />
peaks.<br />
Displays thefrequency d@Lmnce.<br />
FFT weights the source trace with the function in the window trace (the window trace is<br />
described below). The transform is computed <strong>and</strong> the results are placed in the destination<br />
trace. Unlike FFTAUTO <strong>and</strong> FFTCONTS, FFT performs the FFI’ measurement only once. Use<br />
FFTAUTO or FFI’CONTS if you want the FFT measurement to be performed at the end of every<br />
measurement sweep.<br />
The spectrum analyzer should be in linear mode when using the FF”I’ comm<strong>and</strong>. The FFT<br />
results are displayed on the spectrum analyzer in logarithmic scale. For the horizontal<br />
dimension, the frequency at the left side of the graph is 0 Hz, <strong>and</strong> at the right side is Fmax.<br />
Fmax can be calculated using a few simple equations <strong>and</strong> the sweep time of the spectrum<br />
analyzer. The sweep time divided by the number of trace array elements containing amplitude<br />
information is equal to the sampling period. The reciprocal of the sampling period is the<br />
sampling rate. The sampling rate divided by two yields Fmax.<br />
For example, let the sweep time of the spectrum analyzer be 20 ms <strong>and</strong> the number of trace<br />
elements be 400. The sweep time (20 ms) divided by 400 equals 50 ps, the sampling period.<br />
The sample rate is l/50 ps. Fmax equals l/50 p.s divided by 2, or 10 kHz.<br />
FFT is designed to be used in transforming zero span information into the frequency domain.<br />
Performing FF’T on a frequency sweep (when the frequency span is greater than zero) will not<br />
provide time-domain results.<br />
The windowing function stored in the window trace may be selected with the trace window<br />
(TWNDOW) comm<strong>and</strong> or you can store your own values in that trace. The trace window<br />
function modifies the contents of a trace array according to one of three built-in algorithms:<br />
UNIFORM, HANNING, or FLATTOI? See Figure 5-4, Figure 5-5, <strong>and</strong> Figure 5-6. The TWNDOW<br />
comm<strong>and</strong> multiplies a trace array with one of these windows.<br />
Selecting a window: The amplitude <strong>and</strong> frequency uncertainty of the Fourier-transformed<br />
display depends on both the choice of trace windows <strong>and</strong> the spectrum analyzer sweep time.<br />
Amplitude uncertainty is maximum when the spectral component falls midway between the<br />
filter shapes. Passb<strong>and</strong>s that are flatter in shape, like the FLATTOP filter, contribute less<br />
amplitude uncertainty, but frequency resolution <strong>and</strong> sensitivity are compromised.<br />
The UNIFORM window algorithm has the least frequency uncertainty <strong>and</strong> greatest amplitude<br />
uncertainty. The UNIFORM window does not contain time-domain weighing <strong>and</strong> leaves the<br />
data alone. Use the UNIFORM window for transforming noise signals or transients that decay<br />
within one sweep time period. The UNIFORM window yields the best frequency resolution, but<br />
also produces the highest side lobes for periodic signals.<br />
Programming Comm<strong>and</strong>s 5-l 61
FFT, F&t Fourier Transform<br />
The FLATTOP window has the greatest frequency uncertainty of the windows, but it has<br />
outst<strong>and</strong>ing side lobe suppression <strong>and</strong> amplitude flatness. Use FLATTOP to transform periodic<br />
signals.<br />
The HANNING window is a traditional passb<strong>and</strong> window found in most real-time spectrum<br />
analyzers. The HANNING window offers a compromise between the FLATTOP <strong>and</strong> UNIFORM<br />
windows. Use the HANNING window when transforming periodic or r<strong>and</strong>om data.<br />
The values in the window trace range from -32,768 to 32,767 <strong>and</strong> are treated as fractional<br />
numbers. No offset is used. When FFT is called, the average window value is computed <strong>and</strong><br />
used to correct the results in absolute units.<br />
The Fourier transforms of the window functions (created with TWNDOW) are shown below.<br />
Use the graphs to estimate resolution <strong>and</strong> amplitude uncertainty of a Fourier transform display.<br />
Each horizontal division of the graphs equals l/sweep-time or Fmax/BOO, <strong>and</strong> represents two<br />
trace array elements.<br />
When the source is longer than the destination, the source is truncated to fit. When the source<br />
is shorter than the destination, the last element is repeated to fill the destination.<br />
Note TWNDOW should always be set before FFI’ is executed. Execute MKREAD FFT to<br />
read the marker value as a frequency value instead of time value.<br />
0<br />
-10<br />
-20<br />
-30<br />
-40<br />
-50<br />
cn<br />
1 -60<br />
ii -70<br />
- -80<br />
0<br />
w -90<br />
n -100<br />
5-162 Programming Comm<strong>and</strong>s<br />
-110<br />
-120<br />
-130<br />
-140<br />
-150<br />
- 1 6 0 "<br />
-it--<br />
Figure 5-4. Hanning Filter Window<br />
cu115e
80<br />
.90<br />
00<br />
0<br />
-10<br />
-20<br />
-30<br />
-40<br />
VI<br />
-A -50<br />
E -60<br />
0 -70<br />
E -80<br />
-90<br />
-100<br />
-110<br />
-120<br />
-130<br />
-140<br />
I I<br />
1 i I<br />
Figure 5-5. Uniform Filter Window<br />
Figure 5-6. Flat Top Filter Window<br />
FFT Fbst Fourier Transform<br />
I<br />
I I<br />
Programming Comm<strong>and</strong>s 5-163
FFTAUTO<br />
Marker to Auto FFT<br />
Performs a fast Fourier transform (FIT) on the signal on which the marker is placed.<br />
Syntax<br />
Equivalent Softkey: MARKER -> AUTO FFT .<br />
Prerequisite Comm<strong>and</strong>s: Use a marker comm<strong>and</strong> to place a marker on the signal of interest.<br />
See YIhble 5-4 for a list of the marker comm<strong>and</strong>s.<br />
Related Comm<strong>and</strong>s: FFI’CONTS, FFTOFF, FFTSNGLS.<br />
Example<br />
This example can be used to perform an FF”I’ continuously on an amplitude modulated signal at<br />
100 MHz.<br />
OUTPUT 718*"RL ODB-" Sets reference level to 0 dBm.<br />
OUTPUT 718&F 100ilHZ;" Sets the center frequency to 100 MHz.<br />
OUTPUT 718."SP , IOMHZ-" t Decreases the freqwncg span.<br />
OUTPUT 718."MKPK , HI-" , Places the marker on a signal (this example oxwnes that there<br />
is only one signal present).<br />
OUTPUT 718;"FFTAUTO;" Zoom in on the sip&, <strong>and</strong> then does an FFT continuously<br />
on the modulated siml.<br />
Description<br />
FFTAUTO uses the marker’s position to determine which signal is to be measured. FFIAUTO<br />
centers the signal <strong>and</strong>, if the frequency span of the spectrum analyzer is greater than zero,<br />
decreases the frequency span to zero before performing an FFT on the signal. When the FFT is<br />
performed, the spectrum analyzer does the following:<br />
� Changes to the continuous sweep mode.<br />
� Changes to the linear amplitude scale.<br />
� If the current detector is the peak detector, changes to the sample detector.<br />
� If the initial frequency span was greater than 0 Hz, the spectrum analyzer adjusts the signal<br />
peak to within 0.5 division of the top graticule.<br />
� Does an FFT on trace A <strong>and</strong> then places trace A in both the clear-write <strong>and</strong> store-blank<br />
modes. (When the spectrum analyzer is in both the clear-write <strong>and</strong> store-blank modes, the<br />
trace data is still taken from the spectrum analyzer input during every measurement sweep,<br />
but the trace is not shown on the spectrum analyzer display.)<br />
� Places the results of the FFT in trace B, <strong>and</strong> then changes trace B to the view mode.<br />
FFTAUTO performs the FFT on the signal at the end of every sweep. After executing<br />
FFTAUTO, you should adjust the values for the resolution b<strong>and</strong>width, video b<strong>and</strong>width,<br />
<strong>and</strong> sweep time according to the highest modulation frequency of interest. The resolution<br />
b<strong>and</strong>width should be about ten times greater than the highest modulation frequency of<br />
interest, <strong>and</strong> the video b<strong>and</strong>width should be about 10 times higher than the highest modulation<br />
frequency of interest. The sweep time should be set according to the chart shown in<br />
5-l 64 Programming Comm<strong>and</strong>s
FFTAUTO Marker to Auto FFT<br />
“Measuring Amplitude Modulation with the Fast Fourier Transform Function” in Chapter 4 of<br />
the <strong>HP</strong> <strong>8590</strong> E-<strong>Series</strong> <strong>and</strong> L<strong>Series</strong> <strong>Spectrum</strong> An&zers User’s Guide. You can use the results<br />
of the FFTCLIP comm<strong>and</strong> to determine if the FFT data is valid.<br />
Restrictions<br />
Executing FFTAUTO turns off the following functions: windows display mode (WINON), N dB<br />
point measurement (NDBPNT), gate utility functions (GDRVUTIL), TO1 measurement (TOI),<br />
marker table (MKTBL), peak table (PKTBL), percent AM (PCTAM), peak zoom (PKZOOM),<br />
power menu measurements (ACP, ACPE, C<strong>HP</strong>, <strong>and</strong> OBW), <strong>and</strong> Analog+ display mode<br />
(ANLGPLUS).<br />
FFTAUTO uses the following when performing an FFT:<br />
� The flat top filter window. (See “FFT” for more information about the flat top filter window.)<br />
w Trace B <strong>and</strong> trace C. If you want to save the trace data that is in trace B or trace C, you<br />
should save the trace data before executing FFTAUTO, FFTCONTS, or FFTSNGLS. (See<br />
“SAVET” for more information about saving trace data.)<br />
� The FFTMKR comm<strong>and</strong> to turn on the FFT markers (you can use the MKA or MKF to<br />
determine the amplitude or frequency of the marker).<br />
Programming Comm<strong>and</strong>s 5-165
FFTCLIP<br />
FFT Signal Clipped<br />
Indicates if the FFI’ results are valid.<br />
Syntax<br />
FFTCL I P<br />
Prerequisite Comm<strong>and</strong>s: FFTAUTO, FFTSNGLS, FFTCONTS.<br />
Related Comm<strong>and</strong>s: FFTSTAT.<br />
Example<br />
OUTPUT 718*"FFTCONTS-"<br />
, 9<br />
OUTPUT 718."FFTCLIP'."<br />
Starts the FFI:<br />
Queries FFTCLE<br />
ENTER 718;kclippe& Returns the value of FFTCLII?<br />
Description<br />
Whenever you use FFTAUTO, FFTCONTS, or FFTSNGLS to perform an FFI’ on a signal, you can<br />
use the FFTCLIP comm<strong>and</strong> to determine if the FFT data is valid. If the current measurement<br />
sweep resulted in a trace that is above the top graticule line on the spectrum analyzer display,<br />
the input trace (trace A) has been “clipped,” <strong>and</strong> the FFI data is not valid. If the input trace is<br />
not clipped, the FFT data is valid.<br />
Query Response<br />
5.166 Programming Comm<strong>and</strong>s<br />
QFFTCL IP
FFTCONTS<br />
FFT Continuous Sweep<br />
Performs a fast Fourier transform (FFT) continuously on the current signal.<br />
Syntax<br />
Equivalent Softkey: CONTINUS FFT .<br />
Prerequisite Comm<strong>and</strong>s: LN, Sl?<br />
Related Comm<strong>and</strong>s: FFTOFF, FFTSNGLS.<br />
Example<br />
OUTPUT 718; “SP OHZ; ” Sets the spectrum analyzer to zero span.<br />
OUTPUT 718; “LN; ” Changes the amplitude scale to linear:<br />
OUTPUT 718;"FFTCONTS;" Starts the continuous FlT<br />
Description<br />
FFT.CONTS FFT Continuous Sweep<br />
You should change the frequency span to 0 Hz <strong>and</strong> the amplitude scale to linear before<br />
executing FFTCONTS. When FFTCONTS is executed, the spectrum analyzer does the following:<br />
� Changes to the continuous sweep mode.<br />
� If the current detector is the peak detector, changes to the sample detector.<br />
Does an FFI’ on trace A. Trace A is then placed in both the clear-write <strong>and</strong> store-blank<br />
modes. (When the spectrum analyzer is in both the clear-write <strong>and</strong> store-blank modes, the<br />
trace data is still taken from the spectrum analyzer input during every measurement sweep,<br />
but the trace is not shown on the spectrum analyzer display.)<br />
� Places the results in trace B (trace B is placed in the view mode).<br />
You can use the results of the FFTCLIP comm<strong>and</strong> to determine if the FFI’ data is valid. If you<br />
want to view the input data (trace A), execute “TRDSP TRA,ON; ‘I.<br />
Restrictions<br />
Executing FFTCONTS turns off the following functions: windows display mode (WINON),<br />
N dB point measurement (NDBPNT), gate utility functions (GDRVUTIL), TO1 measurement<br />
(TOI), marker table (MKTBL), peak table (PKTBL), percent AM (PCTAM), peak zoom<br />
(PKZOOM), power menu measurements (ACP, ACPE, C<strong>HP</strong>, <strong>and</strong> OBW), or Analog+ display mode<br />
(ANLGPLUS).<br />
FFTCONTS uses the following when performing an FFT:<br />
� The flat top filter window. See “FFT” for more information about the flat top filter window.<br />
w Trace B <strong>and</strong> trace C. If you want to save the trace data that is in trace B or trace C, you<br />
should save the trace data before executing FFTAUTO, FFTCONTS, or FFTSNGLS. (See<br />
“SAVET” for more information about saving trace data.)<br />
� The FFTMKR comm<strong>and</strong> to turn on the FFI markers (you can use the MKA or MKF to<br />
determine the amplitude or frequency of the marker).<br />
You should execute the FFTOFF comm<strong>and</strong> when you are finished using the FFT measurement.<br />
Programming Comm<strong>and</strong>s 5-167
FFTMKR<br />
FFT Markers<br />
Activates the FFI’ markers <strong>and</strong> displays the FFT annotation on the spectrum analyzer display.<br />
Syntax<br />
FFTMKR<br />
Equivalent Softkey: FFT MARKERS .<br />
Related Comm<strong>and</strong>s: FFTCONTS, FFTOFF, FFISNGLS, FFTPCTAM, FFTPCTAMR, MKA, MKF.<br />
Example<br />
OUTPUT 718;"RCLT TRA,l;" Recalls the FFl’ trace.<br />
OUTPUT 718;"FFTMKR;" Activates the FFT markers.<br />
Description<br />
If the spectrum analyzer is not performing an FFT measurement, the FFTMKR comm<strong>and</strong><br />
displays the FFT annotation below the last graticule on the spectrum analyzer display, <strong>and</strong><br />
activates the marker in the FFT readout mode. (FFTMKR uses the current sweep time to<br />
determine the FFT stop frequency that is displayed.) If the spectrum analyzer is already<br />
performing an FFI’, executing FFI’MKR activates only the FFT markers. You need to execute<br />
FFIOFF to exit out of the FFT measurement <strong>and</strong> return to normal spectrum analyzer<br />
operation.<br />
Restrictions<br />
Executing FFTMKR turns off the following functions: windows display mode (WINON), N dB<br />
point measurement (NDBPNT), gate utility functions (GDRVUTIL), TO1 measurement (TOI),<br />
marker table (MKTBL), peak table (PKTBL), percent AM (PCTAM), peak zoom (PKZOOM),<br />
power menu measurements (ACP, ACPE, C<strong>HP</strong>, <strong>and</strong> OBW), <strong>and</strong> Analog+ display mode<br />
(ANLGPLUS).<br />
The purpose of the FFIMKR comm<strong>and</strong> is to allow you to restore the FFT annotation when you<br />
recall FFT trace data (the FFI annotation is not saved when you save trace data). The percent<br />
AM readout can also be restored by executing the FFTPCTAM comm<strong>and</strong> after FFTMKR. (See<br />
“FFI’PCTAM” for more information about the percent AM measurement.)<br />
You can use the MKF or MKA comm<strong>and</strong>s to determine the amplitude or frequency of an FFI’<br />
marker.<br />
5-l 66 Programming Comm<strong>and</strong>s
FFTMM<br />
FFT Marker to Midscreen<br />
FBTMM FFT Marker to Midscreen<br />
Changes the FFT midscreen frequency of the spectrum analyzer to the frequency of the FFI<br />
marker.<br />
Syntax<br />
FFTMM<br />
Equivalent Softkey: M&lXER -) KID SCRN .<br />
Prerequisite Comm<strong>and</strong>s: FFTAUTO, FFTSNGLS, FFTCONTS.<br />
Related Comm<strong>and</strong>s: FFTMS, MKA, MKF.<br />
Example<br />
OUTPUT 718;"FFTCONTS;"<br />
OUTPUT 718;"MKPK HI;"<br />
OUTPUT 718;"MKPK NH;"<br />
OUTPUT 718;"FFTMM;"<br />
Description<br />
Starts the continuous FIT.<br />
Finds the sign& with the highest amplitude (usually the signal<br />
at 0 Hz).<br />
Finds the signal with the next highest amplitude (usually the<br />
dominant modulation frequency).<br />
Moves the signal to FFT midscreen.<br />
FFI’MM is performed only if the spectrum analyzer is performing a FFI’ measurement.<br />
Changing the FFI midscreen frequency of the spectrum analyzer also changes the FFI’ stop<br />
frequency of the spectrum analyzer. Because the FFl’ stop frequency is limited by sweep time<br />
of the spectrum analyzer, it may not be possible to change the FFI’ midscreen frequency to the<br />
frequency of the FFI marker. If the FFTMM comm<strong>and</strong> does not move the signal to the FFT<br />
midscreen frequency, you should check if the FFT stop frequency is limited by the sweep time<br />
range or the sweep time increments for your spectrum analyzer. The FFI’ stop frequency is<br />
related to the sweep time as follows:<br />
FFT stop frequency =<br />
400<br />
(Sweep time x 2)<br />
Programming Comm<strong>and</strong>s 5-169
FFTMS<br />
FFT Marker to FFT Stop Frequency<br />
Changes the FFT stop frequency of the spectrum analyzer to the frequency of the FFI marker.<br />
Syntax<br />
FFTMS<br />
Equivalent Softkey: MARKER -? FFT STOP.<br />
Prerequisite Comm<strong>and</strong>s: FFTAUTO, FFTSNGLS, FFTCONTS.<br />
Related Comm<strong>and</strong>s: FFI’MM, MKA, MKF.<br />
Example<br />
OUTPUT 718;"FFTCONTS;" Starts the continuous FIT<br />
OUTPUT 718;"MKPK HI;" Finds the signal with the highest amplitude (usually the signal<br />
at 0 Hz).<br />
OUTPUT 718;"MKPK NH;" Finds the signal with the next highest amplitude (usually the<br />
dominant modulation frequency).<br />
OUTPUT 718."FFTMS-"<br />
, 9 Changes the FFT stop frequerxy to the signal frequency.<br />
Description<br />
FFTMS is performed only if the spectrum analyzer is performing a FFT measurement. If a<br />
marker is on a signal, FFTMS will move that signal to the right side of the graticule. FFI’MS<br />
is useful because moving the signal toward the FFT stop frequency increases the frequency<br />
resolution of the FF”I’ measurement. For best results, the signal of interest should be placed<br />
slightly left of the FFI’ stop frequency (the signal should not touch the right side of the<br />
graticule). If the signal is placed at the FFT stop frequency, small variations in acquired data<br />
can cause large changes in the displayed amplitude of the signal which do not reflect the actual<br />
signal amplitude.<br />
Because the FFT stop frequency is limited by sweep time of the spectrum analyzer, it may not<br />
be possible to change the FFT midscreen frequency to the frequency of the FFT marker. If<br />
the FFTMS comm<strong>and</strong> does not move the signal to the FYI’ stop frequency, you should check if<br />
the FFT stop frequency is limited by the sweep time range or sweep time increments for your<br />
spectrum analyzer. The FFT stop frequency is related to the sweep time as follows:<br />
5-170 Programming Comm<strong>and</strong>s<br />
FFT stop frequency =<br />
400<br />
(Sweep time x 2)
FFTOFF<br />
FFTOff<br />
Exits the fast Fourier transform (FFT) measurement <strong>and</strong> FFl’ settings.<br />
Syntax<br />
FFTOFF<br />
Equivalent Softkey: FFT OFF .<br />
Prerequisite Comm<strong>and</strong>s: FFTAUTO, FFTSNGLS, FFTCONTS, FFTMKR.<br />
Related Comm<strong>and</strong>s: FFTMKR, FFI’AUTO, FFTCONTS, FFTSNGLS.<br />
Example<br />
OUTPUT 718;"FFTCONTS;" Starts the continuous FFT<br />
OUTPUT 718;"FFTOFF;" Turns of the FFT<br />
Description<br />
FFTOFFFFTOff<br />
The FFTOFF comm<strong>and</strong> aborts any of the FFT functions (FFTAUTO, FFTCONTS, FFTMKR, or<br />
FFTSNGLS) <strong>and</strong> returns the spectrum analyzer display back to normal.<br />
Programming Comm<strong>and</strong>s 5-171
FFTPCTAM<br />
FFT Percent Amplitude Modulation<br />
Turns on or off the percent AM function.<br />
Syntax<br />
'._.__.'<br />
0<br />
r on 7<br />
1<br />
I<br />
/<br />
/ XFFTPCTAM<br />
Equivalent Softkey: FFTPCTAM is equivalent to using X AK UI? OFF during an FFT<br />
measurement.<br />
Prerequisite Comm<strong>and</strong>s: FFTCONTS, FFI’MKR, FFTSNGLS, FFTAUTO.<br />
Related Comm<strong>and</strong>s: FFTPCTAMR.<br />
Example<br />
OUTPUT 718;"FFTCONTS;" Starts the FlT<br />
OUTPUT 718;"MOV FFTPCTAM,l;" Turns on the percent AMjimction.<br />
Description<br />
The FFI’PCTAM comm<strong>and</strong> turns the percent AM function on or off. The percent AM<br />
modulation is calculated using only the largest single frequency of modulation.<br />
FFTPCTAM can be executed on FFT trace data even if an FFT measurement is not being<br />
performed, as long as the FFT marker (FFTMKR) is invoked. For example, you can restore the<br />
percent AM readout of a recalled FFl’ trace by executing the FFTMKR comm<strong>and</strong>, <strong>and</strong> then the<br />
FFTPCTAM comm<strong>and</strong>.<br />
You can execute the FFTPCTAM comm<strong>and</strong> two different ways. You can either execute the<br />
FFTPCTAM comm<strong>and</strong> directly (for example, "FFTPCTAM 1; I’) or use the MOV comm<strong>and</strong> to move<br />
the 1 or 0 into the FFTPCTAM comm<strong>and</strong> (for example, "MOV FFTPCTAM,l;"). If you use the<br />
MOV comm<strong>and</strong>, no text is displayed in the active function area during comm<strong>and</strong> execution.<br />
Query Response<br />
5-172 Programming Comm<strong>and</strong>s<br />
I-- Off 7<br />
I= 0<br />
f -<br />
output<br />
’ t e r m i n a t i o n +<br />
QFFTPCTAM
FFTPCTAMR FFT Percent Amplitude Modulation Readout<br />
FFTPCTAMR<br />
FFT Percent Amplitude Modulation Readout<br />
Returns the percent of amplitude modulation (AM).<br />
Syntax<br />
FFTPCTAMR<br />
Prerequisite Comm<strong>and</strong>s: FFTCONTS, FFTMKR, FFTSNGLS, FF”IAUT0, FFTPCTAM.<br />
Related Comm<strong>and</strong>s: FFTPCTAM.<br />
Example<br />
OUTPUT 718;"FFTCONTS;" Starts the FFT<br />
OUTPUT 718;"MOV FFTPCTAM,l;" Turns on the percent AMfunction.<br />
OUTPUT 718;"FFTPCTAMR?;" Queries the percent AM reading.<br />
ENTER 718;Percentam Gets the percent AM reading.<br />
Description<br />
FFTPCTAMR returns either a positive real number, a “0,” or a “-1” as follows:<br />
XFFTPCTAMR<br />
A real number If the a valid signal could be measured, FFTPCTAMR returns a real number<br />
that represents the percent AM of the FFT signal (the percent AM is calculated<br />
using only the largest single frequency of modulation).<br />
0 If no modulation was detected, FFIPCTAMR returns a “0.”<br />
-1 If the FFT input was above the top graticule (clipped), FFTPCTAMR returns a<br />
U-1.”<br />
Query Response<br />
% AM<br />
modulation<br />
/ \<br />
output<br />
termination +<br />
OFFTPCTAMR<br />
Programming Comm<strong>and</strong>s 5-173
FFTSNGLS<br />
FFT Single Sweep<br />
Changes the spectrum analyzer’s sweep mode to single sweep mode (if necessary), <strong>and</strong> then<br />
performs a fast Fourier transform (FFT) on trace A.<br />
Syntax<br />
Equivalent Softkey: SINGLE FFT .<br />
Prerequisite Comm<strong>and</strong>s: LN, Sl?<br />
Related Comm<strong>and</strong>s: FFI’CONTS, FFTOFF<br />
Example<br />
OUTPUT 7 18 . “SP OHZ # * ”<br />
OUTPUT 7 18 ; “LN ; ”<br />
Sets the spectrum analyzer to zero span.<br />
Changes the amplitude scale to linear:<br />
OUTPUT 718 ; “FFTSNGLS ; ” Ftyforms the FFi?<br />
Description<br />
You should change the frequency span to 0 Hz <strong>and</strong> the amplitude scale to linear before<br />
executing FFTSNGLS. How FFTSNGLS performs the FFT depends on the current sweep mode,<br />
the trace status of trace A, <strong>and</strong> if FFTSNGLS is already active.<br />
� If the spectrum analyzer is in the single-sweep mode or trace A is in the view mode when<br />
FFISNGLS is first executed, the spectrum analyzer does an FFT on trace A without updating<br />
the contents of trace A.<br />
� If the spectrum analyzer is in the continuous-sweep mode when FFTSNGLS is executed, the<br />
spectrum analyzer changes to the single sweep mode, <strong>and</strong> then does an FFT on trace A.<br />
� If the spectrum analyzer is currently performing the FFTSNGLS comm<strong>and</strong>, a take sweep is<br />
performed <strong>and</strong> then an FFI’ is performed on trace A.<br />
FFTSNGLS does the following when performing an FFT:<br />
� If the current detector is the peak detector, the detector is changed to the sample detector.<br />
� Places trace A in both the clear-write <strong>and</strong> store-blank modes. (When the spectrum analyzer is<br />
in both the clear-write <strong>and</strong> store-blank modes, the trace data is still taken from the spectrum<br />
analyzer input during every measurement sweep, but the trace is not shown on the spectrum<br />
analyzer display.)<br />
� Places the results of the FFT in trace B, <strong>and</strong> then changes trace B to the view mode.<br />
Restrictions<br />
Executing FFTSNGLS exits the following functions: windows display mode (WINON), N dB<br />
point measurement (NDBPNT), gate utility functions (GDRVUTIL), TO1 measurement (TOI),<br />
marker table (MKTBL), peak table (PKTBL), percent AM (PCTAM), peak zoom (PKZOOM),<br />
power menu measurements (ACP, ACPE, C<strong>HP</strong>, <strong>and</strong> OBW), <strong>and</strong> Analog+ display mode<br />
(ANLGPLUS).<br />
You can use the results of the FFTCLIP comm<strong>and</strong> to determine if the FFT data is valid.<br />
5.174 Programming Comm<strong>and</strong>s
FFTSNGLS uses the following when performing an FFT:<br />
FFTSNGLS FFT Single Sweep<br />
w The flat top filter window. See “FFT” for more information about the flat top filter window.<br />
w Trace B <strong>and</strong> trace C. If you want to save the trace data that is in trace B or trace C, you<br />
should save the trace data before executing FFIAUTO, FFTCONTS, or FFTSNGLS. (See<br />
“SAVET” for more information about saving trace data.)<br />
H The FFTMKR comm<strong>and</strong> to turn on the FFT markers (you can use the MKA or MKF to<br />
determine the amplitude or frequency of the marker).<br />
You should execute the FFTOFF comm<strong>and</strong> when you are finished using the FFT measurement.<br />
Programming Comm<strong>and</strong>s 5.175
FFTSTAT<br />
FFT Status<br />
Returns the status of the spectrum analyzer’s FFT measurement functions.<br />
Syntax<br />
FFTSTAT<br />
Prerequisite Comm<strong>and</strong>s: FFI’AUTO, FFTSNGLS, FFTCONTS, FFTMKR.<br />
Related Comm<strong>and</strong>s: FFTCLIP.<br />
Example<br />
OUTPUT 718*"FFTCONTS*" Starts the FFT<br />
OUTPUT 718;"FFTSTAT?;" Qv.wries FF’TSTAII:<br />
ENTER 718;Fftstatus Returns the value of FmSTAT.<br />
Description<br />
FFTSTAT returns either a “0,’ a “ 1,” or a “2” as follows:<br />
0 If the spectrum analyzer is not performing an FFI’ measurement, FFTSTAT returns a<br />
“0. ”<br />
1 If the spectrum analyzer is performing an FFT measurement, FFI’STAT returns a ” 1. ”<br />
2 If the spectrum analyzer is not performing an FFT measurement but the FFT markers<br />
<strong>and</strong> FFT annotation are on, FFI’STAT returns a “2.”<br />
FFTSTAT returns a “0” if FFTOFF has been executed.<br />
Query Response<br />
5-176 Programming Comm<strong>and</strong>s<br />
,,-.<br />
r a c t i v e 7<br />
output<br />
0 / ’ t e r m i n a t i o n +<br />
7(<br />
active 4<br />
annotation
FFTSTOP<br />
FFT Stop Frequency<br />
Sets the FFI’ stop frequency of the FFT measurement.<br />
Syntax<br />
FFTSTOP FFT Stop Frequency<br />
Item Description/Default R-e<br />
Number Any real or integer number. Default unit is Hz. Range is limited by<br />
the range of the<br />
sweep time for the<br />
Prerequisite Comm<strong>and</strong>s: FFI’AUTO, FFTSNGLS, FFTCONTS.<br />
Related Comm<strong>and</strong>s: ST.<br />
Example<br />
OUTPUT 718 * “FFTCONTS - ”<br />
OUTPUT 718; “FFTSTOP ;KHZ; ”<br />
Description<br />
Starts the FFT<br />
Sets the FlTstopjYequemy to 1 kHz.<br />
To change the FFT stop frequency, FFTSTOP changes the sweep time of the spectrum analyzer<br />
as follows:<br />
400<br />
FFT stop frequency = (Sweep time x 2j<br />
You can execute the FFTSTOP comm<strong>and</strong> two different ways. You can either execute the<br />
FFTSTOP comm<strong>and</strong> directly (for example, “FFTSTOP 1; ‘I) or use the MOV comm<strong>and</strong> to move<br />
the 1 or 0 into the FFTSTOP comm<strong>and</strong> (for example, “MOV FFTSTOP, 1; ‘I). If you use the MOV<br />
comm<strong>and</strong>, no text is displayed in the active function area during comm<strong>and</strong> execution.<br />
Programming Comm<strong>and</strong>s 5-177
FFTSTOP FFT Stop Frequency<br />
Query Response<br />
5-176 Programming Comm<strong>and</strong>s<br />
stop<br />
frequency<br />
/ \<br />
output<br />
termination +<br />
QFFTSTOP
FMGAIN<br />
FM Gain<br />
Sets the total FM frequency deviation for full screen demodulation.<br />
Syntax<br />
FMGA IN<br />
-...._.: / frequency value \<br />
HZ T--*0-+<br />
/<br />
I<br />
/<br />
..’<br />
..’<br />
..’<br />
/<br />
J<br />
FMGAIN FM Gain<br />
Item I Description/Default R=r3e<br />
Number Any real or integer number. Default unit is Hz. 10 kHz to 500 kHz.<br />
Equivalent Softkey: FM GAIN .<br />
Option Required: Option 102, 103, or 301.<br />
Preset Value: 100 kHz.<br />
Related Comm<strong>and</strong>s: DEMOD, SPEAKER, SQLCH.<br />
Example<br />
OUTPUT 718;"FMGAIN 10KHZ; ‘I Sets theFMgain.<br />
Description<br />
XFMGAlN<br />
The center of the display (the fourth graticule) represents zero frequency deviation from the<br />
spectrum analyzer center frequency. The top graticule <strong>and</strong> the bottom graticule represent a<br />
positive or negative value of FM gain frequency deviation from the spectrum analyzer center<br />
frequency. The value of FMGAIN divided by four yields the FM gain per division.<br />
Query Response<br />
Programming Comm<strong>and</strong>s 5-179
FOFFSET<br />
Frequency Offset<br />
Specifies the frequency offset for all absolute frequency readouts such as center frequency.<br />
Syntax<br />
FOFFSET<br />
. . ..._..’<br />
/ frequency value \<br />
Item Description/Default Range<br />
Number Any real or integer number. Default unit is Hz.<br />
Equivalent Softkey: FREQ OFFSET .<br />
Preset State: 0 Hz.<br />
Related Comm<strong>and</strong>s: CF, FA, FB, MKN,<br />
Example<br />
10 OUTPUT 718;"IP;FA 200MZ;"<br />
20 OUTPUT 718;"FB 1GZ;"<br />
30 OUTPUT 718;"TS;MKPK HI;"<br />
40 OUTPUT 718;"MF;"<br />
50 ENTER 718;A<br />
60 PRINT A<br />
70 OUTPUT 718;"FOFFSET 500MZ;"<br />
80 OUTPUT 718;"TS;MF;"<br />
90 ENTER 718;A<br />
100 PRINT A<br />
110 END<br />
5-180 Programming Comm<strong>and</strong>s<br />
MKF,MKSP, MKSS.<br />
HZ<br />
Initializes spectrum analyz4x Sets start frequency.<br />
Sets stop freqwncy.<br />
Places marker on signal peak.<br />
Finds frequency of marker:<br />
Printsfrequency of marker:<br />
Adds a frequewy oflset.<br />
The frequency of the marker now is the frequency of<br />
the signal peak plus the frequency offset.<br />
The displayed frequency is 500 MHz greater than the<br />
frequency displayed in line 60.
Description<br />
FOFFSET Frequency Offset<br />
The FOFFSET comm<strong>and</strong> selects a value that offsets the frequency scale for all absolute<br />
frequency readouts (for example, center frequency). Relative values such as span <strong>and</strong> marker<br />
delta are not offset.<br />
After execution, the FOFFSET comm<strong>and</strong> displays the frequency offset in the active function<br />
readout. When an offset is in effect, it is displayed beneath the bottom graticule line on the<br />
spectrum analyzer screen.<br />
Execute “FOFFSET 0;” or “IP;” to turn off the offset.<br />
Query Response<br />
Programming Comm<strong>and</strong>s 5-181
FORMAT<br />
Format Card<br />
Formats the memory card.<br />
Syntax<br />
Equivalent Softkey: FORMAT CARD .<br />
Character<br />
Delimiter<br />
Item<br />
/ l a b e l \<br />
imi ter character<br />
Description/Default Range<br />
XFORMAT<br />
Any valid character. 0 to 6 characters long,<br />
A through Z <strong>and</strong> the<br />
underscore (the<br />
underscore cannot be<br />
the Arst character of<br />
the label).<br />
Matching characters marking the beginning <strong>and</strong> end of the list of - 1 \ @ = / - $ % ; ! ’ :<br />
spectrum analyzer comm<strong>and</strong>s. ” &<br />
Option Required: An <strong>HP</strong> <strong>8590</strong>L or <strong>HP</strong> 8592L needs to have Option 003 installed in the<br />
spectrum analyzer to use the FORMAT comm<strong>and</strong>.<br />
Example<br />
OUTPUT 718;"FORMAT XMYCARDW l+rwmts a memory card with the label “MYCARD. ”<br />
Description<br />
The memory card if formatted with the LIF format. If a label is not specified, the label defaults<br />
to <strong>HP</strong>859X.<br />
5-182 Programming Comm<strong>and</strong>s
FS<br />
Full Span<br />
Sets the frequency span of the spectrum analyzer to full span.<br />
Syntax<br />
Equivalent Softkey: FULL SPAN .<br />
Related Comm<strong>and</strong>s: CF, FA, FB, HNLOCK, SP, SS.<br />
Example<br />
OUTPUT 7 18 ; “FS ; ” Puts the spectrum analyzer in full-span mode.<br />
Description<br />
FS Full Span<br />
The FS comm<strong>and</strong> selects both the start frequency <strong>and</strong> the stop frequency according to the<br />
frequency span of the spectrum analyzer. Resolution b<strong>and</strong>width, video b<strong>and</strong>width, <strong>and</strong> sweep<br />
time are all set to autocoupled.<br />
<strong>Spectrum</strong> Analyzer start stop<br />
Model Frequency Frequency<br />
<strong>HP</strong> <strong>8590</strong>L or <strong>HP</strong> 85913 0 Hz 1.8 GHz<br />
<strong>HP</strong> 8592L* or <strong>HP</strong> 8593E* 2.750 GHz 22 GHz<br />
<strong>HP</strong> 85943 0 Hz 2.9 GHz<br />
<strong>HP</strong> 8595E* 0 Hz 6.5 GHz<br />
<strong>HP</strong> 85963' 0 12.8 GHz<br />
I *In harmonic unlock. I<br />
In harmonic lock, “FS;” sets both the center frequency <strong>and</strong> the span according to the harmonic<br />
b<strong>and</strong> shown in the following table.<br />
Center Frequency <strong>and</strong> Span Setting<br />
2<strong>HP</strong> 8592L, <strong>HP</strong> 85933, or <strong>HP</strong> 85963 only.<br />
Programming Comm<strong>and</strong>s 5-183
FUNCDEF<br />
Define Function<br />
Defines a routine consisting of spectrum analyzer comm<strong>and</strong>s, assigns the routine a label, <strong>and</strong><br />
stores the routine <strong>and</strong> its label in the user memory.<br />
Syntax<br />
user-defined<br />
function nane<br />
/ \<br />
FUNCDEF character<br />
comnonds t o<br />
/ be executed \<br />
analyzer comn<strong>and</strong><br />
< # A character<br />
character<br />
Item Description/Default<br />
Character (function name) 9ny valid character.<br />
jelimiter<br />
inalyzer comm<strong>and</strong><br />
vlsb length<br />
.sb length<br />
Xaracter (data)<br />
:haracter & EOI<br />
Matching characters marking the beginning <strong>and</strong> end of the list of<br />
spectrum analyzer comm<strong>and</strong>s.<br />
4ny valid spectrum analyzer comm<strong>and</strong>.<br />
VIost significant byte of a two-byte word that describes the<br />
lumber of bytes transmitted.<br />
.east signlflcant byte of a two-byte word that describes the<br />
mmber of bytes transmitted.<br />
1ny valid character.<br />
1ny valid character <strong>and</strong> END.<br />
Restriction: User-defined function name cannot be a reserved word (see lkble 5-2).<br />
Related Comm<strong>and</strong>s: ABORT, DISPOSE, KEYDEF, RETURN.<br />
5-184 Programming Comm<strong>and</strong>s<br />
Range<br />
! to 11 characters<br />
.ong, A through Z <strong>and</strong><br />
;he underscore (the<br />
utderscore should be<br />
used as the second<br />
:haracter of the<br />
abel).<br />
‘I\@=/^$%;!‘:<br />
‘&
Example<br />
Connect CAL OUT to the spectrum analyzer input.<br />
IO OUTPUT 718;“IP;”<br />
20 OUTPUT 718;“VARDEF H-SPAN,O;”<br />
30 OUTPUT 718;“FUNCDEF S,HIFT,O”;<br />
40 OUTPUT 718;“DIV H_SPAN,SP,2;“;<br />
50 OUTPUT 718;“ADD CF,CF,H-SPAN;“;<br />
60 OUTPUT 718*“@*”<br />
70 OUTPUT 718;“KkDEF l,S-HIFT,%SHIFT-UP%;”<br />
80 OUTPUT 718;“CF 300MHZ;”<br />
90 OUTPUT 718;“SP IMHZ;“;<br />
100 LOCAL 718<br />
110 END<br />
.<br />
FUNCDEF Define Function<br />
Initializes spectrum analyzer<br />
D&nes user-o!@ned variable with an<br />
initial value of 0.<br />
Creates user-&@u?d jimction, called<br />
SHIFT. Shift divides the span by two<br />
<strong>and</strong> adds the results to the center frequency.<br />
The Y@” delimits the d@inition.<br />
Puts half of span value into H-SPAN.<br />
Adds H-SPAN to Cl?<br />
Marks the end of the FUNCDEF declaration.<br />
Assigns the function XHIFT to the<br />
user&$ned sojtkey, called SHITl’-UI?<br />
Displays the calibrator signal.<br />
Returns control to local mode.<br />
The semicolons at the end of lines 30, 40, <strong>and</strong> 50 in the example suppress BASIC’s carriage<br />
return <strong>and</strong> line feed. Adding the semicolons at the end of the lines of a FUNCDEF declaration<br />
saves memory (because the carriage returns <strong>and</strong> line feeds are not stored in the FUNCDEF).<br />
Description<br />
The FUNCDEF comm<strong>and</strong> can be used to create a user-defined function. Note that a<br />
user-defined function does not return a value like functions do in many programming<br />
languages. ‘lb use the FUNCDEF comm<strong>and</strong>, you must specify the function label <strong>and</strong> the list<br />
of comm<strong>and</strong>s it executes. Once a user-defined function is created, it is stored in spectrum<br />
analyzer memory. The user-defined function can be executed by invoking the function name<br />
within the definition of a user-defined softkey, another user-defined function, or a computer<br />
program. ‘Ib delete the function from spectrum analyzer memory, use the DISPOSE comm<strong>and</strong>.<br />
(See Chapter 4 for more information about creating <strong>and</strong> using a FUNCDEF).<br />
The ABORT, IF/THEN/ELSE/ENDIF, REPEAT/UNTIL, or RETURN comm<strong>and</strong>s are useful<br />
comm<strong>and</strong>s for altering the user-defined function’s operation.<br />
The following are general rules <strong>and</strong> limitations of FUNCDEF:<br />
� Do not use existing function names or secondary keywords (reserved words) as labels for<br />
user-defined functions. See %ble 5-2 for a list of reserved words.<br />
w Limit the number of characters (between the delimiters) in the list of spectrum analyzer<br />
comm<strong>and</strong>s to a maximum of 2047 characters.<br />
w The maximum number of nested FUNCDEF declarations is 40. (Nested FUNCDEF<br />
declarations is when one FUNCDEF calls another FUNCDEF.) See the programming example<br />
for the ABORT comm<strong>and</strong> for an example of nesting FUNCDEF declarations.<br />
� Avoid using the POWERON LAST, SAVE STATE, <strong>and</strong> RECALL STATE programming comm<strong>and</strong>s<br />
within the function. These comm<strong>and</strong>s save <strong>and</strong> recall a state that, within auser-defined<br />
function, may only partially recall the saved state.<br />
Programming Comm<strong>and</strong>s 5-l 85
GATE<br />
Gate<br />
Turns on or off the time-gating.<br />
Syntax<br />
GATE OFF<br />
Equivalent Softkey: lGgTE ON OFF .<br />
Option Required: Option 105.<br />
Preset State: GATE OFF’.<br />
Related Comm<strong>and</strong>s: GATECTL, GD, GDRVUTIL, GL, GP<br />
Example<br />
Connect the HI SWEEP IN/OUT connector to the GATE TRIGGER INPUT. Connect the CAL OUT<br />
to the spectrum analyzer input.<br />
10 OUTPUT 718."IP-"<br />
20 OUTPUT 718;"CF'300MHZ;SP 0HZ;ST 200MS;"<br />
30 OUTPUT 718;"GD 66MS;GL 66M.S;”<br />
40 OUTPUT 718;"GATECTL EDGE;"<br />
50 OUTPUT 718."GP POS*"<br />
> 9<br />
60 OUTPUT 718;"GATE ON;"<br />
70 END<br />
5-l 88 Programming Comm<strong>and</strong>s<br />
ON<br />
/<br />
KATE<br />
It?rforms an instrument preset.<br />
Sets the center frequency, span, <strong>and</strong><br />
sweep time.<br />
Sets the gate delay <strong>and</strong> gate length.<br />
Sets the gate triggering for the edge<br />
of the trigger input signal.<br />
Triggers on the positive edge of the<br />
trigger input signal.<br />
Turns on the gating.
GATECTL<br />
Gate Control<br />
GATECTL Gate Control<br />
Selects between the edge <strong>and</strong> the level mode for Option 105, the time-gated spectrum analysis<br />
capability.<br />
Syntax<br />
Equivalent Softkey: GATE CTL EDGE LVL .<br />
Option Required: Option 105.<br />
Preset State: GATECTL EDGE.<br />
Related Comm<strong>and</strong>s: GATE, GD, GL, GP.<br />
Example<br />
OUTPUT 718;“GATECTL LEVEL;”<br />
Description<br />
XGATECTL<br />
In the edge mode, a trigger input starts the delay timer that triggers the gate timer. The gate<br />
polarity (GP), gate delay time (GD), <strong>and</strong> gate time length (GL) are operational in the edge mode,<br />
but not in the level mode. In the level mode, the gate follows the trigger input level.<br />
When used as a predefined variable, GATECTL returns a “0” if GATECTL has been set to<br />
EDGE, a “ 1 n if GATECTL has been set to LEVEL.<br />
Query Response<br />
output<br />
t e r m i n a t i o n --)<br />
QCATECTL<br />
Programming Comm<strong>and</strong>s 5-187
GC<br />
Gate Preset<br />
Presets Option 105, the time-gated spectrum analysis capability.<br />
Syntax<br />
( GC<br />
Option Required: Option 105.<br />
Related Comm<strong>and</strong>s: GATE, GATECTL, GD, GL, GP.<br />
Example<br />
OUTPUT 718;"GC;"<br />
Description<br />
The GC comm<strong>and</strong> sets the following time-gated spectrum analysis functions:<br />
� GATE to OFF.<br />
w GATECTL to EDGE.<br />
� GP to POS.<br />
w The gate delay (GD) <strong>and</strong> gate length (GL) time values are set to 1 ps.<br />
5-188 Programming Comm<strong>and</strong>s<br />
XGC
GD<br />
Gate Delay<br />
Sets the delay time from when the gate trigger occurs to when the gate opens.<br />
Syntax<br />
c<br />
GD<br />
‘...._..’<br />
I- t i m e v a l u e -\<br />
\<br />
u s<br />
;gY<br />
L /<br />
/<br />
GD Gate Delay<br />
Item Description/Default Range<br />
Number Any real or integer number. Default unit is seconds. 1 ps to 65.5 ms<br />
Equivalent Softkey: GATE DELAY .<br />
Option Required: Option 105.<br />
Preset State: 1 ps.<br />
Related Comm<strong>and</strong>s: GATE, GATECTL, GC, GL.<br />
Example<br />
OUTPUT 718; “GD 1US; ”<br />
Description<br />
GD applies only if GATECTL is set to EDGE.<br />
Query Response<br />
XGD<br />
QQI<br />
Programming Comm<strong>and</strong>s 5-l 88
GDRVCLPAR<br />
Clear Pulse Parameters<br />
Clears the pulse parameters (pulse width, pulse repetition interval, <strong>and</strong> reference edge) for a<br />
time-gate measurement by setting the pulse parameters to 0.<br />
Syntax<br />
XGDRVCLPAR<br />
Equivalent Softkey: CLE&R PARAM .<br />
Option Required: Option 105. Option 101 is recommended.<br />
Related Comm<strong>and</strong>s: GDRVPWID, GDRVPRI, GDRVREFE, GDRVST, GDRVVBW, GDRVRBW.<br />
Example<br />
OUTPUT 718;"GDRVCLPAR;" Clears all the pulse parameters.<br />
Description<br />
GDRVPWID, GDRVPRI, GDRVREFE are the programming comm<strong>and</strong>s that can be used to set the<br />
pulse width, pulse repetition interval, <strong>and</strong> reference edge, respectively.<br />
GDRVCLPAR also turns off the resolution b<strong>and</strong>width to pulse width coupling, video b<strong>and</strong>width<br />
to gate length coupling, <strong>and</strong> sweeptime to pulse repetition interval coupling.<br />
The GDRVCLPAR comm<strong>and</strong> is a gate utility function (see “GDRVUTIL” for more information<br />
about the gate utility functions). Executing a gate utility comm<strong>and</strong> without Option 105<br />
installed in the spectrum analyzer generates the COMMAND ERROR: message <strong>and</strong> an SRQ 140.<br />
5-180 Programming Comm<strong>and</strong>s
GDRVGDEL<br />
Gate Delay for the Frequency Window<br />
GDRVGDEL Gate Delay for the Frequency Window<br />
For the frequency window only, GDRVGDEL sets the time delay from when the gate trigger<br />
occurs to when the gate is opened.<br />
Syntax<br />
\ / XGDRVGDEL<br />
Item I Description/Default R=u3e<br />
Number Any real or integer number. Default unit is seconds. 1 ps to 65 ms.<br />
Equivalent Softkey: GDRVGDEL is equivalent to GATE DELAY when using the gate utility<br />
(GATE UTILfTY ) functions.<br />
Option Required: Option 105. Option 101 is recommended.<br />
Preset Value: 1 ps<br />
Related Comm<strong>and</strong>s: GDRVUTIL, GDRVGLEN, GD, GL.<br />
Example<br />
OUTPUT 718;"MOV GDRVGDEL,lUS;" Sets the gate marker delay to 1 ps.<br />
Description<br />
If the frequency window is currently the active window, GDRVGDEL updates the gate position<br />
markers <strong>and</strong> the position of the gate. If the time window is currently active, only the gate<br />
position markers are updated.<br />
You can execute the GDRVGDEL comm<strong>and</strong> two different ways. You can either execute the<br />
GDRVGDEL comm<strong>and</strong> directly (for example, "GDRVGDEL IMS ; ‘I) or use the MOV comm<strong>and</strong><br />
to move the value for the time delay into the GDRVGDEL comm<strong>and</strong> (for example, “MOV<br />
GDRVGDEL, 1MS ; ‘I). If you use the MOV comm<strong>and</strong>, no text is displayed in the active function<br />
area during comm<strong>and</strong> execution.<br />
The GDRVGDEL comm<strong>and</strong> is a gate utility function (see “GDRVUTIL” for more information<br />
about the gate utility functions). Executing a gate utility comm<strong>and</strong> without Option 105<br />
installed in the spectrum analyzer generates the COMMAND ERROR: message <strong>and</strong> an SRQ 140.<br />
Programming Comm<strong>and</strong>s 5-191
GDRVGDEL Gate Delay for the Frequency Window<br />
Query Response<br />
GDRVGDEL? returns the last value entered for GDRVGDEL. To determine the current gate<br />
delay, query the gate delay (GD) comm<strong>and</strong>.<br />
5-l 92 Programming Comm<strong>and</strong>s<br />
g a t e d e l a y<br />
/<br />
output<br />
t e r m i n a t i o n +<br />
QCDRVGDEL
GDRVGLEN Gate Length for the Frequency <strong>and</strong> Time Windows<br />
GDRVGLEN<br />
Gate Length for the Frequency <strong>and</strong> Time Windows<br />
Adjusts the gate length in both the time <strong>and</strong> frequency windows.<br />
Syntax<br />
- octe lenath -<br />
Item Description/Default hnge<br />
Number Any real or integer number. Default unit is seconds. 1 ps to 65 ms.<br />
Equivalent Softkey: GDRVGLEN is equivalent to GATE LElWI% when using the gate utility<br />
(GATE UTILITY ) functions.<br />
Option Required: Option 105. Option 101 is recommended.<br />
Preset Value: 1 ps.<br />
Related Comm<strong>and</strong>s: GDRVUTIL, GDRVGDEL, GD, GL.<br />
Example<br />
OUTPUT 718;"MOV GDRVGLEN,lUS;" Sets the gate marker to a length of 1 ps.<br />
Description<br />
You can execute the GDRVGLEN comm<strong>and</strong> two different ways. You can either execute the<br />
GDRVGLEN comm<strong>and</strong> directly (for example, "GDRVGLEN 1MS ; ‘I) or use the MOV comm<strong>and</strong> to<br />
move the value for the gate length delay into the GDRVGLEN comm<strong>and</strong> (for example, “MOV<br />
GDRVGLEN , 1MS ; ‘I). If you use the MOV comm<strong>and</strong>, no text is displayed in the active function<br />
area during comm<strong>and</strong> execution.<br />
The GDRVGLEN comm<strong>and</strong> is a gate utility function (see “GDRVUTIL” for more information<br />
about the gate utility functions). Executing a gate utility comm<strong>and</strong> without Option 105<br />
installed in the spectrum analyzer generates the COMMAND ERROR: message <strong>and</strong> an SRQ 140.<br />
Query Response<br />
GDRVGLEN? returns the last value entered for GDRVGLEN. lb determine the current gate<br />
time length, query the gate length (GL) comm<strong>and</strong>.<br />
g a t e<br />
l e n g t h 7<br />
output<br />
termlnotion -<br />
Programming Comm<strong>and</strong>s 5-l 93
GDRVGLEN Gate Length for the Frequency <strong>and</strong> Time Windows<br />
GDRVGT<br />
Window Gate Control<br />
Turns on or off the gate in the frequency window.<br />
Syntax<br />
gate<br />
r off 7<br />
GDRVGT 0<br />
. . ..._..’<br />
gate on<br />
/ \<br />
Equivalent Softkey: GDRVGT is equivalent to GATE Ohl OFF when using the gate utility<br />
(GATE UTILITY ) functions.<br />
Option Required: Option 105. Option 101 is recommended.<br />
Related Comm<strong>and</strong>s: GDRVUTIL, GATE.<br />
Example<br />
OUTPUT 718;"MOV GDRVGT,l;" Turns on the gate in thefrequmcu window.<br />
Description<br />
Before executing GDRVGT, you should do the following:<br />
1. Ensure there is a trigger pulse connected to the GATE TRIGGER INPUT connector on the<br />
rear panel of spectrum analyzer. The gate utility functions do not work if there is not a<br />
trigger input.<br />
2. Ensure that the GATE OUTPUT connector <strong>and</strong> the EXT TRIG INPUT connector are<br />
connected together.<br />
If the time window is the active window, turning on the gate with GDRVGT makes the<br />
frequency window the active window. The GDRVGT comm<strong>and</strong> is a gate utility function (see<br />
“GDRVUTIL” for more information about the gate utility functions). Executing a gate utility<br />
comm<strong>and</strong> without Option 105 installed in the spectrum analyzer generates the COMMAND ERROR:<br />
message <strong>and</strong> an SRQ 140.<br />
You can execute the GDRVGT comm<strong>and</strong> two different ways. You can either execute the<br />
GDRVGT comm<strong>and</strong> directly (for example, "GDRVGT 1; I’) or use the MOV comm<strong>and</strong> to move<br />
the 1 or 0 into the GDRVGT comm<strong>and</strong> (for example, "MOV GDRVGT,l;"). If you use the MOV<br />
comm<strong>and</strong>, no text is displayed in the active function area during comm<strong>and</strong> execution.<br />
5-194 Programming Comm<strong>and</strong>s<br />
r
Query Response<br />
7<<br />
r off 7<br />
0<br />
I<br />
output<br />
t e r m i n a t i o n +<br />
GDRVGT Window Gate Control<br />
Programming Comm<strong>and</strong>s 5-l 95
GDRVGTIM<br />
Gate Trigger to Marker Position for the Time Window<br />
Activates the gate trigger marker, <strong>and</strong> then places it at the given value in the time window.<br />
The trigger marker readout shows the time between the gate trigger edge <strong>and</strong> the current<br />
marker position.<br />
Syntax<br />
.._._..’<br />
- marker position 7<br />
Item Description/Default<br />
4 US<br />
2;;<br />
L I<br />
Number Any real or integer number. Default unit is seconds.<br />
Equivalent Softkey: GDRVGTIM is similar to TRIG MKR ON OFF .<br />
Option Required: Option 105. Option 101 is recommended.<br />
Initial Value: 0.<br />
Related Comm<strong>and</strong>s: GDRVUTIL.<br />
Example<br />
/<br />
/<br />
!<br />
I 0<br />
Range<br />
XGDRVGTIM<br />
to the sum of the<br />
sweev time <strong>and</strong> sweev I<br />
delay (GDRVSWDE). -<br />
OUTPUT 718;“MOV GDRVGTIM,lOMS;” Places the gate trigger marker 10 ms a&v- the start<br />
of the sweep.<br />
Description<br />
If the frequency window is the active window, executing GDRVGTIM makes the time window<br />
the active window.<br />
Once you enter a value into GDRVGTIM, that value is retained until you change it, or execute<br />
DISPOSE ALL. Pressing (-1 or turning the spectrum analyzer off does not change the<br />
value of GDRVGTIM.<br />
You can execute the GDRVGTIM comm<strong>and</strong> two different ways. You can either execute the<br />
GDRVGTIM comm<strong>and</strong> directly (for example, “GDRVGTIM 1MS ; I’) or use the MOV comm<strong>and</strong><br />
to move the value for the time delay into the GDRVGTIM comm<strong>and</strong> (for example, “MOV<br />
GDRVGTIM, 1MS ; ‘I). If you use the MOV comm<strong>and</strong>, no text is displayed in the active function<br />
area during comm<strong>and</strong> execution.<br />
The GDRVGTIM comm<strong>and</strong> is a gate utility function (see “GDRVUTIL” for more information<br />
about the gate utility functions). Executing a gate utility comm<strong>and</strong> without Option 105<br />
installed in the spectrum analyzer generates the COMMAND ERROR: message <strong>and</strong> an SRQ 140.<br />
5-195 Programming Comm<strong>and</strong>s
Query Response<br />
GDRVGTIM Gate Trigger to Marker Position for the Time Window<br />
GDRVGTIM? returns the last value entered for GDRVGTIM. If you want the current value for<br />
the gate trigger marker, make the marker active with MKAC<strong>TV</strong>, <strong>and</strong> then use MKF?.<br />
m a r k e r<br />
output<br />
terminot ion --)<br />
Programming Comm<strong>and</strong>s 5-l 97
GDRVPRI<br />
Pulse Repetition Interval<br />
Enters the specified value as the pulse repetition interval.<br />
Syntax<br />
GDRVPR I<br />
pulse<br />
r e p e t i t i o n i n t e r v a l 7<br />
d<br />
u s<br />
f+<br />
Item Description/Default Range<br />
Number Any real or integer number. Default unit is seconds. Range is from the<br />
sweep delay<br />
(GDRVSWDE) to the<br />
sweep time plus the<br />
GDRVPRI is equivalent to ENTER $31 .<br />
Option Required: Option 105. Option 101 is recommended.<br />
Initial Value: 0.<br />
Related Comm<strong>and</strong>s: GDRVCLPAR, GDRVST.<br />
Example<br />
OUTPUT 718;"MOV GDRVPRI,lMS;" Sets the pulse repetition interval to 1 ms.<br />
Description<br />
When the pulse repetition interval is entered, the approximate gate trigger position will be<br />
indicated on screen by either a “T”for a positive trigger, or a “I” for a negative trigger. Unlike<br />
EhlTER PRI , GDRVPRI does not make the marker function active or display the Pulse Param<br />
softkeys.<br />
Once you enter a value into GDRVPRI, that value is retained until you change it, or execute<br />
DISPOSE ALL. Pressing (j-1 or turning the spectrum analyzer off does not change the<br />
value of GDRVPRI.<br />
You can execute the GDRVPRI comm<strong>and</strong> two different ways. You can either execute the<br />
GDRVPRI comm<strong>and</strong> directly (for example, "GDRVPRI 1MS ; I’) or use the MOV comm<strong>and</strong> to move<br />
the value for the time delay into the GDRVPRI comm<strong>and</strong> (for example, "MOV GDRVPRI , 1MS ; I').<br />
If you use the MOV comm<strong>and</strong>, no text is displayed in the active function area during comm<strong>and</strong><br />
execution.<br />
The GDRVPRI comm<strong>and</strong> is a gate utility function (see “GDRVUTIL” for more information about<br />
the gate utility functions). Executing a gate utility comm<strong>and</strong> without Option 105 installed in<br />
the spectrum analyzer generates the COMMAND ERROR: message <strong>and</strong> an SRQ 140.<br />
5-l 98 Programming Comm<strong>and</strong>s
Query Response<br />
GDRVPRI returns the current value for the pulse repetition interval.<br />
p u l s e r e p e t i t i o n<br />
r i n t e r v a l 7<br />
o u t p u t<br />
t e r m i n a t i o n -<br />
GDRVPRI Pulse Repetition Interval<br />
Programming Comm<strong>and</strong>s 5-l 99
GDRVPWID<br />
Pulse Width<br />
Enters the specified value as the pulse width.<br />
Syntax<br />
GDRVPWI D<br />
.._._.:<br />
Item Description/Default Raw-<br />
Number Any real or integer number. Default unit is ps. Range is from the<br />
sweep delay<br />
(GDRVSWDE) plus the<br />
sweep time to the<br />
Equivalent Softkey: E#m WIDTH .<br />
Option Required: Option 105. Option 101 is recommended.<br />
Initial Value: 0.<br />
Related Comm<strong>and</strong>s: GDRVCLPAR, GDRVRBW.<br />
Example<br />
OUTPUT 718;"MOV GDRVPWID,lMS;" Sets the pulse width to 1 ms.<br />
Description<br />
Unlike ElQTER WIDTH , GDRVPWID does not make the marker function active or display the<br />
Pulse Param softkeys.<br />
Once you enter a value into GDRVPWID, that value is retained until you change it, or execute<br />
DISPOSE ALL. Pressing CPRESET) or turning the spectrum analyzer off does not change the<br />
value of GDRVPWID.<br />
You can execute the GDRVPWID comm<strong>and</strong> two different ways. You can either execute the<br />
GDRVPWID comm<strong>and</strong> directly (for example, "GDRVPWID 1MS ; ‘I) or use the MOV comm<strong>and</strong><br />
to move the value for the pulse width into the GDRVPWID comm<strong>and</strong> (for example, "MOV<br />
GDRVPWID, 1MS; I’). If you use the MOV comm<strong>and</strong>, no text is displayed in the active function<br />
area during comm<strong>and</strong> execution.<br />
The GDRVPWID comm<strong>and</strong> is a gate utility function (see “GDRVUTIL” for more information<br />
about the gate utility functions). Executing a gate utility comm<strong>and</strong> without Option 105<br />
installed in the spectrum analyzer generates the COMMAND ERROR: message <strong>and</strong> an SRQ 140.<br />
5-200 Programming Comm<strong>and</strong>s<br />
/
Query Response<br />
GDRVPWID returns the current value for the pulse width.<br />
pulse<br />
/- w i d t h<br />
output<br />
t e r m i n a t i o n -<br />
GDRVPWID Pulse Width<br />
Programming Comm<strong>and</strong>s 5-201
GDRVRBW<br />
Couple Resolution B<strong>and</strong>width to Pulse Width<br />
Couples or uncouples the resolution b<strong>and</strong>width to the specified pulse width.<br />
Syntax<br />
uncoupled<br />
, \<br />
Equivalent Softkey: CPL RBW OM OFF.<br />
Option Required: Option 105. Option 101 is recommended.<br />
Preset Value: Uncoupled.<br />
Related Comm<strong>and</strong>s: GDRVPWID, GDRVVBW, GDRVST.<br />
Example<br />
OUTPUT 718;“MOV GDRVRBW,l;” Couples the resolution b<strong>and</strong>width to the pulse width.<br />
Description<br />
Before coupling the resolution b<strong>and</strong>width to the pulse width, you should enter the pulse width<br />
into GDRVPWID. Coupling the resolution b<strong>and</strong>width to the pulse width updates the trace<br />
display in the active window. If the resolution b<strong>and</strong>width <strong>and</strong> the pulse width are uncoupled,<br />
the setting of the resolution b<strong>and</strong>width does not change.<br />
The resolution b<strong>and</strong>width is at least three times Pu,sekadth when coupled. The resolution<br />
b<strong>and</strong>width is updated to the coupled value when the window is next active.<br />
You can execute the GDRVRBW comm<strong>and</strong> two different ways. You can either execute the<br />
GDRVRBW comm<strong>and</strong> directly (for example, “GDRVRBW 1; I’) or use the MOV comm<strong>and</strong> to move<br />
the 1 or 0 into the GDRVRBW comm<strong>and</strong> (for example, “MOV GDRVRBW, 1; ‘I). If you use the MOV<br />
comm<strong>and</strong>, no text is displayed in the active function area during comm<strong>and</strong> execution.<br />
The GDRVRBW comm<strong>and</strong> is a gate utility function (see “GDRVUTIL” for more information<br />
about the gate utility functions). Executing a gate utility comm<strong>and</strong> without Option 105<br />
installed in the spectrum analyzer generates the COMMAND ERROR: message <strong>and</strong> an SRQ 140.<br />
5.202 Programming Comm<strong>and</strong>s
Query Response<br />
GDRVRBW Couple Resolution B<strong>and</strong>width to Pulse Width<br />
GDRVRBW returns a “1” if the resolution b<strong>and</strong>width is coupled to the pulse width, or a “0” if<br />
it is not coupled.<br />
OGDRVREW<br />
Programming Comm<strong>and</strong>s 5-203
GDRVREFE<br />
Enter Reference Edge<br />
Allows you to enter the position (in time) for a reference edge.<br />
Syntax<br />
GDRVREFE<br />
‘._._.’<br />
/ XGDRVREFE<br />
Item Description/Default Range<br />
Number Any real or integer number. Default unit is p.s. Range is from the sweep delay<br />
(GDRVSWDE) plus the sweep time to the<br />
I I sweep delay. I<br />
Equivalent Softkey: ENTER REF EDGE .<br />
Option Required: Option 105. Option 101 is recommended.<br />
Initial Value: 0 s.<br />
Related Comm<strong>and</strong>s: GDRVUTIL.<br />
Example<br />
OUTPUT 718;"MOV GDRVREFE,lMS;"<br />
Description<br />
Unlike ENTER REF EDGE , GDRVREFE does not make the marker function active or display the<br />
Enter REF EDGE softkeys.<br />
Once you enter a value into GDRVREFE, that value is retained until you change it, or execute<br />
DISPOSE ALL. Pressing @?Z’Z7] or turning the spectrum analyzer off does not change the<br />
value of GDRVREFE.<br />
You can execute the GDRVREFE comm<strong>and</strong> two different ways. You can either execute the<br />
GDRVREFE comm<strong>and</strong> directly (for example, "GDRVREFE 1MS ; ‘I) or use the MOV comm<strong>and</strong><br />
to move the value into the GDRVREFE comm<strong>and</strong> (for example, “MOV GDRVREFE, 1MS; ‘I). If<br />
you use the MOV comm<strong>and</strong>, no text is displayed in the active function area during comm<strong>and</strong><br />
execution.<br />
The GDRVREFE comm<strong>and</strong> is a gate utility function (see “GDRVUTIL” for more information<br />
about the gate utility functions). Executing a gate utility comm<strong>and</strong> without Option 105<br />
installed in the spectrum analyzer generates the COMMAND ERROR: message <strong>and</strong> an SRQ 140.<br />
5-204 Programming Comm<strong>and</strong>s
Query Response<br />
r e f e r e n c e<br />
/ edge\<br />
output<br />
termination +<br />
GDRVREFE Enter Reference Edge<br />
Programming Comm<strong>and</strong>s 5-205
GDRVST<br />
Couple Sweep Time to Pulse Repetition Interval<br />
Couples or uncouples the sweep time to the pulse repetition interval<br />
Syntax<br />
.._._..’<br />
uncoup I ed<br />
c o u p l e d<br />
/ \<br />
Equivalent Softkey: CPL SWP ON OFF.<br />
Option Required: Option 105. Option 101 is recommended.<br />
Preset Value: Uncoupled.<br />
Related Comm<strong>and</strong>s: GDRVPRI.<br />
Example<br />
XGDRVST<br />
OUTPUT 718;"MOV GDRVST,l;" Couples the sweep time to the pulse repetition interval.<br />
Description<br />
Before coupling the sweep time to the pulse repetition interval, you should enter the pulse<br />
repetition interval into GDRVPRI. Coupling the sweep time to the pulse repetition interval<br />
updates the trace display in the active window. If the sweep time <strong>and</strong> the pulse repetition<br />
interval are uncoupled, the setting of the sweep time does not change.<br />
The sweep time is 401 times the pulse repetition interval when coupled. The sweep time is<br />
updated to the coupled value when the window is next active.<br />
You can execute the GDRVST comm<strong>and</strong> two different ways. You can either execute the<br />
GDRVST comm<strong>and</strong> directly (for example, "GDRVST 1; I’) or use the MOV comm<strong>and</strong> to move<br />
the 1 or 0 into the GDRVST comm<strong>and</strong> (for example, "MOV GDRVST, 1; 'I). If you use the MOV<br />
comm<strong>and</strong>, no text is displayed in the active function area during comm<strong>and</strong> execution.<br />
The GDRVST comm<strong>and</strong> is a gate utility function (see “GDRVUTIL” for more information about<br />
the gate utility functions). Executing a gate utility comm<strong>and</strong> without Option 105 installed in<br />
the spectrum analyzer generates the COMMAND ERROR: message <strong>and</strong> an SRQ 140.<br />
5-206 Programming Comm<strong>and</strong>s
Query Response<br />
GDRVST Couple Sweep Time to Pulse Repetition Interval<br />
GDRVST returns a “1” if the sweep time is coupled to the pulse repetition interval, or a “0” if<br />
it is not coupled.<br />
Programming Comm<strong>and</strong>s 5-207
GDRVSWAP<br />
Update the Time or Frequency Window<br />
Makes the window (either the time or frequency window) that is currently not the active<br />
window, the active window.<br />
Syntax<br />
Equivalent Softkey: GDRVSWAP is equivalent to UPDATE TIMEFREq , or pressing ml.<br />
Option Required: Option 105. Option 101 is recommended.<br />
Related Comm<strong>and</strong>s: GDRVUTIL.<br />
Example<br />
OUTPUT 718;"GDRVSWAP;"<br />
Description<br />
Whenever the window is made active, the trace <strong>and</strong> gate position are updated. GDRVSWAP<br />
also couples the resolution b<strong>and</strong>width, video b<strong>and</strong>width, <strong>and</strong> sweep time to the current pulse<br />
width <strong>and</strong> pulse repetition interval values, if the pulse values have been entered <strong>and</strong> coupling<br />
is active. (See “GDRVRBW, ” “ GDRVVBW, ” <strong>and</strong> “GDRVST” for more information about coupling<br />
resolution b<strong>and</strong>width, video b<strong>and</strong>width, <strong>and</strong> sweep time to the current pulse width <strong>and</strong> pulse<br />
repetition interval.)<br />
The GDRVSWAP comm<strong>and</strong> is a gate utility function (see “GDRVUTIL” comm<strong>and</strong> for more<br />
information about the gate utility functions). Executing a gate utility comm<strong>and</strong> without Option<br />
105 installed in the spectrum analyzer generates the COMMAND ERROR: message <strong>and</strong> an SRQ 140.<br />
5-206 Programming Comm<strong>and</strong>s
GDRVSWDE<br />
Delay Sweep for Time Window<br />
GDRVSWDE Delay Sweep for Time Window<br />
Allows you to specify the delay from the edge of the gate trigger until the sweep is started in<br />
the time window.<br />
Syntax<br />
Item Description/Default R=t3e<br />
Number Any real or integer number. Default unit is second. 1 ps to 65 ms.<br />
Equivalent Softkey: SWEEP DELAY .<br />
Option Required: Option 105. Option 101 is recommended.<br />
Initial Value: 1 ps.<br />
Related Comm<strong>and</strong>s: GDRVUTIL, GD.<br />
Example<br />
OUTPUT 718 ; “MOV GDRVSWDE, 1US ; ” Sets the time delay to 1 ps.<br />
Description<br />
When using GDRVSWDE, the gate zone markers shown in the time window are updated to the<br />
value of GDRVSWDE.<br />
Once you enter a value into GDRVSWDE, that value is retained until you change it, or execute<br />
DISPOSE ALL. Pressing (PRESET] or turning the spectrum analyzer off does not change the<br />
value of GDRVSWDE.<br />
You can execute the GDRVSWDE comm<strong>and</strong> two different ways. You can either execute the<br />
GDRVSWDE comm<strong>and</strong> directly (for example, “GDRVSWDE 1MS ; I’) or use the MOV comm<strong>and</strong><br />
to move the value for the time delay into the GDRVSWDE comm<strong>and</strong> (for example, “MOV<br />
GDRVSWDE, 1MS ; ‘I). If you use the MOV comm<strong>and</strong>, no text is displayed in the active function<br />
area during comm<strong>and</strong> execution.<br />
The GDRVSWDE comm<strong>and</strong> is a gate utility function (see “GDRVUTIL” for more information<br />
about the gate utility functions). Executing a gate utility comm<strong>and</strong> without Option 105<br />
installed in the spectrum analyzer generates the COMMAND ERROR: message <strong>and</strong> an SRQ 140.<br />
Programming Comm<strong>and</strong>s 5-209
GDRVSWDE Delay Sweep for Time Window<br />
Query Response<br />
GDRVSWDE? returns the last value entered into GDRVSWDE. To determine the current value<br />
of the sweep time delay, query the gate delay (GD) comm<strong>and</strong>.<br />
5-210 Programming Comm<strong>and</strong>s<br />
output<br />
termination +
GDRVSWP<br />
Sweep Time for the Time Window<br />
Specifies the sweep time for the time domain window of the gate utility.<br />
Syntax<br />
GDRVSWP Sweep Time for the Time Window<br />
/- s w e e p t i m e -\<br />
/ XGDRVSWP<br />
Item Description/Default Range<br />
Number Any real or integer number. Default unit is second. 0 to 65 ms.<br />
Option Required: Option 105. Option 101 is recommended.<br />
Initial Value: 0.<br />
Related Comm<strong>and</strong>s: GDRVUTIL, ST.<br />
Example<br />
OUTPUT 718 ; “MOV GDRVSWP, 1MS ; ‘I Sets the time o?ek.zy to 1 rns.<br />
Description<br />
The positions of the gate markers <strong>and</strong> the gate trigger markers are updated to the new value of<br />
the sweep time.<br />
Once you enter a value into GDRVSWP, that value is retained until you change it, or execute<br />
DISPOSE ALL. Pressing CM] or turning the spectrum analyzer off does not change the<br />
value of GDRVSWP<br />
You can execute the GDRVSWP comm<strong>and</strong> two different ways. You can either execute the<br />
GDRVSWP comm<strong>and</strong> directly (for example, “GDRVSWP 1MS ; ‘I) or use the MOV comm<strong>and</strong><br />
to move the value for the sweep time into the GDRVSWP comm<strong>and</strong> (for example, “MOV<br />
GDRVSWP , 1MS ; ‘I). If you use the MOV comm<strong>and</strong>, no text is displayed in the active function area<br />
during comm<strong>and</strong> execution.<br />
The GDRVSWP comm<strong>and</strong> is a gate utility function (see “GDRVUTIL” for more information<br />
about the gate utility functions). Executing a gate utility comm<strong>and</strong> without Option 105<br />
installed in the spectrum analyzer generates the COMMAND ERROR: message <strong>and</strong> an SRQ 140.<br />
Programming Comm<strong>and</strong>s 5-211
GDRVSWP Sweep Time for the Time Window<br />
Query Response<br />
GDRVSWP? returns the last value entered into GDRVSWP To determine the current value of<br />
the sweep time in the time window, query the sweep time (ST).<br />
5-212 Programming Comm<strong>and</strong>s<br />
sweep time<br />
/ \<br />
o u t p u t<br />
termination +
GDRVUTIL<br />
Gate Utility<br />
Turns on or off the gate utility.<br />
Syntax<br />
..___...<br />
u t i l i t y<br />
r Off 7<br />
0<br />
u t i l i t y<br />
/- on 7<br />
Equivalent Softkey: GATE UTILITY .<br />
Option Required: Option 105. Option 101 is recommended.<br />
Example<br />
OUTPUT 718;"MOV GDRVUTIL,l;" Turns on the gate utility.<br />
Description<br />
/<br />
GDRVUTIL Gate Utility<br />
When the gate utility is turned on, the spectrum analyzer screen displays two windows. The<br />
upper window displays the input signal in the time domain, <strong>and</strong> the lower window displays the<br />
input signal in the frequency domain. If the spectrum analyzer is in zero span when the gate<br />
utility is turned on, the frequency span of the lower window will be set to a nonzero frequency<br />
span.<br />
Before executing GDRVUTIL, you should do the following:<br />
1. Ensure there is a trigger pulse connected to the GATE TRIGGER INPUT connector on the<br />
rear panel of spectrum analyzer. The gate utility functions do not work if there is not a<br />
trigger input.<br />
2. Ensure that the GATE OUTPUT connector <strong>and</strong> the EXT TRIG INPUT connector are<br />
connected together.<br />
3. Set the center frequency of the analyzer to the signal’s center frequency.<br />
4. Set the reference level of the analyzer so that the signal’s peak is within the first graticule.<br />
The spectrum analyzer cannot turn on the gate utility if the spectrum analyzer is not properly<br />
triggered. Once the gate utility has been turned on, you can use the comm<strong>and</strong>s that begin<br />
with “GDRV” to make the time-gate measurement. Executing a gate utility comm<strong>and</strong> without<br />
Option 105 installed in the spectrum analyzer generates the COMMAND ERROR: message <strong>and</strong> an<br />
SRQ 140.<br />
Programming Comm<strong>and</strong>s 5-213
GDRVUTIL Gate Utility<br />
Restrictions<br />
Executing GDRVUTIL exits the following functions: windows display mode (WINON), N<br />
dB point measurement (NDBPNT), the FFT menu measurements (FFTAUTO, FFTCONTS,<br />
FFISNGLS), TO1 measurement (TOI), marker table (MKTBL), peak table (PKTBL), percent AM<br />
(PCTAM), peak zoom (PKZOOM), or power menu measurements (ACP, ACPE, C<strong>HP</strong>, <strong>and</strong> OBW).<br />
You should turn off the gate utility (set GDRVUTIL to 0) when you are done with the gate<br />
utilities.<br />
Query Response<br />
5-214 Programming Comm<strong>and</strong>s<br />
r off<br />
0<br />
7<br />
1”<br />
f<br />
o u t p u t<br />
� termination +<br />
QGDRVUT I L
GDRVVBW<br />
Couple Video B<strong>and</strong>width to Gate Length<br />
Couples or uncouples the video b<strong>and</strong>width to the gate length.<br />
Syntax<br />
Equivalent Softkey: CPL VBU ON OFF.<br />
Option Required: Option 105. Option 101 is recommended.<br />
Preset Value: Uncoupled.<br />
Related Comm<strong>and</strong>s: GDRVGLEN.<br />
Example<br />
GDRVVBW Couple Video B<strong>and</strong>width to Gate Length<br />
OUTPUT 718;"MOV GDRVVBW,l;" Couples the video b<strong>and</strong>width to the gate length.<br />
Description<br />
XGDRVVBW<br />
Before coupling the video b<strong>and</strong>width to the gate length, you should enter the gate length into<br />
GDRVGLEN. Coupling the video b<strong>and</strong>width to the gate length updates the trace display in the<br />
active window. If the video b<strong>and</strong>width <strong>and</strong> the gate length is uncoupled, the setting of the<br />
video b<strong>and</strong>width does not change.<br />
The video b<strong>and</strong>width is at least equal to the inverse of the gate length when coupled. The<br />
video b<strong>and</strong>width is updated to the coupled value when the window is next active.<br />
You can execute the GDRVVBW comm<strong>and</strong> two different ways. You can either execute the<br />
GDRVVBW comm<strong>and</strong> directly (for example, "GDRVVBW 1; ‘I) or use the MOV comm<strong>and</strong> to move<br />
the 1 or 0 into the GDRVVBW comm<strong>and</strong> (for example, "MOV GDRVVBW, 1; 'I). If you use the MOV<br />
comm<strong>and</strong>, no text is displayed in the active function area during comm<strong>and</strong> execution.<br />
The GDRVVBW comm<strong>and</strong> is a gate utility function (see “GDRVUTIL” for more information<br />
about the gate utility functions). Executing a gate utility comm<strong>and</strong> without Option 105<br />
installed in the spectrum analyzer generates the COMMAND ERROR: message <strong>and</strong> an SRQ 140.<br />
Programming Comm<strong>and</strong>s 5-215
GDRVVBW Couple Video B<strong>and</strong>width to Gate Length<br />
Query Response<br />
GDRVVBW returns a “1” if the resolution b<strong>and</strong>width is coupled to the pulse width, or a “0” if<br />
it is not coupled.<br />
5-216 Programming Comm<strong>and</strong>s<br />
QGDRVVBW
GETPLOT<br />
Get Plot<br />
GETPLOT Get Plot<br />
Initiates output of the spectrum analyzer display to the active plotter port. GETPLOT is meant<br />
to be used within a downloadable program.<br />
Syntax<br />
Item Description/Default<br />
Number Any real or integer number.<br />
XGETPLOT<br />
R=u3e<br />
Number within<br />
the plotter<br />
Related Comm<strong>and</strong>s: FUNCDEF, GETPRNT, SNGLS, TS, PLTPRT.<br />
Restrictions: Not available with Analog+ display mode. See “ANLGPLUS” for more<br />
information.<br />
Example for the <strong>HP</strong>-IB Interface<br />
This example illustrates how you can use a softkey to plot the spectrum analyzer display, <strong>and</strong><br />
then have the plotter perform a page feed. (Not all plotters support the page feed comm<strong>and</strong>,<br />
however.) This example assumes that the plotter is at address 5 <strong>and</strong> the spectrum analyzer is at<br />
address 18. (This example is only valid for <strong>HP</strong> 9000 series 200 <strong>and</strong> 300 computers.)<br />
OUTPUT 718;"FUNCDEF P-LOT,%";<br />
OUTPUT 718."GETPLOT*"-<br />
, , #<br />
OUTPUT 718;"OUTPUT 5,B,80;";<br />
OUTPUT 718;"OUTPUT 5,B,71;";<br />
OUTPUT 718;"OUTPUT 5,B,59;";<br />
OUTPUT 718;"%;"<br />
OUTPUT 718;"KEYDEF l,P-LOT,%PLOT PGIFEED %; ”<br />
LOCAL 718<br />
Creates a user-o!@nedjimction called<br />
P-LOT.<br />
P-LOTperforms the GETPLOTcomm<strong>and</strong><br />
to plot the spectrum anuly.247.r<br />
screen.<br />
P-LOT then sends the ASCII code<br />
for “P” to the plotter:<br />
P-LOT then sends the ASCII code<br />
for “G” to the plotter<br />
P-LOT then sends the ASCII code<br />
for a semicolon to the plotter:<br />
Ends the FUNCDEF declaration.<br />
Assigns P-LOT to soflkey number<br />
1. SojZkey number 1 can be accessed<br />
bypressingC~EAS/USER), User ?ktntzrs.<br />
Programming Comm<strong>and</strong>s 5-217
GETPLOT Get Plot<br />
Description<br />
The GETPLOT comm<strong>and</strong> transfers the trace data, graticule, <strong>and</strong> annotation of the spectrum<br />
analyzer screen to a plotter via the spectrum analyzer interface (softkey labels excluded). The<br />
data is transferred in ASCII, <strong>HP</strong>GL format.<br />
Before executing the downloadable program that contains GETPLOT, you should do one of the<br />
following:<br />
� Disconnect the computer from the spectrum analyzer.<br />
Or,<br />
� Send the following BASIC comm<strong>and</strong>s:<br />
ABORT 7<br />
LOCAL 7<br />
ABORT 7 instructs the computer to release control of the <strong>HP</strong>-IB, <strong>and</strong> LOCAL 7 allows you to<br />
control the spectrum analyzer from the front panel.<br />
When using the PLOT comm<strong>and</strong>, the scaling points (Plx, Ply; P2x, P2y) can be specified.<br />
These scaling points specify the (x,y) coordinates, which determine the size of the plot.<br />
(Plx,Ply) refers to the lower-left plotter coordinates. (P2x,P2y) refers to the upper-right<br />
plotter coordinates.<br />
Note The <strong>HP</strong> 7470A plotter does not support 2 plots per page. If you use an<br />
<strong>HP</strong> 7470A plotter with an <strong>HP</strong> <strong>8590</strong> <strong>Series</strong> spectrum analyzer, you can select one<br />
plot per page or four plots per page but not 2 plots per page.<br />
5-218 Programming Comm<strong>and</strong>s
GETPRNT<br />
Get Print<br />
GETPRNT Get Print<br />
Initiates output of the spectrum analyzer display to a printer. GETPRNT is meant to be used<br />
within a downloadable program.<br />
Syntax<br />
( GETPRNT -k<br />
*<br />
. ...-’<br />
r BW 7<br />
C D -<br />
/ color ,<br />
-<br />
LQ570SM<br />
e<br />
LQ570LG<br />
s<br />
DJCOLOR<br />
D<br />
D J540CLR<br />
/<br />
I<br />
/<br />
/<br />
I<br />
I<br />
/<br />
I<br />
-a--+<br />
cu126e<br />
Programming Comm<strong>and</strong>s 5-21 g
GETPRNT Get Print<br />
Related Comm<strong>and</strong>s: FUNCDEF, GETPLOT, PRNPRT.<br />
Example for the <strong>HP</strong>-IB Interface<br />
This example illustrates how you can use a softkey to print the spectrum analyzer display, <strong>and</strong><br />
then have the printer perform a page feed. This example assumes that the printer is at address<br />
1 <strong>and</strong> the spectrum analyzer is at address 18. (This example is only valid for <strong>HP</strong> 9000 series 200<br />
<strong>and</strong> 300 computers.)<br />
OUTPUT 718;"FUNCDEF P,RINT,%";<br />
OUTPUT 718;"GETPRNT;";<br />
OUTPUT 718;"OUTPUT l,B,lO;";<br />
OUTPUT 718;"OUTPUT l,B,l3;";<br />
OUTPUT 718;"OUTPUT l,B,l2;";<br />
OUTPUT 718;"%;"<br />
OUTPUT 718;"KEYDEF 2,P,RINT,%PRINTIFRM FEED%;"<br />
LOCAL 718<br />
Description<br />
Creates a user-&fined fan&ion<br />
called PJLWT<br />
PXINT performs the GEI’PRNT<br />
comm<strong>and</strong> to print the spectrum<br />
analger screen.<br />
P-RINT then sends the ASCII code<br />
for a carriage return to the printer<br />
PJINT then sends the ASCII code<br />
for a line feed to the printer:<br />
PXINT then sends the ASCII code<br />
for a form feed to the printer:<br />
Ends the FUNCDEF declaration.<br />
Assigns PJLWT to soflkep number<br />
2. Sojtkep number 2 can be<br />
accessed bg pressing CMEASIUSER),<br />
User Meltus.<br />
Allows you to control the spectrum<br />
analyzerfrom thefront panel.<br />
The data is output in <strong>HP</strong> raster graphics format. Executing “GETPRNT;“, “GETPRNT O;“, or<br />
“GETPRNT BW;” produces a monochrome printout. Executing “GETPRNT 1;” <strong>and</strong> “GETPRNT<br />
COLOR;” produces a “color format” output for an <strong>HP</strong> PaintJet printer. Execute “MENU 0;”<br />
before printing to blank the softkeys.<br />
Before executing the downloadable program that contains GETPRNT, you should do one of the<br />
following:<br />
� Disconnect the computer from the spectrum analyzer.<br />
� Send the following BASIC comm<strong>and</strong>s:<br />
ABORT7<br />
LOCAL7<br />
ABORT 7 instructs the computer to release control of the <strong>HP</strong>-IB, <strong>and</strong> LOCAL 7 allows you to<br />
control the spectrum analyzer from the front panel.<br />
5-220 Programming Comm<strong>and</strong>s
GL<br />
Gate Length<br />
Sets the length of time the gate is open.<br />
Syntax<br />
( GL /<br />
. . ..._..’<br />
24;<br />
L /<br />
J<br />
GL Gate Length<br />
Item Description/Default Range<br />
Number Any real or integer number. Default unit is seconds. 1 ps to 65.5 ms<br />
Equivalent Softkey: GATE LENGTH .<br />
Option Required: Option 105.<br />
Preset State: 1 ms.<br />
Related Comm<strong>and</strong>s: GATE, GATECTL, GC, GD.<br />
Example<br />
OUTPUT 718;"GL IUS;"<br />
Description<br />
GL applies only if GATECTL is set to EDGE.<br />
Query Response<br />
XGL<br />
Programming Comm<strong>and</strong>s 5-221
GP<br />
Gate Polarity<br />
Sets the polarity (positive or negative) for the gate trigger.<br />
Syntax<br />
Equivalent Softkey: EDGE POL POS NEG.<br />
Option Required: Option 105.<br />
Preset State: GP POS.<br />
Related Comm<strong>and</strong>s: GATE, GATECTL, GD, GL.<br />
Example<br />
OUTPUT 718;"GP POS;"<br />
Description<br />
GP applies only if GATECTL is set to EDGE.<br />
When used as a predefined variable, GP returns a “0” if GP has been set to NEG, a “1” if GP<br />
has been set to POS.<br />
Query Response<br />
5-222 Programming Comm<strong>and</strong>s<br />
output<br />
b t e r m i n a t i o n --)<br />
XGP<br />
QGP
GR<br />
Graph<br />
Graphs the given 9 coordinate while incrementing the x coordinate by 1.<br />
Syntax<br />
c<br />
GR<br />
Item Description/Default Range<br />
Number Any valid integer. -22 to 233.<br />
Related Comm<strong>and</strong>s: CLRDSP, DA.<br />
Example<br />
This example graphs a diagonal line on the spectrum analyzer display.<br />
OUTPUT 718;"BLANK TRA;"<br />
OUTPUT 718;"PU;PA 0,O;GR;" Rxitions thepen.<br />
FOR I = 0 TO 400 I represents the Y value in graticule coordinates.<br />
OUTPUT 718;I DIV 2 Graphs the Y values, incrementing the X value by 1.<br />
NEXT I<br />
Description<br />
GR Graph<br />
The GR comm<strong>and</strong> plots a graph at the amplitude point indicated by the next y coordinate. The<br />
3 coordinates are specified in display units, with -22 at the bottom of the spectrum analyzer<br />
display <strong>and</strong> 233 at the top of the spectrum analyzer display. See “PA” for more information<br />
about display units. The x coordinate is always incremented by 1; it cannot be decremented.<br />
The GR comm<strong>and</strong> also places the graph in the display list. See “DA” for more information<br />
about the display list.<br />
XGR<br />
Programming Comm<strong>and</strong>s 5-223
GRAT<br />
Graticule<br />
Turns on or off the graticule.<br />
Syntax<br />
Equivalent Softkey: GRIT OEf OFF.<br />
Preset State: GRAT ON.<br />
Related Comm<strong>and</strong>s: ANNOT.<br />
Example<br />
OUTPUT 718 ; "GRAT OFF ; ” lWn.s ofl the graticule.<br />
OUTPUT 718;"GRAT?;" Qu.tkes graticub status.<br />
ENTER 718;Grat$ Gets response from the spectrum analyze?:<br />
DISP Grat$ Risplays OFF on the computer screen.<br />
Query Response<br />
5-224 Programming Comm<strong>and</strong>s<br />
ON<br />
OFF<br />
o u t p u t<br />
b t e r m i n a t i o n --)<br />
002
HAVE<br />
Have<br />
Returns a “0” if the specified option or device is not installed.<br />
Syntax<br />
Example<br />
OUTPUT 718; “HAVE <strong>HP</strong>IB; ” Queries whether Option 041 is installed.<br />
ENTER 718;A Recm~ves response from spectrum analyzer<br />
DISP A Disph ys response.<br />
HAVE Have<br />
cu 125e<br />
Programming Comm<strong>and</strong>s 5-225
HAVE Have<br />
Description<br />
The parameters are:<br />
<strong>HP</strong>IB<br />
<strong>HP</strong>IBA<br />
<strong>HP</strong>IBB<br />
RS232<br />
RS232A<br />
RS232B<br />
IO<br />
TG<br />
FMD<br />
QPD<br />
CNT<br />
OVEN<br />
<strong>TV</strong><br />
<strong>TV</strong>PICT<br />
FADC<br />
CARD<br />
GATE<br />
BANDS<br />
NBW<br />
<strong>HP</strong>-IB interface, Option 021, or <strong>HP</strong>-IB <strong>and</strong> parallel interface, Option 041.<br />
<strong>HP</strong>-IB interface, Option 021.<br />
<strong>HP</strong>-IB <strong>and</strong> parallel interface, Option 041.<br />
RS-232 interface, Option 023, or RS-232 <strong>and</strong> parallel interface, Option 043.<br />
RS-232 interface, Option 023.<br />
RS-232 <strong>and</strong> parallel interface, Option 043.<br />
Either the <strong>HP</strong>-IB <strong>and</strong> parallel interface (Option 041) or RS-232 <strong>and</strong> parallel<br />
interface (Option 043).<br />
Tracking generator, Option 010 or 011.<br />
FM demodulator, Option 102, 103, or 301.<br />
Quasi-peak detector, Option 103.<br />
Counter-lock. (The frequency counter is st<strong>and</strong>ard for an <strong>HP</strong> 85913, <strong>HP</strong> 85933,<br />
<strong>HP</strong> 85943, <strong>HP</strong> 85953, or <strong>HP</strong> 85963; it is available as Option 013 for an<br />
<strong>HP</strong> <strong>8590</strong>L.)<br />
Precision frequency reference, Option 004.<br />
<strong>TV</strong> synch trigger, Option 102 or 301. If the <strong>TV</strong> synch trigger option is installed in<br />
the spectrum analyzer <strong>and</strong> in use, “HAVE <strong>TV</strong>?; ” returns a “2. ”<br />
<strong>TV</strong> picture display, Option 180.<br />
Fast ADC, Option 101 or 301.<br />
Memory card reader. (The memory card reader is Option 003 for the <strong>HP</strong> <strong>8590</strong>1,<br />
or <strong>HP</strong> 8592L. The memory card reader is st<strong>and</strong>ard for the <strong>HP</strong> 85913, <strong>HP</strong> 8593E,<br />
<strong>HP</strong> 85943, <strong>HP</strong> 85953, or <strong>HP</strong> 85963.)<br />
Time-gated spectrum analyzer capability, Option 105.<br />
Returns the number of frequency b<strong>and</strong>s that the spectrum analyzer has. See the<br />
following description.<br />
Narrow b<strong>and</strong>widths, Option 130.<br />
BANDS returns the number of frequency b<strong>and</strong>s that the spectrum analyzer has, as shown in the<br />
following table.<br />
I Model Number I Value HAVE BANDS Returns I<br />
<strong>HP</strong> 859OL, <strong>HP</strong> 85913, or <strong>HP</strong> 85943 1<br />
<strong>HP</strong> 85953 2<br />
<strong>HP</strong> 8592L or <strong>HP</strong> 85933 5<br />
<strong>HP</strong> 85963 3<br />
“HAVE CARD;” returns additional information about the memory card. By checking the bit<br />
status of the byte returned from “HAVE CARD;“, you can determine the information shown in<br />
the following table.<br />
5.226 Programming Comm<strong>and</strong>s
I 3<br />
Bit<br />
Position<br />
Bit Status = 0 Bit Status = 1<br />
0 Memory card reader is not installed. Memory card reader is installed.<br />
1 Memory card is write protected. Memory card is not write protected.<br />
2 Memory card is a r<strong>and</strong>om access card Memory card is a read only memory<br />
(RAM). card (ROM).<br />
Memory card not inserted into memory Memory card is inserted into memory<br />
card reader. I card reader.<br />
You can use the BIT or BITF comm<strong>and</strong> to determine the status of the bits. For example,<br />
OUTPUT 718;"VARDEF R-ESULT,O;" Stores the bit status in R-ESULT<br />
OUTPUT 718;"BIT R,ESULT,HAVE CARD,S;" Checks the status of bit 3.<br />
OUTPUT 718;"R,ESULT?;" Gets the result.<br />
ENTER 718;A<br />
DISP A Displays the bit status of bit 3.<br />
HAVE Have<br />
Programming Comm<strong>and</strong>s 5-227
HD<br />
Hold Data Entry<br />
Disables data entry via the spectrum analyzer numeric keypad, knob, or step keys. The active<br />
function readout is blanked, <strong>and</strong> any active function is deactivated.<br />
Syntax<br />
( HD<br />
Equivalent Key: HOLD (for the <strong>HP</strong> 85913, <strong>HP</strong> 85933, <strong>HP</strong> 85943, <strong>HP</strong> 85953, or <strong>HP</strong> 85963) or<br />
(HOLD) (for the <strong>HP</strong> <strong>8590</strong>L or <strong>HP</strong> 8592L).<br />
Related Comm<strong>and</strong>s: Any active function. See the description below for a list of the active<br />
functions.<br />
Example<br />
OUTPUT 718;"HD;" Disables the active jbaction <strong>and</strong> clears the active<br />
function block area on the spectrum analyzer<br />
screen.<br />
OUTPUT 718;"CF 600MHZ;HD;700MHZ;" This will leave the center frequency at 600 MHZ,<br />
because HD deactivates any current function.<br />
Description<br />
The active functions are ACPBW, ACPSP, AT, BAUDRATE, CF, COUPLE, CRT<strong>HP</strong>OS, CR<strong>TV</strong>POS,<br />
DA, DL, DOTDENS, FA, FB, FFTSTOP, FMGAIN, FOFFSET, GATECTL, GD, GL, GP, INZ, LG,<br />
MKA, MKD, MKFC, MKFCR, MKN, MKPAUSE, MKPX, ML, MODE, NDB, NRL, PREAMPG, RB,<br />
RCLS, ROFFSET, RL, RLPOS, SAVES, SAVRCLN, SETDATE, SETTIME, SP, SQLCH, SRCAT,<br />
SRCPOFS, SRCPSTP, SRCPSWP, SRCPWR, SRCTK, SS, ST, TH, TIMEDATE, <strong>TV</strong>LINE, VAVG,<br />
VB, VBR, ZMKSPAN, ZMKCNTR <strong>and</strong> user-defined active function specified by the ACTDEF<br />
comm<strong>and</strong>.<br />
5-226 Programming Comm<strong>and</strong>s<br />
XHD
HN<br />
Harmonic Number<br />
HN Harmonic Number<br />
Returns the harmonic number of the current harmonic b<strong>and</strong> in which the spectrum analyzer is<br />
tuning.<br />
Syntax<br />
c<br />
PreZefined<br />
function path only<br />
Model Required: <strong>HP</strong> 8592L, <strong>HP</strong> 85933, <strong>HP</strong> 85953, or <strong>HP</strong> 85963.<br />
Related Comm<strong>and</strong>s: FS, HNLOCK, HNUNLK.<br />
Example<br />
OUTPUT 718*"HN'*" Queries harmonic b<strong>and</strong> of spectrum analyzer:<br />
ENTER 718;kmb;; Gets response from the spectrum analyzer<br />
DISP Number Displays the result on computer screen.<br />
Query Response<br />
The HN comm<strong>and</strong> returns the number of the harmonic b<strong>and</strong>, if the spectrum analyzer is<br />
sweeping single-b<strong>and</strong>. A “-1” is returned if the spectrum analyzer is sweeping multib<strong>and</strong>.<br />
XHN<br />
Programming Comm<strong>and</strong>s 5.229
HNLOCK<br />
Harmonic Number Lock<br />
Forces the spectrum analyzer to use only the selected harmonic b<strong>and</strong>.<br />
Syntax<br />
selected<br />
Item Description/Default Range<br />
Number Any valid integer number. 0 to 4 (for <strong>HP</strong> 8592L, <strong>HP</strong> 85933, or <strong>HP</strong> 8596E), 0<br />
to 3 (<strong>HP</strong> 85963 only), 0 to 1 (for <strong>HP</strong> 8595E).<br />
Equivalent Softkey: The HNLOCK comm<strong>and</strong> <strong>and</strong> the softkeys under the B<strong>and</strong> Luck menu<br />
are identical.<br />
Model Required: <strong>HP</strong> 8592L, <strong>HP</strong> 85933, <strong>HP</strong> 85953, or <strong>HP</strong> 85963.<br />
Preset State: HNLOCK OFF<br />
Related Comm<strong>and</strong>s: CF, FA, FB, FOFFSET, HN, HNUNLK, SNGLS, SP<br />
Example<br />
INPUT "SELECT THE DESIRED FRECjUENCY BAND",Harm Gets harmonicb<strong>and</strong>fromusex<br />
OUTPUT 718;"HNLOCK ";Harm;";" Loch harmonic b<strong>and</strong>.<br />
Description<br />
HNLOCK ON locks onto the harmonic b<strong>and</strong> that is appropriate for the current center<br />
frequency, lowering the span, if necessary, due to the limits of the harmonic b<strong>and</strong>.<br />
HNLOCK , where is an integer, locks onto harmonic b<strong>and</strong> <strong>and</strong><br />
automatically selects the settings shown in the following table.<br />
T Remote<br />
1Equivalent Frequent y<br />
Comm<strong>and</strong>s Softkey Settings<br />
HNLOCK 0<br />
HNLOCK 1<br />
HNLOCK 2<br />
HNLOCK 3<br />
HNLOCK 4<br />
5-230 Programming Comm<strong>and</strong>s<br />
BAND 0 Center frequency 1.450 GHz<br />
BAND 1 Center frequency 4.638 GHz<br />
BAND 2 Center frequency 9.400 GHz<br />
BAND 3 Center frequency 15.90 GHz<br />
BAND 4 Center frequency 20.55 GHz<br />
1<br />
Span 2.900 GHz<br />
Span 3.600 GHz<br />
Span 6.800 GHz<br />
Span 7.000 GHz<br />
Span 2.900 GHz
HNLOCK Harmonic Number Lock<br />
Once HNLOCK is set, only frequencies <strong>and</strong> spans that fall within the frequency b<strong>and</strong> of the<br />
current harmonic may be entered. The span is reduced automatically to accommodate a center<br />
frequency specified near the end of the b<strong>and</strong> range.<br />
Note Before changing the frequency range to another harmonic, unlock the b<strong>and</strong><br />
with the harmonic unlock comm<strong>and</strong>, “HNLOCK OFF;” or “HNUNLK; “.<br />
BAND LOCK ON (HNLOCK ON)<br />
Start Frequency<br />
If a start frequency is entered that is outside of the current b<strong>and</strong> boundaries, it will be set<br />
to the nearest b<strong>and</strong> edge instead. If a start frequency that is greater than the current stop<br />
frequency is entered, the (possibly modified) start frequency is used for both the start <strong>and</strong> the<br />
stop frequency; therefore, the span will be set to zero. If the start <strong>and</strong> stop frequencies specify<br />
too large a span, they will be modified. (Also see “FA.“)<br />
Stop Frequency<br />
If a stop frequency is entered that is outside of the current b<strong>and</strong> boundaries, it will be set to<br />
the nearest b<strong>and</strong> edge instead. If a stop frequency that is less than the current start frequency<br />
is entered, the (possibly modified) stop frequency will be used for both the start <strong>and</strong> stop<br />
frequency; therefore, the span will be set to zero. (Also see “FB.“)<br />
Center Frequency<br />
The span will be modified if necessary to get the center frequency specified without crossing<br />
the b<strong>and</strong> edges. (Also see “CF.“)<br />
Span<br />
The span will be limited as necessary to keep the start <strong>and</strong> stop frequencies within the b<strong>and</strong><br />
edges without changing the center frequency. The maximum span allowed is 2.943 GHz in b<strong>and</strong><br />
0, 3.600 GHz in b<strong>and</strong> 1, 6.957 GHz in b<strong>and</strong> 2, <strong>and</strong> 7 GHz in higher b<strong>and</strong>s. (Also see “SP.“)<br />
BAND LOCK OFF (HNLOCK OFF)<br />
The start <strong>and</strong> stop frequencies are bounded by the range of the instrument.<br />
The frequency not specified will be bounded by the following scheme:<br />
Continuous Sweep Mode: If the specified frequency is in b<strong>and</strong> 0, the values will be contained<br />
by the bounds of b<strong>and</strong> 0. If the value is in the harmonic b<strong>and</strong> range, the values will<br />
be bounded by the top of the instrument range <strong>and</strong> the lower end of b<strong>and</strong> 1. (Also see<br />
“CONTS. “)<br />
Single Sweep Mode: The values are bounded by the instrument range only; therefore, b<strong>and</strong> 0<br />
can be included in a multib<strong>and</strong> sweep in single mode. (Also see “SNGLS.“)<br />
Programming Comm<strong>and</strong>s 5-231
HNLOCK Harmonic Number Lock<br />
Query Response<br />
5-232 Programming Comm<strong>and</strong>s<br />
output<br />
’ t e r m i n a t i o n --)<br />
a02
HNUNLK<br />
Unlock Harmonic Number<br />
Unlocks the harmonic b<strong>and</strong>.<br />
Syntax<br />
HNUNLK<br />
HNUNLK Unlock Harmonic Number<br />
XHNVNLK<br />
Equivalent Softkey: HNUNLK is equivalent to HNLOCK OFF <strong>and</strong> BIJD LDCK ON OFF (OFF is<br />
underlined).<br />
Model Required: <strong>HP</strong> 8592L, <strong>HP</strong> 85933, <strong>HP</strong> 85953, or <strong>HP</strong> 85963.<br />
Related Comm<strong>and</strong>s: CF, FA, FB, FOFFSET, FS, HN, HNLOCK, SP.<br />
Example<br />
OUTPUT 718;"HNUNLK;"<br />
Description<br />
The HNUNLK comm<strong>and</strong> allows you to select frequencies <strong>and</strong> spans outside the range of a single<br />
harmonic b<strong>and</strong>.<br />
Programming Comm<strong>and</strong>s 5-233
IB<br />
Input B<br />
Provides a method for putting values into trace B. The spectrum analyzer expects 401 two-byte<br />
integers. The data values can represent the range of integer numbers.<br />
Syntax<br />
Item Description/Default Range<br />
Data byte &bit byte containing numeric or character data.<br />
Example<br />
10 ASSIGN @a TO 718;FORMAT ON<br />
20 ASSIGN BSa-bin TO 718;FORMAT OFF<br />
30 INTEGER Binary(l:401)<br />
40 OUTPUT (PSa;"CF 300MZ;CLRW TRB;BLANK TRA;SP<br />
1OMZ;SNGLS;TS;"<br />
50 OUTPUT QISa;"TDF B;MDS W;TB;"<br />
60 ENTER QSa-bin;Binary(*)<br />
70 OUTPUT @Sa;"CF 1OOMZ;RB 30KZ;SP 1MZ;TS;"<br />
80 DISP "PRESS CONTINUE WHEN READY"<br />
90 PAUSE<br />
100 OUTPUT OSa;"IB";<br />
110 OUTPUT aSa_bin;Binary(*)<br />
120 OUTPUT 718;"VIEW TRB;"<br />
130 END<br />
Description<br />
Llimensions an array called “‘Binary. ”<br />
Zzkes a measurement sweep.<br />
Outputs trace B (in binary) to computer:<br />
Stores trace data in array.<br />
Changes the spectrum analyzer settings.<br />
Prepares spectrum analyzer to receive<br />
trace B data stored in array.<br />
Sends trace B data to spectrum analyzer<br />
The IB comm<strong>and</strong> sends trace B data as binary data only; IB is independent of the measurement<br />
data size (MDS) comm<strong>and</strong>. The IB comm<strong>and</strong> expects 802 data bytes (401 data points, two bytes<br />
each).<br />
5.234 Programming Comm<strong>and</strong>s
ID<br />
Identify<br />
Returns the spectrum analyzer model number to the controller (for example, “<strong>HP</strong>8593E”).<br />
Syntax<br />
Equivalent Softkey: SHOW DPTIOlG .<br />
Related Comm<strong>and</strong>s: REV, SER.<br />
Example<br />
10 ALLOCATE A$[501 Allocates string to hold model number:<br />
20 OUTPUT 718;"ID;" Gets m.oo!&numberz<br />
30 ENTER 718;A$ Transfers number to computer:<br />
40 DISP A$ Displ.uys m&3? number:<br />
50 END<br />
Query Response<br />
ID Identify<br />
Programming Comm<strong>and</strong>s 5-235
IF THEN ELSE ENDIF<br />
If Then Else Endif<br />
The IF/THEN/ELSE/ENDIF comm<strong>and</strong>s form a decision <strong>and</strong> branching construct.<br />
Syntax<br />
predefined variable /<br />
buser-defined v a r i a b l e /<br />
G trace element /<br />
,- oper<strong>and</strong> 1 -,<br />
b p r e d e f i n e d v a r i a b l e /<br />
huser-defined v a r i a b l e )<br />
b predefined function /<br />
L t r a c e element /<br />
Item Description/Default<br />
Number Any real or integer number.<br />
/<br />
GT<br />
LT<br />
EQ<br />
NE<br />
GE<br />
analyzer comm<strong>and</strong> ENDIF<br />
User-defined variable A variable defined by VARDEF or ACTDEF comm<strong>and</strong>s.<br />
Predefined variable<br />
Predefined function<br />
Trace element<br />
Analyzer comm<strong>and</strong><br />
A comm<strong>and</strong> that acts as a variable. Refer to Table 5-l.<br />
Function that returns a value. Refer to lhble 5-1.<br />
An element of trace A, trace B, trace C, or a user-defined trace.<br />
Any spectrum analyzer comm<strong>and</strong>.<br />
LE<br />
/<br />
analyzer comm<strong>and</strong><br />
Prerequisite Comm<strong>and</strong>s: ACTDEF or VARDEF when using a user-defined variable.<br />
Related Comm<strong>and</strong>s: REPEAT/UNTIL.<br />
5-236 Programming Comm<strong>and</strong>s<br />
Range<br />
Real number range.<br />
Any valid variable<br />
name.
Example<br />
IF TEEN ELSE ENDIF If Then Else Endif<br />
The following example uses the IF/THEN/ELSE/ENDIF comm<strong>and</strong> to pick a center frequency.<br />
10 OUTPUT 718; “IP; ”<br />
20 OUTPUT 718;“TH -35DM;”<br />
30 OUTPUT 718;“TS;MKPK HI;MA;”<br />
40 OUTPUT 718;“IF MA,GT,TH THEN;”<br />
50 OUTPUT 7 18 ; “CF 20MHZ ; ”<br />
60 OUTPUT 718; “ELSE; ”<br />
70 OUTPUT 718;“CF 100MHZ;TS;MKPK HI;”<br />
80 OUTPUT 718; “ENDIF; ”<br />
90 END<br />
Initializes spectrum analyzxx<br />
Sets threshold level.<br />
Finds highest peak.<br />
Compares peak to threshold.<br />
Changes center frequency to 20 MHz if peak<br />
amplitude is greater than the threshold.<br />
This line is executed if peak is less than or<br />
equal to the threshold level.<br />
End of IF/THEN/EUE/ENDIF<br />
The example below does not include the ELSE portion of the IF/THEN/ELSE/ENDIF comm<strong>and</strong>.<br />
This example lowers any signal positioned above the spectrum analyzer screen.<br />
10 OUTPUT 718; “IP; ” Initializes spectrum analyzer<br />
20 OUTPUT 718 ; “SNGLS ; TS ; MKPK HI ; MA ; ‘I Finds peak of trace.<br />
30 OUTPUT 718;“IF MA,GT,RL THEN;” Compares peak amplitude <strong>and</strong> reference level.<br />
40 OUTPUT 7 18 ; “MKRL ; ” rt?rfrms line 40 if the marker amplitude is<br />
50 OUTPUT 718; “ENDIF; ”<br />
60 END<br />
Description<br />
greater than the reference level.<br />
Ends IF/THEN/EN/ENDIF structure.<br />
The IF portion compares oper<strong>and</strong>s 1 <strong>and</strong> 2 with the operators shown in the following table.<br />
Operator Description<br />
GT<br />
LT<br />
EQ<br />
NE<br />
GE<br />
LE<br />
Greater than.<br />
Less than.<br />
Equal to.<br />
Not equal to.<br />
Greater than or equal to.<br />
Less than or equal to.<br />
If the condition is true, the comm<strong>and</strong> list following the IF statement is executed <strong>and</strong> comm<strong>and</strong>s<br />
between ELSE <strong>and</strong> ENDIF are skipped. If the condition is false, the comm<strong>and</strong>s after the ELSE<br />
statement are executed. If there is no ELSE statement, program execution resumes after the<br />
ENDIF statement.<br />
Programming Comm<strong>and</strong>s 5-237
IF THEN ELSE ENDIF If Then Else Endif<br />
The “equal to” (EQ) operator is not recommended if value 1 or value 2 represents a real<br />
number. When checking for equality with real numbers, the difference between the numbers is<br />
useful. For example:<br />
OUTPUT 718;"SUB T,EST,V-ARA,V,ARB;" Pkices the di@?wn.ce of VARA <strong>and</strong> V-ARB into<br />
T-EST. VARA, VA@ <strong>and</strong> T-EST are userd&ned<br />
variables.<br />
OUTPUT 718;"ABS T,EST,T-EST;" Finds the absolute value of T-EST<br />
OUTPUT 718;"IF T,EST,LT,.Ol THEN;" Does a comparison.<br />
OUTPUT 718;"CF UP;"<br />
OUTPUT 718~"ENDIF~"<br />
9 ,<br />
When used within a downloadable program (DLP), the maximum number of IF THEN ELSE<br />
ENDIF statements that can be nested is 20.<br />
5-238 Programming Comm<strong>and</strong>s
INT<br />
Integer<br />
INT Integer<br />
Places the greatest integer that is less than or equal to the source value into the destination.<br />
Syntax<br />
4 u s e r - d e f i n e d t r a c e M<br />
Item Description/Default<br />
User-deflned trace A trace defined by the TRDEF comm<strong>and</strong>.<br />
User-defined variable A variable defined by VARDEF or ACTDEF comm<strong>and</strong>s.<br />
PredeEned variable A comm<strong>and</strong> that acts as a variable. Refer to ‘lbble 5-l.<br />
PredeEned function Function that returns a value. Refer to Table 5-l.<br />
Trace range A segment of trace A, trace B, trace C, or a user-defined trace.<br />
Number Any real or integer number.<br />
Range<br />
x I NT<br />
Any valid trace name.<br />
Any valid variable<br />
name.<br />
Real number range.<br />
Prerequisite Comm<strong>and</strong>s: TRDEF when using a user-defined trace. ACTDEF or VARDEF when<br />
using a user-defined variable. TS when using trace data.<br />
Related Comm<strong>and</strong>s: REPEAT/UNTIL.<br />
Programming Comm<strong>and</strong>s 5-239
INT Integer<br />
Example<br />
OUTPUT 718;"INT RL,3.75;" Resets the reference level wing the integer value of 3.<br />
Description<br />
When the number of items in the source is longer than the destination, the source is truncated<br />
to fit. When the source is shorter than the destination, the last element is repeated to fill the<br />
destination.<br />
When the spectrum analyzer is sweeping across more than one b<strong>and</strong>, taking the integer value<br />
of the sweep time (ST) may yield a real number.<br />
5-240 Programming Comm<strong>and</strong>s
INZ<br />
Input Impedance<br />
Specifies the value of input impedance expected at the active input port.<br />
Syntax<br />
Equivalent Softkey: fIJKIl’ Z 508 75Q .<br />
Preset Value: Returns impedance to the power-on value.<br />
Related Comm<strong>and</strong>s: AUNITS.<br />
Example<br />
OUTPUT 718;"INZ 75;" Changes input impedance to 75 ohms.<br />
OUTPUT 718 ; "AUNITS V; ” Changes amplitude units to volts.<br />
Description<br />
INZ Input Impedance<br />
The actual impedance can be affected only by internal hardware. With the exception of Option<br />
001 or 011 (<strong>HP</strong> 859OL or <strong>HP</strong> 85913 only), the spectrum analyzer hardware supports 5Ofl only.<br />
The INZ comm<strong>and</strong> is used for computation purposes during power or voltage conversions.<br />
The INZ comm<strong>and</strong> affects only the amplitude results that are reported in absolute relative<br />
power (dBm units or watts). (See “AUNITS.“)<br />
Query Response<br />
QINZ<br />
Programming Comm<strong>and</strong>s 5-241
IP<br />
Instrument Preset<br />
Performs an instrument preset.<br />
Syntax<br />
Equivalent Softkey: (PRESET_) is similar<br />
Example<br />
OUTPUT 718;"IP;"<br />
Description<br />
AMB<br />
AMBPL<br />
AMPCOR<br />
ANLGPLUS<br />
ANNOT<br />
AT<br />
AUNITS<br />
AUTO<br />
BLANK B, BLANK C<br />
CLRDSP<br />
CLRW A<br />
CONTS<br />
COUPLE<br />
DA<br />
DET<br />
DL<br />
DOTDENS<br />
FMGAIN<br />
FOFFSET<br />
GATE<br />
GATECTL<br />
5-242 Programming Comm<strong>and</strong>s<br />
Turns off A - B mode.<br />
Turns off A - B plus display line mode.<br />
Turns off amplitude correction factors.<br />
Turns off the Analog+ display mode.<br />
Turns on annotation.<br />
Sets attenuation to 10 dB.<br />
Loads the amplitude units from a configuration location in spectrum<br />
analyzer memory.<br />
Couples RB, AT, SS, ST, <strong>and</strong> VB. Turns off display line <strong>and</strong> threshold.<br />
Blanks trace B <strong>and</strong> trace C.<br />
Erases user graphics.<br />
Clears <strong>and</strong> writes trace A.<br />
Selects continuous sweep mode.<br />
Selects ac coupling. (<strong>HP</strong> 85943, <strong>HP</strong> 85953, <strong>HP</strong> 85963 only.)<br />
Sets the display address to zero.<br />
Selects positive peak detection.<br />
Turns off the display line.<br />
Sets the dot density value to 15.<br />
Sets FM gain to 100 kHz. (Option 102 or 103 only.)<br />
Sets the frequency offset to 0 Hz.<br />
Sets the gating to off. (Option 105 only.)<br />
Sets the gate control to edge triggering. (Option 105 only.)
GD<br />
GDRVGDEL<br />
GDRVGLEN<br />
GDRVRBW<br />
GDRVST<br />
GDRVVBW<br />
GL<br />
GP<br />
GRAT<br />
HD<br />
HNLOCK OFF<br />
GRAT<br />
INZ<br />
LG<br />
LIMIDISP<br />
LIMIHI or LIMILO<br />
LIMITEST<br />
MDS<br />
MEASURE<br />
MKDLMODE<br />
MKFCR<br />
MKNOISE<br />
MKOFF<br />
MKPAUSE<br />
MKPX<br />
MKREAD<br />
MKTBL<br />
MKTRACK<br />
MKTYPE<br />
ML<br />
MODE<br />
Sets the gate delay to 1 ps. (Option 105 only.)<br />
Sets the gate delay to 1 ,us. (Option 105 only.)<br />
Sets the gate length to 1 ps. (Option 105 only.)<br />
IP Instrument Preset<br />
Uncouples the resolution b<strong>and</strong>width <strong>and</strong> the pulse width. (Option 105<br />
only.)<br />
Uncouples the sweep time <strong>and</strong> the pulse repetition interval. (Option<br />
105 only.)<br />
Uncouples the video b<strong>and</strong>width <strong>and</strong> the gate length. (Option 105<br />
only.)<br />
Sets the gate length to 1 ms. (Option 105 only.)<br />
Sets the gate trigger polarity to trigger on the positive edge. (Option<br />
105 only.)<br />
Turns on the graticule.<br />
Hold (deactivates active function).<br />
Unlocks harmonic b<strong>and</strong>, allowing multib<strong>and</strong> sweeping. (<strong>HP</strong> 8592L,<br />
<strong>HP</strong> 85933, <strong>HP</strong> 85953, or <strong>HP</strong> 85963 only.)<br />
Turns on the graticule.<br />
Loaded from a configurable location in spectrum analyzer memory.<br />
Selects 10 dB per division log scale.<br />
Sets LIMIDISP to AUTO.<br />
Clears any limit-line trace specified by LIMIHI or LIMILO.<br />
Turns off limit-line testing.<br />
Sets measurement to signal analysis.<br />
8-bit<br />
Displays the marker amplitude values as relative to the reference<br />
level.<br />
Marker counter resolution is set to AUTO, but a calculated value other<br />
than 0 may be returned if the marker counter resolution is queried. (<br />
<strong>HP</strong> 85913, <strong>HP</strong> 85933, <strong>HP</strong> 85943, <strong>HP</strong> 85953, <strong>HP</strong> 85963, or Option 013<br />
with <strong>HP</strong> <strong>8590</strong>L only.)<br />
Turns off noise markers.<br />
Turns off marker pause mode.<br />
Minimum excursion for peak identification is set to 6 dB.<br />
Sets marker readouts to frequency.<br />
Turns off the marker table.<br />
Turns off marker tracking.<br />
Sets the marker type as position type.<br />
Sets mixer level to -10<br />
Sets the operating mode to 0.<br />
Programming Comm<strong>and</strong>s 5,243
IP Instrument Preset<br />
MS1<br />
NDB<br />
PD<br />
PKDLMODE<br />
PKSORT<br />
PKTBL<br />
PKZOOM<br />
QPOFFSET<br />
RB<br />
RL<br />
RLPOS<br />
ROFFSET<br />
RQS 40<br />
SPEAKER<br />
SQLCH<br />
SRCALC<br />
SRCNORM<br />
SRCPSWP<br />
SRCPWR<br />
ss<br />
STATUS BYTE<br />
TH<br />
TITLE<br />
TM<br />
TDF<br />
TRB<br />
TRC<br />
<strong>TV</strong>LINE<br />
<strong>TV</strong>SYNC<br />
VAVG<br />
VB<br />
VBR<br />
5-244 Programming Comm<strong>and</strong>s<br />
Selects the spectrum analyzer memory as the mass storage device.<br />
Sets the number of dB for the NDBPNT measurement to -3 dB.<br />
Puts pen down at current position.<br />
Displays all the signal peaks in the peak table.<br />
Sorts the signal peaks in the peak table by decreasing amplitude.<br />
Turns off the peak table.<br />
Sets the final span for the peak zoom routine to 1 MHz.<br />
Sets the QPOFFSET to 20. (Option 103 only.)<br />
Sets the resolution b<strong>and</strong>width to 3 MHz.<br />
Sets reference level to 0 dBm.<br />
Sets the reference level position to 8.<br />
Sets reference offset to 0.<br />
Allows SRQ 110, SRQ 140 for illegal comm<strong>and</strong>s or broken hardware.<br />
Turns on the speaker. (Option 102, 103, or 301 only.)<br />
Sets the squelch level to 0. (Option 102 or 103 only.)<br />
Sets the source leveling control to internal. (Option 010 or 011 only.)<br />
Sets the source normalization to off. (Option 010 or 011 only.)<br />
Sets the source power sweep to off. (Option 010 or 011 only.)<br />
Sets the source power level to -10 dBm. (Option 010 or 011 only.)<br />
Sets the center frequency step size to 100 MHz.<br />
Clear the status byte.<br />
One division above bottom graticule line, threshold line off.<br />
Clears the title from the spectrum analyzer screen.<br />
Selects free run trigger mode.<br />
Selects parameter units output format.<br />
Sets the trace values to 0.<br />
Sets the trace values to 8000.<br />
Sets <strong>TV</strong> line number to 17. (Options 101 <strong>and</strong> 102, or 301 only.)<br />
Triggers on negative polarity of the video modulation. (Options 101<br />
<strong>and</strong> 102, or 301 only.)<br />
Turns off video averaging <strong>and</strong> sets the video averaging limit to 100.<br />
Sets the video b<strong>and</strong>width to 1 MHz.<br />
Sets VBR to 0.300.
IP Instrument Preset<br />
IP also clears all user graphics, all on-event algorithms, <strong>and</strong> turns off the windows display<br />
mode. (The on-event algorithms are ONCYCLE, ONDELAY, ONEOS, ONMKR, ONSRQ, ONSWP,<br />
<strong>and</strong> ONTIME.)<br />
Instrument preset automatically occurs when you turn on the spectrum analyzer. IP is a good<br />
starting point for many measurement processes. When IP is executed remotely, the spectrum<br />
analyzer does not necessarily execute a complete sweep, however. You should execute a take<br />
sweep (TS) to ensure that the trace data is valid after an IP.<br />
Note that ONPWRUP will be terminated, not erased, by performing one of the following:<br />
� Pressing [?Z5Z?-j on the spectrum analyzer.<br />
� Executing the universal <strong>HP</strong>-IB comm<strong>and</strong> DCL Device Clear.<br />
� Executing the RS-232 comm<strong>and</strong> BREAK.<br />
To remove ONPWRUP execute the DISPOSE ONPWRUP comm<strong>and</strong>.<br />
Programming Comm<strong>and</strong>s 5-245
KEYCLR<br />
Key Clear<br />
Clears softkeys 1 through 6 of menu 1.<br />
Syntax<br />
KEYCLR<br />
Related Comm<strong>and</strong>s: DISPOSE, KEYDEF, KEYEXC, KEYLBL, SAVEMENU.<br />
Example 1<br />
OUTPUT 718;"MENU 1;" Dis$h!ayswwnu1.<br />
OUTPUT 718;"KEYCLR;" Erases sojtkeys 1 through 6 of menu 1.<br />
Example 2<br />
OUTPUT 718;"MENU 1;"<br />
OUTPUT 718;"SAVEMENU 101;"<br />
OUTPUT 718;"KEYCLR;"<br />
PAUSE<br />
OUTPUT 718;"MENU 101;"<br />
Description<br />
XKEYCLR<br />
Displays ???xnu 1.<br />
Copies the softkey functions from menu 1 into menu 101.<br />
Erases the soflkey functions of wwnu 1.<br />
Lxsphys menu 101.<br />
The KEYCLR comm<strong>and</strong> clears softkeys 1 through 6. Use the DISPOSE comm<strong>and</strong> to clear a<br />
single softkey.<br />
Softkeys 1 through 6 can be displayed by executing “MENU 1;” or by pressing [m),<br />
User Menus .<br />
5-246 Programming Comm<strong>and</strong>s
KEYCMD<br />
Key Comm<strong>and</strong><br />
KEYCMD Key Comm<strong>and</strong><br />
Allows you define the function <strong>and</strong> label of a softkey. The softkey label is updated whenever a<br />
softkey is pressed.<br />
Syntax<br />
Item<br />
KEYCMD<br />
User-detlned variable<br />
Predefined function<br />
Trace element<br />
Number<br />
Predellned variable<br />
Analyzer comm<strong>and</strong><br />
Delimiter<br />
executed when<br />
- key is pressed 7<br />
/<br />
,- key number \<br />
b p r e d e f i n e d v a r i a b l e /<br />
% user-defined variable)<br />
9 p r e d e f i n e d f u n c t i o n /<br />
b trace element /<br />
executed when<br />
r menu is updated 7<br />
/<br />
del imi ter<br />
del imi ter del imi ter<br />
analyzer corrm<strong>and</strong> de I imi ter<br />
Description/Default Range<br />
A variable defined by VARDEF or ACTDEF comm<strong>and</strong>s. Any valid variable<br />
name.<br />
Function that returns a value. Refer to lhble 5-l.<br />
An element of trace A, trace B, trace C, or a user-defined trace.<br />
Any valid integer. 1 to 6, 601 to 1200<br />
A comm<strong>and</strong> that act as a variable. Refer to Table 5-l.<br />
Any valid spectrum analyzer comm<strong>and</strong>.<br />
Matching characters marking the beginning <strong>and</strong> end of the list of - 1 \ @ = / ^ $ % ; ! ’ :<br />
spectrum analyzer comm<strong>and</strong>s. ” &<br />
Related Comm<strong>and</strong>s: DISPOSE, ERASE, FUNCDEF, KEYENH, KEYEXC, KEYLBL.<br />
Programming Comm<strong>and</strong>s 5-247
KEYCMD Key Comm<strong>and</strong><br />
Example 1<br />
This example defines 1. Softkey 1 has the label “QSAD” until it is pressed. When<br />
softkey 1 is pressed, the following changes occur: center frequency changes to 105.3 MHz,<br />
span changes to 300 <strong>and</strong> the label for 1 changes from “QSAD” to “KSAD.” If<br />
softkey 1 is pressed again, the center frequency changes to 100.1 MHz <strong>and</strong> the label changes<br />
back to “QSAD. ”<br />
10 OUTPUT 718;"IP;" Initializes spectrum analyzer:<br />
20 !<br />
30 OUTPUT 718;"VARDEF CmOUNTRY,l;" DQin..es variable called C-OUNTRI!<br />
40 !<br />
50 OUTPUT 718;"KEYCMD 1,"; Llqfims sojtkey 1.<br />
60 OUTPUT 718;"%";<br />
70 OUTPUT 718;"IF C,OUNTRY,EQ,<br />
1;THEN;";<br />
80 OUTPUT 718;"CF 105.3MHZ;SP 300KHZ;";<br />
90 OUTPUT 718;"MOV CmOUNTRY,O;";<br />
100 OUTPUT 718;"ELSE;";<br />
110 OUTPUT 718;"CF lOO.lMHZ;SP 300KHZ;";<br />
120 OUTPUT 718;"MOV C-OUNTRY,l;";<br />
130 OUTPUT 718;"ENDIF;";<br />
140 OUTPUT 718;"%,";<br />
150 OUTPUT 718;"@";<br />
160 OUTPUT 718;"IF C,OUNTRY,EQ,O THEN;";<br />
170 OUTPUT 718;"KEYLBL l,%KSAD%;";<br />
180 OUTPUT 718;"ELSE;";<br />
190 OUTPUT 718;"KEYLBL l,%QSAD%;";<br />
200 OUTPUT 718;"ENDIF;";<br />
210 OUTPUT 718*"@*"-<br />
8 9,<br />
220 END<br />
Example 2<br />
Softkey 2 has a softkey label, “COUNTRY YES NO.” If the value of the variable COUNTRY<br />
is 1, then YES is underlined <strong>and</strong> label of softkey 1 is “QSAD.” Pressing softkey 2 moves the<br />
underline to NO <strong>and</strong> changes the label of softkey 1 to “KSAD. ”<br />
10<br />
20<br />
30<br />
40<br />
50<br />
60<br />
70<br />
80<br />
90<br />
100<br />
110<br />
120<br />
130<br />
140<br />
150<br />
160<br />
OUTPUT 718;"IP;"<br />
Ul$=CHR$(lG)<br />
Off$=CHR$(l5)<br />
OUTPUT 718;"VARDEF C-OUNTRY,l;"<br />
!<br />
OUTPUT 718;"KEYCMD 1,";<br />
OUTPUT 718;"%";<br />
OUTPUT 718;"IF C,OUNTRY,EQ,Q THEN;";<br />
OUTPUT 718;"MOV CF 105.3MHZ;MOV SP,300KHZ;";<br />
OUTPUT 718;"MOV C,OUNTRY,O;";<br />
OUTPUT 718*"ELSE-"*<br />
OUTPUT 7;8;"MO; CF lOO.lMHA;MOV SP,300KHZ;";<br />
OUTPUT 718;"MOV CmOUNTRY,l;";<br />
OUTPUT 718;"ENDIF;";<br />
5-248 Programming Comm<strong>and</strong>s
170<br />
180<br />
190<br />
200<br />
210<br />
220<br />
230<br />
240<br />
250<br />
260<br />
270<br />
280<br />
290<br />
300<br />
310<br />
320<br />
330<br />
340<br />
350<br />
360<br />
370<br />
380<br />
390<br />
400<br />
410<br />
420<br />
430<br />
440<br />
450<br />
460<br />
470<br />
OUTPUT 718;"%,";<br />
OUTPUT 718."(6".<br />
OUTPUT 718;"IF'C.OUNTRY.EQ.O THEN;";<br />
OUTPUT 718;"KEYLBL l,%KSAD%;";<br />
OUTPUT 718;"ELSE;";<br />
OUTPUT 718;"KEYLBL l,%QSAD%;";<br />
OUTPUT 718;"ENDIF;";<br />
OUTPUT 718*"@-"-<br />
9 ,,<br />
!<br />
OUTPUT 718;"KEYCMD 2,";<br />
OUTPUT 718;"X";<br />
OUTPUT 718;"IF C-OUNTRY,EQ,l THEN;";<br />
OUTPUT 718;“MOV CF,l05.3MHZ;MOV SP,300KHZ;";<br />
OUTPUT 718;"MOV C,OUNTRY,O;";<br />
OUTPUT 718;"ELSE;";<br />
OUTPUT 718;"MOV CF,lOO.lMHZ;MOV SP,300KHZ;";<br />
OUTPUT 718;"MOV C-OUNTRY,l;";<br />
OUTPUT 718;"ENDIF;";<br />
OUTPUT 718;"%,";<br />
OUTPUT 718;"O";<br />
OUTPUT 718;"KEYENH 2,";<br />
OUTPUT 718;"/";<br />
OUTPUT 718;"COUNTRYI";Ul$;"YES";Off$;" NO";<br />
OUTPUT 718;"/";<br />
OUTPUT 718;",0,";<br />
OUTPUT 718;"!";<br />
OUTPUT 718;"IF CmOUNTRY,EQ,O";<br />
OUTPUT 718;"! ;'I;<br />
OUTPUT 718*"@-"* , ,,<br />
!<br />
END<br />
Description<br />
KEYCMD Key Comm<strong>and</strong><br />
The KEYCMD comm<strong>and</strong> updates the label whenever the softkey is pressed (as shown in<br />
example 2).<br />
The functions of KEYCMD <strong>and</strong> KEYDEF are similar. The advantage of KEYCMD is that the<br />
label of the softkey can change dependent on a conditional statement without the softkey itself<br />
being pressed. KEYCMD is useful for indicating the state of a function in the spectrum analyzer<br />
by changing the appearance of the softkey.<br />
Programming Comm<strong>and</strong>s 5-249
KEYCMD Key Comm<strong>and</strong><br />
Softkey numbers: When specifying the softkey number, you should only use a number from 1<br />
through 6, or 601 through 1200. Using other than the recommended softkey numbers can cause<br />
undesirable results.<br />
The softkey number corresponds to the menu number as follows:<br />
softkey number = (menu number - 1) x 6 + softkey position<br />
(The softkey position range is 1 through 6.)<br />
For example:<br />
Menu 1 contains softkey numbers 1 through 6<br />
Menu 101 contains softkey numbers 601 to 606<br />
Menu 200 contains softkey numbers 1195 to 1200<br />
Menu 1 can be accessed by pressing (j-1, U;ser Menus . Menus 101 through 200, as well<br />
as menu 1, can be accessed using the MENU comm<strong>and</strong>. See “MENU” for more information on<br />
accessing softkeys <strong>and</strong> menus.<br />
5-250 Programming Comm<strong>and</strong>s
KEYDEF<br />
User-Defined Key Definition<br />
Assigns a label <strong>and</strong> user-defined function to a softkey.<br />
Syntax<br />
I II,/--<br />
,- key number -\<br />
b predefined variable<br />
h user-defined variable J<br />
b p r e d e f i n e d f u n c t i o n /<br />
b trace element /<br />
corrmond s t r i n g -,<br />
analyzer comm<strong>and</strong><br />
user-defined function<br />
/-key label\<br />
KEYDEF User-Defined Key Definition<br />
D/ del imiter 1<br />
del imi ter<br />
xkeydef<br />
Programming Comm<strong>and</strong>s 5-251
KEYDEF User-Defined Key Definition<br />
Item<br />
User-de&ted variable<br />
Predefined function<br />
Trace element<br />
Number<br />
Predefined variable<br />
Delimiter<br />
Analyzer comm<strong>and</strong><br />
User-defined function<br />
Character<br />
Description/Default Range<br />
A variable deEned by VARDEF or ACTDEF comm<strong>and</strong>s. Any valid variable<br />
name.<br />
Function that returns a value. Refer to lhble 5-l. Any valid predeflned<br />
function that returns<br />
a value within the<br />
softkey number range.<br />
An element of trace A, trace B, trace C, or a user-defined trace.<br />
Any valid integer. 1 to 6, 601 to 1200.<br />
A comm<strong>and</strong> that acts as a variable. Refer to Table 5-l. Any valid predeflned<br />
variable that returns a<br />
value within softkey<br />
number range.<br />
Matching characters marking the beginning <strong>and</strong> end of the list of - 1 \ @ = / ^ $ % ; ! ’ :<br />
spectrum analyzer comm<strong>and</strong>s. ” &<br />
Any valid spectrum analyzer comm<strong>and</strong>.<br />
A subroutine de&red by the FUNCDEF comm<strong>and</strong>. Any valid function<br />
name.<br />
Any valid character. Bee “LB” for additional characters <strong>and</strong> label 1 to 8 characters per<br />
functions. label line, use the (I)<br />
symbol or blank<br />
spaces to separate<br />
softkey label lines.<br />
Prerequisite Comm<strong>and</strong>s: ACTDEF or VARDEF when using a user-defined variable.<br />
Related Comm<strong>and</strong>s: DISPOSE, ERASE, FUNCDEF, KEYEXC, KEYLBL.<br />
Example 1<br />
Connect CAL OUT to the spectrum analyzer input.<br />
OUTPUT 718*"IP*"<br />
OUTPUT 718;"FUkDEF D-LP,Q";<br />
OUTPUT 718;"CF 300MHZ;";<br />
OUTPUT 718;"SP IMHZ;";<br />
OUTPUT 718."(9."<br />
3 ,<br />
OUTPUT 718;"KEYDEF l,D,LP,%SHOWICAL%;"<br />
OUTPUT 718;"KEYEXC 1;"<br />
5-252 Programming Comm<strong>and</strong>s<br />
Initializes spectrum analyzex<br />
L%@u?s a function called D-L?<br />
Changes center frequency to measure the<br />
calibration signal.<br />
Measures the calibration signal in narrow<br />
span.<br />
The ‘@” signifies the end of the &n&ion<br />
declaration.<br />
SojZkey 1 will now have the “‘SHOW CAL”<br />
label <strong>and</strong> perform thejbnction D-LI?<br />
Exectutes sofikey 1.
Example 2<br />
KEYDEF User-Defined Key Definition<br />
To redefine the comm<strong>and</strong> string without changing the label, enter a single blank space for the<br />
comm<strong>and</strong> string parameter. If you want to delete the comm<strong>and</strong> string <strong>and</strong> the softkey label,<br />
enter two or more blank spaces for the softkey label parameter.<br />
OUTPUT 718;“KEYDEF 2,XIP;CF 300MHZ;%,%MY KEYILABELX;” &@zesso~?key,Z.<br />
OUTPUT 718;“KEYDEF 2, ,%MY KEYILABELI;” Removes the comm<strong>and</strong> string<br />
fM.ctions, but the sojtkey<br />
label remain.5 on screen.<br />
OUTPUT 718;“KEYDEF 2, , ;‘I Removes the comm<strong>and</strong> string<br />
ficnctions <strong>and</strong> the sojtkey<br />
label.<br />
Description<br />
Limit the number of characters (between the delimiters) in the list of spectrum analyzer<br />
comm<strong>and</strong>s to a maximum of 2047 characters.<br />
Programming Comm<strong>and</strong>s 5-253
KEYDEF User-Defined Key Definition<br />
Softkey numbers: When specifying the softkey number, you should only use a number from 1<br />
through 6, or 601 through 1200. Using other than the recommended softkey numbers can cause<br />
undesirable results.<br />
The softkey number corresponds to the menu number as follows:<br />
softkey number = (menu number - 1) x 6 + softkey position<br />
(The softkey position range is 1 through 6.)<br />
For example:<br />
Menu 1 contains softkey numbers 1 through 6<br />
Menu 101 contains softkey numbers 601 to 606<br />
Menu 200 contains softkey numbers 1195 to 1200<br />
Menu 1 can be accessed by pressing f-J, User #enus . Menus 101 through 200, as well<br />
as menu 1, can be accessed using the MENU comm<strong>and</strong>. See “MENU” for more information on<br />
accessing softkeys <strong>and</strong> menus.<br />
The softkey label <strong>and</strong> the comm<strong>and</strong> string can be deleted by entering blank spaces in the<br />
softkey label or comm<strong>and</strong> string. See example 2.<br />
Query Response<br />
5-254 Programming Comm<strong>and</strong>s<br />
output<br />
terminot ion �<br />
QKEYDEF
KEYENH<br />
Key Enhance<br />
KEYENH Key Enhance<br />
Allows you to activate inverse video mode or underline part or all of the softkey label.<br />
Syntax<br />
KEYENH<br />
/<br />
c<br />
r k e y l a b e l 7<br />
inverse video<br />
I- c o n d i t i o n -\<br />
,- key number \<br />
9 p r e d e f i n e d v a r i a b l e /<br />
buuser-defined v a r i a b l e )<br />
% p r e d e f i n e d f u n c t i o n /<br />
b trace element /<br />
del imi ter<br />
del imi ter<br />
analyzer comn<strong>and</strong> del imi ter del imi ter<br />
I<br />
rove enhancement<br />
,- condi t i o n -\<br />
analyzer comn<strong>and</strong> de I imi ter<br />
XKEYENH<br />
Programming Comm<strong>and</strong>s 5-255
KEYENH Key Enhance<br />
Item<br />
User-defined variable<br />
Predefined function<br />
Trace element<br />
Number<br />
Predefined variable<br />
Delimiter<br />
Character<br />
Description/Default<br />
A variable defined by VARDEF or ACTDEF comm<strong>and</strong>s.<br />
Analyzer comm<strong>and</strong> Any valid spectrum analyzer comm<strong>and</strong>.<br />
Range<br />
Any valid variable<br />
name.<br />
Function that returns a value. Refer to Table 5-1. Any valid predefined<br />
function that returns<br />
a value within the<br />
softkey number range<br />
An element of trace A, trace B, trace C, or a user-defined trace.<br />
Any valid integer. 1 to 6, 601 to 1200.<br />
A comm<strong>and</strong> that act as a variable. Refer to Table 5-l. Any valid predefined<br />
variable that returns 2<br />
value within softkey<br />
number range.<br />
Matching characters marking the beginning <strong>and</strong> end of the list of - 1 \ @ = / - $ % ; ! ’ :<br />
spectrum analyzer comm<strong>and</strong>s. ” &<br />
Any valid character. gee “LB” for additional characters <strong>and</strong> label 1 to 8 characters per<br />
functions. line, use the (I) symbol<br />
or blank spaces to<br />
separate softkey label<br />
lines.<br />
Related Comm<strong>and</strong>s: DISPOSE, ERASE, FUNCDEF, KEYCMD, KEYEXC, KEYLBL.<br />
Example 1<br />
The following program lines show two different ways of using KEYENH to underline “OFF” in<br />
the softkey label.<br />
OUTPUT 718;"KEYENH 2,@0N ";CHR$(lG)~;"OFF"; Uno!erlirws the “OFF” section of the la-<br />
CHR$(l5);"@,0,0;" bel. Notice that the wuwe enhancement<br />
condition is false, <strong>and</strong> CHRS(l6) <strong>and</strong><br />
CHR$(lS) control the “OFF” section of<br />
OUTPUT 718;"KEYENH 2,O";CHR$(l6>;"ON";<br />
CHR$(lS);" OFFQ,O,l;"<br />
the soflkey label.<br />
Underlines the “OFF” section of the label.<br />
Notice that the move enhancement<br />
condition is trme, <strong>and</strong> CHR$(16) <strong>and</strong><br />
CHR$(lS) control the “ON” section of the<br />
softkey label.<br />
The following program lines show two different ways of using KEYENH to underline “ON” in<br />
the softkey label.<br />
OUTPUT 718;"KEYENH 2,O";CHR$(l6);"ON";CHR$(l5); Urmkrlines the “ON” section of the<br />
' OFF@,O,O;" llabel.<br />
OUTPUT 718;"KEYENH 2,@0N";CHR$(l6);" OFF"; Underlines the “ON” section of the<br />
CHR$(l5);"@,0,1;" label.<br />
5-256 Programming Comm<strong>and</strong>s
Example 2<br />
KEYENH Key Enhance<br />
Use the KEYENH comm<strong>and</strong> to turn on inverse video for the upper label line of softkey number<br />
1.<br />
Ul$=CHR$ (IS)<br />
IJff$=CHR$(lS)<br />
OUTPUT 718;"VARDEF I,NV,O;"<br />
OUTPUT 718;"VARDEF M-OVENH,O<br />
OUTPUT 718;"KEYENH l,%MY KEY<br />
EQ,I,NVO,QIF O,Eq,M,OVENHO;"<br />
Example 3<br />
. II<br />
9<br />
I";Ul$;"ON";Off$;" OFF%,@IF 0,<br />
Changing the condition of the inverse video mode to false turns off the inverse video.<br />
Ul$=CHR$(lG)<br />
Off$=CHR$(lS)<br />
OUTPUT 718;"MOV I,NV,O;"<br />
OUTPUT 718;"MOV M,OVENH,l;"<br />
OUTPUT 718;"KEYENH l,%MY KEYl";Ul$;"ON";Off$;" OFF%,OIF 0,<br />
EQ,I,NVO,QIF O,EQ,M,OVENHQ;"<br />
Defines UL$ as the character<br />
to turn the underline<br />
on.<br />
Dc#n-e.s OFF$ as the character<br />
to turn oflinverse<br />
video <strong>and</strong> underlining.<br />
The value of I-NV acts<br />
as a inverse video condition.<br />
The value of MSOVENH<br />
acts as the move enhancement<br />
condition.<br />
The MY KEY label line<br />
changes to inverse video,<br />
<strong>and</strong> OFF (in the lower<br />
label line) is underlined.<br />
B@ses UL$ as the character<br />
to turn the underline<br />
on.<br />
D@hes OFF$ as the character<br />
to turn oflinverse<br />
video <strong>and</strong> underlining.<br />
Changes the conditional<br />
vo9ue of MmOVENH.<br />
The ON portion of the<br />
lower label is underlined,<br />
the My KEY portion of<br />
the label is still in inverse<br />
video.<br />
Programming Comm<strong>and</strong>s 5-257
KEYENH Key Enhance<br />
Example 4<br />
Omitting Ul$ <strong>and</strong> Off$ turns on inverse video for the upper <strong>and</strong> lower softkey label lines.<br />
Ul$=CHR$ (16)<br />
Off$=CHR$(lS)<br />
OUTPUT 718;“MOV I-NV,O;”<br />
&f&es UL$ as the character<br />
to turn the underline<br />
on.<br />
Lk@ws OFF$ as the character<br />
to turn o~$ inverse<br />
video <strong>and</strong> underlining.<br />
OUTPUT 718;“MOV M,OVENH,l;”<br />
OUTPUT 718;“KEYENH l,%MY KEYION OFF%,@IF 0, EQ,I-NVQ,OIF MYKEY<strong>and</strong> ONOFFare<br />
O,EQ,M-OVENHO;” displayed in inverse video.<br />
Description<br />
The KEYENH comm<strong>and</strong> has two parameters (inverse video condition <strong>and</strong> move enhancement<br />
condition). Setting these parameters to true or false controls how the softkey label is displayed.<br />
The softkey label can be displayed with sections of the label in inverse video or underlined.<br />
If the inverse video condition for the softkey label is true, the following occurs:<br />
w The top line of the softkey label is displayed in inverse video (see example 2).<br />
w If there are no enhancements embedded in the softkey label for the second line of the<br />
softkey label, the second line of the softkey label is displayed in inverse video. (See<br />
example 4). (See the following section, “Using Enhancements,” for more information about<br />
enhancements.)<br />
If the inverse video condition for the softkey label is false, the inverse video is not used <strong>and</strong><br />
the softkey label appears as specified by the move enhancement condition.<br />
If the move enhancement condition is true, the following occurs:<br />
� If no enhancements are used in the softkey label, the last line of the softkey label is<br />
underlined.<br />
w If enhancements are used in the softkey label, the enhancement (inverse video or<br />
underlining) is moved to the other side of the softkey label.<br />
If the move enhancement condition for the softkey label is false, the softkey label appears as<br />
specified by the inverse enhancement condition.<br />
Using Enhancements<br />
An alternate way to control underlining <strong>and</strong> inverse video is to use “codes” to separate sections<br />
of a softkey label.<br />
� If you want to underline different sections of the softkey label, use code CHR$(lG) (turns on<br />
underlining) <strong>and</strong> CHR$(15) (turns off the enhancements).<br />
� If you want to use inverse video on different sections of the softkey label, use code CHR$(14)<br />
(turns on inverse video) <strong>and</strong> CHR$(15) (turns off enhancements).<br />
Example 1 demonstrates that there are two ways to underline the “OFF” section of softkey<br />
label using enhancements.<br />
The recommended convention for using inverse video <strong>and</strong> underlining is to use inverse video to<br />
indicate an active function <strong>and</strong> underlined labels to show a choice.<br />
5-258 Programming Comm<strong>and</strong>s
KEYENH Key Enhance<br />
Softkey numbers: When specifying the softkey number, you should only use a number from 1<br />
through 6, or 601 through 1200. Using other than the recommended softkey numbers can cause<br />
undesirable results. The softkey number corresponds to the menu number as follows:<br />
softkey number = (menu number - 1) x 6 + softkey position<br />
(The softkey position range is 1 through 6.)<br />
For example:<br />
Menu 1 contains softkey numbers 1 through 6<br />
Menu 101 contains softkey numbers 601 to 606<br />
Menu 200 contains softkey numbers 1195 to 1200<br />
Menu 1 can be accessed by pressing Cm), User Menus . Menus 101 through 200, as well<br />
as menu 1, can be accessed using the MENU comm<strong>and</strong>. See “MENU” for more information on<br />
accessing softkeys <strong>and</strong> menus.<br />
Programming Comm<strong>and</strong>s 5-259
KEYEXC<br />
Key Execute<br />
Executes the specified, previously defined softkey.<br />
Syntax<br />
KEYEXC<br />
key number<br />
/ \<br />
Item Description/Default<br />
Number Any valid integer<br />
Related Comm<strong>and</strong>s: DISPOSE, ERASE, FUNCDEF, KEYDEF, KEYLBL.<br />
Example<br />
OUTPUT 718;"FUNCDEF D-LP,@";<br />
OUTPUT 718*"CF 300MHZ.".<br />
, t 9<br />
OUTPUT 718;"SP IMHZ;";<br />
OUTPUT 718;"@;"<br />
OUTPUT 718;"KEYDEF l,D,LP,%SHOW CAL%;"<br />
OUTPUT 718;"KEYEXC 1;"<br />
5.260 Programming Comm<strong>and</strong>s<br />
Range<br />
XKEYEXC<br />
1 to 6, 601 to 1200.<br />
De@ws a jimction called D-LET<br />
Changes center frequency to wwasure the<br />
calibration signal.<br />
Measures the calibration signal in narrow<br />
span.<br />
The “@” signi~ the end of the jbzction<br />
declaration.<br />
Soflkey 1 will now have the “SHOW CAL.”<br />
label <strong>and</strong> perform the fimction DAR<br />
Executes sojtkey 1.
KEYLBL<br />
Key Label<br />
Relabels a softkey without changing its function.<br />
Syntax<br />
1 c-z.11<br />
KEYLBL<br />
User-defined variable<br />
?redefined function<br />
rrace element<br />
Yumber<br />
?redefied variable<br />
Delimiter<br />
Character<br />
- kev number -<br />
.<br />
/<br />
“mziDI;I qJC’“‘Y YmzilauL<br />
del imi ter<br />
KEYLBL Key Label<br />
-‘t&C<br />
A variable defined by VARDEF or ACTDEF comm<strong>and</strong>s. Any valid variable<br />
name.<br />
Function that returns a value. Refer to %ble 5-l.<br />
An element of trace A, trace B, trace C, or a user-defined trace.<br />
Any valid integer. 1 to 6, 601 to 1200.<br />
A comm<strong>and</strong> that acts as a variable. Refer to Table 5-1.<br />
Matching characters marking the beginning <strong>and</strong> end of the list of - 1 \ @ = / ^ $ % ; ! ’<br />
spectrum analyzer comm<strong>and</strong>s. ” &<br />
Any valid character. See “LB” for additional characters <strong>and</strong> label 1 to 8 characters per<br />
functions.<br />
label line, use the (I)<br />
symbol or blank<br />
spaces to separate<br />
softkey label lines.<br />
Prerequisite Comm<strong>and</strong>s: ACTDEF or VARDEF when using a user-defined variable.<br />
Related Comm<strong>and</strong>s: DISPOSE, ERASE, FUNCDEF, KEYDEF, KEYEXC, KEYLBL.<br />
Example<br />
Connect CAL OUT to the spectrum analyzer input.<br />
10 OUTPUT 718;"FUNCDEF D,LP,O";<br />
20 OUTPUT 718;"CF 300MHZ;";<br />
30 OUTPUT 718;"SP 1MHZ;";<br />
&fines a function called D-LP The ‘@”<br />
sp&ol indicates the beginning of the<br />
function.<br />
Changes center frequency to masure the<br />
calibration signal.<br />
Measures the calibration signal in narrow<br />
span.<br />
Programming Comm<strong>and</strong>s 5-261
KEYLESL Key Label<br />
40 OUTPUT 718;"@;"<br />
50 OUTPUT 718;"KEYDEF l,D-LP,%SHOW CAL%;"<br />
60 OUTPUT 718;"KEYEXC 1;"<br />
70 OUTPUT 718;"KEYLBL l,%NEW NAME%;"<br />
80 END<br />
Description<br />
The “@” signifies the end of the function<br />
declaration.<br />
Soflkey 1 is now called “‘SHOW CAL” <strong>and</strong><br />
performs the function D-L2<br />
Executes sojtkey 1.<br />
Soflkey 1 is now labeled “NEW NAME”,<br />
but performs the same function.<br />
When specifying the softkey number, you should only use a number from 1 through 6, or 601<br />
through 1200. Using other than the recommended softkey numbers can cause undesirable<br />
results.<br />
The softkey number corresponds to the menu number as follows:<br />
softkey number = (menu number - 1) x 6 + softkey position<br />
(The softkey position range is 1 through 6.)<br />
For example:<br />
Menu 1 contains softkey numbers 1 through 6<br />
Menu 101 contains softkey numbers 601 to 606<br />
Menu 200 contains softkey numbers 1195 to 1200<br />
Menu 1 can be accessed by pressing (MEAS/USEji), User hanus . Menus 101 through 200, as well<br />
as menu 1, can be accessed using the MENU comm<strong>and</strong>. See “MENU” for more information on<br />
accessing softkeys <strong>and</strong> menus.<br />
5-262 Programming Comm<strong>and</strong>s
LB<br />
Label<br />
LB Label<br />
Writes text (label) at the current pen position. The text consists of alphanumeric characters<br />
specified in the character field.<br />
Syntax<br />
LB<br />
,- text -\<br />
7 terminator<br />
character character<br />
Item Description/Default<br />
Character (text) Any valid character. See “LB” for additional characters available.<br />
Character (delimiter) Anv valid character declared as a delimiter bv the DT comm<strong>and</strong>.<br />
Prerequisite Comm<strong>and</strong>: DT.<br />
Related Comm<strong>and</strong>s: TEXT, TITLE.<br />
Example<br />
10 OUTPUT 718*"IP-"<br />
20 OUTPUT 718;"BLiNK TRA;ANNOT OFF;"<br />
30 OUTPUT 718;"DT@;"<br />
40 OUTPUT 718;"PU;PA 75,175;LB LABEL@;"<br />
50 OUTPUT 718;"PU;PA 75,150;LB";<br />
CHR$(36);"@;"<br />
60 OUTPUT 718;"PU;PA 75,125;LB";CHR$(16);<br />
"AN UNDERLINED LABEL";CHR$(l5);"0;"<br />
70 OUTPUT 718;"PU;PA 75,100;LB";CHR$(l4);<br />
"A LABEL IN INVERSE VIDEO";CHR$(l5);"@;"<br />
80 END<br />
Range<br />
XLB<br />
Initializes spectrum awlyzez<br />
Clears trace <strong>and</strong> annotation from the<br />
spectrum analyzer screen.<br />
Establishes @ as the termination of the<br />
label text.<br />
Displays “‘LABEL” on the spectrum analyzer<br />
screen.<br />
Displays the dollar sign “$” on the<br />
spectrum analyzer screen. l%e semicolons<br />
before <strong>and</strong> a$er CHRS(36) prevent<br />
the computer from performing a<br />
line feed.<br />
Underlines the text.<br />
Displays the text in inverse video.<br />
Programming Comm<strong>and</strong>s 5-263
LB Label<br />
Description<br />
Each text character is specified by 8 bits in an 8 bit data byte, which immediately follows the<br />
LB comm<strong>and</strong>. Additional characters can be displayed using CHR$(code) where code represents<br />
the ASCII code. (See line 50 of the example.) Refer to the following tables for additional<br />
characters <strong>and</strong> label functions available.<br />
LB displays the text at the current pen position. When using LB, the end of the text characters<br />
must be terminated. If the text is not terminated, instructions <strong>and</strong> other text following the<br />
actual label’s statement are displayed on the spectrum analyzer screen. The label mode can<br />
always be terminated with an ASCII end-of-text code (decimal code 3), or with a character<br />
specified previously by the DT comm<strong>and</strong>. The terminator character itself must immediately<br />
follow the label.<br />
To remove the text written by the LB comm<strong>and</strong>, write spaces over the text or use the CLRDSP<br />
comm<strong>and</strong>.<br />
The LB comm<strong>and</strong> also enters the text into the display list. See “DA” for more information<br />
about the display list.<br />
5-264 Programming Comm<strong>and</strong>s
LB Label<br />
‘Ihble 5-6. Character Set<br />
Code<br />
32<br />
33<br />
34<br />
35<br />
36<br />
37<br />
38<br />
39<br />
40<br />
41<br />
42<br />
43<br />
44<br />
45<br />
46<br />
47<br />
48<br />
49<br />
50<br />
51<br />
52<br />
53<br />
54<br />
55<br />
56<br />
57<br />
58<br />
59<br />
60<br />
61<br />
62<br />
63<br />
64<br />
65<br />
66<br />
67<br />
68<br />
69<br />
70<br />
71<br />
72<br />
Char<br />
Ispace:<br />
!<br />
II<br />
#<br />
$<br />
%<br />
&<br />
;<br />
><br />
*<br />
+<br />
,<br />
-<br />
I<br />
0<br />
1<br />
2<br />
3<br />
4<br />
5<br />
6<br />
7<br />
8<br />
9<br />
,<br />
< =<br />
><br />
?<br />
@<br />
A<br />
B<br />
C<br />
D<br />
E<br />
F<br />
G<br />
H<br />
Code<br />
73<br />
74<br />
75<br />
76<br />
77<br />
78<br />
79<br />
80<br />
81<br />
82<br />
83<br />
84<br />
85<br />
86<br />
87<br />
88<br />
89<br />
90<br />
91<br />
92<br />
93<br />
94<br />
95<br />
96<br />
97<br />
98<br />
99<br />
100<br />
101<br />
102<br />
103<br />
104<br />
105<br />
106<br />
107<br />
108<br />
109<br />
110<br />
111<br />
112<br />
113<br />
Chw<br />
I<br />
J<br />
K<br />
L<br />
M<br />
N<br />
0<br />
l!<br />
R<br />
S<br />
T<br />
U<br />
V<br />
W<br />
X<br />
Y<br />
2<br />
:<br />
1<br />
.<br />
a<br />
b<br />
C<br />
d<br />
e<br />
f<br />
Ii!<br />
h<br />
i<br />
j<br />
k<br />
1<br />
m<br />
n<br />
0<br />
P<br />
9<br />
Code<br />
114<br />
115<br />
116<br />
117<br />
118<br />
119<br />
120<br />
121<br />
122<br />
123<br />
125<br />
126<br />
160<br />
162<br />
163<br />
164<br />
165<br />
166<br />
167<br />
168<br />
169<br />
170<br />
171<br />
172<br />
173<br />
174<br />
175<br />
176<br />
177<br />
178<br />
179<br />
180<br />
181<br />
182<br />
183<br />
184<br />
185<br />
186<br />
187<br />
188<br />
189<br />
Chu<br />
r<br />
S<br />
t<br />
U<br />
V<br />
W<br />
X<br />
Y<br />
Z<br />
{<br />
l<br />
A . .<br />
f<br />
L<br />
cx<br />
@<br />
+<br />
+<br />
§<br />
*<br />
1<br />
X<br />
7<br />
0<br />
1<br />
2<br />
3<br />
-1<br />
2<br />
;<br />
N<br />
II<br />
:.<br />
5<br />
1<br />
L<br />
Code<br />
190<br />
191<br />
192<br />
193<br />
194<br />
195<br />
196<br />
199<br />
200<br />
201<br />
204<br />
205<br />
206<br />
207<br />
208<br />
209<br />
210<br />
211<br />
212<br />
213<br />
214<br />
216<br />
217<br />
218<br />
219<br />
220<br />
221<br />
222<br />
224<br />
225<br />
226<br />
227<br />
228<br />
229<br />
230<br />
231<br />
232<br />
233<br />
234<br />
235<br />
236<br />
Char<br />
1<br />
L<br />
A<br />
s<br />
e<br />
V<br />
!3<br />
h<br />
T<br />
L<br />
”<br />
n<br />
Cl<br />
P<br />
Co<br />
r<br />
S<br />
T<br />
A<br />
V<br />
I-+=++<br />
II<br />
Code<br />
237<br />
238<br />
239<br />
240<br />
241<br />
242<br />
243<br />
244<br />
245<br />
246<br />
247<br />
248<br />
249<br />
250<br />
251<br />
252<br />
253<br />
254<br />
Chal<br />
P<br />
v<br />
0<br />
iT<br />
e<br />
e<br />
L7<br />
7<br />
v<br />
W<br />
r<br />
6<br />
D<br />
cl<br />
A<br />
T<br />
x<br />
Programming Comm<strong>and</strong>s 5-265
LB Label<br />
Code<br />
8<br />
10<br />
11<br />
12<br />
13<br />
14<br />
15<br />
16<br />
Function<br />
back space<br />
line feed<br />
vertical tab<br />
form feed<br />
carriage return<br />
5-266 Programming Comm<strong>and</strong>s<br />
inverse video on<br />
enhancements off<br />
I<br />
i underlining on<br />
1 ible 5-7. Label Functions<br />
Description<br />
~ Positions the pen back one character width.<br />
Positions the pen position down one character height.<br />
, Positions the pen up one character height.<br />
‘Position the pen to the upper-left comer of the display.<br />
Positions the pen at the far left side of the display.<br />
Turns on inverse video.<br />
Turns off underlining or inverse video.<br />
Turns on underlining.
LF<br />
Base B<strong>and</strong> Instrument Preset<br />
Performs an instrument preset into base b<strong>and</strong> (b<strong>and</strong> 0).<br />
Syntax<br />
( LF<br />
Model Required: <strong>HP</strong> 8592L, <strong>HP</strong> 85933, <strong>HP</strong> 85953, <strong>HP</strong> 85963.<br />
Related Comm<strong>and</strong>s: IP.<br />
Example<br />
OUTPUT 718;"LF;"<br />
Description<br />
LF’ Base B<strong>and</strong> Instrument Preset<br />
Use LF instead of instrument preset (IP) if harmonic b<strong>and</strong> 0 is desired. Using LF instead of IP<br />
reduces the wear on an internal spectrum analyzer switch (the RF switch).<br />
XLF<br />
Programming Comm<strong>and</strong>s 5-267
LG<br />
Logarithmic Scale<br />
Specifies the vertical graticule divisions as logarithmic units, without changing the reference<br />
level.<br />
Syntax<br />
l o g a r i t h m i c scale 7<br />
Item I Description/Default I Range<br />
Number Any real or integer number. Default units are dB. 0.1 to 20 dB.<br />
Equivalent Softkey: SCALE LOG LIN (when LOG is underlined).<br />
Preset State: 10 dB.<br />
Related Comm<strong>and</strong>s: LN.<br />
Example<br />
OUTPUT 718;"LG 1DB;"<br />
Description<br />
The vertical scale can be specified (in tenths) from 0.1 to 0.9 dB, or in integers from 1 to 20 dB<br />
per graticule division.<br />
If LG is used as the destination in a MOV comm<strong>and</strong>, it changes the log scale, but does not<br />
change the scale from linear to logarithmic.<br />
Query Response<br />
5.266 Programming Comm<strong>and</strong>s
LIMIDEL<br />
Delete Limit-Line Table<br />
Deletes all upper <strong>and</strong> lower segments in the current limit-line table.<br />
Syntax<br />
Equivalent Softkey: PURGE LIMITS .<br />
Related Comm<strong>and</strong>s: LIMIFT, LIMIHI, LIMILO, LIMIREL, LIMISEG, LIMISEGT, SEGDEL,<br />
SENTER, SENTERT.<br />
Example<br />
OUTPUT 718."LIMIDEL*"<br />
9 #<br />
Description<br />
Use LIMIDEL before entering a new limit line.<br />
Note Use STOR, SAVET, or SAVRCLW if you want to save the current limit-line table.<br />
LIMIDEL does not affect stored limit-line data.<br />
LIMIDEL sets LIMIREL OFF (specifies that the limit line is fixed) <strong>and</strong> LIMIFT FREQ (specifies<br />
that the limit line is based on frequency). See “LIMILINE” for more information about limit<br />
line construction.<br />
Programming Comm<strong>and</strong>s 5-269
LIMIDISP<br />
Limit Line Display<br />
Controls when the limit line (or limit lines) are displayed.<br />
Syntax<br />
Equivalent Softkey: LMT DXSP Y N AUTO .<br />
Preset Value: AUTO.<br />
Related Comm<strong>and</strong>s: ANLGPLUS, LIMILINE, LIMITEST.<br />
Example<br />
OUTPUT 718; “LIMIDISP ON; ” Displays any portion of the limit lines that are currently<br />
within the spectrum analyzer screen boundaries.<br />
Description<br />
If a limit line is currently in spectrum analyzer memory, you can use LIMIDISP to control the<br />
display of the limit lines. The parameters of LIMIDISP do the following:<br />
ON Turns on the limit line display.<br />
OFF Turns off the limit line display.<br />
AUTO Allows LIMITEST to control the display of the limit lines. If LIMITEST is on,<br />
the limit lines will be displayed. If LIMITEST is off, the limit lines will not be<br />
displayed.<br />
UPPER Displays the upper limit line only.<br />
LOWER Displays the lower limit line only.<br />
Note Turning on Analog+ display mode changes the way that LIMIDISP functions as<br />
follows:<br />
5.270 Programming Comm<strong>and</strong>s<br />
� LIMIDISP ON, LIMIDISP LOWER, <strong>and</strong> LIMIDISP UPPER do not work when<br />
the Analog+ display mode is turned on.<br />
� LIMIDISP AUTO will still perform the limit line test if LIMITEST is on, but<br />
the limit lines will not be displayed.
LIMIDISP Limit Line Display<br />
When used as a predefined variable, LIMIDISP returns a number from 0 to four, depending on<br />
the setting of the LIMIDISP parameter. The number corresponds to the LIMIDISP parameter as<br />
shown in the following table.<br />
Query Response<br />
o u t p u t<br />
termination +<br />
Programming Comm<strong>and</strong>s 5-271
LIMIFAIL<br />
Limits Failed<br />
Returns a “0” ifthelastmeasurementsweep of trace AisequaIto or within the limit-line<br />
bounds.<br />
Syntax<br />
Pre’def ined<br />
function path only<br />
Related Comm<strong>and</strong>s: LIMIHI, LIMILINE, LIMILO, LIMISEG, LIMISEGT, LIMITEST, SENTER,<br />
SENTERT.<br />
Example<br />
10 OUTPUT 718;“IP;SNGLS;CF300MHZ;SPlOOMHZ;”<br />
20 OUTPUT 718;“LIMIDEL;”<br />
30 OUTPUT 718;“LIMIMODE UPPER;”<br />
40 OUTPUT 718;“LIMISEG 250MHZ,-60DB,FLAT;”<br />
50<br />
60<br />
70<br />
80<br />
90<br />
100<br />
110<br />
120<br />
130<br />
140<br />
Initializes spectrum analyzer <strong>and</strong><br />
changes the frequency <strong>and</strong> span<br />
settings.<br />
Deletes any limit-line tables, sets<br />
the table type to $xed.<br />
Spec@es the upper limit-line table.<br />
Creates an entry for the upper<br />
limit-line table. Because the LIMISEG<br />
comm<strong>and</strong> is used, the limit-line<br />
will be boxed on the frequency.<br />
OUTPUT 718;“LIMISEG 290MHZ,-60DB,SLOPE;”<br />
OUTPUT 718;"LIMISEG 295MHZ,-lSDB,FLAT;"<br />
OUTPUT 718;"LIMISEG 305MHZ,-15DB,SLOPE;"<br />
OUTPUT 718;"LIMISEG 3lOMHZ,-GODB,FLAT;"<br />
OUTPUT 718;"LIMISEG SlOMHZ,-GODB,FLAT;"<br />
OUTPUT 718;"LIMITEST 0N;TS;" Turns on limit-line testing.<br />
OUTPUT 718;"LIMIFAIL?;" Returns the status of the limit-line<br />
testing.<br />
ENTER 718;A<br />
DISP A Displays the result.<br />
END<br />
5.272 Programming Comm<strong>and</strong>s
Description<br />
LIMIFAIL returns one of the following values:<br />
LIMIFAIL Limits lkiled<br />
0 indicates that the measurement sweep was within the limit-line bounds.<br />
1 indicates that the measurement sweep failed the lower limit.<br />
2 indicates that the measurement sweep failed the upper limit.<br />
3 indicates that the measurement sweep failed both the lower <strong>and</strong> upper limits.<br />
4 indicates that no test was performed. A “4” is returned if LIMITEST is set to OFF.<br />
Query Response<br />
Programming Comm<strong>and</strong>s 5.273
LIMIFT<br />
Select Frequency or Time Limit Line<br />
Selects how the limit-line segments are defined: according to frequency, or according to the<br />
sweep time setting of the spectrum analyzer.<br />
Syntax<br />
Equivalent Softkey: LIMIFT is equivalent to LIMITS FRIJ TIME.<br />
Related Comm<strong>and</strong>s: LIMIDEL, LIMILINE, LIMIMODE, LIMIREL, LIMISEG, LIMISEGT,<br />
SEGDEL, SENTER, SENTERT.<br />
Example<br />
OUTPUT 718;"LIMIFT TIME;" Ifthe current limit-line table is a frequency limit-line table,<br />
it is purged. LIMIFT TIME places the limit-line segments<br />
on the spectrum analyzer display with respect to the sweep<br />
time of the spectrum analyzer:<br />
Description<br />
If you execute “LIMIFT TIME;“, LIMISEGT, or SENTERT, the limit-line segments are placed on<br />
the spectrum analyzer display with respect to the sweep time setting of the spectrum analyzer.<br />
If you execute “LIMIFT FREQ;“, LIMISEG, or SENTER, the limit-line segments are placed<br />
according to the frequency that is specified for each segment. If a limit line has already been<br />
defined, changing the LIMIFI’ setting clears the existing limit line.<br />
Query Response<br />
5-274 Programming Comm<strong>and</strong>s<br />
TIME<br />
FREQ
LIMIHI<br />
Upper Limit<br />
Allows you to specify a fixed trace as the upper limit line.<br />
Syntax<br />
LIMIHI<br />
h u s e r - d e f i n e d t r a c e /<br />
/<br />
LIMIHI Upper Limit<br />
Related Comm<strong>and</strong>s: IP, LIMIDEL, LIMIFAIL, LIMILO, LIMISEG, LIMITEST, SENTER.<br />
Example<br />
10 OUTPUT 718;"TRDEF M,ASK,401;”<br />
20 OUTPUT 718;"MOV M,ASKC1,1001,1000;"<br />
30 OUTPUT 718;"MOV M~ASK[101,2001,2000;"<br />
40 OUTPUT 718;"MOV M~ASK[201,300],3000;"<br />
50 OUTPUT 718;"MOV M,ASK[301,401] ,400O;”<br />
60 OUTPUT 718;"LIMIHI M-ASK;"<br />
70 OUTPUT 718;"LIMITEST ON;"<br />
80 OUTPUT 718;"LIMIFAIL?;"<br />
90 ENTER 718;A<br />
100 DISP A<br />
110 END<br />
Description<br />
XLlMlHl<br />
Dejines a trace called “M-ASK. ”<br />
Moves values into sections of the M-ASK<br />
trace.<br />
Spec@.es M-ASK as the upper limit<br />
line<br />
Turns on limit-line testing.<br />
l&sts if trace A fails limit-line testing.<br />
Displays result of limit-line testing.<br />
Unlike specifying a limit line with LIMISEG, LIMISEGT, SENTER, or SENTERT, the limit line<br />
specified with LIMIHI is not updated if the center frequency, frequency span, sweep time, or<br />
reference level are changed.<br />
Note Executing IP, LIMIDEL, LIMISEG, LIMISEGT, SENTER, or SENTERT will delete<br />
the limit line specified with LIMILO or LIMIHI. Executing LIMILO or LIMIHI<br />
will delete the limit line specified with LIMISEG, LIMISEGT, SENTER, or<br />
SENTERT.<br />
Use LIMITEST ON to display the limit line trace specified by LIMIHI. Use LIMITEST OFF to<br />
blank the limit line trace specified by LIMIHI.<br />
Programming Comm<strong>and</strong>s 5-275
LIMILINE<br />
Limit Lines<br />
Outputs the current limit-line table definitions.<br />
Syntax<br />
LIMILINE<br />
Related Comm<strong>and</strong>s: LIMIFI’, LIMIREL, LIMIMODE, LIMIREL, LIMISEG, LIMISEGT,<br />
LIMITEST, SAVRCLW, SENTER, SENTERT.<br />
Example<br />
10 DIM States$[2000]<br />
20 OUTPUT 7l8;"IP;CF300MHZ;SPlOOMHZ;"<br />
30 OUTPUT 718;"LIMIDEL;"<br />
40 OUTPUT 718;"LIMIMODE UPPER;"<br />
45 OUTPUT 718;"LIMIFT FREG;"<br />
50 OUTPUT 718;"LIMISEG 250MHZ,-60DB,FLAT;"<br />
60 OUTPUT 718;"LIMISEG 290MHZ,-60DB,SLOPE;"<br />
70 OUTPUT 718;"LIMISEG 295MHZ,-15DB,FLAT;"<br />
80 OUTPUT 718;"LIMISEG 305MHZ,-15DB,SLOPE;"<br />
90 OUTPUT 718;"LIMISEG 3lOMHZ,-GODB,FLAT;"<br />
100 OUTPUT 718;"LIMISEG 910MHZ,-60DB,FLAT;"<br />
110 OUTPUT 718;"LIMILINE?;"<br />
120 ENTER 718 USING I'#,-K";States$<br />
130 PRINT States$<br />
140 END<br />
5-276 Programming Comm<strong>and</strong>s<br />
Dhnmsions an array to store the<br />
limit-line irlformation.<br />
Initializes spectrum analyzex<br />
Lkletes any limit-line tables, sets<br />
the table type to fiked.<br />
Specifies the upper limit-line table.<br />
Selects a limit line based onfrequency.<br />
Enters a value for the upper limitline<br />
table. Because the LJMXSEG<br />
comm<strong>and</strong> is used, the limit-line<br />
segment is for a limit-line based<br />
mfMww.<br />
Gets the current limit-line table<br />
o!.@nitions.<br />
Enters in&ormation into array.<br />
Prints the current limit-line table<br />
&$nitions.
Description<br />
LIMILINE Limit Lines<br />
LIMILINE is used to query the current limit line. Executing LIMILINE returns an ASCII string<br />
containing the comm<strong>and</strong>s needed to create the limit line.<br />
Use these comm<strong>and</strong>s (in the order given) to build a limit line:<br />
1. Use LIMIDEL to clear the limit-line table.<br />
2. Use LIMIFI’ to select a limit line that is either based on frequency or sweep time.<br />
3. Use LIMIREL to determine whether the values of the limit line are absolute values or<br />
positioned relative to the reference-level <strong>and</strong> center-frequency settings.<br />
4. Use LIMIMODE, LIMISEG, LIMISEGT, SENTER, SENTERT to enter the limit-line segments.<br />
(Use LIMISEG or SENTER for a limit-line based on frequency; use LIMISEGT or SENTERT<br />
for a limit-line based on sweep time.)<br />
5. Use the LIMIDISP comm<strong>and</strong> to select if the limit line is displayed or not.<br />
6. Use the LIMITEST comm<strong>and</strong> to turn on limit-line testing.<br />
7. Use the LIMIFAIL comm<strong>and</strong> to determine if the measurement sweep passed or failed the<br />
limit line boundaries.<br />
Enabling limit-line testing: When limit testing is enabled, the segments in the current table<br />
are interpolated into the limit-line traces according to the current span <strong>and</strong> center frequency or<br />
sweep time of the spectrum analyzer. After the sweep, each value in trace A is compared to its<br />
corresponding value in the limit-line traces. If the current limit-line table is empty (for instance<br />
after using the comm<strong>and</strong> LIMIDEL) <strong>and</strong> limit testing is enabled, then the limit-line traces are<br />
blanked <strong>and</strong> set to out-of-range values. By using the SUB, MKPK HI, <strong>and</strong> MKF? comm<strong>and</strong>s, you<br />
can read the point of greatest difference between the trace <strong>and</strong> limit line. See “LIMITEST” for<br />
more information about limit-line testing.<br />
Saving the limit line table: Once you have built the limit line, you can save the limit-line<br />
table on a memory card or in spectrum analyzer memory. Use the STOR or SAVRCLW<br />
comm<strong>and</strong>s to store the current limit-line table on the memory card. Use SAVET or SAVRCLW to<br />
store the limit-line table in spectrum analyzer memory.<br />
Query Response<br />
The query response is a character string consisting of LIMILINE, LIMIREL, LIMIMODE,<br />
LIMIHALF, LIMISEG, LIMISEGT, SENTER, or SENTERT comm<strong>and</strong>s. LIMIMODE returns<br />
the number of for the current limit-line table. (The LIMIHALF comm<strong>and</strong> is for backward<br />
compatibility; it is not used as an <strong>HP</strong> <strong>8590</strong> <strong>Series</strong> spectrum analyzer programming comm<strong>and</strong>.)<br />
Programming Comm<strong>and</strong>s 5-277
LIMILINE Limit Lines<br />
number of<br />
r s e g m e n t s 7<br />
LIMIDEL LIMIREL<br />
SENTER<br />
SENTERT<br />
/frequency\<br />
5-278 Programming Comm<strong>and</strong>s<br />
uPPer<br />
lower<br />
/value 7 / v a l u e \<br />
/frequency\ /ompIitude\
LIMILO<br />
Lower Limit<br />
Allows you to specify a fixed trace as the lower limit line.<br />
Syntax<br />
Related Comm<strong>and</strong>s: IF’, LIMIDEL, LIMIFAIL, LIMISEG, LIMITEST, SENTER.<br />
Example<br />
LIMILO Lower Limit<br />
XLIMILO<br />
10 OUTPUT 718;"TRDEF M,ASK,401;" D$ke.s a trace called ‘M_ASK. ”<br />
20 OUTPUT 718;"MOV M~ASK[1,100],1000;" Moves mlues into sections of the M-ASK<br />
trace.<br />
30 OUTPUT 718;"MOV M~ASK[101,200],2000;"<br />
40 OUTPUT 718;"MOV M,ASK[201,300],3000;"<br />
50 OUTPUT 718;"MOV M~ASK[301,401],4000;"<br />
60 OUTPUT 718;"LIMILO M-ASK;" Specifies M-ASK as the lower limit<br />
70 OUTPUT 718;"LIMITEST ON;"<br />
80 OUTPUT 718;"LIMIFAIL?;"<br />
90 ENTER 718;A<br />
100 DISP A<br />
110 END<br />
Description<br />
line.<br />
Turns on limit-line testing.<br />
7bst.s if trace A fails limit-line testing.<br />
Displays result of limit-line testing.<br />
Unlike specifying a limit line with LIMISEG, LIMISEGT, SENTERT, or SENTER, the limit line<br />
specified with LIMILO is not updated if the center frequency, frequency span, sweep time, or<br />
reference level is changed.<br />
Note Executing IP, LIMIDEL, LIMISEG, LIMISEGT, SENTERT, or SENTER will delete<br />
the limit line specified with LIMILO or LIMIHI. Executing LIMILO or LIMIHI<br />
will delete the limit line specified with LIMISEG or SENTER.<br />
Use LIMITEST ON to display the limit line trace specified by LIMILO. Use LIMITEST OFF to<br />
blank the limit line trace specified by LIMILO.<br />
Programming Comm<strong>and</strong>s 5-279
LIMIMIRROR<br />
Mirror Limit Line<br />
Reflects the current definition about the amplitude axis at the largest frequency (for a limit line<br />
based on frequency) or the largest sweep time (for a limit line based on the sweep time) in the<br />
definition.<br />
Syntax<br />
Related Comm<strong>and</strong>s: LIMILINE, LIMISEG, LIMISEGT, SENTER, SENTERT.<br />
Example<br />
10 OUTPUT 718 , "IP;CF300MHZ;SPlOOMHZ;"<br />
20 OUTPUT 718 ; "LIMIDEL;"<br />
30 OUTPUT 718;"LIMIMODE UPPER;"<br />
35 OUTPUT 718;"LIMIFT FREQ;"<br />
40 OUTPUT 718;"LIMISEG 250MHZ,-60DB,FLAT;"<br />
50 OUTPUT 718;"LIMISEG 290MHZ ,-50DB,SLOPE;"<br />
60 OUTPUT 718;"LIMISEG<br />
!<br />
295MHZ,-15DB,SLOPE;"<br />
70 OUTPUT 718;"LIMISEG 300MHZ,-lODB,SLOPE;"<br />
80 OUTPUT 718;"LIMIMIRROR;"<br />
90 OUTPUT 718;"LIMITEST ON;"<br />
100 END<br />
The example results in the limit-line table shown in the following table.<br />
-<br />
1EG -fWART-FREQ<br />
1 250.0 MHz<br />
2<br />
3<br />
4<br />
5<br />
6<br />
7<br />
8-<br />
290.0 MHz<br />
295.0 MHz<br />
300.0 MHz<br />
305.0 MHz<br />
310.0 MHz<br />
310.0 MHz<br />
350.0 MHz<br />
Initializes spectrum an&y- changes<br />
the frequency <strong>and</strong> span.<br />
Deletes any limit-line tables, sets<br />
the table type to jixed.<br />
SpecQks the upper limit-line table<br />
Selects a limit line boxed on frequency.<br />
Enters a value into the upper limitline<br />
table.<br />
Mirrors the upper limit-line entries.<br />
Turns on the limit-line testing <strong>and</strong><br />
displays the limit lines.<br />
You may notice that the LIMIMIRROR comm<strong>and</strong> may create more than one table entry for a<br />
frequency (for example, see segment 6 in the above table). The LIMIMIRROR comm<strong>and</strong> creates<br />
an extra segment so that the previous segment is explicitly ended at the correct amplitude.<br />
5-280 Programming Comm<strong>and</strong>s
LIMIMODE<br />
Limit-Line Entry Mode<br />
LIMIMODE Limit-Line Entry Mode<br />
Determines whether the limit-line entries are treated as upper amplitude values, lower<br />
amplitude values, upper <strong>and</strong> lower amplitude values, or mid-amplitude <strong>and</strong> delta values.<br />
Syntax<br />
Related Comm<strong>and</strong>s: LIMILINE, LIMISEG, LIMISEGT, SEGDEL, SENTER, SENTERT.<br />
Example<br />
This example uses LIMIMODE to enter segments into the upper limit-line table, <strong>and</strong> then to<br />
enter a segment into the lower limit-line table (upper <strong>and</strong> lower limit lines are treated as<br />
separate tables). Line 60 demonstrates entering a segment into a combined upper <strong>and</strong> lower<br />
limit-line table.<br />
10 OUTPUT 718;"LIMIDEL;" Deletes the current limit-line ta-<br />
20 OUTPUT 718;"LIMIMODE UPPER;"<br />
30 OUTPUT 718;"LIMIFT FREQ;"<br />
40 OUTPUT 718;"LIMISEG 300MHZ,-30DB,SLOPE;"<br />
50 OUTPUT 718;"LIMIMODE LOWER;"<br />
60 OUTPUT 718;"LIMISEG 300MHZ,-70DB,SLOPE;"<br />
70 OUTPUT 718;"LIMIMODE UPLOW;"<br />
80 OUTPUT 718;"SENTER 350MHZ,-30DB,-80DB,FLAT;"<br />
90 OUTPUT 718;"LIMIDISP ON;"<br />
100 END<br />
ble, sets the table type to jixed.<br />
Specifies the upper limit-line table.<br />
Selects a limit line based on frequency.<br />
Enters a segment into the upper<br />
limit-line table. Because the<br />
LMSEG comm<strong>and</strong> is used, the<br />
limit-line table will be based on<br />
freq-9.<br />
Spec@.es the lower limit-line table.<br />
Enters a segment into the lower<br />
limit-line table.<br />
SpecQies the upper <strong>and</strong> lower limitline<br />
tables.<br />
Enters a segment into the upper<br />
<strong>and</strong> lower limit-line tables.<br />
Displays the limit lines.<br />
Programming Comm<strong>and</strong>s 5-281
LIMIMODE Limit-Line Entry Mode<br />
Description<br />
Use LIMIMODE in conjunction with LIMISEG, LIMISEGT, SENTER, or SENTERT. Specify<br />
LIMIMODE UPPER or LIMIMODE LOWER before using LIMISEG or LIMISEGT. Specify<br />
LIMIMODE UPLOW or LIMIMODE DELTA before using SENTER or SENTERT.<br />
The LIMIMODE comm<strong>and</strong> determines whether the limit-line table entries are to be treated<br />
separately (upper or lower) or together (upper <strong>and</strong> lower) when deleting a segment with<br />
SEGDEL (see “SEGDEL”). If limit-line table entries are entered with LIMISEG or LIMISEGT,<br />
they are treated as entries to separate tables even if LIMIMODE UPLOW or LIMIMODE DELTA<br />
had been previously specified.<br />
When used as a predefined variable, LIMIMODE returns a number from 0 to three, depending<br />
on the setting of the LIMIMODE parameter. The number corresponds to the LIMIMODE<br />
parameter as shown in the following table.<br />
Query Response<br />
5-282 Programming Comm<strong>and</strong>s<br />
output<br />
’ t e r m i n a t i o n ---)<br />
QLIMIMODE
LIMIREL<br />
Relative Limit Lines<br />
Specifies whether the current limit lines are fixed or relative.<br />
Syntax<br />
LIMIREL OFF<br />
Related Comm<strong>and</strong>s: LIMIDEL, LIMIFT, LIMILINE.<br />
Example<br />
ON<br />
/<br />
LIMIREL Relative Limit Lines<br />
OUTPUT 718;"LIMIFT FREQ;" Selects a limit line based on frequency.<br />
OUTPUT 718;"LIMIREL ON;" SpecQks that the limit line will be relative to the referencelevel<br />
<strong>and</strong> center-frequency settings.<br />
Description<br />
You should use LIMIFT to select whether the limit lines are based on frequency or sweep time<br />
before using LIMIREL, because changing between a frequency or sweep time limit line purges<br />
the current limit line table <strong>and</strong> sets LIMIREL to OFF.<br />
LIMIREL <strong>and</strong> the reference level: Regardless of whether the limit line is based on frequency<br />
or sweep time, LIMIREL determines if the amplitude parameter in a limit line table represents<br />
absolute values or relative values. If LIMIREL is set to OFF, the limit lines amplitude values<br />
are specified in absolute amplitude <strong>and</strong> do not depend on the reference level (RL) setting. If<br />
LIMIREL is set to ON, the limit line amplitude values are relative to the current reference level<br />
(RL) setting.<br />
For limit lines that are based on frequency: The LIMIREL comm<strong>and</strong> determines whether<br />
the frequency parameter in a limit-line table represent absolute or relative values that are<br />
referenced to the center-frequency settings.<br />
� Executing “LIMIREL OFF;” specifies that the frequency values in a limit-line table are fixed<br />
values, <strong>and</strong> the limit line is positioned accordingly. Fixed limit lines are specified in absolute<br />
frequency <strong>and</strong> do not depend upon the center frequency value.<br />
� Executing “LIMIREL ON;” specifies that the frequency values in a limit-line table are relative<br />
values <strong>and</strong> positions the limit line relative to the center-frequency settings. Relative limit<br />
lines are specified in relative frequency <strong>and</strong> are positioned with respect to the current center<br />
frequency. When the current center frequency value is changed, the segment frequencies<br />
are converted according to the current center frequency value.<br />
Programming Comm<strong>and</strong>s 5.283
LIMIREL Relative Limit Lines<br />
For limit lines that are based on the sweep time: Limit lines that are based on sweep time<br />
are always relative to the start time, <strong>and</strong> the horizontal position of the limit line is not affected<br />
by the setting of LIMIREL.<br />
Query Response<br />
5-284 Programming Comm<strong>and</strong>s<br />
output<br />
� termination +<br />
002
LIMISEG<br />
Enter Limit-Line Segment for Frequency<br />
LIMISEG Enter Limit-Line Segment for Frequency<br />
Adds new segments to the current frequency limit line in either the upper limit line or the<br />
lower limit line.<br />
Syntax<br />
LIMISEC<br />
b p r e d e f i n e d v a r i a b l e J<br />
buuser-defined variable><br />
b p r e d e f i n e d f u n c t i o n J<br />
trace element<br />
,- frequency-,<br />
HZ<br />
� predefined variable - /<br />
Luser-defined v a r i a b l e - I<br />
L predefined function<br />
k trace element<br />
J<br />
TQ-d<br />
I<br />
I<br />
I<br />
/<br />
z<br />
segment<br />
/ type \<br />
SLOPE<br />
-0<br />
Item Description/Default Range<br />
XLIMISEG<br />
Number Any real or integer number. Default unit is dBm. Varies with FOFFSET<br />
<strong>and</strong> ROFFSET.<br />
Related Comm<strong>and</strong>s: LIMIDEL, LIMILINE, LIMIMODE, LIMIREL, SEGDEL, SENTER.<br />
Programming Comm<strong>and</strong>s 5-285
LIMISEG Enter Limit-Line Segment for Frequency<br />
Example<br />
10 OUTPUT 718;"IP;SNGLS;CF300MHZ;SPlOOMHZ;RB 3MHZ;"<br />
20 OUTPUT 718;"LIMIDEL;"<br />
30 OUTPUT 718;"LIMIMODE UPPER;"<br />
35 OUTPUT 718;"LIMIFT FRED;"<br />
40 OUTPUT 718;"LIMISEG 250MHZ ,-GODB,FLAT;"<br />
50 OUTPUT 718;"LIMISEG 290MHZ,-60DB,SLOPE;"<br />
60 OUTPUT 718;"LIMISEG 295MHZ,-15DB,FLAT;"<br />
70 OUTPUT 718;"LIMISEG 305MHZ,-15DB,SLOPE;"<br />
80 OUTPUT 718;"LIMISEG 3lOMHZ,-GODB,FLAT;"<br />
90 OUTPUT 718;"LIMISEG 910MHZ,-60DB,FLAT;"<br />
100 OUTPUT 718;"LIMIMODE LOWER;"<br />
110 OUTPUT 718;"LIMISEG 250MHZ,-75DB,FLAT;"<br />
120 OUTPUT 718;"LIMISEG SlOMHZ,-75DB,FLAT;"<br />
130 OUTPUT 718;"LIMITEST 0N;TS;"<br />
140 OUTPUT 718;"LIMIFAIL?;"<br />
150 ENTER 718;A<br />
160 DISP A<br />
170 END<br />
Description<br />
Initializes spectrum analyq<br />
changes the frequency,<br />
span, <strong>and</strong> b<strong>and</strong>width.<br />
Deletes the current limitline<br />
table, sets the table<br />
type to $xed.<br />
Spec@es the upper limitline<br />
table.<br />
Selects a limit line based<br />
on frequent y.<br />
Adds segment to the upper<br />
limit-line table<br />
Specifies the lower limitline<br />
table.<br />
Adds segment to the lower<br />
limit-line table.<br />
Enables limit-line testing.<br />
Returns the result of limitline<br />
testing.<br />
Displays the result.<br />
If the current limit line table contains lines based on sweep time (as opposed to a limit line<br />
based on the frequency), executing LIMISEG will clear the current sweep time limit line table,<br />
<strong>and</strong> set LIMIREL to OFF.<br />
Each limit-line segment is specified with a starting frequency, an amplitude, <strong>and</strong> a segment<br />
type. The segment type defines how the line segment is to extend from its starting point to the<br />
next segment. The segment types are FLAT, SLOPE, <strong>and</strong> POINT.<br />
� FLAT draws a zero-slope line between the coordinate point of the current segment <strong>and</strong> the<br />
coordinate point of the next segment, producing limit-line values equal in amplitude for all<br />
frequencies between the two points. If the amplitude values of the two segments differ, the<br />
limit line will “step” to the value of the second segment.<br />
w SLOPE draws a straight line between the coordinate point of the current segment <strong>and</strong> the<br />
coordinate point of the next segment, producing limit-line values for all frequencies between<br />
the two points.<br />
5-286 Programming Comm<strong>and</strong>s
LIMISEG Enter Limit-Line Segment for Frequency<br />
� POINT specifies a limit value for the coordinate point, <strong>and</strong> no other frequency points, so<br />
that a POINT segment specifies a limit value for a single frequency. For an upper limit line,<br />
a POINT segment is indicated by a line drawn from the coordinate point, to a point that is<br />
vertically off the top of screen. For a lower limit line, a POINT segment is indicated by a line<br />
drawn from the coordinate point, to a point that is vertically off the bottom of screen. The<br />
POINT segment type should be used as the last segment in the limit-line table. However, if<br />
the last segment in the table is not specified as the POINT segment type, an implicit point is<br />
used automatically. If a visible POINT segment at the right edge of the display is not desired,<br />
add an explicit last point segment (higher in frequency than the stop frequency) to the<br />
limit-line table.<br />
Segments are sorted according to starting frequency. A maximum of 20 segments can be<br />
defined in each of the upper <strong>and</strong> lower halves of a limit line. When the segment type is<br />
omitted, the last type given (or SLOPE if no previous type has been given) is used.<br />
Use LIMISEG if you want to enter amplitude data in the upper or lower limit lines. If you<br />
want to enter amplitude data as upper <strong>and</strong> lower amplitude pairs or as mid <strong>and</strong> delta pairs, use<br />
the SENTER comm<strong>and</strong> instead of LIMISEG. Use LIMIMODE to specify entry into the upper<br />
limit-line table or the lower limit-line table. (See line 30 of example.)<br />
Programming Comm<strong>and</strong>s 5-287
LIMISEGT<br />
Enter Limit-Line Segment for Sweep Time<br />
Adds new segments to the current sweep time limit line in either the upper limit line or the<br />
lower limit line.<br />
Syntax<br />
LIMISEGT<br />
,- t ime -\<br />
\ us /<br />
g-;<br />
L /<br />
b p r e d e f i n e d v a r i a b l e d<br />
%user-defined variable><br />
% predefined Function -J<br />
b trace element d<br />
,- amp I i tude .-\<br />
segment<br />
/ type \<br />
DE<br />
/<br />
p--J ..,<br />
SLOPE<br />
Y p r e d e f i n e d v a r i a b l e -/<br />
*user-defined variable2<br />
Y predefined function 2<br />
Y trace element J<br />
I<br />
Item Description/Default Rwle<br />
Number Any real or integer number. For the sweep time, the default unit The range of the<br />
is seconds. For the amplitude value, the default unit is dBm. sweep time is<br />
0 to 100 s. The range<br />
of the amplitude<br />
varies with ROFFSET.<br />
Related Comm<strong>and</strong>s: LIMIDEL, LIMIFT, LIMILINE, LIMIMODE, LIMIREL, SEGDEL, SENTERT.<br />
5-288 Programming Comm<strong>and</strong>s
Example<br />
OUTPUT 718;"LIMIDEL;"<br />
OUTPUT 718;"LIMIMODE UPPER;"<br />
OUTPUT 718;"LIMIFT TIME;"<br />
OUTPUT 718;"LIMISEGT OMS,-GODB,FLAT;"<br />
OUTPUT 718;"LIMISEGT GMS,-GODB,SLOPE;"<br />
OUTPUT 718;"LIMISEGT 8MS,-lSDB,FLAT;"<br />
OUTPUT 718;"LIMISEGT llMS,-20DB,SLOPE;"<br />
OUTPUT 718;"LIMISEGT 14MS,-GODB,FLAT;"<br />
OUTPUT 718;"LIMISEGT 20MS,-GODB,POINT;"<br />
OUTPUT 718;"LIMIMODE LOWER;"<br />
OUTPUT 718;"LIMISEGT OK,-75DB,FLAT;"<br />
OUTPUT 718;"LIMISEGT 20MS,-75DB,POINT;"<br />
OUTPUT 718;"LIMITEST 0N;TS;"<br />
OUTPUT 718;"LIMIFAIL?;"<br />
ENTER 718;A<br />
DISP A<br />
Description<br />
LIMISEGT Enter Limit-Line Segment for Sweep Time<br />
Deletes the current limit-line table, sets the<br />
table type to jixed.<br />
Spec.@es the upper limit-line table.<br />
Selects a limit line based on the sweep time.<br />
Adds segment to the upper limit-line table.<br />
Specifies the lower limit-line table<br />
Adds segment to the lower limit-line table.<br />
Enubles limit-line testing.<br />
Returns the result of limit-line testing.<br />
Displays the result.<br />
Each limit-line segment is specified with a starting sweep time, an amplitude, <strong>and</strong> a segment<br />
type.<br />
Note If the current limit line table contains limit lines based on frequency (as<br />
opposed to a limit line based on the sweep time), executing LIMISEGT will<br />
clear the current frequency limit line table, <strong>and</strong> set LIMIREL to OFF<br />
Starting sweep time: When you specify the starting sweep time, you are specifying the<br />
starting sweep time with respect to the sweep time of the spectrum analyzer. For example, if<br />
you specify a starting sweep time of 0, the limit-line segment will start at the left side of the<br />
spectrum analyzer display.<br />
Segment type: The segment type defines how the line segment is to extend from its starting<br />
point to the next segment. The segment types are FLAT, SLOPE, <strong>and</strong> POINT.<br />
� FLAT draws a zero-slope line between the coordinate point of the current segment <strong>and</strong> the<br />
coordinate point of the next segment, producing limit-line values equal in amplitude for all<br />
sweep times between the two points. If the amplitude values of the two segments differ, the<br />
limit line will “step” to the value of the second segment.<br />
w SLOPE draws a straight line between the coordinate point of the current segment <strong>and</strong> the<br />
coordinate point of the next segment, interpolating amplitude values for all sweep times<br />
between the two points.<br />
Programming Comm<strong>and</strong>s 5-288
LIMISEGT Enter Limit-Line Segment for Sweep Time<br />
� POINT specifies a limit value for the coordinate point, <strong>and</strong> no other sweep time points, so<br />
that a POINT segment specifies an amplitude value for a single sweep time. For an upper<br />
limit line, a POINT segment is indicated by a line drawn from the coordinate point, to a point<br />
that is vertically off the top of the graticule area. For a lower limit line, a POINT segment<br />
is indicated by a line drawn from the coordinate point, to a point that is vertically off the<br />
the limit-line table. However, if the last segment in the table is not specified as the POINT<br />
edge of the display is not desired, add an explicit last point segment to (higher in sweep time<br />
Segments are sorted according to starting sweep time. A maximum of 20 segments can be<br />
Use LIMISEGT if you want to enter amplitude data in the upper or lower limit lines. Use<br />
LIMIMODE to specify entry into the upper limit-line table or the lower limit-line table (see line<br />
30 of example). If you want to enter amplitude data as upper <strong>and</strong> lower amplitude pairs or as<br />
mid <strong>and</strong> delta pairs, use the SENTERT comm<strong>and</strong> instead of LIMISEGT.<br />
5-280 Programming Comm<strong>and</strong>s
LIMITEST<br />
Enable Limit Line ‘&sting<br />
Compares trace A with the current limit-line data.<br />
Syntax<br />
LIMITEST Enable Limit Line Testing<br />
Preset State: LIMITEST OFF.<br />
Related Comm<strong>and</strong>s: LIMIFAIL, LIMIHI, LIMILO, LIMISEG, LIMISEGT, SENTER, SENTERT.<br />
Restrictions: Not available with Analog+ display mode. See “ANLGPLUS” for more<br />
information.<br />
Example<br />
10 OUTPUT 7l8;"IP;SNGLS;CF300MHZ;SPlOOMHZ;"<br />
20 OUTPUT 718;"LIMIDEL;"<br />
30 OUTPUT 718;"LIMIMODE UPPER;"<br />
35 OUTPUT 718;"LIMIFT FREQ;"<br />
40 OUTPUT 718;"LIMISEG 250MHZ,-60DB,FLAT;"<br />
50 OUTPUT 718;"LIMISEG 290MHZ,-60DB,SLOPE;"<br />
60 OUTPUT 718;"LIMISEG 295MHZ,-lSDB,FLAT;"<br />
70 OUTPUT 718;"LIMISEG 305MHZ,-lSDB,SLOPE;"<br />
80 OUTPUT 718;"LIMISEG 310MHZ,-GODB,FLAT;"<br />
90 OUTPUT 718;"LIMISEG SlOMHZ,-GODB,FLAT;"<br />
100 OUTPUT 718;"LIMITEST 0N;TS;"<br />
110 OUTPUT 718;"LIMIFAIL?;"<br />
120 ENTER 718;A<br />
130 DISP A<br />
140 END<br />
XLIMITEST<br />
Initializes spectrum analyzer <strong>and</strong><br />
changes the frequency <strong>and</strong> span<br />
settings.<br />
Deletes any limit-line tables, sets<br />
the table type to jixed.<br />
Specifies the upper limit-line table.<br />
Selects a limit line based onfrequency.<br />
Creates an entry to the upper limitline<br />
table.<br />
Turns on limit-line testing.<br />
Returns the status of the limit-line<br />
testing.<br />
Displays the result.<br />
Programming Comm<strong>and</strong>s 5.281
LIMITEST Enable Limit Line Testing<br />
Description<br />
A test is made of the data in TRA (trace A), <strong>and</strong> the result can be read, using LIMIFAIL, after<br />
each sweep.<br />
5-282 Programming Comm<strong>and</strong>s
LINFILL<br />
Line Fill<br />
Fills linear interpolated data into the specified trace data points of a destination trace.<br />
Syntax<br />
9 p r e d e f i n e d v a r i a b l e /<br />
h u s e r - d e f i n e d variable/<br />
b p r e d e f i n e d f u n c t i o n I<br />
b trace element /<br />
n u m b e r o f e l e m e n t s<br />
/- \<br />
� number<br />
$ p r e d e f i n e d v a r i a b l e /<br />
*user-defined v a r i a b l e )<br />
b p r e d e f i n e d f u n c t i o n 1<br />
b trace element /<br />
% p r e d e f i n e d v a r i a b l e /<br />
huser-defined v a r i a b l e /<br />
% p r e d e f i n e d f u n c t i o n I<br />
b trace element J<br />
/<br />
LINFILL Line Fill<br />
/<br />
Programming Comm<strong>and</strong>s 5-283
LINFILL Line Fill<br />
Item<br />
User-defined variable<br />
Predefined variable<br />
Predefined function<br />
Trace element<br />
Number<br />
Example<br />
Description/Default R-f&<br />
A variable deEned by VARDEF or ACTDEF Any valid variable name.<br />
comm<strong>and</strong>s.<br />
A comm<strong>and</strong> that acts as a variable. Refer to<br />
‘lhble 5-1.<br />
Function that returns a value. Refer to ‘lhble<br />
5-l.<br />
An element of trace A, trace B, trace C, or a<br />
user-defined trace.<br />
Any valid integer number. For the starting value or number of<br />
elements, the range of the number is 0 to<br />
the length of the trace minus 1. For the<br />
ending value, the range is -32,763 to<br />
+ 32,767.<br />
OUTPUT 718;"LINFILL TRC,O,O,O;" Initializes trace C.<br />
OUTPUT 718;"MOV TRC[l,lO] ,TRA[l,lOl;" Moves the jirst 10 elements of trace A into<br />
trace C.<br />
OUTPUT 718;"LINFILL TRC,l0,40,8000;" Uses the 10th element of trace C as the starting<br />
valwq fills trace C elements 11 through 50<br />
with the interpolated data, <strong>and</strong> places ending<br />
value (8000) into the 50th element of trace<br />
C.<br />
Description<br />
LINFILL uses the value of the starting value <strong>and</strong> the ending value to calculate the linear<br />
interpolation data (the values for ending value should be in measurement units). The “number<br />
of elements” field allows you to specify the number trace data points that are “filled in” with<br />
linear interpolation data. The number of elements field includes the starting element, so if the<br />
starting value is 10 <strong>and</strong> the number of elements is 40, the ending element will be 50.<br />
The data will not be interpolated if the starting value is 0. If the starting value is 0, the ending<br />
value is copied into the first element of the destination trace. You may want to set the starting<br />
value to 0 to initialize a trace before using LINFILL to fill the trace with interpolated data. If<br />
the starting value <strong>and</strong> the number of elements exceed the length of the destination trace, the<br />
interpolation ends at the end of the trace array; the ending value is never reached.<br />
5.284 Programming Comm<strong>and</strong>s
LN<br />
Linear Scale<br />
LN Linear Scale<br />
Specifies the vertical graticule divisions as linear units, without changing the reference level.<br />
Syntax<br />
( LN<br />
Equivalent Softkey: SXLE LOG LIN (when LIN is underlined).<br />
Related Comm<strong>and</strong>s: LG, RL.<br />
Example<br />
OUTPUT 718*"LN*"<br />
OUTPUT 718;"LN;RL 30MV;"<br />
Description<br />
Selects linear mode.<br />
The LN comm<strong>and</strong> scales the amplitude (vertical graticule divisions) proportionally to the input<br />
voltage, without changing the reference level. The bottom graticule line represents a signal<br />
level of zero volts.<br />
Voltage entries are rounded to the nearest 0.1 dB. Thus, 30.16 mV becomes - 17.4 dBm for a<br />
5OB spectrum analyzer system.<br />
Programming Comm<strong>and</strong>s 5-295
LOAD<br />
Load<br />
Loads a file from the memory card.<br />
Syntax<br />
r f i l e n a m e 7<br />
LOAD del imi ter c h a r a c t e r del Imi ter<br />
f-<br />
/<br />
r t r a c e d e s t i n a t i o n<br />
u s e r - d e f i n e d t r a c e<br />
\ J XLOAD<br />
Item Description/Default R=t3e<br />
Character Any valid character. Any valid file name.<br />
Delimiter Matching characters marking the beginning <strong>and</strong> end of the list of - ) \ @ = / ^ $ % ; ! ’ :<br />
spectrum analyzer comm<strong>and</strong>s. ” &<br />
Equivalent Softkey: LOAII FILE.<br />
Option Required: An <strong>HP</strong> 859OL or <strong>HP</strong> 8592L needs to have Option 003 installed in the<br />
spectrum analyzer to use the LOAD comm<strong>and</strong> to load a file from the memory card.<br />
Related Comm<strong>and</strong>s: CAT, STOR.<br />
Example<br />
OUTPUT 7 18 ; “LOAD %tMYTRA% ,TRA ; ” Loads MYTRA from the memory card into trace A.<br />
OUTPUT 718 ; “LOAD %dM-YPROG% ; ” Loads a program from the memory card into spectrum<br />
aruzl~zer memory.<br />
Description<br />
Be sure to insert the memory card into the spectrum analyzer’s memory card reader before<br />
using the LOAD comm<strong>and</strong>.<br />
lb use the LOAD comm<strong>and</strong>, you must specify the file name of the file to be loaded from the<br />
memory card into spectrum analyzer memory, <strong>and</strong>, if you are loading trace data, you must also<br />
specify the trace destination.<br />
5-296 Programming Comm<strong>and</strong>s
LOAD Load<br />
File name: You must supply the file name of the file to be loaded. When specifying the file<br />
name, be sure to include the lowercase letter that indicates the data type, because the result<br />
of the LOAD operation is dependent on the data type. (For example, the “d” in “dM-YPROG”<br />
indicates the file type is for a downloadable program.) The lowercase letters correspond to the<br />
data type as shown in the following table.<br />
File Description<br />
I<br />
Result<br />
a Amplitude correction Loads the amplitude correction factors.<br />
factors I<br />
i Display image file Loads <strong>and</strong> displays the display image file.<br />
d Downloadable Loads the contents of the file that was stored with STOR. Because<br />
program STOR stores a copy of user-memory in the file, more than one item<br />
may be retrieved when executing the LOAD comm<strong>and</strong>.<br />
I 1 I Limit lines I Loads the limit-line values into the current limit-line table. I<br />
Loads the spectrum analyzer state, <strong>and</strong> changes the current spectrum<br />
analyzer state to the state that was loaded.<br />
ItJT.race 1 Loads the trace <strong>and</strong> state. The current spectrum analyzer trace <strong>and</strong><br />
state is changed to the trace <strong>and</strong> state that was loaded.<br />
Destination: When recalling trace data, you need to specify either TRA, TRB, TRC, or<br />
a user-defined trace as the destination. Omit the destination parameter when recalling<br />
downloadable programs, states, limit-line tables, display image files, or amplitude correction<br />
factors.<br />
Note The LOAD comm<strong>and</strong> recalls data from the memory card. See “SAVRCLN, n<br />
“RCLT, ” or “RCLS” to recall data from spectrum analyzer memory.<br />
Programming Comm<strong>and</strong>s 5-297<br />
I
LOG<br />
Logarithm<br />
‘E&es the logarithm (base 10) of the source, multiplies the result by the scaling factor, then<br />
stores it in the destination.<br />
Syntax<br />
predefined variable<br />
user-defined variable<br />
predefined function<br />
b u s e r - d e f i n e d t r a c e /<br />
b trace range /<br />
% p r e d e f i n e d v a r i a b l e I<br />
user-defined variable/<br />
Item Description/Default<br />
User-defined trace A trace defined by the TRDEF comm<strong>and</strong>.<br />
- scaling factor<br />
M predefined varic<br />
user-defined variable)<br />
User-defined variable A variable defined by VARDEF or ACTDEF comm<strong>and</strong>s.<br />
Predefined variable<br />
Predefined function<br />
Trace range<br />
Trace element<br />
Number<br />
5-298 Programming Comm<strong>and</strong>s<br />
A comm<strong>and</strong> that acts as a variable. Refer to Table 5-l.<br />
Function that returns a value. Refer to Table 5-1.<br />
A segment of trace A, trace B, trace C, or a user-defined trace.<br />
An element of trace A, trace B, trace C, or a user-defined trace.<br />
tinge<br />
XLOG<br />
Any valid trace name.<br />
Any valid variable<br />
name.<br />
Any real or integer number. Real number range.
LOG Logarithm<br />
Prerequisite Comm<strong>and</strong>s: TRDEF when using a user-defined trace. ACTDEF or VARDEF when<br />
using a user-defined variable. TS when using trace data.<br />
Related Comm<strong>and</strong>s: EXP.<br />
Example 1<br />
OUTPUT 718~"IP~"<br />
OUTPUT 718;"VAIiDEF P,OWER,O;"<br />
Initializes spectrum analyzer<br />
Dt$nes a user-de$ned variable, called P-OWE& <strong>and</strong> sets<br />
it equal to 0.<br />
OUTPUT 718;"LOG P,OWER,S,lO;" P-OWER = 10x LOG(5)<br />
OUTPUT 718;"P,OWER?;" Returns value to computer:<br />
ENTER 718;N Assigns value to computer variable.<br />
DISP USING "D.DD,K";N;" dB" Displays value on the computer screen.<br />
Example 2<br />
This example finds the natural exponential of a number <strong>and</strong> uses the LOG function to return<br />
the original source value of the EXP function.<br />
10 OUTPUT 718;"VARDEF E-XP,O;"<br />
20 OUTPUT 718;"EXP E,XP,2,2.30259;"<br />
30 OUTPUT 718;"E_XP?;"<br />
40 ENTER 718;Value<br />
50 PRINT Value<br />
60 OUTPUT 718;"LOG EmXP,E-XP,2.30259;"<br />
70 OUTPUT 718*"E XP'."<br />
, - *,<br />
80 ENTER 718;Logvalue<br />
90 PRINT Logvalue<br />
100 OUTPUT 718;"VARDEF E-XPY,O;"<br />
110 OUTPUT 718;"EXP E,XPY,-5,2.30259;"<br />
120 OUTPUT 718;"E_XPY?;"<br />
130 ENTER 718;Value2<br />
140 PRINT Value2<br />
150 OUTPUT 718;"LOG E-XPY,E-XPY,2.30259;"<br />
160 OUTPUT 718;"E,XPY?;"<br />
170 ENTER 718;Logval<br />
180 PRINT Logval<br />
190 END<br />
Dt$lnes a variable called E-XI!<br />
Fino!s the natural exponential of 2.<br />
Returns the natural exponential of 2.<br />
I?+& the value of the exponential.<br />
Uses the log function on the exponential<br />
value.<br />
The log of the exponential value is approximately<br />
2.<br />
Declares a variable called E-XPk:<br />
Finds the natural exponential of -5.<br />
Returns the value of the natural exponential<br />
of -5.<br />
FVints the value of the exponential.<br />
Uses the log fan&ion on the exponential<br />
value.<br />
The log of the exponential value is approximately<br />
-5.<br />
Programming Comm<strong>and</strong>s 5-299
LOG Logarithm<br />
Description<br />
The scaling factor may be used to improve numerical computations when calculating logarithms<br />
of integer trace data. For example, the log of a trace value of 8000 is 3.9, which would be<br />
stored as the value 4 in a trace.<br />
The log of trace value of 1 is 0, so the log of a trace containing values from 1 to 8000 would<br />
be compressed to values 0, 1, 2, 3, 4. Computational accuracy can be improved by using the<br />
scaling factor to scale up the log values before they are stored. In this case, because 3.903 is<br />
the log of 8000 <strong>and</strong> the largest positive trace value is 32,767, a scaling factor of 32,767 divided<br />
by 3.903 or 8,395 may be applied to the data. Because EXP <strong>and</strong> LOG are inverse functions, the<br />
EXP comm<strong>and</strong> has a scaling factor that may be used to “undo” the scaling factor of the LOG<br />
comm<strong>and</strong>.<br />
The LOG comm<strong>and</strong> can be used to calculate the natural logarithm by using 2.30259 as the<br />
scaling factor.<br />
The LOG function returns an invalid result if the source is zero or a negative number.<br />
When the source is longer than the destination, the source is truncated to fit. When the source<br />
is shorter than the destination, the last element is repeated to fill the destination.<br />
5-300 Programming Comm<strong>and</strong>s
LSPAN<br />
Last Span<br />
Changes the spectrum analyzer’s span to the previous span setting.<br />
Syntax<br />
Equivalent Softkey: LAST SPAN .<br />
Related Comm<strong>and</strong>s: SF!<br />
Example<br />
OUTPUT 718;"LSPAN;"<br />
LSPAN<br />
LSPAN Last Span<br />
Programming Comm<strong>and</strong>s 5-301
MDS<br />
Measurement Data Size<br />
Specifies measurement data size as byte or word.<br />
Syntax<br />
Related Comm<strong>and</strong>s: MKA, TDF, TRA.<br />
Preset State: W.<br />
Example<br />
c<br />
These comm<strong>and</strong>s transfer trace A in binary, 2 bytes per word.<br />
INTEGER TRACE-A (1:401) Declares variable, Trace-A.<br />
OUTPUT 718;"SNGLS;TS;" Activates single-sweep, updates trace A.<br />
OUTPUT 718;"TDF B;MDS W;TRA?;" Reads trace A in “word” form&.<br />
ENTER 7 18 USING 'I#, 40 1 ( W) II ; TRACE-A (* > Fbmu~ts trace A output using data size of one<br />
word.<br />
PRINT TRACE-A(*) Prints trace A.<br />
Description<br />
The MDS comm<strong>and</strong> formats binary data in one of the following formats:<br />
B selects a data size of one 8-bit byte. When transferring trace data, MDS B transfers trace<br />
data the faster than MDS W because only 401 bytes are transferred. Because MDS B<br />
combines two bytes into one byte, some resolution is lost.<br />
W selects a data size of one word, which is two 8-bit bytes. When transferring trace data,<br />
MDS W transfers 802 bytes of trace data with no loss of resolution.<br />
How data is represented with MDS W: When data is sent with MDS W, the trace data is<br />
converted into two bytes as follows:<br />
1. The trace element’s amplitude (in measurement units) is divided by 256. The binary<br />
representation of the result is placed in the most significant byte (MSB).<br />
2. The binary representation of the remainder is placed in the least significant byte (LSB).<br />
For example, a trace element that is at the reference level has the value of 8000 (in<br />
measurement units). The result of 8000 divided by 256 is 30, with a remainder of 120. For this<br />
data, the contents of the MSB would contain the binary representation for 30.<br />
5-302 Programming Comm<strong>and</strong>s<br />
Contents of the MSB<br />
0 OlOllll 1 110
MDS Measurement Data Size<br />
For this data, the contents of the LSB would contain the binary representation for 120.<br />
Contents of the LSB<br />
01110010<br />
How data is represented with MDS B: When data is sent with MDS B, the trace data is<br />
converted into one byte as follows:<br />
H The trace element’s amplitude (in measurement units) is divided by 32. The binary<br />
representation of the result is placed into one byte.<br />
For example, a trace element that is at the reference level has the value of 8000 (in<br />
measurement units). The result of 8000 divided by 32 is 250. For this data, the contents of the<br />
byte would contain the binary representation for 250.<br />
Contents of Byte<br />
11111010<br />
See “TDF” for information about using MDS for trace data transfers.<br />
Query Response:<br />
o u t p u t<br />
� termination ---*<br />
Programming Comm<strong>and</strong>s 5-303
MDU<br />
Measurement Data Units<br />
Returns values for the spectrum analyzer baseline <strong>and</strong> reference level.<br />
Syntax<br />
Related Comm<strong>and</strong>s: TDF.<br />
Example<br />
10 OUTPUT 718;"IP;TDF M;"<br />
20 OUTPUT 718;"RL -1ODM;"<br />
30 OUTPUT 718*"MDU'*" 9 , *<br />
40 ENTER 718;A,B,C,D,A$<br />
50 PRINT A,B,C,D,A$<br />
60 END<br />
Initializes the spectrum analyzer <strong>and</strong> formats the trace data<br />
in measurenxent units.<br />
Changes the refwertce level to -10 dBm.<br />
Queries the position of the spectrum analyzer baseline <strong>and</strong><br />
reference level.<br />
Moves the spectrum analyzer response to the computer<br />
Displays the results on the computer screen.<br />
The example returns the following to the controller: 0, 200, -90, -10 dBm. The first two<br />
numbers received indicate that the vertical scale spans from 0 to 200 plotter units. The third<br />
<strong>and</strong> fourth number received indicate that the baseline is at -90 dBm, <strong>and</strong> the reference level is<br />
at -10 dBm. So, the baseline value of -90 dBm is equal to 0 plotter units. The reference level<br />
of -10 dBm is equal to 200 plotter units.<br />
Description<br />
The MDU comm<strong>and</strong> returns values for the spectrum analyzer baseline <strong>and</strong> reference level, in<br />
plotter units <strong>and</strong> measurement units.<br />
5304 Programming Comm<strong>and</strong>s
Query Response<br />
base1 ine reference bosel ine reference<br />
MDU Measurement Data Units<br />
QMDU<br />
Programming Comm<strong>and</strong>s 5-305
MEAN<br />
Trace Mean<br />
Returns the mean value of the given trace in measurement units.<br />
Syntax<br />
MEAN<br />
,- source-\<br />
b u s e r - d e f i n e d t r a c e /<br />
F<br />
PreZef ined<br />
function path only<br />
Item Description/Default Range<br />
User-defined trace A trace defined by the TRDEF comm<strong>and</strong> Any valid trace name.<br />
Trace Range A segment of trace A, trace B, trace C, or a user-defined trace.<br />
Prerequisite Comm<strong>and</strong>s: TRDEF when using a user-defined trace. TS when using trace data.<br />
Related Comm<strong>and</strong>s: MEANTH, RMS, STDEV, VARIANCE.<br />
Example<br />
10 OUTPUT 718;"IP;"<br />
Initializes spectrum analyzer<br />
20 OUTPUT 718*"SNGLS-"<br />
Activates the single-sweep mode.<br />
30 OUTPUT 718;"CF 30;MHZ;SP IMHZ;" Sets measurement range.<br />
40 OUTPUT 718;"TS;" Sweeps trace A.<br />
50 OUTPUT 718;"MEAN TRA?;" Returns the mean value of trace A to the computer:<br />
60 ENTER 718;Number Assigns value to computer variable, Number<br />
70 DISP "MEAN OF TRACE A IS '-, Number<br />
80 END<br />
Displays result on the computer screen.<br />
Query Response<br />
5-306 Programming Comm<strong>and</strong>s
MEANTH<br />
Trace Mean Above Threshold<br />
MEANTEI Trace Mean Above Threshold<br />
Returns the mean value of the given trace above the threshold, in measurement units.<br />
Syntax<br />
MEANTH<br />
,-- source -,<br />
$ u s e r - d e f i n e d t r a c e /<br />
b trace range /<br />
Item Description/Default<br />
User-dellned trace A trace defined by the TRDEF comm<strong>and</strong><br />
/<br />
f<br />
b<br />
Pretef ined<br />
function path only<br />
Trace Range A segment of trace A, trace B, trace C, or a user-defined trace.<br />
Range<br />
Any valid trace name.<br />
Prerequisite Comm<strong>and</strong>s: TRDEF when using a user-defined trace. TS when using trace data.<br />
Related Comm<strong>and</strong>s: MEAN, RMS, STDEV, TH, VARIANCE.<br />
Restrictions: Not available with Analog+ display mode. See “ANLGPLUS” for more<br />
information.<br />
Example<br />
10 OUTPUT 718;"IP;"<br />
20 OUTPUT 718;"SNGLS;"<br />
30 OUTPUT 718;"CF 300MHZ;SP IGHZ;"<br />
40 OUTPUT 718;"TH -40;"<br />
50 OUTPUT 718*"TS*"<br />
60 OUTPUT 718;"MEiNTH TRA?;"<br />
70 ENTER 718;Number<br />
80 DISP "MEAN OF TRACE A ABOVE THE THRESHOLD IS ";Number<br />
90 END<br />
Initializes spectrum analyzer:<br />
Activates the single-sweep<br />
mode.<br />
Sets measurement range.<br />
Sets threshold level to -40<br />
dR<br />
Sweeps trace A.<br />
Returns the mean value of<br />
trace A above the threshold<br />
to the computer:<br />
Assigns value to computer<br />
variable, Number:<br />
Displays result on the computer<br />
screen.<br />
Programming Comm<strong>and</strong>s 5-307
MEANTH Trace Mean Above Threshold<br />
Description<br />
MEANTH returns the mean value of the trace above the threshold; MEAN returns the mean<br />
value of the trace, regardless of the threshold level. MEANTH returns a “0” if there is not a<br />
signal above the threshold.<br />
Use TH (threshold) to set the threshold level.<br />
Query Response<br />
5.308 Programming Comm<strong>and</strong>s<br />
output<br />
t e r m i n a t i o n --+
MEASOFF<br />
Measurement Off<br />
MEASOFF’ Measurement Off<br />
Turns off the current measurement, erases the display, <strong>and</strong> then displays the MEAS/USER<br />
menu.<br />
Syntax<br />
Equivalent Softkey: MEBS OFF .<br />
Related Comm<strong>and</strong>s: ACP, ACPE, ACPGRAPH, C<strong>HP</strong>, OBW.<br />
Example<br />
OUTPUT 718;"MEASOFF;" lbns ofl the current measurement.<br />
Description<br />
If ACPPAR is set to automatic, executing MEASOFF returns the following spectrum analyzer<br />
settings back to their premeasurement settings:<br />
H Frequency span, resolution b<strong>and</strong>width, video b<strong>and</strong>width, center frequency step size, <strong>and</strong><br />
sweep time.<br />
� Detector mode.<br />
� Amplitude scale.<br />
MEASOFF does not do any of the following:<br />
� Change the values of the channel spacing (ACPSP) or the channel b<strong>and</strong>width (ACPBW).<br />
� Restore the trace contents, trigger mode, amplitude units, <strong>and</strong> any trace math functions (see<br />
‘l%ble 5-4 for a list of the trace math functions) to their premeasurement state.<br />
You should execute MEASOFF when you no longer want to use any of the power menu<br />
functions. (The power menu functions are ACP, ACPE, ACPGRAPH, C<strong>HP</strong>, <strong>and</strong> OBW).<br />
MEASOFF may also turn off some other spectrum analyzer measurements. For example,<br />
MEASOFF also turns off FFTCONTS, FFTAUTO, FFTSNGLS, NDBPNT, PCTAM, GDRVUTIL, <strong>and</strong><br />
TOI.<br />
Programming Comm<strong>and</strong>s 5-309
MEASURE<br />
Measure Mode<br />
Determines what kind of measurements the spectrum analyzer makes: signal analysis, stimulus<br />
response, or signal normalization.<br />
Syntax<br />
Option Required: Option 010 or 011.<br />
Related Comm<strong>and</strong>s: Comm<strong>and</strong>s affecting amplitude, such as AUNITS, DL, INZ, LN, MKA,<br />
MKREAD, MKRL, RL, RLPOS, ROFFSET, TH.<br />
Preset State: MEASURE SA.<br />
Example<br />
Activate the tracking-generator source output.<br />
XMEASURE<br />
OUTPUT 718;"MEASURE SR;" Sets spectrum anul~z43r to stimulus-response mode.<br />
OUTPUT 718;"SRCPWR -1ODM;" Makes the tracking generator source power the active<br />
function.<br />
Description<br />
“MEASURE SA;” activates spectrum analysis <strong>and</strong> auto couples the spectrum analyzer<br />
functions. If AMB ON or AMBPL ON <strong>and</strong> RLPOS have been executed prior to MEASURE SA,<br />
MEASURE SA turns off the reference level position. When normalization is off, all amplitude<br />
units are specified in absolute values determined by:<br />
� Amplitude units (AUNITS).<br />
� Reference level (RL).<br />
� Reference-level offset (ROFFSET).<br />
� Input impedance (INZ).<br />
� Logarithm scale (LG).<br />
� Linear scale (LN).<br />
w Amplitude Correction (AMPCOR).<br />
“MEASURE SR;” activates stimulus-response measurements <strong>and</strong> uncouples the sweep time<br />
for faster sweep times. If AMB ON or AMBPL ON <strong>and</strong> RLPOS are executed, MEASURE SR<br />
activates the reference level position. When normalization is used, amplitude units are<br />
specified relative to the display level.<br />
5-310 Programming Comm<strong>and</strong>s
During this relative-amplitude mode, the following parameters are in dB:<br />
� Trace data (TRA, TRB, TRC).<br />
w Display line (DL).<br />
� Threshold (TH).<br />
� Marker amplitude (MKA).<br />
MEASURE Measure Mode<br />
“MEASURE NRM;” recouples the sweep time for accurate signal analysis measurements. If<br />
AMB ON or AMBPL ON <strong>and</strong> RLPOS are executed, MEASURE NRM activates the reference<br />
level position.<br />
See “RLPOS” for more information about changing the reference level position.<br />
When used as a predefined variable, MEASURE returns a value depending on the setting of the<br />
MEASURE parameter.<br />
Query Response<br />
Programming Comm<strong>and</strong>s 5-311
MEM<br />
Memory Available<br />
Returns the amount of spectrum analyzer memory available.<br />
Syntax<br />
f u n c t i o n p a t h o n l y<br />
Related Comm<strong>and</strong>s: ACTDEF, DISPOSE, ERASE, FUNCDEF, LOAD, ONDELAY, ONEOS,<br />
ONTIME, ONSRQ, ONSWP, TRCMEM, TRDEF, TRMATH, VARDEF.<br />
Example<br />
10 OUTPUT 718*"MEM'*"<br />
20 ENTER 718;iow-m;:h-memory<br />
30 DISP How-much-memory<br />
40 END<br />
Description<br />
Queries the amount of user-allotted memory available.<br />
Sends response from spectrum analyzer to the computer.<br />
Displays the amount of available memory.<br />
Functions that affect the amount of user-allotted memory include: ACTDEF, FUNCDEF,<br />
ONDELAY, ONEOS, ONSRQ, ONSWP, ONTIME, TRDEF, TRMATH, VARDEF.<br />
The MEM comm<strong>and</strong> returns the number of bytes of user-allotted spectrum analyzer memory to<br />
the controller.<br />
Query Response<br />
5-312 Programming Comm<strong>and</strong>s<br />
XMEM
MENU<br />
Menu<br />
Selects <strong>and</strong> displays the softkey menus on the spectrum analyzer screen.<br />
Syntax<br />
MENU<br />
Item Description/Default Range<br />
Number Any valid integer number. 1, 101 to 200.<br />
Related Comm<strong>and</strong>s: DISPOSE, ERASE, KEYDEF, KEYLBL, SAVEMENU.<br />
Example 1<br />
OUTPUT 718;"MENU 1;" Displays menu 1 on the spectrum analyzer screen.<br />
Example 2<br />
10 OUTPUT 718;"KEYDEF l,!IP;CF 300MHZ;SP IOOMHZ;<br />
MKPK HI;!,OSETUPI#l@;"<br />
20 OUTPUT 718;"KEYDEF 2,!IP;CF 600MHZ;SP 1OOMHZ;<br />
MKPK HI;!OSETUPl#20;"<br />
30 OUTPUT 718;"KEYDEF 3,!IP;CF 900MHZ;SP IOOMHZ;<br />
MKPK HI;!,QSETUPI#3@;"<br />
40 OUTPUT 718;"KEYDEF 4,!SNGLS;TS;MKPK<br />
HI;MKD;MKMIN;!,OFINDIDELTAO;"<br />
50 OUTPUT 718;"KEYDEF 5,!MKOFF ALL;<br />
CONTS;!,ORESUMElSWEEPO;"<br />
60 OUTPUT 718;"KEYDEF G,!MENU 102! ,OMOREISETUPSQ;"<br />
70 OUTPUT 718;"KEYDEF 607,!FA 88MHZ;FB 108MHZ;<br />
MKPK HI;DEMOD ON;DEMOD FM;MENU ~;!,QFM IDEMOD(P;~~<br />
80 OUTPUT 718;"KEYDEF 608,!FA 10KHZ;FB 88MHZ;<br />
MKPK HI;DEMOD ~N;DEMOD AM;MENU 1; !,OAM IDEMoD@;”<br />
Lk@t.es sojtkey 1.<br />
D&ws soBkey 2.<br />
Lk@t.es soj%key 3.<br />
Defines sofikey 4.<br />
Dynes sofi ke y 5.<br />
MENU Menu<br />
Lk@tes sojtkey 6.<br />
L3@nes so$key 607. So&<br />
key 607 is accessed by executing<br />
MENU 102 (see programming<br />
line 60).<br />
D@ues sofikey 608. Sofikey<br />
608 is accessed by executing<br />
MENU 102 (see programming<br />
line 60).<br />
Programming Comm<strong>and</strong>s 5.313
MENU Menu<br />
Description<br />
When using the KEYDEF, KEYENH, or KEYCMD comm<strong>and</strong>s, you need to specify the softkey<br />
number. The softkey number corresponds to the menu number as follows:<br />
softkey number = (menu number - 1) x 6 + softkey position<br />
(The softkey position range is 1 through 6.)<br />
For example:<br />
Menu 1 contains softkey numbers 1 through 6<br />
Menu 101 contains softkey numbers 601 to 606<br />
Menu 200 contains softkey numbers 1195 to 1200<br />
Menu 1 can be accessed by pressing C-J, User IIenus . Menus 101 through 200, as well<br />
as menu 1, can be accessed using the MENU comm<strong>and</strong>. The MENU comm<strong>and</strong> is a useful way<br />
to “link” softkey menus together. For example, example 2 shows how menu 1 (with softkeys<br />
1 through 6) can be used to access menu 102 (with softkeys 607 <strong>and</strong> 608). Menu 1 can be<br />
v I<br />
accessed by pressing c-1, User Minus .<br />
Sof tkeys<br />
1 through 6<br />
MENU 1 MENU 102<br />
F IND DELTA<br />
RESUME SWEEP<br />
MORE SETUPS --+<br />
-<br />
FM DEMOD<br />
\<br />
AM DEMOD \<br />
/<br />
/<br />
/<br />
Figure 5-7. Using the MENU Comm<strong>and</strong><br />
Sof tkeys<br />
607 through 612<br />
The menu numbers 1 <strong>and</strong> 101 through 200 are the recommended menus available for the user<br />
to use.<br />
Executing “MENU 0;” clears the softkey menu from the spectrum analyzer screen.<br />
Query Response<br />
5-314 Programming Comm<strong>and</strong>s<br />
cull8e
MERGE<br />
Merge Two Traces<br />
Merges the source trace into the specified area of the destination trace.<br />
Syntax<br />
Item<br />
User-defined variable<br />
r destination s t a r t 7<br />
h p r e d e f i n e d v a r i a b l e /<br />
b user-defined vorioble)<br />
b predefined function M’<br />
L trace element /<br />
user-defined trace<br />
trace range<br />
y- destination trace<br />
b u s e r - d e f i n e d t r a c e /<br />
/<br />
r destination end 7<br />
+ number<br />
* p r e d e f i n e d v a r i a b l e 1<br />
buuser-defined variable)<br />
b predefined function /<br />
G t r a c e element /<br />
predefined variable I<br />
buuser-defined vorioblel<br />
b predefined function /<br />
trace element<br />
Predeilned variable A comm<strong>and</strong> that acts as a variable. Refer to able 5-1.<br />
PredeEned function Function that returns a value. Refer to Table 5-1.<br />
Trace element An element of trace A, trace B, trace C, or a user-defined trace.<br />
Number Any valid integer number.<br />
Description/Default<br />
A variable defined by VARDEF or ACTDEF comm<strong>and</strong>s.<br />
MERGE Merge Two Traces<br />
/<br />
R=v3e<br />
Any valid variable<br />
name.<br />
-32,768 to + 32,767.<br />
Related Comm<strong>and</strong>s: All other trace math comm<strong>and</strong>s. See lkble 5-4 for a list of trace math<br />
comm<strong>and</strong>s.<br />
Programming Comm<strong>and</strong>s 5-3 15
MERGE Merge Two Traces<br />
Example<br />
OUTPUT 718;"MERGE TRC,l,200,TRA,200;" Merges trace A into trace C. The trace A<br />
elements 200 through 399 are merged into<br />
trace C elements 1 through 200.<br />
Description<br />
MERGE copies the trace data from the source trace, starting at the specified trace element, into<br />
the specified trace elements of the destination trace. MERGE differs from CONCAT because<br />
MERGE does not need the trace range of the source to be specified. If the source is not a<br />
trace, its value is copied to the destination trace. If the destination segment is longer than the<br />
specified source segment, the last element of the source trace is repeated to fill the destination.<br />
5-316 Programming Comm<strong>and</strong>s
MF<br />
Marker Frequency Output<br />
Returns the frequency (or time) of the on-screen active marker.<br />
Syntax<br />
Related Comm<strong>and</strong>s: MA, MKA, MKCF, MKD, MKF, MKN, MKPK, MKREAD.<br />
Example<br />
Connect CAL OUT to the spectrum analyzer input.<br />
MF’ Marker Frequency Output<br />
OUTPUT 718;"IP;SNGLS;" Initializes the spectrum analy~ activates singlesweep<br />
mode.<br />
OUTPUT 718;"FA 280MHZ;FB 320MHZ;TS;" Sets up the measurement range.<br />
OUTPUT 718;"MKN;MKPK HI;" Places marker on peak of calibrator signal.<br />
OUTPUT 718;"MF;" Rzkesfrequency of marker:<br />
ENTER 718;A Returns frequency to the computer:<br />
PRINT A Prints the frequency on the computer screen.<br />
Description<br />
The MF comm<strong>and</strong> returns the frequency of the active marker to the controller if the marker<br />
is on screen. In delta marker mode, nonzero span, “MF;” returns the frequency difference<br />
between the two markers. In zero span, “MF;” returns the marker time, or the delta marker<br />
time.<br />
The data that is returned by “MF;” depends on many comm<strong>and</strong> conditions including TDF,<br />
MKREAD, <strong>and</strong> MDS.<br />
If the trace data format P is used with MF, the result is one real value in time units or<br />
frequency units, depending on the marker readout format. (See “MKREAD.“)<br />
Example 1<br />
OUTPUT 718;"TDF P;MKREAD FRCj;MF;" This returns a frequency value (in Hz) if not in<br />
zero-span.<br />
OUTPUT 718;"TDF P;MKREAD FRQ;MF;" This returns a time value (in seconds) if in zerospan.<br />
OUTPUT 718;"TDF P;MKREAD PER;MF;" This returns the time value (in seconds) of l/(marker<br />
frequency).<br />
OUTPUT 718;"TDF P;MKREAD SWT;MF;" This returns the marker time value (in seconds).<br />
OUTPUT 718;"TDF P;MKREAD 1ST;MF;" This returns thefrequency value (in Hz)for l/(marker<br />
time).<br />
OUTPUT 718;"TDF P;MKREAD FFT;MF;" This returns the frequency value (in Hz).<br />
If the trace data format is used with trace data format A, the result depends on the setting of<br />
the MDS comm<strong>and</strong>.<br />
XMF<br />
Programming Comm<strong>and</strong>s 5-317
MF Marker Frequency Output<br />
Example 2<br />
OUTPUT 718;"TDF A;MDS B;MF;" Returns one byte representing the marker position. The<br />
byte can assume values 1 to 101.<br />
OUTPUT 718;"TDF A;MDS W;MF;" Returns two bytes in a binary word format that has a<br />
value from 1 to 401.<br />
If the trace data format is used with trace data format M, the result is the marker horizontal<br />
position value, from 1 to 401, in ASCII.<br />
Example 3<br />
OUTPUT 7 18 ; "TDF M ; MF ; ” Returns marker horizontal position value in ASCII.<br />
5-318 Programming Comm<strong>and</strong>s
MIN<br />
Minimum<br />
MIN Minimum<br />
Compares source 1 <strong>and</strong> 2, point by point, <strong>and</strong> stores the lesser of the two in the destination.<br />
Syntax<br />
Item<br />
User-defined trace<br />
User-defined variable<br />
- dest inot ion<br />
% u s e r - d e f i n e d t r a c e /<br />
b t r a c e range /<br />
b p r e d e f i n e d v a r i a b l e I<br />
user-defined variable/<br />
Description/Default<br />
A trace defined by the TRDEF comm<strong>and</strong>.<br />
A variable defined by VARDEF or ACTDEF comm<strong>and</strong>s.<br />
Predefined variable A comm<strong>and</strong> that acts as a variable. Refer to Table 5-l.<br />
Predetied function Function that returns a value. Refer to Table 5-l.<br />
Trace range A segment of trace A, trace B, trace C, or a user-defined trace.<br />
Range<br />
Any valid trace name.<br />
Any valid variable<br />
name.<br />
Number Any real or integer number. Real number range.<br />
Prerequisite Comm<strong>and</strong>s: TRDEF when using a user-defined trace. ACTDEF or VARDEF when<br />
using a user-defined variable. TS when using trace data.<br />
Related Comm<strong>and</strong>s: MINPOS, MXM, TS.<br />
Programming Comm<strong>and</strong>s 5-319
MIN Minimum<br />
Example<br />
10 OUTPUT 718;"IP;"<br />
20 OUTPUT 718*"SNGLS*"<br />
30 OUTPUT 718;"VARDEi M,INIMUM,O;"<br />
40 OUTPUT 718;"TS;MKPK HI;";<br />
50 OUTPUT 718;"MIN M-INIMUM,MKA,-20;";<br />
60 OUTPUT 718;"M,INIMUM?;"<br />
70 ENTER 718;Number<br />
80 DISP Number<br />
90 END<br />
Description<br />
Initializes spectrum analyzer:<br />
Activates the single-sweep mode.<br />
&y%.es vam’able with an initial value of 0.<br />
Sweeps trace A <strong>and</strong> places the marker at the<br />
highest peak.<br />
Compares the marker amplitude to -20 dBm.<br />
Stores the lesser of the two in MINIMUM.<br />
Returns the result to the computer:<br />
Puts the result in the computer variable,<br />
Number:<br />
LXsplays the result.<br />
If one of the sources is a single value, it acts as a threshold, <strong>and</strong> all values equal to or less than<br />
the threshold pass to the destination. The values larger than the threshold are replaced by the<br />
threshold value in the destination.<br />
When the source is longer than the destination, the source is truncated to fit. When the source<br />
is shorter than the destination, the last element is repeated to fill the destination.<br />
5-320 Programming Comm<strong>and</strong>s
MINH<br />
Minimum Hold<br />
Updates trace C with the minimum level detected.<br />
Syntax<br />
MINH<br />
MINH Minimum Hold<br />
Equivalent Softkey: MII? HOLD C .<br />
Related Comm<strong>and</strong>s: BLANK, CLRW, MXMH, VAVG, VIEW.<br />
Restrictions: Not available with Analog+ display mode. See “ANLGPLUS” for more<br />
information.<br />
Example<br />
OUTPUT 718;"CLRW TRC;CONTS;" Clears trace C <strong>and</strong> begin taking data.<br />
OUTPUT 718;"MINH TRC;" Updates trace C with the minimum level detected.<br />
Description<br />
MINH updates trace C with a new value from a detector only if the new value is smaller than<br />
the previous trace data value.<br />
Programming Comm<strong>and</strong>s 5-321
MINPOS<br />
Minimum Position<br />
Returns a value, which is the x-axis position (in display units) of the minimum amplitude value<br />
in trace A, trace B, trace C, or user-defined trace.<br />
Syntax<br />
MI NPOS<br />
b u s e r - d e f i n e d t r a c e I<br />
L trace range /<br />
Item Description/Default Range<br />
XMINPOS<br />
User-defined trace A trace defined by the TRDEF comm<strong>and</strong>. Any valid trace name.<br />
Trace range A segment of trace A, trace B, trace C, or a user-defined trace.<br />
Prerequisite Comm<strong>and</strong>s: TRDEF when using a user-defined trace ACTDEF. TS when using<br />
trace data.<br />
Related Comm<strong>and</strong>s: MIN, MKMIN, PKPOS.<br />
Example<br />
10 OUTPUT 718;"IP;" Initializes spectrum analyztx<br />
20 OUTPUT 718;"MINPOS TRA;" Finds the minimum value of trace A.<br />
30 ENTER 718;Number Returns value to the computer:<br />
40 DISP Number Displays result.<br />
50 END<br />
Description<br />
If a trace range is used with MINPOS, MINPOS returns a value relative to the first element of<br />
the trace range. For example, if a trace has a range of 150 to 300 elements, <strong>and</strong> the minimum<br />
value is element 200, MINPOS will return the value of 51.<br />
5422 Programming Comm<strong>and</strong>s
MIRROR<br />
Mirror Image<br />
Displays the mirror image of the trace.<br />
Syntax<br />
M I RROR<br />
r destination trace<br />
b u s e r - d e f i n e d t r a c e /<br />
b t r a c e range /<br />
- source trace<br />
user-defined trace<br />
Item Description/Default<br />
User-defined trace A trace defined by the TRDEF comm<strong>and</strong>.<br />
Trace range A segment of trace A, trace B, trace C, or a user-defined trace.<br />
MIRROR Mirror Image<br />
Range<br />
Any valid trace name.<br />
Prerequisite Comm<strong>and</strong>s: TRDEF when using a user-defined trace. TS when using trace data.<br />
Example<br />
10 OUTPUT 718;“IP;”<br />
20 OUTPUT 718;“SNGLS;”<br />
30 OUTPUT 718;“TS;”<br />
40 OUTPUT 718;“BLANK TRA;”<br />
50 OUTPUT 718;“MIRROR TRB,TRA;”<br />
60 OUTPUT 718;“VIEW TRB;”<br />
70 END<br />
Initializes spectrum analyzer<br />
Activates the single-sweep mode.<br />
Zzkes sweep.<br />
Blanks trace A from spectrum analyzer screen.<br />
Moves the mirror image of trace A into trace B<br />
Displays the result.<br />
Programming Comm<strong>and</strong>s 5-323
MIRROR Mirror Image<br />
Description<br />
The MIRROR comm<strong>and</strong> stores the mirror image (with respect to the frequency axis) of a source<br />
trace in a destination trace.<br />
When the source is longer than the destination, the source is truncated to fit. When the source<br />
is shorter than the destination, the last element is repeated to fill the destination.<br />
5-324 Programming Comm<strong>and</strong>s
MKA<br />
Marker Amplitude<br />
MKA Marker Amplitude<br />
Specifies the amplitude of the active marker in the current amplitude units when marker type<br />
is of fixed or amplitude type. When queried, MKA returns the marker amplitude independent<br />
of marker type.<br />
Syntax<br />
MKA<br />
ompl i tude<br />
Item Description/Default R-fxe<br />
Number Any real or integer number. Unit is current amplitude type. Amplitude range of<br />
spectrum analyzer.<br />
Step Increment: by 1 dB.<br />
Related Comm<strong>and</strong>s: AUNITS, AUTO, MA, MKD, MKN, MKTYPE, TDF.<br />
Example<br />
OUTPUT 718*"IP*"<br />
Initializes the spectrum analyzex<br />
OUTPUT 718;"MK;YPE AMP;" Changes the marker type to amplitude.<br />
OUTPUT 718;"MKA -50;" Places the marker at -50 dBm.<br />
Description<br />
The MKA comm<strong>and</strong> specifies the amplitude of the active marker in current units when the<br />
marker is the fixed or amplitude type (see “MKTYPE”). If both the delta marker <strong>and</strong> active<br />
marker are on the screen, “MKA?;” returns the amplitude difference between the two markers.<br />
Specifying the marker amplitude moves the marker to the point of the trace closest to the<br />
given marker amplitude.<br />
If the trace data format P (TDF P), is used with MKA, the result is one real value in the current<br />
amplitude units (AUNITS can be used to change the current amplitude units).<br />
XMKA<br />
Programming Comm<strong>and</strong>s 5-325
MKA Marker Amplitude<br />
Example<br />
OUTPUT 718;"TDF P;AUNITS DBM;MKA?;" This returns the amplitude value of the marker<br />
(amplitude unit is dBm).<br />
If the trace data format is used with trace data format A, the result depends on the setting of<br />
the MDS comm<strong>and</strong>.<br />
Example<br />
OUTPUT 718;"TDF A;MDS B;MKA?;" Returns one byte representing the marker vertical<br />
position (-32,768 to 32,767) divided by 32 <strong>and</strong> then<br />
AhDed with 255.<br />
OUTPUT 718;"TDF A;MDS H;MKA?;" Returns two bytes in a binary word format that has<br />
a value from -32,768 to 32,767. The value represents<br />
the binary trace amplitude value.<br />
Using the trace data format I is equivalent to the TDF A format. If the trace data format is<br />
used with trace data format M, the result is returned in ASCII measurement units (-32,768 to<br />
32,767).<br />
Example<br />
OUTPUT 718;"TDF M;MKA?;" Returns one vertical position value in measurement units.<br />
Query Response<br />
5-326 Programming Comm<strong>and</strong>s
MKACT<br />
Activate Marker<br />
Specifies the active marker.<br />
Syntax<br />
marker<br />
MKACT Activate Marker<br />
Item I Description/Default Range<br />
Number Any valid integer. Default value is 1. 1 to 4.<br />
Equivalent Softkey: SELECT I 2 3 4 .<br />
Related Comm<strong>and</strong>s: MA, MKA, MKF.<br />
Example<br />
OUTPUT 7 18 ; "MKACT 4 ; ‘I Marker 4 becomes marker 1.<br />
Description<br />
There can be four different markers, but only one marker can be active at any time.<br />
When this comm<strong>and</strong> is used, the following results occur:<br />
� The marker number supplied by the comm<strong>and</strong> is made marker 1, the active marker.<br />
� If the marker number is not already on, the marker is turned on with preset type (position),<br />
<strong>and</strong> the marker is placed at center screen. The trace chosen is the first displayed trace<br />
found: trace A, trace B, trace C.<br />
Note Using MKACT replaces marker 1 with the new marker function. The amplitude<br />
<strong>and</strong> frequency for the previous marker are not saved.<br />
Query Response<br />
“MKACT?; n returns the marker number.<br />
Programming Comm<strong>and</strong>s 5-327
MKAC<strong>TV</strong><br />
Marker As the Active Function<br />
Makes the current active marker the active function.<br />
Syntax<br />
MKAC<strong>TV</strong><br />
Equivalent Softkey: MKAC<strong>TV</strong> is equivalent to turning on a marker with<br />
MAItKER ON OFF (ON is underlined).<br />
Related Comm<strong>and</strong>s: MKACT, MKN, MKTYPE.<br />
Example<br />
OUTPUT 7 18 - “MKACT 2 - ”<br />
OUTPUT 7 18 ; “MKAC<strong>TV</strong> ; ’<br />
Description<br />
Makes marker number 2 the active marker:<br />
Makes marker number 2 the active fin&ion.<br />
If you have more than one marker displayed on the spectrum analyzer display, you need to<br />
make the desired marker the active function before you can manipulate the marker.<br />
‘lb make the marker the active function:<br />
1. Select the desired marker with the MKACT comm<strong>and</strong> (MKACT makes the specified marker<br />
the active marker).<br />
2. Execute MKAC<strong>TV</strong> to make the active marker the active function.<br />
If there is no active marker, executing MKAC<strong>TV</strong> makes marker 1 the active marker <strong>and</strong> the<br />
active function. MKAC<strong>TV</strong> makes the marker an active function according to its marker type<br />
(see “MKTYPE” for more information about marker type).<br />
5-328 Programming Comm<strong>and</strong>s
MKBW<br />
Marker B<strong>and</strong>width<br />
MKBW Marker B<strong>and</strong>width<br />
Returns the b<strong>and</strong>width at the specified power level relative to an on-screen marker (if present)<br />
or the signal peak (if no on-screen marker is present).<br />
Syntax<br />
Pre’def i ned<br />
function path only<br />
Item Description/Default Range<br />
Number Any valid negative integer. 0 to the amplitude of<br />
the noise floor.<br />
Example<br />
OUTPUT 718. “IP * ”<br />
OUTPUT 718;"CF'SOOMHZ;SP 1OOMHZ;SNGLS;"<br />
Initializes spectrum anulyzex<br />
Changes the center j?-equency <strong>and</strong> span,<br />
then activates the single-sweep moo%.<br />
OUTPUT 7 18 ; “TS ; MKPK HI ; ” Updates the sweep, places marker on signal<br />
peak.<br />
OUTPUT 718 ; “MKBW -3 ; ” Uses the MKBWjimction to find the signal<br />
b<strong>and</strong>width at -3 dB below the marker:<br />
Description<br />
The MKBW comm<strong>and</strong> also displays (in the message area) the b<strong>and</strong>width at the power level in<br />
dB below the current marker position or the current signal peak.<br />
MKBW finds the b<strong>and</strong>width at the specified power level for one measurement sweep. If you<br />
want the spectrum analyzer to find the b<strong>and</strong>width at the specified power level during every<br />
measurement sweep, use the NDBPNT comm<strong>and</strong> instead of MKBW.<br />
Programming Comm<strong>and</strong>s 5-328
MKCF<br />
Marker to Center Frequency<br />
Sets the center frequency equal to the marker frequency <strong>and</strong> moves the marker to the center<br />
of the screen.<br />
Syntax<br />
Equivalent Softkey: NARKHH -> CF.<br />
Related Comm<strong>and</strong>s: CF, MKF.<br />
Example<br />
MKCF<br />
This example provides a quick way to center the desired frequency on the spectrum analyzer<br />
screen.<br />
10 OUTPUT 718;"IP;SP 1MHZ;SNGLS;" Initializes spectrum an&q activates singlesweep<br />
mode.<br />
20 INPUT "ENTER IN DESIRED STATION<br />
FREQUENCY, IN MHZ”, Freq<br />
30 OUTPUT 718."CF Us,Freq;"MHZ;"<br />
40 OUTPUT 718;"TS;MKPK HI;MKCF;TS;"<br />
60 END<br />
Description<br />
Changes spectrum analyzer center frequency.<br />
Updates the trace, places marker at the signal<br />
peak <strong>and</strong> centers it on screen.<br />
This comm<strong>and</strong> is performed only if an active marker is present on screen.<br />
5-330 Programming Comm<strong>and</strong>s
MKCONT<br />
Marker Continue<br />
Resumes the sweep after execution of a MKSTOP comm<strong>and</strong>.<br />
Syntax<br />
Related Comm<strong>and</strong>s: MKSTOl?<br />
Example<br />
MKCONT<br />
10 OUTPUT 718."IP*TS*" Initializw spectrum aruzljgxx<br />
20 OUTPUT 718;"MK;K I&' Creates an active marker:<br />
30 OUTPUT 718;"MKSTOP;" Stops sweep at marker:<br />
40 OUTPUT 718; "MKCONT;"<br />
50 END<br />
Resumes sweep.<br />
MKCONT Marker Continue<br />
Programming Comm<strong>and</strong>s 5-331
MKD<br />
Marker Delta<br />
Activates the delta marker.<br />
Syntax<br />
/ f r e q u e n c y value \<br />
Item Description/Default Range<br />
Number Any real or integer number. Default unit is Hz, default value is Start frequency to<br />
value of the active marker. stop frequency of<br />
spectrum analyzer.<br />
Equivalent Softkey: MARXXR h .<br />
Step Increment: by l/10 of the frequency span.<br />
Related Comm<strong>and</strong>s: AUTO, MA, MKCF, MKF, MKN, MKSP, MKSS, MKPK.<br />
Example<br />
10 OUTPUT 718;"IP;" Initializes spectmcm analyzer:<br />
20 OUTPUT 718;"MKMIN;" Places a marker at the minimum amplitude of trace.<br />
30 OUTPUT 718;"MKD;" Activates marker delta.<br />
40 OUTPUT 718;"MKPK HI;" Places marker at highest amplitude of trace.<br />
50 OUTPUT 718;"MKSP;" Changes span to the values of the l.@Z <strong>and</strong> right markers.<br />
60 END<br />
5-332 Programming Comm<strong>and</strong>s<br />
XMKD
Description<br />
MKD Marker Delta<br />
The MKD comm<strong>and</strong> computes the frequency <strong>and</strong> amplitude difference of the active marker<br />
<strong>and</strong> a special marker, called the delta or differential marker. These values are displayed in the<br />
display readout.<br />
The differential value of the frequency is equal to the active marker frequency minus the<br />
delta marker frequency. The differential value of the amplitude is equal to the active marker<br />
amplitude minus the delta marker amplitude.<br />
If an active marker is not on the screen, MKD positions an active marker at center screen. If a<br />
delta marker is not on the screen, MKD places one at the specified frequency, or at the current<br />
active marker. If the active marker is in amplitude mode, the delta marker is placed at the<br />
same amplitude as the active marker (or a specified value).<br />
To read the amplitude, use MKA?. ‘lb read the frequency, use MKF? The results are displayed<br />
on the spectrum analyzer screen.<br />
In linear mode, MKD computes the ratio of the amplitudes of the active <strong>and</strong> delta markers<br />
rather than the difference. This results in similar treatment for logarithmic <strong>and</strong> linear data<br />
because the delta of the difference of two logarithmically generated numbers results in the<br />
logarithmically generated value of the ratio of the two numbers. (You should not change<br />
amplitude units when making a marker delta measurement, however.)<br />
Programming Comm<strong>and</strong>s 5-333
MKDLMODE<br />
Marker Delta Display Line Mode<br />
When the marker table is turned on, MKDLMODE selects if the marker amplitude values are<br />
shown as relative to the reference level (normal mode) or relative to the display line (delta<br />
mode).<br />
Syntax<br />
Equivalent Softkey: TABLE ADL NRM .<br />
Preset State: 0 (normal mode).<br />
Related Comm<strong>and</strong>s: DL, MKTBL.<br />
Example<br />
norma I<br />
XMKDLMODE<br />
OUTPUT 718;"MOV MKTBL,l;" Turns on the marker table.<br />
OUTPUT 718;"DL -20;" Sets the display line.<br />
OUTPUT 718;"MOV MKDLMODE,l;" Displays the marker amplitudes values relative to the<br />
display line.<br />
Description<br />
If MKDLMODE is set to 0, the spectrum analyzer displays absolute marker amplitudes or<br />
marker delta amplitudes (normal mode). If MKDLMODE is set to 1, the spectrum analyzer<br />
displays the marker amplitudes relative to the display line (delta mode). Setting MKDLMODE to<br />
1 turns on the display line automatically. Use the DL comm<strong>and</strong> to place the display line.<br />
MKDLMODE determines the way the marker amplitudes are displayed in the marker table only,<br />
it does not change the marker amplitude values that are returned remotely.<br />
You can execute the MKDLMODE comm<strong>and</strong> two different ways. You can either execute the<br />
MKDLMODE comm<strong>and</strong> directly (for example, "MKDLMODE 1; I’) or use the MOV comm<strong>and</strong> to<br />
move the 1 or 0 into the MKDLMODE comm<strong>and</strong> (for example, "MOV MKDLMODE,l;"). If you use<br />
the MOV comm<strong>and</strong>, no text is displayed in the active function area during comm<strong>and</strong> execution.<br />
5-334 Programming Comm<strong>and</strong>s
Query Response<br />
de t a<br />
MKDLMODE Marker Delta, Display Line Mode<br />
OMKDLMODE<br />
Programming Comm<strong>and</strong>s 5-335
MKF<br />
Marker Frequency<br />
Specifies the frequency value of the active marker.<br />
Syntax<br />
I Number<br />
HZ<br />
KHZ<br />
MHZ<br />
GHZ<br />
\<br />
&-;<br />
+F--) . . .<br />
Example<br />
MKF Marker Frequency<br />
OUTPUT 718;"TDF P;MKREAD FRQ;MKF?;" This returns a frequency value (in Hz) if not in<br />
zero-span.<br />
OUTPUT 718;"TDF P;MKREAD FRQ;MKF?;" This returns a time value (in seconds) if in mospan.<br />
OUTPUT 718;"TDF P;MKREAD PER;MKF?;" This returns the time value (in seconds) of l/(mrker<br />
frequen4.d.<br />
OUTPUT 718;"TDF P;MKREAD SWT;MKF?;" This returns the marker time value (in seconds).<br />
OUTPUT 718;"TDF P;MKREAD IST;MKF?;" This returns the frequency value (in Hz) for<br />
l/(m.arker time).<br />
OUTPUT 718;"TDF P;MKREAD FFT;MKF?;" This returns the frequency value (in Hz).<br />
MKF results with TDF set to A or I: If the trace data format is used with trace data format<br />
A, the result depends on the setting of the MDS comm<strong>and</strong>.<br />
Example<br />
OUTPUT 718;"TDF A;MDS B;MKF?;" Returns one byte representing the marker position.<br />
OUTPUT 718;"TDF A;MDS W;MKF?;" Returns two bytes in a binary word format that has a<br />
value from 1 to 401.<br />
Using the trace data format I is equivalent to the TDF A format.<br />
MKF results with TDF set to M: If the trace data format is used with trace data format M,<br />
the result is the marker horizontal position value, from 1 to 401, in ASCII.<br />
Example<br />
OUTPUT 718;"TDF M;MKF?;" Returns marker horimntal position value in ASCII.<br />
Query Response<br />
Programming Comm<strong>and</strong>s 5-337
MKFC<br />
Marker Counter<br />
Turns on or off the marker frequency counter.<br />
Syntax<br />
Equivalent Softkey: MK lCW?T ON OFF .<br />
Model Required: <strong>HP</strong> 85913, <strong>HP</strong> 85933, <strong>HP</strong> 85943, <strong>HP</strong> 85953, <strong>HP</strong> 85963, or <strong>HP</strong> <strong>8590</strong>1, with<br />
Option 013.<br />
Related Comm<strong>and</strong>s: MKFCR, MKN.<br />
Restrictions: Not available with Analog+ display mode. See “ANLGPLUS” for more<br />
information. Not available with the marker table (MKTBL).<br />
Example<br />
OUTPUT 718 ; "MKFC ON ; ” Turns on the wmrker counts<br />
5-338 Programming Comm<strong>and</strong>s
MKFCR<br />
Marker Counter Resolution<br />
Sets the resolution of the marker frequency counter.<br />
Syntax<br />
‘.....-.:<br />
j- r e s o l u t i o n -\<br />
MKFCR Marker Counter Resolution<br />
Item Description/Default Range<br />
Number Any real or integer number. Default unit is Hz. 0 Hz to 100 kHz.<br />
Equivalent Softkey: CNT RES AUXI NAN .<br />
Model Required: <strong>HP</strong> 85913, <strong>HP</strong> 85933, <strong>HP</strong> 85943, <strong>HP</strong> 85953, <strong>HP</strong> 85963, or <strong>HP</strong> <strong>8590</strong>L with<br />
Option 013.<br />
Preset State: Marker counter resolution is set to AUTO. The calculated value for the marker<br />
counter resolution is returned if the MKFCR is queried.<br />
Related Comm<strong>and</strong>s: AUTO, MKFC.<br />
Example<br />
OUTPUT 718;"MKFCR IOKHZ;" Sets the marker counter resolution to 10 kHz.<br />
OUTPUT 718;"MKFCR?;" Queries the marker counter resolution.<br />
ENTER 718;A Gets the query response.<br />
DISP A LXspla ys the marker counter resolution.<br />
HZ<br />
XMKFCR<br />
Programming Comm<strong>and</strong>s 5.338
MKFCR Marker Counter Resolution<br />
Description<br />
Executing either “MKFCR 0;” or “MKFCR AUTO; n auto-couples the marker counter resolution<br />
to the frequency span.<br />
Query Response<br />
5-340 Programming Comm<strong>and</strong>s
MKMIN<br />
Marker Minimum<br />
Moves the active marker to the minimum value detected.<br />
Syntax<br />
Related Comm<strong>and</strong>s: MKPK, SMOOTH, TH, VAVG.<br />
Example<br />
10 OUTPUT 718;"IP;SNGLS;"<br />
20 INPUT "ENTER IN THE START FREqUENCY,<br />
IN MHZ",Start,freq<br />
30 INPUT "ENTER IN THE STOP FREQUENCY,<br />
IN MHZ",Stop,freq<br />
40 OUTPUT 718;"FA ";Start-freq;"MHZ"<br />
50 OUTPUT 718;"FB ";Stop,freq;"MHZ"<br />
60 OUTPUT 718;"TS;MKPK HI;MKD;MKMIN;MKF?;"<br />
70 ENTER 718;Delta-freq<br />
80 PRINT "DIFFERENCE IN FREqUENCY IS ",<br />
Delta-freq,"HZ"<br />
90 END<br />
MKMIN Marker Minimum<br />
Initializes spectrum analym activates<br />
single-sweep mode.<br />
Sets the start frequency.<br />
Sets the stop frequency.<br />
Updates trace, jinds trace peak, turns on<br />
marker delta function, jinds the minimum<br />
value of trace, <strong>and</strong> return the frequency<br />
delta.<br />
Gets the result from spectrum analyzer<br />
Programming Comm<strong>and</strong>s 5-341
MKN<br />
Marker Normal<br />
Activates <strong>and</strong> moves the marker to the specified frequency.<br />
Syntax<br />
MKN<br />
Item Description/Default R=ae<br />
Number Any real or integer number. Default unit is Hz. Default value is Start frequency to<br />
the center frequency of the spectrum analyzer. stop frequency of<br />
spectrum analyzer.<br />
Equivalent Softkey: WWER NORMAL .<br />
Step Increment: by l/10 of the frequency span.<br />
Related Comm<strong>and</strong>s: AUTO, DEMOD, MKA, MKD, MKF, MKPK.<br />
5-342 Programming Comm<strong>and</strong>s
Example<br />
10 INPUT "ENTER IN THE START FREQUENCY, IN MHZ",Start-freq<br />
20 INPUT "ENTER IN THE STOP FREQUENCY, IN MHZ",Stop-freq<br />
30 OUTPUT 718;"IP;FA ";Start-freq;"MHZ"<br />
40 OUTPUT 718;"FB ";Stop-freq;"MHZ"<br />
50 OUTPUT 718; “MKN EK;”<br />
60 PRINT "PLACE MARKER ON THE DESIRED SIGNAL"<br />
70 PRINT "PRESS HOLD THEN PRESS CONTINUE"<br />
80 PAUSE<br />
90 OUTPUT 718*"MKN'-"<br />
# * ,<br />
100 ENTER 718;Mkr<br />
110 PRINT "MARKER FREQUENCY IS ",Mkr,"Hz"<br />
120 END<br />
Description<br />
MKN Marker Normal<br />
Initial&s spectrum analyzer<br />
<strong>and</strong> changes the<br />
start frequency.<br />
Changes the stop frequency.<br />
Enables the front-panel<br />
knob.<br />
Gets the freqwnc y of the<br />
marker:<br />
Puts thefrequency value<br />
into the computer variab&<br />
Mkr:<br />
Prints the result.<br />
In nonzero span, “MKN?;” returns the frequency value. In zero span, “MKN?;” returns the time<br />
value.<br />
Query Response<br />
Programming Comm<strong>and</strong>s 5-343
MKNOISE<br />
Marker Noise<br />
Displays the average noise level at the marker.<br />
Syntax<br />
Restrictions: Not available with the marker table (MKTBL).<br />
Equivalent Softkey: MK HfXSE ON OFF .<br />
Related Comm<strong>and</strong>s: MKA, MKF, MKMIN, MKN.<br />
Example<br />
OUTPUT 718;"IP;CF 300MHZ;SNGLS;"<br />
OUTPUT 718;"SP 1OMHZ;DET SMP;TS;"<br />
OUTPUT 718;"MKPK HI;MKA?;"<br />
ENTER 718;Amp-one<br />
OUTPUT 718;"MKD UP;UP;MKNOISE ON;MKA?;"<br />
ENTER 718;Amp,two<br />
OUTPUT 718;"MKNOISE OFF;"<br />
DISP Amp-two<br />
C-to,n=Amp-one - Amp-two<br />
PRINT "CARRIER TO NOISE RATIO IN 1 HZ<br />
BANDWIDTH IS ";C-to-n<br />
PRINT ' DB"<br />
5-344 Programming Comm<strong>and</strong>s<br />
Initializes spectrum an&y- changes center<br />
frequency, activates single-sweep mode.<br />
Changes span, activates sample detecto?<br />
updates trace.<br />
Places marker on highest point of trace,<br />
queries marker amplitude.<br />
Pats the spectrum analyzer response in the<br />
computer variable, Amp-one.<br />
Moves marker <strong>and</strong> turns on the marker<br />
noise function.<br />
Puts the spectrum analyzer response in the<br />
computer variable, Amp-two.<br />
Turns ofl the marker noise fin&ion.<br />
Displays the result.<br />
Calculates the carrier to noise ratio.<br />
Outputs result.
Description<br />
MKNOISE Marker Noise<br />
The marker value is normalized to a l-Hz b<strong>and</strong>width. Use “MKA?; ” to read the noise marker<br />
value.<br />
The noise marker averages 32 trace data values about the location of the marker on the<br />
frequency or time scale. The 32 values averaged, except for the first 15 or last 14 values in the<br />
trace, commence with the 16th point to the left of the marker, <strong>and</strong> end with the 15th point to<br />
the right of the marker. Note that the data values averaged are not exactly symmetrical with<br />
respect to marker position. At the trace end points, the spectrum analyzer uses the nearest 32<br />
data values. So while the marker may be moved to trace position 1 to 15, the actual amplitude<br />
value returned will be the same value for any marker position from 1 to 15. A similar situation<br />
applies for markers at the end of the trace.<br />
A nominal correction for equivalent noise b<strong>and</strong>widths is made by the firmware based on a<br />
nominal 3 dB resolution b<strong>and</strong>width. The firmware assumes the noise b<strong>and</strong>width is 1.12 times<br />
the resolution b<strong>and</strong>width. This means the shape of the resolution b<strong>and</strong>width filters cause the<br />
noise power to be overstated by 1.12 times. The detection mode also affects the measurement.<br />
If in log mode, the log detector understates the noise response. lb compensate, 2.5 dB is<br />
added to the measurement. If the detector is in linear mode, the firmware uses 1.05 dB as a<br />
correction value.<br />
In log detector mode, the final reported value will then be, with the result reported in dBm in a<br />
l-Hz b<strong>and</strong>width:<br />
(Averaged value over 32 values) - 10 x (log[1.12 x Resolution b<strong>and</strong>width]) + 2.5 dB<br />
In linear detector mode (dBm) units, the final reported value will then be, with the result<br />
reported in dBm in a l-Hz b<strong>and</strong>width:<br />
(Averaged value over 32 values) - 10 x (log[1.12 x Resolution b<strong>and</strong>width]) + 1.05 dB<br />
In linear detector mode with the normal display of voltage units, the noise marker voltage<br />
value will be related to the present marker voltage by this relation.<br />
(V-noise-marker)2 = (V-average)’ x 1.12 x Resolution b<strong>and</strong>width x 0.7824<br />
V-noise-marker = V-average/( 1.12 x Resolution b<strong>and</strong>width x 0.7824)“.5<br />
V-noise-marker = V-average x l.O6633/(Resolution b<strong>and</strong>width)0.5<br />
Query Response<br />
ON<br />
OFF<br />
output<br />
termination +<br />
002<br />
Programming Comm<strong>and</strong>s 5.345
MKOFF<br />
Marker Off<br />
Turns off either the active marker or all the markers.<br />
Syntax<br />
Equivalent Softkey: IURKEB ALL OFF .<br />
Related Comm<strong>and</strong>s: MKA, MKACT, MKAC<strong>TV</strong>, MKCF, MKD, MKF, MKN, MKPK.<br />
Example<br />
OUTPUT 718;"MKOFF ALL;" Turn.s oflall the on-screen markers.<br />
Description<br />
If the ALL parameter is omitted, only the active marker is turned off.<br />
5-346 Programming Comm<strong>and</strong>s
MKP<br />
Marker Position<br />
Places the active marker at the given x-coordinate.<br />
Syntax<br />
Number<br />
Item<br />
User-defined variable<br />
Predefined variable<br />
PredefLned function<br />
Trace element<br />
x<br />
c o o r d i n a t e<br />
p r e d e f i n e d v a r i a b l e<br />
b u s e r - d e f i n e d v a r i a b l e /<br />
% p r e d e f i n e d f u n c t i o n /<br />
b t r a c e e l e m e n t<br />
J<br />
MKP Marker Position<br />
Description/Default Range<br />
Any valid integer. -401 to 401.<br />
A variable defined by VARDEF or ACTDEF comm<strong>and</strong>s. Any valid variable<br />
name.<br />
A comm<strong>and</strong> that acts as a variable. Refer to Table 5-l.<br />
Function that returns a value. Refer to Table 5-l.<br />
An element of trace A, trace B, trace C, or a user-defined trace.<br />
Prerequisite Comm<strong>and</strong>s: ACTDEF or VARDEF when using a user-defined variable.<br />
Related Comm<strong>and</strong>s: MKA, MKCF, MKD, MKMIN.<br />
Example<br />
OUTPUT 718;"IP;" Initializes spectrum analyzer:<br />
OUTPUT 718;"MKP 100;" Mioves the active marker to a element 100 of trace A.<br />
Description<br />
If no marker is active, the marker is turned on with preset type (position) <strong>and</strong> marker is placed<br />
at the given screen position. The marker is placed on the first displayed trace that is found (in<br />
order): trace A, trace B, or trace C.<br />
If the marker delta mode is active, the value of the marker position is relative to the fixed<br />
marker, <strong>and</strong> therefore MKP can return a negative position.<br />
Note that MKP <strong>and</strong> MKCF comm<strong>and</strong>s perform different functions. MKCF sets the center<br />
frequency equal to the marker frequency <strong>and</strong> moves the marker to the center of the screen.<br />
MKP places the marker to the position of the element specified.<br />
XMKP<br />
Programming Comm<strong>and</strong>s 5-347
MKP Marker Position<br />
Query Response<br />
5-348 Programming Comm<strong>and</strong>s<br />
o u t p u t<br />
termination ---)
MKPAUSE<br />
Marker Pause<br />
Pauses the sweep at the active marker for the duration of the delay period.<br />
Syntax<br />
MKPAUSE Marker Pause<br />
Item Description/Default Range<br />
Number Any real or integer number. 2msto 100s.<br />
Restrictions: Not available with Analog+ display mode. See “ANLGPLUS” for more<br />
information. Not available with negative peak detection.<br />
Equivalent Softkey: MK PAUSE ON OFF.<br />
Step Decrement: Time value divided by 2.<br />
Step Increment: Time value multiplied by 2.<br />
Related Comm<strong>and</strong>s: DEMOD, MKA, MKF, MKFC, MKN, MKOFF, ST.<br />
Example<br />
OUTPUT 718;"MKPAUSE IOSC;" Changes the marker pause time to 10 seconds.<br />
Description<br />
To turn MKPAUSE off, turn off markers or send “MKPAUSE 0;“.<br />
The MKPAUSE comm<strong>and</strong> requires a sweep time of 50 ms or longer. The sweep time is changed<br />
to 50 ms if MKPAUSE is used with a sweep time that is less than 50 ms.<br />
After MKPAUSE is executed, the sweep must be completed before another comm<strong>and</strong> will be<br />
executed.<br />
Programming Comm<strong>and</strong>s 5-349
MKPAUSE Marker Pause<br />
Query Response<br />
5-350 Programming Comm<strong>and</strong>s<br />
output<br />
t e r m i n a t i o n +
MKPK<br />
Marker Peak<br />
Positions the active marker on a signal peak.<br />
Syntax<br />
MKPK<br />
MKPK Marker Peak<br />
Equivalent Softkey: NEXT PEAK , NEXT PK RIGHT, I?EXT PK LEFT, <strong>and</strong> [PEAK SEARCH].<br />
Related Comm<strong>and</strong>s: MKCF, MKF, MKOFF, MKPX, TH.<br />
Example<br />
10 OUTPUT 718;"IP;"<br />
20 OUTPUT 718;"SNGLS;TS;MKPK HI;"<br />
30 OUTPUT 718;"MKA?;"<br />
40 ENTER 718;A<br />
50 DISP A<br />
60 END<br />
Description<br />
Initializes the spectrum analyzer:<br />
Places active marker on highest peak.<br />
Returns amplitude value of marker to the computer<br />
Puts the spectrum analyzer response in the computer<br />
variable, A.<br />
tiplays amplitude value.<br />
Executing MKPK HI, or simply MKPK, positions the active marker at the highest signal<br />
detected. If an active marker is on the screen, the MKPK parameters move the marker as<br />
follows:<br />
HI (highest) moves the active marker to the highest peak.<br />
NH (next highest) moves the active marker to the next signal peak of lower amplitude.<br />
NR (next right) moves the active marker to the next signal peak of higher frequency.<br />
NL (next left) moves the active marker to the next signal peak of lower frequency.<br />
Note This function is for use with the frequency markers only.<br />
Programming Comm<strong>and</strong>s 5-351
MKPX<br />
Marker Peak Excursion<br />
Specifies the minimum signal excursion for the spectrum analyzer’s internal peak-identification<br />
routine.<br />
Syntax<br />
7 ompl itude v a l u e 7<br />
Item Description/Default R-f3e<br />
Number Any real or integer number. Default unit is dB. Oto 100dB.<br />
Equivalent Softkey: PEAK EXCUWN .<br />
Preset State: 6 dB.<br />
Step Increment: by 1 dB.<br />
Related Comm<strong>and</strong>s: MKPK, PEAKS.<br />
Example<br />
10 OUTPUT 718;"IP;CF 300MHZ;SP IGHZ;"<br />
20 INPUT "ENTER IN PEAK EXCURSION, IN DB ",Excursion<br />
30 OUTPUT 718;"MKPX ";Excursion;"DB;"<br />
40 OUTPUT 718;"TS;MKPK HI;MKPK NH;"<br />
50 OUTPUT 718;"MKF?;"<br />
60 ENTER 718;Freq<br />
70 IF Freq 0 THEN<br />
80 PRINT "PEAK FOUND"<br />
90 ELSE<br />
100 PRINT "NO PEAKS FOUND"<br />
110 END IF<br />
120 END<br />
5-352 Programming Comm<strong>and</strong>s<br />
DE<br />
Initializes spectrum anulym<br />
changes start <strong>and</strong> stop frequencies.<br />
Changes peak excursion level.<br />
Searches for highest peaks<br />
of trace.<br />
Finds frequency d&@rvnce<br />
between peaks.<br />
Puts the spectrum analyzer<br />
response in the computer<br />
variable, Req.<br />
Outputs results if marker<br />
amplitude was not 0.<br />
Prints “NO PEAKS FOUND”<br />
if Freq = 0.
Query Response<br />
MKPX Marker Peak Excursion<br />
Programming Comm<strong>and</strong>s 5-353
MKREAD<br />
Marker Readout<br />
Selects the type of active trace information displayed by the spectrum analyzer marker<br />
readout.<br />
Syntax<br />
( MKREAD ‘r<br />
Equivalent Softkey: I4K HEAl F T I P provides the marker readouts in the frequency,<br />
sweep time, inverse sweep time, <strong>and</strong> period. The fast Fourier transform readout is not<br />
available with the softkey, however.<br />
Related Comm<strong>and</strong>s: FFT, MKF, MKTYPE.<br />
Example<br />
OUTPUT 718;"MKREAD FFT;"<br />
Description<br />
The MKREAD comm<strong>and</strong> can select the following types of active trace information:<br />
=Q frequency<br />
SWT sweep time<br />
IST inverse sweep time<br />
PER period<br />
FFT Fast Fourier Transform Readout<br />
The results of the data depend on the MKREAD parameter, the frequency span, <strong>and</strong> if the<br />
marker delta function is used.<br />
5354 Programming Comm<strong>and</strong>s<br />
XMKREAD
MKRRAD Marker Readout<br />
MKREAD Non-Zero Non-Zero Span Zero Zero Span<br />
Type Span Delta Swn Delta<br />
FRQ Reads frequency Reads delta frequency Reads time Reads delta time<br />
SWT Reads time since Reads delta time Waveform Waveform measurements of<br />
the start of sweep between end points measurements of detected modulation<br />
detected modulation<br />
IST N/A N/A N/A Computes frequency<br />
corresponding to delta of markers.<br />
Performs l/(Tr - T2)<br />
PER Period of frequency (Pulse measurement) N/A N/A<br />
delta time<br />
FFf N/A N/A Reads frequency Reads delta frequency<br />
corresponding the to corresponding to delta FFf bucket<br />
FFT bucket<br />
Query Response<br />
QMKREAD<br />
Programming Comm<strong>and</strong>s 5-355
MKRL<br />
Marker to Reference Level<br />
Sets the reference level to the amplitude value of the active marker.<br />
Syntax<br />
MKRL<br />
Equivalent Softkey: #ARKER -2 REF LVL .<br />
Related Comm<strong>and</strong>s: MKOF'F', RL.<br />
Example<br />
10 OUTPUT 718;"IP;SNGLS;CF 300MHZ;SP 20MHZ;"<br />
20 OUTPUT 718;"TS;MKPK HI;MKRL;TS;"<br />
30 OUTPUT 718;"RL?;"<br />
40 ENTER 718 USING "K";Ref-level<br />
50 OUTPUT 718;"AUNITS?;"<br />
60 ENTER 718;Aunits$<br />
50 PRINT "REFERENCE LEVEL IS",Ref-level,Aunits$<br />
60 END<br />
5-356 Programming Comm<strong>and</strong>s<br />
Initializes spectrum an&y- changes<br />
center frequency <strong>and</strong> span.<br />
Places a marker on trace peak,<br />
sets the reference level to the amplitude<br />
of the active markq updates<br />
the sweep.<br />
Gets the reference level.<br />
Puts the spectrum analyzer response<br />
in the computer variable,<br />
&fLkvel.<br />
Gets the current amplitude units.
MKSP<br />
Marker to Span<br />
Sets the start <strong>and</strong> stop frequencies to the values of the delta markers.<br />
Syntax<br />
Equivalent Softkey: MKl3 B -> SPAN.<br />
Related Comm<strong>and</strong>s: MKD, SI?<br />
Example<br />
10 OUTPUT 718;"IP;"<br />
20 OUTPUT 718*"MKMIN-"<br />
30 OUTPUT 718;"MKD;"'<br />
40 OUTPUT 718;"MKPK HI;"<br />
50 OUTPUT 718;"MKSP;"<br />
60 END<br />
Description<br />
MKSP<br />
MKSP Marker to Span<br />
Initializes spectrum analyzer<br />
Places a marker at the minimum amplitude of trace.<br />
Activates marker delta.<br />
Places marker at highest amplitude of trace.<br />
Changes span to the values of the left <strong>and</strong> right markers.<br />
The left marker specifies start frequency, <strong>and</strong> the right marker specifies stop frequency. If MKD<br />
is off, no operation is performed.<br />
Programming Comm<strong>and</strong>s 5-357
MKSS<br />
Marker to Step Size<br />
Sets the center-frequency step-size to the marker frequency.<br />
Syntax<br />
MKSS<br />
Equivalent Softkey: MARKER -2 CF STEP .<br />
Related Comm<strong>and</strong>s: CF, MKA, MKCF, MKD, MKF, SS.<br />
Example<br />
This example measures a harmonic of the CAL OUT signal.<br />
10 DISP "CONNECT THE CAL OUT TO THE INPUT"<br />
20 OUTPUT 718;"IP;SNGLS;CF 300MHZ;SP 20MHZ;TS;"<br />
30 OUTPUT 718;"MKPK HI;MKSS;MKD;CF UP;TS;MKPK HI;"<br />
40 OUTPUT 718;"MKA?;"<br />
50 ENTER 718;Delta,amp<br />
60 OUTPUT 718."MKF'." , 9 *<br />
70 ENTER 718;Delta-freq<br />
80 PRINT "DIFFERENCE IN AMPLITUDE IS ",Delta,amp,"dB"<br />
90 PRINT "DIFFERENCE IN FREQUENCY IS ",Delta,freq,"Hz"<br />
100 END<br />
Description<br />
Initializes spectrum analym<br />
activates singlesweep<br />
mode, changes center<br />
frequency <strong>and</strong> span,<br />
updates trace.<br />
Places the marker on the<br />
highest point of the trace,<br />
changes the step size to<br />
the marker frequency, activates<br />
marker delta, increase<br />
center frequency,<br />
update trace, places the<br />
marker at highest point<br />
of the trace.<br />
Gets the amplitude of the<br />
marker:<br />
Puts the spectrum analyzer<br />
response in the computer<br />
variable, Delta-Amp.<br />
Gets the frequency of the<br />
marker:<br />
Puts the spectrum analyzer<br />
response in the computer<br />
variable, Deltafreq.<br />
Sets the center-frequency step-size equal to the marker frequency. If in the delta mode, the<br />
step size is set to the delta frequency (absolute value).<br />
5-358 Programming Comm<strong>and</strong>s
MKSTOP<br />
Marker Stop<br />
Stops the sweep at the active marker.<br />
Syntax<br />
MKSTOP Marker Stop<br />
Related Comm<strong>and</strong>s: MKCONT.<br />
Restrictions: Not available with Analog+ display mode. See “ANLGPLUS” for more<br />
information.<br />
Example<br />
10 OUTPUT 718;"IP;TS;"<br />
20 OUTPUT 718;"MKPK HI;"<br />
30 OUTPUT 718;"MKSTOP;"<br />
40 OUTPUT 718;"MKCONT;"<br />
50 END<br />
Initializes spectrum analyzer<br />
Creates an active marker:<br />
Stops sweep at markex<br />
Resumes sweep.<br />
Programming Comm<strong>and</strong>s 5-358
MKTBL<br />
Marker ‘Ihble<br />
Turns on or off the marker table.<br />
Syntax<br />
Equivalent Softkey: ?4K TABLE ON OFF .<br />
Preset State: 0 (marker table is off).<br />
Related Comm<strong>and</strong>s: DL, MKDLMODE.<br />
Example<br />
table<br />
7 o f f -<br />
OUTPUT 718;“MOV MKTBL,l;” Turns on the marker table.<br />
Description<br />
When the marker table is turned on, the spectrum analyzer screen displays two windows. The<br />
upper window displays the traces <strong>and</strong> the graticule, <strong>and</strong> the lower window displays the marker<br />
table. The marker table displays the following information about the on-screen markers: the<br />
trace (trace A, B, or C) on which the marker is located, the type of marker (frequency, time,<br />
inverse sweep time, or period), the frequency or time of the marker, <strong>and</strong> the amplitude of the<br />
marker. While the marker table is turned on, the marker table data is updated at the end of<br />
every sweep, or whenever a marker is moved. (MKTBL comm<strong>and</strong> uses the ONMKRU comm<strong>and</strong><br />
to update the marker table information).<br />
The marker table is displayed on the spectrum analyzer display only. To obtain the information<br />
that is displayed in the marker table remotely, you must use the following programming<br />
comm<strong>and</strong>s.<br />
H Use MKACT to select a marker. Use the MKAC<strong>TV</strong> comm<strong>and</strong> makes the selected marker the<br />
active function.<br />
H Use MKA? to determine the amplitude of a marker.<br />
� Use MKF? to determine the frequency or time of a marker.<br />
� Use MKREAD? to determine the type of marker.<br />
� Use MKTRACE? to determine which trace the marker is located on.<br />
5-360 Programming Comm<strong>and</strong>s
MKTBL Marker ‘able<br />
Restrictions<br />
Turning on the marker table turns off following functions: windows display mode (WINON),<br />
N dB point measurement (NDBPNT), the FFT menu measurements (FFTAUTO, FFTCONTS,<br />
FFTSNGLS), gate utility functions (GDRVUTIL), TO1 measurement (TOI), peak table (PKTBL),<br />
percent AM (PCTAM), peak zoom (PKZOOM), <strong>and</strong> power menu measurements (ACP, ACPE, C<strong>HP</strong>,<br />
<strong>and</strong> OBW). Marker noise (MKNOISE) <strong>and</strong> marker counter (MKFC) are not available with the<br />
marker table.<br />
You can execute the MKTBL comm<strong>and</strong> two different ways. You can either execute the MKTBL<br />
comm<strong>and</strong> directly (for example, “MKTBL 1; “) or use the MOV comm<strong>and</strong> to move the 1 or 0 into<br />
the MKTBL comm<strong>and</strong> (for example, “MOV MKTBL, 1; ‘I). If you use the MOV comm<strong>and</strong>, no text is<br />
displayed in the active function area during comm<strong>and</strong> execution.<br />
You should turn off the marker table (set MKTBL to 0) when you are done with the marker<br />
table.<br />
Query Response<br />
table<br />
r off 7<br />
0<br />
table<br />
output<br />
’ t e r m i n a t i o n +<br />
qMKTBL<br />
Programming Comm<strong>and</strong>s 5-361
MKTRACE<br />
Marker Trace<br />
Moves the active marker to a corresponding position in trace A, trace B, or trace C.<br />
Syntax<br />
Equivalent Softkey: HK TRACE hUTi ABC.<br />
Example<br />
10 OUTPUT 718;"IP;"<br />
20 OUTPUT 718 *“MKMIN*”<br />
30 OUTPUT 718;"MKTRAbE TRB;"<br />
40 OUTPUT 718;"BLANK TRA;CLRW TRB;"<br />
50 END<br />
Query Response<br />
5-362 Programming Comm<strong>and</strong>s<br />
XMKTRACE<br />
Initializes spectrum analyzer<br />
Finds the lowest amplitude of trace.<br />
Moves marker to corresponding position on<br />
trace B<br />
Blanks trace A <strong>and</strong> displays trace B
MKTRACK<br />
Marker Track<br />
MKTRACK Marker Track<br />
Moves the signal on which the active marker is located, to the center of the spectrum analyzer<br />
display <strong>and</strong> keeps the signal peak at center screen.<br />
Syntax<br />
Equivalent Softkey: MF TRACK ON OFF .<br />
Related Comm<strong>and</strong>s: MKA, MKCF, MKF’.<br />
Restrictions: Not available with Analog+ display mode. See “ANLGPLUS” for more<br />
information.<br />
Example<br />
OUTPUT 718;"IP;"<br />
OUTPUT 718;"CF 300MHZ;TS;"<br />
OUTPUT 718;"MKTRACK ON;"<br />
OUTPUT 718;"SP 10MHZ;TS;"<br />
OUTPUT 718;"MKTRACK OFF;"<br />
Description<br />
OFF<br />
ON<br />
Initializes spectrum analy2ef.x<br />
Changes the center flequenc y.<br />
Activates the marker track.<br />
Changes the span.<br />
Turns of the marker track.<br />
/<br />
XMKTRACK<br />
To keep a drifting signal at center screen, place the active marker on the desired signal before<br />
turning on MKTRACK.<br />
Query Response<br />
QO2<br />
Programming Comm<strong>and</strong>s 5-363
MKTYPE<br />
Marker Type<br />
Changes the type of the current active marker.<br />
Syntax<br />
Equivalent Softkey: The functions of MKTYPE AMP <strong>and</strong> MaRKER AMPTD are equivalent.<br />
Preset State: MKTYPE PSN.<br />
Related Comm<strong>and</strong>s: MKA, MKBW.<br />
Example<br />
OUTPUT 718;"MKTYPE AMP;MKA -5;" Fbsitiom the marker at -5 dBm.<br />
Description<br />
The marker types are as follows:<br />
PSN allows markers to be positioned according to the horizontal position on the display. The<br />
marker type is set to PSN after an instrument preset.<br />
AMP allows markers to be positioned according to amplitude, as shown in the example. If<br />
two or more points on the trace are at the same amplitude, the marker is moved to the<br />
closest point on the trace with the correct amplitude. If no point on the trace is at the<br />
specified amplitude, the marker is placed at the specified amplitude <strong>and</strong> not on the trace.<br />
FIXED allows a marker to be placed at any fixed point on the spectrum analyzer screen. The<br />
position of the marker cannot be changed unless another marker type is used.<br />
Use “MKTYPE PSN” to return from using the AMP, FIXED, or DELTA types.<br />
Query Response<br />
5-364 Programming Comm<strong>and</strong>s<br />
/
ML<br />
Mixer Level<br />
ML Mixer Level<br />
Specifies the maximum signal level that is applied to the input mixer for a signal that is equal<br />
to or below the reference level.<br />
Syntax<br />
Item Description/Default R-f+<br />
Number Any real or integer number. Default unit is dBm. -10 to -60 dBm.<br />
Equivalent Softkey: HAX MXR LEVEL .<br />
Preset State: -10 dBm.<br />
Step Increment: by 10 dBm.<br />
Related Comm<strong>and</strong>s: AT, ROFFSET.<br />
Example<br />
OUTPUT 7 18 * “ML -4ODM * ”<br />
# 9 As the reference level is changed, the coupled input<br />
attenuator is changed automaticall@ This limits the<br />
maximum signal at the mixvr input to -40 d&n for<br />
signals less than or equal to the reference level.<br />
Description<br />
The ML comm<strong>and</strong> specifies the maximum signal level that is applied to the input mixer for a<br />
signal that is equal to or below the reference level.<br />
The effective mixer level is equal to the reference level minus the input attenuator setting.<br />
When ML is activated, the effective mixer level can be set from -10 dBm to -60 dBm in 10 dB<br />
steps.<br />
Programming Comm<strong>and</strong>s 5-365
MOD<br />
Modulo<br />
Stores the remainder from the division of source 1 by source 2 in the destination.<br />
Syntax<br />
Item<br />
User-defined trace<br />
User-defined variable<br />
Predefined variable<br />
Predefined function<br />
Trace range<br />
Number<br />
- dest inot ion<br />
h u s e r - d e f i n e d t r a c e /<br />
b trace range /<br />
b p r e d e f i n e d v a r i a b l e I<br />
buser-defined variable/<br />
Description/Default Range<br />
MOD Modulo<br />
A trace defined by the TRDEF comm<strong>and</strong>. Any valid trace name.<br />
A variable defined by VARDEF or ACTDEF comm<strong>and</strong>s. Any valid variable<br />
name.<br />
A comm<strong>and</strong> that acts as a variable. Refer to Table 5-l.<br />
Function that returns a value. Refer to Table 5-1.<br />
A segment of trace A, trace B, trace C, or a user-defined trace.<br />
Any real or integer number. Real number range.<br />
Prerequisite Comm<strong>and</strong>s: TRDEF when using a user-defined trace. ACTDEF or VARDEF when<br />
using a user-defined variable. TS when using trace data.<br />
Related Comm<strong>and</strong>s: DIV.<br />
XMOO<br />
Programming Comm<strong>and</strong>s 5-367
MOD Modulo<br />
Example<br />
10 OUTPUT 718;"VARDEF S_ONE,l5;"<br />
20 OUTPUT 718;"VARDEF S_TW0,4;"<br />
30 OUTPUT 718;"VARDEF D,EST,O;"<br />
40 OUTPUT 718;"MOD D,EST,S-ONE,S-TWO;"<br />
50 OUTPUT 718;"D_EST?;"<br />
60 ENTER 718;Number<br />
70 DISP Number<br />
80 END<br />
Description<br />
Places 15 into S-ONE.<br />
Places 4 into S-TWO.<br />
D-EST holds the result.<br />
Moves the result to the computer:<br />
Puts the spectrum analyzer response<br />
in the computer variable, Number:<br />
Displays a 3.<br />
If source 1 is a negative number <strong>and</strong> source 2 is a positive number, the MOD function returns<br />
a negative remainder. If both sources are negative, the MOD function returns a negative<br />
remainder.<br />
Integer values are used when a trace is the destination or one of the sources. If trace data is<br />
used as the source <strong>and</strong> the destination, the MOD function is done with 32-bit arithmetic using<br />
16-bit integer data. If a user-defined variable or predefined variable is used as the source or<br />
destination, the MOD function is done in floating point format. If a real number is used as a<br />
source, but the destination is an integer value, the result is truncated. If a trace is used as<br />
a source, be sure the trace contains a complete sweep of measurement information before<br />
executing MOD.<br />
When the source is longer than the destination, the source is truncated to fit. When the source<br />
is shorter than the destination, the last element is repeated to fill the destination.<br />
5-366 Programming Comm<strong>and</strong>s
MODE<br />
Mode<br />
Returns a “0” if the mode of operation is spectrum analysis. A number other than “0” is<br />
returned if the operating mode is other than spectrum analysis.<br />
Syntax<br />
Example<br />
OUTPUT 7 18 ; “MODE? ; ”<br />
Description<br />
MODE<br />
MODE Mode<br />
All spectrum analyzers have the spectrum analyzer mode of operation. If a program (also called<br />
a downloadable program or personality) has been loaded into the spectrum analyzer’s memory,<br />
<strong>and</strong> the spectrum analyzer is using the personality mode, the number that is returned by MODE<br />
may be modified.<br />
Query Response<br />
Programming Comm<strong>and</strong>s 5-369
MOV<br />
Move<br />
Copies the source values into the destination.<br />
Syntax<br />
7 destination<br />
Item Description/Default<br />
User-defined trace A trace defined by the TRDEF comm<strong>and</strong>.<br />
User-defined variable A variable defined by VARDEF or ACTDEF comm<strong>and</strong>s.<br />
Predehned variable A comm<strong>and</strong> that acts as a variable. Refer to ‘fable 5-l.<br />
Predeflned function Function that returns a value. Refer to Table 5-l.<br />
Trace range A segment of trace A, trace B, trace C, or a user-defined trace.<br />
Number Any real or integer number.<br />
Range<br />
Any valid trace name.<br />
Any valid variable<br />
name.<br />
Real number range.<br />
Prerequisite Comm<strong>and</strong>s: TRDEF when using a user-defined trace. ACTDEF or VARDEF when<br />
using a user-defined variable.<br />
5-370 Programming Comm<strong>and</strong>s
Example<br />
10 CLEAR 718<br />
20 OUTPUT 718.“IP-”<br />
30 OUTPUT 7181”FA’lOOMHZ;FB 1100MHZ;”<br />
40 OUTPUT 718;“TS;MKPK HI;”<br />
50 OUTPUT 718; “DL ON; ”<br />
60 OUTPUT 718;“MOV DL,MKA;”<br />
70 END<br />
Description<br />
MOV Move<br />
Clears the <strong>HP</strong>-IB bus <strong>and</strong> spectrum analyzxx<br />
Initializes spectrum analyzer<br />
Sets up the measurement range.<br />
Places a marker at the highest peak.<br />
Turns on display line.<br />
Sets the display-line value equal to the marker<br />
amplitude by storing the value of the marker<br />
amplitude variable, MKA, in the display line<br />
variable, DL.<br />
When the source is longer than the destination, the source is truncated to fit. When the source<br />
is shorter than the destination, the last element is repeated to fill the destination.<br />
Programming Comm<strong>and</strong>s 5.371
MPY<br />
Multiply<br />
Multiplies the sources, point by point, <strong>and</strong> places the results in the destination.<br />
Syntax<br />
Item<br />
User-defined trace<br />
User-defined variable<br />
Predeflned variable<br />
Predeflned function<br />
Trace range<br />
Number<br />
h u s e r - d e f i n e d t r a c e /<br />
b t r a c e range<br />
7 d e s t i n a t i o n -<br />
h u s e r - d e f i n e d t r a c e /<br />
b t r a c e range /<br />
b p r e d e f i n e d v a r i a b l e I<br />
buuser-defined variable)<br />
h predefined variable predefined variable<br />
Description/Default<br />
A trace defined by the TRDEF comm<strong>and</strong>.<br />
user-defined variable<br />
predefined function<br />
A variable defined by VARDEF or ACTDEF comm<strong>and</strong>s.<br />
A comm<strong>and</strong> that acts as a variable. Refer to Table 5-l.<br />
Function that returns a value. Refer to ‘fable 5-l.<br />
A segment of trace A, trace B, trace C, or a user-defined trace.<br />
Any real or integer number.<br />
R-m<br />
Any valid trace name.<br />
Any valid variable<br />
name.<br />
Real number range.<br />
Prerequisite Comm<strong>and</strong>s: TRDEF when using a user-defined trace. ACTDEF or VARDEF when<br />
using a user-defined variable. TS when using trace data.<br />
5-372 Programming Comm<strong>and</strong>s
Example<br />
OUTPUT 718 ; "MPY CF , CF ,2 ; I' Doubles the centerfrequency.<br />
Description<br />
MPY Multiply<br />
Traces, user-defined traces, <strong>and</strong> trace ranges are multiplied as 16-bit integers. Negative<br />
numbers are represented in two’s complement format. ,Single variables <strong>and</strong> numbers are<br />
treated as floating point numbers <strong>and</strong> must be within the real number range as defined in Table<br />
5-l.<br />
When the source is longer than the destination, the source is truncated to fit. When the source<br />
is shorter than the destination, the last element is repeated to fill the destination.<br />
Programming Comm<strong>and</strong>s 5-373
MS1<br />
Mass Storage Is<br />
Allows you to specify the current mass storage device as the spectrum analyzer memory or a<br />
memory card.<br />
Syntax<br />
Related Comm<strong>and</strong>s: CAT, SAVRCLN.<br />
Example<br />
OUTPUT 718 ; “MS1 CARD ; ‘I Selects the memory card as the current wmss storage dewice.<br />
Description<br />
If you specify INT, the current mass storage device is set to spectrum analyzer memory. If you<br />
specify CARD, the current mass storage device is set to the memory card. fir the <strong>HP</strong> 859OL<br />
or <strong>HP</strong> 859ZL only: Your spectrum analyzer must have Option 003 installed in it to select the<br />
memory card as the mass storage device.<br />
If MS1 is used as a predefined variable, it returns a “0” if the mass storage device is the<br />
spectrum analyzer memory <strong>and</strong> a “ 1” if it is the memory card.<br />
Query Response<br />
5-374 Programming Comm<strong>and</strong>s
MXM<br />
M2lXhU.In<br />
MXM Maximum<br />
Compares source 1 <strong>and</strong> source 2, point by point, sending the greater value of each comparison<br />
to the destination.<br />
Syntax<br />
1 L&xl.<br />
User-defined trace<br />
User-defined variable<br />
I<br />
7 d e s t i n a t i o n -<br />
A trace defined by the TRDEF comm<strong>and</strong>.<br />
predefined variable I<br />
A variable defined by VARDEF or ACTDEF comm<strong>and</strong>s.<br />
Predeflned variable A comm<strong>and</strong> that acts as a variable. Refer to Table 5-l.<br />
Predefined function Function that returns a value. Refer to Table 5-1.<br />
Trace range A segment of trace A, trace B, trace C, or a user-defined trace.<br />
Number Any real or integer number.<br />
I<br />
I<br />
J<br />
-----<br />
Any valid trace name.<br />
Any valid variable<br />
name.<br />
Real number range.<br />
Prerequisite Comm<strong>and</strong>s: TRDEF when using a user-defined trace. ACTDEF or VARDEF when<br />
using a user-defined variable. TS when using trace data.<br />
Related Comm<strong>and</strong>s: MIN, PKPOS, TS.<br />
Programming Comm<strong>and</strong>s 5-375
MXM Maximum<br />
Example<br />
10 OUTPUT 718;"IP;"<br />
20 OUTPUT 718;"CF 300MHZ;SNGLS;"<br />
30 OUTPUT 718;"TS;VIEW TRA;"<br />
40 OUTPUT 718;"MXM TRB,TRA,4000;"<br />
50 OUTPUT 718;"BLANK TRA;VIEW TRB;"<br />
60 END<br />
Description<br />
Initializes spectrum analyzer<br />
Changes the centerfrequency <strong>and</strong> activate singlesweep<br />
mode.<br />
Updates trace. Displays <strong>and</strong> stores the results of<br />
trace A.<br />
Moves elements of trace A that exceed 4OUO trace<br />
data points (above center screen) to trace B<br />
Displays result.<br />
If one of the sources is a single value, it acts as a threshold; all values equal to or greater than<br />
the threshold pass to the destination.<br />
When the source is longer than the destination, the source is truncated to fit. When the source<br />
is shorter than the destination, the last element is repeated to fill the destination.<br />
5.376 Programming Comm<strong>and</strong>s
MXMH<br />
Maximum Hold<br />
Updates each trace element with the maximum level detected.<br />
Syntax<br />
MXMH<br />
MXMH Maximum Hold<br />
Equivalent Softkeys: l4A% fiOLD A <strong>and</strong> MAX HOLD B .<br />
Related Comm<strong>and</strong>s: BLANK, CLRW, MINH, VAVG, VIEW.<br />
Restrictions: Not available with Analog+ display mode. See “ANLGPLUS” for more<br />
information.<br />
Example<br />
OUTPUT 718;"MXMH TRA;"<br />
Description<br />
MXMH updates the specified trace (either trace A or trace B) with a new value from a detector<br />
only if the new value is larger than the previous trace data value.<br />
Programming Comm<strong>and</strong>s 5-377
M4<br />
Marker Zoom<br />
Activates a single marker on the trace <strong>and</strong> enables the knob to change the position of the<br />
marker. When changing the frequency span, M4 keeps the marker at center frequency.<br />
Syntax<br />
Item Description/Default R=r3e<br />
Number Any real or integer number. Start frequency to<br />
stop frequency of<br />
Step Decrement: Span divided by 2.<br />
Step Increment: Span multiplied by 2.<br />
Related Comm<strong>and</strong>s: MKCF, MKN, SI?<br />
Example<br />
OUTPUT 718;“M4;”<br />
5-376 Programming Comm<strong>and</strong>s<br />
XM4
Description<br />
M4 Marker Zoom<br />
Used with a marker on the signal peak or at a position of interest, M4 keeps the marker at<br />
center screen while the frequency span is decreased.<br />
Query Response<br />
Programming Comm<strong>and</strong>s 5-379
NDB<br />
Number of dB<br />
Specifies the distance (in dB) from the signal peak for the N dB points measurement (NDBPNT).<br />
Syntax<br />
dB f r o m<br />
Item Description/Default Rw!e<br />
Number Any negative real or negative integer number. Default unit is dB. - 1 to -80 dB.<br />
Preset State: -3 dB.<br />
Related Comm<strong>and</strong>s: MKBW, MKPX, NDB, NDBPNT, NDBPNTR, TH.<br />
Restrictions: Not available for the windows display mode.<br />
Example<br />
OUTPUT 718;"MOV NDBPNT,l;" lkns on the N dB points masurmt.<br />
OUTPUT 718;"NDB -6DB;" Sets the N dB points masurernent to measure 6 dB below<br />
the signal’s peak.<br />
OUTPUT 718;"NDBPNTR?;" Queries NDBPNTR. NDBPNTR contains the rneasurenzent<br />
results of the N dB points measurement.<br />
ENTER 718;Six Stores the result in the variable Six.<br />
Description<br />
When the NdB points function is turned on, the spectrum analyzer finds the b<strong>and</strong>width, at<br />
the number of dB down specified by the NDB comm<strong>and</strong>, of the highest on-screen signal. The<br />
highest on-screen signal must be greater than the peak excursion above the current threshold,<br />
but the N dB points may fall below the threshold.<br />
Query Response<br />
5.380 Programming Comm<strong>and</strong>s<br />
dB f r o m<br />
/ peak \<br />
o u t p u t<br />
termination +<br />
XNDB
NDBPNT<br />
N dB Points<br />
Turns on or off the N dB points function.<br />
Syntax<br />
Equivalent Softkey: # d3 PTS ON OFF.<br />
Related Comm<strong>and</strong>s: MKBW, MKPX, NDB, NDBPNTR, TH.<br />
Example<br />
This example finds the shape factor of a signal.<br />
OUTPUT 718;"MOV NDBPNT,l;"<br />
OUTPUT 718;"NDB -6DB;"<br />
OUTPUT 718."NDBPNTR'*"<br />
, - ,<br />
ENTER 718;Six<br />
OUTPUT 718;"NDB -6ODB;"<br />
OUTPUT 718;"NDBPNTR?;"<br />
ENTER 718;Sixty<br />
IF Six 0 -100 AND Sixty -100 THEN<br />
NDBPNT N dB Points<br />
XNDBPNT<br />
Turns on the N dB points<br />
measurement.<br />
Sets the N dB points measurW<br />
to wmxsure 6 dB<br />
below the sign& !s peak.<br />
Queries NDBPNTR. NDBPNTR<br />
contains the wzmsurernent results<br />
of the N dBpoints mmsurement.<br />
Stores the result in the variable<br />
Six.<br />
Sets the N dB points rneasurernent<br />
to measure 60 dB<br />
below the signal’s peak.<br />
Queries NDBPNTR.<br />
Stores the result in the variable<br />
Sixty.<br />
If both the rneasurernmt at<br />
-6dB<strong>and</strong>-60dBweremlid,<br />
print the shape factor of the<br />
signal.<br />
PRINT "Shape factor is ",Sixty/Six Prints the shape factor of the<br />
signal.<br />
ELSE Cfthe b<strong>and</strong>width at -6 dB or<br />
-60 dB could not be found,<br />
an error statement isprinted.<br />
PRINT "Error, b<strong>and</strong>width could not be determined"<br />
END IF<br />
Programming Comm<strong>and</strong>s 5.381
OUTPUT 718;“MOV NDBPNT,O;” Turns off the N dB points<br />
memr-t.<br />
Description<br />
Setting NDBPNT to 1 turns on the N dB points measurement. Setting NDBPNT to 0 turns off<br />
the N dB points measurement. When the NdB points function is turned on, the spectrum<br />
analyzer finds the b<strong>and</strong>width, at the number of dB down specified by the NDB comm<strong>and</strong>, of<br />
the highest on-screen signal. The N dB points measurement is repeated at the end of every<br />
sweep (NDBPNT uses the ONEOS comm<strong>and</strong> to update the measurement data) until you turn off<br />
the N dB points measurement. To determine the b<strong>and</strong>width measured by NDBPNT, you must<br />
query NDBPNTR.<br />
To be able to measure a signal with NDBPNT, there must be an on-screen signal that is greater<br />
than the peak excursion (see “MKPX” for more information about the peak excursion) above<br />
the threshold, <strong>and</strong> there cannot be any other signals with amplitudes within N dB of the peak<br />
of the highest signal. If a signal cannot be found or there is more than one signal within the<br />
value of NDB of the highest signal, the value of NDBPNTR will be -100.<br />
You can execute the NDBPNT comm<strong>and</strong> two different ways. You can either execute the<br />
NDBPNT comm<strong>and</strong> directly (for example, “NDBPNT 1; ‘I) or use the MOV comm<strong>and</strong> to move<br />
the 1 or 0 into the NDBPNT comm<strong>and</strong> (for example, “MOV NDBPNT, 1; ‘I). If you use the MOV<br />
comm<strong>and</strong>, no text is displayed in the active function area during comm<strong>and</strong> execution.<br />
Restrictions<br />
Turning on the NDBPNT function turns off the following functions: windows display mode<br />
(WINON), the FFT menu measurements (FFTAUTO, FFTCONTS, FFTSNGLS), gate utility<br />
functions (GDRVUTIL), TO1 measurement (TOI), marker table (MKTBL), peak table (PKTBL),<br />
percent AM (PCTAM), peak zoom (PKZOOM), <strong>and</strong> power menu measurements (ACP, ACPE, C<strong>HP</strong>,<br />
<strong>and</strong> OBW).<br />
You should turn off the N dB points measurement (set NDBPNT to 0) when you are done with<br />
the N dB points measurement.<br />
Query Response<br />
5-382 Programming Comm<strong>and</strong>s<br />
r Off 7<br />
0<br />
1”<br />
f<br />
output<br />
’ t e r m i n a t i o n +<br />
QNDBPNl
NDBPNTR<br />
N dB Points B<strong>and</strong>width<br />
Returns the b<strong>and</strong>width measured by the N dB points measurement (NDBPT).<br />
Syntax<br />
NDBPNTR<br />
Related Comm<strong>and</strong>s: MKPX, NDB, NDBPNT, TH.<br />
Example<br />
NDBPNTR N dB Points B<strong>and</strong>width<br />
OUTPUT 718;"MOV NDBPNT,l;" Turns on the N dB points measurement.<br />
OUTPUT 718;"NDB -6DB;" Sets the N dB points measurement to mmsure 6 dB below<br />
the signal’s peak.<br />
OUTPUT 718;"NDBPNTR?;" Queries NDBPNTR. NDBPNTR contains the measurement<br />
results of the N dB points measurement.<br />
ENTER 718;Six Stores the result in the variable Six.<br />
Description<br />
NDBPNTR returns a -100 if the NDBPNT function has not been turned on, or if NDBPNT did<br />
not find a signal to measure. (For NDBPNT to be able to measure a signal, there must be an<br />
on-screen signal that is greater than the peak excursion above the threshold, <strong>and</strong> there cannot<br />
be any other signals with amplitudes that are within N dB of the peak of the highest signal.)<br />
Query Response<br />
bondwidth<br />
’<br />
output<br />
t e r m i n a t i o n +<br />
Programming Comm<strong>and</strong>s 5-383
NRL<br />
Normalized Reference Level<br />
Sets the normalized reference level.<br />
Syntax<br />
I t e m Description/Default I Range<br />
Number Any real or integer number. Default unit is dBm.<br />
Preset State: 0 dB.<br />
Related Comm<strong>and</strong>s: MEASURE, RL, RLPOS.<br />
Example<br />
10 OUTPUT 718*"IP*"<br />
20 OUTPUT 718;"SRCPWR -1ODB;"<br />
30 PRINT "CONNECT TRACKING GENERATOR OUTPUT TO INPUT"<br />
40 PRINT "THEN PRESS CONTINUE"<br />
50 PAUSE<br />
60 OUTPUT 718;"MEASURE SR;"<br />
70 OUTPUT 718;"CLRW TRB;TS;"<br />
80 OUTPUT 718;"BLANK TRB;"<br />
so PRINT "CONNECT DEVICE TO ANALYZER"<br />
100 PRINT "THEN PRESS CONTINUE"<br />
110 PAUSE<br />
120 OUTPUT 718;"CLRW TRA;TS;"<br />
130 OUTPUT 718;"AMBPL ON;"<br />
140 OUTPUT 718;"RLPOS 4;"<br />
150 OUTPUT 718;"NRL 40DB;"<br />
160 END<br />
5-384 Programming Comm<strong>and</strong>s<br />
Initializes spectrum anal2/2er<br />
Sets tracking generator output.<br />
Sets the measurement mode<br />
to stimulus-response.<br />
lbkes a measurement sweep<br />
of thejlatness of the system.<br />
Zxkes a mxxzsurement sweep<br />
of the device under test in<br />
the system.<br />
Normalizes the response.<br />
Changes the location of the<br />
reference level to thefourth<br />
graticule from the bottom.<br />
Oflsets trace A so it is onscreen.
Description<br />
NRL Normalized Reference Level<br />
This function is a trace-offset function that enables you to offset the displayed trace without<br />
introducing hardware-switching errors into the stimulus-response measurement. The input<br />
attenuator <strong>and</strong> IF step gains are not affected when using NRL.<br />
In absolute power mode (dBm), reference level affects the gain <strong>and</strong> RF attenuation settings of<br />
the instrument, which affects the measurement or dynamic range. In normalized mode (relative<br />
power or dB-measurement mode), NRL offsets the trace data on-screen <strong>and</strong> does not affect the<br />
instrument gain or attenuation settings. This allows the displayed normalized trace to be moved<br />
without decreasing the measurement accuracy due to changes in gain or RF attenuation. If the<br />
measurement range must be changed to bring trace data on-screen, then the range level should<br />
be adjusted. Adjusting the range-level normalized mode has the same effect on the instrument<br />
settings as does reference level in absolute power mode (normalize off).<br />
Query Response<br />
Programming Comm<strong>and</strong>s 5-385
OA<br />
Output Active Function Value<br />
Sends the value of the active function to the controller.<br />
Syntax<br />
Example<br />
10 OUTPUT 718;"ST 3SC;OA;" Changes the sweep time, activates the OA comm<strong>and</strong>.<br />
20 ENTER 718;Number Gets the response from the spectrum analyzer<br />
30 DISP Number LIispkqys “3” on the computer screen.<br />
40 END<br />
Query Response<br />
5-388 Programming Comm<strong>and</strong>s
OBW<br />
Occupied B<strong>and</strong>width<br />
OBW Occupied B<strong>and</strong>width<br />
Performs the occupied b<strong>and</strong>width measurement using the value for occupied b<strong>and</strong>width<br />
percent (OBWPCT). For example, if OBWPCT is set to 99 percent, OBW determines the 99<br />
percent power b<strong>and</strong>width.<br />
Syntax<br />
Equivalent Softkey: OCCUPIED BANDWDTH .<br />
Related Comm<strong>and</strong>s: ACPPAR, ACPSNGLM, ACPCONTM, ACPSP, OBWPCT.<br />
Example<br />
OUTPUT 718*"OBW*"<br />
9 ><br />
Description<br />
OBW<br />
OBW measures the power b<strong>and</strong>width of the measured spectrum based on the value of occupied<br />
b<strong>and</strong>width percent (OBWPCT). OBW also measures transmit frequency error (the difference<br />
between the center frequency <strong>and</strong> the midpoint of the percent occupied b<strong>and</strong>width), <strong>and</strong> the<br />
total power of the occupied b<strong>and</strong>width. OBW performs the measurement using the value for<br />
channel spacing (ACPSP).<br />
To use OBW:<br />
1. Set the center frequency to the carrier’s frequency.<br />
2. For best accuracy, set the reference level so that the carrier signal peak is within the first<br />
(top) division of the screen graticule.<br />
3. Select the channel spacing with the ACPSP comm<strong>and</strong>.<br />
4. If you want the spectrum analyzer settings to be set automatically, ensure that ACPPAR is<br />
set to 1. If you want to set the spectrum analyzer settings manually, set ACPPAR to 0. See<br />
“ACPPAR” for more information about selecting the spectrum analyzer settings manually.<br />
5. If the spectrum analyzer is in the continuous-sweep mode, use the single sweep comm<strong>and</strong><br />
(SNGLS) to select the single-sweep mode.<br />
6. Execute the OBW comm<strong>and</strong>.<br />
7. Query OBWBW, OBWLOWER, OBWUPPER, OBWFERR, <strong>and</strong> OBWPWR variables for the<br />
numeric results of the OBW measurement. See the following table for more information<br />
about these variables.<br />
8. Query trace A (TRA) for the trace results of the OBW measurement.<br />
Measurement Results: The results of the OBW comm<strong>and</strong> are stored in the variables <strong>and</strong> trace<br />
in the following table.<br />
Programming Comm<strong>and</strong>s 5-387
OBW Occupied B<strong>and</strong>width<br />
Variable<br />
or Trace<br />
OBWBW<br />
OBWLOWER<br />
OBWUPPER<br />
OBWFERR<br />
OBWPWR<br />
TRA<br />
OBW Measurement Results<br />
Description units<br />
A variable that contains the b<strong>and</strong>width measured by OBW. HZ<br />
A variable that contains the relative lower frequency limit of the occupied Hz<br />
b<strong>and</strong>width. The lower frequency limit is relative to the center frequency of<br />
the spectrum analyzer. The lower frequency limit is equal to the frequency<br />
of the lower occupied b<strong>and</strong>width edge minus the center frequency of the<br />
spectrum analyzer.<br />
A variable that contains the relative upper frequency limit of the occupied Hz<br />
b<strong>and</strong>width. The upper frequency limit is relative to the center frequency of<br />
the spectrum analyzer. The upper frequency limit is equal to the frequency<br />
of the upper occupied b<strong>and</strong>width edge minus the center frequency of the<br />
spectrum analyzer.<br />
A variable that contains the occupied b<strong>and</strong>width transmit frequency error. Hz<br />
This error is equal to the following:<br />
F~equencyerror =<br />
(OBWUPPER + OBWLOWER)<br />
2<br />
A variable that contains the total power in the occupied b<strong>and</strong>width. The Determined by<br />
total power of the occupied b<strong>and</strong>width is a summation of the power over AUNITS comm<strong>and</strong>.<br />
the measured occupied b<strong>and</strong>width. Default unit is dBm.<br />
TRA is trace A. Trace A contains the swept RF spectrum that was used to Determined by the<br />
measure occupied b<strong>and</strong>width. trace data format<br />
(TDF) comm<strong>and</strong>.<br />
Restrictions<br />
Executing OBW turns off the following functions: windows display mode (WINON), N dB point<br />
measurement (NDBPNT), the FFI’ menu measurements (FFIAUTO, FFTCONTS, FFTSNGLS),<br />
gate utility functions (GDRVUTIL), TO1 measurement (TOI), marker table (MKTBL), peak table<br />
(PKTBL), percent AM (PCTAM), <strong>and</strong> peak zoom (PKZOOM).<br />
5-388 Programming Comm<strong>and</strong>s
OBWPCT<br />
Occupied B<strong>and</strong>width Percent<br />
OBWPCT Occupied B<strong>and</strong>width Percent<br />
Specifies the percent of total power that is to be used in calculating the occupied b<strong>and</strong>width<br />
(OBW).<br />
Syntax<br />
% p e r c e n t<br />
/ \<br />
f+<br />
Item Description/Default R-k3<br />
Number Any real or integer number. 1% to 99.99%.<br />
Equivalent Softkey: OCC l3W % POWER.<br />
Initial Value: 99.<br />
Preset State: Last value entered.<br />
Related Comm<strong>and</strong>s: OBW.<br />
Example<br />
OUTPUT 718;“MOV OBWPCT,SO;” Sets the occupied b<strong>and</strong>width percent to 50%.<br />
OUTPUT 718; “OBW; ” I+yforms the occupied b<strong>and</strong>width wteasurement.<br />
Description<br />
Once you enter a value into OBWPCT, that value is retained until you change it, or execute<br />
DISPOSE ALL. Pressing (j-1 or turning the spectrum analyzer off does not change the<br />
value of OBWPCT.<br />
You can execute the OBWPCT comm<strong>and</strong> two different ways. You can either execute the<br />
OBWPCT comm<strong>and</strong> directly (for example, “OBWPCT 50 ; I’) or use the MOV comm<strong>and</strong> to move<br />
the value into the OBWPCT comm<strong>and</strong> (for example, “MOV OBWPCT ,50 ; ‘I). If you use the MOV<br />
comm<strong>and</strong>, no text is displayed in the active function area during comm<strong>and</strong> execution.<br />
Query Response<br />
/ p e r c e n t ,<br />
output<br />
terminot ion --*<br />
Programming Comm<strong>and</strong>s 5.388
OL<br />
Output Learn String<br />
Transmits information to the controller that describes the state of the spectrum analyzer when<br />
the OL comm<strong>and</strong> is executed.<br />
Syntax<br />
Related Comm<strong>and</strong>s: RCLS, SAVES.<br />
Example<br />
10 DIM Learn-String$ [202] Allocates rn-ewmy space for the Learnd3Ping.<br />
20 OUTPUT 718 ; “OL ; ” Asks for first state.<br />
30 ENTER 718 USING ‘I# ,202A”; LEARN-STRINGS Computer receives the irlformation.<br />
40 DISP “CHANGE ANALYZER TO ANOTHER STATE,<br />
THEN CONTINUE TO RESTORE FIRST STATE;”<br />
50 PAUSE<br />
60 OUTPUT 718; LEARN-STRING$<br />
70 END<br />
Description<br />
Returns the spectrum analyzer to its former<br />
state (when OL was first activated<br />
in line 20).<br />
The information received from the spectrum analyzer is called the learn string. The learn string<br />
can be sent from the controller back to the spectrum analyzer to restore the spectrum analyzer<br />
to its original state.<br />
The learn string requires 202 bytes of storage space. See “Saving <strong>and</strong> Recalling Instrument<br />
States, n in Chapter 3 for more information.<br />
To restore the spectrum analyzer to the learn string state, you must return the learn string to<br />
the spectrum analyzer. The learn string contains information to tell the spectrum analyzer that<br />
it is learn string data. (Also see “RCLS” <strong>and</strong> “SAVES.“)<br />
5-380 Programming Comm<strong>and</strong>s
ONCYCLE<br />
On Cycle<br />
Executes the list of analyzer comm<strong>and</strong>s periodically.<br />
Syntax<br />
Number<br />
Item<br />
User-defined variable<br />
Delimiter<br />
Analyzer comm<strong>and</strong><br />
f<br />
user-defined variable<br />
corrm<strong>and</strong>s t o<br />
/ be executed \<br />
ONCYCLE On Cycle<br />
Description/Default Range<br />
A valid number. 0 to 2,147,483<br />
seconds.<br />
XONCYCLE<br />
A variable defined by VARDEF or ACTDEF comm<strong>and</strong>s. Any valid variable<br />
name.<br />
Matching characters marking the beginning <strong>and</strong> end of the list of - ) \ @ = / ^ $ % ; ! ’ :<br />
spectrum analyzer comm<strong>and</strong>s. ” &<br />
Any spectrum analyzer comm<strong>and</strong>.<br />
Related Comm<strong>and</strong>s: CAT, DISPOSE, ERASE, IP, ONDELAY, ONEOS, ONMKR, ONSRQ,<br />
ONSWP, ONTIME.<br />
Example<br />
OUTPUT 718;"ONCYCLE 86400,!MKPK HI;!;" Places a marker on the highest signal peak<br />
everg 24 hours (86,400 equals 24 hours x 60<br />
minutes x 60 seconds).<br />
Programming Comm<strong>and</strong>s 5-391
ONCYCLE On Cycle<br />
Description<br />
The ONCYCLE comm<strong>and</strong> performs the list of spectrum analyzer comm<strong>and</strong>s<br />
periodically. In contrast, the ONDELAY comm<strong>and</strong> performs the list of spectrum analyzer<br />
comm<strong>and</strong>s once after the elapsed time interval. After the ONCYCLE function has been created,<br />
the first execution of the spectrum analyzer comm<strong>and</strong>s does not occur until the time value has<br />
elapsed.<br />
Limit the number of characters (between the delimiters) in the list of spectrum analyzer<br />
comm<strong>and</strong>s to a maximum of 2047 characters.<br />
Clearing the ONCYCLJZ definition: IP clears the ONCYCLE definition. You can use the<br />
DISPOSE comm<strong>and</strong> to clear the ONCYCLE definition also.<br />
Query Response<br />
t ime<br />
5.392 Programming Comm<strong>and</strong>s<br />
#A<br />
analyzer comm<strong>and</strong><br />
msb length<br />
output<br />
terminot ion �<br />
OONCYCLE
ONDELAY<br />
On Delay<br />
Executes the list of analyzer comm<strong>and</strong>s after the time value has elapsed.<br />
Syntax<br />
Number<br />
Item<br />
User-defined variable<br />
Delimiter<br />
Analyzer comm<strong>and</strong><br />
/<br />
time<br />
user-defined variable<br />
comnonds t o<br />
/ be executed \<br />
del imi ter<br />
ONDELAY On Delay<br />
Description/Default Range<br />
XONDELAY<br />
A valid number. 0 to 2,147,483 seconds<br />
A variable defined by VARDEF or ACTDEF comm<strong>and</strong>s. Any valid variable<br />
name.<br />
Matching characters marking the beginning <strong>and</strong> end of the list of - 1 \ @ = / ^ $ % ; ! ’ :<br />
spectrum analyzer comm<strong>and</strong>s. ” &<br />
Any spectrum analyzer comm<strong>and</strong>.<br />
Related Comm<strong>and</strong>s: CAT, DISPOSE, ERASE, IP, ONCYCLE, ONEOS, ONMKR, ONSRQ,<br />
ONSWP, ONTIME.<br />
Example<br />
OUTPUT 718;"ONDELAY 000030,!CF 1.2GHZ;!;" Changes the center frequency after 30<br />
seconds.<br />
Programming Comm<strong>and</strong>s 5-393
ONDELAY On Delay<br />
Description<br />
The ONDELAY comm<strong>and</strong> performs the list of spectrum analyzer comm<strong>and</strong>s once after<br />
the elapsed time interval; the ONCYCLE comm<strong>and</strong> performs the list of spectrum analyzer<br />
comm<strong>and</strong>s periodically.<br />
Limit the number of characters (between the delimiters) in the list of spectrum analyzer<br />
comm<strong>and</strong>s to a maximum of 2047 characters.<br />
Clearing the ONDEIAY definition: IP clears the ONDELAY definition. You can use the<br />
DISPOSE comm<strong>and</strong> to clear the ONDELAY definition also.<br />
Query Response<br />
t i m e l e f t<br />
u n t i l e v e n t<br />
/ \<br />
5-394 Programming Comm<strong>and</strong>s<br />
# A m s b l e n g t h I s b l e n g t h<br />
QONDELAY
ONEOS<br />
On End of Sweep<br />
Executes the contents of the data field after the end of the sweep.<br />
Syntax<br />
Delimiter<br />
Item<br />
Analyzer comm<strong>and</strong><br />
Msb length<br />
Lsb length<br />
Character & EOI<br />
I<br />
r s t r i n g d a t a f i e l d 7<br />
A-block data field<br />
l-block data field<br />
analyzer comnond character 6% EOI<br />
ONEOS On End of Sweep<br />
Description/Default Range<br />
Matching characters marking the beginning <strong>and</strong> end of the list of - 1 \ @ = I ^ $ % ; ! ’ :<br />
spectrum analyzer comm<strong>and</strong>s. ” &<br />
Any spectrum analyzer comm<strong>and</strong> except TS.<br />
Most signif?cant byte of a two-byte word that describes the<br />
number of bytes transmitted.<br />
Least significant byte of a two-byte word that describes the<br />
number of bytes transmitted.<br />
Any valid character <strong>and</strong> END.<br />
Related Comm<strong>and</strong>s: CAT, DISPOSE, ERASE, IP, ONSWI?<br />
Example<br />
OUTPUT 718;"ONEOS!CF IOOMHZ;!" Center frequemg is changed at the end of the sweep.<br />
Programming Comm<strong>and</strong>s 5-395
ONEOS On End of Sweep<br />
Description<br />
Restrictions: The list of analyzer comm<strong>and</strong>s should not include a take sweep (TS). Limit the<br />
number of characters (between the delimiters) in the list of spectrum analyzer comm<strong>and</strong>s to a<br />
maximum of 2047 characters.<br />
The #A, msb length, LSB length, <strong>and</strong> character data form a A-block data field. The A-block<br />
data field is used when the length of the character data is known. The #I, character data, <strong>and</strong><br />
EOI (END) form <strong>and</strong> I-block data field. The I-block data field is used when the length of the<br />
character data is unknown. The I-block data field is available for <strong>HP</strong>-IB interface only.<br />
Clearing the ONEOS definition: IP clears the ONEOS definition. You can use the DISPOSE<br />
comm<strong>and</strong> to clear the ONEOS definition also.<br />
Query Response<br />
< #A msb length analyzer cotwn<strong>and</strong><br />
5-396 Programming Comm<strong>and</strong>s<br />
kt<br />
output<br />
termination
ONMKR<br />
On Marker<br />
ONMKR On Marker<br />
Performs the list of spectrum analyzer comm<strong>and</strong>s when the sweep reaches the marker position.<br />
Syntax<br />
Delimiter<br />
Item<br />
Analyzer comm<strong>and</strong><br />
conm<strong>and</strong>s t o<br />
/ be executed \<br />
analyzer comn<strong>and</strong><br />
Description/Default Rui!e<br />
Matching characters marking the beginning <strong>and</strong> end of the list of - ( \ @ - / ^ $ % ; ! ’ :<br />
spectrum analyzer comm<strong>and</strong>s. ” &<br />
Any spectrum analyzer comm<strong>and</strong>.<br />
Related Comm<strong>and</strong>s: CAT, DISPOSE, ERASE, IP, ONCYCLE, ONDELAY, ONEOS, ONSRQ,<br />
ONSWP, ONTIME.<br />
Restrictions: Not available with Analog+ display mode. See “ANLGPLUS” for more<br />
information.<br />
Example<br />
OUTPUT 718;"ONMKR !PU,PA 100,lOO;TEXTQCONNECT CAL The text is displayed on the<br />
OUT TO INPUTQ;!;" spectrum analyzer screen when<br />
the sweep reaches the marker<br />
position.<br />
Description<br />
The ONMKR comm<strong>and</strong> performs the list of spectrum analyzer comm<strong>and</strong>s when the sweep<br />
reaches the marker. The sweep resumes after the list of spectrum analyzer comm<strong>and</strong>s is<br />
executed, provided the list of spectrum analyzer comm<strong>and</strong>s does not halt execution.<br />
Limit the number of characters (between the delimiters) in the list of spectrum analyzer<br />
comm<strong>and</strong>s to a maximum of 2047 characters.<br />
Clearing the ONMKR definition: IP clears the ONMKR definition. You can use the DISPOSE<br />
comm<strong>and</strong> to clear the ONMKR definition also.<br />
Programming Comm<strong>and</strong>s 5-397
ONMKR On Marker<br />
Query Response<br />
-+( #A msb length analyzer comn<strong>and</strong><br />
5-366 Programming Comm<strong>and</strong>s<br />
43<br />
output<br />
termination
ONMKRU<br />
On Marker Update<br />
ONMKRU On Marker Update<br />
Executes the Iistofspectrum analyzer comm<strong>and</strong>s whenever the value or the units of the active<br />
marker are changed.<br />
Syntax<br />
corrm<strong>and</strong>s t o<br />
- be executed -<br />
de I imt ter analyzer comnond del imi ter<br />
Related Comm<strong>and</strong>s: DISPOSE,IP.<br />
Example<br />
The following example uses ONMKRU to display the marker's amplitude in watts.<br />
150 ASSIGN QSa TO 718<br />
160 !<br />
170 OUTPUT OSa;"VARDEF T,EMP,O;";<br />
180 !<br />
190 OUTPUT QSa;"ONMKRU$";<br />
200 OUTPUT OSa;"EXP T-EMP,MA,lO;"<br />
210 OUTPUT @Sa;"MPY T-EMP,T-EMP,lOOO;t';<br />
220 OUTPUT OSa;"MOV DA,O;";<br />
230<br />
240<br />
250<br />
260<br />
270<br />
280<br />
290<br />
OUTPUT QSa;"PUPAlO,lOI;";<br />
OUTPUT OSa;"TEXT-Power:-;";<br />
OUTPUT OSa;"DSPLY T-EMP,9.4;";<br />
OUTPUT OSa;"TEXT- uW^;";<br />
OUTPUT @Sa;"$;";<br />
I<br />
Assigns the IO path to spectrum anulyxer:<br />
Lk$ines a variable called T-EM2<br />
Starts the ONMKRU o!x$nition.<br />
Changes the marker’s amplitude value<br />
to milliwatts <strong>and</strong> places it in T-Em<br />
Changes the value of T-EMP to pwatts.<br />
Changes the display address to 0 to<br />
reset the display list.<br />
B.&ions the pen.<br />
Displays a label for the results.<br />
Displays the results.<br />
Displays the units.<br />
Ends the ONWRU d@nition.<br />
OUTPUT OSa;"CF300MZ;" Sets the center frequency to the calibration<br />
signal.<br />
300 OUTPUT OSa;"SPlMZ;" Changes the span to 1 MHz.<br />
310 OUTPUT QSa;"RL -2ODM;" Sets the reference level.<br />
320 OUTPUT QSa;"RB30KZ;" Sets the resolution b<strong>and</strong>width.<br />
Programming Comm<strong>and</strong>s 5-399
ONMKRU On Marker Update<br />
330 OUTPUT QSa; "SNGLS;TS;"<br />
340 OUTPUT QSa;"MKN;"<br />
350 !<br />
360 END<br />
Description<br />
Takes a sweep.<br />
Activates a mm1 wmrkm<br />
ONMKRU executes the specified user-defined function whenever the value or units of a marker<br />
are changed, While ONMKR executes the function when the marker is encountered, ONMKRU<br />
executes the function at the end of the sweep (when the marker data is updated), when the<br />
marker is moved, or if the units are changed with AUNITS. Executing any of the marker<br />
comm<strong>and</strong>s (for example, MKA, MKF, or MKNOISE) also executes the function.<br />
Restrictions: The user-defined function should not include a take sweep (TS).<br />
Clearing the ONMKRU definition: IP clears the ONMKRU definition. You can use the<br />
DISPOSE comm<strong>and</strong> to clear the ONMKRU definition also.<br />
Query Response<br />
< #A<br />
5-400 Programming Comm<strong>and</strong>s
ONPWRUP<br />
On Power Up<br />
Executes the list of spectrum analyzer comm<strong>and</strong>s once on power up.<br />
Syntax<br />
comm<strong>and</strong>s to<br />
/ b e e x e c u t e d \<br />
/<br />
ONPWRUP On Power Up<br />
Related Comm<strong>and</strong>s: CAT, DISPOSE, ERASE, ONDELAY, ONEOS, ONMKR, ONSWP, ONTIME<br />
Example<br />
10 OUTPUT 718;"0NPWRUP! SPlOMZ; CF300MZ;!;" Sets the spectrum analyzer span to<br />
10 MH.. <strong>and</strong> the center frequency to<br />
3OOMHizuponinstrumentpowwup.<br />
Description<br />
Limit the number of characters (between the delimiters) in the list of spectrum analyzer<br />
comm<strong>and</strong>s to a maximum of 2047 characters.<br />
Clearing the ONPWRUP definition: DISPOSE.<br />
Note If an infinite loop is inadvertently programmed in an ONPWRUP, press [PRESET)<br />
to terminate the ONPWRUP, then DISPOSE the ONPWRUP. Powering the<br />
spectrum analyzer on <strong>and</strong> off will not terminate the ONPWRUP.<br />
Programming Comm<strong>and</strong>s 5-401
ONSRQ<br />
On Service Request<br />
Executes the list of analyzer comm<strong>and</strong>s whenever a service request occurs.<br />
Syntax<br />
Delimiter<br />
Item<br />
Analyzer comm<strong>and</strong><br />
comm<strong>and</strong>s to<br />
- be executed 7<br />
delimiter delimiter<br />
Description/Default Rmife<br />
XONSRO<br />
Matching characters marking the beginning <strong>and</strong> end of the list of - 1 \ @ = / ^ $ % ; ! ’ :<br />
spectrum analyzer comm<strong>and</strong>s. ” &<br />
Any spectrum analyzer comm<strong>and</strong>.<br />
Related Comm<strong>and</strong>s: CAT, DISPOSE, ERASE, IP, ONDELAY, ONEOS, ONMKR, ONSWP,<br />
ONTIME, SRQ.<br />
Example<br />
OUTPUT 718;"ONSRQ !PU;PA 100,lOO;TEXT QSRQ OCCURRED@; !;” “SRQOCCURRED”isdisplayed<br />
on the spectrum<br />
analyzer screen if an SRQ<br />
is encountered.<br />
Description<br />
Limit the number of characters (between the delimiters) in the list of spectrum analyzer<br />
comm<strong>and</strong>s to a maximum of 2047 characters.<br />
Clearing the ONSRQ definition: IP clears the ONSRQ definition. You can use the DISPOSE<br />
comm<strong>and</strong> to clear the ONSRQ definition also.<br />
5-402 Programming Comm<strong>and</strong>s
Query Response<br />
< #A<br />
ONSRQ On Service Request<br />
analyzer comn<strong>and</strong><br />
OONSRO<br />
Programming Comm<strong>and</strong>s 5403
ONSWP<br />
On Sweep<br />
Executes the list of spectrum analyzer comm<strong>and</strong>s at the beginning of the sweep.<br />
Syntax<br />
/<br />
Delimiter<br />
Item<br />
Analyzer comm<strong>and</strong><br />
Msb length<br />
Lsb length<br />
Character & EOI<br />
r<br />
r s t r i n g d a t a f i e l d 7<br />
A-block data field<br />
l-block data field<br />
/<br />
analyzer corm<strong>and</strong><br />
character & EOI<br />
Description/Default Range<br />
Matching characters marking the beginning <strong>and</strong> end of the list of - 1 \ @ = / ^ $ % ; ! ’ :<br />
spectrum analyzer comm<strong>and</strong>s. ” &<br />
Any spectrum analyzer comm<strong>and</strong> except TS.<br />
Most signillcant byte of a two-byte word that describes the<br />
number of bytes transmitted.<br />
Least significant byte of a two-byte word that describes the<br />
number of bytes transmitted.<br />
Any valid character <strong>and</strong> END.<br />
Related Comm<strong>and</strong>s: CAT, DISPOSE, ERASE, IP, ONDELAY, ONEOS, ONMKR, ONSRQ,<br />
ONSWP.<br />
Example<br />
OUTPUT 718;"0NSWP!CF IOOMHZ;!" The center frequency is changed to 100 iW%z at the<br />
beginning of the sweep.<br />
5-404 Programming Comm<strong>and</strong>s<br />
/
Description<br />
ONSWP On Sweep<br />
The list of analyzer comm<strong>and</strong>s should not include a take sweep (TS). Limit the number of<br />
characters (between the delimiters) in the list of spectrum analyzer comm<strong>and</strong>s to a maximum<br />
of 2047 characters.<br />
The #A, msb length, lsb length, <strong>and</strong> character data form an A-block data field. The A-block<br />
data field is used when the length of the character data is known. To use the A-block data<br />
format, #A must precede the msb length <strong>and</strong> lsb length. The msb length <strong>and</strong> lsb length<br />
represent the length of the character data. The #I, character data, <strong>and</strong> EOI (END) form an<br />
I-block data field. The I-block data field is used when the length of the character data is<br />
unknown. The I-block data field is available for the <strong>HP</strong>-IB interface only.<br />
Clearing the ONSWP definition: IP clears the ONSWP definition. You can use the DISPOSE<br />
comm<strong>and</strong> to clear the ONSWP definition also.<br />
Query Response<br />
+( #A msb length Isb l e n g t h analyzer comn<strong>and</strong><br />
QONSWP<br />
Programming Comm<strong>and</strong>s 5-405
Description<br />
ONTIME On Time<br />
Limit the number of characters (between the delimiters) in the list of spectrum analyzer<br />
comm<strong>and</strong>s to a maximum of 2047 characters.<br />
Clearing the ONTIME definition: IP clears the ONTIME definition. You can use the DISPOSE<br />
comm<strong>and</strong> to clear the ONTIME definition also.<br />
Query Response<br />
/- yeor -1 , - m o n t h -, - day \<br />
digit digit digit digit<br />
,- hours ‘-\ /- minutes .-\ ,- seconds ‘-\<br />
digit digit digit digit<br />
#A<br />
msb length<br />
OONT I ME<br />
Programming Comm<strong>and</strong>s 5-407
OP<br />
Output Parameter<br />
Returns parameter values Pl <strong>and</strong> P2, which represent the x <strong>and</strong> y coordinates of the lower-left<br />
<strong>and</strong> upper-right spectrum analyzer display.<br />
Syntax<br />
Example<br />
C<br />
OP<br />
10 DIM A$[201 Allocates memory space for result.<br />
30 OUTPUT 718 * , “OP’ * 9* ” Gets the lower-kfl <strong>and</strong> the upper-right coordinates of the spectrum<br />
analyzer display.<br />
40 ENTER 718;A$ Moves result to the computex<br />
50 DISP A$<br />
60 END<br />
Dkplays the result.<br />
Description<br />
The values returned represent x <strong>and</strong> y screen coordinates of the spectrum analyzer display.<br />
The screen coordinates designate the total on-screen area. The values returned are the<br />
minimum x coordinate, the minimum y coordinate, the maximum x coordinate, <strong>and</strong> the<br />
maximum y coordinate.<br />
Query Response<br />
5408 Programming Comm<strong>and</strong>s<br />
output<br />
termination +<br />
‘2OP
OUTPUT<br />
Output to Remote Port or Parallel Port<br />
OUTPUT Output to Remote Port or Parallel Port<br />
Allows the spectrum analyzer to send data to other devices via remote or parallel ports.<br />
Syntax<br />
OUTPUT<br />
Number<br />
Number<br />
Item<br />
f<br />
Predefined function<br />
Predefined variable<br />
User-defined variable<br />
Trace element<br />
Msb length<br />
Lsb length<br />
Data byte<br />
Data byte & EOI<br />
,-address.-,<br />
predefined variable N’<br />
user-defined variable I<br />
trace element<br />
/ output doto \<br />
- predefined variable<br />
user-defined variable<br />
trace element<br />
delimiter<br />
data byte & EOI<br />
del imi ter<br />
/<br />
I<br />
-<br />
Description/Default Rw3e<br />
xoutput<br />
An integer number. 0 to 30 (remote port).<br />
An integer number. 40 (parallel port).<br />
Function that returns a value. Refer to lbble 5-l.<br />
A comm<strong>and</strong> that acts as a variable. Refer to Table 5-l.<br />
A variable defined by VARDEF or ACTDEF comm<strong>and</strong>s. Any valid variable<br />
name.<br />
An element of trace A, trace B, trace C, or a user-defined trace.<br />
Most signifkant byte of a two-byte word that describes the<br />
number of bytes transmitted.<br />
Least significant byte of a two-byte word that describes the<br />
number of bytes transmitted.<br />
S-bit byte containing numeric or character data.<br />
&bit byte containing numeric or character data followed by END.<br />
Programming Comm<strong>and</strong>s 5.408<br />
/
OUTPUT Output to Remote Port or Parallel Port<br />
Prerequisite Comm<strong>and</strong>s: ACTDEF or VARDEF when using a user-defined variable.<br />
Related Comm<strong>and</strong>s: ENTER, REL<strong>HP</strong>IB.<br />
Example<br />
This example assumes that the plotter is at address 5 <strong>and</strong> the spectrum analyzer is at address<br />
18. (The program is only valid for <strong>HP</strong> 9000 <strong>Series</strong> 200 <strong>and</strong> 300 computers.)<br />
The following example uses the spectrum analyzer to send the ASCII code for OP; (output<br />
parameter) to the plotter. The ENTER comm<strong>and</strong> is then used to receive the coordinates from<br />
the plotter. Program lines 110 to 140 display the coordinates on the spectrum analyzer screen.<br />
Softkey 1 is programmed to display the plotter coordinates. Softkey 1 can be accessed by<br />
pressing (j-1, IJser Menus .<br />
Note Disconnect the computer before pressing softkey 1 or execute ABORT 7,<br />
LOCAL 7 from the computer. The execute the P-OP function, the spectrum<br />
analyzer must be the only controller on the <strong>HP</strong>-IB.<br />
10 OUTPUT 718;"VAFlDEF P,ONEX,l,VARDEF P,ONEY,l;" Dechres the variables used to<br />
hold the plotter coordinates.<br />
20 OUTPUT 718;"VARDEF P-TWOX,l;VARDEF P,TWOY,l;” Declares the variables used to<br />
hold the plotter coordinates.<br />
30 OUTPUT 718;"FUNCDEF P,OP,@"; &f&es a function called P-OF<br />
40 OUTPUT 718;"OUTPUT 5,B,79;"; Seno!s ASCII code for “0”.<br />
50 OUTPUT 718;"OUTPUT 5,B,80;"; Sends ASCII code for “P”.<br />
60 OUTPUT 718;"OUTPUT 5,B,59;"; Sends ASCII code for ‘; “.<br />
70 OUTPUT 718;"ENTER S,K,P,ONEX;"; Gets plotter coordinates from<br />
plotter:<br />
80 OUTPUT 718;"ENTER S,K,P,ONEY;"; Gets Ycoordinutefromplotttx<br />
90 OUTPUT 718;“ENTJZR 5,K,P,TWOX;“; Gets Xcoordiruztefrom plotter:<br />
100 OUTPUT 718;"ENTER 5,K,P_TWOY;"; Gets Y coordinatefrom plot&x<br />
110 OUTPUT 718;"PU;PA 200,190;DSPLY P-ONEX,l0.2;"; Displa?~s coordinate on spectrum<br />
analyzer screen.<br />
120 OUTPUT 718;"PU;PA 200,180;DSPLY P-ONEY,l0.2;"; LKsplays coordinate on spectrum<br />
an4zly.243 screen.<br />
130 OUTPUT 718;"PU;PA 200,170;DSPLY P,TWOX,l0.2;"; Displays coordinate on spectrum<br />
an4zl~z47r screen.<br />
140 OUTPUT 718;"PU;PA 200,160;DSPLY P-TWOY ,10.2;“; Displu$~s coordinate on spec-<br />
150 OUTPUT 718;"REL<strong>HP</strong>IB;";<br />
160 OUTPUT 718;"(8;"<br />
170 OUTPUT 718;"KEYDEF l,P,OP,!DSP OP;!;"<br />
180 END<br />
5.410 Programming Comm<strong>and</strong>s<br />
trum anul~zer screen.<br />
Releases spectrum analyzer control<br />
of the <strong>HP</strong>-II3<br />
Marks the end of the function,<br />
P-OI?<br />
Assigns the P-OP fanction to<br />
soj%key 1.
Description<br />
OUTPUT Output to Remote Port or Parallel Port<br />
Use OUTPUT to send data or instructions to an <strong>HP</strong>-IB device using the following output<br />
formats.<br />
K Outputs in free-field ASCII format with no terminator.<br />
B Outputs in a free-field format with no terminator, but in a single &bit bytes.<br />
KC Outputs in free-field ASCII with a carriage return <strong>and</strong> line feed terminator.<br />
KL Outputs in free-field ASCII with a line feed <strong>and</strong> an EOI terminator.<br />
F Outputs an ASCII number with the field width <strong>and</strong> decimal places specified. For<br />
example, a number displayed as 13.3 has a field width of 13 <strong>and</strong> a decimal place<br />
of three. If a “C” follows the ASCII number, a carriage return <strong>and</strong> line feed will<br />
terminate the output.<br />
Because <strong>HP</strong>-IB allows only one controller on the <strong>HP</strong>-IB, OUTPUT must be synchronized with a<br />
controller operation or else incorporated into user-defined functions that are executed with<br />
softkeys when the spectrum analyzer is under manual control. If another controller is detected<br />
on the <strong>HP</strong>-IB, the OUTPUT function is aborted.<br />
Execute REL<strong>HP</strong>IB (RELEASE <strong>HP</strong>-IB) to discontinue spectrum analyzer control of <strong>HP</strong>-IB.<br />
Programming Comm<strong>and</strong>s 5411
PA<br />
Plot Absolute<br />
Moves the pen to a vector location on the spectrum analyzer screen relative to the reference<br />
coordinates (0,O) in display units.<br />
Syntax<br />
x Y<br />
coordinate coordinate<br />
/ \ / \<br />
number<br />
Item Description/Default R=vze<br />
Number Any valid integer. Within screen or<br />
graticule coordinates.<br />
Related Comm<strong>and</strong>s: CLRDSP, DSPLY, TEXT, PD, PLOT, PR, PRINT, PU.<br />
Example<br />
OUTPUT 718;"IP;BLANK TRA;" Initializes the spectrum analyzer <strong>and</strong> blanks<br />
trace A.<br />
OUTPUT 718;"ANNOT 0FF;GRAT OFF;" Clears the spectrum analyzer screen.<br />
OUTPUT 718;"PU;" Fen up.<br />
OUTPUT 718;"PA 100,100;PD 100,150;" PU <strong>and</strong> PA comm<strong>and</strong>s prevent an initial<br />
vector from being drawn before the pen is<br />
positioned at (100, 100). PD draws a vector<br />
to (loo, 150).<br />
OUTPUT 718;"150,150,150,100,100;" Draws the last three sides of the rectangle.<br />
Description<br />
The vector is drawn on the screen if the pen-down (PD) comm<strong>and</strong> is in effect. If the pen-up<br />
(PU) comm<strong>and</strong> is in effect, the vector does not appear on the screen.<br />
Display units are the scaling units of the spectrum analyzer display for on screen graphics<br />
comm<strong>and</strong>s such as PA or PR. One display unit is the distance between two points along an the<br />
x or Q axis. For the <strong>HP</strong> <strong>8590</strong> <strong>Series</strong> spectrum analyzer, there are a maximum of 511 display<br />
units (-40 to 471) along the x axis <strong>and</strong> 255 display units (-22 to 233) along the y axis. See<br />
Figure 5-8.<br />
5-412 Programming Comm<strong>and</strong>s<br />
XPA
3 . 2 5 0 GHz<br />
o,o<br />
ATTEN 1 0 dG<br />
Figure 5-8. Display Units<br />
PA Plot Absolute<br />
400, 200 471, 233<br />
I<br />
SThRT<br />
FREQ<br />
I<br />
STOP<br />
FREQ<br />
I<br />
CF STEP<br />
aulp MAN<br />
I<br />
FREQ<br />
OFFSET<br />
I<br />
B<strong>and</strong><br />
Lock<br />
R<br />
The coordinates of the lower left screen corner of the screen are -4O,-22 <strong>and</strong> the upper right<br />
screen corner of the screen are 471,233. For the graticule area, the coordinates of the lower<br />
left corner of the graticule are 0,O <strong>and</strong> the coordinates of the upper right graticule area are<br />
400,200. For example, you could execute “PU;PA 0,O;PD;PA 0,200,400,200,400,0,0,0;” to draw<br />
a box around the graticule area.<br />
Because PA is an active function, executing PA causes the.active function area on the spectrum<br />
analyzer screen to blank. lb prevent the text following PA from being written in the active<br />
function area, execute hold (HD) after PA.<br />
PU should be executed before the first PA comm<strong>and</strong>, <strong>and</strong> PA should be executed before<br />
executing TEXT, PD, or DSPLY comm<strong>and</strong>s.<br />
Programming Comm<strong>and</strong>s 5-413
PARSTAT<br />
Parallel Status<br />
Reports the status of the printer connected to the parallel port. (Option 024, 041, 043).<br />
Syntax<br />
Related Comm<strong>and</strong>s: PRINT, GETPRINT<br />
Item Description/Default Range<br />
Number Any valid integer. 0 - 32 (Option 024)<br />
I I<br />
0 - 128 (Option 041,<br />
1043) I<br />
Example<br />
OUTPUT 718; “PARSTAT; ”<br />
ENTER 718;A<br />
PRINT “A”<br />
Description<br />
‘Ihble 5-9. <strong>Spectrum</strong> Analyzer Status Byte (Option 024)<br />
Bit Decimal Bit Status = 0<br />
Number Equivalent<br />
5 32 State of ACK line<br />
4 16 N/A<br />
3 8 Printer error<br />
2 4 Off line<br />
1 2<br />
0 1<br />
5-414 Programming Comm<strong>and</strong>s<br />
State of ACK line<br />
WA<br />
On line<br />
Paper end<br />
Printer busy<br />
Bit Status = 1<br />
cu124e<br />
I
‘Ihble 5-9. <strong>Spectrum</strong> Analyzer Status Byte (Option 041, 043)<br />
Bit Decimal Bit Status = 0 Bit Status = 1<br />
Number Equivalent<br />
Query Response<br />
7 128 Printer busy Printer not busy<br />
6 64 State of ACK line State of ACK line<br />
5 32 Paper end<br />
4 16 Off line On line<br />
3 8 Printer error<br />
2 4 N/A N/A<br />
1 2 N/A N/A<br />
0 1 N/A N/A<br />
PARSTAT Parallel Status<br />
Programming Comm<strong>and</strong>s 5-415
PCTAM<br />
Percent AM<br />
Turns on or off the percent AM measurement.<br />
Syntax<br />
Equivalent Softkey: $! AM ON OFF.<br />
Related Comm<strong>and</strong>s: MKPX, PCTAMR, TH.<br />
Example<br />
OUTPUT 718;"MOV PCTAM,l;"<br />
OUTPUT 718;"PCTAMR?;"<br />
Turns on the percent AM rneasurmt.<br />
Queries PCTAMR. FCTAMR contains the results of the<br />
percent AMmeasurement.<br />
ENTER 718;Percent Stores the value of PCTMR in the variable Brcent.<br />
PRINT "Percent AM is ",Percent Prints the results.<br />
OUTPUT 718;"MOV PCTAM,O;" Turns ofl the percent AM measurement.<br />
Description<br />
Setting PCTAM to 0 turns off the percent AM function. Setting PCTAM to 1 turns on the<br />
percent AM function. When the percent AM function is turned on, the spectrum analyzer finds<br />
the signal with the highest amplitude, <strong>and</strong> then finds two signals (with lower amplitudes) on<br />
either side of the highest signal. The highest on-screen signal is assumed to be the carrier, <strong>and</strong><br />
the adjacent signals are assumed to be the sideb<strong>and</strong>s. The amplitude levels of all three signals<br />
are measured, <strong>and</strong> the percent AM is calculated using the carrier level <strong>and</strong> the sideb<strong>and</strong> with<br />
the higher amplitude level. Percent AM is calculated as follows:<br />
Percent Ah4 = 200 x Leuek7a,rier<br />
LeV47ideb<strong>and</strong><br />
The percent AM measurement is repeated at the end of every sweep (PCTAM uses the ONEOS<br />
comm<strong>and</strong>) until you turn off the percent AM measurement. You must query PCTAMR to<br />
determine the percent AM.<br />
PCTAM can perform the percent AM measurement only if there are three on-screen signals<br />
that have the characteristics of a carrier with two sideb<strong>and</strong>s. Also, to be considered a signal,<br />
the levels of the carrier <strong>and</strong> sideb<strong>and</strong> signals must be greater than the peak excursion above<br />
the threshold. If there are not three signals that fit the characteristics of a carrier with two<br />
sideb<strong>and</strong>s, the value of PCTAMR will be -100.<br />
You can execute the PCTAM comm<strong>and</strong> two different ways. You can either execute the PCTAM<br />
comm<strong>and</strong> directly (for example, "PCTAM 1; ‘I) or use the MOV comm<strong>and</strong> to move the 1 or 0 into<br />
5-416 Programming Comm<strong>and</strong>s
PCIAM Percent AM<br />
the PCTAM comm<strong>and</strong> (for example, "MOV PCTAM, 1; ‘I). If you use the MOV comm<strong>and</strong>, no text is<br />
displayed in the active function area during comm<strong>and</strong> execution.<br />
Restrictions<br />
Turning on the PCTAM function turns off the following functions: windows display mode<br />
(WINON), N dB point measurement (NDBPNT), the FFT menu measurements (FFI’AUTO,<br />
FFJXONTS, FFTSNGLS), gate utility functions (GDRVUTIL), TO1 measurement (TOI), marker<br />
table (MKTBL), peak table (PKTBL), peak zoom (PKZOOM), <strong>and</strong> power menu measurements<br />
(ACP, ACPE, C<strong>HP</strong>, <strong>and</strong> OBW).<br />
You should turn off the percent AM measurement (set PCTAM to 0) when you are done with<br />
the percent AM measurement.<br />
Query Response<br />
r off 7<br />
I<<br />
0<br />
f<br />
output<br />
� termination +<br />
QPCTAM<br />
Programming Comm<strong>and</strong>s 5-417
PCTAMR<br />
Percent AM Response<br />
Returns the percent AM measured by the percent AM measurement (PCTAM).<br />
Syntax<br />
PCTAh4R<br />
Related Comm<strong>and</strong>s: MKPX, PCTAM, TH.<br />
Example<br />
OUTPUT 718;"MOV PCTAM,l;"<br />
OUTPUT 718;"PCTAMR?;"<br />
Turn-s on the percent AMmeasurement.<br />
Queries PCTAMR. PCTMR contains the results of the<br />
percent AM?neasurement.<br />
ENTER 718;Percent Stores the value of PCTMR in the vam’able I%rcnt.<br />
PRINT "Percent AM is ",Percent Prints the results.<br />
OUTPUT 718;"MOV PCTAM,O;" Turns ofl the percent AM mmsur~t.<br />
Description<br />
PCTAMR returns a -100 if the PCTAM function has not been turned on, or if the on-screen<br />
signal is not valid or is not present. PCTAM can perform the percent AM measurement only if<br />
there are three on-screen signals that have the characteristics of a carrier <strong>and</strong> two sideb<strong>and</strong>s.<br />
Also, to be considered a signal, the levels of the carrier <strong>and</strong> sideb<strong>and</strong> signals must be greater<br />
than the peak excursion above the threshold.<br />
Query Response<br />
5-418 Programming Comm<strong>and</strong>s<br />
output<br />
termination +
PD<br />
Pen Down<br />
PD Pen Down<br />
Instructs the spectrum analyzer to plot vectors on the spectrum analyzer screen until a PU<br />
comm<strong>and</strong> is received.<br />
Syntax<br />
( PD<br />
Related Comm<strong>and</strong>s: DSPLY, PA, PLOT, PR, PU, TEXT.<br />
Example<br />
OUTPUT 718;"IP;BLANK TRA;"<br />
OUTPUT 718;"ANNOT 0FF;GRAT OFF;"<br />
OUTPUT 718;"PU;"<br />
OUTPUT 718;"PA 100,lOO;PD 100,150;"<br />
OUTPUT 718;"150,150,150,100,100,100;"<br />
Description<br />
Initializes the spectrum analyzer <strong>and</strong> blanks<br />
trace A.<br />
Clears the spectrum analyzer screen.<br />
R?n up.<br />
PU <strong>and</strong> PA comm<strong>and</strong>s prevent an initial<br />
vector from being drawn before the pen is<br />
positioned at (100, 100). PD draws a vector<br />
to (loo, 150).<br />
Draws the last three sio!es of the rectangle.<br />
The comm<strong>and</strong> PD is used to enable drawing of all vectors specified by the comm<strong>and</strong>s PA (plot<br />
absolute), or PR (plot relative). It remains in effect until a PU comm<strong>and</strong> is received. PD does<br />
not need to be executed before using the TEXT or DSPLY comm<strong>and</strong>s.<br />
XPD<br />
Programming Comm<strong>and</strong>s 5-418
PDA<br />
Probability Distribution of Amplitude<br />
Sums the probability distribution of amplitude in the destination trace with the amplitude<br />
distribution function of the source trace.<br />
Syntax<br />
Item<br />
User-defined trace<br />
Number<br />
User-defined variable<br />
PredeEned variable<br />
Predelined function<br />
Trace element<br />
Description/Default<br />
A trace dellned by the TRDEF comm<strong>and</strong>.<br />
Any real or integer number.<br />
predefined variable<br />
A variable deEned by VARDEF or ACTDEF comm<strong>and</strong>s.<br />
A comm<strong>and</strong> that acts as a variable. Refer to Table 5-1.<br />
Function that returns a value. Refer to Table 5-I.<br />
An element of trace A, trace B, trace C, or a user-defined trace.<br />
Rwte<br />
XPDA<br />
Any valid trace name.<br />
Real number range.<br />
Any valid variable<br />
name.<br />
Prerequisite Comm<strong>and</strong>s: TRDEF when using a user-defined trace. ACTDEF or VARDEF for a<br />
user-defined variable. TS when using trace data.<br />
Related Comm<strong>and</strong>s: PDF, RMS, STDEV.<br />
5-420 Programming Comm<strong>and</strong>s
Example<br />
OUTPUT 718;"IP;SNGLS;"<br />
OUTPUT 718;"VB 1OKHZ;HD;TS;"<br />
OUTPUT 718;"MOV TRB,O;"<br />
OUTPUT 718;"PDA TRB,TRA,l;"<br />
OUTPUT 718;"MPY TRB,TRB,S;"<br />
OUTPUT 718;"VIEW TRB;"<br />
Description<br />
PDA Probability Distribution of Amplitude<br />
Initializes spectrum analyzer <strong>and</strong> activates the singlesweep<br />
m4de.<br />
Changes video b<strong>and</strong>width, updates trace.<br />
&places trace B data with all zeros.<br />
Determines the distribution of trace A <strong>and</strong> sums results<br />
into trace B<br />
Multiplies values in trace B by 5 to make the results more<br />
visible.<br />
Displays the result.<br />
The PDA comm<strong>and</strong> takes the data in the source trace on a point-by-point basis. Each amplitude<br />
value is divided by 100 times resolution value, <strong>and</strong> the result of the division is rounded to an<br />
integer. If the result falls within the range of the buckets of the destination trace, the content<br />
of the corresponding destination trace element is increased by one. For example, to show the<br />
distribution of amplitudes on a trace with values ranging from 0 to 8000, a resolution value of<br />
1 dB would result in 81 buckets ((SOOO/(l x lOO))+ 1). Amplitude values ranging from 0 to 99<br />
would go to bucket 1, values from 100 to 199 would go into bucket 2, <strong>and</strong> so forth. Finally,<br />
values from 7900 to 7999 would go to bucket 400. An amplitude value of 8000 would fall into<br />
bucket 81.<br />
Due to the summing nature of the PDA comm<strong>and</strong>, the destination trace should always be<br />
initialized to all zeros.<br />
The PDA function is similar to the probability density function in statistics. The probability<br />
density function has the y-axis as the probability of an occurrence, where the PDA function of<br />
the <strong>HP</strong> <strong>8590</strong> <strong>Series</strong> spectrum analyzer has the number of occurrences as its y-axis. The PDA<br />
could be converted to a probability density function by dividing, in an external controller, the<br />
value of each bucket by the total number of source elements. Note that performing the divide<br />
inside the spectrum analyzer would not be appropriate because the result is less than 1, which<br />
would be truncated to 0.<br />
Programming Comm<strong>and</strong>s 5-421
PDF<br />
Probability Distribution of Frequency<br />
Increments an element of the destination trace whenever the corresponding element of the<br />
source trace exceeds a threshold. This is useful for constructing a frequency probability density<br />
function.<br />
Syntax<br />
PDF<br />
- destination 7<br />
user-defined trace<br />
user-defined trace<br />
Item Description/Default<br />
User-defined trace A trace defined by the TRDEF comm<strong>and</strong>.<br />
Range<br />
Any valid trace name.<br />
Prerequisite Comm<strong>and</strong>s: TRDEF when using a user-defined trace. TS when using trace data.<br />
Related Comm<strong>and</strong>s: PDA, TH.<br />
5422 Programming Comm<strong>and</strong>s
Example<br />
PDF Probability Distribution of Frequency<br />
This example finds the portions of the frequency b<strong>and</strong> where no signals above -50 dBm are<br />
observedin an hour time frame.<br />
10 OUTPUT 718;"IP;"; Initializes spectrum anal~.z.ex<br />
20 OUTPUT 718;"SP 1OOMZ;CF 300MZ;” Changes the span <strong>and</strong> centerfrequency<br />
30 OUTPUT 718;"TH -50 DM;TS;" Activates the threshold level, take a<br />
40 OUTPUT 718;"VIEW TRB;CLRW TRA;MOV TRB,O;"<br />
50 OUTPUT 718*"ST'*"<br />
60 ENTER 718;Sweepitime<br />
70 Sup-retrace = Sweep-time+.1<br />
80 Num,sweeps = 3600/Swp,retrace<br />
90 FOR I = 1 TO Num-sweeps<br />
100 OUTPUT 718;"TS;PDF TRB,TRA;"<br />
110 NEXT I<br />
120 END<br />
Description<br />
sweep.<br />
Sets trace B to zeros.<br />
Gets the sweep time.<br />
I&turns the sweep time to the controller:<br />
Calculates the total sweep time, including<br />
the retrace time.<br />
Calculates the number of sweeps in<br />
one hour:<br />
Thisjino!s the maximum number of<br />
sweeps that can be taken before numerical<br />
ove@ow (greater than 32,767.)<br />
When I = Num-sweeps, trace B contains<br />
the number of sweep that had<br />
amplitudes at or above the threshold<br />
level of -50 dBm.<br />
The TH comm<strong>and</strong> permits the user to set an amplitude threshold value. When PDF is<br />
performed, measurement buckets of the source trace that exceed the threshold increment the<br />
corresponding frequency bucket in the destination trace.<br />
The destination trace should be set to zeros before PDF is executed for the first time.<br />
Subsequent calls to PDF increment the destination trace.<br />
When the source is longer than the destination, the source is truncated to fit. When the source<br />
is shorter than the destination, the last element is repeated to fill the destination. The PDF<br />
function is similar to the probability density function in statistics. The probability density<br />
function has the y-axis as the probability of an occurrence, where the PDF function of the<br />
<strong>HP</strong> <strong>8590</strong> <strong>Series</strong> spectrum analyzer has the number of occurrences as its y-axis. The PDF could<br />
be converted to a probability density function by dividing, in an external controller, the value<br />
on each bucket by the total number of buckets. Note that performing the division inside the<br />
spectrum analyzer would not be appropriate because the result is less than 1, which would be<br />
truncated to 0.<br />
Programming Comm<strong>and</strong>s 5.423
PEAKS<br />
Peaks<br />
Sorts signal peaks by frequency or amplitude, stores the results in the destination trace, <strong>and</strong><br />
returns the number of peaks found.<br />
Syntax<br />
7 destination<br />
% user-defined trace I<br />
sorting<br />
r method<br />
function path only<br />
Item Description/Default R-59<br />
User-defied trace A trace defined by the TRDEF comm<strong>and</strong>. Any valid trace name.<br />
Trace range A segment of trace A, trace B, trace C, or a user-defined trace.<br />
Prerequisite Comm<strong>and</strong>s: TRDEF when using a user-defined trace. TS when using trace data.<br />
Related Comm<strong>and</strong>s: MKPX, TH.<br />
5-424 Programming Comm<strong>and</strong>s
Example<br />
Connect CAL OUT to the spectrum analyzer input.<br />
OUTPUT 718."IP*"<br />
OUTPUT 718;"CF'300MHZ;SP 1500MHZ;RB 30KHZ;SNGLS;"<br />
OUTPUT 718;"TH -60DM;MKPX 10DB;TS;"<br />
OUTPUT 718;"PEAKS TRB,TRA,FRQ?;"<br />
ENTER 718;Number<br />
DISP Number<br />
FOR I=1 TO Number<br />
NEXT I<br />
Description<br />
OUTPUT 718;"MKP TRB[";I;"]";<br />
OUTPUT 718;"MKA?;"<br />
ENTER 718;A<br />
OUTPUT 718*"MKF'*"<br />
* 9<br />
ENTER 718;;<br />
PRINT A,B<br />
PEAKS Peaks<br />
Initializes spectrum analyzer<br />
Changes the center frequency,<br />
span, b<strong>and</strong>width. Actiuatessinglesweep<br />
mode.<br />
Sets up threshold, sets minimum<br />
peak excursion.<br />
Returns the number of peaks in<br />
trace A above the threshold.<br />
Gets the number of peaks from<br />
the spectrum analyzer<br />
Displays the result on the computer<br />
screen.<br />
Fbr one to the number of peaks<br />
do the following steps.<br />
Place marker at the position of<br />
the first trace B element.<br />
Find the amplitude of the marker<br />
Find thefrequency of the marker<br />
Print the amplitude <strong>and</strong> the<br />
frequency of the marker<br />
Repeat the FOR NEXT loop for<br />
all of the peaks that werefound.<br />
When sorting by frequency (FRQ), PEAKS first computes the horizontal position of all peaks.<br />
These positions are loaded into the destination trace consecutively, with the lowest frequency<br />
value occupying the first element. Thus, signal frequencies, from low to high, determine the<br />
amplitude of the destination trace from left to right.<br />
When sorting by amplitude (AMP), PEAKS first computes the amplitudes of all peaks in the<br />
source trace in measurement units, <strong>and</strong> sorts these values from high to low. The positions of<br />
the peaks are then loaded into the destination trace, with the position of the highest amplitude<br />
value occupying the first element.<br />
For example, executing the programming example results in the following spectrum analyzer<br />
display:<br />
Programming Comm<strong>and</strong>s 5-425
PEAKS Peaks<br />
47<br />
REF .0 dBm ATTEN 1 0 dB<br />
MKR 608 MHz<br />
-42.23 dBm<br />
PEAK<br />
1 LY” ne 1<br />
. . . . . . . . . . . . . . . . . . . . . . . . . . . . . . . . . . . . . . . . . . . . . . . . . . . . . . . . . . . . . . . . . . . . . . . . . . . . . . . . . . . . . . . . . . . . . . . . . . .<br />
2,<br />
. . . . . . . . . . . . . . . . . . . . . . . . . . . . . . . . . . . . . . . . . . . . . . . . . . . . . . . . . . . . . . . . . . . . . . . . . . . . . . . . . . . . . . . . . . . . . . . . . .<br />
MARKER<br />
608 YHz<br />
. . . . . . . . . . . . . . . . . . . . . . . . . . . . . . . . . . . . . . . . . . . . . . . . . .<br />
- 4 2 . 2 3 dBm<br />
. . . . . . . . . . . . . . . . . . . . . . . . . . . . . . . . . . . . . . . . . . . . . . . . . . . . . . . . . . . . . . . . . . . . . . . . . . . . . . . . . . . . . . . . . . . . . . .<br />
. . . . . . . . . . . . . . . . . . . . . . . . . . . . . . . . . . . . . . . . . . . . . . . . . . . . . . . . . . . . . . . . . . . . . . . . . . . . . . . . . . . . . . . . . . . . . . . . . .<br />
WF, S B<br />
SC FS<br />
CORR’<br />
i<br />
: ; : ; : ; : : !<br />
TH<br />
-60 .0 . . . . . . . . . . . . . . . . . . . . . . . . . ..t......................................................................<br />
dBm<br />
I I<br />
CENTER 300 MHz<br />
tRES B W 3 0 kHz UBW 3 0 kHz<br />
SPAN 1.500<br />
SWP 5.00<br />
8Hz<br />
set R<br />
Figure 5-9. Frequency <strong>and</strong> Amplitude of the Peaks<br />
If the FRQ parameter is used with the PEAKS comm<strong>and</strong>, the programming example returns the<br />
values that shown in the following table.<br />
Trace Element<br />
TRB[ l]<br />
TRB[2]LTRB[3]<br />
TRB[4]<br />
TRB[S]<br />
If the AMP parameter is used with the PEAKS comm<strong>and</strong>, the programming example returns<br />
the values that are shown in the following table.<br />
Trace Element Amplitude Frequency<br />
TRB[l] -13.95 4.E+6<br />
TRB[S] -28.14 3.04E+8<br />
TRB[J] -28.89 -2.963+8<br />
TRB[4] -32.6 9.07E + 8<br />
TRB[B] -42.23 6.08+8<br />
Notice that MKA? <strong>and</strong> MKF? are used to determine the amplitude <strong>and</strong> frequency of the peak<br />
position.<br />
PEAKS sorts only signals that are above the threshold value. To be classified as a signal peak,<br />
a signal must be MKPX above the threshold value <strong>and</strong> it must rise <strong>and</strong> fall at least the peak<br />
excursion (MKPX value). To change the threshold, use the TH comm<strong>and</strong> before PEAKS is<br />
executed.<br />
If necessary, the last sorted value is repeated to fill remaining elements of the destination trace.<br />
PEAKS must be used as either a query or as a source in another spectrum analyzer-comm<strong>and</strong><br />
function. Form a query by ending the PEAKS statement with a “?.” When used as a query,<br />
PEAKS returns the number of peaks found. When querying the trace elements of destination<br />
trace, the x-axis coordinate (relative to the first trace element) of the peak is returned.<br />
5-426 Programming Comm<strong>and</strong>s
Query Response<br />
PEAKS Peaks<br />
Programming Comm<strong>and</strong>s 5427
PKDLMODE<br />
Peak Table Delta Display Line Mode<br />
Selects the signal peaks that are displayed in the peak table. The signal peaks can be selected<br />
as follows: all the signal peaks, only the signal peaks that are above the display line, or only<br />
the peaks that are below the display line.<br />
Syntax<br />
.._,_..’<br />
Equivalent Softkey: PK MODE DL NRM .<br />
Preset State: 0 (display all the signal peaks).<br />
Related Comm<strong>and</strong>s: DL, PKSORT, PKTBL.<br />
Example<br />
peaks below<br />
r DL ?<br />
-1<br />
01 I<br />
/ peaks \<br />
0<br />
peaks above<br />
r DL I<br />
1<br />
/<br />
XPKDLMODE<br />
OUTPUT 718;“MOV PKTBL,l;” Turns on the peak table.<br />
OUTPUT 718;“DL -20;” Sets the display line.<br />
OUTPUT 718;“MOV PKDLMODE,l;” Displays the on.!?/ the signal peaks that are above the<br />
display line.<br />
Description<br />
The value of PKDLMODE determines how the signal peaks are displayed. You can set<br />
PKDLMODE to the following values:<br />
� If PKDLMODE is set to 0, all signal peaks are displayed <strong>and</strong> listed.<br />
H If PKDLMODE is set to - 1, only the signal peaks below the display line are displayed <strong>and</strong><br />
listed.<br />
H If PKDLMODE is set to 1, only the signal peaks above the display line are displayed <strong>and</strong><br />
listed.<br />
You can execute the PKDLMODE comm<strong>and</strong> two different ways. You can either execute the<br />
PKDLMODE comm<strong>and</strong> directly (for example, “PKDLMODE 1; ‘I) or use the MOV comm<strong>and</strong> to<br />
move the 1 or 0 into the PKDLMODE comm<strong>and</strong> (for example, I’MOV PKDLMODE, 1; I’). If you use<br />
the MOV comm<strong>and</strong>, no text is displayed in the active function area during comm<strong>and</strong> execution.<br />
5-428 Programming Comm<strong>and</strong>s
Query Response<br />
peaks below<br />
peaks above<br />
PKDLMODE Peak ‘lhble Delta Display Line Mode<br />
QPKDLMODE<br />
Programming Comm<strong>and</strong>s 5-429
PKPOS<br />
Peak Position<br />
Returns a value, which is the index of the maximum value in trace A, trace B, trace C, or<br />
user-defined trace.<br />
Syntax<br />
PKPOS<br />
function path only<br />
Item Description/Default Range<br />
User-defined trace A trace deEned by the TRDEF comm<strong>and</strong>. Any valid trace name.<br />
Trace range A segment of trace A, trace B, trace C, or a user-defined trace.<br />
Prerequisite Comm<strong>and</strong>s: TRDEF when using a user-defined trace. TS when using trace data.<br />
Related Comm<strong>and</strong>s: MINPOS, MXM.<br />
Example<br />
OUTPUT 718;"IP;" Initializes spectrum anulyz..ex<br />
OUTPUT 718;"SNGLS;TS;" Activates single-sweep mode, takes sweep.<br />
OUTPUT 718;"PKPOS TRA;" Finds the position of the highest peak.<br />
ENTER 718;Pkresult Outputs result to the computex<br />
DISP Pkresult Displays the result.<br />
Description<br />
If a trace range is used with PKPOS, PKPOS returns a value relative to the first element of<br />
the trace range. For example, if a trace has a range of 150 to 300 elements, <strong>and</strong> the maximum<br />
value is element 200, PKPOS will return the value of 51.<br />
5-430 Programming Comm<strong>and</strong>s<br />
XPKPOS
PKRES<br />
Peak Result<br />
PKRES returns the x-axis coordinates of the peaks in the peak table.<br />
Syntax<br />
PKRES Peak Result<br />
Item Description/Default Range<br />
Number An integer number. 1 to 10.<br />
Related Comm<strong>and</strong>s: DL, PKSORT, PKTBL, TDF.<br />
Example<br />
DIM Results(l0)<br />
OUTPUT 718;"TDF M;"<br />
OUTPUT 718;"PKSORT 0;"<br />
OUTPUT 718;"MOV PKTBL,l;"<br />
OUTPUT 718*"TS*" ><br />
FOR I=1 TO'10<br />
OUTPUT 718;"PKRESC";I;"]?"<br />
ENTER 718;Results(I)<br />
NEXT I<br />
OUTPUT 718;"TDF P;"<br />
PRINT "PEAK","FREQUENCY","AMPLITUDE"<br />
FOR I=1 TO 10<br />
IF Results(I)>0 THEN<br />
OUTPUT 718;"MKP ";Results(I);";"<br />
OUTPUT 718;"MKF?;"<br />
ENTER 718;A<br />
OUTPUT 718;"MKA?;"<br />
ENTER 718;B<br />
PRINT I,A,B<br />
END IF<br />
NEXT I<br />
Dimensions an array to hold the results.<br />
Changes the trace data format to measurement<br />
units.<br />
Selects listing the peaks by decreasing amplitude.<br />
Turns on the peak table.<br />
mforms a take sweep.<br />
Uses a FOR NEXT loop to get the data from<br />
PKRES<br />
Queries each PKRES element.<br />
Enters the PKRES element into the Results<br />
element.<br />
Changes the trace data format to parameter<br />
units.<br />
Prints a heading.<br />
Uses a FOR NEXT loop to print the results.<br />
Results(I) is greater than zero if peak was<br />
found.<br />
Places a marker at the x- axis coordinate.<br />
Returns the frequency of the marker<br />
Enters the marker’s frequency into A.<br />
Returns the amplitude of the marker:<br />
Enters the marker’s amplitude into B<br />
Prints the peak number; frequency, <strong>and</strong> amplitude<br />
Eno!s the IF THEN statement.<br />
Programming Comm<strong>and</strong>s 5431
PKRES Peak Result<br />
Description<br />
PKRES is an array that contains 10 elements. Each element of the PKRES array contains the<br />
x-axis coordinate of a signal peak, if a signal peak was found. If a signal peak was not found,<br />
the PKRES element contains a 0. The order in which the signal peaks are placed in the PKRES<br />
array depends on how the signal peaks were sorted (see “PKSORT” for more information).<br />
You must do the following before using PKRES:<br />
1. Set the trace data format to TDF A, TDF B, TDF I, or TDF M only. You cannot use the TDF P<br />
trace data format before PKRES is queried.<br />
2. Use PKSORT to select sorting the signal peaks by amplitude or by frequency.<br />
3. Turn on the peak table with PKTBL.<br />
4. Execute a take sweep (TS) to ensure that valid data is stored in PKRES.<br />
Query Response<br />
Querying PKRES returns the values of the 10 trace elements, with each value separated by a<br />
comma. Querying one element of PKRES (for example, “PKRES [l]?; “) returns the value of that<br />
element, followed by the output termination.<br />
5-432 Programming Comm<strong>and</strong>s
PKSORT<br />
Peak Sort<br />
PKSORT Peak Sort<br />
Selects how the signal peaks listed in the peak table are sorted: by decreasing amplitude or by<br />
ascending frequency.<br />
Syntax<br />
Equivalent Softkey: PK SORT FRQ A#P .<br />
Preset State: 0 (sort by decreasing amplitude).<br />
Related Comm<strong>and</strong>s: DL, PKSORT, PKTBL.<br />
Example<br />
decreasing<br />
amp I i tude<br />
OUTPUT 718;"MOV PKTBL,l;" Twn.s on the peak table.<br />
OUTPUT 718;"MOV PKSORT,O;" Sorts the peaks by &creasing amplitude.<br />
Description<br />
If PKSORT is set to 0, the spectrum analyzer sorts <strong>and</strong> displays the list of the peaks according<br />
to the amplitude of the peaks (highest amplitude first). If PKSORT is set to 1, the spectrum<br />
analyzer sorts <strong>and</strong> displays the list of the peaks according to frequency (lowest frequency signal<br />
peak is listed first).<br />
See “PKRES” for information about how to get the information in the peak table remotely.<br />
You can execute the PKSORT comm<strong>and</strong> two different ways. You can either execute the<br />
PKSORT comm<strong>and</strong> directly (for example, "PKSORT 1; ‘I) or use the MOV comm<strong>and</strong> to move<br />
the 1 or 0 into the PKSORT comm<strong>and</strong> (for example, "MOV PKSORT,l;"). If you use the MOV<br />
comm<strong>and</strong>, no text is displayed in the active function area during comm<strong>and</strong> execution.<br />
Query Response<br />
decreasing<br />
Programming Comm<strong>and</strong>s 5-433
PKSORT Peak Sort<br />
PKTBL<br />
Peak ‘Ihble<br />
Turns on or off the peak table.<br />
Syntax<br />
. . . .._...<br />
table<br />
/- off 7<br />
0<br />
table<br />
I- 0” 7<br />
Equivalent Softkey: PK TABLE ON OFF .<br />
Preset State: 0 (Off).<br />
Related Comm<strong>and</strong>s: DL, PKRES, PKSORT, PKDLMODE.<br />
Example<br />
OUTPUT 718;"MOV PKTBL,l;" Twns on the peak table.<br />
Description<br />
When the peak table is turned on, the spectrum analyzer screen displays two windows. The<br />
upper window displays trace A, with the signal peaks of trace A identified <strong>and</strong> numbered<br />
(the peaks are numbered according to their frequency or amplitude, see “PKSORT” for more<br />
information). The lower window displays the peak table. The peak table displays the following<br />
information about the on-screen signal peaks: the number of the peak, the frequency of the<br />
peak, <strong>and</strong> the amplitude of the peak. A signal must be equal to or exceed the peak excursion<br />
to be considered a peak. (See “MKPX” for more information about the peak excursion.) While<br />
the peak table is turned on, the frequency <strong>and</strong> amplitude of each peak is updated at the<br />
end of every sweep (PKTBL comm<strong>and</strong> uses the ONEOS comm<strong>and</strong> to update the peak table<br />
information).<br />
See “PKRES” for information about how to get the information in the peak table remotely.<br />
You can execute the PKTBL comm<strong>and</strong> two different ways. You can either execute the PKTBL<br />
comm<strong>and</strong> directly (for example, “PKTBL 1; ‘I) or use the MOV comm<strong>and</strong> to move the 1 or 0 into<br />
the PKTBL comm<strong>and</strong> (for example, “MOV PKTBL , 1; ‘I). If you use the MOV comm<strong>and</strong>, no text is<br />
displayed in the active function area during comm<strong>and</strong> execution.<br />
Restrictions<br />
Turning on the peak table turns off the following functions: windows display mode (WINON),<br />
N dB point measurement (NDBPNT), the FFT menu measurements (FFTAUTO, FFTCONTS,<br />
FFI’SNGLS), gate utility functions (GDRVUTIL), TO1 measurement (TOI), marker table (MKTBL),<br />
percent AM (PCTAM), peak zoom (PKZOOM), <strong>and</strong> power menu measurements (ACP, ACPE, C<strong>HP</strong>,<br />
<strong>and</strong> OBW).<br />
You should turn off the peak table (set PKTBL to 0) when you are done with the peak table.<br />
5-434 Programming Comm<strong>and</strong>s<br />
/
Query Response<br />
table<br />
PKTBL Peak ‘Ihble<br />
Programming Comm<strong>and</strong>s 5-435
PKZMOK<br />
Peak Zoom Okay<br />
Returns a “1” if the peak zoom routine (PKZOOM) found a valid signal, otherwise a “0” is<br />
returned.<br />
Syntax<br />
Related Comm<strong>and</strong>s: PKZOOM.<br />
Example<br />
OUTPUT 718;"PKZOOM IMHZ;" Sets thejinal frequency span to 1 MHZ.<br />
OUTPUT 718;"PKZMOK?;" Queries the value of PKZMOK.<br />
ENTER 718;Peak-zoom-ok<br />
IF Peak-zoom-ok = 0 THEN zf PKZMOK is equal to 0, the PKZOOM routine did not<br />
.find a signal.<br />
PRINT "Signal Not Found"<br />
ELSE<br />
Query Response<br />
5-436 Programming Comm<strong>and</strong>s
PKZOOM<br />
Peak Zoom<br />
PKZOOM Peak Zoom<br />
Automatically tunes the spectrum analyzer to the signal with the highest amplitude level while<br />
narrowing the frequency span to the specified frequency span.<br />
Syntax<br />
PKZOCM<br />
. . . .._... /<br />
final frequency span<br />
/ \<br />
Item ! Description/Default<br />
HZ<br />
/<br />
I<br />
..’<br />
..’<br />
..’<br />
I<br />
/<br />
-G--+<br />
XPKZOOM<br />
Number Any real or integer number. Default unit is Hz. Minimum frequency<br />
span depends on<br />
model, maximum<br />
frequency span is<br />
Equivalent Softkey: PEAK ZOOM.<br />
Preset State: 1 MHz.<br />
Related Comm<strong>and</strong>s: PKZMOK.<br />
Example<br />
OUTPUT 718;"PKZOOM 1MHZ;"<br />
OUTPUT 718;"PKZMOK?;"<br />
ENTER 718;Peak_zoom,ok<br />
IF Peak-zoom-ok = 0 THEN<br />
PRINT "Signal Not Found"<br />
ELSE<br />
Sets the final frequ..emz/ span to 1 MHz.<br />
Queries the value of PKZMOK.<br />
If PIEMOK is equal to 0, the PKZOOM routine did not<br />
find a signal.<br />
Programming Comm<strong>and</strong>s 5437
PKZOOM Peak Zoom<br />
Description<br />
PKZOOM finds the highest displayed signal <strong>and</strong> narrows the frequency span to the specified<br />
value. PKZOOM ignores the spectrum analyzer’s local oscillator (LO) feedthrough signal.<br />
PKZOOM sets the reference level to the signal’s amplitude, sets the center frequency step<br />
size to the signal’s frequency, <strong>and</strong> if the signal is within a preselected b<strong>and</strong>, performs the<br />
preselector peak routine (<strong>HP</strong> 8592L, <strong>HP</strong> 85933, <strong>HP</strong> 85953, or <strong>HP</strong> 85963 only). The minimum<br />
value for the final frequency span depends on the model of the spectrum analyzer.<br />
<strong>Spectrum</strong> Analyzer Frequency Span<br />
Model<br />
<strong>HP</strong> 859OL or <strong>HP</strong> 8592L 500 kHz<br />
<strong>HP</strong> 85913, <strong>HP</strong> 85933, <strong>HP</strong> 85943, <strong>HP</strong> 85953, or <strong>HP</strong> 85963 10 kHz<br />
<strong>HP</strong> 85913, <strong>HP</strong> 85933, <strong>HP</strong> 85943, <strong>HP</strong> 85953, or <strong>HP</strong> 85963 with Option 130 300 Hz<br />
‘lb be able to find a valid signal, PKZOOM changes the following comm<strong>and</strong>s:<br />
TH Sets the threshold to 8 divisions from the top screen.<br />
LG Changes the amplitude scale to logarithmic.<br />
MKPX Sets the peak excursion to 6 dB.<br />
VAVG Sets video averaging to off.<br />
AT, RB, VB, ST Attenuation, resolution b<strong>and</strong>width, video b<strong>and</strong>width, <strong>and</strong> sweeptime are<br />
autocoupled.<br />
MKSS The center frequency step size is set to the marker’s frequency.<br />
For a signal to be found by PKZOOM, the signal must have a peak excursion (rise <strong>and</strong> fall) of at<br />
least 6 dB.<br />
Restrictions<br />
Executing PKZOOM turns off the following functions: windows display mode (WINON), N<br />
dB point measurement (NDBPNT), the FF”I’ menu measurements (FF’IAUTO, FFTCONTS,<br />
FFTSNGLS), gate utility functions (GDRVUTIL), TO1 measurement (TOI), marker table (MKTBL),<br />
peak table (PKTBL), percent AM (PCTAM), <strong>and</strong> power menu measurements (ACP, ACPE, C<strong>HP</strong>,<br />
<strong>and</strong> OBW).<br />
Query Response<br />
5-438 Programming Comm<strong>and</strong>s<br />
termination ---)<br />
001
PLOT<br />
Plot<br />
Initiates a plotter output of the screen data to the remote interface. With the appropriate<br />
<strong>HP</strong>-IB comm<strong>and</strong>s, the <strong>HP</strong>-IB can be configured to route the data to an external plotter.<br />
Syntax<br />
PLOT<br />
Item Description/Default Range<br />
PLOT Plot<br />
Number Any real or integer number. Number within the<br />
plotter coordinates.<br />
Related Comm<strong>and</strong>s: GETPLOT, PRINT, SNGLS, TS.<br />
Restrictions: Not available with Analog+ display mode. See “ANLGPLUS” for more<br />
information.<br />
Example for the <strong>HP</strong>-IB Interface<br />
The plotter is at address 5 <strong>and</strong> the spectrum analyzer is at address 18 in this example. (The<br />
program is only valid for <strong>HP</strong> 9000 series 200 <strong>and</strong> 300 computers.)<br />
This example illustrates how an external controller can initiate the sending of print data to an<br />
external printer.<br />
10 DIM P$[801 Allocates room in memory.<br />
20 OUTPUT 705;"OP;" Plotter outputs lower-L@ <strong>and</strong> upper-right display<br />
dimensions.<br />
30 ENTER 705;P$ Puts the plotter response in the computer string.<br />
40 OUTPUT 718;"PLOT";P$ Plots the spectrum analyzer display according to the<br />
dimensions stored in the computer string.<br />
50 SEND 7 ; LISTEN 5 TALK 18 DATA Conjigures the interface to output data from spectmcm<br />
analyzer to plotter:<br />
60 END<br />
Programming Comm<strong>and</strong>s 5-439
PLOT Plot<br />
Description<br />
The PLOT comm<strong>and</strong> transfers the trace data, graticule, <strong>and</strong> annotation of the spectrum<br />
analyzer screen to a plotter via the spectrum analyzer interface (softkey labels excluded). The<br />
data is transferred in ASCII, <strong>HP</strong>GL format.<br />
The example routes the data to an external plotter; however, the controller can read the data<br />
into a string if desired.<br />
When using the PLOT comm<strong>and</strong>, the scaling points (Plx, Ply; P2x, P2y) can be specified.<br />
These scaling points specify the (x,y) coordinates, which determine the size of the plot.<br />
(Plx,Ply) refers to the lower-left plotter coordinates. (P2x,P2y) refers to the upper-right<br />
plotter coordinates.<br />
The PLOT comm<strong>and</strong> should not be used within a DLP; you should use the GETPLOT comm<strong>and</strong><br />
instead.<br />
Note The <strong>HP</strong> 7470A plotter does not support 2 plots per page. If you use an<br />
<strong>HP</strong> 7470A plotter with an <strong>HP</strong> <strong>8590</strong> <strong>Series</strong> spectrum analyzer, you can select one<br />
plot per page or four plots per page but not 2 plots per page.<br />
5-440 Programming Comm<strong>and</strong>s
PLTPRT<br />
Plot Port<br />
PWPRT Plot Port<br />
Selects which port to output plotter data from the analyzer. (Option 041 or Option 043)<br />
Syntax<br />
PLTPRT<br />
Related Comm<strong>and</strong>s: PLOT, GETPLOT, PARSTAT, PRNPRT<br />
Example<br />
OUTPUT 718;"PLTPFtT 3;" Routes the plot i@ommtion to the serial port for Option 043.<br />
Description<br />
PLTPRT 0 = <strong>HP</strong>-IB port of Option 021 or Option 041<br />
PLTPRT 1 = serial port or Option 023<br />
PLTPRT 2 = parallel port of Option 024<br />
PLTPRT 3 = serial port of Option 043<br />
PLTPRT 4 = parallel port of Option 041 or Option 043<br />
Note Setting the PRNPRT to a port inconsistent with the installed hardware option is<br />
ignored, so executing PLTPRT 1 on an <strong>HP</strong>-IB equipped analyzer is ignored.<br />
Query Response<br />
cu122e<br />
Programming Comm<strong>and</strong>s 5441
POWERON<br />
Power-On State<br />
Selects the state of the spectrum analyzer when the spectrum analyzer is turned on: the<br />
IP state (same state as an instrument preset comm<strong>and</strong>) or last state (the state the spectrum<br />
analyzer was in when the spectrum analyzer was turned off).<br />
Syntax<br />
Equivalent Softkey: POWER ON IP LAST.<br />
Example<br />
OUTPUT 718; “POWERON LAST; ”<br />
Description<br />
XPOWERON<br />
POWERON LAST restores the last state of the spectrum analyzer. Limit line testing is not<br />
considered to be a spectrum analyzer state <strong>and</strong> is not resumed after the spectrum analyzer is<br />
turned off. The limit line table will be restored even if the spectrum analyzer is turned off,<br />
however.<br />
Note The last state of the spectrum analyzer is not retained in the case of battery<br />
power failure of the spectrum analyzer’s internal battery.<br />
When used as a predefined variable, POWERON returns either a “0” or a “1,” depending on the<br />
setting of the POWERON parameter. Refer to the following table.<br />
Query Response<br />
5-442 Programming Comm<strong>and</strong>s<br />
QPOWERON
PP<br />
Preselector Peak<br />
Peaks the preselector.<br />
Syntax<br />
( PP<br />
PP Preselector Peak<br />
Equivalent Softkey: PRESEL PEAK .<br />
Restrictions: Not compatible with Analog+ display mode. See “ANLGPLUS” for more<br />
information.<br />
Model Required: <strong>HP</strong> 8592L, <strong>HP</strong> 85933, <strong>HP</strong> 85953, or <strong>HP</strong> 85963.<br />
Related Comm<strong>and</strong>s: MKA, MKCF, MKD, MKF, MKN, MKPK.<br />
Example<br />
OUTPUT 718;"IP;CF 3GHZ;SP SOOKHZ;" Initializes spectrum analyzq changes center frequency,<br />
span.<br />
OUTPUT 718;"TS;MKPK HI;MKCF;PP;" Baks the highest on-screen signal.<br />
Description<br />
‘Ib use PP, set the desired trace to clear-write mode, place a marker on a desired signal, then<br />
execute PP. Comm<strong>and</strong>s following PP are not executed until after the spectrum analyzer has<br />
finished peaking the preselector.<br />
PP automatically adjusts the preselector tracking to peak the signal at the active marker.<br />
(When the marker is tuned to a signal <strong>and</strong> PREXXL PEAK is pressed, an internal routine<br />
searches for the peak response of the preselector <strong>and</strong> adjusts the tracking accordingly.) Using<br />
preselector peak prior to measuring a signal yields the most accurate amplitude reading.<br />
Preselector peak operates with the MARKER TJORMAL or MARKER A markers. If the marker is<br />
OFF, pressing PRESET PEAK initiates a peak search routine <strong>and</strong> then peaks the response at that<br />
marker; otherwise, it peaks around the active marker. The CAL : PEAKING message appears on<br />
the active graticule area to indicate operation of the peaking routine. Preselector peak only<br />
operates in the 2.75 to 22 GHz preselector b<strong>and</strong>s.<br />
XPF<br />
Programming Comm<strong>and</strong>s 5443
PR<br />
Plot Relative<br />
Moves the pen to a new plot location on the spectrum analyzer screen relative to the current<br />
coordinates in display units.<br />
Syntax<br />
x<br />
coordinate<br />
/ \<br />
Y.<br />
coordinate<br />
/ \<br />
number<br />
Item Description/Default Range<br />
Number Any valid integer. Dependent on the<br />
current pen position.<br />
Related Comm<strong>and</strong>s: DSPLY, PA, PLOT, PRINT, PU, TEXT.<br />
Example<br />
OUTPUT 718; “IP; ” Initializes spectrum aruzlym<br />
OUTPUT 7 18 ; “BLANK TRA ; ANNOT OFF ; ” Clears the display.<br />
OUTPUT 718;“GRAT OFF;” Turns off graticule.<br />
OUTPUT 718;“PU;PA 0,100;” Rxitions pen.<br />
OUTPUT 718;“PD;PR lOO,O,O,-lOO,-lOO,O,O,lOO;” Drawsa rectangle.<br />
Description<br />
Vector coordinate sets (x,y pairs) following the PR comm<strong>and</strong> can be either positive or negative,<br />
depending on the direction of the individual vectors to be drawn. PU (pen up) <strong>and</strong> PD (pen<br />
down) comm<strong>and</strong>s tell the spectrum analyzer to draw or not draw the vectors on the screen.<br />
(See “PU” <strong>and</strong> “PD.“)<br />
Display units are the scaling units of the spectrum analyzer display for on screen graphics<br />
comm<strong>and</strong>s such as PA or PR. See “PA” for more information about display units.<br />
The coordinates of the lower left screen corner of the screen are -4O,-22 <strong>and</strong> the upper right<br />
screen corner of the screen are 471,233. For the graticule area, the coordinates of the lower<br />
left corner of the graticule are 0,O <strong>and</strong> the coordinates of the upper right graticule area are<br />
400,200. For example, you could execute “PU;PA 0,O;PD;PA 0,200,400,200,400,0,0,0;” to draw<br />
a box around the graticule area.<br />
Because PR is an active function, executing PR causes the active function area on the spectrum<br />
analyzer screen to blank. To prevent the text following PR from being written in the active<br />
function area, execute hold (HD) after PR.<br />
5444 Programming Comm<strong>and</strong>s<br />
XPR
PREAMPG<br />
External Preamplifier Gain<br />
PRJZAMPG External Preamplifier Gain<br />
Subtracts a positive or negative preamplifier gain value from the displayed signal.<br />
Syntax<br />
Example<br />
OUTPUT 718; “PREAMPG IODB; ”<br />
Description<br />
7 amplitude value 7<br />
Unlike using ROFFSET, PREAMPG can change the attenuation depending on the preamplifier<br />
gain entered.<br />
XPREAMPC<br />
A preamplifier gain offset is used for measurements that require an external preamplifier or<br />
long cables. The offset is subtracted from the amplitude readout so that the displayed signal<br />
level represents the signal level at the input of the preamplifier or long cable. The preamplifier<br />
gain offset is displayed at the top of the screen <strong>and</strong> is removed by entering zero.<br />
Note PREAMPG is not reset to 0 by an instrument preset (IP). Be sure to execute<br />
“PREAMPG 0; ” when the preamplifier gain is no longer needed.<br />
Press CAL STClRE if you want the spectrum analyzer to use the current preamplifier gain offset<br />
when power is turned on. Preamplifier gain offset is set to zero by DEFAULT CONFIG .<br />
Query Response<br />
Programming Comm<strong>and</strong>s 5-445
PREFX<br />
Prefix<br />
Specifies or changes the prefix used in save <strong>and</strong> recall operations.<br />
Syntax<br />
I- p r e f i x 7<br />
PREFX del imi ter character delimiter<br />
Item Description/Default Range<br />
Character Any valid character. 0 to 6 characters long,<br />
A through Z <strong>and</strong> the<br />
underscore (the<br />
underscore cannot be<br />
the lirst character of<br />
the preti).<br />
Delimiter Matching characters marking the beginning <strong>and</strong> end of the list of - ( \ @ = / ^ $ % ; ! ’ :<br />
spectrum analyzer comm<strong>and</strong>s.<br />
” &<br />
Equivalent Softkey: Change Prefix .<br />
Related Comm<strong>and</strong>s: CAT, SAVRCLN, STOR.<br />
Example<br />
OUTPUT ~I~~PREFX %DAVE%;~~<br />
5-446 Programming Comm<strong>and</strong>s
PRINT<br />
Print<br />
Initiates a output of the screen data to the remote interface. With appropriate <strong>HP</strong>-IB<br />
comm<strong>and</strong>s, the <strong>HP</strong>-IB can be configured to route the data to an external printer.<br />
Syntax<br />
PRINT<br />
I+@- sP<br />
. .._.<br />
+a--+<br />
PRINT. Print<br />
xprint<br />
Programming Comm<strong>and</strong>s 5.447
PRINT Print<br />
Related Comm<strong>and</strong>s: GETPRNT, PLOT.<br />
Example for the <strong>HP</strong>-IB Interface<br />
The printer usually resides at address 1 <strong>and</strong> the plotter at address 5. (The program is only valid<br />
for <strong>HP</strong> 9000 <strong>Series</strong> 200 <strong>and</strong> 300 computers <strong>and</strong> <strong>HP</strong> Vectra personal computer with an <strong>HP</strong> raster<br />
graphics printer, such as the <strong>HP</strong> Thinkjet.)<br />
This example illustrates how an external controller can initiate the sending of print data to an<br />
external printer.<br />
OUTPUT 718."PRINT-"<br />
SEND 7;UNT'UNL LISTEN 1 TALK 18 DATA Sendsdutatoprinter:<br />
Note To print without disconnecting the computer, you must execute the following<br />
BASIC comm<strong>and</strong>s:<br />
ABORT7<br />
LOCAL 7<br />
Then press Icopvl.<br />
Description<br />
The data is output in <strong>HP</strong> raster graphics format. PRINT, PRINT 0, or PRINT BW produces a<br />
monochrome printout. PRINT 1 <strong>and</strong> PRINT COLOR produces a “color format” output for an<br />
<strong>HP</strong> PaintJet printer. Execute “MENU 0;” before printing to blank the softkeys.<br />
The PRINT comm<strong>and</strong> should not be used within a DLP; you should use the GETPRNT comm<strong>and</strong><br />
instead.<br />
5446 Programming Comm<strong>and</strong>s
PRNTADRS<br />
Print Address<br />
Allows you to set the <strong>HP</strong>-IB address of the printer.<br />
Syntax<br />
printer<br />
r address<br />
Item Description/Default<br />
Number Any valid integer number.<br />
Equivalent Softkey: PfsXm AIXJRESS .<br />
Option Required: Option 02 1.<br />
Example<br />
PRNTADRS Print Address<br />
R-awe<br />
0 to 30<br />
10 OUTPUT 718;"VARDEF L,OC,l;MOV L,OC,l2;" Dtf~nes a variable called L-OC, <strong>and</strong><br />
then moves 12 into L-OC.<br />
20 OUTPUT 718;"PRNTADRS 1;" Sets the <strong>HP</strong>-IB address of the printer<br />
to 1.<br />
. You can insert programming comm<strong>and</strong>s<br />
here.<br />
300 OUTPUT 718;"OUTPUT PRNTADRS,F3.0,L,OC;" You could use this statement within<br />
a DLP This statement outputs the<br />
number 12 to the printer<br />
Description<br />
You may find it useful to assign PRNTADRS near the beginning of your program, <strong>and</strong>, from<br />
then on, refer to the printer address in your program as PRNTADRS. The advantage of using<br />
PRNTADRS in this way is that if you need to change the printer address, you need only<br />
change the programming line that assigns the printer address to PRNTADRS (see line 20 of the<br />
programming example).<br />
Query Response<br />
PRNTADRS? returns the current <strong>HP</strong>-IB address of the printer.<br />
printer<br />
r address<br />
output<br />
termination +<br />
Programming Comm<strong>and</strong>s 5449
PRNPRT<br />
Print Port<br />
Selects which port to output printer data from the analyzer. (Option 041 or Option 043)<br />
Syntax<br />
PRNPRT<br />
Related Comm<strong>and</strong>s: PRINT, GETPRINT, PARSTAT, PLTPRT<br />
Example<br />
OUTPUT 718 ; "PRNPRT 3 ; ‘I Routes the print in$ormution to the serial port for Option 043.<br />
Description<br />
PRNPRT 0 = <strong>HP</strong>-IB port of Option 021 or Option 041<br />
PRNPRT 1 = serial port or Option 023<br />
PRNPRT 2 = parallel port of Option 024<br />
PRNPRT 3 = serial port of Option 043<br />
PRNPRT 4 = parallel port of Option 041 or Option 043<br />
Note Setting the PRNPRT to a port inconsistent with the installed hardware option is<br />
ignored, so executing PRNPRT 1 on an <strong>HP</strong>-IB equipped analyzer is ignored.<br />
Query Response<br />
5-450 Programming Comm<strong>and</strong>s
PSTATE<br />
Protect State<br />
PSTATE Protect State<br />
Protects all of the spectrum analyzer’s user state <strong>and</strong> trace registers from being changed,<br />
except when ERASE MEM ALL is pressed.<br />
Caution The spectrum analyzer user states are not protected when EM% ME34 ALL is<br />
pressed.<br />
Syntax<br />
Equivalent Softkey: SAV LOCK OK OFF .<br />
Related Comm<strong>and</strong>s: ERASE, RCLS, SAVES.<br />
Example<br />
OUTPUT 7 18 ; “PSTATE ON; ”<br />
Query Response<br />
output<br />
termination ---)<br />
002<br />
Programming Comm<strong>and</strong>s 5-451
PU<br />
Pen Up<br />
Instructs the spectrum analyzer not to plot vectors on the spectrum analyzer screen until a PD<br />
comm<strong>and</strong> is received.<br />
Syntax<br />
( PU<br />
Related Comm<strong>and</strong>s: DSPLY, PA, PD, PLOT, PR, TEXT.<br />
Example<br />
OUTPUT 718;"IP;BLANK TRA;" Initializes spectrum anulyzeq blanks trace A.<br />
OUTPUT 718;"ANNOT 0FF;GRAT OFF;" Turns oflannotation, graticule.<br />
OUTPUT 718;"PU;" Prevents initial vector from king drawn.<br />
OUTPUT 718;"PA 100,lOO;PD 100,150;" Rxitions pen, pen down.<br />
OUTPUT 718;"150,150,150,100,100,100;" Draws remaining 3 sides of rectangle.<br />
Description<br />
The PU comm<strong>and</strong> is used before the comm<strong>and</strong>s PA (plot absolute), or PR (plot relative), to<br />
suppress drawing while moving to the starting point of a vector. It remains in effect until a PD<br />
comm<strong>and</strong> is received.<br />
5452 Programming Comm<strong>and</strong>s
PURGE<br />
Purge. File<br />
Deletes the specified file from the current mass storage device.<br />
Syntax<br />
Delimiter<br />
Character<br />
Item<br />
Related Comm<strong>and</strong>s: MSI.<br />
Example<br />
character del imi ter<br />
PURGE Purge File<br />
Description/Default Range<br />
XPURGE<br />
Matching characters marking the beginning <strong>and</strong> end of the list of - 1 \ @ = / ^ $ % ; ! ’ :<br />
spectrum analyzer comm<strong>and</strong>s. ” &<br />
Any valid character. Any valid filename.<br />
OUTPUT 718; “MS1 CARD;" Selects the memoq card as the mass storage device.<br />
OUTPUT 718;"PURGE %dMYFILE%;" Deletes the fZ.!.e called “dMYFZJ3” from the memory<br />
card.<br />
Description<br />
Use the MS1 comm<strong>and</strong> to select the mass storage device (either the spectrum analyzer memory<br />
or a memory card) before using the PURGE comm<strong>and</strong>. When deleting a file from a RAM card,<br />
the RAM card files are repacked automatically after a PURGE comm<strong>and</strong> is executed.<br />
Programming Comm<strong>and</strong>s 5453
PWRBW<br />
Power B<strong>and</strong>width<br />
Computes the b<strong>and</strong>width around the trace center, which includes signals whose total power is a<br />
specified percentage of the total trace signal power.<br />
Syntax<br />
Item<br />
User-defmed trace<br />
Trace range<br />
User-defined variable<br />
PWRBW<br />
predefined variable<br />
Description/Default Range<br />
A trace defined by the TRDEF comm<strong>and</strong>. Any valid trace name.<br />
A segment of trace A, trace B, trace C, or a user-defined trace.<br />
A variable defined by VARDEF or ACTDEF comm<strong>and</strong>s. Any valid variable<br />
name.<br />
Predeflned variable A comm<strong>and</strong> that acts as a variable. Refer to ‘lbble 5-1.<br />
Predefined function Function that returns a value. Refer to lbble 5-1.<br />
Trace element An element of trace A, trace B, trace C, or a user-defined trace.<br />
Number Any real or integer number. 0 to 100.<br />
Parameter Values: The field used for the percentage must use a value between 0 <strong>and</strong> 100.<br />
Prerequisite Comm<strong>and</strong>s: TRDEF when using a user-defined trace. ACTDEF or VARDEF for a<br />
user-defined variable. TS when using trace data.<br />
Related Comm<strong>and</strong>s: RB, SP<br />
5.454 Programming Comm<strong>and</strong>s
Example<br />
DISP "CONNECT CAL OUT TO INPUT"<br />
OUTPUT 718;“IP;"<br />
OUTPUT 718;"SNGLS;"<br />
OUTPUT 718;"CF 300MHZ;SP 1MHZ;RB 300KHZ;"<br />
OUTPUT 718;"MXMH TRA;TS;TS;TS;TS;"<br />
OUTPUT 718;"PWRBW TRA, 99.0;"<br />
ENTER 718;P<br />
DISP "THE POWER BANDWIDTH AT 99 PERCENT IS";P/l.OE+3;"kHz"<br />
Description<br />
If trace A is the source, a delta marker is set at the start <strong>and</strong> stop frequencies.<br />
PWRBW Power B<strong>and</strong>width<br />
LXsplays a user prompt.<br />
Initializes spectrum analyzex<br />
Activates single-sweep mode.<br />
Changes centerfrequency,<br />
span, <strong>and</strong> b<strong>and</strong>width.<br />
Activates the maximum<br />
hold of trace A, sweep 4<br />
times.<br />
Returns the 99% power<br />
b<strong>and</strong>width.<br />
Gets the resultf?om the<br />
spectrum analyzer:<br />
Displays the frequency<br />
of the power b<strong>and</strong>width<br />
specQi.ed on the computer<br />
screen.<br />
If 100% is specified, the power b<strong>and</strong>width equals the frequency range of the screen display. If<br />
50% is specified, trace elements are eliminated from either end of the array, until the combined<br />
power of the remaining signal responses equals half of the original power computed. The<br />
frequency span of these remaining trace elements is the power b<strong>and</strong>width returned.<br />
Query Response<br />
Programming Comm<strong>and</strong>s 5-455
PWRUPTIME<br />
Power Up Time<br />
Returns the number of milliseconds that have elapsed since the spectrum analyzer was turned<br />
on.<br />
Syntax<br />
Example<br />
OUTPUT 718;"PWRUPTIME;"<br />
ENTER 718;A<br />
A= A/1000<br />
Executes PWRUPTIME.<br />
Places the result of PWRUPTIME into A.<br />
Changes the milliseconds to seconds.<br />
PRINT "Minutes elapsed ",A/60 Prints the number of minutes that have elapsed since<br />
the spectrum analyzer was turned on.<br />
Description<br />
PWRUPTIME can count the number of milliseconds for up to 232 milliseconds (232 milliseconds<br />
is equivalent to 49.7 days). If the spectrum analyzer is left on for more than 49.7 days,<br />
PWRUPTIME is reset to 0 <strong>and</strong> restarts the count.<br />
Query Response<br />
5-456 Programming Comm<strong>and</strong>s<br />
time<br />
in milliseconds
RB<br />
Resolution B<strong>and</strong>width<br />
Specifies the resolution b<strong>and</strong>width.<br />
Syntax<br />
RB Resolution B<strong>and</strong>width<br />
Item Description/Default Range<br />
Number Any real or integer number. Default unit is Hz. If Option 130 is<br />
installed, 30 Hz to 3<br />
MHz, otherwise 1 kHz<br />
to 3 MHz.<br />
Equivalent Softkey: RES BU AUTO MAN .<br />
Preset State: 3 MHz.<br />
Step Increment: In a 1, 3, 10.<br />
Related Comm<strong>and</strong>s: AUTO, SP, ST, VB, VBR.<br />
Example<br />
OUTPUT 718;"RB IKHZ;" Sets the resolution b<strong>and</strong>width to 1 kHz.<br />
XRB<br />
Programming Comm<strong>and</strong>s 5457
RR Resolution B<strong>and</strong>width<br />
Description<br />
The coupling between sweep time <strong>and</strong> resolution b<strong>and</strong>width is terminated by this comm<strong>and</strong>.<br />
Execute RB AUTO to reestablish coupling. (Also see “AUTO.“)<br />
The 200 Hz, 9 kHz, <strong>and</strong> 120 kHz 6-dB resolution b<strong>and</strong>widths (used for EM1 testing) are available<br />
by specifying 200 Hz (for spectrum analyzers with Option 130 installed), 9 kHz, or 120 kHz as<br />
the frequency value; the front-panel knob, step increment keys, <strong>and</strong> auto-coupled settings<br />
provide the 1, 3, 10 resolution b<strong>and</strong>width sequence only. Frequencies are rounded to the<br />
nearest value in the 1, 3, 10 sequence if the frequency is other than 9 kHz, 120 kHz, 5 MHz, or<br />
in the 1, 3, 10 sequence.<br />
The spectrum analyzer provides uncalibrated b<strong>and</strong>widths of 300 Hz (10 Hz if the spectrum<br />
analyzer has Option 130 installed in it) <strong>and</strong> 5 MHz.<br />
Query Response<br />
5-458 Programming Comm<strong>and</strong>s
RCLS<br />
Recall State<br />
RCLS Recall State<br />
Recalls spectrum analyzer state data from the specified state register in spectrum analyzer<br />
memory.<br />
Syntax<br />
state<br />
r register<br />
Item Description/Default Range<br />
Number Any real or integer number. 1 to 9<br />
Equivalent Softkey: INTEHMAL -> STATE .<br />
Related Comm<strong>and</strong>s: LOAD, POWERON, RCLT, SAVES.<br />
Example<br />
OUTPUT 718 ; “IP ; CF 300MHZ ; SP 1MHZ ; I’ Changes centerfreqwnc2(, span.<br />
OUTPUT 718 ; “SAVES 3 ; ” Saves state in register 3.<br />
OUTPUT 718. s “IP , * ”<br />
OUTPUT 7 18 , * “RCLS 3 , * ”<br />
Recalls the contents of register 3.<br />
Description<br />
You can specify a state register number from one to nine. Registers one through eight are<br />
reserved for your use. Registers one through eight contain instrument state information if<br />
instrument state information has been stored in it with the SAVES comm<strong>and</strong>. State register<br />
nine contains the previous state data.<br />
Note The RCLS recalls state data from spectrum analyzer memory. See “LOAD” or<br />
“SAVRCLN” to recall state data from the memory card.<br />
Programming Comm<strong>and</strong>s 5-458
RCLT<br />
Recall Trace<br />
Recalls previously saved trace data, amplitude factors, or limit-line data from the specified<br />
trace register in spectrum analyzer memory. Trace data is recalled with instrument state, date,<br />
<strong>and</strong> screen title.<br />
Syntax<br />
RCLT<br />
user-defined trace<br />
trace range<br />
Item Description/Default Range<br />
User-defined trace A trace defined by the TRDEF comm<strong>and</strong>. Any valid trace name.<br />
Trace range A segment of trace A, trace B, trace C, or a user-defined trace.<br />
Number Any valid integer. 0 to TRCMEM - 1.<br />
Equivalent Softkey: The RCLT comm<strong>and</strong> <strong>and</strong> the VIEW comm<strong>and</strong>s are equivalent to<br />
Intsmal -2 Trace.<br />
Parameter Value: 0 to TRCMEM - 1.<br />
Prerequisite Comm<strong>and</strong>s: TRDEF when using a user-defined trace.<br />
Related Comm<strong>and</strong>s: CAT, CLRW, LOAD, SAVET, SNGLS, TRCMEM, TS, VIEW.<br />
Example<br />
10 OUTPUT 718;"IP;CF 300MHZ;SP 20MHZ;TS;" Initializes spectrum anulyq changes<br />
the center frequency <strong>and</strong> span.<br />
20 OUTPUT 718;"SAVET TRA,l;"<br />
Saves spectrum analyzer state <strong>and</strong> trace<br />
A data in register 1.<br />
30 OUTPUT 718;"IP;"<br />
Initializes spectrum analyzer<br />
40 OUTPUT 718;"RCLT TRA,l;VIEW TRA;" Recalls spectrum analyzer state, trace<br />
data; displays the result.<br />
50 END<br />
5-460 Programming Comm<strong>and</strong>s<br />
I<br />
XRCLl
Description<br />
RCEI’ Recall Trace<br />
The state <strong>and</strong> trace data are recalled when the trace destination is trace A, trace B, or trace C.<br />
When using a user-defined trace or a trace range for the trace destination, only the trace data<br />
is recalled.<br />
When recalling frequency-amplitude correction data, you need to specify AMPCOR as the<br />
destination. When recalling limit line table data, specify LIMILINE as the destination.<br />
To avoid overwriting the recalled trace data, the VIEW comm<strong>and</strong> should be performed<br />
immediately after the RCLT comm<strong>and</strong> when recalling trace data (see line 40 in the example).<br />
Note The RCLT recalls trace data from spectrum analyzer memory. See “LOAD” or<br />
“SAVRCLN” to recall trace data from the memory card.<br />
Programming Comm<strong>and</strong>s 5-461
REL<strong>HP</strong>IB<br />
Release <strong>HP</strong>-IB<br />
Releases spectrum analyzer control of the <strong>HP</strong>-IB.<br />
Syntax<br />
Option Required: Option 021.<br />
Related Comm<strong>and</strong>s: ENTER, OUTPUT.<br />
Example<br />
OUTPUT 718 ; "REL<strong>HP</strong>IB ; ‘I The spectrum analyzer releases control of <strong>HP</strong>-IB so that another<br />
dewice can control the bus.<br />
Description<br />
The REL<strong>HP</strong>IB comm<strong>and</strong> causes the device that is acting as the controller on the <strong>HP</strong>-IB (for<br />
example, the spectrum analyzer) to relinquish control of the bus.<br />
5-462 Programming Comm<strong>and</strong>s
REPEAT UNTIL<br />
Repeat Until<br />
The REPEAT <strong>and</strong> UNTIL comm<strong>and</strong>s form a looping construct.<br />
Syntax<br />
Item<br />
Analyzer comm<strong>and</strong><br />
User-defined variable<br />
Predefined variable<br />
Number<br />
Trace element<br />
% predefined variable I<br />
buuser-defined vorioblel<br />
L trace element /<br />
/<br />
REPEAT UNTIL Repeat Until<br />
UNTIL<br />
Description/Default R=u3e<br />
Any valid complete spectrum analyzer comm<strong>and</strong>.<br />
A variable defined by VARDEF or ACTDEF comm<strong>and</strong>s. Any valid variable<br />
name.<br />
A comm<strong>and</strong> that acts as a variable. Refer to ‘lbble 5-1.<br />
Any real or integer number. Real number range.<br />
An element of trace A, trace B, trace C, or a user-defined trace.<br />
Prerequisite Comm<strong>and</strong>s: FUNCDEF when using a user-defined function. ACTDEF or<br />
VARDEF when using a user-defined variable.<br />
Related Comm<strong>and</strong>s: ABORT, IF (IF/THEN/ELSE/ENDIF).<br />
Programming Comm<strong>and</strong>s 5-463
REPEAT UNTIL Repeat Until<br />
Example<br />
The following program lowers any off-screen signal.<br />
10 OUTPUT 718;"IP;"<br />
20 OUTPUT 718;"SNGLS;TS;MKPK HI;"<br />
30 OUTPUT 718;"IF MA,GT,RL THEN;"<br />
40 OUTPUT 718;"REPEAT;"<br />
50 OUTPUT 718;"RL UP;TS;MKPK HI;"<br />
60 OUTPUT 718;"UNTIL MA,LE,RL;"<br />
70 OUTPUT 718;"ENDIF;"<br />
80 OUTPUT 718."CONTS-" s 3<br />
70 END<br />
Description<br />
Initializes spectrum anal~zfx<br />
Activates single-sweep mode, takes sweep, places<br />
marker on signal peak.<br />
Performs lines 40, 50 <strong>and</strong> 60 if the marker<br />
amplitude is greater than the reference level.<br />
Increases refwence level, takes sweep, places<br />
marker on signal peak.<br />
Does line 40 until peak amplitude is less than<br />
or equal to the reference level.<br />
Ends the IF THEN constrwt.<br />
All comm<strong>and</strong>s following the REPEAT comm<strong>and</strong> are executed until the comparison specified<br />
after the UNTIL comm<strong>and</strong> is true.<br />
The following are used for comparing the oper<strong>and</strong>s:<br />
GT Greater than<br />
I.3 Less than<br />
IJ3 Less than or equal to<br />
GE Greater than or equal to<br />
EQ Equal to<br />
NE Not equal to<br />
When used within a downloadable program (DLP), the number of REPEAT UNTIL statements<br />
that can be nested is limited to 20.<br />
5-464 Programming Comm<strong>and</strong>s
RESETRL<br />
Reset Reference Level<br />
Resets the reference level to its instrument preset level.<br />
Syntax<br />
Related Comm<strong>and</strong>s: AUNITS, IP, ML, RL, RLPOS.<br />
Example<br />
OUTPUT 718;"RESETRL;"<br />
RRSETRL Reset Reference Level<br />
Programming Comm<strong>and</strong>s 5-465
RETURN<br />
Return<br />
Stops the operation of a user-defined comm<strong>and</strong> <strong>and</strong> returns program operation to the point<br />
where the user-defined function was called.<br />
Syntax<br />
RETURN<br />
Related Comm<strong>and</strong>s: ABORT. FUNCDEF. IF (IFflHEN/ELSE/ENDIF), REPEAT<br />
(REPEAT/UNTIL). ’ ’ ’<br />
Example<br />
10<br />
20<br />
30<br />
40<br />
50<br />
60<br />
70<br />
80<br />
90<br />
100<br />
110<br />
120<br />
130<br />
140<br />
150<br />
160<br />
170<br />
180<br />
190<br />
200<br />
210<br />
220<br />
230<br />
240<br />
250<br />
260<br />
Description<br />
OUTPUT 718."IP*"<br />
OUTPUT 718;"SNGLS;TS;DONE?"<br />
ENTER 718;Done<br />
!<br />
OUTPUT 718;"FUNCDEF D,LP,O"<br />
OUTPUT 718;"CF 300MZ;SP 10MZ;TS;"<br />
OUTPUT 718;"MKPK HI;"<br />
OUTPUT 718;"PU;PA 60,180;"<br />
OUTPUT 718;"IF MKA,LT,-30 THEN;"<br />
OUTPUT 718;"TEXT'NO SIGNAL FOUND';"<br />
OUTPUT 718;"HD;"<br />
OUTPUT 718;"CONTS;"<br />
OUTPUT 718;"RETURN;"<br />
OUTPUT 718;"ELSE;"<br />
OUTPUT 718;"TEXT'SIGNAL FOUND';"<br />
OUTPUT 718*"ENDIF."<br />
OUTPUT 718;"SP 5MZ;TS;MKPK;"<br />
OUTPUT 718."MKCF*"<br />
OUTPUT 718;"MKRL;TS;"<br />
OUTPUT 718;"HD;"<br />
OUTPUT 718;"CONTS;"<br />
OUTPUT 718~"Q~"<br />
# ,<br />
!<br />
OUTPUT 718;"D,LP;"<br />
!<br />
END<br />
Initializes spectrum analyzer<br />
put in single sweep mode<br />
wait until done<br />
dejines user de@ed fan&ion<br />
set CF <strong>and</strong> SPAN<br />
marker peak<br />
position pen, get ready for text<br />
marker less than -30 dBm?<br />
refresh graticule<br />
back to continuous sweep<br />
exit the function<br />
narrow span, marker peak<br />
marker to CF<br />
marker to RL<br />
refresh graticule<br />
back to continuous sweep<br />
end of user &fined function<br />
this line executes function D-LP<br />
The example shows the use of the RETURN comm<strong>and</strong> to exit from a user-defined function.<br />
When the RETURN is encountered, execution within the function halts <strong>and</strong> control returns to<br />
the calling context.<br />
5-466 Programming Comm<strong>and</strong>s
REV<br />
Revision<br />
RJW Revision<br />
Returns the date code of the firmware revision date in YYMMDD format (for example, 860910<br />
indicates 10 September 1986).<br />
Syntax<br />
function path only<br />
Equivalent Softkey: SHOW QPTIONS displays the firmware revision date.<br />
Related Comm<strong>and</strong>s: ID, SER, TIMEDATE.<br />
Example<br />
OUTPUT 718 ; "REV ; I’ Gets the firmware revision date of spectrum analgz-ez<br />
ENTER 718;A Puts the spectrum analyzer response in the computer variable, A.<br />
DISP A Displays the jiirmware rezviSiOn date on the computer screen.<br />
Description<br />
The date of the firmware revision also appears when the instrument is first turned on, but it is<br />
displayed in the day, month, year format.<br />
Query Response<br />
XRE”<br />
output<br />
termination �<br />
QREV<br />
Programming Comm<strong>and</strong>s 5467
RL<br />
Reference Level<br />
Specifies the amplitude value of the reference level.<br />
Syntax<br />
RL<br />
- ompl itude v a l u e 7<br />
Item Description/Default Range<br />
Number Any real or integer number. Default unit is the current Amplitude range of<br />
amplitude unit. the spectrum analyzer.<br />
Equivalent Softkey: REF LYL .<br />
Preset State: 0 dBm.<br />
Step Increment: by 10 dBm.<br />
Related Comm<strong>and</strong>s: AT, MKRL, ML, RESETRL, RLPOS.<br />
Example<br />
10 OUTPUT 718;"IP;SNGLS;CF 300MHZ;SP 20MHZ;"<br />
20 OUTPUT 718;"TS;MKPK HI;MKRL;TS;"<br />
30 OUTPUT 718;"RL?;"<br />
40 ENTER 718;RefJevel<br />
50 PRINT "REFERENCE LEVEL IS",Ref-level,"DM"<br />
60 END<br />
5468 Programming Comm<strong>and</strong>s<br />
Initializes spectrum analy,wq activates<br />
single-sweep mooTq changes centecfmww4,<br />
span.<br />
Zxkes sweep, places marker on signal<br />
peak, sets reference level to marker<br />
level.<br />
Queries reference level.<br />
Puts the spectrum analyzer response<br />
in the computer variable, Reflevel.<br />
XRL
Description<br />
RL Reference Level<br />
The reference level <strong>and</strong> input attenuator are coupled to prevent gain compression. Signals with<br />
peaks at or below the reference level are not affected by gain compression.<br />
Caution Signal levels above +30 dBm will damage the spectrum analyzer.<br />
RL may affect the attenuation value.<br />
Query Response<br />
Programming Comm<strong>and</strong>s 5-469
RLPOS<br />
Reference-Level Position<br />
Selects the position of the reference level.<br />
Syntax<br />
RLPOS<br />
Item Description/Default Range<br />
Number Any real or integer number. 0 to 8.<br />
Step Increment: 1.<br />
Related Comm<strong>and</strong>s: IP, MEASURE, NRL, RL.<br />
Preset State: RLPOS 8.<br />
Example<br />
OUTPUT 718;"IP;"<br />
OUTPUT 718;"MEASURE NRM;"<br />
OUTPUT 718;"AMBPL ON;"<br />
OUTPUT 718;"RLPOS 7;"<br />
Description<br />
XRLPOS<br />
Initializes spectrum analyzer<br />
Changes the measurement mode to normalized.<br />
Activates trace normalization.<br />
Rwitions the refwence level at the seventh major graticule<br />
division.<br />
The RLPOS comm<strong>and</strong> changes the position of the reference level during log display mode. The<br />
top <strong>and</strong> bottom graticule lines correspond to 8 <strong>and</strong> 0, respectively. RLPOS must be used with<br />
MEASURE NRM or MEASURE SR, <strong>and</strong> AMBPL ON or AMB ON. Arrows appear on the left <strong>and</strong><br />
right side of the screen graticule when the reference level position is changed.<br />
Query Response<br />
5-470 Programming Comm<strong>and</strong>s
RMS<br />
Root Mean Square Value<br />
Returns the root mean square value of the trace in measurement units.<br />
Syntax<br />
RMS<br />
b u s e r - d e f i n e d t r a c e I<br />
RMS Root Mean Square Value<br />
Item Description/Default Range<br />
User-defined trace A trace defmed by the TRDEF comm<strong>and</strong>. Any valid trace name.<br />
Trace range A segment of trace A; trace B, trace C, or a user-defined trace.<br />
Prerequisite Comm<strong>and</strong>s: TRDEF when using a user-defined trace. TS when using trace data.<br />
Related Comm<strong>and</strong>s: MEAN, PDA, PDF, STDEV, VARIANCE.<br />
Example<br />
OUTPUT 718;"IP;SNGLS;TS;"<br />
OUTPUT 718*"RMS TRA'."<br />
- 9<br />
ENTER 718;Ikmber<br />
DISP Number<br />
Description<br />
Trace data, user-defined trace data, <strong>and</strong> trace range data are treated as 16-bit integers.<br />
Query Response<br />
Programming Comm<strong>and</strong>s 5-471
ROFFSET<br />
Reference Level Offset<br />
Offsets all amplitude readouts without affecting the trace.<br />
Syntax<br />
ROFFSET<br />
Item Description/Default I Range<br />
Number Any real or integer number. Default unit is dB. -200 dB to + 200 dB.<br />
Equivalent Softkey: REF LVL OFFSET .<br />
Preset State: 0 dB.<br />
Related Comm<strong>and</strong>s: AT, RL.<br />
Example<br />
10 OUTPUT 718; “IP; ”<br />
20 OUTPUT 718;“RL -2ODB;”<br />
30 OUTPUT 718 ; “ROFFSET -10 ; ”<br />
40 OUTPUT 718;"RL?;"<br />
50 ENTER 718;Ref<br />
60 DISP "THE NEW REFERENCE LEVEL IS ",Ref<br />
70 END<br />
Description<br />
Initializes spectrum analyzex<br />
Changes the refwence level.<br />
Changes spectrum analyzer reference offset<br />
value.<br />
Gets the reference value from spectrum<br />
analyzer:<br />
Puts the spectrum analyzer response in<br />
the computer variable, I@$<br />
LXsphys -30 as the new refwence level.<br />
Once activated, the ROFFSET comm<strong>and</strong> displays the amplitude offset in the active function<br />
block. And, as long as the offset is in effect, the offset is displayed on the left side of the<br />
screen.<br />
Entering ROFFSET 0 or presetting the spectrum analyzer eliminates an amplitude offset.<br />
Query Response<br />
5-472 Programming Comm<strong>and</strong>s
RQS<br />
Service Request Mask<br />
Sets a bit mask for service requests (see “SRQ”).<br />
Syntax<br />
m a s k f o r s e r v i c e<br />
RQS Service Request Mask<br />
Item Description/Default Range<br />
Number Any valid integer. 0 to 62.<br />
Related Comm<strong>and</strong>s: SRQ, STB.<br />
Example<br />
OUTPUT 718;"RQS 12;" Sends a mask bit for hardware broken <strong>and</strong> end of sweep.<br />
Description<br />
Assignment of values for the mask is as follows:<br />
32 = Illegal comm<strong>and</strong> (bit 5)<br />
16 = Comm<strong>and</strong> complete (bit 4)<br />
8 = Hardware broken (bit 3)<br />
4 = End of sweep (bit 2)<br />
2 = Units key pressed (bit 1)<br />
As shown in the example, a mask with hardware broken <strong>and</strong> end of sweep is equal to 12 (8 +<br />
4). The mask also disables comm<strong>and</strong> complete <strong>and</strong> illegal comm<strong>and</strong> interrupts.<br />
To activate all conditions in the mask, the mask value is equal to 62 (32 + 16 + 8 + 4 + 2). lb<br />
set the service request mask for all conditions, execute OUTPUT 718 ; "RQS 62 ; 'I.<br />
XRQS<br />
Programming Comm<strong>and</strong>s 5-473
RQS Service Request Mask<br />
Each bit in the status byte is defined as follows:<br />
1 Indicates that the units key was pressed. SRQ 102 appears on the spectrum analyzer<br />
screen. If you activate the units key bit, it will remain active until you activate “EE” <strong>and</strong><br />
press a units key. (See “EE.“)<br />
2 Indicates end of sweep. SRQ 104 appears on the spectrum analyzer screen. If you send any<br />
RQS value that contains mask value 4, another sweep will be taken.<br />
3 Indicates broken hardware. SRQ 110 appears on the spectrum analyzer screen.<br />
4 Indicates completion of a comm<strong>and</strong>. It is triggered by EOI at the end of a comm<strong>and</strong> string<br />
or the completion of a print or plot.<br />
5 Indicates an illegal spectrum analyzer comm<strong>and</strong> was used. SRQ 140 appears on the<br />
spectrum analyzer screen.<br />
0 (LSB), 6, <strong>and</strong> 7 are not used.<br />
The spectrum analyzer screen numbers 102, 104, <strong>and</strong> 110 are the octal values corresponding<br />
to the status register values; that is, SRQ 102 = bit 6 = octal 100 <strong>and</strong> bit 2 = octal 2 are both<br />
true.<br />
A service request is generated only if the proper request mask bit has been set, <strong>and</strong> either<br />
the condition itself or the Force Service Request (see “SRQ”) is sent. To set the request mask,<br />
choose the desired interrupt conditions <strong>and</strong> sum their assigned values. Executing the RQS<br />
comm<strong>and</strong> with this value sets the bit mask. After setting the bit mask, only the chosen<br />
conditions can produce an interrupt. Generally, you must set the bit mask using the RQS<br />
comm<strong>and</strong>. However, the “hardware broken” <strong>and</strong> “illegal remote comm<strong>and</strong>” conditions are<br />
automatically enabled after presetting or sending the IP comm<strong>and</strong>. Pressing (PRESET) or sending<br />
the IP comm<strong>and</strong>, then, produces the same interrupt bit mask as sending “RQS 40;” (decimal 40<br />
is the sum of the assigned values of these two interrupt bits, 32 = Bit 5 <strong>and</strong> 8 = Bit 3).<br />
For most conditions, the RQS mask bit stays set until the next IP or RQS comm<strong>and</strong> is executed.<br />
The only condition in which this does not apply is the Units Key Pressed bit. When this bit (bit<br />
1) is set in the RQS mask, a Units Key Pressed interrupt occurs if EE (enable entry mode) is<br />
executed <strong>and</strong> a front-panel units key such as Hz, kHz, MHz, or GHz is pressed.<br />
When a units key is pressed, the interrupt occurs <strong>and</strong> the Units Key Pressed bit in the RQS<br />
mask is reset. To reenable the Units Key Pressed interrupt, you must send a new RQS mask.<br />
Query Response<br />
5-474 Programming Comm<strong>and</strong>s
SAVEMENU<br />
Save Menu<br />
Saves menu 1 under the specified menu number.<br />
Syntax<br />
SAVEMENU Save Menu<br />
Item Description/Default R-f@<br />
Number Any valid integer. 1, 101 to 200.<br />
Example<br />
OUTPUT 718;"MENU 1;" Laplays rrlenu 1.<br />
OUTPUT 718;"SAVEMENU 101;" Copies the key functions from menu 1 into menu 101.<br />
OUTPUT 718;"KEYCLR;" Erases the key functions of menu 1.<br />
PAUSE<br />
OUTPUT 718;"MENU 101;" Displays ?T?Enu 101.<br />
Description<br />
The softkey number corresponds to the menu number as follows:<br />
softkey number = (menu number - 1) x 6 + softkey position<br />
(The softkey position range is 1 through 6.)<br />
For example:<br />
Menu 1 contains softkey numbers 1 through 6<br />
Menu 101 contains softkey numbers 601 to 606<br />
Menu 200 contains softkey numbers 1195 to 1200<br />
Menu 1 is can be accessed by pressing (j-1, UJser Menus .<br />
Menus 101 through 200 as well as menu 1 can be accessed using the MENU comm<strong>and</strong>. See<br />
“MENU” for more information about accessing softkeys <strong>and</strong> menus.<br />
Programming Comm<strong>and</strong>s 5475
SAVES<br />
Save State<br />
Saves the currently displayed instrument state in spectrum analyzer memory.<br />
Syntax<br />
SAVES<br />
state<br />
r register<br />
Item Description/Default Range<br />
Number Any valid integer. 1 to 8.<br />
Equivalent Softkey: STATE -> INTRNL .<br />
Related Comm<strong>and</strong>s: OL, PSTATE, RCLS, SAVET, STOR.<br />
Example<br />
OUTPUT 718;"IP;CF 300MHZ;SP 20MHZ;" Initializes spectrum analyze?; changes center<br />
frequencvp span.<br />
OUTPUT 718."SAVES 8 1." 3 Saves spectrum analyzer state in register 1.<br />
Description<br />
The state data is saved in the specified state register if the state registers have not been locked<br />
by the PSTATE comm<strong>and</strong>.<br />
Only state registers 1 through 8 are available for saving the instrument state. State register<br />
nine contains the previous state data, state register zero contains the current state.<br />
Note The SAVES comm<strong>and</strong> saves state data in spectrum analyzer memory. See<br />
“STOR” or “SAVRCLN” to save state data on a RAM card.<br />
5-476 Programming Comm<strong>and</strong>s<br />
XSAVES
SAVET<br />
Save Trace<br />
!&WET Save Trace<br />
Saves the selected trace data <strong>and</strong> state information, amplitude correction factors, or limit-line<br />
tables in spectrum analyzer memory.<br />
Syntax<br />
SAVET<br />
Item<br />
User-defined trace<br />
Trace range<br />
Number<br />
Description/Default<br />
trace<br />
r register<br />
A trace defined by the TRDEF comm<strong>and</strong> with a length of 401<br />
elements.<br />
A segment of trace A, trace B, trace C, or a user-defined trace.<br />
Any valid integer.<br />
Equivalent Softkey: Trace -> Intrnl .<br />
Prerequisite Comm<strong>and</strong>s: TRDEF when using a user-defined trace.<br />
Related Comm<strong>and</strong>s: CAT, CLRW, PSTATE, RCLT, SNGLS, TS, VIEW.<br />
Example<br />
Rwe<br />
XSAVET<br />
Any valid trace name.<br />
0 to TRCMEM - 1.<br />
OUTPUT 718;"IP;CF 300MHZ;SP 20MHZ;TS;" Initializes spectrum analym changes the<br />
center frequency <strong>and</strong> span.<br />
OUTPUT 718;"VIEW TRA;SAVET TRA,l;" Puts trace A in the view mode, saves spectrum<br />
analyzer state <strong>and</strong> trace A data in register<br />
1.<br />
OUTPUT 718;"IP;" Initializes spectrum analyzer<br />
OUTPUT 718;"RCLT TRA,l;VIEW TRA;" Recalls spectrum analyzer state, trace data.<br />
Programming Comm<strong>and</strong>s 5.477
SAVET Save Trace<br />
Description<br />
The trace data is saved in the specified register if the state registers have not been locked by<br />
PSTATE ON (see “SAVES”). Use AMPCOR to save amplitude correction factors, LIMILINE to<br />
save limit-line tables.<br />
The TS <strong>and</strong> VIEW comm<strong>and</strong>s should be executed prior to saving trace data.<br />
The SAVET comm<strong>and</strong> saves trace data, amplitude correction factors, or limit-line tables in<br />
spectrum analyzer memory. See “STOR” or “SAVRCLN” to save data on a RAM card.<br />
5.478 Programming Comm<strong>and</strong>s
SAVRCLF<br />
Save or Recall Flag<br />
Indicates a save or recall operation.<br />
Syntax<br />
SAVRCLF<br />
SAVRCLF Save or Recall Flag<br />
Related Comm<strong>and</strong>s: MSI, PREFX, RCLS, RCLT, SAVES, SAVET, SAVRCLN, SAVRCLW.<br />
Example<br />
This example allows trace A to be saved on a RAM card.<br />
OUTPUT 718; “SAVRCLF SAVE; ”<br />
OUTPUT 718; “SAVRCLW TRA; ”<br />
OUTPUT 718; “MS1 CARD; ”<br />
OUTPUT 718 ; ~~PFW~ %FRED% ; 11<br />
OUTPUT 718;“PU;PA O,lGO;TEXT%ENTER TEST NUMBER%;”<br />
OUTPUT 718 ; ” SAVRCLN EP ; ”<br />
The RAM card now contains a file called tFRED_(register number).<br />
Spec@ies a save operation.<br />
Spec4Jie.s the source as trace A.<br />
Specifies the card as the mass<br />
storage device.<br />
SpecQies the pre$k to store the<br />
trace data under:<br />
Prompts the user for the number<br />
to append to the prem.<br />
Ajbr the user enters the number;<br />
the number is to appended<br />
to the pre$x<strong>and</strong> the data transfer<br />
is initiated.<br />
Programming Comm<strong>and</strong>s 5479
SAVRCLN<br />
Save or Recall Number<br />
Specifies the number to append to the prefix for a save or recall operation, <strong>and</strong> initiates the<br />
transfer of data.<br />
Syntax<br />
SAVRCLN<br />
number to<br />
Item Description/Default Range<br />
XSAVRCLN<br />
Number Any valid integer. Dependent on mass<br />
storage device.<br />
Related Comm<strong>and</strong>s: MSI, PREFX, RCLS, SAVES, SAVRCLF, SAVRCLW.<br />
Example<br />
This example allows trace A to be saved on a RAM card.<br />
OUTPUT 718;"SAVRCLF SAVE;"<br />
OUTPUT 718;"SAVRCLW TRA;"<br />
OUTPUT 718;"MSI CARD;"<br />
OUTPUT 718;lf~~~FX %FRED%;"<br />
OUTPUT 718;"PU;PA O,IGO;TEXT%ENTER TEST NUMBER%;"<br />
OUTPUT 718;"SAVRCLN EP;"<br />
5480 Programming Comm<strong>and</strong>s<br />
Specifies a save operation.<br />
Spetii_ifies the source as trace A.<br />
Specifies the card as the mass<br />
storage dewice.<br />
SpecQies the prem to store the<br />
trace data under:<br />
Prompts the user for the number<br />
to append to the prem.<br />
A$er the user enters the number,<br />
the number is appended to<br />
the pre& <strong>and</strong> the data transfer<br />
is initiated.
Description<br />
SAVRCLN Save or Recall Number<br />
SAVRCLN is used to save or recall data from spectrum analyzer memory or from a RAM card.<br />
SAVRCLN is useful if you want to write a program that allows the spectrum analyzer operator<br />
to save data in spectrum analyzer memory or on a RAM card. The SAVRCLN comm<strong>and</strong> uses<br />
the SAVRCLF flag information, SAVRCLW information, prefix, <strong>and</strong> mass storage device when<br />
transferring data.<br />
Because the SAVRCLN comm<strong>and</strong> initiates the transfer of data, it should be the last comm<strong>and</strong><br />
specified in the sequence to save or recall data.<br />
The sequence to save or recall data is as follows:<br />
1. Specify either a save or recall operation with SAVRCLF.<br />
2. Indicate the type of data to be saved or recalled using SAVRCLW.<br />
3. Specify a RAM card or spectrum analyzer memory as the mass storage device with MSI.<br />
4. When saving to or recalling from a RAM card, specify the prefix to be used with PREFX.<br />
The prefix is ignored when saving or recalling from spectrum analyzer memory.<br />
5. Enter the number to append to the prefix <strong>and</strong> initiate the data transfer with SAVRCLN.<br />
When saving trace data, amplitude correction factors, or limit-line tables in spectrum analyzer<br />
memory, specify a number within the trace register number range (0 to TRCMEM - 1). When<br />
saving state data in spectrum analyzer memory, specify a number within the state number<br />
range (1 to 8).<br />
When saving data on a RAM card, the number plus the number of characters in the prefix must<br />
not exceed eight characters.<br />
Note With the memory card reader, the spectrum analyzer can read from either a<br />
RAM (r<strong>and</strong>om-access memory) card or a ROM (read-only memory card). lb<br />
write to a memory card, the memory card must be a RAM card. The spectrum<br />
analyzer cannot write to a ROM card.<br />
Programming Comm<strong>and</strong>s 5481
SAVRCLW<br />
Save or Recall Data<br />
Specifies the data to be transferred: trace A, trace B, trace C, program, amplitude correction<br />
factors, limit line, or state.<br />
Syntax<br />
SAVRCLW<br />
Related Comm<strong>and</strong>s: MSI, PREFX, RCLS, RCLT, SAVES, SAVET, SAVRCLF, SAVRCLN.<br />
Example<br />
This example allows the current spectrum analyzer state to be saved on a RAM card.<br />
XSAVRCLW<br />
OUTPUT 718;"SAVRCLF SAVE;" SpecQies a save operation.<br />
OUTPUT 718;"SAVRCLW STATE;" Spec(jies the source as the current spectrum analyzer state.<br />
OUTPUT 718;"MSI CARD;" SpecQies the card as the mass storage okwice,<br />
OUTPUT 718;"PREFX %FRED%;" Spec@.es the pre@ to store the state data under:<br />
OUTPUT. 718;"SAVRCLN 34;" Appends the register number 34 to the prefix <strong>and</strong> initiates<br />
the data transfm<br />
The RAM card now has a file called sFRED-34 that contains the instrument state.<br />
Description<br />
SAVRCLW is used to save or recall data in spectrum analyzer memory or on a RAM card. See<br />
“SAVRCLN” for the sequence of comm<strong>and</strong>s to initiate a data transfer.<br />
The SAVRCLW parameters correspond to the type of data transferred as shown in the following<br />
table.<br />
5-482 Programming Comm<strong>and</strong>s<br />
Parameter Type of Data Transferred<br />
TRA Trace A.<br />
TRB Trace B.<br />
TRC Trace C.<br />
DLP Downloadable programs.<br />
STATE Instrument state.<br />
LIMILINE Limit lines.<br />
. AMPCOR , AmDlitude correction factors
SEGDEL<br />
Segment Delete<br />
Deletes the specified segment from the limit-line tables.<br />
Syntax<br />
SEGDEL<br />
segment<br />
7 number<br />
Related Comm<strong>and</strong>s: LIMIMODE, LIMISEG, LIMISEGT, SENTER, SENTERT.<br />
Example 1<br />
SEGDEL Segment Delete<br />
This example uses LIMIMODE for entering segments into the upper limit-line table, then<br />
entering a segment into the lower limit-line table (upper <strong>and</strong> lower limit lines are treated as<br />
separate tables). Line 60 demonstrates the effect of deleting a segment when the upper <strong>and</strong><br />
lower limit-line tables are treated separately.<br />
10 OUTPUT 718;"LIMIDEL;"<br />
20 OUTPUT 718;"LIMIMODE UPPER ;<br />
25 OUTPUT 718;"LIMIFT FREQ;"<br />
30 OUTPUT 718;"LIMISEG BOOMHZ ,<br />
40 OUTPUT 718;"LIMIMODE LOWER II<br />
50 OUTPUT 718;"LIMISEG 300MHZ;-70DB,FLAT;"<br />
60 OUTPUT 718;"SEGDEL 1;"<br />
70 END<br />
,I<br />
-3ODB,FLAT;"<br />
Deletes the current limit-line table, sets<br />
the table type to jixed.<br />
Speci$?es the upper limit-line table.<br />
Limit lines to be based on frequenq.<br />
Enters a segment into the upper limitline<br />
table.<br />
Spe&fi.es the lower limit-line table.<br />
l3nters a segment into the lower limitline<br />
table.<br />
Deletes the segment from the lower limitline<br />
table.<br />
Programming Comm<strong>and</strong>s 5-483
SEGDEL Segment Delete<br />
Example 2<br />
With the addition of line 60, the upper <strong>and</strong> lower limit-line tables are no longer treated as<br />
separate tables, but as one table. The segment is deleted from the upper <strong>and</strong> lower limit-line<br />
tables (for the given frequency).<br />
10 OUTPUT 718;"LIMIDEL;"<br />
20 OUTPUT 718;"LIMIMODE UPPER;"<br />
25 OUTPUT 718;"LIMIFT FREQ;"<br />
30 OUTPUT 718;"LIMISEG 300MHZ,-30DB,FLAT;"<br />
40 OUTPUT 718;"LIMIMODE LOWER;"<br />
50 OUTPUT 718;"LIMISEG SOOMHZ ,-70DB,FLAT;"<br />
60 OUTPUT 718;"LIMIMODE UPLOW;"<br />
70 OUTPUT 718;"SEGDEL 1;"<br />
80 END<br />
Description<br />
Deletes the current limit-line table.<br />
Specifies the upper limit-line table.<br />
Limit lines to be based on frequency.<br />
Enters segment into the upper limitline<br />
table.<br />
Spec@es the lower limit-line table.<br />
Enters a segment into the lower limitline<br />
table<br />
Spe&@ both the upper <strong>and</strong> lower<br />
limit-line tables.<br />
Deletes the segment from the upper<br />
<strong>and</strong> lower limit-line tables.<br />
The result of SEGDEL depends on the setting of the LIMIMODE comm<strong>and</strong> as shown in the<br />
following table.<br />
LIMIMODE Setting Result of SEGDEL<br />
LIMIMODE UPPER Deletes specified segment from the upper limit-line table.<br />
LIMIMODE LOWER Deletes specilled segment from the lower limit-line table.<br />
LIMIMODE UPLOW Deletes specified segment from the upper <strong>and</strong> lower limit-line table.<br />
LIMIMODE DELTA Deletes specified segment from the mid <strong>and</strong> delta limit-line table.<br />
You may want to query LIMIMODE before using SEGDEL if you are unsure of the LIMIMODE<br />
setting.<br />
‘Ib determine the number of each segment, you can use the softkeys accessed by Edi% Limit<br />
to display the limit-line table. (Limit-line entries are sorted according to frequency or time.)<br />
5.484 Programming Comm<strong>and</strong>s
SENTER<br />
Segment Entry for Frequency Limit Lines<br />
SENTER Segment Entry for Frequency Limit Lines<br />
Enters the limit-line data in the upper <strong>and</strong> lower limit-line table or the mid <strong>and</strong> delta table for<br />
limit lines based on frequency.<br />
Syntax<br />
SENTER<br />
r upper or mid value<br />
$ p r e d e f i n e d v a r i a b l e J<br />
huser-defined variable><br />
b trace element J<br />
,- frequency -\<br />
HZ<br />
KHZ<br />
~.b(-E--) . .<br />
qF-) . .<br />
WpT-) . .<br />
L /<br />
predefined variable<br />
lower or delta value<br />
XSENTER<br />
Programming Comm<strong>and</strong>s 5-485
SENTER Segment Entry for Frequency Limit Lines<br />
Item Description/Default<br />
Number Any real or integer number. Default unit is dBm.<br />
User-defined variable A variable defined by VARDEF or ACTDEF comm<strong>and</strong>s.<br />
Predelined variable A comm<strong>and</strong> that acts as a variable. Refer to Table 5-1.<br />
Trace element An element of trace A, trace B, trace C, or a user-defined trace.<br />
Related Comm<strong>and</strong>s: LIMIMODE, LIMIREL, LIMISEG, SEGDEL, SENTERT.<br />
Example 1<br />
This example enters limit-line values into the upper <strong>and</strong> lower limit-line tables.<br />
Range<br />
Varies with FOFFSET<br />
<strong>and</strong> ROFFSET.<br />
Any valid variable<br />
name.<br />
OUTPUT 718;"LIMIFT FREQ;" Sets the limit lines to be based on<br />
frew.=wh<br />
OUTPUT 718;"LIMIMODE UPLOW;LIMIREL OFF;" Spec@.es the upper <strong>and</strong> lower limitline<br />
table asfixed.<br />
OUTPUT 718;"SENTER 300MHZ,-lODB,-50DB,FLAT;" Enters in values jiwasegment.<br />
OUTPUT 718;"SENTER 350MHZ,-15DB,-60DB,FLAT;" Entersinvalwforasegment.<br />
Example 2<br />
OUTPUT 718;"LIMIFT FREQ;" Sets the limit lines to be based on<br />
.Pewenw<br />
OUTPUT 718;"LIMIMODE DELTA;LIMIREL OFF;" Specifies the mid <strong>and</strong> delta table format<br />
<strong>and</strong>#xed type.<br />
OUTPUT 718;"SENTER 300MHZ,-20DB,lODB,FLAT; ‘I Entersinvalues forasegment.<br />
OUTPUT 718;"SENTER 350MHZ,-30DB,20DB,FLAT;" Entersinvaluesforasegment.<br />
Description<br />
Each limit-line segment is specified with a starting frequency, an upper or median amplitude<br />
value, a lower or delta amplitude value, <strong>and</strong> a segment type. The segment type defines how the<br />
line segment is to extend from its starting point to the next segment.<br />
Note If the current limit line table contains lines based on sweep time (as opposed to<br />
a limit line based on the frequency), executing SENTER will clear the current<br />
sweep time limit line table.<br />
The three segment types are FLAT, SLOPE, <strong>and</strong> POINT.<br />
� FLAT draws a zero-slope line between the coordinate point of the current segment <strong>and</strong> the<br />
coordinate point of the next segment, producing limit-line values equal in amplitude for all<br />
frequencies between the two points. If the amplitude values of the two segments differ, the<br />
limit-line will “step” to the value of the second segment.<br />
� SLOPE draws a straight line between the coordinate point of the current segment <strong>and</strong> the<br />
coordinate point of the next segment, producing limit-line values for all frequencies between<br />
the two points.<br />
E-486 Programming Comm<strong>and</strong>s
SENTER Segment Entry for Frequency Limit Lines<br />
� POINT specifies a limit value for the coordinate point, <strong>and</strong> no other frequency points, so<br />
that a POINT segment specifies a limit value for a single frequency. For an upper limit-line,<br />
a POINT segment is indicated by a line drawn from the coordinate point, vertically off the<br />
top of screen. For a lower limit-line, a POINT segment is indicated by a line drawn from the<br />
coordinate point, vertically off the bottom of screen. The POINT segment type should be<br />
used as the last segment in the limit-line table. However, if the last segment in the table is<br />
not specified as the POINT segment type, an implicit point is automatically used. If a visible<br />
POINT segment at the right-h<strong>and</strong> edge of the display is not desired, add an explicit last point<br />
segment to the limit-line table that is higher in frequency than the stop frequency.<br />
Segments are sorted as they are entered according to starting frequency. A maximum of 20<br />
segments can be defined using SENTER. When the type is omitted, the last type given (or<br />
SLOPE if no previous type has been given) is used.<br />
Programming Comm<strong>and</strong>s 5487
SENTERT<br />
Segment Entry for Sweep Time Limit Lines<br />
Enters the limit-line data in either the upper <strong>and</strong> lower limit-line table or the mid <strong>and</strong> delta<br />
table for limit lines based on sweep time.<br />
Syntax<br />
SENTERT<br />
5488 Programming Comm<strong>and</strong>s<br />
time -,<br />
-I<br />
us<br />
predefined variable<br />
user-defined variable<br />
trace element<br />
lower or delta value<br />
/ \<br />
% p r e d e f i n e d v a r i a b l e d<br />
buuser-defined voriobleJ<br />
L trace element 2<br />
/
SENTERT Segment Entry for Sweep Time Limit Lines<br />
Item Description/Default Range<br />
Uumber Any real or integer number. For amplitude, the The range for the<br />
default unit is dBm. For sweep time, the default amplitude varies<br />
unit is seconds. with ROFFSET.<br />
The range for the<br />
sweep time is the<br />
sweep time range<br />
of the spectrum<br />
analyzer.<br />
User-defined variable A variable defined by VARDEF or ACTDEF Any valid<br />
comm<strong>and</strong>s. variable name.<br />
?redefined variable A comm<strong>and</strong> that acts as a variable. Refer to ‘Ikble<br />
5-1.<br />
Trace element An element of trace A, trace B, trace C, or a<br />
user-defined trace.<br />
Related Comm<strong>and</strong>s: LIMIMODE, LIMIREL, LIMISEGT, SEGDEL, SENTER.<br />
Example 1<br />
This example enters limit-line values into the upper <strong>and</strong> lower limit-line tables.<br />
OUTPUT 718;"RL -1ODB;"<br />
OUTPUT 718~"LIMIDEL*"<br />
OUTPUT ~~~I~~LIMIFT +IME;"<br />
Sets the reference level to -10 dB<br />
Erases any the current limit line table.<br />
Sets the limit lines to be based on<br />
sweep time.<br />
OUTPUT 718;"LIMIMODE UPLOW;LIMIREL ON;" Specifies the upper <strong>and</strong> lower limitline<br />
table as rektive.<br />
OUTPUT 718;"SENTERT lOMS,-lODB,-50DB,FLAT;" Enters in values for a segment.<br />
OUTPUT 718;"SENTERT OMS,-15DB,-GODB,FLAT;" Enters in values for a segment.<br />
OUTPUT 718;"LIMITEST 0N;TS;" Turns on the limit-line testing.<br />
Example 2<br />
OUTPUT 718;"LIMIFT TIME;" Sets the limit lines to be based on sweep<br />
time.<br />
OUTPUT 718;"LIMIMODE DELTA;LIMIREL OFF;" Spec@..es the mid <strong>and</strong> delta table format<br />
<strong>and</strong> jkzd type.<br />
OUTPUT 718;"SENTERT lOMS,-20DB,lODB,FLAT;" Enters in values for a segment.<br />
OUTPUT 718;"SENTERT OMS,-30DB,20DB,FLAT;" Enters in values for a segment.<br />
OUTPUT 718;"LIMITEST 0N;TS" Turns on the limit-line testing.<br />
Description<br />
Each limit-line segment is specified with a starting sweep time, an upper or median amplitude<br />
value, a lower or delta amplitude value, <strong>and</strong> a segment type. The segment type defines how the<br />
line segment is to extend from its starting point to the next segment.<br />
Programming Comm<strong>and</strong>s 5488
SENTERT Segment Entry for Sweep Time Limit Lines<br />
Note If the current limit line table contains lines based on frequency (as opposed to a<br />
limit line based on the sweep time), executing SENTERT will clear the current<br />
frequency limit line table.<br />
The three segment types are FLAT, SLOPE, <strong>and</strong> POINT.<br />
� FLAT draws a zero-slope line between the coordinate point of the current segment <strong>and</strong> the<br />
coordinate point of the next segment, producing limit-line values equal in amplitude for all<br />
sweep times between the two points. If the amplitude values of the two segments differ, the<br />
limit-line will “step” to the value of the second segment.<br />
� SLOPE draws a straight line between the coordinate point of the current segment <strong>and</strong> the<br />
coordinate point of the next segment, producing limit-line values for all sweep times between<br />
the two points.<br />
� POINT specifies a limit value for the coordinate point, <strong>and</strong> no other sweep time points, so<br />
that a POINT segment specifies a limit value for a single sweep time. For an upper limit-line,<br />
a POINT segment is indicated by a line drawn from the coordinate point, vertically off the<br />
top of screen. For a lower limit-line, a POINT segment is indicated by a line drawn from the<br />
coordinate point, vertically off the bottom of screen. The POINT segment type should be<br />
used as the last segment in the limit-line table. However, if the last segment in the table is<br />
not specified as the POINT segment type, an implicit point is automatically used. If a visible<br />
POINT segment at the right-h<strong>and</strong> edge of the display is not desired, add an explicit last point<br />
segment to the limit-line table that is higher in sweep time than the current sweep time of<br />
the spectrum analyzer.<br />
Segments are sorted as they are entered according to starting sweep time. A maximum of 20<br />
segments can be defined using SENTERT.<br />
5480 Programming Comm<strong>and</strong>s
SER<br />
Serial Number<br />
Returns the serial number suffix of the spectrum analyzer.<br />
Syntax<br />
Related Comm<strong>and</strong>s: ID, REV.<br />
Example<br />
function path only<br />
SER Serial Number<br />
DIM Serial$[24] Reserves m.emory space for a string.<br />
OUTPUT 718;"SER;" Gets the serial number from the spectrum analyzer:<br />
ENTER 718; Serials Puts the spectrum analyzer response in the computer variable.<br />
DISP Serial$ Displays the serial number on the computer screen.<br />
Query Response<br />
The last five digits of the serial number are returned.<br />
output<br />
’ t e r m i n a t i o n --)<br />
XSER<br />
Programming Comm<strong>and</strong>s 5-481
SETDATE<br />
Set Date<br />
Allows you to set the date of the real-time clock of the spectrum analyzer.<br />
Syntax<br />
date<br />
f (YYMMDD)<br />
Item Description/Default R-t+<br />
XSETDATE<br />
Number A number in the YYMMDD format. Valid year, month, <strong>and</strong><br />
Equivalent Softkey: SET DATE .<br />
Related Comm<strong>and</strong>s: SETTIME, TIMEDATE, TIMEDSP.<br />
Example<br />
OUTPUT 718;"SETDATE 890212;" Sets the date to Fidmu.zry 12, 1989.<br />
Query Response<br />
5482 Programming Comm<strong>and</strong>s<br />
output<br />
t e r m i n a t i o n �<br />
QSETDATE
SETTIME<br />
Set Time<br />
Allows you to set the time of the real-time clock of the spectrum analyzer.<br />
Syntax<br />
t ime<br />
r (HHMMSS)<br />
SETTIME Set Time<br />
Item Description/Default R=ae<br />
Number A number in the HHMMSS (24 hour) format. 0 to 235959.<br />
Equivalent Softkey: SET TIME.<br />
Related Comm<strong>and</strong>s: SETDATE, TIMEDATE, TIMEDSI?<br />
Example<br />
OUTPUT 718;"SETTIME 135501;" Sets the time to 1:55:01 PM.<br />
Query Response<br />
,- hour<br />
d i g i t<br />
XSETTIME<br />
PSETTIME<br />
Programming Comm<strong>and</strong>s 5-493
SMOOTH<br />
Smooth Trace<br />
Smoothes the trace according to the number of points specified for the running average.<br />
Syntax<br />
Item<br />
User-defined trace<br />
Trace range<br />
Number<br />
User-defined variable<br />
b u s e r - d e f i n e d trace /<br />
b t r a c e r a n g e /<br />
h p r e d e f i n e d v a r i a b l e /<br />
buser-defined variable)<br />
b p r e d e f i n e d f u n c t i o n /<br />
L trace element /<br />
Description/Default R=u3e<br />
XSMOOTH<br />
A trace deflned by the TRDEF comm<strong>and</strong>. Any valid trace name.<br />
A segment of trace A, trace B, trace C, or a user-defined trace.<br />
Any real or integer number. Real number range.<br />
A variable defined by VARDEF or ACTDEF comm<strong>and</strong>s. Any valid variable<br />
name.<br />
Predetied variable A comm<strong>and</strong> that acts as a variable. Refer to Table 5-l.<br />
Predeflned function Function that returns a value. Refer to Table 5-1.<br />
Trace element An element of trace A, trace B, trace C, or a user-defined trace.<br />
Prerequisite Comm<strong>and</strong>s: TRDEF when using a user-defined trace. ACTDEF or VARDEF for a<br />
user-defined variable. TS when using trace data.<br />
Related Comm<strong>and</strong>s: SNGLS, TS, VAVG.<br />
5494 Programming Comm<strong>and</strong>s
Example<br />
10 OUTPUT 718;"IP;"<br />
20 OUTPUT 718;"SNGLS;TS;"<br />
30 OUTPUT 718;"VIEW TRA;"<br />
40 OUTPUT 718;"SMOOTH TRA,lO;"<br />
50 OUTPUT 718;"VIEW TRA;"<br />
60 END<br />
Description<br />
SMOOTH Smooth Trace<br />
Initializes spectrum analyzer:<br />
Activates single-sweep mode, takes a sweep.<br />
Stores results of trace A.<br />
Smoothes trace A.<br />
Displays the result.<br />
Each point value is replaced with the average of the values (in measurement units) of the<br />
given number of points centered on it. Increasing the number of points increases smoothing at<br />
the cost of decreasing resolution. If the number of points is an even number, then the number<br />
of points is increased by one. If the number of points is larger than the size of SOURCE, then<br />
the size of SOURCE is used (unless size of SOURCE is even, in which case the size of SOURCE<br />
minus one is used). Smoothing decreases at the endpoints.<br />
The purpose of this function is to perform a spatial video averaging as compared to the<br />
temporal version supplied by the video-average (VAVG) comm<strong>and</strong>. The functions of SMOOTH<br />
<strong>and</strong> VAVG are not interchangeable however. Unlike VAVG, SMOOTH averages values that occur<br />
before <strong>and</strong> after the data point in time. This can cause some display irregularities at the start<br />
<strong>and</strong> stop frequencies. Use low values for the SMOOTH parameter to avoid signal distortion.<br />
By replacing the value of each point in a trace with the average of the values of a number of<br />
points centered about that point, any rapid variations in video noise or signals are smoothed<br />
into more gradual variations. It thereby performs a function similar to reducing the video<br />
b<strong>and</strong>width without the corresponding changes in sweep time. As such, it does result in a<br />
reduction of frequency resolution. Also, signal peaks are reduced with large smoothing values,<br />
<strong>and</strong> this can cause the amplitude to appear to be low.<br />
This comm<strong>and</strong> requires user memory for its execution. Memory is not permanently allocated,<br />
so the largest amount of memory is available for the functions that are used in a particular<br />
application. When the comm<strong>and</strong> is complete, memory is returned to the free user memory.<br />
Programming Comm<strong>and</strong>s 5495
SNGLS<br />
Single Sweep<br />
Sets the spectrum analyzer to single-sweep mode.<br />
Syntax<br />
SNGLS<br />
Equivalent Keys: CsGLSWP) or SlJEEP COI?T SGL (SGL is underlined).<br />
Related Comm<strong>and</strong>s: CLRW, CONTS, TM, TS.<br />
Example<br />
OUTPUT 718;"SNGLS;"<br />
Description<br />
Each time TS (take sweep) is sent, one sweep is initiated, as long as the trigger <strong>and</strong> data entry<br />
conditions are met.<br />
Fbr the <strong>HP</strong> 8592L or the <strong>HP</strong> 85933 only: The frequency span that can be viewed with a<br />
single-sweep is bounded by the instrument range only; therefore, b<strong>and</strong> 0 can be included in a<br />
multib<strong>and</strong> sweep in single sweep mode. This allows a 0 GHz to 22 GHz span with an <strong>HP</strong> 8592L<br />
or <strong>HP</strong> 85933 (also see “TS”).<br />
5496 Programming Comm<strong>and</strong>s
SP<br />
Span<br />
Changes the total displayed frequency range symmetrically about the center frequency.<br />
Syntax<br />
\<br />
\<br />
/ frequency span \<br />
HZ<br />
f+<br />
Item Description/Default R-f3e<br />
SP Span<br />
Number Any real or integer number. Default unit is Hz. Frequency span of the<br />
spectrum analyzer.<br />
Equivalent Softkey: SPAN .<br />
Step Increment: 1, 2, 5, 10 sequence (up to the stop frequency of the spectrum analyzer).<br />
Related Comm<strong>and</strong>s: CF, FA, FB, FOFFSET, FS, HNLOCK, HNUNLK, RB, ST, VB.<br />
Example<br />
OUTPUT 718;"IP;SP 20MHZ;" Initializes spectrum analym changes frequency span.<br />
OUTPUT 718;"SP?;" Gets the span value from the spectrum analyzer<br />
ENTER 718;Span Puts the spectrum analyzer response in the computer variable,<br />
Span.<br />
PRINT Span Displays the span value.<br />
Programming Comm<strong>and</strong>s 5497
SP Span<br />
Description<br />
The frequency span readout refers to the displayed frequency range. Dividing the readout by<br />
10 yields the frequency span per division.<br />
If resolution <strong>and</strong> video b<strong>and</strong>widths are coupled to the span width, the b<strong>and</strong>widths change with<br />
the span width to provide a predetermined level of resolution <strong>and</strong> noise averaging. Likewise,<br />
the sweep time changes to maintain a calibrated display, if coupled. All of these functions are<br />
normally coupled, unless RB, VB, or ST have been executed.<br />
Because span is affected by frequency, change the frequency before changing span (see<br />
“HNLOCK”). For the <strong>HP</strong> 8592L <strong>and</strong> <strong>HP</strong> 85933, the span can be set to include b<strong>and</strong> 0 <strong>and</strong> b<strong>and</strong><br />
1 except in single-sweep mode.<br />
Specifying 0 Hz enables zero-span mode, which configures the spectrum analyzer as a<br />
fixed-tuned receiver.<br />
Query Response<br />
5-499 Programming Comm<strong>and</strong>s<br />
001
SPEAKER<br />
Speaker<br />
Turns on or off the internal speaker.<br />
Syntax<br />
Option Required: Option 102, Option 103, or Option 301.<br />
Preset State: SPEAKER ON.<br />
Related Comm<strong>and</strong>s: DEMOD, FMGAIN, SQLCH.<br />
Example<br />
OUTPUT 718;"SPEAKER OFF;"<br />
SPEAKER Speaker<br />
XSPEAKER<br />
Programming Comm<strong>and</strong>s 5-499
SPZOOM<br />
Span Zoom<br />
Places a marker on the highest on-screen signal (if an on-screen marker is not present), turns<br />
on the signal track function, <strong>and</strong> activates the span function.<br />
Syntax<br />
Equivalent Softkey: SPAN ZOOM.<br />
Restrictions: Not available with Analog+ display mode. See “ANLGPLUS” for more<br />
information.<br />
Example<br />
OUTPUT 718;"IP;CF 300MZ;TS;"<br />
OUTPUT 718;"SPZOOM;"<br />
Description<br />
If a marker is present before SPZOOM is executed, SPZOOM turns on the signal track function<br />
<strong>and</strong> activates the span function.<br />
5400 Programming Comm<strong>and</strong>s
SQLCH<br />
Squelch<br />
Sets the squelch threshold by setting the squelch level.<br />
Syntax<br />
s q u e l c h<br />
t h r e s h o l d<br />
SQLCH Squelch<br />
Item Description/Default R=u3e<br />
Number Any valid integer. 0 to 100.<br />
Equivalent Softkey: S@XLCH .<br />
Option Required: Option 102, 103, or 301.<br />
Preset Value: 0.<br />
Related Comm<strong>and</strong>s: DEMOD, FMGAIN, SPEAKER.<br />
Example<br />
OUTPUT 718;"SQLCH 100;"<br />
Description<br />
SQLCH mutes weak signals <strong>and</strong> passes strong signals.<br />
Query Response<br />
Programming Comm<strong>and</strong>s 5-501
SQR<br />
Square Root<br />
Places the square root of the source into the destination.<br />
Syntax<br />
SQR<br />
7 d e s t i n a t i o n<br />
Y u s e r - d e f i n e d t r a c e /<br />
Y trace r a n g e /<br />
Y p r e d e f i n e d v a r i a b l e /<br />
*user-defined v a r i a b l e<br />
Item Description/Default<br />
User-defined trace A trace defined by the TRDEF comm<strong>and</strong>.<br />
User-defined variable A variable defined by VARDEF or ACTDEF comm<strong>and</strong>s.<br />
Predeflned variable<br />
Predefined function<br />
Trace range<br />
Number<br />
A comm<strong>and</strong> that acts as a variable. Refer to Table 5-l.<br />
Function that returns a value. Refer to ‘lbble 5-l.<br />
A segment of trace A, trace B, trace C, or a user-defined trace.<br />
Any real or integer number.<br />
name.<br />
!Real number range.<br />
Prerequisite Comm<strong>and</strong>s: TRDEF when using a user-defined trace. ACTDEF or VARDEF for a<br />
user-defined variable. TS when using trace data.<br />
Related Comm<strong>and</strong>s: PDA, PDF, STDEV.<br />
5-502 Programming Comm<strong>and</strong>s
Example<br />
OUTPUT 718 ; "SQR SP, lE8 ; ‘I Changes the span to 10 kHz.<br />
Description<br />
If the source is negative, the square root of the absolute value will be returned.<br />
SQR Square Root<br />
When the source is longer than the destination, the source is truncated to fit. When the source<br />
is shorter than the destination, the last element is repeated to fill the destination.<br />
Programming Comm<strong>and</strong>s 5-503
SRCALC<br />
Source Leveling Control<br />
Selects internal or external leveling for use with the built-in tracking generator.<br />
Syntax<br />
Option Required: Option 010 or 011.<br />
Preset State: SRCALC INT.<br />
Related Comm<strong>and</strong>s: CF, FA, FB, FS, HNLOCK, SI?<br />
Example<br />
OUTPUT 718;"SRCALC XTAL;"<br />
Description<br />
For the <strong>HP</strong> <strong>8590</strong>L or <strong>HP</strong> 85913: Option 010 or 011 for the <strong>HP</strong> 859OL <strong>and</strong> <strong>HP</strong> 85913 provide<br />
internal (INT), crystal (XTAL), <strong>and</strong> meter (MTR) leveling.<br />
� SRCALC INT activates internal leveling.<br />
� SRCALC XTAL activates external leveling. The external leveling input (EXT ALC INPUT) is<br />
located on the rear panel of the spectrum analyzer. Positive- or negative-polarity detectors<br />
are supported. External leveling increases the amplitude accuracy by improving the effective<br />
source match.<br />
� SRCALC MTR narrows loop b<strong>and</strong>width so Hewlett-Packard power meters can be used for<br />
external leveling.<br />
Fbr the <strong>HP</strong> 859OL <strong>and</strong> <strong>HP</strong> 8591E only: The functions of SRCALC <strong>and</strong> ALC KTR INT XT& are<br />
identical.<br />
For the <strong>HP</strong> 85933, <strong>HP</strong> 85943, <strong>HP</strong> 85953, or <strong>HP</strong> 85963: Option 010 for the <strong>HP</strong> 85933,<br />
<strong>HP</strong> 85943, <strong>HP</strong> 85953, or <strong>HP</strong> 85963 provide internal (INT) <strong>and</strong> external (EXT) leveling.<br />
� SRCALC INT activates internal leveling.<br />
� SRCALC EXT is for externai leveling. The external leveling input (EXT ALC INPUT) is<br />
located on the rear panel of the spectrum analyzer. Only negative-polarity detectors are<br />
supported. External leveling increases the amplitude accuracy by improving the effective<br />
source match.<br />
5-504 Programming Comm<strong>and</strong>s
SRCALC Source Leveling Control<br />
Fbr the <strong>HP</strong> 85933, <strong>HP</strong> 8594E, <strong>HP</strong> 8595E, <strong>and</strong> <strong>HP</strong> 85963 only: The functions of SRCALC <strong>and</strong><br />
ALC INT EXT are identical.<br />
When used as a predefined variable, SRCALC returns a number from 0 to 2. The value that is<br />
returned by SRCALC depends on the SRCALC parameter, as shown in the following table.<br />
Query Response<br />
QSRCALC<br />
Programming Comm<strong>and</strong>s 5-505
SRCAT<br />
Source Attenuator<br />
Attenuates the source output level.<br />
Syntax<br />
/- a t t e n u a t i o n<br />
Item Description/Default Range<br />
Number (<strong>HP</strong> 85913 only) Any real or integer number, specified in multiples of 10 dB. 0 to 60 dB.<br />
Number (<strong>HP</strong> 8593E, Any real or integer number, specified in multiples of 8 dB. 0 to 56 dB.<br />
<strong>HP</strong> 85943, <strong>HP</strong> 8595E, or<br />
<strong>HP</strong> 8596E only)<br />
Equivalent Softkey: SBC ATM MAM AUTO .<br />
Option Required: Option 010 or 011 installed in an <strong>HP</strong> 85913. Option 010 installed in an<br />
<strong>HP</strong> 85933, <strong>HP</strong> 85943, <strong>HP</strong> 85953, or <strong>HP</strong> 85963.<br />
Coupling: Coupled to power level of the source output (SRCPWR) when set to auto (SRCAT<br />
AUTO).<br />
Related Comm<strong>and</strong>s: SRCPSTP<br />
Preset State: SRCAT AUTO.<br />
Example<br />
The following example uses the SRCAT comm<strong>and</strong> to attenuate the source output. This value<br />
specified for SRCAT (20 dB) applies to an <strong>HP</strong> 85913 only.<br />
OUTPUT 7la;"SRCAT AUTO;" Activates source-attenuation coupling.<br />
OUTPUT 7lapS~~PwR -2ODB;" Activates source output.<br />
OUTPUT 71a;"SRCAT 20DB;" Sets attenuator to 20 dB This decouples the attenuator<br />
from the source power-level setting.<br />
5.505 Programming Comm<strong>and</strong>s<br />
XSRCAT
Description<br />
SRCAT Source Attenuator<br />
The SRCAT comm<strong>and</strong> attenuates the output level of the source. Use SRCAT to attenuate the<br />
power level of the source manually, from 0 to 60 dB in 10 dB steps for an <strong>HP</strong> 85913, from 0 to<br />
56 dB in 8 dB steps for an <strong>HP</strong> 85933, <strong>HP</strong> 85943, <strong>HP</strong> 85953, or <strong>HP</strong> 85963.<br />
“SRCAT AUTO;” automatically adjusts the attenuator to yield the source amplitude level<br />
specified by the SRCPWR comm<strong>and</strong>.<br />
Query Response<br />
Programming Comm<strong>and</strong>s 5-507
SRCNORM<br />
Source Normalization<br />
Subtracts trace B from trace A, adds the display line value to the difference, <strong>and</strong> sends the<br />
result to trace A during every sweep of the spectrum analyzer.<br />
Syntax<br />
Equivalent Softkey: IK%MLIZE 04 OFF .<br />
Preset State: SRCNORM OFF.<br />
Related Comm<strong>and</strong>s: AMB, CONTS, CLRW, DL, MXMH, SNGLS, TS, VAVG, VIEW.<br />
Example<br />
10 OUTPUT 718;"IP;SNGLS;RL 20DB;"<br />
20 OUTPUT 718;"MOV TRA,5000;"<br />
30 OUTPUT 718;"VIEW TRA;"<br />
40 OUTPUT 718;"MOV TRB,4000;"<br />
50 OUTPUT 718;"VIEW TRB;"<br />
60 OUTPUT 718;"DL ODM;"<br />
70 OUTPUT 718;"SRCNORM ON;"<br />
80 OUTPUT 718;"BLANK TRB;VIEW TRA;"<br />
90 END<br />
5-508 Programming Comm<strong>and</strong>s<br />
OFF<br />
ON<br />
/<br />
XSRCNORM<br />
Initial&s spectrum analog activates singlesweep<br />
mode.<br />
Sets trace A to 5000 measurement units, which<br />
is equal to -10 dBm.<br />
Sets trace B to 4000 measurement units, which<br />
is equal to -20 dBm.<br />
Sets display line to 0 dBm, which is at 6000<br />
measurement units.<br />
Performs trace A - trace B + display line. The<br />
result is 5000 - 4000 + 6000 = 7000 or 10 dBm.<br />
Note that this has resulted in a subtraction of<br />
amplitude in dBm, -10 dBm -(-20 dBm) = 10<br />
dBm.
Description<br />
SRCNORM Source Normalization<br />
The SRCNORM comm<strong>and</strong> subtracts trace B from trace A, point by point, adds the display line<br />
value to the difference, <strong>and</strong> sends the difference to trace A. The SRCNORM function remains in<br />
effect until it is turned off by executing “SRCNORM OFF; ,,.<br />
A common use of trace subtraction is to normalize one trace with respect to another. For<br />
example, traces are frequently subtracted to normalize the spectrum analyzer response when a<br />
tracking generator is used. In such applications, amplitude units in dBm should be subtracted.<br />
To accomplish this, the display line should be set to 0 dBm using DL as shown in the example.<br />
Also see example 2 <strong>and</strong> 3 in “AMB” for comparison.<br />
Query Response<br />
ON<br />
OFF<br />
output<br />
’ t e r m i n a t i o n +<br />
002<br />
Programming Comm<strong>and</strong>s 5-509
SRCPOFS<br />
Source Power Offset<br />
Offsets the source power level readout.<br />
Syntax<br />
Item Description/Default Range<br />
Number Any real or integer number.<br />
Option Required: Option 010 or 011.<br />
Equivalent Softkey: $QlC PWR OFFSET .<br />
Related Comm<strong>and</strong>s: SRCPWR, SRCPSWP<br />
Step Increment: Determined by SRCPSTP<br />
Preset State: 0 dB.<br />
Example<br />
Use SRCPOFS to offset the power-level readout for the tracking-generator source.<br />
OUTPUT 718;"MEASURE SR;" Sets spectrum analyzer to stimulus-response mode.<br />
OUTPUT 718;"SRCPWR -1ODB;" Turns on source output.<br />
OUTPUT 718;"SRCPOFS 13DB;" Oflets power-level readout for source by 13 dR<br />
Description<br />
XSRCPOFS<br />
The SRCPOFS comm<strong>and</strong> offsets the displayed power of the built-in tracking generator. This<br />
function may be used to take into account system losses (for example, cable loss) or gains (for<br />
example, preamplifier gain) reflecting the actual power delivered to the device under test.<br />
Query Response<br />
5.510 Programming Comm<strong>and</strong>s<br />
QQ,
SRCPSTP<br />
Source Power-Level Step Size<br />
Selects the source-power step size.<br />
Syntax<br />
I- step size<br />
SRCPSTP Source Power-Level Step Size<br />
Item Description/Default Range<br />
Number Any real or integer number.<br />
Option Required: Option 010 or 011.<br />
Equivalent Softkey: SRC PWR STP SIZE.<br />
Step Increment: 0.1 dB.<br />
Related Comm<strong>and</strong>s: SRCPWR, SRCPOFS, SRCPSWP<br />
Preset State: SRCPSTP AUTO (one major vertical ‘scale division).<br />
Example<br />
XSRCPSTP<br />
Select incremental changes of power effected by “SRCPWR UP;“, “SRCPWR DN;” comm<strong>and</strong>s, or<br />
the step keys.<br />
OUTPUT 718;"MEASURE SR;" Activates stimulus-response mode.<br />
OUTPUT 718;"SRCPWR -1ODB;" Turns on the source output.<br />
OUTPUT 718;"SRCPSTP .3DB;" Sets power-level step size to 0.3 dB<br />
OUTPUT 718;"SRCPWR UP;" Increases the power level.<br />
Description<br />
The SRCPSTP comm<strong>and</strong> selects the step size for the following source comm<strong>and</strong>s:<br />
� Power offset (SRCPOFS).<br />
� Power sweep (SRCPSWP).<br />
� Power (SRCPWR).<br />
Use SRCPSTP to set the step size to a specific value.<br />
“SRCPSTP AUTO;” sets the step size to one vertical scale division.<br />
Programming Comm<strong>and</strong>s 5-511
SRCPSTP Source Power-Level Step Size<br />
Query Response<br />
5-512 Programming Comm<strong>and</strong>s
SRCPSWP<br />
Source Power Sweep<br />
Selects the sweep range of the source output,<br />
Syntax<br />
( SRCPSWP ><br />
/- sweep --\<br />
SRCPSWP Source Power Sweep<br />
DB<br />
I<br />
I<br />
I<br />
I<br />
I<br />
. . . . . . . . . . . . .._._............. .’<br />
Item Description/Default R-w<br />
Number Any real or integer number.<br />
Option Required: Option 010 or 011.<br />
Equivalent Softkey: PWR SWP ON OFF . ’<br />
Step Increment: Determined by SRCPSTP.<br />
Related Comm<strong>and</strong>s: SRCPSWP, SRCPOFS, SRCPSTP<br />
Preset State: SRCPSWP OFF.<br />
Example<br />
Use SRCPSWP to sweep the power level of the source output.<br />
OUTPUT 718;"MEASURE SR;" Activates stimulus-response mode.<br />
OUTPUT 718;"SRCPWR -1ODB;" Sets power level of source output to -10 dBm.<br />
OUTPUT 718;"SP 0;" Sets span to 0 Hz.<br />
OUTPUT 718;"SRCPSWP IODB;" Sweeps source output from -10 dBm to 0 dBm.<br />
Description<br />
J<br />
XSRCPSWP<br />
The SRCPSWP comm<strong>and</strong> works in conjunction with the SRCPWR (source power) comm<strong>and</strong> to<br />
sweep the amplitude level of the source output. The SRCPWR setting determines the amplitude<br />
level at the beginning of the sweep. The SRCPSWP comm<strong>and</strong> determines the change in<br />
amplitude level of the sweep.<br />
For example, if SRCPWR <strong>and</strong> SRCPSWP are set to -15 dBm <strong>and</strong> 4 dB respectively, the source<br />
sweeps from - 15 dBm to - 11 dBm.<br />
Programming Comm<strong>and</strong>s 5-513
SRCPSWP Source Power Sweep<br />
Note Power is swept from low to high.<br />
The minimum sweep time is limited to 20 ms when performing a source power sweep, even if<br />
the spectrum analyzer has an Option 101 installed in it.<br />
Query Response<br />
5-514 Programming Comm<strong>and</strong>s
SRCPWR<br />
Source Power<br />
Selects the source power level.<br />
Syntax<br />
/- Power\<br />
SRCPWR Source Power<br />
Item Description/Default Range<br />
XSRCPWR<br />
Number Any real or integer number. Default unit is the current Actual range is<br />
amplitude unit. hardware dependent.<br />
Option Required: Option 010 or 011.<br />
Equivalent Softkey: SRC PWR ON OFF .<br />
Step Increment: Set by SRCPSTI?<br />
Related Comm<strong>and</strong>s: SRCAT, SRCPSTP, SRCPSWP.<br />
Preset State: -10 dBm.<br />
Example<br />
Use SRCPWR to turn on the source <strong>and</strong> adjust its power level.<br />
OUTPUT 718;"SRCPWR -2ODB;" Changes power level to -20 dBm.<br />
OUTPUT 718;"AUNITS DBMV;" Changes the current amplitude unit.<br />
OUTPUT 718;"SRCPWR 37;" The source power is rww 37 dBmK<br />
Description<br />
The SRCPWR comm<strong>and</strong> turns the source off or on <strong>and</strong> sets the power level of the source.<br />
The source is turned on automatically whenever its value is specified with SRCPWR. Also see<br />
“ SRCPSTP. ”<br />
Programming Comm<strong>and</strong>s 5-515
SRCPWR Source Power<br />
Query Response<br />
5-516 Programming Comm<strong>and</strong>s
SRCTK<br />
Source Tracking<br />
Adjusts the tracking of the source output with the spectrum analyzer sweep.<br />
Syntax<br />
SRCTK<br />
SRCTK Source Tracking<br />
I t e m Description/Default tinge<br />
Number Any real or integer number. 0 to 16,383.<br />
Option Required: Option 010 or 011.<br />
Equivalent Softkey: Ml? TM ADJUST .<br />
Step Increment: 1.<br />
Related Comm<strong>and</strong>s: Comm<strong>and</strong>s that change b<strong>and</strong>width, such as RB, VB, ST, <strong>and</strong> comm<strong>and</strong>s<br />
that change frequency, such as SP, CF, FA, FB, SP, FS, SRCTKPK.<br />
Example<br />
OUTPUT 718;"MEASURE SR;" Activates the stimulus-response moo%?.<br />
OUTPUT 718;"SRCPWR -2ODB;" Turns on the power at the source output.<br />
OUTPUT 718;"SP IMHZ;" Sets measurement range.<br />
OUTPUT 718;"RB IKHZ;"<br />
OUTPUT 718;"TS;" Zzkes sweep.<br />
OUTPUT 718;"SRCTK EP;" Allows entry offrom front-panel keys to adjust tracking.<br />
Description<br />
The SRCTK comm<strong>and</strong> adjusts the tracking of the tracking-generator output relative to the<br />
center frequency of the spectrum-analyzer. SRCTK is used typically for b<strong>and</strong>widths less than<br />
300 kHz. B<strong>and</strong>widths greater than 300 kHz do not require tracking adjustment. Use SRCTK to<br />
improve amplitude accuracy <strong>and</strong> maximize signal response. Use SRCTKPK to adjust tracking<br />
automatically. See “SRCTKPK. n<br />
Programming Comm<strong>and</strong>s 5-517
SRCTK Source Tracking<br />
Query Response<br />
5-518 Programming Comm<strong>and</strong>s<br />
PO1
SRCTKPK<br />
Source Tracking Peak<br />
SRCTKPK Source Tracking Peak<br />
Automatically adjusts the tracking of source output with spectrum-analyzer sweep.<br />
Syntax<br />
Option Required: Option 010 or 011.<br />
Equivalent Softkey: TRM!KING PEAK .<br />
Related Comm<strong>and</strong>s: Comm<strong>and</strong>s that change b<strong>and</strong>width, such as RB, VB, ST, <strong>and</strong> comm<strong>and</strong>s<br />
that change frequency, such as SP, CF, FA, FB, SP, FS, SRCTK.<br />
Restrictions: Not available with Analog+ display mode. See “ANLGPLUS” for more<br />
information.<br />
Example<br />
OUTPUT 718;"MEASURE SR;" Activates the stimulus-response mode.<br />
OUTPUT 718;"SRCPWR -1ODB;" Turns on the power at the source output to its current<br />
setting.<br />
OUTPUT 718;"SP IMHZ;" Sets mhxsurement range.<br />
OUTPUT 718;"RB 1KHZ;"<br />
OUTPUT 718;"TS;" lbkes sweep.<br />
OUTPUT 718;"SRCTKPK;" Automatically a@ju.sts the tracking.’<br />
Description<br />
The SRCTKPK comm<strong>and</strong> adjusts the tracking of the tracking-generator source output<br />
automatically to maximize responses for measurements made with resolution b<strong>and</strong>widths less<br />
than 300 kHz.<br />
SRCTKPK maximizes the amplitude of the displayed active trace.<br />
Programming Comm<strong>and</strong>s 5-519
SRQ<br />
Force Service Request<br />
The SRQ comm<strong>and</strong> is used by an external controller to simulate interrupts from the spectrum<br />
analyzer.<br />
Syntax<br />
SRQ<br />
service<br />
Item Description/Default mt3e<br />
Number Any valid integer. 2 to 126.<br />
Related Comm<strong>and</strong>s: CLS, EE, RQS, STB.<br />
Example<br />
OUTPUT 718;"RQS 8;SRQ 8;" Sets bit mask for a hardware broken semrice request, genmates<br />
a hardware broken interrupt.<br />
Note A program can respond to the interrupt in the same way it would under a true<br />
service request condition.<br />
Description<br />
The service request condition is also displayed on the spectrum analyzer screen with the<br />
annotation SRQ XXX, where XXX is a three-digit octal number.<br />
The conditions that can generate a service request are as follows:<br />
32 = Illegal comm<strong>and</strong><br />
16 = Comm<strong>and</strong> complete<br />
8 = Hardware broken<br />
4 = End of sweep<br />
2 = Units key pressed<br />
A service request is generated only if the proper request mask bit has been set (see “R&S”),<br />
<strong>and</strong> either the condition itself or the Force Service Request is sent. To set the request mask,<br />
choose the desired interrupt conditions <strong>and</strong> sum their assigned values. Executing the RQS<br />
comm<strong>and</strong> with this value sets the bit mask. After setting the bit mask, only the chosen<br />
conditions can produce an interrupt.<br />
Each bit in the status byte is defined as shown in the following table.<br />
5-520 Programming Comm<strong>and</strong>s<br />
XSRQ
Bit<br />
Number<br />
Decimal<br />
Equivalent<br />
32<br />
16<br />
8<br />
4<br />
2<br />
‘Ihble 5-9. <strong>Spectrum</strong> Analyzer Status Byte<br />
<strong>Spectrum</strong> Analyzer<br />
State<br />
Set when an illegal<br />
comm<strong>and</strong> is present.<br />
Set when any comm<strong>and</strong> is<br />
completed.<br />
Indicates hardware broken<br />
condition.<br />
Indicates end of sweep.<br />
Indicates a units key was<br />
pressed.<br />
Bit numbers 0 (LSB), 6, <strong>and</strong> 7 are not used.<br />
SRQ Force Service Request<br />
Description<br />
SRQ 140 appears on the spectrum<br />
analyzer screen.<br />
It is triggered by EOI at the end of a<br />
comm<strong>and</strong> string or the completion of a<br />
print or plot.<br />
SRQ 110 appears on the spectrum<br />
analyzer screen.<br />
SRQ 104 appears on the spectrum<br />
analyzer screen. If you send any R&S<br />
value that contains mask value 4,<br />
another sweep will be taken.<br />
SRQ 102 appears on the spectrum<br />
analyzer screen. If you activate the<br />
units key bit, it will remain active until<br />
you activate “EE” <strong>and</strong> press a units key.<br />
(See “EE.“)<br />
The spectrum analyzer screen numbers 102, 104, <strong>and</strong> 110 are the octal values corresponding<br />
to the status register values; that is, SRQ 102 = bit 6 = octal 100 <strong>and</strong> bit 2 = octal 2 are both<br />
true.<br />
Generally, you must set the bit mask using the RQS comm<strong>and</strong>. However, the “hardware<br />
broken” <strong>and</strong> “illegal remote comm<strong>and</strong>” conditions are automatically enabled after presetting<br />
or sending the IP comm<strong>and</strong>. Pressing C-1 or sending the IP comm<strong>and</strong>, then, produces the<br />
same interrupt bit mask as sending “RQS 40; n (decimal 40 is the sum of the assigned values of<br />
these two interrupt bits, 32 = bit 5 <strong>and</strong> 8 = bit 3).<br />
For most conditions, the RQS mask bit stays set until the next instrument preset (IP), or RQS<br />
comm<strong>and</strong> is executed. The only condition to which this does not apply is the Units Key Pressed<br />
bit. When this bit (bit 1) is set in the RQS mask, a Units Key Pressed interrupt occurs if EE<br />
(enable entry mode) is executed <strong>and</strong> a front-panel units key such as Hz, kHz, MHz, or GHz is<br />
pressed.<br />
When a units key is pressed, the interrupt occurs <strong>and</strong> the Units Key Pressed bit in the RQS<br />
mask is reset. lb reenable the Units Key Pressed interrupt, you must send a new RQS mask.<br />
See “RQS” for detailed information.<br />
As mentioned, you can simulate a service request condition. Choose the desired interrupt<br />
conditions from the RQS comm<strong>and</strong> table (see “RQS”), <strong>and</strong> sum their assigned values. Use the<br />
RQS comm<strong>and</strong> with this value to set the bit mask. By setting the corresponding bits in the<br />
SRQ comm<strong>and</strong> <strong>and</strong> sending the SRQ comm<strong>and</strong> to the spectrum analyzer, the desired interrupt<br />
occurs. This allows the user to verify proper operation of software routines designed to h<strong>and</strong>le<br />
infrequent or unlikely interrupts.<br />
Programming Comm<strong>and</strong>s 5-521
SRQ Force Service Request<br />
Interface Differences<br />
As implemented on the <strong>HP</strong>-IB interface, an spectrum analyzer service request asserts the SRQ<br />
control line on the <strong>HP</strong>-IB.<br />
On the RS-232 interface, the spectrum analyzer does not have a way of signaling the interrupt<br />
condition to a controller. In this case, the controller must operate in a polled mode if it requires<br />
interrupt information (see “Polled Mode of Operation” below for a discussion of the polled<br />
mode).<br />
Interrupt-Related Comm<strong>and</strong>s Common to All Interfaces:<br />
� CLS Clear status byte, without read.<br />
� RQS Request mask.<br />
� SRQ Force service request.<br />
� STB Read then clear status byte.<br />
The <strong>HP</strong>-IB interface supports interface comm<strong>and</strong>s to read the status byte.<br />
On <strong>HP</strong>-IB in <strong>HP</strong> 9000 <strong>Series</strong> 200 or 300 BASIC, the statement SPOLL (Device-address) can be<br />
used to read the status byte.<br />
Polled Mode of Operation<br />
The polled mode of operation is probably most applicable to an RS-232 interface user. Because<br />
there is no interrupt signal to the RS-232 controller, the user must periodically ask the spectrum<br />
analyzer, via the “STB?” comm<strong>and</strong>, for the contents of its status register. For example, the<br />
RS-232 controller could periodically check for the hardware-broken condition by executing the<br />
“STB?” comm<strong>and</strong> <strong>and</strong> reading the results.<br />
Status Byte Definition<br />
The status byte sent by the spectrum analyzer determines the nature of the service request.<br />
The meaning of each bit of the status byte is explained in Table B-l.<br />
‘Ihble 5-10. Status Byte Definition<br />
Bit Message<br />
I0<br />
(LSB) Unused<br />
1 Unit Key Pressed<br />
2 End of sweep<br />
3 Hardware broken<br />
4 Comm<strong>and</strong> complete<br />
5 Illegal spectrum analyzer comm<strong>and</strong><br />
6 Universal <strong>HP</strong>-IB service request <strong>HP</strong>-IB R&S bit<br />
7 Unused<br />
Display Message<br />
SRQ 102<br />
SRQ 104<br />
SRQ 110<br />
SRQ 120<br />
SRQ 140<br />
The display message is an octal number based on the binary value of the status byte. This<br />
octal number always begins with a u 1” since this is translated from bit 6, the universal service<br />
request bit. The status byte for an illegal spectrum analyzer comm<strong>and</strong> (SRQ 140) is as follows:<br />
5-522 Programming Comm<strong>and</strong>s<br />
bit number 7 6 5 4 3 2 1 0<br />
status byte 0 1 100 0 0 0
This displays the octal equivalent of the status byte binary number: SRq 140<br />
The octal equivalent is based on the whole binary number:<br />
SRQ Force Service Request<br />
01100000 (binary) = 140 (octal) One simple way to determine the octal equivalent of the binary<br />
number is to partition the binary number three bits at a time from the least significant bit, <strong>and</strong><br />
treat each part as a single binary number:<br />
binary 0 1 1 0 0 0 0 0<br />
octal 1 4 0<br />
The decimal equivalent of the octal number is determined as follows:<br />
140 (octal) = 1 x (8) + 4 x (8) + 0 x (8) = 96 (decimal)<br />
More than one service request can be sent at the same time. For example, if an illegal spectrum<br />
analyzer comm<strong>and</strong> (SRQ 140) <strong>and</strong> the end of a sweep (SRQ 104) occurred at the same time, SF&l<br />
144 appears on the spectrum analyzer display, because both bit 5 <strong>and</strong> bit 2 are set as shown<br />
below:<br />
bit number 7 6<br />
status byte 0 1<br />
octal value 1<br />
54 3<br />
100<br />
4<br />
2 10<br />
100<br />
4 = SRQ 144<br />
Programming Comm<strong>and</strong>s 5-523
ss<br />
Center Frequency Step Size<br />
Specifies center frequency step size.<br />
Syntax<br />
UP<br />
AUTO<br />
Item Description/Default Range<br />
Number Any real or integer number. Default unit is Hz. Frequency range of<br />
the spectrum analyzer.<br />
Equivalent Softkey: CF SW AUTO NAN .<br />
Preset State: 100 MHz.<br />
Step Increment: 1, 2, 5, 10 sequence.<br />
Prerequisite Comm<strong>and</strong>s: ACTDEF or VARDEF when using a user-defined variable.<br />
Related Comm<strong>and</strong>s: AUTO, CF, FOFFSET, SP.<br />
5-524 Programming Comm<strong>and</strong>s
Example<br />
10 CLEAR 718<br />
20 OUTPUT 718;"IP;SNGLS;CF 300MHZ;SP 20MHZ;TS;"<br />
30 OUTPUT 718;"MKPK HI;MKRL;TS;MKF?;"<br />
40 ENTER 718 USING "K";Mk,freq<br />
50 OUTPUT 718;"MKA?;"<br />
60 ENTER 718 USING "K";Mk-amp<br />
70 OUTPUT 718;"SS ";Mk-freq;"HZ"<br />
80 OUTPUT 718;"CF UP;TS;MKPK HI;MKA?;"<br />
90 ENTER 718;Mk-amp1<br />
100 PRINT "THE FUNDAMENTAL IS ";Mk-amp-Mk,amp1<br />
110 PRINT "dB ABOVE THE SECOND HARMONIC"<br />
120 END<br />
Description<br />
SS Center Frequency Step Size<br />
Clears the <strong>HP</strong>-B<br />
Initializes the spectrum an&yactivatessingle-sweep<br />
mode, changes<br />
the center frequency, span, takes<br />
sweep.<br />
Finds the highest peak, changes<br />
the reference level to the markq<br />
takes sweep, returns the frequency<br />
of the marker:<br />
Puts the spectrum analyzer response<br />
in the computer variable,<br />
h!k-freq.<br />
Returns the amplitude of the marker<br />
Puts the spectrum analyzer response<br />
in the computer variable,<br />
h<strong>&</strong>.<br />
Changes the step size to the marker<br />
freq-u<br />
Increases the centerfrequency, takes<br />
sweep, puts the marker on the<br />
highest peak <strong>and</strong> returns the amplitude<br />
of the marker<br />
Puts the spectrum analyzer response<br />
in the computer variable,<br />
Mk-ampl.<br />
Outputs the result.<br />
The AUTO parameter removes SS as an active function but does not have an effect on its value.<br />
Query Response<br />
Programming Comm<strong>and</strong>s 5.525
ST<br />
Sweep Time<br />
Specifies the time in which the spectrum analyzer sweeps the displayed frequency range.<br />
Syntax<br />
Item Description/Default Rw&<br />
Number Any real or integer number. Default unit is seconds. Within the sweep time<br />
range of the spectrum<br />
analyzer.<br />
Equivalent Softkey: SWF TfME AUTO MAN .<br />
Sweep Time Range in Zero Span: 15 ms to 100s.<br />
Sweep Time Range in Zero Span, Option 101 only: 20 ,us to 100s.<br />
Sweep Time Range in Non-zero Span: 20 ms to 100 s.<br />
Step Increment: 2, 3, 5, 7.5, 10, 15 sequence.<br />
Prerequisite Comm<strong>and</strong>s: ACTDEF or VARDEF when using a user-defined variable.<br />
Related Comm<strong>and</strong>s: AUTO, CONTS, HNLOCK, HNUNLK, RB, SNGLS, SP, SRCPSWP, TS.<br />
Example<br />
OUTPUT 718;"ST IOOMS;" Sets the sweep the to 100 milliseconds.<br />
Description<br />
When used as a predefined variable, ST returns the sweep time as a real number in seconds.<br />
5-526 Programming Comm<strong>and</strong>s
Query Response<br />
ST Sweep Time<br />
Programming Comm<strong>and</strong>s 5-527
STB<br />
Status Byte Query<br />
Returns to the controller the decimal equivalent of the status byte.<br />
Syntax<br />
Related Comm<strong>and</strong>s: RQS, SRQ,<br />
Example<br />
10 OUTPUT 718;"IP;"<br />
20 OUTPUT 718;"SNGLS;"<br />
30 OUTPUT 718*"CLS-" 9 ,<br />
40 OUTPUT 718*"TS*"<br />
# ,<br />
50 OUTPUT 718."STB'."<br />
60 ENTER 718;ktatui:Byte<br />
70 PRINT Status-byte<br />
80 END<br />
Description<br />
Pre$ef i ned<br />
f u n c t i o n p a t h o n l y<br />
Initializes spectrum anal2/zer<br />
Activates single-sweep mode.<br />
Clears the status bits.<br />
i’bkes sweep.<br />
Returns the status bits.<br />
Puts the spectrum analyzer response in the computer variable,<br />
Status-Byte.<br />
Displays the result.<br />
The STB comm<strong>and</strong> is equivalent to a serial poll comm<strong>and</strong>. The RQS <strong>and</strong> associated bits are<br />
cleared in the same way that a serial poll comm<strong>and</strong> would clear them. The bits in the status<br />
byte are explained under the RQS comm<strong>and</strong>.<br />
Query Response<br />
5.528 Programming Comm<strong>and</strong>s<br />
XSTB
STDEV<br />
St<strong>and</strong>ard Deviation of Trace Amplitudes<br />
STDEV St<strong>and</strong>ard Deviation of Trace Amplitudes<br />
Returns the st<strong>and</strong>ard deviation of the trace amplitude in measurement units.<br />
Syntax<br />
9 u s e r - d e f i n e d t r a c e I<br />
f u n c t i o n p a t h o n l y<br />
Item Description/Default RanBe<br />
User-defined trace A trace deEned by the TRDEF comm<strong>and</strong>. Any valid trace name.<br />
Trace range A segment of trace A, trace B, trace C, or a user-defined trace.<br />
Prerequisite Comm<strong>and</strong>s: TRDEF when using a user-defined trace. TS when using trace data.<br />
Related Comm<strong>and</strong>s: MEAN, PDA, PDF, VARIANCE.<br />
Example<br />
The following program segment finds the st<strong>and</strong>ard deviation of the amplitude of trace A.<br />
OUTPUT 718; “IP; ”<br />
OUTPUT 718 ; “SNGLS ; ”<br />
OUTPUT 718;“CF 300MHZ;SP 2MHZ;RB IOOKHZ;”<br />
OUTPUT 7 18 ; “TS ; ”<br />
OUTPUT 718;“STDEV TRA?;”<br />
ENTER 718;Number<br />
PRINT “THE STANDARD DEVIATION OF TRACE A ” ;Number/lOO; “DB”<br />
XSTDEV<br />
Initializes spectrum analym<br />
Activates single-sweep mode.<br />
Changes the center frequencg,<br />
span, <strong>and</strong> resolution<br />
b<strong>and</strong>width.<br />
!Rxkes sweep.<br />
Finds the st<strong>and</strong>ard deviation<br />
of trace A.<br />
Get the response from<br />
the spectrum analyzer:<br />
Programming Comm<strong>and</strong>s 5-629
STDEV St<strong>and</strong>ard Deviation of Trace Amplitudes<br />
Description<br />
The formula to calculate the st<strong>and</strong>ard deviation is as follows:<br />
Query Response<br />
5-530 Programming Comm<strong>and</strong>s<br />
J<br />
,gz - XiY<br />
n-l<br />
n represents the number of data points.<br />
4 represents a data point.<br />
5 represents the mean of data.<br />
output<br />
termination +
STOR<br />
Store<br />
Stores data on a RAM card.<br />
Syntax<br />
d a t a<br />
r type 7<br />
I- p r e f i x 7<br />
/- f i l e n a m e 7<br />
c h a r a c t e r<br />
f t k e y r a n g e ‘-\<br />
number<br />
STOR Store<br />
XSTOR<br />
Programming Comm<strong>and</strong>s 5-531
STOR Store<br />
Item<br />
User-defined trace<br />
User-defined variable<br />
zharacter (file name)<br />
Xaracter (prefix)<br />
Vumber<br />
Ielimiter<br />
Description/Default Ranee<br />
A trace defined by the TRDEF comm<strong>and</strong>. Any valid trace name.<br />
A variable deflned by VARDEF or ACTDEF comm<strong>and</strong>s. Any valid variable<br />
name.<br />
Any valid character. Characters form the Ele type <strong>and</strong> file name. File type (lowercase a,<br />
c, d, i, 1, s, or t) should<br />
precede the file name.<br />
File name is 0 to 6<br />
characters long, A<br />
through Z <strong>and</strong> the<br />
underscore (the<br />
underscore should be<br />
used as the second<br />
character of the<br />
label).<br />
Any valid character.<br />
A valid softkey number range. Use a decimal point to separate 1 to 6, 601 to 1200.<br />
the softkey numbers when specifying a softkey range.<br />
Matching characters marking the beginning <strong>and</strong> end of the list of - 1 \ @ = / ^ $ % ; ! ’ :<br />
spectrum analyzer comm<strong>and</strong>s. ” &<br />
Option Required: An <strong>HP</strong> <strong>8590</strong>L or <strong>HP</strong> 8592L spectrum analyzer needs Option 003 installed in<br />
it to use STOR.<br />
Related Comm<strong>and</strong>s: CAT, LOAD, PREFX.<br />
Example<br />
OUTPUT 718;"TRDEF N,EW,400;"<br />
OUTPUT 718;"MOV N-EW,TRA;"<br />
OUTPUT 718;"STOR t,%tF,UNCX%,N,EW;"<br />
OUTPUT 718;"STOR d,%dP,ROG-I%,*;"<br />
OUTPUT 718;"STOR a,%aA,MPDATA,7%;"<br />
OUTPUT 718;"STOR l,%lL~IMITS,l%;"<br />
OUTPUT 718;"STOR s,%sS-TATEmIl;"<br />
OUTPUT 718;"STOR d,%dK,EYS,l5%,601.606;"<br />
OUTPUT 718;"STOR d,%dK,EY-l%,GOl;"<br />
OUTPUT 718;"STOR d,%dF-ILES,l%,KEN*;"<br />
5432 Programming Comm<strong>and</strong>s<br />
L%@tes a trace.<br />
Moves the contents of trace A into N-EM?<br />
Stores NJ3’Wunder thefile name of tFUNCX<br />
as trace data.<br />
Stores all downloadable programs in the<br />
spectrum analyzer memory on the RAM<br />
card.<br />
Stores the current amplitude correction<br />
factors.<br />
Stores the current limit-line tables.<br />
Stores the spectrum analyzer state.<br />
Stores soflkey j3mction.s 601 through 606<br />
in thefile dKEYS-1.<br />
Stores sofikey function 601 in the jile<br />
oY!ZY-1.<br />
Stores all downloadable programs with<br />
the pre@ “KEN” on the RAM card.
Description<br />
STOR Store<br />
The STOR comm<strong>and</strong> stores the source data on the RAM card under the specified file name <strong>and</strong><br />
data type.<br />
Data type: Use the data type as the first character of the file name in order to catalog the file<br />
by the file type. For example, use tFUNCX instead of FUNCX to catalog it by traces. If the<br />
file type is not specified as the first character of the file name, the file is stored as an ASCII<br />
file. It is necessary to use the correct data type (a, d, i, 1, s, or t) to load the file into spectrum<br />
analyzer memory correctly. The letters correspond to the data type as shown in the following<br />
table.<br />
Data Type Description<br />
a Amplitude correction factor table.<br />
d Downloadable program.<br />
i Displays image.<br />
1 Limit-line table.<br />
S Instrument state.<br />
t Trace <strong>and</strong> instrument state.<br />
Note The STOR saves data on a RAM card. See “SAVET,” “SAVES,” or “SAVRCLN” to<br />
save data in spectrum analyzer memory.<br />
Specifying the source<br />
With the memory card reader, the spectrum analyzer can read from either a<br />
RAM (r<strong>and</strong>om-access memory) card or a ROM (read-only memory card). lb<br />
write to a memory card, the card must be a RAM card. The spectrum analyzer<br />
cannot write to a ROM card.<br />
When storing trace data, enter the location of the trace data (trace A, trace B, trace C, or<br />
user-defined trace) as the source.<br />
Downloadable programs can be stored as follows:<br />
� For storing all downloadable programs in spectrum analyzer memory on a RAM card, use an<br />
asterisk as the source.<br />
� For storing all downloadable programs with a certain prefix, use a prefix followed by an<br />
asterisk as the source.<br />
H For storing a range of softkey functions, specify the softkey numbers separated with a<br />
decimal. Use the downloadable program file type when storing user-defined variables.<br />
Space required: To store a file on a memory card, there must be enough space on the memory<br />
card for the file. See “Determining the Amount of Space on a RAM Card” in Chapter 4 for more<br />
information about space requirements.<br />
Programming Comm<strong>and</strong>s 5-533
SUB<br />
Subtract<br />
Subtracts source 2 from source 1, point by point, <strong>and</strong> sends the difference to the destination.<br />
Syntax<br />
Item<br />
User-dehned trace<br />
User-de&red variable<br />
Predellned variable<br />
Predefined function<br />
Trace range<br />
Number<br />
- d e s t i n a t i o n<br />
b u s e r - d e f i n e d t r a c e /<br />
b t r a c e range /<br />
b p r e d e f i n e d v a r i a b l e /<br />
u s e r - d e f i n e d v a r i a b l e<br />
Description/Default Bange<br />
A trace defined by the TRDEF comm<strong>and</strong>. Any valid trace name.<br />
A variable defined by VARDEF or ACTDEF comm<strong>and</strong>s. Any valid variable<br />
name.<br />
A comm<strong>and</strong> that acts as a variable. Refer to Table 5-l.<br />
Function that returns a value. Refer to Table 5-1.<br />
A segment of trace A, trace B, trace C, or a user-defined trace.<br />
Any real or integer number. Real number range.<br />
Prerequisite Comm<strong>and</strong>s: TRDEF when using a user-defined trace. ACTDEF or VARDEF for a<br />
user-defined variable. TS when using trace data.<br />
Related Comm<strong>and</strong>s: AMB, AMBPL, BML, LIMITEST, SUM.<br />
5-534 Programming Comm<strong>and</strong>s<br />
/
Example<br />
SUB Subtract<br />
OUTPUT 718;"SUB TRA,TRB,TRC;" Subtracts trace Cfrom trace B <strong>and</strong> places the result in<br />
trace A.<br />
Description<br />
When the source is longer than the destination, the source is truncated to fit. When the source<br />
is shorter than the destination, the last element is repeated to fill the destination.<br />
Programming Comm<strong>and</strong>s 5-535
SUM<br />
Sum of Trace Amplitudes<br />
Returns the sum of the amplitudes of the trace elements in measurement units.<br />
Syntax<br />
k u s e r - d e f i n e d t r a c e /<br />
b t r a c e r a n g e /<br />
f u n c t i o n p a t h o n l y<br />
Item Description/Default tinge<br />
User-defined trace A trace defined by the TRDEF comm<strong>and</strong>. Any valid trace name.<br />
Trace range A segment of trace A, trace B, trace C, or a user-defined trace.<br />
Prerequisite Comm<strong>and</strong>s: TRDEF when using a user-defined trace. TS when using trace data.<br />
Related Comm<strong>and</strong>s: ADD, DIV, MEAN, MPY, SUB, TS, VARIANCE.<br />
Example<br />
10 OUTPUT 718;"IP;"<br />
20 OUTPUT 718;"SNGLS;TS;"<br />
30 OUTPUT 718;"SUM TRA?;"<br />
40 ENTER 718;Tracegum<br />
50 DISP Trace,sum;"MEASUREMENT UNITS" Displuystheresult.<br />
60 END<br />
Query Response<br />
5-536 Programming Comm<strong>and</strong>s<br />
Initializes spectrum analyzer:<br />
Activates single-sweep mode, takes sweep.<br />
Gets the result.<br />
Puts the spectrum analyzer response in the<br />
computer variable, Trace-sum.
SUMSQR<br />
Sum of Squared Trace Amplitudes<br />
SUMSQR Sum of Squared Trace Amplitudes<br />
Returns the sum of the squares of the amplitude of each trace element in measurement units.<br />
Syntax<br />
User-defined trace<br />
Trace range<br />
Item<br />
h u s e r - d e f i n e d t r a c e I<br />
L t r a c e r a n g e J<br />
Description/Default<br />
A trace defined by the TRDEF comm<strong>and</strong>.<br />
A segment of trace A, trace B, trace C, or a<br />
user-defined trace.<br />
f u n c t i o n p a t h o n l y<br />
Range<br />
Any valid trace name.<br />
Prerequisite Comm<strong>and</strong>s: TRDEF when using a user-defined trace. TS when using trace data.<br />
Example<br />
OUTPUT 718; “IP; ”<br />
OUTPUT 718; “SNGLS;TS; ”<br />
OUTPUT 718; “SUMSQR TRA?; ”<br />
ENTER 718;Trace,sqrsum<br />
DISP Trace,sqrsum; “MEASUREMENT UNITS” D&plays the result.<br />
Query Response<br />
Initializes spectrum analyzix<br />
Activates single-sweep mode, takes sweep.<br />
Gets the result.<br />
Puts the spectrum analyzer response in the<br />
computer variably Trace-sqrsum.<br />
Programming Comm<strong>and</strong>s 5-537
SWPCPL<br />
Sweep Couple<br />
Selects either a stimulus-response (SR) or spectrum-analyzer (SA) auto-coupled sweep time.<br />
Syntax<br />
Equivalent Softkey: SWP GPLG SR SA .<br />
Option Required: Option 010 or 011.<br />
Preset State: SWPCPL SA.<br />
Related Comm<strong>and</strong>s: SRCPWR.<br />
Example<br />
10 OUTPUT 718;"IP;SNGLS;"<br />
20 OUTPUT 718;"FA 300KHZ;FB IGHZ;"<br />
30 OUTPUT 718;"SRCPWR -1ODB;"<br />
40 OUTPUT 718;"SWPCPL SR;"<br />
50 OUTPUT 718;"SRCTKPK;DONE?;"<br />
60 ENTER 718;Done<br />
70 LOCAL 718<br />
80 END<br />
Description<br />
In stimulus-response mode, auto-coupled sweep times are usually much faster for<br />
swept-response measurements. Stimulus-response auto-coupled sweep times are typically valid<br />
in stimulus-response measurements when the system’s frequency span is less than 20 times the<br />
b<strong>and</strong>width of the device under test.<br />
When used as a predefined variable, SWPCPL returns either a “0” or a “1,” depending on the<br />
setting of the SWPCPL parameters. Refer to the following table.<br />
5-538 Programming Comm<strong>and</strong>s<br />
1 sParametee e t t i n g w_ rsfmrned]
SYNCMODE<br />
Synchronize Mode<br />
Selects the horizontal <strong>and</strong> vertical synchronizing constants, (the synchronization) rate for<br />
both the internal monitor of the spectrum analyzer <strong>and</strong> the video signal that is output to the<br />
MONITOR OUTPUT connector.<br />
Syntax<br />
Equivalent Softkey: SYK! EflZM NTSC , DEFAULT SYNC , SYNC EfEtpr PAL.<br />
Related Comm<strong>and</strong>s: CRT<strong>HP</strong>OS, CR<strong>TV</strong>POS, IP.<br />
Example<br />
XSYNCMODE<br />
OUTPUT 718;"SYNCMODE NTSC15;" Selects the NTSC format for the spectrum analyzer<br />
monitor <strong>and</strong> monitor output.<br />
OUTPUT 718;"IP;" An instrument preset activates the new synchronizing<br />
constants.<br />
Description<br />
Whenever you use SYNCMODE to change the synchronizing constants, you must press (PRESET]<br />
or execute IP to activate the new synchronizing constants. Changing the vertical scanning rate<br />
may change the location of the time <strong>and</strong> date display on the spectrum analyzer display.<br />
The SYNCMODE parameters NORMAL <strong>and</strong> LOAD15 allow you to change the horizontal <strong>and</strong><br />
vertical synchronizing constants for both the spectrum analyzer’s internal monitor <strong>and</strong> the<br />
video signal to the MONITOR OUTPUT connector.<br />
The SYNCMODE parameters NTSC15 <strong>and</strong> PAL15 allow you to change the vertical scanning rate<br />
for both the spectrum analyzer’s internal monitor <strong>and</strong> the video signal that is output to the<br />
MONITOR OUTPUT connector. The regular vertical scanning rate for the spectrum analyzer’s<br />
monitor is 57 Hz; the NTSC15 changes the vertical scanning rate to 60 Hz, <strong>and</strong> the PAL15<br />
changes the vertical scanning rate to 50 Hz. If you want to record the spectrum analyzer<br />
display on a video cassette recorder (VCR) that uses the NTSC format, you must use the<br />
NTSC15 parameter to change the vertical scanning rate of the spectrum analyzer monitor to 60<br />
Hz. If you want to record the spectrum analyzer display on a VCR that uses the PAL format,<br />
you must use the PAL15 parameter to change the vertical scanning rate of the spectrum<br />
analyzer monitor to 50 Hz.<br />
5-540 Programming Comm<strong>and</strong>s
The following parameters for SYNCMODE are described:<br />
NORMAL<br />
NTSC15<br />
PAL15<br />
LOAD15<br />
SYNCMODE Synchronize Mode<br />
Restores the previous values for the horizontal <strong>and</strong> vertical synchronizing<br />
constants of the spectrum analyzer display if SYNCMODE NTSC15 or<br />
SYNCMODE PAL15 was previously executed. The previous values for the<br />
horizontal <strong>and</strong> vertical position are the positions that were set by CRT<strong>HP</strong>OS<br />
<strong>and</strong> CR<strong>TV</strong>POS. SYNCMODE NORMAL is equivalent to SYNC MRM NTSC (with<br />
NRM underlined).<br />
Selects the NTSC format for a spectrum analyzer that has an internal monitor<br />
with a horizontal scanning rate of 15.75 kHz (the monitors for the <strong>HP</strong> 859OL,<br />
<strong>HP</strong> 85913, <strong>HP</strong> 8592L, <strong>HP</strong> 85933, <strong>HP</strong> 85943, <strong>HP</strong> 85953, <strong>and</strong> <strong>HP</strong> 85963 all have<br />
horizontal scanning rates of 15.75 kHz). SYNCMODE NTSC15 is equivalent to<br />
SYK! NRM NTSC (with NTSC underlined).<br />
Selects the PAL format for a spectrum analyzer that has an internal monitor<br />
with a horizontal scanning rate of 15.75 kHz (the monitors for the <strong>HP</strong> 859OL,<br />
<strong>HP</strong> 85913, <strong>HP</strong> 8592L, <strong>HP</strong> 85933, <strong>HP</strong> 85943, <strong>HP</strong> 85953, <strong>and</strong> <strong>HP</strong> 85963 all have<br />
horizontal scanning rates of 15.75 kHz). SYNCMODE PAL15 is equivalent to<br />
SYI?C NRM PAL (with PAL underlined).<br />
Loads the default constants horizontal <strong>and</strong> vertical position for the display<br />
of a spectrum analyzer with an internal monitor with 15.75 kHz horizontal<br />
scanning (the <strong>HP</strong> 859OL, <strong>HP</strong> 85913, <strong>HP</strong> 8592L, <strong>HP</strong> 85933, <strong>HP</strong> 85943,<br />
<strong>HP</strong> 85953, <strong>and</strong> <strong>HP</strong> 85963 all have horizontal scanning rates of 15.75 kHz).<br />
The default constants are the constants that are stored into the spectrum<br />
analyzer’s read-only memory (ROM). SYNCMODE LOAD15 is equivalent to<br />
RRFAUI,T SYNC .<br />
When used as a predefined variable, SYNCMODE returns a number from 0 to 5. The value that<br />
is returned by SYNCMODE depends on the SYNCMODE parameter, as shown in the following<br />
table.<br />
Programming Comm<strong>and</strong>s 5-541
TA<br />
Transfer A<br />
Returns trace A amplitude values from the spectrum analyzer to the controller.<br />
Syntax<br />
( TA<br />
Related Comm<strong>and</strong>s: MDS, TB, TDF.<br />
Example<br />
This example stores the TA results in array A.<br />
DIM A(4011<br />
OUTPUT 718;"IP;"<br />
OUTPUT 718;"SNGLS;CF 300MHZ;SP 2MHZ;TS;"<br />
OUTPUT 718;"TDF P;TA;"<br />
FOR N = 1 TO 401<br />
ENTER 718;A(N)<br />
NEXT N<br />
FOR N = 1 TO 401<br />
PRINT A(N)<br />
NEXT N<br />
Description<br />
I&SW memory area for array.<br />
Initializes analyzer<br />
Activates single-sweep mo& changes center<br />
frequency <strong>and</strong> span, takes sweep.<br />
Changes trace dutu format, outputs trace<br />
A.<br />
FOR NhXT loop moves each element of<br />
trace A to the computer:<br />
FOR NEXT loop moves the trace values<br />
from the computer to the printer<br />
Prints out the results.<br />
The display unit values are transferred in sequential order (from left to right) as seen on the<br />
screen.<br />
Transfer of trace amplitude data should be done only as follows:<br />
1. Select single sweep mode (SNGLS).<br />
2. Select desired spectrum analyzer settings.<br />
3. lake one complete sweep (TS).<br />
4. Transfer data (TA).<br />
This procedure ensures that the current settings of the spectrum analyzer are reflected in the<br />
transferred data.<br />
See Chapter 3, “Different Formats for Trace Data Transfers,” for more information about<br />
transferring trace data. Items are separated by a comma when in TDF P format.<br />
5.542 Programming Comm<strong>and</strong>s
TB<br />
Transfer B<br />
Transfers trace B amplitude values from the spectrum analyzer to the controller.<br />
Syntax<br />
Related Comm<strong>and</strong>s: MDS, TA, TDF.<br />
Example<br />
DIM A(4011<br />
OUTPUT 718;"IP;"<br />
OUTPUT 718;"SNGLS;CF 300MHZ;SP 2MHZ;TS;"<br />
OUTPUT 718;"TDF P;TB;"<br />
FOR N = 1 TO 401<br />
ENTER 718;A(N)<br />
NEXT N<br />
FOR N = 1 TO 401<br />
PRINT A(N)<br />
NEXT N<br />
Description<br />
The operation of TB is similar to the operation of TA.<br />
TB Transfer B<br />
&serves memory area for array.<br />
Initializes analyz4x<br />
Activates single-sweep mode, changes center<br />
frequency <strong>and</strong> span, takes sweep.<br />
Changes trace data format, outputs trace<br />
B<br />
FOR NEXT loop m.oves each element of<br />
trace A to the computer:<br />
FOR NEXT loop moves the trace values<br />
from the computer to the printer:<br />
Prints out the results.<br />
See Chapter 3, “Different Formats for Trace Data Transfers, n for more information about<br />
transferring trace data.<br />
Programming Comm<strong>and</strong>s 5-543
TDF<br />
Trace Data Format<br />
Formats trace information for return to the controller.<br />
Syntax<br />
Related Comm<strong>and</strong>s: MDS, MKA, TA, TB, TRA.<br />
Example<br />
DIM A(4011<br />
OUTPUT 718;"IP;"<br />
OUTPUT 718;"BLANK TRA;CLRW TRB;"<br />
OUTPUT 718;"SNGLS;CF 300MHZ;SP 2MHZ;TS;"<br />
OUTPUT 718*"TDF P-TB-" , #<br />
FOR N = 1 lo 401<br />
ENTER 718;A(N)<br />
NEXT N<br />
FOR N = 1 TO 401<br />
PRINT A(N)<br />
NEXT N<br />
Description<br />
The different trace data formats are as follows:<br />
TDF P<br />
XTDF<br />
Holds trace data.<br />
Initializes armlym<br />
Views trace I3<br />
Activates single-sweep mode, changes centerfrequency<br />
<strong>and</strong> span.<br />
Rwm4zts trace data.<br />
Transfer trace data to array A, one<br />
element at a time.<br />
Loop prints out trace B data.<br />
Prints out the results.<br />
Description: TDF P is the real number format. An example of a trace element returned with<br />
the real number format is 10.00 dB. When querying the trace or marker value, the value is<br />
returned using the amplitude unit set by AUNITS (for example, watts or dBm).<br />
Restrictions: The spectrum analyzer must be in log scale to use TDF l? To send the trace data<br />
back to the spectrum analyzer, the data must be converted to measurement units.<br />
How data is returned: The following table describes what is transferred when the trace data<br />
format is set to P, but the AUNITS are changed. In every case, the trace data transfer is ended<br />
by a carriage return, <strong>and</strong> a line feed with an EOI.<br />
5-544 Programming Comm<strong>and</strong>s
AUNITS<br />
Setting<br />
Watts<br />
dBmV<br />
dBpV<br />
Volts<br />
TDF P;AIJNITS W;‘L4;<br />
TDF P;AUNITS DBM;TA;<br />
TDF P;AUNITS DBMV;TA;<br />
TDF P;AUNITS DBUV;TA;<br />
TDF P;AUNITS v;TA;<br />
Trace Data Transfers with TDF P<br />
Example Description<br />
Transfers 401 real values, in watts, with each value separated by a<br />
carriage return <strong>and</strong> a line feed.<br />
Transfers 401 real values, in dBm, with each value separated by a<br />
carriage return <strong>and</strong> a line feed.<br />
Transfers 401 real values, in dBmV, with each value separated by a<br />
carriage return <strong>and</strong> a line feed.<br />
Transfers 401 real values, in dBpV, with each value separated by a<br />
carriage return <strong>and</strong> a line feed.<br />
Transfers 401 real values, in volts, with each value separated by a<br />
carriage return <strong>and</strong> a line feed.<br />
Example of how data is returned: For example, if the reference level of the spectrum<br />
analyzer is set to -10 dBm, the amplitude scale is set to 10 dB per division, <strong>and</strong> trace A<br />
contains the following data:<br />
TRA[l] contains 8000 (in measurement units). The value 8000 indicates trace element 1 is at<br />
the reference level.<br />
TRA[B] = 7000 measurement units (trace element 2 is -10 dB below the reference level).<br />
TRA[3] through TRA[401] each contain 6000 (in measurement units). The value 6000<br />
indicates that the trace elements 3 through 401 are all at -20 dB below the reference level.<br />
Querying trace A with the TDF P format <strong>and</strong> AUNITS set to DBM returns ASCII character codes<br />
for the following:<br />
-lO.OO,-20.00,-30.00,(-30.00 is repeated 398 times),<br />
TDF A<br />
Description: TDF A is the A-block data format. With the A-block data format, trace data is<br />
preceded by “#, ” “A,” <strong>and</strong> a two-byte number (the two byte number indicates the number<br />
of trace data bytes). The setting of the MDS comm<strong>and</strong> determines whether the trace data is<br />
transferred as one or two g-bit bytes.<br />
Restrictions: To use the A-block format for sending data, you must provide the number of<br />
data bytes.<br />
How data is returned: The following table describes what is transferred when the trace data<br />
format is set to A, but the MDS setting is changed.<br />
MDS<br />
setting<br />
Binary<br />
TDF A;MDS B;TA;<br />
TDF A;MDS W;TA;<br />
Trace Data Transfers with TDF A<br />
Example Description<br />
Transfers “#A,” the number of bytes of trace data, then the 401 bytes<br />
of trace data. Using MDS B “reduces” each trace value into one byte<br />
by dividing (DIV) the trace value by 32. The trace data transfer is<br />
ended with an EOI.<br />
Transfers “#A,” the number of bytes of trace data, then 802 bytes of<br />
trace data. MDS W uses two bytes per trace element to transfer trace<br />
data. The ilrst byte contains the trace value divided by (DIV) 256, the<br />
second byte contains the remainder (MOD) of that division. The trace<br />
data transfer is ended with an EOI.<br />
Programming Comm<strong>and</strong>s 5-545
TDF Trace Data Format<br />
Example of how data is returned: For the same trace A data that is used in the TDF P<br />
description, querying trace A with the TDF A format <strong>and</strong> MDS set to binary (MDS B) would<br />
return the ASCII character codes for the following:<br />
#A(401 div 256)(401 mod 256)(8000 div 32)(7000 div 32)(6000 div 32)(the number for 6000 div<br />
32 is repeated 398 times)<br />
Notice that #A is followed by the two bytes that contain the number of trace elements.<br />
Because MDS is set to binary, the number of trace elements is 401.<br />
If MDS is set to W, querying trace A with the TDF A format would return the ASCII character<br />
codes for the following:<br />
#A(802 div 256)(802 mod 256)(8000 div 256)(8000 mod 256)(7000 div 32)(7000 mod 256)(6000<br />
div 256)(6000 mod 256)(the number for 6000 div 256, then the number for 6000 mod 256 is<br />
repeated 398 times)<br />
Notice that #A is followed by the two bytes that contain the number of trace elements.<br />
Because MDS is set to W (word), the number of trace elements is 802.<br />
TDF I<br />
Description: TDF I is the I-block data format. With the I-block data format, trace data must<br />
be preceded by “#,” <strong>and</strong> “I.” The setting of the MDS comm<strong>and</strong> determines whether the trace<br />
data is transferred as one or two g-bit bytes. Unlike using the A-block format, you do not<br />
provide the number of data bytes when sending trace data back to the spectrum analyzer.<br />
Restrictions: This format is not recommended for use with an RS-232 interface.<br />
How data is returned: The following table describes what is transferred when the trace data<br />
format is set to I, but the MDS setting is changed.<br />
MDS Example<br />
setting<br />
Binary TDF I;MDS B;TA;<br />
Word TDF I;MDS W;TA;<br />
Trace Data Transfers with TDF I<br />
Description<br />
Transfers “#I,” then the 401 bytes of trace data. Using MDS B<br />
“reduces” the trace value into 1 byte by dividing (DIV) the trace value<br />
by 32. The trace data transfer is ended with an EOI.<br />
Transfers “#A,” then 802 bytes of trace data. MDS W uses two bytes<br />
per trace element to transfer trace data. The ilrst byte contains the<br />
trace value divided by (DIV) 256, the second byte contains the<br />
remainder (MOD) of that division. The trace data transfer is ended<br />
with an EOI.<br />
Example of how data is returned: For the same trace A data that is used in the TDF P<br />
description, querying trace A with the TDF I format <strong>and</strong> MDS set to binary (MDS B) would<br />
return the ASCII character codes for the following:<br />
#I(8000 div 32)(7000 div 32)(6000 div 32)(the number for 6000 div 32 is repeated 398 times)<br />
If MDS is set to W, querying trace A with the TDF I format would return the ASCII character<br />
codes for the following:<br />
#I(8000 div 256)(8000 mod 256)(7000 div 32)(7000 mod 256)(6000 div 256)(6000 mod 256)(the<br />
number for 6000 div 256, then the number for 6000 mod 256 is repeated 398 times)<br />
5-546 Programming Comm<strong>and</strong>s
TDF Trace Data Format<br />
Example of how data is returned: For the same trace A data that is used in the TDF P<br />
description, querying trace A with the TDF A format <strong>and</strong> MDS set to binary (MDS B) would<br />
return the ASCII character codes for the following:<br />
#A(401 div 256)(401 mod 256)(8000 div 32)(7000 div 32)(6000 div 32)(the number for 6000 div<br />
32 is repeated 398 times)<br />
Notice that #A is followed by the two bytes that contain the number of trace elements.<br />
Because MDS is set to binary, the number of trace elements is 401.<br />
If MDS is set to W, querying trace A with the TDF A format would return the ASCII character<br />
codes for the following:<br />
#A(802 div 256)(802 mod 256)(8000 div 256)(8000 mod 256)(7000 div 32)(7000 mod 256)(6000<br />
div 256)(6000 mod 256)(the number for 6000 div 256, then the number for 6000 mod 256 is<br />
repeated 398 times)<br />
Notice that #A is followed by the two bytes that contain the number of trace elements.<br />
Because MDS is set to W (word), the number of trace elements is 802.<br />
TDFI<br />
Description: TDF I is the I-block data format. With the I-block data format, trace data must<br />
be preceded by “#,” <strong>and</strong> “I.” The setting of the MDS comm<strong>and</strong> determines whether the trace<br />
data is transferred as one or two 8-bit bytes. Unlike using the A-block format, you do not<br />
provide the number of data bytes when sending trace data back to the spectrum analyzer.<br />
Restrictions: This format is not recommended for use with an RS-232 interface.<br />
How data is returned: The following table describes what is transferred when the trace data<br />
format is set to I, but the MDS setting is changed.<br />
Trace Data Transfers with TDF I<br />
BIDS Example Description<br />
Seming<br />
BiIUlI-y TDF 1;MDS B;TA; Transfers “#I,” then the 461 bytes of trace data. Using MDS B<br />
“reduces” the trace value into 1 byte by dividing (DIV) the trace value<br />
by 32. The trace data transfer is ended with an EOI.<br />
Word TDF 1;MDS W;TA; Transfers “#A,” then 802 bytes of trace data. MDS W uses two bytes<br />
per trace element to transfer trace data. The ilrst byte contains the<br />
trace value divided by (DIV) 256, the second byte contains the<br />
remainder (MOD) of that division. The trace data transfer is ended<br />
with an EOI.<br />
Example of how data is returned: For the same trace A data that is used in the TDF P<br />
description, querying trace A with the TDF I format <strong>and</strong> MDS set to binary (MDS B) would<br />
return the ASCII character codes for the following:<br />
#I(8000 div 32)(7000 div 32)(6000 div 32)(the number for 6000 div 32 is repeated 398 times)<br />
If MDS is set to W, querying trace A with the TDF I format would return the ASCII character<br />
codes for the following:<br />
#I(8000 div 256)(8000 mod 256)(7000 div 32)(7000 mod 256)(6000 div 256)(6000 mod 256)(the<br />
number for 6000 div 256, then the number for 6000 mod 256 is repeated 398 times)<br />
5-546 Programming Comm<strong>and</strong>s
!IDFB<br />
TDF Trace Data Format<br />
Description: TDF B enables the binary format. With the binary format, the marker or trace<br />
data is transferred as bytes. Of all the trace data formats, TDF B transfers trace data the<br />
fastest. The setting of the MDS comm<strong>and</strong> determines whether the trace data is transferred as<br />
one or two 8-bit bytes.<br />
Restrictions: The TDF B format cannot be used to send data back to the spectrum analyzer<br />
(you must use the A-block format to send data back to the spectrum analyzer).<br />
How data is returned: The following table describes what is transferred when the trace data<br />
format is set to B, but the MDS setting is changed.<br />
Trace Data Transfers with TDF B<br />
MDS Example Description<br />
Setting<br />
Binary TDF B;MDS B;TA; Transfers the 401 bytes of trace data. Using MDS B “reduces” the<br />
trace value into 1 byte by dividing (DIV) the trace value by 32. The<br />
trace data transfer ls ended with an EOI.<br />
Word TDF B;MDS W;TA; Transfers the 802 bytes of trace data. MDS W uses two bytes per trace<br />
element to transfer trace data. The ilrst byte contains the trace value<br />
divided by (DIV) 256, the second byte contains the remainder (MOD)<br />
of that division. The trace data transfer is ended with an EOI.<br />
Example of how data is returned: For the same trace A data that is used in the TDF P<br />
description, querying trace A with the TDF B format <strong>and</strong> MDS set to binary (MDS B) would<br />
return the ASCII character codes for the following:<br />
(8000 div 32)(7000 div 32)(6000 div 32)(the number for 6000 div 32 is repeated 398 times)<br />
If MDS is set to W, querying trace A with the TDF B format would return the ASCII character<br />
codes for following:<br />
(8000 div 256)(8000 mod 256)(7000 div 32)(7000 mod 256)(6000 div 256)(6000 mod 256)(the<br />
number for 6000 div 256, then the number for 6000 mod 256 is repeated 398 times)<br />
TDFM<br />
Description: TDF M is the measurement data format. The measurement data format transfers<br />
trace data in measurement units, <strong>and</strong> the measurement data can range from -32768 to<br />
+ 32767.<br />
Restrictions: TDF M cannot be used to send trace data back to the spectrum analyzer.<br />
How trace data is returned: The following table describes what is transferred when the trace<br />
data format is set to M.<br />
TDF M;TA;<br />
Example<br />
Trace Data Transfers with TDF M<br />
Description<br />
Transfers 401 bytes, with each trace value ln measurement units. The trace data transfer is<br />
ended with a carriage return, a line feed with an EOI.<br />
Example of how data is returned: For the same trace A data that is used in the TDF P<br />
description, querying trace A with the TDF M would return the ASCII character codes for the<br />
following:<br />
8000,7000,6000,(6000 repeated 398 times),<br />
Programming Comm<strong>and</strong>s 5-547
TDF Trace Data Format<br />
Refer to Chapter 3, “Different Formats for Trace Data Transfers,” for more information about<br />
transferring trace data.<br />
Query Response<br />
5-548 Programming Comm<strong>and</strong>s<br />
QTDF
TEXT<br />
lkxt<br />
Writes text on the spectrum analyzer screen at the current pen position.<br />
Syntax<br />
t e x t t o b e<br />
/- d i s p l a y e d 7<br />
d e l i m i t e r c h a r a c t e r de imi ter<br />
Item Description/Default Range<br />
TEXT Text<br />
Delimiter Matching characters marking the beginning <strong>and</strong> end of the list of - 1 \ @ = / ^ 8 % ; ! ’ :<br />
analyzer comm<strong>and</strong>s. ” &<br />
Character Any valid character. See “LB” for additional characters available.<br />
Related Comm<strong>and</strong>s: DSPLY, LB, PA, PD, PU, PR.<br />
Example<br />
OUTPUT 718<br />
OUTPUT 718<br />
Description<br />
;"PU;PA 80,80;TEXT%CONNECT ANTENNA%;" Displays CONNECTANTENNA<br />
on the analyzer screen.<br />
; “PU; PA 100,100;TEXT%50~~;CHR$(250);"%;" Displays 50n on the analyzer<br />
screen.<br />
The TEXT origin is at the lower-left corner of the first character. The pen is placed to the<br />
right of <strong>and</strong> behind the last character position after the text characters. Line feeds are not<br />
automatically generated for lines that extend past the edge of the screen.<br />
See “LB” for the additional characters available by specifying the ASCII character code. (See<br />
second line of the example for an example of using the ASCII character code.)<br />
The TEXT comm<strong>and</strong> also enters the text into the display list. See “DA” for more information<br />
about the display list.<br />
XTEXT<br />
Programming Comm<strong>and</strong>s 5-548
TH<br />
Threshold<br />
Clips signal responses below the threshold level.<br />
Syntax<br />
TH<br />
Item Description/Default RwIe<br />
Number Any real or integer number. Default unit is dBm. Range dependent on<br />
RL setting.<br />
Equivalent Softkey: TRRESIILD ON OFF .<br />
Preset State: Clip off, positioned one division above bottom graticule line.<br />
Step Increment: One division.<br />
Related Comm<strong>and</strong>s: AUTO, DL, MEANTH, MKPK, PEAKS, RL.<br />
Restrictions: Not available with Analog+ display mode. See “ANLGPLUS” for more<br />
information.<br />
Example<br />
OUTPUT 718*"TH UP-"<br />
9 8 kncreases the threshold level.<br />
Description<br />
The threshold level is eight graticule divisions below the top of the screen unless otherwise<br />
specified. The threshold level is annotated in reference level units at the lower-left corner of<br />
the spectrum analyzer screen. AUTO deactivates clipping. The TH level is used for next peak<br />
marker movements (see “MKPK”) <strong>and</strong> the PEAKS comm<strong>and</strong> even if the display clipping is off.<br />
Query Response<br />
5-550 Programming Comm<strong>and</strong>s<br />
XTH
TIMEDATE<br />
Time Date<br />
Allows you to set the time <strong>and</strong> date for the spectrum analyzer real-time clock in the<br />
YYMMDDHHMMSS format.<br />
Syntax<br />
T IMEDATE<br />
t i m e <strong>and</strong> dote (YYMMDDHHMMSS<br />
/<br />
f-<br />
TIMEDATE Time Date<br />
Item Description/Default Range<br />
XTIMEQATE<br />
Number A number representing the date <strong>and</strong> time in the A valid date <strong>and</strong> time.<br />
YYMMDDHHMMSS (24 hour) format.<br />
Related Comm<strong>and</strong>s: SETDATE, SETTIME, TIMEDSP.<br />
Example<br />
OUTPUT 718;"TIMEDATE 881231135501;" Sets the analyzer time <strong>and</strong> date to 1:55:01 PM<br />
on 31 December 1988.<br />
Query Response<br />
output<br />
terminot i o n *<br />
QTIMEDATE<br />
Programming Comm<strong>and</strong>s 5-551
TIMEDSP<br />
Time Display<br />
Enables the display of the time <strong>and</strong> date on the spectrum analyzer screen.<br />
Syntax<br />
Equivalent Softkey: TIHERATE 01 OFF .<br />
Related Comm<strong>and</strong>s: ANNOT, SETDATE, SETTIME, TIMEDATE.<br />
Example<br />
OUTPUT 718;"TIMEDSP OFF;"<br />
Query Response<br />
5-552 Programming Comm<strong>and</strong>s<br />
OFF<br />
ON<br />
termination<br />
/<br />
XT IMEDSP
TITLE<br />
Title<br />
Activates the screen title mode. The title is displayed above the top graticule <strong>and</strong> is left<br />
justified.<br />
Syntax<br />
t i t l e t o b e<br />
r dlsplayed 7<br />
TITLE c h a r a c t e r del imi ter<br />
TITLE Title<br />
Item Description/Default Range<br />
Delimiter Matching characters marking the beginning <strong>and</strong> end of the list of - 1 \ @ = / ^ $ % ; ! ’ :<br />
analyzer comm<strong>and</strong>s. ” &<br />
Character Any valid character. See “LB” for additional characters available. Up to 53 characters.<br />
Equivalent Softkey: Change Title.<br />
Related Comm<strong>and</strong>s: IP, LB, SAVES, TEXT.<br />
Example<br />
OUTPUT ~I~;I~TITLE XADJUST ANTENNA%;" Displays ‘“‘ADJUST ANTENNA” on the analyzer<br />
screen.<br />
Description<br />
This function writes a message at the top of the spectrum analyzer<br />
screen. The full width of the display is available for writing a maximum of 53 characters.<br />
However, the marker readout may interfere with the last 26 characters. IP removes the<br />
message.<br />
The SAVET comm<strong>and</strong> saves the screen title is along with the trace in the trace register.<br />
XTITLE<br />
Programming Comm<strong>and</strong>s 5-553
TM<br />
Trigger Mode<br />
Selects a trigger mode: free, line, video, <strong>TV</strong>, or external.<br />
Syntax<br />
Equivalent Softkeys: The keys accessed by L‘TRIG).<br />
Related Comm<strong>and</strong>s: DL.<br />
Example<br />
OUTPUT 718;"TM EXT;" Activates the extol trigger mode.<br />
Description<br />
The conditions of the four trigger modes are as follows:<br />
FREE<br />
VID<br />
LINE<br />
EXT<br />
<strong>TV</strong><br />
allows the next sweep to start as soon as possible after the last sweep. The functions<br />
of TM FREE <strong>and</strong> FIZZ RUN are identical.<br />
allows the next sweep to start if the trace data rises across a level set by the display<br />
line. The functions of TM VID <strong>and</strong> BIDED are identical.<br />
allows the next sweep to start when the line voltage passes through zero, going<br />
positive. The functions of TM LINE <strong>and</strong> LIYE are identical.<br />
allows the next sweep to start when an external voltage level passes through<br />
approximately 1.5 V, going positive. The external trigger signal level must be between<br />
0 V <strong>and</strong> + 5 V. Connect the external trigger to the EXT TRIG INPUT. The functions of<br />
TM EXT <strong>and</strong> l%l’ERl?AL are identical.<br />
allows <strong>TV</strong> triggering if Options 101 <strong>and</strong> 102, or Option 301 is installed. The functions<br />
of TM <strong>TV</strong> <strong>and</strong> <strong>TV</strong> TftIG are similar. TM <strong>TV</strong> does not select the <strong>TV</strong> line number, set up<br />
the amplitude level, change the span, change the b<strong>and</strong>width, or change the sweep<br />
time.<br />
Note Some spectrum analyzer functions are not performed until the spectrum<br />
analyzer is triggered.<br />
5-554 Programming Comm<strong>and</strong>s<br />
XTM
Query Response<br />
TM Trigger Mode<br />
QTM<br />
Programming Comm<strong>and</strong>s 5-555
TO1<br />
Third-Order Intermodulation Measurement<br />
Turns on or off the third-order inter-modulation (TOI) measurement.<br />
Syntax<br />
Equivalent Softkey: TO1 ClN OFF .<br />
Related Comm<strong>and</strong>s: AUNITS, MKPX, TH, TOIR.<br />
Example<br />
OUTPUT 718*"MOV TO1 1."<br />
, , ,<br />
OUTPUT 718*"TOIR'."<br />
f - ,<br />
ENTER 718;Toi<br />
PRINT 'Third-order intermodulation is ",Toi<br />
OUTPUT 718;"MOV TOI,O;"<br />
Description<br />
Tums on the third-order intemnodul&ion<br />
measurement.<br />
Queries TOIR. TOIR contains the results<br />
of the third-order intermdulation<br />
measurement.<br />
Stores the value of TOIR in the variable<br />
lbi.<br />
Prints the results.<br />
Turns off the third-order interrnodul&ion<br />
measurement.<br />
Setting TO1 to 1 turns on the third-order intermodulation measurement. Setting TO1 to 0 turns<br />
off the third-order intermodulation measurement. When the third-order intermodulation<br />
measurement is turned on, the spectrum analyzer first determines that there are four signals<br />
on the spectrum analyzer display; the four signals must be the two fundamental signals <strong>and</strong><br />
two distortion products. All of the signals must be greater than the peak excursion above<br />
the threshold. If four valid signals could not be found for the third-order intermodulation<br />
measurement, the value of TOIR is -100. If four valid signals could be found, the spectrum<br />
analyzer does the following:<br />
1. Finds the four highest on-screen signals. (If the four highest on-screen signals are not the<br />
two signals <strong>and</strong> two distortion products, the TO1 measurement cannot be performed.)<br />
2. Determines the spacing between the highest two signals. The highest two signals are tone A<br />
<strong>and</strong> tone B.<br />
3. Verifies that the third <strong>and</strong> fourth highest signals (distortion A <strong>and</strong> distortion B) fall above<br />
<strong>and</strong> below tone A <strong>and</strong> tone B by the frequency difference between tone A <strong>and</strong> tone B.<br />
5-555 Programming Comm<strong>and</strong>s
TO1 Third-Order Intermodulation Measurement<br />
4. Measures the levels of the four signals (tone A, tone B, distortion A, <strong>and</strong> distortion B) <strong>and</strong><br />
calculates the third-order intermodulation intercept.<br />
The third-order intermodulation intercept is calculated as follows:<br />
TOI = (2<br />
x LevelTone A - Leve~Di~tortion A + LeVelTone B)<br />
2<br />
The frequency of the distortion product (Distortion A) is equal to the following:<br />
Frequewm8tortion A = 2 X FrequencYTone A - FreqwwTone B<br />
You must query TOIR to determine the value of the higher third-order intermodulation product.<br />
The third-order intermodulation measurement is repeated at the end of every sweep (TO1<br />
uses the ONEOS comm<strong>and</strong> to update the measurement data) until you turn off the third-order<br />
intermodulation measurement.<br />
Restrictions<br />
Turning the TO1 measurement on turns off the following functions: windows display mode<br />
(WINON), N dB point measurement (NDBPNT), the FFT menu measurements (FF’IAUTO,<br />
FFTCONTS, FFTSNGLS), gate utility functions (GDRVUTIL), marker table (MKTBL), peak table<br />
(PKTBL), percent AM (PCTAM), peak zoom (PKZOOM), <strong>and</strong> power menu measurements (ACP,<br />
ACPE, C<strong>HP</strong>, <strong>and</strong> OBW).<br />
You can execute the TO1 comm<strong>and</strong> two different ways. You can either execute the TO1<br />
comm<strong>and</strong> directly (for example, “TO1 1; I’) or use the MOV comm<strong>and</strong> to move the 1 or 0 into<br />
the TO1 comm<strong>and</strong> (for example, “MOV TOI, 1; I’). If you use the MOV comm<strong>and</strong>, no text is<br />
displayed in the active function area during comm<strong>and</strong> execution.<br />
Because TO1 is performed at the end of every measurement sweep, you should turn off<br />
the third-order intermodulation measurement (set TO1 to 0) when you are done with the<br />
third-order intermodulation measurement.<br />
Query Response<br />
r Off 7<br />
0<br />
o u t p u t<br />
’ t e r m i n a t i o n +<br />
QTO I<br />
Programming Comm<strong>and</strong>s 5-557
TOIR<br />
Third-Order Intermodulation Response<br />
Returns the intercept point for the highest third-order intermodulation product measured by<br />
the third-order intermodulation measurement (TOI).<br />
Syntax<br />
TOIR<br />
Related Comm<strong>and</strong>s: AUNITS, MKPX, TH, TOI.<br />
Example<br />
OUTPUT 718;"MOV TOI,l;"<br />
OUTPUT 718*"TOIR'*"<br />
8 - #<br />
ENTER 718;Toi<br />
PRINT "Third-order intermodulation is ",Toi<br />
OUTPUT 718;"MOV TOI,O;"<br />
Description<br />
XTOIR<br />
Turns on the third-order intermodul&ion<br />
nwasurmt.<br />
Queries TOIR. TOIR contains the results<br />
of the third-order intmnodulation<br />
wwasurmt.<br />
Stores the value of TOIR in the var.6<br />
able lbi.<br />
Prints the results.<br />
Turns ofl the third-order intemwduk&on<br />
rrumsurmt.<br />
TOIR returns a -100 if the TO1 function has not been turned on, or if four on-screen signals are<br />
not valid or are not present. For TO1 to perform a third-order intermodulation measurement,<br />
there needs to be four signals on the spectrum analyzer display, <strong>and</strong> all four signals must be<br />
greater than the peak excursion above the threshold.<br />
Query Response<br />
5.558 Programming Comm<strong>and</strong>s<br />
TOI<br />
amp1 1 tude<br />
output<br />
termination +<br />
QTOIR
TRA/TRB/TRC<br />
Trace Data Input <strong>and</strong> Output<br />
TRA/TRB/TRC Trace Data Input <strong>and</strong> Output<br />
The TRA/TRB/TRC comm<strong>and</strong>s provide a method for returning or storing 16-bit trace values.<br />
Syntax<br />
data b y t e & EOI /<br />
Use the same syntax for TRB <strong>and</strong> TRC as shown for TRA, just substitute TRB or TRC for TRA.<br />
Number<br />
Msb length<br />
Lsb length<br />
Data byte<br />
Item<br />
Data byte & EOI<br />
Any real or integer number.<br />
Description/Default<br />
Most signiflcant byte of a two-byte word that describes the<br />
number of bytes transmitted.<br />
Least signiflcant byte of a two-byte word that describes the<br />
number of bytes transmitted.<br />
S-bit byte containing numeric or character data.<br />
g-bit byte containing numeric or character data followed by END.<br />
Related Comm<strong>and</strong>s:1L dOAD, ONEOS, RCLT, SAVET, STOR, TDF.<br />
Example<br />
10 REAL Trace-a(l:401) Creates a 401-point trace array.<br />
20 OUTPUT 718;"IP;" Initializes analym<br />
30 OUTPUT 718;"TDF P;" Changes the format for real numbers.<br />
40 OUTPUT 718;"SNGLS;"<br />
50 OUTPUT 718;"CF 300MHZ;" Changes the center freqwncy.<br />
60 OUTPUT 718;"SP 200MHZ;" Changes the span.<br />
70 OUTPUT 718;"TS;"<br />
80 OUTPUT 718;"MKPK HI;"<br />
90 OUTPUT 718;"MKCF;" Mioves peak to center of analyzer screen.<br />
100 OUTPUT 718;"TS;" Updates mkmsuremmt trace.<br />
110 OUTPUT 718;"TRA?;" Gets the trace data.<br />
Range<br />
XTRA<br />
nteger number range<br />
Programming Comm<strong>and</strong>s 5-558
TRA/TRB/TRC Trace Data Input <strong>and</strong> Output<br />
120 ENTER 718;Trace-a(*) Sends the trace data to the computer:<br />
130 OUTPUT 718;"CONTS;" Activates continuous sweep mode<br />
140 END<br />
Description<br />
Trace data that is input in the A-block or the I-block format is treated as measurement units<br />
independent of trace data format (TDF). Enter words in measurement units only. The output<br />
format is specified according to TDF <strong>and</strong> MDS.<br />
The comm<strong>and</strong> may be used to input integer data to traces. See “Saving Trace Data” in Chapter<br />
3. Because the lengths of trace A, trace B, <strong>and</strong> trace C are fixed, there are always 401 or 802<br />
bytes transferred during binary input or binary output mode, respectively.<br />
Query Response<br />
The form of the query response is dependent upon the previously used TDF <strong>and</strong> MDS<br />
comm<strong>and</strong>s as follows:<br />
/<br />
TDF M or TDF I=, ASCII<br />
/ \<br />
output<br />
’ terminot ion ?-’<br />
< # A msb length Isb length<br />
TDF A<br />
/ TDF I \<br />
,- T D F B -\<br />
If Analog+ display mode is turned on, only the 401 or 802 bytes of trace data are returned; the<br />
dot display is not returned.<br />
5-566 Programming Comm<strong>and</strong>s
TRCMEM<br />
Trace Memory<br />
TRCMEM Trace Memory<br />
Returns a nonnegative integer that indicates the total number of trace registers available for<br />
SAVET <strong>and</strong> RCLT.<br />
syntax<br />
function path only<br />
Related Comm<strong>and</strong>s: ACTDEF, DISPOSE, FUNCDEF, RCLT, SAVET, TRDEF<br />
Example<br />
OUTPUT 718;"TRCMEM?;" Gets the total number of trace registers.<br />
ENTER 718;Number<br />
DISP Number<br />
Description<br />
The value of TRCMEM is displayed on the spectrum analyzer display when you save a trace,<br />
limit-line table, or table of amplitude correction factors in spectrum analyzer memory with<br />
Trace -3 In&stml .<br />
Query Response<br />
Programming Comm<strong>and</strong>s 5.561
TRDEF<br />
Trace Define<br />
Creates a user-defined trace.<br />
Syntax<br />
TROEF character<br />
Item Description/Default<br />
Character Any valid character.<br />
User-defined variable<br />
Predefined variable<br />
Predefined function<br />
Trace element<br />
Number<br />
b p r e d e f i n e d v a r i a b l e /<br />
huuser-defined voriobl A<br />
4 predefined function I<br />
G trace element /<br />
A variable defined by VARDEF or ACTDEF comm<strong>and</strong>s.<br />
A comm<strong>and</strong> that acts as a variable. Refer to %ble 5-1.<br />
Function that returns a value. Refer to ‘pable 5-l.<br />
An element of trace A, trace B, trace C, or a user-defined trace.<br />
Any real or integer number.<br />
Range<br />
2 to 11 characters<br />
long, A through Z <strong>and</strong><br />
the underscore (the<br />
underscore should be<br />
used as the second<br />
character of the<br />
label).<br />
Any valid variable<br />
name.<br />
2 to 2047.<br />
Parameter Value: 2 to 2047.<br />
Prerequisite Comm<strong>and</strong>s: ACTDEF or VARDEF when using a user-defined variable.<br />
Related Comm<strong>and</strong>s: DISPOSE.<br />
Example<br />
OUTPUT 718;"TRDEF NEW,lOO;" LIefines a trace called NEW<br />
5-562 Programming Comm<strong>and</strong>s
Description<br />
TRDEF Trace Define<br />
The TRDEF comm<strong>and</strong> defines a trace <strong>and</strong> the number of points the trace will contain. Each<br />
trace element consists of 16 bits <strong>and</strong> stores the trace amplitude in measurement units. See<br />
the description for the TDF M format that is described in “Different Formats for Trace Data<br />
Transfers” in Chapter 3 for more information about measurement units.<br />
Query Response<br />
The query response returns the number of trace elements in the trace.<br />
Programming Comm<strong>and</strong>s 5-563
TRDSP<br />
Trace Display<br />
Turns on or off the display of trace A, B, or C without clearing the trace (measurements can<br />
still be taken).<br />
Syntax<br />
Related Comm<strong>and</strong>s: TRPRST, TRSTAT.<br />
Restrictions: Not available with Analog+ display mode. See “ANLGPLUS” for more<br />
information.<br />
Example<br />
OUTPUT 718;"TRDSP TRA,OFF;"<br />
Description<br />
TRDSP OFF reduces the time duration between sweeps.<br />
5-564 Programming Comm<strong>and</strong>s
TRGRPH<br />
Trace Graph<br />
Displays a compressed trace on the spectrum analyzer display.<br />
Syntax<br />
TRGRPH Trace Graph<br />
d i s p l a y exp<strong>and</strong>ing<br />
u s e r - d e f i n e d t r a c e<br />
Item Description/Default<br />
Number Any valid integer.<br />
Number (exp<strong>and</strong>ing factor) Any valid integer.<br />
User-defined trace A trace defined by the TRDEF comm<strong>and</strong>.<br />
Prerequisite Comm<strong>and</strong>s: TRDEF when using a user-defined trace.<br />
Related Comm<strong>and</strong>s: COMPRESS, DSPLY.<br />
Example<br />
OUTPUT 718."IP-"<br />
OUTPUT 718;"TRiEF NEW,lOO;"<br />
Range<br />
0 to 4000 for the z<br />
coordinate, 0 to 8000<br />
for the y coordinate.<br />
0 to 100.<br />
Any valid trace name.<br />
Initializes analyzer<br />
D&n,es a trace called NEW with 100 trace<br />
elements.<br />
OUTPUT 718;"CF 300MHZ;SNGLS;" Changes the center frequency, activates singlesweep<br />
moo%.<br />
OUTPUT 718;"TS;" ltLkes sweep.<br />
OUTPUT 718;"COMPRESS NEW,TRA,POS;" Compresses the contents of trace A into trace<br />
NEW<br />
OUTPUT 718;"BLANK TRA;"<br />
OUTPUT 718;"TRGRPH 0,0,400,4,NEW;" Redraws trace NEW 400 rneasurernent units<br />
above the baseline, exp<strong>and</strong>ed by a factor of 4.<br />
Programming Comm<strong>and</strong>s 5-565
TRGRPH Trace Graph<br />
Description<br />
The x <strong>and</strong> y coordinates specify the position of the first trace element. Each horizontal<br />
division represents 40 x coordinates. Each vertical division represents 1000 9 coordinates. The<br />
display address is inoperative; it is specified for backward compatibility only. The trace can be<br />
exp<strong>and</strong>ed according to the scale determined by the exp<strong>and</strong>ing factor.<br />
5-566 Programming Comm<strong>and</strong>s
TRMATH<br />
Trace Math<br />
Executes a list of spectrum analyzer comm<strong>and</strong>s at the end of each sweep.<br />
Syntax<br />
Delimiter<br />
Item<br />
/<br />
Analyzer Comm<strong>and</strong><br />
Msb length<br />
Lsb length<br />
Character<br />
Character & EOI<br />
string data field<br />
A-block data field<br />
l - b l o c k d a t a f i e l d -1<br />
character character & EOI<br />
TRMATH Trace Math<br />
Description/Default Range<br />
Matching characters marking the beginning <strong>and</strong> end of the list of - ) \ @ = / ^ $ % ; ! ’ :<br />
analyzer comm<strong>and</strong>s. ” &<br />
Any spectrum analyzer comm<strong>and</strong> except TS.<br />
Most signilicant byte of a two-byte word that describes the<br />
number of bytes transmitted.<br />
Least significant byte of a two-byte word that describes the<br />
number of bytes transmitted.<br />
Any valid character.<br />
Any valid character <strong>and</strong> END.<br />
Related Comm<strong>and</strong>s: LIMITEST, ONDELAY, ONEOS, ONMKR, ONSRQ, ONSWP, ONTIME.<br />
Programming Comm<strong>and</strong>s 5.567
TRMATH Trace Math<br />
Example<br />
The program below halves the amplitude of trace A <strong>and</strong> moves it to trace B.<br />
OUTPUT 718;"CLRW TRA;VIEW TRB;" Displays trace B<br />
OUTPUT 718;"DISPOSE TRMATH;" Disposes of existing TRiUATH comm<strong>and</strong>s.<br />
OUTPUT 718;"TRMATH! DIV TRB,TRA,2! ;" LXwio!.es trace A by 2 <strong>and</strong> moves it into trace<br />
B<br />
Description<br />
The TRMATH comm<strong>and</strong> executes the list of spectrum analyzer comm<strong>and</strong>s at the end of each<br />
sweep. Any spectrum analyzer comm<strong>and</strong> except TS is allowed within the list of comm<strong>and</strong>s.<br />
The oper<strong>and</strong>s <strong>and</strong> results of trace math are truncated if they are not within certain limits. If<br />
operating on traces A, B, or C, trace lengths must be less than or equal to 401. If operating on<br />
user-defined traces, results must be less than or equal to 2047.<br />
After the TRMATH comm<strong>and</strong> is executed, any current ONEOS definitions are executed, <strong>and</strong><br />
then any current limit-line testing (LIMITEST).<br />
Limit the number of characters (between the delimiters) in the list of spectrum analyzer<br />
comm<strong>and</strong>s to a maximum of 2047 characters.<br />
Clearing the TRMATH definition: IP clears the TRMATH definition. You can use the DISPOSE<br />
comm<strong>and</strong> to clear the TRMATH definition also.<br />
Query Response<br />
< #A analyzer comm<strong>and</strong><br />
5-566 Programming Comm<strong>and</strong>s
TRPRST<br />
Trace Preset<br />
Sets the trace operations to their preset values.<br />
Syntax<br />
Related Comm<strong>and</strong>s: AMB, BLANK, CLRDSP, CLRW, DISPOSE, DL, IP, TH.<br />
Example<br />
OUTPUT 718;"TRPRST;"<br />
Description<br />
TRPRST executes these comm<strong>and</strong>s:<br />
AMB OFF<br />
AMBPL OFF<br />
ANLGPLUS OFF<br />
BLANK TRB<br />
BLANK TRC<br />
CLRW TRA<br />
DISPOSE ONEOS<br />
DISPOSE ONSWP<br />
DISPOSE TRMATH<br />
DL OFF<br />
EM<br />
TH OFF<br />
TRPRST Trace Preset<br />
Programming Comm<strong>and</strong>s 5-569
TRSTAT<br />
Trace Status<br />
Returns the status of traces A, B, <strong>and</strong> C: clear write, blank, view, minimum hold, or maximum<br />
hold.<br />
Syntax<br />
Related Comm<strong>and</strong>s: BLANK, CLRW, DET, MINH, TRDSP, VIEW.<br />
Example<br />
This example returns the measurement state of traces A, B, <strong>and</strong> C.<br />
DIM States$[40] Declares arra2/ for results.<br />
OUTPUT 718;"TRSTAT?;" Returns the status results to the computer:<br />
ENTER 718 USING I'-K";States$<br />
PRINT States$ Prints out status of traces.<br />
Query Response<br />
5-570 Programming Comm<strong>and</strong>s<br />
-c ;<br />
output<br />
terminot ion �<br />
XTRSTAT<br />
QTRSTAT
TS<br />
Thke Sweep<br />
Starts <strong>and</strong> completes one full sweep before the next comm<strong>and</strong> is executed.<br />
Syntax<br />
Related Comm<strong>and</strong>s: SNGLS, TM.<br />
Example<br />
TS ‘Ihke Sweep<br />
OUTPUT 718;"SNGLS;TS;" Activates the single-sweep mode, <strong>and</strong> performs a take sweep.<br />
Description<br />
A take sweep is required for each sweep in the single-sweep mode. TS prevents further input<br />
from the interface bus until the sweep is completed to allow synchronization with other<br />
instruments.<br />
In the example below, the comm<strong>and</strong> sequence does not allow sufficient time for a full sweep of<br />
the specified span before VIEW is executed. Therefore, only the span set by the instrument is<br />
displayed in trace A.<br />
OUTPUT 718;"IP;SNGLS;CF 400MHZ;SP 20KHZ;VIEW TRA;"<br />
A TS comm<strong>and</strong> inserted before VIEW makes the spectrum analyzer take one complete sweep<br />
before displaying trace A. This allows the spectrum analyzer sufficient time to respond to each<br />
comm<strong>and</strong> in the<br />
sequence.<br />
OUTPUT 718;"IP;CF 400MHZ;SP 20MHZ;TS;VIEW TRA;"<br />
TS is recommended before transmission of marker data <strong>and</strong> before executing marker operations<br />
such as peak search. This is because the active marker is repositioned at the end of each<br />
sweep. When the spectrum analyzer receives a TS comm<strong>and</strong>, it is not ready to receive any<br />
more data until one full sweep has been completed. However, when slow sweep speeds are<br />
being used, the controller can be programmed to perform computations or address other<br />
instruments while the spectrum analyzer completes its sweep.<br />
On-event comm<strong>and</strong>s (ONCYCLE, ONDELAY, ONEOS, ONMKR, ONSRQ, ONSWP, ONTIME, <strong>and</strong><br />
TRMATH) do not interrupt a take sweep.<br />
Note When MKPAUSE or MKSTOP are activated, TS considers the sweep complete<br />
when it reaches the active marker.<br />
XTS<br />
Programming Comm<strong>and</strong>s 5-57 1
<strong>TV</strong>LINE<br />
<strong>TV</strong> Line<br />
Selects which horizontal line of video to trigger on.<br />
Syntax<br />
Item Description/Default Range<br />
Number Any valid integer number. Default value is 17. 1 to 1012.<br />
I ine<br />
Equivalent Softkey: <strong>TV</strong> LIXIZ t .<br />
Options Required: Options 101 <strong>and</strong> 102, or Option 301.<br />
Preset Value: 17.<br />
Related Comm<strong>and</strong>s: HAVE, <strong>TV</strong>SFRM, <strong>TV</strong>STND.<br />
Example<br />
OUTPUT 718;"<strong>TV</strong>LINE 20;"<br />
Query Response<br />
5-572 Programming Comm<strong>and</strong>s<br />
output<br />
termination +<br />
X<strong>TV</strong>L INE
<strong>TV</strong>SFRM<br />
<strong>TV</strong> Frame<br />
Selects the type of video frame to trigger on.<br />
Syntax<br />
Options Required: Options 101 <strong>and</strong> 102, or Option 301.<br />
Related Comm<strong>and</strong>s: HAVE, <strong>TV</strong>LINE, <strong>TV</strong>SYNC.<br />
Example<br />
OUTPUT 718;"<strong>TV</strong>SFRM BOTH;"<br />
Description<br />
<strong>TV</strong>SFRM <strong>TV</strong> Frame<br />
The ODD <strong>and</strong> EVEN trigger are for interlaced formats, <strong>and</strong> VERTICAL is for noninterlaced<br />
display formats.<br />
The functions of <strong>TV</strong>SFRM ODD, <strong>TV</strong>SFRM EVEN, <strong>and</strong> <strong>TV</strong>SFRM BOTH are identical to<br />
<strong>TV</strong> TRIG ODD FLD , <strong>TV</strong> TRIG EVEN FLD , <strong>and</strong> <strong>TV</strong> TRfG VERT INT , respectively. <strong>TV</strong>SFRM<br />
BOTH is the same as <strong>TV</strong>SFRM VERTICAL.<br />
When used as a predefined variable, <strong>TV</strong>SFRM returns a number. The number that is returned<br />
depends upon the setting of the <strong>TV</strong>SFRM parameter, as shown in the following table.<br />
I VERTICAL or BOTH I 0 I<br />
EVEN 1<br />
ODD I 2 I<br />
Programming Comm<strong>and</strong>s 5-573
<strong>TV</strong>SFRM <strong>TV</strong> Frame<br />
Query Response<br />
5-574 Programming Comm<strong>and</strong>s<br />
O<strong>TV</strong>SFRM
<strong>TV</strong>STND<br />
<strong>TV</strong> St<strong>and</strong>ard<br />
Selects the triggering for NTSC, PAL, PAL-M, <strong>and</strong> SECAM-L formats.<br />
Syntax<br />
Equivalent Softkey: <strong>TV</strong> St<strong>and</strong>ard.<br />
Options Required: Options 101 <strong>and</strong> 102, or Option 301.<br />
Related Comm<strong>and</strong>s: TM, <strong>TV</strong>LINE, <strong>TV</strong>SYNC.<br />
Example<br />
OUTPUT 718;"<strong>TV</strong>STND PAL;"<br />
Description<br />
<strong>TV</strong>STND <strong>TV</strong> St<strong>and</strong>ard<br />
<strong>TV</strong>STND sets corrections for <strong>TV</strong>LINE for each st<strong>and</strong>ard format. <strong>TV</strong>STND sets the polarity<br />
to trigger on (positive or negative) automatically; it is necessary to use <strong>TV</strong>SYNC after using<br />
<strong>TV</strong>STND only if you require a non-st<strong>and</strong>ard format.<br />
When used as a predefined variable, <strong>TV</strong>STND returns a number. The number that is returned<br />
depends upon the setting of the <strong>TV</strong>STND parameter, as shown in the following table.<br />
<strong>TV</strong>STND Parameter Value<br />
setting Returned<br />
NTSC 0<br />
PALM 1<br />
PAL 2<br />
SECAML 3<br />
X<strong>TV</strong>STND<br />
Programming Comm<strong>and</strong>s 5-575
<strong>TV</strong>STND <strong>TV</strong> St<strong>and</strong>ard<br />
Query Response<br />
5.576 Programming Comm<strong>and</strong>s<br />
Q<strong>TV</strong>STND
<strong>TV</strong>SYNC<br />
<strong>TV</strong> Sync<br />
Selects the polarity of video modulation to trigger on.<br />
syntax<br />
Equivalent Softkey: <strong>TV</strong> SYNC NEG POS .<br />
Options Required: Options 101 <strong>and</strong> 102, or Option 301.<br />
Preset Value: <strong>TV</strong>SYNC NEG.<br />
Related Comm<strong>and</strong>s: HAVE, <strong>TV</strong>LINE, <strong>TV</strong>SFRM, <strong>TV</strong>STND.<br />
Example<br />
OUTPUT 718; “<strong>TV</strong>SYNC POS; ”<br />
Description<br />
<strong>TV</strong>SYNC <strong>TV</strong> Sync<br />
<strong>TV</strong>SYNC allows you to trigger on the negative or positive modulation video format. <strong>TV</strong>STND<br />
changes the triggering polarity for the selected video format.<br />
When used as a predefined variable, <strong>TV</strong>SYNC returns a “0” when <strong>TV</strong>SYNC is set to POS, a “ 1”<br />
if <strong>TV</strong>SYNC is set to NEG.<br />
Programming Comm<strong>and</strong>s 5-577
TWNDOW<br />
Trace Window<br />
Creates a window trace array for the fast Fourier transform (FFT) function.<br />
Syntax<br />
TWNDDW<br />
7 d e s t i n a t i o n r w i n d o w<br />
b u s e r - d e f i n e d t r a c e /<br />
b t r a c e r a n g e /<br />
Item Description/Default<br />
User-defined trace A trace defined by the TRDEF comm<strong>and</strong>.<br />
Trace Range A segment of trace A, trace B, trace C, or a user-defined trace<br />
Range<br />
Any valid trace name.<br />
Prerequisite Comm<strong>and</strong>s: TRDEF when using a user-defined trace. TS when using trace data.<br />
Related Comm<strong>and</strong>s: FFT.<br />
Example<br />
Connect calibrator signal to the spectrum analyzer input.<br />
OUTPUT 718;"IP;"<br />
OUTPUT 718;"CF 300MHZ;"<br />
OUTPUT 718;"SP 0HZ;ST 800MS;"<br />
OUTPUT 718;"TRDEF NEW,401;"<br />
OUTPUT 718;"TWNDOW NEW,UNIFORM;"<br />
OUTPUT 718;"CLRW TRB;"<br />
OUTPUT 718;"SNGLS;TS;TS;"<br />
OUTPUT 718;"FFT TRA,TRB,NEW;"<br />
OUTPUT 718;"BLANK TRB;"<br />
OUTPUT 718;"VIEW TRA;"<br />
Description<br />
Initializes analyzer:<br />
Changes the center frequency.<br />
Changes span, sweep time.<br />
Dq@uxs a trace called NEW<br />
Trace NE?Vstores the window algorithm, UNIFORM.<br />
Activates single-sweep mode <strong>and</strong> updates trace.<br />
Performs fast I;burier transform on trace B <strong>and</strong><br />
stores the results in trace A.<br />
Displays the result.<br />
The trace window function creates a trace array according to three built-in algorithms:<br />
UNIFORM, HANNING, or FLATTOP When used with the FFl? comm<strong>and</strong>, the three algorithms<br />
give resultant passb<strong>and</strong> shapes that represent a give-<strong>and</strong>-take between amplitude uncertainty,<br />
sensitivity, <strong>and</strong> frequency resolution. See “FFT” for more information about these algorithms<br />
<strong>and</strong> the FFT function.<br />
5-578 Programming Comm<strong>and</strong>s
UP<br />
UP<br />
Increases the value of the active function by the applicable step size.<br />
Syntax<br />
( UP<br />
Related Comm<strong>and</strong>s: See the list of active functions listed in the description for UP<br />
Example<br />
UP up<br />
OUTPUT 718;"IP;MKN;RB 1OKHZ;MKPK NH;UP;" Increases the resolution b<strong>and</strong>width to<br />
30 kHz because MKPK NH does not change<br />
the active function.<br />
Description<br />
Before executing UP, be sure that the function to be decreased is the active function. For<br />
example, the programming example increases the resolution b<strong>and</strong>width, because marker peak<br />
(MKPK) is not an active function.<br />
The active functions are ACPBW, ACPSP, AT, CF, CRT<strong>HP</strong>OS, CR<strong>TV</strong>POS, DL, DOTDENS, FA,<br />
FB, FMGAIN, GD, GL, LG, MKA, MKD, MKFCR, MKN, MKPAUSE, MKPX, ML, NDB, NRL, RB,<br />
RCLS, ROFFSET, RL, RLPOS, SAVES, SAVRCLN, SETDATE, SETTIME, SP, SQLCH, SRCALC,<br />
SRCAT, SRCPOFS, SRCPSWP, SRCPWR, SRCTK, SS, ST, TH, <strong>TV</strong>LINE, VB, VBR, <strong>and</strong> user-defined<br />
active function specified by the ACTDEF comm<strong>and</strong>.<br />
Programming Comm<strong>and</strong>s 5.579
Query Response<br />
USTATE User State<br />
USTATE? returns the user state to the computer. Also returned are instructions required by the<br />
spectrum analyzer when the user state information is transmitted to the spectrum analyzer.<br />
The contents of user memory can be restored by executing USTATE followed by the A-block<br />
data retrieved by a previous “USTATE?;” comm<strong>and</strong>.<br />
< #A msb l e n g t h Isb l e n g t h c h a r a c t e r<br />
I I<br />
QUSTATE<br />
Programming Comm<strong>and</strong>s 5.581
VARDEF<br />
Variable Definition<br />
Creates a user-defined variable <strong>and</strong> assigns it a value.<br />
Syntax<br />
VARDEF<br />
Character<br />
Number<br />
Item<br />
User-defined variable<br />
Predefined variable<br />
Predehned function<br />
lkace element<br />
variable name<br />
/ \<br />
Related Comm<strong>and</strong>s: DISPOSE, TRDEF’.<br />
5.582 Programming Comm<strong>and</strong>s<br />
7 initial value 7<br />
c number<br />
b predefined variable d<br />
buser-defined variable/<br />
* predefined function /<br />
b trace element /<br />
Description/Default Rwte<br />
c<br />
XVARDEF<br />
Any valid character. 2 to 11 characters<br />
long, A through 2 <strong>and</strong><br />
the underscore (the<br />
underscore should be<br />
used as the second<br />
character of the<br />
label).<br />
Any real or integer number. Real number range.<br />
A variable defined by VARDEF or ACTDEF comm<strong>and</strong>s. Any valid variable<br />
name.<br />
A comm<strong>and</strong> that acts as a variable. Refer to Table 5-l.<br />
Function that returns a value. Refer to Table 5-1.<br />
An element of trace A, trace B, trace C, or a user-defined trace.
Example<br />
OUTPUT 718;"VARDEF V-AR,O;"<br />
DISP "ENTER THE VALUE OF THE VARIABLE USING<br />
THE ANALYZER KEYS"<br />
OUTPUT 718;"V,AR EP;"<br />
OUTPUT 718;"V,AR?;"<br />
ENTER 718;N<br />
PRINT N<br />
OUTPUT 718;"IP;"<br />
OUTPUT 718."V # - AR'." *,<br />
ENTER 718;N<br />
PRINT N<br />
Description<br />
VARDEF Variable Definition<br />
Lk$nes variable called V-AR <strong>and</strong> assigns<br />
it a value of 0.<br />
The value of VAR is changed by<br />
using the front-panel controls.<br />
Returns entered value of V-AR to the<br />
computer:<br />
LGpluys value on the computer screen.<br />
Initializes analyzer:<br />
The value of V-AR changes to its<br />
initial value afler an I.<br />
The VARDEF comm<strong>and</strong> creates a user-defined variable <strong>and</strong> assigns it a value. User-defined<br />
variables can be used in many of the spectrum-analyzer remote-control processes. Use<br />
user-defined variables wherever “user-defined variable” appears in the syntax diagrams. An<br />
instrument preset (IP) sets user-defined variables to their initial value (see example).<br />
An error results if a variable name is the same as any reserved word. ‘Ihble 5-2 lists reserved<br />
words.<br />
User-defined variables occupy spectrum analyzer memory. Use the DISPOSE comm<strong>and</strong> to clear<br />
user-defined variables from memory.<br />
Programming Comm<strong>and</strong>s 5.583
VARIANCE<br />
Variance of Trace Amplitudes<br />
Returns the amplitude variance of the specified trace, in measurement units.<br />
Syntax<br />
VAR I ANCE<br />
. .<br />
Item Description/Default Range<br />
User-defined trace A trace delined by the TRDEF comm<strong>and</strong>. Any valid trace name.<br />
Trace range A segment of trace A, trace B, trace C, or a user-defined trace.<br />
Prerequisite Comm<strong>and</strong>s: TRDEF when using a user-defined trace. TS when using trace data.<br />
Related Comm<strong>and</strong>s: MEAN, RMS, STDEV.<br />
Example<br />
OUTPUT 718;"IP;"<br />
OUTPUT 718;"SNGLS;TS;"<br />
OUTPUT 718;"VARIANCE TRA?;"<br />
ENTER 718;Number<br />
DISP Number;"MEASUREMENT UNITS"<br />
Description<br />
Initializes analyzex<br />
Activates single-sweep mode.<br />
I&turns variance of trace A to computer:<br />
Stores value in computer variable.<br />
LXsplu~s the results on computer screen.<br />
‘lkking the square root of a variance yields the st<strong>and</strong>ard deviation value.<br />
The formula to calculate the variance is as follows:<br />
5-584 Programming Comm<strong>and</strong>s<br />
n-l<br />
n represents the number of data points.<br />
xi represents a data point.<br />
X represents the mean of data.
Query Response<br />
VARIANCE Variance of Trace Amplitudes<br />
Programming Comm<strong>and</strong>s 5-585
VAVG<br />
Video Average<br />
Enables the video-averaging function, which averages trace points to smooth the displayed<br />
trace.<br />
Syntax<br />
Item Description/Default Rwse<br />
Number Any valid integer. Default is 100. 1 to 16384.<br />
Equivalent Softkey: VID AVE ON OFF .<br />
Related Comm<strong>and</strong>s: AUTO, CLRAVG, IP, SMOOTH.<br />
Restrictions: Not available with Analog+ display mode. See “ANLGPLUS” for more<br />
information.<br />
Example<br />
OUTPUT 718."VAVG 150."<br />
, 3 Video averages the trace.<br />
Description<br />
Use VAVG to view low-level signals without slowing the sweep time. Video averaging can<br />
lower the noise floor by more than a 30 Hz video b<strong>and</strong>width if a large number of sweeps has<br />
been specified for averaging. VAVG may also be used to monitor instrument state changes (for<br />
example, changing b<strong>and</strong>widths, center frequencies) while maintaining a low noise floor. The<br />
active function readout indicates the number of sweeps to be averaged; the default for the<br />
number of sweeps is 100 unless otherwise specified. Executing “VAVG OFF;” turns off video<br />
averaging. Executing “VAVG ON;” turns on video averaging.<br />
Query Response<br />
5-586 Programming Comm<strong>and</strong>s<br />
termination ---)<br />
X”A”G
VB<br />
Video B<strong>and</strong>width<br />
Specifies the video b<strong>and</strong>width, which is a post-detection, low-pass filter.<br />
Syntax<br />
(<br />
VB<br />
1 3-6 ‘. P ;’<br />
. ...__..’<br />
,- frequency-\<br />
‘I<br />
VB Video B<strong>and</strong>width<br />
Item Description/Default Range<br />
Number Any real or integer number. Default unit is Hz. 30 Hz to 3 MHz.<br />
Equivalent Softkey: VID l3W AUTO NAN.<br />
Preset State: 1 MHz.<br />
Step Increment: In a 1, 3, 10 sequence.<br />
Related Comm<strong>and</strong>s: AUTO, RB, SP, ST, VBR.<br />
Example<br />
OUTPUT 718;"VB 10KHZ;" Changes the video b<strong>and</strong>width to 10 kHz.<br />
Description<br />
The resolution b<strong>and</strong>width, video b<strong>and</strong>width, <strong>and</strong> sweep time are normally coupled to the<br />
span. Executing VB uncouples video b<strong>and</strong>width from resolution b<strong>and</strong>width (it does nothing to<br />
the sweep-time, resolution-b<strong>and</strong>width, <strong>and</strong> span coupling). Executing AUTO recouples video<br />
b<strong>and</strong>width to the resolution b<strong>and</strong>width.<br />
Frequency values other than the values in the 1, 3, 10 sequence are rounded to the nearest<br />
permissible value.<br />
Programming Comm<strong>and</strong>s 5.587
VB Video B<strong>and</strong>width<br />
Query Response<br />
5-588 Programming Comm<strong>and</strong>s<br />
output<br />
t e r m i n a t i o n +
VBR<br />
Video B<strong>and</strong>width Ratio<br />
VBR Video B<strong>and</strong>width Ratio<br />
The VBR parameter is multiplied by the resolution b<strong>and</strong>width to determine the automatic<br />
setting of video b<strong>and</strong>width.<br />
Syntax<br />
Item Description/Default hnge<br />
Number Any valid real number. 0 to 3000000<br />
Equivalent Softkey: VWW/RBW RATIO .<br />
Preset State: 0.300.<br />
Step Increment: 1, 3, 10 sequence.<br />
Related Comm<strong>and</strong>s: AUTO, RB, SP, VB.<br />
Example<br />
OUTPUT 718;"VBR 1;"<br />
Description<br />
Ratio values other than the values in the 1, 3, 10 sequence are rounded to the nearest<br />
permissible value.<br />
VBR returns a real number when used as a predefined variable.<br />
Query Response<br />
Programming Comm<strong>and</strong>s 5-588
VIEW<br />
View Trace<br />
Displays trace A, trace B, or trace C, <strong>and</strong> stops taking new data into the viewed trace.<br />
Syntax<br />
Equivalent Softkey: VIEW A , VIEW B , <strong>and</strong> VIEW C .<br />
Related Comm<strong>and</strong>s: BLANK, CLRW, MINH, MXMH.<br />
Restrictions: Not available with Analog+ display mode. See “ANLGPLUS” for more<br />
information.<br />
Example<br />
OUTPUT 718;"VIEW TRA;"<br />
Description<br />
In the VIEW mode the trace is not updated. When VIEW is executed, the contents of the trace<br />
are stored in display memory.<br />
5-580 Programming Comm<strong>and</strong>s
WAIT<br />
Wait<br />
Suspends all spectrum analyzer operation for the specified time duration.<br />
WAIT<br />
/-wait t i m e<br />
p r e d e f i n e d v a r i a b l e<br />
% u s e r - d e f i n e d v a r i a b l e 2<br />
h p r e d e f i n e d f u n c t i o n J<br />
b t r a c e element J<br />
\<br />
. ../ +<br />
Item Description/Default Rule<br />
Number Any real or integer number. Default unit is seconds. 1 ms to 1000 8.<br />
Example<br />
Use WAIT to suspend spectrum analyzer operation.<br />
/<br />
WAIT Wait<br />
130 OUTPUT 718;"TRDSP TRA,OFF;TS;" Blanks trace A.<br />
140 OUTPUT 718;"WAIT 2SC;" Suspends analgwr operation for 2 seconds.<br />
150 OUTPUT 718;"TRDSP TRA,ON;" L?ispla~s trace A.<br />
Description<br />
The WAIT comm<strong>and</strong> suspends all spectrum analyzer operation for the specified time. Use the<br />
ONDELAY comm<strong>and</strong> if you want the spectrum analyzer to keep taking data during the elapsed<br />
time period.<br />
Programming Comm<strong>and</strong>s 5.581
WINNEXT<br />
Window Next<br />
When using the windows display mode, you can use WINNEXT to select the upper or lower<br />
window as the active window.<br />
Syntax<br />
Equivalent Front-Panel Key (<strong>HP</strong> 85913, <strong>HP</strong> 85933, <strong>HP</strong> 85943, <strong>HP</strong> 85953, or <strong>HP</strong> 85963 only):<br />
@EQ.<br />
Related Comm<strong>and</strong>s: WINON, WINOFF.<br />
Example<br />
OUTPUT 718~"WINON~"<br />
OUTPUT 718;"WINNE;T;"<br />
Description<br />
Turns on the windows display mode.<br />
Selects the window that is currently not active to be the active<br />
window.<br />
When the windows display mode is activated, there will be two windows displayed on the<br />
spectrum analyzer display. Only one of the windows is active (the currently active window will<br />
have a solid line around the graticule rather than a broken line.) You can use the WINNEXT<br />
comm<strong>and</strong> to select the active window.<br />
5-582 Programming Comm<strong>and</strong>s
WINOFF<br />
Window Off<br />
Turns off the windows display mode.<br />
Syntax<br />
WI NOFF<br />
WINOFF Window Off<br />
Equivalent Softkey (<strong>HP</strong> 85913, <strong>HP</strong> 85933, <strong>HP</strong> 85943, <strong>HP</strong> 85953, or <strong>HP</strong> 85963 only):<br />
WINROWS OFF.<br />
Related Comm<strong>and</strong>s: WINON.<br />
Example<br />
OUTPUT 718;"WINON;" Turns on the windows display mode.<br />
OUTPUT 718; “WINNEXT; ” Selects the window that is currently not active to be the active<br />
window.<br />
OUTPUT 718; “WINOFF; ” Turns ofl the windows display mode.<br />
Description<br />
When you execute WINON, there will be two windows displayed on the spectrum analyzer<br />
screen. You must execute WINOFF to turn the windows off <strong>and</strong> return to a single display,<br />
<strong>and</strong> the display will have the settings of the last active window. In contrast, WINZOOM also<br />
changes from two windows to one full screen display but does not exit the windows display<br />
mode; you can still access the second window by executing WINZOOM again.<br />
Programming Comm<strong>and</strong>s 5-583
WINON<br />
Window ON<br />
Displays the two windows on the spectrum analyzer display.<br />
Syntax<br />
WINON<br />
Equivalent Front-Panel Key (<strong>HP</strong> 85913, <strong>HP</strong> 85933, <strong>HP</strong> 85943, <strong>HP</strong> 85953, or <strong>HP</strong> 85963 only):<br />
(ONJ.<br />
Related Comm<strong>and</strong>s: WINOFF, WINNEXT, WINZOOM.<br />
Example<br />
OUTPUT 718;"WINON;"<br />
Description<br />
WINON activates the windows display mode <strong>and</strong> the zone marker.<br />
Windows display mode: When the windows display mode is first activated, there will be two<br />
windows displayed on the spectrum analyzer display. Only one of the windows is active (the<br />
active window will have a solid line around the graticule rather than a broken line.) You can<br />
use the WINNEXT comm<strong>and</strong> to select the active window. The instrument state of the active<br />
window can be changed without affecting the state of the inactive window.<br />
Zone marker: The zone marker is shown in the upper window by two vertical lines. The<br />
frequency span between the two edges of the zone marker is the frequency range of the lower<br />
window. The zone marker can be moved <strong>and</strong> changed by using the ZMKCNTR, ZMKSPAN,<br />
ZMKPKNR, or ZMKPKNL programming comm<strong>and</strong>s. Changing the span or center frequency of<br />
the lower window will change the span or location of the zone marker on the upper window<br />
correspondingly.<br />
Most programming comm<strong>and</strong>s can be executed when the windows display mode is used.<br />
Some functions cannot be used with the windows display mode, however. ‘Ihble 5-11 lists the<br />
programming comm<strong>and</strong>s that, when executed, exit the windows display mode.<br />
5.584 Programming Comm<strong>and</strong>s
‘Ihble 5-11.<br />
Programming Comm<strong>and</strong>s That Exit The Windows Display Mode<br />
ACP<br />
CAL<br />
C<strong>HP</strong><br />
CNF<br />
Comm<strong>and</strong><br />
DISPOSE ALL or ERASE<br />
FFTAUTO, FFTCONTS, FFTSNGL!<br />
GDVRUTIL<br />
IP<br />
LF<br />
NDBPNT<br />
OBW<br />
PCTAM<br />
PKZOOM<br />
TOI<br />
Description<br />
Measures adjacent channel power.<br />
Performs the calibration routines.<br />
Measures channel power.<br />
Performs the confidence test.<br />
Disposes of the contents of user memory.<br />
Initiates a FFT measurement.<br />
Accesses the time-Sate functions.<br />
Performs an instrument preset.<br />
Performs an instrument preset into base b<strong>and</strong><br />
Measures NdB b<strong>and</strong>width.<br />
Measures occupied b<strong>and</strong>width.<br />
Measures the percent AM.<br />
Performs the peak zoom routine.<br />
Makes a third order intercept measurement.<br />
WINON Window ON<br />
When in the windows display mode, saving the trace or state saves the state of the currently<br />
active window only. The recall state function recalls the stored state into the currently active<br />
window.<br />
You must execute WINOFF to turn the windows off.<br />
Programming Comm<strong>and</strong>s 5-595
WINZOOM<br />
Window Zoom<br />
When using the windows display mode, you can use WINZOOM to either exp<strong>and</strong> the size of the<br />
active window so that it fills the entire spectrum analyzer display, or display both the upper<br />
<strong>and</strong> lower windows on the spectrum analyzer display.<br />
Syntax<br />
Equivalent Front-Panel Key (<strong>HP</strong> 85913, <strong>HP</strong> 85933, <strong>HP</strong> 85943, <strong>HP</strong> 85953, or <strong>HP</strong> 85963 only):<br />
(ZOOM).<br />
Related Comm<strong>and</strong>s: WINNEXT, WINON.<br />
Example<br />
OUTPUT 718;"WINON;" Turns on the windows display rmde.<br />
OUTPUT 718;"WINZOOM;" Exp<strong>and</strong>s the size of the active window.<br />
Description<br />
The first time WINZOOM is executed, it exp<strong>and</strong>s the active window. Executing WINZOOM again<br />
restores the windows display mode so that both of the windows are displayed on the spectrum<br />
analyzer display.<br />
5-596 Programming Comm<strong>and</strong>s
XCH<br />
Exchange<br />
Exchanges the contents of sources 1 <strong>and</strong> 2.<br />
Syntax<br />
Item<br />
User-defined trace<br />
User-defined variable<br />
Predeflned variable<br />
Trace range<br />
u s e r - d e f i n e d v a r i a b l e<br />
Description/Default Range<br />
XCH Exchange<br />
A trace defined by the TRDEF comm<strong>and</strong>. Any valid trace name.<br />
A variable deEned by VARDEF or ACTDEF comm<strong>and</strong>s. Any valid variable<br />
name.<br />
A comm<strong>and</strong> that acts as a variable. Refer to Table 5-l.<br />
A segment of trace A, trace B, trace C, or a user-defined trace.<br />
Prerequisite Comm<strong>and</strong>s: TRDEF when using a user-defined trace. ACTDEF or VARDEF for a<br />
user-defined variable. TS when using trace data.<br />
Related Comm<strong>and</strong>s: AXB, BXC.<br />
XXCH<br />
Programming Comm<strong>and</strong>s 5-597
XCH Exchange<br />
Example<br />
OUTPUT 718;"XCH TRA,TRB;" Exchanges the contents of trace A with trace B<br />
Description<br />
When the source is longer than the destination, the source is truncated to fit. When the source<br />
is shorter than the destination, the last element is repeated to fill the destination.<br />
5-596 Programming Comm<strong>and</strong>s
ZMKCNTR<br />
Zone Marker at Center Frequency<br />
Positions the zone marker at the specified frequency.<br />
Syntax<br />
ZMKCNTR Zone Marker at Center Frequency<br />
zone m a r k e r f r e q u e n c y<br />
Item Description/Default Range<br />
HZ<br />
\<br />
/<br />
/<br />
I<br />
.:<br />
..’<br />
...<br />
/<br />
/<br />
XZMKCNTR<br />
Number Any real or integer number. Default unit is Hz. Frequency range of<br />
the spectrum analyzer.<br />
Equivalent Softkey (<strong>HP</strong> 85913, <strong>HP</strong> 85933, <strong>HP</strong> 85943, <strong>HP</strong> 85953, or <strong>HP</strong> 85963 only):<br />
ZONE CENTER .<br />
Default value: If a marker is on-screen, the frequency value of the marker. If a marker is<br />
not on-screen, the spectrum analyzer center frequency.<br />
Related Comm<strong>and</strong>s: CF, SP, WINON, ZMKSPAN.<br />
Example<br />
OUTPUT 718;"WINON;" Turns on the windows display m&e.<br />
OUTPUT 718;"ZMKCNTR 300MHZ;" Places the zone marker at 300 MHz<br />
Description<br />
ZMKCNTR allows you to move the zone marker within the frequency range displayed in the<br />
upper window. When the lower window is the active window, changing the center frequency<br />
(CF) or frequency span (SP) of the lower window changes the position of zone marker in the<br />
upper window.<br />
Restrictions: Use ZMKCNTR only if the window is in non-zero span; ZMKCNTR does not apply<br />
if the window is in the time domain. The zone marker can be moved beyond the frequency<br />
range displayed by the upper window (the zone marker cannot exceed the frequency range of<br />
the spectrum analyzer, however.) ZMKCNTR should only be used when the windows display<br />
mode is turned on.<br />
You can use ZMKSPAN to change the span of the zone marker.<br />
Programming Comm<strong>and</strong>s 5-599
ZMKCNTR Zone Marker at Center Frequency<br />
Query Response<br />
5.600 Programming Comm<strong>and</strong>s<br />
ZO”e<br />
m a r k e r f r e q u e n c y<br />
/ \<br />
I<br />
output<br />
t e r m i n a t i o n +<br />
I QZMKCNTR
ZMKPKNL<br />
Zone Marker for Next Left Peak<br />
ZMKPKNL Zone Marker for Next Left Peak<br />
Places the zone marker at the next signal peak that is left of the zone marker’s current<br />
position.<br />
Syntax<br />
Equivalent Softkey (<strong>HP</strong> 85913, <strong>HP</strong> 85933, <strong>HP</strong> 85943, <strong>HP</strong> 85953, or <strong>HP</strong> 85963 only):<br />
ZONE PK LEFT,<br />
Related Comm<strong>and</strong>s: MKPX, WINON, ZMKCNTR, ZMKSPAN, ZMKPKNR.<br />
Example<br />
XZMKPKNL<br />
OUTPUT 718;"WINON;" Turns on the windows display mode.<br />
OUTPUT 718;"ZMKPKNL;" PZuces the zone mm&r at the next peak to the left of the cum-ent<br />
position of the zone marker:<br />
Description<br />
ZMKPKNL does the following:<br />
1. Searches for the next signal peak outside <strong>and</strong> to the left of the zone marker. ZMKPKNL only<br />
applies if the window is in a non-zero span; ZMKPKNL does not apply if the window is in<br />
the time domain.<br />
2. If a peak is found, ZMKPKNL moves the zone marker so that it is centered around the peak.<br />
If a signal peak cannot be found, or the window is in zero span, the zone marker is not<br />
moved.<br />
3. Changes the center frequency of the lower window to the frequency of the signal peak.<br />
‘Ib be considered a signal peak, the signal must be greater than the peak excursion (see<br />
“MKPX” for more information about the peak excursion).<br />
ZMKPKNL should only be used when the windows display mode is turned on.<br />
Programming Comm<strong>and</strong>s 5-601
ZMKPKNR<br />
Zone Marker for Next Right Peak<br />
Places the zone marker at the next peak to the right of the zone marker’s current position.<br />
Syntax<br />
Equivalent Softkey (<strong>HP</strong> 85913, <strong>HP</strong> 85933, <strong>HP</strong> 85943, <strong>HP</strong> 85953, or <strong>HP</strong> 85963 only):<br />
ZOIJE PK RfGHT .<br />
Related Comm<strong>and</strong>s: MKPX, WINON, ZMKCNTR, ZMKSPAN, ZMKPKNL.<br />
Example<br />
XZMKPKNR<br />
OUTPUT 718;"WINON;" Turns on the windows display wmd.e.<br />
OUTPUT 718;"ZMKPKNR;" Places the zone marker at the next peak to the right of the current<br />
position of the zone marker:<br />
Description<br />
ZMKPKNR does the following:<br />
1. Searches for the next signal peak outside <strong>and</strong> to the right of the zone marker. ZMKPKNR<br />
only applies if the window is in a non-zero span; ZMKPKNR does not apply if the window is<br />
in the time domain.<br />
2. If a peak is found, moves the zone marker so that it is centered around the peak. If a signal<br />
peak cannot be found, or the window is in zero span, the zone marker is not moved.<br />
3. Changes the center frequency of the lower window to the frequency of the signal peak.<br />
To be considered a signal peak, the signal must be greater than the peak excursion (see<br />
“MKPX” for more information about the peak excursion).<br />
ZMKPKNR should only be used when the windows display mode is turned on.<br />
5-602 Programming Comm<strong>and</strong>s
ZMKSPAN<br />
Zone Marker Span<br />
Changes the width of the zone marker.<br />
Syntax<br />
ZMKSPAN Zone Marker Span<br />
XZMKSPAN<br />
I Item Description/Default ! Range<br />
Number Any real or integer number. Default unit is Hz. 0 to maximum<br />
frequency span of the I<br />
Equivalent Softkey (<strong>HP</strong> 85913, <strong>HP</strong> 85933, <strong>HP</strong> 85943, <strong>HP</strong> 85953, or <strong>HP</strong> 85963 only):<br />
ZOESE SPAN.<br />
Default value: l/10 of the spectrum analyzer’s frequency span.<br />
Related Comm<strong>and</strong>s: SP, WINON, ZMKCNTR.<br />
Example<br />
OUTPUT 718;"WINON;" Turns on the windows display mode.<br />
OUTPUT 718;"ZMKSPAN IOOMHZ;" Sets the span of the zone marker to 100 MHz<br />
Description<br />
ZMKSPAN allows you to change the frequency span of the zone marker that is displayed in<br />
the upper window. When the lower window is the active window, frequency span (SP) of the<br />
lower window changes the frequency span of zone marker in the upper window.<br />
Restrictions: Use ZMKSPAN only if the window is in non-zero span; ZMKSPAN does not apply<br />
if the window is in the time domain. ZMKSPAN should only be used when the windows display<br />
mode is turned on.<br />
Programming Comm<strong>and</strong>s 5603
ZMKSPAN Zone Marker Span<br />
Query Response<br />
5.604 Programming Comm<strong>and</strong>s<br />
t e r m i n a t i o n ---*<br />
QZMKSPAN
<strong>Spectrum</strong> Analyzer Error Messages<br />
Error Messages<br />
The spectrum analyzer can generate various messages that appear on its screen during<br />
operation to indicate a problem.<br />
There are three types of messages: hardware error messages (H), user-created error messages<br />
(U), <strong>and</strong> informational messages (M).<br />
H Hardware error messages indicate the spectrum analyzer hardware is probably broken. Refer<br />
to Chapter 8 in the <strong>HP</strong> <strong>8590</strong> E-<strong>Series</strong> <strong>and</strong> L-<strong>Series</strong> <strong>Spectrum</strong> <strong>Analyzers</strong> User’s Guide for more<br />
information.<br />
� User-created error messages appear when the spectrum analyzer is used incorrectly. They are<br />
usually generated during remote operation (entering programming comm<strong>and</strong>s using either a<br />
controller or the external keyboard).<br />
w Informational messages provide information indicating the spectrum analyzer’s progress<br />
within a specific procedure.<br />
The messages are listed in alphabetical order on the following pages; each message is defined,<br />
<strong>and</strong> its type is indicated by an (H), (U), or (M).<br />
$75LOCKOFF<br />
Indicates slow YTO tuning. This message may appear if the spectrum analyzer is using<br />
default correction factors. If this message appears constantly, perform the CAL FREQ routine<br />
to try to eliminate this message. 4 LOCK OFF appears briefly during the CAL FREQ routine,<br />
during instrument preset, or when the frequency value is changed; this is normal <strong>and</strong> does<br />
not indicate a problem. (U) <strong>and</strong> (H)<br />
ADGBV FAIL<br />
Indicates a hardware failure. (H)<br />
ADC-GND FAIL<br />
Indicates a hardware failure. (H)<br />
ADGTIME FAIL<br />
Indicates a hardware failure. (H) <strong>and</strong> (U)<br />
CAL:- - -<br />
During the self-calibration routine, messages may appear on the display to indicate how the<br />
calibration routines are progressing. For example, sweep, freq, span, MC delay, FM coil,<br />
<strong>and</strong> atten can appear on the spectrum analyzer display. 4 LOCK OFF appears briefly during<br />
the CAL FREQ self-calibration routine; this is normal <strong>and</strong> does not indicate a problem. (M)<br />
CAL:- - - : done Press CAL STORE to save<br />
Indicates that the self-calibration routine is finished <strong>and</strong> that you should press CAL STORE.<br />
(Ml<br />
CAL: cannot execute CALAMP enter: 0 dB PREAMP GAIN<br />
The preamplifier gain should be set to 0 dB before the CAL AMPTD routine is performed.<br />
<strong>Spectrum</strong> Analyzer Error Messages A-l
The preamplifier gain is set by using EXT?BNAL PkRAMPG . This message also sets SRQ 110.<br />
UJ)<br />
CAL: DATA NOT STORED CAL AMP NEEDED<br />
The correction factors are corrupt <strong>and</strong> cannot be stored. You need to perform the CAL FREQ<br />
& AMPTD routine before trying to store the correction factors. This message also sets SRQ<br />
110. (U)<br />
CAL: FM SPAN SENS FAIL<br />
The spectrum analyzer could not set up span sensitivity of the FM coil. (H)<br />
CAL: GAIN FAIL<br />
Indicates the signal amplitude is too low during the CAL AMPTD routine. This message also<br />
sets SRQ 110. (H)<br />
Cal harmonic > = 5.7 GHz NOT found<br />
Indicates that the CAL YTF routine for an <strong>HP</strong> 85953 cannot find a harmonic of the 300 MHz<br />
calibration signal. If this happens, ensure that the CAL OUT connector is connected to the<br />
spectrum analyzer input, perform the CAL FREQ & AMPTD routine, <strong>and</strong> then perform the<br />
CAL YTF routine again. (U) <strong>and</strong> (H)<br />
CAL: MAIN COIL SENSE FAIL<br />
The spectrum analyzer could not set up span sensitivity of the main coil. If this<br />
message appears, press [FREQUENCY), -37, (KJ m, Mom 1 of 4, More 2 of 4,<br />
DEFAI&T CAL DATA , <strong>and</strong> perform the CAL FREQ routine again. (H)<br />
CAL: NBW 200 Hz notch amp failed<br />
Indicates that the 200 Hz resolution b<strong>and</strong>width is not the correct shape for the calibration<br />
routine. (H)<br />
CAL: NBW 200 Hz notch failed<br />
Indicates that the 200 Hz resolution b<strong>and</strong>width is not the correct shape for the calibration<br />
routine. (H)<br />
CAL: NBW 200 Hz width failed<br />
Indicates that the 200 Hz resolution b<strong>and</strong>width is not the correct b<strong>and</strong>width for the<br />
calibration routine. (H)<br />
CAL: NBW gain failed<br />
Indicates that one of the resolution b<strong>and</strong>widths is not the correct amplitude for the<br />
calibration routine. (H)<br />
CAL: NBW width failed<br />
Indicates that one of the resolution b<strong>and</strong>widths is not the correct width for the calibration<br />
routine. (H)<br />
CAL: PASSCODE NEEDED<br />
Indicates that the function cannot be accessed without the pass code. For the DEFAULT CA.L<br />
DATA function, the pass code is setting the center frequency of the spectrum analyzer to<br />
-37 Hz. (M)<br />
CAL: RES BW AMPL FAIL<br />
The relative insertion loss of the resolution b<strong>and</strong>width is incorrect.<br />
SRQ 110. (H)<br />
This message also sets<br />
CAL SIGNAL NOT FOUND<br />
Indicates the calibration signal (CAL OUT) cannot be found. Check that the CAL OUT <strong>and</strong><br />
the spectrum analyzer input connectors are connected with an appropriate cable. If the<br />
calibration signal is connected to the spectrum analyzer input but cannot be found, press<br />
(FREQUENCY), M -37,1Hz), a, ora 2 of 4 , More 2 of 4 , IlEFAaT GAS DATA . If the<br />
A-2 <strong>Spectrum</strong> Analyzer Error Messages
calibration signal still cannot be found, press L-1, -37, (Hz) <strong>and</strong> perform the CAL<br />
FREQ or CAL FREQ 8~ AMPTD self-calibration routines. This message also sets SRQ 110. (U)<br />
<strong>and</strong> U-U<br />
CAL: SPAN SENS FAIL<br />
The self-calibration span sensitivity routine failed. This message also sets SRQ 110. (H)<br />
CAL: USING DEFAUIX DA’IA<br />
Indicates that the calibration data is corrupt <strong>and</strong> the default correction factors are being<br />
used. Interruption of the self-calibration routines or an error can cause this problem. (M)<br />
CAL YTF FAILED<br />
Indicates that the CAL YTF routine could not be successfully completed. If this message<br />
appears, ensure that the CAL OUT connector (for the <strong>HP</strong> 85953) or 100 MHz COMB OUT<br />
connector (for the <strong>HP</strong> 8592L, <strong>HP</strong> 85933, or <strong>HP</strong> 85963) is connected to the spectrum analyzer<br />
input, perform the CAL FREQ & AMPTD routine, <strong>and</strong> then perform the CAL YTF routine<br />
again. (U) <strong>and</strong> (H)<br />
CAL: ZERO FAIL<br />
The spectrum analyzer could not set up the tuning sensitivity of the main coil. If this<br />
message appears, press @ZZKYj, -37, (KJ, (CAL, More 2 of 4, More 2 of 4,<br />
DEFAULT CIE DATA , <strong>and</strong> perform the CAL FREQ routine again. (H)<br />
Cannot engage phase lock with current CAL FREQ data<br />
Indicates that the CAL FREQ routine needs to be performed before phase locking can be<br />
turned on. (U)<br />
Cannot reach N dB points<br />
Indicates that the number of dB specified for the N dB PTS function is greater than the<br />
distance of the signal peak from the spectrum analyzer noise floor or peak threshold. (U)<br />
Check trigger input<br />
Indicates that the spectrum analyzer needs an external trigger signal to use the time-gating<br />
functions. Before using the time-gating functions, you should ensure there is a trigger pulse<br />
connected to the GATE TRIGGER INPUT connector on the rear panel of spectrum analyzer<br />
<strong>and</strong> that the GATE OUTPUT is connected the EXT TRIG INPUT connector. (U)<br />
Comb harmonic at - _ _ GHz NOT found<br />
Indicates that the CAL YTF routine for the spectrum analyzer cannot find a harmonic of the<br />
comb generator at frequency displayed. If this happens, ensure that the 100 MHz COMB OUT<br />
connector (for an <strong>HP</strong> 8592L, <strong>HP</strong> 85933, or <strong>HP</strong> 85963) or the CAL OUT connector (for an<br />
<strong>HP</strong> 85953) is connected to the spectrum analyzer input with a low-loss, short cable before<br />
the CAL YTF routine is performed. (U) <strong>and</strong> (H)<br />
COMB SIGNAL NOT FOUND<br />
The comb signal cannot be found. Check that 100 MHz COMB OUT is connected to the<br />
spectrum analyzer input. The comb generator is available with the <strong>HP</strong> 8592L, <strong>HP</strong> 85933, or<br />
<strong>HP</strong> 85963 only. (U) <strong>and</strong> (H)<br />
CMD ERR:- - -<br />
The specified programming comm<strong>and</strong> is not recognized by the spectrum analyzer. (U)<br />
CONF TEST FAIL<br />
Indicates that the confidence test failed. If this happens, ensure that the CAL OUT connector<br />
is connected to the spectrum analyzer input, perform the CAL FREQ & AMPTD routine, <strong>and</strong><br />
then perform the confidence test again. This message also sets SRQ 110. (H) <strong>and</strong> (U)<br />
Factory dlp, not editable<br />
Indicates that the downloadable program or variable that you have selected is used by a<br />
“personality” <strong>and</strong> cannot be edited. A personality is a program that is manufactured by<br />
<strong>Spectrum</strong> Analyzer Error Messages A-3
Hewlett-Packard <strong>and</strong> is available for use with the <strong>HP</strong> <strong>8590</strong> <strong>Series</strong> spectrum analyzer. An<br />
example of a personality is the <strong>HP</strong> 85716A CA<strong>TV</strong> system monitor personality. (U)<br />
FAIL:- _ _<br />
An error was discovered during the power-up check. The 4-digit by lo-digit code indicates<br />
the type of error. Error codes are described in the spectrum analyzer’s service guide. (H)<br />
File type incompatible<br />
Indicates that the selected file is not a display image file. The file name for a display image<br />
file is always preceded by an “i.” (U)<br />
FREQ UNCAL<br />
If the FREQ UNCAL message appears constantly, it indicates a YTO-tuning error. If this<br />
message appears constantly, perform the CAL FREQ routine. FREQ UNCAL appears briefly<br />
during the CAL FREQ routine; this is normal <strong>and</strong> does not indicate a problem. (U) <strong>and</strong> (H)<br />
W> <strong>and</strong> V-0<br />
Function not available in current Mode<br />
Indicates that the function that you have selected can only be used with the spectrum<br />
analyzer mode. You can use the (-1 key to select the spectrum analyzer mode. (U)<br />
Function not available with analog display<br />
Indicates that the function that you have selected is not compatible with the Analog+<br />
display mode. lb use the function, you must first turn off the Analog+ display mode with<br />
ANALOG* ON OFF. (U)<br />
Gate card not calibrated<br />
This message can indicate that either the CAL AMPTD routine need to be performed before<br />
the time-gating functions can be used, or that something was connected to the GATE<br />
TRIGGER INPUT connector during the CAL AMPTD or CAL FREQ & AMPTD routines. If<br />
your spectrum analyzer has an Option 105 installed in it, you should ensure that nothing is<br />
connected to the GATE TRIGGER INPUT connector when the CAL AMPTD or CAL FREQ &<br />
AMPTD routines are performed. (U) <strong>and</strong> (H)<br />
INTERNAL LOCKED<br />
The spectrum analyzer’s internal trace <strong>and</strong> state registers have been locked. lb unlock the<br />
trace or state registers, press SAV LOCK ON OFF so that OFF is underlined. For remote<br />
operation, use PSTATE OFF. (U)<br />
INVALID ACTDEF: - - -<br />
The specified ACTDEF name is not valid. See the ACTDEF programming comm<strong>and</strong>. (U)<br />
INVALID AMPCOR: FREQ<br />
For the AMPCOR comm<strong>and</strong>, the frequency data must be entered in increasing order. See the<br />
description for the AMPCOR programming comm<strong>and</strong> for more information. (U)<br />
INVALID BLOCK FORMAT: IF STATEMENT<br />
An invalid block format appeared within the IF statement. See the description for the IF<br />
THEN ELSE ENDIF programming comm<strong>and</strong> for more information. (U)<br />
INVALID CARD<br />
Indicates one of the following conditions: a card reader is not installed, the memory card is<br />
write-protected (check the position of the switch on the memory card), the memory card is a<br />
read-only memory (ROM) card, or a memory card has not been inserted. This message can<br />
also occur if remote programming comm<strong>and</strong>s for the memory card capability are executed<br />
with an <strong>HP</strong> 859OL or <strong>HP</strong> 8592L that does not have an Option 003. (U)<br />
INVALID CARD: BAD MEDIA<br />
Indicates the formatting routine (FOIST CARD ) for the memory card could not be<br />
A-4 <strong>Spectrum</strong> Analyzer Error Messages
completed. See the description for INVALID CARD above for more information about the<br />
possible causes of this message. (U) <strong>and</strong> (H)<br />
INVALID CARD: DATA ERROR<br />
Indicates the data could not be retrieved from the memory card. (U) <strong>and</strong> (H)<br />
INVALID CARD: DIRECI?ORY<br />
Indicates the memory card has not been formatted. (U)<br />
INVALID CARD: NO CARD<br />
Indicates a memory card has not been inserted. (U)<br />
INVALID CARD: TYPE<br />
Indicates one of the following conditions: a card reader is not installed, the memory card is<br />
write-protected (check the position of the switch on the memory card), the memory card is a<br />
read-only memory (ROM) card, or a memory card has not been inserted. This message can<br />
also occur if remote programming comm<strong>and</strong>s for the memory card capability are executed<br />
with an <strong>HP</strong> <strong>8590</strong>1, or <strong>HP</strong> 8592L that does not have an Option 003. (U)<br />
INVALID CHECKSUM: USTATE<br />
The user-defined state does not follow the expected format. (U)<br />
INVALID COMPARE OPERATOR<br />
An IF/THEN or REPEAT/UNTIL routine is improperly constructed. Specifically, the IF or<br />
UNTIL oper<strong>and</strong>s are incorrect. (U)<br />
INVALID DET: FM or <strong>TV</strong> option only<br />
Indicates that the selected detector cannot be used until the appropriate option is installed in<br />
the spectrum analyzer. (U)<br />
INVALID ENTER FORMAT<br />
The enter format is not valid. See the appropriate programming comm<strong>and</strong> description to<br />
determine the correct format. (U)<br />
INVALID NOT FOUND<br />
Indicates that the specified file could not be loaded into spectrum analyzer memory or<br />
purged from memory because the file name cannot be found. (U)<br />
INVALID FILENAME _ _ _<br />
Indicates the specified file name is invalid. A file name is invalid if there is no file name<br />
specified, if the first letter of the file name is not alphabetic, or if the specified file type does<br />
not match the type of file. See the description SAVRCLW or STOR programming comm<strong>and</strong> for<br />
more information. (U)<br />
INVALID FILE: NO ROOM<br />
Indicates that there is insufficient space available on the memory card to store the data. (U)<br />
INVALID BP-IB ADRWOPERATION<br />
An <strong>HP</strong>-IB operation was aborted due to an incorrect address or invalid operation. Check that<br />
there is only one controller (the spectrum analyzer) connected to the printer or plotter. (U)<br />
INVALID BP-IB OPERATION REN TRUE<br />
The <strong>HP</strong>-IB operation is not allowed. (This is usually caused by trying to print or plot when a<br />
controller is on the interface bus with the spectrum analyzer.) lb use the spectrum analyzer<br />
print or plot functions, you must disconnect any other controllers on the <strong>HP</strong>-IB. If you are<br />
using programming comm<strong>and</strong>s to print or plot, you can use an <strong>HP</strong> BASIC comm<strong>and</strong> instead<br />
of disconnecting the controller. See the description for the PRINT comm<strong>and</strong> for more<br />
information. (U)<br />
INVALID ITEM:- - _<br />
Indicates an invalid parameter has been used in a programming comm<strong>and</strong>. (U)<br />
<strong>Spectrum</strong> Analyzer Error Messages A-5
INVALID KEYLBL: _ - -<br />
Indicates that the specified key label contains too many characters. A key label is limited to<br />
8 printable characters per label line. (U)<br />
INVALID KEYNAME:- - -<br />
The specified key name is not allowed. (The key name may have conflicted with a spectrum<br />
analyzer programming comm<strong>and</strong>.) lb avoid this problem, use an underscore as the second<br />
character in the key name, or avoid beginning the key name with the following pairs of<br />
letters: LB, OA, OL, TA, TB, TR, MA, MF, TS, OT, <strong>and</strong> DR. (U)<br />
INVALID OUTPUT FORMAT<br />
The output format is not valid. See the appropriate programming comm<strong>and</strong> description to<br />
determine the correct format. (U)<br />
INVALID RANGE: Stop < Start<br />
Indicates that the first trace element specified for a range of trace elements is larger that<br />
ending trace element. When specifying a trace range the starting element must be less than<br />
the ending element. For example, TRA[2,300] is legal but TRA[300,2] is not. (U)<br />
INVALID REGISTER NUMBER<br />
The specified trace register number is invalid. (U)<br />
INVALID REPEAT MEM OVFL<br />
Memory overflow occurred due to a REPEAT routine. This can occur if there is not enough<br />
spectrum analyzer memory for the REPEAT UNTIL declaration, or if the REPEAT UNTIL<br />
declaration exceeds 2047 characters. (U)<br />
INVALID REPEAT NEST LEVEL<br />
The nesting level in the REPEAT routine is improperly constructed. This can occur if too<br />
many REPEAT routines are nested. When used within a downloadable program (DLP), the<br />
maximum number of REPEAT UNTIL statements that can be nested is 20. (U)<br />
INVALID RS-232 ADRWOPERATION<br />
An RS-232 operation was aborted due to an invalid operation. (U)<br />
INVALID SAVE REG<br />
Data has not been saved in the specified state or trace register, or the data is corrupt. (U)<br />
INVALID SCRMOVE<br />
Indicates the spectrum analyzer may have a hardware failure. See the spectrum analyzer’s<br />
Service Guide for more information. (H)<br />
INVALID START INDEX<br />
Indicates that the first trace element specified for a range of trace elements is not within the<br />
trace range of the specified trace. (U)<br />
INVALID STOP INDEX<br />
Indicates that the ending trace element specified for a range of trace elements is not within<br />
the trace range of the specified trace. (U)<br />
INVALID STORE DEST: - - -<br />
The specified destination field is invalid. (U)<br />
INVALID TRACE: _ _ _<br />
The specified trace is invalid. (U)<br />
INVALID TRACE NAME: _ _ _<br />
The specified trace name is not allowed. Use an underscore as the second character in the<br />
trace name, or avoid beginning the trace name with the following pairs of letters: LB, OA,<br />
OL, TA, TB, TR, MA, MF, TS, OT, <strong>and</strong> DR. (U)<br />
A-6 <strong>Spectrum</strong> Analyzer Error Messages
INVALID TRACENAME: - - -<br />
Indicates the specified trace could not be saved because the trace name is not allowed. ‘lb<br />
avoid this problem, use an underscore as the second character in the trace name, or avoid<br />
beginning the trace name with the following pairs of letters: LB, OA, OL, TA, TB, TR, MA,<br />
MF, TS, OT, <strong>and</strong> DR. (U)<br />
INVALID VALUE PARAMETER: - - -<br />
The specified value parameter is invalid. (U)<br />
INVALID VARDEF: - - -<br />
The specified variable name is not allowed. ‘Ib avoid this problem, use an underscore as<br />
the second character in the variable label, or avoid beginning the variable label with the<br />
following pairs of letters: LB, OA, OL, TA, TB, TR, MA, MF, TS, OT, <strong>and</strong> DR. (U)<br />
INVALID WINDOW TYPE: _ _ _<br />
The specified window is invalid. See the description for the TWNDOW programming<br />
comm<strong>and</strong>. (U)<br />
LOST SIGNAL<br />
For the <strong>HP</strong> 8592L, <strong>HP</strong> 85933, or <strong>HP</strong> 85963, this message indicates that the cable from the<br />
100 MHz COMB OUT connector to the spectrum analyzer input is defective or has become<br />
disconnected during the CAL YTF routine. For the <strong>HP</strong> 85953, this message indicates that the<br />
cable from the CAL OUT connector is defective or has been disconnected during the CAL<br />
YTF routine. Be sure to use a short, low-loss cable to connect the signal to the spectrum<br />
analyzer input when performing the CAL YTF routine. (U)<br />
LO UNLVL<br />
Indicates that the spectrum analyzer’s local oscillator distribution amplifier is not functioning<br />
properly. (H)<br />
Marker Count Reduce SPAN<br />
Indicates the resolution b<strong>and</strong>width to span ratio is too small to use the marker count<br />
function. Check the span <strong>and</strong> resolution b<strong>and</strong>width settings. (U)<br />
Marker Count Widen RES BW<br />
Indicates that the current resolution b<strong>and</strong>width setting is too narrow to use with the marker<br />
counter function. The marker counter function can be in narrow resolution b<strong>and</strong>widths<br />
(b<strong>and</strong>widths that are less than 1 kHz) with the following procedure:<br />
1. Place the marker on the desired signal.<br />
2. Increase the resolution b<strong>and</strong>width to 1 kHz <strong>and</strong> verify the marker is on the signal peak.<br />
3. If the marker in on the signal peak, the marker count function can be used in either the<br />
1 kHz resolution b<strong>and</strong>width or the original narrow resolution b<strong>and</strong>width setting. If the<br />
marker is not on the signal peak, it should be moved to the signal peak <strong>and</strong> the marker<br />
counter function should not be used with a resolution b<strong>and</strong>width setting of less than<br />
1 kHz.<br />
uJ><br />
MEAS UNCAL<br />
The measurement is uncalibrated. Check the sweep time, span, <strong>and</strong> b<strong>and</strong>width settings, or<br />
press [AUTO COUPLE], AUTO AL+L . (U)<br />
No card found<br />
Indicates that the memory card is not inserted. (U)<br />
No points defined<br />
Indicates the specified limit line or amplitude correction function cannot be performed<br />
because no limit line segments or amplitude correction factors have been defined. (U)<br />
<strong>Spectrum</strong> Analyzer Error Messages A-7
OVEN COLD<br />
Indicates that the spectrum analyzer has been powered up for less than 5 minutes. (The<br />
actual temperature of the precision frequency oven is not measured.) (Option 004 only.) (M)<br />
PARAMETER ERROR: - - -<br />
The specified parameter is not recognized by the spectrum analyzer. See the appropriate<br />
programming comm<strong>and</strong> description to determine the correct parameters. (U)<br />
PASSCODE NEEDED<br />
Indicates that the function cannot be accessed without the pass code. (U)<br />
POS-PK FAIL<br />
Indicates the positive-peak detector has failed. (H)<br />
REF UNLOCK<br />
Indicates that the frequency reference is not locked to the external reference input. Check<br />
that the 10 MHz REF OUT connector is connected to the EXT REF IN connector, or, when<br />
using an external reference, that an external 10 MHz reference source of sufficient amplitude<br />
is connect to the EXT REF IN connector. (U) <strong>and</strong> (H)<br />
Require 1 signal > PEAK EXCURSION above THRESHOLD<br />
Indicates that the N dB PTS routine cannot locate a signal that is high enough to measure.<br />
The signal must be greater than the peak excursion above the threshold level to measure. (U)<br />
Require 3 signals > PEAK EXCURSION above THRESHOLD<br />
Indicates that the % AM routine cannot locate three signals that are high enough to measure.<br />
The signals must be greater than the peak excursion above the threshold level to measure.<br />
w><br />
Require 4 signals > PEAK EXCURSION above THRESHOLD<br />
Indicates that the TOI routine cannot locate four signals that are high enough to measure.<br />
The signals must be greater than the peak excursion above the threshold level to measure.<br />
uJ><br />
Required option not installed Some spectrum analyzer functions require that an option<br />
be installed in the spectrum analyzer. See the description for the function in the <strong>HP</strong> <strong>8590</strong><br />
E-<strong>Series</strong> <strong>and</strong> L-<strong>Series</strong> <strong>Spectrum</strong> Analgwrs User’s Guide for more information about which<br />
option is required. (U)<br />
RES-BW NOISE FAIL<br />
Indicates the noise floor level is incorrect at the indicated b<strong>and</strong>width. (H)<br />
RES-BW SHAPE FAIL<br />
Indicates the 3 dB b<strong>and</strong>width is not within specifications. (H)<br />
RF PRESEL ERROR<br />
Indicates that the preselector peak routine cannot be performed. (H)<br />
RF PRESEL TIMEOUT<br />
Indicates that the preselector peak routine cannot be performed. (H)<br />
SAMPLE FAIL<br />
Indicates the sample detector has failed. (H)<br />
SETUP ERROR<br />
Indicates that the span, channel b<strong>and</strong>width, or channel spacing are not set correctly for the<br />
adjacent channel power or channel power measurement. (U)<br />
SIGNAL CLIPPED<br />
Indicates that the current FFT measurement sweep resulted in a trace that is above the top<br />
graticule line on the spectrum analyzer display. If this happens, the input trace (trace A) has<br />
been “clipped,” <strong>and</strong> the FFf data is not valid. (U)<br />
A-8 <strong>Spectrum</strong> Analyzer Error Messages
Signal not found<br />
Indicates the PEAK ZOOM routine did not find a valid signal. (U)<br />
Signals do not fit expected % AM pattern<br />
Indicates that the % AM routine cannot perform the percent AM measurement because the<br />
on-screen signals do not have the characteristics of a carrier with two sideb<strong>and</strong>s. (U)<br />
Signals do not flt expected TO1 pattern<br />
Indicates that the TO1 routine cannot perform the third-order intermodulation measurement<br />
because the on-screen signals do not have the characteristics of two signals <strong>and</strong> two<br />
distortion products. (U)<br />
SMPLR UNLCK<br />
Indicates that the sampling oscillator circuitry is not functioning properly. If this message<br />
appears, check that the external frequency reference is correctly connected to the EXT REF<br />
INPUT. (U) <strong>and</strong> (H)<br />
SOFTKEY OVFL<br />
Softkey nesting exceeds the maximum number of levels. (U)<br />
SRQ _ _ -<br />
The specified service request is active. Service requests are a form of informational message<br />
<strong>and</strong> are explained in Appendix A of the <strong>HP</strong> <strong>8590</strong> E-<strong>Series</strong> <strong>and</strong> L<strong>Series</strong> <strong>Spectrum</strong> <strong>Analyzers</strong><br />
User’s Guide. (M)<br />
STEP GAIN/ATI’N FAIL<br />
Indicates the step gain has failed. (H)<br />
Stop at marker not available with negative detection<br />
Indicates that the marker counter cannot be used when negative peak detection is selected.<br />
‘RI use the marker counter, turn off negative peak detection with DETECTOR PK 5P NG . (U)<br />
EMPTY DLP MEM<br />
Indicates that the user-defined items (user-defined functions, user-defined variables,<br />
user-defined traces, user-defined softkeys) <strong>and</strong> any personalities (for example, the <strong>HP</strong> 85716A<br />
CA<strong>TV</strong> System Monitor Personality) in the spectrum analyzer’s memory have been deleted.<br />
If this message appears, use ERASE DLP NEM to clear spectrum analyzer memory. If the<br />
message is still displayed, it may indicate a hardware failure. See the spectrum analyzer’s<br />
Service Guide for more information. (U)<br />
TABLE FULL<br />
Indicates the upper or lower table of limit lines contains the maximum number of entries<br />
allowed. Additional entries to the table are ignored. (U)<br />
TG SIGNAL NOT FOUND<br />
Indicates the tracking generator output signal cannot be found. Check that the tracking<br />
generator output (RF OUT 500 or RF OUT 75Q) is connected to the spectrum analyzer input<br />
connector with an appropriate cable. (U)<br />
TG UNLVL<br />
This message can indicate the following: that the source power is set higher or lower than<br />
the spectrum analyzer can provide, that the frequency span extends beyond the specified<br />
frequency range of the tracking generator, or that the calibration data for the tracking<br />
generator is incorrect. See “Stimulus-Response Measurements” in Chapter 4 of the <strong>HP</strong> <strong>8590</strong><br />
E-<strong>Series</strong> <strong>and</strong> L<strong>Series</strong> <strong>Spectrum</strong> <strong>Analyzers</strong> User’s Guide for more information. (U)<br />
Too many signal with valid N dB points<br />
Indicates the N dB PTS function has located two or more signals that have amplitudes within<br />
the specified dB from the signal peak. If this happens, you should decrease the span of the<br />
spectrum analyzer so that only the signal that you want to measure is displayed. (U)<br />
<strong>Spectrum</strong> Analyzer Error Messages A-9
Trace A is not available<br />
Indicates that trace A is in the store-blank mode <strong>and</strong> cannot be used for limit-line testing.<br />
Use CLEAR WRfTE A or VIEW A to change trace A from the store-blank mode to the clear<br />
write mode, <strong>and</strong> then turn on limit-line testing. (U)<br />
UNDF KEY<br />
The softkey number is not recognized by the spectrum analyzer. (U)<br />
USING DEFAUIXS self cal needed<br />
Indicates that the current correction factors are the default correction factors <strong>and</strong> that<br />
the CAL FREQ & AMPTD routine needs to be performed. For the <strong>HP</strong> 8592L, <strong>HP</strong> 85933,<br />
<strong>HP</strong> 85953, or <strong>HP</strong> 85963, CAL YTF routine needs to be performed also. (U)<br />
Verify gate trigger input is disconnected before CAL AMPTD<br />
This message is meant to remind you that nothing should be connected to the GATE<br />
TRIGGER INPUT connector on the spectrum analyzer’s rear panel during the CAL AMPT.D<br />
routine. (U)<br />
VID-BW FAIL<br />
Indicates the video b<strong>and</strong>widths have failed. (H)<br />
Waiting for gate input . . .<br />
Indicates that the spectrum analyzer needs an external trigger signal to use the time-gating<br />
functions. Before using the time-gating functions, you should ensure there is a trigger pulse<br />
connected to the GATE TRIGGER INPUT connector on the rear panel of spectrum analyzer<br />
<strong>and</strong> that the GATE OUTPUT is connected the EXT TRIG INPUT connector. If you do not<br />
want to use the time-gating functions, press c-1. (U)<br />
YTF is not available<br />
The YTF is only available for the <strong>HP</strong> 8592L, <strong>HP</strong> 85933, <strong>HP</strong> 85953, <strong>and</strong> <strong>HP</strong> 85963. (U)<br />
A-10 <strong>Spectrum</strong> Analyzer Error Messages
<strong>HP</strong>-IB <strong>and</strong> Parallel Option 041<br />
This appendix tells you how to connect a computer to your <strong>HP</strong> <strong>8590</strong> <strong>Series</strong> Option 041<br />
spectrum analyzer with the Hewlett-Packard Interface Bus (<strong>HP</strong>-IB).<br />
Your spectrum analyzer has an <strong>HP</strong>-IB connector on the rear panel, as shown in Figure B-l.<br />
‘0 PARALLEL 0<br />
@c-j@ @<br />
n<br />
OPTION 041<br />
Figure B-l. <strong>HP</strong>-IB Connector<br />
The <strong>HP</strong>-IB system utilizes a party-line bus structure. Devices such as the spectrum analyzer<br />
are connected on the party line with <strong>HP</strong>-IB cables. A computer gives instructions <strong>and</strong> is the<br />
“controller. ” The spectrum analyzer takes orders <strong>and</strong> is the “listener.” The spectrum analyzer<br />
is also capable of transmitting data over the party line. Devices that transmit data back to the<br />
computer are “talkers. n<br />
Each device on the party line has an address. Device addresses are used by the controller to<br />
specify who talks <strong>and</strong> who listens. A device’s address is usually set at the factory.<br />
The number 7 preceding the device’s address (for example, Analyzer=718), signifies that the<br />
<strong>HP</strong>-IB interface is selected.<br />
When you turn on the spectrum analyzer, the <strong>HP</strong>-IB address appears on the screen (for<br />
example, <strong>HP</strong>-IB ADRS : 18). If necessary, you can reset the address of the spectrum analyzer by<br />
pressing @fiFiF], More 2 of 3 , AWLYZER ADDRESS , entering in the address number using<br />
the front-panel number keys, then pressing Cm]. You may use any address between 0 <strong>and</strong><br />
30. (Usually, 1 is reserved for printers <strong>and</strong> 5 for plotters.)<br />
0<br />
n<br />
cu133e<br />
B<br />
<strong>HP</strong>-IB <strong>and</strong> Parallel Option 041 B-1
RS-232 <strong>and</strong> Parallel Option 043<br />
What You’ll Learn in This Appendix<br />
This appendix explains how to connect a computer to your <strong>HP</strong> <strong>8590</strong> <strong>Series</strong> Option 043 spectrum<br />
analyzer using the RS-232 interface. It contains information pertaining to RS-232 signals, cable<br />
connections, <strong>and</strong> baud rate.<br />
Introducing the RS-232 Interface<br />
Your spectrum analyzer has an RS-232 connector on the rear panel, as shown in Figure C-l.<br />
lo PARALLEL 0 SERIAL<br />
10. .oJ<br />
v<br />
OPTION 043<br />
Figure C-l. RS-232 Connector<br />
The RS-232 interface utilizes serial data transmission. Data is sent, one bit at a time, in groups<br />
of 10 to 12 data-bits.<br />
Two devices, such as the spectrum analyzer <strong>and</strong> a computer, can exchange comm<strong>and</strong>s <strong>and</strong> data<br />
over the RS-232 connection. This interface uses two serial data lines <strong>and</strong> five h<strong>and</strong>shaking<br />
lines. H<strong>and</strong>shaking signals are required for full hardware control of the information exchange.<br />
It is possible to use a three-wire connection, in some situations.<br />
Another parameter for the RS-232 interface is the “baud,” or data rate. This is the speed at<br />
which the computer <strong>and</strong> spectrum analyzer exchange data. The baud rate of each of the two<br />
RS-232 devices must be the same.<br />
The W-232 Data Lines<br />
RS-232 uses serial data transmission, meaning that data is transmitted one bit at a time. There<br />
are two data lines carrying signals:<br />
w Transmit data (TxD)-the serial data output. This line is connected to the RxD input line.<br />
� Receive data (RxD)-the serial data input. This line is connected to the TxD output line.<br />
The RS-232 H<strong>and</strong>shaking Lines<br />
In addition to the data signals, there are five other signals lines (called h<strong>and</strong>shaking lines), used<br />
to control the flow of data. Listed below are the h<strong>and</strong>shake signal descriptions:<br />
� Request to send (RTS)-Output signal indicates that the spectrum analyzer is ready to<br />
communicate. This line is true at power-up <strong>and</strong> stays true while power is on.<br />
V<br />
cu134e<br />
C<br />
M-232 <strong>and</strong> Parallel Option 043 C-l
� Clear to send (CTS)-Input signal indicates that the external controller is ready to receive<br />
data.<br />
� Data terminal ready (DTR)-Output signal from the spectrum analyzer. When the input buffer<br />
is full, this line goes false.<br />
� Data set ready (DSR)-Is not available.<br />
� Data carrier detect (DCD)-Input to the spectrum analyzer. If DCD is true, the spectrum<br />
analyzer will receive data from the controller. If false, no data will be input. The data will<br />
be ignored.<br />
The spectrum analyzer checks its CTS input before transmitting data to the computer. If the<br />
CTS line is false, the spectrum analyzer will not transmit data. The spectrum analyzer transmits<br />
data when the CTS line is true.<br />
The spectrum analyzer sets the DTR line (PC CTS) false when its input buffer is full.<br />
Baud Rate<br />
The speed at which data is exchanged is called the baud rate or data rate, This is usually<br />
expressed in baud or bits per second. Common baud rates are 1200 <strong>and</strong> 9600.<br />
Note Some of the programs in this manual use 1200 baud for proper operation. If<br />
your system uses the RS-232 h<strong>and</strong>shake lines, you can use 9600 baud for all of<br />
the programs.<br />
If you need to change the baud rate, refer to the “Setting the <strong>Spectrum</strong> Analyzer Baud Rate” in<br />
this appendix.<br />
Protocol<br />
The RS-232 protocol is as follows:<br />
Baud rate 300 to 57,000 baud.<br />
8 bits per character.<br />
1 stop bit.<br />
No parity.<br />
Software h<strong>and</strong>shake-none.<br />
Xon/Xoff <strong>and</strong> ENQ/ACK not supported by the spectrum analyzer.<br />
When BREAK is issued to the spectrum analyzer, the following occurs:<br />
1. The present comm<strong>and</strong> is aborted.<br />
2. The input buffer is cleared.<br />
3. The output buffer is cleared.<br />
4. All trace output is stopped.<br />
5. The comm<strong>and</strong> parser is reinitialized.<br />
BREAK does not perform any of the following:<br />
� Invoke instrument preset.<br />
� Clear SRQ off screen.<br />
H Clear illegal comm<strong>and</strong> off screen.<br />
The RTS signal goes true on power-up <strong>and</strong> does not go false during any communication. It stays<br />
true while power is on.<br />
Figure C-2 <strong>and</strong> Figure C-3 lists the signal connections between a personal computer <strong>and</strong> the<br />
spectrum analyzer.<br />
C-2 RS-232 <strong>and</strong> Parallel Option 043
Person0 computer Analyzer<br />
TxD 2 > > 2 RxD<br />
RxD 3 3 TxD<br />
RTS 4<br />
1 DCD<br />
;a; ,” s 4 DTR<br />
GND 7<br />
DCD 8<br />
DTR 20<br />
no connection 9 RI<br />
Figure C-2. <strong>HP</strong> 245426 25-pin to g-pin Full H<strong>and</strong>shaking Connection<br />
Personal Computer Analyzer<br />
DCD 1 < < 7 RTS<br />
RxD 2<br />
TxD 3<br />
DTR 4<br />
GND 5<br />
RTS 7<br />
I:: ,” z<br />
5 GND<br />
1 DCD<br />
4 DTR<br />
RI 9 no connection 9 RI<br />
Figure C-3. <strong>HP</strong> 24542U g-pin to g-pin Full H<strong>and</strong>shaking Connection<br />
If your computer operates with only three wires, you can use the cable connections in<br />
Figure C-4.<br />
Some computers require that the CTS, DSR, <strong>and</strong> DCD inputs be true before serial transmission<br />
can occur. lb solve this problem, you can wire these three signals to the personal computer<br />
RTS line.<br />
Personal Computer Analyzer<br />
TxD 2 > > 2 RxD<br />
RxD 3 < < 3 TxD<br />
GND 7 < < 5 GND<br />
E 8 7 1 CTS RTS DCD<br />
Figure C-4. 25-pin to O-pin S-Wire Connection<br />
cu135e<br />
cu136e<br />
cu137e<br />
M-232 <strong>and</strong> Parallel Option 043 C-3
Personal Computer<br />
RxD 2 <<br />
TxD 3 ><br />
GND 5 <<br />
Connecting a ThinkJet Printer<br />
Analyzer<br />
< 3 TxD<br />
> 2 RxD<br />
< 5 GND<br />
7 RTS<br />
6 CTS<br />
1 DCD<br />
Figure C-5. O-pin to g-pin S-Wire Connection<br />
lb connect an <strong>HP</strong> ThinkJet printer to the spectrum analyzer, use the information in Figure C-6,<br />
‘lhble C-l, ‘Iable C-2, <strong>and</strong> ‘Ihble C-3. Be sure to turn the printer off <strong>and</strong> then back on u$er<br />
changing the printer settings. See the ThinkJet Printer Manual for more information.<br />
ThinkJet RS-232 Analyzer<br />
TxD 2<br />
RxD 3<br />
RTS 4<br />
CTS 5<br />
DSR 6<br />
GND 7<br />
DCD 8<br />
DTR 20<br />
> > 2 RxD<br />
3 TxD<br />
1 DCD<br />
e 4 D T R<br />
no connection 9 RI<br />
Figure C-6. 25-pin to g-pin ThinkJet Printer Connection<br />
ThinkJet Printer Mode Switches:<br />
C-4 RS-232 <strong>and</strong> Parallel Option 043<br />
lhble C-l. S !tting of Thinkjet Printer Mode Switches<br />
Comments<br />
Printer performs a carriage return only.<br />
Printer performs a line feed only.<br />
Sets the printer to skip paper perforations.<br />
Sets the printer for a paper length of 11 inches.<br />
Sets the printer to <strong>HP</strong> MODE.<br />
Sets the printer to USASCII.<br />
cul4le
Connecting a LaserJet Printer<br />
able G2. Setting of RS-232 Switches<br />
1 Switch 1 Setting -<br />
1 Comments 1<br />
Number 1<br />
I<br />
I 1 IUD 1 DTR. I<br />
‘Ihble C-3. Setting the Baud Rate<br />
Baud Setting for Setting for<br />
Rate Switch 4 Switch 5<br />
1200 up up<br />
2400 up down<br />
9600 down down<br />
‘lb connect an <strong>HP</strong> LaserJet printer to the spectrum analyzer, use the information in Figure C-7.<br />
LaserJet 4P/4MP AnOlYZer<br />
RTS 1<br />
TxD 2<br />
RxD 3<br />
DSR 4<br />
GND 5<br />
DTR 6<br />
nc 7<br />
DTR 6<br />
nc 9<br />
> > 1 DCD<br />
> > 2 RxD<br />
( < 3 TxD<br />
< < 4 DTR<br />
< < 5 GND<br />
> > 6 DSR<br />
---opt ionol--- 7 RTS<br />
> > 0 CTS<br />
---ootionol--- 7 RI<br />
Figure G7. <strong>HP</strong> C2932A g-pin to g-pin LaserJet Printer Connection<br />
cu139e<br />
RS-232 <strong>and</strong> Parallel Option 043 C-5
Connecting a Modem<br />
To connect a modem to the spectrum analyzer, use the information in Figure C-8. The<br />
connection is for a Hayes 1200 Modem <strong>and</strong> the spectrum analyzer.<br />
System Settings<br />
Modem Allalyzer<br />
TxD 2<br />
RrD 3<br />
RTS 4<br />
CTS 5<br />
DSR 6<br />
GND 7<br />
DCD 8<br />
DTR 20<br />
RI 22<br />
< < 3 TxD<br />
> > 2 RxD<br />
< > 7 RTS<br />
\<br />
> 8 CTS<br />
< > 6 DSR<br />
< < 5 GND<br />
> > 1 DCD<br />
< < 4 DTR<br />
no connection 9 RI<br />
Figure C-8. 25-pin to g-pin Modem Connection<br />
Select 1200 baud for both the modem <strong>and</strong> the spectrum analyzer.<br />
Connecting an <strong>HP</strong>-GL Plotter<br />
‘Lb connect an <strong>HP</strong>-GL plotter to the spectrum analyzer, use the information in Figure C-9.<br />
Switch Settings<br />
Plotter Atlalvzer<br />
GND 1<br />
TxD 2<br />
RxD 3<br />
RTS 4<br />
CTS 5<br />
DSR 6<br />
GND 7<br />
DTR 20<br />
< > 1 GND<br />
> > 3 RxD<br />
< < 2 TxD<br />
8 DCD<br />
F *O DTR<br />
< 7 GND<br />
> > 5 CTS<br />
Figure C-9. <strong>HP</strong>-GL Plotter Connection<br />
cu140e<br />
Set the switches on the <strong>HP</strong>-GL plotter to the following settings. Set the baud rate of the plotter<br />
<strong>and</strong> spectrum analyzer to the same value. After setting the switch positions, turn plotter off,<br />
then on again.<br />
C-6 M-232 <strong>and</strong> Parallel Option 043<br />
Switch Position Switch Position<br />
Exp<strong>and</strong>: 4 Parity: ) (Off)<br />
Emulate: 1 Even/Odd: ) (Odd)<br />
St<strong>and</strong>-alone: 4 Duplex: ) (Full)<br />
Monitor Mode: ) (normal) Hardwire: I<br />
Local ) (normal) DTR-Bypass: ) (normal)<br />
cul13e
Setting the <strong>Spectrum</strong> Analyzer Baud Rate<br />
The baud rates of the spectrum analyzer <strong>and</strong> the personal computer must be the same. For<br />
example, to set the spectrum analyzer to 9600 baud, use the following procedure:<br />
1. Press the @5EiZJ Mars 1 of 3 .<br />
2. Press the BAUD RATE softkey.<br />
3. Press these keys: 9600,1Hz). lb set the baud rate to 1200 baud, press these keys: 1200, (KJ.<br />
Note Some of the programs in this manual use 1200 baud for proper operation. If<br />
your system uses the RS-232 h<strong>and</strong>shake lines, you can use 9600 baud for all of<br />
the programs.<br />
RS-232 <strong>and</strong> Parallel Option 043 C-7
Index<br />
A<br />
A2, 5-9<br />
A3, 5-9<br />
A4, 5-9<br />
A-block format, 3-24<br />
ABORT, 5-29<br />
executing ABORT in a DLP, 5-30<br />
ABS, 5-31<br />
absolute value, 5-31<br />
access the DLP editor, 4-16<br />
ACP, 5-33<br />
ACPBW, 5-35<br />
ACPCONTM, 5-37<br />
ACPE, 5-38<br />
ACPGR, 5-40<br />
ACPGRAPH, 5-42<br />
ACP manual or auto, 5-44<br />
ACPMK, 5-43<br />
ACPPAR, 5-44<br />
ACPSNGLM, 5-46<br />
ACPSP, 5-47<br />
ACTDEF, 5-49<br />
activate marker, 5-327<br />
active function, 5-54, 5-228<br />
decreasing value with DN, 5-137<br />
active function definition, 5-49<br />
active functions, 5-54<br />
AC<strong>TV</strong>F, 5-54<br />
ADD, 5-55<br />
address<br />
changing the <strong>HP</strong>-IB address, B-l<br />
<strong>HP</strong>-IB operation, B- 1<br />
adjacent channel power, 5-33<br />
adjacent channel power extended, 5-38<br />
ADJ CHAN POWER softkey. See ACP<br />
ADJ CHAN PWR extd softkey. See ACPE<br />
ALC INT EXT, ALC MTR INT XTAL softkey.<br />
See SRCALC<br />
A ++ B softkey. See AXB<br />
alternate comm<strong>and</strong>s, 5-9-10<br />
AMB, 5-57<br />
AMBPL, 5-60<br />
% AM comm<strong>and</strong>s<br />
percent AM (PCTAM), 5-416<br />
percent AM response (PCTAMR), 5-418<br />
A - B -, A ON OFF softkey. See AMB<br />
% AM ON OFF softkey. See FFTPCTAM,<br />
PCTAM<br />
AMPCOR, 5-62<br />
Amp Cor softkey. See AMPCOR<br />
AMPLEN, 5-64<br />
amplitude<br />
marker type, 5-364<br />
amplitude correction, 5-62<br />
amplitude correction factors. See frequencyamplitude<br />
correction factors<br />
amplitude correction length, 5-64<br />
amplitude units, 5-4, 5-71<br />
Amptd Units softkey. See AUNITS<br />
analog display emulation, 5-65<br />
Analog+ display mode<br />
with AMPCOR, 5-63<br />
with LIMIDISP, 5-270<br />
ANALOG + ON OFF softkey. See ANLGPLUS<br />
analog plus, 5-65<br />
analyzer comm<strong>and</strong>, 5-3<br />
ANLGPLUS, 5-65<br />
ANNOT, 5-67<br />
annotation, 5-67<br />
ANNOTATN ON OFF softkey. See ANNOT<br />
APB, 5-68<br />
APND CAT ITEM softkey, 4-19<br />
AT, 5-69<br />
ATTEN AUTO MAN softkey. See AT<br />
attenuation, 5-69<br />
AUNITS, 3-21, 5-71<br />
AUTO, 5-72<br />
auto couple, 5-72<br />
auxiliary interface control line A, 5-106<br />
auxiliary interface control line B, 5-107<br />
auxiliary interface control line C, 5-108<br />
auxiliary interface control line D, 5-109<br />
auxiliary interface control line I, 5-110<br />
average, 5-73<br />
average detection, 5-l 13<br />
average noise level at the marker<br />
MKNOISE, 5-344<br />
AVG, 5-73<br />
AXB, 5-75<br />
Index-l
B<br />
Bl, 5-9<br />
B2, 5-9<br />
B3, 5-9<br />
B4, 5-9<br />
back space<br />
label function, 5-266<br />
B<strong>and</strong> Lock softkey. See HNLOCK<br />
base b<strong>and</strong> instrument preset, 5-267<br />
BASIC<br />
INPUT comm<strong>and</strong>, 2-6, 2-7<br />
REAL comm<strong>and</strong>, 2-8<br />
BAUDRATE, 5-76<br />
baud rate of spectrum analyzer, 5-76<br />
BAUD RATE softkey. See BAUDRATE<br />
B format, 3-22<br />
binary, 5-523<br />
BIT, 5-78<br />
bit checking, 5-78<br />
BITF, 5-80<br />
bit flag, 5-80<br />
BL, 5-9<br />
BLANK, 5-82<br />
BLANK A, BLANK B, BLANK C softkey. See<br />
BLANK<br />
blanking part of the display. See CLRBOX<br />
blank trace, 5-82<br />
B * C softkey. See BXC<br />
B - DL + B softkey. See BML<br />
BML, 5-83<br />
BND LOCK ON OFF softkey. See HNUNLK<br />
BREAK<br />
RS-232 operation, C-2<br />
B + C softkey. See BTC<br />
BTC, 5-84<br />
BXC, 5-85<br />
C<br />
Cl, 5-9<br />
c2, 5-9<br />
CA, 5-9<br />
CAL, 5-86<br />
CAL AMPTD softkey. See CAL<br />
CAL FETCH softkey. See CAL<br />
CAL FREQ & AMPT.D softkey. See CAL<br />
CAL FREQ softkey. See CAL<br />
calibration, 5-86<br />
CAL STORE softkey. See CAL<br />
CAL YTF softkey. See CAL<br />
carriage return<br />
label function, 5-266<br />
CAT, 5-89<br />
catalog, 5-89<br />
cataloging spectrum analyzer memory, 5-9 1<br />
cataloging the memory card, 5-90<br />
Index.2<br />
Catalog Internal, Catalog Card softkey. See<br />
CAT<br />
CATALOG ON EVENT softkey. See CAT<br />
CENTER FREQ softkey. See CF<br />
center frequency, 2-4, 2-5, 5-93<br />
center frequency step size, 5-524<br />
CF, 2-4, 2-5, 5-93<br />
CF STEP AUTO MAN softkey. See SS<br />
Change Prefix softkey. See PREFX<br />
Change Title softkey. See TITLE<br />
changing the amplitude units<br />
AUNITS, 5-7 1<br />
changing the <strong>HP</strong>-IB address, B-l<br />
changing the video b<strong>and</strong>width<br />
VB, 5-587<br />
CHANNEL BANDWDTH softkey. See ACPBW<br />
channel b<strong>and</strong>width, 5-35<br />
channel power, 5-95<br />
CHANNEL POWER softkey. See C<strong>HP</strong><br />
channel spacing, 5-47<br />
CHANNEL SPACING softkey. See ACPSP<br />
character, 5-3<br />
character & EOI, 5-3<br />
characters <strong>and</strong> secondary keywords, 5-5-8<br />
C<strong>HP</strong>, 5-95<br />
C<strong>HP</strong>GR, 5-97<br />
clear average, 5-98<br />
clear box, 5-99<br />
clear display, 5-101<br />
clearing on-event algorithms with ERASE,<br />
5-152<br />
clearing the softkey definitions, 5-246<br />
CLEAR PARAM softkey. See GDRVCLPAR<br />
clear pulse parameters, 5-190<br />
clear status byte, 5-103<br />
clear to send<br />
RS-232 h<strong>and</strong>shaking line, C-l<br />
clear write, 5-102<br />
CLEAR WRITE A, CLEAR WRITE B, CLEAR<br />
WRITE C softkey. See CLRW<br />
CLRAVG, 5-98<br />
CLRBOX, 5-99<br />
CLRDSP, 5-101<br />
CLRW, 5-102<br />
CLS, 5-103<br />
CMDERRQ, 5-104<br />
CNF, 5-105<br />
CNTLA, 5-106<br />
CNTL A 0 1 softkey. See CNTLA<br />
CNTLB, 5-107<br />
CNTL B 0 1 softkey. See CNTLB<br />
CNTLC, 5-108<br />
CNTL C 0 1 softkey. See CNTLC<br />
CNTLD, 5-109<br />
CNTL D 0 1 softkey. See CNTLD
CNTLI, 5-110<br />
CNT RES AUTO MAN softkey. See MKFCR<br />
COMB, 5-111<br />
comb generator control<br />
COMB, 5-l 11<br />
COMB GEN ON OFF softkey. See COMB<br />
combining two traces, 5-114<br />
COM comm<strong>and</strong>, 2-3<br />
comm<strong>and</strong> complete, 5-522<br />
comm<strong>and</strong> mnemonic, 5-2<br />
comm<strong>and</strong>s, 2-2<br />
comm<strong>and</strong> terminators, 5-2<br />
commenting programming lines, 2-10<br />
compatible comm<strong>and</strong>s, 5-9-10<br />
COMPRESS, 5- 112<br />
compress trace, 5-l 12<br />
COMPUTE ACPGRAPH softkey. See<br />
ACPGRAPH<br />
compute the adjacent channel power graph,<br />
5-42<br />
CONCAT, 5-l 14<br />
concatenate, 5- 114<br />
confidence test, 5- 105<br />
configuring your computer system, l-l<br />
CONF TEST softkey. See CNF<br />
connecting a modem<br />
RS-232 operation, C-6<br />
connecting your spectrum analyzer to a<br />
printer or plotter, l-11<br />
connection an <strong>HP</strong>-GL plotter (RS-232<br />
operation), C-6<br />
continuous sweep, 5-l 16<br />
continuous sweep measurement, 5-37<br />
CONTINUS FFT softkey. See FFTCONTS<br />
CONT MEAS softkey. See ACPCONTM<br />
controlling the marker counter, 5-338<br />
controlling trace data with a computer, 3-2<br />
CONTS, 5-l 16<br />
convert to absolute units, 5-121<br />
convert to measurement units, 5-123<br />
copying the source to a destination<br />
MOV, 5-370<br />
COPY key. See PLOT, PRINT<br />
correction factors on, 5-117<br />
CORRECT ON OFF softkey. See CAL, CORREK<br />
CORREK, 5-l 17<br />
COUPLE, 5-l 18<br />
COUPLE AC DC softkey. See COUPLE<br />
couple resolution b<strong>and</strong>width to pulse width,<br />
5-202<br />
couple sweep time to pulse repetition interval,<br />
5-206<br />
couple video b<strong>and</strong>width to gate length, 5-215<br />
CPL RBW ON OFF softkey. See GDRVRBW<br />
CPL SWP ON OFF softkey. See GDRVST<br />
CPL VBW ON OFF softkey. See GDRVVBW<br />
CR, 5-9<br />
create a DLP with the DLP editor, 4-17<br />
creating a DLP, 4-2<br />
creating a modular DLP, 4-7<br />
creating a trace window, 5-578<br />
creating a user-defined trace, 5-562<br />
creating a user-defined variable, 5-583<br />
CRT HORZ POSITION softkey. See CRT<strong>HP</strong>OS<br />
CRT<strong>HP</strong>OS, 5-l 19<br />
CRT VERT POSITION softkey. See CR<strong>TV</strong>POS<br />
CR<strong>TV</strong>POS, 5-120<br />
cs, 5-9<br />
CT, 5-9<br />
CTA, 5-121<br />
CTM, 5-123<br />
CTS<br />
RS-232 h<strong>and</strong>shaking line, C-l<br />
current units, 5-4<br />
cv, 5-9<br />
D<br />
DA, 5-124<br />
data byte, 5-3<br />
data byte & EOI, 5-3<br />
data carrier detect<br />
RS-232 h<strong>and</strong>shaking line, C-2<br />
data entry<br />
disabling, 5-228<br />
data lines<br />
RS-232, C-l<br />
data terminal ready<br />
RS-232 h<strong>and</strong>shaking line, C-2<br />
date mode, 5-127<br />
DATEMODE, 5-127<br />
DATEMODE MDY DMY softkey. See<br />
DATEMODE<br />
DCD<br />
RS-232 h<strong>and</strong>shaking line, C-2<br />
DEFAULT CAL DATA softkey. See CAL<br />
DEFAULT SYNC softkey. See SYNCMODE<br />
define function, 5-184<br />
define terminator, 5-145<br />
delay sweep for time window, 5-209<br />
DELETE FILE softkey. See DISPOSE, PURGE<br />
delete limit-line table, 5-269<br />
deleting a DLP from analyzer memory, 4-14<br />
deleting a file from a RAM card, 5-453<br />
deleting on event comm<strong>and</strong>s, 5-132<br />
deleting softkeys, 5-132<br />
delimiter, 5-3<br />
delta<br />
marker type, 5-364<br />
DEMOD, 5-128<br />
DEMOD ON OFF softkey. See DEMOD<br />
Index-3
demodulation, 5-128<br />
DET, 5-129<br />
detection mode, 5-129<br />
DETECTOR PK SP NG, DETECTOR SMP PK<br />
softkey. See DET<br />
determining available analyzer memory,<br />
4-12<br />
determining if a function is active, 5-54<br />
determining the amount of memory needed<br />
for a DLP, 4-12<br />
determining the amount of space on a RAM<br />
card, 4-12<br />
determining the trace status, 5-570<br />
digit, 5-3<br />
display, 5- 143<br />
display address, 5- 124<br />
DISPLAY CNTL I softkey. See CNTLI<br />
displaying a compressed trace, 5-565<br />
displaying a trace, 5-564<br />
displaying a variable with DSPLY, 5-143<br />
displaying text on the spectrum analyzer<br />
screen<br />
TEXT, 5-549<br />
displaying the screen title, 5-553<br />
displaying the softkey menu with MENU,<br />
5-313<br />
displaying the time <strong>and</strong> date, 5-552<br />
display line, 5-135<br />
display list, 5-125<br />
DISPOSE, 5-131<br />
DISPOSE USER MEM softkey. See DISPOSE<br />
DIV, 5-133<br />
divide, 5- 133<br />
DL, 5-135<br />
DLP<br />
definition, 4- 1<br />
if the DLP causes a spectrum analyzer<br />
problem, 4-2 1<br />
required space on a RAM card, 4-12<br />
spectrum analyzer memory required, 4-12<br />
DLP editor, 4-15<br />
access, 4-16<br />
creating a DLP, 4-17<br />
modifying the DLP, 4-18<br />
DLP programming guidelines, 4-20<br />
DN, 5-137<br />
DONE, 5-138<br />
DOTDENS, 5-140<br />
dot density, 5-140<br />
dot density <strong>and</strong> analog display emulation,<br />
5-65<br />
dotted lines, 5-2<br />
down, 5-137<br />
downloadable program<br />
definition, 4-l<br />
Index-4<br />
FUNCDEF, 5- 184<br />
downloadable programs<br />
using abort, 5-30<br />
draw box, 5-141<br />
DRAWBOX, 5-141<br />
DSP LINE ON OFF softkey. See DL<br />
DSPLY, 5-143<br />
DSR<br />
RS-232 h<strong>and</strong>shaking line, C-2<br />
DT, 5-145<br />
DTR<br />
RS-232 h<strong>and</strong>shaking line, C-2<br />
E<br />
El, 5-9<br />
E2, 5-9<br />
E3, 5-9<br />
E4, 5-9<br />
EDGE POL POS NEG softkey. See GP<br />
EDIT CAT ITEM softkey, 4-19<br />
editing a catalog item, 4-19<br />
EDIT LAST softkey, 4-18<br />
Editor softkey, 4-16<br />
EE, 5-146<br />
EK, 5-148<br />
ELSE, 5-236<br />
EM, 5-9<br />
enable entry, 5-146<br />
enable knob, 5-148<br />
enable limit line testing, 5-291<br />
ENDIF, 5-236<br />
end of sweep, 5-522<br />
end-or-identify, 3-9<br />
END statement, 3-25<br />
enhancements<br />
label function, 5-266<br />
ENTER, 5-149<br />
enter From <strong>HP</strong>-IB, 5-149<br />
entering values into a DLP, 4-6<br />
enter limit-line segment for frequency, 5-285<br />
enter limit-line segment for sweep time,<br />
5-288<br />
enter parameter function, 5-151<br />
ENTER PRI softkey. See GDRVPRI<br />
ENTER REF EDGE softkey. See GDRVREFE<br />
enter reference edge, 5-204<br />
ENTER WIDTH softkey. See GDRVPWID<br />
EOI, 3-9, 3-25<br />
EP, 5-151<br />
ERASE, 5-152<br />
erasing a DLP from analyzer memory, 4-14<br />
EX, 5-9<br />
exchange, 5-597<br />
exchange trace A <strong>and</strong> trace B, 5-75<br />
exchanging traces
XCH, 5-598<br />
excursion<br />
marker peak excursion, 5-352<br />
executing a DLP, 4-9<br />
executing a DLP with a softkey, 4-9<br />
executing a DLP within a program, 4-9<br />
EXP, 5-153<br />
exponent, 5-153<br />
external keyboard, 4-15<br />
external keyboard installation, 4-15<br />
external preamplifier gain, 5-445<br />
EXTERNAL softkey. See TM<br />
external trigger mode, 5-554<br />
F<br />
FA, 5-156<br />
fast Fourier transform, 5-160<br />
creating a trace window, 5-578<br />
marker readout, 5-354<br />
FB, 5-158<br />
FFT, 5-160<br />
creating a trace window, 5-578<br />
FFTAUTO, 5- 164<br />
FFICLIP, 5- 166<br />
FFT continuous sweep, 5-167<br />
FFTCONTS, 5- 167<br />
FFT marker readout, 5-354<br />
FFT markers, 5-168<br />
FFI’ MARKERS softkey. See FFTMKR<br />
FFI’ marker to FFT stop frequency, 5-170<br />
FFT marker to midscreen, 5-169<br />
FFI’ menu comm<strong>and</strong>s<br />
FFI’ continuous sweep (FFI’CONTS), 5-167<br />
FFT markers (FFTMKR), 5-168<br />
FFI’ marker to FFT stop frequency (FFI’MS),<br />
5-170<br />
FFT marker to midscreen (FFTMM), 5-169<br />
FFT off (FFTOFF), 5-171<br />
FFT percent AM (FFTPCTAM), 5-172<br />
FFT percent AM readout (FFTPCTAMR),<br />
5-173<br />
FFI’ signal clipped (FFTCLIP), 5-166<br />
FFI’ single sweep (FFTSNGLS), 5-174<br />
FFI status (FFTSTAT), 5-176<br />
FFI’ stop frequency (FFTSTOP), 5-177<br />
marker to auto FFI’ (FFI’AUTO), 5-164<br />
FFTMKR, 5-168<br />
FFTMM, 5-169<br />
FFTMS, 5-170<br />
FFT Off, 5-171<br />
FFTOFF, 5-171<br />
FF”I’ OFF softkey. See FFTOFF<br />
FFTPCTAM, 5-172<br />
FFTPCTAMR, 5- 173<br />
FFI’ percent AM, 5-172<br />
FFT percent AM readout, 5-173<br />
FFT signal clipped, 5-166<br />
FFT single sweep, 5-174<br />
FFTSNGLS, 5-174<br />
FFTSTAT, 5-176<br />
FFT status, 5-176<br />
FFTSTOP, 5-177<br />
FFl’ stop frequency, 5-177<br />
field width, 5-143<br />
field width <strong>and</strong> decimal places specified<br />
OUTPUT, 5-411<br />
finding the absolute value, 5-31<br />
finding the maximum<br />
MXM, 5-375<br />
finding the minimum value, 5-319<br />
fixed<br />
marker type, 5-364<br />
FLATTOP filter<br />
FFT, 5-161<br />
FM gain, 5-179<br />
FMGAIN, 5-179<br />
FM GAIN softkey. See FMGAIN<br />
FOFFSET, 5-180<br />
force service request, 5-520<br />
FORMAT, 5-182<br />
format card, 5-182<br />
FORMAT CARD softkey. See FORMAT<br />
form feed<br />
label function, 5-266<br />
frame<br />
selecting the type of video frame, 5-573<br />
free-field ASCII format<br />
OUTPUT, 5-411<br />
free-field ASCII with carriage return <strong>and</strong> line<br />
feed terminator<br />
OUTPUT, 5-4 11<br />
free-field ASCII with line feed <strong>and</strong> an EOI<br />
terminator<br />
OUTPUT, 5-4 11<br />
free-field format with no terminator<br />
OUTPUT, 5-4 11<br />
FREE RUN softkey. See TM<br />
free trigger mode, 5-554<br />
FREQ OFFSET softkey. See FOFFSET<br />
frequency<br />
marker readout, 5-354<br />
start frequency, 5-157<br />
frequency-amplitude correction factors<br />
number of, 5-64<br />
frequency offset, 5-180<br />
frequency units, 5-4<br />
FS, 5-183<br />
full span, 5-183<br />
FULL SPAN softkey. See FS<br />
FUNCDEF, 5- 184<br />
Index-5
FUNCDEF comm<strong>and</strong><br />
avoiding problems, 4-3<br />
functional index, 5-1, 5-11-28<br />
function keys on the external keyboard,<br />
4-16<br />
G<br />
GATE, 5-186<br />
gate control, 5-187<br />
GATECTL, 5-187<br />
GATE CTL EDGE LVL softkey. See GATECTL<br />
gate delay, 5-189, 5-191<br />
GATE DELAY softkey. See GD, GDRVGDEL<br />
gate length, 5-193<br />
GATE LENGTH softkey. See GDRVGLEN,<br />
GL<br />
GATE ON OFF softkey. See GATE, GDRVGT<br />
gate polarity, 5-222<br />
gate preset, 5-188<br />
gate time length, 5-221<br />
gate trigger to marker position for time<br />
window, 5-196<br />
gate utility, 5-213<br />
gate utility comm<strong>and</strong>s<br />
clear pulse parameters (GDRVCLPAR),<br />
5-190<br />
couple resolution b<strong>and</strong>width to pulse width<br />
(GDRVRBW), 5-202<br />
couple sweep time to pulse repetition<br />
interval (GDRVST), 5-206<br />
couple video b<strong>and</strong>width to gate length<br />
(GDRVVBW), 5-215<br />
delay sweep for time window<br />
(GDRVSWDE), 5-209<br />
enter reference edge (GDRVREFE), 5-204<br />
gate delay for the frequency window<br />
(GDRVGDEL), 5-191<br />
gate length for the frequency <strong>and</strong> time<br />
windows (GDRVGLEN), 5-193<br />
gate trigger to marker position for time<br />
window (GDRVGTIM), 5-196<br />
gate utility (GDRVUTIL), 5-213<br />
pulse repetition interval (GDRVPRI), 5-198<br />
pulse width (GDRVPWID), 5-200<br />
sweep time for the time window<br />
(GDRVSWP), 5-211<br />
update the time or frequency window<br />
(GDRVSWAP), 5-208<br />
window gate control (GDRVGT), 5-194<br />
GATE UTILITY softkey. See GDRVUTIL<br />
GC, 5-188<br />
GD, 5-189<br />
GDRVCLPAR, 5-190<br />
GDRVGDEL, 5-191<br />
GDRVGLEN, 5-193<br />
Index-6<br />
GDRVGT, 5- 194<br />
GDRVGTIM, 5-196<br />
GDRVPRI, 5-198<br />
GDRVPWID, 5-200<br />
GDRVRBW, 5-202<br />
GDRVREFE, 5-204<br />
GDRVST, 5-206<br />
GDRVSWAP, 5-208<br />
GDRVSWDE, 5-209<br />
GDRVSWP, 5-2 11<br />
GDRVUTIL, 5-2 13<br />
GDRVVBW, 5-215<br />
Get Plot, 5-217<br />
GETPLOT, 5-2 17<br />
Get Print, 5-219<br />
GETPRNT, 5-2 19<br />
GL, 5-221<br />
GP, 5-222<br />
GR, 5-223<br />
graph, 5-223<br />
graphics<br />
entering graphics in the display list, 5-125<br />
GRAT, 5-224<br />
graticule, 5-224<br />
GRAT ON OFF softkey. See GRAT<br />
GW BASIC<br />
OPEN comm<strong>and</strong>, 3-5<br />
GW BASIC DIM, 3-11<br />
H<br />
h<strong>and</strong>shaking connection<br />
RS-232 operation, C-2<br />
h<strong>and</strong>shaking lines<br />
RS-232, C-l<br />
HANNING filter<br />
FFT, 5-161<br />
hardware broken, 5-522<br />
hardware error messages, A-l<br />
harmonic number, 5-229<br />
harmonic number lock, 5-230<br />
HAVE, 5-225<br />
HD, 5-228<br />
Hewlett-Packard interface bus, B-l<br />
HN, 5-229<br />
HNLOCK, 5-230<br />
HNUNLK, 5-233<br />
hold data entry, 5-228<br />
HOLD softkey. See HD<br />
horizontal position of CRT display, 5-119<br />
<strong>HP</strong> 9000 <strong>Series</strong> 200 technical computers, l-3<br />
<strong>HP</strong> 9000 <strong>Series</strong> 300 technical computers, l-5<br />
<strong>HP</strong> BASIC<br />
CLEAR comm<strong>and</strong>, 2-2<br />
CREATE comm<strong>and</strong>, 3-4<br />
DIM comm<strong>and</strong>, 3-9
END comm<strong>and</strong>, 2-2<br />
ENTER, 3-9<br />
LOCAL comm<strong>and</strong>, 2-2<br />
REAL comm<strong>and</strong>, 2-6<br />
USING comm<strong>and</strong>, 3-9<br />
<strong>HP</strong>-IB interface, l-2<br />
<strong>HP</strong>-IB interface bus, B-l<br />
<strong>HP</strong> Vectra personal computer<br />
<strong>HP</strong>-IB interface, l-7<br />
RS-232 interface, l-9<br />
I<br />
IB, 5-234<br />
I-block format, 3-25<br />
ID, 5-235<br />
identify, 5-235<br />
IF THEN ELSE ENDIF, 5-236<br />
if the spectrum analyzer is not responding,<br />
4-21<br />
illegal spectrum analyzer comm<strong>and</strong>, 5-522<br />
impedance<br />
INZ, 5-241<br />
impedance units, 5-4<br />
increasing the value<br />
UP, 5-579<br />
informational messages, A-l<br />
input B, 5-234<br />
input impedance, 5-241<br />
INPUT Z 503 753 softkey. See INZ<br />
installation, external keyboard, 4-15<br />
instrument preset, 2-2, 2-3, 5-242<br />
INT, 5-239<br />
integer, 5-239<br />
integer number range, 5-3<br />
interface bus<br />
RS-232, C-l<br />
INTERNAL + STATE softkey. See RCLS<br />
Internal ---) Trace softkey. See RCLT<br />
interpolated data. See LINFILL<br />
inverse sweep time<br />
marker readout, 5-354<br />
inverse video<br />
label function, 5-266<br />
inverse video for softkey labels, 5-255<br />
INZ, 5-241<br />
IP, 2-2, 2-3, 5-242<br />
K<br />
keyboard, external, 4-15<br />
key clear, 5-246<br />
KEYCLR, 5-246<br />
KEYCMD, 5-247<br />
key comm<strong>and</strong>, 5-247<br />
KEYDEF, 5-251<br />
KEYENH, 5-255<br />
key enhance, 5-255<br />
KEYEXC, 5-260<br />
key execute, 5-260<br />
key label, 5-261<br />
KEYLBL, 5-261<br />
knob<br />
enabling knob with EP, 5-148<br />
KSA, 5-9<br />
KSB, 5-9<br />
KSc, 5-9<br />
KSC, 5-9<br />
KSE, 5-9<br />
KSG, 5-9<br />
KSH, 5-9<br />
KSi, 5-9<br />
KSI, 5-9<br />
KSm, 5-9<br />
KSM, 5-9<br />
KSn, 5-9<br />
KSo, 5-9<br />
KSO, 5-9<br />
KSp, 5-9<br />
KSZ, 5-9<br />
L<br />
LO, 5-9<br />
label, 5-263<br />
label functions, 5-266<br />
last span, 5-301<br />
LAST SPAN softkey. See LSPAN<br />
LB, 5-263<br />
LF, 3-9, 5-267<br />
LG, 5-268<br />
LIMIDEL, 5-269<br />
LIMIDISP, 5-270<br />
LIMIFAIL, 5-272<br />
LIMIFT, 5-274<br />
LIMIHI, 5-275<br />
LIMILINE, 5-276<br />
LIMILO, 5-279<br />
LIMIMIRROR, 5-280<br />
LIMIMODE, 5-281<br />
LIMIREL, 5-283<br />
LIMISEG, 5-285<br />
LIMISEGT, 5-288<br />
LIMITEST, 5-291<br />
limit line<br />
entry mode, 5-281<br />
limit line display, 5-270<br />
limit lines, 5-276<br />
enable limit line testing, 5-291<br />
enter limit-line segment for frequency,<br />
5-285<br />
enter limit-line segment for sweep time,<br />
5-288<br />
Index-7
limits failed, 5-272<br />
mirror limit line, 5-280<br />
relative limit lines, 5-283<br />
limits failed, 5-272<br />
linear scale, 5-295<br />
line-feed, 3-9<br />
line feed<br />
label function, 5-266<br />
line fill, 5-293<br />
line number<br />
<strong>TV</strong>LINE, 5-572<br />
LINE softkey. See TM<br />
line trigger mode, 5-554<br />
LINFILL, 5-293<br />
LMT DISP Y N AUTO softkey. See LIMIDISP<br />
LN, 5-295<br />
LOAD, 5-296<br />
LOAD FILE softkey. See LOAD<br />
loading a file from the memory card, 5-296<br />
loading DLPs from a memory card into<br />
analyzer memory, 4-11<br />
LOG, 5-298<br />
logarithm, 5-298<br />
logarithmic scale, 5-268<br />
log to linear conversion, 5-153<br />
lower limit line, 5-279<br />
lsb length, 5-3<br />
LSB length, 3-24<br />
LSPAN, 5-301<br />
M<br />
Ml, 5-10<br />
M2, 5-10<br />
M3, 5-10<br />
M4, 5-378<br />
MA, 5-10<br />
making the DLP more readable, 4-20<br />
MAN TRK ADJUST softkey. See SRCTK<br />
MARKER ALL OFF softkey. See MKOFF<br />
Marker Amplitude, 5-325<br />
MARKER AMPTD softkey. See MKTYPE<br />
marker as the active function, 5-328<br />
marker b<strong>and</strong>width, 5-329<br />
marker continue, 5-331<br />
marker counter, 5-338<br />
marker counter resolution, 5-339<br />
marker delta, 5-332<br />
marker delta display line mode, 5-334<br />
marker frequency, 5-336<br />
marker frequency output, 5-317<br />
marker minimum, 5-341<br />
marker noise, 5-344<br />
marker normal, 5-342<br />
MARKER NORMAL softkey. See MKN<br />
Index-8<br />
MARKER ON OFF softkey. See<br />
MKAC<strong>TV</strong><br />
marker off, 5-346<br />
marker pause, 5-349<br />
marker peak, 5-351<br />
marker peak excursion, 5-352<br />
marker position, 5-347<br />
marker readout, 5-354<br />
marker readout in frequency, 5-354<br />
MARKER -, AUTO FFT softkey. See FFTAUTO<br />
MARKER -+ CF softkey. See MKCF<br />
MARKER + CF STEP softkey. See MKSS<br />
MARKER + FFl’ STOP softkey. See FFTMS<br />
MARKER ---) MID SCRN softkey. See FFTMM<br />
MARKER + REF LVL softkey. See MKRL<br />
marker step size, 5-358<br />
marker stop, 5-359<br />
marker table, 5-360<br />
marker table comm<strong>and</strong>s<br />
marker delta display line mode<br />
(MKDLMODE), 5-334<br />
marker table (MKTBL), 5-360<br />
marker to auto FFl’, 5-164<br />
marker to center frequency, 5-330<br />
marker to reference level, 5-356<br />
marker to span, 5-357<br />
marker trace, 5-362<br />
marker track, 5-363<br />
marker type,, 5-364<br />
amplitude, 5-364<br />
delta, 5-364<br />
fixed, 5-364<br />
position, 5-364<br />
MARKER A softkey. See MKD<br />
marker zoom, 5-378<br />
mass storage is, 5-374<br />
MAX HOLD A, MAX HOLD B softkey. See<br />
MXMH<br />
maximum, 5-375<br />
maximum hold, 5-377<br />
MAX MXR LEVEL softkey. See ML<br />
MC, 5-10<br />
MDS, 3-22, 5-302<br />
MDS comm<strong>and</strong><br />
MKF programming example, 5-337<br />
MDU, 5-304<br />
MEAN, 5-306<br />
MEANTH, 5-307<br />
MEASOFF, 5-309<br />
MEAS OFF softkey. See MEASOFF<br />
MEASURE, 5-310<br />
measurement data size, 3-22, 5-302<br />
measurement data units, 5-304<br />
measurement off, 5-309<br />
measurement units, 3-26, 5-122
ange, 3-26<br />
measure mode, 5-310<br />
measuring harmonic distortion<br />
<strong>HP</strong>-IB, 3-15-17<br />
RS-232, 3-18-19<br />
MEM, 5-312<br />
memory<br />
determining the amount needed for a DLP,<br />
4-12<br />
memory available, 5-3 12<br />
memory card<br />
determining information with HAVE, 5-226<br />
MENU, 5-313<br />
MERGE, 5-315<br />
merge two traces, 5-315<br />
MF, 5-317<br />
M format, 3-26-27<br />
MIN, 5-319<br />
MINH, 5-321<br />
MIN HOLD C softkey. See MINH<br />
minimum, 5-319<br />
minimum hold, 5-321<br />
minimum position, 5-322<br />
minimum trace value<br />
MKMIN, 5-341<br />
MINPOS, 5-322<br />
MIRROR, 5-323<br />
mirror image, 5-323<br />
mirror limit line, 5-280<br />
mixer level, 5-365<br />
MKA, 3-2, 3-3, 5-325<br />
MKACT, 5-327<br />
MKAC<strong>TV</strong>, 5-328<br />
MKBW, 5-329<br />
MKCF, 5-330<br />
MKCONT, 5-33 1<br />
MK COUNT ON OFF softkey. See MKFC<br />
MKD, 5-332<br />
MKDLMODE, 5-334<br />
MKF, 3-2, 3-3, 5-336<br />
MKFC, 5-338<br />
MKFCR, 5-339<br />
MKMIN, 5-341<br />
MKN, 5-342<br />
MKNOISE, 5-344<br />
MK NOISE ON OFF softkey. See MKNOISE<br />
MKOFF, 5-346<br />
MKP, 5-347<br />
MKPAUSE, 5-349<br />
MK PAUSE ON OFF softkey. See MKPAUSE<br />
MKPK, 5-351<br />
MKPK HI, 2-4, 2-5<br />
MKPX, 5-352<br />
MKREAD, 5-354<br />
MK READ F T I P softkey. See MKREAD<br />
MKRL, 5-356<br />
MKR A -+ SPAN softkey. See MKSP<br />
MKSP, 5-357<br />
MKSS, 5-358<br />
MKSTOP, 5-359<br />
MK TABLE ON OFF softkey. See MKTBL<br />
MKTBL, 5-360<br />
MKTRACE, 5-362<br />
MK TRACE AUTO ABC softkey. See<br />
MKTRACE<br />
MKTRACK, 5-363<br />
MK TRACK ON OFF softkey. See MKTRACK<br />
MKTYPE, 5-364<br />
ML, 5-365<br />
MOD, 5-367<br />
MODE, 5-369<br />
modulo, 5-367<br />
MOV, 5-370<br />
move, 5-370<br />
moving the active marker between traces<br />
MKTRACE, 5-362<br />
MPY, 5-372<br />
msb length, 5-3<br />
MSB length, 3-24<br />
MSI, 5-374<br />
MTO, 5-10<br />
MTl, 5-10<br />
multiply, 5-372<br />
MXM, 5-375<br />
MXMH, 5-377<br />
N<br />
natural exponent, 5-155<br />
NDB, 5-380<br />
NDBPNT, 5-38 1<br />
NDBPNTR, 5-383<br />
N dB points, 5-381<br />
N dB points b<strong>and</strong>width, 5-383<br />
N dB points comm<strong>and</strong>s<br />
N dB points b<strong>and</strong>width (NDBPNTR), 5-383<br />
N dB points (NDBPNT), 5-381<br />
number of dB (NDB), 5-380<br />
N dB PTS ON OFF softkey. See NDBPNT<br />
negative detection, 5-l 13<br />
NEW EDIT softkey, 4-17<br />
NEXT key. See WINNEXT<br />
NEXT PEAK, NEXT PK RIGHT, NEXT PK<br />
LEFT softkey. See MKPK<br />
normal detection, 5-l 13<br />
normalization<br />
using AMB, 5-59<br />
using AMBPL, 5-61<br />
normalized reference level, 5-384<br />
NORMLIZE ON OFF softkey. See AMBPL,<br />
SRCNORM<br />
Index-9
NRL, 5-384<br />
NTSC<br />
triggering, 5-575<br />
number, 5-3<br />
number of dB, 5-380<br />
0<br />
01, 5-10<br />
02, 5-10<br />
03, 5-10<br />
04, 5-10<br />
OA, 5-386<br />
OBW, 5-387<br />
OBWPCT, 5-389<br />
OCC BW % POWER softkey. See OBWPCT<br />
OCCUPIED BANDWDTH softkey. See OBW<br />
occupied b<strong>and</strong>width, 5-387<br />
occupied b<strong>and</strong>width percent, 5-389<br />
octal to binary, 5-523<br />
OL, 3-11, 5-390<br />
on cycle, 5-391<br />
ONCYCLE, 5-391<br />
on delay, 5-393<br />
ONDELAY, 5-393<br />
on end of sweep, 5-395<br />
ONEOS, 5-395<br />
ON key. See WINON<br />
on marker, 5-397<br />
on marker update, 5-399<br />
ONMKR, 5-397<br />
ONMKRU, 5-399<br />
ONPWRUP, 5-401<br />
on service request, 5-402<br />
ONSRQ, 5-402<br />
on sweep, 5-404<br />
ONSWP, 5-404<br />
on time, 5-406<br />
ONTIME, 5-406<br />
OP, 5-408<br />
OUTPUT, 5-409<br />
output active function value, 5-386<br />
output learn string, 3-l 1, 5-390<br />
output parameter, 5-408<br />
output termination, 5-3<br />
output to <strong>HP</strong>-IB, 5-409<br />
over range for measurement units, 3-26<br />
P<br />
PA, 5-412<br />
PAL<br />
triggering, 5-575<br />
PAL-M<br />
triggering, 5-575<br />
Parallel port status, 5-414<br />
PARAM AUTO MAN softkey. See ACPPAR<br />
Index-10<br />
parameter units, 3-21<br />
PARSTAT, 5-414<br />
party-line bus structure, B-l<br />
Pause key, 4-16<br />
PCTAM, 5-416<br />
PCTAMR, 5-418<br />
PD, 5-419<br />
PDA, 5-420<br />
PDF, 5-422<br />
peak average detection, 5-113<br />
PEAK EXCURSN softkey. See MKPX<br />
peak position, 5-430<br />
peak result, 5-431<br />
PEAKS, 5-424<br />
PEAK SEARCH key. See MKPK<br />
peak sort, 5-433<br />
peak table, 5-434<br />
peak table comm<strong>and</strong>s<br />
peak result (PKRES), 5-431<br />
peak sort (PKSORT), 5-433<br />
peak table delta display line mode<br />
(PKDLMODE), 5-428<br />
peak table (PKTBL), 5-434<br />
peak table delta display line mode, 5-428<br />
peak zoom, 5-437<br />
peak zoom comm<strong>and</strong>s<br />
peak zoom okay (PKZMOK), 5-436<br />
peak zoom (PKZOOM), 5-437<br />
peak zoom okay, 5-436<br />
PEAK ZOOM softkey. See PKZOOM<br />
pen down, 5-419<br />
pen up, 5-452<br />
Percent AM, 5-416<br />
percent AM response, 5-418<br />
performing comm<strong>and</strong>s after an elapsed time<br />
ONDELAY, 5-393<br />
performing comm<strong>and</strong>s at a specific time<br />
ONTIME, 5-406<br />
performing comm<strong>and</strong>s at the beginning of a<br />
sweep<br />
ONSWP, 5-404<br />
performing comm<strong>and</strong>s at the end of a sweep<br />
ONEOS, 5-395<br />
TRMATH, 5-567<br />
performing comm<strong>and</strong>s at the marker<br />
ONMKR, 5-397<br />
performing comm<strong>and</strong>s on a service request<br />
ONSRQ, 5-402<br />
performing comm<strong>and</strong>s periodically<br />
ONCYCLE, 5-392<br />
period<br />
marker readout, 5-354<br />
P format, 3-20<br />
PKDLMODE, 5-428
PK MODE oDL NRM softkey. See<br />
PKDLMODE<br />
PKPOS, 5-430<br />
PKRES, 5-431<br />
PKSORT, 5-433<br />
PK SORT FRQ AMP softkey. See PKSORT<br />
PK TABLE ON OFF softkey. See PKTBL<br />
PKTBL, 5-434<br />
PKZMOK, 5-436<br />
PKZOOM, 5-437<br />
placing a marker<br />
MKP, 5-347<br />
placing a marker on a signal peak<br />
MKPK, 5-351<br />
PLOT, 5-439<br />
plot absolute, 5-412<br />
plot relative, 5-444<br />
Plotter port, 5-441<br />
plotter units, 5-304<br />
plotting<br />
from within DLPs, 5-217<br />
<strong>HP</strong>-IB interface, 1-14<br />
laserjet, l-22<br />
RS-232, 1-18<br />
plotting the analyzer display, 5-125<br />
PLTPRT, 5-44 1<br />
polarity<br />
<strong>TV</strong>SYNC, 5-577<br />
position<br />
marker type, 5-364<br />
positive <strong>and</strong> negative peaks detection, 5-l 13<br />
positive detection, 5-l 13<br />
power b<strong>and</strong>width, 5-454<br />
power menu comm<strong>and</strong>s<br />
ACP manual or auto (ACPPAR), 5-44<br />
adjacent channel power (ACP), 5-33<br />
adjacent channel power extended (ACPE),<br />
5-38<br />
channel b<strong>and</strong>width (ACPBW), 5-35<br />
channel power (C<strong>HP</strong>), 5-95<br />
channel spacing (ACPSP), 5-47<br />
compute the adjacent channel power graph<br />
(ACPGRAPH), 5-42<br />
continuous sweep measurement<br />
(ACPCONTM), 5-37<br />
measurement off (MEASOFF), 5-309<br />
occupied b<strong>and</strong>width (OBW), 5-387<br />
occupied b<strong>and</strong>width percent (OBWPCT),<br />
5-389<br />
single sweep measurement (ACPSNGLM),<br />
5-46<br />
POWERON, 5-442<br />
POWER ON IP LAST softkey. See POWERON<br />
power-on state, 5-442<br />
power up time, 5-456<br />
PP, 5-443<br />
PR, 5-444<br />
PREAMPG, 5-445<br />
preamplifier gain, 5-445<br />
predefined function, 5-3<br />
predefined variable, 5-4<br />
prefix, 5-446<br />
PREFX, 5-446<br />
preselector peak, 5-443<br />
PRESEL PEAK softkey. See PP<br />
PRESET key. See IP<br />
PRINT, 5-447<br />
print address, 5-449<br />
Printer port, 5-450<br />
printing<br />
from within DLl3, 5-219<br />
with a LaserJet Printer (RS-232 only), C-5<br />
with a ThinkJet Printer (RS-232 only), C-4<br />
printing, <strong>HP</strong>-IB<br />
centronics converter, l-l 1<br />
deskjet, l-l 1<br />
epson, l-l 1<br />
laserjet, l-l 1<br />
paintjet, l-l 1<br />
thinkjet, l-l 1<br />
printing, parallel<br />
deskjet, l-20<br />
epson, l-20<br />
laserjet, l-20<br />
paintjet, l-20<br />
thinkjet, l-20<br />
printing, RS-232<br />
deskjet, 1-16<br />
epson , 1-16<br />
laserjet , 1-16<br />
paintjet , 1-16<br />
thinkjet, 1-16<br />
PRNPRT, 5-450<br />
PRNTADRS, 5-449<br />
probability distribution of amplitude, 5-420<br />
probability distribution of frequency, 5-422<br />
problems, l-24<br />
programming guidelines, 2-10<br />
protect state, 5-451<br />
protocol<br />
RS-232 protocol, C-2<br />
PSTATE, 5-45 1<br />
PU, 5-452<br />
pulse repetition interval, 5-198<br />
pulse width, 5-200<br />
PURGE, 5-453<br />
purge file, 5-453<br />
PURGE LIMITS softkey. See LIMIDEL<br />
PWRBW , 5-454<br />
PWR SWP ON OFF softkey. See SRCPSWP<br />
Index-11
PWRUPTIME, 5-456<br />
It<br />
Rl, 5-10<br />
R2, 5-10<br />
R3, 5-10<br />
R4, 5-10<br />
RAM card, 5-481, 5-533<br />
storing DLPs on a RAM card, 4-10<br />
r<strong>and</strong>om-access memory card, 5-481, 5-533<br />
ratio<br />
setting the video b<strong>and</strong>width ratio, 5-589<br />
RB, 5-457<br />
RC, 5-10<br />
RCLS, 5-459<br />
RCLT, 5-460<br />
reading trace data, 3-2<br />
read-only memory card, 5-481, 5-533<br />
real number range, 5-3<br />
recalling with a prefix, 5-446<br />
recall state, 5-459<br />
recall trace, 5-460<br />
recommended path, 5-2<br />
records, 3-9<br />
redrawing the analyzer display, 5-125<br />
reference level, 5-468<br />
marker to reference level, 5-356<br />
reference level offset, 5-472<br />
reference-level position, 5-470<br />
REF LVL OFFSET softkey. See ROFFSET<br />
REF LVL softkey. See RL<br />
relative limit lines, 5-283<br />
release <strong>HP</strong>-IB, 5-462<br />
REL<strong>HP</strong>IB, 5-462<br />
remainder<br />
finding the remainder with MOD, 5-367<br />
repeating syntax element, 5-2<br />
REPEAT UNTIL, 5-463<br />
request to send<br />
RS-232 h<strong>and</strong>shaking line, C-l<br />
RES BW AUTO MAN softkey. See RB<br />
reserved words, 5-2<br />
reset reference level, 5-465<br />
RESETRL, 5-465<br />
resolution b<strong>and</strong>width, 5-457<br />
RETURN, 5-466<br />
returning or storing trace values, 5-559<br />
returning the spectrum analyzer to its former<br />
state, 3-12<br />
returning trace A data to the controller<br />
TA, 5-542<br />
returning trace B data to the controller<br />
TA, 5-543<br />
returning trace data<br />
changing the trace data format, 5-544<br />
Index-12<br />
REV, 5-467<br />
revision, 5-467<br />
RL, 5-468<br />
RLPOS, 5-470<br />
RMS, 5-471<br />
ROFFSET, 5-472<br />
ROM card, 5-481, 5-533<br />
root mean square value, 5-471<br />
rosenfell algorithm, 5-l 13<br />
RQS, 5-473<br />
RS-232<br />
3-wire connection, C-3, C-4<br />
baud rate, C-2<br />
connecting a modem, C-6<br />
connecting an <strong>HP</strong>-GL plotter, C-6<br />
connecting a ThinkJet printer, C-4<br />
data lines, C-l<br />
h<strong>and</strong>shaking connection for personal<br />
computer, C-2<br />
h<strong>and</strong>shaking lines, C-l<br />
protocol, C-2<br />
setting the baud rate, C-7<br />
RS-232 interface, l-2<br />
RS-232 interface bus, C-l<br />
RTS<br />
RS-232 h<strong>and</strong>shaking line, C-l<br />
S<br />
Sl, 5-10<br />
s2, 5-10<br />
sample detection, 5-113<br />
SAVE EDIT softkey, 4-17<br />
save menu, 5-475<br />
SAVEMENU, 5-475<br />
save or recall data, 5-482<br />
save or recall flag, 5-479<br />
save or recall number, 5-480<br />
SAVES, 5-476<br />
save state, 5-476<br />
SAVET, 5-477<br />
save trace, 5-477<br />
saving <strong>and</strong> recalling instrument states, 3-7<br />
saving trace data, 3-4<br />
saving with a prefix, 5-446<br />
SAV LOCK ON OFF softkey. See PSTATE<br />
SAVRCLF, 5-479<br />
SAVRCLN , 5-480<br />
SAVRCLW, 5-482<br />
SCALE LOG LIN softkey. See LG, LN<br />
scaling factor, 5-155, 5-300<br />
screen title<br />
TITLE, 5-553<br />
SECAM-L<br />
triggering, 5-575<br />
secondary keywords, 5-2
SEGDEL, 5-483<br />
segment delete, 5-483<br />
segment entry for frequency limit lines,<br />
5-485<br />
segment entry for sweep time limit lines,<br />
5-488<br />
select frequency or time limit line, 5-274<br />
selecting a trace window for FFT, 5-578<br />
selecting polarity<br />
<strong>TV</strong>SYNC, 5-577<br />
selecting the type of video frame, 5-573<br />
selecting triggering for the <strong>TV</strong> st<strong>and</strong>ard<br />
formats, 5-575<br />
SENTER, 5-485<br />
SENTERT, 5-488<br />
SER, 5-491<br />
serial number, 5-491<br />
service request mask, 5-473<br />
set date, 5-492<br />
SETDATE, 5-492<br />
SET DATE softkey. See SETDATE<br />
set time, 5-493<br />
SETTIME, 5-493<br />
SET TIME softkey. See SETTIME<br />
setting the baud rate, C-7<br />
setting the marker counter resolution, 5-339<br />
setting the real-time clock, 5-551<br />
setting the spectrum analyzer trigger mode,<br />
5-554<br />
setting the threshold level, 5-550<br />
setting the time <strong>and</strong> date, 5-551<br />
setting the trace operations to preset values,<br />
5-569<br />
setting the <strong>TV</strong> line number, 5-572<br />
setting the video b<strong>and</strong>width<br />
VB, 5-587<br />
setting the video b<strong>and</strong>width ratio, 5-589<br />
SGL SWP key. See SNGLS<br />
SIGNAL TRACK<br />
MKTRACK, 5-363<br />
SINGLE FFT softkey. See FFTSNGLS<br />
SINGLE MEAS softkey. See ACPSNGLM<br />
single sweep, 5-496<br />
single sweep measurement, 5-46<br />
single-sweep mode, 2-2, 2-3<br />
SMOOTH, 5-494<br />
smooth trace, 5-494<br />
SNGLS, 2-2, 2-3, 5-496<br />
softkey<br />
underlining <strong>and</strong> inverse video, 5-255<br />
softkeys<br />
clearing with KEYDEF, 5-246<br />
source attenuator, 5-506<br />
source leveling control, 5-504<br />
source normalization, 5-508<br />
source power, 5-515<br />
source power-level step size, 5-511<br />
source power offset, 5-510<br />
source power sweep, 5-513<br />
source tracking, 5-5 17<br />
source tracking peak, 5-519<br />
SP, 2-4, 2-5, 5-497<br />
span, 2-4, 2-5, 5-497<br />
marker to span, 5-357<br />
SPAN softkey. See SP<br />
span zoom, 5-500<br />
SPAN ZOOM softkey. See SPZOOM<br />
SPEAKER, 5-499<br />
special numbers <strong>and</strong> characters, 5-2<br />
specifying the frequency of the marker<br />
MKF, 5-336<br />
spectrum analyzer error messages, A-l<br />
spectrum analyzer state, 3-9<br />
SPZOOM, 5-500<br />
SQLCH, 5-501<br />
SQR, 5-502<br />
square root, 5-502<br />
squelch, 5-501<br />
SQUELCH softkey. See SQLCH<br />
SRCALC, 5-504<br />
SRCAT, 5-506<br />
SRC ATN MAN AUTO softkey. See SRCAT<br />
SRCNORM, 5-508<br />
SRCPOFS, 5-510<br />
SRCPSTP, 5-511<br />
SRCPSWP, 5-513<br />
SRCPWR, 5-515<br />
SRC PWR OFFSET softkey. See SRCPOFS<br />
SRC PWR ON OFF softkey. See SRCPWR<br />
SRC PWR STP SIZE softkey. See SRCPSTP<br />
SRCTK, 5-517<br />
SRCTKPK, 5-519<br />
SRQ, 5-520<br />
SS, 5-524<br />
ST, 5-526<br />
st<strong>and</strong>ard baud rates, 5-76<br />
st<strong>and</strong>ard deviation of trace amplitudes, 5-529<br />
START FREQ softkey. See FA<br />
start frequency, 5-156<br />
STATE --$ INTRNL softkey. See SAVES<br />
status bits<br />
clearing, 5- 103<br />
status byte definition, 5-522<br />
status byte query, 5-528<br />
status of a trace<br />
TRSTAT, 5-570<br />
STB, 5-528<br />
STDEV, 5-529<br />
step size<br />
decreasing by the step size with DN, 5-137<br />
Index-13
marker step size, 5-358<br />
STOP FREQ softkey. See FB<br />
stop frequency, 5-158<br />
STOR, 5-531<br />
store, 5-531<br />
storing DLPs on a RAM card, 4-10<br />
SUB, 5-534<br />
subtract, 5-534<br />
SUM, 5-536<br />
sum of squared trace amplitudes, 5-537<br />
sum of trace amplitudes, 5-536<br />
SUMSQR, 5-537<br />
sv, 5-10<br />
SWEEP CONT SGL softkey. See CONT, SNGLS<br />
Sweep Couple, 5-538<br />
SWEEP DELAY softkey. See GDRVSWDE<br />
sweep time, 5-526<br />
marker readout, 5-354<br />
sweep time for the time window, 5-211<br />
SWEEP TIME softkey. See GDRVSWP<br />
SWPCPL, 5-538<br />
SWP CPLG SR SA softkey. See SWPCPL<br />
SWP TIME AUTO MAN softkey. See ST<br />
synchronize mode, 5-540<br />
SYNCMODE, 5-540<br />
SYNC NRM NTSC, SYNC NRM PAL softkey.<br />
See SYNCMODE<br />
syntax elements, 5-2, 5-3-4<br />
T<br />
TO, 5-10<br />
Tl, 5-10<br />
T2, 5-10<br />
T3, 5-10<br />
T4, 5-10<br />
T7, 5-10<br />
T8, 5-10<br />
TA, 5-542<br />
TABLE ADL NRM softkey. See MKDLMODE<br />
take sweep, 5-571<br />
taking a measurement sweep, 5-571<br />
TB, 5-543<br />
TDF, 3-20, 5-544<br />
TDF comm<strong>and</strong><br />
MKF programming example, 5-337<br />
test program, l-2<br />
text<br />
entering text in the display list, 5-125<br />
TEXT, 5-549<br />
TH, 5-550<br />
THEN, 5-236<br />
ThinkJet Printer mode switch settings, l-11,<br />
c-4<br />
ThinkJet RS-232 switch settings, C-4<br />
Index-14<br />
third-order intermodulation measurement,<br />
5-556<br />
third-order intermodulation response, 5-558<br />
THRESHLD ON OFF softkey. See TH<br />
threshold, 5-550<br />
time <strong>and</strong> date<br />
displaying the time <strong>and</strong> date, 5-552<br />
time date, 5-551<br />
TIMEDATE, 5-551<br />
TIMEDATE ON OFF softkey. See TIMEDSP<br />
time display, 5-552<br />
TIMEDSP, 5-552<br />
time units, 5-4<br />
TITLE, 5-553<br />
TM, 5-554<br />
to find problems in a DLP, 4-20<br />
TOI, 5-556<br />
TO1 comm<strong>and</strong>s<br />
third-order intermodulation measurement<br />
(TOI), 5-556<br />
third-order intermodulation response<br />
(TOIR), 5-558<br />
TO1 ON OFF softkey. See TO1<br />
TOIR, 5-558<br />
TRA, 3-2, 3-3, 5-559<br />
trace A minus trace B, 5-57<br />
trace A minus trace B plus display line, 5-60<br />
trace A plus trace B, 5-68<br />
trace B exchange trace C, 5-85<br />
trace B minus display line, 5-83<br />
trace data format, 5-544<br />
binary, 3-9, 3-11<br />
TDF, 2-8, 2-9<br />
trace data formats, 3-20<br />
trace data input <strong>and</strong> output, 5-559<br />
trace data transfers, 3-20<br />
trace define, 5-562<br />
trace display, 5-564<br />
trace element, 5-4<br />
trace graph, 5-565<br />
trace math, 3-26, 5-567<br />
trace mean, 5-306<br />
trace mean above threshold, 5-307<br />
trace memory, 5-561<br />
trace preset, 5-569<br />
trace range, 5-4<br />
trace registers<br />
determining the total number of trace<br />
registers available, 5-561<br />
Trace ---i Intrnl softkey. See SAVET<br />
trace status, 5-570<br />
trace window, 5-578<br />
TRACKING PEAK softkey. See SRCTKPK<br />
tracking the signal<br />
MKTRACK, 5-363
transfer A, 5-542<br />
transfer B, 5-543<br />
transferring trace A data, 5-542<br />
transferring trace B data, 5-543<br />
transfer trace B to trace C, 5-84<br />
TRA/TRB/TRC, 5-559<br />
TRB, 5-559<br />
TRC, 5-559<br />
TRCMEM, 5-561<br />
TRDEF, 5-562<br />
TRDSP, 5-564<br />
TRGRPH, 5-565<br />
triggering the spectrum analyzer, 5-554<br />
trigger mode, 5-554<br />
TRIG key. See TM<br />
TRIG MKR ON OFF softkey. See GDRVTIM<br />
TRMATH, 5-567<br />
TRPRST, 5-569<br />
TRSTAT, 5-570<br />
TS, 2-2, 2-3, 5-571<br />
turning off markers<br />
MKOFF, 5-346<br />
<strong>TV</strong> frame, 5-573<br />
<strong>TV</strong> line, 5-572<br />
<strong>TV</strong>LINE, 5-572<br />
<strong>TV</strong> LINE # softkey. See <strong>TV</strong>LINE<br />
<strong>TV</strong>SFRM, 5-573<br />
<strong>TV</strong> St<strong>and</strong>ard, 5-575<br />
<strong>TV</strong> St<strong>and</strong>ard softkey. See <strong>TV</strong>STND<br />
<strong>TV</strong>STND, 5-575<br />
<strong>TV</strong> sync, 5-577<br />
<strong>TV</strong>SYNC, 5-577<br />
<strong>TV</strong> SYNC NEG POS softkey. See <strong>TV</strong>SYNC<br />
<strong>TV</strong> trigger mode, 5-554<br />
<strong>TV</strong> TRIG ODD FLD, <strong>TV</strong> TRIG EVEN FLD, <strong>TV</strong><br />
TRIG VERT INT softkey. See <strong>TV</strong>SFRM<br />
<strong>TV</strong> TRIG softkey. See TM<br />
TWNDOW, 5-578<br />
two’s complement, 5-68<br />
type of marker<br />
changing the type, 5-364<br />
U<br />
underlining<br />
label function, 5-266<br />
underlining for softkey labels, 5-255<br />
UNIFORM filter<br />
FFT, 5-161<br />
unit key pressed, 5-522<br />
units, 5-4<br />
universal <strong>HP</strong>-IB service request, 5-522<br />
unlock harmonic number, 5-233<br />
UNTIL, 5-463<br />
UP, 5-579<br />
update the time or frequency window, 5-208<br />
UPDATE TIMEFREQ softkey. See GDRVSWAP<br />
upper limit line, 5-275<br />
use of a DLP, 4-l<br />
user-created error messages, A-l<br />
user-defined function, 5-4, 5-184<br />
user-defined functions<br />
using ABORT in user-defined functions,<br />
5-29<br />
using C<strong>HP</strong>GR in user-defined functions,<br />
5-97, 5-401<br />
user-defined function within a DLP, 4-3<br />
user-defined softkey definition, 5-251<br />
user-defined trace, 5-4<br />
user-defined trace <strong>and</strong> use within a DLP,<br />
4-5<br />
user-defined variable, 5-4, 5-582<br />
user-defined variables <strong>and</strong> use within a DLP,<br />
4-4<br />
user state, 5-580<br />
using the DLP editor, 4-15<br />
USTATE, 5-580<br />
V<br />
VARDEF, 5-582<br />
variable definition, 5-582<br />
variables, 2-6<br />
VARIANCE, 5-584<br />
variance of trace amplitudes, 5-584<br />
VAVG, 5-586<br />
VB, 5-587<br />
VBR, 5-589<br />
VBW/RBW RATIO softkey. See VBR<br />
vertical position of CRT display, 5-120<br />
vertical tab<br />
label function, 5-266<br />
VID AVG ON OFF softkey. See VAVG<br />
VID BW AUTO MAN softkey. See VB<br />
video average, 5-586<br />
video b<strong>and</strong>width, 5-587<br />
video b<strong>and</strong>width ratio, 5-589<br />
video modulation polarity<br />
<strong>TV</strong>SYNC, 5-577<br />
VIDEO softkey. See TM<br />
video trigger mode, 5-554<br />
VIEW, 5-590<br />
VIEW A, VIEW B, VIEW C softkey. See<br />
VIEW<br />
viewing a trace<br />
VIEW, 5-590<br />
w<br />
WAIT, 5-591<br />
what is a DLP, 4-l<br />
why use a DLP, 4-l<br />
window gate control, 5-194<br />
Index-l 5
window next, 5-592<br />
window off, 5-593<br />
window on, 5-594<br />
windows comm<strong>and</strong>s<br />
WINNEXT, 5-592<br />
WINOFF, 5-593<br />
WINON, 5-594<br />
WINZOOM, 5-596<br />
ZMKCNTR, 5-599<br />
ZMKPKNL, 5-601<br />
ZMKPKNR, 5-602<br />
ZMKSPAN, 5-603<br />
WINDOWS OFF softkey. See WINOFF<br />
window zoom, 5-596<br />
WINNEXT, 5-592<br />
WINOFF, 5-593<br />
WINON, 5-594<br />
WINZOOM, 5-596<br />
writing your first program, 2-2<br />
Index-l 6<br />
X<br />
XCH, 5-597<br />
Z<br />
ZMKCNTR, 5-599<br />
ZMKPKNL, 5-601<br />
ZMKPKNR, 5-602<br />
ZMKSPAN, 5-603<br />
ZONE CENTER softkey. See ZMKCNTR<br />
zone marker at center frequency, 5-599<br />
zone marker for next left peak, 5-601<br />
zone marker for next right peak, 5-602<br />
zone marker span, 5-603<br />
ZONE PK LEFT softkey. See ZMKPKNL<br />
ZONE PK RIGHT softkey. See ZMKPKNR<br />
ZONE SPAN softkey. See ZMKSPAN<br />
ZOOM key. See WINZOOM