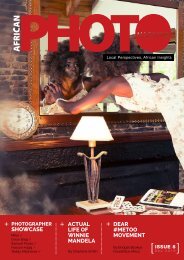
African Photo Magazine Issue #6
This is the 6th issue of the Pan-African photography magazine, African Photo Magazine and the main showcase is Ghana Photography. Additionally, we showcase African photographers and visual artists showcased by Performa, Red Hook Labs and Nataal in 2017, in New York City.
This is the 6th issue of the Pan-African photography magazine, African Photo Magazine and the main showcase is Ghana Photography. Additionally, we showcase African photographers and visual artists showcased by Performa, Red Hook Labs and Nataal in 2017, in New York City.
Create successful ePaper yourself
Turn your PDF publications into a flip-book with our unique Google optimized e-Paper software.
Hein Waschefort for VSS Creative, PSSA and Africa <strong>Photo</strong> <strong>Magazine</strong><br />
step 3<br />
2 PUSHING<br />
SATURATION<br />
Click Laer 1 and Curves 1<br />
(holding shift) right click and<br />
choose Merge layers.<br />
Go to Image - Adjustment -<br />
Levels and move sliders for<br />
better tonal range.<br />
Burn and dodge for more<br />
dramatic lighting. Do not take<br />
exposure above 20%.<br />
When Saturation is increased<br />
some colours block out<br />
(posturise, banding) to a pure<br />
red/pure blue, etc. (picture on<br />
right pushed to +31 from picture<br />
on top) This would happen when<br />
Saturation is boosted beyond a<br />
certain point. This is called<br />
'clipping' the same happens<br />
when Levels are pushed too<br />
much when attempting to boost<br />
contrast.<br />
Here is a good trick to solve this<br />
problem...<br />
PHOTOSHOP TUTORIAL 3<br />
step 3<br />
step 2<br />
Go to Image -<br />
Adjustments -<br />
Hue/Saturation<br />
(Ctrl+U) and push it<br />
higher up than you<br />
normally would, to<br />
prove a point (I have<br />
pushed it all the way up<br />
to 41 which is in the<br />
zone where ‘clipping’<br />
really becomes<br />
evident).<br />
Click on drop-down arrow next<br />
to Normal at the top in the<br />
Layers palette, and choose the<br />
Blending Mode to Color from<br />
the list. The blurring will<br />
disappear and allow the detail<br />
from the original to show<br />
through. With the blurred Layer<br />
highlighted, you can still<br />
change the saturation, click<br />
Ctrl+U and re-adjust saturation<br />
to your liking. You can push<br />
colours much more on the<br />
blurred image, there's no fine<br />
detail present to get ‘clipped’.<br />
You can des-aturate areas with<br />
excessive colour casts using<br />
the sponge tool, in this case the<br />
rocks got a bluish tint which<br />
needed to be de-saturated.<br />
step 1<br />
Make 2 copy Layers<br />
(click on background in<br />
LAYER pallet then click<br />
Ctrl+J x 2).<br />
With copy Layer<br />
highlighted at top of the<br />
Layers stack, go to<br />
Filter - Blur - Gaussian<br />
Blur. Move the Radius<br />
slider to blur the detail<br />
effectively without<br />
changing the shape or<br />
form of the image too<br />
much.<br />
© Hein Waschefort<br />
© Hein Waschefort<br />
52 africanphotomagazine ISSUE 6 JUNE 2017 53


