
You also want an ePaper? Increase the reach of your titles
YUMPU automatically turns print PDFs into web optimized ePapers that Google loves.
EASTERN REGIONAL LIBRARIES { I<br />
ru,ilUryry.WY<br />
ffiw&€s &<br />
publication by I<br />
0zaki ant Unkaku Koyama
Critical acclaim for the volumes<br />
in the HOW TO DRAW MANGA series<br />
published by Graphic-sha and Japanime:<br />
Clear, concise, and amazingly<br />
easy-<strong>to</strong>-follow, "Getting<br />
Started" will take you through<br />
the process of creating <strong>manga</strong><br />
and leave you with so clear an<br />
understanding that you will<br />
feel as though you've known<br />
this stuff for years." lf it's true<br />
that a picture is worth a<br />
thousand words, then this book<br />
says millions.You'll wonder how<br />
anyone ever got started without<br />
it," writes Gerry Poulos of<br />
Edi<strong>to</strong>rs Choice Reviews.<br />
lsBN 4-92120s-00-0<br />
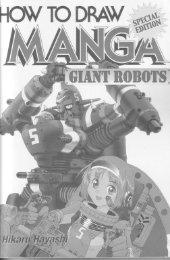
Drawing realistic robots is like<br />
building a better mousetrap:<br />
Every <strong>manga</strong> artist wants <strong>to</strong><br />
do it, but few know where <strong>to</strong><br />
begin. "Giant Robots," a<br />
special entry in the worldrenowned<br />
HOWTO DRAW<br />
MANGA series, provides stepby-step<br />
instructions and<br />
detailed illustrations that will<br />
prove invaluable <strong>to</strong> novice<br />
artists and accomplished<br />
illustra<strong>to</strong>rs alike.<br />
lsBN 4-7661-1255-5<br />
lsBN 4-766',] -1260-1<br />
Bring your <strong>manga</strong> illustrations<br />
<strong>to</strong> life! "Super Tone<br />
Techniques" is the definitive<br />
guide <strong>to</strong> the fine art of using<br />
screen <strong>to</strong>nes and <strong>to</strong>ols.<br />
Renowned artist Unkaku<br />
Koyama (co-author of "<strong>Maids</strong><br />
and <strong>Miko</strong>") demonstrates the<br />
secret techniques used by<br />
professional <strong>manga</strong> artists <strong>to</strong><br />
create stunning characters and<br />
spectacular landscapes.<br />
Discover how screen <strong>to</strong>nes can<br />
add a whole new dimension <strong>to</strong><br />
your artwork.
<strong>Maids</strong> & <strong>Miko</strong>
I<br />
}IOWTO DMW MANGA: <strong>Maids</strong> & MiKo<br />
Jdnt publication by<br />
Tabuhiro Ozaki and Unkaku Koyama<br />
CopynSht @ 2001 Tatsuhiro 0zaki<br />
CopynSht @ 2001 Unkaku Koyama<br />
Copynsht @ 2001 Graphic-sha Publishing Co., Ltd.<br />
Ile book was first designed and produced by Graphic-sha Publishing Co., Ltd.<br />
in Japan in 2001. This English edition was published by Graphic-sha Publishing Co., Ltd.<br />
h Japan in 2002.<br />
Graphic-sha Publishing Co., Ltd.<br />
Sansou Kudan Bldg. 4th Floor<br />
1-14-17 Kudan-kita, Chiyoda-ku, Tokyo 102-0073 Japan<br />
Drawing, composition and scenario: Tatsuhiro Ozaki, Unkaku Koyama<br />
Corer <strong>draw</strong>ing and colorlng: Ganma Suzuki<br />
llain tiile logo design:<br />
.japanese edition Edi<strong>to</strong>r:<br />
Erpli$ edition Edi<strong>to</strong>r:<br />
Hideyuki Amemura<br />
Mo<strong>to</strong>fumi Nakanishi (Graphic-sha Publishing Co., Ltd.)<br />
Glenn Kardy (JAPANIME Co., Ltd.)<br />
0over and text page layout: Shinichi lshioka<br />
BE[sh fanslaion management Lingua fr6nca, lnc. (an3y-skmt@asahi-net.or.jp) ,<br />
Foreign language edition proiect coordina<strong>to</strong>r: Kumik0 Sakamo<strong>to</strong> (Graphic-sha Publishing Co., Ltd.)<br />
All dgtrb reserved. No part of this publication may be reproduced,<br />
sfured in a retrieval system, or transmitted in any form or by any means,<br />
dec<strong>to</strong>nic, mechanical, pho<strong>to</strong>copying, recording, or otherwise,<br />
with0ut fie pilor written permission of the publisher<br />
Disfihrted by<br />
.lapanime Co., Ltd.<br />
2* l 02 Naka-cho, Kawaguchi-shi,<br />
SEitsma ffi2-m22, Japan<br />
Pisle /Pax +81 -(0)48-259-3444<br />
E
Table of Contents<br />
Fmurmd ...................4<br />
ffi, Gooks, Governesses, etc.<br />
f,ur hffiotfirction <strong>to</strong> Domestic Servants........6<br />
" llllilusernaid<br />
" il[nsernald<br />
,0o*<br />
" l&Htenmaid<br />
. Scdhry maid<br />
. Sffioorn maid<br />
r ["ilrtdrgss<br />
. kbrmaid<br />
. lhsekeeper<br />
, Eotefness<br />
" Ladfs maid<br />
Frequenty Drawn Maid Costumes ...........,..8<br />
"<br />
Unen Headwear<br />
" BotE<br />
thawing Ruffles....... .......,.,...,....'t0<br />
Standing.... ............. 11<br />
. [hdergarments<br />
Bouring ....................16<br />
Bending Forward..... ................. 19<br />
Looking Back.......... ,,,,...............21<br />
Botfi Arms Raised F0rward .........................25<br />
Both Arms Raised <strong>to</strong> the Side.....................30<br />
One Arm Raised Forward ....... 35<br />
. Key Points in Drawing One Arm Raised<br />
. Key Points in Drawing an Overhead<br />
Perspective of a Gharacter with Raised Arms<br />
. The Sleeves<br />
One Arm Raised <strong>to</strong> the Side..............,......,.,41<br />
. The Sleeves<br />
Sitting ......................46<br />
Sitting with the Legs Grossed ....................48<br />
Sitting Primly on the Floor ..........................53<br />
Sitting on the Floor, Holding the Legs.......so<br />
Sitting on the Floor, Legs Extended...........60<br />
Kneeling on One 1e9.....................................62<br />
Sitting with Legs Tucked <strong>to</strong> the Side........0+<br />
Sitting with Knees Together and Feet Out...66<br />
Kneeling on All Fours ...............67<br />
Reclining .................69<br />
Shading and Shadows ............,... ................7 4<br />
. Using Solid Black Etfectively<br />
Crash Gourse in Editing ...........76<br />
o What Lines for Greases Mean<br />
<strong>Miko</strong><br />
The Basics of <strong>Miko</strong> Attire ........82<br />
The Hakama ...........84<br />
. Hakama Golors<br />
Dressing in <strong>Miko</strong> Attire ............86<br />
Adjusting Garments.. ................89<br />
More About Adjusting Garments................91<br />
The Chihaya ............92<br />
Hair Adornments............ ...........96<br />
20ri............. ...... .......97<br />
Kashiwade (Ceremonial Glapping)..,..........98<br />
llai (Devotional Bowing) ..................,,........ 1 01<br />
Holding the Sleeve ..................102<br />
Turning the Body... ..,,...,..........106<br />
Both Arms Raised F0rward .......................1 08<br />
Both Arms Raised <strong>to</strong> the Side................,.,116<br />
One Arm Raised Forward...., ......................124<br />
. Giving Volume <strong>to</strong> Creases and Folds<br />
One Arm Raised <strong>to</strong> the Side......................129<br />
The Arms Grossed..... ..............134<br />
Holding a Broom..... .................135<br />
Sitting Seiza-style ...................141<br />
Bowi n g While Seated Se iza-sty\e ............1 42<br />
Sitting with Legs Tucked <strong>to</strong> the Side......t4s<br />
Reclining ..............,145
Foreword<br />
This volume, written for <strong>manga</strong> artists of all skill levels, was compiled <strong>to</strong> serve as<br />
reference when <strong>draw</strong>ing maid uniforms and the traditional dress of miko<br />
(pronounced mee-koh), young maidens in the service of Shin<strong>to</strong> shrines.<br />
This publication includes not only the costumes worn by maids and miko, but also<br />
covers traditional Japanese dress, using shade and shadow, <strong>draw</strong>ing creases, and<br />
other various <strong>to</strong>pics essential <strong>to</strong> <strong>draw</strong>ing costumes. We hope that you read and<br />
study this book thoroughly <strong>to</strong> improve your skills.<br />
Reproduction of the samples provided herein is permitted. <strong>How</strong>ever, we ask that<br />
you try <strong>to</strong> incorporate your own <strong>to</strong>uches rather than simply produce a faithful copy.<br />
Accordingly, we have included illustrations that even intermediate artists find<br />
difficult <strong>to</strong> produce, along with compositions that are <strong>draw</strong>n frequently. We have<br />
also provided numerous detailed explanations of the key points in <strong>draw</strong>ing the<br />
garments appearing in each section.<br />
To have a "knack for <strong>draw</strong>ing" is <strong>to</strong> have the ability <strong>to</strong> observe a subject carefully<br />
and then accurately represent the subject in an illustration. Once you learn they<br />
key points of observation, you <strong>to</strong>o will possess this "knack." These points are<br />
presented through the focused <strong>to</strong>pic of maid and mrko costumes. 0f course,<br />
artlstc talent and experience go hand in hand. Consequently, the more you<br />
rra,i:.e, the better you will become. Believe this and make the best of this book.
ffi*,<br />
ench<br />
5
An lntroduction <strong>to</strong> Domestic Servants<br />
A domestic servant is one who works in another person's<br />
home, and is responsible for such things as the housework<br />
or the children's upbringing. ln Japan, such employees<br />
were known as kaseifu-san or otetsudaL-san (meaning<br />
"housekeeper" or "maid"). lt is said these occupations<br />
claim a long tradition that can be traced back <strong>to</strong> the<br />
Assyrian Empire of the Near East (a collective term for the<br />
countries of Southwest Asia, primarily those on the Arabian<br />
Peninsula but including Egypt and others, and constituting<br />
one of the oldest civilizations in the world).<br />
Even though with the advancements of the modern age a<br />
single homemaker is now able <strong>to</strong> handle all of these chores<br />
alone, there are likely many who, if given the financial<br />
means, would hire help <strong>to</strong>'take care of the housework and<br />
children. Since up <strong>to</strong> only a few decades ago housework<br />
required considerable labor, it is only natural that such<br />
occupations would come in<strong>to</strong> existence,<br />
Today's familiar maid uniform originated in 19th-century<br />
Great Britain during the lndustrial Revolution. At the time,<br />
Great Britain was a class-structured society, and those who<br />
ernployed domestic servants were members of the middle<br />
and upper classes. The number of domestic servants<br />
engaged by a given household depended on its economic<br />
status. ln those cases where the household was able <strong>to</strong> hire<br />
only a single maid, that maid was expected <strong>to</strong> handle all of<br />
the housework. If the household was able <strong>to</strong> afford multiple<br />
servants, then the work would be divided among an<br />
assortment of domestic servants who were skilled in<br />
specific tasks.<br />
The following is a sampling of domestic servants' roles.<br />
Housemaid<br />
The housemaid is likely the closest <strong>to</strong> what is associated with the<br />
word "maid" <strong>to</strong>day. Her duties consisted primarily of chores<br />
within the home, such as making the beds, cleaning the house<br />
and looking after her employer.<br />
Nursemaid<br />
The children's nanny. Traditionally, middle- and upper-class<br />
homes had a nursery, and children were raised predominantly by<br />
a woman referred <strong>to</strong> as a "nurse" rather than by their mother.<br />
The nursemaid also was responsible for housekeeping in the<br />
nursery.<br />
Cook<br />
This job <strong>to</strong>day is often held by men, but the word itself is genderfree.<br />
The cook was skilled in the culinary arts and ran the<br />
kitchen.
ffimnrnaid<br />
fu +;rrrr€raaid served as asistant <strong>to</strong> the cook. A hierarchy would form in households where<br />
nM'* t"a- orne krbhenmaid was employed, resulting in a structure quite similar <strong>to</strong> the kitchen of<br />
i llnmr'- 'esEurant<br />
Soffiy maid<br />
TIE s:ulery l.naid had fie lowest position in the kitchen and was delegated primarily the<br />
!0E0Er- r rashing dishes. A scullery was a small room adjacent <strong>to</strong> the kitchen where<br />
m!qr*{rei= ntre prepared and dishes were washed before being sent <strong>to</strong> the kitchen.<br />
,ffioom maid<br />
iTlnrr rads were responsible for preparing the cotfee 0r tea, and making and s<strong>to</strong>ring<br />
lsilis xkes. jams and preserves, liqueurs, etc. The stillroom maid was a position shown<br />
Urrmrr rryhnce once the British cus<strong>to</strong>m of serving tea, sandwiches and cakes as an<br />
rts-cm meal became established. The stillroom was a room equipped and used for distilling<br />
nr :r:rarrrng medicines and herbal concoctions, fragrances, preserves and cakes. With<br />
sas-6snenb in medicine, the household still fell out of use, but the name remains.<br />
r-endress<br />
*rc a;.rdress was primarily responsible for the laundry, which was an onerous task way back<br />
r :E rays before washing machines were invented.<br />
Hormaid<br />
-*r :er"lbrmaid was in charge of the linen and utensils for the table, and for preparing and<br />
ifl-'l-g wine and other drinks.<br />
ihsekeeper<br />
--e ',esekeeper was responsible for all of the<br />
cmer female servants. The lady's maid, (who, like<br />
fe rr:tsekeeper, was an upper servant) did not<br />
ir-sAer <strong>to</strong> fi e housekeeper.<br />
Eouerness<br />
:--ffity of middle-class origin herself, the<br />
lftErTless functioned as tu<strong>to</strong>r <strong>to</strong> the children of<br />
:e nousehold. At the time, it was thought virtuous (<br />
t-n rnen <strong>to</strong> be industrious, while women were<br />
:r:ected <strong>to</strong> spend their time being charming and<br />
f'aceful. The only respectable options available <strong>to</strong><br />
ncrnen of middle class who were lacking in<br />
'rancial means were that of writer, teacher or<br />
llremess. <strong>How</strong>ever, very few middle-class<br />
-cqrseholds could afford a governess, making<br />
:rmpetition among those vying for a single<br />
:mrtion quite strong.<br />
l-ady's maid<br />
ne role of a lady's maid was not <strong>to</strong> engage in<br />
-ousework but <strong>to</strong> stay by and assist her employer.<br />
1 iady's maid was desired by women of the upper<br />
:lass as a symbol of their peerage. She was a<br />
rxury representing the wealth of the household.
Frequently Drawn Maid Costumes<br />
The most commonly <strong>draw</strong>n maid uniforms are billowy in appearance, owing <strong>to</strong><br />
the presence of a pannier underneath <strong>to</strong> ensure that the external skirt has<br />
fullness and flounce. Traditionally, the pannier was made of a material called<br />
"tulle," a netted fabric about as stiff as a screen window. The parts that would<br />
<strong>to</strong>uch the skin were made of sheer or soft materials. A soft petticoat was worn<br />
directly underneath the skirl <strong>to</strong> protect it from the stiff tulle.<br />
This illustration shows a basic pannier.<br />
When <strong>draw</strong>ing, visualize the pannier as<br />
being semitransparent, allowing the<br />
silhouette of the figure underneath <strong>to</strong> be<br />
visible.<br />
The illustration below shows a pannier<br />
with frills. This is worn <strong>to</strong> give more<br />
volume and flounee <strong>to</strong> the skirt.<br />
This illustration shows a pannier<br />
overlain with a petticoat. The<br />
petticoat is an underskirt originally<br />
worn <strong>to</strong> prevent the feet from<br />
becoming tangled in the skirt's<br />
hem. <strong>How</strong>ever, here it is worn <strong>to</strong><br />
protect the outer skirt from being<br />
damaged by the stiff tulle,<br />
\<br />
(- ::::::::]:::.r<br />
tL:<br />
4 ii ln<br />
re:i::i:::::i<br />
Pannier<br />
-Lff5J-i+<br />
** "ru<br />
I<br />
'-P<br />
)<br />
I1<br />
tl<br />
\t \l<br />
i II<br />
1<br />
\\<br />
i.<br />
t\ \<br />
ffiffi<br />
\\<br />
H\\<br />
ffi<br />
Depending on the fashion, the lace trim<br />
of the petticoat may be designed <strong>to</strong><br />
show from underneath the skirt.
UnEn lleadurear<br />
tillmmg rkr rtear linen headwear as<br />
)Mr [r fcit'ur-liforms. Such<br />
hmmsrses come in various<br />
lNMWxs. aruing from a single<br />
ulrnrnmr mnd of ruffled fabric <strong>to</strong><br />
;lmmrtlmg{<br />
-rruftiple<br />
layers of lace.<br />
The character in this example is<br />
wearing a headdress featuring a<br />
single yet ornate layer of lace.<br />
Similar designs with two or three<br />
layers of lace are also popular.<br />
"re itru$ation <strong>to</strong> the<br />
qrr stmus fie most<br />
rn*s fosn of headwear.<br />
The picture above illustrates<br />
another type of headdress.<br />
Bows<br />
There are decorative bows that are already looped and can simply'be attached <strong>to</strong> the garment.<br />
Figure A depicts the kind of bow that one might find 0n an apron. The bow in Figure B is for<br />
decorative purposes. Please note that the bow pictured in Figure B is rather one-dimensional, and<br />
therefore unsuitable for close-ups. When you want <strong>to</strong> <strong>draw</strong> attention <strong>to</strong> a bow, be sure <strong>to</strong> evoke a<br />
sense of volume as depicted in Figure A.<br />
;cure A<br />
The area indicated by the arrow is where<br />
creases are naturally in abundance. <strong>How</strong>ever,<br />
<strong>draw</strong>ing all of those creases makes for an<br />
unattractive bow, so include just one, two or<br />
three lines at the most.<br />
Using straight<br />
lines flattens<br />
the <strong>draw</strong>ing,<br />
thereby losing<br />
a sense of<br />
volume.<br />
Figure B<br />
Showing the part<br />
where the fabric<br />
wraps around and<br />
forms a loop also<br />
creates a sense of<br />
volume.<br />
Loops with round<br />
con<strong>to</strong>urs generate<br />
a greater sense of<br />
volume.<br />
Having the trailing ends of the bow curl<br />
around completes the look of realism.<br />
Even when <strong>draw</strong>ing<br />
a bow as viewed<br />
from straight ahead,<br />
try <strong>to</strong> use shading<br />
and depict the<br />
looping shape of the<br />
fabric <strong>to</strong> create a<br />
more threedimensional<br />
appearance.<br />
I
Drawing Ruffles<br />
Next, position the ruffles,<br />
<strong>draw</strong>ing the outermost<br />
edges in a rippled pattern<br />
@<br />
Creases appear where<br />
the fabric puckers at the<br />
Follow these simple steps.<br />
First, lay out the general<br />
form in a balanced<br />
composition.<br />
Structure of a Buffle<br />
1\VO<br />
Add lines representing the<br />
small folds (called gathers)<br />
that extend from the rippled<br />
edges <strong>to</strong> the center.<br />
Pulling a thread on one side of a fabric and causing it <strong>to</strong> ruffle is<br />
called "<strong>draw</strong>ing a gather." Gathers scrunch the fabric, creating<br />
ruffles and frills. Puckering forms at the gather. One point<br />
requiring attention when <strong>draw</strong>ing rutfles is <strong>to</strong> keep them varied.<br />
Remember, you are not <strong>draw</strong>ing a repeated pattern. Alternate and<br />
merge <strong>to</strong>gether various rhomboid, square, triangular and round<br />
forms <strong>to</strong> create a satisfying image of ruffles and frills,<br />
Finally, add the inside line of the<br />
Wgathers.<br />
w<br />
!<br />
:-i-:Er :,:._::i-- -;:: Ie angle. Use this figure as reference<br />
nrirrr :r':rL' 't-i :?t- + a-i --]ffle 0n yOUf maid'S UnifOfm.
ffiamding<br />
'",ltffi'f,m,hrylfq IAESS<br />
)il|Ilffiflffillll: i ::Ararff in<br />
]lllllr.m imninq acstlon<br />
u*uWm|rlq a rAreJ,C<br />
rilIlli]ulLlll]( irnlrEr-s<br />
'+ l,<br />
i.<br />
J'<br />
The unilorm appearing on<br />
fiis page is very popular<br />
and is reminiscent of the<br />
clothing wom byAlice in<br />
Wonderland. The sleeves<br />
are puffed. The apron has<br />
a bib, and ruffles appear<br />
on the shoulders.<br />
-l'lnr$ $ i:ll frared<br />
:ttrut,,n- tf: g,l S,,rlS With<br />
I Jfrnlr!' .rndemeath.<br />
The character takes<br />
on a more charming<br />
appearance when<br />
<strong>draw</strong>n with an axial<br />
line that has a slight<br />
S-curve.
This page features a maid<br />
uniform with a bouffant<br />
skirt. "Bouffant" comes<br />
from the French word<br />
bouffer, meaning "<strong>to</strong><br />
swell," "<strong>to</strong> puff up" or<br />
"<strong>to</strong> be full." The skirt is<br />
full and bouncy. The<br />
dress sports so-calied<br />
leg-of-mut<strong>to</strong>n sleeves.<br />
The design often includes<br />
lace or frills at the hem<br />
that are either paft of the<br />
skirt itself or on the<br />
petticoat underneath, This<br />
skift has such trimming<br />
directly on the skirt's hem.<br />
Underneath the skirt is a<br />
pannier.
The uniform features<br />
an apron with shoulder<br />
ruffles and no bib.<br />
This is more of a<br />
waitress's<br />
uniform, but it<br />
was inspired by<br />
a maid's<br />
costume.<br />
The skirt on this uniform has no<br />
pannier or petticoat, giving it a lighter<br />
appearance than the maid uniforms<br />
presented earlier.
Note the collar design. A collar that is<br />
broad and rounded like this is called a<br />
"Peter Pan collar." The headdress is<br />
formed by a single piece of ruffled<br />
fabric.<br />
This uniform has a pannier<br />
underneath the skirt and<br />
features a petticoat with<br />
frills peaking out from<br />
below. The uniform on this<br />
page was based on the<br />
dress worn by Alice in<br />
Wonderland.<br />
.tA
--* :ress underneath the<br />
:,-r-n iS rather Simple,<br />
r:r-nng a flared skirt and<br />
: -*:d sleeves.<br />
The seam where the puffed sleeve<br />
attaches <strong>to</strong> the bodice lies in the<br />
same position as that of a regular<br />
sleeve.<br />
15
Bowing<br />
Create a sense<br />
of volume by<br />
adding a cast<br />
shadow from<br />
the head <strong>to</strong> the<br />
chest.
lllilmm lfr sr:srtion of the feet. The right<br />
lxmr $ :EEK furher, with shading<br />
:r$wn-q li,,e entrre leg. A balance of<br />
iilur,r a-fl siiudow is then achieved by<br />
qnm$fli ffie left leg bright, which also<br />
Imxer:.ss a feeling of space and depth.<br />
lurr al -Eans, remember this technique.<br />
The pannier is visible<br />
from underneath.<br />
The character on the preceding<br />
page may appear more polite as<br />
she keeps both legs and feet<br />
<strong>to</strong>gether while bowing, but having<br />
one foot pulled back slightly makes<br />
the legs more attractive, especially<br />
with the short skirt.
immffirming Forward<br />
1<br />
'lN';5<br />
r,'Jil]lM*d<br />
J,"<br />
Assume that the<br />
underside of the skirt<br />
would normally be in<br />
fullshadow, <strong>How</strong>ever,<br />
the underside should<br />
not be rendered<br />
<strong>to</strong>tally in shadow<br />
when suggesting the<br />
skirt is billowing as if<br />
from a breeze,<br />
exposing the<br />
petticoat.
^,,!+\\\\
ll,rmoking Back<br />
":i3 tho difference in feel<br />
:{u'/een when a pannier is<br />
l-: is not present underneath<br />
:: skit1.
Draw large and dramatic<br />
ripples in fie skirt and ruffles.
Use these illustrations as<br />
reference for how far back you<br />
should <strong>draw</strong> the right foot.
24
$dmffi Arms Raised Forward<br />
*,,,,,r* ,-,:-,18S n the fabfiC<br />
iifl- -,*: :i: s'oulders and<br />
lltrr :'?:r-,.e of cfeaSeS<br />
ilr-tF,t :r:: iTnS afe<br />
Lillill'Il'-<br />
' ri#*nr -rS:eiCnS ShOW hOW<br />
li,lilrr:{ :.:,Ee.ar in the dfeSS<br />
,l i:f'-{j:: :he apron.
Points <strong>to</strong> keep in mind when <strong>draw</strong>ing from an<br />
overhead perspective:<br />
Occasionally, showing a skirt being blown in a breeze<br />
can produce an odd image. When <strong>draw</strong>ing skirts in<br />
perspective, be daring and really show the skirt flowing.<br />
This goes for all skirts, not just maid uniforms.<br />
Show the skirt flowing<br />
about like this.<br />
skirt/<br />
appears t00<br />
straight and flat.
When the arms are raised, the<br />
fabric around the shoulders rises as<br />
well. The rounded <strong>to</strong>p of the sleeve<br />
has relatively few creases, while<br />
the underside has many.<br />
27
When the arms are raised, the<br />
rounded <strong>to</strong>p of the sleeve rises,<br />
and the underside is pulled,<br />
The <strong>to</strong>p of the<br />
sleeve rises<br />
upward.<br />
N\
Areas <strong>to</strong> add shading:<br />
. Under the collar<br />
. Under the bow<br />
. Here and there on the<br />
creases<br />
. Underneath the skirl<br />
. Here and there on the<br />
bot<strong>to</strong>m of the creases<br />
29
Both Arms Raised <strong>to</strong> the Side<br />
The sleeve is pulled <strong>to</strong>ward the body.<br />
Represent this by showing creases at<br />
an oblique angle.<br />
Avoid <strong>draw</strong>ing horizontal creas<br />
Not good<br />
+o/<br />
Y Y As the arms are raised<br />
Note the seam where the<br />
rulfles attach <strong>to</strong> the<br />
apron shoulder. 0nly the<br />
ruffles along the seam<br />
rise with the shoulders.<br />
When <strong>draw</strong>ing a<br />
character with the arms<br />
raised, as in this figure,<br />
rce fie seam as a<br />
guideline for positioning<br />
he ruffles.<br />
/ lffiTH,,n_\ li,ffi:::J::J".'<br />
increasingly triangular.<br />
ltL
When <strong>draw</strong>ing ruffles on the<br />
apron and the seam is not<br />
visible, add a line representing<br />
the hidden seam <strong>to</strong> help you<br />
calculate how long the ruffles<br />
should be <strong>draw</strong>n.<br />
31
32
The sash of this apron is fastened in<br />
the back with a but<strong>to</strong>n (indicated by<br />
the arrow). There are also designs<br />
where the sash is stitched on<strong>to</strong> the<br />
apron. Show careful consideration <strong>to</strong><br />
such details when <strong>draw</strong>ing.<br />
33
ffiMilE Arm Raised Forward<br />
"tmr numrance of creases around the shoulder<br />
flIWfiW according <strong>to</strong> whether the arm is raised<br />
rmllrflrruflm or <strong>to</strong> the side. Pay careful attention <strong>to</strong><br />
1illlmrtIu m:rr.t when <strong>draw</strong>ing.
Key Points in Drawing One Arm Raised<br />
When an arm is raised,<br />
changes occur around the<br />
shoulder.<br />
For example, the shoulder<br />
rises. This becomes obvious<br />
if you take note of the<br />
collarbone. This is because<br />
the trapezius, a triangular<br />
muscle located between the<br />
neck and the shoulder,<br />
contracts, thereby<br />
shoftening the distance<br />
between the shoulder and<br />
neck.<br />
f,<br />
\L<br />
vJ\<br />
\r<br />
I<br />
\<br />
1<br />
Not good<br />
,,{A<br />
Not changing the appearance of the<br />
shoulder will result in an awkward <strong>draw</strong>ing<br />
where the character's shoulders appear<br />
unnaturally broad, as in the figure above.<br />
1 \-\r<br />
) ,)<br />
f )t<br />
Y/<br />
il)<br />
Good \ /<br />
A <strong>draw</strong>ing of the shoulder<br />
rising should appear<br />
something like this. Showing<br />
the collarbone rising as well<br />
will result in a natural<br />
image.<br />
Key Points in Drawing an<br />
Overhead Perspective of a<br />
Gharacter with Raised Arms<br />
The overhead perspective is one with a high angle.<br />
The higher the angle, the more dramatic the<br />
foreshortening required becomes, such as in Figure A.<br />
Avoid <strong>draw</strong>ing the trunk as a trapezoid, as in Figure B,<br />
or as if viewed directly from the front, as in Figure C.<br />
Not good<br />
Figure D<br />
Good<br />
Simply <strong>draw</strong>ing the con<strong>to</strong>ur lines without giving<br />
them careful consideration will result in something<br />
like Figure D, where the viewer seems <strong>to</strong> be<br />
looking directly at the head. This mistake arises<br />
when no attention is paid <strong>to</strong> the body's thickness<br />
or <strong>to</strong> lines hidden by shadows from this angle. A<br />
correctly <strong>draw</strong>n overhead perspective will appear<br />
more like Figure E.<br />
Figure E<br />
Figure C<br />
Not good<br />
36
When the arm is<br />
raised, the fabric is<br />
pulled upward,<br />
causing creases <strong>to</strong><br />
appear underneath.<br />
There is a seam circling from<br />
the shoulder <strong>to</strong> the underarm<br />
where the sleeve attaches <strong>to</strong><br />
the bodice. Always keep in<br />
mind any hidden portions when<br />
<strong>draw</strong>ing this seam or<br />
suggesting volume in the<br />
sleeve.<br />
A slipshod<br />
rendition of the<br />
seam could<br />
cause the<br />
figure <strong>to</strong><br />
become flat<br />
and lose its<br />
volume.
When only raising one arm, the<br />
opposite shoulder drops.<br />
This shou<br />
drops.<br />
t<br />
Here, the shoulder<br />
drops even fufther.<br />
The figure has an axial line<br />
running down the center.<br />
Draw this in an S-curve.<br />
39
The Sleeves<br />
f-::: S==,=S:The + fX<br />
:-- -; :::e hems of / h<br />
-<br />
=-.2'.<br />
crfferent, but ( rt l)<br />
T-=;o',iiJ,,l'"1"0 W<br />
Dropped, Putfed Sleeve: \ \<br />
These sleeves are less \<br />
puffy and a bit longer than<br />
standard puffed sleeves. \<br />
Balloon Sleeve:This<br />
illustration shows a<br />
balloon sleeve with the<br />
hem finished with<br />
elastic.<br />
\<br />
W<br />
40
lqr.le Arm Raised <strong>to</strong> the Side<br />
ululr& -rl',i/ the shoulder and bib of the apron<br />
rt'ilil-,:,r Sosition as the arm is raised.<br />
lilr:r -r: 1 shadow cast by the collar against<br />
,'Iilr11 '*:ri makes the overall composition<br />
iulril, r!: iJsy. This holds true for all types of<br />
rii' -:r-ding <strong>manga</strong>. <strong>How</strong>ever, it is effective<br />
r , ,i :rawings and other intricate artwork.<br />
41
43
When the arm is raised,<br />
creases as seen from<br />
the side flow in a single<br />
direction, such as that<br />
in the illustration <strong>to</strong> the<br />
left.<br />
Take care <strong>to</strong> prevent<br />
the creases from the<br />
waist and <strong>to</strong> the<br />
shoulder from flowing<br />
in different directions,<br />
such as illustration <strong>to</strong><br />
the left.<br />
Not good
-cm tleeves<br />
-'/<br />
I<br />
+ Leg-of-Mut<strong>to</strong>n<br />
,<br />
Sleeves: This is<br />
I<br />
a long sleeve<br />
with a puffed<br />
shoulder.<br />
- Leg-of-Chicken<br />
Sleeves: The<br />
arm fits tlghter<br />
than that of the<br />
leg-of-mut<strong>to</strong>n.<br />
). \<br />
c<br />
,, tl l-, :,r:tPuff ><br />
lur*r,}t ihis type of<br />
ill{#,,q :?matically<br />
iltlrri#,': .-0m the<br />
rlill]1,..:ri. 0n down.<br />
riiuii i::-ght lines.<br />
45
Sitting<br />
When adding skirt<br />
creases <strong>to</strong> a seated<br />
character, it is<br />
extremely important<br />
<strong>to</strong> gain an idea of<br />
the overall form <strong>to</strong><br />
avoid <strong>draw</strong>ing the<br />
creases incorrectly.<br />
46
This skirt has<br />
considerable volume<br />
and a heavy<br />
appearance owing <strong>to</strong><br />
the presence of a<br />
pannier underneath.
Sitting with the Legs Grossed<br />
The following pages show uniforms with two<br />
skirt lengths: a mini and a belowthe-knee.
The skirt on this page has a<br />
stiffer, more starched<br />
appearance than the skirt<br />
on the preceding page,<br />
owing <strong>to</strong> the presence of a<br />
pannier and petticoat<br />
underneath.<br />
This shadow is cast by the<br />
character's hair.<br />
Keep in mind line A rather<br />
than line B when<br />
determining the shape of<br />
the chest.<br />
t\<br />
/- In<br />
\-\-./<br />
=<br />
The skirt rises as the legs are<br />
crossed, while the rest of the fabric<br />
cascades <strong>to</strong> the side, causing the<br />
area seen from the side <strong>to</strong> broaden.<br />
This broad side will either be covered<br />
with an expansive shadow or will be<br />
bright with reflected light.
-f'.-
\\/ .<br />
X.-,/ll,
Sitting Primly on the FIoor (Legs Tucked Underneath)
Here, the shadow formed on the inside of the<br />
bow's loop on the apron sash is rendered with a<br />
solid patch of ink. This brings the composition<br />
<strong>to</strong>gether. For other areas of shading on these<br />
pages, two sheets of screen <strong>to</strong>ne at 30% density<br />
were layered.<br />
(<br />
\-<br />
:T
Numerous creases appear at<br />
the waist because of puckering<br />
resulting from the gathers,<br />
which give volume <strong>to</strong> the skirt<br />
and apron.<br />
- :,annier worn underneath<br />
:e skirt gives it volume.
Sitting on the Floor, Holding the Legs<br />
Source<br />
Adding large, bold patches of<br />
shading rather than detailed<br />
shadows <strong>to</strong> suggest numerous tiny<br />
rises is a more effecting means of<br />
shading relatively flat areas of fabric<br />
Use large shadows <strong>to</strong><br />
suggest the flow of<br />
fabric.
--e shoulder is pulled<br />
:r*ryafd.<br />
Exposing the knee ever<br />
so slightly makes for a<br />
more charming<br />
composition.<br />
\K<br />
snou<strong>to</strong>er is ffl.iiiiiffi"<br />
i:l;:<br />
The pulling back of the<br />
arm causes the<br />
sleeve's hem <strong>to</strong> drop<br />
back.
lrE
59
Sitting on the Flool Legs Extended
61
lfteeling on One Leg
f<br />
ffiting with Legs Tucked <strong>to</strong> the Side
65
Sitting with Knees Together and Feet Out
. ing on All Fours<br />
Problem: (Left illustration) <strong>How</strong><br />
should you <strong>draw</strong> the apron's<br />
shoulders when the waist is<br />
hidden? Where should the apron's<br />
bow be positioned?<br />
,irdillilurm-, sketch the con<strong>to</strong>urs<br />
m ilihn mast, which will be<br />
llumfimn ru{n view in the final<br />
ilntulrlllillrq. Drawing it in this way<br />
iLLlttillr :mlirq attention <strong>to</strong> where<br />
r rrlr,ur,ilc be positioned will<br />
,iutlllil:,tlrllr rau <strong>to</strong> grasp<br />
iLlllrmnrafcal ly where the<br />
iNmmr ; st<strong>to</strong>ulders<br />
ittttlllrx lcr# should be.<br />
67
68
Md[ning
S<strong>to</strong>ckings end about midthigh,<br />
covering the knee.<br />
The inclusion of s<strong>to</strong>ckings,<br />
which are commonly worn<br />
with maid uniforms, allows the<br />
artist <strong>to</strong> express the<br />
suppleness of the flesh. Being<br />
aware of gravity and showing<br />
just a tad of body fat bulging<br />
and drooping ever so slightly<br />
will allow your character <strong>to</strong><br />
take on a soft, feminine<br />
appearance.
Remember that a pannier<br />
underneath the skirt will give it<br />
more volume.
73
Shading and Shadows<br />
Flgure A shows both shading on the side opposite<br />
he light source and the shadow cast by the object<br />
on he ground. Just <strong>to</strong> experiment, a solid black<br />
shadow (refened <strong>to</strong> as "BL" in the world of<br />
anime) was added <strong>to</strong> Figure B. This resulted in an<br />
image with very high contrast.<br />
There are times when such an idiosyncratic <strong>to</strong>uch<br />
might be desirable. <strong>How</strong>ever, for the time being,<br />
here are a few suggestions for using solid black<br />
shading effectively.<br />
Figure A<br />
Shading on the side opposite<br />
light source<br />
-the<br />
There are some set rules <strong>to</strong> adding solid black<br />
shading. lf you commit them <strong>to</strong> memory, you<br />
should improve your artwork by having a very<br />
effective technique at your disposal.<br />
Figure B<br />
Shading on the side opposite<br />
the light source<br />
Shadow<br />
Modulate the values of the shading you use <strong>to</strong> give the<br />
composition balance and create a sense of depth.<br />
Screen <strong>to</strong>ne of 10% density was used for the shading on<br />
the box's side in Figure A above, while one of 30% was<br />
used for the shadow on the ground. Conversely, since<br />
the value of the shadow on the side of the box in Figure<br />
B is inherently dark, a lighter-valued <strong>to</strong>ne of 10% was<br />
used for the shadow on the ground. Give thought <strong>to</strong> the<br />
combination of <strong>to</strong>ne values and the overall composition<br />
when shading.<br />
High contrast creates a specific effect,<br />
but it also causes the <strong>draw</strong>ing <strong>to</strong> take<br />
on a weighty appearance.<br />
74
fllHm f,ffid mecfi Eftec'tively<br />
Jrrm"lilltltm<br />
:lmm alr oeaks<br />
Iiltr xlll)lmffiMm mtr'mds. use<br />
ufllilltllllmlll]llllilnrflu u rfi-err mndilrmruflr<br />
$mrmffi rstead of<br />
imilllllrll[ ilMlT'm :tr Sading.<br />
The shadows under the chin and under tiny<br />
ruffles and frills are small and delicate. Avoid<br />
using solid patches ol black.<br />
Avoid using solid patches of black shading on<br />
tiny bows, even if they are dark in color or<br />
value. lf you absolutely have <strong>to</strong> use solid black<br />
shading, then use it on the entire bows.<br />
Use solid black shading on dark items or for specific<br />
shadows on dark items. lf you are simply adding general<br />
shading <strong>to</strong> the item, then avoid using solid black.<br />
lfimdmmlnt<br />
"ummfe nfi<br />
Use solid black in areas such as where a<br />
<strong>draw</strong>n line bends or where two lines<br />
intersect,<br />
solid black in the<br />
crook of a fold. (Refer <strong>to</strong><br />
Figures A, B, and C below.)<br />
Use solid black for<br />
obvious shadows such<br />
as those underneath the<br />
character.<br />
Use solid black for<br />
overlapping cloth. ln this<br />
particular case, avoid<br />
adding lines for creases.<br />
When a gray value is<br />
desirable over solid<br />
black, such as in Figure<br />
B, use hatching instead.<br />
This will result in a<br />
lighter <strong>to</strong>uch.<br />
Heh, heh!<br />
J<br />
\<br />
75
Crash Gourse in Editing<br />
This is a <strong>draw</strong>ing by a student participating in the<br />
Japan-based Society for the Study of Manga<br />
Techniques. Parts of the <strong>draw</strong>ing appear awkward.<br />
But why? Let's take a close look.<br />
This shadow is clearly resulting<br />
from a light source on the right,<br />
so it should cover a greater<br />
The shading<br />
on the chest<br />
SEEMS<br />
artificial.<br />
The light source<br />
causing this<br />
shadow is unclea'<br />
Because proper consideration was not<br />
given <strong>to</strong> the direction of light, shading<br />
appears in unnatural locations.<br />
The shapes of these<br />
shadows are<br />
indistinguishable.<br />
This<br />
shadow's<br />
shape is<br />
<strong>to</strong>o vague.<br />
Some<br />
shading is<br />
needed here,<br />
<strong>to</strong>ward the<br />
back.<br />
This sort of crease is<br />
unnatural and would<br />
simply not occur.<br />
The angle of the leg is<br />
unnatural. lt would look<br />
more realistic if <strong>draw</strong>n<br />
straight.<br />
Add shading <strong>to</strong><br />
show the flow<br />
of creases.<br />
these creases are<br />
about the same depth and<br />
in the same position, they<br />
should have virtually<br />
identical shading.<br />
aftist has misunders<strong>to</strong>od<br />
the shape of the leg. As a<br />
result, a shadow more likely<br />
<strong>to</strong> be seen on a stick has<br />
been added.<br />
The figure is facing the light source, so the knee has more<br />
shade than necessary. This is likely because the artist did not<br />
give sufficient consideration <strong>to</strong> the leg's volume or <strong>to</strong> the<br />
direction of light, but rather simply added decorative shadows<br />
following the con<strong>to</strong>urs of surrounding forms.<br />
This back sash would<br />
naturally have some<br />
shading. Adding shadow<br />
would give the figure a<br />
sense of volume and<br />
balance.<br />
Figure A<br />
Figure B<br />
Even if upper and lower shadows are separated, they should follow a<br />
connected flow, as suggested by the dotted arrow. ln fact, the shadows on<br />
Figure B have been added along the flow illustrated in Figure A. The dotted<br />
arrow in the boxed illustration shows this flow from <strong>to</strong>p <strong>to</strong> bot<strong>to</strong>m,<br />
iC
This shape<br />
lacks definition,<br />
but it is good<br />
enough. \<br />
This bow constitutes a<br />
small detail, so shading<br />
should be kept simple.<br />
_-_4<br />
lltttruhir iirilil, tffinr Sarefully rendered<br />
flrrrilllllJilrril|l ur(: * ls make for an<br />
rlffiluiilrttt rlltir ]i':luing. <strong>How</strong>ever,<br />
uufillmn rmlr *aiy different ways of<br />
mllflllilf-liliirfl"rTlTq details, so it al|<br />
rlllulfllilillltit"niHMn ffie artist's style and<br />
r]rifl fl lll]l]lili]I'ifl '{ii:<br />
The knee is<br />
formless and<br />
lacking in<br />
detail.<br />
t<br />
This shadow works well<br />
because it conforms <strong>to</strong><br />
the shape of the knee.<br />
This ruffle lacks definition. A great<br />
way of handling such ambiguous<br />
areas is <strong>to</strong> either show the part<br />
drenched in light or in <strong>to</strong>tal shadow.<br />
lll]lil illfl,t' ]'E Creases seem ambiguous, opt for<br />
,11111116rr; rl1€ entire area rather than adding<br />
lilfliitll<br />
There tends <strong>to</strong> be a great disparity in the<br />
way different artists render the knees. While<br />
there is no need <strong>to</strong> add realistic detail, the<br />
artist would still benefit from being<br />
conscious of the bone structure when<br />
<strong>draw</strong>ing.<br />
...:.:.::::j:.:.:.::::::::::ljlli:.:i::::::::j:i:i:iillllilllll:,ill;P. N<br />
.,,:,:,:,:,::,,,,,iiiri+HI ,,. - \<br />
^Al;:;l,V l/<br />
At'i":":'::':':':""''.."<br />
..,.,,,:l r:'::i:iiii:;iii""''-<br />
V<br />
Not good<br />
Good
Good \<br />
e<br />
A sharp arc<br />
of this sort<br />
represents a<br />
crease with a<br />
sunken center.<br />
Add shading <strong>to</strong><br />
the center.<br />
b<br />
There are ripples in the cloth between points A and<br />
B, requiring shading. <strong>How</strong>ever, creases on the bow<br />
should be kept simple and <strong>to</strong> a minimum. Big,<br />
expansive shadows work better here than tiny,<br />
detailed shadows.<br />
Why do <strong>draw</strong>n lines appear clumsy?<br />
The most common cause of clumsily <strong>draw</strong>n<br />
lines is when the artist is not accus<strong>to</strong>med t0<br />
<strong>draw</strong>ing. Another is indecisiveness.<br />
O The lines are indecisively <strong>draw</strong>n.<br />
@ Details have not been properly<br />
rendered.<br />
Be confident when <strong>draw</strong>ing Iines!<br />
--"'-<br />
@ Lack of experience with the pen<br />
resulted in this shaky line.<br />
@ The line is not<br />
elegant and<br />
flowing, making<br />
it appear stitf.<br />
lf the structure has not been properly determined at the sketching<br />
stage, then it will be impossible <strong>to</strong> add penned lines accurately.<br />
Since there is not a lot of space between frill and ruffle folds,<br />
certainly no more dips and curves should occur.<br />
78
iillllffilnullllrrrrrlrrrru<br />
*wr,e "rr i !€E r'r properly rendered.<br />
llllr ' rr:::: .- - -: :-i fUffleS tend tO<br />
Illr, llllur"' - -. - :,::nding from this<br />
illnillt ruul*:[ :- :e ::afly visible. While<br />
,11{rllilltLlll r"r r- -; - -:- <strong>to</strong>uching either<br />
tillut tr: - 'l ::i= -elp<strong>to</strong>suggestthe<br />
lifltlrlll, i - :..-a]:,s here the line is a<br />
lfllllllllflr r- : =-:<br />
The artist must clearly define from<br />
which fold the line extends. ln this<br />
case, A seems the more natural<br />
point.<br />
Two lines similarly separated from<br />
the cloth's edge.<br />
ifliillltli! r,*!<br />
The above applies<br />
<strong>to</strong> curtains and<br />
pleated skirts as<br />
well as <strong>to</strong> ruffles.<br />
;- , a"gular or boxy lines will cause your<br />
t-': :: lose its softness. Lrkewise, an<br />
*-r -Jr-v! line takes on a frenetic<br />
;" :n:-ance. lncluding some angular lines<br />
" =:::nt will result in a pleasing image.<br />
This is handled the<br />
same as a ruffle.<br />
Unless the curtain is<br />
supposed <strong>to</strong> be blowing in<br />
a breeze, use a ruler <strong>to</strong><br />
<strong>draw</strong> these lines.<br />
r ,, , : e.r interest in <strong>draw</strong>ing or who have reached a certain level will probably feel that they are already well aware of<br />
i ' il: -:,e written above. <strong>How</strong>ever, it is quite difficult <strong>to</strong> put these ideas in<strong>to</strong> practice! Even if one part of an illustration<br />
,r -:- ,rfldBrfully rendered, other similar areas of the <strong>draw</strong>ing tend <strong>to</strong> be overlooked. Why is that?<br />
,, -' . ,:' s artists tend <strong>to</strong> focus on areas that attract their attention but neglect those areas that interest them less. lt is<br />
' :r -1 -: :at you concentrate and direct your attention <strong>to</strong> the entire composition. Moreover, for those of you who are<br />
-; :icause you are more interested in the character rather than in <strong>draw</strong>ing per se, if you hope <strong>to</strong> advance your skills<br />
:;' develop a greater interest in the background and its relation <strong>to</strong> the character. For example, even if you are able<br />
- : maids and miko in this book perfectly, your efforts are ultimately wasted if you are unable <strong>to</strong> <strong>draw</strong> such<br />
. .- in context with their natural surroundings. Therefore, if you learn <strong>to</strong> concentrate on the entire composition, your<br />
- :,oduce picture-perfect <strong>manga</strong> will improve by leaps and hounds.<br />
79
l{hat Lines for Greases Mean<br />
What pafi of the crease do <strong>draw</strong>n lines actually<br />
illustrate? The following figures show two parts<br />
of the crease represented by the lines,<br />
O Lines represent the clear visual breaks in large,<br />
dramatic ripples, where the fabric curves up or<br />
down.<br />
These lines represent the crease.<br />
@ Lines are used <strong>to</strong> suggest<br />
surface curves of gentle<br />
undulations in the fabric.<br />
I ---<br />
\<br />
These ripples are actually <strong>to</strong>o<br />
gentle <strong>to</strong> add lines <strong>to</strong> the sufface.<br />
lnstead, lines are added <strong>to</strong> show<br />
where the ripples dip up or down,<br />
\<br />
Where <strong>to</strong> Add Lines for Creases<br />
.1.<br />
Add creases <strong>to</strong> joints.<br />
2. Add creases in the direction that<br />
the fabric is pulled.<br />
Points <strong>to</strong> Remember for Strategically Placing Creases<br />
1. Be daring and confident when adding creases.<br />
2. Add general, large lines <strong>to</strong> areas where few creases<br />
would appear, and tiny, precise lines <strong>to</strong> areas where<br />
many creases would develop.<br />
Type 2 creases help create a<br />
ceftain overall mood in the<br />
artwork.<br />
These two types of creases are extremely important and<br />
are used in illustrations throughout this book.<br />
80
ffi<br />
81
The Basics of <strong>Miko</strong>Attire<br />
A miko is engaged in the service of the Japanese<br />
lmperial Couft or a Shin<strong>to</strong> shrine, arranging and<br />
conducting Shin<strong>to</strong> rituals and festivals. (Such<br />
servants are also called kamiko. The word mihois<br />
written in Japanese using multiple Chinesederived<br />
kanji characters.) The miko also acts as<br />
an oracle or medium, channeling divine spirits,<br />
depafied souls and the sacred forces or spirits of<br />
natural objects in<strong>to</strong> her own body, listening <strong>to</strong><br />
their prophesies, and is able <strong>to</strong> make her own<br />
spirit pass outside of her body. ln other words, she<br />
is able <strong>to</strong> engage in extracorporeal travels,<br />
communicating with spirits, and exorcising evil<br />
spirits that have possessed others. Generally<br />
speaking, the traditional mikowas in fact a<br />
shaman.<br />
During the Meiji Period (1868-1912), a time in<br />
which Japan became increasingly modernized, the<br />
role of the miko became mostly ceremonial and<br />
for entertainment's sake, with the spiritual duties<br />
left <strong>to</strong> a subgenre of miko known asthe ikko<br />
(spiritual medium).<br />
The traditional clothing worn by mikois called miko<br />
shozoku. There are minor variations in the outfits worn by<br />
members of one Shin<strong>to</strong> sect <strong>to</strong> the next; however, the style<br />
depicted in this book is the most common.<br />
82
-<br />
\<br />
r\..<br />
I<br />
When a character wears a leotard or other formfitting<br />
article of clothing, then the body shape naturally comes<br />
through in the <strong>draw</strong>ing. <strong>How</strong>ever, the loose robes worn<br />
by miko make it more difficult <strong>to</strong> achieve a sense of the<br />
size and shape of the character. <strong>How</strong>ever, if you make<br />
optimal use of free, hanging fabric in your <strong>draw</strong>ing,<br />
then you should be able <strong>to</strong> engender your character<br />
with a sense of presence. What is critical here is <strong>to</strong> be<br />
conscious of the elbows, shoulders, knees, waist, hips<br />
and chest when <strong>draw</strong>ing.<br />
Above all, always keep in mind the overall balance and<br />
details <strong>to</strong> include when <strong>draw</strong>ing miko shozoku. Japanese<br />
clothing tends <strong>to</strong> be rather complicated, and there is<br />
variation depending on the kimono. Those familiar with<br />
the kimono say that most <strong>draw</strong>ings of kimono, even<br />
those by professional artists, tend <strong>to</strong> be inaccurate. Some<br />
artists simply brush it off with the lazy excuse, "The<br />
people who read the <strong>manga</strong> won't ever know." But<br />
aftists should approach their craft with the assumption<br />
that someone who does know the difference willsee<br />
their work. Therefore, please make every effort <strong>to</strong> learn<br />
the correct way of <strong>draw</strong>ing the mrko's dress.<br />
First, <strong>draw</strong> a silhouette of the<br />
miko in her robes. Many artists<br />
skip over this step, but you will<br />
achieve better results if you start<br />
with the overall form. Once the<br />
form has been set, the rest of the<br />
composition can be <strong>draw</strong>n easily<br />
without destroying its balance.<br />
Balance tends <strong>to</strong> become lost if<br />
details are <strong>draw</strong>n first.<br />
83
The Hakama<br />
Many mistakenly believe the<br />
hakama <strong>to</strong> be similar <strong>to</strong><br />
trousers, where the garment is<br />
divided in<strong>to</strong> a right and a left<br />
leg. <strong>How</strong>ever, that sorl of<br />
garment is actually something<br />
called either a machidakahakama<br />
(a hakama with a high<br />
godet) or an umanori-hakama<br />
(a hakamafor riding<br />
horseback). Such hakama are<br />
generally worn as formal dress<br />
by men or for aikido or kendo<br />
training.<br />
The hakamaworn by a mikois<br />
called an " andon-bakama"<br />
(due <strong>to</strong> its resemblance <strong>to</strong> the<br />
shape of an andon, or<br />
Japanese paper lantern). Like<br />
a skir1, the andon-bakama is<br />
basically cylindrical in form.<br />
Ihe hakama has pleats reminiscent of the<br />
pleaied skirt of a Japanese schoolgirl's<br />
uniform. More on lhe hakama's design will<br />
be explained later in the section titled<br />
"Putting onlhe Hakama." Spreading out<br />
lhe hakamalo its full width, as in the figure<br />
below, reveals quite a bit of cloth. Creases<br />
on lhe hakama in its spread state are<br />
difficult <strong>to</strong> <strong>draw</strong>, so use the examples<br />
presented here.<br />
&+
liiltlii,iiilfltmil ::lI-": n various colors,<br />
illui,itLLlllt ilrr[ :E s,nowy white variation<br />
lrmlrl" t'\ jr-rr-tC pfiests.The hakama<br />
iitif,it rlriiriiltljr rilttr by miko is red or<br />
rmr nnu lr:m r :olor, and is called a<br />
llllIlllilild 16<br />
85
Dressing in <strong>Miko</strong> Attire<br />
The Undergarments<br />
First, the miko puts on the susoyoke<br />
(an underskirt), and over that dons a<br />
hadajuban (a short, wrapped<br />
undergarment). Nowadays, a<br />
brassiere and panties are frequently<br />
worn under lhe susoyake and<br />
hadajuban, but the latter two<br />
constitute the traditional<br />
undergarments worn by the miko.<br />
The susoyake covers the lower half of the body and<br />
serves <strong>to</strong> prevent the feet from becoming entangled in<br />
the long skirt of the Japanese robe, which extends all<br />
the way <strong>to</strong> the ankles. This undergarment corresponds<br />
<strong>to</strong> the Western slip or underskirt. The hadajuban is made<br />
of a fabric similar <strong>to</strong> thick gauze or bleached cot<strong>to</strong>n<br />
cloth. lt is so lightweight that the miko's figure is visible<br />
from underneath.<br />
The susoyake is white and<br />
ends above the ankles,<br />
leaving the feet exposed.<br />
Ihe hadajuban is short in<br />
length, ending approximately<br />
at the hips.<br />
Hakui(white robe)<br />
The mikowears a white robe called<br />
a hakui ouer the undergarments.<br />
Sodetsuke<br />
(armhole seam)<br />
Sleeve<br />
Height<br />
Furl(sleeve under<br />
the armhole)<br />
Bot<strong>to</strong>m of the<br />
sleeve<br />
Seam of lhe 1kumi<br />
(panel under the collar)<br />
85<br />
As is apparent from the illustrations above, a kimono has an okumi seam<br />
and a senai seam on the front and back, indicating its center. When the<br />
kimono is worn, these seams should fall over the axial line of the body;<br />
however, the front okumiseam will fall at an angle leaning <strong>to</strong>ward the end<br />
of the robe facing.<br />
0nly a small paft of the okumiseam is actually visible. Please see the<br />
following pages for reference.
*-e -.a
Putting on the Hakama<br />
fhe hakama has openings on the right and<br />
lefi sides <strong>to</strong> help align the back and the<br />
front when dressing.<br />
The hakama is fastened in the front<br />
with a sash, tied in a bow. The knot<br />
itself is situated somewhat lower than<br />
the obi (broad sash of a kimono). A<br />
decorative cord woven in<strong>to</strong> the oDi<br />
should also be visible.<br />
This oblsecures the<br />
hakui.<br />
This is the knot of the<br />
obi attached <strong>to</strong> the front<br />
ot lhe hakama.<br />
+<br />
The back obi is<br />
reinforced <strong>to</strong> help<br />
it maintain its<br />
shape. The front<br />
obi is similarly<br />
structured.<br />
The oDi becomes<br />
a soft sash at the<br />
opening.<br />
z,<br />
The obl lies<br />
somewhat above<br />
tne waist.<br />
The side<br />
openings end just<br />
above the knees.<br />
The decorative cord is<br />
attached <strong>to</strong> the o0l in the<br />
following two patterns:<br />
o One consists of seven<br />
alternating, tiny intervals,<br />
the fourth of which<br />
appears in the direct<br />
center of the hakama.<br />
. The other consists of six<br />
wider intervals, gradually<br />
becoming smaller <strong>to</strong>ward<br />
the center otthe hakama<br />
and then broadening<br />
again.<br />
:5<br />
The pleats are referred <strong>to</strong> as "box<br />
pleats," and fold <strong>to</strong>ward the center of<br />
lhe hakama. There are four pleats in<br />
the front and four in the back.<br />
The illustration above is a<br />
close-up of the cord, lt is<br />
woven in<strong>to</strong> the obi of the<br />
hakama similar <strong>to</strong> the way a<br />
belt weaves in and out of the<br />
belt loops of pants.
illt*Efiwffiilmng Garments<br />
,rilrrlilt r :tir|ijt[4r ,+3_* 3f y,,ggf il'19 a kimOnO tO makg it appeaf<br />
-11-ip<br />
lltt,1lt".d,n\rrillt *,r-rt,-l Can beCOme IOOSe Of UnkemptfrOm SUCh<br />
rti::1uul,Ill|ilililIililil<br />
lllli:itirT r: z stng or gesturing with the arm, so the<br />
,iulltilltrlnfltIilniltltl tfrsl"l ",::: S adjustment.<br />
The right facing can be<br />
easily pulled or adjusted by<br />
slipping the hand through<br />
the very wide sodetsuke<br />
(armhole seam).<br />
89
Give careful consideration<br />
when determining areas<br />
where light meets shadow<br />
This will give the arm<br />
weight and volume.<br />
\\\<br />
I\,<br />
I -==<br />
t/*<br />
The large shadow<br />
appearing on the character<br />
<strong>to</strong> the right is intrinsic <strong>to</strong><br />
the expansive sleeve of the<br />
kimono. lt looks impressive<br />
and works extremely well in<br />
key panels.<br />
90
ffiilillmmrs About Adjusting Garments<br />
,ilir i1 llllllll lliir"rlin,r*j -,aS<br />
leen W0fn Ovef an<br />
I Ir',, 1llflrfll liil"'"" -;:: -e, it beginS tO<br />
r;il:. L<br />
"lllill:' -- :: li"l Oe fiXed by<br />
ri; rr illl1'rillr11ilii<br />
* * : :::: :' :f lhe obi.<br />
I rl,iL.r{ :* :t furi(hanging portion<br />
r []ili , .- :r- : S 30v0) iS open,<br />
' l i;u: r :,' :s design as woman's<br />
ir:l rnlll 'r' r :;,-,:rsely, the pocket of<br />
I fl, i..lr"' ri l),:-
The Chihaya<br />
The chihaya is an outer robe worn by miko when performing a traditional dance at a festival or other<br />
ceremony. The garment presented in this book is a simplified version. Chihaya come in two general<br />
styles: pure white and patterned.<br />
0penings tend <strong>to</strong> be included in the shouldersot chihaya in <strong>manga</strong> and anime; however, such openings<br />
are actually found in kariginu (traditional hunting dress)or suikan (man's outer robe).<br />
Ihe kariginu was part of the ordinary dress of Japanese nobility during the Heian Period (794-1185).<br />
Beginning in the Kamakura Period (1 1 86-1 333) , the kariginu became an article of formal wear for both<br />
nobles and members of the samurai class. Today, the garment is worn primarily by Shin<strong>to</strong> priests. The<br />
suikan was part of the everyday clothing worn by courtiers and dignitaries and the formal dress of<br />
juvenile nobles who had not yet undergone their coming-of-age ceremony. ln the Kamakura Period, the<br />
suikan was transformed in<strong>to</strong> the formal attire of the samurai.<br />
The illustration <strong>to</strong> the left shows a shirabyoshi(temale dancer in male attire) wearing an eboshi(<strong>to</strong>rmal headwear of<br />
courtiers) and suikan. The word shirabyoshioriginally refened <strong>to</strong> traditional musical performances that were popular<br />
during the late Heian Period. <strong>How</strong>ever, the word also refers <strong>to</strong> a female dancer dressed in men's clothing. There have<br />
been accounts of miko who for some reason losttheir divine or priestess abilities, causing them <strong>to</strong> leave the shrine anc<br />
earn money performing in the arts.<br />
The roles of these <strong>to</strong>rmer miko<br />
spanned the spectrum of<br />
entertainment. Some were even<br />
said <strong>to</strong> have prostituted<br />
themselves. Others, however,<br />
remained virtuous, including<br />
Shizukagozen (a famed nikowho<br />
lived during the late Heian and<br />
early Kamakura periods), despite<br />
the fact that she had become the<br />
concubine of Japanese military<br />
leader and tragic hero Minamo<strong>to</strong><br />
Yoshitsune.<br />
Ihose shi rabyoshl who succumbed<br />
<strong>to</strong> prostitution were believed <strong>to</strong><br />
have lost their spiritual powers<br />
along with their virginity, and<br />
therefore unable <strong>to</strong> resume their<br />
former positions as mrko. <strong>How</strong>ever,<br />
depending on the mlko's lineage,<br />
some were believed <strong>to</strong> retain their<br />
powers even after having given<br />
birth and and were said <strong>to</strong> have<br />
received from or passed along<br />
powers <strong>to</strong> their offspring.<br />
Therefore, shirabyoshi and miko<br />
can be considered closely linked<br />
occupations.<br />
N<br />
\\<br />
\\<br />
\\<br />
This figure is dressed as a kannushi(Shin<strong>to</strong> priest or shrine<br />
guardian) and wearing kariginu. The occupation ot kannushi<br />
be held by both men and women. Although lhe kannushiis<br />
different from the miko,the kariginu is still acceptable dress<br />
a female character.
il0ll llllllllilllllflllllrlfl!ll ': :t: -: SeVe<br />
,Bliffi uiilrlllllffi ulutri?1: i rre arm<br />
ulllsfl Ifl lrnru illlLlllllJll'<br />
ry qr"<br />
When <strong>draw</strong>ing<br />
Japanese clothing,<br />
avoid adding dark<br />
shadows. lf shading is<br />
<strong>to</strong> be included, keep it<br />
light.<br />
ffi<br />
.a.r<br />
F.<br />
Both feet should be in shadow.<br />
<strong>How</strong>ever, in key <strong>manga</strong> panels or<br />
illustrations, think about how<br />
lighting might fall on the feet,<br />
depending on their positions, and<br />
shade appropriately. (Note the arrow<br />
in the illustration <strong>to</strong> the right.)<br />
Pffi<br />
ffi<br />
the chihaya featured on this page<br />
are adorned with these two<br />
patterns.<br />
93
The right and left sides of the<br />
chihaya are open. These figures<br />
were <strong>draw</strong>n <strong>to</strong> represent a chihaya<br />
made of nylon, resulting in a<br />
somewhat stiff yet slick<br />
appearance. The semitransparent<br />
fabric allows lhe shozoku robes <strong>to</strong><br />
be discernible from underneath.
* / \<br />
.4.<br />
itr<br />
wk<br />
I<br />
,i:::,<br />
ry<br />
/,<br />
.iii:.ffi/<br />
m<br />
The ripples and folds appearing<br />
around the shoulder are created<br />
when the fabric is draped over<br />
something round. Although they<br />
primarily fall straight down, there<br />
are some that cascade at an angle<br />
around the arm, which will need <strong>to</strong><br />
be represented in gentle curves,<br />
depending on the position of the<br />
ripple. Be aware of the placement<br />
when <strong>draw</strong>ing such folds and<br />
ripples.<br />
95
Hair Adornments<br />
<strong>Miko</strong> may wear hair adornments such as those illustrated in<br />
below. The hair is wrappedin washi(handmade paper) and<br />
then tied with a ceremonial red and white cord called a<br />
mizuhiki. Such ornamentation is worn by ordained mrko.<br />
Those without bound hair are called jokin (apprentice), young<br />
women who basically serve as parttime assistants.<br />
E6
.lmr'"T<br />
The zori(Japanese sandals) pictured here have been <strong>draw</strong>n as<br />
if made of plastic and thus have a slick appearance. Traditional<br />
zoriare made of woven straw or rush stalks and bamboo bark<br />
and have a texture similar lo tatami(straw floor mats).<br />
Zoriare oblong in design, and those worn by women are<br />
intended <strong>to</strong> allow the foot <strong>to</strong> hang slightly over the sole.<br />
=={<br />
ivzz<br />
n, '//,<br />
]-=---,,,'rrqr:-.<br />
(1".s<br />
97
Kashiwade (Geremonial Clapping)<br />
Devotional worship of Shin<strong>to</strong> deities and spirits includes ceremonial<br />
dapping called kashiwade. This practice demonstrates reverence<br />
<strong>to</strong>ward fie spirits and also carries the meaning of respect <strong>to</strong>ward<br />
ofiers. Kashiwade takes severalforms, depending on the particular<br />
shrine. One version consists of two bows and three claps followed by<br />
one bow; another consists of eight claps (yahirafe); and a third version<br />
{shinobite) involves quietly <strong>to</strong>uching the four fingers of the right hand<br />
(but not the ihumb) <strong>to</strong> the patm of the left.<br />
Ceremonial clapping is never exaggerated or loud, but instead genfle<br />
and unaffected.<br />
This shadow results<br />
from the bagginess of<br />
the hakuiand notfrom<br />
the mlko's chest.<br />
The line indicated by<br />
the arrow islhe okumi<br />
seam.
\\<br />
,CA<br />
Showing just a little of the<br />
inside of the furl gives the<br />
composition a sense of<br />
depth. From this angle, the<br />
inside of the furlwould be<br />
in <strong>to</strong>tal shadow.<br />
,\)<br />
\\<br />
rt<br />
\,\D ,'\vd<br />
99
ffir' (@euotional Bowing)<br />
7\f<br />
W'<br />
These pages illustrate ritual<br />
bowing and clapping. Here, the<br />
mrko bows twice, follows with<br />
three claps, and then bows<br />
once again. The bows are<br />
subdued and shallow.
Holding the Sleeve<br />
When intending <strong>to</strong> reach for or grab an object, the long sleeve can be<br />
a nuisance. Therefore, whenever extending the arm, the sleeve is first<br />
grasped with the opposite hand.<br />
\\<br />
\''<br />
\$<br />
\$<br />
XTR'\<br />
(''N '<br />
\<br />
,,::tt<br />
t' \<br />
\ \:<br />
f, fven from this angle.<br />
part of the Ieft hand<br />
can be seen.<br />
142
iirlr ': :: the left hand<br />
flrr]",1: fot it both holds the<br />
tilrirv,r,i i:d presses close <strong>to</strong> the<br />
r:rir', --,s causes the right<br />
l{ll,, ,,: l: be dfagged<br />
'rrL'r'- aid. while this is an<br />
li l'i:i: 0lls OCCUffenCe,<br />
iri": -g it will give your<br />
"r:,:s,'iion a sense of<br />
ilLri.-r1 stII.<br />
103
lllflutilrflm" :*-: 19 forward, the front of the<br />
,iririii,iiiirlr,*i :zpes fonrvard while the back rises.<br />
\)9<br />
\\<<br />
N<br />
105
Turning the Body<br />
Because lhe hakamais<br />
shaped similarly <strong>to</strong> a<br />
skirt, shading should be<br />
bold. Give consideration<br />
<strong>to</strong> the light source and<br />
avoid adding <strong>to</strong>o many<br />
tiny, ambiguous<br />
shadows.<br />
Ub
Detailed shadows become<br />
obscured from dramatically<br />
high or low angles. Use bold<br />
shading, such as covering<br />
half of the character in<br />
shadow.
Both Arms Raised Forward<br />
Note changes around the<br />
shoulders and the presence oI<br />
creases when both arms are<br />
raised.<br />
As suggested in the illustration above, shadows appear on the sleeves and<br />
extend <strong>to</strong> the body, in relation <strong>to</strong> the pose and the position of the light source<br />
<strong>How</strong>ever, depending on the compositional circumstances, you may want <strong>to</strong> a,.<br />
adding expansive shadows. ln such a case, either minimize the size of the<br />
shadows or adjust the pose <strong>to</strong> one that would naturally require less shading.<br />
For large areas of shading, attach a patch of<br />
<strong>to</strong>ne. Picture the shaded areas in two-dimensional<br />
patterns. lncluding an additional layer of shading is<br />
great for evoking a sense of volume and depth, but<br />
',,,'hen this option is not available, add highlights<br />
b'ght areas of reflected light) <strong>to</strong> protruding or rising<br />
S.rri3cS and other major locations. Note the knot in<br />
:: a::,,,e illustration. The shadows are rendered<br />
a<br />
:- .E<br />
; aie'ed screen <strong>to</strong>ne and a three-dimensional<br />
;--:'::ed by adding highlights here and there.<br />
":, :,: -: -:'a is <strong>to</strong> maintain the overallform of<br />
.L h ,: -:<br />
The shadows on the sleeves in the figure above<br />
do not extend <strong>to</strong> the trunk. lnstead, they appear<br />
<strong>to</strong> fall back.
The arm passes through the<br />
armhole, creating an almost<br />
cylindrical shape inside. The furi<br />
(hanging pad of the sleeve) is, in<br />
contrast, practically flat. The height<br />
of the sleeve is measured as the<br />
distance from the <strong>to</strong>p of the<br />
armhole <strong>to</strong> the bot<strong>to</strong>m ot lhe furi.<br />
While the armhole and the furi<strong>to</strong>rm<br />
a single unit, conceive of them as<br />
separate pieces when <strong>draw</strong>ing.<br />
,)
The three-dimensionality of the sleeve is difficult <strong>to</strong><br />
produce without being aware of the robe's overall<br />
composition. 0ften, this shadow is insensitively<br />
splashed across the sleeve. This shadow is vital, so<br />
remember it.<br />
When the arm is raised, the furi folds back<br />
and rolls in<strong>to</strong> the sleeve, reducing its<br />
expanse <strong>to</strong> almost half, and taking on a<br />
triangular shape.<br />
lt
'rm li-iifiitrE consists of a shadow<br />
rlltrinmilr'.,tlnrE :;,0ut half of the back. Detailed<br />
ttlmfiililuurlrs ire added <strong>to</strong> areas increasingly<br />
nltlffittl{tlllr Eht. Handling shading in this<br />
:mtlnmum :n':vents the image from<br />
l&uultuuu,lr{; Susy with tiny shadows and<br />
mfiiffilnll "lr a balanced composition.<br />
The furi tends <strong>to</strong><br />
roll inward, causing<br />
shadows of this<br />
sort.<br />
$\<br />
\Ị<br />
,1,<br />
lllt<br />
Creases extending<br />
from the obi <strong>to</strong> the<br />
shoulder appear.<br />
111
112
Audacious shading sui'<br />
as this can suggest<br />
volume in the arm.<br />
<strong>How</strong>ever, take care in<br />
that if such shading is<br />
not handled skillfully, :<br />
can result in an<br />
awkward image.
lrrriri ,iLr *,i '.1-,es 0n this page<br />
'riflrr ii lirlli ";',, :re hakUi hUgS<br />
:ilru " tE 3,6f y Such that the<br />
rrirrrt' I lr,<br />
- ritr--d the ShOuldef are<br />
](iil,ltirilr"-i r-{- the arms arg<br />
l,l i ri ',<br />
I \ ll<br />
\JI<br />
t,<br />
tll<br />
/l<br />
I
Both Arms Raised <strong>to</strong> the Side<br />
Although both arms are still being<br />
raised, the visual differences of<br />
raising the arms <strong>to</strong> the side versus<br />
forward are great.<br />
/t<br />
I<br />
\.
The lurl generally falls<br />
<strong>to</strong> waist-level.<br />
When the arms are raised, the<br />
sleeves slide back, bringing the<br />
sleeve's bot<strong>to</strong>m <strong>to</strong> a position<br />
almost identical <strong>to</strong> when the<br />
arms are raised fonruard.<br />
--+<br />
The openings at<br />
the hakama's<br />
sides extend <strong>to</strong><br />
about kneelevel.
The visible portions of tft.<br />
sleeve's interior are mort<br />
complex than one might<br />
expect, This is because<br />
sleeve of the juban<br />
appears underneath the<br />
hakui.<br />
When the arm is raised,<br />
the sleeve rolls inward,<br />
taking on a triangular<br />
shape.<br />
118
. ri ,': :: use foreshoftening properly<br />
ixut u':. <strong>draw</strong>ing a human figure. Note<br />
I rL -r attempting <strong>to</strong> add a reasonable<br />
tifltrrr!:i :n of depth, such as for a<br />
lL*r-:n ivith both arms extended <strong>to</strong> the<br />
r , '- I overemphasizing a sense of<br />
ru- :: except where intended.<br />
When the arms are raised<br />
<strong>to</strong> the side, the clothing<br />
should be <strong>draw</strong>n as if<br />
pulled upward.<br />
Creases that form around the shoulders<br />
change according <strong>to</strong> whether the arms are<br />
raised forward or <strong>to</strong> the side. When the<br />
arms are raised forward, the fabric<br />
becomes wrapped around the arms and<br />
appears <strong>to</strong> be lifted up.<br />
121
The flow of folds and creases lets the<br />
character take on a three-dimensional<br />
appearance, making them indispensable <strong>to</strong><br />
suggesting volume and weight.<br />
122
,,t
One Arm Raised Fonruard<br />
Light source<br />
When the inside<br />
of the sleeve is<br />
opposite the<br />
light source,<br />
putting it in<br />
shade, a<br />
shadow is also<br />
cast across the<br />
body. The size ol<br />
this shadow<br />
changes<br />
according <strong>to</strong> the<br />
angle of the<br />
light source.<br />
Shading inside<br />
the sleeve<br />
The shadow<br />
indicated by<br />
the arrow is<br />
serving as an<br />
accent. Avoid<br />
overusing<br />
shading in +<br />
this manner.<br />
While gravity is pulling<br />
the sleeve down, the<br />
furi curls inward,<br />
causing it <strong>to</strong> take on a<br />
weightier look.<br />
A 50-line screen <strong>to</strong>ne of<br />
30% density was used<br />
on the sleeve in this<br />
illustration.<br />
124
Note the facing side of<br />
the arm.<br />
125
\\<br />
BI<br />
:$\;/<br />
126
The hakuls form alters according<br />
<strong>to</strong> the angle at which the arm is<br />
raised. As shown on this page, the<br />
shapes of the shoulders and back<br />
still change even when the raised<br />
arm is hidden by the body.<br />
When the arm is lowered,lhe furi<br />
GMng Volume <strong>to</strong> Creases and Folds<br />
Hgure A shows the typical curved line used for a crease, We do<br />
not have a sense of the crease's depth, raising the question of<br />
how <strong>to</strong> achieve such an effect.One way is <strong>to</strong> attach screen <strong>to</strong>ne<br />
<strong>to</strong> he side of the crease, creating a three-dimensional look.<br />
Anofier way is <strong>to</strong> <strong>draw</strong> a curve as shown in Figure B, where the<br />
firsl line starts at PointA and then a second line is <strong>draw</strong>n<br />
on'"
frmme Arm Raised <strong>to</strong> the Side<br />
An arm raised <strong>to</strong><br />
this level only<br />
generates a small<br />
number of<br />
creases.<br />
When the arm is raised above a<br />
line parallel <strong>to</strong> the horizon,<br />
creases appear in abundance,<br />
as if being pulled by the upper<br />
arm. Raising the arm even<br />
higher results in the sleeve<br />
sliding back and the fabric<br />
overlapping.<br />
i
Shading is added <strong>to</strong> suggest<br />
volume. <strong>How</strong>ever, the<br />
illustration above shows that<br />
judicious use of solid black can<br />
be an effective means of<br />
evoking a sense of depth and<br />
pulling <strong>to</strong>gether the<br />
composition.<br />
130
131
The seam attaching the<br />
shoulder of the hakul<strong>to</strong> the<br />
sleeve is somewhat lower on<br />
the arm.<br />
+<br />
I<br />
The armhole and the furibend<br />
and fold as if they were<br />
separate pieces.<br />
}<br />
Vt<br />
Creases wrapping<br />
around the arm<br />
appear<br />
simultaneously with<br />
creases and ripples<br />
formed from the cloth<br />
being pulled upward.<br />
JZ
There are cascading ripples<br />
down from just below the<br />
wrist. These are<br />
undulations in the cloth<br />
that curve downward when<br />
it is suspended lightly from<br />
both the right and left, and<br />
also form when the fabric<br />
hangs from one side.<br />
133
The Arms Grossed<br />
This shadow<br />
formed from the<br />
seam retaining<br />
a crease from<br />
when the<br />
garment was<br />
folded.0mit<br />
lines and<br />
shadows<br />
according <strong>to</strong><br />
your personal<br />
style when<br />
creating your<br />
own <strong>draw</strong>ing.
,Lllding a Broom<br />
: -1Qo of a miko holding a broom<br />
:-mmon, it is indispensable. For<br />
rj: ] pose, <strong>draw</strong> the broom on the<br />
I '; against it.
The expanse otlhe hakuls<br />
sleeve from <strong>to</strong>p <strong>to</strong> bot<strong>to</strong>m is<br />
generous, allowing for a large<br />
shadow <strong>to</strong> form. The illustration<br />
<strong>to</strong> the left features a shadow<br />
extending from the shoulder<br />
<strong>to</strong> the elbow, Use bold shading.<br />
N<<br />
,/\) /Al<br />
:":,",",,,,,.,,,<br />
/- "<br />
\*<br />
JO
This large shadow works<br />
well with the composition.<br />
Be sure <strong>to</strong> use it as a<br />
reference.
Looking at a character with the<br />
arms bent, the sleeve otlhe hakui<br />
seems almost <strong>to</strong> float around the<br />
arm from the elbow. This is<br />
because lhe hakuls material is<br />
extremely stiff in texture. As a<br />
comparison, it is somewhat heavier<br />
than the material used in a man's<br />
dress shirt.<br />
The furi hanging under the sleeve<br />
often appears <strong>to</strong> be wrapped<br />
around the arm. Being aware of this<br />
point when looking at these sample<br />
<strong>draw</strong>ings will help you take your<br />
own artwork <strong>to</strong> the next level.<br />
140<br />
\<br />
Use expansive shading and then add just a <strong>to</strong>uch of<br />
highlight. Add darker shading if the result appears flat.
,sitting Seiza-style (Legs Tucked Underneath)<br />
The <strong>to</strong>p of the hakama is<br />
situated somewhat above the<br />
waist, and when the figure is<br />
seated selza-style, the obi<br />
ends up in an unexpectedly<br />
high position. As a guideline,<br />
use a 1:1 ratio ol hakui<br />
(measured from the back of<br />
the neck) <strong>to</strong> hakamawhen<br />
<strong>draw</strong>ing. The obi should be<br />
placed midway. This is an easy<br />
area <strong>to</strong> overlook, so take care.<br />
A great technique for<br />
suggesting a slight<br />
bend <strong>to</strong> the arm under<br />
the sleeve is <strong>to</strong> add a<br />
ripple line from the<br />
elbow. lncidentally, this<br />
is about how the arm<br />
would appear when<br />
sitting serZa-style.<br />
Remember when <strong>draw</strong>ing the<br />
hakama that the knees are<br />
underneath.<br />
1$ i\<br />
\1r<br />
\it.<br />
I ,,I,,,,tr<br />
\ \i<br />
\$<br />
The cloth is drooping down<br />
somewhat. <strong>How</strong>ever, crease<br />
lines have been clearly<br />
delineated from the area<br />
where the knees are,<br />
suggesting their presence<br />
underneath. lf you are able<br />
<strong>to</strong> suggest a human form<br />
IE underneath clothing using<br />
minimal crease lines and<br />
shading in this manner,<br />
then you have reached an<br />
advanced level of character<br />
<strong>draw</strong>ing.<br />
141
Bowing While Seated Seiza-style<br />
The shoulders shift fonntard and back, albeit slightly. When the chest is<br />
puffed out and the character is leaning back, then the shoulders roll<br />
back. Conversely, when the back is slumped and the character bends<br />
#i#<br />
forward, then the shoulders roll <strong>to</strong>ward the front.<br />
The shoulders roll-<br />
This shows the viewer<br />
that there are shoulders<br />
and a back underneath<br />
the kimono. Give<br />
consideration <strong>to</strong> the<br />
position of the shoulders<br />
and back when <strong>draw</strong>ing<br />
the character.<br />
142<br />
Avoid being imprecise when <strong>draw</strong>ing the lines of<br />
lhe hakama. Give careful thought <strong>to</strong> the structure<br />
of the hips and posterior before <strong>draw</strong>ing.
Sitting with Legs Tucked <strong>to</strong> the Side<br />
ln any painting or sketch, the<br />
shoulder gains a sense of volume<br />
from surrounding creases and<br />
shading. The loose and drooping cloth<br />
of the miko's robes allows ample<br />
opportunity for suggesting the body<br />
underneath.<br />
The figure <strong>to</strong> the left shows the three<br />
lines used <strong>to</strong> give the shoulder a sense<br />
of presence. Main lines are indicated<br />
by the arrows.<br />
This line extending from the<br />
shoulder suggests<br />
bagginess in the kimono.<br />
Shading creates the appearance of a<br />
knee underneath.<br />
143
Keep in mind these lines<br />
fiat are obscured from view<br />
by the folding ot the furi.<br />
Screen <strong>to</strong>ne used<br />
here represents the<br />
shadows formed by a<br />
Y-shaped ripple, as<br />
seen in the illustration<br />
below. Here, only the<br />
-
Reclining<br />
r i::ne of a miko sleeping<br />
" -e. robes is unusual and<br />
:r:i repreSented.<br />
r,r{,,?lf eless, here afe<br />
r *e sample illustrations<br />
::r -:ference.
Irl s difiuauft <strong>to</strong> visualize how the loose skirt of the<br />
hifulrama tred hakamd will appear on a sleeping<br />
fgr.rre. Use fie samples offered in this book as<br />
reference.<br />
146
The upper body is<br />
twisted a bit <strong>to</strong> the left;<br />
therefore, although<br />
some interspersing is<br />
allowable, creases<br />
appearing on the<br />
character's back should<br />
appear <strong>to</strong> be pulled<br />
primarily <strong>to</strong>ward the left<br />
shoulder.<br />
Fabric tends <strong>to</strong> hug closely <strong>to</strong> any protruding<br />
parts of the body. Thus, not many creases<br />
would appear in a <strong>to</strong>p sufface such as this. By<br />
the same <strong>to</strong>ken, since this is a <strong>to</strong>p surface, it<br />
tends <strong>to</strong> be exposed <strong>to</strong> light, making it appear<br />
pure white. Try <strong>to</strong> use this <strong>to</strong> your advantage,
The hakama is not an afticle that fits snugly against the body. Consequently,<br />
the fabric tends <strong>to</strong> rumple and shift at will depending on the character's<br />
position, taking on forms beyond what the artist generally anticipates. This<br />
makes it difficult <strong>to</strong> <strong>draw</strong>. Rather than taking on the impossible task of<br />
rendering every wrinkle possible, just <strong>draw</strong> them in a convincing way. To<br />
achieve this, first produce a rough sketch of the figure. Then add creases<br />
and ripples of fabric along the body's con<strong>to</strong>urs. Strategically place key lines<br />
such as seams and folds, and simply add the rest wherever it seems<br />
appropriate.<br />
The key here is<br />
giving rounded<br />
edges <strong>to</strong> the folds,<br />
Have seams and folds lollow the<br />
curves of the body.<br />
148<br />
arrow is permissible, provided it follows the<br />
body's lines.
Even though the clothing is rumpled owing <strong>to</strong> the<br />
position of the character, it still retains points that<br />
strike the viewer's recollection. Be sure <strong>to</strong> add such<br />
points. The close-up of the fold running from center of<br />
the hakana (illustration <strong>to</strong> the left) is such a point.<br />
149
u$rn<br />
Official books<br />
Starter kits<br />
Pens and nibs<br />
Gopic markers<br />
Tones and <strong>to</strong>ols<br />
lnstructional videos<br />
Japanese <strong>manga</strong> paper<br />
Artists' bulletin board<br />
Imtw.h owl0 il tawm a n u a.G0 m<br />
Your officio[ source for outhentic loponese mqngo supplies<br />
To moster the ort of mongo, you need the proper <strong>to</strong>ols.<br />
Butyou don't hove <strong>to</strong>trqvelollthewoy<strong>to</strong> Jopon <strong>to</strong> find them.<br />
Shop online of www.how<strong>to</strong>drowmongo.com. lt's where the pros go.<br />
2-8-L02 NAKA-CHO, KAWAGUCHI-SHI, SAITAMA 332-0022 JAPAN I PHONE/FAX +81-48-259-3444 o EMAIL sales@japanime.coo'<br />
Guorqnteed Wortdwide Delivery We Accept Atl Moior Credit Cqrds Secure Online Shoppinq<br />
FecB(<br />
iid@Pffi@<br />
#Iour"J* :$jliT,
us $19.99<br />
About the Authors<br />
Tatsuhiro Ozakiwas born in Hokkaido in<br />
September of 1964.Upon graduating from high<br />
school, a strong desire <strong>to</strong> <strong>draw</strong> despite a professed<br />
lack of talent brought a reckless and solitary Ozaki<br />
<strong>to</strong>Jokyo. Lacking the funds <strong>to</strong> attend a technical<br />
school, he instead went directly <strong>to</strong> various<br />
animation studios, demanding work, until he was<br />
accepted. After gaining a year of experience, Ozaki<br />
became the assistant of a professional <strong>manga</strong> artist<br />
and apprenticed under various other professionals,<br />
before finally debuting himself has a <strong>manga</strong> artist.<br />
Ten years later, he established the Society for the<br />
Study of Manga Techniques. He attributes his<br />
current success <strong>to</strong> all that he has observed and his<br />
many experiences, as well as <strong>to</strong> having taught<br />
himself the trade.<br />
Unkaku Koyama was born on Aug.10,1967.A<br />
longtime <strong>manga</strong> enthusiast, Koyama launched his<br />
professional career in 1986 as an assistant in the<br />
production of Kazushi Hagiwara's acclaimed work<br />
"Bastard #1." ln 1988, Koyama was named<br />
Hagiwara's chief assistant for <strong>to</strong>ne work and placed<br />
in charge of several novice assistants.Within a few<br />
years,the up-and-coming artist was enjoying<br />
success as a freelance artist as well as a professional<br />
assistant at Shueisha Co., Kadokawa Shoten<br />
Publishing Co.and other publishing houses,where<br />
he produced <strong>to</strong>ne work and backgrounds for a<br />
number of <strong>manga</strong> artists. He is currently a chief<br />
assistant for Haruhiko Mikimo<strong>to</strong>'s "Macross 7Trash,"<br />
and is also actively involved with Comptiq Monthly,<br />
Cabinet lnc. and the Manga Technical Workshop.<br />
Koyama has published several works under the pen<br />
name Toshiaki Misuzumi, including the popular<br />
"Uchu Bishoujo Shari" (France Shoin lnc.).<br />
www. h ow<strong>to</strong>d rawm an ga. co m
'IilililIililililIIIIil<br />
tl[lluJflffiJllfiil<br />
rsBN r+-7hEl,-131,?-1<br />
www. h ow<strong>to</strong>d rawm an ga. co m<br />
BORONTA 9762 4099 HEALESVTLLE ........5962 4423<br />
FTG ....._................_ ... 9294 A140 L|LYDALE s2g4 3120<br />
KNOX.................... ... 9801 1422 MONTROSE ......... ... 97294224<br />
KNOX MOB|LE........ 9762 4099 MOOROOLBARK .... 9726 82oO<br />
ROWVTLLE ..............9294.1300 MT EVELYN ............ 9736 3851<br />
CRoYDON .............. 9294 5640 RANGES MOBTLE ..97547266<br />
YARRA JUNCTION 5967 1588