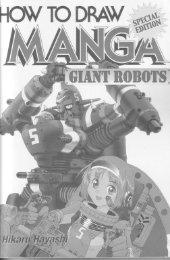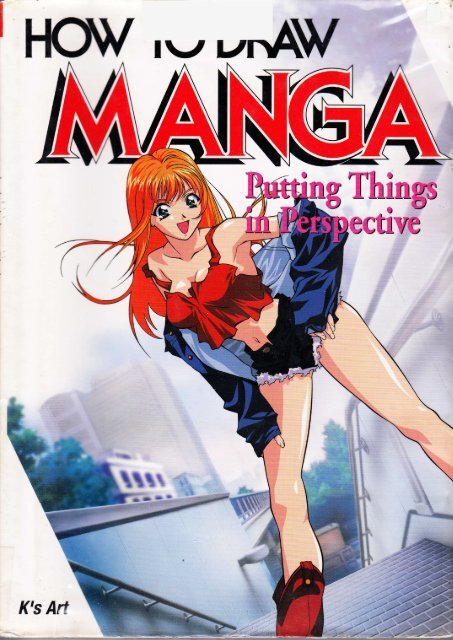
How to draw manga - Putting Things in Perspective

Create successful ePaper yourself
Turn your PDF publications into a flip-book with our unique Google optimized e-Paper software.
EASTERN REGIONAL LIBRARIES<br />
lryruryw<br />
EI<br />
t,<br />
.*<br />
t&.%%<br />
X?*.**<br />
K's Art
Collect all volumes of the exch<strong>in</strong>g<br />
HOW TO DRAW series.<br />
J]I"TI<br />
FEMALE CHARACTERS<br />
t5BN4-7661 1146_X<br />
ILLUSTRATING BATTLES<br />
ISBN4 7661-1 147_8<br />
BISHOUJO - Pretty Gals<br />
t5BN4-7661-1 148_6<br />
il6lrcUJ0 Aroqd ttre World<br />
5iih.!--56'-- 14+4<br />
OCCULT & HORROR<br />
t5BN4-7661 -1 1 50_8<br />
BODIES & ANATOMY<br />
ISBN4-766 I -1 238-5<br />
lsl/ xcDRts/<br />
MAKING ANIME<br />
ISBN4-7661 -1 239-3<br />
-rEiti:uum: }<br />
flPltilil fl{Lp?*il IruiEtI m.<br />
I-l {.mue >rr-rp:a.<br />
Iirr umnm-qu lnu<br />
l"'-[;- [ iffie1<br />
1{, *.i' -, lr_*r-i-::j-'qll{jl<br />
:uili *xj: " Iljl*:rTI*"(" Iiri<br />
:"mruli ruUmmqUrmilJm0rrliEr. re m<br />
D rsf !q-:ed Ercl usively<br />
: trr:r] l;er.:a !_1<br />
IffiflM.IL NTllSA I}GTRtsI.ITIOTI<br />
- - -': lr:ri-ll-rl-rr i: _n:<br />
.i'<br />
-agm -l :[:-l+: _ :..!-<br />
E ,. " To"e-i ,<br />
:im l- [i frlu-- - :r<br />
i ,.mm ummruuunmmnr&ry.nifrlfa :r r<br />
_i*.=. UnjUr|, :-i-;_ "-
<strong>Putt<strong>in</strong>g</strong> <strong>Th<strong>in</strong>gs</strong> <strong>in</strong> <strong>Perspective</strong><br />
Backgrounds/Crowds
HOWTO DRAW MANGA:<br />
<strong>Putt<strong>in</strong>g</strong> <strong>Th<strong>in</strong>gs</strong> <strong>in</strong> <strong>Perspective</strong><br />
by K's Art<br />
Copyright O 1 997 K's Art<br />
Copyright @ 1997 Graphic-sha Publish<strong>in</strong>g Co., Ltd.<br />
First designed and published <strong>in</strong> 1997 by Graphic-sha Publish<strong>in</strong>g Co., Ltd.<br />
This English edition was published <strong>in</strong> 2002 by<br />
Graphic-sha Publish<strong>in</strong>g Co., Ltd.<br />
1 -1 4-1 7 Kudan-kita, Chiyoda-ku, Tokyo 1 02-0073 Japan<br />
Production direc<strong>to</strong>r: KatsuyaYamakami<br />
Production manager: Hikaru Hayashi<br />
Background aftist:<br />
Maguro<br />
F<strong>in</strong>ish<strong>in</strong>g work artist: Nobuko Yuuki<br />
English title logo design: Hideyuki Amemura<br />
English edition layout: Sh<strong>in</strong>ichi lshioka<br />
English translation management: L<strong>in</strong>gua frdnca, lnc. (an3y-skmt@asahi-net.or.ip)<br />
Japanese edition edi<strong>to</strong>r: Mo<strong>to</strong>fumi Nakanish (Graphic-sha Publish<strong>in</strong>g C0., Ltd.)<br />
Foreign language edition project coord<strong>in</strong>a<strong>to</strong>r: Kumiko Sakamo<strong>to</strong> (Graphic-sha Publish<strong>in</strong>g Co., Ltd.)<br />
All rights reserved. No part of this publication may be reproduced,<br />
s<strong>to</strong>red <strong>in</strong> a retrieval system, or transmitted <strong>in</strong> any form or by any means,<br />
electronic, mechanical, pho<strong>to</strong>copy<strong>in</strong>g, record<strong>in</strong>g, or otherwise,<br />
without the prior written permission 0f the publisher<br />
Distributed by<br />
NIPP0N SHUPPAN HANBAI lNC.<br />
Distributed Exclusively<br />
ln North America by<br />
4-3 Kanda Surugadai, Digital Manga Distribution<br />
Chiyoda-ku, Tokyo<br />
1123 Dom<strong>in</strong>guez St., Unit "K"<br />
1 0 1 -871 0 Japan Carson, CA 90746, U.S.A.<br />
Tel: +81-(0)3-3233-4083 Tel: (310)- 604-9701<br />
Fax +81-(0)3-3233-4106 Fax: (310)- 604-1134<br />
E-mail: nippan@netlaputa.ne.ip E-mail: distribution@e<strong>manga</strong>.com<br />
URL:http://www.e<strong>manga</strong>.com/dmd/<br />
Hrst pr<strong>in</strong>t<strong>in</strong>g: oc<strong>to</strong>ber 2002<br />
S&i: 4-7661 -1 256-3<br />
P-n-ed ard bound <strong>in</strong> Ch<strong>in</strong>a
Backgrounds <strong>in</strong>dicate where<br />
characters are. They are <strong>draw</strong>n<br />
<strong>to</strong> illustrate places and<br />
situations.<br />
A cut with only the character<br />
A cut with the background <strong>in</strong>cluded
. Example without background<br />
l'm leav<strong>in</strong>g<br />
<strong>to</strong>r schooll<br />
Vx<br />
: :i ,: ::: :i:<br />
Ah.1omebody<br />
juet, aVpeared<br />
trom around<br />
lhe cornerl<br />
1...1 can't e<strong>to</strong>pl<br />
Oelter Lake a<br />
ehor\cuLl<br />
t<br />
E<br />
fr<br />
E<br />
PITTER-PATTER<br />
ln this scene, a girl <strong>in</strong> a hurry collides with someone at a corner. The<br />
scene is much easier <strong>to</strong> grasp with the background.
. Example with background<br />
/'1<br />
D<br />
9.<br />
.o
Table of Gontents<br />
lntroduction:Why Draw Backgrounds?......,s . <strong>How</strong> <strong>to</strong> create height ditferences<br />
Chapter 1<br />
-<br />
Rais<strong>in</strong>g and lower<strong>in</strong>g the head<br />
. An easier way <strong>to</strong> <strong>draw</strong> crowds<br />
Basics: Stand<strong>in</strong>g on the Earth .........1r Creat<strong>in</strong>g Effects by Chang<strong>in</strong>g the<br />
Beg<strong>in</strong> Draw<strong>in</strong>g Backgrounds<br />
Gomposition of a Picture...........................s0<br />
with a S<strong>in</strong>gle Horizon L<strong>in</strong>e.......................12 r Draw<strong>in</strong>g upward views<br />
. Draw<strong>in</strong>g <strong>manga</strong> is just like film<strong>in</strong>g a movie. r Three-po<strong>in</strong>t perspective <strong>draw</strong><strong>in</strong>g<br />
r Presentation: Long shots and close-ups r Ariel view of scenery -<br />
Bird's-eye view<br />
. Vanish<strong>in</strong>g po<strong>in</strong>t<br />
. Simple way <strong>to</strong> pick a vanish<strong>in</strong>g po<strong>in</strong>t<br />
<strong>How</strong> <strong>to</strong> Draw <strong>in</strong> One-Po<strong>in</strong>t <strong>Perspective</strong>: r <strong>Perspective</strong> when the ground is curved<br />
Let's Try Draw<strong>in</strong>g while<br />
Looki n g at a Pho<strong>to</strong>g raph ......... ..................23<br />
r Draw<strong>in</strong>gs suited <strong>to</strong> one-po<strong>in</strong>t perspective<br />
r Mak<strong>in</strong>g a group of build<strong>in</strong>gs<br />
<strong>in</strong> the distance look cool<br />
Let's Draw Outer Space ........65<br />
. when <strong>to</strong> use two-po<strong>in</strong>t perspective Chapter 3<br />
Distance of natural obiects:<br />
Tree-L<strong>in</strong>ed Roads/<br />
Ghapter 2<br />
Light and Shadow/Sky .......67<br />
Draw<strong>in</strong>g the Outdoors: <strong>How</strong><strong>to</strong> DrawTrees.. ....................,08<br />
From Everyday Scenery<br />
r Draw<strong>in</strong>g roadside trees<br />
..................2g r Draw<strong>in</strong>g atree-l<strong>in</strong>ed road<br />
<strong>to</strong> 0uter Space......<br />
<strong>How</strong> <strong>to</strong> Draw a Roof .,..........<br />
<strong>How</strong> <strong>to</strong> Draw Slopes<br />
<strong>How</strong> <strong>to</strong> Draw Forked Roads<br />
Draw<strong>in</strong>g Houses<br />
- When the Vanish<strong>in</strong>g Po<strong>in</strong>t is Far Away .......38 '<br />
Draw<strong>in</strong>g a Gymnasium .................40<br />
.........30 n Draw<strong>in</strong>g shrubbery<br />
..............,......34 . Leaves of roadside trees<br />
.........36 <strong>How</strong> <strong>to</strong> Draw Shad0ws.....................................72<br />
. Sunlight<br />
Light from streetlights and <strong>in</strong>door lights<br />
<strong>How</strong> <strong>to</strong> Draw Characters and Backgrounds.....42 Etfective Use of Backgrounds<br />
r Plac<strong>in</strong>g multiple characters<br />
-<br />
Slide method Basic concepts and techniques..............74<br />
r <strong>How</strong> <strong>to</strong> <strong>draw</strong> groups of students go<strong>in</strong>g <strong>to</strong><br />
or com<strong>in</strong>g home from school<br />
8
Ghapter 4<br />
Draw<strong>in</strong>g lndoor Scenes<br />
<strong>How</strong> <strong>to</strong> Make a Narrow Hallway Look Wide.....80<br />
Classroom: <strong>How</strong> <strong>to</strong> Draw Desks.......................83<br />
r Common chair/desk composition<br />
and the horizon<br />
Distance Between Characters and Walls .........88<br />
<strong>How</strong> <strong>to</strong> Draw lndoor Scenes (Liv<strong>in</strong>g room) ......90<br />
1. Draw<strong>in</strong>g the opposite wall<br />
2. Draw<strong>in</strong>g a rough sketch<br />
3. Draw<strong>in</strong>g a couch.<br />
4. Draw<strong>in</strong>g a table.<br />
5.Draw<strong>in</strong>gaWstand.<br />
Draw<strong>in</strong>g Small lndoor Objects .........................95<br />
r Small objects on tables and desks<br />
- 1<br />
Draw<strong>in</strong>g without us<strong>in</strong>g perspective<br />
. Small objects on tables and desks<br />
- 2<br />
Draw<strong>in</strong>g us<strong>in</strong>g perspective<br />
r <strong>How</strong> <strong>to</strong> <strong>draw</strong> cups: Circles on tables<br />
r Draw<strong>in</strong>g small objects<br />
Chapter 5<br />
<strong>How</strong> <strong>to</strong> Draw Backgrounds<br />
Hallways/Stairs/Small 0bjects...........7e Learn<strong>in</strong>g by Do<strong>in</strong>g. ..............10e<br />
Process of Draw<strong>in</strong>g Manga Backgrounds.,....1 1 0<br />
1. Draw<strong>in</strong>g a residential area<br />
2. Draw<strong>in</strong>g a school<br />
3. Pen <strong>draw</strong><strong>in</strong>g<br />
4. Eras<strong>in</strong>g and white correction fluid<br />
5. Add<strong>in</strong>g <strong>to</strong>ne 1 - Residential area<br />
6. Add<strong>in</strong>g <strong>to</strong>ne 2 - School<br />
Gomparison of Characters and Objects .........122<br />
Ghapter 6<br />
Special Etfects and Character<br />
Representation Us<strong>in</strong>g <strong>Perspective</strong>..l 25<br />
Draw<strong>in</strong>g Special Effect L<strong>in</strong>es and<br />
Sound Words Us<strong>in</strong>g <strong>Perspective</strong>............. .............126<br />
Creat<strong>in</strong>g a Greater Sense of Existence<br />
Us<strong>in</strong>g M<strong>in</strong>or Techniques.. ................129<br />
Draw<strong>in</strong>g with <strong>Perspective</strong> Rulers ....130<br />
Special Effects Us<strong>in</strong> g <strong>Perspective</strong> Techniques..... 1 32<br />
Us<strong>in</strong>g cellular phones as an example<br />
Draw<strong>in</strong>g Beds............ .................100<br />
Draw<strong>in</strong>g D00rs.......... .................102<br />
r Structure of doors<br />
. Open<strong>in</strong>g doors<br />
. Examples of open doors<br />
Draw<strong>in</strong>g Stairs.......... .................105<br />
. Look<strong>in</strong>g down a flight of stairs<br />
r Side view of stairs<br />
. Dist<strong>in</strong>guish<strong>in</strong>g features of stairs<br />
Various wide angles. .......................135<br />
Examples/Chang<strong>in</strong>g Camera Ang|es....................1 36
4<br />
{<br />
10
Chapter 1 Basics<br />
S<strong>to</strong>ndirg<br />
the Eorrh<br />
on
When you want <strong>to</strong> <strong>draw</strong> a<br />
picture with the ma<strong>in</strong><br />
character stand<strong>in</strong>g <strong>in</strong> a<br />
wasteland, <strong>draw</strong> a divid<strong>in</strong>g<br />
l<strong>in</strong>e between the earth and<br />
the sky (horizon). All<br />
backgrounds beg<strong>in</strong> with<br />
<strong>draw</strong><strong>in</strong>g of the horizon.<br />
/i\<br />
The expanse of the earth differs<br />
depend<strong>in</strong>g on the position of the<br />
horizon.<br />
4<br />
I<br />
/t,<br />
12<br />
Column: ln Japanese class, the divid<strong>in</strong>g l<strong>in</strong>e between the earth and the sky is called chiheisen<br />
(horizon) and the divid<strong>in</strong>g l<strong>in</strong>e between oceans and the sky is called suiheisen (horizon), but both<br />
are referred <strong>to</strong> as suiheisen <strong>in</strong> <strong>draw</strong><strong>in</strong>g.
I<br />
\.\]<br />
l<br />
When <strong>draw</strong><strong>in</strong>g the horizon, pretend like you are film<strong>in</strong>g a<br />
movie and th<strong>in</strong>k about where you will hold the camera.<br />
o<br />
ln <strong>manga</strong>, the height of the camera is the horizon.<br />
Column:Why is the horizon on land also called suiheisen <strong>in</strong> <strong>draw</strong><strong>in</strong>g? lt is called suiheisen because<br />
it is a horizontal (suihei) l<strong>in</strong>e (sen).<br />
13
Draw<strong>in</strong>q the horizon below (foot level) a character<br />
--/<br />
-<br />
-=-::=><br />
Draw<strong>in</strong>g the horizon at foot level<br />
expresses the expanse of the wasteland.<br />
This is a low-angled composition.<br />
//Wi<br />
Film<strong>in</strong>g conditions<br />
The character will float <strong>in</strong> the air when the<br />
horizon is <strong>draw</strong>n below foot level.<br />
@ Dig a hole <strong>to</strong> film from ground<br />
D<br />
\<br />
@ The edqe of a cliff is the<br />
height of the horizon<br />
\
Draw<strong>in</strong>g the horizon above<br />
a character<br />
Draw<strong>in</strong>g the horizon above the head of a character creates the sensation of look<strong>in</strong>g down on the<br />
character. The so-called bird's-eye view. This is a high-angteo composition.<br />
:<br />
.".:\\.-!1,, ,rz<br />
View<strong>in</strong>g height<br />
Film<strong>in</strong>g from radio-controlled airplane or stepladder<br />
-;:-:ally look<strong>in</strong>g down on person (bird,s_eye view of character)<br />
Bird's-eye view ard the horizon<br />
When yoti take::'ii piciiire from'*ie nonnat<br />
15
the horizon <strong>in</strong> a character<br />
You <strong>draw</strong> the horizon somewhere between<br />
the head and feet. This will create the<br />
most ord<strong>in</strong>ary view.<br />
Film<strong>in</strong>g conditions<br />
@ Low angle<br />
16
. This is often used <strong>in</strong> scenes<br />
with dialogue.<br />
. Draw the horizon at eye level<br />
when a character is mov<strong>in</strong>g <strong>in</strong><br />
this direction or for close-ups<br />
of the face.<br />
. ftis is often used for full-body<br />
"<br />
strots.<br />
Draw the horizon at bust<br />
reight when <strong>draw</strong><strong>in</strong>g the<br />
artire body (down <strong>to</strong> feet).<br />
. -lis is often used for dramatic<br />
:nesentation.<br />
. lnaw the horizon below the<br />
*rnees of a character when you<br />
rant <strong>to</strong> make a strong<br />
rnpression or give the picture<br />
i sense of depth or vastness.<br />
# 4<br />
.^-<br />
Here a character between a close-up of feet <strong>in</strong> the foreground and a character <strong>in</strong><br />
the distance create a good sense of depth.
Presentation: Long shots and cl<br />
Th<strong>in</strong>k of the<br />
difference between<br />
long shots and<br />
close-ups as a<br />
difference <strong>in</strong> camera<br />
work (presentation).<br />
A cut us<strong>in</strong>g a long outdoor shot<br />
There isn't much<br />
need <strong>to</strong> th<strong>in</strong>k about<br />
the perspective of<br />
small objects <strong>in</strong><br />
scenes us<strong>in</strong>g long<br />
shots.<br />
18<br />
Long shot...zoom oul<br />
Close-up...zoom <strong>in</strong>
,-llose-ups are used<br />
:r present hands or<br />
.nall objects.<br />
G<br />
@<br />
-se a long shot when<br />
r,t-- lvdflt <strong>to</strong> illustrate<br />
lil:-irsfh<strong>in</strong>g with an<br />
:,,:-all view. Use a<br />
: :se-up when you want<br />
: :nrphasize one part.<br />
brp<br />
rtdce-xf<br />
rnqnifed;i',ir<br />
rGEtss<br />
orapstda::<br />
rXrgdemgst<br />
.lfiire<br />
fii*angle<br />
I"nnumn: Technically, wide angle is a word used <strong>in</strong> pho<strong>to</strong>graphy. A thicker lens than usual is used <strong>to</strong> make<br />
an impressive etfect by mak<strong>in</strong>g a picture extremely dis<strong>to</strong>rted.
Vanish<strong>in</strong>g po<strong>in</strong>t<br />
The vanish<strong>in</strong>g po<strong>in</strong>t is the po<strong>in</strong>t<br />
where all perspective l<strong>in</strong>es<br />
c0nverge.<br />
A <strong>draw</strong><strong>in</strong>g technique that uses<br />
one vanish<strong>in</strong>g po<strong>in</strong>t is called<br />
one-po<strong>in</strong>t perspective. There<br />
are also two- and three-po<strong>in</strong>t<br />
perspectives, but let's learn<br />
about the vanish<strong>in</strong>g po<strong>in</strong>t us<strong>in</strong>g<br />
one-po<strong>in</strong>t perspective f irst.<br />
Vanish<strong>in</strong>g po<strong>in</strong>t<br />
Pho<strong>to</strong>graph used for reference<br />
Chang<strong>in</strong>g the position of the vanish<strong>in</strong>g po<strong>in</strong>t changes how the sides look.<br />
Column: When you <strong>draw</strong> a build<strong>in</strong>g, for <strong>in</strong>stance, th<strong>in</strong>k about whether you want <strong>to</strong> see the build<strong>in</strong>g from<br />
the right or from the left. lf you want <strong>to</strong> see the build<strong>in</strong>g from the right, place the vanish<strong>in</strong>g po<strong>in</strong>t<br />
20 <strong>in</strong> tire position shown <strong>in</strong> the right frame.
lag<strong>in</strong>e you are tak<strong>in</strong>g a<br />
: cture. lf you stand directly <strong>in</strong><br />
*cnt of your subject, the<br />
*anish<strong>in</strong>g po<strong>in</strong>t is <strong>in</strong> the middle.<br />
" iou move <strong>to</strong> the right, the<br />
,-rrish<strong>in</strong>g po<strong>in</strong>t moves <strong>to</strong> the<br />
-,::t as well.<br />
C<br />
1\<br />
oo<br />
| ..t !<br />
"-------r' 30<br />
l<br />
Side view<br />
--s is taken from the right side of the road. You can see more of the wall on the left side.<br />
This is taken from the left. You can see more of the right side of the road.
'way <strong>to</strong> pick a<br />
When you want <strong>to</strong> <strong>draw</strong> a<br />
simple build<strong>in</strong>g roof or other<br />
objects beh<strong>in</strong>d characters, use<br />
one-po<strong>in</strong>t perspective. The<br />
vanish<strong>in</strong>g po<strong>in</strong>t could be <strong>in</strong> a<br />
variety of positions, depend<strong>in</strong>g<br />
on the diagonal l<strong>in</strong>es of your<br />
outl<strong>in</strong>e. Pick a vanish<strong>in</strong>g po<strong>in</strong>t<br />
by choos<strong>in</strong>g an angle you like.<br />
Subject<br />
Completed <strong>draw</strong><strong>in</strong>g<br />
1. Draw outl<strong>in</strong>e<br />
2. Draw horizon<br />
ll<br />
'il ll ,<br />
'l ..{<br />
;*' :<br />
't<br />
:1 -"<br />
I<br />
'll ,*-\<br />
:-" *l*,<br />
\l<br />
'r<br />
-("<br />
-<br />
3. Pick vanish<strong>in</strong>g po<strong>in</strong>t<br />
Column: 0nce you have picked a vanish<strong>in</strong>g<br />
po<strong>in</strong>t, <strong>draw</strong> a rough sketch. lgnore the<br />
other perspective l<strong>in</strong>es of the outl<strong>in</strong>e<br />
and <strong>draw</strong> all the l<strong>in</strong>es <strong>in</strong> the direction<br />
of just the one vanish<strong>in</strong>g po<strong>in</strong>t.<br />
Regard<strong>in</strong>g background and<br />
perspective, once you get used <strong>to</strong> this,<br />
you can beg<strong>in</strong> <strong>draw</strong><strong>in</strong>g a rough sketch<br />
by first pick<strong>in</strong>g a horizon and a<br />
vanish<strong>in</strong>g po<strong>in</strong>t when <strong>draw</strong><strong>in</strong>g the<br />
outl<strong>in</strong>e of the image.<br />
Extend diagonal l<strong>in</strong>e of outl<strong>in</strong>e.<br />
The po<strong>in</strong>t where it meets the horizon l<strong>in</strong>e<br />
becomes the vanish<strong>in</strong>g po<strong>in</strong>t.
:Whil0:'..l0ok<strong>in</strong>gr,, 01,, n<br />
ien <strong>draw</strong><strong>in</strong>g backgrounds,<br />
,: sts often refer <strong>to</strong><br />
: -:<strong>to</strong>graphs that they have<br />
"..en. <strong>Perspective</strong> <strong>draw</strong><strong>in</strong>g is<br />
-, most efficient way <strong>to</strong><br />
: -Juce a good <strong>draw</strong><strong>in</strong>g, so<br />
. s get comfortable with it.<br />
Reference pho<strong>to</strong>graph<br />
sketch of the background and choose a horizon and<br />
,,,' a rough <strong>draw</strong><strong>in</strong>g<br />
-; :ho<strong>to</strong>graph while<br />
- '<br />
: :re depth l<strong>in</strong>es<br />
t:<br />
: - l ngs and the<br />
-:ortant <strong>to</strong> grasp<br />
-- .,:'all picture.<br />
'. - :-..oso the road<br />
*.<br />
,," :"aw<strong>in</strong>g the<br />
,,r r--.Jfld, simplify<br />
r"-:parts<br />
- :r - : 'lg 0n y0ur<br />
, -,; tid needs (note<br />
"<br />
- *: cho<strong>to</strong>graph is<br />
, ": ':'reference<br />
: L-r':nr Horizon and vanish<strong>in</strong>g po<strong>in</strong>ts<br />
- ln pho<strong>to</strong>graphs the vanish<strong>in</strong>g po<strong>in</strong>t is often not clear.<br />
It is important that you choose a clear horizon and vanish<strong>in</strong>g po<strong>in</strong>t for your <strong>draw</strong><strong>in</strong>g.<br />
23<br />
'lh
ffi Completed rough sketch<br />
ffi<br />
Ren <strong>draw</strong><strong>in</strong>g<br />
Draw<br />
th<strong>in</strong> l<strong>in</strong>es.<br />
Start with the foreground.<br />
Make foreground l<strong>in</strong>es bold and l<strong>in</strong>es <strong>in</strong> the distance th<strong>in</strong>.<br />
Leave w<strong>in</strong>dows and other details for last.<br />
Con<strong>to</strong>ur l<strong>in</strong>es<br />
24<br />
Draw<strong>in</strong>g th<strong>in</strong> non-con<strong>to</strong>ur<br />
l<strong>in</strong>es creates a threedimensional<br />
etfect.
ffi Completion of pen <strong>draw</strong><strong>in</strong>g, eras<strong>in</strong>g and apply<strong>in</strong>g white-out<br />
Erase completely after f<strong>in</strong>ish<strong>in</strong>g the pen <strong>draw</strong><strong>in</strong>g.<br />
Correct protrud<strong>in</strong>g l<strong>in</strong>es and other anomalies after eras<strong>in</strong>g.<br />
I .' -se solid colors if you want<strong>to</strong> create an overallwhite <strong>draw</strong><strong>in</strong>g<br />
, '* . c'ht feel<strong>in</strong>g.<br />
- - :',,,,,<strong>in</strong>9 is complete. Lighfly apply <strong>to</strong>ne <strong>to</strong> shaded areas.<br />
- , .:cut where the light (sun)and shadows are when apply<strong>in</strong>g <strong>to</strong>ne.<br />
,r' ; ! .,,, <strong>to</strong>ne is applied under the eaves and <strong>to</strong> the sides of build<strong>in</strong>gs.<br />
25
Draw<strong>in</strong>gs suited <strong>to</strong> one-po<strong>in</strong>t perspective<br />
One-po<strong>in</strong>t perspective is short for "one-po<strong>in</strong>t<br />
perspective <strong>draw</strong><strong>in</strong>g." This technique is suited<br />
<strong>to</strong> <strong>draw</strong><strong>in</strong>g <strong>in</strong>door scenes and creat<strong>in</strong>g a sense<br />
of depth.<br />
Road (ma<strong>in</strong> road and side roads, etc.)<br />
Road with wall and build<strong>in</strong>gs with w<strong>in</strong>dows, etc.
Vanish<strong>in</strong>g po<strong>in</strong>t<br />
ln a one-po<strong>in</strong>t <strong>draw</strong><strong>in</strong>g, you can only see the<br />
front of an object when the vanish<strong>in</strong>g po<strong>in</strong>t<br />
comes from with<strong>in</strong> the object,<br />
27
When <strong>to</strong> use two-po<strong>in</strong>t perspective<br />
Two-po<strong>in</strong>t perspective <strong>draw</strong><strong>in</strong>g is<br />
a technique suited <strong>to</strong> creat<strong>in</strong>g a<br />
three-dimensional effect or a<br />
demand<strong>in</strong>g presence. Use twopo<strong>in</strong>t<br />
perspective <strong>draw</strong><strong>in</strong>g when<br />
there are many build<strong>in</strong>g stand<strong>in</strong>g<br />
side by side or when you can see<br />
two sides of build<strong>in</strong>gs.<br />
0ffice build<strong>in</strong>gs <strong>draw</strong>n with one-po<strong>in</strong>t perspective<br />
Office build<strong>in</strong>gs <strong>draw</strong>n with two-po<strong>in</strong>t perspective<br />
Use a long shot when you want <strong>to</strong> illustrate someth<strong>in</strong>g with an<br />
overall view. Use a close-up when you want <strong>to</strong> emphasize one pafi.<br />
vanish<strong>in</strong>g po<strong>in</strong>t<br />
28
Chopter 2<br />
Drqw<strong>in</strong>gtheOff<strong>in</strong>t<br />
Frcm hrerydoyScenety ilo<br />
Outer Spqce
Th<strong>in</strong>k of a roof as<br />
be<strong>in</strong>g on <strong>to</strong>p of a -71\<br />
box.Anybody can R<br />
ciraw a roof as<br />
li:iff',i:t
<strong>in</strong>k this corner and the<br />
ranish<strong>in</strong>g po<strong>in</strong>t and then<br />
:rtend the l<strong>in</strong>e.<br />
The l<strong>in</strong>e <strong>draw</strong>n straight <strong>to</strong> the<br />
side of the apex of the roof<br />
makes the roof look more<br />
realistic.<br />
Supplementary l<strong>in</strong>e<br />
liwnsr<strong>in</strong>g po<strong>in</strong>t<br />
l<strong>in</strong>e 6 parallel<strong>to</strong><br />
the slanted l<strong>in</strong>e on this<br />
side of the roof.<br />
',I<br />
' Draw l<strong>in</strong>e @ from the<br />
po<strong>in</strong>t of <strong>in</strong>tersection of<br />
l<strong>in</strong>es @ and @.<br />
Draw l<strong>in</strong>e @ right along<br />
the center.<br />
,6@<br />
L<strong>in</strong>e @ can be <strong>draw</strong>n only after the supplementary l<strong>in</strong>e @ has been <strong>draw</strong>n.
Thickness l<strong>in</strong>es are at<br />
right angles <strong>to</strong> the<br />
slanted l<strong>in</strong>es.<br />
Judge the length witf<br />
your eyes.<br />
Ditferent types of roofs<br />
1=<br />
Draw shadows under the eaves.
0u can <strong>draw</strong> these k<strong>in</strong>ds of roofs with this technique.<br />
* urr-.ll <strong>in</strong> the samurai house style.
Create a vanish<strong>in</strong>g po<strong>in</strong>t<br />
for slopes <strong>in</strong> addition <strong>to</strong><br />
the normal vanish<strong>in</strong>g<br />
po<strong>in</strong>t on the horizon l<strong>in</strong>e.<br />
Build<strong>in</strong>gs are <strong>draw</strong>n<br />
based on the normal<br />
vanish<strong>in</strong>g po<strong>in</strong>t, while<br />
slopes are based on the<br />
slope vanish<strong>in</strong>g po<strong>in</strong>t.<br />
.i..*:- Slope vanish<strong>in</strong>g Po<strong>in</strong>t<br />
Drawn <strong>in</strong>conectly<br />
t ar,<br />
,<<br />
(B 'l{<br />
When you <strong>draw</strong> two vanish<strong>in</strong>g<br />
po<strong>in</strong>ts veftical <strong>to</strong> each other,<br />
make sure they are on a<br />
straight veftical l<strong>in</strong>e.<br />
Slope vanish<strong>in</strong>g po<strong>in</strong>t<br />
.&/<br />
Draw build<strong>in</strong>gs <strong>in</strong> one-po<strong>in</strong>t,<br />
perspective us<strong>in</strong>g the<br />
normal vanish<strong>in</strong>g po<strong>in</strong>t.<br />
Po<strong>in</strong>ts where vertical<br />
build<strong>in</strong>g l<strong>in</strong>es and the road<br />
(slope) <strong>in</strong>tersect. The<br />
extended l<strong>in</strong>es that l<strong>in</strong>k<br />
these po<strong>in</strong>ts and the<br />
vanish<strong>in</strong>g po<strong>in</strong>t become tht<br />
l<strong>in</strong>es for the floors<br />
(foundations) of build<strong>in</strong>gs.<br />
Guardrails are located<br />
on the edges of roads,<br />
so their l<strong>in</strong>es converge<br />
on the slope vanish<strong>in</strong>g<br />
po<strong>in</strong>t.
Floor l<strong>in</strong>e of<br />
the build<strong>in</strong>g<br />
Uphill slope<br />
vanish<strong>in</strong>g po<strong>in</strong>t ----.-<br />
Houses are not built slanted<br />
Fiil<br />
ic'a,rhill slope<br />
:rsh<strong>in</strong>g po<strong>in</strong>t<br />
Road l<strong>in</strong>e<br />
For downhill slopes, place the downhill<br />
slope vanish<strong>in</strong>g po<strong>in</strong>t below the horizon.<br />
is impoftant <strong>to</strong> <strong>draw</strong> a foundation so<br />
that the house will stand straight up.<br />
Express a slope by the difference<br />
between the road l<strong>in</strong>e and the floor<br />
l<strong>in</strong>e of the build<strong>in</strong>g.<br />
)eate a vanish<strong>in</strong>g po<strong>in</strong>t for slopes <strong>in</strong> addition <strong>to</strong> the normal<br />
renish<strong>in</strong>g po<strong>in</strong>t.<br />
lrnurm: Characters on slopes -<br />
Draw characters above the horizon as if you were look<strong>in</strong>g up at<br />
them and characters below the horizon as if you were look<strong>in</strong>g down on them.<br />
35
Th<strong>in</strong>k of a forked road as an<br />
<strong>in</strong>tersection of two roads with<br />
differ<strong>in</strong>g vanish<strong>in</strong>g po<strong>in</strong>ts.<br />
Aerial pho<strong>to</strong>graph<br />
Vanish<strong>in</strong>g po<strong>in</strong>t A of a<br />
straight road<br />
Vanish<strong>in</strong>g po<strong>in</strong>ts B and A<br />
C of branch<strong>in</strong>g roads To vanish<strong>in</strong>g<br />
Po<strong>in</strong>t B<br />
To vanish<strong>in</strong>g po<strong>in</strong>t A<br />
Roads B and C <strong>in</strong>tersect at a right angle
O Choose road vanish<strong>in</strong>g po<strong>in</strong>ts<br />
#<br />
@ Draw roads from each vanish<strong>in</strong>g po<strong>in</strong>t<br />
BA<br />
B hamnl<strong>in</strong>uation<br />
The closer the road is <strong>to</strong> the horizon, the narrower it will look, so<br />
be careful not <strong>to</strong> make roads B and C <strong>to</strong>o wide.<br />
Build<strong>in</strong>gs stand along the road, so<br />
the road vanish<strong>in</strong>g po<strong>in</strong>t serves as<br />
the perspective.<br />
Vanish<strong>in</strong>g po<strong>in</strong>t
What do you do when the vanish<strong>in</strong>g<br />
po<strong>in</strong>t of the build<strong>in</strong>g you want <strong>to</strong><br />
<strong>draw</strong> is located off the paper? There<br />
are three th<strong>in</strong>gs you can do.<br />
'1 . Add paper<br />
2. Use a copier<br />
3. Draw guidel<strong>in</strong>es<br />
H<br />
4.'<br />
D--<br />
@<br />
Attach temporarily<br />
with mask<strong>in</strong>g tape,<br />
etc.<br />
O Draw a rough sketch <strong>in</strong> a size that is easy<br />
<strong>to</strong> <strong>draw</strong><br />
@ Make an enlarged copy<br />
Use a copier <strong>to</strong> enlarge the rough sketch <strong>to</strong><br />
the desired size.<br />
@ Trace<br />
Put trac<strong>in</strong>g paper or transparent PPC (copy) paper over the<br />
enlarged rough sketch and <strong>draw</strong> with pen.<br />
JO
3nce you have decided on the outer border of<br />
lte build<strong>in</strong>g, partition the vertical l<strong>in</strong>es.<br />
@ L<strong>in</strong>k each partition po<strong>in</strong>t<br />
@ Start <strong>draw</strong><strong>in</strong>g us<strong>in</strong>g the l<strong>in</strong>es as a guide<br />
gw<br />
loilumn' One trick is <strong>to</strong> <strong>draw</strong> the partition l<strong>in</strong>es us<strong>in</strong>g yellow or blue colored pencits (yellow and<br />
blue wiil not show up when pr<strong>in</strong>ted). rt is usua[y on one side or the other that the<br />
vanish<strong>in</strong>g po<strong>in</strong>t becomes so far away that you cannot reach it with a ruler.<br />
3ei<br />
l<br />
i<br />
I<br />
I<br />
1<br />
I
When <strong>draw</strong><strong>in</strong>g a<br />
build<strong>in</strong>g, capture<br />
the dist<strong>in</strong>ctive<br />
features of the<br />
build<strong>in</strong>g.<br />
Draw wide<br />
build<strong>in</strong>gs like a<br />
gymnasium<br />
us<strong>in</strong>g two-po<strong>in</strong>t<br />
perspective.<br />
Dist<strong>in</strong>ctive features of gymnasiums<br />
Exterior: Many are wide and have a round roof.<br />
lnterior: Spacious. Try <strong>to</strong> present them <strong>in</strong> a way that<br />
makes them look spacious.<br />
@ F<strong>in</strong>d the apex of the arc<br />
O Give the gymnasium shape<br />
@ Draw the roof us<strong>in</strong>g an oval template<br />
When giv<strong>in</strong>g the gymnasium shape, enclose<br />
the roof portion <strong>in</strong> a box.<br />
<strong>How</strong> <strong>to</strong> align the oval template:<br />
The type of oval you choose depends 0n your<br />
preferences and the image you have of the roof.
,Mne fie floor and wails big <strong>to</strong> express the spaciousness and height of tne nullng.<br />
When you <strong>draw</strong> a scene close <strong>to</strong> a wall, create the<br />
atmosphere of a gymnasium by <strong>in</strong>clud<strong>in</strong>g w<strong>in</strong>dows<br />
near the floor, protective bars on w<strong>in</strong>dows and other<br />
dist<strong>in</strong>ctive objects.<br />
You can present a wide-open space by putt<strong>in</strong>g the<br />
floor l<strong>in</strong>es higher and <strong>draw</strong><strong>in</strong>g w<strong>in</strong>dows smafler.<br />
41
When <strong>draw</strong><strong>in</strong>g backgrounds, the<br />
size of characters is very impoftant.<br />
Here you will learn how <strong>to</strong> <strong>draw</strong> a<br />
background from the perspective of<br />
characters.<br />
Sense of distance of<br />
characters stand<strong>in</strong>g <strong>in</strong><br />
a straiqht l<strong>in</strong>e<br />
Let's try figur<strong>in</strong>g out the vanish<strong>in</strong>g<br />
po<strong>in</strong>t and horizon from the wall<br />
<strong>draw</strong>n beh<strong>in</strong>d these characters<br />
stand<strong>in</strong>g <strong>in</strong> a straight l<strong>in</strong>e.<br />
i<br />
,,1<br />
a<br />
^/H V I<br />
&<br />
v<br />
I<br />
I<br />
o.<br />
MI<br />
\)v<br />
The three characters are Pretty<br />
much <strong>in</strong> a straight l<strong>in</strong>e when seer<br />
from above.<br />
The horizon is the<br />
same height as the<br />
face of Girl A. These<br />
three characters are<br />
-* stand<strong>in</strong>g <strong>in</strong> a straight<br />
l<strong>in</strong>e, so even if there is<br />
a height difference<br />
between the<br />
characters, the<br />
relationship of the<br />
other two characters is<br />
like that shown <strong>in</strong> the<br />
side view.<br />
When viewed from the side, GirlA is the only one that<br />
fits <strong>in</strong> with the background.<br />
t<br />
Vanish<strong>in</strong>g poi<br />
1. L<strong>in</strong>k the feet of GirlA with the vanish<strong>in</strong>g<br />
po<strong>in</strong>t.<br />
2. S<strong>in</strong>ce the three characters are stand<strong>in</strong>g ir<br />
straight l<strong>in</strong>e, move the other two character<br />
<strong>to</strong> the same l<strong>in</strong>e as GirlA.<br />
42
Vanish<strong>in</strong>g po<strong>in</strong>t<br />
/<br />
characters on the same perspective l<strong>in</strong>e<br />
ff: <strong>in</strong> a straight l<strong>in</strong>e.<br />
-\- <strong>Perspective</strong> l<strong>in</strong>e<br />
43
lac<strong>in</strong>g multiple characters<br />
-<br />
Slide method<br />
1. Draw the orig<strong>in</strong>al character.<br />
2. Choose an appropriate vanish<strong>in</strong>g<br />
po<strong>in</strong>t, l<strong>in</strong>k it <strong>to</strong> the character and<br />
<strong>draw</strong> characters <strong>in</strong> front of and<br />
beh<strong>in</strong>d the orig<strong>in</strong>al character.<br />
Note:All the characters are the same height<br />
Choose a vanish<strong>in</strong>g po<strong>in</strong>t near the<br />
orig<strong>in</strong>al character.<br />
You can choose any number<br />
of vanish<strong>in</strong>g po<strong>in</strong>ts for<br />
plac<strong>in</strong>g characters.<br />
,,t<br />
0rig<strong>in</strong>ahharacter<br />
Y<br />
I<br />
- - -1- - - - - - -- -L - - - *- - - -- - -<br />
New vanish<strong>in</strong>g po<strong>in</strong>t New vanish<strong>in</strong>g po<strong>in</strong>t<br />
Randomly choose<br />
vanish<strong>in</strong>g po<strong>in</strong>ts<br />
lL<br />
Column: Place multiple characters by slid<strong>in</strong>t'one character. You can th<strong>in</strong>k of it as placement by<br />
reproduction/movement.
f<br />
oraw one character<br />
Draw<strong>in</strong>g groups of characters can be quite difficult. lf you<br />
don't <strong>draw</strong> them carefully, characters can look like they<br />
are float<strong>in</strong>g or s<strong>in</strong>k<strong>in</strong>g or they will not fit <strong>in</strong> with the<br />
background.<br />
Process:<br />
1. Draw a character around which the other characters will<br />
be based.<br />
2. Choose a horizon and vanish<strong>in</strong>g po<strong>in</strong>t and <strong>draw</strong> a rough<br />
sketch of the background.<br />
3. Based on the first character you drew, beg<strong>in</strong> plac<strong>in</strong>g all<br />
the other characters from the vanish<strong>in</strong>g po<strong>in</strong>t (this is<br />
called the slide method).<br />
4. Lastly, <strong>draw</strong> the background.<br />
fte other characters will be <strong>draw</strong>n based<br />
rn the first character.<br />
Column: lt does not matter if the background changes a little<br />
later on. When <strong>draw</strong><strong>in</strong>g the first character, it is<br />
important <strong>to</strong> choose the horizon and vanish<strong>in</strong>g<br />
po<strong>in</strong>t, which are the core of the picture.
Draw a short horizontal l<strong>in</strong>e where you want <strong>to</strong><br />
put the character.<br />
t_*w<br />
View from above<br />
Supplementary l<strong>in</strong>e <strong>to</strong> l<strong>in</strong>d the"<br />
When you want <strong>to</strong> <strong>draw</strong> a character<br />
beh<strong>in</strong>d the first character<br />
Column: Stand<strong>in</strong>g directly <strong>in</strong> front of or directly beh<strong>in</strong>d is the same as<br />
stand<strong>in</strong>g <strong>in</strong> a straight l<strong>in</strong>e. This is called "characters on the<br />
same l<strong>in</strong>e."
T-c<br />
domly place characters<br />
View from above<br />
tu<br />
-:'r you want <strong>to</strong> place<br />
.:"-acters like this and not<br />
- . sfaight l<strong>in</strong>e, there are<br />
i,r : #0!S <strong>to</strong> do it.<br />
Vanish<strong>in</strong>g po<strong>in</strong>l<br />
:<br />
J=-<br />
Lll<br />
Camera<br />
0rig<strong>in</strong>al character<br />
@<br />
C<br />
Where you want <strong>to</strong><br />
new<br />
r, ::'zcter on this l<strong>in</strong>e will be \<br />
m '': with the orig<strong>in</strong>al ---{<br />
lilTmiil?:?r <strong>in</strong> relation <strong>to</strong> the road. ',<br />
O Slid<strong>in</strong>g backward and fonruard-Draw<br />
placement vanish<strong>in</strong>g po<strong>in</strong>t<br />
Draw a placement vanish<strong>in</strong>g po<strong>in</strong>t a<br />
little <strong>to</strong> the left of the orig<strong>in</strong>at<br />
7 vanish<strong>in</strong>g po<strong>in</strong>t.<br />
/&<br />
_--_FI]l-i:_<br />
)t)<br />
lt<br />
II I}<br />
Slid<strong>in</strong>g from the new vanish<strong>in</strong>g po<strong>in</strong>t<br />
@ Parallel translation and slid<strong>in</strong>g backward<br />
and fonruard-0n the basis of dummy<br />
i{Y (l_---T_---<br />
i' \ l:4. i<br />
'\i( l-/<br />
I<br />
-- - j*<br />
Slide the orig<strong>in</strong>al character <strong>in</strong><strong>to</strong> a<br />
parallel position (height is the same).<br />
*/"ry<br />
.'\t<br />
I f<br />
I<br />
I<br />
ptacement<br />
vanish<strong>in</strong>g<br />
Po<strong>in</strong>t - -r--<br />
Put a placement vanish<strong>in</strong>g po<strong>in</strong>t<br />
near the dummy.<br />
:<br />
47
i1;,l}ttK-<br />
48<br />
Column: For scenes of students go<strong>in</strong>g <strong>to</strong> school, place blocks of two or three students walk<strong>in</strong>g side by side anc<br />
place a s<strong>in</strong>gle student beh<strong>in</strong>d, <strong>in</strong> front of or beside them.
,-4<br />
'': - rn;yl'il,H:iliT:iy,:f";t'rs <strong>in</strong> tne <strong>to</strong>iesr;nd,;;; i;;; l;A;;;;;;i;i;i;;t|1;<br />
49
<strong>How</strong> <strong>to</strong> create height ditferenceS -<br />
All the characters will be<br />
the same height if you just<br />
slide backward and<br />
fonruard and use parallel<br />
slid<strong>in</strong>g. When you want <strong>to</strong><br />
express height differences,<br />
do so by rais<strong>in</strong>g and<br />
lower<strong>in</strong>g the head, leav<strong>in</strong>g *<br />
the feet as they are.<br />
Rais<strong>in</strong>g and <strong>to</strong>wer<strong>in</strong>g the head<br />
-30 cm<br />
(-11. Bl <strong>in</strong>.)<br />
A human head is about 30 cm<br />
(11.81 <strong>in</strong>.). Use a height of 160 cn<br />
(5.25 ft.).<br />
1<br />
|<br />
+20 cm<br />
(+7.87 <strong>in</strong>.)<br />
+15 cm<br />
(+5.91 i"<br />
0ne.hef,d shorter<br />
Height about 130 cm<br />
2i3 head longer<br />
Height about 18,<br />
\ll characters are the same height,<br />
t,.6o<br />
r*<br />
lg*m ,'/<br />
180 cm = 5,90 ft.<br />
160 cm = 5.25 ft.<br />
150 cm = 4.92 ft.<br />
130 cm = 4.27 ft.<br />
Not good<br />
,J<br />
"--"***^<br />
z1 |<br />
.a<br />
.L<br />
Good<br />
rT1<br />
\/I * r-***-r"-<br />
"48' i ,.-.*<br />
Y rTvl<br />
I<br />
'ii.<br />
:fii<br />
1i:r<br />
-.; - *.*-l*-.1 .-i-<br />
Rais<strong>in</strong>g and lower<strong>in</strong>g the feet make a<br />
character float or s<strong>in</strong>k.<br />
50<br />
Column: Give each person <strong>in</strong> a crowd a different direction and<br />
different clothes <strong>to</strong> make a picture come alive.
ffi,.orno.<br />
An easier<br />
<strong>to</strong> <strong>draw</strong> crowds<br />
- '.,,v various sized heads on the horizon<br />
-:. Then <strong>draw</strong> the bodies us<strong>in</strong>g the heads Draw various sized heads<br />
:: a measure of each person,s height.<br />
Cut with rough image of background<br />
r . Horizon
Measure the length of<br />
the head and multi<br />
<strong>to</strong> get the <strong>to</strong>tal length<br />
of the character.<br />
Multiply by five if the<br />
head<strong>to</strong>-body ratio is<br />
1:5 and multiply by six<br />
if the head-<strong>to</strong>-body<br />
ratio is 1:6.<br />
Length of head<br />
Note:Always multiply the head length by the same<br />
number for all characters.<br />
All are multiplied by different number.<br />
Reference: ln the case of a head<strong>to</strong>-body ratio of 1:ti<br />
ln this <strong>draw</strong><strong>in</strong>g, heights were determ<strong>in</strong>ed us<strong>in</strong>g the<br />
same head-<strong>to</strong>-body ratio before <strong>in</strong>dividual differences<br />
<strong>in</strong> head-<strong>to</strong>-body ratio were added.<br />
After the<br />
<strong>to</strong>tal length<br />
has been<br />
determ<strong>in</strong>ed,<br />
balance the<br />
characters<br />
<strong>to</strong> taste.<br />
All are multiplied by five. Good<br />
Characters <strong>draw</strong>n with a head-<strong>to</strong>-body<br />
Head-<strong>to</strong>-body ratio of 1:5<br />
Head<strong>to</strong>-body ratio of 1:6
3,ack<br />
for bust shots of characters<br />
-=^ <strong>draw</strong><strong>in</strong>g backgrounds for bust shots of characters, <strong>draw</strong> the<br />
,-:': body of the character even if it won't all appear <strong>in</strong> the<br />
.<br />
--'e.<br />
--; ^eight of the build<strong>in</strong>g door and guardrail should be <strong>draw</strong>n <strong>in</strong><br />
Rough image<br />
Edge of sidewalk<br />
(road side)<br />
I i,.,<br />
<strong>Perspective</strong> l<strong>in</strong>e \<br />
represent<strong>in</strong>g<br />
the edge of the build<strong>in</strong>g<br />
Draw<strong>in</strong>g build<strong>in</strong>g on right<br />
<strong>in</strong><strong>in</strong>o heioht of<br />
door<br />
-----t ----'-l<br />
I<br />
<strong>Perspective</strong> l<strong>in</strong>e<br />
<strong>in</strong>dicat<strong>in</strong>g height<br />
of door (2 m)<br />
I<br />
Slide character horizontally (<strong>draw</strong><br />
dummy)<br />
@<br />
\'<br />
2m<br />
' 1.8 m<br />
;, " rrrcnize the<br />
illlill,."= :f the<br />
,":3ter<br />
(<br />
ll I lilll ,: j'ound and<br />
tf. 1 -: :fiaracter<br />
--lllllti a dummy.<br />
door=2m(6,56ft,)<br />
t<br />
*-*.<br />
(adult male) = 1,8 m (5.90 ft.)<br />
The height 0, the door is about one head higher than the characler<br />
Column: Synchronize the scale of the character and the background. When <strong>draw</strong><strong>in</strong>g the<br />
background, clearly show how high background parts are above the ground. When you<br />
try <strong>to</strong> do it by eye, you end up with doors that are <strong>to</strong>o big or houses that are <strong>to</strong> small<br />
<strong>in</strong> relation <strong>to</strong> the character.
ng guardrail 1<br />
n<strong>in</strong><strong>in</strong>g height of guardrail<br />
I \ t,a<br />
lt |<br />
:<br />
1<br />
I ,' l\<br />
.ll<br />
i ' t,<br />
. J:<br />
tl,t\<br />
i1 \<br />
{\<br />
i l: \<br />
',;*'; \<br />
-'t<br />
o Slide the character <strong>to</strong> the edge of the<br />
l<br />
j<br />
I<br />
i<br />
The height of the guardrail is a little above<br />
the thighs<br />
ng guardrail 2<br />
rail poles at even <strong>in</strong>tervals<br />
@ Draw a supplementary l<strong>in</strong>e horizontally<br />
at a little above thigh height.<br />
@ You get the right guardrail heig'<br />
<strong>in</strong> relation <strong>to</strong> the size of the<br />
character.<br />
@ Draw a supplementary l<strong>in</strong>e.<br />
@ Determ<strong>in</strong>e the position of<br />
,f<br />
\,Third pole<br />
/The <strong>in</strong>terval between<br />
guardrail poles is uniform.<br />
You are free <strong>to</strong> choose any<br />
<strong>in</strong>terval.<br />
Divide at 1i2 the height<br />
Supplementary l<strong>in</strong>e <strong>in</strong><br />
direction of vanish<strong>in</strong>g po<strong>in</strong>t.<br />
@ Determ<strong>in</strong>e positions<br />
of rema<strong>in</strong><strong>in</strong>g poles.<br />
\<br />
,ono* or<br />
second pole<br />
'll2 supplementary<br />
54
J JJJ<br />
==2,
Do not use perspective <strong>draw</strong><strong>in</strong>g<br />
<strong>in</strong>discrim <strong>in</strong>ately when <strong>draw</strong><strong>in</strong>g<br />
long shots of build<strong>in</strong>gs and<br />
upward and downward views,<br />
etc. Simple ideas can create<br />
large effects.<br />
Draw<strong>in</strong>g upward views<br />
ical two-po<strong>in</strong>t perspective<br />
When <strong>draw</strong><strong>in</strong>g an upward view,<br />
assume the location from the<br />
placement of build<strong>in</strong>gs <strong>in</strong> a<br />
rough sketch. The technique<br />
you will use is veftical twopo<strong>in</strong>t<br />
perspective.<br />
Character<br />
tb I<br />
Cut based on proposal 2<br />
build<strong>in</strong>g<br />
ffi<br />
Location proposal 2<br />
1,,fr,,1<br />
G<br />
D<br />
E<br />
F<br />
Characl er Street<br />
56<br />
B<br />
A<br />
"*,1<br />
c
-:n picture ispracedon itssiol"""'" ,y1;33,:il,i:{i.li;ffi;;;H::[#:?l,lHJ:,#T::, $<br />
look<strong>in</strong>s up ano'oown-ai;;,Xffi,ffise ]/'u are s<strong>to</strong>pp<strong>in</strong>g ano<br />
fu<br />
_il<br />
3$i<br />
k'edtbpotut<br />
illt@s ranish<strong>in</strong>g po<strong>in</strong>t:<br />
illtlwvanish<strong>in</strong>g<br />
r@As was<br />
ffi&m vani<br />
Generally, <strong>in</strong> one_po<strong>in</strong>t perspective and<br />
tw_o-po<strong>in</strong>t perspective <strong>draw</strong><strong>in</strong>gs the<br />
<strong>in</strong> vanish<strong>in</strong>g po<strong>in</strong>t is always placed on the<br />
norizon and objects i<br />
perpe n d icu rai iil; iffi:T i:TJ".J<br />
ji ,'<br />
two-po<strong>in</strong>t perspective, tne vanisfrrng<br />
;<strong>in</strong>h<br />
are. placed near the <strong>to</strong>p and Oot<strong>to</strong>*ii<strong>in</strong>u"<br />
picture<br />
\ --xr<br />
tr..'\<br />
. "r"'\ I<br />
.,...."\<br />
\<br />
\\\ \\X<br />
\\/<br />
. \\ !\ ''...\"<br />
\<br />
two-po<strong>in</strong>t<br />
I<br />
/'.,, I .'r1..'{l,,.#rr, \ it<br />
I lt 1 , /\ ,,<br />
i li-''*':'l b<br />
!11 ,l il ,-,<br />
/ '*<br />
-<br />
'--i<br />
g';g--- -ffi1 I Fil)=Q';:".+f<br />
":-:.-:;:i{S{,::--
Three-po<strong>in</strong>t perspective <strong>draw</strong><strong>in</strong>g<br />
-,',0-po<strong>in</strong>t perspective is a technique for creat<strong>in</strong>g a cubic effect by giv<strong>in</strong>g a sense of<br />
- stance <strong>to</strong> the left and right of a picture.<br />
- three-po<strong>in</strong>t perspective, a third vanish<strong>in</strong>g po<strong>in</strong>t is added <strong>to</strong> give a sense of<br />
: stance <strong>to</strong> height. Unlike one-po<strong>in</strong>t and two-po<strong>in</strong>t perspectives, the usual vedical<br />
,-i parallel l<strong>in</strong>es are not present.ln addition, the horizon l<strong>in</strong>e and vertical l<strong>in</strong>es<br />
-<br />
::rsect perpendicularly.<br />
,fu wj<br />
Two-po<strong>in</strong>t perspective<br />
Three-po<strong>in</strong>t perspective<br />
allows you <strong>to</strong> <strong>draw</strong><br />
powedul pictures.
Aerial view of scenery<br />
Bird's-eye view<br />
When <strong>draw</strong><strong>in</strong>g a bird's-eye<br />
view and the horizon is not<br />
visible, there is no perspective<br />
(vanish<strong>in</strong>g po<strong>in</strong>t). Draw<br />
build<strong>in</strong>gs parallel lengthwise<br />
and crosswise.<br />
Do not th<strong>in</strong>k <strong>to</strong>o much<br />
about perspective <strong>in</strong><br />
bird's-eye view pictures.<br />
Skyscrapers<br />
For placement o{ build<strong>in</strong>gs,<br />
try.<strong>draw</strong><strong>in</strong>g-a map<br />
terill0i!0llpqf$:$rtelpsiilaralr*Iei,g&d$-6_:i,]<br />
ti.;lrt: :!,:,::::r:i::,::r,;ii::rr:::,,,. -r'.1-.rr...-..,<br />
:i:lgri{r.c$rt*ixll,ber::]r:,:l:::i:':iii::ii:<br />
r:,:::::<br />
:nOii'iielg$iiSgi:<br />
!.ri&i?,0ii1&:::i:i::il
column: when <strong>draw</strong><strong>in</strong>g a bird's-eye view of scenery us<strong>in</strong>g one-po<strong>in</strong>t perspective, freely place the vanish<strong>in</strong>g po<strong>in</strong>t<br />
<strong>in</strong> accordance with the objective of the piciure or the composition.<br />
61
Mak<strong>in</strong>g a qroup of build<strong>in</strong>qs <strong>in</strong> the distance look cool<br />
When <strong>draw</strong><strong>in</strong>g a group of build<strong>in</strong>gs <strong>in</strong> the distance, reduce the<br />
of the buildi<br />
Reduc<strong>in</strong>g the depth of build<strong>in</strong>gs is effective when the ma<strong>in</strong> subject is <strong>in</strong> the foreground and the build<strong>in</strong>gs are<br />
used for pure scenery <strong>in</strong> the background.<br />
Reference:Town <strong>in</strong> the distance<br />
This<br />
ofa<br />
an obiec't is the less thieK
When <strong>draw</strong><strong>in</strong>g a l<strong>in</strong>e of build<strong>in</strong>gs us<strong>in</strong>g one-po<strong>in</strong>t perspective,<br />
mak<strong>in</strong>g the width (depth) of build<strong>in</strong>gs narrower elim<strong>in</strong>ates the<br />
cramped feel<strong>in</strong>g.<br />
6ct*<br />
Draw objects far away with th<strong>in</strong> l<strong>in</strong>es. For l<strong>in</strong>es that<br />
run <strong>in</strong><strong>to</strong> characters, <strong>draw</strong> them th<strong>in</strong> as if they fade<br />
away and do not make contact with the character.<br />
There is a big difference even then the frames are the same<br />
size and the vanish<strong>in</strong>g po<strong>in</strong>ts are <strong>in</strong> the same position.<br />
Build<strong>in</strong>gs <strong>draw</strong>n with reduced width<br />
Build<strong>in</strong>gs <strong>draw</strong>n with normal width<br />
Column: When you want <strong>to</strong> avoid <strong>draw</strong><strong>in</strong>g a confus<strong>in</strong>g group of build<strong>in</strong>gs <strong>in</strong> a long, narrow frame, <strong>draw</strong> build<strong>in</strong>gs<br />
as if they were <strong>in</strong> the distance us<strong>in</strong>g narrow depth l<strong>in</strong>es.
when the<br />
is curved<br />
Dis<strong>to</strong>rted ground<br />
used for dramatic<br />
presentation can<br />
be used <strong>in</strong> a<br />
picture where you<br />
are look<strong>in</strong>g up<br />
from a low place.<br />
Place the<br />
vanish<strong>in</strong>g po<strong>in</strong>t <strong>in</strong><br />
the middle directly<br />
above the picture.<br />
Groupff:huild<strong>in</strong>ge ; Wfien,dnw<strong>in</strong> us<strong>in</strong>s, vertieal'hrrro.p<strong>in</strong>t perspective<br />
View from above<br />
The amount of dis<strong>to</strong>rtion of the<br />
curved surface depends on<br />
ndividual sensitivity. Draw freely.<br />
ln fie case of a group of build<strong>in</strong>gs,<br />
rse vertical two-po<strong>in</strong>t perspective.
65<br />
,'lhen depict<strong>in</strong>g outer space <strong>in</strong> <strong>manga</strong>, compose pictures<br />
r a way that creates a sense of distance.<br />
" Paft of a large planet <strong>in</strong> the<br />
foreground<br />
- Many small stars <strong>in</strong> the<br />
distance<br />
: ln the middle, place planets<br />
ihat are just big enough for<br />
,,ou <strong>to</strong> can discern their<br />
:atterns.<br />
splatter white conection fruid for the dots represent<strong>in</strong>g very sma, stars.<br />
<strong>How</strong> <strong>to</strong> splatter correction fluid<br />
Dots will be large if you do<br />
it away from the paper.<br />
Put oil-based correction fluid on tip of pen<br />
0<br />
a7o<br />
a<br />
/a<br />
@ Ftick with brush<br />
Dots will be<br />
small if you do<br />
it close <strong>to</strong> the<br />
paper.<br />
column: correction fruid wi, spratter <strong>in</strong> the generar vic<strong>in</strong>ity, so put tape around<br />
the manuscript and frame <strong>to</strong> mask;;;.'
Mak<strong>in</strong>g planets realistic<br />
Use a template for<br />
planet circles.<br />
Representation of<br />
outer space<br />
Present the depth and<br />
mysteriousness of outer<br />
space us<strong>in</strong>g special <strong>to</strong>ne<br />
patterns and apply<strong>in</strong>g layers<br />
of <strong>to</strong>ne.<br />
otE r<br />
03E<br />
(-)o3<br />
,--, (J 3<br />
! -, /--\ :<br />
!-r- 3<br />
( )-:<br />
ooi<br />
Give planets a <strong>to</strong>uch of color and apply <strong>to</strong>ne <strong>to</strong> make them round<br />
and <strong>to</strong> make them look heavy.
Chqpter 3<br />
Disiqnce of Noturul<br />
Oblects<br />
Tree-l<strong>in</strong>ed Roqd slljght ond Shodow/Sly
Draw<strong>in</strong>q roadside trees<br />
To <strong>draw</strong> roadside trees<br />
planted at even<br />
<strong>in</strong>tervals, choose the<br />
positions of the first and<br />
second trees and use<br />
the technique <strong>to</strong> an even<br />
<strong>in</strong>terval. Th<strong>in</strong>k of tree<br />
trunks as poles,<br />
O Draw one tree<br />
lir,<br />
Side view<br />
@ Draw supplementary<br />
l<strong>in</strong>e.<br />
€) Choose <strong>in</strong>terval<br />
between trees.<br />
ta....<br />
Place on sidewalk slightly<br />
away from road l<strong>in</strong>e.<br />
@ Draw "pole" for<br />
second tree.<br />
Draw vanish<strong>in</strong>g<br />
po<strong>in</strong>t and<br />
supplementary<br />
l<strong>in</strong>es connect<strong>in</strong>g it<br />
with tip of the tree<br />
and the base.<br />
Mark the spot<br />
where you want <strong>to</strong><br />
plant the next<br />
tree.<br />
@ Turn <strong>in</strong><strong>to</strong> trees.<br />
Second tree<br />
.i<br />
,;'<br />
a,',<br />
@ Determ<strong>in</strong>e where <strong>to</strong> plant the<br />
rest of the trees.<br />
Fourth tree<br />
I<br />
.I<br />
Draw trees by flesh<strong>in</strong>g out<br />
the poles.<br />
Column:When <strong>draw</strong><strong>in</strong>g roadside trees and tree-l<strong>in</strong>ed roads, first clearly sketch the road<br />
and sidewalk. (Needless <strong>to</strong> say, you need a vanish<strong>in</strong>g po<strong>in</strong>t and horizon.)
lraw a l<strong>in</strong>e of trees on<br />
,re side of the treered<br />
road and slide it <strong>to</strong><br />
::e opposite side.<br />
-<br />
Draw a l<strong>in</strong>e of<br />
trees on one side<br />
of the road.<br />
@ Draw a perspective l<strong>in</strong>e<br />
where the trees will<br />
be placed.<br />
<strong>Perspective</strong> l<strong>in</strong>e where<br />
trees will be placed<br />
7<br />
tl<br />
j<br />
I<br />
1' ---'-' <strong>Perspective</strong> l<strong>in</strong>e for road<br />
69<br />
@ Slide <strong>to</strong> the opposite side.<br />
The trick is <strong>to</strong> raise veftical l<strong>in</strong>es from the<br />
rerspective l<strong>in</strong>e where trees will be placed.<br />
.w.<br />
Golumn:This technique can also be used for <strong>draw</strong><strong>in</strong>g opposiig doors <strong>in</strong> condom<strong>in</strong>iums<br />
and hotels and oppos<strong>in</strong>g w<strong>in</strong>dows on tra<strong>in</strong>s.<br />
/
Draw<strong>in</strong>g shrubbery<br />
Shrubbery can be round<br />
or square. lt is best <strong>to</strong><br />
simplify it.<br />
Square type<br />
ooo<br />
Round type<br />
ri ,:<br />
Th<strong>in</strong>k of square shrubbery as a<br />
rectangular parallelepiped <strong>in</strong> perspective.<br />
Like tree-l<strong>in</strong>ed roads, round shrubbery is<br />
often planted at even <strong>in</strong>tervals.<br />
l ''s.<br />
shrubbery, th<strong>in</strong>k about how<br />
light is hitt<strong>in</strong>g them.<br />
6't<br />
A tree consists of leaves and a trunk.<br />
There is no need <strong>to</strong> <strong>draw</strong> everyth<strong>in</strong>g. ln the case of both trunks and<br />
leaves, do not <strong>draw</strong> the parts with light hitt<strong>in</strong>g them.<br />
-<br />
Th<strong>in</strong>k about the direction of the light and <strong>draw</strong> the shadowed parts.<br />
Give the trunk the feel of a trunk and leaves the feel of a leaf.
Example: Boadside trees <strong>draw</strong>n far apaft<br />
T-<br />
kEler@-L@tesE<br />
:;:, nese parasol/Maple<br />
$.<br />
i'-\)44<br />
: Y/<br />
!^ \v//<br />
1--l-**<br />
Sycamore<br />
iN)N'\<br />
\( \N)<br />
t\<br />
CherrylZelkova<br />
M<br />
ffiffi<br />
AurNS, @ g"<br />
Ch<strong>in</strong>aberry/False acacia<br />
Example: Roadside trees <strong>draw</strong>n close <strong>to</strong>gether
l{ow, ..hi<br />
had6illlsii.,iiii.....i<br />
1;. r:urself the follow<strong>in</strong>g<br />
: - :S-rrons when <strong>draw</strong><strong>in</strong>g<br />
:* j[o''vS. 'What is the light<br />
-: -'ae?" "What direction is<br />
:-n qlt com<strong>in</strong>g from?"<br />
Sh<strong>in</strong><strong>in</strong>g from directly above:<br />
Shadow is short (around noon).<br />
Shadows could be various<br />
shapes depend<strong>in</strong>g on the<br />
shape of the ground and the<br />
presentation.<br />
Sh<strong>in</strong><strong>in</strong>g from an angle:<br />
Shadow is somewhai long.<br />
[0rcr']-rng or even<strong>in</strong>g:<br />
SiirEi,ow is long.<br />
--: -,,r8I the sun is, the<br />
: - : :" :te shadow will be.<br />
qI<br />
++<br />
East<br />
18:00<br />
16:00<br />
14:00<br />
Even<strong>in</strong>g sun \ The lengths of shadows<br />
-t created bY sunlight are<br />
t:4^-^-r<br />
-.*=€ different depend<strong>in</strong>g on the<br />
time of day.<br />
West<br />
When <strong>draw</strong><strong>in</strong>g shadows <strong>in</strong><br />
6:00<br />
<strong>manga</strong>, choose the length<br />
and direction of shadows<br />
by th<strong>in</strong>k<strong>in</strong>g about what<br />
time of the day it is.<br />
Shadows<br />
below eaves<br />
Sunlight<br />
summer -<br />
Make them<br />
't,:,',',,,,.',,t'.,'.,<br />
solid.<br />
Rays are weak <strong>in</strong> spr<strong>in</strong>g and<br />
fall. so shadows are also<br />
kht -<br />
dagnnal l<strong>in</strong>es.<br />
Use <strong>to</strong>ne and<br />
Tle rays of the sun reach<br />
te ea'tir as oarallel l<strong>in</strong>es.<br />
Shadows are <strong>in</strong> l<strong>in</strong>e with the rays<br />
of the sun.
Shadows formed by small objects<br />
<strong>Perspective</strong> is<br />
used for<br />
shadows created<br />
by artificial light.<br />
Dlace the<br />
ranish<strong>in</strong>g po<strong>in</strong>t<br />
r the center of a<br />
streetlight and<br />
determ<strong>in</strong>e the<br />
shape of the<br />
shadow by<br />
lonnect<strong>in</strong>g it<br />
,,rith the object<br />
:e<strong>in</strong>g Iit.<br />
When light source is<br />
above, shadow is short.<br />
When light source is above and<br />
<strong>to</strong> the side, shadow is long.<br />
Shadow formed by<br />
florescent light is fa<strong>in</strong>t.<br />
When there are two sources of light,<br />
two shadows appear.<br />
The candle is emitt<strong>in</strong>g light <strong>in</strong> alt<br />
directions. Shadows are formed <strong>in</strong><br />
perspective <strong>to</strong> the center of the flame.<br />
The shadows are fa<strong>in</strong>t s<strong>in</strong>ce the light<br />
itself is not very bright.
At the heafi of this<br />
matter is how <strong>to</strong><br />
place objects. Draw<br />
objects <strong>in</strong> the<br />
foreground bigger<br />
and objects <strong>in</strong> the<br />
background smaller,<br />
and place mid-size<br />
objects between<br />
them.
:i#r-*_.li=lr_-<br />
For ra<strong>in</strong> <strong>in</strong> t-own,'diaw<br />
build<strong>in</strong>gs and shadows <strong>in</strong><br />
a free-hand us<strong>in</strong>g shorl<br />
I<strong>in</strong>es.<br />
lur,l_lr,,"ll<br />
t"-- i,i rl<br />
flwfl$rlj' l'<br />
Technique for solid parts<br />
Gradate parts <strong>in</strong> the distance.<br />
Draw trees and other objects us<strong>in</strong>g<br />
slanted l<strong>in</strong>es.<br />
Use slanted l<strong>in</strong>es<br />
<strong>draw</strong>n free hand.<br />
Add ra<strong>in</strong> l<strong>in</strong>es us<strong>in</strong>g<br />
white correction fluid<br />
on solid pafts.
Rivers<br />
Draw rivers us<strong>in</strong>g the<br />
techniques for <strong>draw</strong><strong>in</strong>g<br />
roads. Choose a<br />
vanish<strong>in</strong>g po<strong>in</strong>t and<br />
<strong>draw</strong> free hand.<br />
Horizon<br />
Vanish<strong>in</strong>g po<strong>in</strong>t<br />
Normal river<br />
(use technique for straight road)<br />
Use two vanish<strong>in</strong>g po<strong>in</strong>ts for<br />
meander<strong>in</strong>g river.<br />
1;-*:'-<br />
Technique for river surface<br />
I Add <strong>to</strong>uches with pen <strong>in</strong><br />
accordance with the<br />
direction and skength of<br />
&e current.
)epend<strong>in</strong>g on the clouds, keep perspective <strong>in</strong> m<strong>in</strong>d when <strong>draw</strong><strong>in</strong>g them.<br />
<strong>Perspective</strong> and natural objects<br />
You can use the concept of perspective without alteration<br />
for <strong>draw</strong><strong>in</strong>g rivers, rnountalns and other foreground '<br />
objeets tlmt move ofi <strong>in</strong><strong>to</strong> the distance.<br />
with a sense of distance or any object you want <strong>to</strong> give a<br />
sense of distance.<br />
77
Various<br />
Scratch with the tip of a cutter.<br />
Cumulonimbus<br />
Blur by cutt<strong>in</strong>g out, eras<strong>in</strong>g with<br />
a sand eraser and shav<strong>in</strong>g.<br />
Sett<strong>in</strong>g sun Apply layers of <strong>to</strong>ne and shave.<br />
iii:,,ti1ll|;tiiltl:iiitii,iiiitit<br />
78
Chopter 4<br />
Drcrw<strong>in</strong>g Indoor Scenes<br />
Ho I lwoys/Silo its / Smq ll Obiects
There are two ways <strong>to</strong> make a hallway <strong>in</strong> a<br />
narrow frame look wide.<br />
O Draw us<strong>in</strong>g irregular two-po<strong>in</strong>t perspective.<br />
" ';,:",11<br />
\:4..'l rrlt<br />
\i.,,/,f \<br />
|Z/Y' :l<br />
s#<br />
t,,,,,,fi,tr .l<br />
I ::,lil. ,.lli<br />
tl:1:::I1<br />
t+:....:l:::!l<br />
\i:{:i}/<br />
l:/r';Altl<br />
i ,T,1,,/<br />
t:i,H<br />
0.Y."E)<br />
m<br />
Hallway <strong>draw</strong>n us<strong>in</strong>g regular<br />
one-po<strong>in</strong>t perspective<br />
@ Widen hallway<br />
Method <strong>to</strong><br />
widen hallway<br />
Vanish<strong>in</strong>g po<strong>in</strong>t for right wall Vanish<strong>in</strong>g po<strong>in</strong>t for left wall<br />
I<br />
[Jse rregular two-po<strong>in</strong>t<br />
cerspective when the<br />
,',,'rr of the hallway is<br />
fued due <strong>to</strong> the sett<strong>in</strong>g.
E.<br />
-re farther apart the two po<strong>in</strong>ts are, the wider the space will be.<br />
Narrow space<br />
When you<br />
reverse the<br />
po<strong>in</strong>ts the<br />
walls are<br />
<strong>draw</strong>n from, it<br />
becomes<br />
narrower than<br />
one-po<strong>in</strong>t<br />
perspective<br />
(when the two<br />
po<strong>in</strong>ts are<br />
close<br />
<strong>to</strong>gether).<br />
Wide space<br />
Draw the right wall from<br />
the right po<strong>in</strong>t and the<br />
left wall from the left<br />
po<strong>in</strong>t.<br />
:<br />
E<br />
The closer the two po<strong>in</strong>ts are, the<br />
closer it will be <strong>to</strong> one-po<strong>in</strong>t<br />
perspective.<br />
*<br />
:rr<br />
I<br />
. -se when you want <strong>to</strong> create tension or<br />
:'3SSUre.
lrregular two-po<strong>in</strong>t perspective is a technique used <strong>to</strong> emphasize<br />
build<strong>in</strong>gs <strong>in</strong> the foreground.<br />
Use this technique when <strong>draw</strong><strong>in</strong>g dead ends and T-shaped junctions.<br />
o This technique is often used for <strong>draw</strong><strong>in</strong>g<br />
the background when you want <strong>to</strong> put the<br />
character <strong>in</strong> the center.<br />
. When <strong>draw</strong><strong>in</strong>g scenery alone, build<strong>in</strong>gs<br />
should end before and after the vanish<strong>in</strong>g<br />
po<strong>in</strong>ts. (unique <strong>to</strong> this technique)<br />
Example: Dead ends, three-forked roads,<br />
<strong>in</strong>sides of cars and airplanes, etc., that<br />
serve as a background <strong>to</strong> characters.<br />
. When us<strong>in</strong>g this technique for T-shaped<br />
junctions, <strong>draw</strong> a wall or house directly<br />
ahead (on the horizon).<br />
Character background/Town<br />
Example: T-shaped junction<br />
82<br />
lrregular two-po<strong>in</strong>t perspective comes <strong>in</strong> handy when you<br />
want <strong>to</strong> make a narrow space (hallway, etc.) look wide or<br />
make a scene <strong>in</strong> a narrow frame Iook wide.
i:i.iii<br />
83
A character sitt<strong>in</strong>g at a desk <strong>in</strong> class. First<br />
imag<strong>in</strong>e the composition you want and<br />
<strong>draw</strong> a rough sketch.<br />
View from above<br />
Rough sketch<br />
F<strong>in</strong>d the vanish<strong>in</strong>g po<strong>in</strong>t from the shoulder l<strong>in</strong>e<br />
of the character and the desk l<strong>in</strong>e.<br />
Vanish<strong>in</strong>g po<strong>in</strong>t<br />
\]"'J*xqa<br />
!\.<br />
\<br />
r..<br />
Shoulder<br />
/<br />
The horizon is determ<strong>in</strong>ed after the vanish<strong>in</strong>g po<strong>in</strong>t<br />
has been determ<strong>in</strong>ed.<br />
After f<strong>in</strong>d<strong>in</strong>g the vanish<strong>in</strong>g po<strong>in</strong>t, <strong>draw</strong> a l<strong>in</strong>e directly <strong>to</strong> the side.<br />
A character sitt<strong>in</strong>g at a desk.<br />
The character, chair and desk are<br />
usually parallel <strong>to</strong> each other.<br />
Not <strong>draw</strong>n <strong>in</strong> perspective
You may <strong>draw</strong> round c,mers free hand, (6)<br />
but trey will lmk sharper I you use an \__/-.<br />
ovartemprate.<br />
\ ]0, :1.0.r,0 arso <strong>draw</strong> the parts that wiil not<br />
be visible.<br />
-<br />
The height of the<br />
chair is about<br />
half that of the<br />
desk.<br />
l<br />
i<br />
t<br />
Draw straight<br />
from around this<br />
t_egs angle<br />
slightly.<br />
oui<br />
.L<br />
Side view<br />
85<br />
d
Common chair/desk composition and the horizon<br />
Vanish<strong>in</strong>g po<strong>in</strong>t
ii:. Horizon
The distance<br />
between a<br />
character and a<br />
wall is represented<br />
by the relationship<br />
between the<br />
position of the<br />
character's feet<br />
and that of the<br />
floor l<strong>in</strong>e.<br />
Near the wall
{<<br />
.')/, //,<br />
R<br />
lndicate the presence of a wall by <strong>draw</strong><strong>in</strong>g a shadow.<br />
lraw a l<strong>in</strong>e separat<strong>in</strong>g the ceil<strong>in</strong>g and walls.<br />
Give the wall a sense of presence by<br />
<strong>draw</strong><strong>in</strong>g shadows on both the floor and wall.<br />
lraw a w<strong>in</strong>dow or bookshelf beh<strong>in</strong>d a character.<br />
Use shadows and<br />
sense of distance<br />
the room layout <strong>to</strong> create a<br />
between characters and walls.<br />
89
When you want <strong>to</strong> <strong>draw</strong> a room<br />
with a person sitt<strong>in</strong>g on the couch<br />
watch<strong>in</strong>g TV as seen from one wall,<br />
staft by <strong>draw</strong><strong>in</strong>g an outl<strong>in</strong>e of the<br />
r00m.<br />
Draw the opposite wall and <strong>draw</strong> a<br />
door, the ceil<strong>in</strong>g, the floor and walls<br />
on either side.<br />
Then <strong>draw</strong> furniture and the person.<br />
Ceil<strong>in</strong>g height<br />
240-270cm - *<br />
You are stand<strong>in</strong>g<br />
here with camera<br />
<strong>in</strong> hand.<br />
270 cm<br />
240 cm<br />
160 cm<br />
150 cm<br />
Room plan<br />
80 cm<br />
1. Draw<strong>in</strong>q the ite wall<br />
Side VIEW<br />
Relationship between person,<br />
camera and ceil<strong>in</strong>g<br />
270 cm = 8.86 ft.<br />
240 cm =7.87 fi.<br />
160 cm = 5.25 ft.<br />
150 cm = 4.92 tt.<br />
80 cm = 2.63 ft.<br />
Staft by <strong>draw</strong><strong>in</strong>g<br />
this wall<br />
O Draw shape of wall.<br />
Draw wall l<strong>in</strong>es from four corners.<br />
90<br />
@ Draw door so it<br />
looks natural relative<br />
<strong>to</strong> the ceil<strong>in</strong>g.<br />
I'l<br />
@ Determ<strong>in</strong>e horizon<br />
and vanish<strong>in</strong>g po<strong>in</strong>t<br />
based on the height of<br />
the door.<br />
. The room may be any width you choose.<br />
. S<strong>in</strong>ce the view is that of a stand<strong>in</strong>g person, <strong>draw</strong> the horizon at about j50 cm.<br />
Plac<strong>in</strong>g the vanish<strong>in</strong>g po<strong>in</strong>t a little <strong>to</strong> the left or right of center will make the<br />
picture look better.<br />
o The ceil<strong>in</strong>g, floor and sidewalls are <strong>draw</strong>n us<strong>in</strong>g l<strong>in</strong>es com<strong>in</strong>g from the vanish<strong>in</strong>g<br />
po<strong>in</strong>t and pass<strong>in</strong>g through the corners.<br />
. Draw a perspective l<strong>in</strong>e on the left and right walls that are the same height as<br />
the door.<br />
column:The perspective l<strong>in</strong>e that is the same height as the door acts as a guide for<br />
determ<strong>in</strong><strong>in</strong>g the height of furniture. Draw<strong>in</strong>g a perspective l<strong>in</strong>e with a dist<strong>in</strong>ct<br />
height is the key <strong>to</strong> <strong>draw</strong><strong>in</strong>g backgrounds <strong>in</strong> both <strong>in</strong>door and outdoor pictures
2. Draw<strong>in</strong>o a rouoh sketch<br />
T<br />
I<br />
{<br />
,,<br />
l'aw the <strong>in</strong>terior on the basis of the plan.<br />
Reference: Completed <strong>draw</strong><strong>in</strong>g with character
O Draw a projection.<br />
@ Draw thickness.<br />
Vanish<strong>in</strong>g po<strong>in</strong>t<br />
@ Draw shape.<br />
80 cm = 31.5 <strong>in</strong>.<br />
40 cm = 15.75 <strong>in</strong>.<br />
25 cm = 9.84 <strong>in</strong>.<br />
15 cm = 5.90 <strong>in</strong>.<br />
Determ<strong>in</strong>e the height of the couch<br />
based on the 150-cm wall l<strong>in</strong>e (same as<br />
height of horizon <strong>in</strong> this <strong>draw</strong><strong>in</strong>g).<br />
Determ<strong>in</strong>e the thickness from this,<br />
Create the overall shape of<br />
the couch by connect<strong>in</strong>g the<br />
vanish<strong>in</strong>g po<strong>in</strong>t and the <strong>to</strong>p<br />
of each vefiical l<strong>in</strong>e.<br />
92<br />
150 cm = 59.06 <strong>in</strong>.<br />
80 cm = 31.5 <strong>in</strong>.<br />
70 cm = 27.56 <strong>in</strong>.<br />
Make corners and edges<br />
round <strong>to</strong> make it look like a<br />
couch.
- l:al'r a projection.<br />
Vanish<strong>in</strong>g po<strong>in</strong>t<br />
i Determ<strong>in</strong>e height.<br />
Height is about half that of the couch.<br />
/, th the table aga<strong>in</strong>st the wall,<br />
:;lerm<strong>in</strong>e the height of the table<br />
-:m the height of the couch.<br />
80 cm = 31.5 <strong>in</strong>.<br />
40 cm = 15.75 <strong>in</strong>.<br />
@ Add thickness.<br />
When <strong>draw</strong><strong>in</strong>g the legs, also <strong>draw</strong><br />
the portions that will not be visible.<br />
93
5. Draw<strong>in</strong>q a TV stand Like the couch and table, start by<br />
<strong>draw</strong><strong>in</strong>g a projection.<br />
Determ<strong>in</strong>e the thickness and<br />
width <strong>in</strong> relation <strong>to</strong> the couch<br />
<strong>draw</strong>n earlier (they do not<br />
have <strong>to</strong> be as exact as the<br />
depth and height).<br />
Completed <strong>draw</strong><strong>in</strong>g<br />
Look<strong>in</strong>g at the floor plan, <strong>draw</strong> it <strong>in</strong><br />
I<strong>in</strong>e with the table, for <strong>in</strong>stance.<br />
Column:Draw <strong>in</strong>door scenes us<strong>in</strong>g one-po<strong>in</strong>t perspective. (Two-po<strong>in</strong>t perspective is not used very often.)
Small objects on<br />
tables and desks<br />
- 1<br />
)raw<strong>in</strong>g without us<strong>in</strong>g<br />
not show this portion.<br />
/<br />
)<br />
-.erspective<br />
- a scene where one side (or<br />
,,, o corners) of a table is not<br />
, s ble, <strong>draw</strong> without us<strong>in</strong>g<br />
:<br />
"'spective.<br />
Show this part of the table.
Small objects on<br />
tables and desks<br />
- 2<br />
Draw<strong>in</strong>g us<strong>in</strong>g perspective<br />
Use perspective for <strong>draw</strong><strong>in</strong>g objects<br />
when the edges of the table or desk<br />
visible.<br />
Small objects on a table <strong>draw</strong>n us<strong>in</strong>g onepo<strong>in</strong>t<br />
perspective each have their own<br />
vanish<strong>in</strong>g po<strong>in</strong>t on the horizon l<strong>in</strong>e (they all<br />
share the same horizon l<strong>in</strong>e).<br />
Tables are often <strong>draw</strong>n us<strong>in</strong>g one-po<strong>in</strong>t<br />
perspective, but objects on a table seldom use<br />
the same vanish<strong>in</strong>g po<strong>in</strong>t as the table.
<strong>How</strong> <strong>to</strong> <strong>draw</strong> cups<br />
Circles on tables<br />
Horizon<br />
. When the <strong>to</strong>p of the table and the horizon l<strong>in</strong>e<br />
lncorrectly <strong>draw</strong>n<br />
are close, use an oval that looks like this.<br />
Th<strong>in</strong> ovals Iook like O are often used for long shots.<br />
Long shots are used for explana<strong>to</strong>ry scenes with<br />
almost the entire body of a character and background.<br />
lncorrectly <strong>draw</strong>n
When the <strong>to</strong>p of the table and the horizon l<strong>in</strong>e are far apaft,<br />
use an oval that looks like Q<br />
.<br />
Horizon<br />
B@<br />
0vals that are almost circles are often used<br />
for close-ups. Close-ups are used when you<br />
want <strong>to</strong> make a strong impression or you<br />
want <strong>to</strong> magnify someth<strong>in</strong>g.<br />
The farther away the circle is from the horizon<br />
l<strong>in</strong>e, the closer it becomes <strong>to</strong> be<strong>in</strong>g a perfect<br />
circle.<br />
Draw the bot<strong>to</strong>m oval of<br />
cans, etc., round.<br />
K/<br />
\7<br />
BB<br />
98
Draw<strong>in</strong>g small ,bfits--_l When <strong>draw</strong><strong>in</strong>g small objects made up of squares, simply<br />
Us<strong>in</strong>g cellular phones as an example<br />
I <strong>draw</strong> all vertical and horizontal l<strong>in</strong>es parallel <strong>to</strong> each other.<br />
Drawn us<strong>in</strong>g one-po<strong>in</strong>t<br />
perspective<br />
Drawn us<strong>in</strong>g two-po<strong>in</strong>t<br />
perspective<br />
ffi<br />
The shapes of small objects will not look<br />
good if the vanish<strong>in</strong>g po<strong>in</strong>t is not pretty far<br />
away.<br />
ff$<br />
Use one-po<strong>in</strong>t perspective when perspective is<br />
used from the standpo<strong>in</strong>t of presentation.<br />
99
You do not normally th<strong>in</strong>k very much about<br />
perspective when <strong>draw</strong><strong>in</strong>g beds. When<br />
<strong>draw</strong><strong>in</strong>g a character sleep<strong>in</strong>g on a bed,<br />
th<strong>in</strong>k of the cubic effect of the person's<br />
body.<br />
-1-r,rr<br />
l_< ;/ //lll\<br />
\tN<br />
ll, r/<br />
"<br />
l[, ,,9<br />
Build a simple model when it is difficult <strong>to</strong><br />
come up with the cubic effect of the<br />
mattress and person.<br />
A doll made with a marble,<br />
ballpo<strong>in</strong>t pens and an eraser was<br />
laid down on a handkerchief<br />
mattress. Tissue paper was used<br />
for the covers.<br />
100<br />
Column: Use perspective when you want <strong>to</strong> create an impressive effect.
101
When <strong>draw</strong><strong>in</strong>g open doors, place separate<br />
vanish<strong>in</strong>g po<strong>in</strong>ts for the frame and the<br />
door.<br />
When viewed from above,<br />
/ffi<br />
<strong>draw</strong> a circle with the axis<br />
as the center. ,'<br />
\_v<br />
The doorknob is <strong>in</strong> the center.<br />
The doorknob is<br />
@,,<br />
on the left.<br />
l"<br />
V<br />
-\ r\, l<br />
\<br />
\l+ /f-'+ I<br />
I<br />
l,'re i<br />
1\i<br />
\<br />
#I<br />
<strong>in</strong>g height<br />
i40 cm<br />
I<br />
240 cm = 7.87 fi.<br />
180 cm = 5.90 ft.<br />
160 cm = 5.25 ft.<br />
80 cm = 2.63 ft.<br />
I<br />
I<br />
Determ<strong>in</strong><strong>in</strong>g door width<br />
. Start <strong>draw</strong><strong>in</strong>g the width ol the door<br />
from the side with the doorknob.<br />
o Make the width of a door <strong>draw</strong>n <strong>in</strong><br />
perspective slightly nanow.<br />
:Make the distance between the <strong>to</strong>p of the door and the ceil<strong>in</strong>g<br />
about B0 cm, which is about half the height of the character.<br />
I<br />
_t
O Draw the door as seen from<br />
straight on.<br />
@ Draw the door open at 1B0o<br />
angle.<br />
of the height and <strong>draw</strong> the door<br />
as seen from straight on.<br />
No matter what the perspective<br />
of the door you want <strong>to</strong> <strong>draw</strong><br />
is, make it look like this when<br />
you <strong>draw</strong> an open door.<br />
O Draw an oval (locus of door).<br />
@ 0pen the door.<br />
Draw an oval that passes through the<br />
apexes represent<strong>in</strong>g the corner of the<br />
door. (l-he oval path the door travels<br />
when opened.)<br />
Draw the bot<strong>to</strong>m door l<strong>in</strong>e<br />
<strong>in</strong>dicat<strong>in</strong>g how far the door is<br />
open.<br />
Top of axis<br />
@ You get an open<br />
door <strong>draw</strong>n <strong>in</strong><br />
perspective.<br />
Vanish<strong>in</strong>g<br />
po<strong>in</strong>t of<br />
opendoor<br />
\<br />
Door locus
Door vanish<strong>in</strong>g ,,'<br />
lil<br />
f/<br />
Horizon<br />
I<br />
@<br />
Vanish<strong>in</strong>g po<strong>in</strong>t<br />
of open door<br />
I<br />
Vanish<strong>in</strong>g po<strong>in</strong>t<br />
of open door<br />
-r_<br />
/=<br />
The door<br />
vanish<strong>in</strong>g<br />
po<strong>in</strong>t is far<br />
away.<br />
Upper vanish<strong>in</strong>g<br />
po<strong>in</strong>t
Move the<br />
vanish<strong>in</strong>g po<strong>in</strong>t<br />
<strong>to</strong> the left when<br />
you want <strong>to</strong><br />
make it look like<br />
you are<br />
up from the left.<br />
--l ^ ,rrhlL<br />
C Draw supplementary l<strong>in</strong>e for <strong>in</strong>cl<strong>in</strong>ation.<br />
//<br />
O Determ<strong>in</strong>e step height.<br />
<strong>to</strong><strong>in</strong>ct<strong>in</strong>atidon vantsh<strong>in</strong>g po<strong>in</strong>t<br />
@ Draw width.<br />
lncl<strong>in</strong>ation vanish<strong>in</strong>g po<strong>in</strong>t<br />
Like slopes, <strong>draw</strong><br />
stairs us<strong>in</strong>g two<br />
vanish<strong>in</strong>g po<strong>in</strong>ts.<br />
ffhe normal eyelevel<br />
vanish<strong>in</strong>g po<strong>in</strong>t<br />
and a vanish<strong>in</strong>g<br />
po<strong>in</strong>t for<br />
determ<strong>in</strong><strong>in</strong>g the<br />
<strong>in</strong>cl<strong>in</strong>ation of the<br />
stairs.)<br />
Vanish<strong>in</strong>g po<strong>in</strong>t<br />
l<strong>in</strong>e for determ<strong>in</strong><strong>in</strong>g step width.<br />
Width l<strong>in</strong>e comes from here<br />
Stairs are <strong>draw</strong>n <strong>in</strong> one-po<strong>in</strong>t perspective us<strong>in</strong>g<br />
two vanish<strong>in</strong>g po<strong>in</strong>ts and two supplementary l<strong>in</strong>es.<br />
105
:Vanish<strong>in</strong>g po<strong>in</strong>t<br />
; (eye-level<br />
vanish<strong>in</strong>g po<strong>in</strong>t)<br />
. Always <strong>draw</strong> the width l<strong>in</strong>e<br />
from the eye-level vanish<strong>in</strong>g<br />
po<strong>in</strong>t.<br />
. Draw the parts that will not<br />
visible as well.
Loddng down a<br />
-- .x of there be<strong>in</strong>g<br />
-: -orizon when you<br />
,"-.1L<br />
/t*<br />
/,<br />
, *&.<br />
i. i t,<br />
.' f}<br />
:-, r, stairs from the<br />
::: cok<strong>in</strong>g down.<br />
-'.,,, them us<strong>in</strong>g<br />
-I<br />
'.::'ral two-po<strong>in</strong>t<br />
:* "r:eCtive.<br />
l''0'iurnn You cannot see the horizon <strong>in</strong> a picture look<strong>in</strong>g down a flight of stairs because of the<br />
composition of the picture.<br />
107
When <strong>draw</strong><strong>in</strong>g a side<br />
view of stairs, there is no<br />
need for an <strong>in</strong>cl<strong>in</strong>ation<br />
vanish<strong>in</strong>g po<strong>in</strong>t. Just pay<br />
attention <strong>to</strong> the eye-level<br />
vanish<strong>in</strong>g po<strong>in</strong>t and<br />
horizon.<br />
The angle of <strong>in</strong>cl<strong>in</strong>ation of the handrail<br />
and that of the stairs are the same.<br />
Difference <strong>in</strong> appearance depend<strong>in</strong>g<br />
on view<strong>in</strong>g location <strong>in</strong> relation <strong>to</strong><br />
vanish<strong>in</strong>g po<strong>in</strong>t<br />
Left of<br />
vanish<strong>in</strong>g po<strong>in</strong>t<br />
Right of vanish<strong>in</strong>g po<strong>in</strong>t<br />
Difference <strong>in</strong> appearance depend<strong>in</strong>g<br />
on view<strong>in</strong>g location <strong>in</strong> relation <strong>to</strong><br />
horizon<br />
Vanish<strong>in</strong>g po<strong>in</strong>t<br />
Above horizon Above horizon<br />
. Cannot see<br />
upper surface<br />
Below horizon<br />
Right of vanish<strong>in</strong>g po<strong>in</strong>t<br />
. Can see height of steps<br />
Below . horizon<br />
Left of vanish<strong>in</strong>g po<strong>in</strong>t<br />
. Can see upper surface<br />
Can see width of steps
-1"<br />
Chopter 5<br />
<strong>How</strong><strong>to</strong> Drqvn<br />
Bockgrounds<br />
leom<strong>in</strong>g by Do<strong>in</strong>g
Let's say you have a name and a character for your <strong>manga</strong>.<br />
All that is left <strong>to</strong> do is <strong>draw</strong> the backgrounds.<br />
Let's take a look at the actual process of <strong>draw</strong><strong>in</strong>g <strong>manga</strong><br />
backgrounds us<strong>in</strong>g perspective.<br />
Draw <strong>to</strong>wn scene here<br />
(residential area).<br />
Proposal draft<br />
('neemu' <strong>in</strong> Japanese)<br />
Draw school here.<br />
1'10
ṟ<br />
ihe case of <strong>manga</strong>, you<br />
-:_rally <strong>draw</strong> the frame at the<br />
-::er left or the <strong>to</strong>p row first.<br />
*- s helps keep the page from<br />
:;:r<strong>in</strong>g messy.<br />
Reference pho<strong>to</strong>graph<br />
- Determ<strong>in</strong>e horizon and vanish<strong>in</strong>g po<strong>in</strong>t.<br />
Vanish<strong>in</strong>g po<strong>in</strong>t<br />
= Draw road.<br />
lolumn: when <strong>draw</strong><strong>in</strong>g, mask the frames you are not work<strong>in</strong>g on with paper <strong>to</strong> keep them as<br />
clean as possible.<br />
111
3 Draw build<strong>in</strong>gs on the left.<br />
Determ<strong>in</strong>e the height of the show w<strong>in</strong>dow<br />
and other build<strong>in</strong>gs by slid<strong>in</strong>g the<br />
character over.<br />
Raise the character <strong>to</strong> the level of the<br />
sidewalk.<br />
240 cm = 7.87 ll. 200 cm *<br />
190 cm<br />
220 cm =7.2211.<br />
200 cm = 6.56 ft.<br />
190 cm = 6.23 ft.<br />
180 cm = 5.90 ft.<br />
160 cm = 5.25 ft.<br />
.*.- 240 cm<br />
---- -<br />
220cn<br />
180 cm<br />
160 cm<br />
Th<strong>in</strong>k of the street entrance of the build<strong>in</strong>g as be<strong>in</strong>g 2 meters high<br />
and the show w<strong>in</strong>dow as be<strong>in</strong>g 2.4 meters high. Use the<br />
character as a guide when determ<strong>in</strong><strong>in</strong>g the size of the build<strong>in</strong>g,<br />
i.e., the height of the character plus number of heads.<br />
The height of the show w<strong>in</strong>dow is<br />
between 200 and 240 cm
-<br />
@ Draw build<strong>in</strong>gs on the right<br />
*<br />
Slide the character <strong>to</strong> the right and determ<strong>in</strong>e the height of<br />
the vend<strong>in</strong>g mach<strong>in</strong>e, which will be used as the basis for<br />
Height of yend<strong>in</strong>g mach<strong>in</strong>e<br />
When there is a sidewalk, raise<br />
ffie dummy <strong>to</strong> the level of tie<br />
sidewalk.<br />
180 cm<br />
G y,l?t,i:H[i :3'Jffi 111,.,<br />
t--i €**<br />
-'-\- -<br />
....\<br />
180 cm = 5.90 ft<br />
175 cm =5.74fL<br />
160 cm = 5.25 ft.<br />
lfi) cm = 3.28 fi-<br />
80 cm = 2.63 ft.<br />
180 cm<br />
Comparison of character and<br />
vend<strong>in</strong>g mach<strong>in</strong>e
m<br />
Next is a school. There<br />
will be no character <strong>in</strong> the<br />
scene, but start by<br />
dr'aw<strong>in</strong>g the foundation<br />
and a dummy character.<br />
Reference pho<strong>to</strong>graph<br />
O Draw a character next <strong>to</strong> the school and determ<strong>in</strong>e the<br />
horizon and vanish<strong>in</strong>g po<strong>in</strong>t.<br />
O-t Draw horizon at eye level<br />
(middle of ground{loor w<strong>in</strong>dow).<br />
O-2 Extend slop<strong>in</strong>g l<strong>in</strong>e <strong>in</strong> rough sketch <strong>to</strong><br />
get vanish<strong>in</strong>g po<strong>in</strong>t (po<strong>in</strong>t of <strong>in</strong>tersection<br />
with horizon l<strong>in</strong>e).<br />
300 cm = 9.84 ft.<br />
280 cm = 9.19 ft.<br />
180 cm = 5.90 ft.<br />
1 60 cm = 5.25 ft.<br />
120 cm = 3.94 ft.<br />
100 cm = 3.28 tt.<br />
90 cm = 2.95 ft.<br />
/_y*,*<br />
cm<br />
Even if it will not appear In the<br />
picture, clearly <strong>draw</strong> the sudace<br />
where the character and the<br />
school come <strong>in</strong><strong>to</strong> contact <strong>to</strong><br />
make sure they are balanced<br />
conectly.
@ Draw con<strong>to</strong>ur<br />
,, .&,.<br />
s ,r1<br />
t8': .l<br />
,i :<br />
;j ,<br />
i1 ;,<br />
irjYi<br />
t -*t"'<br />
1'<br />
i . -.."-{:"1- l<br />
'3-._ a a<br />
I11 i. I'i<br />
tti<br />
I'<br />
I ai<br />
ll<br />
li<br />
@-2 Divide eachfloor., ./<br />
I<br />
I<br />
t<br />
ffi<br />
@-1 Determ<strong>in</strong>e each floor by divid<strong>in</strong>g<br />
<strong>in</strong><strong>to</strong> four parts.<br />
t<br />
ffi<br />
f<br />
H<br />
-..-..-_.-il<br />
---"'t.<br />
I<br />
I<br />
ffi<br />
:<br />
The eaves, w<strong>in</strong>dow and wall ratios of<br />
schools and other build<strong>in</strong>gs are the<br />
same for each floor.<br />
Side view<br />
<strong>in</strong><strong>to</strong> four parts start<strong>in</strong>g<br />
from the first-floor contact<br />
surface that is not visible.
3 Draw w<strong>in</strong>dows.<br />
Clearly <strong>draw</strong> the overall w<strong>in</strong>dow<br />
border (<strong>in</strong>clud<strong>in</strong>g parts not<br />
visible).<br />
@-t F<strong>in</strong>d center<br />
by <strong>draw</strong><strong>in</strong>g<br />
diagonal<br />
l<strong>in</strong>es.<br />
Draw rema<strong>in</strong><strong>in</strong>g<br />
w<strong>in</strong>dows.<br />
The depth ratio of<br />
w<strong>in</strong>dows is the same<br />
for every floor as long<br />
as the perspective is<br />
not from above. Thus,<br />
for the rema<strong>in</strong><strong>in</strong>g<br />
w<strong>in</strong>dows all you have<br />
<strong>to</strong> do is extend the<br />
w<strong>in</strong>dow l<strong>in</strong>es from<br />
another floor.<br />
116<br />
@-g Draw<br />
supplementary<br />
l<strong>in</strong>es.<br />
@-4 Divide<br />
each <strong>in</strong><strong>to</strong><br />
two (<strong>to</strong><br />
divide<br />
w<strong>in</strong>dow<br />
<strong>in</strong><strong>to</strong> four).
3 Pen <strong>draw</strong><strong>in</strong>g I<br />
Do not br<strong>in</strong>g background l<strong>in</strong>es<br />
Tape a thumbtack over the<br />
vanish<strong>in</strong>g po<strong>in</strong>t.<br />
<strong>in</strong><strong>to</strong> contact with characters.<br />
Mask<strong>in</strong>g tape<br />
fi<br />
4<br />
Thumbtack<br />
1./'<br />
Lir ';r tr;3*|nn l<strong>in</strong>es <strong>in</strong> the direction of the<br />
;:- i.- r"rg po<strong>in</strong>t, tape a thumbtack over the<br />
;r-:il' ng po<strong>in</strong>t. Us<strong>in</strong>g a ruler with the<br />
'" - -:-ack as the axis makes it easier <strong>to</strong> <strong>draw</strong><br />
:::* -:,:gh sketches and <strong>in</strong> pen.
Eras<strong>in</strong>q and white correction fluid<br />
0mit <strong>in</strong>tricate parts. Represent<br />
them by mak<strong>in</strong>g use of shadows.<br />
Not jo<strong>in</strong><strong>in</strong>g the edge l<strong>in</strong>e <strong>to</strong> the<br />
corner better creates the mood of<br />
a build<strong>in</strong>g.<br />
118
tr<br />
Soft <strong>to</strong>uch: Use little <strong>to</strong>ne.<br />
rard <strong>to</strong>uch: Apply <strong>to</strong>ne discrim<strong>in</strong>at<strong>in</strong>gly.<br />
Z,<br />
-N<br />
Th<strong>in</strong>k of perspective when<br />
determ<strong>in</strong><strong>in</strong>g <strong>to</strong>ne cut.<br />
Scrape uniform curve us<strong>in</strong>g<br />
blade tip of cutter.<br />
119
Add<strong>in</strong>g <strong>to</strong>ne 2- Residential area<br />
+re<br />
The page is complete<br />
after you have f<strong>in</strong>ished<br />
add<strong>in</strong>g detailed <strong>to</strong>ne!<br />
Soft <strong>to</strong>uch: Use little <strong>to</strong>ne.<br />
124<br />
Hard <strong>to</strong>uch: Apply <strong>to</strong>ne discrim<strong>in</strong>at<strong>in</strong>gly.
:<br />
€*<br />
#<br />
\,
that you see around yourself<br />
every day can all be used <strong>in</strong> your<br />
<strong>draw</strong><strong>in</strong>gs. lt will be very helpful when<br />
<strong>draw</strong><strong>in</strong>g <strong>manga</strong> if you know the size<br />
of objects around you. Remember<br />
the size of objects relative <strong>to</strong> the size<br />
of human be<strong>in</strong>gs (yourself).<br />
270 Ceil<strong>in</strong>g l<strong>in</strong>e<br />
240<br />
210<br />
180<br />
160 -<br />
150<br />
120<br />
90<br />
60<br />
30<br />
330 (10.83 ft.)<br />
300 (9.84 ft.)<br />
Average adult male<br />
180 cm<br />
Average adult female<br />
160 cm<br />
t<br />
=<br />
Height of first-floor<br />
Desk<br />
70-80cm<br />
270 (8.86 fr.)<br />
About 3 m<br />
240 (7.87 tt.)<br />
210 (6.89 ft.)<br />
180 (5.90 ft.)<br />
150 (4.92 ft.)<br />
120 (3.94 ft.)<br />
90 (2.e5 ft.)<br />
_-,60 (1.97 ft.)<br />
I<br />
ffilg'eft.t<br />
122
One <strong>in</strong>terval = 30 cm<br />
(about one character head)<br />
135 cm (4.43 ft.)<br />
Chest of <strong>draw</strong>ers<br />
Mattress height<br />
30-40cm<br />
Low traffic signs and signals.<br />
The signs are 3 meters (9.84 ft.) and<br />
tall signals can be 5 meters (16.4 ft.)<br />
0r more.<br />
123
Add<strong>in</strong>g reflection <strong>to</strong>ne <strong>to</strong> w<strong>in</strong>dowpanes creates<br />
a more realistic atmosphere.<br />
Shadow from opposite build<strong>in</strong>g<br />
E.<br />
124
Chopter 6<br />
Speciol Efhcrs qnd<br />
Chorcclrer Rryresenlqlion<br />
Us<strong>in</strong>g<br />
(n
Use of perspective<br />
is not limited <strong>to</strong><br />
build<strong>in</strong>gs and<br />
backgrounds. lt can<br />
be used for<br />
anyth<strong>in</strong>g that is<br />
pafi of a picture.<br />
That <strong>in</strong>cludes<br />
special effect l<strong>in</strong>es<br />
and sound words.<br />
€ ---- --<br />
- -./<br />
!L<br />
'- 1-.t.<br />
\- l, ---.<br />
il<br />
il<br />
J<br />
H<br />
E U<br />
Side<br />
Front<br />
The sword <strong>in</strong> this picture was <strong>draw</strong>n <strong>in</strong><br />
perspective, but the sound word and special<br />
effect l<strong>in</strong>es were not.<br />
The special etfect l<strong>in</strong>es (concentration l<strong>in</strong>es) were <strong>draw</strong>n<br />
from the sword's vanish<strong>in</strong>g po<strong>in</strong>t.<br />
i,<br />
I<br />
^y<br />
.:-t1<br />
rl<br />
,l<br />
. Special effect l<strong>in</strong>es<br />
when the vanish<strong>in</strong>g<br />
po<strong>in</strong>t is <strong>in</strong> the picture<br />
. Draw them <strong>to</strong>ward the<br />
vanish<strong>in</strong>g po<strong>in</strong>t.<br />
This sword was <strong>draw</strong>n with a vanish<strong>in</strong>g po<strong>in</strong>t farther away and<br />
the special effect l<strong>in</strong>es were <strong>draw</strong>n accord<strong>in</strong>gly.<br />
. Special effect l<strong>in</strong>es<br />
when the vanish<strong>in</strong>g<br />
po<strong>in</strong>t is outside the<br />
picture<br />
. Draw them away from<br />
the vanish<strong>in</strong>g'po<strong>in</strong>t.<br />
llo
fume of the con<strong>to</strong>ur l<strong>in</strong>es of this sword were represented by<br />
;anted l<strong>in</strong>es po<strong>in</strong>ted <strong>in</strong> the direction of the vanish<strong>in</strong>g po<strong>in</strong>t.<br />
SHHHHRRRRRR<br />
perspective <strong>in</strong><br />
m<strong>in</strong>d <strong>to</strong> make<br />
them look<br />
cool.<br />
127
Special effect l<strong>in</strong>es when the vanish<strong>in</strong>g po<strong>in</strong>t is<br />
outside the picture.<br />
Draw them away from the vanish<strong>in</strong>g po<strong>in</strong>t.<br />
Design the word. Draw veftical l<strong>in</strong>es<br />
<strong>in</strong> general direction of vanish<strong>in</strong>g<br />
po<strong>in</strong>t.<br />
"BANG" was <strong>draw</strong>n with the<br />
<strong>in</strong>cl<strong>in</strong>ation of thesldnted l<strong>in</strong>es <strong>in</strong><br />
milld.<br />
W<br />
w<br />
*<br />
4t#<br />
W
hat<strong>in</strong>g a Greater Sense,of ,rExbtBnceius<strong>in</strong>g,,, M<strong>in</strong>or {eehniquer<br />
-+- . :icture strictly<br />
t': ' - !,vo-po<strong>in</strong>t<br />
- :::i::ve does not turn<br />
" .- :€ very <strong>in</strong>terest<strong>in</strong>g,<br />
- : :-: perSpeCtiVe<br />
,.,, i"l3<br />
Vanish<strong>in</strong>g po<strong>in</strong>t<br />
'-\\<br />
,,- -; ,erlical l<strong>in</strong>es<br />
6": , -. anted will create<br />
.',i.= -rf existence and<br />
:I-<br />
Do not go <strong>to</strong> the trouble of<br />
mark<strong>in</strong>g a po<strong>in</strong>t. Draw a<br />
house assum<strong>in</strong>g that the<br />
vanish<strong>in</strong>g po<strong>in</strong>t is above<br />
the house.<br />
af,_<br />
irianga and dratt<strong>in</strong>g techniques<br />
'.^y draft<strong>in</strong>g techniques are used <strong>to</strong> <strong>draw</strong> <strong>manga</strong>, but<br />
:-:;;<strong>in</strong>g <strong>manga</strong> is not dratt<strong>in</strong>g.lf it is effective <strong>to</strong> do so, use<br />
:",t<strong>in</strong>g techniques flexibly. For <strong>in</strong>stance, you do not have <strong>to</strong><br />
-.= three-po<strong>in</strong>t perspective just because the vanish<strong>in</strong>g po<strong>in</strong>t is<br />
'-,:ve the picture.<br />
129
<strong>Perspective</strong> rulers<br />
fioo Corporation) are<br />
transparent, platetype<br />
<strong>draw</strong><strong>in</strong>g <strong>to</strong>ols<br />
with floor and wall<br />
perspective l<strong>in</strong>es.<br />
,They come <strong>in</strong> onepo<strong>in</strong>t,<br />
two-po<strong>in</strong>t and<br />
three po<strong>in</strong>t<br />
perspective types.<br />
They allow you <strong>to</strong><br />
easily <strong>draw</strong> objects<br />
with vanish<strong>in</strong>g po<strong>in</strong>ts<br />
far away, so use the<br />
type that matches the<br />
angle or image you<br />
want.<br />
0ne-po<strong>in</strong>t perspective type<br />
ffhe horizon l<strong>in</strong>e was added <strong>in</strong> this book.)<br />
Two-po<strong>in</strong>t perspective type<br />
Dedicated ruler<br />
Three-po<strong>in</strong>t perspective type<br />
When you align the dedicated<br />
ruler that comes with it with the<br />
plate's curved surface, slanted<br />
l<strong>in</strong>es and depth l<strong>in</strong>es will<br />
converge on the vanish<strong>in</strong>g po<strong>in</strong>t.<br />
\-<br />
.-\<br />
lf you assume that one<br />
graduation is 20 cm, the<br />
graduations are designed so that<br />
the height of the horizon is 160<br />
cm.<br />
Ceil<strong>in</strong>g heights and room<br />
compositions are freely<br />
determ<strong>in</strong>ed by choos<strong>in</strong>g<br />
graduation positions.<br />
t)<br />
The two-po<strong>in</strong>t perspective ruler can be used<br />
as the basis of a one-po<strong>in</strong>t perspective<br />
background,<br />
130
@ Align horizon of perspective ruler.<br />
,<br />
uil<br />
P<br />
----\<br />
r: :. 3 graduations on<br />
]tliirrcE itive rulers <strong>to</strong><br />
'tr'"r"'ill potential.<br />
,, i' : ,:( Convenient tO<br />
.iut,r{ :El'spective rulers<br />
,r*,1' :raw<strong>in</strong>g a rough<br />
ilr: -<br />
,<br />
', "':ru a horizon l<strong>in</strong>e on<br />
@ Draw perspective liries<br />
-r:-r 'rugh sketch when<br />
-,: ..ril ffie one-po<strong>in</strong>t and<br />
"ililr,{- :,0<strong>in</strong>t perspective<br />
",:,r Serspective rulers.<br />
Us<strong>in</strong>g a kac<strong>in</strong>g box<br />
Trac<strong>in</strong>g paper is usually<br />
placed over a perspective<br />
ruler, but us<strong>in</strong>g a trac<strong>in</strong>g box<br />
will be more efficient.<br />
131
The horizon l<strong>in</strong>e is two steps down<br />
from the <strong>to</strong>p of the stairs. The horizon<br />
l<strong>in</strong>e is oblique relative <strong>to</strong> the picture.
lren if you <strong>draw</strong> a character normally, you will get a powerful<br />
:,rmposition by tilt<strong>in</strong>g the horizon l<strong>in</strong>e,<br />
Simple one-po<strong>in</strong>t perspectiveall<br />
the artist did was tilt the<br />
horizon l<strong>in</strong>e.<br />
The ground has been tilted.<br />
The build<strong>in</strong>gs were <strong>draw</strong>n<br />
us<strong>in</strong>g vertical two-po<strong>in</strong>t<br />
perspective.<br />
Eo,lumn: 0veruse ol this technique of<br />
tilt<strong>in</strong>g the horizon l<strong>in</strong>e relative<br />
<strong>to</strong> the picture can result <strong>in</strong> a<br />
page that is confus<strong>in</strong>g <strong>to</strong> look<br />
at. Save it for special<br />
situations.<br />
133
Look<strong>in</strong>g straight up.<br />
Simple one-po<strong>in</strong>t perspective.<br />
rffi<br />
',f, irr ur [a ril rrl lt<br />
na lra arr tta ltr lrr lll<br />
One-po<strong>in</strong>t perspective where the horizon<br />
was tilted and curved.<br />
Draw perspective l<strong>in</strong>es and special<br />
effect l<strong>in</strong>es us<strong>in</strong>g curved l<strong>in</strong>es.<br />
ț/,<br />
fr
W
@rc
Gtr<br />
us $1g.ee<br />
PUTTING THINGS IN<br />
PERSPECTIVE<br />
lsBN4-7661 -1 256-3<br />
MORE ABOUT PRETTY GALS<br />
tsBN4 7661-1242-3<br />
PEN AND TONE TECHNIQUES<br />
l5BN4-7661 -1 258-X<br />
COSTUME ENCYCLOPEDIA<br />
lsBN4-7661 -1 2s7-1<br />
HOW TO DRAW ANIME & GAME<br />
CHARACrERSVOL.I<br />
|SBN+7661 1120-6<br />
HOW TO DRAW ANIME & GAME<br />
CHARACTERS VOL.2<br />
tsBN4 7661-1 174-5<br />
HOW TO DRAW ANIME & GAME<br />
CHARACTERS VOL.3<br />
tsBN4-7661 1 1 75-3<br />
HOWTO DRAW ANIME & GAME<br />
CHARACTERSVOL4<br />
tsBN4-7661 -1 254-7<br />
HOWrc DRAW AI{IME & GAME<br />
CHARICIIRSVOT.s<br />
lsBN+7661-',t 276-8
-II[IflJil<br />
ISBN t{ -<br />
1<br />
II[il<br />
thl-Ia5b-3<br />
'ililflffiIm|ilJt<br />
BORONTA s7624099 HEALESVTLLE ........5962442s<br />
FTG ......._............... ... 9294 al/i} L|LYDALE g2s4 g12O<br />
KNOX................_...... 9801 .1422 MONTBOSE ......... ... 9728 4224<br />
KNOX MOB|LE........ 9762 4099 MOOROOLBABK . ... 9726 8200<br />
ROWVTLLE ............_.92941300 MT EVELYN ............ 9736 3851<br />
oHoYDON ._............ 9294 5640 RANGES MOBTLE .. s7547266<br />
RTNGWOOD ............ 9870 0177 VALLEY MOBTLE .... s2g4 3120<br />
BELGBAVE ......_...... 9754 7266 YARRA JUNCTTON 5967 1588