How to draw manga - Enhancing a characters

Create successful ePaper yourself
Turn your PDF publications into a flip-book with our unique Google optimized e-Paper software.
L-+-+:1.<br />
RrOBg<br />
fimuml$uffliluiluu[iluufiuuil rn<br />
r!'HovToDRA$/<br />
voL.3<br />
!rtiurtujrtil<br />
tltliS<br />
Uituir<br />
).<br />
UIJ SiiSilu!<br />
Go Office
<strong>to</strong>vxSDR#<br />
ffi<br />
Vol.l : Compiling Characters<br />
Chapter 1 Drawing the Face<br />
Chapter 2 <strong>How</strong> <strong>to</strong> Draw Bodies<br />
Chapter 3 Drawing Characters<br />
lsBN4-7661 -1 473-6<br />
Vol.2: Compiling Techniques<br />
Chapter'1 Background Management Basics<br />
Chapter 2 Tone Techniques<br />
Chapter 3 Expressing Light and Shadows<br />
lsBN4-7 661 -1 47 4-4<br />
Vol.3: Compiling Application and Practice<br />
Chapter 1 <strong>How</strong> <strong>to</strong> Draw lnteriors and Exteriors<br />
Chapter 2 <strong>How</strong> <strong>to</strong> Draw Machines<br />
Chapter 3 <strong>How</strong> <strong>to</strong> Create a Short S<strong>to</strong>ry MANGA<br />
lsBN4-7661-1475-2<br />
Vol.4: Dressing Your Characters in<br />
Casual Wear<br />
Chapter 1 Underwear and T-shirts<br />
Chapter 2 Sweatshirts and Skirts<br />
Chapter 3 Jackets and Jeans<br />
tsBN4-7 661 -1477 -9<br />
Special: Colored Original Drawing<br />
(Copic Sketch Pen)<br />
Chapter 1 Copic Sketch Pen<br />
Chapter 2 Copic Airbrushing System<br />
Chapter 3 Try Using Different Painting Materials with Markers<br />
lsBN4-7661-1479-5<br />
Hru<br />
Btr;<br />
{F<br />
^44\<br />
+-F<br />
Vol.5: Developing Shoujo Manga<br />
Techniques<br />
Chapter I <strong>How</strong> <strong>to</strong> Draw Characters<br />
Chapter 2 <strong>How</strong> <strong>to</strong> Draw Backgrounds<br />
Chapter 3 <strong>How</strong> <strong>to</strong> Create S<strong>to</strong>ries<br />
Chapter 4 <strong>How</strong> <strong>to</strong> Create Manga<br />
Manuscripts<br />
1SBN4-7 661 -1 47 6-A<br />
Vol.6: Martial Arts & Combat Sports<br />
Chapter 1 ..ludo<br />
Chapter 2 Karate<br />
Chapter 3 Kendo<br />
Chapter 4 Boxing<br />
Chapter 5 Street Battles<br />
lsBN4-7661-1478-7<br />
Distrlbuted by<br />
JAPAN PUBLICATIONS TRADING CO,,LTD.<br />
'- - :;-.-'j-=- - :.:. la,yooa-ku. Tokyo. I0l-0064 Japan<br />
:-rrr-€ i - - j - :-r-- j-: - -<br />
-, : 3' -3-3292 Cdl C E-mail: jpt@lptco.co.jp
ffiTODRAS/<br />
Vo!.3<br />
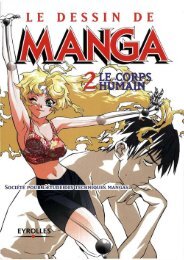
<strong>Enhancing</strong> a Charaeter's<br />
Sense of Presence
MoRE HoW T0 DRAW MANGA Vol. 3: <strong>Enhancing</strong> a Character's Sense of Presence<br />
by Hikaru Hayashi, Rio Yagizawa/ Go 0ffice<br />
Copyright @ 2003 Hikaru Hayashi, Rio Yagizawa/ Go 0ffice<br />
Copyright @ 2003 Graphic-sha Publishing Co., Ltd.<br />
This book was first designed and published by Graphic-sha Publishing Co., Ltd. in Japan in 2003.<br />
This English edition was published by Graphic-sha Publishing Co., Ltd. in Japan in 2004.<br />
Artwork and Production: Kazuaki Morita, Yumiko Deguchi, Hiroko Shioda, Akira Gokita, Haru<strong>to</strong>,<br />
Production Assistant:<br />
Production Support:<br />
CoverArtwork:<br />
English Main Title Logo Design: Hideyuki Amemura<br />
Composition and Text:<br />
Article Conhibu<strong>to</strong>r :<br />
Reference Pho<strong>to</strong>graphy: Go 0fiice<br />
Kozue Onishi, Ushio, Kei Asagi, Ru'u, Mayumi Tomaru, Ken<strong>to</strong> Shimazaki,<br />
Rio Yagizawa<br />
Takumi Takahashi, Kozue 0nishi, Haruki Takahashi<br />
Julie Asakura<br />
Kazuaki Morita<br />
Hikaru Hayashi, Rio Yagizawa (Go Office)<br />
Yoshihiro Yonezawa<br />
English Edition Layout Shinichi lshioka<br />
English Translation Management: Llngua fr6nca, lnc. (an3y-skmt@asahi-net.or.jp)<br />
Planning Edi<strong>to</strong>r:<br />
Mo<strong>to</strong>fumi Nakanishi (Graphic-sha Publishing C0., Ltd.)<br />
Foreign Language Edition Project Coordina<strong>to</strong>r: Kumiko Sakamo<strong>to</strong> (Graphic-sha Publishing Co., Ltd.)<br />
All rights reserved. No paft of this publication may be reproduced or used in any form or by any means<br />
- graphic, electronic, or mechanical, including pho<strong>to</strong>copying, recording, taping, or information s<strong>to</strong>rage and<br />
retrieval systems - wlthout written permission of the publisher and the copyright holders.<br />
Distribu<strong>to</strong>r:<br />
Japan Publications Trading Co., Ltd.<br />
1-2-1 Sarugaku-cho, Chiyoda-ku, Tokyo, 101-0064<br />
Telephone: +81 (0)3-3292-3751 Fax: +81 (0)3-3292-0410<br />
E-mail: jpt@jptco.co.jp<br />
URL: http://wwwjptco.co.jp/<br />
First priniing: August 2004<br />
tsBN 4-7661-1484-1<br />
Printed and bound in China
Vol. 3<br />
<strong>Enhancing</strong> a character's sense of presence<br />
(v<br />
\\<br />
[\
Table of Contents<br />
Chapter 1<br />
The lmportance of Tone Work<br />
Tones Attached <strong>to</strong> Characters Serve 2 Purposes: Shading and C010r.........8<br />
7 Panelization Styles Used <strong>to</strong> Enhance the Character's Sense of Presence ...........1 0<br />
Composition Samples Using the 7 Panelization Sty|es..............................12<br />
3PanelizationStylesSuited<strong>to</strong>wardShading.... .,...,..............13<br />
The Fundamentals of Light and Shadow ...........14<br />
3 Types of Shadows Connected <strong>to</strong> Light Standard, Bright, and Soft Light.....16<br />
The Shading Process .........,.,.........18<br />
The ABC's of Tone .......20<br />
Attaching Tone:Tools and the Process...... .........22<br />
Sample Uses of Gradation T0ne.....,.,... ......................28<br />
Ghapter 2<br />
Character Shading and Tone<br />
The ABC's of Facial Shadows ............<br />
Shadows under the Chin ...........<br />
The Basics of Cheek Shadows ..............31<br />
Dark and Light Shadows: Bright and<br />
When <strong>to</strong> Keep the Face Shadow-Free ..............34<br />
Guidelines in Suggesting Color<br />
Planning According <strong>to</strong> Value<br />
32<br />
Rendering the Hair.......<br />
Profile .........<br />
Moderate Low Angle<br />
...........Y<br />
40<br />
41<br />
Common Body Shadows .............<br />
Principles in Figure Shading.......<br />
Tricks <strong>to</strong> Drawing Body Shad0ws............. .........54<br />
Male Characters............. ............54<br />
Female Characters... ...................58<br />
Shadows at the Feet .............,........62<br />
Creating a Composition without Using Tone:<br />
Sample Compositions in Pen .........64
Ghapter 3<br />
Movement with a Sense of<br />
The Key Points <strong>to</strong> Portraying Natural Movement<br />
Shoulder Basics<br />
Juncture of the Shoulders and Neck (Shoulder<br />
The Bust Shot Drawing Process<br />
The Side Centerline Gives the Torso 72<br />
The Clavicle ls Another Vital Point <strong>to</strong> Giving ttreft-rsb ..,...76<br />
Sample Clavicles .......................78<br />
Showing a Figure Extending and Contracting Allows<br />
i<br />
The Waist and Back.....<br />
Bending Over and Hunkering Down .......... ..................,,92<br />
Arcing the Back/Leaning Back ................100<br />
Leaning <strong>to</strong> the Side: Fashion Model Poses ...................106<br />
Twisting and Turning ...........108<br />
Adding the Finishing Touches <strong>to</strong><br />
a Hot "Backward Glance" Pose with Torsion ................,.....112<br />
Ghapter 4<br />
More Manga<br />
The Fundamentals of Manga Portrayal:<br />
Making the Composition Obvious at a Glance ............... ....1 16<br />
4 Basic Elements..... ....,............116<br />
Telling a S<strong>to</strong>ry Visually ..............1 17<br />
Panel Design (Ihe ABC's of Page Composition) ..................1 18<br />
Giving the Panel Design Variation .................,120<br />
Figures and Cars: <strong>How</strong> <strong>to</strong> Draw Comfortably Scenes of<br />
Figures Getting in and out of Cars........... ........122<br />
Special Effects That Enhance a Character's Sense of Presence .............124
I Obiectives of this Book<br />
mil<br />
tKt<br />
l) ll<br />
v<br />
This volume<br />
reveale all<br />
of Nhe key<br />
techniqueo.
The lmportance of<br />
Tone Work<br />
[:i:.i.:.:.:.: : ::.:<br />
I..,.""<br />
::::::l.::i'
Shading is a technique used <strong>to</strong> evoke a<br />
sense of 3-dimensionality when added <strong>to</strong><br />
the face or figure. lt is primarily used in key<br />
panels or shots. (<br />
--a\<br />
I<br />
G*<br />
Wi:iiiiin<br />
Close-up<br />
Close-ups are<br />
used <strong>to</strong> give<br />
impact <strong>to</strong> a<br />
character's facial<br />
,/<br />
#51, 61, 7'1, etc. are the <strong>to</strong>ness commonly<br />
used for shadows on the face and figure.<br />
,,,',,:,,,,,:,:':.,,:,,.,:':.,,:r,,,:':-.:,:r,:rr::,,<br />
: ||, --j: : -'i:|:, |:,,,||,||,,:.,,|:||:,,
Color<br />
Colors are portrayed by contrasting values<br />
of black, white, and grey, distinguishing<br />
lighter values from darker ones.<br />
r_I<br />
b= l'--o\ il<br />
o II<br />
Fll<br />
Tone Guides for Portraying Color<br />
Darker values are often used <strong>to</strong><br />
portray red or blue.<br />
/ \/ \<br />
\ /\ /<br />
iflflflflilt1," :tEi,,<br />
Lighter values are commonly used <strong>to</strong><br />
portray yellow or pink.<br />
"ilirumr<br />
.sed for Both Shading and Color<br />
o The same <strong>to</strong>ne is attached in layers<br />
<strong>to</strong> portray shadow.<br />
o This technique, which creates a<br />
look common <strong>to</strong> anime, works well<br />
with close-ups and with<br />
i I lustration -style artwork.
7 Panelization Styles Used <strong>to</strong> Enhance the Gharacter's Sense of Presence<br />
While <strong>manga</strong> artists seem <strong>to</strong> <strong>draw</strong> faces in countless<br />
different sizes, in truth they use only 7. Once you are<br />
able <strong>to</strong> distinguish properly these 7 different paneliza<br />
styles you will finally achieve success in enhancing your<br />
<strong>characters</strong>' senses of presence.<br />
@ rult Figure: Large<br />
(Fig. height approx. 22 cm<br />
or 8 5/8")<br />
This is an impressive<br />
shot, used when the<br />
character is making his<br />
or her appearance on<br />
the scene. The head is<br />
about 3 cm (1 1/8") in<br />
height.<br />
Here we see a cut using faces' sizes used with O<br />
@. Bust shots like these are often used with<br />
conversation scenes. The faces appear at various<br />
sizes, according <strong>to</strong> the facial expression or<br />
dimensions of the face within the panel.<br />
Full Figure:Medium<br />
(Fig. height approx. '14 cm or 5 1/2")<br />
This height is used for<br />
showing the characteris<br />
full figure. This height is<br />
still considered on the<br />
large size for dramatic<br />
portrayal. The facial<br />
shadows are optional.<br />
The figure below shows<br />
a character of the same<br />
height seatedi<br />
Long Shot: Large<br />
(Fig. height approx.<br />
7 cn or 23/4")<br />
Long Shot<br />
Mid-length<br />
(Fig. height<br />
approx. 4 cm<br />
or 1 1/2")<br />
Long shots of a<br />
character are primarily<br />
used in backgrounds<br />
and settings in order <strong>to</strong><br />
establish the scene.<br />
(i.e. they appear in<br />
panels focusing more<br />
on the background<br />
than the character.)
i--<br />
t+h<br />
l<br />
,{<br />
lllllltrruum $fmrlr:<br />
iiltrlm il _rm r-s; of fie large full figure<br />
t[mmltuu]tr *# e.-. lt is the most frequenily<br />
{rttmltt llrfim r 3 character used in <strong>manga</strong>. Use<br />
rir 'lmlutllr lm f;r nce is optional. Shadows on<br />
llilr lttlltili,lr* ;r' ailfective.<br />
fh i, \<br />
*[,i,J , \<br />
\;..;lti./ i I<br />
ffiJ \i<br />
t'\\<br />
@ wlio-sizeo {<br />
Close-up \<br />
\
the 7 Panelization<br />
Use <strong>to</strong>ne for uniforms and other areas where the color is<br />
predetermined. As shadows are added when the face or<br />
figure size is large, the <strong>to</strong>ne gives <strong>to</strong>nal balance, <strong>draw</strong>ing<br />
out the character.<br />
1:t::<br />
l:titiil<br />
O Full figure (large): Tone added for shadows on the face and figure and for the uniform's colors @ Full figure<br />
(medium and larger): Tone added only for shadows on the face and for the uniform's colors @ Long shot (large): Tone<br />
added only for the uniform's colors @ Bust shot: Tone added only for the uniform's colors @ Close-up (mid-sized):<br />
The face is cropped, and <strong>to</strong>ne is added for shadows in the face and the uniform's colors @ Close-up: Tone added for<br />
shadows in the face and the uniform's colors Note: Actual size of <strong>draw</strong>ing approx. 1.2 times (120%) that shown in<br />
, figgre.
$ Fanelization <strong>to</strong>ward Shading<br />
Adding shadows <strong>to</strong> the face and figure<br />
are more effective when used with the<br />
FullFigure<br />
(Large)<br />
Try <strong>to</strong> keep<br />
<strong>to</strong>ne use on<br />
the face<br />
simple (i.e. do<br />
not use much).<br />
rilltrlM<br />
ilfimffilillurllut :re used<br />
mr iiritiltru :nm-mitions,<br />
ruumfl m rt-,oduc<strong>to</strong>ry scenes for<br />
flmrr,illu[ms as well as major scenes.<br />
llrililrl(1ir :me -rlst <strong>to</strong> overuse <strong>to</strong>ne by<br />
i,rfilmurilrlflilnq : h every single character,<br />
m ,lrll]|lufl fi:rrB could have the counter<br />
!r i messy, busy composition.<br />
'rfrlillillfiinllllll<br />
Glose-up (Mid-sized)<br />
Perfect for when a<br />
moderately large face is<br />
desired, this is half the size<br />
of a regular close-up and<br />
twice the size of a bust shot.<br />
tlti<br />
:{.1:.r.<br />
l.1r': \:<br />
l !:it.:l<br />
f::::::::::::<br />
\::i:::;:r
The Fundamentals of Light and Shadow<br />
Average Light<br />
Since volume is portrayed using light and shadow,<br />
use shadow <strong>to</strong> create a sense of 3-dimensionality.<br />
Normal indoor<br />
lighting, sunlight, etc.<br />
Light Source<br />
While film and paintings require minute<br />
direction in terms of the light source's<br />
position or the placement of lighting, its<br />
Here, the rays of light following parallel<br />
lines are referred <strong>to</strong> as "directional light."<br />
14<br />
intensity, number of lights/light sources,<br />
elc., in <strong>manga</strong> only the position of the light<br />
source need be decided (e.9. whether <strong>to</strong><br />
place it <strong>to</strong> the character's upper left or righl<br />
side, etc.).<br />
Clothing: 10% <strong>to</strong>ne<br />
Shadows: 20% <strong>to</strong>ne
:: pecial Lighting Etfects<br />
The spotlight is the most well known 'light ray." ln contrast <strong>to</strong><br />
the Sun, which is a directional light source, the spoflight is<br />
also referred <strong>to</strong> as a point light source.<br />
Spotlight<br />
Double spotlight<br />
,:illilrilifl ;r":<br />
:r," :.- 1: ri light off a spotlight tends <strong>to</strong><br />
: r -*:-s; use solid black ink instead of<br />
n.-,. ": :':cuce a dramatic effect.<br />
Combined<br />
Lighting<br />
Here we see light coming from 2 sources (combined lighting) -in<br />
this case from a streetlight and from a gate light. While in reality,<br />
most lighting is combined, in <strong>manga</strong>conuention leans <strong>to</strong>ward<br />
point sources or spotlights. Combined lighting is used when<br />
seeking an out-of-the-ordinary mode of portrayal 0r effect.<br />
14
3 Types of Shadows Connected <strong>to</strong> Light:<br />
Standard, Bright, and Soft Light<br />
Without Shadow<br />
Shape with Standard Lighting<br />
Typically rendered in grey<br />
\@<br />
\.-<br />
While this style appears clean, it makes for an overly<br />
simplistic image up close.<br />
Bright Lighting<br />
Use black or a dark gradation <strong>to</strong>ne.<br />
This is extremely common shading and works w.<br />
for outdoors and indoors alike.<br />
\/<br />
tI<br />
Shadows rendering in<br />
hatching and crosshatching<br />
-<br />
Shadows rendered in black<br />
16
Soft Lighting<br />
Use <strong>to</strong>ne with fine dots or<br />
a light value (shade).<br />
rc@<br />
Use #71, fine-dot <strong>to</strong>ne.<br />
Tone unetched: The small<br />
area occupied by the shadow<br />
suggests "soft lighting."<br />
illtMfrrung Solid Blacks <strong>to</strong> Boost the Sense of Presence<br />
'1,-r' : :(-Se 0l pfesenOe.<br />
Layering <strong>to</strong>ne <strong>to</strong> produce dark<br />
shadows instead of using solid<br />
blacks creates a look common<br />
<strong>to</strong> anime. This style works well<br />
with illustration-style artwork.
The Shading Process<br />
Penned<br />
<strong>draw</strong>ing<br />
Direction<br />
ol lisht<br />
The plotted<br />
shadows will simply<br />
serve as guidelines<br />
for where <strong>to</strong> attach<br />
<strong>to</strong>ne, so avoid filling<br />
them in.<br />
@<br />
Determine the light source.<br />
@<br />
enttheshadows.<br />
Use a non-pho<strong>to</strong> blue or yellow<br />
pencil <strong>to</strong> jot down the shadows.<br />
Spotting Blacks<br />
a<br />
Fill in any solid blacks before :<br />
attaching <strong>to</strong>ne. Standard practice !<br />
dictates adding blacks under the !<br />
jaw line and underarm.<br />
a<br />
a<br />
a<br />
a<br />
a<br />
a<br />
a<br />
O<br />
a<br />
a<br />
o<br />
w"'<br />
a<br />
a<br />
a<br />
,:' j<br />
a<br />
a<br />
a<br />
a<br />
a<br />
a<br />
a<br />
a<br />
a<br />
a<br />
a<br />
a<br />
a<br />
a<br />
o<br />
a<br />
a<br />
a<br />
o<br />
a<br />
Lead markings of non-pho<strong>to</strong> blue and yellow pencils disappear when the <strong>draw</strong>ing is put in<strong>to</strong><br />
print form or pho<strong>to</strong>copied, so they are frequently used <strong>to</strong>ols. A mechanical pencil may be used<br />
1 8 instead, provided that the lead color is light blue or yellow.
,rir,,rummmre Shading<br />
iilrfiM rilll]iilfffir3 and Tone<br />
mtillilllIr:<br />
ullillt I litl **l:rr,lst<br />
fliLlll]rlllllill]]' -,a:'ia<br />
:llrirnlfl:- igin<br />
t' illliiill(fi: il! itifl]<br />
I r' l ll|illlj:r i-Jtead<br />
iilltiltiili: -.; ::te.<br />
I<br />
{<br />
I<br />
lt<br />
x<br />
I<br />
l<br />
i<br />
:i<br />
" '1 1l ri -- PnqtI<br />
19<br />
Take care when<br />
hatching that the<br />
strokes do not end up<br />
in different directions.<br />
Hatching and Tone
The ABG's of Tone<br />
Composition created<br />
using solely 10%<br />
(saturation) <strong>to</strong>ne<br />
Figure created using <strong>to</strong>ne of<br />
uniform saturation but with<br />
varying dot sizes<br />
Nos.11<strong>to</strong>91<br />
The most<br />
common form<br />
<strong>to</strong>ne, pictured<br />
here, is known<br />
"dot <strong>to</strong>ne."<br />
61 -- The 1 refers <strong>to</strong><br />
t<br />
,o% saturation.<br />
The ten's place refers <strong>to</strong> the dots'<br />
I..-.-.-'-'-.-'-.-.-.-.-'-l<br />
0l<br />
'11<br />
l-'-.-.-'-._.-.-.-......1<br />
t....-.-.......-..'.'...1<br />
r_.-.-.-.-. -.-...-.-.-l 21<br />
F..-.-.-...-..........1<br />
31<br />
li: ::':':': : : :':': ' ' : : : : :::: :::ill<br />
1.1: ,, :. .: r'1: r':l<br />
rr:----ii-::t:=<br />
tfu<br />
41<br />
5t<br />
61<br />
71<br />
81<br />
While each of<br />
these <strong>to</strong>nes<br />
a different feel,<br />
we can see from<br />
their numbers<br />
they are in fact<br />
the same<br />
"saturation. "<br />
larger the figure<br />
the ten's place,<br />
the smaller the<br />
dot size, and<br />
numbers like 60.<br />
70, and over haw.,<br />
very tiny dots.
" l: " :: Cfeated<br />
. "::1090%<br />
r -- :0ne<br />
This figure was created using<br />
<strong>to</strong>nes solely of the 50s range.<br />
(i,e. all of the dots are the same<br />
size.)<br />
54<br />
52<br />
ill<br />
llHr<br />
54<br />
53<br />
55<br />
50<br />
Tones between 50 and 55<br />
Tones with the same number in the<br />
ten's place have the same dot size.<br />
The difference lies in the density<br />
(saturation level).<br />
[-------l sr<br />
lt<br />
L I (10%)<br />
tl<br />
tmai<br />
t................ ._. I J!<br />
t-....-............l<br />
I. -. - -..-,.,. ._._I<br />
t. .... - -........t<br />
t . . . . . . . . . , . , . , . , . . . . . t<br />
[:'t,:,:,:,:.,,t,t,,,,,tit,:.t,t,t.,t,t,,]<br />
tZOoZA<br />
[::iiiii:iii:il:i:iii:iiii::ii:!iilil] (30%)<br />
fl:8"*II*:;rIEll s+<br />
t:t::::::::::::::::::::::: :::r:r:::rl!::::l<br />
(40%)<br />
li:iiiiii::::ii::iiiiii::i!:ii!il<br />
[::I:::I::::i:::::i:::::i::::::::::::::l<br />
l::i:!:i:::::!:j:i:::::i:!:i::::::::::::::::l<br />
[ijii:lir:!:i:ilr:i]li:il_:i:i:i::i:1<br />
ffit-^<br />
w"o<br />
/qn0,{^\<br />
WWffi$O%I<br />
W<br />
50s series <strong>to</strong>ne<br />
Ea..tY.r,tr.rH<br />
N<br />
Itttt{df,itttti<br />
[tf,ttttttttfl<br />
Et[H{t{I[!*]<br />
:th<br />
ffi,,<br />
30s series <strong>to</strong>ne<br />
r' r - i:r ln these 2 pages are lC Screen. Slight differences do appear from brand <strong>to</strong> brand<br />
: I :i : : r the spacing between dots, even-When the <strong>to</strong>ne numbers are identical.<br />
21
AttaChing TOng -Tools<br />
and the process-<br />
E Getting Started @efore Attaching Tone)<br />
Attaching Dot Tone <strong>to</strong><br />
a T-Shirt (lC-51 Used)<br />
Non-stick paper<br />
Matching up the Tone Size<br />
Adhesive<br />
New <strong>to</strong>ne has a paper backing.<br />
O Lay the <strong>to</strong>ne with the backing attached<br />
over the panel.<br />
@ Trim the <strong>to</strong>ne <strong>to</strong> the<br />
desired size (cut it slightly<br />
on the large-side).<br />
22<br />
When attaching <strong>to</strong>ne <strong>to</strong> the whole panel,<br />
some artists will slide the panel<br />
between the <strong>to</strong>ne and its backing.<br />
Caution: the adhesive back of the <strong>to</strong>ne<br />
does pick up specks easily.<br />
.-\\ \<br />
\21 \<br />
v\,r.<br />
@^b<br />
The <strong>to</strong>ne may be trimmed<br />
wilh the backing still<br />
attached.
' ,huut llhn :rr: :r <strong>to</strong>p of the panel and press lighfly.<br />
llilnm,.qffi#r 1 i[] i}?r Jc entire target area.<br />
ET<br />
L<br />
Do not press down <strong>to</strong>o hard on<br />
portions you plan on removing.<br />
Points Goncerning Tone<br />
Alignment<br />
i:i:i::l -E:t<br />
o_a_a_ol o-O-<br />
It<br />
-at-l<br />
is important Except for when a<br />
that you align the pafticular effect is<br />
<strong>to</strong>ne squarely desired, <strong>to</strong>ne is<br />
against the panel rarely attached at<br />
or <strong>draw</strong>ing. a skewed angle.<br />
Press down on<br />
areas <strong>to</strong> be<br />
permanently<br />
attached.<br />
Another good idea is <strong>to</strong><br />
check the alignment with a<br />
straightedge before pressing<br />
down on the <strong>to</strong>ne.<br />
i,'ri,3 X',. <strong>to</strong>ne is supposed <strong>to</strong> cover the T-shirt, trim it<br />
I :':end slightly over the target area in all directions.<br />
:i: :iot use the panel as your guide <strong>to</strong> trimming.<br />
;q,h?ys remember that the target area is the area <strong>to</strong><br />
urr,:h the <strong>to</strong>ne will be attached.)<br />
Common Pitfalls<br />
t*:#;H"the<strong>to</strong>ne<br />
j?j<br />
---_--.-.t<br />
Paper backing<br />
A Word on Soiled Tone<br />
V<br />
The <strong>to</strong>ne fails <strong>to</strong> cover the<br />
entire target area. Take<br />
careful note of edges and<br />
c0rners.<br />
flur<br />
iflmlllrnfl<br />
lrii ilii -:l never remove the paper<br />
iliilri r -: -T"ll the entire <strong>to</strong>ne when<br />
luiiiiitil r'' "-,- :rne <strong>to</strong> a small target area.<br />
"''ll :Ljl-P-:S ve baCk eaSily attraCtS dUSt<br />
i' r:1r " r1,r:ES. WhiCh COUId ruin almost<br />
, : -<br />
1U..,<br />
Always leave on the paper<br />
backing.<br />
The adhesive backing easily attracts<br />
particles, and once the particles<br />
attach, they will not come off,<br />
ry;<br />
Particles attached<br />
<strong>to</strong> soiled <strong>to</strong>ne will<br />
show up during the<br />
printing process,<br />
The particles are<br />
still evident even<br />
after greatly<br />
reducing the<br />
image. 29
fl Trimming the Tone<br />
The knife is held similarly mr<br />
pencil, but more erectly.<br />
Replace the blades as they<br />
become dull.<br />
Craft knives<br />
Not god<br />
ill ,:al<br />
,ar,'::,,.,,,:<br />
450 angle<br />
.r I.<br />
,,1 !. ,.<br />
:L:::'::l.<br />
600 angle<br />
Blades with 600<br />
angles do cut better,<br />
but they are sharp,<br />
so be careful when<br />
using them.<br />
Hold the knife as upright as possible.<br />
Rotate the <strong>draw</strong>ing,<br />
cutting along the<br />
penned lines.<br />
Take extra care with<br />
corners and areas where<br />
the knife direction<br />
changes, as they are often<br />
not fully cut.<br />
Con<strong>to</strong>ur line (main line)<br />
Tone<br />
Knife path<br />
24<br />
Try <strong>to</strong> trace the con<strong>to</strong>ur lines<br />
with the knife.
m,<br />
msmrmurng the Tone<br />
d--<br />
r- a<br />
#F<br />
*d &u.-<br />
,lirffi,tiril lflr'mr- :a ::-3. lift up an edge using<br />
- nlrllll liillfa<br />
Lift up the edge.<br />
ilffiiilrliifi]llflll -f<br />
:..S: be USgd.<br />
,::: * :i :-:'31tS the<br />
,iB!'ilirlril! ',a:. cf the <strong>to</strong>ne<br />
-"-T lil<br />
a::, ::,tChing<br />
:itiiiirtrltltrlt: i :-':iects the back<br />
'''-- il l -;l lrce you have<br />
'firirlll ir.-;-,s:!med <strong>to</strong> this<br />
' ,r1.:t :- ,,,ill become<br />
' :*:,::',e in handling<br />
. l:<br />
r-:<br />
Remove the excess <strong>to</strong>ne while holding down the target areas.<br />
,/ ra\<br />
r'- .- \<br />
',6 t'<br />
Removing the <strong>to</strong>ne can be lots of fun if it<br />
has been cut properly.<br />
r'r-l . -<br />
I<br />
\.i<br />
. ;l<br />
tl<br />
--'.<br />
r&- \ "<br />
trj\<br />
'l<br />
'-\<br />
q /)<br />
kffis',"<br />
q<br />
.\<br />
1., q--<br />
\\\.-.-<br />
l' \<br />
I<br />
\il<br />
),,<br />
-: rts are peeled up easily. <strong>How</strong>ever, they are often not<br />
- so take extra care with corners or points where the knife<br />
: - changed when peeling off the <strong>to</strong>ne.<br />
lf you accidentally cut<br />
all the way through the<br />
<strong>draw</strong>ing, reattach it by<br />
affixing cellophane<br />
tape <strong>to</strong> the back.<br />
25
E Rubbing the Tone<br />
Tone Burnisher<br />
The burnisher<br />
ensures that the<br />
<strong>to</strong>ne securely<br />
affixes <strong>to</strong> the<br />
<strong>draw</strong>ing. Press the<br />
<strong>to</strong>ne down on the<br />
<strong>draw</strong>ing and rub<br />
with the burnisher<br />
<strong>to</strong> ensure it will<br />
not detach.<br />
Correct way <strong>to</strong> hold the<br />
burnisher (Front)<br />
\<br />
Lay the <strong>to</strong>ne's paper backing<br />
or a sheet of pho<strong>to</strong>copy paper<br />
over the <strong>to</strong>ne and rub. There<br />
' are rare occasions when<br />
rubbing directly the <strong>to</strong>ne's<br />
surface that the <strong>to</strong>ne rips or<br />
becomes damaged, so I<br />
.-) recommend using a buffer<br />
paper <strong>to</strong> those who tend <strong>to</strong><br />
press down hard.<br />
Hold the burnisher at a low unsh ;iih.ir;prrt<br />
<strong>to</strong> the paper.<br />
1. Rub the center region. 2. Rub the edges of the <strong>to</strong>ne and areas with major con<strong>to</strong>ur lines.<br />
,<br />
t<br />
I
The stylus is used <strong>to</strong><br />
press down securely<br />
tiny trimmed areas,<br />
corners, etc.<br />
ri f"r:rii1: ce of the stylus allows<br />
lir; t,tdrr firmly; howevel you<br />
, ,-:= -g the original <strong>draw</strong>ing,<br />
,ir",- r: .- a buffer sheet.<br />
The stylus is used<br />
when adding the final<br />
<strong>to</strong>uches, such as going<br />
over one extra time<br />
areas that detach<br />
easily.<br />
The stylus is held almost the same as<br />
a pencil,<br />
f, i<br />
rl \<br />
Hold the stylus at an angle<br />
close <strong>to</strong> the paper.<br />
Here, the stylus is held <strong>to</strong>o<br />
veftically,<br />
Points requiring repeat<br />
rubbing.<br />
i5,uns;ttr,E Knowledge in Removing Tone and Handling After Removal<br />
2. After removal<br />
3. Removing residual glue<br />
/-\<br />
,- -,. <strong>to</strong>ne that has been really securely<br />
n, -': neatthe <strong>to</strong>ne lightlywith a<br />
, -','<br />
After the <strong>to</strong>ne is removed, some glue will<br />
remain. This tends <strong>to</strong> collect dust and grime if<br />
left as is, plus it could become inadvertently<br />
stuck <strong>to</strong> <strong>draw</strong>ings or other paper laid on <strong>to</strong>p.<br />
Use a clean regular or kneaded<br />
eraser <strong>to</strong> rub the residual glue<br />
off the <strong>draw</strong>ing. Keep a kneaded<br />
eraser on hand specifically <strong>to</strong><br />
use for any finishing <strong>to</strong>uches<br />
needed by your <strong>to</strong>ne work.
le Uses of Gradation Tone<br />
Gradation <strong>to</strong>ne generally comes in 2 types: dark gradation, whicr<br />
gradates from black <strong>to</strong> white, and light gradation, which gradaEi<br />
from grey <strong>to</strong> white. There is a diversity of gradation lones on tlu<br />
market, coming in varying widths, etc.<br />
Gradation Tones<br />
WI<br />
-t<br />
|<br />
-H re;<br />
;<br />
I tu<br />
-r.<br />
2-level (vertical) 3-<br />
gradation gri<br />
BBffi<br />
rcretffi<br />
BGIffi<br />
2-level (horizontal) 3-<br />
gradation gri<br />
Light gradation<br />
Dark gradation<br />
Just what does that "1" mean at the end of the <strong>to</strong>ne number?<br />
The "1" is an abbreviation for "line," an:<br />
it refers <strong>to</strong> the number of lines (rows) o'<br />
dots. This acts as a guideline when<br />
layering <strong>to</strong>nes.<br />
.l ,, = 2.54 cm<br />
Patterns, including a moir6 effect, may appear whn<br />
<strong>to</strong>nes are overlapped.<br />
42.5L 601<br />
1 " = 2.54 cm 1 sq. in. contains 60 lines<br />
'I sq. in. contains 42.5 in all directions.<br />
lines in all directions.<br />
t-...-,-..'-.-,-.-.-...-.-.J l!:.:.1:.!:.:.r:.:.:.:.r.:.r:.1:{ [<br />
t.'.'.'.'.'. . .'.'.'. , , J t.:.tt:.tt: :: :i t:.ttt ! .I l\<br />
l:.:.:.:.:.:.:.:.:.:.:.:.:.1 [::;.:::.:::::;:::.::::l -7<br />
t....-,.......,.,.......,.,J t.t:.;.:.i:.::.i:.:.ii::.::il<br />
t....-........,.,.....'..,J [::.:]:::.:jj.i:jj.::.:r:l<br />
[::::::::::::::::::::::::::l{[:,;,:,:,:,;,;,:,:,:,:,:,:,:,:,:,:,:,:,1 | )<br />
Although these are both 10% saturation, when<br />
overlapped, the different numbers of dot lines<br />
causes a pattern <strong>to</strong> form.<br />
Layering <strong>to</strong> Darken the Tone without Creating a Pattern<br />
42.5L(10o/o)<br />
il<br />
28<br />
+<br />
+<br />
0verlapping <strong>to</strong>nes with differing numbers A pattern can be<br />
of dot lines at various angles affects the created by layerin;<br />
appearance of the pattern formed.<br />
<strong>to</strong>nes with the san{<br />
number of dot linei<br />
at an angle.<br />
These patterns, including the moir6 effect, may be used as print patterns *
Character Shading<br />
and Tone Portraval
The ABG's of Facial Shadows<br />
The neck is a cylinder, causing<br />
the shadow underneath the chin<br />
<strong>to</strong> have a curved con<strong>to</strong>ur.<br />
qa /-\.-<br />
,/T\ I<br />
l/ I\l<br />
\-' 1,,.0,,,.n<br />
I U<br />
lLishtsource<br />
Straight on<br />
Light Source<br />
ffir @N<br />
\ \ ,//<br />
Shadows form under the L, -<br />
nose and the chin when \<br />
\ I ll I I<br />
\ {l//<br />
alightsourceshines \7.f]\ \\<br />
from straishtahead.<br />
(/rj# )\<br />
Shadows also form<br />
underneath the lower<br />
lip and the bangs.<br />
3 main types of shadows form underneath the chin.<br />
Use all of them at your discretion.
Front Left<br />
Light Source<br />
mr 'rllllfiI lXitrrtr :'he eye as<br />
,llllxillllllrir.itr [r :ositioning<br />
llfrfililtrii llfiiil,l]ii:sis<br />
Upper Left<br />
Light Source<br />
A shadow echoing the jaw line<br />
forms under the chin.<br />
31
Dark and Light Shadows: Bright and Soft Light<br />
A shadow's darkness depends on the intensity of the ligfi<br />
Bright Light<br />
source. Differences in the value used for a shadow vane:<br />
according <strong>to</strong> the brightness of the lighting.<br />
Dark shadow<br />
Black shadow<br />
Sofi Light<br />
0<br />
Shadows<br />
Rendered in<br />
Black<br />
Use black shadows with<br />
spotlights or with bright,<br />
midsummer sunlight.<br />
Black shadows are used <strong>to</strong><br />
create a striking<br />
impression or when<br />
seeking a specific effect.<br />
/-<br />
['1<br />
V<br />
Shadows<br />
\ ,,t,<br />
Rendered in<br />
Half<strong>to</strong>nes<br />
Half<strong>to</strong>ne shadows are<br />
used <strong>to</strong> give the face 3-<br />
dimensionality and <strong>draw</strong><br />
focus <strong>to</strong> the character,<br />
regardless of whether<br />
indoors or outdoors.<br />
32<br />
,rlillllfl'<br />
d{slulll] [<br />
rlillil<br />
r\. \<br />
\\.<br />
\-<br />
-\<br />
..!s<br />
\\- \=<<br />
lh.- _<br />
;.i lriui I - .: -: rs effective for<br />
tl -: : r:-ie 0f Skin.<br />
Here, I attached dot<br />
<strong>to</strong>ne over diagonal<br />
hatching.<br />
I created a sense of 3-dimensionality in the lips<br />
by attaching and etching standard dot <strong>to</strong>ne.<br />
Backlighting is when the light source is located in back ol<br />
the subject. Shadow is added <strong>to</strong> the front of the subject,s<br />
face, generating a dramaflc mood.<br />
Filling in the figure with<br />
solid black creates a black<br />
silhouette. The key point<br />
here is that the eyes were<br />
left white.<br />
For this figure, <strong>to</strong>ne was attached t0 the<br />
entire face but the eyes, left white. This<br />
ireatment could be used <strong>to</strong> suggest flames<br />
burning behind the figure or other<br />
situations with low lighttng. 33
When <strong>to</strong> Keep the Face<br />
-Free<br />
Shadows do not work well on faces when the imag:<br />
tiny. Use <strong>to</strong>ne on clothing, hair, shoes, and other mamnr<br />
colored areas. I limited the figures on this page <strong>to</strong><br />
that look better without shadows on their faces.<br />
Standard Long Shot<br />
This figure is approx. 3 E<br />
or 1 1/8" <strong>to</strong> 1 1/2" tall. A<br />
size, the facial features<br />
barely discernible, and<br />
is viftually just an outline<br />
Bust Shot<br />
The head (including hair) measures at<br />
approx.3 cm. (1 1/8"). Shadows may<br />
be added <strong>to</strong> the body.<br />
Full Figure:<br />
Medium<br />
(Fig. height approx.<br />
10 <strong>to</strong> 12 cm or<br />
3 7/8" <strong>to</strong> 4 5/8")<br />
Add shadows <strong>to</strong><br />
the skift, etc.<br />
Long Shot Large<br />
Here, the figure is approx. 6 <strong>to</strong> 7 cm<br />
or 2 318" lo 2 314" tall. For this size,<br />
I opted <strong>to</strong> render her "red" bangs<br />
using solid black in lieu of <strong>to</strong>ne.<br />
These are<br />
sized head<br />
While<br />
hair volume<br />
them appear<br />
extremely d<br />
in size, the<br />
features are :<br />
same stze.<br />
34<br />
Figure 83% of original print sizr
lirrMruurmliffies in Suggesting Color through Tone:<br />
4mmnng According <strong>to</strong> Value Contrast<br />
I Tone Values and Corresponding Colors<br />
o &oooo<br />
Flesh <strong>to</strong>ne shadows: 1 0%<br />
Red&blue:30t050%<br />
@<br />
Deep colors; Black (Solid)<br />
(Deep red or blue)<br />
Here we see the cover<br />
illustration rendered in<br />
black and white (grey<br />
scale). Colored images<br />
are rendered using light<br />
and dark values when<br />
printed in black and<br />
white.<br />
Pale colors: 10 <strong>to</strong> 20%<br />
(Pink or light blue) \.-,<br />
ireen, ZO'2.<br />
(Use solid black for dark green)<br />
Ljott! 01e9n, 1 079<br />
Yellow: 5 <strong>to</strong> l0o/o {)<br />
I<br />
*rr*ing Hair colors<br />
Jet black Red (30%)<br />
Red (20%)<br />
Red hair using<br />
diagonal hatching<br />
Different Colors Suggesting Using the Same Tone Value<br />
-a<br />
A flush <strong>to</strong> the cheeks Suntan<br />
Grey values are contrasted with black and shaded areas,<br />
creating the illusion of a color palette. (Ihe same 10% <strong>to</strong>ne<br />
was used for both figs,)<br />
.G:<br />
lark brown<br />
@Blue<br />
@Red<br />
@,<br />
Violet<br />
35
Gommon Facial Shadows<br />
Let's look at the following 5 light<br />
positions: Front, right, side, low, and<br />
r' tA<br />
r:<br />
',,4fs )i,<br />
: ' ::__ .:'.: lb 1
37<br />
ffi<br />
, Fl<br />
i.ilil:i<br />
rii::irii<br />
rj<br />
-, 1<br />
,qv+,.ii
A broad range of facial shadows<br />
are created by modifying the<br />
angle o{ the face inside the<br />
panel or the way it is trimmed,<br />
or by switching the shadows<br />
from the right <strong>to</strong> the left side<br />
of the face, etc.<br />
k<br />
Here, no light is shown <strong>to</strong>uch<br />
the face, and the <strong>to</strong>ne was ci;<br />
so as <strong>to</strong> leave the eye white.<br />
38<br />
A solid black shadow may be<br />
used for the shadow underneatt<br />
the chin in lieu of <strong>to</strong>ne.
.ffililil<br />
lllllll,<br />
m.<br />
ffi,,i',,,<br />
I<br />
#'<br />
Nere we see use of shadows formed from a backlight. Be<br />
conscious that the figure is backlit and use broken external<br />
con<strong>to</strong>ur lines <strong>to</strong> create the illusion of glowing light.<br />
The mood of the image changes<br />
depending on the <strong>to</strong>ne value and<br />
pattern used. Solid black may be<br />
used instead of <strong>to</strong>ne.<br />
Below is an image<br />
created using j-gpe<br />
facial shadows as a<br />
point of depafiure. I<br />
omitted the cheek<br />
shadow and added<br />
shadows underneath<br />
the nose and <strong>to</strong> the<br />
lips.<br />
These are essentially g-type<br />
shadows, Depending on how<br />
prominent the facial {eatures,<br />
shadows may be added<br />
underneath the brows and<br />
eye sockets.<br />
g<br />
39
4 View<br />
Ref. Fig. e<br />
(Shown lacing<br />
Shadows form in basically the<br />
same manner, whether the figure<br />
faces right or left.
- ffiniimg the Hair<br />
Tone used for<br />
shadows (in areas<br />
opposite the light<br />
source)<br />
41
d-type shadows also work well in close-ups.<br />
Shadows may be added <strong>to</strong> the eyes.<br />
Here we see an image<br />
using b-type shadows. Use<br />
shadows with sharp angles<br />
with long faces. Gently<br />
curving shadows work well<br />
with more typical faces as<br />
seen below.<br />
42
ffiu<br />
-ffi<br />
\rt rt<br />
\<br />
e-types have the fewest shadows, with shading<br />
solely located at the hair, the nose, and the chin.<br />
This works well with clean, cheeful compositions.<br />
This combination of e and d shadows can be used <strong>to</strong><br />
accentuate a particular mood.<br />
Fonruard facing figure using f-type shadows
Profile<br />
,4<br />
r/^
ffip<br />
Expanding the negative space in the direction faced by the figure adds <strong>to</strong> the<br />
effectiveness of e-type shadows. This technique is suited <strong>to</strong>ward long panels.
Low Angle<br />
rfi<br />
,qi,il<br />
': l. ;.,<br />
{u<br />
W li'<br />
rh $'<br />
H<br />
@<br />
::<br />
rfi<br />
fi<br />
-l,<br />
a-i<br />
\J?<br />
i
47<br />
.*<br />
,rdi[,<br />
'rr t tru,<br />
I<br />
m-,n+<br />
tllttrilfilllt,<br />
rii\\\\\lft,, v<br />
c<br />
The shapes of the hair<br />
shadows are intricate.<br />
Contrary <strong>to</strong> what you might<br />
expect, duplicating the<br />
exact shape of the hair in<br />
the shadows will make the<br />
composition unnatural.
Moderate High Angle
,il11<br />
ffimUons <strong>to</strong> Pamts {|.-l!od.erate tli$l}..*d$<br />
k<br />
,,,m<br />
Y<br />
,,,/<br />
//<br />
ril<br />
: ti ilitilt ! : ,,,rich fall across the forehead<br />
ilr I ,, :-:,:ijve in CIOSe-UpS.<br />
W
Shadows are added <strong>to</strong> the body primarily <strong>to</strong><br />
the figure a sense of volume or <strong>to</strong> accentuah<br />
forms. Consequently, poses and compositions<br />
that <strong>draw</strong> attention <strong>to</strong> the figure's con<strong>to</strong>urs or<br />
musculature tend <strong>to</strong> be favored.
*,<br />
t<br />
D<br />
Adding <strong>to</strong> the girths of<br />
the arms and thighs<br />
generate a weightier<br />
feel.<br />
The key <strong>to</strong> exquisite,<br />
lithe muscles is <strong>to</strong> <strong>draw</strong><br />
the arms and legs on<br />
the lean side and<br />
maintain balance.<br />
t-/<br />
l/<br />
\,I<br />
Yi<br />
\<br />
ffi<br />
il ,l<br />
ill<br />
Action scenes, which<br />
primarily comprise<br />
martial arts scenes, tend<br />
<strong>to</strong> <strong>draw</strong> attention <strong>to</strong><br />
male <strong>characters</strong>'<br />
muscles. Have a look at<br />
pro-wrestlers and body<br />
builders for reference.<br />
To <strong>draw</strong> handsome, lean<br />
muscles, look <strong>to</strong> the<br />
bodies of dancers.<br />
51
Gradation <strong>to</strong>ne is<br />
often used for<br />
black or red. Since<br />
there is no set rule<br />
regarding the<br />
direction the <strong>to</strong>ne<br />
should be attached<br />
(e.9. black <strong>to</strong> white<br />
or vice versa), use<br />
your own<br />
discretion.<br />
I<br />
.\<br />
#\<br />
Note: Traditional bunnies<br />
have cot<strong>to</strong>n tails.<br />
@@ffiffi
When applying<br />
shadows <strong>to</strong> male<br />
<strong>characters</strong> or figures<br />
with different builds,<br />
the concept remains<br />
the same; although,<br />
the shapes of the<br />
shadows may change.<br />
Drawing diagonal hatching<br />
in the direction of the light<br />
source clearly establishes<br />
the direction of light and<br />
serves as a guide when<br />
attaching <strong>to</strong>ne,<br />
-rere should usually be<br />
: single light source.<br />
lM Eood<br />
irllllli<br />
i iilllllii ru]5<br />
l,,trau<br />
rllll i-F'<br />
ril'r<br />
:i;ading the face and body with<br />
.ladows indicating different light<br />
:i:!rces results in an unacceptably<br />
:,rkward composition.<br />
Here, I drew the body's shadows <strong>to</strong><br />
match those on the original face.<br />
]<br />
);:<br />
Here, I drew the lacial shadows <strong>to</strong><br />
match those on the original bodV.<br />
53
Tricks <strong>to</strong> Drawing Body Shadows<br />
Male Characters<br />
Even masters at sketching find it difficult <strong>to</strong> identify with absolute certainty how shadov,':<br />
form depending on the lighting.<br />
Figure with upper<br />
/vl<br />
left light source ( I<br />
Good<br />
Draw the neck, arms,<br />
and legs as cylinders.<br />
Jot down the body's<br />
parts as blocks when<br />
laying out shadows.<br />
Common Shading<br />
Patterns<br />
n<br />
n<br />
Use a<br />
block for<br />
the <strong>to</strong>rso.<br />
The key <strong>to</strong> having shadows form<br />
the body's surfaces is <strong>to</strong> establish<br />
the position of the light source.<br />
Playing around with the light<br />
source will cause them <strong>to</strong> become<br />
unmistakably odd-looking, such as<br />
when <strong>draw</strong>ing an indoor scene<br />
where the position of a light is<br />
predetermined or when the<br />
in relation io the sun is clearly<br />
established. ln these cases,<br />
shadows must be clearly <strong>draw</strong>n<br />
according <strong>to</strong> positional<br />
relationships. <strong>How</strong>ever, you may<br />
establish a special light source<br />
when <strong>draw</strong>ing shadows specifically<br />
<strong>to</strong> "make the character look good"<br />
for the sake of character portrayal.<br />
Not good<br />
-.44<br />
r-L.,<br />
,}iS;i<br />
.(\.#<br />
A light source from<br />
the upper right<br />
makes it difficult<br />
<strong>to</strong> give this figure<br />
3-dimensionality.<br />
Figures with<br />
average shading<br />
/<br />
./\<br />
I<br />
Figure with an abundance of<br />
shadow (e.9. Sun <strong>to</strong> figure's<br />
back)<br />
Shadows<br />
instead of<br />
lines were<br />
used <strong>to</strong><br />
delineate<br />
the s<strong>to</strong>mach<br />
muscles.<br />
Figure wlth minimal shading lit<br />
from the upper left (Light<br />
source at upper left front)<br />
Figure with an abundance Moderately abundan<br />
of shadow (e.9. Sun <strong>to</strong> shadows<br />
figure's back; light source<br />
at upper left back)
,r.rrrillrrflil ililnunilfTE SIdleS<br />
Standard shadow volume<br />
Shadows rendered in hatching<br />
--:<br />
o \<br />
-\ " ,\<br />
,\@<br />
Shadows form on clothed figures<br />
would on a nude.<br />
Standard shadow volume
Shading the Back<br />
Shadows rendered in hatching<br />
M<br />
tr<br />
Add shading<br />
<strong>to</strong> the small<br />
of the back.<br />
To accentuate the<br />
back, add a<br />
shadow <strong>to</strong> the<br />
small of the back.<br />
Overhead light source<br />
Upper right light so-r-r<br />
Upper left light source<br />
56
lrmrllflllllrilullri: m jte Back of a Jacket<br />
Special etfect:<br />
Strong lighting<br />
from front of<br />
figure<br />
, lr llLl<br />
i jtufl llnlU' =<br />
t-<br />
Upper right light source<br />
Special effect:<br />
Lower back light source<br />
(*<br />
:;rtr -- >\<br />
)<br />
-,/<br />
lXli' -;<br />
r,rlr-ar: ight source<br />
This lighting is<br />
suited <strong>to</strong> dramatic<br />
scenes such as scifi<br />
related or on the<br />
roof of a building.<br />
\<br />
V<br />
I'eL,1,0wS 0n<br />
t-*:osterior<br />
Close-ups of a male<br />
character's derriere are<br />
not common, and<br />
shadows are not<br />
typically added,
Female Gharacters<br />
Figure Study<br />
The female figure is composed of curves,<br />
causing the edges of shadows <strong>to</strong> curve as weit<br />
Upper left light source Upper right light source<br />
Upper left light source Upper right light sourc,.<br />
2 Common Shadow Types Used <strong>to</strong><br />
Accentuate the Chest and Posterior<br />
Study how shadows {orm on spherical objects when adding<br />
them <strong>to</strong> the chest and backside. The most common styles<br />
are crescent-shaped shadows and bot<strong>to</strong>m shadows.<br />
j<br />
Upper light source at<br />
oblique angle<br />
/\<br />
()<br />
\_-/<br />
Crescent-shaped<br />
0verhead light source<br />
+<br />
Bot<strong>to</strong>m Shadov,<br />
58
,; muent Shadows<br />
z--., Bot<strong>to</strong>m Shadows<br />
Y<br />
Hatched shadows<br />
Hatched shadows<br />
Shadows in <strong>to</strong>ne<br />
Shadows in <strong>to</strong>ne<br />
59
Side Shadows<br />
Front light sources are suited <strong>to</strong><br />
emphasizing the chest.<br />
Combined Lightin;<br />
Front Light Source<br />
key shadow.<br />
Back Lrght Source<br />
This light source is great<br />
for <strong>draw</strong>ing attention <strong>to</strong> the<br />
backside,<br />
Combined lighting from both the front ar:<br />
back is used <strong>to</strong> accentuate the feminine<br />
charms of a female character.
ifilili]tirir( :lrffioows<br />
Use these shadows <strong>to</strong> accentuate<br />
a posterior clad in tight jeans.<br />
Guideline for positioning shadows<br />
on the backside.<br />
Shadows form underneath the areas<br />
that project outward the most.<br />
61
Shadows at the Feet<br />
Shadows at the Feet (Puddle Shadows)<br />
These shadows are primarily added<br />
<strong>to</strong> shots of <strong>characters</strong> ranging from<br />
medium full figure <strong>to</strong> long shots.<br />
Use gradation <strong>to</strong>ne. Feel free <strong>to</strong> rLr<br />
the edge of the "shadow."<br />
Long Shadows<br />
This is effective for<br />
poftraying scenes with<br />
a setting sun.<br />
1<br />
Although the character's skirt is<br />
\ rippled, the shadow at her feet<br />
remains simple.<br />
Not good<br />
When <strong>draw</strong>ing a long<br />
shadow, jot down parallel<br />
guidelines for the<br />
shoulders, elbows, waist,<br />
lntersecting Shadows<br />
Here we have light shining<br />
from multiple directions.<br />
Silhouette Shadows Created by Backlighting<br />
Solid black in lieu of <strong>to</strong>ne makes for a more dramatic<br />
portrayal.<br />
Leg shadow<br />
Shadoivs at the feet are normally omitted from<br />
<strong>manga</strong> artwork. <strong>How</strong>ever, they are included in<br />
long shots or when seeking <strong>to</strong> create a striking<br />
effect,
drxiiullrrst Fuddle Shadows<br />
#MTone<br />
Use an elliptical form for<br />
shadows at the feet. Be sure<br />
<strong>to</strong> <strong>draw</strong> as well portions that<br />
will not be visible in the final<br />
composition,<br />
lliffiril go0d<br />
' u rraoow is <strong>to</strong>o<br />
lrurir rE should<br />
lurL,r+ 'e*er ripples.<br />
Crosshatched<br />
ttumfitlr.:-lr3ns<br />
iri ilr'il,:w-style executions <strong>to</strong> portray the luster of a floor.<br />
Gradation <strong>to</strong>ne<br />
Diagonal hatching<br />
lrurs:ral EffeCtS<br />
,rlrr-l :ceed lines are used <strong>to</strong> portray shadows<br />
Use a straightedge <strong>to</strong> <strong>draw</strong> fine,<br />
horizontal lines.<br />
63
Creating a Composition without Using Tone:<br />
Sample Gompositions in Pen<br />
Tone used <strong>to</strong> portray colors an:<br />
shading by contrasting dark an:<br />
light shades originate from dia;.<br />
hatching created using pen.<br />
Facial shadows<br />
Tapered lines <strong>draw</strong>n using<br />
a sfaightedge<br />
Hatching portraying the color<br />
and texture of hair or boots<br />
Crosshatching is often used<br />
<strong>to</strong> portray the texture of<br />
This hatching used under:r<br />
chin and on the floor crea:e,<br />
clothing or blackness. Here<br />
it is used for clothing.<br />
a gradation etfect.
Movement with a<br />
Sense of Presence
The Key Points <strong>to</strong> Pofrraying Natural<br />
Movement Lie in the Shoulders<br />
oulder Basics<br />
Good<br />
Normally, when a figure is portrayed standing straigt--<br />
a line connecting the right and left shoulders (shoulce"<br />
line) is horizontal.<br />
Not good<br />
Not good<br />
A natural bust shot<br />
Here, the shoulders are not properly<br />
aligned, and the base of the neck<br />
(marking the <strong>to</strong>p of the shoulder<br />
Iine) is also tilted.<br />
Here, the neck broadens : 'itt'r'<br />
base, and the right shou,:+<br />
missing.<br />
Line connecting<br />
the right and left<br />
sides of the<br />
base of the<br />
^LC<br />
The shoulder line is a<br />
line <strong>draw</strong>n from the <strong>to</strong>:<br />
of each shoulder,<br />
connecting the two.<br />
Horizontal shoulder line<br />
Scapula line<br />
The scapula is a<br />
key element for<br />
giving the body<br />
volume.<br />
\<br />
i\<br />
Here we see guide<br />
lraming for a bust shot<br />
A bust refers <strong>to</strong> a portrafrom<br />
chest up; however<br />
in Japanese <strong>manga</strong>,a<br />
bust shot usually means<br />
a portrait that stafts<br />
somewhere above the<br />
chest. The shoulders<br />
should be visible.
tLrilllllllniltillll,rtifl Je arms up and down causes<br />
'rir tfirnuder line and the chest line <strong>to</strong> shift.<br />
The shoulder line and<br />
chest line should be<br />
parallel.<br />
Shoulder line<br />
While the shoulders may<br />
be skewed in this<br />
manner, the chest line<br />
should be similarly<br />
angled.<br />
Raising one arm causes<br />
the breast on that side <strong>to</strong><br />
rise as well.<br />
Here, the angle of the chest<br />
line is natural for when an<br />
arm is raised, but the<br />
shoulder line is not.<br />
Bad example:<br />
Here, the two shoulders<br />
are even. \.-<br />
Raising an arm causes the base of the<br />
neck's position and the shoulder line <strong>to</strong><br />
shift. Raising the right arm causes the<br />
right shoulder <strong>to</strong> rise. The shoulder of<br />
the lowered arm is likewise low.
ncture ol the<br />
This figure was <strong>draw</strong>n<br />
at a moderately high<br />
angle. From a 3/4<br />
view, lhe<br />
appear askew.<br />
and Neck<br />
Neck and shoulder juncture<br />
Shoulder line -'<br />
'<br />
\-<br />
Draw the enh=<br />
base of the ne:r<br />
even portions :rilt<br />
will not be visr,r<br />
- in the final<br />
comlgsition. Ar<br />
-10 keep the lin:<br />
connecting fie<br />
juncture point<br />
parallel <strong>to</strong> the<br />
shoulder line.<br />
Chest line<br />
\/<br />
------\r<br />
Base chest I "r<br />
Here we see a leaning pose. The<br />
shoulder and chest lines are<br />
parallel.<br />
Raising an arm causes the chest<br />
on that side <strong>to</strong> also rise,<br />
eliminating the angled feel.<br />
Raising both arms causes the<br />
figure <strong>to</strong> return <strong>to</strong> its original<br />
angled pose.<br />
Successful Drawing Tips<br />
Provided that you keep<br />
the shoulder line and<br />
chest line parallel, you<br />
should be able <strong>to</strong> <strong>draw</strong><br />
any bust shot.<br />
Use this line <strong>to</strong> confirm<br />
that the neck and<br />
shoulder junctures are<br />
angled parallel <strong>to</strong> the<br />
other lines.<br />
'-**<br />
68
,ltlmrrlffemmq Mlstakes<br />
tliltltt!; illllllfll'lffi<br />
il0rudflilNfl s[(<br />
llluffili l|il]ffiflxT !<br />
ro,,ir tfllriifltiliur.<br />
The left shoulder and<br />
chest seem <strong>to</strong> be<br />
turned <strong>to</strong> the right.<br />
Bring the neck<br />
con<strong>to</strong>ur in from<br />
the ea( closer <strong>to</strong><br />
theface. ----+<br />
@<br />
Conecting the neck<br />
Move this con<strong>to</strong>ur so that<br />
it is underneath the chin.<br />
Draw the shoulder line<br />
. ihe neck is <strong>to</strong>o thick<br />
. The ilght shoulder is ambiguous<br />
. The <strong>to</strong>rso seems <strong>to</strong> part in profile<br />
and part in 3/4 view.<br />
rili|r]gf.l :e <strong>to</strong>rso is<br />
r I "r r€w, the<br />
mnmu|:err ShoUld<br />
mr ;ar:nlly<br />
I ltsi|:rE<br />
Torso in profile<br />
Torso in 3/4 view, facing <strong>to</strong><br />
the right<br />
The shoulder is in<br />
clear view when the<br />
<strong>to</strong>rso faces the right.<br />
/,*-<br />
Final Drawing FinalDrawing 69
Bust Shot Drawing Process<br />
Draw the face<br />
(Crossed lines indicate<br />
the direction the head<br />
faces).<br />
The arcs of<br />
these lines are<br />
critical.<br />
Figure in a<br />
standard pose<br />
Neck bones<br />
6xis)<br />
Sketch in the shoulder line<br />
and a layout of the <strong>to</strong>rso.<br />
Adjustment of the<br />
shoulder line<br />
/<br />
Sketch in the<br />
underarm (where<br />
the arm connects<br />
<strong>to</strong> the <strong>to</strong>rso) and<br />
determine the<br />
arm's girth.<br />
Detailed Example of Using Knowledge of the Body s<br />
Structure <strong>to</strong> Draw<br />
shoulder<br />
is straight<br />
/.:\<br />
/ /ra't -,\<br />
rrH\<br />
\ry<br />
Raising the left<br />
arm causes the<br />
shoulder line <strong>to</strong><br />
tilt.<br />
ra, /'-\ Draw UfaW the Itle \<br />
I<br />
chest and thet<br />
arms.<br />
The <strong>to</strong>p of the<br />
breast begins<br />
with the same<br />
con<strong>to</strong>ur as the<br />
underarm's<br />
origin.<br />
ldentify how the clavicle flows in:<br />
the shoulder and how they con:;e:<br />
*<br />
Since the breas<br />
begins at the<br />
same point as :r<br />
underarm, the<br />
underarm alsc<br />
marks the <strong>to</strong>p .<br />
the breast<br />
0nce you have sketched in<br />
the left underarm, connect<br />
the two with a line (the<br />
underarm line) parallel <strong>to</strong><br />
the shoulder line.<br />
Gonnect the neck <strong>to</strong> the shoulders using smooth<br />
con<strong>to</strong>urs and position the underarms.<br />
The chest line<br />
falls midway<br />
between the<br />
underarm line<br />
and the base<br />
chest line.<br />
oy,::.<br />
{1\<br />
ft%J*: t<br />
\'/<br />
\/-\,*l-<br />
i
*ft ni{m tfl0l<br />
''' flnttm@i&<br />
Top of fie chest<br />
Bust line<br />
.-\<br />
l,<br />
.,|<br />
f,-<br />
/./'^<br />
| -/'<br />
il, lllltl]llr JuuS-. lrE<br />
u.,,r ltlutttmlfi*litn'tli<br />
Sketch the face, filling in the<br />
facial features and hair. Add<br />
clothing adhering <strong>to</strong> the<br />
<strong>to</strong>rso's con<strong>to</strong>ur lines.<br />
({<br />
To accentuate the chest, leave ler the<br />
r<strong>to</strong>p tr of lf the<br />
chest at the same position, rn, but shift<br />
the ) breast<br />
I st's<br />
peak upward.<br />
Voluptuous build<br />
@ ffi1,,,,n<br />
Finished with Tone
The Side Genterline Gives<br />
the Torso Uolume<br />
Draw the arm's<br />
thickness at about<br />
the same as the<br />
width of the areas of<br />
the side not visible.<br />
The side of a <strong>to</strong>rso is long and narrow and is not visible from the<br />
front or back. Yet, the side constitutes a vital point when <strong>draw</strong>ing<br />
most poses. The side also contains a "seam" connecting the fron:<br />
and the back. This seam is called the "Side centerline."<br />
I<br />
/<br />
)',<br />
(+<br />
wiwis<br />
Border dividing<br />
those areas visible<br />
from those not<br />
visible from the<br />
front<br />
The side centerline appears as<br />
"seam" in the majori\i of<br />
Loose fit<br />
The <strong>to</strong>rso's<br />
silhouette<br />
changes fro:-<br />
the front <strong>to</strong> :rail<br />
views. The s,:iri<br />
centerline is'r<br />
visible.<br />
The side<br />
centerline and<br />
areas visible from<br />
the front joint join<br />
at the leg.<br />
72<br />
While in actuality, clothes do add a bit more girth <strong>to</strong> the <strong>to</strong>rso all<br />
around, in <strong>manga</strong>,it is perfectly acceptable <strong>to</strong> use the same<br />
layout for the character's figure nude as for it clothed.
iiirutttnm fuld<br />
lrfil|lil rffiiflke<br />
rxm .l:l'T<br />
Contrast with an average<br />
build figure<br />
ffi,ry,w*&&<br />
Border dividing those<br />
areas visible from<br />
those not visible from<br />
the front<br />
Draw the <strong>to</strong>rso of a slim<br />
build on the narrow side<br />
while retaining distinct,<br />
separate curves for the<br />
chest and rear.<br />
u{niaJ,e Characters<br />
,<br />
'li ,tsible<br />
rq* front<br />
The thickness and appearance of the body should be<br />
handled similarly <strong>to</strong> that of a female character.
6 Lines Vital <strong>to</strong> Successful Drawing<br />
-\<br />
Practical<br />
I \<br />
Application L/ --v<br />
Shoulder seam<br />
@ Shoulder line<br />
Front closure of a sa,:r' ill<br />
Shoulder seam<br />
Waist (line)<br />
@lS06llli,er6al<br />
The centerline<br />
serves as a guide<br />
for <strong>draw</strong>ing the<br />
but<strong>to</strong>n front<br />
closure.<br />
=---<br />
Side centerline of<br />
the skirt<br />
\<br />
\,<br />
=\<br />
\<br />
\"I<br />
i<br />
\\<br />
\<br />
Side centerline<br />
i-shirt without a<br />
side centerline<br />
Including the side<br />
centerline gives the <strong>to</strong>rso<br />
clearer definition.<br />
The side centerline serves<br />
as guide <strong>to</strong> facilitate<br />
attaching <strong>to</strong>ne.<br />
74<br />
Note: Some T-shirts lack the side seams from the underarm down.
The side centerline along with the<br />
<strong>to</strong>rso's thickness gives the <strong>to</strong>rso<br />
clear definition.<br />
,$itirB,€6ni6itiii6<br />
iEim.M:tsliiia<br />
Loose{itting<br />
clothing<br />
Tailored{it<br />
clothing<br />
r,,l<br />
When seeking <strong>to</strong> add simple<br />
shadows using <strong>to</strong>ne, sketch<br />
in a side centerline <strong>to</strong> use as<br />
a guide.
The Clavicle Is Another Uital<br />
Point <strong>to</strong> Giuing the Torso Uolume<br />
The clavicle is key <strong>to</strong> constructing<br />
the upper front of the <strong>to</strong>rso.<br />
,$ A\<br />
; i)t/<br />
*1,<br />
\i<br />
4, t{<br />
L-1<br />
t\ \<br />
\1<br />
\ \\<br />
The clavicle forms an S-curve<br />
when seen from overhead.
and Movement<br />
the Clavicles<br />
ifitllmmimms ihat Make the<br />
iilillm{ffiss Stand Out<br />
wz<br />
Raising both arms<br />
Jutting the neck<br />
out and down<br />
From a normal stance,<br />
the clavicles do not really<br />
change in appearance even<br />
when an arm is raised.<br />
The more the neck is<br />
rotated <strong>to</strong> the side from<br />
the front, the more the<br />
clavicles and the neck<br />
muscles (tendons)<br />
protrude.<br />
Clavicles often become<br />
prominent accompanying<br />
neck movement, or when<br />
both shoulders are rotated<br />
fonruard or when the<br />
shoulders are tensed.<br />
77
Sample G<br />
Female Characters<br />
The clavicles are prominent on<br />
thin builds and relatively hidden<br />
on fleshy figures.<br />
Clavicles<br />
rendered in<br />
detail<br />
/-<br />
-\<br />
1--<br />
Because the clavicles allow you <strong>to</strong> portray the maleness,<br />
femininity, or adultness in a character, they are often<br />
included when the aftist intends <strong>to</strong> <strong>draw</strong> out these traits.<br />
lncorrect Clavicles<br />
Leave out the clavicle<br />
when <strong>draw</strong>ing children<br />
(this will make them<br />
more "childlike").<br />
The levels and positions of the two<br />
do not correspond.<br />
\<br />
Here, the length and position do not match<br />
78
llllt|lll|]111u<br />
ll'E,nacters<br />
The developed<br />
muscles prevent<br />
shadows from<br />
forming<br />
underneath the<br />
clavicle.<br />
L-<br />
)a<br />
(l<br />
)<br />
\ /-,<br />
,itiiiil tI"JLL.:rr:<br />
I<br />
\<br />
\----/'J<br />
IIlrrnguishing Male and<br />
h**rare Characters<br />
Draw the clavicles so that the reader<br />
can distinguish the character's gender<br />
at a single glance, even when wearing<br />
a T-shir1 and only a portion of the<br />
figure is visible.<br />
\
Showiltg a Figure Extending and Contracti<br />
Allours for Dynamic Expression: Il.[ff jltHi::l:<br />
This distance is<br />
equal <strong>to</strong> or<br />
greater than the<br />
head's length.<br />
Our hands, legs, and <strong>to</strong>rso extend and<br />
contract. Being aware of how far a limh<br />
bends fonruard or back will allow you b<br />
<strong>draw</strong> your <strong>characters</strong>' movements<br />
convincingly.<br />
,\,2,<br />
The <strong>to</strong>rso<br />
stretched<br />
Ref. Fig.: Spine<br />
{<br />
Ref. Fig. Knee<br />
The Principles behind<br />
Bgt fi,fu<br />
Hard bones are connected <strong>to</strong> each other by soft<br />
cartilage. Cartilage has elasticity that can be likere:<br />
<strong>to</strong> rubber.<br />
The arms also stretch.<br />
i<br />
The figures height<br />
expands by the length<br />
of the feet when<br />
standing on <strong>to</strong>e tips.<br />
Stretching the body <strong>to</strong> the<br />
extent possible lengthens<br />
even further the <strong>to</strong>rso and<br />
upper body and the arms.<br />
Sketching and Contracting<br />
Caused by Bending<br />
,,,ffi**.<br />
Stretching and contracting both occur<br />
during the act of "bending."<br />
\<br />
Stretching occurs at the shoulder (joint).
'lrlrlllililllLLrrt<br />
l- ;11 othing<br />
clothing is made of fabrics capable of stretching and contracting (stretch fibers),<br />
Clothing is designed with movement (the body extending) in mind. While some<br />
typically, clothing is pulled with the body, altering its silhouette.<br />
7\<br />
\<br />
--Z<br />
: r. - Fitted Clothing<br />
s<br />
ANH<br />
With both arms<br />
raised<br />
With the arms<br />
extended <strong>to</strong><br />
the max<br />
z<br />
\<br />
The shoulders<br />
and arms pull at<br />
the shirt, causing<br />
it <strong>to</strong> rise.<br />
The length of<br />
the <strong>to</strong>rso<br />
exposed is the<br />
same as that it<br />
extends.<br />
81
Bendinq the Neck<br />
Stretching and contracting of the neck is<br />
a frequently used, key motion.<br />
Common Stretching and Contracting of the Neck<br />
Normal pose<br />
Stretching and Contracting <strong>to</strong> the Side<br />
& ({ (<br />
ts<br />
Head held relatively uprigtr<br />
with shoulders raised<br />
Looking down/Looking at one's feet<br />
At this angle, the<br />
neck is obscurec<br />
This is a combination of leaning<br />
fonrvard and looking down. The<br />
back is rounded, and the neck<br />
underneath the chin is extended.<br />
Here, the character is<br />
looking down with her<br />
chin tucked under.<br />
This pose is almost<br />
identical <strong>to</strong> the above<br />
"looking down" pose.<br />
82
ilfitffiflmilltq flhe Head up<br />
Bad example.<br />
),e..)'<br />
\<br />
The head should<br />
be tilted more.<br />
The neck should<br />
be longer.<br />
Changing the direction<br />
of the face creates a<br />
"glancing back" pose.<br />
./\<br />
\<br />
The trick is <strong>to</strong> give the neck<br />
a dramatic angle.<br />
*ffiuml'rg Forward with the Body<br />
Not good<br />
The neck-<strong>to</strong>-shoulder<br />
con<strong>to</strong>ur is <strong>to</strong>o short.<br />
The con<strong>to</strong>ur from the neck<br />
<strong>to</strong> the shoulder is critical.
The Arms<br />
Carrying a Load of<br />
NormalWeight<br />
Scenes in <strong>manga</strong> of a character <strong>to</strong>ting a heavy load require that you take<br />
extra care with <strong>draw</strong>ing the arms in an extended position.<br />
Lifting a Moderately<br />
Heavy Load<br />
Lifting an Utfa<br />
Heavy Load<br />
The shoulderu<br />
drop even furfimr<br />
The body hunches<br />
fonruard.<br />
While the arms' length do<br />
not change dramatically,<br />
giving the muscles a<br />
moderate bulge shows<br />
that the arms are being<br />
stretched.<br />
Draw the amu<br />
just a tad<br />
(about 5% E<br />
100/o) longe<br />
The legs are<br />
Not good<br />
----'><br />
. ----__/ .a<br />
Another nice <strong>to</strong>uch would/<br />
be <strong>to</strong> show the feet<br />
sinking in<strong>to</strong> the ground.<br />
Drawing the back<br />
and neck straight<br />
suggests either<br />
that the load<br />
canied is light or<br />
that the character<br />
is strong.<br />
Emphasizing the<br />
clavicles suggests<br />
straining.<br />
Contrast of arr<br />
lengths: Draw<br />
the forearm aru<br />
wrist narrower<br />
il(<br />
v)<br />
The body is pulled<br />
<strong>to</strong> the right by the<br />
bag, causing the<br />
character <strong>to</strong> want<br />
<strong>to</strong> lean <strong>to</strong>ward the<br />
left, and the head<br />
<strong>to</strong> tilt <strong>to</strong> the left.<br />
84<br />
\
Etrbow and Wrist<br />
Since the wrist is<br />
capable of bending<br />
<strong>to</strong>ward the front as<br />
well as the back,<br />
wrinkles form around<br />
all sides.<br />
\'v-<br />
;b<br />
\i \ A wrinkle<br />
---\<br />
Here, the wrist is bent unaffectedly,<br />
illustrating the wrist's natural movements.<br />
-rt@<br />
<br />
The wrist<br />
These poses are suited for atfected,<br />
contrived gestures.<br />
rdrshng on the Elbows The elbows and wrists<br />
become key elements<br />
when the hand is brought<br />
<strong>to</strong> the face.<br />
85
Hands and Fingers<br />
The stretching and contracting of the hands and fingers is tied irr<br />
the opening and gripping of the hand.<br />
5 Poses Where the Hands Play a Key Role<br />
Speaking (with the hand<br />
held <strong>to</strong> the face)<br />
Hand unconsciously<br />
draped over knee<br />
?<br />
t-a \p<br />
86
,iiiitilril l,:ln.h in Drawing the Hands and Fingers:<br />
iilllillfliltffrlr'-,; - ; Th icknesses and Lengths<br />
Artists tend <strong>to</strong> concern themselves with the shape of<br />
the hands. Still, you should be able <strong>to</strong> produce a<br />
satisfying hand even if you do botch up the shape<br />
somewhat, provided that the fingers' thicknesses,<br />
lengths, and nail shapes match.<br />
r'rfl' :,:':ucing a rough <strong>draw</strong>ing, sketch the<br />
iLmltu'-- l *3te positions, shapes, and sizes of the<br />
iiiii r -:! should establish the image in general<br />
il r"- j<br />
3r) F<br />
, ('1't<br />
Simple Rendition<br />
Here we see a clean<br />
line <strong>draw</strong>ing.<br />
:: - -,lers are<br />
..\<br />
," : :i nalls are<br />
i -,r rn thicknesses<br />
-.-=-t sizes.<br />
Here are 9 common<br />
pitfall points.<br />
Realistic Rendition<br />
Showing the muscles<br />
around the fingers and<br />
bones in the hand<br />
(<strong>draw</strong>ing the tendons<br />
protruding) gives the<br />
hand a realistic flavor.<br />
87
The Hand Held Unaffectedly<br />
Use these gestures when <strong>draw</strong>ing a figure held naturally<br />
or when standing normally.<br />
Standing Normally<br />
The hands add <strong>to</strong> expression of the character's emotional state. lt is<br />
important <strong>to</strong> distinguish gestures. To portray a normal or casual atmosp:er<br />
show the hands in a relaxed state. To portray tension, show the hands<br />
clenched in fists. Take care when <strong>draw</strong>ing the hands, as both natural an:<br />
contrived or awkward compositions show up clearly <strong>to</strong> the viewer.<br />
Not good<br />
This strongly clenched fist suggests<br />
that the character is either about <strong>to</strong><br />
engage in battle or is feeling oddly<br />
tense.<br />
This is a better facial<br />
expression for suggesting<br />
readiness <strong>to</strong> fight or<br />
determination.<br />
Character in relaxed state<br />
Lightly Clenched Fist<br />
Not good<br />
Here, not only is the hand in a fist, but the<br />
wrist is bent back. This generates an even<br />
more awkward image. Hands <strong>draw</strong>n like<br />
this should only be used in special<br />
circumstances or with an odd, eccentric<br />
character. lt could also be used in combat<br />
scenes.<br />
Use this face <strong>to</strong> show that a<br />
character is alefied <strong>to</strong> something<br />
or feeling tense.<br />
Character in normal state
fr<br />
Awkward<br />
+<br />
Natural<br />
of the intent or<br />
feeling of tension in<br />
the owner. The<br />
unconscious<br />
clenching of the hand<br />
acts as evidence that<br />
the character is<br />
tense.<br />
-re $e hands <strong>to</strong> show a character's<br />
:-,:<strong>to</strong>nal state when glancing back<br />
The hand held lightly<br />
clenched when the<br />
character feels slightly<br />
tense or when deep in<br />
thought. The character is<br />
unconsciously tensing<br />
her hand. <strong>How</strong>ever, since<br />
the hand is not balled<br />
in<strong>to</strong> tight fist, the thumb<br />
is slack.<br />
Here, the hand is held<br />
open in a normal state.<br />
The hand is unconsciously<br />
relaxed. The fingers are<br />
bent in<strong>to</strong> gentle curves.<br />
E<br />
Differences in the<br />
impression the character<br />
projects or her<br />
personality vary with<br />
how the hands are<br />
<strong>draw</strong>n, even in the same<br />
"glancing back" pose.<br />
The lightly gripped fist is<br />
works well when<br />
portraying the moment a<br />
character glances back<br />
and is slightly surprised<br />
or experiences a little<br />
jolt. This is the hand<br />
most suited <strong>to</strong> looking<br />
back unaffectedly.<br />
The open hand suggests<br />
that a limply held hand.<br />
This hand is suited <strong>to</strong><br />
suggesting<br />
disappointment.<br />
The clenched fist works<br />
well when showing the<br />
character in mid-sprint<br />
or <strong>to</strong> suggest a<br />
determined state ('You<br />
can't make me!" etc.)
The Legs<br />
Extension and contraction of the legs are primarily<br />
allocated <strong>to</strong> kick scenes. The prevailing trend is <strong>to</strong><br />
indicate that the leg is extended using special effects<br />
lines or other means <strong>to</strong> blur the foot.<br />
There is no way the kick can be<br />
delivered from this distance.<br />
ffi<br />
Yet, somehow it is. Here, the tip of the foot is<br />
not <strong>draw</strong>n, but rendered in diagonal hatching<br />
(suggesting a bluned foot <strong>to</strong>o fast <strong>to</strong> be<br />
captured in a pho<strong>to</strong>). Leaning back of the<br />
kick's recipient indicates where the kick was<br />
delivered-in this case, on the forehead.<br />
Tip of the foot<br />
When showing a foot that has<br />
delivered a kick pulling back,<br />
add diagonal lines <strong>to</strong> the knee<br />
<strong>to</strong> portray movement. This<br />
effectively creates the<br />
impression of a kick<br />
delivered from the knee.<br />
Trajec<strong>to</strong>ry of<br />
the left arm<br />
Use broken con<strong>to</strong>ur<br />
lines, adding diagonal<br />
lines. This will create<br />
a senSe of speed.<br />
90<br />
Concentrating diagonal lines<br />
around the tip of the foot is<br />
a standard technique for<br />
suggesting speed.<br />
Using diagonal lines <strong>to</strong> render<br />
the entire foot. This creates a<br />
"shadow, " suggesting extreme<br />
blurring.
The Feet<br />
_/<br />
F---<br />
\<br />
I<br />
xtaas)<br />
)<br />
This page shows key points in the bending (extending and contracting)<br />
of the ankle and tip of the foot. There is not a wide range for<br />
portraying the <strong>to</strong>es themselves bending and stretching.<br />
The big <strong>to</strong>e bends<br />
more than the others.<br />
I<br />
I<br />
Here we see the extent <strong>to</strong> which<br />
the tip of the foot rises with the<br />
heel used as a pivot.<br />
;ffir iflE portrayed bending primarily<br />
I' uaBng scenes.<br />
Painting the <strong>to</strong>enails<br />
i - r- rrawing the feet in shoes, the feet<br />
- t,i :,e <strong>draw</strong>n the same size as when<br />
:"i:'irt or made bigger all around.<br />
The bending fonivard<br />
and back of the <strong>to</strong>es<br />
are key elements of<br />
this p0se.<br />
h::: fflat the foot<br />
::{:S on a different<br />
:-:.:e when clad in<br />
" -- heels.<br />
The <strong>to</strong>es are<br />
actually crammed<br />
tightly <strong>to</strong>gether in<br />
the shoe.<br />
\\<br />
u\_fl<br />
91
The Waist and Back<br />
Bending over causes skin folds <strong>to</strong> form in the abdomerr<br />
Bending 0ver and Hunkering Down<br />
Common Poses with the Back Rounded<br />
Pay careful<br />
attention <strong>to</strong><br />
"stretching"<br />
at the hips.<br />
The back of<br />
the neck also<br />
stretches.<br />
Wrinkles and<br />
skin folds<br />
appear 0n<br />
the sides<br />
that contract.<br />
Putting on or<br />
removing socks<br />
and shoes
then fie back is rounded,<br />
tle $oulders roll lorward<br />
The back<br />
becomes<br />
rounded when<br />
the shoulders<br />
are rotate<br />
fonruard.<br />
Pav careful attention <strong>to</strong> how the<br />
shoulders rotate fonruard and back'<br />
Leaning fonruard<br />
/ r\<br />
lt\<br />
Li<br />
)D\,<br />
)x<br />
/M<br />
r\l I<br />
\-+<br />
ln a normal stance,<br />
the shoulders are<br />
fairly much<br />
centered.<br />
Drawing the shoulders back<br />
causes the chest <strong>to</strong> thrust<br />
outward and the back <strong>to</strong> arc<br />
rearuvard.<br />
The small of the<br />
back stretches.<br />
The muscles along<br />
the spine follow a<br />
natural curve.<br />
Deep Bow<br />
Skin lolds<br />
appear in the<br />
abdomen.<br />
Bow in Greeting<br />
Here, furrows deePer<br />
than in a regular bow<br />
form, as if the uPPer<br />
body were<br />
swallowing the bellY.<br />
While hardlY anY folds are<br />
visible from the front,<br />
failing <strong>to</strong> <strong>draw</strong> them will<br />
prevent the figure from<br />
appearing <strong>to</strong> be bowing'<br />
Drawing the head inward<br />
causes the back <strong>to</strong> round'<br />
The waist is stretched <strong>to</strong><br />
its limits, and the furrows<br />
in the bellY are at their<br />
deepest.<br />
ln disappointed and tired backs'<br />
the shoulders are rotated forward'<br />
and the back is rounded'<br />
Exaggerate the look of the sloPing<br />
shoulders when <strong>draw</strong>ing'<br />
93
When sitting in a relaxed<br />
position, the back forms a<br />
gentle arc.<br />
The same holds true for<br />
sitting in a chair.<br />
The key <strong>to</strong> <strong>draw</strong>ing a<br />
seated pose is <strong>to</strong> plan out<br />
the knees'positions.<br />
i <br />
When dressed, creases at the abdomen vary<br />
according <strong>to</strong> the clothing worn.<br />
Suit skirt and jacket<br />
T-shirt and jeans<br />
94
,iiillfMnnl qeEularly, But Slightly Hunched Forward<br />
ln both the back study diagram and the high, oblique angled study<br />
diagram, the roundness of the back looks best when not<br />
overemphasized. Use a gentle curve for the slope of the back.<br />
Study Diagram:<br />
Front View<br />
A key point here is<br />
the fold that forms<br />
in the abdomen.<br />
rllr'rrri- 'Lrched fon/lrard, the upper<br />
riii: ?r"5 approximately the same<br />
"r-- '.-;-ner seated on the floor or<br />
A key point when <strong>draw</strong>ing<br />
the figure facing the picture<br />
plane is <strong>to</strong> <strong>draw</strong> the<br />
centerline of the hips facing<br />
forward.<br />
Study Diagram<br />
for Practical<br />
Application<br />
Seated on a S<strong>to</strong>ol<br />
- all 3, the con<strong>to</strong>ur from the shoulder <strong>to</strong><br />
:: back is the same. flhe only difference<br />
. Jre thickness of the clothing or <strong>to</strong>wel.)
Sitting While Hugging a Knee<br />
Establish fie<br />
shapes of fie<br />
waist and<br />
abdomen, ever<br />
though the anrs<br />
and leg will<br />
obscure them ir<br />
the final<br />
<strong>draw</strong>ing.<br />
ldentifying the<br />
body's entire<br />
structure will<br />
help you balance<br />
the legs.<br />
Line <strong>draw</strong>ing<br />
Study Diagram<br />
Study Diagram<br />
This skin fold in the<br />
back is a key point.<br />
\<br />
\<br />
Failing <strong>to</strong> include a skin fold in the<br />
back will make the character appear<br />
contrived, causing her <strong>to</strong> lose her<br />
sense of presbnce.
: ,:stures for Sitting on the Floor with the Knees Bent<br />
The 2 postures<br />
overlapped<br />
The key points in<br />
distinguishing sitting<br />
up straight and<br />
hunching over lie in<br />
the shoulder line and<br />
waist.<br />
Differences in the back con<strong>to</strong>urs<br />
\<br />
,tlll<br />
With <strong>characters</strong> of identical height, the 2<br />
postures result in a half-head difference in<br />
height.<br />
1<br />
-<br />
97
Key Points in Distinguishing the 2 Postures<br />
Hunched 0ver<br />
The shoulders are rolled<br />
forward, and the knees are<br />
casually grasped.<br />
The shoulders are<br />
held the same as<br />
when standing.<br />
Straight Back<br />
The curve at the waist<br />
is clearly evident.<br />
This disguises the<br />
tapering of the waist.<br />
Pulling the shoulders back brings<br />
the hands behind the figure.<br />
ln this pose, the<br />
curve at the<br />
waist is<br />
emphasized ever<br />
further.<br />
When the back is<br />
straight, <strong>to</strong>rso pretty<br />
much remains the same<br />
height whether sitting or<br />
standing.<br />
The waist (line) is<br />
clearly visible.<br />
Straightening the<br />
back causes the<br />
rear <strong>to</strong> roll slightly<br />
fonmrd.
Balling up <strong>to</strong> the extent<br />
that the chin rests on the<br />
knees molds the back in<strong>to</strong><br />
a semicircle.<br />
Curled up<br />
Hunched over Back straight<br />
normally<br />
Variations on Sitting on the Floor<br />
with the Knees Bent<br />
99
Arcing the BacULeaning Back<br />
The upper back con<strong>to</strong>ur is usually convex.<br />
:-r<br />
Bending back <strong>to</strong><br />
this extent causes<br />
the upper back<br />
con<strong>to</strong>ur <strong>to</strong> take on<br />
a concave curve.<br />
Not good<br />
character is shot or hit in the back<br />
with an object, etc.<br />
The upper back<br />
con<strong>to</strong>ur retains<br />
virtually the same<br />
convex curve.<br />
The waisVlower<br />
back region<br />
constitutes a key<br />
point in this pose.<br />
\\<br />
fft<br />
\\<br />
'V<br />
The snugly fitting<br />
jean-clad rear may<br />
be <strong>draw</strong>n just a<br />
hair smaller than<br />
on the figure nude.<br />
100
Te $tandard Convex Curve ofthe Upper Back<br />
The upper back rarely<br />
curves inward.<br />
(,<br />
i<br />
\]<br />
I<br />
Special Cases for Drawing the Upper Back with a Convex Curve<br />
When <strong>draw</strong>ing the<br />
composition from a high<br />
When <strong>draw</strong>ing the<br />
composition from a low<br />
angle and the shoulders<br />
are rotated back<br />
angle, and the chest is<br />
thrust out and the back<br />
arced<br />
101
Uses ofArcing the Back 1: Cheering<br />
lncorrect<br />
These samples lack<br />
movement.<br />
Showing the wrist arcing<br />
back evokes the feel of<br />
the arms unconsciously<br />
raised, creating the<br />
impression of jumping<br />
for joy.<br />
(-_<br />
l,02l<br />
Keep the wrist straight<br />
when suggesting that the<br />
character is consciously<br />
celebrating.<br />
This stiff cheering pose<br />
leaves little impact on the<br />
reader.
Practical Application Samples<br />
Tilting the head down turns<br />
this in<strong>to</strong> a "yawning" or<br />
<<br />
-]ow fie character<br />
mes her arms<br />
rdicates subtleties<br />
n her personality<br />
:n feeling of joy.<br />
(J<br />
The pose and angle are the same<br />
as in the cheering poses, but<br />
changes have been made in the<br />
direction of the face and the way<br />
the arms are raised.
Uses ofArcing the Back 2:<br />
Escaping (Unwanted Grasps, etc.)<br />
When the muscles are<br />
flexed, the body moves in<br />
a burst from a shrunken<br />
state <strong>to</strong> an expanded<br />
state.<br />
/-\N<br />
k-i|<br />
)./<br />
L:J :<br />
rT<br />
\\A<br />
..\ v<br />
Shrunken state<br />
Expanded state<br />
,l/<br />
/-.,,<br />
Shrunken state<br />
Direction of the<br />
upper body<br />
Expanded state<br />
Direction of<br />
the lower<br />
body<br />
Elements of twisting<br />
are being mixed in<br />
with the arcing the<br />
back action.<br />
A character<br />
and shaking off her assailant's grasp<br />
104<br />
\-l<br />
I'<br />
Spreading the legs far apart<br />
would make the character seem<br />
like a martial arts expert, so<br />
position them on the close side.
105<br />
-:s.es of Arcing the Back 3:<br />
i;"n nin g/Escaping: Running Away Scenes<br />
,1'2<br />
', (\*<br />
Showing the back<br />
arced is also<br />
effective in scenes<br />
where a character<br />
has been locked up<br />
and is begging <strong>to</strong><br />
be released.<br />
When the wrist is<br />
grabbed, etc., the<br />
back will arc when<br />
kying <strong>to</strong> escape that<br />
grasp.
Leaning <strong>to</strong> the Side: Fashion Model Poses<br />
The waist is<br />
stretched on<br />
one side.<br />
The upper part<br />
of the <strong>to</strong>rso<br />
stretches.<br />
These S-curve poses are afiected poses the character adopts when<br />
intentionally attempting <strong>to</strong> make herself appear attractive and are,<br />
consequently, used for scenes when a character makes a first entrance<br />
<strong>to</strong> give that scene impact.<br />
This is typically<br />
an exercise<br />
pose, and just<br />
a means of<br />
moving the<br />
body. <strong>How</strong>ever,<br />
it has wide<br />
applications in<br />
key compositions.<br />
\<br />
+<br />
Skin folds<br />
Chibi character in pose<br />
Contrast of S-Curve Poses<br />
Leaning Forward<br />
Leaning <strong>to</strong> the Side<br />
Here the<br />
character, seen<br />
from a<br />
moderately low<br />
angle, leans <strong>to</strong><br />
one side.<br />
Here, the character,<br />
seen from a<br />
moderately high<br />
angle, leans<br />
forward.<br />
Common pose:<br />
Figure arcing the<br />
back while leaning<br />
fonruard<br />
While these two S-curve poses are<br />
similar, they differ in that one leans<br />
foruvard, while the other, <strong>to</strong> the<br />
side.<br />
Figure arcing back<br />
<strong>to</strong>ward one side
iiurding S-Curve Poses<br />
:"- 'r\<br />
1\ i\\<br />
--\<br />
19<br />
\<br />
r\ \\<br />
n<br />
\<br />
\\ \\<br />
- \l<br />
@<br />
0<br />
.-\<br />
zz-'/
Iwisting and Turning<br />
While <strong>to</strong>rsion does appear in the waist during the common act of walking' this<br />
<strong>to</strong>rsion becomes important i"tlntt of u ch-aracter running and principally in<br />
The fundamental asPect of<br />
showing twisting or turning<br />
are changes in the directions<br />
of the uPPer bodY<br />
and lower body.<br />
Glancing back Establishing a stance<br />
M an g *StYle StYl ization :<br />
Figure with OnlY the Chest Turning<br />
rs<br />
(<br />
Fioure in Perfect<br />
7\<br />
Figure with the<br />
pr"ofile (Normal view) chest turned<br />
lf there is no need <strong>to</strong><br />
adhere <strong>to</strong> actual<br />
physical structure, a<br />
character maY be<br />
<strong>draw</strong>n in Profile, but<br />
with her chest turned<br />
slightlY. This<br />
technique, unique <strong>to</strong><br />
<strong>manga</strong>, enhances the<br />
character's sense of<br />
presence once she is<br />
dressed in clothing.
krrast of Figures in S-Curve Poses and with Torsion<br />
Figure leaning<br />
<strong>to</strong> the left with<br />
lower body<br />
Giving the figure<br />
<strong>to</strong>rsion is etfective<br />
when showing a<br />
character breaking<br />
in<strong>to</strong> a run.<br />
This work6 well with<br />
static poses.<br />
The upper body<br />
and lower body<br />
face difterent<br />
directions.<br />
109
Twisting and Turning Are Key Fac<strong>to</strong>rs in Combat Scenes: Torsion Symbolizes Combat<br />
Study figure illustrating<br />
the conventional "twist."<br />
The centerline from the upper<br />
body <strong>to</strong> lower body is straight.<br />
Her backside seems <strong>to</strong> be jutting<br />
out, causing the figure <strong>to</strong> loose<br />
force.<br />
Good example<br />
Here, the upper body and<br />
lower body face different<br />
directions, forming the<br />
centerlines in<strong>to</strong> an S-<br />
curve.<br />
110
l,e. ;r 3 simple back view, a bit<br />
:r E-slofl evokes the look of a<br />
::ria1 expert.<br />
This figure has no <strong>to</strong>rsion and is<br />
standing bolt upright. Nou the<br />
character appears unaccus<strong>to</strong>med<br />
<strong>to</strong> fighting.<br />
Changing the direction of<br />
the head on twisting/turning<br />
poses allows the creation of<br />
limitless new variations.<br />
Add fine, diagonal lines, symbolic of<br />
movement <strong>to</strong> enhance a dynamic<br />
'.W<br />
v<br />
composition's impact.<br />
Without the diagonal hatching, even<br />
though the figure has been given<br />
<strong>to</strong>rsion, it still lacks force.<br />
Here, the hand's<br />
con<strong>to</strong>urs are rendered<br />
in diagonal hatching.<br />
Alternative Styles<br />
111
Adding the Finishing Touches t0 a Hot "Backward Glance" Pose with Torsion<br />
(Ihe Steps in Attaching Tone)<br />
C<br />
a-a(<br />
I\?(1<br />
Ir \-<br />
\N\<br />
D\\<br />
Study Figure<br />
ru Line <strong>draw</strong>ing<br />
Attach 2 sheets<br />
of layered <strong>to</strong>ne<br />
<strong>to</strong> the blouse.<br />
Use <strong>to</strong>ne with<br />
identical line<br />
numbers <strong>to</strong><br />
avoid a moir6<br />
effect.<br />
Attach a light gradation <strong>to</strong>ne <strong>to</strong> the shoulders, shorts,<br />
gloves, and boots. Mixing gradation <strong>to</strong>ne with regular dot<br />
<strong>to</strong>ne could result in a moir6 effect even if both <strong>to</strong>nes have<br />
the same line number. Verify beforehand that you are<br />
using 2 compatible <strong>to</strong>nes.
-r inish, rub with an eraser those areas<br />
,,,xere you wish <strong>to</strong> show highlights.<br />
Ref. Fig.: Same image without shading.<br />
Shading is optional in small panels and<br />
compositions.<br />
This figure was created digitally. The creation process and points oJ caution are the same as when attaching regular <strong>to</strong>ne.
Both the figure delivering and receiving the slap<br />
have more impact with <strong>to</strong>rsion at the waist.<br />
Here,ltakearunning<br />
figure and shift the<br />
right hand <strong>to</strong> the front.<br />
Here, both figures are <strong>draw</strong>n standing<br />
bolt upright and lack <strong>to</strong>rsion at the waist.<br />
The result is a<br />
figure putting her<br />
waist in<strong>to</strong><br />
delivering a punch.<br />
Here, the figure delivering the slap retains the<br />
same stance, but the figure receiving the slap<br />
is twisting at the waist.<br />
114
More Manga
The Fundamentals of Manga<br />
Po rt raya I : Uf,f[,fl,'lf ,t3llpositi<br />
on<br />
4 Basic Elements<br />
ln <strong>manga</strong>, the reader figures out the s<strong>to</strong>ry by seeing how the pictures flow. That is what<br />
characterizes the medium. Any dialogue or narrative text is supplementary t0 add <strong>to</strong> the<br />
reader's understanding. We say that in <strong>manga</strong>, pictures tell the s<strong>to</strong>ry, and the significance<br />
of heightening the <strong>characters</strong>' sense 0f presence lies in that statement. But, let's first start<br />
with telling a s<strong>to</strong>ry (communicating) through pictures.<br />
What do they look like? What are their personalities?<br />
What will they say?<br />
When (Time)<br />
Where (Location)<br />
These are the 4 points that need <strong>to</strong> be clarified in<br />
order <strong>to</strong> convey the situation <strong>to</strong> the reader and have<br />
him or her understand.<br />
Actions<br />
Something done for<br />
someone's behalf<br />
116
hxlg fi SmnT blflralfy<br />
n11nmrnr IIli:1-,: - I :"a-:<br />
fte key rs <strong>to</strong> decide your theme-i.e. what <strong>to</strong><br />
communicate-and what must be <strong>draw</strong>n-i.e.<br />
ivhat rnformation <strong>to</strong> <strong>draw</strong>.<br />
)inql<br />
Mangacan be anything: even<br />
your thoughts or daily activities.<br />
What panels will you select for your theme,<br />
"waiting in a caf6"?<br />
o A character waiting<br />
. The <strong>characters</strong> meeting<br />
r A character waiting, and then the<br />
<strong>characters</strong> meeting<br />
You will need <strong>to</strong> decide beforehand what<br />
types 0f panels you will <strong>draw</strong>. This is what<br />
it means <strong>to</strong> "decide a theme."<br />
Good example.:<br />
Bad example.:<br />
. The setting does not necessarily look like<br />
a caf6.<br />
. We have no idea what kind of person the<br />
character is.<br />
. We are not sure what she is doing.<br />
lndica<strong>to</strong>rs that the location is a caf6: a receipt, a menu, a window, etc. "Waiting" indica<strong>to</strong>rs: a paftially read<br />
book, half drunk water. Character indica<strong>to</strong>rs: a cigarette dangling from the mouth, smoke drifting from cigarette<br />
butts in the ashtray. The indica<strong>to</strong>rs we see in the panel suggest an uncouth character type. 117
Panel Design (The ABC's of Page Composition)<br />
Panel design begins with deciding what needs <strong>to</strong> be <strong>draw</strong>n. Clear<br />
panel design will lead <strong>to</strong> poftraying <strong>characters</strong> with presence.<br />
Theme:<br />
Gaf6<br />
Rendezvous<br />
il<br />
Analysis<br />
Main S<strong>to</strong>rv Points<br />
The 4 Elements The Adist's Conceotion<br />
The protagonist Character: character desion<br />
Durino the evenino When: oortraval of evenino<br />
ln a caf6<br />
Where: oortraval of cafe<br />
Has a rendezvous Action: meeting, talking, etc.<br />
Underlying Theme: "He's here!"<br />
#ffi<br />
\_sl,<br />
protagonist<br />
"Waiting" as the Main Theme:<br />
Once these 4<br />
elements have been<br />
clarified, determine<br />
specifically the main<br />
point you wish <strong>to</strong><br />
make.<br />
For what purpose are<br />
you <strong>draw</strong>ing a<br />
Evening<br />
rendezvous in a caf6?<br />
What do you hope <strong>to</strong><br />
communicate using<br />
this theme? You need<br />
<strong>to</strong> establish the<br />
underlying theme.<br />
0ftentimes, if you fail<br />
<strong>to</strong> clarify this point,<br />
you may find yourself<br />
unable <strong>to</strong> compose<br />
your theme, even if<br />
you try.<br />
1,,r4 accidenl.<br />
J -(lrel,(<br />
\...g<br />
Caf6<br />
"Waiting," "worrying, "<br />
and other acts relating<br />
<strong>to</strong> "meeting": the<br />
ways of executing the<br />
simplistic theme,<br />
"rendezvous at a<br />
caf6" are limitless.<br />
Thankheavene, ?<br />
@%<br />
Meeting<br />
118<br />
The protagonist's reaction reveals her<br />
personality through "action." These 4 panels<br />
form an "incident" that illustrates the<br />
protagonist's personality.<br />
Here the third panel,<br />
where we see the<br />
protagonist's<br />
imagination let fly, is<br />
recomposed so that<br />
the visuals dominate.<br />
Now, the panel has<br />
more of a <strong>manga</strong><br />
flavor, and we can tell<br />
at a glance what is<br />
taking place. <strong>How</strong>ever,<br />
the original panel<br />
coveys more strongly<br />
the protagonist's state<br />
of "anxiety."
Waiting on a Friend: Character lntroduction Scene<br />
Well, I've<br />
nolhinA <strong>to</strong><br />
do. \,4iqhr, ae<br />
well bues lhe<br />
table myaelf.<br />
blah<br />
an my way Lo lhe 3o,I lold hlm, buL he<br />
5td(ta". L- b +o-e Blah<br />
q-er didtr underata. a. eo<br />
cafie ta and, aEKea I \aA <strong>to</strong> t ake ' r Ard, you know whaL?<br />
me il 1l'new a qood lherc'<br />
lle wao )ike lhia ?rince<br />
who came l:o<br />
auahi<br />
Ja?an<br />
bar,<br />
incoqri<strong>to</strong> trom hi6<br />
Olah<br />
cauntry)<br />
abh<br />
aerioue?l<br />
Then you can<br />
finioh off<br />
yaur dream<br />
by trakinq me<br />
Lo LhaL<br />
6ubhi bar.<br />
w<br />
%<br />
eo,<br />
1ut I<br />
wanted<br />
<strong>to</strong> finieh<br />
the<br />
dream,<br />
so I tell<br />
baak Lo<br />
eleep.<br />
Lhen 1<br />
wake u? ana<br />
realizei it<br />
wae all a<br />
dream and<br />
t had,<br />
over6le?L.<br />
#,,,;,,10;.<br />
Here, the relationship between the two becomes<br />
clear immediately (explained by the scene). 1 1 I
GMng the Panel Design Variation This refers <strong>to</strong> modifyins the<br />
3frfff ;;',fiJlIlJf;"un'''<br />
Readjustment of "He's here!"<br />
Readjustment of "Waiting on a Friend',: Character lntroduction Scene<br />
--T-:a---7---.v-z-l<br />
*-4& I<br />
' ----rff:M/V<br />
-ffi=ffi5fi -:--]Hk''l<br />
.............=_-rhF-.l;h<br />
*l<br />
Since the idea that the<br />
friend finally arrived is<br />
fie main point, her<br />
appearance panel is<br />
made the largest.<br />
Tardon,<br />
mademoiaelle,<br />
Whereis zeea<br />
aushi bar, a'il<br />
vouo plairl<br />
,6)1<br />
v\r,<br />
P_<br />
Thankheaveno, p<br />
you're alivel :<br />
Ihenyou can<br />
finioh oft your<br />
dream by taking<br />
rne la that<br />
aushi bar,<br />
120<br />
For this scene, <strong>to</strong> emphasize the<br />
character's personality, the "Thank<br />
heavens!" panel should be made larger,<br />
as shown above. To introduce the "late<br />
friend," lay out the panels as seen<br />
below. Since the fifth panel illustrating<br />
the protagonist's worrywart wanderings<br />
was <strong>draw</strong>n rather large, the first example<br />
works better within the flow.
,ftriril Jtsqr n=qrrtening the<br />
mtmfirlMi Ssse of hesence<br />
Gry-r-.-<br />
Y<br />
a<br />
Good Example<br />
Here, the panel<br />
design has<br />
been given<br />
variation by<br />
making the<br />
largest the<br />
panel<br />
introducing the<br />
boyfriend, who<br />
is the focus of<br />
the scene.<br />
fhen aqain, he'e<br />
,------q<br />
i';::)::';*, _\r-d<br />
, ('-\r'; )<br />
nap?ened.<br />
--7<br />
Here, each panel is viewed<br />
as equally important, and,<br />
therefore, all are <strong>draw</strong>n the<br />
same size.<br />
fhank<br />
heavens,<br />
you're alivel<br />
For this, I <strong>to</strong>ok the original 4-panel scene and<br />
redesigned the panels, making his appearance the<br />
key panel. Varying large and small panels turns thls<br />
4-panel scene in<strong>to</strong> a full-fledged 1 -page episode.<br />
The same theme can appear greafly different<br />
(i.e. give the reader an entirely different impression)<br />
simply by modifying the panet design. With ail<br />
panels the same size, the reader is unclear oJ<br />
the scene's gist.<br />
You, the artist, must determine what point you want<br />
<strong>to</strong> make, what you want <strong>to</strong> tell <strong>to</strong> the reader, and<br />
what it is you need <strong>to</strong> communicate. Failing <strong>to</strong> do<br />
s0 could easily result in a mono<strong>to</strong>nous panel design.<br />
Your main point rests in the key panel. Draw your<br />
key panels the largest.<br />
121
Figures and ,r ^ _- _ <strong>How</strong> <strong>to</strong> Draw Comfortably<br />
Scenes of Figures Gettin!<br />
UafS:<br />
in and out of Cars<br />
Mangaconuenlion dictates using sound effects of car doors opening and closing <strong>to</strong> portray<br />
getting in and out of a car.<br />
The door handle<br />
should be situated<br />
about the same<br />
level as the hand<br />
when hanging.<br />
I<br />
t I<br />
,rhr,<br />
t+1<br />
Here we see the door closed.<br />
A figure assumes this fonivard<br />
leaning pose when opening the<br />
door (getting in the car) and<br />
when closing the door (getting<br />
out of the car).<br />
Here we see the door open<br />
and the figure in a fashion<br />
model pose. Even with the<br />
door open, the fonruard<br />
leaning pose would look<br />
more natural.<br />
Here we see a character getting in<strong>to</strong><br />
a car. Without the sound effects, this<br />
could also be interpreted as a<br />
disembarking scene.<br />
With the same composition, the<br />
ditferent sound effects indicate<br />
whether the door is being<br />
opened ("click") or closed<br />
("slaml").<br />
122
muilMillMm lk a Sample Scenes: Getting in and out 0f a Car<br />
q rilrtlrtttilri, flltnltilr m t-r* :pr ar6 dose-up of the front windshield explain the scene.<br />
II<br />
-u<br />
&"r1<br />
Normally, artists are limited <strong>to</strong> the page space<br />
0r number of panels they can use <strong>to</strong> poftray<br />
<strong>characters</strong> getting in<strong>to</strong> a car. Here we have<br />
samples illustrating that minimal aftwork, using<br />
few panels (1 <strong>to</strong> 2) allows you adequately <strong>to</strong><br />
portray "getting in<strong>to</strong> or out of a car."<br />
" provided that a shot of the front, side, or rear<br />
of the car has been included.<br />
Scene poftrayed using a front view of a car and partial door shots<br />
1wE : :i{xE rew of the car is used, and any shot of opening<br />
)r ril. :E!'r' tas been omitted. Still, we understand that the<br />
:|Tffia:En lave gotten in<strong>to</strong> the car.<br />
The sound effect "slam" may be added <strong>to</strong> the third panel if desired.<br />
Drawing the female character instead the male in panel 1 would have<br />
altered the scene so that she was the one boarding. Turning the vehicle<br />
in<strong>to</strong> a foreign car (i.e. switching the steering wheel <strong>to</strong> the left side) would<br />
suggest that the male character is the one boarding. Alternatively, it<br />
could be that she was driving the car but turned the wheel over t0 him.<br />
-8"? ie iar is s<strong>to</strong>pped, and<br />
i.ti'tr :r*c -,ders get out. Showing<br />
tr$ :er l,:o1'open in the second<br />
rfl-e s i iine with common<br />
tl?;:r:: n portraying scenes of<br />
mrr-'; i and out of a car.<br />
...S<br />
:':*ersing the images in the last<br />
r,!,: 3anels cOuld be used <strong>to</strong><br />
that the character emerged<br />
*:r "-';s.est a rear passenger seat or that<br />
:e driver had emerged and is<br />
=nding still.<br />
Portrayal using the rear view and partial views of a car
Special Effects That Enhance a<br />
Character's Sense of Presence<br />
Attaching a Simple Tone as a Character Backdrop<br />
Good Example<br />
The manner in which <strong>to</strong>ne is attached as a character<br />
backdrop allows you <strong>to</strong> suggest movement by using a bit of<br />
ingenuity, thereby enhancing his or her sense of presence.<br />
Here, the composition is open<br />
in back of the character. This<br />
creates a sinister mood, as if<br />
something might creep up<br />
from behind.<br />
Keep the composition open in<br />
the direction the character<br />
faces.<br />
Front view <strong>to</strong>ne effect<br />
Even if the character's body is facing one direction, keep<br />
the composition open in the direction the head faces.<br />
Alternative Styles<br />
Donut clip<br />
Donut clip + accent
&mr I -fffle Creativity When Attaching Tone<br />
'u a ffitr,mn'aoter<br />
(<br />
Here, the <strong>to</strong>ne is cut<br />
closely along the<br />
con<strong>to</strong>ur lines, in line<br />
with standard<br />
practice.<br />
Here, the <strong>to</strong>ne is cut<br />
just a tad over the<br />
con<strong>to</strong>ur lines.<br />
-y.; :ren though the <strong>to</strong>ne has been cut along<br />
:E :,:ricur lines, it still evokes a distinctive<br />
as uil.<br />
Emotional Portrayal and Tone Effects:<br />
Create a Mood Using Backdrops of Cu<strong>to</strong>utTone<br />
Detailed effect Shadow falling<br />
across the iris<br />
€h-<br />
SF<br />
suggesting brown or blue<br />
--<br />
Vivaciousness/mirth<br />
Tension/nervousness
More Tones: Composition Using Popular Tones 0ther than Standard Dot and Gradation<br />
Tone comes in a mynad<br />
of patterns, the most<br />
common of which<br />
outside of dot and<br />
gradation may be<br />
roughly grouped in<strong>to</strong> tfr<br />
following 6 categories.<br />
When using random dot or<br />
patterned <strong>to</strong>ne, keep a<br />
slight gap between con<strong>to</strong>ur<br />
lines and the <strong>to</strong>ne. ln<br />
particular, when using<br />
motif <strong>to</strong>ne for cloth<br />
patterns, having the<br />
pattern continue without<br />
interruption at, say where<br />
a dip in a ripple. etc.<br />
should occur, results in a<br />
visually awkward image.<br />
You can easily show dips<br />
in a ripple or crease by<br />
etching the <strong>to</strong>ne along the<br />
crease line.<br />
Random dot<br />
ICW<br />
,/^-til<br />
*,<br />
'-* .o -.init<br />
" '1'o .!l ;l<br />
t-:*#,s nn',<br />
Qrc:' ^y<br />
Random dot gradation<br />
DigitalTone<br />
126
lu:um's Frofile<br />
-lr*a,:.., Hayashi<br />
;,ft" 1:r n Tokyo.<br />
,ri$i i*aluted with a degree in the Social Sciences and Humanities from Tokyo Metropolitan University.<br />
{$nr a major in Philosophy.<br />
;N[": ;*:elted a hortative award and honorable mention for his work on Shueisha lnc.'s Buslness Jumpand served as<br />
isss:ant <strong>to</strong> Hajime Furukawa.<br />
:ilEll iln!:&ed 0n shueisha's shukan Young Jump while apprenticing under Noriyoshi lnoue.<br />
lU r.c,shed his debut work based 0n a true s<strong>to</strong>ry, "/fi Kongu Monogatari' ["The S<strong>to</strong>ry ofAja Kong"] in Beafs Ctub.<br />
,1{s; =:r-niedthe<strong>manga</strong>designandproductionstudio,Gooffice.Producedillustrationsfortheworks Butsuzoni ai ni ikolon<br />
i-E ilpreciation of Buddhist sculpturel by Hiromichi Fukushima (published by Tokyo Bijutsu lnc.)<br />
.--'il$d rr:,ored <strong>How</strong> <strong>to</strong> Draw Manga: Female Characters, <strong>How</strong> <strong>to</strong> Draw Manga: Male Characters, <strong>How</strong> <strong>to</strong> Draw Manga: Couples,<br />
r,c :<strong>to</strong>w <strong>to</strong> Draw Manga: lllustrating Batiles.<br />
]l${r* rr-:rcred <strong>How</strong> <strong>to</strong> Draw Manga: Bishoujo around the World, <strong>How</strong> <strong>to</strong> Draw Manga: Bishoujo/Pretty Girls, <strong>How</strong> <strong>to</strong> Draw<br />
l{a'$a: )ccult and Horror, and <strong>How</strong> <strong>to</strong> Draw Manga: Mue about Pretty Glas ; promoted, produced, and wrote lhe <strong>manga</strong><br />
r:!cr r0r Koki lshii's Kokuhatsu <strong>manga</strong> riken ref<strong>to</strong> (b00k on the wasteful spending of Japanese politicians), published by<br />
Ns:s:r Co.. Ltd.; and produced the corporate identity mascot characterforTaiyo Group driving school.<br />
Jr [r[ !u:,ved <strong>How</strong> <strong>to</strong> Draw Manga: Animals; produced and initiated the release o'f Bishoujo Fighting, a dojinshi (tanzine or<br />
:i-a 3ress comlc) for pro wrestling fans under the name of Me<strong>to</strong> (a fanzine specializing in woman's wresfling and cat<br />
''riy: ?ldeos, published biannually when matches occur; fifth issue on sale as of 2002).<br />
f:rlli 1 l":a-J<strong>to</strong>red <strong>How</strong> <strong>to</strong> Draw Manga: Marlial Arts and Combat Spotts, <strong>How</strong> <strong>to</strong> Draw Manga: Giant Robots, and <strong>How</strong> <strong>to</strong> Draw<br />
hta'pa : Co stu m e En cycl o p e d i a, Eve ry d ay Fash i o n.<br />
lll,iflflI ,,;amored More <strong>How</strong> <strong>to</strong> Draw MangaVol. 1 and <strong>How</strong> t0 Draw Manga: Costume Encyclopedia, tntimate Apparet,<br />
:r-f,, shed by Graphic-sha. Mr. Hayashi continues the planning and production of original Go Office fanzines.<br />
:ur rEgizawa<br />
lfiilL f;il;3ta'i'ras born in Tokyo on January 8. She is a Capricorn with an A blood type. She first started doodling in pencil in<br />
rur:mr a;;'r:ol and made her first attempt at <strong>draw</strong>ing <strong>manga</strong>in pen during the fifth grade. ln junior high, she began <strong>to</strong> produce<br />
.ilzulrilrsn t,;E rflafileworks with friends from upper grades and in her class.<br />
il' ' $tl- s-l: debuted as an illustra<strong>to</strong>r with Minori Shobo's monthly publication, Gekkan 1tJT. She acted as an illustra<strong>to</strong>r, an<br />
iirflrtrffir 3:r -a<strong>to</strong>n parody) and <strong>manga</strong> artist, an anime writer, etc., contributing illustrations <strong>to</strong> Minori Shobo's Aniparo Comics,<br />
{liulirr }*[r s] rg' s My Ani m e, Tokuma Shoten's An i mage, elc.<br />
ilr ' IiM $-r. teblrted as a full{ledged nangaafiisl in Kobunsha's Comic Val. Since then, she has contributed series and single<br />
)rullnlrrEnrr r,trks <strong>to</strong> Kobusha's Pretty, as well as cover and page illustrations for paperback editions targeted <strong>to</strong>ward young<br />
'mmn :r.r'stled by Seishinsha, Kadokawa Shoten, Shogakkan, and other publishers. She has authored 9 <strong>manga</strong> volumes and<br />
luumi:ae: --re fian 25 paperback books.<br />
n ' I${ s-e negan <strong>to</strong> participate on the production side with Graphic-sha and Go office, starting with H\w <strong>to</strong> Draw Mangq;<br />
.I;urimr* rrd sontinues such efforts <strong>to</strong>day.<br />
&u Office Profile<br />
Ilu lffic; *r,as founded in May '1997 and has been specialzing in the production of tu<strong>to</strong>rial resources using <strong>manga</strong> and<br />
illlu]5il:iinrll s i,,.trich include publications on <strong>How</strong> <strong>to</strong> Draw Mangaseries.
RUGTIO}I<br />
....MA]{GA MASTERS!<br />
DRAW MANGA<br />
CI<br />
9<br />
.<br />
Graphic:sha Publiihitig
--< )-:Y9<br />
}IAIB<br />
Vol.7: Amazing Effects<br />
Crapter ' The Basics in Composition<br />
Chapter 2 The Basics in Character Portrayal<br />
Chapter 3 The Basics in Voice Portrayal<br />
Chapter 4The Basics in Panel Design<br />
Chapter 5 The Basics of Manga Portrayal<br />
rsBN4-7661 -1 480-9<br />
Vol.8: Super Basics<br />
Chapter 1 Materials and Simple Means of Usage<br />
Chapter 2 Creating Manga<br />
Chapter 3 Drawing People and Animals<br />
Chapter 4 Manga Techniques<br />
Chapter 5 Depicting Greenery and 3-Dimensional Objects<br />
Chapter 6 Creating Well-composed Manga<br />
lsBN4-766 1 -1 481 -7<br />
.g -;::<br />
J:3J i='<br />
'"h.<br />
{c, a<br />
= 'r-+tr<br />
* 6"<br />
More <strong>How</strong><strong>to</strong> Draw Manga<br />
Vol. 1 : The Basics of Character Drawing<br />
Chapter 1 Drawing in Pencil<br />
Chapter 2 Drawing Faces<br />
Chapter 3 Drawing the Figure<br />
Chapter 4 Manga Miscellaneous<br />
lsBN4-7661 -1 482-5<br />
More <strong>How</strong> <strong>to</strong> Draw Manga<br />
Vol. 2: Penning Characters<br />
Chapter 1 Pen Fundamentals<br />
Chapter 2 Making Characters Distinctive<br />
Chapter 3 Facial Expressions<br />
Chapter 4 Manga Miscellaneous<br />
tsBN4-7661 -1 483-3<br />
More <strong>How</strong> <strong>to</strong> Draw Manga<br />
Vol.3: <strong>Enhancing</strong> a Character's Sense of Presence<br />
Chapter 1 The lmportance of Tone Work<br />
Chapter 2 Character Shading and Tone Portrayal<br />
Chapter 3 Movement with a Sense of Presence<br />
Chapter 4 More Manga<br />
lsBN4-7661 -1 484-1<br />
More <strong>How</strong> <strong>to</strong> Draw Manga<br />
Vol.4: Mastering Bishoujo Characters<br />
Chapter 1 Twelve CharacterTypes<br />
Chapter 2 Making the Figure Move<br />
lsBN4-7661 -1 485-X<br />
Distributed in North America by<br />
Diamond Comic Distribu<strong>to</strong>rs/Diamond Book Distribu<strong>to</strong>rs<br />
1 966 Greenspring Drive<br />
Timonium, MD 21093<br />
Phone (410) 560-7100<br />
www.diamondcomics.com<br />
www.diam0ndbookdistribulors.com<br />
All of Graphic-Sha's publications can be lound at<br />
your local comic book s<strong>to</strong>re. To lind a s<strong>to</strong>re near you.<br />
please use the Comic Shop Localor Service by calling <strong>to</strong>ll free:<br />
1 -888-C0MlC-800K (1 -888-266-4226) in the U.S, or log on <strong>to</strong><br />
csls.diamondcomics.com
=lffiililJLllilffi[il|<br />
=ililililililililffil|<br />
r s B N 4-7 661 -1 484-1<br />
BOBONTA 97624099 HEALESV|LLE........59624423<br />
FTG..........................92948140 LILYDALE 92943120<br />
KNOX.................... ... 9801 1422 MONTROSE ......... ... 972A 4224<br />
KNOX MOBTLE ........ 9762 4099 MOOROOLBARK . ... 9726 8200<br />
ROWVTLLE .............. 9294 1300 MT EVELYN ............ 9736 3851<br />
CRoYDON .............. 9294 5640 RANGES MOBILE .. 9754 7266<br />
RTNGWOOD ............9870 0177 VALLEY MOBILE .... 9294 3',120<br />
BELGBAVE .............9754 7266 YARRAJUNCTION 5967 1588