

HAIMA 7 Service Manual(MT)-U Heater and air conditioning system

Create successful ePaper yourself
Turn your PDF publications into a flip-book with our unique Google optimized e-Paper software.
<strong>Service</strong> warnings<br />
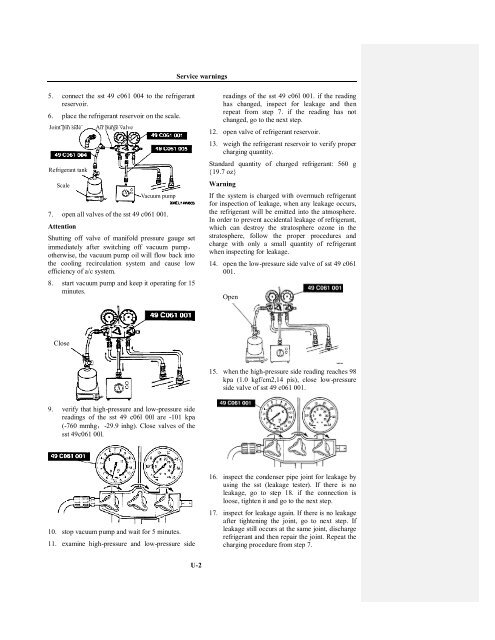
5. connect the sst 49 c061 004 to the refrigerant<br />
reservoir.<br />
6. place the refrigerant reservoir on the scale.<br />
Joint pin side<br />
Refrigerant tank<br />
Scale<br />
7. open all valves of the sst 49 c061 001.<br />
Attention<br />
Air purge valve<br />
Vacuum pump<br />
Shutting off valve of manifold pressure gauge set<br />
immediately after switching off vacuum pump,<br />
otherwise, the vacuum pump oil will flow back into<br />
the cooling recirculation <strong>system</strong> <strong>and</strong> cause low<br />
efficiency of a/c <strong>system</strong>.<br />
8. start vacuum pump <strong>and</strong> keep it operating for 15<br />
minutes.<br />
readings of the sst 49 c06l 001. if the reading<br />
has changed, inspect for leakage <strong>and</strong> then<br />
repeat from step 7. if the reading has not<br />
changed, go to the next step.<br />
12. open valve of refrigerant reservoir.<br />
13. weigh the refrigerant reservoir to verify proper<br />
charging quantity.<br />
St<strong>and</strong>ard quantity of charged refrigerant: 560 g<br />
{19.7 oz}<br />
Warning<br />
If the <strong>system</strong> is charged with overmuch refrigerant<br />
for inspection of leakage, when any leakage occurs,<br />
the refrigerant will be emitted into the atmosphere.<br />
In order to prevent accidental leakage of refrigerant,<br />
which can destroy the stratosphere ozone in the<br />
stratosphere, follow the proper procedures <strong>and</strong><br />
charge with only a small quantity of refrigerant<br />
when inspecting for leakage.<br />
14. open the low-pressure side valve of sst 49 c061<br />
001.<br />
Open<br />
Close<br />
15. when the high-pressure side reading reaches 98<br />
kpa (1.0 kgf/cm2,14 pis), close low-pressure<br />
side valve of sst 49 c061 001.<br />
9. verify that high-pressure <strong>and</strong> low-pressure side<br />
readings of the sst 49 c06l 00l are -101 kpa<br />
(-760 mmhg,-29.9 inhg). Close valves of the<br />
sst 49c061 00l.<br />
10. stop vacuum pump <strong>and</strong> wait for 5 minutes.<br />
11. examine high-pressure <strong>and</strong> low-pressure side<br />
16. inspect the condenser pipe joint for leakage by<br />
using the sst (leakage tester). If there is no<br />
leakage, go to step 18. if the connection is<br />
loose, tighten it <strong>and</strong> go to the next step.<br />
17. inspect for leakage again. If there is no leakage<br />
after tightening the joint, go to next step. If<br />
leakage still occurs at the same joint, discharge<br />
refrigerant <strong>and</strong> then rep<strong>air</strong> the joint. Repeat the<br />
charging procedure from step 7.<br />
U-2