

QUILTsocial | Issue 10
Welcome to a new issue of QUILTsocial! I'm so excited to share with you tips, tutorials and product reviews in this issue and I'm even more excited you'll be able to download it for future reference! Among the several projects 5 of them are created by playing with rulers: a square, a triangle and a circular cutter. My favorite is the triangle ruler, as it simplifies and shortens the time it takes to make half square triangles, substantially. Another must-read feature is about using the lowly placemat as a creative platform and learning tool to discover different quilting techniques and embroidery possibilities. Also you don't want to miss the 9 essential tools for successful quilting on your domestic machine, guidelines that will change your quilting possibilities. Let me highlight one more, you know those quilt panels you love so much and hate to cut up into a quilt? We offer tips about how to cut these so the images are highlighted instead of lost. Enjoy exploring everything else there is in this amazing issue.
Welcome to a new issue of QUILTsocial! I'm so excited to share with you tips, tutorials and product reviews in this issue and I'm even more excited you'll be able to download it for future reference! Among the several projects 5 of them are created by playing with rulers: a square, a triangle and a circular cutter. My favorite is the triangle ruler, as it simplifies and shortens the time it takes to make half square triangles, substantially. Another must-read feature is about using the lowly placemat as a creative platform and learning tool to discover different quilting techniques and embroidery possibilities. Also you don't want to miss the 9 essential tools for successful quilting on your domestic machine, guidelines that will change your quilting possibilities. Let me highlight one more, you know those quilt panels you love so much and hate to cut up into a quilt? We offer tips about how to cut these so the images are highlighted instead of lost. Enjoy exploring everything else there is in this amazing issue.

You also want an ePaper? Increase the reach of your titles
YUMPU automatically turns print PDFs into web optimized ePapers that Google loves.
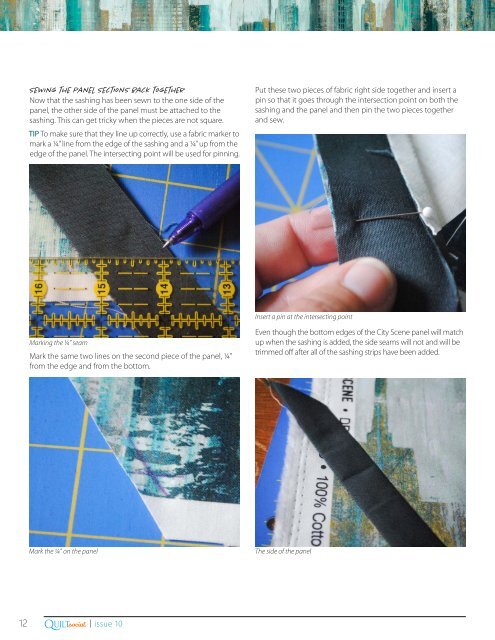
Sewing the panel sections back together<br />
Now that the sashing has been sewn to the one side of the<br />
panel, the other side of the panel must be attached to the<br />
sashing. This can get tricky when the pieces are not square.<br />
TIP To make sure that they line up correctly, use a fabric marker to<br />
mark a ¼” line from the edge of the sashing and a ¼” up from the<br />
edge of the panel. The intersecting point will be used for pinning.<br />
Put these two pieces of fabric right side together and insert a<br />
pin so that it goes through the intersection point on both the<br />
sashing and the panel and then pin the two pieces together<br />
and sew.<br />
Insert a pin at the intersecting point<br />
Marking the ¼” seam<br />
Mark the same two lines on the second piece of the panel, ¼”<br />
from the edge and from the bottom.<br />
Even though the bottom edges of the City Scene panel will match<br />
up when the sashing is added, the side seams will not and will be<br />
trimmed off after all of the sashing strips have been added.<br />
Mark the ¼” on the panel<br />
The side of the panel<br />
Q<br />
12 .com| issue <strong>10</strong><br />
UILTsocial


