Oracle Enterprise Manager 12c Cloud Control
Oracle Enterprise Manager 12c Cloud Control
Oracle Enterprise Manager 12c Cloud Control

Create successful ePaper yourself
Turn your PDF publications into a flip-book with our unique Google optimized e-Paper software.
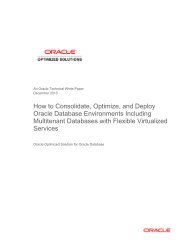
An <strong>Oracle</strong> White Paper<br />
March, 2012<br />
<strong>Enterprise</strong> <strong>Manager</strong> <strong>12c</strong> <strong>Cloud</strong> <strong>Control</strong>:<br />
Configuring OMS High Availability with F5 BIG-<br />
IP Local Traffic <strong>Manager</strong>
<strong>Enterprise</strong> <strong>Manager</strong> <strong>12c</strong> <strong>Cloud</strong> <strong>Control</strong><br />
Configuring OMS High Availability with F5 BIG-IP Local Traffic <strong>Manager</strong><br />
Executive Overview ........................................................................... 2<br />
About F5 BIG-IP and <strong>Oracle</strong> <strong>Enterprise</strong> <strong>Manager</strong> <strong>Cloud</strong> <strong>Control</strong> ....... 3<br />
Configuring an F5 BIG-IP LTM for <strong>Cloud</strong> <strong>Control</strong> Services ................ 6<br />
Prerequisites and Best Practice Recommendations ...................... 6<br />
Methodology .................................................................................. 7<br />
Create the Health Monitors ............................................................ 7<br />
Create the <strong>Cloud</strong> <strong>Control</strong> Pools ................................................... 10<br />
Create the TCP Profiles ............................................................... 11<br />
Create the Persistence Profiles ................................................... 12<br />
Create a Redirect iRule for the Unsecure Console service .......... 13<br />
Create the Virtual Servers ........................................................... 14<br />
Configuring <strong>Enterprise</strong> <strong>Manager</strong> for Use with F5 BIG-IP LTM ...... 17<br />
Resecure Management Service ................................................... 17<br />
Verify Status of Management Service .......................................... 18<br />
Appendix A: F5 BIG-IP Local Traffic <strong>Manager</strong> Terms ...................... 19<br />
Monitor ........................................................................................ 19<br />
Pool ............................................................................................. 19<br />
Member ....................................................................................... 19<br />
Virtual Server ............................................................................... 19<br />
Profile .......................................................................................... 20<br />
Persistence .................................................................................. 20<br />
Rule ............................................................................................. 20
Executive Overview<br />
<strong>Enterprise</strong> <strong>Manager</strong> <strong>12c</strong> <strong>Cloud</strong> <strong>Control</strong><br />
Configuring OMS High Availability with F5 BIG-IP Local Traffic <strong>Manager</strong><br />
<strong>Oracle</strong> <strong>Enterprise</strong> <strong>Manager</strong> is <strong>Oracle</strong>’s integrated enterprise IT management product line and<br />
provides the industry’s first complete cloud lifecycle management solution. <strong>Oracle</strong> <strong>Enterprise</strong><br />
<strong>Manager</strong>’s Business-Driven IT Management capabilities allow you to quickly set up, manage<br />
and support enterprise clouds and traditional <strong>Oracle</strong> IT environments from applications to disk.<br />
<strong>Enterprise</strong> <strong>Manager</strong> allows customers to achieve:<br />
� Best service levels for traditional and cloud applications through management from a<br />
business perspective including <strong>Oracle</strong> Fusion Applications<br />
� Maximum return on IT management investment through the best solutions for intelligent<br />
management of the <strong>Oracle</strong> stack and engineered systems<br />
� Unmatched customer support experience through real-time integration of <strong>Oracle</strong>’s<br />
knowledgebase with each customer environment<br />
<strong>Oracle</strong> Maximum Availability Architecture (MAA) is the <strong>Oracle</strong> best practices blueprint for<br />
implementing <strong>Oracle</strong> high-availability technologies. <strong>Oracle</strong> <strong>Enterprise</strong> <strong>Manager</strong> is the<br />
management platform for <strong>Oracle</strong> solutions. This white paper has been jointly written by <strong>Oracle</strong><br />
Corporation and F5 Networks and provides the detailed steps for implementation of an <strong>Oracle</strong><br />
MAA solution for <strong>Oracle</strong> <strong>Enterprise</strong> <strong>Manager</strong> <strong>Cloud</strong> <strong>Control</strong> using BIG-IP from F5 Networks as<br />
the front end for the <strong>Cloud</strong> <strong>Control</strong> mid-tiers, known as the <strong>Oracle</strong> Management Service<br />
(OMS). The BIG-IP hardware platform can provide load balancing, high availability, service<br />
monitoring, TCP/IP enhancements, and application persistence for the <strong>Cloud</strong> <strong>Control</strong><br />
environment as the front end for several <strong>Cloud</strong> <strong>Control</strong> services. Most of the procedures in this<br />
document are performed on the BIG-IP Local Traffic <strong>Manager</strong> (LTM), targeting different areas<br />
of the infrastructure where high availability is required to provide continuous access to the<br />
<strong>Cloud</strong> <strong>Control</strong> OMS application that has been deemed mission critical. This paper is designed<br />
to provide the <strong>Cloud</strong> <strong>Control</strong> Administrator with an introduction to the high availability and load<br />
balancing features available with F5 solutions. Step-by-step configuration instructions and<br />
screen shots are provided to make it easier to understand and implement BIG-IP as a critical<br />
component of the <strong>Cloud</strong> <strong>Control</strong> architecture. In general, assume that the following software<br />
versions are used in this white paper:<br />
● BIG-IP Version 11.1.0, Build 1943.0 Final<br />
2
● <strong>Cloud</strong> <strong>Control</strong> Release 12.1.0.1.0<br />
<strong>Enterprise</strong> <strong>Manager</strong> <strong>12c</strong> <strong>Cloud</strong> <strong>Control</strong><br />
Configuring OMS High Availability with F5 BIG-IP Local Traffic <strong>Manager</strong><br />
Any distinction in release numbers is noted within the relevant discussions of this paper.<br />
Note: This white paper assumes that you are familiar with BIG-IP from F5 Networks. See<br />
Appendix A for a quick terminology reference. For detailed information, see the BIG-IP<br />
Solutions Guide and BIG-IP Configuration Guide, and Chapter 21 in the <strong>Oracle</strong> <strong>Enterprise</strong><br />
<strong>Manager</strong> <strong>Cloud</strong> <strong>Control</strong> Administrator’s Guide.<br />
About F5 BIG-IP and <strong>Oracle</strong> <strong>Enterprise</strong> <strong>Manager</strong> <strong>Cloud</strong> <strong>Control</strong><br />
The diagram below shows F5 and <strong>Oracle</strong> <strong>Enterprise</strong> <strong>Manager</strong> components in a <strong>Cloud</strong> <strong>Control</strong><br />
Environment<br />
3
<strong>Enterprise</strong> <strong>Manager</strong> <strong>12c</strong> <strong>Cloud</strong> <strong>Control</strong><br />
Configuring OMS High Availability with F5 BIG-IP Local Traffic <strong>Manager</strong><br />
<strong>Cloud</strong> <strong>Control</strong> OMS Servers provide http or https access to a set of <strong>Cloud</strong> <strong>Control</strong> services,<br />
listed below, to the <strong>Cloud</strong> <strong>Control</strong> clients, including the <strong>Cloud</strong> <strong>Control</strong> console and Management<br />
Agents. When more than one <strong>Cloud</strong> <strong>Control</strong> OMS Server is deployed, F5 BIG IP can load<br />
balance requests for each service via virtual servers, with the <strong>Cloud</strong> <strong>Control</strong> clients making<br />
service requests using a virtual hostname.<br />
The <strong>Cloud</strong> <strong>Control</strong> services that can be served by the F5 BIG IP in a multi-OMS setup are:<br />
CLOUD CONTROL SERVICE DESCRIPTION<br />
Secure Console HTTPS access to <strong>Cloud</strong> <strong>Control</strong> Console<br />
Unsecure Console HTTP access to <strong>Cloud</strong> <strong>Control</strong> Console<br />
Secure Upload Secure Agent to OMS communication<br />
Agent Registration Unsecure Agent to OMS communication<br />
Each <strong>Cloud</strong> <strong>Control</strong> service that is managed by F5 BIG-IP requires that you configure the<br />
following F5 BIG-IP Local Traffic <strong>Manager</strong> objects:<br />
� A health monitor for the service.<br />
The health monitor is the process by which BIG-IP determines that the service is up<br />
and running and can take connections.<br />
� A TCP profile for the service.<br />
The TCP profile is used to tune the TCP/IP stack from BIG-IP for optimum<br />
performance.<br />
� A Pool for the service.<br />
A Pool is a group of two or more OMS <strong>Cloud</strong> <strong>Control</strong> servers that are load balanced,<br />
with each pool running an instance of the different <strong>Cloud</strong> <strong>Control</strong> services.<br />
� A Persistence profile for the service.<br />
The Persistence profile is used to link a client to the proper <strong>Cloud</strong> <strong>Control</strong> pool member<br />
for the duration of a connection. This is required for all <strong>Cloud</strong> <strong>Control</strong> services except<br />
Secure Upload.<br />
� A Virtual Server for the service.<br />
A Virtual Server is a unique IP address and port that represents a pool of servers.<br />
The remainder of this paper provides detailed instructions for configuring BIG-IP LTM for<br />
<strong>Cloud</strong> <strong>Control</strong> services. Each of the configuration discussions imparts:<br />
4
<strong>Enterprise</strong> <strong>Manager</strong> <strong>12c</strong> <strong>Cloud</strong> <strong>Control</strong><br />
Configuring OMS High Availability with F5 BIG-IP Local Traffic <strong>Manager</strong><br />
� Operational best practices when using the F5 BIG-IP Web configuration utility to<br />
configure <strong>Oracle</strong> <strong>Enterprise</strong> <strong>Manager</strong> <strong>Cloud</strong> <strong>Control</strong> services.<br />
� Screen shots of the BIG-IP Web interface that are based on BIG-IP Version 11.1.0<br />
software.<br />
� A Configuration Summary page naming all of the <strong>Cloud</strong> <strong>Control</strong> services and matching<br />
F5 configuration elements.<br />
For additional information about configuring BIG-IP, see the BIG-IP documentation at<br />
http://www.f5.com.<br />
5
<strong>Enterprise</strong> <strong>Manager</strong> <strong>12c</strong> <strong>Cloud</strong> <strong>Control</strong><br />
Configuring OMS High Availability with F5 BIG-IP Local Traffic <strong>Manager</strong><br />
Configuring an F5 BIG-IP LTM for <strong>Cloud</strong> <strong>Control</strong> Services<br />
Use the instructions that follow to configure <strong>Oracle</strong> <strong>Enterprise</strong> <strong>Manager</strong> <strong>Cloud</strong> <strong>Control</strong> to work with<br />
the F5 BIG-IP LTM.<br />
Prerequisites and Best Practice Recommendations<br />
Use the following general guidelines when building your configuration.<br />
Use BIG-IP Administrative Partitions<br />
A feature of the BIG-IP software is the ability to use Administrative Partitions to allow multiple<br />
administrators or operators to manage the configuration. The best practice recommendation is to<br />
create a dedicated Administrative Partition on the BIG-IP for configuration access and use by the<br />
<strong>Cloud</strong> <strong>Control</strong> administrators. All the necessary F5 configuration elements for the MAA <strong>Cloud</strong><br />
<strong>Control</strong> environment are located in the Administrative Partition. Additions, deletions, and changes to<br />
these pools created in this partition would not interfere with any other services provided by the BIG-<br />
IP.<br />
For more information about configuring Administrative Partitions, see the BIG-IP documentation.<br />
Use the Configuration Table and Standard Naming Conventions<br />
To make the configuration consistent, easy to read, and easy to administer, this white paper uses a<br />
standard naming convention for the F5 configuration. Your organization may already use naming<br />
standards (which your Network Operations team can provide if necessary), or you can create naming<br />
conventions or adopt the ones used in this white paper.<br />
The following table shows the naming conventions used by the MAA example described in this white<br />
paper.<br />
BIG-IP CONFIGURATION OBJECT CONVENTION<br />
Health Monitors mon_<br />
TCP Profiles tcp_<br />
Pools pool_<br />
Cookie Persistence Profile cookie_<br />
Source IP Address Persistence Profile sourceip_<br />
Virtual Server vs_<br />
Using the Secure Console service as an example, we derived the service label “ccsc” and terminated<br />
each name with the TCP port number as a suffix.<br />
6
<strong>Enterprise</strong> <strong>Manager</strong> <strong>12c</strong> <strong>Cloud</strong> <strong>Control</strong><br />
Configuring OMS High Availability with F5 BIG-IP Local Traffic <strong>Manager</strong><br />
In the following list of names, the TCP port number 7799 is the secure console port for cloud control,<br />
and 443 is used for the virtual server:<br />
� mon_ccsc7799<br />
� tcp_ccsc7799<br />
� sourceip_ccsc7799<br />
� pool_ccsc7799<br />
� vs_ccsc443<br />
Note: A Virtual Server port can be different to a pool port, as is the case in this example. Configuring<br />
port 443 for the secure console Virtual Server port allows https console access without specifying a<br />
port even though the <strong>Cloud</strong> <strong>Control</strong> secure console is running on port 7799. When configured using<br />
the following instructions, BIG-IP takes care of forwarding the request from the Virtual Server to the<br />
correct port on the OMS servers transparently.<br />
The example values are reproduced in the table below, which provides a reference for all of the F5<br />
configuration objects in this document. All of the names used in this white paper follow this<br />
convention, which is considered to be a best practice.<br />
CLOUD<br />
CONTROL<br />
SERVICE<br />
Secure<br />
Console<br />
Unsecure<br />
Console<br />
Secure<br />
Upload<br />
Agent<br />
Registration<br />
TCP<br />
PORT<br />
Methodology<br />
MONITOR NAME<br />
TCP PROFILE<br />
NAME<br />
PERSISTENCE<br />
PROFILE<br />
POOL NAME<br />
VIRTUAL<br />
SERVER NAME<br />
7799 mon_ccsc7799 tcp_ccsc7799 sourceip_ccsc7799 pool_ccsc7799 vs_ccsc443 443<br />
7788 mon_ccuc7788 tcp_ccuc7788 sourceip_ccuc7788 pool_ccuc7788 vs_ccuc7788 7788<br />
4900 mon_ccsu4900 tcp_ccsu4900 None pool_ccsu4900 vs_ccsu4900 4900<br />
4889 mon_ccar4889 tcp_aaar4889 cookie_ccar4889 pool_ccar4889 vs_ccar4889 4889<br />
VIRTUAL<br />
SERVER<br />
PORT<br />
To configure BIG-IP for <strong>Cloud</strong> <strong>Control</strong>, it is necessary to create health monitor, load balancing pool,<br />
persistence profile and virtual server configuration objects for the <strong>Cloud</strong> <strong>Control</strong> services listed in the<br />
above table. The following sections describe how to create and configure each of the configuration<br />
objects, providing a reference table with the required settings for each of the <strong>Cloud</strong> <strong>Control</strong> services,<br />
followed by a detailed example, including screenshots, using the Secure Console service as an example.<br />
The steps in each section should be repeated for each of the <strong>Cloud</strong> <strong>Control</strong> services.<br />
Create the Health Monitors<br />
Create the following Monitors.<br />
7
CLOUD<br />
CONTROL<br />
SERVICE<br />
Secure<br />
Console<br />
(when not<br />
using SSO)<br />
Secure<br />
Console<br />
(when<br />
using SSO)<br />
Unsecure<br />
Console<br />
(when not<br />
using SSO)<br />
Unsecure<br />
Console<br />
(when<br />
using SSO)<br />
Secure<br />
Upload<br />
Agent<br />
Registration<br />
TCP<br />
PORT<br />
<strong>Enterprise</strong> <strong>Manager</strong> <strong>12c</strong> <strong>Cloud</strong> <strong>Control</strong><br />
Configuring OMS High Availability with F5 BIG-IP Local Traffic <strong>Manager</strong><br />
MONITOR NAME TYPE INTERVAL TIMEOUT SEND STRING RECEIVE STRING<br />
7799 mon_ccsc7799 https 5 16 GET /em/console/home<br />
HTTP/1.1\r\nHost:<br />
\r\nConnection: Close \r\n\r\n<br />
/em/login.jsp<br />
7799 mon_ccsc7799 https 5 16 GET /empbs/genwallet \r\n GenWallet Servlet<br />
activated<br />
7788 mon_ccuc7788 http 5 16 GET /em/console/home<br />
HTTP/1.1\r\nHost:<br />
\r\nConnection: Close \r\n\r\n<br />
/em/login.jsp<br />
7788 mon_ccuc7788 http 5 16 GET /empbs/genwallet \r\n GenWallet Servlet<br />
activated<br />
4900 mon_ccsu4900 https 60 181 GET /empbs/upload \r\n Http Receiver Servlet<br />
active!<br />
4889 mon_ccar4889 http 60 181 GET /empbs/genwallet \r\n GenWallet Servlet<br />
activated<br />
Note: There are two entries for both the Secure Console and the Unsecure Console services.<br />
Configuration of the Secure Console and Unsecure console monitors differs depending on whether<br />
SSO has been configured for <strong>Enterprise</strong> <strong>Manager</strong> authentication. Only one monitor needs to be<br />
configured for each service, choose the relevant one for your environment.<br />
The following steps should be followed for each Monitor that needs to be created:<br />
1. On the Main tab, expand Local Traffic, and then click Monitors.<br />
2. On the Monitors screen, click Create.<br />
The New Monitor screen opens.<br />
3. In the Name field, enter a unique name for the Monitor. For example: mon_ccsc7799<br />
4. From the Type list, select the type for the Monitor. For example: HTTPS.<br />
The Monitor configuration options display.<br />
5. From the Configuration list, select Advanced.<br />
6. In the Configuration section, enter the appropriate values in Interval and Timeout fields:<br />
� Interval is the Health Monitor property that specifies the frequency at which the system<br />
issues the monitor check.<br />
� Timeout is the setting that allows the monitor to fail three times before marking a pool<br />
member as down. The recommendation is to set the BIG-IP LTM Health Monitor Timeout<br />
setting as (3 * “Interval”) + 1, allowing at least a 1:3 +1 ratio between the interval and the<br />
timeout.<br />
8
<strong>Enterprise</strong> <strong>Manager</strong> <strong>12c</strong> <strong>Cloud</strong> <strong>Control</strong><br />
Configuring OMS High Availability with F5 BIG-IP Local Traffic <strong>Manager</strong><br />
For example, set Interval to 5 and set Timeout to 16. Refer to the table above for the appropriate<br />
Interval and Timeout values for your monitor.<br />
7. In the Send String field, add the Send String for the Monitor you are creating. For example:<br />
GET /em/console/home HTTP/1.1\r\nHost: \r\nConnection: Close \r\n\r\n<br />
8. In the Receive String field, add the Receive String for the Monitor you are creating. For example:<br />
/em/login.jsp<br />
9. In the Alias Service Port field, enter the port for the monitor you are creating, for example 7799.<br />
All other configuration settings are optional.<br />
10. Click Finished.<br />
9
Create the <strong>Cloud</strong> <strong>Control</strong> Pools<br />
<strong>Enterprise</strong> <strong>Manager</strong> <strong>12c</strong> <strong>Cloud</strong> <strong>Control</strong><br />
Configuring OMS High Availability with F5 BIG-IP Local Traffic <strong>Manager</strong><br />
A BIG-IP LTM pool is a set of servers grouped together to receive traffic according to a load<br />
balancing method. A pool needs to be created for each of the <strong>Cloud</strong> <strong>Control</strong> services as per the<br />
following table:<br />
CLOUD<br />
CONTROL<br />
SERVICE<br />
POOL NAME<br />
ASSOCIATED HEALTH<br />
MONITOR Load Balancing MEMBERS<br />
Secure Console pool_ccsc7799 mon_ccsc7799 Least Connections (member) OMS Host A:7799<br />
OMS Host B:7799<br />
Unsecure<br />
Console<br />
pool_ccuc7788 mon_ccuc7799 Least Connections (member) OMS Host A:7799<br />
OMS Host B:7799<br />
Secure Upload pool_ccsu4900 mon_ccsu4900 Least Connections (member) OMS Host A:4900<br />
OMS Host B:4900<br />
Agent<br />
Registration<br />
pool_ccar4889 mon_ccar4889 Least Connections (member) OMS Host A:4889<br />
OMS Host B:4889<br />
The following steps should be followed for each Pool that needs to be created:<br />
1. On the Main tab, expand Local Traffic, and then click Pools.<br />
The Pool screen opens.<br />
2. In the upper right portion of the screen, click Create.<br />
The New Pool screen opens.<br />
Note: For more (optional) pool configuration settings, from the Configuration list, select<br />
Advanced. Configure these settings, as applicable, for your network.<br />
3. In the Name field, enter a unique name for your pool.<br />
For example, enter pool_ccsc7799.<br />
4. In the Health Monitors section, select the name of the monitor for the service that the pool is<br />
being created for, and click the Add (
Create the TCP Profiles<br />
<strong>Enterprise</strong> <strong>Manager</strong> <strong>12c</strong> <strong>Cloud</strong> <strong>Control</strong><br />
Configuring OMS High Availability with F5 BIG-IP Local Traffic <strong>Manager</strong><br />
In our example, we base each TCP profile on the default TCP profile, and keep all the options at their<br />
default settings. You can configure these options, as appropriate, for your network. A TCP profile<br />
needs to be created for each of the <strong>Cloud</strong> <strong>Control</strong> services as per the following table:<br />
CLOUD CONTROL<br />
SERVICE<br />
TCP PROFILE NAME<br />
Secure Console tcp_ccsc7799<br />
Unsecure Console tcp_ccuc7788<br />
Secure Upload tcp_ccsu4900<br />
Agent Registration tcp_ccar4889<br />
The steps below should be followed for each TCP profile that needs to be created:<br />
1. On the Main tab, expand Local Traffic.<br />
2. Click Profiles.<br />
The HTTP Profiles screen opens.<br />
3. On the Menu bar, from the Protocol menu, select TCP.<br />
4. In the upper right portion of the screen, click Create.<br />
The New TCP Profile screen opens.<br />
5. In the Name field, enter a unique name for this profile. For example: tcp_ccsc7799.<br />
11
<strong>Enterprise</strong> <strong>Manager</strong> <strong>12c</strong> <strong>Cloud</strong> <strong>Control</strong><br />
Configuring OMS High Availability with F5 BIG-IP Local Traffic <strong>Manager</strong><br />
6. If needed, modify as applicable for your network. See the F5 online help for more information<br />
about the configuration options. Note that this example keeps the settings at their default levels.<br />
7. Click Finished.<br />
Create the Persistence Profiles<br />
A persistence profile needs to be created for each of the <strong>Cloud</strong> <strong>Control</strong> services, except for the secure<br />
upload service, as per the following table:<br />
CLOUD CONTROL<br />
SERVICE<br />
F5 PERSISTENCE<br />
PROFILE NAME<br />
Secure Console sourceip_ccsc7799 Source Address<br />
Affinity<br />
Unsecure Console sourceip_ccuc7788 Source Address<br />
Affinity<br />
TYPE TIMEOUT EXPIRATION<br />
3600 Not Applicable<br />
3600 Not Applicable<br />
Agent Registration cookie_ccar4889 Cookie Not Applicable 3600<br />
The following steps should be followed for each persistence profile that needs to be created:<br />
1. On the Main tab, expand Local Traffic, and then click Profiles.<br />
The HTTP Profiles screen opens.<br />
2. On the Menu bar, click Persistence.<br />
The Persistence Profiles screen opens.<br />
3. In the upper right portion of the screen, click Create.<br />
4. The New Persistence Profile screen opens.<br />
5. In the Name field, enter a unique name for this profile. For example, enter sourceip_ccsc7799.<br />
6. If the persistence type for the service being created is ‘Source Address Affinity’, from the<br />
Persistence Type list select Source Address Affinity.<br />
� The configuration options for SourceIP persistence display.<br />
� Check the box next to the ‘Timeout’ field to allow the Timeout value to be overridden<br />
� Modify the Timeout value to 3600.<br />
12
<strong>Enterprise</strong> <strong>Manager</strong> <strong>12c</strong> <strong>Cloud</strong> <strong>Control</strong><br />
Configuring OMS High Availability with F5 BIG-IP Local Traffic <strong>Manager</strong><br />
If the persistence type for the service being created is ‘Cookie’, from the Persistence Type list<br />
select Cookie.<br />
� The configuration options for Cookie persistence display.<br />
� Check the box next to the ‘Expiration’ field to allow the Expiration value to be overridden<br />
� Clear the clear the Session Cookie box.<br />
� The expiration options appear.<br />
� Provide the value 3600 in the seconds field.<br />
7. Click Finished.<br />
Note: For more information about creating or modifying profiles, or applying profiles in general, see<br />
the BIG-IP documentation.<br />
Create a Redirect iRule for the Unsecure Console service<br />
A Redirect iRule can be created to take incoming HTTP requests (non-secure) and redirect those<br />
requests to the correct HTTPS (secure) virtual server without user interaction. This Redirect iRule is<br />
used in the configuration of the <strong>Cloud</strong> <strong>Control</strong> unsecure console service virtual server, to redirect<br />
clients to the matching <strong>Cloud</strong> <strong>Control</strong> secure console service.<br />
The following steps should be followed to create the Redirect iRule:<br />
1. On the Main tab, expand Local Traffic and click iRules.<br />
2. In the upper right portion of the iRule screen, click Create.<br />
3. In the Name field on the New iRule screen, enter a name for your iRule. In our example, we use<br />
ccuc_httptohttps.<br />
4. In the Definition section, copy and paste the following iRule:<br />
13
when HTTP_REQUEST {<br />
}<br />
<strong>Enterprise</strong> <strong>Manager</strong> <strong>12c</strong> <strong>Cloud</strong> <strong>Control</strong><br />
Configuring OMS High Availability with F5 BIG-IP Local Traffic <strong>Manager</strong><br />
HTTP::redirect "https://[getfield [HTTP::host] : 1][HTTP::uri]"<br />
5. Click Finished.<br />
Create the Virtual Servers<br />
The final step is to define virtual servers that references the profiles and pools created for each <strong>Cloud</strong><br />
<strong>Control</strong> Service. A virtual server with its virtual address and port number, is the client addressable host<br />
name or IP address through which members of a load balancing pool are made available to a client. A<br />
virtual server needs to be created for each of the <strong>Cloud</strong> <strong>Control</strong> services as per the following table:<br />
CLOUD<br />
CONTROL<br />
SERVICE<br />
Secure<br />
Console<br />
Unsecure<br />
Console<br />
Secure<br />
Upload<br />
Agent<br />
Registration<br />
VIRTUAL<br />
SERVER<br />
NAME<br />
VIRTUAL<br />
IP AND<br />
PORT<br />
vs_ccsc443 :443<br />
vs_ccuc7788 :7788<br />
vs_ccsu4900 :4900<br />
vs_ccar4889 :4889<br />
PROTOCOL<br />
PROFILE<br />
(CLIENT)<br />
HTTP<br />
PROFILE<br />
SNAT<br />
POOL iRULE<br />
DEFAULT<br />
POOL<br />
tcp_ccsc7799 None Auto None pool_ccsc<br />
7799<br />
tcp_ccuc7788 http Auto ccuc_<br />
httpto<br />
https<br />
pool_ccuc<br />
7788<br />
tcp_ccsu4900 None Auto None pool_ccsu<br />
4900<br />
tcp_ccar4889 http Auto None pool_ccar<br />
4889<br />
The following steps should be followed for each virtual server that needs to be created:<br />
1. On the Main tab, expand Local Traffic, and then click Virtual Servers.<br />
The Virtual Servers screen opens.<br />
2. In the upper right portion of the screen, click the Create button.<br />
DEFAULT<br />
PERSISTENCE<br />
PROFILE<br />
sourceip_<br />
ccsc7799<br />
sourceip_<br />
ccuc7788<br />
None<br />
cookie_<br />
ccar4889<br />
14
The New Virtual Server screen opens.<br />
3. In the Name field, enter a unique name for this virtual server.<br />
In this example, we entered vs_ccsc443.<br />
4. In the Destination section, select the Host option button.<br />
5. In the Address field, enter the IP address of this virtual server.<br />
<strong>Enterprise</strong> <strong>Manager</strong> <strong>12c</strong> <strong>Cloud</strong> <strong>Control</strong><br />
Configuring OMS High Availability with F5 BIG-IP Local Traffic <strong>Manager</strong><br />
6. In the Service Port field, enter the Virtual IP Port for the service being created. For example, 443.<br />
7. From the Configuration list, select Advanced.<br />
The Advanced configuration options display.<br />
8. Keep the Type list at the default setting: Standard.<br />
9. From the Protocol Profile (Client) list select the name of the profile for the service being<br />
created.<br />
In this example, we selected tcp_ccsc7799.<br />
10. Keep the Protocol Profile (Server) option at the default setting.<br />
11. For the Agent Registration and Unsecure Console services only, select http from the HTTP<br />
Profile list.<br />
12. Change the SNAT Pool setting to Automap.<br />
13. For the Unsecure Console service only, in the iRules section, add the iRule created earlier by<br />
selecting it in the Available list and clicking
<strong>Enterprise</strong> <strong>Manager</strong> <strong>12c</strong> <strong>Cloud</strong> <strong>Control</strong><br />
Configuring OMS High Availability with F5 BIG-IP Local Traffic <strong>Manager</strong><br />
16
Configuring <strong>Enterprise</strong> <strong>Manager</strong> for Use with F5 BIG-IP LTM<br />
Resecure Management Service<br />
<strong>Enterprise</strong> <strong>Manager</strong> <strong>12c</strong> <strong>Cloud</strong> <strong>Control</strong><br />
Configuring OMS High Availability with F5 BIG-IP Local Traffic <strong>Manager</strong><br />
The management services must now be reconfigured so that the Management Service certificate uses<br />
the hostname associated with the Load Balancer. Steps 1 and 2 must be repeated for each configured<br />
OMS<br />
1: Resecure OMS<br />
In our example we issued the following command:<br />
$ emctl secure oms –sysman_pwd xxxxxx –reg_pwd xxxxxx –host<br />
slb.example.com –secure_port 4900 –slb_port 4900 –slb_console_port<br />
443 –console –lock –lock_console<br />
<strong>Oracle</strong> <strong>Enterprise</strong> <strong>Manager</strong> <strong>Cloud</strong> <strong>Control</strong> <strong>12c</strong> Release 12.1.0.1.0<br />
Copyright (c) 1996, 2011 <strong>Oracle</strong> Corporation. All rights reserved.<br />
Securing OMS... Started.<br />
Securing OMS... Successful<br />
Restart OMS<br />
2: Restart the OMS<br />
$ ./emctl stop oms -all<br />
<strong>Oracle</strong> <strong>Enterprise</strong> <strong>Manager</strong> <strong>Cloud</strong> <strong>Control</strong> <strong>12c</strong> Release 12.1.0.1.0<br />
Copyright (c) 1996, 2011 <strong>Oracle</strong> Corporation. All rights reserved.<br />
Stopping WebTier...<br />
WebTier Successfully Stopped<br />
Stopping <strong>Oracle</strong> Management Server...<br />
<strong>Oracle</strong> Management Server Successfully Stopped<br />
AdminServer Successfully Stopped<br />
<strong>Oracle</strong> Management Server is Down<br />
$<br />
$ ./emctl start oms<br />
17
<strong>Enterprise</strong> <strong>Manager</strong> <strong>12c</strong> <strong>Cloud</strong> <strong>Control</strong><br />
Configuring OMS High Availability with F5 BIG-IP Local Traffic <strong>Manager</strong><br />
<strong>Oracle</strong> <strong>Enterprise</strong> <strong>Manager</strong> <strong>Cloud</strong> <strong>Control</strong> <strong>12c</strong> Release 12.1.0.1.0<br />
Copyright (c) 1996, 2011 <strong>Oracle</strong> Corporation. All rights reserved.<br />
Starting WebTier...<br />
WebTier Successfully Started<br />
Starting <strong>Oracle</strong> Management Server...<br />
<strong>Oracle</strong> Management Server Successfully Started<br />
<strong>Oracle</strong> Management Server is Up<br />
3: Resecure all Management Agents<br />
$ ./emctl secure agent -emdWalletSrcUrl<br />
https://slb.example.com:4900/em<br />
<strong>Oracle</strong> <strong>Enterprise</strong> <strong>Manager</strong> <strong>12c</strong> Release 1 12.1.0.1.0<br />
Copyright (c) 1996, 2011 <strong>Oracle</strong> Corporation. All rights reserved.<br />
Agent successfully stopped... Done.<br />
Securing agent... Started.<br />
Enter Agent Registration Password :<br />
Agent successfully restarted... Done.<br />
EMD gensudoprops completed successfully<br />
Securing agent... Successful.<br />
Verify Status of Management Service<br />
The OMS configuration can be checked using the emctl status oms –details command. Following<br />
successful configuration this should show that the SLB or virtual hostname field has been set.<br />
$ ./emctl status oms -details<br />
<strong>Oracle</strong> <strong>Enterprise</strong> <strong>Manager</strong> <strong>Cloud</strong> <strong>Control</strong> <strong>12c</strong> Release 12.1.0.1.0<br />
Copyright (c) 1996, 2011 <strong>Oracle</strong> Corporation. All rights reserved.<br />
Enter <strong>Enterprise</strong> <strong>Manager</strong> Root (SYSMAN) Password :<br />
Console Server Host : omsa.example.com<br />
HTTP Console Port : 7788<br />
HTTPS Console Port : 7799<br />
HTTP Upload Port : 4889<br />
HTTPS Upload Port : 4900<br />
SLB or virtual hostname: slb.example.com<br />
HTTPS SLB Upload Port : 4900<br />
HTTPS SLB Console Port : 443<br />
Agent Upload is locked.<br />
OMS Console is unlocked.<br />
Active CA ID: 1<br />
Console URL: https://slb.example.com:443/em<br />
Upload URL: https://slb.example.com:4900/empbs/upload<br />
WLS Domain Information<br />
Domain Name : GCDomain<br />
Admin Server Host: omsa.xxx.xxx.xxx<br />
Managed Server Information<br />
Managed Server Instance Name: EMGC_OMS1<br />
Managed Server Instance Host: omsa.xxx.xxx.xxx<br />
18
<strong>Enterprise</strong> <strong>Manager</strong> <strong>12c</strong> <strong>Cloud</strong> <strong>Control</strong><br />
Configuring OMS High Availability with F5 BIG-IP Local Traffic <strong>Manager</strong><br />
Appendix A: F5 BIG-IP Local Traffic <strong>Manager</strong> Terms<br />
This document assumes that you are familiar with F5 Networks BIG-IP. This section discusses the<br />
basic terminology. For a detailed discussion of these terms, see the BIG-IP Solutions Guide and the<br />
BIG-IP Configuration Guide.<br />
Monitor<br />
Monitors are used to verify the operational state of pool members. Monitors verify connections and<br />
services on nodes that are members of load-balancing pools. A monitor is designed to check the status<br />
of a service on an ongoing basis, at a set interval. If the service being checked does not respond within<br />
a specified timeout period, or the status of the service indicates that the performance has degraded, the<br />
BIG-IP system automatically takes it out of the pool and will choose the other members of the pool.<br />
When the node or service becomes available again, the monitor detects this and the member is<br />
automatically accessible to the pool and able to handle traffic. Monitors can be as simple as an ICMP<br />
ping to a server’s IP address, to a TCP 3-way handshake to a service port, or as sophisticated as an<br />
HTTP Get Request with parameters, or SSL session negotiation. F5 monitors can also be custom<br />
programmed for specific needs.<br />
Pool<br />
A pool is a set of servers grouped together to receive traffic on a specific TCP port using a load<br />
balancing method. Each pool can have its own unique characteristic for a persistence definition and<br />
the load-balancing algorithm used. The preferred setting of the load balance algorithm for all <strong>Cloud</strong><br />
<strong>Control</strong> pools is Least Connections (Member). Pools are associated with specific virtual servers directly<br />
or by rules (see later). As a result, the traffic coming to a virtual server is directed to one of the<br />
associated pools, and ultimately to one of the pool members.<br />
Member<br />
A member of the pool is defined as a node, as a destination for traffic, with an IP address and a port<br />
definition, expressed as a.b.c.d:nn, or 192.168.1.200:80 for a Web server with IP address 192.168.1.200<br />
and listening on port 80. There must be at least two members in every pool to provide high availability.<br />
If one of the pool members is unavailable or offline, traffic is sent to the remaining member or<br />
members.<br />
Virtual Server<br />
A virtual server with its virtual IP Address and port number is the client addressable hostname or IP<br />
address through which members of a load balancing pool are made available to a client. After a virtual<br />
server receives a request, it directs the request to a member of the pool based on a chosen load<br />
balancing method. After a virtual server receives traffic, either directly or through a rule, the virtual<br />
server can optionally perform a number of different operations, such as inserting or modifying a<br />
header into an HTTP request, setting a persistence record, or redirecting the request to another site or<br />
fallback destination. Before creating a virtual server, you must configure a load balancing pool of the<br />
actual physical devices (members) you wish to forward the traffic to. You can then create the virtual<br />
19
<strong>Enterprise</strong> <strong>Manager</strong> <strong>12c</strong> <strong>Cloud</strong> <strong>Control</strong><br />
Configuring OMS High Availability with F5 BIG-IP Local Traffic <strong>Manager</strong><br />
server, specifying that pool as the destination for any traffic coming from this virtual server. Also, if<br />
you want some of the traffic from that virtual server to go to multiple pools based on a pre-determined<br />
criterion, then you can create a rule specifying the criteria, and BIG-IP would forward the traffic to a<br />
pool matching the rule’s criteria. A virtual server is configured to a specific port or to accept “ANY”<br />
ports. A given F5 BIG-IP device may contain one or more virtual servers.<br />
Profile<br />
A profile is an F5 object that contains user-configurable settings for controlling the behavior of a<br />
particular type of network traffic, such as TCP or HTTP connections. BIG-IP version 9.0 and later<br />
uses profiles. Using profiles enhances your control over managing network traffic, and makes trafficmanagement<br />
tasks easier and more efficient. It also allows for different characteristics to be matched to<br />
specific clients or applications. For example, one HTTP profile could be configured for Internet<br />
Explorer browsers, a different profile for Mozilla browsers, and yet another profile for hand held<br />
mobile browsers. You would have complete control over all the HTTP options in each profile, to<br />
match the characteristics of these different Web browser types.<br />
Although it is possible to use the default profiles, the best practice recommendation is to create new<br />
profiles based on the default parent profiles, even if you do not change any of the settings initially.<br />
Creating new profiles allows you to easily modify the profile settings specific to this deployment, and<br />
ensures that you do not accidentally overwrite the default profile.<br />
Persistence<br />
Certain types of applications may require the same client returning to the same pool member, this is<br />
called persistence, or “stickiness”. It can be configured using a persistence profile, and applied to the<br />
virtual server. For ORACLE <strong>Cloud</strong> <strong>Control</strong> services, persistence needs to be configured for every<br />
service, except for the Secure Upload service.<br />
Rule<br />
A rule is a user-written script that uses criteria to choose among one or more pools. In the BIG-IP<br />
software, it is called an iRule and provides a powerful and more granular level of control over traffic<br />
management. For an incoming request to a virtual server, the iRule is evaluated and selects the pool to<br />
which a request will be sent. For more information about F5 iRules, see the F5 DevCentral Web site<br />
20
<strong>Enterprise</strong> <strong>Manager</strong> <strong>12c</strong> <strong>Cloud</strong> <strong>Control</strong>:<br />
Configuring OMS High Availability with F5 BIG-<br />
IP Local Traffic <strong>Manager</strong><br />
March, 2012<br />
Authors: Mark McGill (<strong>Oracle</strong>), David Parker-<br />
Bastable (<strong>Oracle</strong>)<br />
Contributing Authors: Farouk Abushaban<br />
(<strong>Oracle</strong>), James Viscusi (<strong>Oracle</strong>), Chris Akker<br />
(F5 Networks)<br />
<strong>Oracle</strong> Corporation<br />
World Headquarters<br />
500 <strong>Oracle</strong> Parkway<br />
Redwood Shores, CA 94065<br />
U.S.A.<br />
Worldwide Inquiries:<br />
Phone: +1.650.506.7000<br />
Fax: +1.650.506.7200<br />
oracle.com<br />
Copyright © 2011, <strong>Oracle</strong> and/or its affiliates. All rights reserved. This document is provided for information purposes only and the<br />
contents hereof are subject to change without notice. This document is not warranted to be error-free, nor subject to any other<br />
warranties or conditions, whether expressed orally or implied in law, including implied warranties and conditions of merchantability or<br />
fitness for a particular purpose. We specifically disclaim any liability with respect to this document and no contractual obligations are<br />
formed either directly or indirectly by this document. This document may not be reproduced or transmitted in any form or by any<br />
means, electronic or mechanical, for any purpose, without our prior written permission.<br />
<strong>Oracle</strong> and Java are registered trademarks of <strong>Oracle</strong> and/or its affiliates. Other names may be trademarks of their respective owners.<br />
AMD, Opteron, the AMD logo, and the AMD Opteron logo are trademarks or registered trademarks of Advanced Micro Devices.<br />
Intel and Intel Xeon are trademarks or registered trademarks of Intel Corporation. All SPARC trademarks are used under license<br />
and are trademarks or registered trademarks of SPARC International, Inc. UNIX is a registered trademark licensed through X/Open<br />
Company, Ltd. 1010