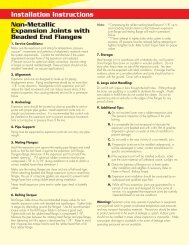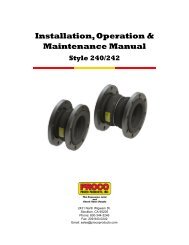
ProFlex Series 700: style 710720, 730 and 740 Check Valves
ProFlex Series 700: style 710720, 730 and 740 Check Valves
ProFlex Series 700: style 710720, 730 and 740 Check Valves

Create successful ePaper yourself
Turn your PDF publications into a flip-book with our unique Google optimized e-Paper software.
<strong>ProFlex</strong> <strong>Series</strong> <strong>700</strong>: <strong>style</strong> 710,720, <strong>730</strong> <strong>and</strong> <strong>740</strong> <strong>Check</strong> <strong>Valves</strong><br />
Installation, Operation<br />
<strong>and</strong> Maintenance<br />
Manual<br />
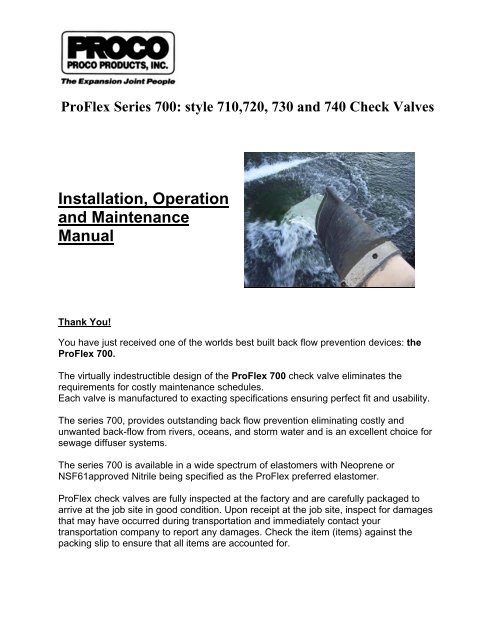
Thank You!<br />
You have just received one of the worlds best built back flow prevention devices: the<br />
<strong>ProFlex</strong> <strong>700</strong>.<br />
The virtually indestructible design of the <strong>ProFlex</strong> <strong>700</strong> check valve eliminates the<br />
requirements for costly maintenance schedules.<br />
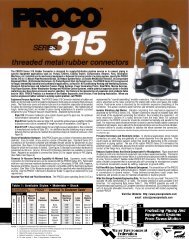
Each valve is manufactured to exacting specifications ensuring perfect fit <strong>and</strong> usability.<br />
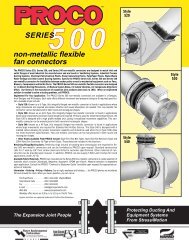
The series <strong>700</strong>, provides outst<strong>and</strong>ing back flow prevention eliminating costly <strong>and</strong><br />
unwanted back-flow from rivers, oceans, <strong>and</strong> storm water <strong>and</strong> is an excellent choice for<br />
sewage diffuser systems.<br />
The series <strong>700</strong> is available in a wide spectrum of elastomers with Neoprene or<br />
NSF61approved Nitrile being specified as the <strong>ProFlex</strong> preferred elastomer.<br />
<strong>ProFlex</strong> check valves are fully inspected at the factory <strong>and</strong> are carefully packaged to<br />
arrive at the job site in good condition. Upon receipt at the job site, inspect for damages<br />
that may have occurred during transportation <strong>and</strong> immediately contact your<br />
transportation company to report any damages. <strong>Check</strong> the item (items) against the<br />
packing slip to ensure that all items are accounted for.
<strong>ProFlex</strong> <strong>Series</strong> <strong>700</strong>: <strong>style</strong> 710,720, <strong>730</strong> <strong>and</strong> <strong>740</strong> <strong>Check</strong> <strong>Valves</strong><br />
Important<br />
It is to be noted that each check valve installation can be considered as a major pipe<br />
installation <strong>and</strong> the same safety issues as used in pipe contracting installations should<br />
be implemented.<br />
Proco Products will accept no responsibility for an improperly installed check valve or<br />
the improper use of this product. Incorrect installation may result in injury to personnel,<br />
reduced valve life or damage to other mating pipe products.<br />
Please review the following safe installation practices before attempting to install this<br />
<strong>ProFlex</strong> product.<br />
If you have any questions or concerns, please call your Agent or the Proco Hotline for<br />
immediate assistance (5:30 am-5:15 pm PST). North America 1-800-344-3246, Intl. 1-<br />
209-943-6088.<br />
Follow proper piping installations
<strong>ProFlex</strong> <strong>Series</strong> <strong>700</strong>: <strong>style</strong> 710,720, <strong>730</strong> <strong>and</strong> <strong>740</strong> <strong>Check</strong> <strong>Valves</strong><br />
Installation<br />
Each check valve regardless of size should be installed in the same fashion. A check<br />
valve’s operation is simple <strong>and</strong> concern during installation should be as follows.<br />
Always check your work area for safety hazards which may cause injury or damage to<br />
personnel or product. Develop <strong>and</strong> discuss a safety <strong>and</strong> exit plan for you <strong>and</strong> your<br />
fellow employees in the event of an emergency.<br />
+<br />
Safety Exit<br />
1- Mating pipe must be free of sharp edges, which may damage the inside diameter<br />
of the rubber check valve, add soapy water to the outside of the pipe prior to<br />
attempting the valve installation this will allow for an easier installation.<br />
2- The pipe diameter should be as tight as possible to the true I.D of the check<br />
valve. If the check valve appears to be to loose because of incorrectly supplied<br />
dimensions, strips of rubber may be used to allow a proper “snug” fit. Do not<br />
attempt to install a check valve which is obviously not the correct size.<br />
3- If this is a slip on unit Style <strong>730</strong>, always align the valve so the bill is vertical to the<br />
ground unless there is a clearance issue, if this is evident you may rotate the<br />
valve to a maximum of 30-35 deg to allow clearance from the ground area. If this<br />
is a slip on <strong>style</strong> of valve align the clamp sections in a fashion that will allow you<br />
ease while tightening the bolts. If the valve that you are installing has more than1<br />
fabricated stainless clamp then rotate the additional clamps which will place the<br />
clamping section at opposite angles from the first clamp. This will ensure even<br />
pressure is applied to the valve.
<strong>ProFlex</strong> <strong>Series</strong> <strong>700</strong>: <strong>style</strong> 710,720, <strong>730</strong> <strong>and</strong> <strong>740</strong> <strong>Check</strong> <strong>Valves</strong><br />
4- Adjustable hose clamps (T-Bolt <strong>style</strong>) will be supplied on valves up to 10” dia, 12”<br />
– 24” will be supplied with a single fabricated stainless clamp, 26” through 54” will<br />
have two fabricated stainless clamps <strong>and</strong> 60” through 72” <strong>and</strong> larger will have<br />
three fabricated stainless clamps.<br />
5- After the valve has been installed drill a hole or holes depending on valve size,<br />
through the rubber cuff <strong>and</strong> into the mating pipe using the center hole on the<br />
clamp as a guide. Insert a bolt which will be sufficient in length to completely<br />
travel through the clamp, valve <strong>and</strong> mating pipe. Completely weld or use some<br />
other means of ensuring that this bolt will not fall out or be removed. (The bolt<br />
only needs to be welded on the head of the bolt) This will create a pinning effect<br />
which is all that is required to ensure zero slippage.<br />
(See attached drawing A.)<br />
6- Stainless bolts are highly recommended as steel bolts can corrode <strong>and</strong><br />
eventually fall off.<br />
Drawing A
<strong>ProFlex</strong> <strong>Series</strong> <strong>700</strong>: <strong>style</strong> 710,720, <strong>730</strong> <strong>and</strong> <strong>740</strong> <strong>Check</strong> <strong>Valves</strong><br />
7- If this is a flanged unit, Style 710 always align the valve so the bill is vertical to<br />
the ground unless there is a clearance issue, if this is evident you may rotate the<br />
valve to a maximum of 30-35 deg to allow clearance to the ground area. If the<br />
Stainless backing ring has been supplied as a split ring use a stainless steel flat<br />
washer to properly cover the split area of each backing ring while installing the<br />
flange bolts.<br />
8- Tighten the flange bolts in a criss- cross pattern until the rubber flange bulges<br />
slightly which will ensure proper crush on the flange sealing face.<br />
Typical tightening patterns<br />
9- <strong>Check</strong> both installations for clamp tightness Style <strong>730</strong> as well as flange crush<br />
Style 710 periodically, if the application so allows.<br />
10- Contact Proco Products, Inc. if bottom clearance is an issue, we will provide you<br />
with a proper rotational degree drawing to ensure proper installation.<br />
In Line <strong>Series</strong><br />
11- If this is an Inline Style 720 simply insert the valve inside the existing pipe <strong>and</strong><br />
reattach the 2 mating pipe flanges. Since this is a rubber flange there is no<br />
requirement for any gasketing. Torque the flange bolts as shown in the above<br />
Typical tightening patterns<br />
12- If this is an Inline Style <strong>740</strong>, insert the valve inside the existing pipe <strong>and</strong> using<br />
an appropriate wrench, tighten the exp<strong>and</strong>able clamp until the Stainless portion<br />
of the clamp has imbedded itself into the rubber of the valve. At this point simply<br />
tighten the locking nut. Please note that this <strong>style</strong> relies on external pressure of<br />
the clamp to ensure that the valve does not move. Care is to be taken to ensure<br />
proper seating.
<strong>ProFlex</strong> <strong>Series</strong> <strong>700</strong>: <strong>style</strong> 710,720, <strong>730</strong> <strong>and</strong> <strong>740</strong> <strong>Check</strong> <strong>Valves</strong><br />
Operation<br />
The Proco <strong>700</strong> <strong>Series</strong> of check valves require little operational requirements, each unit<br />
is an elastomeric back flow device which relies solely on inlet flow pressure <strong>and</strong> back<br />
flow pressure to provide operation.<br />
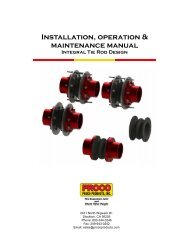
The <strong>ProFlex</strong> check valve will only be supplied as a “straight bill” design.<br />
Studies have shown that the curved bill design can be subject to failure due to the<br />
installation <strong>and</strong> flow direction. Tidal action can also cause failure with design as there is<br />
no proper way to install against flow in a tidal application.<br />
Maintenance<br />
The <strong>ProFlex</strong> <strong>Check</strong> valve requires little maintenance; periodic checks can ensure that<br />
this valve will provide years of maintenance free service. <strong>Check</strong> for cuts or gouges<br />
which can easily be repaired with self curing rubber compound. (Contact Proco) Ensure<br />
that the bill section is free from any debris that may have been lodged in the bill. This<br />
will be the only areas of concern that you may periodically check.<br />
Congratulations!<br />
You have just installed the finest back flow prevention device ever manufactured. The<br />
<strong>ProFlex</strong> <strong>700</strong>.<br />
10/18/2005 Rev 1