

QUILTsocial | Issue 11
If you're getting bored with the same ol' quilting, this issue is for you! In this extraordinary issue of QUILTsocial, we break a few rules and think outside the quilting box too. Quilting teacher Julie Plotniko, shares tips and her tutorial on everything you wanted to know about the twin needle and what the excitement is about in quilting with a twin needle. Quilter Paul Leger breaks the quilting rules by incorporating Banyan Batiks in his modern quilt design and shows how linear quilting isn't so linear after all. Quilter Christine Baker explores THE Dream Machine 2 and its embroidery capabilities to make a miniature quilt, seamless and easy, see how she did it! Also included is award winner Claire Haillot's most refreshing table runner pattern for the summer using the PFAFF creative icon. Let's hop to it! Happy Quilting!
If you're getting bored with the same ol' quilting, this issue is for you! In this extraordinary issue of QUILTsocial, we break a few rules and think outside the quilting box too. Quilting teacher Julie Plotniko, shares tips and her tutorial on everything you wanted to know about the twin needle and what the excitement is about in quilting with a twin needle. Quilter Paul Leger breaks the quilting rules by incorporating Banyan Batiks in his modern quilt design and shows how linear quilting isn't so linear after all. Quilter Christine Baker explores THE Dream Machine 2 and its embroidery capabilities to make a miniature quilt, seamless and easy, see how she did it! Also included is award winner Claire Haillot's most refreshing table runner pattern for the summer using the PFAFF creative icon. Let's hop to it! Happy Quilting!

Create successful ePaper yourself
Turn your PDF publications into a flip-book with our unique Google optimized e-Paper software.
Q<br />
Diagram 2<br />
ISSUE<strong>11</strong><br />
UILTsocial<br />
…eat, sleep, quilt, repeat<br />
.com<br />
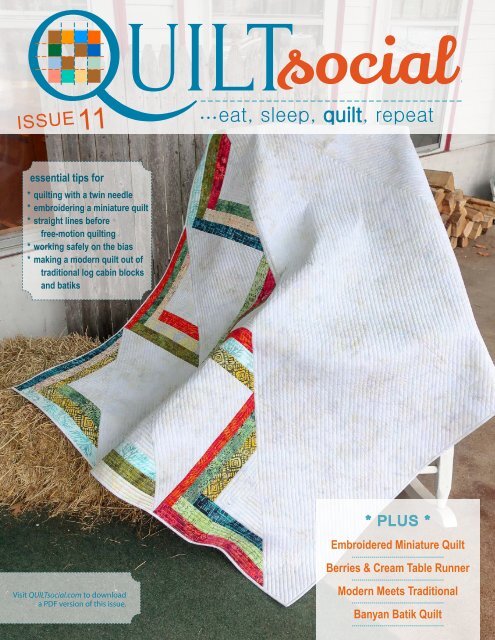
essential tips for<br />
* quilting with a twin needle<br />
* embroidering a miniature quilt<br />
* straight lines before<br />
free-motion quilting<br />
* working safely on the bias<br />
* making a modern quilt out of<br />
traditional log cabin blocks<br />
and batiks<br />
* PLUS *<br />
Embroidered Miniature Quilt<br />
Berries & Cream Table Runner<br />
Visit <strong>QUILTsocial</strong>.com to download<br />
a PDF version of this issue.<br />
Modern Meets Traditional<br />
Banyan Batik Quilt
editor's letter<br />
follow me on<br />
One of our <strong>QUILTsocial</strong><br />
readers once commented,<br />
'These machines are just<br />
getting awesomer and<br />
awesomer!' I agree with her,<br />
for all of us who engage in<br />
quilting and sewing, we are<br />
spoiled! So many features<br />
have been added to make<br />
our sewing experience<br />
easier and effortless so<br />
we can focus on being<br />
creative. Let the machines<br />
do everything for you!<br />
Granted, there are different<br />
price points, but even in<br />
the simpler machines, the<br />
technology has advanced<br />
to make sewing that much<br />
smoother.<br />
In this issue, let's play<br />
with the twin needle! Julie<br />
Plotniko, an inspiring quilter<br />
and quilting teacher, has<br />
written an in-depth look<br />
all you ever need to know<br />
about quilting with the twin<br />
needle. Add dimension to<br />
your quilting and learn what<br />
all the numbers mean on<br />
the twin needle box, so can<br />
finally choose the right one<br />
for your project.<br />
Included in a plentiful<br />
repertoire of patterns in<br />
this issue are two quilts<br />
that could be described as<br />
refreshing! Paul Leger's quilt<br />
that defies modern quilting<br />
by breaking some of the<br />
modern quilting rules for a<br />
truly unique quilt pattern,<br />
and Claire Haillot's table<br />
runner Berries & Cream,<br />
which captivates everyone's<br />
interest. This is what<br />
happens when we let the<br />
sewing machines do all the<br />
work, with features that take<br />
the slog out of sewing and<br />
quilting intricate patterns.<br />
What's with the HSTs on this<br />
page? I'll tell you all about<br />
this quilt in progress in the<br />
next issue.<br />
Cheerfully,<br />
3
Q<br />
<strong>QUILTsocial</strong><br />
◦<br />
{ daily blog<br />
◦<br />
{ weekly giveaways<br />
◦<br />
{ monthly newsletter<br />
◦<br />
{ quarterly magazine<br />
◦<br />
{ fun Facebook page<br />
◦<br />
{ yummy Pinterest page<br />
◦<br />
{ app on iTunes/Google Play<br />
◦{<br />
ALL of the above!<br />
<br />
.com<br />
eat, sleep, quilt, repeat<br />
* projects<br />
* techniques<br />
* product reviews<br />
ALL<br />
FREE!<br />
Visit <strong>QUILTsocial</strong>.com<br />
and download our free ebook<br />
Elaine’s Quilting Tech Tips!<br />
PUBLISHER, EDITOR-IN-CHIEF, ART DIRECTOR<br />
Carla A. Canonico<br />
carla@<strong>QUILTsocial</strong>.com<br />
PUBLISHER, ADVERTISING SALES<br />
John De Fusco<br />
john@<strong>QUILTsocial</strong>.com<br />
PHOTOGRAPHERS<br />
John De Fusco, Carla A. Canonico<br />
BLOGGERS/CONTRIBUTORS<br />
Christine Baker<br />
FairfieldRoadDesigns.com<br />
Claire Haillot<br />
quiltingwithclaire.com<br />
Julie Plotniko<br />
juliesquiltclass.blogspot.com<br />
Paul Léger<br />
paullegerquilts.com<br />
GRAPHIC & WEB DESIGN<br />
Carla A. Canonico<br />
carla@<strong>QUILTsocial</strong>.com<br />
Sondra Armas<br />
WEB and IT Support<br />
Alejandro Araujo<br />
WEBSITE / BLOG : https://<strong>QUILTsocial</strong>.com<br />
Like us on Facebook : <strong>QUILTsocial</strong><br />
Follow us on Twitter : @<strong>QUILTsocial</strong><br />
WHERE TO GET YOUR COPY<br />
<strong>QUILTsocial</strong> is a quarterly eMagazine published by A Needle<br />
Pulling Thread. It is available free for personal use online at<br />
https://<strong>QUILTsocial</strong>.com.<br />
A limited number of printed copies of <strong>QUILTsocial</strong> are available<br />
for purchase at select quilt shops and specialty stores. Ask for it<br />
at your local shop. <strong>QUILTsocial</strong> is not available by subscription.<br />
QUILT SHOPS<br />
If you are interested in carrying <strong>QUILTsocial</strong> in your store, please<br />
email john@<strong>QUILTsocial</strong>.com.<br />
EDITORIAL<br />
Designers and other contributors who would like to be<br />
considered for future issues please email carla@<strong>QUILTsocial</strong>.com<br />
with a brief description of your work and your proposed project<br />
for the magazine.<br />
©2018 <strong>QUILTsocial</strong>. All rights reserved. <strong>Issue</strong> <strong>11</strong>. ISSN 2368-5913.<br />
No part of this publication may be reproduced without written<br />
permission from the publisher.<br />
All designs, patterns, and information in this magazine are for<br />
private, non-commercial use only, and are copyrighted material<br />
owned by their respective creators or owners.<br />
Advertiser Index<br />
72 A Needle Pulling Thread Magazine<br />
57 Brother<br />
70 Business Directory<br />
59 Coats<br />
39 Eat Your Heart Out Tours<br />
49 Gütermann Creativ<br />
02 Husqvarna Viking<br />
67 Northcott<br />
71 PFAFF<br />
04 <strong>QUILTsocial</strong><br />
69 WonderFil Specialty Threads<br />
Q<br />
4 .com| issue <strong>11</strong><br />
UILTsocial
<strong>QUILTsocial</strong><br />
issue <strong>11</strong><br />
c o n t e n t s<br />
06<br />
08<br />
18<br />
28<br />
40<br />
50<br />
54<br />
60<br />
64<br />
Hooked on Books<br />
Everything you ever wanted to know about quilting with a twin needle<br />
Embroidering a miniature quilt on THE Dream Machine 2<br />
Berries & Cream, quilting with the NEW PFAFF creative icon<br />
Using Northcott Banyan Batiks in a modern quilt<br />
Tree of Life Photo Frame<br />
Funky Lovebirds Bolster Pillow<br />
Wedding Memories<br />
Flash of Flamingo Quilt<br />
Q<br />
UILTsocial<br />
.com | issue <strong>11</strong> 5
hooked on books<br />
Walking Foot Quilting Designs<br />
Melissa Marginet<br />
A brilliant quilter, Melissa Marginet has compiled in<br />
this golden nugget of a book, step by step diagrams<br />
and pictures to help you quilt your quilt. The<br />
designs shown can be made as simple or complex<br />
as described in clear and comprehensive diagrams.<br />
Walking Foot Quilting Designs will become for you a<br />
reference book you’ll keep by your sewing machine<br />
and quilt with confidence using its creative guidance.<br />
100 Pages, ISBN 978-0-9952741-0-5<br />
Self-published<br />
www.melissamarginet.ca<br />
The T-Shirt Quilt Book<br />
Lindsay Conner and Carla Hegeman Crim<br />
Turn treasured tees into something brand new–a<br />
T-shirt quilt! Capture the memories of a special<br />
time, starting with a quick pillow project or a baby<br />
quilt made from onesies, and work your way up<br />
to bed quilts in multiple sizes. Learn the secrets<br />
to choosing shirts, centering and cutting out<br />
around a logo, working with shirts that are too<br />
small, and interfacing knit fabrics with finesse. You'll<br />
practice your skills with 8 projects ranging from<br />
simple squares to pieced stars and triangles, plus<br />
easy machine-appliquéd motifs. With beginnerfriendly<br />
designs and truly unique layouts to entice<br />
experienced quilters, this essential guide to T-shirt<br />
quilts covers all the bases.<br />
80 Pages, ISBN 978-1-61745-530-8<br />
C&T Publishing<br />
ctpub.com<br />
Rainbow Quilts for Scrap Lovers<br />
Judy Gauthier<br />
You'll actually be hungry for more leftovers<br />
Are you swimming in fabric scraps from sewing<br />
garments, bags, and quilts? Learn to rescue and<br />
reuse fabric leftovers with 12 stunning, colorful quilt<br />
patterns for scrap lovers. Judy Gauthier teaches you<br />
her indispensable system for cutting usable squares<br />
from real, oddly shaped scraps, not just strips or<br />
precuts! Cut scraps into 3½", 4½", and 5½" squares, a<br />
magical combination for both beginning quilters<br />
and more advanced piecers, using traditional rotary<br />
cutting or Judy's fast2cut Simple Square Templates.<br />
Judy’s clever organizing and quilt-assembly tips will<br />
help you uncover hidden treasures from your stash.<br />
96 Pages, ISBN 978-1-61745-461-5<br />
C&T Publishing<br />
ctpub.com<br />
Visual Guide to Free-Motion Quilting Feathers<br />
Natalia Bonner<br />
Put a feather in your quilting cap<br />
Take the fear out of quilting feathers! Explore 68<br />
modern feather designs with step-by-step guidance<br />
from award-winning quilter Natalia Bonner. Quilt<br />
stunning feathers on a variety of blocks and borders<br />
with this beginner-friendly, visual guide. Unlike<br />
traditional feather quilting, which relies on exactness<br />
and precision, Natalia’s ideas will help you break<br />
away from perfection and find creativity in your<br />
quilting practice. Use your home sewing machine or<br />
a longarm to free-motion feathers with confidence,<br />
adding a truly elegant finish to today’s modern quilts.<br />
144 pages, ISBN 978-1-61745-506-3<br />
C&T Publishing<br />
ctpub.com<br />
Sew Yourself a Merry Little Christmas<br />
Mary Hertel<br />
Pick your project then pick your block: mix and match<br />
8 super-easy projects with 16 adorable paper-pieced<br />
blocks just for Christmas. Simply follow Mary’s clearly<br />
illustrated instructions to create fun and fresh holiday<br />
blocks. Plus, use her time-saving technique for paper<br />
piecing with less waste to create custom winter decor<br />
ranging from tree skirts and table toppers to gift bags,<br />
mug rugs, pot holders, and more. Sew by number and<br />
watch your image emerge!<br />
56 Pages, ISBN 978-1-61745-528-5<br />
C&T Publishing<br />
ctpub.com<br />
New York Beauties & Flying Geese<br />
Carl Hentsch<br />
Dramatic curves and angles for today's<br />
adventurous quilter<br />
Become a skilled foundation piecer with New York<br />
Beauty blocks and arcs of Flying Geese that amaze! Carl<br />
Hentsch simplifies a technique loved by many with his<br />
straightforward approach to curved piecing, foundation<br />
piecing, and simple machine applique. Stitch your<br />
way through 31 architectural block patterns, ideal for<br />
advanced beginners and intermediate quilters. Then it's<br />
time to practice on 10 full-size quilts and 27 bonus pillow<br />
projects with lively color combinations to provide<br />
movement and drama.<br />
96 pages, ISBN 978-1-61745-176-8<br />
C&T Publishing<br />
ctpub.com<br />
Q<br />
6 .com| issue <strong>11</strong><br />
UILTsocial
hooked on books<br />
Intuitive Color & Design, Updated 2nd Edition<br />
Jean Wells<br />
Jean Wells gives you the assignment of your life: put<br />
away your ruler and use your inner vision to design<br />
and piece spectacular, free-form quilts you'd never<br />
have guessed you could create. In this updated<br />
edition of best-selling Intuitive Color & Design, Jean’s<br />
workshop assignments get your creative juices<br />
flowing, giving you challenges to expand your<br />
quilting horizons. Start by learning to see line and<br />
color; study the nuts and bolts of design; develop<br />
your color work and composition; and when you get<br />
stuck, there’s expert advice on problem solving. You<br />
will never see quiltmaking in the same way again.<br />
<strong>11</strong>2 pages, ISBN 978-1-61745-524-7<br />
C&T Publishing<br />
ctpub.com<br />
True Blue Quilts<br />
Annette Plog<br />
Sew 15 Reproduction Quilts Honoring 19th-<br />
Century Designs<br />
The blue-and-white quilt is one of the most desired<br />
antiques, and many can still be found in good<br />
condition. Learn the history of blue fabrics used<br />
during the 19th century, from the first production<br />
of indigo fabrics through the invention of the<br />
sewing machine, and up to the development of<br />
synthetic dyes in the late 1800s. Get inspired to<br />
design and create your own heirlooms, stitching<br />
up 15 historically accurate reproduction quilts from<br />
traditional blocks.<br />
80 pages, ISBN 978-1-61745-340-3<br />
C&T Publishing<br />
ctpub.com<br />
Wonderful One Patch Quilts<br />
Sarah Nephew and Marci Baker<br />
A new angle on classic quilt designs<br />
What can you sew with a 60° ruler and a simple,<br />
repeated shape? The possibilities are endless!<br />
Favorite authors Sara Nephew and Marci Baker are<br />
back with 20 beautifully bold one-patch quilts made<br />
from triangles, half-hexagons, diamonds and more.<br />
With their eye-catching color placement and clever<br />
pieced units like half-triangles and quarter-hexagons,<br />
no two quilts look alike. For even more variety, pick<br />
your favorite method – working from scraps or strip<br />
piecing yardage – to create an array of quilts from<br />
wallhangings to full-size beauties.<br />
128 pages, ISBN 978-161745-467-7<br />
C&T Publishing<br />
ctpub.com<br />
Charm School – 18 Quilts from 5” Squares<br />
Vanessa Goertzen of Lella Boutique<br />
Mind your p’s and q’s... precuts and quilt blocks, that<br />
is! Popular designer Vanessa Goertzen puts charm<br />
squares to the test with 18 projects using precut 5" x<br />
5" squares. Start with fresh, simple blocks and build<br />
your skills to sew versatile snowballs, stars, flying<br />
geese, and more. Using precuts from your stash or<br />
cutting your own charms from scraps or yardage,<br />
you’ll learn tips to take the guesswork out of piecing.<br />
Quilters of all types will fall in love with these quick,<br />
clever, and clean designs!<br />
128 pages, ISBN 978-1-61745-281-0<br />
C&T Publishing<br />
ctpub.com<br />
Block Genius<br />
Sue Voegtlin<br />
An amazing new quilting book, truly perfect for<br />
quilters of all levels…. With 201 pieced block designs,<br />
each in three different sizes (6”, 9” and 12”) with<br />
sample settings…an exceptional reference tool.” All<br />
the math is done for you!<br />
144 pages, ISBN 978-1-935726-90-6<br />
Fox Chapel Publishing<br />
thomasallen.ca<br />
Artful Log Cabin Quilts<br />
Katie Pasquini Masopust<br />
Take the first steps to becoming an art quilter with<br />
popular teacher and best-selling author Katie Pasquini<br />
Masopust. Starting with an inspiration photo or<br />
painting, choose fabrics to create your own artistic<br />
log cabin quilts. Learn to navigate visual pathways<br />
and composition, applying easy techniques and<br />
experimenting with color. Student work is presented,<br />
showing that anyone can create an art quilt! Design<br />
and make your masterpiece with freeform log cabin<br />
blocks using this versatile method.<br />
80 pages, ISBN 978-1-61745-450-9<br />
C&T Publishing<br />
ctpub.com<br />
Q<br />
UILTsocial<br />
.com | issue <strong>11</strong> 7
Everything you ever wanted to know<br />
about quilting with a twin needle<br />
Julie Plotniko<br />
The numbers at the bottom of the<br />
package tell you the space between the<br />
two needles and the size of the needles.<br />
On the left is the distance between the<br />
two needles. In this case 4.0. The larger<br />
the number the larger the space.<br />
On the right is the size of the needle.<br />
Once again, the larger the number the<br />
larger the needle.<br />
This one is a size 100 so it’s quite thick<br />
and has a large eye.<br />
A variety of SCHMETZ twin needles appropriate to quilting<br />
In this five part series we’ll explore some<br />
of the different ways that you can use<br />
a SCHMETZ twin or double needle for<br />
quilting on your home sewing machine.<br />
The possibilities are endless so let’s have<br />
a little fun!<br />
What is a twin needle and how do I use it<br />
on my home sewing machine?<br />
A twin needle, also known as a double<br />
needle, is a single shank with two<br />
needles attached. It’s used to make two<br />
parallel rows of simultaneous stitches.<br />
This needle is attached to your home<br />
sewing machine the same way as a<br />
regular sewing needle.<br />
You must have a zigzag sewing machine as<br />
opposed to a straight stitch only machine.<br />
This is because a straight stitch machine<br />
does not have a large enough opening<br />
in the needle plate to allow the twin<br />
needle to pass through.<br />
A twin or double needle<br />
Q<br />
8 .com| issue <strong>11</strong><br />
UILTsocial<br />
The needle package gives you<br />
important information<br />
The top of my package says SCHMETZ.<br />
This is the name of the company that<br />
makes the needles I’m using. Top quality<br />
needles allow your machine to make the<br />
best possible stitch.<br />
I know I can depend on SCHMETZ<br />
needles to give me beautiful results.<br />
The second piece of information the package<br />
tells me is that I have a Twin Needle.<br />
Under the words Twin Needle it says<br />
130/705H-J ZWI. This is just a code that<br />
means that it has a flat back home sewing<br />
machine needle with a scarf (little notch)<br />
just above the eye of the needle.<br />
J means it’s a jeans needle and ZWI<br />
means it’s a twin needle.<br />
The most important pieces of<br />
information are what comes next.<br />
This package has the words Jeans Denim<br />
easily confirming the information given<br />
in short form.<br />
Twin needles have the same properties<br />
as their single siblings so we know that<br />
a jeans twin will have a nice sharp point<br />
to easily pierce all of our layers of fabric<br />
and batting.<br />
These properties make it a good<br />
choice for quilting as it won’t bend<br />
too easily and the large eye can easily<br />
accommodate 50 weight cotton or<br />
heavier thread.<br />
Twin needles are available in a variety<br />
of types and sizes. For our twin<br />
needle quilting we’ll use the Universal,<br />
Embroidery, Jeans and Metallic needles.<br />
These range in size from 1.6/70 all the<br />
way up to 8.0/100 with the Universal<br />
category having the most options to<br />
choose from.<br />
The size of the opening in the zigzag<br />
plate of your sewing machine will<br />
determine the maximum distance<br />
between the two needles that you<br />
can use.<br />
TIP To determine the widest distance<br />
between needles that you can use check<br />
your machines zigzag settings.<br />
• If your widest stitch is a 5 then your<br />
widest twin needle will be a 4.<br />
• If your widest zigzag is 7 then your<br />
widest twin needle will be a 6.<br />
• If your widest zigzag is 9 then you<br />
can use the largest twin needle of 8.<br />
A needle package contains valuable information
Threading your machine<br />
Using a twin needle requires two spools of thread on the top<br />
and a single bobbin below.<br />
The two top threads are both caught and held in place by the<br />
single bobbin thread. This gives the stitch on the bottom the look<br />
of a false zigzag. We’ll explore this in the next couple of articles.<br />
When using two larger spools of thread you’ll need to use two<br />
separate spool holders. Most machines have this capability.<br />
Two small spools of thread will often fit on one spool pin<br />
Machine ready to thread using two upper spool pins<br />
If your machine doesn’t have two spool pins or if the spool pins<br />
are too small to allow your thread to feed smoothly then an<br />
upright cone thread holder from UNIQUE is an ideal tool.<br />
It’s possible to wind a bobbin and use it for your extra top<br />
thread if you don’t have two spools.<br />
A bobbin can be used in place of a second spool of thread<br />
Wind a bobbin with the same weight and type of thread as<br />
you’ll be using on the top. I’ll be using 50 weight cotton in the<br />
top and bobbin.<br />
If you’re using small spools of thread you’ll sometimes be able<br />
to put both spools onto one spool holder.<br />
UNIQUE cone thread holder available at your local quilt store<br />
Photos by Julie Plotniko<br />
Q<br />
UILTsocial<br />
.com | issue <strong>11</strong> 9
Thread both threads through the<br />
normal pathway.<br />
First thread the left needle from the<br />
standard spool pin. This will be the one<br />
closest to the left side of your sewing<br />
machine. Once again, follow the normal<br />
pathway and thread the right needle<br />
from the secondary spool pin. Threading<br />
the needles one at a time will keep them<br />
from twisting together.<br />
Skip the last guide to prevent tangling<br />
My machine is threaded with a twin needle<br />
on and I’m ready to go!<br />
Keep the threads from twisting as you thread a<br />
twin needle<br />
If the threads seem to want to tangle<br />
then put the one on the right through<br />
the last thread guide and the one on the<br />
left in front of the last guide.<br />
Remember not to use the needle<br />
threader on your machine to thread a<br />
twin needle. You could jam the needle<br />
threader and cause damage to the<br />
machine. If you have an automatic<br />
needle threader consider putting a<br />
sticky note over the activation button<br />
as a reminder not to push it! Place your<br />
bobbin in the machine and bring up the<br />
bobbin thread.<br />
Some computerized sewing machines<br />
have an internal setting that you activate<br />
to tell the machine what twin needle<br />
you have on the machine. Using this<br />
setting will give you optimum stitch<br />
quality as it helps control the thread<br />
tension. It’ll also prevent you from<br />
selecting a stitch that’s too wide for the<br />
twin needle you have on the machine.<br />
Set the internal settings if required by your<br />
sewing machine<br />
A 4.0 twin needle threaded and ready for quilting<br />
Keep reading to learn how to use<br />
SCHMETZ twin needles with a walking<br />
foot to add easy detail to a straight line<br />
quilting.<br />
Remember<br />
do not use the needle<br />
threader on your<br />
machine to thread a<br />
twin needle.<br />
Q<br />
10 .com| issue <strong>11</strong><br />
UILTsocial
Let your walking foot work its magic<br />
for easy twin needle quilting<br />
The easiest form of machine quilting is<br />
straight line stitching with a walking foot<br />
so we’ll start our journey through twin<br />
needle quilting the same way.<br />
Why a walking foot?<br />
• A walking foot also known as a dual<br />
feed or even feed foot has feed teeth<br />
that help pull the top layer of your<br />
quilt through the sewing machine.<br />
• It does this at the same speed that<br />
the sewing machine teeth feed the<br />
bottom layer allowing the top fabric,<br />
batting and back fabric to move<br />
through the sewing machine evenly.<br />
• This helps keep your work flat and<br />
prevents puckers.<br />
• When twin needle quilting the<br />
walking foot gives us the added<br />
benefit of reducing the amount of<br />
stress on the twin needle.<br />
• The weight of the quilt can pull on<br />
the twin needle as we sew causing<br />
one or both needles to bend.<br />
• This can damage or even break the<br />
needles.<br />
• Because the walking foot feeds the<br />
quilt evenly through the machine it’s<br />
much easier to handle and we’ll have<br />
better quality stitching.<br />
Machine prepared for quilting with walking foot<br />
and twin needle in place<br />
A short test stitching with each of your<br />
twin needles will help you decide what<br />
needle best suites your current needs.<br />
Here we have a 1.6/70, 2.5/80 and<br />
3.0/90 Universal.<br />
Remember that the first number is<br />
the distance between the needles<br />
and the second number is the size of<br />
the needles.<br />
A test stitch out of a variety of twin needles<br />
The 4.0/80 Universal and 4.0/100 Jeans/<br />
Denim are good needles to use while<br />
learning how to quilt with a twin needle.<br />
The Jeans/Denim needle in particular has<br />
a sharp point to pierce the multiple layers.<br />
This one is a size 100 so it’s quite thick<br />
and has a large eye.<br />
These properties make it a good choice<br />
for beginners as it will not bend too<br />
easily.<br />
The large eye can easily accommodate<br />
50 weight cotton or heavier thread<br />
without shredding or breaking.<br />
The 6.0/100 Universal has the widest<br />
space between needles that I can use on<br />
my machine.<br />
Caution must be used with these very<br />
wide needles.<br />
They’re almost the full width of my stitch<br />
plate so pulling on the quilt sandwich<br />
too much can result in a broken needle.<br />
Reduce top thread tension if the<br />
stitching creates too deep of a channel<br />
between stitching lines.<br />
Test stitching of 4.0 and 6.0 needles<br />
Begin by stitching simple grids of<br />
parallel lines<br />
A great way to practice your twin needle<br />
quilting is to stitch a simple grid of<br />
parallel lines using a 4.0 twin needle.<br />
Use your favorite marking tool to draw a<br />
series of reference lines.<br />
Stitch with your drawn line running<br />
between the twin needle for nice<br />
straight lines.<br />
Hold your fabric steady as it feeds<br />
through the walking foot.<br />
Try not to overcorrect while stitching as<br />
this will create wobbly lines.<br />
Stop your machine with the needles<br />
in the down position to reposition<br />
your fabric.<br />
Make sure there’s no drag or weight on<br />
the needles before you resume stitching!<br />
Allow your walking foot and SCHMETZ<br />
twin needle to work their magic as you<br />
create double rows of detailed looking<br />
straight line stitching.<br />
A simple parallel grid stitched with a 4.0 twin needle<br />
Q<br />
UILTsocial<br />
.com | issue <strong>11</strong> <strong>11</strong>
Repeating patterns of alternate spacing<br />
between grid lines will create rhythm,<br />
movement and interest for a fun<br />
modern look.<br />
A repeat pattern of wide and narrow spacing<br />
A checkerboard grid is created by<br />
stitching evenly spaced horizontal and<br />
vertical rows.<br />
The twin needle adds charming detail<br />
that would be difficult to obtain if we<br />
were using a single needle.<br />
A twin needle checkerboard grid<br />
Matchstick quilting is parallel rows of<br />
quilting stitched very close together.<br />
I absolutely love the texture of very<br />
dense matchstick quilting.<br />
The time to complete this beautiful design<br />
is cut in half by using a twin needle.<br />
You’ll want to draw some reference<br />
lines to keep your stitching lines<br />
parallel and square.<br />
I use my 4.0 twin needle and the edge<br />
of my walking foot against the previous<br />
row of stitching to make quilting these<br />
matchsticks a breeze.<br />
Note: You can’t pivot with a twin needle in<br />
the down position. To turn your fabric this<br />
way would twist and break the twin needle.<br />
Raise the needle and manually<br />
reposition instead if you need to turn<br />
without breaking the thread.<br />
Have fun experimenting to see just how<br />
many designs you can come up with<br />
using your twin needles and walking foot!<br />
Free motion quilting with a<br />
twin needle – instant ribbon stippling magic<br />
It’s amazing what our SCHMETZ twin<br />
needles are capable of with a little help.<br />
Twin needle matchstick quilting<br />
A variety of darning feet for free motion quilting<br />
SCHMETZ twin needle<br />
Free motion quilting is a technique that<br />
puts us in the driver‘s seat to steer the<br />
fabric where we want it to go.<br />
The feed dogs on the machine are<br />
normally dropped or covered and a<br />
darning foot is placed on the machine.<br />
This allows us to move our fabric in any<br />
direction as well as control the stitch<br />
length just by how we move our hands.<br />
Free motion quilting with a twin needle<br />
There are a wide variety of darning feet<br />
available for most machines.<br />
A closed toe foot is preferred for use with<br />
a twin needle as it protects the needle<br />
better than an open toe foot.<br />
Smooth hand movement is required<br />
when using a twin needle to free<br />
motion quilt.<br />
We must be careful not to allow the<br />
weight of the fabric to drag or twist and<br />
turn the fabric while we stitch.<br />
While it’s easier to begin with a wide<br />
spacing between the needles for straight<br />
line stitching, the opposite is true for free<br />
motion quilting. A narrower 80 or 90<br />
needle is the easiest to use.<br />
For that reason it’s best to start with a 2.5<br />
universal twin needle.<br />
Q<br />
12 .com| issue <strong>11</strong><br />
UILTsocial
Before you begin always check to be sure that your chosen twin<br />
needle will clear the opening in the foot.<br />
Loop de Loops with a 2.5 twin needle<br />
Check to be sure your twin needle will clear the opening in the foot.<br />
Make sure that your machine is threaded properly with any<br />
internal settings set.<br />
The needle threads should be through the foot and laid<br />
towards the back of the machine.<br />
What is free motion quilting and can I really do that with a<br />
twin needle?<br />
Ribbon stippling is normally created by stitching your quilt<br />
twice.<br />
The first line of quilting establishes the pattern while the second<br />
line of quilting mirrors the first.<br />
Crossing over the first line of stitching causes the ribbon effect.<br />
All of this occurs naturally with a twin needle and we only have<br />
to stitch the design once.<br />
Once you’re comfortable with your hand movement you can<br />
switch to a wider spacing between the needles.<br />
A 4.0 twin needle really accents the ribbon effect in<br />
many patterns.<br />
Closed toe darning foot with spring and 4.0 twin needle ready for stitching<br />
What makes free motion twin needle quilting so different?<br />
Circles that wander all over your fabric are called Loop de Loops.<br />
Stitching loops is great way to begin.<br />
Notice that when you move the fabric in a forward or backward<br />
motion the space between the stitching is consistent with the<br />
distance between the needles.<br />
When you move your hands from left to right the two<br />
needles stitch on top of one another giving the effect of a<br />
single thread.<br />
If you move your hands in a circular motion the distance<br />
between the needles seems to change as the threads cross<br />
over one another.<br />
What a neat trick!<br />
Ribbon stippling with a 4.0 twin needle<br />
Q<br />
UILTsocial<br />
.com | issue <strong>11</strong> 13
More detailed patterns are easier to stitch with a narrow<br />
spacing between the needles.<br />
A 1.6 needle easily stitches the most complex designs.<br />
Square stippling is the more modern cousin of our traditional<br />
stippling.<br />
Lines and corners don’t have to be perfectly straight for this<br />
playful kind of quilting.<br />
Have lots of fun practicing your free motion quilting with your<br />
SCHMETZ twin needle.<br />
Keep reading for the modern flair of twin needle quilting as we<br />
see just how many ways we can make use of the way the back<br />
of a twin needle stitch is formed.<br />
Square stippling is modern and fun.<br />
Detailed designs are easier to stitch with a narrow space between the needles.<br />
The modern flair of twin needle<br />
quilting: embrace the zigzag<br />
When the single bobbin thread catches<br />
both the right and left needle it forms a<br />
bridge between the two.<br />
This gives the appearance of a zigzag<br />
stitch on the back even when you are<br />
doing a straight stitch.<br />
The wider the space between the<br />
needles the more pronounced this false<br />
zigzag is.<br />
Exploring a variety of quilting methods using<br />
SCHMETZ twin needle.<br />
How a twin needle makes a stitch<br />
As we learned in part one, to make a<br />
stitch with a twin needle our sewing<br />
machine requires threethreads, two<br />
through the needles and one bobbin.<br />
Back of 1.6 straight line stitching<br />
Back of 4.0 straight line stitching<br />
Q<br />
14 .com| issue <strong>11</strong><br />
UILTsocial
Make the appearance of a zigzag work<br />
for you<br />
We can choose to minimize the<br />
appearance of the zigzag by using a<br />
narrow twin needle.<br />
A backing fabric with a busy print will<br />
also help hide the stitching.<br />
I choose to embrace the zigzag and let it<br />
become part of my quilting design.<br />
After all, we have already decided to do<br />
something unusual by using our twin<br />
needle for quilting.<br />
If using a printed backing choose a<br />
thread color to accent the print so that<br />
your stitching will show.<br />
Thread the needles with one color and<br />
the bobbin with another for a more<br />
visible ladder effect.<br />
Tighten the top tension and shorten<br />
the stitch length.<br />
Thread the needles with one color and<br />
the bobbin with a contrasting color. You’ll<br />
get the look of a bordered satin stitch.<br />
Use three of the same color threads<br />
and slightly loosen the top tension for a<br />
honeycomb appearance.<br />
Variegated thread in the bobbin will<br />
give a different appearance, sometimes<br />
subtle sometimes extreme.<br />
A wide twin needle, a slightly<br />
reduced top tension and all three<br />
threads the same color will create a<br />
pronounced honeycomb.<br />
Be sure to draw frequent positioning<br />
lines on the back to keep this stitching<br />
square on the front.<br />
Matchstick quilting looks completely different<br />
stitched upside down<br />
Embrace the zigzag and twin needle free<br />
motion quilt your design from the back.<br />
Accent the colors in the print<br />
Gridwork that alternates between<br />
stitching from the front and back makes<br />
wonderful use of the decorative element<br />
created by the bobbin thread.<br />
Adjust the stitch settings or thread colors to<br />
highlight the zigzag<br />
Matchstick quilting stitched from the<br />
back looks completely different.<br />
Accent whimsical free motion quilting by stitching<br />
from the back<br />
It’s OK to practice! Start with something<br />
small. Your friends will all wonder “how<br />
did you do that?!”<br />
Keep reading for our final installment of<br />
the week as we double the fun and use<br />
our SCHMETZ twin needles for quilting<br />
with decorative stitches.<br />
Diagonal grid that alternates stitching from the<br />
front and back<br />
We can highlight the appearance of a<br />
zigzag by adjusting the threading or<br />
stitch settings on our sewing machine.<br />
Q<br />
UILTsocial<br />
.com | issue <strong>11</strong> 15
Double the fun:twin needle quilting<br />
with decorative stitches<br />
I talked about some basic techniques for machine quilting<br />
using various sizes and types of SCHMETZ twin needles.<br />
Though we used both a walking foot and a darning foot, the<br />
only stitch we used up until now is the straight stitch.<br />
It’s time to double the fun!<br />
In this last part of 'everything you ever wanted to know about<br />
quilting with a twin needle', I’ll use my sewing machine’s<br />
decorative stitches.<br />
A simple zigzag stitch will take on new beauty when used for<br />
twin needle quilting.<br />
This is a side motion, machine stitched zig zag not to be<br />
confused with the false zigzag created by the bobbin thread<br />
when sewing with a twin needle.<br />
This one is stitched with a 4.0 twin needle.<br />
A single zig zag takes on new beauty.<br />
Even simple decorative stitches look complex when stitched with a twin needle<br />
Preparing your machine for decorative stitching<br />
A walking foot is essential to help the decorative stitches<br />
feed evenly.<br />
Many machines have walking feet with bases that can be<br />
changed for different kinds of stitching.<br />
The ideal machine set-up would be to have one of these with a<br />
bottom plate designed for decorative stitching.<br />
If this isn't possible then a traditional open toe walking foot will<br />
work.<br />
Activate your machine’s internal setting for twin needle quilting,<br />
if required.<br />
Though the wider twin needles can be used for decorative<br />
stitching they can limit the amount of side to side motion that<br />
your machine is able to do. This will sometimes have the effect<br />
of flattening out the stitch.<br />
A 2.5 or smaller twin needle will work well for decorative stitching.<br />
To start, I'll use some standard construction stitches and make<br />
them decorative!<br />
A three step zigzag does exactly that. This is a construction<br />
stitch used to finish raw edges or build in stretch.<br />
Doesn’t it look amazing as a decorative twin needle quilting stitch?<br />
A three step zig zag stitched with a 1.6 twin needle<br />
Q<br />
16 .com| issue <strong>11</strong><br />
UILTsocial
TIPs for using decorative stitches<br />
• Most decorative stitches have a certain amount of side to<br />
side motion.<br />
• Try to stick to the somewhat simpler more open stitches for<br />
quilting with your twin needle and walking foot.<br />
• Dense stitches such as satin stitch combinations can be<br />
stitched through batting but may require tension, foot<br />
pressure or stitch width adjustments for optimum stitching.<br />
• If your machine doesn’t have a twin needle setting it’s best<br />
to un-thread your machine and turn the flywheel manually<br />
through one stitch repeat to be sure that the stitch setting<br />
isn’t too wide for your chosen needle.<br />
• Go slow and guide very gently allowing your machine to<br />
feed the stitch.<br />
• The pattern repeat will be more even this way and you’ll<br />
have fewer skipped stitches.<br />
• Skipped stitches are usually caused by going too fast or a<br />
dull needle.<br />
Decorative stitches look amazing stitched with a twin needle<br />
As I mentioned earlier, do flip your quilt over and stitch upside<br />
down for a differentlook.<br />
All you really need to get good at quilting using a twin needle is<br />
the tips in this week-long tutorial, time to explore the varieties<br />
of stitching and SCHMETZ twin needle as a trusted tool.<br />
Enjoy!<br />
Julie Plotniko<br />
juliesquiltclass.blogspot.ca<br />
For something different stitch decorative stitches upside down<br />
Q<br />
UILTsocial<br />
.com | issue <strong>11</strong> 17
First steps to embroidering a miniature<br />
quilt on THE Dream Machine 2<br />
Christine Baker<br />
THE Brother Dream Machine 2<br />
Welcome to this feature about THE Dream Machine 2 from<br />
Brother and BOY have I been having fun with this machine!!<br />
As you’ve seen on <strong>QUILTsocial</strong>, I’ve used the machine to make<br />
quick and easy Christmas gifts, and a sweet Valentine’s pillow,<br />
but I’ve also been using the machine behind the scenes on<br />
some other projects. I’ve embroidered two t-shirts for next<br />
Christmas and even helped my son make a German flag for<br />
his history project!<br />
I’ve always wanted to make a miniature quilt and since<br />
I’ve been using this machine, I started wondering about<br />
embroidering one. I looked around online and found a few quilt<br />
block embroidery designs but they weren’t exactly what I was<br />
looking for so I decided to design a miniature quilt on EQ and<br />
then import it into the machine so that it could be converted<br />
into an embroidery design.<br />
Here's my first design – I created it<br />
with a white background, so that I<br />
could “scan” the image and remove the<br />
background (anything that is white).<br />
That way I could use the appropriate<br />
colored threads to embroider onto<br />
black fabric and then I would add<br />
quilting stitches to emphasize the block<br />
edges, sashing and borders.<br />
Unfortunately, the image I created was<br />
too big for the machine to import and this<br />
error message popped up on the screen.<br />
Error message with file that is too large<br />
So I went back to the drawing board<br />
and saved my miniature quilt design<br />
as a smaller image file. Unfortunately,<br />
when it was imported into the<br />
machine, the embroidery design that<br />
was created from the smaller EQ file<br />
did not have enough details to make a<br />
nice looking design.<br />
The embroidery design created from a smaller file<br />
Miniature quilt design<br />
Q<br />
18 .com| issue <strong>11</strong><br />
UILTsocial
So I decided to approach my miniature<br />
quilt design a different way. Instead<br />
of designing the entire quilt at once, I<br />
decided to design a series of individual<br />
blocks that could be arranged into a<br />
bigger quilt design on the embroidery<br />
design screen. Here's the first pieced<br />
block image that I created to import.<br />
The six block embroidery designs<br />
The converted embroidery design<br />
I then designed five more pieced<br />
blocks on my computer and used THE<br />
Dream Machine 2 to convert them into<br />
embroidery designs. I made sure that the<br />
colors I used in each design were very<br />
distinct so that the machine could easily<br />
distinguish between them.<br />
Click here to download original PHC files for<br />
all six of these embroidery designs. Once<br />
downloaded and unzipped, you can use<br />
it on your Dream Machine 2 or see if your<br />
machine will convert it into a file that’s<br />
appropriate for you to use.<br />
Now that I’ve got six different blocks<br />
made into embroidery designs, I’ll<br />
play around with coloring the blocks<br />
differently.<br />
Pieced block design<br />
I followed the same procedure I used for<br />
importing my Valentine’s design and in<br />
the next photo is the embroidery design<br />
that THE Dream Machine 2 created. Isn’t<br />
it adorable?!!<br />
1 easy way to change thread colors in a<br />
machine embroidery design<br />
This is how I 'recolor' the blocks in my<br />
design to match the threads that I have<br />
on hand.<br />
I'm using the Splendor rayon thread pack,<br />
Retro, to embroider my miniature quilt.<br />
I want to be able to see what my block<br />
designs will look like in the thread<br />
colors that are included in the thread<br />
pack, so I’ll do the modifications from<br />
the “edit” screen.<br />
I select the thread palette key on the edit<br />
screen.<br />
WonderFil thread pack, Retro<br />
Photos by Christine Baker<br />
Entering the “edit” screen<br />
Select the thread color button<br />
Q<br />
UILTsocial<br />
.com | issue <strong>11</strong> 19
The screen now shows all of the thread<br />
changes required to stitch the block<br />
designs. The up and down arrows are<br />
used to scroll through the different<br />
colors in the embroidery design.<br />
The thread palette is shown at the<br />
bottom of the edit screen. The new color<br />
can be selected from any of the colors<br />
shown. When a thread color is selected,<br />
that square becomes bigger than all of<br />
the others and the name of the color<br />
appears at the top of the palette. You<br />
can select the color by either touching<br />
the colored boxes or by using the arrows<br />
on the right side of the screen to scroll<br />
through the colors.<br />
As you can see I changed the colors in<br />
the embroidery design on the screen of<br />
THE Dream Machine 2 so that they closely<br />
match the threads in the WonderFil<br />
theme pack.<br />
Use arrows to scroll through the colors in the design<br />
When I press on the color I want<br />
to change and I can tell it’s been<br />
selected because the outline of the<br />
key is now blue.<br />
Selecting a new color from the thread palette<br />
Once a new color is selected, the quilt<br />
block design on the screen will show<br />
what it will look like if stitched with that<br />
color choice, like pre screening…<br />
Matching the thread colors<br />
Here’s a close up of the six recolored<br />
block embroidery designs.<br />
Now that the block embroidery designs<br />
are recolored, I'll rearrange them into<br />
an actual quilt design. I can’t wait to get<br />
stitching my miniature quilt!<br />
The selected color is highlighted with a blue ring<br />
Since we selected the “royal purple”<br />
key, the screen shows the royal<br />
purple section of the first quilt block<br />
embroidery design. Since each of the<br />
blocks is a separate embroidery design,<br />
I’m only changing the royal purple in<br />
the first block not all of the royal purple<br />
sections on the screen.<br />
The recolored block<br />
The<br />
6<br />
recolored<br />
quilt<br />
blocks<br />
The royal purple section of the first block<br />
Q<br />
20 .com| issue <strong>11</strong><br />
UILTsocial
Iron out the kinks<br />
on your embroidery<br />
design on<br />
THE Dream Machine 2<br />
THE Dream Machine 2<br />
Once I started lining up the quilt block<br />
embroideries on the design screen of<br />
THE Dream Machine 2, I realized that it<br />
would be a lot easier to make sure they<br />
were straight if there were grid lines on<br />
the screen.<br />
I scrolled through the nine setting<br />
screens until I found screen 7. Many of<br />
the embroidery settings can be accessed<br />
from this screen, but I was most<br />
interested in the “Embroidery Frame<br />
Display” settings at the top of the screen.<br />
Accessing the machine setting screens<br />
Lining up the blocks<br />
I went to the home screen and then<br />
selected the machine setting screen<br />
from the top of the display.<br />
Settings screen 7<br />
I discovered here, that grid lines can be<br />
added to the embroidery frame display<br />
by pressing the right and left arrows to<br />
scroll through the selections. I chose<br />
the 3⁄8” grid, but there's also a 1” grid that<br />
could be selected.<br />
Adding grid lines<br />
Q<br />
UILTsocial<br />
.com | issue <strong>11</strong> 21
The grid lines on the display can be<br />
used to easily line up the quilt block<br />
embroidery images and add border<br />
designs evenly to all four sides of the<br />
quilt design.<br />
The duplicated block appears on the<br />
screen just to the right and slightly lower<br />
than the original. To move it to its new<br />
position, press on it with your finger<br />
or with the sensor pen and drag it to<br />
wherever you want it to go.<br />
To make all of the 12 cornerstones, I just<br />
kept duplicating this block and moving<br />
the new ones to their correct positions.<br />
As you can see, I added four outer<br />
border cornerstone blocks and decided<br />
against the blue and red swirl design<br />
that I had originally put in the outer<br />
borders. It’s amazing what you can see<br />
when the blocks are layed out before<br />
starting the embroidery.<br />
Now that the design is all done, I can<br />
start stitching!!<br />
Lining up the quilt block embroidery images<br />
For my design, I wanted 12<br />
cornerstone blocks, so I followed the<br />
same procedure as I mentioned at the<br />
beginning of this feature, to design<br />
and import a small four patch block<br />
into my quilt design. Instead of adding<br />
the same embroidery design over<br />
and over again from memory, I used<br />
the edit screen to make a copy of the<br />
selected embroidery design. To do this,<br />
just press the duplicate button on the<br />
edit screen as shown.<br />
The duplicated block<br />
Here’s the final miniature quilt<br />
embroidery design that I created on THE<br />
Dream Machine 2.<br />
The final miniature quilt design<br />
The Duplicate button<br />
Q<br />
22 .com| issue <strong>11</strong><br />
UILTsocial
1 way to minimize thread changes during<br />
embroidery with THE Dream Machine 2<br />
I used this awesome grid feature to finish designing our<br />
embroidered miniature quilt. Let’s start stitching!!<br />
The first step is to stabilize my black Toscana fabric from Northcott.<br />
I decided to use Sulky Totally Stable and ironed it to the back of<br />
the fabric.<br />
THE Dream Machine 2 from Brother<br />
After you touch the “Embroider” button on the bottom of the<br />
design screen, the display will change to show the overall size<br />
of the finished embroidery, the stitch count, the number of<br />
thread changes and the time it will take to embroider the<br />
entire design.<br />
Since each of my blocks is a separate embroidery design, you<br />
can see at the right side of the screen (beside the spool icon)<br />
that there are a total of 65 thread changes to be done!!! Since<br />
I’m using the same colored threads over and over again, I<br />
decided to come up with a way to minimize the number of<br />
times I needed to rethread the machine.<br />
The embroidery size and stitch count display<br />
Totally Stable from Sulky<br />
The Sky Blue section of the first block was the first part to be<br />
embroidered, so I threaded<br />
the machine with my sky<br />
blue thread.<br />
After this section was stitched,<br />
the machine wanted me to<br />
change the thread to pink.<br />
Instead of rethreading the<br />
machine with the next<br />
color that was listed on the<br />
embroidery screen, I used<br />
the arrow down button to<br />
scroll to the next section that<br />
was labelled “sky blue” and<br />
stitched out that section.<br />
After each section was<br />
stitched, I scrolled down to<br />
the next sky blue section and<br />
had the machine stitch out<br />
that part. All of the sky blue<br />
sections were stitched while<br />
that color of thread was on<br />
the machine.<br />
No thread changes yet!<br />
Embroidering the Sky Blue section of<br />
the first block<br />
Q<br />
UILTsocial<br />
.com | issue <strong>11</strong> 23
The Sky Blue block sections<br />
Adding the pink and purple threads<br />
Next I scrolled back up to the beginning of the design and<br />
selected the first pink section. I rethreaded the machine with<br />
the pink thread and followed the same process to stitch first the<br />
pink and then the purple sections. I couldn’t believe how cute<br />
my little quilt was looking!!<br />
After all of the blocks were stitched, I started stitching the<br />
cornerstone blocks. I had the THE Dream Machine 2 stitch all of<br />
the aqua sections first and then scrolled back and had it stitch<br />
all of the pink sections last.<br />
By using this simple technique, I was able to decrease the<br />
number of thread changes from 65 to less than 10!<br />
Not all designs will work with this technique – if you have an<br />
embroidery design where colors are layered on top of each<br />
other you must have the machine stitch the bottom-most color<br />
first and then work your way towards the top color or your<br />
design won’t look right.<br />
Now that I see the stitched version of my design, I decided I<br />
don’t want to add the outside blocks that would have been the<br />
cornerstones of an outer border. I love it just the way it is, so<br />
we’re going to layer, quilt and bind my miniature quilt!<br />
Stitching the last of the cornerstones<br />
Q<br />
24 .com| issue <strong>11</strong><br />
UILTsocial
3 machine features that make finishing a<br />
miniature quilt super easy<br />
After I removed the fabric from the embroidery hoop, I pulled off<br />
the Sulky Totally Stable stabilizer from the back of the embroidery.<br />
The dual feed foot<br />
I then replace the embroidery W+ foot with the dual feed foot<br />
that came with THE Dream Machine 2. This foot is AMAZING<br />
for machine quilting as it pulls all of the quilt sandwich layers<br />
through at the same time which results in beautiful stitches<br />
with no puckering at all!<br />
Remove the stabilizer<br />
Next, I layered the embroidered fabric, batting and backing<br />
and used my Odif 505 spray to fuse it all together so that I<br />
could start quilting.<br />
The dual feed foot and embroidery W+ foot<br />
The regular bobbin case (with the green screw) also needed<br />
to be put back in to replace the embroidery bobbin case that I<br />
had been using with the embroidery foot.<br />
Replacing the bobbin case<br />
The quilt sandwich<br />
Q<br />
UILTsocial<br />
.com | issue <strong>11</strong> 25
Just like the embroidery foot, the dual feed foot needs to be<br />
plugged into the back of THE Dream Machine 2.<br />
With the laser guideline showing me the way, I used the dual<br />
feed foot to machine quilt “in the ditch” around each block<br />
and cornerstone.<br />
Using the laser pointing for quilting<br />
I also quilted some straight lines through the blocks along the<br />
“seams”. This helped to give the embroidery some dimension<br />
and made the blocks look even more “quilt-like”.<br />
Side view of the dual feed foot<br />
The guideline marker<br />
The guideline marker button appears on the LCD screen while<br />
sewing. Once pressed, it activates the laser light which can be<br />
used to help line up your stitching while straight line machine<br />
quilting using the dual feed foot.<br />
Quilting through the “blocks”<br />
The guideline marker button<br />
Q<br />
26 .com| issue <strong>11</strong><br />
UILTsocial
The presser foot lifter<br />
I love using the presser foot lifter button<br />
on THE Dream Machine 2! The machine<br />
also comes with a knee lift, but I really<br />
prefer using the button. It’s especially<br />
handy when used in combination with<br />
the needle down function. When you’re<br />
machine quilting straight lines you just<br />
stop at the end of the line, the needle<br />
goes down, you push the button to lift<br />
the foot and you can pivot the fabric<br />
around to line up your next quilting line<br />
– it’s perfect!<br />
The dual feed foot is also super<br />
for topstitching the binding! I just<br />
fold the binding around to the<br />
back of the quilt, making sure that<br />
the folded edge extends past the<br />
stitching line. Then I use a thread<br />
that matches the top of the quilt<br />
and I topstitch right along the<br />
edge of the binding on the front<br />
of the quilt, making sure to catch<br />
the folded edge on the back.<br />
I added my label and …done!<br />
Here it is – my finished miniature<br />
quilt! As you can see it fits<br />
perfectly on the bed of THE<br />
Dream Machine 2. It looks so<br />
sweet and it was so much easier<br />
than piecing a quilt that size!<br />
My son said it’s “cheating” but I<br />
disagree – I think it was more like<br />
thinking outside the box!<br />
Attaching the binding<br />
The “Presser Foot Lifter” button<br />
Next I made the binding for the<br />
miniature quilt. The guideline marker<br />
is so awesome for sewing that mitered<br />
seam between strips of binding. For<br />
more info on binding a quilt, check out<br />
my <strong>QUILTsocial</strong> post from October 2014.<br />
Christine Baker<br />
FairfieldRoadDesigns.com<br />
Topstitching the binding<br />
Sewing the mitred seam<br />
The dual feed foot on THE Dream<br />
Machine 2 is also great for sewing<br />
binding onto the edge of a quilt.<br />
The finished miniature quilt<br />
Q<br />
UILTsocial<br />
.com | issue <strong>11</strong> 27
Berries & Cream, quilting with the<br />
NEW PFAFF creative icon Claire Haillot<br />
Banishing your blues with this fabulous hot pink table runner<br />
One of the many wonderful things of summer are the many<br />
berries that are available. The colors and flavors are very<br />
inspiring to make beautiful quilts based on the many berries.<br />
Using the NEW PFAFF creative icon will make this Berries & Cream<br />
table runner fast and easy to make!<br />
You’ll love this project as it doesn’t require many fabrics; just pull<br />
out your leftover 2½” strips from other projects and a neutral<br />
background fabric.<br />
Presenting the PFAFF creative icon!<br />
While making this beauty, I’ll also be showing you the many<br />
features of the new PFAFF creative icon machine that I’ve had<br />
the pleasure to sew with.<br />
Over the years, I’ve had many quilters ask me what my favorite<br />
sewing machine is. To which I always answer that it’s more<br />
important to figure out what features one desires to have on a<br />
sewing machine. Picking out a favorite sewing machine is a very<br />
personal affair, as everyone has a different approach to quilting.<br />
From this point of view, I suggest making a list of the features<br />
your sewing machine doesn’t have that you feel you would love<br />
to have.<br />
So, here’s my wish list for the ideal sewing machine:<br />
• Great lighting: how many of you have stacked up<br />
numerous lamps around the sewing machine and still feel<br />
these don’t shed enough light?<br />
• Self-threading needle, yes!: I finally understand why it’s<br />
SO important. Can we say that I have finally reached the<br />
age of reason?<br />
• More workspace: I want to have more room between the<br />
needle and arm so that I can quilt bigger projects on my own.<br />
• Big screen: I want a machine that has a big screen which<br />
tells me what I’m doing wrong, as in: when I’m running out<br />
of thread in my bobbin or when I’m about to start sewing<br />
using the wrong foot, or stitch. I want the sewing machine<br />
to be idiot proof.<br />
• Sturdy: I need a sewing machine that can handle piecing<br />
and quilting non-stop when I finally have some “me time”.<br />
Whether it’s 3 hours or 3 days.<br />
Q<br />
28 .com| issue <strong>11</strong><br />
UILTsocial
Believe it or not! My prayers have been answered! And<br />
then some! In the article that follow, I’ll be looking at more<br />
outstanding features of the new creative icon. Also you might<br />
one to check out this video<br />
Reviewing the creative icon on <strong>QUILTsocial</strong> is quite a treat as<br />
it really answered all my needs. And the fact that it also has<br />
the integrated Dual-Feed is icing on the cake. The creative<br />
icon is German engineered, which means that it will never<br />
let me down. You might find it hard to believe, but it has 12.2”<br />
workspace from the needle to the arm and is 5.5” high, so I<br />
really get to see where I’m going when sewing and quilting.<br />
And I’m so happy to say that this area is completely lighted, so<br />
no need for all the extra lights around my workspace.<br />
Having all these great features made it a breeze to make this<br />
project. Now let’s get you started!<br />
Hot pinks inspire summer quilt making!<br />
It may look confusing when choosing the fabrics but just keep<br />
in mind the values, ranging from the darkest to the lightest. If<br />
you’re not sure, take a picture of your fabrics and transfer the<br />
photo to black and white… you’ll clearly see the range.<br />
Strips should measure 2½” wide, I noted the minimum length<br />
needed in the list below. You can grab from your leftover strips<br />
depending on the length you have or go for your strip prepacks<br />
or fat quarter stash.<br />
Presenting the PFAFF creative icon!<br />
materials<br />
• 1 strip of 3 dark prints (A1 A2 and A3 must both be 10” long)<br />
• 1 strip of 4 medium dark prints (B1 = 8”, B2 = 20”, B3= 10” and<br />
B4 = 20”)<br />
• 1 strip of 4 medium prints (C1, C2, C3 and C4 must all be 15”<br />
long)<br />
• 1 strip of 5 light prints (D1, D2, D3, D4 must all be 15” long<br />
and D5 must be 20” long)<br />
You'll need a yard of your background fabric:<br />
• two 1½” strips<br />
• six 2½” strips<br />
• five strips for your binding<br />
Find those strips in your fabric stash and label them to be ready<br />
to play with more wonderful features on the PFAFF creative icon!<br />
Choosing your fabrics for the table runner<br />
Photos by Claire Haillot<br />
Q<br />
UILTsocial<br />
.com | issue <strong>11</strong> 29
Why the ¼” seam<br />
allowance is<br />
precise on the<br />
PFAFF creative icon<br />
Presenting the NEW PFAFF creative icon<br />
My best advice to ensure precise piecing<br />
is to know where to sew ¼” seam<br />
allowance with your sewing foot.<br />
It was a breeze to find the precise ¼”<br />
on the PFAFF creative icon as it has a<br />
¼” Quilting Foot and the distance from<br />
the needle to the outer edge of the<br />
right toe is a precise ¼”. The hole in the<br />
center of the foot indicates where the<br />
needle will go through and therefore<br />
create the seam.<br />
As I always do prior to starting a project,<br />
I tested to ensure I had ¼” by sewing<br />
a test piece and measuring my seam<br />
allowance. Ideally you want to have the<br />
seam allowance a hairline within the ¼”.<br />
If you need more details, you can check<br />
my Precise ¼” Seam Allowance article.<br />
Tools to help you with precise piecing<br />
The creative icon did not disappoint as<br />
my seam allowance was right on at my<br />
very first try. I must admit that I did place<br />
the straight stich needle plate on the<br />
machine, which is part of the accessories<br />
included with the machine. The smaller<br />
hole in the Straight Stitch Needle Plate<br />
supports the fabric closer to the needle<br />
and helps prevent the fabric from being<br />
pulled down into the bobbin area,<br />
especially at the beginning and end of<br />
a seam.<br />
Piecing the table runner<br />
Now let’s test that precise seam by<br />
sewing some strips together, shall we?<br />
Step 1<br />
• Take a background strip and cut two<br />
8” strips.<br />
• Stitch the two background strips to<br />
your medium dark B1 strip.<br />
• Cut to make three 2½” x 6½”<br />
rectangles.<br />
Tools to help you with precise piecing with the<br />
PFAFF creative icon.<br />
Q<br />
30 .com| issue <strong>11</strong><br />
UILTsocial<br />
PFAFF creative icon’s Straight Stitch Needle Plate<br />
What is also nice is that the ¼” foot is<br />
designed to be used with the integrated<br />
dual feed system which means that your<br />
top and bottom fabrics are being fed<br />
through at the same time, preventing<br />
your layers from shifting while sewing<br />
and ensuring a precise piecing.<br />
Step 1 A<br />
Step 1B
Step 2<br />
• From your dark A1 strip, cut four<br />
2½” squares.<br />
• From a background strip, cut four 2½”<br />
x 4½” rectangles.<br />
• Sew your dark square at the edge of<br />
your background rectangle.<br />
• Repeat to make four 2½” x 6½”<br />
rectangles.<br />
For the outer blocks:<br />
• From a background strip, cut two 2½”<br />
x 6½” rectangles.<br />
• Sew one rectangle and Step 2 units<br />
on each side of Step 1 unit.<br />
• Repeat to make two 6½” block.<br />
Step 4<br />
Step 2<br />
Step 3<br />
Step 4 A<br />
• Sew 2 light strips (D1 and D2) to a<br />
medium C1 strip.<br />
• Cut to make six 2½” x 6½” rectangles.<br />
• Sew 2 units on alternate sides of Step<br />
3 blocks.<br />
• Makes three 6½” x 10½” rectangles<br />
(one center block and two end<br />
blocks).<br />
Step 3 for the center block<br />
For the center block:<br />
• Sew two units of Step 2 on each side<br />
of a Step 1 unit.<br />
• Ensure that the dark fabric A2 on Step<br />
2 units is placed on alternate sides.<br />
• Makes one 6½” block.<br />
Step 4B for center block<br />
Step 4B for outer blocks<br />
Step 3 for the outer blocks<br />
Q<br />
UILTsocial<br />
.com | issue <strong>11</strong> 31
Step 5<br />
• Sew two light strips (D3 and D4) between<br />
three medium strips (C2, C3, C4).<br />
• Cut to make six 2½” x 10½” rectangles.<br />
Step 5 A<br />
• Sew 2 units on alternate sides of Step<br />
3 blocks<br />
• Makes three 10½” squares (one center<br />
block and two outer blocks)<br />
Congratulations, the first part of the table runner is<br />
ready!<br />
Ensure that you measure each step to help you<br />
adjust and obtain your precise piecing.<br />
Step 5 B Center Block<br />
Completed blocks at Step 5<br />
Step 5 B Outer Blocks<br />
Q<br />
32 .com| issue <strong>11</strong><br />
UILTsocial
Stop unthreading<br />
your machine<br />
to make new bobbins!<br />
Presenting the PFAFF creative icon<br />
Can I mention one quick feature that<br />
I really love on the PFAFF creative icon?<br />
How about NOT having to unthread<br />
your machine to make a new bobbin?<br />
Believe it or not, we can wind a new<br />
bobbin directly through the needle<br />
without having to unthread/re-thread<br />
the machine! The people at PFAFF have<br />
added a groove on the front right side<br />
of the machine which means that we<br />
simply must bring the thread through<br />
that area and up in the bobbin. OK…<br />
please read the instructions in the<br />
manual as there are more steps and<br />
remember, the manual is your best<br />
friend! It did take me a few times to<br />
figure it out, but it was well worth it.<br />
Let’s continue our project, shall we?<br />
Step 6<br />
• Stitch a background strip to the<br />
medium dark B2 strip.<br />
• Cut to make four 2½” x 4½” rectangles.<br />
• Set the rest of the strip aside for Step 8.<br />
Step 6 A<br />
Step 7<br />
• Take a background fabric strip and cut<br />
four 2½” x 6½” rectangles.<br />
• Stitch a rectangle to the end of the<br />
medium dark fabric square of a Step 6<br />
rectangle.<br />
• Makes four 2½” x 10½” rectangles.<br />
Step 8<br />
• Stitch your dark A2 strip to the<br />
background edge of your leftover<br />
strip from Step 6.<br />
• Cut to make four 2½” x 6½” rectangles.<br />
Step 9<br />
• Take a strip of the background fabric<br />
and cut four 2½” x 8½” rectangles.<br />
• Stitch a rectangle to the end of the<br />
medium dark fabric square of a Step<br />
8 rectangle.<br />
• Makes four 2½” x 14½” rectangles.<br />
Step 10<br />
• Center block<br />
• Stitch two Step 7 rectangles to the<br />
center block, on opposite ends.<br />
Make sure that the medium dark<br />
square is aligned with the dark square<br />
in the center block.<br />
• Stitch two Step 9 rectangles to the<br />
center block, on opposite ends.<br />
Make sure that the medium dark and<br />
dark squares are aligned with the<br />
dark square in the center block.<br />
• Makes one 14½” square center block.<br />
Step 7<br />
Step 8 A<br />
Step 8 B<br />
Step 9<br />
Step 6B<br />
Q<br />
UILTsocial<br />
.com | issue <strong>11</strong> 33
Step 10 Center Block<br />
Step 10 Center Block<br />
End blocks<br />
Stitch one Step 7 rectangle to one side of<br />
the end blocks (where the dark square is<br />
in the block).<br />
Cut two 2½” x 10½” rectangles from your<br />
background fabric.<br />
Stitch one background rectangle to the<br />
other side on the end blocks.<br />
Stitch one Step 9 rectangle to the end<br />
blocks (where the dark square is in the<br />
block).<br />
Cut two 2½” x 14½” rectangles from your<br />
background fabric.<br />
Stitch one background rectangle to the<br />
other side on the end blocks.<br />
Makes two 14½” square block.<br />
Congratulations, the second part of the<br />
table runner is ready.<br />
Now tell me? How many times have<br />
you had to unthread your machine to<br />
make a new bobbin during this project?<br />
Wouldn’t you love this feature on your<br />
machine? Keep reading to continue this<br />
fine project as we discover more stellar<br />
features on the new PFAFF creative icon.<br />
A surprising must-have feature on<br />
the PFAFF creative icon<br />
All right, as if not needing to unthread the machine to make<br />
new bobbins wasn’t awesome enough, I have another great<br />
feature to talk about on the PFAFF creative icon.<br />
This is something I would have never thought of putting on<br />
my wish list. Yet I was so happy to see that the people at PFAFF<br />
have thought about it. How many of you have purchased<br />
BIG thread bobbins only to find out that they can’t fit on your<br />
sewing machine? So we buy yet another gadget to carry<br />
around with our machine that holds the bobbins and feeds the<br />
thread to our machine. And how many times we end up with<br />
the adapter falling, or the peg breaking….<br />
The must-have feature of which I would have never thought!<br />
Well NO MORE! The creative icon comes with two different<br />
adapters: a thread cone holder and a large spool holder that<br />
allows to place big bobbins on your machine. The thread<br />
will never tangle! All my big bobbins fit whether they are for<br />
piecing or quilting!<br />
Q<br />
A nice touch on the PFAFF creative icon<br />
34 .com| issue <strong>11</strong><br />
UILTsocial
Now let’s finish the table runner top!<br />
Step <strong>11</strong><br />
• Stitch a background strip to your<br />
medium dark B3 strip.<br />
• Cut to make four (4) 2½” x 4½”<br />
rectangles.<br />
Step 12<br />
• Cut from a background strip four (4)<br />
2½” x 4½” rectangles.<br />
• Stitch a background rectangle to a<br />
Step <strong>11</strong> rectangle.<br />
• Makes four (4) 4½” squares.<br />
Step 13<br />
• Stitch together the light D5 strip to<br />
the medium dark B4 strip.<br />
• Cut to make four (4) 2½” x 4½”<br />
rectangles.<br />
Step 14<br />
• With the leftover strip, stitch a dark<br />
strip (A3) along the medium dark<br />
strip.<br />
• Cut to make four (4) 2½” x 6½”<br />
rectangles.<br />
Step 15<br />
• Stitch a step 13 and step 14<br />
rectangles to a Step <strong>11</strong> square.<br />
• Makes a 6½” square.<br />
• Repeat to make 4.<br />
Step 12<br />
Step 13<br />
Step 14<br />
Step 16<br />
• Take the 1½” background strips and<br />
cut:<br />
ūū<br />
four (4) 1½” x 6½” rectangle (R1);<br />
ūū<br />
four (4) 1½” x 7½” rectangle (R2);<br />
• Stitch a R1 and R2 rectangles to a<br />
step 14 square.<br />
• Make a 7½” square.<br />
• Repeat to make four.<br />
Step 15 Step 16<br />
Q<br />
UILTsocial<br />
.com | issue <strong>11</strong> 35
Step 17 Outer Blocks<br />
Step 17 Center Block<br />
Step 17<br />
• Stitch two (2) Step 16 squares to your<br />
Step 10 center block.<br />
• Align the end medium dark squares<br />
from the smaller blocks to the dark<br />
squares of your center block.<br />
• Makes 1 irregular shape block.<br />
• Stitch one (1) Step 16 square to each<br />
Step 10 end block.<br />
• Makes 2 irregular shape blocks.<br />
• Stitch both end blocks to your center<br />
block.<br />
Congratulations! Your table runner top<br />
is complete.<br />
Now don’t forget to sandwich your piece.<br />
And I’ll be able to place my large quilting<br />
spool on my machine thanks to the<br />
must-have adapters.<br />
Sandwich your quilt top to the batting and backing<br />
Step 17 Final Step<br />
Q<br />
36 .com| issue <strong>11</strong><br />
UILTsocial
Straight lines before<br />
I know that there are many quilters dreading this moment so I<br />
have come up with simple steps to make your quilting easy. I,<br />
on the other hand, was looking forward to this part as I knew<br />
the PFAFF creative icon would be the perfect tool.<br />
free-motion quilting<br />
Free motion quilting witht he PFAFF creative icon<br />
Presenting the PFAFF creative icon<br />
1st step: the sandwich<br />
The first step is to sandwich your quilt! I use<br />
ODIF 505 Temporary Fabric Adhesive Spray and wait overnight to<br />
begin quilting so I’m sure nothing will move.<br />
2nd step: straight lines before free-motion<br />
Now for this piece, I want to have some free-motion designs<br />
so in order to ensure that my piece won’t shift or shrink during<br />
that part, I’m going to run some straight line quilting along the<br />
table runner so that it will ‘set’ my project.<br />
I decided to do some simple stitch in the ditch to set my table<br />
runner as I don’t want to see that quilting. I want all eyes on the<br />
free-motion design. It was really easy to do since the ¼” foot<br />
is designed to be used with the integrated dual feed system<br />
which means that I don’t need a bulky walking foot for any<br />
straight line quilting on the creative icon.<br />
And by a simple touch of the screen I was able to select my<br />
quilting stitch and adjust length and tension.<br />
Once that was done, I changed to my Dynamic Spring foot<br />
and adjusted the speed to allow me to free-motion quilt in the<br />
center of the blocks.<br />
Once again I was impressed on how easy it was to change foot<br />
the creative icon. I realized that I never have to unscrew the<br />
pressure foot ankle, the Dynamic Spring foot clips onto it.<br />
Again, the machine was my true friend as I had enough work<br />
space in height and width to see where I was going. And I really<br />
love using Dynamic Spring Foot. There was no hesitation and<br />
my free-motion quilting was very fun to do.<br />
I had practiced the design and movement on paper until I was<br />
ready to move to the creative icon. And this is really important<br />
to remember.<br />
You can’t quilt it if you can’t draw it!<br />
Guidelines to quilting your table runner<br />
Here’s my quilting design. The first stitch in the ditch is marked<br />
in black, the second is in yellow. Once that’s done, you can do a<br />
free-motion pattern. I liked the floral design and decided to go<br />
with it on the table runner.<br />
Stitch in the ditch with the PFAFF creative icon<br />
Q<br />
UILTsocial<br />
.com | issue <strong>11</strong> 37
Floral quilting step 1<br />
Floral quilting step 2<br />
Floral quilting step 3<br />
Here’s how I quilted it:<br />
If you really want to mark your table<br />
runner and free-motion on the drawing<br />
then I suggest drawing the pattern on<br />
a Glad Press’n Seal sheet, you can easily<br />
remove it once done by simply tearing<br />
it off and using a hot iron on the tough<br />
to reach pieces under your thread.<br />
Don’t worry! It won’t melt onto your<br />
fabric or iron.<br />
I hope that these simple steps have<br />
helped you gain confidence in your<br />
quilting abilities.<br />
All that is left to do is the binding and you’ll<br />
be ready to enjoy your new table runner.<br />
If you’re worried about the inside<br />
corners… no need to worry. Mark your<br />
¼” and find the inside corner (see photo).<br />
When you’re sewing your binding, stop<br />
at that corner and simply move to the<br />
other side of the quilt, while stretching<br />
out the side you just stitched to become<br />
a continuous line with your new edge<br />
and continue sewing. (OK, check the<br />
photo as an image speaks louder than<br />
words.)<br />
I must admit I cheated on this table<br />
runner. I used leftover 2½” strips in the<br />
light color for my binding and machine<br />
stitched on both sides.<br />
Imagine what a bowl of fresh cherries<br />
or raspberries will look like on this table<br />
runner. I'll tell you, that streudel and milk<br />
bottle are looking really good as well!!<br />
The beauty of the PFAFF creative icon is that<br />
it will give you hours of joyful sewing and<br />
quilting all year long!<br />
Claire Haillot<br />
quiltingwithclaire.com<br />
Binding your quilt step 1<br />
Binding you quilt step 2<br />
Binding you quilt step 3<br />
Floral quilting step 4<br />
Q<br />
38 .com| issue <strong>11</strong><br />
UILTsocial<br />
Enjoy your new table runner
TEXTILE<br />
TOUR<br />
gujarat-kutch-rajasthan<br />
january 2019<br />
workshops•demos•festivals<br />
remote desert villages<br />
limited spaces!<br />
also morocco, uzbekistan, orissa<br />
905-715-7725<br />
www.thatsewingplace.ca<br />
SPECIALIZING IN SEWING MACHINE<br />
SALES/SERVICE/CLASSES<br />
AUTHORIZED DEALER FOR<br />
Kelly’s Creative Sewing<br />
Machines and More...<br />
902-435-7380<br />
www.kellyscreativesewing.ca<br />
804 Main Street<br />
Dartmouth, Nova Scotia B2W 3V1<br />
kellyscreativesewing@gmail.com<br />
Specialize in Sewing, Embroidery machines,<br />
Sergers and Long arm Quilting Systems<br />
www.sewwithvision.net<br />
902-479-2227<br />
480 Parkland Dr,<br />
Halifax, NS B3S 1P9, Canada<br />
Your Authorized Dealer for:<br />
Ottawa Valley Authorized Dealer<br />
Sewing, Knitting & Having a Good Time<br />
Arnprior Shopping Centre<br />
375 Daniel St S, Arnprior, ON K7S 3K6<br />
613-623-0500<br />
www.sewinspired.ca<br />
info@sewinspired.ca<br />
Q<br />
UILTsocial<br />
.com | issue <strong>11</strong> 39
Using Northcott Banyan Batiks in a modern quilt<br />
For those who didn’t already know,<br />
Northcott introduced a new collection<br />
in September 2017. They added<br />
several batik collections to their already<br />
impressive fabric repertoire.<br />
Naturally when I was asked to write about<br />
the fabrics from the Northcott Banyan<br />
Batiks collections, I knew exactly which<br />
quilt I wanted to make.<br />
When the time came to choose the<br />
fabrics for this project I was very happy<br />
to see that compared to many batik lines<br />
that primarily consist of medium to dark<br />
colors, the Banyan Batiks collections also<br />
offer many batik fabrics in lighter colors.<br />
This lighter color option is something<br />
that’s very important to me because I<br />
like to have many options in the fabric<br />
tones I use.<br />
If you’d like to quilt along as I make this<br />
quilt, here are the fabrics I chose from<br />
three batik collections:<br />
• Nostalgic Vibes<br />
• Primitive Lines<br />
• Shadows<br />
From the Nostalgic Vibes collection,<br />
I chose ¼ yard from each of the<br />
following fabrics:<br />
Blue Green<br />
Colorway<br />
Red Black<br />
Colorway<br />
80016-63 80010-91<br />
80010-60 80017-24<br />
80018-74 80013-52<br />
Northcott Banyan Batiks Primitive Line collections in blue-red and gold-green<br />
From the Primitive Lines collection,<br />
I chose ¼ yard from each of the<br />
following fabrics:<br />
Gold Greens<br />
Colorway<br />
Blue Red<br />
Colorway<br />
80041-70 80041-12<br />
80043-50 80040-25<br />
80044-70 80042-12<br />
6 fabrics from the Primitive Lines collection that<br />
will be used in the quilt.<br />
From the Shadows collection, I chose 3¾<br />
yards from the following fabric:<br />
81300-<strong>11</strong> (pictured below as the<br />
background fabric).<br />
Paul Leger<br />
If you’re wondering where to find<br />
these fabrics, check out my February 5,<br />
2018 post on <strong>QUILTsocial</strong>. There you’ll<br />
find a great step-by-step guide to help<br />
you find Northcott Banyan Batiks fabrics<br />
along with all the other Northcott<br />
fabric collections.<br />
As title says, 'we’re going modern'? Yes!<br />
We’ll make a modern quilt using batik<br />
fabrics.<br />
I’m guessing that some of you are<br />
thinking that the Modern Quilt<br />
Movement says not to use batiks in a<br />
modern quilt. Well, I’d refute that and<br />
respond that it isn’t so much a rule but<br />
more of a guideline.<br />
Photos by Banyan Batiks<br />
6 fabrics from the Nostalgic Vibes collection used<br />
to make this quilt<br />
Background fabric from the Shadow collection.<br />
Q<br />
40 .com| issue <strong>11</strong><br />
UILTsocial<br />
Photos by Paul Leger
In my case, I love working with batiks and for that reason,<br />
I’m asserting my right to rebel and use batiks to make<br />
a modern quilt! After all, at the end of the day, the quilt<br />
belongs to the maker and the maker must be happy with<br />
his or her choice of fabrics!<br />
Before we launch into the details of making the quilt we<br />
must chat about the age-old question. Do we pre-wash<br />
our fabrics or not?<br />
The colors of Batik fabrics are known to bleed when<br />
washed, especially the medium to dark fabrics. Not<br />
wanting to take a chance with this quilt, I checked my<br />
chosen fabrics. I was pleasantly surprised. Yes, there was<br />
some bleeding, but overall I was very impressed with how<br />
little there was. I forged ahead (after performing this precheck)<br />
and pre-washed all of the fabrics.<br />
We’ll start cutting and sewing these delicious fabrics<br />
from the Northcott Banyan Batik Nostalgic Vibe, Primitive<br />
Lines and Shadows collections.<br />
A colorful sketch of this modern quilt project 59¼” x 73½”<br />
Making a modern quilt out of traditional<br />
log cabin blocks and batiks<br />
As I mentioned, this quilt is inspired by<br />
the modern quilt trend. I talked about<br />
how it’s not quite ‘modern’ to use batiks<br />
in a modern quilt, it’s more of a guideline<br />
than a rule. Rules are made to be broken!<br />
I used batiks in modern quilts and will<br />
continue to do so, because I like batiks<br />
and I like modern quilting and with<br />
the right design together they make a<br />
beautiful quilt!<br />
With the Northcott Banyan Batiks selected,<br />
we’ll make a marvelous modern quilt.<br />
Let’s go!<br />
Remember! It’s important to pre-wash<br />
your batik fabrics. Although I found that<br />
the colors of the Northcott Banyan Batiks<br />
didn’t bleed much, it’s still a very good<br />
idea to pre-wash them.<br />
Here’s a little piece of great-to-know<br />
information: as you are aware, most<br />
fabrics are typically 40” to 42” wide, the<br />
Banyan Batiks fabrics, with selvage,<br />
measure 44¾” wide! Therefore, you’ll<br />
have 44” of usable width. Those 2 to 4<br />
extra inches will come in very handy.<br />
Now, let’s begin cutting our fabrics!<br />
From each of the Nostalgic Vibes and<br />
Primitive Lines fabrics cut two 2¼” strips<br />
from each fabric.<br />
The construction of this quilt is very<br />
much like a Log Cabin quilt block.<br />
Starting on one side of the center block,<br />
sew a strip to each side of the center<br />
block until you have 3 strips per side.<br />
From the neutral Shadows fabric cut:<br />
• (4) 19½” x 19½” squares<br />
• (5) 18¾” x 18¾” squares<br />
• (4) 10½” x 10½” squares<br />
• (4) 4½” x 18¾” strips for border<br />
• (8) 2½” strips for binding<br />
Click the link to download a PDF diagram<br />
on how to efficiently cut fabric your<br />
Shadow fabric.<br />
Fabrics from the Nostalgic Vibes and Primitive<br />
Lines collections<br />
2¼” fabric strip ready to be cut and sewn.<br />
Q<br />
UILTsocial<br />
.com | issue <strong>11</strong> 41
Here are 2 possible layouts that would<br />
work for this quilt.<br />
Multiple fabrics used randomly to create a colorful<br />
log cabin block.<br />
What the 2 halves will look like using block A.<br />
If we cut diagonally down the center of<br />
the block we’ll end up with little triangles<br />
affecting the block’s symmetry.<br />
Now, to decide which layout you’d prefer<br />
for your quilt top.<br />
I’m using block A’s layout since I love<br />
using lots of colors in my quilts. Block<br />
B, naturally would be my 2nd option as<br />
there would be no 2 identical halves.<br />
Click the link to download a pdf file<br />
containing the cutting instructions for<br />
all three blocks. When your fabrics are<br />
cut, feel free to start sewing the blocks<br />
together!<br />
Note: DO NOT cut your blocks. We’ll talk<br />
about that coming up next!<br />
If you’re still unsure which fabrics you<br />
wish to use, I’d suggest that you check out<br />
the Northcott Banyan Batiks Collections, so<br />
much from which to choose!<br />
6 fabrics, 3 per side, make a great traditionallooking<br />
log cabin block.<br />
When looking at the above photos,<br />
remember that these blocks will be<br />
cut in half diagonally; therefore their<br />
appearance will change a bit.<br />
Here’s a look at what the 2 halves of<br />
block A will look like after the diagonal<br />
cut is made.<br />
If using block A, we’ll have to remove a<br />
2½” strip from the center of the block.<br />
Cutting diagonally down the center leaves little<br />
triangles which affect the symmetry of the block.<br />
For the same reasons as with block<br />
A, we’d have to remove a 2½” strip.<br />
The 2 halves would then create a very<br />
symmetrical look.<br />
This variation gives us 2 precise and distinct halves.<br />
Q<br />
42 .com| issue <strong>11</strong><br />
UILTsocial
Safely working on the bias:<br />
making a half log cabin block<br />
Get ready for more cutting and sewing!<br />
Now that our blocks are assembled,<br />
we’re ready to cut diagonally across our<br />
blocks to continue the quilt top.<br />
I opted to use block A’s layout, that is,<br />
multiple fabrics with lots of colors. I<br />
don’t want little triangles to skew the<br />
overall look of my finished quilt top. So,<br />
to avoid triangles, I’ll have to cut in a<br />
creative way! Rather than cut once, I<br />
will be cutting twice.<br />
The method to make my 2 cuts is quick<br />
and simple.<br />
Place a ruler on the 1¼” mark on the line that you have drawn.<br />
Placement of ruler’s 1¼” mark over pencil line.<br />
Once the ruler is in place use a rotary cutter to make a diagonal<br />
cut across the entire block. Then make the same cut on the<br />
opposite side of the line. Repeat this step on all of your blocks.<br />
Making a diagonal directly in the center would<br />
create these orphan triangles.<br />
The first step is to draw a diagonal center<br />
line going from corner to corner on the<br />
light colored 10” square center section of<br />
the block.<br />
Parallel cuts are made on each side of the diagonal line.<br />
Note: After you’ve made the cuts don’t handle the half blocks too<br />
much. Remember, the cuts were made on the fabric’s bias and you<br />
don’t want your half blocks to stretch out of shape.<br />
Draw a diagonal line from corner to corner on<br />
the center section of the block.<br />
Q<br />
UILTsocial<br />
.com | issue <strong>11</strong> 43
Next, draw a diagonal line on all 4 – 19½” x 19½” squares of<br />
background fabric.<br />
Repeat this step for all half blocks.<br />
Draw a diagonal line on the 4 pieces of the background fabric.<br />
Gently take 1 of your half blocks and, right side down, line up<br />
its cut edge against the diagonal line that you just drew on the<br />
19½” x 19½” background fabric pieces, pin in place. Remember<br />
not to stretch the half blocks.<br />
Line up and pin 2nd half block on the opposite side of the background fabric line.<br />
When all of the half blocks are placed and pinned, sew along<br />
the diagonal seam ¼” from the aligned edge of the half blocks.<br />
Align the diagonal half block edge with the line drawn on the background fabric.<br />
Place another half block’s cut edge right side up along the<br />
opposite side of the line and pin in place.<br />
Sew a seam ¼” from the diagonal edge.<br />
Q<br />
44 .com| issue <strong>11</strong><br />
UILTsocial
Once you’ve finished<br />
sewing, use the rotary<br />
cutter to cut along<br />
the edge of each half<br />
block to separate the<br />
half blocks.<br />
Press the blocks and<br />
square them off to<br />
18¾” x 18¾”.<br />
Squaring off a block at 18¾” x 18¾”<br />
Take a well-deserved<br />
moment to admire your blocks before they’re joined together<br />
in a quilt top.<br />
Photos by Banyan Batiks<br />
2 of the 7 blocks that will be used in our modern quilt.<br />
Separate both half blocks by cutting along edges.<br />
Banyan Batiks Shadow<br />
A great background fabric for a modern quilt<br />
I look forward to finishing this<br />
modern quilt that showcases<br />
Northcott’s Banyan Batiks fabric collections.<br />
We’ve sewed 4 log cabin blocks then<br />
halved them by cutting each block<br />
diagonally. Then we sewed each of<br />
the log cabin block halves to a piece<br />
of background fabric to make 8 blocks<br />
in total.<br />
Northcott’s Banyan Batiks fabric: the Shadows collection<br />
I hope you didn’t find working on the<br />
bias too hazardous, and that you were<br />
careful with your bias edges. Let’s piece<br />
all of our blocks together and start<br />
quilting!<br />
As I was getting ready and cutting the<br />
background fabric, I was admiring it. It<br />
was a great choice. It’s light enough<br />
that it makes a subtle background color,<br />
allowing the other colors to stand out<br />
and shine. This background batik has<br />
enough pattern to give it some interest<br />
without overtaking the space.<br />
Half Log Cabin block paired with background fabric.<br />
Q<br />
UILTsocial<br />
.com | issue <strong>11</strong> 45
Now, we’ll take all of the pieces of the Shadows collection fabric<br />
that we cut earlier and join them to all of the blocks.<br />
I’ve been playing with the blocks’ placement on my design<br />
wall and was pleasantly surprised when I saw the overall effect.<br />
Design walls are so useful; they allow us to instantly see what’s<br />
really going on with our design concept. You’ll instantly see if<br />
the elements gel, where some need to be changed around, and<br />
what is or isn’t working.<br />
I was expecting a bolder, brighter look to this quilt, but find that<br />
I really like its calm, appeasing look. It will have many aspects<br />
that a modern quilt should have such as:<br />
• no border<br />
• lots of negative space<br />
• linear quilting<br />
After the rows are<br />
sewed, sew the<br />
rows together.<br />
With the quilt top<br />
completed, it’s<br />
quilting time!<br />
We need 3½ yards<br />
of fabric for the<br />
backing and a<br />
package of double<br />
size batting.<br />
Completed quilt top.<br />
Quilt blocks layout on design wall<br />
Once you find a block placement you like, you can sew the rest<br />
of the background fabric pieces into rows as follows:<br />
For this quilt, I’m using Fairfield Low-Loft<br />
Quilt Batting –Double – 81” x 96”. This is a<br />
Poly-Fil Low-Loft quilt batting. The batting<br />
will retain its loft wash after wash and dries<br />
quickly. Something else I enjoy about this<br />
batting is that because it’s lightweight it’s<br />
ideal when you don’t want to add much<br />
additional weight to your project. This is true<br />
when making a baby quilt or when your quilt<br />
top is already large and heavy.<br />
Fairfield battings are also available in the<br />
following sizes:<br />
»»<br />
Crib – 45” x 60”<br />
»»<br />
Double – 81” x 96”<br />
»»<br />
Queen – 90” x 108”<br />
»»<br />
King – 120” x 120”<br />
Since this quilt measures 60½” x 75” before quilting, I decided to<br />
go ahead and quilt it on my own domestic sewing machine.<br />
Another aspect I like about modern quilting is the quilting itself.<br />
I love the use of straight lines, curves or even geometric designs<br />
for the quilting.<br />
I’ll quilt in straight lines, ½” apart using a thread that will blend<br />
nicely with the background fabric.<br />
Here’s a photo to tease you along and show how the straightline<br />
quilting will look.<br />
Keep reading for the grand finale and see how all these fabrics<br />
from the Banyan Batiks collections will look once the quilting<br />
has done its magic!<br />
Row<br />
Half Triangle<br />
Block Quantity<br />
18¾” x 18¾”<br />
Background<br />
Blocks Quantity<br />
18¾” x 18¾”<br />
Other Pieces<br />
Quantity<br />
4½” x 18¾”<br />
1 1 2 1<br />
2 1 2 1<br />
3 2 1 1<br />
4 3 0 1<br />
Q<br />
46 .com| issue <strong>11</strong><br />
UILTsocial
Adding interest with linear quilting<br />
Feels bitter sweet: it’s nice to finish the<br />
quilt but the fun is over?<br />
I started and finished quilting the quilt,<br />
so that I could show you the results. As<br />
you’ll see, it’s very linear. This is a style<br />
of quilting that is very popular with<br />
modern quilters.<br />
My first step was to stitch in the ditch<br />
along every previously sewn seam in the<br />
half log cabin blocks.<br />
Using the edge of my quilting foot as a<br />
guide, I followed the first seam and then<br />
repeated the same steps over and over,<br />
sewing parallel lines.<br />
that isn’t so linear<br />
In the quilt’s large negative space, the quilting lines go in 2 directions. I did this to add<br />
more visual interest to the quilt.<br />
TIP The easy way to sew lines going in 2 different directions is to use the seam<br />
between blocks as a pivot point.<br />
Quilt along every seam of the half log cabin blocks.<br />
I kept sewing parallel lines until the very<br />
large negative space was filled along<br />
with the half of each log cabin block that<br />
had negative space.<br />
Use a seam as a turning point to pivot direction when quilting.<br />
I marked a very thin diagonal line in the<br />
half log cabin blocks section. I then used<br />
the line as a pivot point where there are<br />
no seams to use for this purpose.<br />
Following the seams and pivoting<br />
once at the line will give make nice,<br />
sharp corners.<br />
As in the larger negative spaces, I also<br />
used the edge of the walking foot as my<br />
guide to make the parallel lines.<br />
Mark a thin line where your pivot point should be.<br />
Interest and movement are added to<br />
the quilt through the use of multi-directional quilting lines. With all these tips, you’re<br />
now ready to quilt your own modern masterpiece quilt.<br />
Use edge of your quilting foot to make nice<br />
parallel quilting lines.<br />
Pivot 90° on the line.<br />
Parallel lines are also sewn in the half log cabin<br />
portion of the quilt’s block.<br />
Q<br />
UILTsocial<br />
.com | issue <strong>11</strong> 47
I love the quilting lines, and the Shadows used for<br />
the negative part of the quilt gives this space a<br />
little movement.<br />
Binding<br />
After the quilting is finished, put the<br />
binding on.<br />
On <strong>QUILTsocial</strong>, Elaine posted a great<br />
tutorial on bindings. Take a couple of<br />
minutes to check out her post!<br />
What a great feeling of accomplishment!<br />
I always enjoy the process of bringing<br />
the quilt I have in my mind’s eye to<br />
life. And I also love sharing with other<br />
passionate quilters!<br />
Putting the rules aside and making<br />
a beautiful modern quilt using<br />
batiks has also made this a lot of fun!<br />
The Nostalgic Vibes, Primitive Lines and<br />
Shadows fabrics from the Northcott<br />
Banyan Batiks collections were just<br />
perfect for this daring, rule-breaking quilt<br />
project.<br />
Have a fantastic quilting time!<br />
I love the quilting lines, and the Shadows used for the negative part<br />
of the quilt gives this space a little movement.<br />
Paul Leger<br />
paullegerquilts.com<br />
48<br />
Q<br />
UILTsocial<br />
.com<br />
| issue <strong>11</strong>
49
Tree of Life<br />
Photo Frame<br />
As I was working on this<br />
project I was thinking of<br />
my mom and her life. The<br />
love of her family (children,<br />
grandchildren and great<br />
grandchildren) and her love<br />
of nature were a huge part of<br />
what made this woman such<br />
a special person. I wouldn’t<br />
be the creative spirit that I<br />
am today without the love<br />
and support of my mother. I<br />
wanted to include a branch for<br />
every member of her family<br />
but that would involve an<br />
entire forest so I used buttons<br />
and embellishments to<br />
represent some of the special<br />
people and things that made<br />
her life so special.<br />
Please use the tree design<br />
provided or take this<br />
opportunity to design your<br />
own tree. When the picture<br />
is added to your personalized<br />
frame it will complete the<br />
story of your Tree of Life.<br />
– Cathy<br />
Q<br />
50 .com| issue <strong>11</strong><br />
UILTsocial
sewing<br />
skill level intermediate<br />
finished measurements<br />
10” x 13” to fit a 5” x 7” photo<br />
materials<br />
fabric<br />
• 4 pieces 14” x 16” cotton (front, front<br />
lining, back and back lining)<br />
• 2 pieces 14” x 16”<br />
Fairfield Poly-Fil Extra-Loft quilt batting<br />
• stabilizers<br />
* 14” x 16” Sulky Soft’n Sheer<br />
* 14” x 16” Fuse’n Stitch<br />
needles<br />
• Schmetz quilting needle size 90/14<br />
• Schmetz twin metallic needle size<br />
80/12, 2.5mm<br />
notions<br />
• paper<br />
• pencil<br />
• paper scissors<br />
• fusible bias tape<br />
• Feather Nest and Sew Cute Birds Dress<br />
It Up Buttons<br />
• 2 Sulky Blendable threads that match<br />
fusible bias tape<br />
• Gütermann Sew all thread<br />
• black bobbin thread<br />
• Sulky transfer pen<br />
• Sulky KK2000<br />
• iron<br />
• Clover Hold it Precision Stiletto<br />
• HeatnBond pressing sheets<br />
• glass headed pins<br />
• white ink marker<br />
• fabric folding pen<br />
• point turner<br />
• Small Clever Clips<br />
• scissors<br />
• sewing machine<br />
• hand needle<br />
instructions<br />
The size of the photo will determine the<br />
size of the center opening. This pattern<br />
has been created with a 4” x 6” opening<br />
to accommodate a 5” x 7” photo. The lines<br />
on the pattern are the stitching lines.<br />
1. Cut 4 pieces of cotton fabric 14” x 16”.<br />
2. To make a full size pattern place the<br />
template on a folded piece of paper.<br />
Trace and cut out the pattern removing<br />
the paper from inside the oval.<br />
3. Pin the pattern to the right side of the<br />
front fabric. With a temporary fabric<br />
marker trace the pattern. Do not cut<br />
this out – it will be used as a guide to<br />
position the tree pattern.<br />
4. Transfer the tree pattern to the right<br />
hand side of the oval.<br />
Note: Sulky Transfer pens are designed to<br />
transfer patterns from paper to fabric.<br />
This is a permanent transfer and will not<br />
wash out.<br />
Photocopy the tree pattern. Working<br />
on the photocopy trace the tree<br />
branches with a transfer pen in a<br />
colour that will show up on your<br />
fabric (light colour pens will show<br />
up on darker fabrics). Follow the<br />
instructions on the Sulky pens to<br />
transfer the pattern.<br />
TIP Protect your iron and ironing board<br />
from colour transfer with HeatnBond<br />
pressing sheets.<br />
5. Remove paper backing from the<br />
Fusible Bias Tape and pin (with glass<br />
head pins) the tape in place along<br />
lines for the tree branches, building<br />
the tree from the back to the front.<br />
TIP When placing bias tape stretch it<br />
slightly around the curves. Fold ¼” of tape<br />
under on the top ends of the branches.<br />
6. Fuse in place removing the pins as<br />
you go.<br />
7. Make a quilt sandwich as follows:<br />
Sulky Soft’n Sheer, quilt batting<br />
and fabric from step 4 (right side<br />
up). Use Sulky KK2000 to secure the<br />
layers together.<br />
Products used<br />
With a temporary fabric marker trace the pattern. This will<br />
be used as a guide to position the tree pattern.<br />
Q<br />
UILTsocial<br />
.com | issue <strong>11</strong> 51
To give the tree some depth, sew down the<br />
back branches first. Start at the top ends of<br />
the branches and stitch toward the trunk.<br />
1. Repeat steps 5 to 7 with extra fabric<br />
to make a test sample. Set up for<br />
twin needle stitching and practice<br />
on this sample before stitching your<br />
final project. Refer to twin needle<br />
information for tips and set up. When<br />
you’re happy with your sample<br />
stitching move to next step.<br />
Create your Tree of Life<br />
Sewing Machine Set up<br />
Needle: 2.5/80 Twin Metallic needle<br />
Top thread: 2 Sulky Blendables 30 wt.<br />
threads<br />
Bobbin thread: black bobbin thread<br />
Stitch: zigzag<br />
Stitch Width: medium (see note below)<br />
Stitch Length: 4mm<br />
Tension: loosen tension by one number<br />
1. To give the tree some depth, sew down<br />
the back branches first. Start at the top<br />
ends of the branches and stitch toward<br />
the trunk. Do not back stitch when<br />
starting and leave a 3” thread tail at the<br />
tops of each branch. Trim the threads at<br />
the bottom of the branch that will be<br />
tucked under the trunk.<br />
2. Stitch trunk in place making sure<br />
branches are tucked under it as you go.<br />
3. Pull the threads tails from the ends of<br />
the branches to the back and secure.<br />
Construction of the Photo Frame<br />
Sewing Machine Set up<br />
Needle: quilting needle size 90/12<br />
Top thread: Gütermann Sew All thread<br />
Bobbin thread: Gütermann Sew All thread<br />
Stitch: straight stitch<br />
Length: 2mm<br />
Tension: normal<br />
1. Turn the embellished front right side<br />
down on table. Line up the paper<br />
pattern using the stitching on the<br />
branches of the tree as a guide and<br />
trace the center oval with a fabric<br />
marking pen, this will be drawn on the<br />
Soft’n Sheer.<br />
2. Place front lining right sides together<br />
with the embellished front. Using the<br />
line made in Step 1 as the sewing line,<br />
stitch the oval.<br />
3. Cut out inside of oval grading and<br />
trimming to approx. ¼”. Clip the<br />
curves. For a crisper turn: run the<br />
fabric folding pen along the stitching<br />
line on front and back.<br />
4. Turn right side out and press.<br />
5. Bond Sulky Fuse’n Stitch to the back of<br />
the second piece of batting.<br />
6. Pin the paper pattern to the Sulky<br />
Fuse’n Stitch. With a fabric marker<br />
trace complete pattern onto the<br />
Fuse’n Stitch. Do not cut anything.<br />
7. On a flat surface make a quilt<br />
sandwich in the following order: back<br />
(right side up), front frame (right side<br />
down), inside back fabric (right side<br />
down), batting with Sulky Fuse’n Stitch<br />
(right side up: you can see the pattern<br />
you traced). Check the alignment<br />
feeling the oval opening to make sure<br />
it’s aligned. Pin well.<br />
8. Stitch the outside edge, leaving a 4”<br />
opening on the side seam without<br />
the tree.<br />
9. Trim away the batting and the Sulky<br />
Fuse’n Stitch as close as possible to<br />
the stitching line. Clip curves on the<br />
corners. Trim all seams to ¼” but do<br />
not cut out the center. Run fabric<br />
folding pen along stitching lines on<br />
both sides.<br />
10. Reach inside between the front and<br />
back and pull right side out.<br />
<strong>11</strong>. Use a point turner to help get nice<br />
crisp corners.<br />
12. Press and slip stitch the opening closed.<br />
13. Embellish with bird and/or bird<br />
house buttons.<br />
14. Insert a picture of that special person.<br />
TIP If the picture slides within the frame<br />
you can use double sided tape or Velcro<br />
buttons on back of the picture and inside<br />
of the frame to hold it in place.<br />
Q<br />
52 .com| issue <strong>11</strong><br />
UILTsocial
About Metallic Twin Needles<br />
Every zigzag sewing machine can use a twin needle. Twin needles will add a<br />
new twist and look to basic machine stitching. Sometimes I find the simpler<br />
the stitch the better the result. Twin needles now come in many widths<br />
starting at 1.6mm going up to 8mm.<br />
There are also different sized eyes available. When choosing the twin needle<br />
take the following into consideration:<br />
• y The opening on the foot and the needle plate of the sewing machine. Check<br />
your sewing machine manual to find out the width of the opening on the<br />
needle plate.<br />
• y The weight of the fabric. When using a straight stitch and a twin needle<br />
that’s too wide, lightweight fabric will tunnel or pucker.<br />
• y Width of decorative stitches. The rule of thumb is, the width of your twin<br />
needle plus the width of your stitch cannot exceed the opening on your<br />
needle plate and foot.<br />
• y How dense the stich is. Dense stitches do not stitch out well.<br />
• y Weight of the thread. A heavy thread will require a larger eye.<br />
Why use a metallic twin needle for this project when metallic thread isn’t used?<br />
A metallic needle has a much larger eye than a universal twin needle. 30 wt<br />
Blendable thread is heavier than embroidery or quilting thread so it needs the<br />
larger eye. Everyone should have a metallic twin needle in their stash as this<br />
will allow the use of different weights of threads in a twin needle.<br />
Steps for using a twin needle with decorative thread<br />
and decorative stitches.<br />
1. Thread the machine as per your machine manual. Note: Use a thread stand.<br />
2. Work on test fabric that is set up the same as the project; sew a<br />
straight stitch.<br />
3. Choose an open decorative stitch (stay away from satin stitches and<br />
complex stitches).<br />
4. Double-check the width, if your machine has a setting for a twin needle,<br />
use it. If not, narrow the stitch down so it will fit into the foot and needle<br />
plate opening.<br />
5. Hold the thread tails and start to sew slowly to make sure the thread is<br />
passing easily through the needle eye and not hanging up on the fabric.<br />
TIP If you’re not sure about the width of the stitch hand turn the whole stitch<br />
before stitching.<br />
6. When you’re happy with the stitch, stitch slowly on the project without<br />
changing anything.<br />
7. Twin Needle TIP When purchasing twin needles buy them in two’s. If you<br />
break a needle as you’re sewing you must replace it with the exact same<br />
sized needle. A different size needle will stitch out differently and your<br />
stitching will not be the same.<br />
For more information<br />
About<br />
quilting with<br />
a twin needle,<br />
see our posts on<br />
<strong>QUILTsocial</strong>.com<br />
January 15 - 19,<br />
2018<br />
Q<br />
UILTsocial<br />
.com | issue <strong>11</strong> 53
Funky Lovebirds<br />
Bolster Pillow<br />
These fun and funky<br />
lovebirds will add a touch of<br />
whimsy to your bedroom or<br />
family room décor.<br />
Use your Brother sewing<br />
machine and ScanNCut to<br />
create this bright and happy<br />
bolster pillow.<br />
54<br />
Q<br />
54 .com| issue <strong>11</strong><br />
UILTsocial
quilting<br />
Brother THE Dream Machine XV8500D<br />
Embroidery, Sewing, Quilting, & Crafting<br />
Brother ScanNCut CM650W<br />
skill level intermediate<br />
finished measurement<br />
circumference x length 27" x 24" [69 x 61cm]<br />
materials<br />
fabric<br />
• 14” x 28” [36 x 71cm] fabric for main section of pillow<br />
• 10” x 28” [25.5 x 71cm] fabric for side sections of pillow<br />
• 10" x 10" [25.5 x 25.5cm] fabric scraps for each: birds, branch<br />
and heart<br />
• 4" x 60" [10 x 152.4cm] fabric for piping<br />
Note: Either purchased bias piping or cut bias strips of fabric to make<br />
your own<br />
• 8” x 8” [20.5 x 20.5cm] felt square<br />
notions<br />
• thread and wound bobbins<br />
• pins<br />
• rotary cutter, ruler and mat<br />
• marking tools<br />
• spray baste (optional)<br />
• 60” cording for piping<br />
• 2 pieces 14” long string<br />
• 2 round decorative buttons<br />
• 1 heart shaped button<br />
• medium tack cutting mat (CAMATM12)<br />
• scanning mat (CAMATS12)<br />
• Iron-on Fabric Appliqué contact sheet (CASTBL1)<br />
• bolster pillow form (20” long x 26” circumference)<br />
Note: Or your choice of bolster size. Fabric required and<br />
measurements will need to be adjusted depending upon size of<br />
bolster pillow.<br />
equipment<br />
• Brother Sewing Machine (any Brother sewing machine from<br />
the XV, NQ or VQ series)<br />
• zipper foot (included with the machine)<br />
• Brother ScanNCut CM650W<br />
• iron and ironing board<br />
Q<br />
UILTsocial<br />
.com | issue <strong>11</strong> 55
Designs on Scanning Mat<br />
Fabric on Scanning Mat<br />
Designs centered on fabric<br />
Attaching the piping to center panel<br />
Q<br />
56 .com| issue <strong>11</strong><br />
UILTsocial<br />
instructions<br />
Appliqué<br />
1. Place bird and branch diagram on<br />
Scanning Mat of your ScanNCut and<br />
select Scan to Cut Data.<br />
2. Save the design to the machine.<br />
3. Fuse appliqué backing to the wrong<br />
side of the fabric for birds, branch<br />
and heart.<br />
4. Position appliqué fabric to ScanNCut<br />
Medium Tack mat fabric side down.<br />
All pieces of fabric will fit on one mat.<br />
5. Recall the “Saved Design”.<br />
Note: Cut the two birds on the fabric so<br />
the fabric is RS up when the birds are<br />
facing each other. Be sure to change the<br />
number to ‘2’.<br />
6. Add a “Test Cut”.<br />
7. Load the mat.<br />
8. Scan the mat to position the cutting<br />
shapes in the desired location on<br />
the mat.<br />
9. Press cut. ScanNCut will first cut the<br />
“Test Cut”. Adjust blade setting if<br />
necessary.<br />
10. Continue to cut appliqué shapes.<br />
<strong>11</strong>. Remove cut appliqué shapes from<br />
mat and set aside.<br />
Prepare the piping<br />
1. Determine how much piping<br />
is required by measuring the<br />
circumference of the bolster pillow.<br />
Multiply by 2 and add 4”.<br />
2. Cut cord for piping to desired length.<br />
3. Cut 2½” x 60” bias strips from piping<br />
fabric the same length as piping cord.<br />
4. Place cord in the middle of the piping<br />
fabric strip.<br />
5. Place zipper foot on sewing<br />
machine and stitch close to the<br />
piping cord encasing the cord to<br />
create the piping.<br />
6. Cut covered piping in half to create 2<br />
pieces for the pillow.<br />
Prepare pillow cover<br />
1. With RS together, lay piping along<br />
the right edge of center panel. Be<br />
sure to line up the piping to the right<br />
side edges of fabric. Continue to use<br />
the zipper foot. Stitch on top of the<br />
previous line of stitching.<br />
2. Repeat steps 1 and 2 to stitch piping<br />
to the left side of the center front<br />
panel.<br />
Appliqué center panel<br />
1. Position appliqué pieces on<br />
center panel.<br />
2. Cut 2 small triangles from the<br />
remaining scrap fabric from the<br />
branch and position as beaks on<br />
the birds.<br />
3. Press in place to adhere all<br />
appliqué pieces.<br />
Free motion embroidery around the bird<br />
4. Free motion stitch around the bird,<br />
heart and branch.<br />
5. Add legs and feet to the birds.<br />
6. Stitch heart button on heart.<br />
Assemble pillow<br />
1. With RS together stitch the side panels<br />
and center panels together to form<br />
a circular tube, matching the places<br />
where the piping ends.<br />
Attaching side panels<br />
Instruction photos by Lynn Swanson
THE DREAM MACHINE 2<br />
Luxury in every detail<br />
Loaded with enhanced features, this machine lets you dream big. The perfect pick for true enthusiasts,<br />
it delivers an incomparable sewing, embroidery and quilting experience.<br />
Industry Firsts<br />
Exclusive<br />
Innoveye ® 2 technology<br />
For precise positioning.<br />
It’s like having a built-in<br />
camera and scanner.<br />
Enhanced My Design Center<br />
Easy-to-use design capabilities<br />
make your projects unique,<br />
all without a PC.<br />
Large LCD screen<br />
10.1” built-in high definition<br />
LCD screen with intuitive<br />
user interface.<br />
Disney is in our DNA<br />
Only THE Dream Machine 2<br />
has the magic of 166 Disney<br />
embroidery designs built right in.<br />
Visit your Brother authorized dealer,<br />
or go to brother.ca to discover more.<br />
Photos are for illustration purposes only. The XV8550D shown in this ad has been manufactured by Brother Industries, Ltd., under a licensing agreement with Disney Enterprise Inc., through which Brother has permission to use the Disney images.<br />
The embroidery designs built into the embroidery machine are for personal use within the home only and may not be used for business or industrial purposes. Brother and its logo are trademarks of Brother Industries, Ltd., Japan. All specifications are<br />
subject to change without notice. All registered trademarks referenced herein are the property of their respective companies. The Best Buy Seal and other licensed materials are registered certification marks and trademarks of Consumers Digest<br />
Communications, LLC, used under license. For award information visit ConsumersDigest.com. ©2018 Brother International Corporation (Canada) Ltd. 1, rue Hôtel de Ville, Dollard-des-Ormeaux, Québec, H9B 3H6. ©Disney 04/2018_18-0038<br />
57
2. Turn under ¼” at each end of the side<br />
panels and press. Then turn under 1”<br />
along long edge of both side panels<br />
and press. Stitch 7⁄8” from the edge to<br />
stitch hem in place; then stitch ½”<br />
from edge to form a channel.<br />
3. Thread cord through the channels<br />
created at each end of the bolster<br />
pillow to create a drawstring.<br />
4. Slip pillow form into the pillow tube.<br />
5. Pull the drawstring together to close<br />
the gap at one end of the pillow.<br />
Securely tie a knot.<br />
6. Insert pillow form into pillow case.<br />
7. Repeat steps 4 and 5 at the other end<br />
of the pillow case.<br />
8. Cut two circles from the felt<br />
(approximately 3” wide in order to<br />
cover the drawstring opening on<br />
each end)<br />
9. Stitch a button to the center of each<br />
of the 2 felt circles.<br />
10. Position felt circle over each end of<br />
the pillow where it has been drawn<br />
together.<br />
<strong>11</strong>. Hand stitch in place.<br />
12. ENJOY!<br />
Lynn Swanson<br />
Brother Educator<br />
Western Canada<br />
www.brother.ca<br />
Q<br />
58 .com| issue <strong>11</strong><br />
UILTsocial
Dual Duty XP® combines superior strength & durability<br />
with a smooth finish for trouble-free sewing.<br />
DUAL DUTY XP®<br />
The "Xtra Performance" All Purpose Thread.<br />
World’s leading thread company for over 200 years.<br />
makeitcoats.com<br />
15-020 © 2015 Coats & Clark. All rights reserved. Coats & Clark is a registered trademark.<br />
59
Wedding Memories<br />
designing and stitching<br />
Q<br />
60 .com| issue <strong>11</strong><br />
UILTsocial<br />
a wedding wallhanging
machine embroidery<br />
PFAFF® creative icon machine with extension table<br />
This is a very creative way to<br />
commemorate the wedding of<br />
a loved-one. You can make it<br />
as it is suggested here, or add<br />
more embroidery to match the<br />
desired look. Use an embroidery<br />
machine and PREMIER+ 2<br />
Embroidery Software to match<br />
your unlimited creativity.<br />
PREMIER+ 2 Embroidery software<br />
skill level Intermediate<br />
finished measurements 19” x 19” [48 x 48cm]<br />
materials<br />
fabric<br />
• 24” [61cm] square fabric for background<br />
• 12” x length of fabric [30.5cm x length of fabric] strip of<br />
fabric for border<br />
• 12” x length of fabric [30.5cm x length of fabric] strip of<br />
fabric for binding<br />
• 24” [61cm] square fusible batting<br />
• 24” [61cm] square fabric for backing<br />
sewing feet used<br />
• 0A Sewing foot<br />
• 1A Decorative foot<br />
• 6D Dynamic Embroidery foot<br />
software<br />
• PREMIER+ 2 ULTRA Embroidery System<br />
needles<br />
• size 90 Topstitch needle<br />
• size 80 Universal needle<br />
threads<br />
• assorted colours of Robison-Anton® 40wt Rayon thread<br />
• 60wt bobbin thread<br />
• sewing thread<br />
stabilizers<br />
• INSPIRA Tear Away Stabilizer<br />
other<br />
• embroidery machine – the PFAFF® creative icon was used<br />
to make the sample<br />
• creative Grand Dream Hoop 360mm x 350mm<br />
• creative Quilter’s Hoop 200mm x 200mm<br />
• rotary ruler cutter and mat<br />
• Sewing Revolution 17” Block Marker or other square ruler<br />
• water soluble marker<br />
• Mary Ellen’s Best Press<br />
• INSPIRA scissors<br />
Q<br />
UILTsocial<br />
.com | issue <strong>11</strong> 61
instructions<br />
Preparation<br />
1. Fuse the background fabric to the fusible batting.<br />
2. Cut the border strips 3” wide by the length of the fabric.<br />
3. Spray and press the border strips with Mary Ellen’s Best<br />
Press several times so they are a bit stiff.<br />
4. Cut the binding strips 3” wide.<br />
5. Press the binding strips in half lengthwise.<br />
6. Mark the vertical and horizontal centerlines on the 24”<br />
background fabric.<br />
Creating the embroidery<br />
1. Open PREMIER+ 2 ULTRA Embroidery System.<br />
2. Click on the PREMIER+ 2 Embroidery icon.<br />
3. Click on Change Hoop on the top Toolbar.<br />
4. In the Hoop Group select PFAFF® creative icon.<br />
5. Click on Enter Hoop Size and enter 350mm x 350mm. Click<br />
Ok. This will be our working size for our project.<br />
6. Click on the SuperDesign Tab. Select Category Hearts.<br />
7. Click on #9 Doves.<br />
8. Change the size to 150mm.<br />
9. Click Apply.<br />
10. If the doves are not in the center of the hoop, click on<br />
the Home Tab. Then click on Alignment and click on<br />
Center in Hoop.<br />
<strong>11</strong>. Click on #3 the Hearts with the Arrows.<br />
12. Change the size to 55mm. Click Apply.<br />
13. Click the arrow on the left of the Selection Box to mirror the<br />
design side to side.<br />
14. Click on the Encore Tab.<br />
15. Select the Line option, the Mirror option and Straight Line.<br />
16. Change the Repeats to 2. Click Preview.<br />
17. Click inside the box and move it to the top of the hoop and<br />
center on the vertical centerline.<br />
18. Click on the white box on the right side and pull it across<br />
the screen just inside the edges of the hoop. Click Apply.<br />
19. Click on the Home Tab.<br />
20. Click on Copy and click on Paste.<br />
21. Click on Rotate 45 4 times so that the design is mirrored to<br />
the top one.<br />
22. Click inside the box and move it to the bottom of the hoop<br />
and center on the vertical centerline.<br />
23. Click on the SuperDesign Tab. Click on #3 the Hearts with<br />
the Arrows.<br />
24. Click Apply.<br />
25. Click on the Home Tab.<br />
26. Click on Rotate 45 six times so that the design is sideways<br />
with the heart tips facing the center of the block.<br />
27. Click on the Encore Tab.<br />
28. Select the Line option, the Mirror option and Straight Line.<br />
29. Change the Repeats to 2. Click Preview.<br />
30. Click on the white box at the side and pull it across the<br />
center of the quilt to just inside the edges of the hoop.<br />
Click Apply.<br />
31. Click inside the box and move it to the center of the hoop.<br />
32. Click on the Letter Tab.<br />
33. Click on the down arrow and scroll to the Font Category.<br />
Select Nimbus 15-45.<br />
34. Change the size to 25mm. Click Apply.<br />
35. Type “Marriage of” and click Apply.<br />
36. Move the lettering to the top of the screen about 3 grids<br />
from the top and centered on the vertical line.<br />
37. Change the size to 28mm.<br />
38. Type the Bride’s name. Click Apply. If the lettering is too big<br />
make the lettering size smaller by 2mm.<br />
39. Move the lettering to about 2 grids above the Doves and<br />
centered on the vertical centerline.<br />
40. Type the Groom’s name. Click Apply.<br />
41. Move the lettering to about 2 grids under the Doves and<br />
centered on the vertical centerline.<br />
42. Change the size to 25mm.<br />
43. Type the wedding date. Click Apply.<br />
44. Move the lettering to about 2 grids above the lower edge of<br />
the hoop.<br />
45. Click on File Menu and then click Save As and save it as<br />
Wedding Memories.vp4. This saves it as a working file so<br />
that it can be edited anytime.<br />
46. When stitching in a large turnable hoop the designs are split<br />
into two pieces. We do not want the Doves to be split so we<br />
will stitch them after the lettering and hearts in a 200mm x<br />
200mm hoop. Therefore, we need to create a separate file<br />
for the Doves.<br />
47. Click on the Doves and click Cut.<br />
48. Click on the File Menu.<br />
49. Click on New Window.<br />
50. Click on Paste.<br />
51. Click on the File Menu.<br />
52. Click on Export and export as Doves.vp3.<br />
53. Close the window.<br />
54. Now we are back in our original design window with<br />
the hearts and lettering. Click on Change Hoop on the<br />
top toolbar.<br />
55. In the Hoop Group select PFAFF® creative icon with Natural<br />
Orientation.<br />
56. Select the 350mm x 360mm creative Grand Dream Hoop.<br />
57. Click on the File Menu and click on Export and name the file<br />
Wedding Memories.vp3.<br />
58. This file is ready to be stitched in the creative Grand<br />
Dream hoop.<br />
Set up your machine for embroidery<br />
1. Attach the 6D Dynamic Embroidery foot.<br />
2. Insert size 90 Top Stitch needle.<br />
3. Attach the embroidery unit.<br />
4. Thread with Robison-Anton® 40wt Rayon thread on top and<br />
60wt bobbin thread on the bottom.<br />
Q<br />
62 .com| issue <strong>11</strong><br />
UILTsocial<br />
Instruction photos by Kerrin Brookes
Embroidering the design in the creative Grand Dream Hoop (350mm x<br />
360mm) and creative Quilter’s Hoop (200mm x 200mm)<br />
1. Place INSPIRA Tear Away Stabilizer under the 24” square of background<br />
fabric.<br />
2. Center and hoop the background fabric using the center markings in the<br />
creative Grand Dream Hoop.<br />
3. Stitch according to the directions for the creative Grand Dream hoop.<br />
4. Remove from the creative Grand Dream hoop.<br />
5. Center and hoop the background fabric in the creative Quilter’s Hoop using<br />
the center markings.<br />
6. Stitch the doves.<br />
Construction<br />
1. Center the Sewing Revolution 17” Ruler on the embroidered wallhanging.<br />
2. Draw a square around the Sewing Revolution 17” Ruler with the water soluble<br />
marker.<br />
3. Cut 2 – 3” x 17” border strips.<br />
4. Place the strip on the side of the embroidered wallhanging with the edges<br />
just touching the marked line.<br />
5. On the PFAFF® creative icon, select the Sewing option.<br />
6. Select one of the Floating stiches.<br />
7. Thread with Robison-Anton® 40wt Rayon thread.<br />
8. Attach the 1A foot and engage the IDT.<br />
9. Place the edge of the foot along the edge of the border strip. Stitch the<br />
selected Floating stitch.<br />
10. Open out the seam to see the beautiful Floating stitches.<br />
<strong>11</strong>. Repeat on the opposite side.<br />
12. Cut 2 – 3” x 22” border strips.<br />
13. Stitch the border strips on the top and bottom with the Floating stitches.<br />
14. Square up the wallhanging and trim away any excess fabric.<br />
15. Tear away the stabilizer.<br />
16. Pin the backing to the back of the wallhanging.<br />
17. Quilt as desired.<br />
18. Stitch on the binding using your favourite method.<br />
Kerrin Brookes<br />
Sewing and Software Specialist, SVP Canada Inc.<br />
www.pfaff.com<br />
PFAFF, CREATIVE, CREATIVE ICON, PREMIER + and INSPIRA<br />
are trademarks of SingerSourcing Limited LLC,<br />
©2017 Singer Sourcing Limited LLC.<br />
Place the edge of the foot along the edge of the<br />
border strip.<br />
Stitching the selected Floating Stitch with IDT<br />
System engaged<br />
When the seam is opened, the Floating Stitches are revealed.<br />
Q<br />
UILTsocial<br />
.com | issue <strong>11</strong> 63<br />
63
KETAN, pronounced “kay-tan”,<br />
is colourful, holiday rice from<br />
Indonesia. Ketan is offered in<br />
an array of colours for every<br />
Indonesian celebration and is<br />
always the food staple that mixes<br />
perfectly into any meal. The<br />
rice motif and its multitude of<br />
colours are the inspiration for<br />
Banyan Batiks’ mixer program.<br />
Similar to the colourful, holiday<br />
rice in Indonesian culture,<br />
Banyan Batiks’ Ketan fabrics<br />
mix perfectly into any batik<br />
project. With a range of 80<br />
beautiful colours to choose<br />
from, this mixer program acts<br />
as the perfect complement<br />
in every quilt project.<br />
Flash of<br />
Flamingo<br />
Quilt<br />
Q<br />
64 .com| issue <strong>11</strong><br />
UILTsocial
skill level easy<br />
finished measurements<br />
62” x 74” [157.5 x 188cm]<br />
materials<br />
fabric<br />
Fabrics from Ketan by Banyan Batiks<br />
(a division of Northcott):<br />
• 2yd [1.83m] – pink contrast 81000-282<br />
Cut 14 strips measuring 2½” x wof<br />
»»<br />
Sub cut 148 rectangles measuring<br />
2½” x 3½”<br />
Cut 4 strips measuring 3½” x wof<br />
(outer side border)<br />
Cut 7 strips measuring 2½” x WOF<br />
for the binding. Join end to end<br />
using a diagonal seam.<br />
• 3yd [2.8m] – blues/greens for the strips<br />
(81000-715, 81000-732, 81000-710,<br />
81000-612, 81000-782, 81000-625,<br />
81000-433, 81000-633, 81000-627,<br />
81000-621, 81000-467, 81000-465)<br />
Cut 148 rectangles measuring<br />
2½” x <strong>11</strong>½”<br />
• 4yd [3.7m] – backing<br />
pieced crosswise<br />
other<br />
• matching thread<br />
• rotary cutter<br />
• cutting mat<br />
• ruler<br />
• pin<br />
quilting<br />
Instructions<br />
Assembly<br />
1. Join a pink rectangle to each of the<br />
blue/green rectangles. 148 units total.<br />
2. Divide these units into four groups of 37.<br />
3. Place the units on the design wall in<br />
FOUR columns, alternating the end with<br />
the pink.<br />
4. Sew the units into columns. To make it<br />
easy to assemble, press the seams in the<br />
1st and 3rd column UP and the seams in<br />
the 2nd and 4th column DOWN.<br />
Outer side border<br />
1. Join two strips of the 3½” pink border on<br />
the diagonal. Do this twice to get two<br />
lengths of fabric for the outer border.<br />
2. Cut TWO pieces of fabric that equal<br />
the vertical length of the quilt (take<br />
the measurement through the vertical<br />
center of the quilt).<br />
3. Match the center of the outer side<br />
border to the side center of the quilt<br />
and pin.<br />
4. Match the ends of the outer side border<br />
to both ends of the quilt and pin. You<br />
may have to ease the border or the quilt.<br />
5. Sew the seams.<br />
6. Press toward the border.<br />
Banyan Batiks’<br />
Ketan fabrics<br />
mix perfectly<br />
into any batik<br />
project.<br />
Elaine Theriault<br />
www.northcott.com<br />
Q<br />
UILTsocial<br />
.com | issue <strong>11</strong> 65
<strong>QUILTsocial</strong> bloggers<br />
in this issue<br />
Julie Plotniko<br />
juliesquiltclass.blogspot.com<br />
Julie Plotniko is a quilting teacher,<br />
blogger and designer from Vancouver<br />
Island in British Columbia, Canada.<br />
Teaching for almost 40 years, recent<br />
credits include Quilt Canada 2016<br />
and 2017, many quilt guilds and<br />
groups throughout Canada and<br />
CreativFestival Sewing and Craft<br />
Shows in Victoria, Abbotsford and<br />
Toronto. When not on the road Julie<br />
works and teaches at Snip & Stitch<br />
Sewing Center in Nanaimo, BC. Her<br />
favorite things include free motion<br />
quilting (standard bed and midarm<br />
machines), precision piecing,<br />
scrap quilting, machine embroidery,<br />
blogging, designing and of course<br />
teaching. Julie believes that to<br />
see a student go from tentative<br />
beginnings to having confidence in<br />
themselves and their abilities is one<br />
of the greatest rewards that life has<br />
to offer.<br />
Christine Baker<br />
FairfieldRoadDesigns.com<br />
Christine has been designing and<br />
publishing quilt patterns for the<br />
last 10 years under the business<br />
name Fairfield Road Designs.<br />
Her patterns range from fusible<br />
applique and piecing to felted wool<br />
applique and punchneedle. You can<br />
see all her patterns on her website.<br />
Paul Léger<br />
paullegerquilts.com<br />
I took my first quilting course in<br />
September 1994 in Barrie, Ontario,<br />
near the armed forces base where<br />
I was stationed. After moving to<br />
Ottawa in 1996, I joined my first<br />
guild. I took more courses and<br />
began to buy quilting books and<br />
lots of fabrics. Quilting has become<br />
my passion. I have made over 150<br />
more quilts since then, and have<br />
never looked back. I now share my<br />
knowledge of quilting by teaching<br />
and doing presentations, and<br />
blogging!<br />
Claire Haillot<br />
quiltingwithclaire.com<br />
Married with three young boys,<br />
Claire Haillot shares her passion<br />
for quilting among her neighbors<br />
in the United States and<br />
Canada as well as her cousins in<br />
France. Claire has been active<br />
in the quilting industry since<br />
2004. In 2006, she started her<br />
own line of patterns and later<br />
began publishing patterns and<br />
articles in Canadian, European<br />
and American magazines. She<br />
collaborated with PlumEasy<br />
patterns to launch the Dancing<br />
Diamonds. Claire has also won<br />
a few awards for her work. Most<br />
recently her quilt Remembering<br />
Sotchi won Best of Show in<br />
special exhibit A Celebration of<br />
Color at the International Quilt<br />
Festival in Chicago April 2018.<br />
Q<br />
66 .com| issue <strong>11</strong><br />
UILTsocial
You’ll fall for Stonehenge Maplewood, the stunning new autumn-inspired collection by Helen Knott and<br />
Linda Ludovico! The exquisitely detailed panel print is complemented with a variety of full width ombre<br />
leaf prints, patterns and textures. Maplewood comes in two beautiful colorways: Scarlet emphasizes autumn<br />
golds,rich oranges, and burnt red maple leaves, and Woodland features crisp forest greens, teals, and creams.<br />
View the entire collection and all of the patterns at www.northcott.com and use the<br />
product finder tool to locate a shop near you that carries this line.<br />
Quilt shown: Maplewood Trail • 64 1/2” x 64 1/2” • By Daphne Greig of Patchworks Studio<br />
67
don't miss these<br />
projects & tutorials online!<br />
Q<br />
UILTsocial<br />
.com<br />
Quilting<br />
farmyard fun pot<br />
holders for the<br />
kitchen<br />
READ NOW<br />
READ NOW<br />
READ NOW<br />
Creativity with a leftover<br />
Banyan Batik block<br />
and there's so much more!<br />
Piecing & quilting the boho<br />
inspired quilted cushion cover<br />
68
69
BUSINESS DIRECTORY To list your business in this space please call 1.866.969.2678.<br />
Brenda Franklin Designs<br />
7570 Mapleton SR 18 RR 1, Alma, ON N0B 1A0<br />
519.638.9958 bfdesigns.on.ca<br />
help@bfdesigns.on.ca<br />
More than 500 charts available for counted<br />
needlework, latch hook rugs, beadwork, beaded<br />
knits and knitting patterns. Mail/fax order or ask<br />
for our products at your local shop. Contact us for<br />
custom designs or needle felted sculpture.<br />
Brampton Sew & Serge<br />
289 Rutherford Rd S, Unit 7, Brampton, ON L6W 3R9<br />
905.874.1564 sewnserge.com<br />
monique@bramptonsewnserge.com<br />
Welcome to Your One Stop Sewing Centre! We are<br />
authorized dealers of Baby Lock, Husqvarna Viking,<br />
and Singer sewing machines and sergers. We also<br />
offer a full schedule of sewing classes for everyone.<br />
Bytowne Threads - Ottawa, ON<br />
1.888.831.4095 bytownethreads.com<br />
mlj@bytownethreads.com<br />
Featuring Aurifil thread from Italy. Long staple<br />
Egyptian cotton threads - 270 colours in 12, 28, 40<br />
and 50 wt; 88 colours in 80 wt. Polyester Aurilux -<br />
240 high sheen colours. Wool threads - 192 colours.<br />
Many kits available. Check our website!<br />
Canadian National Fabric - Melancthon, ON<br />
https://canadiannationalfabric.com/<br />
info@canadiannationalfabric.com<br />
We are an online fabric shoppe offering a wide<br />
variety of fabrics, patterns, books and notions for all<br />
your sewing needs. Flat rate Canada wide shipping<br />
of $5 with FREE SHIPPING for orders over $75. Shop<br />
in person available by appointment!<br />
Country Concessions<br />
1 Dufferin St, Cookstown, ON L0L 1L0<br />
705.458.4546 or toll-free 1.888.834.4407<br />
countryconcessions.com<br />
info@countryconcessions.com<br />
Visit our lovely and unique quilt shop in the quaint<br />
village of Cookstown. We have over 7000 bolts of<br />
cotton fabrics plus a wide selection of patterns, books<br />
& notions. You will be so glad you came for a visit.<br />
Gitta's<br />
271 Lakeshore Rd E, Mississauga, ON L5G 1G8<br />
905.274.7198 gittas.com<br />
questions@gittas.com<br />
Gitta's, named after owner Gitta Al-Basi, nestled in<br />
the east village of Port Credit, is the place where<br />
stitchers meet with their stitching friends, shop for<br />
stitching supplies and see the new stitching designs<br />
from Europe and the United States.<br />
Hardanger House, designs by Betty Stokoe<br />
PO Box 1223, Stettler, AB T0C 2L0<br />
403.742.2749 bettystokoe@gmail.com<br />
tnplisting.com/hardanger-house.html<br />
Hardanger embroidery charts and kits. Designs<br />
feature contemporary adaptations of this traditional<br />
cutwork embroidery from Norway. Shop online<br />
at etsy.com/shop/HardangerHouse. Some digital<br />
downloads available.<br />
Haus of Stitches<br />
626 Main Street, Humboldt, SK S0K 2A0<br />
306.682.0772 or toll-free 1.800.344.6024<br />
hausofstitches.ca<br />
Our one of a kind store offers everything you need<br />
for sewing, quilting, knitting, rug hooking and<br />
needlework. Authorized dealers for Janome and Elna.<br />
Heartfelt Fibre Arts<br />
42 Industrial St, Toronto, ON M4G 1Y9<br />
647.920.3616 heartfeltfibrearts.com<br />
info@hearftfeltfibrearts.com<br />
Canadian Fibre Arts supply store specializing in<br />
high-quality, unique fibre and tools for all of your<br />
knitting, felting, rug hooking and stitching needs.<br />
Q<br />
70 .com| issue <strong>11</strong><br />
UILTsocial<br />
Impressions Embroidery & Engraving<br />
#8-449 Mayor Magrath Dr S, Lethbridge, AB T1J 3L8<br />
403.942.3934 impressionslethbridge.ca<br />
impressions22@shaw.ca<br />
Our shop does embroidery and laser engraving.<br />
Laser engraving is a beautiful process for fabric,<br />
as nothing cuts cleaner and more precisely than a<br />
laser. We now carry a nice array of fabric as well to<br />
compliment the abilities of the laser.<br />
Kelly's Creative Sewing<br />
804 Main St, Dartmouth, NS B2W 3V1<br />
902.435.7380 kellyscreativesewing.ca<br />
kellyscreativesewing@gmail.com<br />
We offer sales and on-site service of high-end<br />
domestic embroidery, sewing machines and sergers,<br />
as well as a variety of educational programs.<br />
Needles & Knits<br />
15040 Yonge St, Aurora, ON L4G 1M4<br />
905.713.2066 needlesandknits.com<br />
Fabulous selection of yarns. Extremely<br />
knowledgable and expert help. Cozy and friendly<br />
atmosphere. Classes. Guild night every first Tuesday<br />
of the month. Tea with Tove, the owner, every<br />
Thursday from 6-8pm.<br />
Needleworker's Delight / Silkweaver Fabrics<br />
Plaza K 181 Route 1 South, Metuchen, NJ 08840<br />
732-388-4545 needleworkersdelight.com<br />
info@needleworkersdelight.com<br />
Standard & specialty Zweigart Fabrics & canvas,<br />
hand-dyed fabrics, floss, fibers, towels, tableware,<br />
leaflets/designs, painted canvases, notions, tools,<br />
baby items, home decor, and so much more!<br />
Pine Ridge Knit & Sew<br />
17477 Hwy 2 PO Box 68, Trenton, ON K8V 5R1<br />
613.392.1422 pineridgeknitsew.com<br />
yvette@pineridgeknitsew.com<br />
We have knitting machines by Artisan and Silver<br />
Reed, embroidery machines by Husqvarna/Viking<br />
& White. Sewing notions and supplies, books and<br />
software. Hands-on lessons and classes. Wide variety<br />
of yarns, threads, dress and pant zippers.<br />
Ruby Pearl Quilts<br />
500 King St W, Suite 8, Oshawa, ON L1J 2K9<br />
905.436.3535 rubypearlquilts.com<br />
joy@rubypearlquilts.com<br />
We are your full service source of professional quilting<br />
equipment, products, & courses. Led by 44 years of<br />
sewing experience & more than 20 years of quilting<br />
experience, we have the experience necessary to help<br />
you push your hobby to the next level!<br />
Serenity Knits<br />
525 Brooker Ridge #102, Newmarket, ON L3X 2M2<br />
905.710.3283 serenityknits.ca<br />
info@serenityknits.ca<br />
We offer a wide selection of high quality yarns as well<br />
as needles, hooks, patterns and notions. We also offer<br />
a large variety of classes from beginner to the more<br />
advanced.<br />
Sew Fancy Inc.<br />
Guelph, ON<br />
519.824.4127 sewfancy.com<br />
sales@sewfancy.com<br />
Your Premier Canadian Source for Specialty Sewing<br />
Supplies including Smocking, Heirloom Sewing,<br />
Goldwork, Silk Ribbon Embroidery, Needle Tatting,<br />
Swarovski Crystals, Sashiko, Quilting and more. Visit<br />
the website for the latest in sewing supplies.<br />
Sew Inspired<br />
375 Daniel St S, Arnprior, ON K7S 3K6<br />
613.623.0500 sewinspired.ca<br />
info@sewinspired.ca<br />
Your Ottawa Valley PFAFF® Authorized Dealer. We<br />
have a large supply of quilting & sewing supplies,<br />
knitting supplies, as well as in stock PFAFF® sewing<br />
machines. We also have a listing of sewing and<br />
quilting classes.<br />
Sew With Vision<br />
480 Parkland Dr, Halifax, NS B3S 1P9<br />
902.479.2227 sewwithvision.net<br />
Authorized PFAFF, HUSQVARNA VIKING, and SINGER<br />
dealer and service provider offering an extensive<br />
line of sewing, embroidery and serger machines, as<br />
well as long-arm quilting systems.<br />
That Sewing Place<br />
16610 Bayview Ave #10, Newmarket, ON L3X 1X3<br />
905.715.7725 thatsewingplace.ca<br />
jaret&liana@thatsewingplace.ca<br />
Introducing That Sewing Place as your sewing<br />
source and Authorized Dealers for Bernina and<br />
Brother machines. Jaret & Liana focus on placing<br />
your sewing needs first, providing outstanding<br />
support, service, and training.<br />
The Quilt Store / Evelyn's Sewing Centre<br />
17817 Leslie St, Unit 40, Newmarket, ON L3Y 8C6<br />
905.853.7001 or toll-free 1.888.853.7001<br />
The Quilt Store West<br />
695 Plains Rd E, Unit 6, Burlington, ON L7T 2E8<br />
905.631.0894 or toll-free 1.877.367.7070<br />
thequiltstore.ca<br />
Now with 2 locations to serve you, we are your Quilt<br />
Store Destination! The staff here at The Quilt Store<br />
is always on hand to provide Quilt Wisdom, Quilt<br />
Inspiration and most of all we pride ourselves as the<br />
place to make... All Your Quilt Dreams Come True!<br />
The Stitcher's Muse<br />
99 Commercial Street, Nanaimo, BC V9R 5G3<br />
250.591.6873 thestitchersmuse.com<br />
info@thestitchersmuse.com<br />
A divine little shop with supplies for all your hand<br />
stitching needs! Friendly, knowledgeable, helpful<br />
staff. Cross stitch, canvaswork, needlepoint,<br />
embroidery, counted thread, lace making and<br />
more. Books, patterns, fabric, threads, tools.<br />
The Yarn Guy<br />
15 Gower St, Toronto, ON M4B 1E3<br />
416.752.1828 or toll-free 1.800.836.6536<br />
theyarnguy.com info@sewknit.ca<br />
See us on Facebook, follow us on Twitter!<br />
Knitting machines, sewing machines, repairs, parts<br />
for Passap, Studio, Singer, Silver Reed, Superba,<br />
White. Sewing notions and supplies, books, ball<br />
yarns, coned yarns, TAMM yarns, Paton's yarns,<br />
Bernat yarns, Phentex yarns, Bernat kits & crafts.<br />
Ultimate Sewing Centre<br />
191 Bloor St East, Oshawa, ON L1H 3M3<br />
905.436.9193 ultimatesewing.com<br />
ultimatesewing@bellnet.ca<br />
For all your sewing needs be sure to call Durham’s<br />
largest one stop shop: Janome and Elna Sewing<br />
Machines, Sergers, & Embroidery machines,<br />
over 3000 bolts of first quality cottons, Floriani<br />
Embroidery supplies, the latest notions, books, &<br />
patterns, year round classes, and so much more!<br />
Upper Canada Quiltworks<br />
PO Box 64, Brockville, ON K6V 5T7<br />
613.345.3956 Fax: 613.342.3327<br />
uppercanadaquiltworks.com<br />
Visit us online for a wide selection quilt patterns<br />
and books. Techniques include felted wool, fusible<br />
appliqué, punchneedle, rag quilting and printing<br />
photos on fabric.
Get more quilting fun in<br />
A NEEDLE PULLING THREAD<br />
QUILT SEW KNIT CROCHET CROSS STITCH EMBROIDER HOOK RUGS<br />
A NEEDLE PULLING THREAD<br />
A Needle Pulling Thread<br />
QUILT SEW KNIT CROCHET CROSS STITCH EMBROIDER HOOK RUGS<br />
2018 <strong>Issue</strong> 47<br />
84<br />
The Beauty of<br />
Texture<br />
Surface Honeycomb Stitch<br />
60<br />
16<br />
30<br />
Exploring<br />
painting<br />
&<br />
needlework<br />
Thoughtful Soles<br />
Wiggle Room socks<br />
Volume 13 <strong>Issue</strong> 2<br />
Artist Reviews<br />
with<br />
Lise Belanger<br />
Claire Haillot<br />
Make<br />
H<br />
& Be<br />
appy!<br />
Visit www.ANPTmag.com to order!<br />
Click on the cover to<br />
see the FREE sampler


