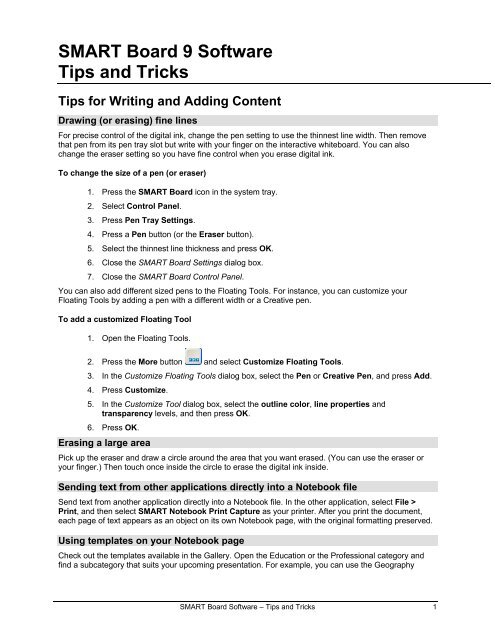
SMART Board 9 Software Tips and Tricks
SMART Board 9 Software Tips and Tricks
SMART Board 9 Software Tips and Tricks
You also want an ePaper? Increase the reach of your titles
YUMPU automatically turns print PDFs into web optimized ePapers that Google loves.
<strong>SMART</strong> <strong>Board</strong> 9 <strong>Software</strong><br />
<strong>Tips</strong> <strong>and</strong> <strong>Tricks</strong><br />
<strong>Tips</strong> for Writing <strong>and</strong> Adding Content<br />
Drawing (or erasing) fine lines<br />
For precise control of the digital ink, change the pen setting to use the thinnest line width. Then remove<br />
that pen from its pen tray slot but write with your finger on the interactive whiteboard. You can also<br />
change the eraser setting so you have fine control when you erase digital ink.<br />
To change the size of a pen (or eraser)<br />
1. Press the <strong>SMART</strong> <strong>Board</strong> icon in the system tray.<br />
2. Select Control Panel.<br />
3. Press Pen Tray Settings.<br />
4. Press a Pen button (or the Eraser button).<br />
5. Select the thinnest line thickness <strong>and</strong> press OK.<br />
6. Close the <strong>SMART</strong> <strong>Board</strong> Settings dialog box.<br />
7. Close the <strong>SMART</strong> <strong>Board</strong> Control Panel.<br />
You can also add different sized pens to the Floating Tools. For instance, you can customize your<br />
Floating Tools by adding a pen with a different width or a Creative pen.<br />
To add a customized Floating Tool<br />
1. Open the Floating Tools.<br />
2. Press the More button <strong>and</strong> select Customize Floating Tools.<br />
3. In the Customize Floating Tools dialog box, select the Pen or Creative Pen, <strong>and</strong> press Add.<br />
4. Press Customize.<br />
5. In the Customize Tool dialog box, select the outline color, line properties <strong>and</strong><br />
transparency levels, <strong>and</strong> then press OK.<br />
6. Press OK.<br />
Erasing a large area<br />
Pick up the eraser <strong>and</strong> draw a circle around the area that you want erased. (You can use the eraser or<br />
your finger.) Then touch once inside the circle to erase the digital ink inside.<br />
Sending text from other applications directly into a Notebook file<br />
Send text from another application directly into a Notebook file. In the other application, select File ><br />
Print, <strong>and</strong> then select <strong>SMART</strong> Notebook Print Capture as your printer. After you print the document,<br />
each page of text appears as an object on its own Notebook page, with the original formatting preserved.<br />
Using templates on your Notebook page<br />
Check out the templates available in the Gallery. Open the Education or the Professional category <strong>and</strong><br />
find a subcategory that suits your upcoming presentation. For example, you can use the Geography<br />
<strong>SMART</strong> <strong>Board</strong> <strong>Software</strong> – <strong>Tips</strong> <strong>and</strong> <strong>Tricks</strong> 1
category to add maps to your page, or use the financial formulas that are available in the Strategy<br />
subcategory.<br />
Drag a template from the Gallery onto the Notebook page to make it appear on a new page. Any notes<br />
that you make appear over the template images.<br />
You can create your own template <strong>and</strong> add it to the Gallery. Lay out your Notebook page the way you<br />
want the template to appear. This could include locking objects in place. Then open the Gallery tab <strong>and</strong><br />
select the My Content category. Press the Add/Import button <strong>and</strong> select Add Current Page to Gallery.<br />
Adding objects to the Gallery in Notebook software<br />
You can add images from your Notebook page to the Gallery by dragging the image from the page onto<br />
the Gallery tab.<br />
To add Flash files, press the Add/Import button in the Gallery <strong>and</strong> select Import Flash File. Navigate to<br />
the file <strong>and</strong> press Open.<br />
Using the different <strong>SMART</strong> Keyboard views<br />
At the interactive screen, you can use a specific view in the <strong>SMART</strong> Keyboard to add typed text or<br />
numbers to your active application. For example, if you’re adding numbers to a document, select the<br />
Number Pad view <strong>and</strong> press the virtual keys. Or if you’re teaching beginner spellers, they might find it<br />
easier to type with the Simple view, where the keys are in alphabetical order.<br />
Presenting <strong>Tips</strong><br />
Accessing frequently used programs from the Start Center<br />
Access a program at the interactive screen by adding a Start Center button that launches it. You can<br />
have up to 11 buttons on the Start Center.<br />
To add a button to the Start Center<br />
1. Press the Start Center’s More button <strong>and</strong> select Customize Start Center.<br />
2. In the Customize Start Center dialog box, press Browse.<br />
3. In the Open dialog box, navigate to the program’s .exe file <strong>and</strong> press Open.<br />
A button for that program appears in the Current Toolbar list.<br />
4. Press OK.<br />
Presenting with Notebook software<br />
Create your presentation for an upcoming meeting in Notebook software on any computer that has<br />
<strong>SMART</strong> <strong>Board</strong> software installed. Drag content, including Flash files, from the Gallery onto your Notebook<br />
page. Then store this file somewhere accessible to you when you’re at the <strong>SMART</strong> product. This might be<br />
a network drive or a CD.<br />
When you’re presenting, use the Full Screen view to maximize the Notebook page’s workspace. You can<br />
further customize the screen by moving the side tabs to the other side of the screen <strong>and</strong> the toolbar to the<br />
bottom of the screen.<br />
E-mail the meeting notes to all participants by pressing File > Send To > Mail Recipient. You can also<br />
print them by pressing File > Print.<br />
2 <strong>SMART</strong> <strong>Board</strong> <strong>Software</strong> – <strong>Tips</strong> <strong>and</strong> <strong>Tricks</strong>
Presenting with <strong>SMART</strong> <strong>Board</strong> Tools<br />
Use the Magnifier tool to make small screen areas easier to see.<br />
Use the Screen Shade to cover your screen until you’re ready to reveal it to your audience. Then drag it<br />
from any side.<br />
Use the Spotlight to focus the audience’s attention on a particular area of your screen.<br />
Use the Pointer Tool from the Floating Tools to point out important areas of your screen.<br />
Use LinQ software to share a presentation file from your laptop with the meeting room’s <strong>SMART</strong> product<br />
without connecting any cables. To do this, your laptop must be connected to the same network as the<br />
<strong>SMART</strong> product.<br />
To share your file on the interactive product<br />
1. At the interactive screen, open the <strong>SMART</strong> <strong>Board</strong> Control Panel <strong>and</strong> select Mobile <strong>and</strong><br />
Wireless Device Settings.<br />
2. In the Mobile <strong>and</strong> Wireless Device Settings dialog box, select Start the Mobile Device<br />
Manager <strong>and</strong> press OK.<br />
3. At your laptop, install LinQ software from the <strong>SMART</strong> <strong>Board</strong> software CD.<br />
4. At your laptop, double-press the LinQ icon to open it.<br />
5. In the Connect dialog box, type your name <strong>and</strong> select the <strong>SMART</strong> product from the list.<br />
6. Press Connect.<br />
7. When you’re ready to share your presentation file with the group, press Share Desktop.<br />
Saving your presentation as a video<br />
Before you begin your presentation, open <strong>SMART</strong> Recorder <strong>and</strong> press the Record button. When you<br />
finish presenting, press the Stop button in <strong>SMART</strong> Recorder. You’ve just created a video file that shows<br />
everything you did at the interactive screen during your presentation. If your setup includes a microphone,<br />
this file will also contain your narration.<br />
You can play back this file using <strong>SMART</strong> Video Player.<br />
PowerPoint navigation shortcuts<br />
Navigate in your PowerPoint slide show by using the arrow buttons on the toolbar or by touching twice on<br />
the screen. To advance one slide, make your second press to the right of the first. To go back one slide,<br />
make the second press to the left of the first.<br />
Hardware <strong>Tips</strong><br />
Quickly accessing the orientation screen<br />
Press <strong>and</strong> hold both buttons on the pen tray to activate the orientation screen.<br />
<strong>SMART</strong> <strong>Board</strong> <strong>Software</strong> – <strong>Tips</strong> <strong>and</strong> <strong>Tricks</strong> 3
Right clicking<br />
Press <strong>and</strong> hold your finger on the interactive whiteboard until you see the right-click menu. Alternatively,<br />
you can press the Right Mouse button on the pen tray <strong>and</strong> your next press on the interactive whiteboard<br />
will be a right click. The next press reverts back to a left click.<br />
Obtaining hover mouse or floating-mouse actions<br />
A “hover” or “floating mouse” is similar to moving the cursor on your workstation screen without clicking<br />
your mouse. To get this effect at the interactive screen, add the Hover button to your Floating<br />
Tools. Then press this button, touch the screen <strong>and</strong> slide your finger across the surface to view a tool tip<br />
or to move the pointer without activating a program component.<br />
Avoiding tripping hazards with your interactive whiteboard<br />
Use the <strong>SMART</strong> Wireless Adapter to set up your front projection <strong>SMART</strong> <strong>Board</strong> interactive whiteboard<br />
without wires between it <strong>and</strong> your computer. Call your dealer, or visit<br />
http://www.smarttech.com/support/product/accessories/index.asp for more information.<br />
Stabilizing the interactive whiteboard<br />
If your interactive whiteboard is mounted on a floor st<strong>and</strong>, make sure the anti-tip feet are extended. These<br />
feet provide extra stability for the <strong>SMART</strong> <strong>Board</strong> interactive whiteboard.<br />
Solving connection problems<br />
If you’re having problems with your <strong>SMART</strong> product, open the <strong>SMART</strong> <strong>Board</strong> Control Panel <strong>and</strong> press<br />
<strong>SMART</strong> <strong>Board</strong> Connection Wizard. This wizard leads you through the process of checking your<br />
software connection <strong>and</strong> your cables.<br />
Filling an empty pen tray slot<br />
If you lose a pen from the pen tray, you must place another object in the empty slot. Otherwise, the<br />
interactive whiteboard senses that a tool is missing <strong>and</strong> assumes that you’re using it when you press on<br />
the interactive screen.<br />
4 <strong>SMART</strong> <strong>Board</strong> <strong>Software</strong> – <strong>Tips</strong> <strong>and</strong> <strong>Tricks</strong>
<strong>Tips</strong> for Non-Projected Mode<br />
Erasing a very small area<br />
When all the pen tray tools are in their slots, a touch on the <strong>SMART</strong> <strong>Board</strong> interactive whiteboard in nonprojected<br />
mode erases digital ink that’s on your Notebook page. To erase a very small area of digital ink,<br />
make sure all the tools are in the pen tray, <strong>and</strong> then touch the interactive whiteboard with your finger, a<br />
cloth or even a tissue. The digital ink also disappears from your computer screen.<br />
Using Zoom > Entire Page<br />
When using Notebook software on a <strong>SMART</strong> <strong>Board</strong> interactive whiteboard in non-projected mode,<br />
maximize the window, <strong>and</strong> then select View > Zoom > Entire Page. Your page enlarges so you can see<br />
the entire workspace without scrolling. This setting ensures that whatever you write on the screen<br />
displays on your monitor.<br />
Improving the appearance of your annotations on a monitor<br />
To improve the appearance of your annotations on a monitor, reduce the pen width to one pixel.<br />
1 Press the <strong>SMART</strong> <strong>Board</strong> icon in the system tray.<br />
2 Select Control Panel.<br />
3 Press Pen Tray Settings.<br />
4 Press the appropriate Pen button.<br />
5 Select the thinnest line thickness <strong>and</strong> press OK.<br />
6 Close the <strong>SMART</strong> <strong>Board</strong> Settings dialog box.<br />
7 Close the <strong>SMART</strong> <strong>Board</strong> Control Panel.<br />
<strong>SMART</strong> <strong>Board</strong> <strong>Software</strong> – <strong>Tips</strong> <strong>and</strong> <strong>Tricks</strong> 5


