Kodak EasyShare Z7590 zoom digital camera - Foto Source ...
Kodak EasyShare Z7590 zoom digital camera - Foto Source ...
Kodak EasyShare Z7590 zoom digital camera - Foto Source ...

You also want an ePaper? Increase the reach of your titles
YUMPU automatically turns print PDFs into web optimized ePapers that Google loves.
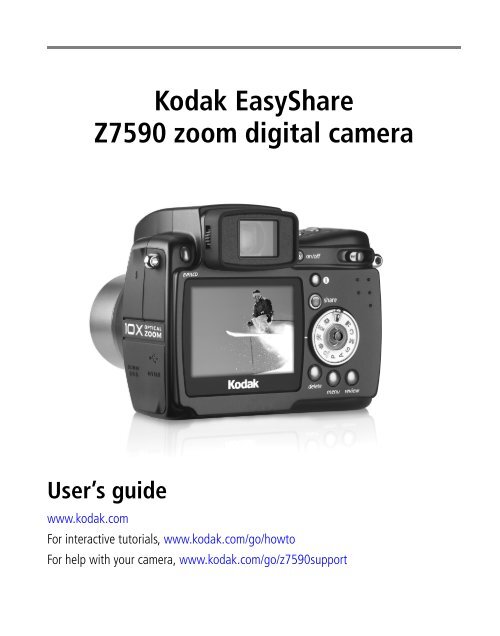
<strong>Kodak</strong> <strong>EasyShare</strong><br />
<strong>Z7590</strong> <strong>zoom</strong> <strong>digital</strong> <strong>camera</strong><br />
User’s guide<br />
FPO<br />
www.kodak.com<br />
For interactive tutorials, www.kodak.com/go/howto<br />
For help with your <strong>camera</strong>, www.kodak.com/go/z7590support
Eastman <strong>Kodak</strong> Company<br />
Rochester, New York 14650<br />
© Eastman <strong>Kodak</strong> Company, 2005<br />
All screen images are simulated.<br />
<strong>Kodak</strong> and <strong>EasyShare</strong> are trademarks of Eastman <strong>Kodak</strong> Company.<br />
Schneider-Kreuznach, Xenar, and Variogon are trademarks of Jos. Schneider<br />
Optische Werke GmbH used under license by Eastman <strong>Kodak</strong> Company.<br />
P/N 4J3110
Top, front view<br />
2<br />
1<br />
1 Jog dial 4 Flip-up flash<br />
2 Shutter button 5 Self-Timer/Video light<br />
3 Microphone 6 Lens<br />
Product features<br />
www.kodak.com/go/support i<br />
3<br />
4<br />
5<br />
6
Product features<br />
Side views<br />
1<br />
1 SD/MMC card slot 5 USB port/ DC-In/ A/V-Out cover<br />
2 Diopter dial 6 USB port<br />
3 External flash connector 7 DC-In (5V)<br />
4<br />
5<br />
3<br />
6<br />
4 External-flash-connector cover 8 A/V Out (for TV viewing)<br />
2<br />
7<br />
ii www.kodak.com/go/support<br />
8
Back view<br />
1<br />
1 Neck strap post 10 Mode dial<br />
2 EVF/LCD toggle button 11 Review button<br />
3 EVF (Electronic Viewfinder) 12 Menu button<br />
4 On/Off button 13 Delete button<br />
5 Zoom (Wide Angle/Telephoto) 14 Power ring<br />
Product features<br />
6 Neck strap post 15 LCD screen (Liquid Crystal Display)<br />
7 Status button<br />
8 Share button<br />
9 Joystick (move );<br />
OK button (press)<br />
2<br />
3<br />
15 14 13 12<br />
www.kodak.com/go/support iii<br />
4<br />
5<br />
11<br />
7<br />
8<br />
10<br />
6<br />
9
Product features<br />
Top and bottom views<br />
7<br />
1<br />
2<br />
3 4<br />
6<br />
5<br />
8 9 10 11<br />
Top Bottom<br />
1 Speaker 8 Battery door<br />
2 Exposure bracketing /<br />
9 Tripod socket/locator for<br />
First burst /Last burst button <strong>EasyShare</strong> <strong>camera</strong> dock or<br />
3 Close-up /Landscape button printer dock<br />
4 Flash button 10 Dock connector<br />
5 Flip-up flash<br />
11 Locator for <strong>EasyShare</strong> <strong>camera</strong><br />
6 Open flash switch<br />
dock or printer dock<br />
7 Shutter button<br />
iv www.kodak.com/go/support
Table of contents 1<br />
1 Getting started ......................................................................................1<br />
Installing the software first............................................................................1<br />
Charging the battery .....................................................................................1<br />
Inserting the battery......................................................................................2<br />
Important battery information .......................................................................2<br />
Battery safety and handling...........................................................................4<br />
Turning the <strong>camera</strong> on and off ......................................................................5<br />
Setting the language.....................................................................................5<br />
Setting the date and time..............................................................................6<br />
Changing the display, EVF or LCD..................................................................7<br />
Checking <strong>camera</strong> and picture status ..............................................................7<br />
Storing pictures on a SD or MMC card ...........................................................8<br />
2 Taking pictures and videos ....................................................................9<br />
Taking a picture ............................................................................................9<br />
Taking a video ............................................................................................14<br />
Quickview—Reviewing the picture or video just taken.................................15<br />
Using optical <strong>zoom</strong> .....................................................................................16<br />
Using advanced <strong>digital</strong> <strong>zoom</strong>.......................................................................16<br />
Picture-taking modes ..................................................................................17<br />
Using the flip-up flash .................................................................................23<br />
Using an external flash unit.........................................................................27<br />
Shooting close-up and landscape pictures....................................................27<br />
Using exposure bracketing ..........................................................................28<br />
Using burst .................................................................................................29<br />
Changing picture-taking settings .................................................................30<br />
Using setup to customize your <strong>camera</strong>.........................................................36<br />
Putting yourself in the picture or video.........................................................38<br />
Pre-tagging for album names ......................................................................39<br />
Tips for better pictures ................................................................................40<br />
www.kodak.com/go/support v
Table of contents<br />
3 Reviewing pictures and videos ............................................................45<br />
Viewing single pictures and videos ..............................................................45<br />
Viewing multiple pictures and videos...........................................................47<br />
Playing a video............................................................................................47<br />
Deleting pictures and videos........................................................................48<br />
Magnifying pictures.....................................................................................48<br />
Changing optional review settings...............................................................49<br />
Protecting pictures and videos from deletion................................................49<br />
Viewing picture/video information ...............................................................50<br />
Tagging pictures/videos for albums..............................................................50<br />
Running a slide show ..................................................................................51<br />
Displaying pictures and videos on a television..............................................52<br />
Copying pictures and videos........................................................................53<br />
4 Installing the software ........................................................................54<br />
Install the software .....................................................................................55<br />
5 Sharing pictures and videos ................................................................56<br />
When can I tag my pictures and videos? ......................................................56<br />
Tagging pictures for printing........................................................................57<br />
Tagging pictures and videos for emailing .....................................................58<br />
Tagging pictures as favorites .......................................................................59<br />
6 Transferring and printing pictures .......................................................62<br />
Transferring pictures/videos with the USB cable ...........................................62<br />
Printing from a <strong>Kodak</strong> <strong>EasyShare</strong> printer dock or your computer...................63<br />
Printing from an optional SD or MMC card ..................................................63<br />
Ordering prints online .................................................................................63<br />
Direct printing with a PictBridge-enabled printer..........................................64<br />
Dock compatibility for your <strong>camera</strong>..............................................................66<br />
vi www.kodak.com/go/support
Table of contents<br />
7 Troubleshooting ..................................................................................67<br />
Camera problems........................................................................................67<br />
Computer/connectivity problems..................................................................70<br />
Picture quality problems ..............................................................................70<br />
Power-ring-light status................................................................................72<br />
Direct printing (PictBridge) problems............................................................73<br />
8 Getting help ........................................................................................74<br />
Helpful links................................................................................................74<br />
Telephone customer support .......................................................................75<br />
9 Appendix .............................................................................................76<br />
Camera specifications .................................................................................76<br />
Storage capacities .......................................................................................79<br />
Power-saving features.................................................................................81<br />
Accessories ................................................................................................82<br />
Upgrading your software and firmware........................................................83<br />
Additional care and maintenance ................................................................83<br />
Warranty.....................................................................................................84<br />
Regulatory compliance ................................................................................86<br />
www.kodak.com/go/support vii
viii www.kodak.com/go/support
1 Getting started<br />
Installing the software first<br />
IMPORTANT: Install the software from the <strong>Kodak</strong> <strong>EasyShare</strong> software CD before<br />
connecting the <strong>camera</strong> (or dock) to the computer. Otherwise, the software<br />
may install incorrectly. See the Start Here! guide or Install the software,<br />
page 55.<br />
Charging the battery<br />
The Li-Ion rechargeable battery requires charging before first use.<br />
1 2 3<br />
1 Insert the battery into the charger.<br />
2 Insert the plug that matches your electrical outlet.<br />
3 Plug the charger into the outlet.<br />
The indicator light turns red. When the indicator light turns green, remove the battery<br />
and unplug the charger. Charging takes approximately 3 hours.<br />
You can also charge the battery using an optional <strong>Kodak</strong> <strong>EasyShare</strong> printer dock or<br />
<strong>camera</strong> dock. Purchase these and other accessories at a dealer of <strong>Kodak</strong> products or<br />
visit www.kodak.com/go/z7590accessories.<br />
www.kodak.com/go/support 1
Getting started<br />
Inserting the battery<br />
CAUTION:<br />
Use only a <strong>Kodak</strong> <strong>EasyShare</strong> Li-Ion rechargeable battery.<br />
1 Make sure the <strong>camera</strong> is turned off.<br />
Important battery information<br />
2 On the bottom of the <strong>camera</strong>, slide the battery door<br />
and lift to open.<br />
3 Insert the battery as shown. Push the battery<br />
completely into the battery compartment.<br />
4 Close the battery door.<br />
<strong>Kodak</strong> battery replacement types/battery life<br />
Actual battery life may vary based on usage.<br />
Li-Ion rechargeable battery,<br />
1700 mAh (KLIC 5001)<br />
(included with <strong>camera</strong>)<br />
275-325<br />
0 400<br />
Battery Life (Approx. number of pictures)<br />
We recommend using only a <strong>Kodak</strong> <strong>EasyShare</strong> Li-Ion rechargeable battery. Not all<br />
manufacturers’ 3.7V Li-Ion rechargeable batteries are compatible with the <strong>camera</strong>.<br />
Damage caused by unauthorized accessories is not covered under warranty.<br />
Optional battery: You can use a <strong>Kodak</strong> <strong>EasyShare</strong> Li-Ion rechargeable battery, 1050<br />
mAh, but it is a lower power battery. Expect approximately 30% fewer pictures per<br />
full charge than with the 1700 mAh battery included with your <strong>camera</strong>.<br />
2 www.kodak.com/go/support
Extending battery life<br />
■ Limit the following activities that deplete battery power:<br />
– Using Quickview (page 15)<br />
– Excessive use of the flash<br />
– Using the LCD screen; utilize the EVF screen instead.<br />
Getting started<br />
■ Dirt on the battery contacts can affect battery life. Wipe the contacts with a clean,<br />
dry cloth before inserting a battery in the <strong>camera</strong>.<br />
■ Battery performance is reduced at temperatures below 41° F (5° C). When using<br />
your <strong>camera</strong> in cold weather, carry spare batteries and keep them warm. Do not<br />
discard cold batteries that do not work; when they return to room temperature,<br />
they may be usable.<br />
Visit www.kodak.com/go/z7590accessories for:<br />
<strong>Kodak</strong> <strong>EasyShare</strong> <strong>camera</strong> dock—powers your <strong>camera</strong>, transfers pictures to your<br />
computer, and charges your battery.<br />
<strong>Kodak</strong> <strong>EasyShare</strong> printer dock—powers your <strong>camera</strong>, makes<br />
4 x 6 in. (10 x 15 cm) prints with or without a computer, transfers pictures, and<br />
charges your battery.<br />
<strong>Kodak</strong> 5-volt AC adapter—powers your <strong>camera</strong>.<br />
www.kodak.com/go/support 3
Getting started<br />
Battery safety and handling<br />
CAUTION:<br />
When removing batteries, allow them to cool first; batteries may<br />
be hot.<br />
■ Read and follow all warnings and instructions supplied by the battery<br />
manufacturer.<br />
■ Use only batteries that are approved for this product.<br />
■ Keep batteries out of the reach of children.<br />
■ Do not allow batteries to touch metal objects, including coins. Otherwise, a battery<br />
may short circuit, discharge energy, become hot, or leak.<br />
■ Do not disassemble, install backward, or expose batteries to liquid, moisture, fire,<br />
or extreme temperature.<br />
■ Remove battery when the product is stored for an extended period of time. In the<br />
unlikely event that battery fluid leaks inside the product, contact your local <strong>Kodak</strong><br />
Customer Service representative.<br />
■ In the unlikely event that battery fluid leaks onto your skin, wash immediately with<br />
water and contact your local health provider. For additional health-related<br />
information, contact your local <strong>Kodak</strong> Customer Service representative.<br />
■ Dispose of batteries according to local and national regulations.<br />
■ Do not charge non-rechargeable batteries.<br />
4 www.kodak.com/go/support
Turning the <strong>camera</strong> on and off<br />
Power ring<br />
Setting the language<br />
■ Press the On/Off button.<br />
1 Turn on the <strong>camera</strong>. Press the Menu button.<br />
Getting started<br />
Your <strong>camera</strong> is ready to take pictures when the Power<br />
ring stops blinking.<br />
The EVF or the LCD screen turns on, depending on<br />
which display was last used.<br />
■ Press the On/Off button to turn off<br />
the <strong>camera</strong>.<br />
The <strong>camera</strong> completes operations that are<br />
in process.<br />
2 Move the Joystick to highlight Setup Menu , then press the<br />
OK button.<br />
3 Move the Joystick to highlight Language , then press the<br />
OK button.<br />
4 Move the Joystick to choose a language: English, German, Spanish, French,<br />
Italian, Portuguese, Chinese, Korean, or Japanese.<br />
5 When finished, press the OK button.<br />
6 Press the Menu button to exit the menu.<br />
www.kodak.com/go/support 5
Getting started<br />
Setting the date and time<br />
Setting the date & time, first time<br />
The message Date and Time have been reset appears the first time you turn on the<br />
<strong>camera</strong> or if the battery is removed for an extended time.<br />
1 SET DATE & TIME is highlighted. Press the OK button.<br />
2 Go to step 4 in Setting the date & time, anytime.<br />
Setting the date & time, anytime<br />
1 Turn on the <strong>camera</strong>. Press the Menu button.<br />
2 Move the Joystick to highlight Setup Menu , then press the<br />
OK button.<br />
3 Move the Joystick to highlight Date & Time , then press the<br />
OK button.<br />
4 Move the Joystick to adjust the date and time. Move the<br />
Joystick to advance to the next setting.<br />
5 When finished, press the OK button.<br />
6 Press the Menu button to exit the menu.<br />
NOTE: Depending on your computer operating system, <strong>Kodak</strong> <strong>EasyShare</strong> software may update the <strong>camera</strong><br />
clock when you connect the <strong>camera</strong>. See the <strong>EasyShare</strong> software Help for details.<br />
6 www.kodak.com/go/support
Changing the display, EVF or LCD<br />
Getting started<br />
Your <strong>camera</strong> has an Electronic Viewfinder (EVF). The EVF, like the LCD (Liquid Crystal<br />
Display) screen, displays what the <strong>camera</strong> captures.<br />
EVF/LCD<br />
toggle<br />
button<br />
Press the EVF/LCD toggle button to change the<br />
screen from EVF to LCD, and back.<br />
The selection remains until you press<br />
the button again.<br />
NOTE: The EVF/LCD screen turns off after 1 minute if no pictures are taken. Press any button to turn the<br />
display back on.<br />
Using the diopter dial<br />
You can adjust the EVF sharpness for your eyesight.<br />
Diopter dial<br />
EVF<br />
■ Look through the EVF.<br />
■ Turn the Diopter dial until the viewfinder image is<br />
sharp.<br />
Checking <strong>camera</strong> and picture status<br />
The icons that appear on the EVF/LCD screen indicate the active <strong>camera</strong> and picture<br />
settings.<br />
Status<br />
button<br />
Press the Status button to turn the icons off<br />
and on.<br />
www.kodak.com/go/support 7
Getting started<br />
Storing pictures on a SD or MMC card<br />
Your <strong>camera</strong> has 32 MB of internal memory. You can purchase optional SD cards at a<br />
dealer of <strong>Kodak</strong> products or at www.kodak.com/global/en/<strong>digital</strong>/accessories for<br />
removable, reusable storage for your pictures and videos.<br />
NOTE: We recommend <strong>Kodak</strong> SD or MMC cards. Other SD brands are acceptable, but must possess the SD<br />
logo. (The SD logo is a trademark of the SD Card Association.) When using the card for the<br />
first time, format it in this <strong>camera</strong> before taking pictures (see page 38).<br />
CAUTION:<br />
The card can only be inserted one way; forcing it may damage the<br />
<strong>camera</strong> or card. Do not insert or remove a card when the green<br />
ready light is blinking; doing so may damage your pictures, card,<br />
or <strong>camera</strong>.<br />
1 Turn off the <strong>camera</strong>, then open the card door.<br />
2 Orient the card as shown on the <strong>camera</strong> body.<br />
3 Push the card all the way into the slot.<br />
4 Close the door.<br />
To remove the card, turn off the <strong>camera</strong>. Push the<br />
card in, then release it. When the card is partially<br />
ejected, pull it out.<br />
See page 79 for storage capacities.<br />
8 www.kodak.com/go/support
2 Taking pictures and videos<br />
Taking a picture<br />
The <strong>camera</strong> is always ready to take pictures—in Review, Share, or Setup but not in<br />
Favorites. (In Video mode, the <strong>camera</strong> captures video.)<br />
1 Press the On/Off button.<br />
2 Turn the Mode dial to the desired setting.<br />
NOTE: Use Auto for general picture-taking situations. (See page 17 for other <strong>camera</strong>-mode options.)<br />
3 Use the EVF or LCD screen to frame your subject. (Press the EVF/LCD toggle button<br />
to switch to the other. See page 7.)<br />
The EVF/LCD screen displays a mode description and a live view.<br />
NOTE: To take flash pictures, open the flip-up flash (see page 20). An Open Flash warning appears on the<br />
EVF/LCD screen when the flash unit needs to be open.<br />
www.kodak.com/go/support 9
Taking pictures and videos<br />
4 Press the Shutter button halfway to set the Auto Focus (AF) and Auto<br />
Exposure (AE).<br />
The AF/AE indicator is displayed. If the focus and/or exposure fails, recompose the shot<br />
and try again.<br />
5 Continue pressing the Shutter button completely down to take the picture.<br />
EVF screen<br />
LCD screen<br />
AF/AE indicator<br />
AF/AE indicator:<br />
green—successful<br />
red—failed<br />
failed focus<br />
failed exposure<br />
10 www.kodak.com/go/support
Using the auto-focus framing marks<br />
Taking pictures and videos<br />
When using the <strong>camera</strong> EVF/LCD screen as a viewfinder, framing marks indicate<br />
where the <strong>camera</strong> is focusing. For the best pictures, the <strong>camera</strong> attempts to focus on<br />
foreground subjects, even if the subjects are not centered in the scene.<br />
1 Press the Shutter button halfway and hold.<br />
When the framing marks turn from blue to green, focus is accomplished.<br />
While the shutter button is pressed halfway:<br />
Framing marks<br />
Center focus<br />
Center wide focus<br />
Side focus<br />
Center and side focus<br />
Left and right focus<br />
2 If the <strong>camera</strong> is not focusing on the desired subject (or if the framing marks<br />
disappear), release the Shutter button and recompose the scene.<br />
3 Press the Shutter button completely down to take the picture.<br />
NOTE: Framing marks do not appear in Landscape or Video mode. When you use Focus<br />
Zone (page 33) and set Center Zone, the framing marks are fixed at Center Wide.<br />
www.kodak.com/go/support 11
Taking pictures and videos<br />
Capture modes<br />
Only active <strong>camera</strong> settings are displayed:<br />
Burst/ Exposure<br />
metering/<br />
Self-timer<br />
Landscape/<br />
Close-up<br />
Date stamp<br />
Album name<br />
Zoom:<br />
<strong>digital</strong><br />
telephoto<br />
wide<br />
Histogram<br />
Aperture<br />
Shutter speed<br />
Flash<br />
mode<br />
Picture size<br />
Compression<br />
Pictures/time remaining<br />
Storage location<br />
AF mode<br />
Focus zone<br />
Exposure<br />
metering<br />
White balance<br />
ISO<br />
Low battery<br />
(flashing = exhausted)<br />
Camera mode<br />
Flash compensation<br />
Exposure compensation<br />
NOTE: A histogram shows the distribution of the subject’s brightness. If the peak is to<br />
the far right of the graph, the subject is too bright; if it is to the left, it is too<br />
dark. Optimal exposure is achieved when the peak is in the middle of the<br />
histogram.<br />
12 www.kodak.com/go/support
Capture modes—shutter pressed halfway<br />
Taking pictures and videos<br />
Press the Shutter button halfway to display the active manual settings:<br />
Open flash<br />
warning<br />
Auto focus<br />
framing marks<br />
Aperture<br />
Shutter speed<br />
Slow shutter speed warning<br />
Auto Focus/<br />
Auto Exposure<br />
(AF/AE indicator)<br />
Flash compensation<br />
Exposure compensation<br />
www.kodak.com/go/support 13<br />
ISO
Taking pictures and videos<br />
Taking a video<br />
NOTE: You can change optical <strong>zoom</strong> before (but not during) video recording.<br />
1 Turn the Mode dial to Video .<br />
2 Press the Menu button. Move the Joystick to highlight Video Size, then<br />
press the OK button.<br />
3 Move the Joystick to highlight the desired Size, then press the<br />
OK button.<br />
4 To eliminate <strong>camera</strong> noise during recording, turn off Continuous AF<br />
(see page 34).<br />
5 Use the EVF or LCD screen to frame your subject. (Press the EVF/LCD toggle button<br />
to switch to the other screen, see page 7.)<br />
6 Press the Shutter button completely down and release. To stop recording, press<br />
and release the Shutter button again.<br />
During recording, REC blinks on the screen and the elapsed time is displayed.<br />
NOTE: If you prefer, press the Shutter button completely down and hold it for more than<br />
2 seconds to begin recording. To stop recording, release the Shutter button. Recording also stops if<br />
the storage location is full. See page 81 for video storage capacities.<br />
14 www.kodak.com/go/support
Taking pictures and videos<br />
Quickview—Reviewing the picture or video just<br />
taken<br />
After you take a picture or video, the EVF or LCD screen displays a Quickview for<br />
approximately 5 seconds. While the picture or video is displayed, you can:<br />
■ Review: If you take no action, the picture/video is<br />
saved.<br />
■ Play (video): Press the OK button to play the<br />
video. Move the Joystick to adjust the<br />
volume. Press OK again to pause the video.<br />
■ Share: Press the Share button to tag a<br />
picture/video for email (see page 58) or as a<br />
favorite, or to tag a picture for print. (See page 57.)<br />
Share<br />
Delete<br />
OK<br />
■ Delete: Press the Delete button while the<br />
picture/video and are displayed.<br />
NOTE: Only the final picture of exposure bracketing (see page 28) or<br />
burst series (see page 29) is displayed during Quickview. If<br />
you select Delete, all pictures in the burst series are deleted.<br />
To delete selectively, do so in Review (see page 48).<br />
www.kodak.com/go/support 15
Taking pictures and videos<br />
Using optical <strong>zoom</strong><br />
Use optical <strong>zoom</strong> to get up to 10X closer to your subject. Optical <strong>zoom</strong> is effective<br />
when the lens is no closer than 2 ft (0.6 m) from the subject. (See Tips for better<br />
pictures on page 40.) You can change optical <strong>zoom</strong> before (but not during) video<br />
recording.<br />
IMPORTANT: Place the <strong>camera</strong> on a sturdy surface or tripod when you take high-<strong>zoom</strong><br />
pictures.<br />
1 Use the EVF or LCD screen to frame your subject.<br />
Zoom indicator<br />
Digital <strong>zoom</strong> range<br />
Optical <strong>zoom</strong> range<br />
Using advanced <strong>digital</strong> <strong>zoom</strong><br />
2 Push the Zoom button toward Telephoto (T) to<br />
<strong>zoom</strong> in. Push it toward Wide Angle (W) to <strong>zoom</strong><br />
out.<br />
The EVF or LCD screen displays the <strong>zoom</strong>ed image and<br />
the <strong>zoom</strong> indicator.<br />
3 Press the Shutter button halfway and hold to set<br />
the exposure and focus, then press completely<br />
down to take the picture. (When taking videos,<br />
press and release the Shutter button.)<br />
Use advanced <strong>digital</strong> <strong>zoom</strong> in any Still mode to get an additional 3X magnification<br />
beyond optical <strong>zoom</strong>; available settings are from 12X to 30X.<br />
IMPORTANT: Place the <strong>camera</strong> on a sturdy surface or tripod when you take high-<strong>zoom</strong><br />
pictures.<br />
1 Push the Zoom button to the telephoto optical <strong>zoom</strong> limit (10X). Release the<br />
button, then push it again.<br />
The EVF or LCD screen displays the <strong>zoom</strong>ed image and the <strong>zoom</strong> indicator.<br />
16 www.kodak.com/go/support
Taking pictures and videos<br />
2 Press the Shutter button halfway and hold to set the exposure and focus, then<br />
press completely down to take the picture.<br />
NOTE: You cannot use <strong>digital</strong> <strong>zoom</strong> for video recording.<br />
IMPORTANT: You may notice a decrease in printed image quality when using <strong>digital</strong><br />
<strong>zoom</strong>. The slider on the <strong>zoom</strong> indicator pauses, then turns red when the<br />
picture size is approximately 1 MP. For an acceptable 4 x 6 in. (10 x 15 cm)<br />
print, ensure that the slider remains blue.<br />
Picture-taking modes<br />
Mode dial<br />
Choose the mode that best suits your<br />
subjects and surroundings.<br />
Use this mode For<br />
Auto General picture-taking—offers an excellent balance of image quality<br />
and ease of use.<br />
Program Controlling exposure compensation (how much light enters the<br />
<strong>camera</strong>) and flash compensation. The <strong>camera</strong> automatically sets the<br />
shutter speed and aperture (f-stop) based on the scene lighting.<br />
Program mode offers the ease of auto shooting with full access to all<br />
menu options. Use the jog dial to select settings. (See P, A, S, M, and<br />
C modes, page 21.) Press the Menu button to change other settings.<br />
www.kodak.com/go/support 17
Taking pictures and videos<br />
Use this mode For<br />
Aperture<br />
Priority<br />
Shutter<br />
Priority<br />
Controlling aperture, exposure compensation, flash compensation,<br />
and ISO speed. Aperture priority mode is primarily used to control<br />
depth of field (the range of sharpness).<br />
NOTE: The aperture setting may be affected when using optical<br />
<strong>zoom</strong>. Use the jog dial to select settings. (See P, A, S, M, and C<br />
modes, page 21.) Press the Menu button to change other settings.<br />
Controlling the shutter speed, exposure compensation, flash<br />
compensation, and ISO speed. The <strong>camera</strong> automatically sets the<br />
aperture for proper exposure. Shutter priority mode is primarily used<br />
to prevent blur when your subject is moving. To prevent <strong>camera</strong><br />
shake, use a tripod for slow shutter speeds. Use the jog dial to select<br />
settings. (See P, A, S, M, and C modes, page 21.) Press the Menu<br />
button to change other settings.<br />
Manual Enjoying the highest level of creative control. You set the aperture,<br />
flash compensation, shutter speed and ISO speed. Exposure<br />
compensation acts as an exposure meter, recommending the proper<br />
combination of aperture and shutter speed to produce an acceptable<br />
exposure. To prevent <strong>camera</strong> shake, use a tripod for slow shutter<br />
speeds. Use the jog dial to select settings. (See P, A, S, M, and C<br />
modes, page 21.) Press the Menu button to change other settings.<br />
Custom The "user-created” mode. For applying P, A, S, M plus any Custom<br />
settings (exposure compensation, flash compensation, ISO speed)<br />
which are saved independent of other <strong>camera</strong> settings. Use the jog<br />
dial to select settings. (See P, A, S, M, and C modes, page 21.) Press<br />
the Menu button to choose a capture mode. (See Custom Exposure<br />
Mode, page 30.) Press the Menu button to change other settings.<br />
Video Capturing video with sound. (See page 14.)<br />
Favorites Viewing your favorites. (See page 59.)<br />
18 www.kodak.com/go/support
Use this mode For<br />
Scene modes<br />
1 Turn the Mode dial to Scene .<br />
2 Move the Joystick to display Scene mode descriptions.<br />
NOTE: If the screen turns off, press the OK button.<br />
3 Press the OK button to choose a Scene mode.<br />
Taking pictures and videos<br />
Scene Point-and-shoot simplicity when taking pictures under 14 special<br />
conditions. (See Scene modes, page 19.)<br />
Sport Subjects that are in motion. Shutter speed is fast. The <strong>camera</strong><br />
pre-settings are f/2.8–f/3.7, Multi-Pattern Exposure Metering,<br />
Multi-Zone Focus, ISO 100–ISO 200.<br />
Portrait Full-frame portraits of people. Allows the subject to be sharp and the<br />
background to be indistinct. For best results, position your subject at<br />
least 6 ft (2 m) away and fill the frame with a head and shoulder<br />
pose. Use Telephoto to exaggerate background blur. The <strong>camera</strong><br />
pre-settings are f/2.8–f/3.7, Multi-Pattern Exposure Metering,<br />
Multi-Zone Focus, ISO 100.<br />
Use this SCN mode For Camera pre-settings<br />
Close-up Subjects closer than<br />
28 in. (70 cm).<br />
Landscape Distant scenery. Flash does not<br />
fire. Auto-focus framing marks<br />
(page 11) are not available in<br />
Landscape.<br />
Night<br />
Portrait<br />
Reduces red eye of people in<br />
night scenes or low-light<br />
conditions. Place the <strong>camera</strong> on<br />
a flat, steady surface or use a<br />
tripod.<br />
f/2.8–f/3.7, Macro Focus, Center-<br />
Weight Metering, Center-Zone<br />
Focus, ISO 100<br />
f/2.8–f/3.7, Infinity Focus,<br />
Multi-Pattern Exposure Metering,<br />
Daylight White Balance, ISO 100<br />
f/2.8–f/3.7, Multi-Pattern Exposure<br />
Metering, Multi-Zone Focus, ISO 140<br />
www.kodak.com/go/support 19
Taking pictures and videos<br />
Use this SCN mode For Camera pre-settings<br />
Night<br />
Landscape<br />
Distant scenery at night. Flash<br />
does not fire. Place the <strong>camera</strong><br />
on a flat, steady surface or use<br />
a tripod.<br />
f/2.8–f/3.7, Infinity Focus, Daylight<br />
White Balance, Center-Weight<br />
Metering, ISO 100<br />
Snow Bright snow scenes. f/2.8–f/3.7, +1 Exposure<br />
Compensation, Center-Weight<br />
Metering, Multi-Zone Focus, ISO 100<br />
Beach Bright beach scenes. f/2.8–f/3.7, +1 Exposure<br />
Compensation, Center-Weight<br />
Metering, Daylight White Balance,<br />
ISO 100<br />
Text Documents. f/2.8–f/3.7, Macro Focus, +1<br />
Exposure Compensation,<br />
Center-Weight Metering, ISO 140<br />
Fireworks Flash does not fire. Place the<br />
<strong>camera</strong> on a flat, steady surface<br />
or use a tripod.<br />
Flower Close-ups of flowers or other<br />
small subjects in bright light.<br />
Manner/<br />
Museum<br />
Self-<br />
Portrait<br />
Quiet occasions, like a wedding<br />
or lecture. Flash and sound are<br />
disabled.<br />
Close-ups of yourself. Assures<br />
proper focus and minimizes red<br />
eye.<br />
Party People indoors. Minimizes red<br />
eye.<br />
f/5.6, 2 second exposure, Infinity<br />
Focus, Center-Weight Metering,<br />
Daylight White Balance, ISO 100<br />
f/2.8–f/3.7, Macro Focus, Daylight<br />
White Balance, Center-Zone Focus,<br />
Center-Weight Metering, ISO 140<br />
f/2.8–f/3.7, no sounds, no flash,<br />
Multi-Pattern Exposure Metering,<br />
Multi-Zone Focus, ISO 100<br />
f/2.8, Macro Focus, Multi-Pattern<br />
Exposure Metering, Multi-Zone<br />
Focus, Red-Eye Flash, ISO 100<br />
f/2.8–f/3.7, Multi-Pattern Exposure<br />
Metering, Multi-Zone Focus, Red-Eye<br />
Flash, ISO 140<br />
20 www.kodak.com/go/support
P, A, S, M, and C modes<br />
Taking pictures and videos<br />
Use this SCN mode For Camera pre-settings<br />
Children Action pictures of children in<br />
bright light.<br />
Backlight Subjects that are in shadow or<br />
“backlit” (when light is behind<br />
the subject).<br />
f/2.8–f/3.7, Multi-Pattern Exposure<br />
Metering, Multi-Zone Focus, ISO 140<br />
f/2.8–f/3.7, Multi-Pattern Exposure<br />
Metering, Multi-Zone Focus,<br />
Fill-Flash, ISO 100<br />
Settings you change in P, A, S or M modes apply only to pictures taken in those<br />
modes. Settings you change in C mode apply only to pictures taken in that mode.<br />
For example, if you change the Color Mode to Sepia while in P, A, S, or M mode, you<br />
still retain the default setting of Color for Auto and Scene modes.<br />
NOTE: The settings, including Flash, are maintained for P, A, S, M, and C modes—even when you change<br />
modes or turn off the <strong>camera</strong>. Use Reset to Default (see page 34) to reset P, A, S, M, or C mode to<br />
its default setting.<br />
Aperture<br />
Shutter<br />
speed<br />
Exposure<br />
compensation<br />
Flash<br />
compensation<br />
Mode setting<br />
ISO<br />
Aperture—also known as f-stop, controls the size<br />
of the lens opening, which determines the depth of<br />
field. Smaller f-numbers, for example f/2.8, refers to<br />
a bigger lens opening. Larger f-numbers, for<br />
example f/8, refers to a smaller lens opening.<br />
Larger f-numbers keep the main subject sharp;<br />
good for landscapes and well-lit conditions. Smaller<br />
f-numbers are good for portraits and low-light<br />
conditions. The highest and lowest aperture<br />
numbers may be affected by optical <strong>zoom</strong>.<br />
www.kodak.com/go/support 21
Taking pictures and videos<br />
Shutter speed—controls how long the shutter stays open. A shaking hand icon<br />
warns of slow shutter speeds. (Use a tripod for slow shutter speeds.)<br />
Exposure Compensation—allows the user to manually adjust the exposure;<br />
good for controlling backlit or non-standard scenes. If the picture is too light,<br />
decrease the setting; if it’s too dark, increase the setting.<br />
Flash Compensation—controls the flash brightness (+0.5, +1.0, –0.5, –1.0).<br />
You must be within flash range. Unavailable if flash setting is Off.<br />
ISO—controls sensitivity of the <strong>camera</strong> sensor (80,100, 200, 400, 800). Higher<br />
settings are more sensitive to light, but may produce unwanted “noise” in a<br />
picture. You can only use ISO 800 if you are in the 1.8 MP Picture Size setting. (See<br />
Picture Size, page 31.)<br />
See Tips for better pictures on page 40.<br />
Using the jog dial to change P, A, S, M, or C mode settings<br />
The Jog dial controls the f-number, shutter speed, exposure and flash compensations,<br />
and ISO. Use the Menu button to control all other settings.<br />
Jog dial:<br />
• Rotate to move<br />
the cursor or<br />
change settings.<br />
• Press to open<br />
or save settings.<br />
P, A, S, M, or C mode options<br />
White—selectable Grey—non-selectable<br />
Yellow—changeable value Red—out of range<br />
22 www.kodak.com/go/support
1 Turn the Mode dial to P, A, S, M, or C.<br />
The mode options are displayed.<br />
2 Use the Jog dial:<br />
■ Rotate the Jog dial to move the cursor between<br />
the available settings.<br />
■ Press the Jog dial to open a setting.<br />
■ Rotate the Jog dial to change the setting .<br />
■ Press the Jog dial to save the setting.<br />
3 Press the Menu button to change other settings (see page 30).<br />
4 Take a picture.<br />
Using the flip-up flash<br />
Taking pictures and videos<br />
Use the flash when you take pictures at night, indoors, or outdoors in heavy shadows.<br />
You can change the flash setting in most Still modes, except Burst; the default setting<br />
is restored when you exit the mode or turn off the <strong>camera</strong>.<br />
Turning on the flash<br />
open switch<br />
Slide the open flash switch to raise<br />
the flash and to turn it on.<br />
NOTE: The flash unit must be open<br />
to use the flash and to change the flash<br />
modes. An Open Flash warning appears<br />
on the EVF/LCD screen when the flash unit<br />
needs to be open.<br />
www.kodak.com/go/support 23
Taking pictures and videos<br />
Changing the flash settings<br />
Flash-to-subject distance<br />
Zoom position Flash distance<br />
Wide angle 2–16.1 ft (0.6–4.9 m) @ ISO 140<br />
Telephoto 6.6–12.1 ft (2.0–3.7 m) @ ISO 140<br />
Flash-icon<br />
behavior<br />
Cause Action<br />
Blinking Flash is charging. Wait. Take picture when the icon stops<br />
blinking.<br />
Flash button is pressed, flash<br />
unit is closed.<br />
button<br />
Flash modes Flash fires<br />
Auto<br />
Flash<br />
When the lighting conditions require it.<br />
Press the flash button repeatedly to scroll<br />
through the flash modes (see Flash modes<br />
table).<br />
NOTE: The active flash icon is displayed in<br />
the EVF/LCD screen status area.<br />
Open flash unit or take the picture without<br />
flash.<br />
Fill Every time you take a picture, regardless of the lighting conditions. Use<br />
when the subject is in shadow or is “backlit” (when the light is behind<br />
the subject). In low light, hold the <strong>camera</strong> steady or use a tripod. See<br />
Tips for better pictures on page 40.<br />
24 www.kodak.com/go/support
Taking pictures and videos<br />
Red-eye Once, so the subject’s eyes become accustomed to the flash, then fires<br />
again when the picture is taken. (If the lighting conditions require flash<br />
but do not require Red-eye reduction, the flash may fire only once.)<br />
Off Never<br />
NOTE: Rear-curtain-flash sync activates automatically when the flash is fired and the shutter speed is set at<br />
1/30 second or longer. The flash fires just before the shutter closes to create a stream-of-light effect<br />
behind a moving object for a more natural appearance. This feature prevails only in S, M, and C and<br />
in Night portrait mode.<br />
Flash settings in each mode<br />
Flash settings are pre-set for each picture-taking mode.<br />
Capture modes Default setting Available settings<br />
P, A, S,<br />
M, C<br />
Auto Auto* Auto, Off, Fill Flash, Red-eye<br />
Portrait Auto* Auto, Off, Fill Flash, Red-eye<br />
Sport Auto* Auto, Off, Fill Flash, Red-eye<br />
P, A, S, M, or C Auto* Auto, Off, Fill Flash, Red-eye<br />
Scene modes<br />
Close-up Off Auto, Off, Fill Flash<br />
Landscape Off Off<br />
Night Portrait Red-eye* Auto, Off, Fill Flash, Red-eye<br />
Night Landscape Off Off<br />
www.kodak.com/go/support 25
Taking pictures and videos<br />
Capture modes Default setting Available settings<br />
Snow Auto* Auto, Off, Fill Flash, Red-eye<br />
Beach Auto* Auto, Off, Fill Flash, Red-eye<br />
Text Off Auto, Off<br />
Fireworks Off Off<br />
Flower Off Auto, Off, Fill Flash<br />
Manner/Museum Off Off<br />
Self-Portrait Red-eye* Auto, Off, Fill Flash, Red-eye<br />
Party Red-eye* Auto, Off, Fill Flash, Red-eye<br />
Children Auto* Auto, Off, Fill Flash, Red-eye<br />
Backlight Fill Fill<br />
Video Off Off<br />
First burst Off Off<br />
Last burst Off Off<br />
Exposure<br />
bracketing<br />
Off Off<br />
* When you change to Auto or Red-eye in these modes, it becomes the default until<br />
you change it.<br />
26 www.kodak.com/go/support
Using an external flash unit<br />
Taking pictures and videos<br />
Use an external flash unit when you want additional or specialized lighting. You can<br />
use the <strong>camera</strong>’s built-in flash, as well, to provide extra fill flash.<br />
1 Turn off the <strong>camera</strong> and flash unit.<br />
External flash<br />
connector<br />
External-flash-<br />
connector cover<br />
2 Open the External-flash-connector cover.<br />
3 Plug your external-flash-unit cable into the External<br />
flash connector on the <strong>camera</strong>.<br />
The external flash unit is live when connected to the<br />
<strong>camera</strong>. The flash synchronizes at any shutter speed.<br />
Refer to your external flash unit user’s guide for details.<br />
NOTE: The connector accepts all standard external flash cables,<br />
maximum 500 volts.<br />
Shooting close-up and landscape pictures<br />
Use the Close-up/Landscape button to take pictures of scenes that are very<br />
close or very far away. (Not available in Scene modes.)<br />
1 Set the Mode dial to any Capture mode.<br />
Close-up/Landscape<br />
2 Press the Close-up/Landscape button<br />
repeatedly until the or icon appears in the<br />
status bar.<br />
3 Take a picture.<br />
www.kodak.com/go/support 27
Taking pictures and videos<br />
Close-up pictures<br />
Use the Close-up setting to gain sharpness and detail in pictures at close range.<br />
Use available light instead of flash if possible. The <strong>camera</strong> automatically sets the focus<br />
distance depending on the <strong>zoom</strong> position:<br />
Zoom position Close-up distance<br />
Wide angle 4.7 to 27.6 in. (0.12 to 0.7 m)<br />
Telephoto 3.9 to 6.9 ft (1.2 to 2.1 m)<br />
See Tips for better pictures on page 40.<br />
Landscape pictures<br />
Use the Landscape setting to gain maximum sharpness of far away scenes. With<br />
this setting, the <strong>camera</strong> uses infinity auto-focus. Auto-focus framing marks (see<br />
page 11) are not available in Landscape.<br />
Using exposure bracketing<br />
Option Description Purpose<br />
Exposure<br />
Bracketing<br />
1 Set the exposure bracketing interval. (See Exposure Bracketing Interval, page 32.)<br />
2 In most Still modes, press the Exposure bracketing button repeatedly to choose<br />
.<br />
The <strong>camera</strong> takes 3 pictures —<br />
one at +, one at 0, and one<br />
at –exposure.<br />
Determine the best exposure level for<br />
your conditions based on your evaluation<br />
of 3 pictures.<br />
3 Press the Shutter button halfway and hold to set the auto focus and exposure.<br />
4 Press the Shutter button completely down to take the pictures.<br />
The <strong>camera</strong> takes 3 pictures. To evaluate them, press the Review button. Exposure<br />
bracketing turns off after the pictures are taken.<br />
28 www.kodak.com/go/support
Taking pictures and videos<br />
Using exposure compensation with exposure bracketing<br />
In P, A, and S modes, you can use exposure compensation in conjunction with<br />
exposure bracketing.<br />
If exposure<br />
compensation is<br />
set to<br />
0.0<br />
Using burst<br />
And if the exposure<br />
bracketing interval is<br />
set to<br />
Then the exposures taken<br />
are<br />
+1.0 the default +/-0.3<br />
–0.3, 0.0, +0.3<br />
+0.7, +1.0, +1.3<br />
–1.0 –1.3, –1.0, –0.7<br />
Option Description Purpose<br />
First<br />
Burst<br />
Last<br />
Burst<br />
Camera takes up to 5 pictures (2 per second) while the<br />
Shutter button is pressed.<br />
First 5 pictures<br />
are saved.<br />
Camera takes up to 30 pictures (2 per second for up to<br />
15 seconds) while the Shutter button is pressed. When<br />
the Shutter button is released, only the last 4 pictures<br />
are saved.<br />
Last 4 pictures<br />
are saved.<br />
Capture an expected<br />
event.<br />
Example:<br />
A person swinging a<br />
golf club.<br />
Capture an event<br />
when the precise<br />
timing is uncertain.<br />
Example:<br />
A child blowing out<br />
birthday candles.<br />
www.kodak.com/go/support 29
Taking pictures and videos<br />
1 In most Still modes, press the Burst button repeatedly to choose an option.<br />
2 Press the Shutter button halfway and hold to set the auto focus and exposure.<br />
3 Press the Shutter button completely down and hold it to take the pictures.<br />
The <strong>camera</strong> stops taking pictures when you release the Shutter button, when the<br />
pictures are taken, or when there is no more storage space.<br />
NOTE: The EVF/LCD screen will not display during burst.<br />
Changing picture-taking settings<br />
You can change settings to get the best results from your <strong>camera</strong>:<br />
1 Turn the Mode dial to the desired mode.<br />
2 Press the Menu button. (Some settings are unavailable in some modes.)<br />
3 Move the Joystick to highlight a setting, then press the OK button.<br />
4 Choose an option, then press the OK button.<br />
5 Press the Menu button to exit.<br />
Setting Icon Options and icons<br />
that appear in Liveview<br />
Custom Exposure Mode<br />
Choose a preferred capture<br />
mode. (See Custom, page 18.)<br />
This setting remains until you<br />
change it.<br />
Self-Timer<br />
Turn the Self-Timer on or off.<br />
This setting remains until you take<br />
the picture, turn the Mode dial, or<br />
turn off the <strong>camera</strong>.<br />
P<br />
ASM<br />
Program (default)<br />
Aperture Priority<br />
Shutter Priority<br />
Manual<br />
Available only in Custom (C) mode.<br />
On<br />
Off (default)<br />
30 www.kodak.com/go/support
Setting Icon Options and icons<br />
that appear in Liveview<br />
Picture Size<br />
Choose a picture resolution.<br />
This setting remains until you<br />
change it.<br />
Compression<br />
Choose a compression.<br />
This setting remains until you<br />
change it. The setting is displayed<br />
in the status area as<br />
“S” or “F.”<br />
JPG<br />
Taking pictures and videos<br />
5.0 MP (default)—for printing up to<br />
20 x 30 in. (51 x 76 cm); pictures are highest<br />
resolution and largest file size.<br />
4.4 MP (3:2)— ideal for printing 4 x 6 in.<br />
(10 x 15 cm) prints without cropping. Also for<br />
printing up to 20 x 30 in. (51 x 76 cm)<br />
4.0 MP— for printing up to 20 x 30 in.<br />
(51 x 76 cm); pictures are medium resolution<br />
with smaller file size.<br />
3.1 MP—for printing up to 11 x 14 in.<br />
(28 x 36 cm); pictures are medium resolution<br />
with smaller file size.<br />
1.8 MP—for printing 4 x 6 in.<br />
(10 x 15 cm) prints, emailing, Internet, screen<br />
display, or for conserving space.<br />
Standard (default)<br />
Fine<br />
NOTE: The Fine setting renders a larger file size.<br />
www.kodak.com/go/support 31
Taking pictures and videos<br />
Setting Icon Options and icons<br />
that appear in Liveview<br />
White Balance<br />
Choose your lighting condition.<br />
The EVF/LCD screen displays the<br />
chosen White Balance. This setting<br />
remains until you change it.<br />
Exposure Bracketing<br />
Interval<br />
Choose an exposure bracketing<br />
interval.<br />
P, A, S, M, C: This setting remains<br />
until you change it or take pictures.<br />
Auto, Scene: This setting remains<br />
until you turn the Mode dial or turn<br />
off the <strong>camera</strong>.<br />
Auto (default) —automatically corrects<br />
white balance. Ideal for general picture-taking.<br />
Daylight —for pictures in natural lighting.<br />
Tungsten —corrects the orange cast of<br />
household light bulbs. Ideal for indoor pictures<br />
under tungsten or halogen lighting without<br />
flash.<br />
Fluorescent —corrects the green cast of<br />
fluorescent lighting. Ideal for indoor pictures<br />
under fluorescent lighting without flash.<br />
Open Shade —for pictures in the shade in<br />
natural lighting.<br />
Unavailable in Auto, Scene, or Video modes.<br />
+/– 0.3 EV (default)<br />
+/– 0.7 EV<br />
+/– 1.0 EV<br />
See Using exposure bracketing, page 28.<br />
32 www.kodak.com/go/support
Setting Icon Options and icons<br />
that appear in Liveview<br />
Exposure Metering<br />
Evaluate light levels at specific<br />
areas of a scene.<br />
This setting remains until you<br />
change it. The setting is displayed<br />
on the right side of Liveview if set<br />
to Center-weight or Center-spot.<br />
Focus Zone<br />
Choose a large or concentrated<br />
area of focus.<br />
This setting remains until you<br />
change it. The setting is displayed<br />
on the right side of Liveview if set<br />
to Center-zone or Selectable-zone.<br />
Taking pictures and videos<br />
Multi-Pattern (default) —evaluates<br />
lighting conditions throughout the image to<br />
give an optimum picture exposure. Ideal for<br />
general picture-taking.<br />
Center-Weight —evaluates the lighting<br />
conditions of the subject centered in the<br />
viewfinder. Ideal for backlit subjects.<br />
Center-Spot —similar to Center-weight,<br />
except the metering is concentrated on a<br />
smaller area of the subject centered in the<br />
viewfinder. (A circle indicates the metering<br />
spot.) Ideal when you need an exact exposure<br />
of a specific area in the picture.<br />
Unavailable in Auto, Scene, or Video modes.<br />
Multi-Zone (default) —evaluates 3<br />
zones to give an even picture focus. Ideal for<br />
general picture-taking.<br />
Center-Zone —evaluates the small area<br />
centered in the viewfinder. Ideal when precise<br />
focus of a specific area in the picture is needed.<br />
Selectable-Zone —move the focus<br />
brackets to center, left, or right.<br />
Unavailable in Auto, Scene, or Video modes.<br />
www.kodak.com/go/support 33
Taking pictures and videos<br />
Setting Icon Options and icons<br />
that appear in Liveview<br />
AF Control<br />
Choose an auto-focus setting.<br />
This setting remains until you<br />
change it.<br />
Color Mode<br />
Choose color tones.<br />
In Auto and Scene modes, this<br />
setting remains until you turn the<br />
Mode dial or turn off the <strong>camera</strong>.<br />
Sharpness<br />
Control picture sharpness.<br />
This setting remains until you<br />
change it.<br />
Reset to Default<br />
Reset all picture-taking settings<br />
to the defaults.<br />
Continuous AF (default)—uses external AF<br />
sensor and TTL-AF (Through-The-Lens).<br />
Because the <strong>camera</strong> is always focusing, there is<br />
no need to press the Shutter button halfway<br />
down to focus.<br />
Single AF —uses external AF sensor and<br />
TTL-AF when the Shutter button is pressed<br />
halfway down.<br />
Accessory Lens AF —uses TTL-AF.<br />
Unavailable in Video mode.<br />
High Color<br />
Natural Color (default)<br />
Low Color<br />
Black & White<br />
Sepia (for pictures with a reddish-brown,<br />
antique look.)<br />
NOTE: <strong>EasyShare</strong> software also lets you change a<br />
color picture to black-and-white or sepia, but<br />
you cannot change a black-and-white or<br />
sepia picture to color.<br />
Unavailable in Video mode.<br />
High<br />
Normal (default)<br />
Low<br />
Unavailable in Auto, Scene, or Video modes.<br />
Reset P, A, S, M, or C mode to its default setting.<br />
34 www.kodak.com/go/support
Setting Icon Options and icons<br />
that appear in Liveview<br />
Set Album (Still)<br />
Choose Album names.<br />
This setting remains until you<br />
change it.<br />
Image Storage<br />
Choose a storage location for<br />
pictures and videos.<br />
This setting remains until you<br />
change it.<br />
Video Length (Video)<br />
Choose a default video length<br />
(useful in self-timer videos).<br />
Setup Menu<br />
Choose additional settings.<br />
Taking pictures and videos<br />
On or Off<br />
Pre-select album names before you take<br />
pictures or videos. Then, all the pictures or<br />
videos you take are tagged with those album<br />
names. See page 39.<br />
Auto (default) —the <strong>camera</strong> uses the card<br />
if one is in the <strong>camera</strong>. If not, the <strong>camera</strong> uses<br />
internal memory.<br />
Internal Memory —the <strong>camera</strong> always<br />
uses internal memory, even if a card is inserted.<br />
Continuous (default)—as long as there is<br />
room on the card or internal memory, or until<br />
you press the Shutter button. Choose 5, 15, or<br />
30 seconds duration.<br />
See Using setup to customize your <strong>camera</strong>.<br />
www.kodak.com/go/support 35
Taking pictures and videos<br />
Using setup to customize your <strong>camera</strong><br />
1 In any mode, press the Menu button.<br />
2 Move the Joystick to highlight Setup , then press the OK button.<br />
3 Move the Joystick to highlight a setting, then press the OK button.<br />
4 Choose an option, then press the OK button.<br />
5 Press the Menu button to exit.<br />
Setting Icon Options<br />
Return to previous menu.<br />
Quickview<br />
Display a picture or video (for 5<br />
seconds) after it is taken.<br />
Advanced Digital Zoom<br />
Choose how <strong>digital</strong> <strong>zoom</strong> is<br />
employed.<br />
On (default)<br />
Off<br />
Continuous —no pause between optical and<br />
<strong>digital</strong> <strong>zoom</strong>.<br />
Pause (default)—after reaching 10X optical<br />
<strong>zoom</strong>, the <strong>zoom</strong> button must be released, then<br />
activated again to begin <strong>digital</strong> <strong>zoom</strong>.<br />
None—<strong>digital</strong> <strong>zoom</strong> is disabled.<br />
Print Warning Pause (default)—when the blue slider on the<br />
<strong>zoom</strong> indicator pauses during <strong>digital</strong> <strong>zoom</strong>, the<br />
<strong>zoom</strong> lever must be released and reactivated.<br />
The slider turns red when the picture may no<br />
longer render an acceptable 4 x 6 in. (10 x 15<br />
cm) print.<br />
None—no pause.<br />
36 www.kodak.com/go/support
Setting Icon Options<br />
Sound Themes Shutter Only<br />
Default<br />
Classical<br />
Jazz<br />
Sci-fi<br />
Sound Volume Off<br />
Low (default)<br />
Medium<br />
High<br />
Mode Description<br />
Display mode description when<br />
entering a mode.<br />
On (default)<br />
Off<br />
Date & Time See page 6.<br />
Video Out<br />
Choose the regional setting that<br />
lets you connect the <strong>camera</strong> to a<br />
television or other external device.<br />
Orientation Sensor<br />
Orient pictures so that they are<br />
displayed with the correct side up.<br />
Date Stamp<br />
Imprint the date on pictures.<br />
Taking pictures and videos<br />
NTSC (default)—used in North America and<br />
Japan.<br />
PAL—used in Europe and China.<br />
On (default)<br />
Off<br />
Choose date format, or turn off the feature.<br />
(Default is off.)<br />
Video Date Display On (default)— choose from 3 date formats<br />
with or without hours and minutes.<br />
Off<br />
Language Choose a language (see page 5).<br />
www.kodak.com/go/support 37
Taking pictures and videos<br />
Setting Icon Options<br />
Format<br />
Memory Card—deletes everything on the<br />
card; formats the card.<br />
CAUTION:<br />
Cancel—exits without making a change.<br />
Formatting deletes all<br />
Internal Memory—deletes everything in<br />
pictures and videos,<br />
internal memory including email addresses,<br />
including those that are<br />
album names, and favorites; formats the<br />
protected. Removing a<br />
card during formatting<br />
may damage the card.<br />
internal memory.<br />
About<br />
View <strong>camera</strong> information.<br />
Camera model/firmware information.<br />
Putting yourself in the picture or video<br />
Use the Self-Timer to create a 2- or 10-second delay between the time you press the<br />
Shutter button and the time the picture or video is taken.<br />
1 Place the <strong>camera</strong> on a flat surface or tripod.<br />
2 Select the desired Still or Video mode.<br />
3 Press the Menu button.<br />
4 Move the Joystick to highlight Self-Timer , then press<br />
the OK button.<br />
5 Move the Joystick to highlight 10 seconds (so you have time to get into the<br />
scene) or 2 seconds (for a steady, auto-shutter release on a tripod), then press the<br />
OK button.<br />
38 www.kodak.com/go/support
Taking pictures and videos<br />
6 Compose the scene. Then press the Shutter button halfway and hold to set the<br />
exposure and focus, then press completely down. Quickly position yourself in<br />
the scene.<br />
The Self-Timer light on the front of the <strong>camera</strong> blinks slowly for 8 seconds<br />
(then quickly for 2 seconds) before the picture/video is taken.<br />
The Self-Timer turns off after you take the picture/video or if you<br />
change modes.<br />
NOTE: The default Video Length is Continuous. The video will stop when you press the Shutter button or<br />
when no storage space remains. To change the video length, see page 35. To turn off the Self-Timer<br />
<strong>camera</strong> sounds, see page 37.<br />
Pre-tagging for album names<br />
Use the Set Album (Still or Video) feature to pre-select album names before you take<br />
pictures or videos. Then, all the pictures or videos you take are tagged with those<br />
album names.<br />
First—on your computer<br />
Use <strong>Kodak</strong> <strong>EasyShare</strong> software that came with your <strong>camera</strong> (see page 54) to create<br />
album names on your computer. (To get the latest version of <strong>EasyShare</strong> software, go<br />
to www.kodak.com/go/z7590downloads.) Then copy up to 32 album names to the<br />
<strong>camera</strong>’s album name list the next time you connect the <strong>camera</strong> to the computer. See<br />
<strong>Kodak</strong> <strong>EasyShare</strong> software Help for details.<br />
Second—on your <strong>camera</strong><br />
1 In any mode, press the Menu button.<br />
2 Move the Joystick to highlight Set Album , then press<br />
the OK button.<br />
3 Move the Joystick to highlight an album name, then press the OK button.<br />
Repeat to select more than one album name.<br />
Selected albums are noted with a check mark.<br />
www.kodak.com/go/support 39
Taking pictures and videos<br />
4 To remove a selection, highlight an album name and press the OK button. To<br />
remove all album selections, move the Joystick to highlight Clear All.<br />
5 Highlight Exit, then press the OK button.<br />
Your selections are saved. If you turn on the <strong>camera</strong> screen, your album selection is<br />
displayed on the screen. A plus (+) after the album name means more than one album is<br />
selected.<br />
6 Press the Menu button to exit the menu.<br />
Third—transfer to your computer<br />
When you transfer the tagged pictures and videos to your computer (see page 62),<br />
the <strong>Kodak</strong> <strong>EasyShare</strong> software opens and categorizes your pictures and videos in the<br />
appropriate album. See the <strong>Kodak</strong> <strong>EasyShare</strong> software Help for details.<br />
Tips for better pictures<br />
Zoom<br />
When you use longer <strong>zoom</strong> ranges, place the <strong>camera</strong> on a flat, steady surface or<br />
ideally use a tripod.<br />
1X 10X<br />
30X (<strong>digital</strong>)<br />
Images taken at f/3.7, 1/500 second<br />
40 www.kodak.com/go/support
Exposure compensation<br />
Taking pictures and videos<br />
When you want to control the exposure of backlit subjects or take images in varied<br />
light, use exposure compensation.<br />
If the picture is too light, decrease (–) the setting; if it’s too dark, increase (+) the<br />
setting. Use the Jog dial to access this function (see page 22).<br />
Exposure<br />
Compensation<br />
www.kodak.com/go/support 41
Taking pictures and videos<br />
Aperture and shutter speed (Manual mode)<br />
You can manually choose the best combination of lens aperture (f-number) and<br />
shutter speed to obtain the appropriate exposure compensation for your particular<br />
setting.<br />
Images have a greater focus range with a larger f-number, such as f/8. But it is not the<br />
best choice when shooting a moving object, so a smaller f-number is preferred, such<br />
as f/2.8.<br />
Wide Angle, f/2.8 10X Zoom, f/3.6<br />
f/8<br />
NOTE: Some of the shutter speeds are not shown.<br />
42 www.kodak.com/go/support
Fill flash<br />
Taking pictures and videos<br />
Fill flash is included on your <strong>camera</strong> (see page 24), and is a popular feature. Use fill<br />
flash for sunny-day portraits to fill in those dark shadows under the eyes, nose, or<br />
under the rim of a baseball hat. It’s also useful for side- and back-lit scenes with<br />
nearby people or objects with detail you want to reveal.<br />
Use Exposure Compensation, or Flash Compensation when needed, by adjusting the<br />
Jog dial (see page 21).<br />
Fill-flash on<br />
Fill-flash off<br />
Images taken in Portrait mode<br />
www.kodak.com/go/support 43
Taking pictures and videos<br />
Close ups with a close-up mode<br />
The flower icon on the <strong>camera</strong> indicates you have Close-up mode. Once in<br />
Close-up mode, your <strong>camera</strong> takes sharp pictures at close range (see page 28). The<br />
<strong>camera</strong> automatically sets the focus distance depending on the <strong>zoom</strong> position. Use<br />
available light instead of the flash, if possible.<br />
Close-up telephoto lets you keep your distance from the subject (e.g., when you want<br />
to capture butterflies and bees on flowers without disturbing them).<br />
Close-up wide<br />
at 5 in. (12.7 cm)<br />
Close-up telephoto<br />
at 30 in. (76.2 cm)<br />
Images taken at f/5,1/500 second<br />
44 www.kodak.com/go/support
3 Reviewing pictures and<br />
videos<br />
Press the Review button to view and work with your pictures and videos. To save<br />
battery power, use the optional <strong>Kodak</strong> <strong>EasyShare</strong> <strong>camera</strong> or printer dock, or <strong>Kodak</strong><br />
5-volt AC adapter. (See www.kodak.com/go/z7590accessories.)<br />
Viewing single pictures and videos<br />
1 Press the Review button.<br />
2 Move the Joystick to scroll backward or forward through pictures and videos.<br />
(For fast scrolling, hold the Joystick .)<br />
3 Press the Review button to exit Review.<br />
NOTE: Pictures taken at the 4.4 MP (3:2) quality setting are displayed at a 3:2 aspect ratio with a black bar<br />
at the top of the screen.<br />
www.kodak.com/go/support 45
Reviewing pictures and videos<br />
Checking <strong>camera</strong> status review mode<br />
Press the Review button. The applied features of the current picture or video are<br />
displayed:<br />
Print tag/number of prints<br />
Favorite tag<br />
Protect<br />
Picture/video number<br />
Email tag<br />
Storage<br />
Album name<br />
location<br />
Histogram<br />
Scroll arrows<br />
Review<br />
mode<br />
46 www.kodak.com/go/support
Viewing multiple pictures and videos<br />
1 Press the Review button.<br />
2 Move the Joystick .<br />
Reviewing pictures and videos<br />
NOTE: You can also press the Menu button, highlight Multi-up , then press the OK button.<br />
Thumbnails of pictures and videos are displayed.<br />
To display the previous or next row of thumbnails, move the Joystick .<br />
To scroll through the thumbnails one at a time, move the Joystick .<br />
To display a single view of the selected picture, press the OK button.<br />
Playing a video<br />
1 Press the Review button.<br />
2 Move the Joystick to locate a video. (In Multi-up view, highlight a video, then<br />
press the OK button. When a video is highlighted in Multi-up view, the video<br />
duration is displayed at the top of the <strong>camera</strong> screen.)<br />
3 To play or pause a video, press the OK button.<br />
NOTE: You can also press the Menu button, highlight , then press the OK button.<br />
To adjust the volume, move the Joystick .<br />
To return to the beginning of the video, move the Joystick during playback.<br />
To replay the video, press the OK button.<br />
To go to the previous or next picture or video, move the Joystick .<br />
www.kodak.com/go/support 47
Reviewing pictures and videos<br />
Deleting pictures and videos<br />
1 Press the Review button.<br />
2 Move the Joystick to locate a picture or video (or highlight one in Multi-up<br />
view), then press the Delete button.<br />
3 Move the Joystick to highlight an option, then press the OK button:<br />
PICTURE or VIDEO—deletes the displayed picture or video.<br />
EXIT—exits the Delete screen.<br />
ALL—deletes all pictures and videos from your current storage location.<br />
To delete more pictures and videos, return to Step 2.<br />
NOTE: You cannot delete protected pictures and videos this way. Remove protection before deleting (see<br />
page 49).<br />
Magnifying pictures<br />
1 Press the Review button.<br />
2 Push the Zoom button to magnify the picture<br />
between 1X and 8X.<br />
To see different parts of the picture, move the<br />
Joystick .<br />
To redisplay the picture at the 1X (original) size,<br />
press the OK button.<br />
To exit Magnify, press the OK button.<br />
To exit Review, press the Review button.<br />
48 www.kodak.com/go/support
Changing optional review settings<br />
Reviewing pictures and videos<br />
In Review, press the Menu button to access optional review settings.<br />
Album (page 50) Copy (page 53)<br />
Protect (page 49) Multi-Up (page 47)<br />
Image Storage (page 35) Picture/Video Information (page 50)<br />
Slide Show (page 51) Setup Menu (page 36)<br />
Protecting pictures and videos from deletion<br />
1 Press the Review button.<br />
2 Press the Menu button.<br />
3 Move the Joystick to highlight Protect , then press the OK button.<br />
The picture or video is protected and cannot be deleted. The Protect icon appears<br />
with the protected picture or video.<br />
4 To remove protection, press the OK button again.<br />
5 Press the Menu button to exit the menu.<br />
CAUTION:<br />
Formatting internal memory or an SD or MMC card deletes all<br />
(including protected) pictures, videos. (Formatting internal<br />
memory also deletes email addresses, album names, and<br />
favorites. To restore them, see <strong>EasyShare</strong> software Help.)<br />
www.kodak.com/go/support 49
Reviewing pictures and videos<br />
Viewing picture/video information<br />
1 Press the Review button.<br />
2 Move the Joystick to highlight a picture/video.<br />
3 Press the Status button once or twice to see<br />
information about the picture/video.<br />
Tagging pictures/videos for albums<br />
Use the Album feature in Review to tag the pictures and videos in your <strong>camera</strong> with<br />
album names.<br />
First—on your computer<br />
Use <strong>Kodak</strong> <strong>EasyShare</strong> software that came with your <strong>camera</strong> (see page 54) to create<br />
album names on your computer. (To get the latest version of <strong>EasyShare</strong> software, go<br />
to www.kodak.com/go/z7590downloads.) Then copy up to 32 album names to the<br />
<strong>camera</strong>’s internal memory. See <strong>Kodak</strong> <strong>EasyShare</strong> software Help for details.<br />
Second—on your <strong>camera</strong><br />
1 Press the Review button.<br />
2 Press the Menu button.<br />
3 Move the Joystick to highlight Album , then press the OK button.<br />
4 Move the Joystick to highlight an album, then press the OK button.<br />
To add other pictures to the same album, move the Joystick to scroll through<br />
pictures. When you see the picture you want, press the OK button.<br />
To add the pictures to more than one album, repeat step 4 for each album.<br />
50 www.kodak.com/go/support
Reviewing pictures and videos<br />
The album name appears with the picture. A plus (+) after the album name means the<br />
picture was added to more than one album.<br />
To remove a selection, highlight an album name and press the OK button. To remove<br />
all album selections, select Clear All.<br />
Third—transfer to your computer<br />
When you transfer the tagged pictures and videos to your computer (see page 62),<br />
the <strong>Kodak</strong> <strong>EasyShare</strong> software opens and categorizes your pictures and videos in the<br />
appropriate album. See <strong>Kodak</strong> <strong>EasyShare</strong> software Help for details.<br />
Running a slide show<br />
Use the Slide Show to display your pictures and videos on the <strong>camera</strong> screen. To run a<br />
slide show on a television or on any external device, see page 52. To save battery<br />
power, use an optional <strong>Kodak</strong> 5V AC adapter.<br />
(Visit www.kodak.com/goz7590accessories.)<br />
Starting the slide show<br />
1 Press the Review button, then press the Menu button.<br />
2 Move the Joystick to highlight Slide Show , then press the OK button.<br />
3 Move the Joystick to highlight Begin Show, then press the OK button.<br />
Each picture and video is displayed once, in the order in which you took them.<br />
To interrupt the Slide Show, press the OK button.<br />
Changing the slide show display interval<br />
The default interval setting displays each picture for 5 seconds. You can change the<br />
display interval from 3 seconds to 60 seconds.<br />
1 On the Slide Show menu, move the Joystick to highlight Interval, then press<br />
the OK button.<br />
www.kodak.com/go/support 51
Reviewing pictures and videos<br />
2 Select a display interval.<br />
To scroll through the seconds quickly, hold the Joystick .<br />
3 Press the OK button.<br />
The interval setting remains until you change it.<br />
Running a continuous slide show loop<br />
When you turn on Loop, the slide show is continuously repeated.<br />
1 On the Slide Show menu, move the Joystick to highlight Loop, then press<br />
the OK button.<br />
2 Move the Joystick to highlight On, then press the OK button.<br />
The slide show repeats until you press the OK button or until battery power is<br />
exhausted.<br />
Displaying pictures and videos on a television<br />
You can display pictures and videos on a television, computer monitor, or any device<br />
equipped with a video input. (Image quality on a television screen may not be as good<br />
as on a computer monitor or when printed.)<br />
NOTE: Ensure that the Video Out setting (NTSC or PAL) is correct (see page 37). The slide show stops if you<br />
connect or disconnect the cable while the slide show is running.<br />
1 Connect the audio/video cable (included) from the <strong>camera</strong> video-out port to the<br />
television video-in port (yellow) and audio-in port (white). See your television<br />
user’s guide for details.<br />
2 Review pictures and videos on the television.<br />
52 www.kodak.com/go/support
Copying pictures and videos<br />
Reviewing pictures and videos<br />
You can copy pictures and videos from a card to internal memory or from internal<br />
memory to a card.<br />
Before you copy, make sure that:<br />
■ A card is inserted in the <strong>camera</strong>.<br />
■ The <strong>camera</strong>’s picture storage location is set to the location from which you are<br />
copying. See page 35.<br />
Copy pictures or videos:<br />
1 Press the Review button, then press the Menu button.<br />
2 Move the Joystick to highlight Copy , then press the OK button.<br />
3 Move the Joystick to highlight an option:<br />
PICTURE or VIDEO—copies the current picture or video.<br />
EXIT—returns to the Review menu.<br />
ALL—copies all pictures and videos from your selected storage location to the<br />
other location.<br />
4 Press the OK button.<br />
NOTE: Pictures and videos are copied, not moved. To remove pictures and videos from the original location<br />
after they are copied, delete them (see page 48).<br />
Tags that you applied for print, email, and favorites are not copied. Protection settings are not<br />
copied. To apply protection to a picture or video, see page 49.<br />
www.kodak.com/go/support 53
4 Installing the software<br />
Minimum system requirements Minimum hardware requirements<br />
■ Windows 98, 98SE, ME, 2000 SPI,<br />
or XP OS<br />
Internet Explorer 5.01 or higher<br />
233 MHz processor or greater<br />
■ Macintosh OS X 10.2.3, 10.3<br />
Safari 1.0 or higher<br />
■ 128 MB RAM (64 MB RAM for<br />
Windows 98, 98SE, 2000 SPI, or<br />
ME OS)<br />
■ 200 MB hard disk space available<br />
■ CD-ROM drive<br />
■ Available USB port<br />
54 www.kodak.com/go/support
Install the software<br />
Installing the software<br />
CAUTION:<br />
Install <strong>Kodak</strong> <strong>EasyShare</strong> software before<br />
connecting the <strong>camera</strong> or optional<br />
dock to the computer. Failure to do so<br />
may cause the software to install<br />
incorrectly.<br />
1 Close all software applications that are open on your computer (including<br />
anti-virus software).<br />
2 Place the <strong>Kodak</strong> <strong>EasyShare</strong> software CD into the CD-ROM drive.<br />
3 Install the software:<br />
Windows OS-based computer—if the install window does not appear, choose Run<br />
from the Start menu and type d:\setup.exe where d is the drive letter that<br />
contains the CD.<br />
Mac OS X—double-click the CD icon on the desktop, then click the Install icon.<br />
4 Follow the on-screen instructions to install the software.<br />
Windows OS-based computer—select Complete to automatically install all the<br />
applications. Select Custom to choose the applications you wish to install.<br />
Mac OS X—follow the on-screen instructions.<br />
NOTE: When prompted, take a few minutes to electronically register your <strong>camera</strong> and software. This lets<br />
you receive information regarding software updates and registers some of the products included<br />
with the <strong>camera</strong>. You must be connected to your Internet service provider to register electronically.<br />
To register later, see www.kodak.com/go/register.<br />
5 Restart the computer. If you turned off anti-virus software, turn it back on. See the<br />
anti-virus software manual for details.<br />
For information on the software applications included on the <strong>Kodak</strong> <strong>EasyShare</strong><br />
software CD, click the Help button in the <strong>Kodak</strong> <strong>EasyShare</strong> software.<br />
www.kodak.com/go/support 55
5 Sharing pictures and videos<br />
Print (page 57) ✔<br />
NOTE: Share tags remain until removed. If a tagged picture/video is copied on the <strong>camera</strong>, the Share tag is<br />
not copied. (If a tagged picture/video is copied in <strong>EasyShare</strong> software, the Share tag is copied.) In a<br />
burst series, only the last picture is tagged during Quickview.<br />
When can I tag my pictures and videos?<br />
Press the Share button to tag pictures/videos:<br />
■ Any time (The most recent picture/video taken is displayed.)<br />
■ Just after you take a picture/video, during Quickview (see page 15).<br />
■ After pressing the Review button (see page 45).<br />
Pictures Videos<br />
Email (page 58) ✔ ✔<br />
Favorites (page 59)<br />
for easy organization on your computer and for sharing<br />
on your <strong>camera</strong><br />
Press the Share button to<br />
“tag” your pictures and videos.<br />
When they are transferred<br />
to your computer, you can<br />
share them by:<br />
✔ ✔<br />
56 www.kodak.com/go/support
Tagging pictures for printing<br />
Sharing pictures and videos<br />
1 Press the Share button. Move the Joystick to locate a picture.<br />
2 Move the Joystick to highlight Print , then press the OK button.*<br />
3 Move the Joystick to select the number of copies (0-99). Zero removes the<br />
tag for that picture.<br />
The Print icon appears in the status area. The default quantity is one.<br />
4 Optional: You can apply a print quantity to other pictures. Move the Joystick<br />
to locate a picture. Keep the print quantity as is, or press to change it.<br />
Repeat this step until the desired print quantity is applied to the pictures.<br />
5 Press the OK button. Then press the Share button to exit the menu.<br />
* To tag all pictures in the storage location, highlight Print All, press the OK button,<br />
then indicate the number of copies as described above. Print All is not available in<br />
Quickview.<br />
To remove the print tagging for all pictures in the storage location:<br />
■ Highlight Cancel Prints, then press the OK button.<br />
■ Select either Yes or No to delete all prints.<br />
■ Press the OK button.<br />
Cancel Prints is not available in Quickview.<br />
Printing tagged pictures<br />
When you transfer the tagged pictures to your computer, the <strong>Kodak</strong> <strong>EasyShare</strong><br />
software print screen opens. For details on printing, click the Help button in the <strong>Kodak</strong><br />
<strong>EasyShare</strong> software. For more information on printing from your computer, printer<br />
dock, or card, see page 65.<br />
NOTE: For the best 4 x 6 in. (10 x 15 cm) prints, set the <strong>camera</strong> to the 4.4 MP (3:2) print quality setting (see<br />
page 31).<br />
www.kodak.com/go/support 57
Sharing pictures and videos<br />
Tagging pictures and videos for emailing<br />
First—on your computer<br />
Use <strong>Kodak</strong> <strong>EasyShare</strong> software that came with your <strong>camera</strong> to create an email address<br />
book on your computer. (To get the latest version of <strong>EasyShare</strong> software, go to<br />
www.kodak.com/go/z7590downloads.) Then copy up to 32 email addresses to the<br />
<strong>camera</strong>’s internal memory. See the <strong>Kodak</strong> <strong>EasyShare</strong> software Help for details.<br />
Second—tag pictures/videos on your <strong>camera</strong><br />
1 Press the Share button. Move the Joystick to locate a picture/video.<br />
2 Move the Joystick to highlight Email , then press the OK button.<br />
The Email icon appears in the status area.<br />
3 Move the Joystick to highlight an email address, then press the<br />
OK button.<br />
To tag other pictures/videos with the same address, move the<br />
Joystick to scroll through them. When the picture you want is displayed,<br />
press OK.<br />
To send the pictures/videos to more than one address, repeat step 3 for each<br />
address.<br />
Selected addresses are checked.<br />
4 To remove a selection, highlight a checked address and press the OK button. To<br />
remove all email selections, highlight Clear All.<br />
5 Move the Joystick to highlight Exit, then press the OK button.<br />
The Email icon appears in the status area.<br />
6 Press the Share button to exit the menu.<br />
58 www.kodak.com/go/support
Third—transfer and email<br />
Sharing pictures and videos<br />
When you transfer the tagged pictures and videos to your computer (see page 62),<br />
the email screen opens and lets you send them to the addresses you specified. See the<br />
<strong>Kodak</strong> <strong>EasyShare</strong> software Help for details.<br />
Tagging pictures as favorites<br />
You can store your favorite pictures in the Favorites section of your <strong>camera</strong>’s<br />
internal memory, then share them with friends and family.<br />
NOTE: When you transfer pictures from your <strong>camera</strong> to your computer, all pictures<br />
(including favorites) are stored on your computer at full size. Favorite<br />
pictures—smaller copies of your originals—are loaded back to your <strong>camera</strong>, so<br />
you can share and enjoy more.<br />
Share your favorite pictures in 4 easy steps:<br />
1. Take pictures<br />
2. Tag pictures as<br />
favorites<br />
1 Press the Share button. Move the Joystick<br />
locate a picture.<br />
to<br />
2 Move the Joystick<br />
press the OK button.<br />
to highlight Favorite , then<br />
The Favorite icon appears in the status area.<br />
To remove the tag, press the OK button again.<br />
Press the Share button to exit the menu.<br />
www.kodak.com/go/support 59
Sharing pictures and videos<br />
3. Transfer pictures<br />
to your computer<br />
4. View favorites on<br />
your <strong>camera</strong><br />
1 To enjoy full functionality, load and use <strong>Kodak</strong> <strong>EasyShare</strong><br />
software that came with your <strong>camera</strong> (see page 54).<br />
2 Connect the <strong>camera</strong> to the computer using the USB cable<br />
(see page 62) or an <strong>EasyShare</strong> dock.<br />
The first time you transfer pictures, a software wizard helps<br />
you make choices about your favorite pictures. Then, your<br />
pictures are transferred to the computer. Favorite pictures are<br />
loaded to the Favorites section of your <strong>camera</strong>’s internal<br />
memory.<br />
1 Turn the Mode dial to Favorites .<br />
2 Move the Joystick to scroll through favorites.<br />
To exit Favorites mode, turn the Mode dial to any other<br />
position.<br />
To view pictures/videos on a card or in non-favorite internal<br />
memory, press the Review button. (See page 45.)<br />
NOTE: The <strong>camera</strong> holds a limited number of favorites. Use Camera Favorites in the <strong>EasyShare</strong> software to<br />
customize the size of your <strong>camera</strong> Favorites section. For more information, click the Help button in<br />
the <strong>Kodak</strong> <strong>EasyShare</strong> software.<br />
Optional settings<br />
In Favorites mode, press the Menu button to access optional settings.<br />
Slide Show (page 51) Remove all favorites (page 61)<br />
Multi-up (page 47) Setup Menu (page 36)<br />
NOTE: Pictures taken at the 4.4 MP (3:2) quality setting are displayed at a 3:2 aspect ratio with a black bar<br />
at the top of the screen. (See Picture Size, page 31.)<br />
60 www.kodak.com/go/support
Removing all favorites from your <strong>camera</strong><br />
1 Turn the Mode dial to Favorites .<br />
2 Press the Menu button.<br />
3 Highlight , then press the OK button.<br />
Sharing pictures and videos<br />
All pictures stored in the Favorites section of internal memory are removed. Favorites are<br />
restored to your <strong>camera</strong> the next time you transfer pictures to the computer. To remove<br />
single favorites, do so in <strong>EasyShare</strong> software.<br />
4 Press the Menu button to exit the menu.<br />
Preventing favorites from transferring to the <strong>camera</strong><br />
1 Open the <strong>Kodak</strong> <strong>EasyShare</strong> software. Click the My Collection tab.<br />
2 Go to the Albums view.<br />
3 Click the Camera Favorites Album for your <strong>camera</strong>.<br />
4 Click Remove Album.<br />
The next time you transfer pictures from your <strong>camera</strong> to the computer, use the Camera<br />
Favorites Wizard/Assistant in <strong>EasyShare</strong> software to recreate your Camera Favorites<br />
Album or to turn off the Camera Favorites feature.<br />
Printing and emailing favorites<br />
1 Turn the Mode dial to Favorites . Press to locate a picture.<br />
2 Press the Share button.<br />
3 Highlight Print or Email , then press the OK button.<br />
NOTE: Favorites that were taken on this <strong>camera</strong> (not imported from another source) are good for a 4 x 6 in.<br />
(10 x 15 cm) print.<br />
www.kodak.com/go/support 61
6 Transferring and printing<br />
pictures<br />
CAUTION:<br />
Install <strong>Kodak</strong> <strong>EasyShare</strong> software before connecting the <strong>camera</strong> or<br />
optional dock to the computer. Failure to do so may cause the<br />
software to install incorrectly.<br />
Transferring pictures/videos with the USB cable<br />
1 Turn off the <strong>camera</strong>.<br />
2 Plug the labeled end of the USB cable into the<br />
labeled USB port on your computer. See your<br />
computer user’s guide for details.<br />
3 Plug the other end of the USB cable into the labeled<br />
USB port on the <strong>camera</strong>.<br />
4 Turn on the <strong>camera</strong>.<br />
<strong>Kodak</strong> <strong>EasyShare</strong> software opens on your computer.<br />
The software prompts you through the transfer<br />
process.<br />
NOTE: Visit www.kodak.com/go/howto for an online tutorial on connecting.<br />
Also available for transferring<br />
You can also use these <strong>Kodak</strong> products to transfer your pictures and videos:<br />
■ <strong>Kodak</strong> <strong>EasyShare</strong> <strong>camera</strong> dock, <strong>Kodak</strong> <strong>EasyShare</strong> printer dock<br />
■ <strong>Kodak</strong> multi-card reader, <strong>Kodak</strong> SD multimedia card reader-writer<br />
Purchase these and other accessories at a dealer of <strong>Kodak</strong> products or<br />
www.kodak.com/go/z7590accessories.<br />
62 www.kodak.com/go/support
Transferring and printing pictures<br />
Printing from a <strong>Kodak</strong> <strong>EasyShare</strong> printer dock or<br />
your computer<br />
Computer—Click the Help button in the <strong>Kodak</strong> <strong>EasyShare</strong> software for details on<br />
printing from your computer.<br />
Printer dock—Dock your <strong>camera</strong> to the <strong>Kodak</strong> <strong>EasyShare</strong> printer dock and print<br />
directly with or without a computer. Purchase this and other accessories at a dealer of<br />
<strong>Kodak</strong> products or www.kodak.com/go/z7590accessories.<br />
Printing from an optional SD or MMC card<br />
■ Automatically print tagged pictures when you insert your card into a printer with<br />
an SD or MMC card slot. See your printer user’s guide for details.<br />
■ Make prints at an SD or MMC card-capable <strong>Kodak</strong> picture maker. (Contact a<br />
location prior to visiting. See www.kodak.com/go/picturemaker.)<br />
■ Take the card to your local photo retailer for professional printing.<br />
Ordering prints online<br />
<strong>Kodak</strong> <strong>EasyShare</strong> print service (provided by Ofoto, www.ofoto.com) is one of the many<br />
online print services offered in the <strong>Kodak</strong> <strong>EasyShare</strong> software. You can easily:<br />
■ Upload your pictures.<br />
■ Edit, enhance, and add borders to your pictures.<br />
■ Store pictures, and share them with family and friends.<br />
■ Order high-quality prints, photo greeting cards, frames, and albums—and have<br />
them delivered to your door.<br />
www.kodak.com/go/support 63
Transferring and printing pictures<br />
Direct printing with a PictBridge-enabled printer<br />
Your <strong>camera</strong> features PictBridge technology, which lets you print directly to<br />
PictBridge-enabled printers, without a computer. You need:<br />
■ Camera with fully charged batteries, or<br />
with optional <strong>Kodak</strong> 5-volt AC adapter<br />
Connecting the <strong>camera</strong> to the printer<br />
1 Turn off the <strong>camera</strong> and printer.<br />
■ PictBridge-enabled printer<br />
■ USB cable included with your <strong>camera</strong><br />
2 Optional: If you have a <strong>Kodak</strong> 5-volt AC adapter (optional accessory), plug it into<br />
the <strong>camera</strong> and into an electrical outlet.<br />
3 Using the USB cable that came with your <strong>camera</strong>, connect the <strong>camera</strong> to the<br />
printer. (See your printer user’s guide for details.)<br />
64 www.kodak.com/go/support
Printing pictures<br />
1 Turn on the printer. Turn the <strong>camera</strong> Mode dial to Auto.<br />
Transferring and printing pictures<br />
The PictBridge logo is displayed, followed by the current picture and menu. (If no<br />
pictures are found, a message is displayed.) If the menu interface turns off, press any<br />
button to redisplay it.<br />
2 Move the Joystick to choose a printing option, then press the<br />
OK button.<br />
Current Picture Press to choose a picture. Choose the number of copies.<br />
Tagged Pictures If your printer is capable, print pictures that you tagged for<br />
printing (see page 57) and choose a print size.<br />
Index Print Print thumbnails of all pictures. This requires one or more sheets<br />
of paper. If the printer is capable, choose a print size.<br />
All Pictures Print all pictures in internal memory, on a card, or in Favorites.<br />
Choose the number of copies.<br />
Image Storage Access internal memory, a card, or Favorites.<br />
NOTE: During direct printing, pictures are not permanently transferred or saved to the computer or printer.<br />
To transfer pictures to your computer, see page 62. If you turned the Mode dial to Favorites, the<br />
current favorite picture is displayed.<br />
Disconnecting the <strong>camera</strong> from the printer<br />
1 Turn off the <strong>camera</strong> and printer.<br />
2 Disconnect the USB cable from the <strong>camera</strong> and the printer.<br />
www.kodak.com/go/support 65
Transferring and printing pictures<br />
Dock compatibility for your <strong>camera</strong><br />
<strong>Kodak</strong> <strong>EasyShare</strong> dock Docking configuration<br />
■ printer dock 4000<br />
■ <strong>camera</strong> dock II<br />
■ LS420, LS 443 <strong>camera</strong> dock<br />
■ printer dock<br />
■ printer dock plus<br />
■ printer dock 6000<br />
■ <strong>camera</strong> dock 6000<br />
■ others, including series 3 printer<br />
docks and <strong>camera</strong> docks<br />
Not compatible<br />
Custom<br />
<strong>camera</strong> insert<br />
Adapter<br />
Dock<br />
Custom<br />
<strong>camera</strong> insert<br />
Dock<br />
Purchase <strong>camera</strong> docks, printer docks, and other accessories at a dealer of <strong>Kodak</strong><br />
products or www.kodak.com/go/z7590accessories.<br />
66 www.kodak.com/go/support
7 Troubleshooting<br />
When you have questions about your <strong>camera</strong>, start here. Additional technical<br />
information is available in the ReadMe file located on the <strong>Kodak</strong> <strong>EasyShare</strong> software<br />
CD. For updates to Troubleshooting information, see<br />
www.kodak.com/go/z7590support.<br />
Camera problems<br />
If... Try one or more of the following<br />
Camera does not<br />
turn on<br />
Camera does not<br />
turn off and the lens<br />
does not retract<br />
Camera buttons and<br />
controls do not<br />
function<br />
Lens does not extend<br />
when <strong>camera</strong> turns<br />
on or does not retract<br />
EVF/LCD screen is<br />
black or does not<br />
turn on<br />
In Review, a blue or<br />
black screen is<br />
displayed instead of<br />
a picture<br />
■ Remove battery and verify that it’s the correct type, then<br />
reinsert it.<br />
■ Insert a charged battery.<br />
■ Place the <strong>camera</strong> on a <strong>Kodak</strong> <strong>EasyShare</strong> <strong>camera</strong> or printer<br />
dock (sold separately), then try again.<br />
■ Connect the <strong>camera</strong> to a <strong>Kodak</strong> 5-volt AC adapter (sold<br />
separately), then try again. See page 2 for more battery<br />
information.<br />
■ Confirm that the battery in <strong>camera</strong> is charged.<br />
■ Turn <strong>camera</strong> on and off again.<br />
■ If problem still exists, get help (see page 74).<br />
■ Remove the lens cap.<br />
■ Push the EVF/LCD toggle button to change display.<br />
■ Transfer the picture to the computer.<br />
■ Transfer all pictures to the computer (see page 62).<br />
■ Take another picture. If problem still continues try internal<br />
memory and/or another memory card.<br />
www.kodak.com/go/support 67
Troubleshooting<br />
If... Try one or more of the following<br />
Pictures remaining<br />
number does not<br />
decrease after taking<br />
a picture<br />
Picture orientation is<br />
not accurate<br />
■ Continue taking pictures. The <strong>camera</strong> is operating normally.<br />
(The <strong>camera</strong> estimates the number of pictures remaining after<br />
each picture is taken, based on picture size and content.)<br />
■ Set the Orientation Sensor to ON (page 37).<br />
Flash does not fire ■ Open the flash unit (page 23).<br />
Storage location is<br />
almost or entirely full<br />
■ Check the flash setting and change as needed (page 23).<br />
■ Transfer pictures to the computer (page 62).<br />
■ Delete pictures from the card or insert a new one (page 8).<br />
■ Change image storage location to internal memory<br />
(page 35).<br />
Battery life is short ■ Wipe the contacts with a clean, dry cloth (page 83) before<br />
inserting a battery in the <strong>camera</strong>.<br />
■ Insert a charged battery (page 1).<br />
You cannot take a<br />
picture<br />
■ Turn the <strong>camera</strong> off, then on again.<br />
■ Depress shutter button all the way (page 9).<br />
■ Insert a charged battery (page 1).<br />
■ Wait until the AF/AE indicator turns green before attempting<br />
to take another picture.<br />
■ Memory full. Transfer pictures to the computer (page 62),<br />
delete pictures from the <strong>camera</strong> (page 48) or card, change<br />
image storage location, or insert a new card.<br />
68 www.kodak.com/go/support
If... Try one or more of the following<br />
Error message<br />
appears on EVF/LCD<br />
screen<br />
Memory card not<br />
recognized or <strong>camera</strong><br />
freezes with card.<br />
Troubleshooting<br />
■ Turn the <strong>camera</strong> off.<br />
■ Remove memory card from the <strong>camera</strong>.<br />
■ Remove the battery and wipe the contacts with a clean, dry<br />
cloth (page 83).<br />
■ Reinstall the battery.<br />
■ Turn on the <strong>camera</strong>.<br />
■ If all else fails, get customer support help (see page 75).<br />
■ Card may be corrupted. Format card in <strong>camera</strong> (see page 8).<br />
■ Use another memory card.<br />
www.kodak.com/go/support 69
Troubleshooting<br />
Computer/connectivity problems<br />
If... Try one or more of the following<br />
Computer does not ■ Turn on the <strong>camera</strong>.<br />
communicate with ■ Insert a charged battery (page 1).<br />
the <strong>camera</strong><br />
■ Make sure USB cable is securely connected on <strong>camera</strong> and<br />
computer port (page 62).<br />
■ Make sure the <strong>EasyShare</strong> software is installed (page 54).<br />
Pictures do not ■ Click the Help button in the <strong>EasyShare</strong> software.<br />
transfer to computer<br />
Slide Show does not<br />
run on an external<br />
video device<br />
Picture quality problems<br />
■ Adjust the <strong>camera</strong> Video Out setting (NTSC or PAL,<br />
page 37).<br />
■ Make sure the external device settings are correct (see the<br />
device’s user’s guide).<br />
If... Try one or more of the following<br />
Picture is too dark ■ Reposition <strong>camera</strong> for more available light.<br />
or underexposed ■ Use Fill flash (page 23) or change your position so light is not<br />
behind the subject.<br />
■ Move so that the distance between you and the subject is<br />
within the effective flash range (page 23).<br />
■ To automatically set exposure and focus, press the Shutter<br />
button halfway and hold. When the AF/AE indicator turns<br />
green, press the Shutter button completely down to take<br />
the picture.<br />
■ Use P mode to adjust the Exposure and Flash Compensations<br />
(page 22).<br />
■ Use P mode (page 22) and Selectable Zone (see Focus Zone on<br />
page 33).<br />
70 www.kodak.com/go/support
If... Try one or more of the following<br />
Troubleshooting<br />
Picture is too light ■ Reposition <strong>camera</strong> to reduce the amount of available light.<br />
■ Turn flash off (page 23).<br />
■ Move so that the distance between you and the subject is<br />
within the effective flash range (page 23).<br />
■ To automatically set exposure and focus, press the Shutter<br />
button halfway and hold. When the AF/AE indicator turns<br />
green, press the Shutter button completely down to take<br />
the picture.<br />
■ Use P mode to adjust the Exposure and Flash Compensations<br />
(page 22).<br />
Picture is not clear ■ To automatically set exposure and focus, press the Shutter<br />
button halfway and hold. When the AF/AE indicator turns<br />
green, press the Shutter button completely down to take<br />
the picture.<br />
■ Clean the lens (page 83).<br />
■ Make sure <strong>camera</strong> is not in Close-up mode if you are more<br />
than 21 in. (0.7 m) from your subject.<br />
■ Place the <strong>camera</strong> on a flat, steady surface or use a tripod,<br />
especially in high-<strong>zoom</strong> settings or in low light.<br />
www.kodak.com/go/support 71
Troubleshooting<br />
Power-ring-light status<br />
Status Cause<br />
Power ring does not<br />
turn on and the<br />
<strong>camera</strong> does not<br />
work.<br />
Power ring glows<br />
steady green.<br />
Power ring glows<br />
steady amber.<br />
Power ring<br />
blinks green.<br />
Power ring<br />
blinks amber.<br />
■ Turn on the <strong>camera</strong>.<br />
■ Recharge the battery or install a new one (page 2).<br />
■ Turn Mode dial off, then back on.<br />
■ Camera is on and ready to take a picture or video.<br />
■ Camera is in Favorite mode.<br />
■ Camera firmware update is in process.<br />
■ Camera is connected to computer, USB connection<br />
is active.<br />
■ Date and time set with lens retracted.<br />
■ Camera turned off while picture is being processed and<br />
saved. Camera operating normally. Processing is<br />
completed before power off.<br />
■ Do not remove the card while the light is blinking.<br />
■ Camera operating normally at power up. Take pictures<br />
when the blinking stops.<br />
■ Camera operating normally during connect mode to<br />
computer.<br />
■ Battery is low or exhausted. Recharge the<br />
battery (page 1).<br />
■ Internal <strong>camera</strong> temperature is too high. Turn the <strong>camera</strong><br />
off for several minutes; then turn it back on. If the<br />
condition continues, get help (page 75).<br />
72 www.kodak.com/go/support
Direct printing (PictBridge) problems<br />
Still having problems?<br />
Visit www.kodak.com/go/z7590support, or see Chapter 8, Getting help.<br />
For Direct printing issues, contact the printer manufacturer.<br />
Troubleshooting<br />
Status Cause Solution<br />
Cannot locate desired The Mode dial is set to Turn the Mode dial to Auto.<br />
picture.<br />
Favorites.<br />
Camera is accessing a Use the Direct print menu to<br />
card or internal memory. change the image storage<br />
location.<br />
The Direct print menu The menu interface has Press any button to redisplay it.<br />
interface turns off. timed out.<br />
Cannot print pictures. There is a connection Ensure that there is a<br />
issue.<br />
connection between <strong>camera</strong><br />
and printer (page 64).<br />
There is a power issue. Ensure the printer and <strong>camera</strong><br />
have power (page 64).<br />
Camera or printer There is a <strong>camera</strong> or Follow the prompts to resolve<br />
displays an error<br />
message.<br />
printer issue.<br />
the issue.<br />
www.kodak.com/go/support 73
8 Getting help<br />
Helpful links<br />
Camera Get support for your product (FAQs,<br />
troubleshooting information, etc.)<br />
www.kodak.com/go/z7590support<br />
Purchase <strong>camera</strong> accessories (<strong>camera</strong><br />
docks, printer docks, lenses, cards, etc.)<br />
www.kodak.com/go/z7590accessories<br />
Download the latest <strong>camera</strong> firmware<br />
and software<br />
www.kodak.com/go/z7590downloads<br />
See online demonstrations of your<br />
<strong>camera</strong><br />
www.kodak.com/go/howto<br />
Software Get information on <strong>EasyShare</strong> software www.kodak.com/go/easysharesw<br />
(or click the Help button in the<br />
<strong>EasyShare</strong> software)<br />
Get help with the Windows operating<br />
system and working with <strong>digital</strong> pictures<br />
www.kodak.com/go/pcbasics<br />
Other Get support for other <strong>camera</strong>s, software, www.kodak.com/go/support<br />
accessories, more<br />
Get information on <strong>Kodak</strong> <strong>EasyShare</strong><br />
printer docks<br />
www.kodak.com/go/printerdocks<br />
Get information on <strong>Kodak</strong> inkjet<br />
products<br />
www.kodak.com/go/inkjet<br />
Optimize your printer for truer, more<br />
vibrant colors<br />
www.kodak.com/go/onetouch<br />
Register your <strong>camera</strong> www.kodak.com/go/register<br />
74 www.kodak.com/go/support
Telephone customer support<br />
Getting help<br />
If you have questions concerning the operation of the software or <strong>camera</strong>, you may<br />
speak with a customer support representative. Before you call, have the <strong>camera</strong> or<br />
dock connected to your computer. Be at your computer, and have the following<br />
information available:<br />
■ Computer model, Operating system ■ Camera serial number<br />
■ Processor type and speed (MHz) ■ Version of <strong>Kodak</strong> <strong>EasyShare</strong> software<br />
■ Amount of memory (MB) & free hard<br />
disk space<br />
■ Exact error message you received<br />
Australia 1800 147 701 Greece 00800 441<br />
25605<br />
Spain 91 749 76 53<br />
Austria 0179 567 357 Hong Kong 800 901 514 Sweden 08 587 704 21<br />
Belgium 02 713 14 45 India 91 22 617 5823 Switzerland 01 838 53 51<br />
Brazil 0800 150000 Italy 02 696 33452 Taiwan 0800 096 868<br />
Canada 1 800 465 6325 Japan 03 5540 9002 Thailand 001 800 631<br />
0017<br />
China 800 820 6027 Korea 00798 631 0024 UK 0870 243 0270<br />
Denmark 3 848 71 30 Netherlands 020 346 9372 US 1 800 235 6325<br />
Indonesia 001 803 631<br />
0010<br />
New Zealand 0800 440 786 Outside US 585 726 7260<br />
Ireland 01 407 3054 Norway 23 16 21 33 International<br />
Toll Line<br />
Finland 0800 1 17056 Philippines /<br />
Metro Manila<br />
1 800 1 888 9600<br />
/ 632 6369600<br />
France 01 55 1740 77 Portugal 021 415 4125<br />
Germany 069 5007 0035 Singapore 800 6363 036<br />
International<br />
Toll Fax<br />
+44 131 458<br />
6714<br />
+44 131 458<br />
6962<br />
Visit: http://www.kodak.com/US/en/<strong>digital</strong>/contacts/DAIInternationalContacts.shtml<br />
www.kodak.com/go/support 75
9 Appendix<br />
Camera specifications<br />
For more specifications, visit www.kodak.com/go/z7590support.<br />
<strong>Kodak</strong> <strong>EasyShare</strong> <strong>Z7590</strong> <strong>zoom</strong> <strong>digital</strong> <strong>camera</strong><br />
CCD (charge-coupled device)<br />
CCD 1/2.5 in. CCD, 4:3 aspect ratio<br />
Output image size<br />
(picture size)<br />
2576 x 1932 (5.0 M) pixels<br />
2576 x 1716 (4.4 M) pixels<br />
2304 x 1728 (4.0 M) pixels<br />
2048 x 1536 (3.1 M) pixels<br />
1552 x 1164 (1.8 M) pixels<br />
Display<br />
Color LCD Hybrid high-resolution display 2.2 in. (55.9 mm);<br />
640 x 240 (153K) pixels<br />
Color Viewfinder—<br />
Electronic (EVF)<br />
LCD and EVF not simultaneous;<br />
0.26 in. (6.5 mm), (311k) pixels.<br />
Preview (LCD/EVF) Frame rate: 30 fps<br />
Lens<br />
Taking lens 10X optical <strong>zoom</strong> lens, f/2.8–f/3.7,<br />
38–380 mm (35 mm equivalent)<br />
76 www.kodak.com/go/support
<strong>Kodak</strong> <strong>EasyShare</strong> <strong>Z7590</strong> <strong>zoom</strong> <strong>digital</strong> <strong>camera</strong><br />
Appendix<br />
Focus system Hybrid AF External Passive Sensor; Multi-, Center-, or<br />
Selectable-Zones. Continuous AF in movie and preview modes.<br />
Working range:<br />
Standard wide: 2.0 ft (0.6 m) to infinity<br />
Standard tele: 6.6 ft (2.0 m) to infinity<br />
Close-up wide: 4.7 to 27.6 in. (0.12 to 0.7 m)<br />
Close-up tele: 3.9 to 6.9 ft (1.2 to 2.1 m)<br />
Wide and tele infinity: 65.6 ft (20 m) to infinity<br />
Digital <strong>zoom</strong> 3.0X continuous advanced <strong>zoom</strong>, 0.2X increments that starts at<br />
10X optical <strong>zoom</strong> (LCD display mode)<br />
Optical <strong>zoom</strong> 10X, 38–380 mm (35 mm equivalent); F= 6.32–63.2 mm actual<br />
Accessory lens Yes (inside lens ring)<br />
thread<br />
Lens barrier Lens cap<br />
Exposure<br />
Exposure metering TTL–AE with program modes;<br />
Multi-Pattern AE, Center-Weight AE, Center-Spot AE<br />
Exposure range AE range: EV 5.3 to 16.0 (@ wide)<br />
Full range: EV 0 to 16.0 (@ wide)<br />
Exposure mode Programmed AE mode: Auto, P, A, S, M, and C, Scene modes.<br />
Aperture Priority AE: f/2.8–f/8 @ wide<br />
Shutter Priority AE: 16–1/1000 sec. @ wide<br />
Full Manual Exposure (Noise Reduction: subtraction of black<br />
image @ >0.7 sec.)<br />
Exposure Compensation: +2.0 EV with 1/3 EV step<br />
Shutter speed Mechanical shutter with CCD electrical. Auto 16–1/1700 sec.,<br />
Manual 16–1/1000 sec.<br />
www.kodak.com/go/support 77
Appendix<br />
<strong>Kodak</strong> <strong>EasyShare</strong> <strong>Z7590</strong> <strong>zoom</strong> <strong>digital</strong> <strong>camera</strong><br />
ISO speed Auto: 80,100, 200, 400, and 800 (800 @ 1.8 MP)<br />
Selectable: P, A, S, M, and C Mode<br />
Flash<br />
Electronic flash Guide no. 12 @ ISO 140; auto flash with photo sensor<br />
Working range: Wide: 2–16.1 ft (0.6–4.9 m) @ ISO 140<br />
Tele: 6.6–12.1 ft (2.0–3.7 m) @ ISO 140<br />
Flash modes Auto, Fill, Red-eye, Off<br />
External flash sync Yes, 500-volts maximum<br />
Capture<br />
Capture modes Auto, Program, Aperture Priority, Shutter Priority, Manual,<br />
Custom, Sport, Portrait, Scenes (14), Burst, Video<br />
Jog dial Used to adjust Exposure Compensation, Aperture Priority AE,<br />
Shutter Priority AE, ISO, Flash Compensation, Full Manual<br />
Exposure.<br />
Burst mode First Burst 5 pictures; Last Burst 4 pictures; both @ 2.0 fps<br />
(AE, AF, AWB executed for first shot only.)<br />
Still image buffer 32 MB internal memory<br />
Video capture Image size/frame rate: VGA (640 x 480) at 12 fps,<br />
QVGA (320 x 240) at 20 fps<br />
Image file format Still: EXIF 2.21 (JPEG compression), file organization DCF<br />
Video: QuickTime (CODEC MPEG4)<br />
Image storage Optional MMC or SD Card<br />
of the SD Card Association.)<br />
(The SD logo is a trademark<br />
Internal storage<br />
capacity<br />
Review<br />
32 MB internal memory<br />
Quickview Yes<br />
78 www.kodak.com/go/support
<strong>Kodak</strong> <strong>EasyShare</strong> <strong>Z7590</strong> <strong>zoom</strong> <strong>digital</strong> <strong>camera</strong><br />
Video output NTSC or PAL<br />
Power<br />
<strong>Kodak</strong> <strong>EasyShare</strong> Li-Ion rechargeable battery (KLIC–5000); 5V AC adapter, optional<br />
Communication with computer<br />
USB, via USB cable; <strong>EasyShare</strong> <strong>camera</strong> dock or printer dock<br />
Languages<br />
English/German/Spanish/French/Italian/Portuguese/Chinese/Korean/Japanese<br />
Other features<br />
Self-timer 10 seconds<br />
Sound feedback Power up, shutter, self-timer, error, sound modes<br />
White balance Auto, Daylight, Tungsten, Fluorescent, Open Shade<br />
Auto sleep mode Yes. 8 minutes<br />
Color modes High Color, Natural Color, Low Color, Black & White, Sepia<br />
Sharpness High, Normal, Low<br />
Date stamp None, YYYY/MM/DD, MM/DD/YYYY, DD/MM/YYYY<br />
Tripod mount 1/4 inch metal<br />
Size 3.9 in. (99.6 mm) x 3.2 in. (81.2 mm) x 3.2 in. (79.9 mm)<br />
Weight 12 oz (340 g) without battery and card<br />
Storage capacities<br />
Appendix<br />
File sizes can vary due to image content and exposure. You may be able to store more<br />
or fewer pictures and videos. Favorites take up additional space in internal memory<br />
and reduce storage capacity.<br />
www.kodak.com/go/support 79
Appendix<br />
Picture storage capacity—standard compression<br />
Number of pictures<br />
5.0 MP 4.4 MP (3:2) 4.0 MP 3.1 MP 1.8 MP<br />
16 MB SD/MMC 9 11 12 15 24<br />
32 MB internal memory 17 19 21 27 43<br />
32 MB SD/MMC 19 22 24 30 48<br />
64 MB SD/MMC 39 44 48 60 97<br />
128 MB SD/MMC 79 88 97 121 195<br />
256 MB SD/MMC 159 178 196 242 391<br />
512 MB SD/MMC 319 356 392 485 783<br />
Picture storage capacity—fine compression<br />
Number of pictures<br />
5.0 MP 4.4 MP (3:2) 4.0 MP 3.1 MP 1.8 MP<br />
16 MB SD/MMC 4 5 5 7 12<br />
32 MB internal memory 8 9 10 12 21<br />
32 MB SD/MMC 9 10 11 14 24<br />
64 MB SD/MMC 18 20 23 28 48<br />
128 MB SD/MMC 37 41 46 57 97<br />
256 MB SD/MMC 74 83 92 115 194<br />
512 MB SD/MMC 149 167 185 231 389<br />
80 www.kodak.com/go/support
Video storage capacity<br />
Power-saving features<br />
Minutes/seconds of video<br />
VGA (640 x 480) QVGA (320 x 240)<br />
16 MB SD/MMC 59 sec. 1 min. 53 sec.<br />
32 MB internal memory 1 min. 47 sec. 3 min. 23 sec.<br />
32 MB SD/MMC 1 min. 52 sec. 3 min. 46 sec.<br />
64 MB SD/MMC 3 min. 59 sec. 7 min. 32 sec.<br />
128 MB SD/MMC 7 min. 59 sec. 15 min. 4 sec.<br />
256 MB SD/MMC 15 min. 58 sec. 30 min. 8 sec.<br />
512 MB SD/MMC 31 min. 57 sec. 60 min. 17 sec.<br />
If no action for The <strong>camera</strong> To turn it back on<br />
1 minute EVF/LCD screen turns off Press the OK button.<br />
Appendix<br />
8 minutes Enters auto power off Press any button or insert/remove card.<br />
www.kodak.com/go/support 81
Appendix<br />
Accessories<br />
Item Description Where to buy<br />
Schneider-<br />
Kreuznach Xenar<br />
0.7X wide-angle lens<br />
<strong>Kodak</strong><br />
DX6490/<strong>Z7590</strong> lens<br />
adapter<br />
Lens filter<br />
(black & white)<br />
<strong>Kodak</strong> 5-volt AC<br />
adapter<br />
<strong>Kodak</strong> performance<br />
series <strong>digital</strong> <strong>camera</strong><br />
case<br />
<strong>Kodak</strong> <strong>EasyShare</strong><br />
Li-Ion rechargeable<br />
battery—1700 mAh<br />
<strong>Kodak</strong> Li-Ion rapid<br />
battery charger kit<br />
Expand your creativity and<br />
photographic options with the versatile<br />
0.7X wide-angle lens.<br />
Allows you to add 55 mm screw-on<br />
lenses or filters<br />
Neutral density filter 102. Reduces<br />
light by 2 f-stops (log density 0.6),<br />
55 mm threads<br />
Circular Polarizing filter<br />
(55 mm threads)<br />
Easy way to extend battery life. Plug<br />
your <strong>camera</strong> in while downloading<br />
or viewing your pictures.<br />
Stylish, but rugged, for <strong>Kodak</strong><br />
<strong>EasyShare</strong> series <strong>digital</strong> <strong>camera</strong>s.<br />
Delivers outstanding capacity and<br />
charges up to 300 times in 3 hours<br />
or less.<br />
Includes six worldwide plugs ranging<br />
from 110–240 volts. Batteries sold<br />
separately.<br />
Check our Web site for the entire listing (batteries & chargers,<br />
memory cards, tripods, <strong>camera</strong> bags, travel kits, cartridge &<br />
photo paper kit, <strong>camera</strong> docks, printer docks, lenses, etc.)<br />
www.kodak.com/go/<br />
z7590accessories<br />
82 www.kodak.com/go/support
Upgrading your software and firmware<br />
Appendix<br />
Download the latest versions of the software included on the <strong>EasyShare</strong> software CD<br />
and the <strong>camera</strong> firmware (the software that runs on the <strong>camera</strong>). See<br />
www.kodak.com/go/z7590downloads.<br />
Additional care and maintenance<br />
■ If the <strong>camera</strong> has been subjected to inclement weather or you suspect water has<br />
gotten inside the <strong>camera</strong>, turn off the <strong>camera</strong> and remove the batteries and card.<br />
Allow all components to air-dry for at least 24 hours before using the <strong>camera</strong><br />
again.<br />
■ Blow gently on the lens or <strong>camera</strong> screen to remove dust and dirt. Wipe gently<br />
with a soft, lint-free cloth or an untreated lens-cleaning tissue. Do not use cleaning<br />
solutions unless designed specifically for <strong>camera</strong> lenses. Do not allow chemicals,<br />
such as suntan lotion, to contact painted surfaces.<br />
■ Do not place your <strong>camera</strong> near equipment, such as electric motors.<br />
Electro-magnetic induction may corrupt pictures or cause <strong>camera</strong> malfunctions.<br />
■ Rapid changes in temperature can cause harmful condensation. Keep your <strong>camera</strong><br />
in an airtight plastic bag and let it adjust to temperature before removing it from<br />
the bag.<br />
■ Service agreements are available in some countries. Contact a dealer of <strong>Kodak</strong><br />
products for more information.<br />
■ For <strong>digital</strong> <strong>camera</strong> disposal or recycling information, contact your local authorities.<br />
In the US, visit the Electronics Industry Alliance Web site at www.eiae.org or the<br />
<strong>Kodak</strong> Web site at www.kodak.com/go/z7590support.<br />
www.kodak.com/go/support 83
Appendix<br />
Warranty<br />
Limited warranty<br />
<strong>Kodak</strong> warrants <strong>Kodak</strong> <strong>digital</strong> <strong>camera</strong>s and accessories (excluding batteries) to be free<br />
from malfunctions and defects in both materials and workmanship for one year from<br />
the date of purchase.<br />
Retain the original dated sales receipt. Proof of the date of purchase will be required<br />
with any request for warranty repair.<br />
Limited warranty coverage<br />
This limited warranty will be honored only within the geographical<br />
location that <strong>Kodak</strong> <strong>digital</strong> <strong>camera</strong>s and accessories were purchased.<br />
<strong>Kodak</strong> will REPAIR or REPLACE <strong>Kodak</strong> <strong>digital</strong> <strong>camera</strong>s and accessories if they fail to<br />
function properly during the warranty period, subject to any conditions and/or<br />
limitations stated herein. Such repair service will include all labor as well as any<br />
necessary adjustments and/or replacement parts. Such repair or replacement is the<br />
sole remedy under this warranty.<br />
If replacement parts are used in making repairs, these parts may be remanufactured,<br />
or may contain remanufactured materials. If it is necessary to replace the entire<br />
product, it may be replaced with a remanufactured product.<br />
Limitations<br />
Request for Warranty service will not be accepted without proof of date of purchase,<br />
such as a copy of the original dated <strong>Kodak</strong> <strong>digital</strong> <strong>camera</strong> or accessory sales receipt.<br />
(Always keep the original for your records.)<br />
This warranty does not apply to the battery(s) used in <strong>digital</strong> <strong>camera</strong>s or accessories.<br />
This warranty does not cover circumstances beyond <strong>Kodak</strong>’s control, nor problems<br />
caused by failure to follow the operating instructions in the <strong>Kodak</strong> <strong>digital</strong> <strong>camera</strong>s and<br />
accessories User’s Guides.<br />
THIS WARRANTY DOES NOT APPLY WHEN FAILURE IS DUE TO SHIPPING DAMAGE,<br />
84 www.kodak.com/go/support
Appendix<br />
ACCIDENT, ALTERATION, MODIFICATION, UNAUTHORIZED SERVICE, MISUSE,<br />
ABUSE, USE WITH INCOMPATIBLE ACCESSORIES OR ATTACHMENTS, FAILURE TO<br />
FOLLOW KODAK’S OPERATION, MAINTENANCE OR REPACKING INSTRUCTIONS,<br />
FAILURE TO USE ITEMS SUPPLIED BY KODAK (SUCH AS ADAPTERS AND CABLES), OR<br />
CLAIMS MADE AFTER THE DURATION OF THIS WARRANTY.<br />
<strong>Kodak</strong> makes no other express or implied warranty for this product. In the event that<br />
the exclusion of any implied warranty is ineffective under the law, the duration of the<br />
implied warranty will be one year from the purchase date.<br />
The option of replacement is <strong>Kodak</strong>’s only obligation. <strong>Kodak</strong> will not be responsible<br />
for any special, consequential or incidental damages resulting from the sale, purchase,<br />
or use of this product, regardless of the cause. Liability for any special, consequential<br />
or incidental damages (including but not limited to loss of revenue or profit,<br />
downtime costs, loss of the use of the equipment, cost of substitute equipment,<br />
facilities or services, or claims of your customers for such damages resulting from the<br />
purchase, use or failure of the product), regardless of cause or for breach of any<br />
written or implied warranty is expressly disclaimed and excluded here from.<br />
Your rights<br />
Some states or jurisdictions do not allow exclusion or limitation of incidental or<br />
consequential damages, so the above limitation or exclusion may not apply to you.<br />
Some states or jurisdictions do not allow limitations on how long an implied warranty<br />
lasts, so the above limitation may not apply to you.<br />
This warranty gives you specific rights, and you may have other rights which vary from<br />
state to state or by jurisdiction.<br />
Outside the United States and Canada<br />
In countries other than the United States and Canada, the terms and conditions of<br />
this warranty may be different. Unless specific <strong>Kodak</strong> warranty is communicated to the<br />
purchaser in writing by a <strong>Kodak</strong> company, no warranty or liability exists beyond any<br />
minimum requirements imposed by law, even though defect, damage, or loss may be<br />
by negligence or other act.<br />
www.kodak.com/go/support 85
Appendix<br />
Regulatory compliance<br />
FCC compliance and advisory<br />
<strong>Kodak</strong> <strong>EasyShare</strong> <strong>Z7590</strong> <strong>zoom</strong> <strong>digital</strong> <strong>camera</strong><br />
This equipment has been tested and found to comply with the limits for a Class B<br />
<strong>digital</strong> device, pursuant to Part 15 of the FCC Rules. These limits are designed to<br />
provide reasonable protection against harmful interference in a residential<br />
installation.<br />
This equipment generates, uses, and can radiate radio frequency energy and, if not<br />
installed or used in accordance with the instructions, may cause harmful interference<br />
to radio communications. However, there is no guarantee that interference will not<br />
occur in a particular installation.<br />
If this equipment does cause harmful interference to radio or television reception,<br />
which can be determined by turning the equipment off and on, the user is encouraged<br />
to try to correct the interference by one or more of the following measures: 1) reorient<br />
or relocate the receiving antenna; 2) increase the separation between the equipment<br />
and the receiver; 3) connect the equipment to an outlet on a circuit different from that<br />
to which the receiver is connected; 4) consult the dealer or an experienced radio/TV<br />
technician for additional suggestions.<br />
Any changes or modifications not expressly approved by the party responsible for<br />
compliance could void the user’s authority to operate the equipment. Where shielded<br />
interface cables have been provided with the product or specified additional<br />
components or accessories elsewhere defined to be used with the installation of the<br />
product, they must be used in order to ensure compliance with FCC regulation.<br />
86 www.kodak.com/go/support
Canadian DOC statement<br />
Appendix<br />
DOC Class B Compliance—This Class B <strong>digital</strong> apparatus complies with Canadian<br />
ICES-003.<br />
Observation des normes-Class B—Cet appareil numérique de la classe B est<br />
conforme à la norme NMB-003 du Canada.<br />
VCCI Class B ITE<br />
English translation:<br />
This is a Class B product based on the standard of the Voluntary Control Council for<br />
Interference from Information Technology Equipment (VCCI). If this is used near a<br />
radio or television receiver in a domestic environment, it may cause radio interference.<br />
Install and use the equipment according to the instruction manual.<br />
MPEG-4<br />
Use of this product in any manner that complies with the MPEG-4 visual standard is<br />
prohibited, except for use by a consumer engaging in personal and non-commercial<br />
activities.<br />
www.kodak.com/go/support 87
Index 1<br />
A<br />
A/V out, 52<br />
A/V out (for TV viewing)<br />
connection location, ii<br />
about this <strong>camera</strong>, 38<br />
AC adapter, 3<br />
accessories<br />
battery, 3<br />
buying, 74<br />
<strong>camera</strong>, 82<br />
external flash, 27<br />
printer dock, 63<br />
SD or MMC card, 8<br />
AF control, 34<br />
album, 35<br />
albums, tagging pictures for, 39, 50<br />
aperture priority, 18<br />
aperture, PASM mode, 21<br />
auto, 17<br />
flash, 23<br />
focus framing marks, 11<br />
power-down, 81<br />
B<br />
backlight, 21<br />
battery<br />
charge via charger, 1<br />
expected life, 2<br />
extending life, 3<br />
inserting, 2<br />
safety, 4<br />
battery door, iv<br />
beach, 20<br />
bracketing interval, 32<br />
burst first/last button, iv<br />
burst,using, 29<br />
button<br />
burst, 29<br />
close-up/landscape, 27<br />
delete, 15<br />
exposure bracketing, 28<br />
flash/status, 23<br />
On/Off, 5<br />
on/off, iii<br />
review, 45<br />
share, iii, 56<br />
<strong>zoom</strong>, 16<br />
C<br />
cable<br />
audio/video, 52<br />
USB, 62<br />
<strong>camera</strong> accessories, 82<br />
<strong>camera</strong> dock, 3<br />
<strong>camera</strong> screen<br />
reviewing pictures, 45<br />
reviewing videos, 45<br />
Canadian compliance, 87<br />
caring for your <strong>camera</strong>, 83<br />
charging<br />
battery via charger, 1<br />
lights, battery charger, 1<br />
children, 21<br />
clock, setting, 6<br />
88 www.kodak.com/go/support
close-up<br />
scenes, 27<br />
close-up button, iv<br />
close-up pictures, 28<br />
color mode, 34<br />
compression, 31<br />
computer<br />
connecting <strong>camera</strong>, 62<br />
transfer to, 62<br />
copy pictures<br />
card to memory, 53<br />
memory to card, 53<br />
to computer via USB cable, 62<br />
custom, 18<br />
custom exposure mode, 30<br />
customer support, 75<br />
D<br />
date setting, 6<br />
DC-In (5V)<br />
connection location, ii<br />
delete button, iii<br />
deleting<br />
during quickview, 15<br />
from internal memory, 48<br />
from MMC/SD Card, 48<br />
<strong>digital</strong> <strong>zoom</strong>, 36<br />
<strong>digital</strong> <strong>zoom</strong>, using, 16<br />
displaying slide show, 51<br />
disposal, recycling, 83<br />
distant scenes, 27<br />
dock<br />
printer, 63<br />
dock compatibility, 66<br />
dock connector, iv<br />
downloading pictures, 62<br />
E<br />
<strong>EasyShare</strong> software, 54<br />
emailing pictures, videos, 58<br />
er, 81<br />
EVF/LCD toggle button, iii<br />
exposure<br />
compensation, PASM mode, 21<br />
exposure bracketing button, iv<br />
exposure metering, 33<br />
external flash, 27<br />
external flash connector location, ii<br />
external video device<br />
viewing pictures, videos, 52<br />
external-flash-connector cover, ii<br />
F<br />
favorites, 18<br />
removing, 61<br />
settings, 60<br />
tagging, 59<br />
FCC compliance, 86<br />
fireworks, 20<br />
firmware, upgrading, 83<br />
first burst/last burst button, iv<br />
flash<br />
compensation, PASM mode, 27<br />
external, 27<br />
off, 27<br />
rear-curtain sync, 27<br />
red-eye, 27<br />
settings, 23<br />
Index<br />
www.kodak.com/go/support 89
Index<br />
flash button, iv<br />
flip-up flash, i, iv<br />
flower, 20<br />
focus framing marks, 11<br />
focus zone, 33<br />
format, 38<br />
H<br />
help<br />
troubleshooting, 67<br />
web links, 74<br />
histogram, 12<br />
I<br />
icons, mode dial, 17<br />
image storage, 35<br />
inserting<br />
battery, 2<br />
SD or MMC card, 8<br />
installing software, 55<br />
internal memory<br />
storage capacity, 79<br />
J<br />
jog dial, i<br />
joystick, iii<br />
K<br />
<strong>Kodak</strong> <strong>EasyShare</strong> software<br />
installing, 55<br />
upgrading, 83<br />
<strong>Kodak</strong> web sites, 74<br />
L<br />
landscape, 19, 27<br />
landscape button, iv<br />
language, 37<br />
LCD (Liquid Crystal Display) screen, iii<br />
LCD/EVF toggle button, iii<br />
lens, i<br />
cleaning lens, 83<br />
light<br />
jog dial, i<br />
power ring, iii, 72<br />
locator for <strong>EasyShare</strong> <strong>camera</strong> dock or<br />
printer dock, iv<br />
M<br />
Macintosh<br />
installing software on, 55<br />
macro mode, 44<br />
magnify picture, 48<br />
maintenance, <strong>camera</strong>, 83<br />
manner, 20<br />
manual, 18<br />
memory<br />
inserting card, 8<br />
menu button, iii<br />
microphone, i<br />
mode dial, iii, 17<br />
mode light, iii<br />
modes<br />
aperture priority, 18<br />
auto, 17<br />
backlight, 21<br />
beach, 20<br />
children, 21<br />
custom, 18<br />
custom exposure, 30<br />
90 www.kodak.com/go/support
favorites, 18<br />
fireworks, 20<br />
flower, 20<br />
landscape, 19<br />
manner, 20<br />
manual, 18<br />
night landscape, 20<br />
night portrait, 19<br />
party, 20<br />
portrait, 19<br />
program, 17<br />
SCN, 19<br />
self-portrait, 20<br />
shutter priority, 18<br />
snow, 20<br />
text, 20<br />
N<br />
neckstrap post, iii<br />
night landscape, 20<br />
night portrait, 19<br />
O<br />
OK button, iii<br />
on/off button, iii<br />
online prints, ordering, 63<br />
open flash lever, iv<br />
optical <strong>zoom</strong>, 16<br />
orientation sensor, 37<br />
P<br />
party, 20<br />
PASM mode<br />
screen options, 21<br />
PictBridge printer, 64<br />
picture size, 31<br />
picture status, iii<br />
pictures<br />
copying, 53<br />
deleting, 48<br />
emailing tagged, 58<br />
magnifying, 48<br />
printing tagged, 57<br />
reviewing, 45<br />
storage capacity, 79<br />
tagging, 50<br />
taking, modes, 17<br />
transfer via USB cable, 62<br />
picture-taking tips, 40<br />
portrait, 19<br />
power<br />
auto off, 81<br />
<strong>camera</strong>, 5<br />
ring, iii, 72<br />
switch, iii<br />
printer dock, 3, 63<br />
printing<br />
from a card, 63<br />
optimizing printer, 74<br />
order online, 63<br />
PictBridge, 64<br />
tagged pictures, 63<br />
with <strong>EasyShare</strong> printer dock, 63<br />
program, 17<br />
protecting pictures, videos, 49<br />
Q<br />
quickview, 36<br />
using, 15<br />
Index<br />
www.kodak.com/go/support 91
Index<br />
R<br />
ReadMe file, 67<br />
rear-curtain-flash sync, 25<br />
recycling, disposal, 83<br />
red-eye, flash, 23<br />
regulatory information, 86<br />
removing favorites, 61<br />
reset to default, 34<br />
review button, iii, 45<br />
reviewing pictures<br />
as you take them, 15<br />
<strong>camera</strong> screen, 45<br />
deleting, 48<br />
magnifying, 48<br />
slide show, 51<br />
reviewing videos<br />
<strong>camera</strong> screen, 45<br />
deleting, 48<br />
slide show, 51<br />
running slide show, 51<br />
S<br />
safety<br />
battery, 4<br />
SCN, 19<br />
SD or MMC card<br />
inserting, 8<br />
storage capacities, 79<br />
SD/MMC card<br />
printing from, 63<br />
SD/MMC card slot, ii<br />
self-portrait, 20<br />
self-timer, 30<br />
pictures/videos, 38<br />
self-timer/video light, i<br />
service and support<br />
telephone numbers, 75<br />
setting<br />
AF control, 34<br />
album, 35<br />
bracketing interval, 32<br />
color mode, 34<br />
compression, 31<br />
date and time, 6<br />
<strong>digital</strong> <strong>zoom</strong>, 36<br />
exposure metering, 33<br />
flash, 23<br />
focus zone, 33<br />
image storage, 35<br />
language, 37<br />
picture size, 31<br />
picture taking mode, 17<br />
quickview, 36<br />
self-timer, 30, 38<br />
sharpness, 34<br />
sound themes, 37<br />
video length, 35<br />
video out, 37<br />
white balance, 32<br />
share button, iii, 56<br />
sharpness, 34<br />
shutoff, auto, 81<br />
shutter<br />
self-timer delay, 38<br />
shutter button, i, iv<br />
shutter priority, 18<br />
shutter speed, PASM mode, 21<br />
shutter, problems, 68<br />
92 www.kodak.com/go/support
sleep mode, 81<br />
slide show<br />
problems, 70<br />
running, 51<br />
snow, 20<br />
software<br />
installing, 55<br />
upgrading, 83<br />
sound themes, 37<br />
speaker, iv<br />
specifications, 76<br />
status button, iii<br />
storage capacity, 79<br />
support, technical, 75<br />
T<br />
tagging, 39<br />
favorites, 59<br />
for email, 58<br />
for print, 57<br />
when to tag, 56<br />
tagging pictures<br />
for albums, 39, 50<br />
telephone support, 75<br />
television, slide show, 52<br />
text, 20<br />
time, setting, 6<br />
timer, shutter delay, 38<br />
tips<br />
battery guidelines, 3<br />
care & maintenance, 83<br />
picture-taking, 40<br />
ReadMe file, 67<br />
transfer, via USB cable, 62<br />
trash can, deleting, 15<br />
tripod socket, iv<br />
troubleshooting, 67<br />
turning <strong>camera</strong> on and off, 5<br />
U<br />
upgrading software, firmware, 83<br />
URLs, <strong>Kodak</strong> web sites, 74<br />
USB (universal serial bus)<br />
connection location, ii<br />
transferring pictures, 62<br />
USB port/DC-in/A/V-out cover, ii<br />
V<br />
VCCI compliance, 87<br />
video length, 35<br />
video out, 37<br />
videos<br />
copying, 53<br />
deleting, 48<br />
emailing tagged, 58<br />
reviewing, 45<br />
storage capacities, 79<br />
transfer to computer, 62<br />
viewing, 45<br />
viewing picture<br />
after taking, 15, 45<br />
magnified, 48<br />
W<br />
warranty, 84<br />
white balance, 32<br />
Windows computers<br />
installing software, 55<br />
Index<br />
www.kodak.com/go/support 93
Index<br />
Z<br />
<strong>zoom</strong><br />
<strong>digital</strong>, 16<br />
optical, 16<br />
<strong>zoom</strong> lever, iii<br />
94 www.kodak.com/go/support