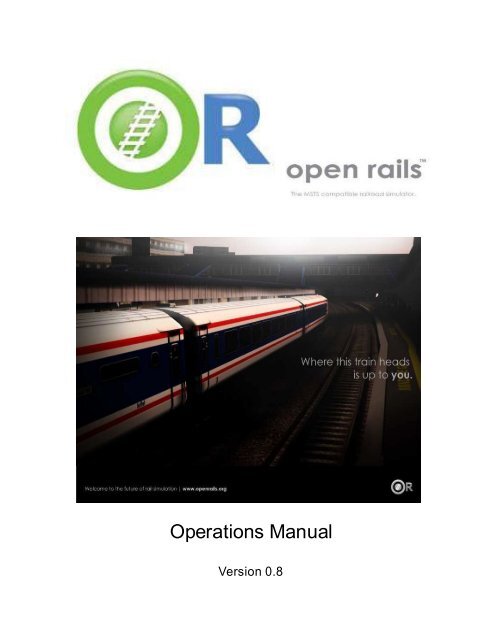
Operations Manual - Open Rails
Operations Manual - Open Rails
Operations Manual - Open Rails

You also want an ePaper? Increase the reach of your titles
YUMPU automatically turns print PDFs into web optimized ePapers that Google loves.
<strong>Operations</strong> <strong>Manual</strong><br />
Version 0.8
Read the included End User License Agreement (EULA)<br />
NO WARRANTIES. openrails.org disclaims any warranty, at all, for its Software. The <strong>Open</strong><br />
<strong>Rails</strong> software and any related tools, or documentation is provided “as is” without warranty of<br />
any kind, either express or implied, including suitability for use. You, as the user of this<br />
software, acknowledge the entire risk from its use.<br />
Trademark Acknowledgment<br />
<strong>Open</strong> <strong>Rails</strong>, <strong>Open</strong> <strong>Rails</strong> Transport Simulator, ORTS, <strong>Open</strong> <strong>Rails</strong> trademark, openrails.org, <strong>Open</strong><br />
<strong>Rails</strong> symbol and associated graphical representations of <strong>Open</strong> <strong>Rails</strong> are the property of<br />
openrails.org. All other third party brands, products, service names, trademarks, or registered<br />
service marks are the property of and used to identify the products or services of their<br />
respective owners.<br />
Copyright Acknowledgment<br />
©2012 openrails.org All rights reserved.<br />
2
Table of Contents<br />
Contents<br />
Introduction ............................................................................................................................................6<br />
About <strong>Open</strong> <strong>Rails</strong>......................................................................................................................................6<br />
Version .....................................................................................................................................................7<br />
Community ..............................................................................................................................................7<br />
<strong>Open</strong> <strong>Rails</strong> software platform ..................................................................................................................7<br />
Architecture .........................................................................................................................................7<br />
<strong>Open</strong> <strong>Rails</strong> game engine........................................................................................................................8<br />
Frames Per Second (FPS) Performance ..................................................................................................9<br />
Game Clock and Internal Clock .............................................................................................................9<br />
Resource Utilization .............................................................................................................................9<br />
Multi-Threaded Coding .........................................................................................................................9<br />
Future & Roadmap.............................................................................................................................. 10<br />
MSTS File Format Compatibility ............................................................................................................. 13<br />
Trainset: ............................................................................................................................................. 13<br />
Consists: ............................................................................................................................................. 13<br />
Services: ............................................................................................................................................. 13<br />
Paths:.................................................................................................................................................. 13<br />
Routes: ............................................................................................................................................... 13<br />
Environment: ..................................................................................................................................... 14<br />
Activities: ........................................................................................................................................... 14<br />
Satellite: ............................................................................................................................................. 14<br />
<strong>Open</strong> <strong>Rails</strong> Software Capabilities............................................................................................................ 14<br />
<strong>Open</strong> <strong>Rails</strong> game environment ........................................................................................................... 14<br />
Time of Day ..................................................................................................................................... 14<br />
Weather .......................................................................................................................................... 15<br />
Seasons ........................................................................................................................................... 15<br />
<strong>Open</strong> <strong>Rails</strong> HUD ................................................................................................................................... 15<br />
3
Basic HUD display............................................................................................................................ 15<br />
Steam Engine HUD – Additional Information .................................................................................. 16<br />
Extended HUD – F5 .......................................................................................................................... 17<br />
Basic F5 HUD + Brake Information...................................................................................................... 17<br />
Basic F5 HUD + Dispatcher Information .............................................................................................. 17<br />
Basic F5 HUD + Debug Information..................................................................................................... 18<br />
Basic F5 HUD + Train Force Information.............................................................................................. 19<br />
Monitor Windows .............................................................................................................................. 19<br />
Compass window ............................................................................................................................ 19<br />
F1 Information Monitor .................................................................................................................. 20<br />
F4 Track Monitor ............................................................................................................................. 21<br />
F6 Siding and Platform Names ........................................................................................................... 21<br />
F7 Train Names ................................................................................................................................. 22<br />
F8 Switch Monitor........................................................................................................................... 22<br />
F9 Train <strong>Operations</strong> Monitor........................................................................................................... 23<br />
F10 Activity Monitor ....................................................................................................................... 23<br />
Save and Resume ................................................................................................................................. 24<br />
Caution............................................................................................................................................. 25<br />
<strong>Open</strong> <strong>Rails</strong> Physics.................................................................................................................................. 26<br />
Train Cars (WAG) ................................................................................................................................. 26<br />
Engine – Classes of Motive Power ...................................................................................................... 26<br />
Adhesion model ................................................................................................................................... 27<br />
Engines – Multiple Units in Same Consist or AI Engines ..................................................................... 29<br />
<strong>Open</strong> <strong>Rails</strong> Braking.............................................................................................................................. 29<br />
Using the F5 HUD Braking information in the Game ........................................................................... 31<br />
Dynamic Brakes .................................................................................................................................. 32<br />
A Glimpse of the Future ..................................................................................................................... 33<br />
Proprietary <strong>Open</strong> <strong>Rails</strong> Braking Parameters – File Inclusions for ENG files .................................... 33<br />
Dynamic Tractive Force ................................................................................................................... 37<br />
Brake Retainers............................................................................................................................... 37<br />
<strong>Open</strong> <strong>Rails</strong> Train Engine Lights ............................................................................................................... 37<br />
4
Enabling <strong>Open</strong> <strong>Rails</strong> Lighting .............................................................................................................. 37<br />
Lighting Functi ons and Known Issues ................................................................................................ 38<br />
Fixing <strong>Open</strong> <strong>Rails</strong> Lighting Problems .................................................................................................. 38<br />
<strong>Open</strong> <strong>Rails</strong> Activities .............................................................................................................................. 39<br />
Player Paths, AI Paths, and How Switches are handled....................................................................... 39<br />
<strong>Open</strong> <strong>Rails</strong> AI .......................................................................................................................................... 39<br />
Basic AI Functionality ......................................................................................................................... 39<br />
<strong>Open</strong> <strong>Rails</strong> Signaling ............................................................................................................................... 40<br />
<strong>Open</strong> <strong>Rails</strong> Multi-Player.......................................................................................................................... 40<br />
Goal:.................................................................................................................................................... 40<br />
Getting Started:.................................................................................................................................... 41<br />
Requirements:...................................................................................................................................... 41<br />
Technical Issues:................................................................................................................................... 41<br />
Technical Support................................................................................................................................. 41<br />
Starting a MultiPlayer session:............................................................................................................... 41<br />
Launch the Server............................................................................................................................. 41<br />
Connect to a server as a Client ........................................................................................................... 42<br />
In Game Controls:................................................................................................................................. 43<br />
Multiplayer Options:............................................................................................................................. 46<br />
Summation: ......................................................................................................................................... 47<br />
Possible Problems:................................................................................................................................ 47<br />
Multi-Player Setting up a Server.......................................................................................................... 48<br />
IP Address ............................................................................................................................................ 48<br />
Port Forwarding ................................................................................................................................... 49<br />
<strong>Open</strong> <strong>Rails</strong> Best Practices ....................................................................................................................... 52<br />
Polys vs. Draw Calls – What’s Important................................................................................................. 52<br />
Acknowledgements................................................................................................................................ 53<br />
License Agreement................................................................................................................................. 54<br />
5
Introduction<br />
<strong>Open</strong> <strong>Rails</strong> software (OPEN RAILS) is a community developed and maintained project from<br />
openrails.org. Its objective is to create a new transport simulator platform that is first, compatible<br />
with routes, activities, consists, locomotives, and rolling stock created for MSTS; and second, a<br />
platform for future content creation freed of the constraints of MSTS.<br />
Our goal is to enhance the railroad simulation hobby through a community designed and<br />
supported platform built to serve as a lasting foundation for an accurate and immersive<br />
simulation experience. By making the source code of the platform accessible to community<br />
members, we ensure that OPEN RAILS software will continually evolve to meet the technical,<br />
operational, graphical, and content building needs of the community. <strong>Open</strong> architecture<br />
ensures that our considerable investment in building accurate representations of routes and<br />
rolling stock will not become obsolete. Access to the source code eliminates the frustration of<br />
undocumented behavior and simplifies understanding the internal operation of the simulator<br />
without the time consuming trial and error experimentation typically needed today.<br />
<strong>Open</strong> <strong>Rails</strong> software is just what the name implies – a railroad simulation platform that’s open<br />
for inspection, open for continuous improvement, open to third parties and commercial<br />
enterprises, open to the community and, best of all, an open door to the future.<br />
About <strong>Open</strong> <strong>Rails</strong><br />
To take advantage of almost a decade of content developed by the train simulation community,<br />
<strong>Open</strong> <strong>Rails</strong> software is a complete new game platform that has backward compatibility with<br />
MSTS content. By leveraging the community’s knowledge base on how to develop content for<br />
MSTS, <strong>Open</strong> <strong>Rails</strong> software provides a rich environment for community and payware<br />
contribution.<br />
The primary objective of the <strong>Open</strong> <strong>Rails</strong> project is to create a railroad simulator that will provide<br />
‘true to life’ operational experience. The <strong>Open</strong> <strong>Rails</strong> software is aimed at the serious train<br />
simulation hobbyist; someone who cares about loco physics, train handling, signals, AI<br />
behavior, dispatching, and most of all running trains in a realistic, prototypical manner. While the<br />
project team will strive to deliver an unparalleled graphical experience, ‘eye candy’ is not the<br />
primary objective of <strong>Open</strong> <strong>Rails</strong> software.<br />
By developing a completely new railroad simulator, <strong>Open</strong> <strong>Rails</strong> software offers the potential to<br />
better utilize current and next generation computer resources, like graphics processing units<br />
(GPUs), multi-core CPUs, advanced APIs such as PhysX, and widescreen monitors, among<br />
many others. The software is distributed in restricted source code form so the user community<br />
can understand how the software functions to facilitate feedback and to improve the capabilities<br />
of <strong>Open</strong> <strong>Rails</strong> software.<br />
6
Version<br />
This document is based on version 0.8.<br />
Community<br />
At the present time, <strong>Open</strong> <strong>Rails</strong> software is offered without technical support. Therefore, users<br />
are encouraged to use their favorite train simulation forums to get support from the community.<br />
- Train-Sim.Com http://forums.flightsim.com/vbts/<br />
- UK Train Sim http://forums.uktrainsim.com/index.php<br />
- Elvas Tower http://www.elvastower.com/forums/index.php?/index<br />
For users interested in multiplayer, a forum is set up for you to seek and announce hosting<br />
sessions: http://www.tsimserver.com.<br />
The <strong>Open</strong> <strong>Rails</strong> team is planning on launching a wiki that will offer the community a central<br />
resource for technical assistance on installation, creating content, known issues, tutorials, and a<br />
place for the community to provide feedback to the <strong>Open</strong> <strong>Rails</strong> team.<br />
The <strong>Open</strong> <strong>Rails</strong> team is NOT planning on hosting a forum on the <strong>Open</strong> <strong>Rails</strong> website. We<br />
believe that the best solution is for the current train simulation forum sites to remain the<br />
destination for users who want to discuss topics relating to <strong>Open</strong> <strong>Rails</strong> software. The <strong>Open</strong><br />
<strong>Rails</strong> team monitors and actively participates at these forums.<br />
<strong>Open</strong> <strong>Rails</strong> software platform<br />
Architecture<br />
To better understand how the <strong>Open</strong> <strong>Rails</strong> game operates, performs, and functions, an<br />
architecture diagram lays out how the software code is organized. The architecture of the <strong>Open</strong><br />
<strong>Rails</strong> software allows for modular extension and development, while providing standardized<br />
methods to customize the simulation experience.<br />
Please note that this diagram includes many capabilities and functions that are yet<br />
to be implemented.<br />
7
<strong>Open</strong> <strong>Rails</strong> game engine<br />
The <strong>Open</strong> <strong>Rails</strong> software is built on Microsoft’s XNA game platform. Source code is developed<br />
in Microsoft Visual C# programming language.<br />
8
The XNA Framework is based on the native implementation of .NET Compact Framework 2.0<br />
for Xbox 360 development and .NET Framework 2.0 on Windows. It includes an extensive set of<br />
class libraries, specific to game development, to promote maximum code reuse across target<br />
platforms. The framework runs on a version of the Common Language Runtime that is<br />
optimized for gaming to provide a managed execution environment. The runtime is available for<br />
Windows XP, Windows Vista, Windows 7, and Xbox 360. Since XNA games are written for the<br />
runtime, they can run on any platform that supports the XNA Framework with minimal or no<br />
modification of the Game engine. 1<br />
A license fee is payable to Microsoft to use XNA Game Studio for Xbox 360 game.<br />
At this time, the <strong>Open</strong> <strong>Rails</strong> team has not investigated whether the <strong>Open</strong> <strong>Rails</strong> software is<br />
suitable for Xbox.<br />
Frames Per Second (FPS) Performance<br />
For the current release, <strong>Open</strong> <strong>Rails</strong> development team has untethered the FPS performance<br />
from the synch rate of the monitor. This allows the development team to more easily document<br />
performance improvements. The <strong>Open</strong> <strong>Rails</strong> team at a later date may decide to limit FPS to the<br />
synch rate of the monitor.<br />
Game Clock and Internal Clock<br />
Like other simulation software, <strong>Open</strong> <strong>Rails</strong> software uses two internal “clocks”; a game clock<br />
and an internal clock. The game clock is required to synchronize the movement of trains, signal<br />
status, and present the correct game environment. The internal clock is used synchronize the<br />
software process for optimal efficiency and correct display of the game environment.<br />
The <strong>Open</strong> <strong>Rails</strong> team is dedicated to ensuring the game clock properly manages time in the<br />
simulation, so that a train will cover the proper distance in the correct time. The development<br />
team considers this vital aspect for an accurate simulation by ensuring activities run consistently<br />
across community member’s computer systems.<br />
Resource Utilization<br />
Because <strong>Open</strong> <strong>Rails</strong> software is designed for Microsoft’s XNA game framework, it natively<br />
exploits today’s graphics cards ability to offload much of the display rendering workload from the<br />
computer’s CPU.<br />
Multi-Threaded Coding<br />
The <strong>Open</strong> <strong>Rails</strong> software is designed from the ground up to support up to 4 CPUs, either as<br />
virtual or physical units. Instead of a single thread looping and updating all the elements of the<br />
9
simulation, the software uses four threads for the main functions of the software.<br />
10<br />
Thread 1 - Main Render Loop ( RenderProcess)<br />
Thread 2 - Physics and Animation (UpdaterProcess)<br />
Thread 3 - Shape and Texture Loading/Unloading (LoaderProcess)<br />
Thread 4 – Sound<br />
There are other threads used by the multiplayer code as each opened communication is<br />
handled by a thread.<br />
The RenderProcess runs in the main game thread. During its initialization, it starts two<br />
subsidiary threads, one of which runs the UpdaterProcess and the other the LoaderProcess. It<br />
is important that the UpdaterProcess stays a frame ahead of RenderProcess, preparing any<br />
updates to camera, sky, terrain, trains, etc. required before the scene can be properly<br />
rendered. If there are not sufficient compute resources for the UpdaterProcess to prepare the<br />
next frame for the RenderProcess, the software reduces the frame rate until it can “catch up”.<br />
Initial testing indicates that “stutters” are significantly reduced because the process<br />
(LoaderProcess) associated with loading shapes and textures when crossing tile boundaries do<br />
not compete with the main rendering loop (RenderProcess) for the same CPU cycles. Thread<br />
safety issues are handled primarily through data partitioning rather than locks or semaphores.<br />
Ongoing testing by the <strong>Open</strong> <strong>Rails</strong> team and the community will determine what and where the<br />
practical limits of the software lie. As the development team receives feedback from the<br />
community, improvements and better optimization of the software will contribute to better overall<br />
performance – potentially allowing high polygon models with densely populated routes at<br />
acceptable frame rates.<br />
Future & Roadmap<br />
The goal of the <strong>Open</strong> <strong>Rails</strong> development team is to make as much of the existing MSTS content<br />
run on the game software. The development team initial focus is on providing a fairly complete<br />
visual replacement for MSTS that effectively builds on that content. As the <strong>Open</strong> <strong>Rails</strong> team has<br />
grown and matured along with the software, we believed that providing the community our<br />
vision was important.<br />
From the perspective of the <strong>Open</strong> <strong>Rails</strong> team, the prior public download (v128) was the<br />
Demonstration Release. This release focused on demonstrating what was possible with an<br />
open, community-based development effort. Almost 15,000 downloads of the software<br />
illustrated the interest and excitement of the community, but recognition of the work yet to be<br />
done.<br />
The latest release has many new and exciting improvements across the Multiplayer<br />
Functionality, 3D Rendering and Environment, Advanced Signaling and Dispatcher, AI, Train<br />
Action Monitoring, Speed Limit, etc.. It is a milestone release for the team. It established the<br />
foundation for our multiplayer that welcomes testing and feedback from the train simulation
community.<br />
Looking ahead to 2013, we still have lots of work to do.<br />
Our basic goals are unchanged - moving from Foundation to Realism and eventually to<br />
Independence. Following are just some of the highlights of what the community can expect in<br />
the upcoming months from the <strong>Open</strong> <strong>Rails</strong> team.<br />
• Totally new signaling, interlocking and AI train control modules<br />
This design allows for simulation from "dark" territory to today's high speed European systems<br />
and allows for signal and train control that spans operating eras from the Train Order &<br />
Timetable to the most sophisticated CTC systems. As part of this effort, <strong>Open</strong> <strong>Rails</strong> will offer<br />
dynamic AI where each train solves their pathing and routing more than 10 times per second.<br />
This means that each time an Activity is run, AI trains will react, in real time, to the timing of<br />
meets and other variables. The main goals achieved are:<br />
• Minimize deadlocks between player and non-player trains<br />
• Allow non-player trains to have complete pathing, movement orders (i.e. pickups, drop<br />
offs) and timetable management<br />
• Simple ability to customize signals to accommodate regional, geographic, or operational<br />
differences<br />
• Allow for dynamic pathing/signaling solutions within activities based on real time<br />
adjustments to player and non-player train location, timing and work orders<br />
• Ability to use mixed signal environments - dark territory to full automatic in-cab train<br />
control within different or the same route<br />
• Ability to pop-up a local dispatcher view of signaling and route to manually make<br />
adjustments and changes to signal states and routes through signals<br />
• Ability to prioritize trains as per prototype operations<br />
• Elimination of AI Dispatcher and its inherent logic problems to be replaced by self-aware<br />
AI trains<br />
The net impact will be the implementation of a next generation Activity Editor for setting up<br />
paths (routes through signaling and interlocking) for both Player and AI trains.<br />
• Next generation physics model for adhesion, traction, engine components and their interaction<br />
with the 3D world<br />
The physics underlying adhesion, traction, engine components and their performance will be<br />
based on a world-class simulation model that takes into account all of the major components of<br />
diesel, electric and steam engines. This includes elements never before simulated in a<br />
11
consumer train simulation game like DC vs AC traction motors, number of axles in the truck<br />
design, wheel creep and hop, electric shunting, tilting, momentum, thermodynamics of the<br />
steam cycle including compensation for fuel types, plus modeling of different electric traction<br />
systems. <strong>Open</strong> <strong>Rails</strong> will approach the level of physics realism only available in professional<br />
simulators.<br />
Some of the major goals for our new physics are:<br />
• Freedom from the constraints and limitations of the MSTS physics<br />
• Ability to dynamically simulate component performance based on player input (traction<br />
motor degrading due to overheating); firing of steam locomotive including all major<br />
elements such as cylinders, blowers, grate, fuel types; component failure (turbo,<br />
electrical system, etc); or dynamic rail conditions on adhesion/traction physics<br />
• Steam cycle implementation delivering an accurate simulation of the smallest to the<br />
largest compound engines as a SINGLE engine including different fuel types, firing<br />
strategies and steam usage (heating, injectors, etc.)<br />
• Interaction of different diesel electric components to the overall physics covering first,<br />
second and third generation designs<br />
• Next generation electric traction model capable of simulating different electrical traction<br />
systems: AC, DC and different generations of electric traction engines<br />
• New sound triggers to give audio complement to the new physics model<br />
For those models that do not have the upgraded <strong>Open</strong> <strong>Rails</strong> capabilities, existing MSTS content<br />
will continue to utilize the current <strong>Open</strong> <strong>Rails</strong> physics that matches the current MSTS physics<br />
model.<br />
• New formats for model building to free content creators from the constraints of MSTS limitations<br />
As we've announced, the <strong>Open</strong> <strong>Rails</strong> team is actively working on delivery of a foundation for<br />
creating higher quality content than what's available via the MSTS infrastructure. Up first is<br />
support for DDS textures that provides better graphics and potentially provides even better<br />
performance as video cards & XNA can natively handle DDS format. At this time there has only<br />
been very preliminary discussion of beyond the current shape (s) file format.<br />
As we move further into the year, the <strong>Open</strong> <strong>Rails</strong> team will be announcing more details about<br />
our road map. So stay tuned as it's going to be a fun ride in 2013.<br />
12
MSTS File Format Compatibility<br />
<strong>Open</strong> <strong>Rails</strong> software supports the MSTS file formats detailed below. The software uses a file<br />
parser to read the MSTS file information for use by the <strong>Open</strong> <strong>Rails</strong> software. Testing of the<br />
parser software indicates that it will locate many errors or malformation in these files that are not<br />
highlighted by the MSTS train sim software or by other utilities. In most cases, the <strong>Open</strong> <strong>Rails</strong><br />
software will ignore the error in the file and run properly. <strong>Open</strong> <strong>Rails</strong> software logs these errors<br />
in a log file on the user’s desktop. This log file may be used to correct problems identified by the<br />
<strong>Open</strong> <strong>Rails</strong> software.<br />
Trainset:<br />
The software currently supports Shape (.s); Shape Definition (.sd); Sound (.sms); and texture<br />
Ace (.ace) files; including displaying the correct LOD, alpha and transparency attributes. The<br />
software does NOT fully support the following file types: Engine (ENG); Wagon (WAG); it<br />
substitutes MSTS-style physics to enable the user to operate trains.<br />
Consists:<br />
<strong>Open</strong> <strong>Rails</strong> software reads and displays Consist files (.con) used for Player Train, AI Train, and<br />
Loose Consists in activities. The development team is aware that some consists may be flipped<br />
compared to how MSTS displays them.<br />
Services:<br />
<strong>Open</strong> <strong>Rails</strong> software supports MSTS Service files (.svc) for the creation of both Player and AI<br />
services.<br />
Paths:<br />
<strong>Open</strong> <strong>Rails</strong> software supports MSTS Path files (.pat) for determining the path of both Player and<br />
AI Trains.<br />
Routes:<br />
<strong>Open</strong> <strong>Rails</strong> software supports the following MSTS Route files with the limitations noted.<br />
• Route Database file (.rdb) - CarSpawner is supported.<br />
• Reference File (.ref) – <strong>Open</strong> <strong>Rails</strong> does not provide a Route Editor in the current release.<br />
• Track Database file (.tdb) –<br />
• Route File (.trk) – Level Crossings are supported. Overhead wire is not supported.<br />
• Sigcfg (.dat) file – About 80% of signal & scripting capabilities are supported.<br />
13
• Sigscr (.dat) file – About 80% of signal & scripting capabilities are supported.<br />
• Speedpost (.dat) file – Not supported at the present time<br />
• Spotter (.dat) file – Not supported at the present time<br />
• Ssource (.dat) file – Not supported at the present time<br />
• Telepole (.dat) file – Yes, supported<br />
• Tsection (.dat) file – Yes, supported<br />
• Ttype (.dat) file – Yes, supported<br />
Environment:<br />
<strong>Open</strong> <strong>Rails</strong> software does not support advanced water and dynamic weather effects at this time.<br />
Activities:<br />
<strong>Open</strong> <strong>Rails</strong> software supports all the passenger and freight activities created using the MSTS<br />
activity editor.<br />
Satellite:<br />
<strong>Open</strong> <strong>Rails</strong> software uses its own sky, cloud, sun, moon and precipitation effects developed<br />
exclusively for it. The starting parameters for time of day and weather are read from the activity<br />
file to determine the starting display in <strong>Open</strong> <strong>Rails</strong> software.<br />
<strong>Open</strong> <strong>Rails</strong> Software Capabilities<br />
<strong>Open</strong> <strong>Rails</strong> game environment<br />
Time of Day<br />
<strong>Open</strong> <strong>Rails</strong> software “reads” the StartTime from the MSTS .act file to determine what the game<br />
time is for the activity. In combination with the longitude and latitude of the route and the season,<br />
<strong>Open</strong> <strong>Rails</strong> computes the actual sun position in the sky. This provides an extremely realistic<br />
representation of the time of day selected for the activity. For example, 12 noon in the winter will<br />
have a lower sun position in the northern hemisphere than 12 noon in the summer. <strong>Open</strong> <strong>Rails</strong><br />
game environment will accurately represent these differences.<br />
Once the activity is started, <strong>Open</strong> <strong>Rails</strong> software allows the player to advance the environment<br />
“time of day” independently of the movement of trains. Thus, the player train may sit stationary<br />
while the time of day is moved ahead or backward.<br />
In addition, <strong>Open</strong> <strong>Rails</strong> offers similar functionality to the time acceleration switch for MSTS. Use<br />
14
Alt + Page Up or Alt + Page Down keys to change the speed of the game clock.<br />
In a multiplayer session, all clients time, weather and season choices will be overridden by<br />
those set by the server.<br />
Weather<br />
<strong>Open</strong> <strong>Rails</strong> software determines the type of weather to display from the Weather parameter in<br />
the MSTS Activity file. The User may also adjust the level of cloud cover while the Activity is<br />
running by pressing the Ctrl key + “plus” or “minus” sign. This demonstrates <strong>Open</strong> <strong>Rails</strong><br />
software’s foundation for dynamic weather effects in the game.<br />
Seasons<br />
<strong>Open</strong> <strong>Rails</strong> software determines the season, and its related alternative textures, to display from<br />
the Season parameter in the MSTS Activity file. <strong>Open</strong> <strong>Rails</strong> program supports all seasons<br />
available in MSTS Activity file – summer, spring, fall and winter.<br />
<strong>Open</strong> <strong>Rails</strong> HUD<br />
Basic HUD display<br />
Selecting the F5 key displays the HUD information in the current version of <strong>Open</strong> <strong>Rails</strong><br />
software. The User cannot modify the HUD at the present time. The following information is<br />
displayed:<br />
• Version = The version of the <strong>Open</strong> <strong>Rails</strong> software you are running<br />
• Time = Game time of the Activity<br />
• Direction = Position of the Reverser - Diesel and Steam. Note: there is no Neutral<br />
position at the present time.<br />
• Throttle = Displays the current position of throttle expressed as a percentage of full<br />
throttle. Throttle correctly uses Notches and configured % of power for Diesel engines or<br />
% of throttle for steam engines.<br />
• Train Brake = Shows the current position of the train brake system and the PSI of the<br />
train brakes. Braking correctly reflects the braking system used; hold/release, self-<br />
lapping or graduated release. The Train brake HUD line has two Brake Reservoir<br />
pressure numbers: the first is Equalization Reservoir (EQ) and Brake Cylinder (BC)<br />
pressure numbers. The BP numbers reflect the brake pressure in the lead engine and<br />
the second is at the last car of the train.<br />
• Engine Brake = percentage of independent engine brake. Not fully releasing will impact<br />
train brake pressures.<br />
• Speed = the speed in Miles per Hour. At the present time, display of metric units is not<br />
supported.<br />
• Slack =<br />
• Coupler Force = Force exerted on couplers in Newtons. (1 Lbs of force = 4.4482216<br />
Newtons)<br />
15
• Camera Heading – the compass direction in degrees.<br />
• Latitude/Longitude – in decimal degrees. Negative longitudes indicate western<br />
hemisphere; negative latitudes indicate southern hemisphere.<br />
• FPS = Number of Frames rendered per second<br />
• Multiplayer status = the name of other players and the distance of their trains<br />
An example of the basic HUD for Diesel locomotives follows:<br />
Steam Engine HUD – Additional Information<br />
When using a steam engine the following additional information is displayed in the HUD:<br />
• Boiler PSI – stays constant at full boiler pressure defined in the ENG file parameter<br />
“MaxBoilerPressure”<br />
• Steam Generation in lbs – based on key physics data in the ENG file. Steam generation<br />
is assumed to be ‘perfect’ from an operational perspective – fire temp, water level, etc.<br />
and is limited by the “MaxBoilerOutput” parameter in the ENG file<br />
• Steam Usage in lbs – based on entirely new physics code developed by the <strong>Open</strong> <strong>Rails</strong><br />
team and is calculated based on parsing the eng file for the following parameters:<br />
number of cylinders; cylinder stroke; cylinder diameter; boiler volume; maximum boiler<br />
pressure; maximum boiler output; exhaust limit; and basic steam usage. An example of<br />
the basic HUD for Steam locomotives follows:<br />
16
Extended HUD – F5<br />
The extended HUD is accessed by pressing the F5 key successive times. The first keystroke<br />
will activate the Basic HUD, and the second will activate the first extended HUD, the third, and<br />
the fourth.<br />
Basic F5 HUD + Brake Information<br />
The first extended F5 HUD display includes all information in the basic HUD plus Brake status<br />
information. Below is an example of an Engine that has just coupled to another train car and<br />
Brake hoses have been connected.<br />
Basic F5 HUD + Dispatcher Information<br />
The second extended F5 HUD display replaces the Braking information with Dispatcher<br />
information. Both player train and AI trains will show in the Dispatcher information.<br />
There is one line for the player train and one line for each active AI train. The first field is the<br />
train number (UiD from the activity), and the second field is the train's speed in meters per<br />
17
second. After that is a string of characters that represent the state of the train's path. There is<br />
one character for each track vector node with the start of the path on the left. The character will<br />
be a '@' if the front or rear of the train occupies the track node, a digit or letter if the track node<br />
is reserved for a train and '=' otherwise. The digit or letter corresponds to the number of the<br />
train the track is reserved for ('A' for train number 10). A '/' is added at a junction node that is a<br />
potential passing location. If the path includes a passing section the start of the passing section<br />
will be marked with a '\' and the passing track vector nodes will be represented by '_' characters.<br />
The main track part of the passing section is marked by other characters up to the next '/'. A '?'<br />
is added to mark a reverse point.<br />
The dispatcher works by reserving track vector nodes for each train. An AI train will be allowed<br />
to move (or start) only if all of the nodes up to the next potential passing location are not<br />
reserved for another train. If this condition cannot be met, the AI train will not spawn.<br />
There are other reasons that an AI train might not appear. The current dispatcher assumes that<br />
all routes are unsignaled. The dispatcher issues a track authority (which is similar to a track<br />
warrant) to all trains. For an AI train to start the tracks it needs must not already be reserved for<br />
another train. The dispatcher compares the paths of the trains to identify possible passing points<br />
and then reserved tracks for a train up until a passing point. When a train gets near the next<br />
passing point the reservation is extended to the next one. The end result is that an AI train won't<br />
be allowed to start if it needs to occupy the same track as the player train and that track has<br />
already been reserved for the player.<br />
At the moment reservations are for both directions. The <strong>Open</strong> <strong>Rails</strong> development team plans on<br />
changing this in the future to allow trains to follow each other.<br />
Basic F5 HUD + Debug Information<br />
The third extended F5 HUD display replaces the Dispatcher information with Debug information.<br />
Pressing the F12 key enables frame by frame logging of the performance of <strong>Open</strong> <strong>Rails</strong> software.<br />
This is helpful in debugging performance related problems or stuttering. Logging file is<br />
automatically saved in the <strong>Open</strong> <strong>Rails</strong>/Program folder with the file name “dump.csv”.<br />
Wide varieties of parameters are shown from frame wait and render speeds in milliseconds, to<br />
number of primitives, Process Thread resource utilization and number of Logical CPUs from the<br />
system’s bios.<br />
18
Basic F5 HUD + Train Force Information<br />
The fourth extended HUD display replaces the Debug information with Force information. The<br />
first number is the total force acting on the car. This is the sum of the other forces after the signs<br />
are properly adjusted. The second number is the motive force which should only be non-zero for<br />
locomotives. The third number is the friction force calculated from the Davis equation. The<br />
fourth value is the force due to gravity. The fifth value is the coupler force between this car and<br />
the next (negative is pull and positive is push). The last number is mass in kg. All the force<br />
values are in Newtons. Many of these values are relative to the orientation of the car, but some<br />
are relative to the train. The last field is "True" if the car is flipped with respect to the train and<br />
otherwise it’s "False".<br />
Monitor Windows<br />
Compass window<br />
<strong>Open</strong> <strong>Rails</strong> software displays a compass that provides a heading based on the direction of the<br />
camera. To activate the compass window press the 0 (zero) key. To deactivate the compass<br />
window, press the 0 (zero) key a second time.<br />
19
F1 Information Monitor<br />
<strong>Open</strong> <strong>Rails</strong> software now offers Briefing, Timetable, Procedures and Keyboard commands in a<br />
tabbed format using the F1 key.<br />
20
F4 Track Monitor<br />
Track Monitor show current speed in Miles per Hour (or Kilometers per Hour depending on the<br />
Route definition) and the Projected Speed based on the current throttle setting, as well as<br />
signal status and speed limits. In addition, the distance to the next Reverse Point is shown or<br />
to the end of the currently authorized path (message = End of Authorization) in the case of a<br />
passing siding.<br />
This displays the distance in meters to the next location where the Player must either reverse<br />
direction (message = Reverser), make a station stop or if a switch needs to be thrown. The<br />
"station" item changes depending on what's "next" according to the virtual dispatcher. If a meet<br />
with an AI train is ahead, the distance to the end of the siding will be displayed (message = End<br />
of Authorization).<br />
F6 Siding and Platform Names<br />
Hit F6 key to bring up the siding and platform names within a region. Hitting F6 again will only<br />
show siding names or platforms.<br />
21
F7 Train Names<br />
Hit F7 key will display train names. In a single-player session, player controlled train will have<br />
name “0”, while in a multiplayer session, player-controlled trains will have name specified by the<br />
players:<br />
F8 Switch Monitor<br />
22
Switch Monitor show the status of the turnout directly in front and behind the train. Clicking on<br />
the leg of the turnout will throw the turnout in that direction. Alternatively, clicking on the switch<br />
in the Main Window will also throw the turnout, as will using the G key and Shift+G key<br />
F9 Train <strong>Operations</strong> Monitor<br />
<strong>Open</strong> <strong>Rails</strong> Train <strong>Operations</strong> window is similar in function to the F9 window in MSTS. This is the<br />
development team’s initial implementation of the feature. Clicking on the coupler icon between<br />
any two cars uncouples consist at that point. Cars are numbered according to their UiD in the<br />
Consist file (.con) or UiD in the Activity file (.act). Only the last two numbers are shown in the<br />
window, so duplicate numbers can and will appear. Scrolling is accomplished by clicking on the<br />
arrows at the left and right bottom corner of the window.<br />
F10 Activity Monitor<br />
The early implementation Activity Monitor in <strong>Open</strong> <strong>Rails</strong> software is similar in function to MSTS.<br />
It records the Arrival time of your train versus the Actual time as well as the Departure Time. A<br />
text message alerts the engineer as to the proper departure time with a whistle or other<br />
departure sound.<br />
23
Save and Resume<br />
<strong>Open</strong> <strong>Rails</strong> has provided Save and Resume facilities for a while, but each new save (press the<br />
F2 key) would always replace the previous one.<br />
From version 0.8, <strong>Open</strong> <strong>Rails</strong> keeps every save until you choose to delete it. You can view them<br />
by choosing an activity and then pressing the Resume button.<br />
24
To help you identify a Save, the list provides a screenshot and the time and distance into the<br />
simulation.<br />
Caution<br />
You should be aware that these Saves will only be useful in the short term as each new version<br />
of <strong>Open</strong> <strong>Rails</strong> will mark Saves from the previous version as invalid. It is very difficult to maintain<br />
backward compatibility with previous versions, although this might be introduced at some later<br />
date.<br />
25
<strong>Open</strong> <strong>Rails</strong> Physics<br />
Train Cars (WAG)<br />
<strong>Open</strong> <strong>Rails</strong> physics is in the early stages of development. At the present time, <strong>Open</strong> <strong>Rails</strong><br />
physics calculates resistance based on partial real world physics: gravity, mass and rolling<br />
resistance. This is calculated individually for each car in the train. The cars are summed up as a<br />
single unit for faster calculation by the program. These physics calculations are redone<br />
whenever train cars are uncoupled or coupled to the consist.<br />
The program calculates rolling resistance, or friction, based on the Friction parameters in the<br />
WAG file. The <strong>Open</strong> <strong>Rails</strong> software identifies whether the WAG file used FCalc or some other<br />
friction data. If FCalc was used to determine the Friction variables within the .waf file, the <strong>Open</strong><br />
<strong>Rails</strong> software compares that data to the <strong>Open</strong> <strong>Rails</strong> Davis equations to identify the closest<br />
match with the <strong>Open</strong> <strong>Rails</strong> Davis equation. If no-FCalc Friction parameters are used in the<br />
WAG file, the <strong>Open</strong> <strong>Rails</strong> software ignores those values, substituting its actual Davis equation<br />
values for the train car.<br />
At the present time, there is no “slack” action for couplers. The <strong>Open</strong> <strong>Rails</strong> team is reviewing<br />
options to implement the physics of couplers.<br />
Engine – Classes of Motive Power<br />
<strong>Open</strong> <strong>Rails</strong> software provides for different classes of engines: diesel, electric, steam and<br />
default. If needed, additional classes can be created with unique performance characteristics.<br />
At the present time, diesel and electric locomotive physics use the default engine physics.<br />
Default engine physics simply uses the MaxPower and MaxForce parameters to determine the<br />
pulling power of the engine modified by the Reverser and Throttle position. The locomotive<br />
physics can be replaced by traction characteristics (speed in mps vs. force in Newtons) as<br />
mentioned bellow.<br />
The electric locomotive output power depends on a status of pantographs. If at least one of the<br />
pantographs is up, the power can be used. The power-on sequence time delay can be<br />
adjusted by the ORTS( PowerOnDelay ); value of the ENG file (in seconds). The power status<br />
is indicated by “Electric power” value of the HUD view. The pantographs of all locomotives in a<br />
consist are triggered by “ControlPantographFirst” and “ControlPantographSecond” command<br />
(“P” and “Shift+P” by default). The pantographs status is indicated by the “Pantographs” value<br />
of the HUD view.<br />
The diesel locomotive output power depends on a diesel engine status. The engine can be<br />
switched on and off by “ControlDieselPlayer” (“Z” key by default). In a multiple-unit train a<br />
26
helper locomotive’s diesel engine status can be controlled by “ControlDieselHelper” command<br />
(“Shift+Z” by default). The switch on/off sequence can be triggered only if the throttle is set to<br />
zero. The diesel engine status is indicated by “Diesel engine” and “Diesel RPM” values of the<br />
HUD view. Following the MSTS model, ORTS computes the diesel engine fuel consumption<br />
based on ENG file parameters. The fuel flow and level are indicated by the HUD view.<br />
The diesel engine exhaust feature can be modified as needed. The main idea of this feature is<br />
based on the general combustion engine exhaust. When operating in a steady state, the color<br />
of the exhaust is given by the new ENG parameter “OR_Diesel(ExhaustColor)”. The amount of<br />
particles emitted is given by a linear interpolation of “OR_Diesel(IdleExhaust)” and<br />
“OR_Diesel(MaxExhaust)” in the range from 1 to 50. In a transient state, the amount of the fuel<br />
increases but the combustion is not optimal. Thus, the amount of the particles is temporary<br />
higher, multiplied by OR_Diesel(ExhaustDynamics) and colored by<br />
OR_Diesel(ExhaustTransientColor). The format of the “color” value is (aarrggbb) - aa = power<br />
of light; rr = part of red color; gg = part of green color; bb = part of blue color in HEX number<br />
format (00 to ff).<br />
The electric, diesel and default locomotive physics can be extended by the following Boolean<br />
parameters: ORTS( EmergencyCausesPowerDown; EmergencyCausesThrottleDown;<br />
EmergencyEngagesHorn). All these parameters are related to an emergency braking situation.<br />
These parameters are used to match some of the real world features of modern locomotives.<br />
Steam engines employ a more developed, but still not complete, physics model. <strong>Open</strong> <strong>Rails</strong><br />
steam physics parses the eng file for the following parameters: NumCylinders; CylinderStroke;<br />
CylinderVolume; BoilerVolume; MaxBoilerPressure; MaxBoilerOutput; ExhaustLimit; and<br />
BasicSteamUsage. These parameters are used as input values for <strong>Open</strong> <strong>Rails</strong> independently<br />
developed steam locomotive physics equations.<br />
Adhesion model<br />
In ORTS the adhesion is computed differently from MSTS. This may cause some compatibility<br />
issues when operating a high-loaded train. The ORTS model consists of two models based on the<br />
adhesion theory. The first model is a simple tractive force condition-based computation very<br />
similar to the MSTS way. If the tractive force reaches its actual maximum, the wheel slip is<br />
indicated in HUD view and the tractive force falls to 10% of the previous value. By setting the<br />
throttle down the adhesive transition is renewed.<br />
The second adhesion model (advanced adhesion) is based on a simplified dynamic adhesion<br />
theory. Very briefly, there is always some speed difference between a wheel speed of the<br />
locomotive and the longitudinal train speed when the tractive force is different from zero. This<br />
difference is called “wheel slip / wheel creep”. The adhesion status is indicated in the HUD “Force<br />
Information” view by the “Wheel Slip” parameter and as a warning in the general area of the HUD<br />
view. For simplicity, only one axle model is computed (and animated). A tilting feature and the<br />
independent axle adhesion model will be introduced in the future.<br />
27
The heart of the model is the slip characteristics (picture below).<br />
The “wheel creep” describes the stable area of the characteristics and is used in the most of the<br />
operation time. When the tractive force reaches the actual maximum of the slip characteristics,<br />
force transition falls down and more power is used to speed up the wheels, so called “wheel slip”.<br />
To avoid the loss of the tractive force, use the throttle in combination with sanding for returning to<br />
the stable area (wheel creep area). Possible sequence of the wheel slip development is shown on<br />
the pictures below. The “Wheel slip” value is displayed as a value relative to the best adhesion<br />
conditions for actual speed and weather. The value of 63% means very good force transition. For<br />
values higher than “Wagon ( OR_adhesion ( SlipWarningTreshold ) )” or 70% by default, the<br />
“Wheel slip warning” is displayed, but the force transition is still very good. This indication should<br />
warn you to use the throttle very carefully. Exceeding 100%, the “Wheel slip” message is<br />
displayed and the wheels are starting to speed up, what can be seen on the speedometer or the<br />
external view 2. To reduce the wheel slip, use “throttle down”, sanding or a locomotive brake.<br />
The “actual maximum” of the tractive force is based on Curtius-Kniffler adhesion theory and can<br />
be adjusted by a following parameter of the ENG file: Wagon ( OR_adhesion ( Curtius_Kniffler ( A<br />
B C D ) ) ), where A, B, C are coefficients of Curtius-Kniffler, Kother or similar formula. By default,<br />
Curtius-Kniffler is used.<br />
28
29<br />
Fadh. MAX<br />
? A ?<br />
? weather _ coeff ? M ? 9,<br />
81?<br />
?<br />
? C?<br />
? B ? Speed?<br />
kmph?<br />
?<br />
This means that the maximum is related to the speed of the train, or to the weather conditions.<br />
“D” parameter is used in advanced adhesion model and should be always 0.7.<br />
There are some additional parameters in the “Force Information” HUD view. The axle/wheel is<br />
driven by the “Axle drive force” and braked by the “Axle brake force”. The “Axle out force” is the<br />
output force of the adhesion model (used to pull the train). To compute the model correctly the<br />
FPS rate needs to be divided by “Solver dividing” value in a range from 1 to 50. By default, the<br />
Runge-Kutta4 solver is used to get the best results. When the “Solver dividing” value is higher<br />
than 40, the Euler-modified solver is used instead to reduce CPU load.<br />
Anyway, in some cases when the CPU load is higher, the time step for the computation may<br />
become very high and the simulation may start to oscillate (the “Wheel slip” rate of change (in the<br />
brackets) becomes very high). There is a stability correction feature that modifies the dynamics of<br />
the adhesion characteristics. Higher instability can cause a huge wheel slip. You can use<br />
“DebugResetWheelSlip” (“Ctrl+X” by default) command to reset the adhesion model. If you<br />
experience such behavior for most of time, please use the basic adhesion model instead by<br />
pressing “DebugToggleAdvancedAdhesion” ( “Ctrl+Alt+X” by default).<br />
To match some of the real world features, the “Wheel slip” event can cause automatic zero throttle<br />
setting. Use the “Engine (ORTS (WheelSlipCausesThrottleDown ))” Boolean value of the ENG file.<br />
Engines – Multiple Units in Same Consist or AI Engines<br />
Locomotives can either be controlled by a player, or controlled by the train's MU signals for<br />
braking and throttle position, etc. The player-controlled loco generates the MU signals which<br />
pass along to every unit in the train. For AI trains, the AI software directly generates the MU<br />
signals - there is no player-controlled loco. In this way, all engines use the same physics code<br />
for power and friction.<br />
This software model will ensure that non-player controlled engines will<br />
behave exactly the same way as player controlled ones.<br />
<strong>Open</strong> <strong>Rails</strong> Braking<br />
<strong>Open</strong> <strong>Rails</strong> software has implemented its own braking physics in the current release. It is based<br />
on the Westinghouse 26C and 26F air brake and controller system. <strong>Open</strong> <strong>Rails</strong> braking will<br />
parse the type of braking from the ENG file to determine if the braking physics uses passenger<br />
or freight standards, self-lapping or not. This is controlled within the Options menu as shown<br />
below.
Selecting Graduated Release Air Brakes in the Options menu allows a partial release of the<br />
brakes. Some 26C brake valves have a cut-off valve that has three positions: passenger, freight<br />
and cut-out. Checked is equivalent to passenger standard and unchecked is equivalent to<br />
freight standard.<br />
The Graduated Release Air Brakes option controls two different features. If the train brake<br />
controller has a self-lapping notch and the Graduated Release Air Brakes box is checked,<br />
then the amount of brake pressure can be adjusted up or down by changing the control in this<br />
notch. If the Graduated Release Air Brakes option is not checked, then the brakes can only be<br />
increased in this notch and one of the release positions is required to release the brakes.<br />
Another capability controlled by the Graduated Release Air Brakes checkbox is the behavior<br />
of the brakes on each car in train. If the Graduated Release Air Brakes box is checked, then<br />
the brake cylinder pressure is regulated to keep it proportional to the difference between the<br />
emergency reservoir pressure and the brake pipe pressure. If the Graduated Release Air<br />
Brakes box is not checked and the brake pipe pressure rises above the auxiliary reservoir<br />
pressure, then the brake cylinder pressure is released completely at a rate determined by the<br />
retainer setting.<br />
At the moment only single pipe air brakes are modeled. So the auxiliary reservoir needs to be<br />
charged by the brake pipe and, depending on the WAG file parameters setting, this can delay<br />
the brake release. When the Graduated Release Air Brakes box is not checked, the auxiliary<br />
reservoir is also charged by the emergency reservoir (until both are equal and then both are<br />
charged from the pipe). When the Graduated Release Air Brakes box is checked, the auxiliary<br />
reservoir is only charged from the brake pipe. The <strong>Open</strong> <strong>Rails</strong> software implements it this way<br />
because the emergency reservoir is used as the reference pressure for regulating the brake<br />
cylinder pressure.<br />
The end result is that you will get a slower release when the Graduated Release Air Brakes<br />
box is checked. This shouldn't be an issue with two pipe air brakes because the second pipe<br />
can be the source of air for charging the auxiliary reservoirs.<br />
<strong>Open</strong> <strong>Rails</strong> software modeled most of this graduated release car brake behavior based on the<br />
26F control valve, but this valve is designed for use on locomotives. That valve uses a control<br />
30
eservoir to maintain the reference pressure and <strong>Open</strong> <strong>Rails</strong> software simply replaced the<br />
control reservoir with the emergency reservoir.<br />
Increasing the Brake Pipe Charging Rate (PSI/Second) value controls the charging rate.<br />
Increasing the value will reduce the time required to recharge the train; while decreasing the<br />
value will slow the charging rate. However, this might be limited by the train brake controller<br />
parameter settings in the ENG file. The brake pipe pressure can't go up faster than the<br />
equalization reservoir.<br />
The default value, 21, should cause the recharge time from a full set to be about 1 minute for<br />
every 12 cars. If Brake Pipe Charging Rate (PSI/Second) value is set to 1000, the pipe<br />
pressure gradient features will be disabled and will disable some of the other new brake<br />
features, but not all of them.<br />
Brake system charging time depends on the train length as it should, but at the moment there is<br />
no modeling of main reservoirs and compressors.<br />
Using the F5 HUD Braking information in the Game<br />
This helps users of <strong>Open</strong> <strong>Rails</strong> understand the status of braking within the game. <strong>Open</strong> <strong>Rails</strong><br />
braking physics is more realistic than MSTS, as it replicates the connection, charging and<br />
exhaust of brake lines. When coupling to static consists, please notice that the brake line for the<br />
newly added car doesn’t have any values. This is because the train brake line/hose has not<br />
been connected.<br />
Pressing the Backslash key (\) connects the brake hoses for all cars that have been coupled to<br />
the engine. Upon connection, charging of the brake train line commences. <strong>Open</strong> <strong>Rails</strong> uses a<br />
default charging rate of about 1 minute per<br />
Notice that, upon connection, all the newly added cars have their handbrakes set to 100%.<br />
31
Pressing the Colon key (:) will release all handbrakes on the consist as shown below.<br />
Pressing the Shift +? (Question mark) will immediately fully charge the train brakes line if you<br />
don’t want to wait for the train brake line to charge.<br />
Dynamic Brakes<br />
<strong>Open</strong> <strong>Rails</strong> software supports dynamic braking for engines. To increase the Dynamic brakes<br />
32
press Period (.) and Comma (,) to decrease them. Initially dynamic brakes are off, the throttle<br />
works and there is no dynamic brake line in the HUD. To turn on dynamic brakes set the throttle<br />
to zero and then press Period, this will add a dynamic brake line to the HUD. Pressing Period<br />
successive times increases the Dynamic braking forces. To turn off the Dynamic brakes press<br />
Comma after setting the brakes to 0%. The throttle will not work when the Dynamic brakes are<br />
on.<br />
The Dynamic brake force as a function of control setting and speed can be defined in a<br />
DynamicBrakeForceCurves table that works like the MaxTractiveForceCurves table. If there is<br />
no DynamicBrakeForceCurves defined in the ENG file, than one is created based on the MSTS<br />
parameter values.<br />
Dynamic brake sounds have not been implemented at this time.<br />
A Glimpse of the Future<br />
Proprietary <strong>Open</strong> <strong>Rails</strong> Braking Parameters – File Inclusions for ENG files<br />
<strong>Open</strong> <strong>Rails</strong> has implemented additional specific braking parameters to deliver realism in braking<br />
performance in the sim.<br />
The <strong>Open</strong> <strong>Rails</strong> team intends to provide separate documentation detailing the<br />
usage, syntax, and methodology of how to use these new braking and performance<br />
parameters. Check the <strong>Open</strong> <strong>Rails</strong> web site periodically for current status.<br />
Following are a list of specific OR parameters and their default values. The default values are<br />
used in place of MSTS braking parameters; however, two MSTS parameters are used for the<br />
release state: MaxAuxilaryChargingRate and EmergencyResChargingRate<br />
wagon(brakepipevolume - Volume of car's brake pipe in cubic feet (default .5). This is<br />
dependent on the train length calculated from the ENG to the last car in the train. This<br />
aggregate factor is used to approximate the effects of train length on other factors.<br />
Strictly speaking this value should depend on the car length, but the <strong>Open</strong> <strong>Rails</strong><br />
Development team doesn’t believe it’s worth the extra complication or CPU time that would be<br />
needed to calculate it in real time. We will let the community customize this effect by adjusting<br />
the brake servicetimefactor instead, but the <strong>Open</strong> <strong>Rails</strong> Development team doesn’t believe this<br />
is worth the effort by the user for the added realism.<br />
engine(mainreschargingrate - Rate of main reservoir pressure change in PSI per second when<br />
the compressor is on (default .4).<br />
engine(enginebrakereleaserate - Rate of engine brake pressure decrease in PSI per second<br />
(default 12.5).<br />
engine(enginebrakeapplicationrate - Rate of engine brake pressure increase in PSI per second<br />
33
(default 12.5).<br />
engine(brakepipechargingrate - Rate of lead engine brake pipe pressure increase in PSI per<br />
second (default 21).<br />
engine(brakeservicetimefactor - Time in seconds for lead engine brake pipe pressure to drop to<br />
about 1/3 for service application (default 1.009).<br />
engine(brakeemergencytimefactor - Time in seconds for lead engine brake pipe pressure to<br />
drop to about 1/3 in emergency (default .1).<br />
engine(brakepipetimefactor - Time in seconds for a difference in pipe pressure between<br />
adjacent cars to equalize to about 1/3 (default .003).<br />
An example of the expanded <strong>Open</strong> <strong>Rails</strong> file syntax is as follows:<br />
include ( ..\bc13ge70tonner.eng )<br />
Wagon (<br />
)<br />
Engine (<br />
34<br />
MaxReleaseRate ( 2.17 )<br />
MaxApplicationRate ( 3.37 )<br />
MaxAuxilaryChargingRate ( .4 )<br />
EmergencyResChargingRate ( .4 )<br />
BrakePipeVolume ( .4 )<br />
AirBrakeMainresvolume ( 16 )<br />
MainResChargingRate ( .5 )<br />
BrakePipeChargingRate ( 21 )<br />
EngineBrakeReleaseRate ( 12.5 )<br />
EngineBrakeApplicationRate ( 12.5 )<br />
BrakePipeTimeFactor ( .00446 )<br />
BrakeServiceTimeFactor ( 1.46 )<br />
BrakeEmergencyTimeFactor ( .15 )<br />
MaxTractiveForceCurves (<br />
0 ( 0 0 50 0 )
35<br />
.125 (<br />
)<br />
.25 (<br />
)<br />
.375 (<br />
)<br />
.5 (<br />
)<br />
.625 (<br />
)<br />
.75 (<br />
)<br />
.875 (<br />
)<br />
1 (<br />
0 23125<br />
.3 23125<br />
1 6984<br />
2 3492<br />
5 1397<br />
10 698<br />
20 349<br />
50 140<br />
0 46250<br />
.61 46250<br />
1 27940<br />
2 13969<br />
5 5588<br />
10 2794<br />
20 1397<br />
50 559<br />
0 69375<br />
.91 69375<br />
2 31430<br />
5 12572<br />
10 6287<br />
20 3143<br />
50 1257<br />
0 92500<br />
1.21 92500<br />
5 22350<br />
10 11175<br />
20 5588<br />
50 2235<br />
0 115625<br />
1.51 115625<br />
5 34922<br />
10 17461<br />
20 8730<br />
50 3492<br />
0 138750<br />
1.82 138750<br />
5 50288<br />
10 25144<br />
20 12572<br />
50 5029<br />
0 161875<br />
2.12 161875<br />
5 68447<br />
10 34223<br />
20 17112<br />
50 6845
0 185000<br />
36
)<br />
37<br />
)<br />
Dynamic Tractive Force<br />
)<br />
2.42 185000<br />
5 89400<br />
10 44700<br />
20 22350<br />
50 8940<br />
The <strong>Open</strong> <strong>Rails</strong> development team has been experimenting with max/continuous tractive force,<br />
where it can be dynamically altered during game play using the MaxTractiveForceCurves<br />
parameter as shown earlier. The parameters were based on the Handbook of Railway Vehicle<br />
Dynamics. This says the increased traction motor heat increase resistance which decreases<br />
current and tractive force. I used a moving average of the actual tractive force to approximate<br />
the heat in the motors. Tractive force is allowed to be at the maximum per the ENG file, if the<br />
average heat calculation is near zero. If the average is near the continuous rating than the<br />
tractive force is de-rated to the continuous rating. There is a parameter called<br />
ContinuousForceTimeFactor that roughly controls the time over which the tractive force is<br />
averaged. The default is 1800 seconds.<br />
Brake Retainers<br />
The retainers are controlled using the left and right Brace ({ and }) keys. The left Brace ({) key<br />
will reset the retainer on all cars to exhaust (the default position). The retainer setting is<br />
increased each time the right Brace (}) key is pressed. First the number of cars is increased<br />
(25%, 50% and then 100%) and then the retainer setting is changed (low pressure, high<br />
pressure and then slow direct). For 25% the retainer is set on every fourth car starting at the<br />
rear of the train. 50% is every other car and 100% is every car. These changes can only be<br />
made when stopped. When the retainer is set to exhaust, the ENG file release rate value is<br />
used, otherwise the release rates are hard coded based on some AB brake documentation used<br />
by the <strong>Open</strong> <strong>Rails</strong> development team.<br />
<strong>Open</strong> <strong>Rails</strong> Train Engine Lights<br />
Enabling <strong>Open</strong> <strong>Rails</strong> Lighting<br />
You must select the Engine Lighting checkbox for lighting to work. At the present time, the<br />
Engine Lighting checkbox is DISABLED by default.
Lighting Functions and Known Issues<br />
Phase one of the <strong>Open</strong> <strong>Rails</strong> Lighting adds basic train light functions as detailed below:<br />
• The H key controls these light states: OFF-DIM-ON. As in MSTS, tap once for dim, then<br />
again for bright. Press CTRL+H in succession to reverse the sequence.<br />
• Dim/bright lights work as long as the lights are set up that way in the ENG file.<br />
• Fade-in/fade-out is supported.<br />
• Scenery illumination is enabled but only when the headlight is bright.<br />
Lighting states are now fully implemented:<br />
• Penalty, Control, Service, TimeOfDay, Weather, and Coupling modes.<br />
• Multiple States<br />
Known Issues:<br />
• Where the Lights block in an ENG file contains in-line comments (format: #comment),<br />
the comments are ignored but each one generates an error message in the console<br />
window. Not to worry: The message is more an advisory that an actual error.<br />
• Glow-light objects are built as quads whose "radius" is specified in the Lights block. The<br />
position of each quad is also specified there. If two adjacent lights are positioned too<br />
closely or if their radius is too large, they will overlap and Z-fighting will occur. This<br />
occasionally can be seen in both MSTS and <strong>Open</strong> <strong>Rails</strong> software.<br />
Fixing <strong>Open</strong> <strong>Rails</strong> Lighting Problems<br />
By organizing the ENG lighting section to the following specification, usually the <strong>Rails</strong> Lighting<br />
errors will be eliminated. The Lighting section must follow the specified sequence of lighting<br />
definitions:<br />
1. Sphere of lights, both headlights which also includes dim and bright,<br />
38
2. ditch lights,<br />
3. the rest of the lights.<br />
If errors still occur, removing the comments from the lighting section almost always fixes the<br />
error conditions. The reason eliminating “comments” fixes <strong>Open</strong> <strong>Rails</strong> lighting errors is that there<br />
are many ways the community have used this feature in MSTS. The <strong>Open</strong> <strong>Rails</strong> team doesn’t<br />
believe it’s a wise investment of their time to accommodate all the potential ways the community<br />
has implemented “comments”. In the future, the <strong>Open</strong> <strong>Rails</strong> team will provide a standardized<br />
methodology for handling comments within the Lighting section of the ENG file that is<br />
backwards compatible with MSTS.<br />
<strong>Open</strong> <strong>Rails</strong> Activities<br />
Player Paths, AI Paths, and How Switches are handled<br />
If the player path requires a switch to be aligned both ways, the alignment that is the last on the<br />
path is used. If an AI train crosses the player path before the player train gets there, the AI train<br />
will leave the switches aligned for the main route (the default setting for most switches)<br />
If you throw a switch to move into a siding, the switch at the far end of the siding is aligned to let<br />
you leave when your train first occupies the siding. But after that it is not changed back to its<br />
original setting. If the switch gets thrown the other way, you can leave the siding with the switch<br />
aligned incorrectly. If you uncouple and re-couple to the train while it occupies the misaligned<br />
switch, the rear end of the train will switch tracks.<br />
<strong>Open</strong> <strong>Rails</strong> AI<br />
Basic AI Functionality<br />
• The software has a basic AI system for now. In time, the AI system will become more<br />
advanced with new features.<br />
• AI trains can pass if both paths have passing sections defined at the same place.<br />
Waiting points and reverse points should work, although the trains might not stop in the<br />
same location as MSTS.<br />
• AI trains will stop near any switch that is not lined properly, throw the switch and then<br />
proceed. (This function will probably get improved and enhanced with community<br />
feedback)<br />
• AI trains can uncouple and leave cars.<br />
• At the moment uncoupling only works from the front of the train and coupling doesn’t<br />
work yet. To uncouple put a waiting point in the path with a waiting time greater than<br />
40000 seconds.<br />
39
• A value of 4NNSS where NN and SS are two digit numbers will cause the first NN cars<br />
to be uncoupled and the train will move again after waiting SS seconds.<br />
• Priorities: AI trains should start as scheduled as long as there is no other AI train already<br />
on a conflict path.<br />
<strong>Open</strong> <strong>Rails</strong> Signaling<br />
At the present time, <strong>Open</strong> <strong>Rails</strong> is in the initial proof of concept stage regarding signals and<br />
signal block detection for player and AI trains. This is NOT included in the public demo<br />
download version.<br />
A basic Signal Monitor (F4 Key) has been developed for testing the <strong>Open</strong> <strong>Rails</strong> signaling efforts.<br />
Please note the Signal Monitor graphic does not necessarily represent the final Signal Monitor.<br />
What the Proof of Concept accomplished:<br />
• Linking the signals together<br />
• Update the signals using a default procedure<br />
• Determine the distance to next signal and aspect from the driver train<br />
The Signaling Proof of Concept will be moving to the next phase of the project, covering:<br />
• Integration with the SIGCFG file for different signal types<br />
• Recognition of different Signal Types, only NORMAL signals work at the moment<br />
• Account for signals with multiple heads.<br />
• Display the aspect on the actual signal shape.<br />
• AI trains to recognize signals and behave according to the signal indication.<br />
• Signal Scripting.<br />
<strong>Open</strong> <strong>Rails</strong> Multi-Player<br />
Goal:<br />
The MultiPlayer mode implemented in this stage is intended for friends to play OR together,<br />
each assuming the role of a train engineer operating a train. There is a built-in way to<br />
compose and send text messages, but there is no built-in tool for chatting, thus players are<br />
40
encouraged to use Ventrillo, Skype, MSN, Yahoo, Teamspeak or other tools to communicate<br />
vocally.<br />
The current release utilizes a peer-to-peer mode, thus each player must start and run OR on<br />
their computer. A special server-side code can be provided upon request.<br />
Getting Started:<br />
One player starts as the server, and then others connect in as clients. Each player will choose<br />
and operate their own consist (and locomotive), but also can jump to watch others’ consists,<br />
or couple with others to work as lead and DPU through a tough route, or even act as a<br />
dispatcher to control signals and switches manually.<br />
Requirements:<br />
The server can start an activity or choose to explore. Clients MUST choose to explore (or a<br />
simple activity with timetable but no AI trains).<br />
The client must choose the same route played by the server.<br />
It is not required for everyone to have the same set of paths, rolling stocks and consists.<br />
Technical Issues:<br />
If you start the server at home, it will be necessary for you to learn your public IP<br />
address. You may also need to configure your router for port forwarding. Details to<br />
accomplish these are given in sections that follow.<br />
It is recommended that you do not run a server for a prolonged period as the code has not<br />
been tightened for security. Only tell people you trust that you have a server started.<br />
Technical Support<br />
The OR team officially does not currently provide support with the MultiPlayer feature, but the<br />
team may make effort to help you sort out problems.<br />
You can ask questions in the following forums: trainsim.com, elvastower.com,<br />
uktrainsim.com, etc.<br />
A new web forum has been set for you to post questions and announce servers. You can also<br />
request a private club so that only your friends know of your server. The forum is free to join<br />
and post:http://www.tsimserver.com/forums<br />
Starting a MultiPlayer session:<br />
Launch the Server<br />
41
1. Start <strong>Open</strong><strong>Rails</strong>.<br />
2. Select the route you wish to play.<br />
3. Select an Activity or choose to Explore the route.<br />
If choosing to Explore the route, then select a consist and start point. You may also choose<br />
the time and weather for all users to experience.<br />
4. Enter a user name as you wish to be seen by others using the server. (Maximum of 10<br />
characters with no spaces.)<br />
5. Turn on the Act as Server option.<br />
6. Optional: Customize the port number. The number must be in the range of 0 to 65,535<br />
but less than 1,000 is not recommended. The default port is 30,000. Other users<br />
connecting to the server must use this same port when connecting.<br />
7. Click Start.<br />
When server starts, Windows Firewall may ask if you want to allow OR access to the<br />
Internet. If so, click Allow. If you use other firewall software, you may need to configure it to<br />
allow <strong>Open</strong><strong>Rails</strong> to access the internet.<br />
Connect to a server as a Client<br />
42
1. Start <strong>Open</strong><strong>Rails</strong>.<br />
2. Select the same route that the server is running.<br />
3. Choose to Explore the route. (You can select an activity if it does not have AI trains)<br />
4. Select a consist and start point.<br />
5. Enter a user name as you wish to be seen by others using the server. (Maximum of 10<br />
characters with no spaces.)<br />
6. Enter the IP address and the port number of the server into the appropriate fields.<br />
7. Click Start.<br />
There is no built-in limit of how many players can connect--a server with good Internet upload<br />
bandwidth can be expected to handle at least 10 client connections.<br />
In Game Controls:<br />
1. Once the server and clients start and connect, MultiPlayer status will be shown on the left<br />
of the screen. You can watch how many players and trains are present and how far away<br />
you are from others.<br />
2. A player joined will have the same weather, time and season as the server, no matter what<br />
are the original choices.<br />
43
3. The player train may join the world and find it is inside another train. Don’t panic, you<br />
have two minutes to move your train out before OR thinks you want to couple with that<br />
train.<br />
4. AI trains are added by the server and broadcast to all players. Although a client can have<br />
its own AI trains, they will not be shown on other players’ game, thus as a client, do not<br />
start an activity with AI trains.<br />
5. You can jump to see other trains in sequence by pressing Alt+9. <strong>Open</strong><strong>Rails</strong> will cycle<br />
through all trains active on the server with each key press. As some trains may be far<br />
away, <strong>Open</strong><strong>Rails</strong> may need a few seconds to load the surrounding scenery. Thus you<br />
may temporarily see a blank screen. You can press F7 to see train names. You can press<br />
9 to return to seeing your own train.<br />
6. Locations of trains from other players are sent over the Internet. Because Internet<br />
routings vary moment to moment there may be some lag, and trains may jump a bit as<br />
<strong>Open</strong><strong>Rails</strong> tries to update the locations with information received.<br />
7. You can couple/decouple as usual. As coupling is controlled in the server, a player needs<br />
to drive slowly so that the server will have accurate information of train positions. If two<br />
player trains couple together, one of them will become a helper, and a message will be<br />
shown on the left indicating that the player is in Helper mode. A player in Helper mode<br />
cannot control their consist as it falls under control of the lead locomotive. By pressing<br />
Shift+E you can swap Helper status with another player on the train. Always press \ and<br />
Shift+/ to reset brakes each time after coupling/uncoupling.<br />
44
8. Players can uncouple their own trains. Players in the uncoupled trains may need to press<br />
Shift+E to gain control; otherwise, the uncoupled trains may become a loose<br />
consist. Always stop completely before uncoupling, otherwise weird things may happen.<br />
Players may also need to press \ and Shift+/ again after uncoupling.<br />
9. Players can throw switches by pressing G or Shift-G , and the switch state will change for<br />
all players on the server. The server has a choice to disallow clients to throw switches<br />
manually.<br />
10. Both switches and signals are synchronized through the server (default every 10 seconds).<br />
11. Player actions, such as sounding the horn or bell, turning on or off headlights, or moving<br />
the pantograph up and down are broadcast to other players. Currently only the player<br />
controlled train has the cone of light shown.<br />
12. A separate window showing the route, signals and trains can be activated by pressing<br />
Ctrl+9. By default, it is minimized and you must click on it on the Taskbar to make it<br />
active. You can hide it by pressing Ctrl+9 again or by pressing Esc when that window has<br />
the focus.<br />
You can zoom in and out by rotating the mouse wheel, or by holding both the left and<br />
right mouse button sand moving the mouse (if you do not have a mousewheel).<br />
You can pan the window by dragging it with the left mouse button.<br />
One can click a switch and press Ctrl+Alt+G to jump to that switch with the free-roam<br />
camera.<br />
The Dispatcher player can click a switch (black dot) and press Alt+G to throw it. They<br />
can also click on a signal signal (green, red or orange dot) and press Ctrl+G to<br />
enable/disable it.<br />
The Dispatcher can choose a player from the avatar list and remove that player from the<br />
game.<br />
You can send a text message by typing in the top left text input area, and view the most<br />
recent 10 messages from the viewing area. One can send message to all after finishing it,<br />
or select some avatars and send a message to those selected.<br />
45
Multiplayer Options:<br />
There are some options to change in the menu, under Options->Simulations:<br />
By default, signals/switches are synchronized every 10 seconds. If you have a fast connection,<br />
you can make it more often. Values of less than 5 seconds are not recommended as they<br />
may stress your Internet connection too much.<br />
To protect your machine player avatars are not shown by default. You can turn them on if you<br />
46
trust your other players. If you wish to use an avatar you can specify its web address. Only<br />
picture files on the Internet can be<br />
used.<br />
Summation:<br />
1. Server can start an activity or Explore. Clients must choose to Explore the route or start<br />
with an activity without AI trains.<br />
2. Missing rolling stock in other players’ consists will be automatically replaced by existing<br />
cars from local directory.<br />
3. You have two minutes after joining the game to move your train out of other trains.<br />
4. Use Alt+9 to see other trains, 9 to see your own train, Ctrl+9 to view/hide the dispatcher<br />
window. Use the mouse wheel to zoom and left mouse button to pan the dispatcher<br />
window.<br />
5. We can send and read messages from the dispatcher window<br />
6. Use Ctrl+Alt+F11 to see the path trains will follow, and F7 to see train names<br />
7. Move trains slowly when trying to couple.<br />
8. Use \ and Shift+/ just after your train is coupled or uncoupled, or when you just gain back<br />
the control of your own train.<br />
9. Use Shift+E to gain control of your own train after uncoupling.<br />
10. Use other communication tools (such as Ventrillo or Skype) to communicate with other<br />
players.<br />
11. Always completely stop before uncoupling trains with two players coupled together<br />
Possible Problems:<br />
1. A server may not be able to listen on the port specified. Restart the server and choose<br />
another port.<br />
2. If you cannot connect to the server, verify sure you have the correct IP address and port<br />
number, and that the server has the port opened.<br />
3. If other player have rolling stock you do not have, that train will automatically replace cars<br />
from your own folder, and this replacement may make the consist “interesting”.<br />
4. You may join the game and see you’ve selected the same start point as someone else and<br />
that your train is inside another train. Move the trains apart within two minutes and it will<br />
be fine.<br />
5. If your train is moving too quickly when trying to couple the process may not work and<br />
weird things can happen.<br />
6. As the server has absolute control, clients may notice the switch just changed will be<br />
changed back a few seconds later if the server controlled train wants to pass it.<br />
7. Coupling/uncoupling the same set of trains may end up with weird things.<br />
8. Ctrl+E locomotive switch may have train cars flipped.<br />
47
Multi-Player Setting up a Server<br />
As any online game, you need to do some extra work if you want to host a multiplayer session.<br />
IP Address<br />
If you are running at home and use a router, you may not have a permanent IP. Thus before you<br />
start as a server, you must find your IP. The quickest ways are the following:<br />
1. Using google: type in “find ip address”, then google will tell you<br />
2. If the above does not work, try http://whatismyipaddress.com/ip-lookup/, which shows your IP<br />
in the middle of the page<br />
48
Port Forwarding<br />
If you are using a router at home with several computers, your router needs to be told which<br />
computer on your home network should receive the network data <strong>Open</strong>a<strong>Rails</strong> needs. This is done<br />
by enabling Port Forwarding on the router. The default port <strong>Open</strong><strong>Rails</strong> uses is 30,000. If you<br />
change that port number in the game you’ll need to change the forwarded port number in the<br />
router as well. Your router must be told to forward data arriving from the internet on the correct<br />
port to the network IP address of the computer running <strong>Open</strong><strong>Rails</strong>. For more information on<br />
Network Address Translation (NAT) and how Port Forwarding works, see this<br />
site: http://www.4remotesupport.com/4content/remote_support_NAT.html Here The following<br />
are the steps:<br />
1. Go to http://portforward.com/english/routers/port_forwarding/, which contains a lot ads--<br />
just focus on the center of this page.<br />
2. Locate the name of the manufacturer of your router, i.e. Airlink and click it:<br />
49
3. A page may appear allowing you to select your specific model of router:<br />
50
4. It then shows all the programs (games) that you want to forward ports. Just click “Default<br />
Guide”:<br />
5. A page like the following should appear. Ignore the part crossed-out but pay special attention<br />
to the part enclosed in red:<br />
51
Then follow the steps listed on the screen. Remember you want to foward port 30,000 by default,<br />
but if you change that you’ll have to forward the correct port.<br />
If you still cannot get others connecting to your computer, please go to tsimserver.com/forums and<br />
ask questions.<br />
<strong>Open</strong> <strong>Rails</strong> Best Practices<br />
Polys vs. Draw Calls – What’s Important<br />
Poly counts are still important in <strong>Open</strong> <strong>Rails</strong> software, but with newer video cards they’re much<br />
less important than in the early days of MSTS. What does remain important to both<br />
environments are Draw Calls.<br />
A Draw Call occurs when the CPU sends a block of data to the Video Card. Each model in view,<br />
plus terrain, will evoke one or more Draw Calls per frame (i.e., a frame rate of 60/second means<br />
all of the draw calls needed to display a scene are repeated 60 times a second). Given the large<br />
number of models displayed in any scene and a reasonable frame rate, the total number of<br />
Draw Calls per second creates a very large demand on the CPU. <strong>Open</strong> <strong>Rails</strong> software will<br />
adjust the frame rate according to the number of required Draw Calls. For example, if your CPU<br />
can handle 60,000 Draw Calls per second and the scene in view requires 1000 Draw Calls, your<br />
frame rate per second will be 60. For the same CPU, if the scene requires 2000 Draw Calls,<br />
your frame rate per second will be 30. Newer design / faster CPU’s can do more Draw Calls per<br />
second than older design / slower CPU’s.<br />
Generally speaking, each Draw Call sends one or more polygon meshes for each occurrence of<br />
a texture file for a model (and usually more when there are multiple material types). What this<br />
means in practice is if you have a model that uses two texture files and there are three<br />
instances of that model in view there will be six draw calls – once for each of the models (3 in<br />
view) times once for each texture file (2 files used), results in six Draw Calls. As an aid to<br />
performance <strong>Open</strong> <strong>Rails</strong> will examine a scene and will issue Draw Calls for only the models that<br />
are visible. As you rotate the camera, other models will come into view and some that were in<br />
view will leave the scene, resulting in a variable number of Draw Calls, all of which will affect the<br />
frame rate.<br />
Model builders are advised that the best performance will result by not mixing different material<br />
types in a texture file as well as using the fewest number of texture files as is practical.<br />
Players are advised to adjust camera positions to cull models from being in view whenever<br />
frame rates fall to unacceptable levels and to adjust the camera again to include more models<br />
when frame rates are high.<br />
52
Acknowledgements<br />
The <strong>Open</strong> <strong>Rails</strong> team would like to acknowledge the following for their work, without which <strong>Open</strong><br />
<strong>Rails</strong> would not be possible.<br />
• John Sandford, Jim Jendro, Wes Card. For deciphering the MSTS tile files and providing<br />
computer algorithms that go a long way toward helping us do the same.<br />
• Riemer Grootjans. For his informative web tutorials and detailed code, and for his book,<br />
"XNA 3.0 Game Programming Recipes."<br />
• Jan Vytlacil. For showing us how to make it rain and snow.<br />
• Paul Bourke. For the high-resolution star maps of the northern and southern<br />
hemispheres.<br />
And Wayne Campbell. For inspiring this improbable journey.<br />
53
License Agreement<br />
54<br />
<strong>Open</strong> <strong>Rails</strong> transport simulator<br />
(“<strong>Open</strong> <strong>Rails</strong>”)<br />
End User License Agreement<br />
IMPORTANT-RE AD CARE FULL Y: THIS END-USER LICE N SE AGREEMENT (“EULA”) IS A LEG AL<br />
AGREEM E NT B E T W EEN Y OU (EITHER AN INDIVI D UAL OR A SI NG LE E NTITY H E R EB Y REFERRE D<br />
TO AS “YOU”) AND OPEN R AIL S.ORG FOR THE ABOVE REFERENCED SOFTWARE PRODUC T (S ),<br />
W HICH I N C LUDE S COMPUTER SOFTWARE AND MAY I NC LUDE D OWNLOAD E D BINAR Y OR<br />
SOURCE CODE FILES, A ND “O NLI NE” OR ELEC TRONI C DOCU ME N TATI O N. THE SOF T WA RE<br />
PRODUCT INC LUDE S ANY UPDATES, SUPPLEMENTS, PATCHES, OR M AINT E NANCE PAC K S<br />
PROVI DE D B Y O PE N R AIL S.ORG. B Y I NS TALLI N G, COP YI NG OR OTHER W ISE U SI NG THE<br />
S OFTW ARE , Y OU AGRE E T O BE BOUND BY THE T E R M S OF THI S E ULA. IF Y OU DO NOT A GREE<br />
TO THE TERMS OF THI S E ULA, DO NOT INS TALL OR USE THE SOFTWARE. YOU SHALL I NFORM<br />
ALL USERS OF THE SOFTWARE OF THE TERMS AND CONDI TIO N S OF THI S E ULA.<br />
This EULA, grants You, the user, a non-exclusive license to use the Software under the<br />
terms and conditions stated herein. You agree that all updates, enhancements,<br />
maintenance releases, patches, bug-fixes or other modifications to the Software<br />
provided to You, on a when and if available basis, shall be governed by the terms and<br />
conditions, including the limited warranty, exclusive remedies and limitations of liability<br />
provisions, contained in this EULA, or the then-current version of this EULA.<br />
You may: (i) use the Software on any number of computers You own; (ii) make modifications to<br />
the original source code of the software for your own personal use; (iii) distribute the compiled<br />
version of the software; (iv) distribute software plug-ins, add-on files, and any other secondary<br />
content created for the software; (v) make copies of the Software, documentation or other user<br />
information, tools, or content accompanying the Software for back-up purposes; (vi) make a<br />
copy of or print documentation provided in electronic form for Your internal use only; and, (vii)<br />
use <strong>Open</strong> <strong>Rails</strong> trademarks solely for these purposes, but You must incorporate all patent,<br />
copyright, trademark and other notices included on the materials on any copies that You make.<br />
You may not: (i) sell, sublicense, rent, or lease the Software to another party; (ii) disseminate<br />
any modification, revision, correction, or change, in any manner, to the Software source code<br />
except and only to the extent that such activity is expressly permitted by this EULA or by written<br />
permission of openrails.org; (iii) transfer or assign Your rights to use the Software; (iv) use the<br />
Software in violation of applicable local, federal or International laws or regulations; (v) use the<br />
Software for any purpose other than as permitted in this EULA; or, (vi) remove, destroy, erase,<br />
alter or otherwise modify <strong>Open</strong> <strong>Rails</strong> trademarks.
NO WARRANTIES. <strong>Open</strong>rails.org disclaims any warranty, at all, for its Software. The OPEN<br />
RAILS software and any related tools, or documentation is provided “as is” without warranty of<br />
any kind, either express or implied, including suitability for use. You, as the user of this<br />
software, acknowledge the entire risk from its use.<br />
NO LIABILITY FOR CONSEQUENTIAL DAMAGES. In no event shall openrails.org or its<br />
suppliers be liable for any damages whatsoever (including, without limitation, damages for loss<br />
of business profits, business interruption, loss of business information, or any other pecuniary<br />
loss) arising out of the use of or inability to use this product, even if openrails.org has been<br />
advised of the possibility of such damages.<br />
COPYRIGHT. Any intellectual property or content which may be accessed through the use of<br />
<strong>Open</strong> <strong>Rails</strong> software program is the property of the respective property or content owner and<br />
may be protected or prohibited by its applicable copyright. You, as the user of the software,<br />
must determine the applicability of any third party intellectual property or content. This EULA<br />
grants you no rights to use such content. The <strong>Open</strong> <strong>Rails</strong> software program(s) itself, title and<br />
copyrights, any accompanying documentation, and copies of the software program are the<br />
property of openrails.org.<br />
Trademark Acknowledgment<br />
<strong>Open</strong> <strong>Rails</strong>, OPEN RAILS Transport Simulator, OPEN RAILS, OPEN RAILS trademark,<br />
openrails.org, OPEN RAILS symbol and associated graphical representations of OPEN RAILS<br />
are the property of OPEN RAILS.org. All other third party brands, products, service names,<br />
trademarks, or registered service marks are the property of and used to identify the products or<br />
services of their respective owners.<br />
Copyright Acknowledgment<br />
©2012 openrails.org All rights reserved.<br />
34