ARMA 2 Operation Arrowhead_manual_UK.qxp:Arma2-OA ... - Steam
ARMA 2 Operation Arrowhead_manual_UK.qxp:Arma2-OA ... - Steam
ARMA 2 Operation Arrowhead_manual_UK.qxp:Arma2-OA ... - Steam

You also want an ePaper? Increase the reach of your titles
YUMPU automatically turns print PDFs into web optimized ePapers that Google loves.
Table of Content<br />
Warning 2<br />
Installation 2<br />
Arma 2: <strong>Operation</strong> <strong>Arrowhead</strong> 3<br />
One country – Two armies – Four men – 24 hours... 3<br />
Takistan Armies and Factions Recognition Manual 3<br />
Task Force Knight 4<br />
Arma 2: <strong>Operation</strong> <strong>Arrowhead</strong> Controls 5<br />
Basic Controls 5<br />
Advanced Controls 6<br />
Vehicle Controls 12<br />
Command and Communication 16<br />
Playing Arma 2: <strong>Operation</strong> <strong>Arrowhead</strong> 26<br />
Single Player 26<br />
Multiplayer 27<br />
Expansions 29<br />
Combat Tactics 29<br />
Options 31<br />
Video Options 31<br />
Audio Options 31<br />
Controls 31<br />
Game Options 32<br />
Mission Editor 33<br />
Basic Controls 33<br />
Placing Units and Groups 34<br />
Waypoints 34<br />
Simple Triggers 35<br />
Modules 35<br />
Intel 35<br />
Mission Management 35<br />
Playing your Missions 35<br />
Troubleshooting 36<br />
Game Updates 36<br />
Technical Support 36<br />
Credits 37<br />
End-User License Agreement 39<br />
1
Warning<br />
Warning: To Owners of Projection Televisions<br />
Still pictures or images may cause permanent picture-tube damage or mark<br />
the phosphor of the cathode-ray tube. Avoid repeated or extended use<br />
of video games on large-screen projection televisions.<br />
Epilepsy Warning<br />
Please read before using this game or allowing your children to use it. Some<br />
people are susceptible to epileptic seizures or loss of consciousness when<br />
exposed to certain flashing lights or light patterns in everyday life. Such<br />
people may have a seizure while watching television images or playing certain<br />
video games. This may happen even if the person has no medical history of<br />
epilepsy or has never had an epileptic seizure. If you or anyone in your family<br />
has ever had symptoms related to epilepsy (seizures or loss of consciousness)<br />
when exposed to flashing lights, consult your doctor prior to playing. We<br />
advise that parents should monitor the use of video games by their children.<br />
If you or your child should experience any of the following symptoms:<br />
dizziness, blurred vision, eye or muscle twitches, loss of consciousness,<br />
disorientation, any involuntary movement or convulsion while playing a video<br />
game, discontinue use IMMEDIATELY and consult your doctor.<br />
Precautions During Use<br />
• Do not stand too close to the screen. Sit a good distance away from<br />
the screen, as far away as the length of the cable allows.<br />
• Preferably play the game on a small screen.<br />
• Avoid playing if you are tired or have not had much sleep.<br />
• Make sure that the room in which you are playing is well lit.<br />
• Rest for at least 10 to 15 minutes per hour while playing a video game.<br />
Installation<br />
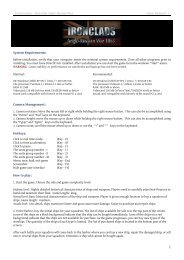
System requirements<br />
Minimal PC Requirements<br />
• CPU: Dual-core Intel Core 2.4 GHz or AMD Athlon 2.4 GHz<br />
• GPU: Nvidia Geforce 8600GT or ATI Radeon 3650 or faster with Shader<br />
Model 3 and 512 MB VRAM<br />
• RAM: 1 GB<br />
• OS: Windows XP or Windows Vista<br />
• DVD: Dual Layer compatible<br />
• HDD: 10 GB free space<br />
Recommended PC Requirements<br />
• CPU: Intel Core i5 or AMD Athlon Phenom X4 or faster<br />
• GPU: Nvidia Geforce GTX 260 or ATI Radeon HD 5770 or faster with Shader<br />
Model 3 and 896 MB VRAM<br />
• RAM: 2 GB<br />
• OS: Windows 7<br />
• DVD: Dual Layer compatible<br />
• HDD: 20 GB free space<br />
Autorun<br />
When you place the Arma 2: <strong>Operation</strong> <strong>Arrowhead</strong> DVD in your PC’s disk tray<br />
and close it, the Autorun application should start. If it does not, you can find<br />
it on your DVD drive’s root folder (Autorun.exe).The Autorun menu gives you<br />
several options, such as viewing the readme file, visiting the Bohemia<br />
Interactive Studio website and of course installing the game.<br />
Setup<br />
To install the game, please follow the instructions provided in the setup process.<br />
2<br />
Arma 2: <strong>Operation</strong> <strong>Arrowhead</strong><br />
One country – Two armies – Four men – 24 hours...<br />
Following the fall of the incumbent monarchy in 1988, tribal Socialist and<br />
Royalist groups fought for supremacy in Takistan. Each faction was backed by<br />
world-leading superpowers (Royalists by the USA, Socialists by the USSR),<br />
providing support to retain strategic control over the nation's rich resources,<br />
particularly its vast crude-oil reserves and huge deposits of Coltan,<br />
a precious-metal ore.<br />
Reinforced by the open Soviet military support and large shipments of Eastern<br />
weaponry, the Socialists prevailed in 1992. Despite this, pockets of local<br />
Royalist tribesmen remained. The supply of crude oil at hand was quickly<br />
exploited to expand and strengthen the Takistani state police and armed<br />
forces. Scud-B ballistic missiles, missile carriers, and the covert research and<br />
development of chemical weapons contributed to the proliferation of military<br />
stockpiles with the aim of maximizing Takistan's military might—and, by<br />
extension—tightening the grip of Soviet rule.<br />
On April 17, 2012, Royalist tribes, with the rumored support of CIA operatives<br />
seeking to destabilize the dangerous regime, succeeded in significantly<br />
damaging the production of crude oil. A well-coordinated raid on key oil fields<br />
dealt the regime three critical blows: the loss of a year's production of crude<br />
oil, the destruction of 68% of the country's oil wells, and the sudden lack of<br />
resources required to hold Takistan.<br />
Power structures started to disintegrate; voices and actions of discontent<br />
spread. In a desperate bid to cling to the reins of power, the Socialist Supreme<br />
Bureau threatened the nearby country of Karzeghistan with the use of<br />
chemical weapons if the oil-rich Sharig Plateau, an integral part of Takistani<br />
territory usurped by the British reign in the times of the Takistani monarchy,<br />
was not "immediately returned to the people of Takistan".<br />
On June 1, 2012, a few days after the ultimatum, Alliance forces deployed<br />
bases in rebel-controlled territories and instigated <strong>Operation</strong> <strong>Arrowhead</strong>,<br />
whose objectives are to neutralize the threat of ballistic missile attacks and<br />
nullify the possibility of an attack on Karzeghistan before attempting any<br />
humanitarian or political actions.<br />
3<br />
Coltan, abbreviated from columbite-tantalite, is a black metallic ore<br />
containing niobium and tantalum. Demand of both metals by the<br />
electrotechnical industry make the ore a strategically important commodity.<br />
The biggest ore deposits can be found in Africa, the Middle East,<br />
Greenland, Brazil and Takistan.<br />
Takistan Armies and Factions Recognition Manual<br />
The United States Army fields<br />
several combined-arms, highly-<br />
-mobile battlegroups, one of<br />
them being Task Force Knight,<br />
whose commander, Colonel Kane, has to<br />
lead his men to strike deep in central<br />
Takistan. Soldiers wear ACU-pattern<br />
camouflage and most vehicles are painted<br />
in a uniform shade of desert tan.<br />
The Czech Republic and the<br />
Federal Republic of Germany<br />
field their best men in Takistan.<br />
Soldiers of the Czech and<br />
German special forces wear the desert<br />
variations of their respective combat<br />
uniforms. Czech Air Force helicopters sport<br />
their typical grey and green camouflage<br />
pattern.<br />
The Takistani Army is equipped<br />
with a mixture of Cold-War-era<br />
equipment of both eastern and<br />
western origin. Soldiers usually<br />
wear distinct steel helmets and khaki or<br />
lizard-patterned uniforms, and special<br />
military police troops also wear black<br />
turbans. Vehicles are painted in irregular<br />
amorphous-shaped fields of desert yellow<br />
and dark green.
The Takistani Republican<br />
Militia is a paramilitary force<br />
composed of armed locals<br />
loyal to the Socialist regime.<br />
They wear normal civilian clothes combined<br />
with camouflaged jackets and vests along<br />
with black head scarves, turbans, and caps.<br />
Soldiers of the Chernarussian<br />
Defence Force representing<br />
the United Nations use their<br />
typical camouflaged uniforms.<br />
To identify themselves as neutral force,<br />
they wear "UN blue" helmet covers and<br />
berets. UN vehicles and aircraft are painted<br />
white.<br />
Takistani people are not easilly<br />
opressed and all kinds of<br />
guerilla fighters appear here<br />
and there. They are armed<br />
civilian groups fighting the regime. When<br />
these men remove their canvas bandoliers<br />
and put away their hunting rifles and<br />
Kalashnikovs, they blend in perfectly with<br />
the rest of population. Guerilla vehicles are<br />
usually painted khaki.<br />
Task Force Knight<br />
Rifleman: CPL Howard Drake, callsign "Hitman"<br />
Drake is an experienced airborne infantry soldier, part of the<br />
US Army deployment in Takistan: Task Force Knight.<br />
Athletic and highly trained, the 24 year old is ideally suited<br />
to deployment in flashpoints worldwide: operating from<br />
helicopter insertion; entering combat zones by parachute;<br />
driving light vehicles and operating mounted weapons.<br />
Tanker: 1LT Ben Herrera, callsign "Badger"<br />
Herrera carries himself with the wild attitude of a man used<br />
to harnessing the power of a 60-ton steel beast.<br />
A stout man of 28 years, with thick sideburns and a strong<br />
"macho" bearing, he is capable of commanding the Abrams<br />
MBT and driving various APCs in a variety of combat zones.<br />
Pilot: CPT Garry Pierce, callsign "Renegade 1"<br />
Pierce is a seasoned combat pilot. A veteran of several<br />
theatres of war, his experience has endowed a wise and<br />
calm attitude.<br />
Trained across a range of military and civilian helicopters, he<br />
is 35 and still flying in action with his Apache.<br />
Special Force: SFC Terry Graves, callsign "Gambler"<br />
Graves is team leader of an elite Special Forces unit: trained for<br />
direct action, reconnaissance and unconventional warfare.<br />
32 years old and with dark eyes set in a sharp, skinny face<br />
with short stubble, Graves is a formidable, battle-hardened<br />
warrior. He likes his old M14 with collimator sights - his<br />
prized possession - but he often carries the SCAR Mk17<br />
variants in urban engagements.<br />
4<br />
Arma 2: <strong>Operation</strong> <strong>Arrowhead</strong> Controls<br />
The quickest way to learn the ropes is to work your way through the Boot<br />
Camp missions. Before that, however, you may want to configure the basic<br />
controls to suit you. In the main menu, click "Options", then "Controls," review<br />
the controls and adjust them to your preference, then click "OK". Once the<br />
controls are configured, return to the main menu, and from there select "Single<br />
Player" and then "Boot Camp". The training missions offer a complete package<br />
of tutorials for the key aspects of Arma 2: <strong>Operation</strong> <strong>Arrowhead</strong>. Remember,<br />
there is no substitute for good training and rigorous practice.<br />
Basic Controls<br />
Movement and Orientation<br />
You can move around the environment in a similar manner to any other first<br />
person shooter using the mouse and keyboard, but there are additional<br />
options:<br />
• Walk/Run: hold Shift to temporarily walk (double tap Shift to toggle<br />
between walking and running).<br />
• Free Look: hold Alt to freely look around using the mouse, even while moving.<br />
• Lean: hold Q or E to lean (double tap to toggle leaning).<br />
• Change Stance: tap Z to go prone, X to crouch, and C to stand up.<br />
Interacting with the Environment<br />
Use the Action Menu to interact with your equipment and the environment in<br />
more advanced ways. If there are any actions available to manipulate your<br />
gear, vehicle or environment, you can see them in the Action Menu that opens<br />
up when you rotate the Mouse Wheel. You can close the menu using the Right<br />
Mouse Button (RMB) or perform any action with the Left Mouse Button (LMB).<br />
Often, you will also see the action icon near your weapon cursor which<br />
indicates a new action available. Press the Mouse wheel to execute this<br />
default action, or invoke the Action Menu as usual and select the requisite<br />
action with the LMB. Contents of the Äction Menu are context sensitive; they<br />
depend upon where you point with the cursor and what is currently available<br />
to do.<br />
5<br />
Using Your Weapons<br />
• Press F to change your weapon mode; for example, toggling a rifle<br />
between single and automatic fire or selecting different types of hand<br />
grenades.<br />
• Press R or use the Action Menu to reload your weapon.<br />
• Rotate the mouse wheel to use the Action Menu to switch to your secondary<br />
weapon (if you have one).<br />
• Click the RMB to toggle between looking down the sights of your weapon.<br />
• Hold the RMB to zoom your view and temporarily hold your breath, which<br />
stabilizes your aim.<br />
• Press G to display all your gear and pick up new items if you are near<br />
a weapon crate or in a vehicle.<br />
• Press PgUp and PgDown to adjust zeroing of scoped optics.<br />
The Map<br />
Press M to show the map. It helps you to find your position relative to your<br />
objectives and to plan your movement. It often contains additional markers that<br />
describe the situation on the battlefield.<br />
The map also contains navigation aids and actual time information. On easy<br />
difficulty settings, it also displays enemy contacts with various levels of precision.<br />
You often receive a grid reference in the game. The grid divides the map into<br />
squares of 100x100 meters, identified by a six-digit code. The first three digits<br />
describe the horizontal position of the square; the last three digits give the vertical<br />
position. If you zoom out, the map becomes divided into 1x1 kilometer squares.<br />
On the map screen you will also find a quick menu allowing you to see your<br />
tasks, mission objectives, and information about your team members:<br />
• Map – Hides the diary and shows only the map.<br />
• Tasks – Shows a list of mission objectives. You may activate any available<br />
task at any time by choosing the "Set as current task" option. Tasks are often<br />
added during the course of a mission.<br />
• Notes – The content of this section is often updated during gameplay. The<br />
text will often contain hyperlinks which point to the particular places on the<br />
map relevant to your current objectives.<br />
• Briefing – Short briefing of the current objectives.<br />
• Situation – Overview of basic background information and general situations.
• Mission – Shows the overview of your mission.<br />
• Execution – Guidelines on how you are expected to fulfill your tasks.<br />
• Support – List of all support available for you.<br />
• Chatlog – Displays the scenario's history of communication, including<br />
conversation and radio chatter on all available channels.<br />
• Units – Overview of your team. You may access your team's equipment from<br />
this section.<br />
• Server Control – Dedicated server settings.<br />
• Players – Multiplayer-only section showing the list of players.<br />
• Other scenario-specific sections may appear in this menu.<br />
Advanced Controls<br />
Combat<br />
Don't be fooled by the fact that Arma 2: <strong>Operation</strong> <strong>Arrowhead</strong> looks like other<br />
first person shooters. Forget some of the tactics you might use in other games<br />
and try to think and behave as in real life combat, where the cost for a single<br />
mistake is often extremely high, and where every bullet can kill.<br />
Movement<br />
Combat Postures<br />
Arma 2: <strong>Operation</strong> <strong>Arrowhead</strong> features three distinct combat postures.<br />
By default, press Z to go prone, X to crouch and C to stand. Each stance<br />
comes with its own strengths and weaknesses:<br />
• Going prone will minimize your silhouette, presenting the enemy with only<br />
a small target at which to fire. Your aim will be much steadier, yet your<br />
movement will be very slow.<br />
• Standing allows you to run and sprint from cover to cover, but your body will<br />
be more exposed to fire and your aim will be less steady.<br />
• Crouching provides a balance of the advantages and disadvantages of going<br />
prone and standing.<br />
Movement Speed<br />
Another choice you have while moving is how fast you want to move:<br />
• Running: The game's default movement speed, faster than walking.<br />
It balances speed with impact upon your stamina.<br />
• Walking: Sometimes it may be prudent to very carefully patrol an area, and<br />
so you will want to walk slowly. Not only does this give you time to scan the<br />
environment for enemies, but you also avoid tiring, which—among other<br />
things—affects your aim. To walk, hold Shift by default while using the<br />
movement keys.<br />
• Sprinting: There are situations when even running is not speedy enough,<br />
such as when you're fleeing from an armed grenade. This is when you can<br />
use sprinting. Be aware, though, that sprinting long distances tires you very<br />
quickly. Double-tap the W key by default to sprint.<br />
Raising and Lowering Weapons<br />
Instead of always walking around with your weapon raised, you may choose<br />
to lower it. By default, this is achieved by double-tapping the Left Control key.<br />
To raise your weapon again, simply press the Fire action (default LMB) or<br />
double-tap the Left Control key again.<br />
Stepping over Obstacles<br />
To step over low walls, fences, or any other low obstacle, press V when<br />
standing next to and facing them.<br />
Leaning<br />
Leaning enables you to peek around the corner of an object, fire your weapon,<br />
and still keep most of your body behind cover. The default keys are Q to lean<br />
left and E to lean right. You can also double-tap a lean key to toggle the<br />
leaning position (with movement speed locked to walking).<br />
6<br />
Swimming<br />
As a soldier, you have been trained to swim in order to save yourself from<br />
drowning. You may not be fast, however, and it's possible you will lose some<br />
your equipment if you spend too long in the water.<br />
Views<br />
Arma 2: <strong>Operation</strong> <strong>Arrowhead</strong> allows you to view your controlled character or<br />
vehicle in the following ways:<br />
• 1st-Person View: This is the default view mode, which lets you view the<br />
game from your character's perspective. It is the most realistic and<br />
immersive mode, and is ideal for controlling characters on foot.<br />
• 3rd-Person View: This gives a greater view of your surroundings, and is<br />
particularly useful when controlling vehicles. In the Expert difficulty setting,<br />
however, 3rd-person view is disabled. By default, Recruit and Regular modes<br />
allow you to toggle between 1st and 3rd person view by pressing Numpad<br />
Enter.<br />
• Weapon View: All weapons in Arma 2: <strong>Operation</strong> <strong>Arrowhead</strong> have realistic<br />
scope and iron-sight views which can be used to accurately engage targets<br />
at a range of distances. The default method of switching to this view is to<br />
single-click the RMB. Note that you may also hold RMB to perform<br />
different actions: concentrate on the middle of the screen with increased<br />
zoom, higher focus and also to hold your breath for a short period of time.<br />
• Commander's View: When you are in command of subordinates, you may<br />
press Numpad . (Decimal) to engage the team commander's external view,<br />
which enables better management of your squad. This view is disabled on<br />
Expert difficulty settings.<br />
Navigation<br />
To make sure you have full situational awareness at all times, the following<br />
options are available to you:<br />
Compass and Directions<br />
When communicating in a squad, two different methods are used to indicate direction.<br />
The first method is based on a standard compass and uses a 360-degree system<br />
to indicate direction: 000 = North, 090 = East, 180 = South, and<br />
270 = West. Use the numbers on the outer ring of your compass to get an<br />
exact reading. This method is often used when issuing a movement order.<br />
The second method is based relative to the current movement of your group<br />
7<br />
and refers to front, right, left and back. This method is most commonly used<br />
to indicate your current direction or the direction of an object or enemy<br />
contact. It is particularly effective if used in combination with the map view.<br />
Vehicles with a target radar on board display your compass heading at the top<br />
of the screen. In the Recruit mode, a yellow line is displayed on your compass,<br />
indicating the direction of your current waypoint.<br />
Peripheral Vision<br />
To support your orientation and situational awareness, Arma 2: <strong>Operation</strong><br />
<strong>Arrowhead</strong> features peripheral vision indicators. These are translucent dots<br />
indicating the direction of known enemies, as well as friendly or neutral<br />
objects, which appear to the edge of your screen, indicating the general direction<br />
of objects nearby but outside of your current view angle. Note that this is<br />
a simulation of real world peripheral awareness, which is restricted by the<br />
constraints of a computer monitor as well as biased by your character's detection<br />
capabilities. For the lowest difficulties, it's possible to allow these rectangles<br />
to also appear on screen on various characters and vehicles to make it<br />
easier to distinguish friend from foe.<br />
GPS<br />
To help you locate your position, some missions provide you with a GPS device<br />
in the map view. This device displays the exact grid reference of your current<br />
position, which can be can cross-referenced with your map; additionally, the<br />
GPS displays altitude above sea level and your orientation (azimuth). If you<br />
have a GPS in your inventory, or GPS is part of the vehicle, you may activate<br />
the in-game minimap by pressing Right Ctrl + M.<br />
Custom Waypoints<br />
On Recruit and Regular difficulty settings, you may use Shift + Left Mouse<br />
Button (LMB) to mark a location when viewing the map. In game, a light-green<br />
waypoint icon is displayed on that position.
Targeting and Firing<br />
As in real life, an unsupported weapon is never fully stabilized. The degree of<br />
stability is dependent upon both your stamina and posture, and is impacted<br />
upon by injuries. Your character's stamina is reflected in the intensity of his<br />
breathing and the extent of his injuries. Going prone or crouching always<br />
allows you to shoot with greater accuracy, and limits the effect of the<br />
weapon's recoil.<br />
Ballistics<br />
Arma 2: <strong>Operation</strong> <strong>Arrowhead</strong> simulates weapon ballistics: bullets will take<br />
time to reach their target, and are also affected by gravity. Remember this<br />
when firing at targets over a long distance; particularly, when firing at moving<br />
targets. Your current level of precision is indicated by your weapon cursor: the<br />
closer its animated parts appear to be, the higher is the accuracy. To improve<br />
your accuracy, use concentration mode. In this mode you hold your breath and<br />
focus your attention on one particular area for an accurate hit. By default,<br />
holding the RMB invokes this mode (note that holding and pressing a button<br />
are distinct actions).<br />
Zooming the Sights<br />
You may adjust field of view and magnification (zoom) in many optical sights;<br />
the change of field of view can be either continuous or discrete. For both, press<br />
Numpad + to zoom in and Numpad - to zoom out. When looking through<br />
iron sights, you may zoom a little by holding RMB. Some optical sights (e.g.<br />
the integral sight on a G36 or an ACOG sight on a SCAR) are fitted with<br />
additional (usually red dot) sights, which may prove useful when firing in<br />
full-automatic fire mode or in close quarter battles. Press / to switch<br />
between a weapon's long-range and CQB optics.<br />
Zeroing the Sights<br />
Ammunition in Arma 2: <strong>Operation</strong> <strong>Arrowhead</strong> has a set ballistic trajectory. To<br />
accurately hit using your weapon's sights, properly Zero your weapon - adjust<br />
the range to which the sights are calibrated. Range is increased by pressing<br />
Page Up and decreased by pressing Page Down. The zeroing value is<br />
displayed in the top right of the weapon HUD.<br />
Personal weapons have default zeroing on following distances:<br />
• 50m – pistols<br />
• 100m – suppressed rifles<br />
• 200m – SVD, AK74 with PSO-1 optics, grenade launchers<br />
• 300m – most assault rifles<br />
• 500m – most machineguns<br />
Ballistic Computer<br />
Several modern vehicles (M1 Abrams, M2 Bradley, AH-64D Apache helicopter)<br />
use simple simulation of ballistic computations. Use RMB to lock the target<br />
and aim your cursor directly on the locked target to hit it. Several optics are<br />
capable of displaying the set range.<br />
8<br />
Weapon Sights Features<br />
The reticles of many optical sights contain visual aids which enable you to<br />
quickly estimate the range to target and adjust the elevation accordingly. Note<br />
that the aids work properly only with the default zeroing of weapon sights.<br />
Some of the optical sights—those found mostly in vehicles—provide additional<br />
info of the weapon or sight mode, rangefinding or zeroing settings.<br />
9<br />
Marks indicate required<br />
elevationto hit on<br />
measured distance.<br />
Height of human body<br />
at particular distance.<br />
Field of view (zoom)<br />
Display mode<br />
Rangefinder<br />
PSO-1 rifle optical sight<br />
M1 Abrams commander display<br />
Weapon Lock<br />
Some guided missile launchers (e.g, Stinger, Javelin) require a sustained<br />
period of aquisition before the target is fully locked. After selecting a target<br />
using the RMB, a square marker is displayed over the enemy, while the round<br />
marker gradually centers on the target.<br />
You need to keep your target in your weapon's sights until the round marker<br />
is fixed in position over the target to achieve a hit. Depending on the particular<br />
system, aural feedback in the form of a tone indicating target lock status may<br />
be present.<br />
missile - locking<br />
missile - locked
Tracer Rounds<br />
For weapons with higher magazine capacity and rates of fire, every fifth shot is<br />
usually a tracer round, which glows in the dark or emits light only in close infrared<br />
wavelength (thus, it can be seen only through night vision goggles). Observing<br />
tracers can help you to discern friend from foe by colour: ammunition of eastern<br />
origin uses yellow-green tracers while western ammunition uses red tracers.<br />
Did you know...<br />
...incoming tracer rounds cannot be spotted, as the glowing phosphorus<br />
load is fitted to the rear of the bullet?<br />
Hand Grenades and Smoke Shells<br />
The degree of power with which a hand held projectile is thrown can be controlled.<br />
Press and hold LMB to prepare the weapon, pause, and release to throw.<br />
Holding LMB for longer time increases the distance.<br />
Night Combat<br />
When darkness falls, features of your equipment, weapon or vehicle may still<br />
allow you to participate in combat:<br />
• Night Vision Goggles (NVG) – Press N to activate image-intensifying<br />
goggles. This device also allows you to see close-infrared radiation; namely,<br />
beams of laser target pointers and infrared strobes. Note, looking through<br />
optics is impossible with a NVG device positioned over your eyes, thus the<br />
goggles are removed automatically when you look through a scoped weapon<br />
optic (Numpad 0 or RMB). Some weapon optics have their own night-vision mode.<br />
• Weapon-Mounted Target Pointer – Many personal weapons are fitted with<br />
a target pointer / illuminator / aiming light (TPIAL), which can emit a beam of<br />
light visible only through night-vision equipment. This aiming aid<br />
compensates for the inability to look through scoped weapon sights with<br />
your NVGs on. However, it is not designed to mark targets in the same way<br />
as a laser marker device. Press L to activate the target pointer.<br />
• Weapon-mounted Flashlight – Some personal weapons have a small<br />
flashlight attached. Press L to turn on the light.<br />
• Infrared Strobes – There are two kinds of strobes available, visible only in<br />
NVG: The Marker strobe and Target strobe. The Marker strobe blinks and is<br />
only practical as a position marker provided your opponent is not equipped<br />
with NVGs. The Target strobe can be targeted by vehicles and aircraft<br />
(machineguns, unguided rockets); it can be used for marking tagets at night.<br />
• Thermal Weapon Sights and FLIR – Some weapons and many modern<br />
vehicles support thermal imaging. This vision model is activated automatically<br />
once you look through optics of a weapon with thermal sights. In vehicles,<br />
you can cycle through available modes by pressing N. Thermal imaging<br />
highlights objects with a temperature higher than their surroundings<br />
(engines, firing weapons, burning wrecks, people) in a monochromatic<br />
spectrum. In most cases, the spectrum is grayscale, and you can toggle<br />
between "white-hot" (displays hot objects in white) and "black-hot" (hottest<br />
objects are black) mode.<br />
normal view night vision<br />
(image intensification)<br />
thermal view<br />
(white hot)<br />
thermal view<br />
(black hot)<br />
10<br />
Gear<br />
The Gear screen lets you organize gear for you and your subordinates. It is also<br />
how you pick up items found in the environment or drop items onto the<br />
ground. In the top-left corner of the Gear screen there is a list of all objects<br />
around you that you can interact with. These can be members of your squad,<br />
ammunition crates, dead bodies, etc. Selecting any of these objects shows you<br />
the items they hold. The "Available Items" list below this shows all items that<br />
are nearby in the environment. These items can be placed into an inventory by<br />
dragging it to one of the objects in the list above. Selecting "Take" will place<br />
the item directly into your own inventory. You can get more information on<br />
a certain item by clicking on its picture. With an item selected you are also able<br />
to 'Drop' it to the ground.<br />
Backpacks<br />
The Backpack allows you to carry an additional number of objects. Objects in<br />
the Backpack are visualized in the Gear section as usual, but their quantity is<br />
displayed on left side, while the rest of the items in Gear are displayed on the<br />
right side. Capacity of backpacks varies by type. Some backpacks are capable<br />
of carying weapons, taking 10 slots of inventory space.<br />
Did you know...<br />
...when you drop a weapon, you will automatically drop all of its associated<br />
ammunition?<br />
Redeployable Static Weapons<br />
Many of the static weapons in the game (machine guns, mortars) can be<br />
disassembled using the "Disassemble" actions. Once disassambled, they turn<br />
into several backpacks, which can be carried to a different position and<br />
reassembled using the 'Assemble' action once one part of the weapon is put<br />
onto the ground. Static weapons are assembled facing in the same direction<br />
you are.<br />
First Aid<br />
Administering First Aid<br />
When you are a member of an elite team trained to handle first aid, you stay<br />
alive after hits which would otherwise eliminate you. Instead, you become<br />
severely injured, which is indicated by blurred red vision. Severely wounded<br />
soldiers bleed, and if first aid or proper healing is not administered in time,<br />
11<br />
they may die. In the event of severe injury, you may call for help as usual (radio<br />
"Action" �"Injured").<br />
When someone is assigned to provide first aid to you, you will see a blue First<br />
Aid icon marking his position. In the event you are healed by a medic, you will<br />
return to a state of full combat readiness. The more experienced the medic is,<br />
the less time it will take to heal.<br />
If your teammate is hit, you will see the red First Aid icon on your HUD indicating<br />
his position, unless you play on high difficulty. You may approach him and start<br />
administering first aid by user action "First Aid". If you need to interrupt the<br />
healing, you may cancel the process with the user action "Cancel First Aid".<br />
While injured, when you double-tap forward key (2 x W, you may start crawling<br />
and you can shoot. However, you cannot reload your weapon or use the<br />
weapon sights).<br />
Battlefield Clearance<br />
Severely wounded soldiers may be dragged or carried away from dangerous<br />
positions. To drag someone, approach him and aim your cursor on the upper<br />
part of his body. Start dragging by activating the action "Drag". To put the<br />
wounded buddy on your back, change your stance to standing while dragging<br />
by pressing C. This takes some time, but enables you to move faster and fire<br />
your personal weapon. You may cancel dragging or carrying either with the<br />
user action or by changing your stance to low X or prone Z.<br />
Conversations<br />
It is possible to talk to various non-player characters in the game. This option<br />
is indicated by a "Talk" icon when you point at the character with the cursor<br />
(note, unless you want to threaten the character it is recommended to lower<br />
your weapon by double-tapping Left Ctrl). You initiate conversation using<br />
Action Menu. Sometimes conversations with you will be initiated by the other<br />
party automatically.<br />
During conversations, you may be given certain options to select. These are<br />
shown in the form of a communication menu, where you can either press the<br />
associated number or use the Mouse Wheel to mark the selection and click the<br />
LMB to confirm it.
Vehicle Controls<br />
Various types of keypresses are recognized by the game: "single tap", "double<br />
tap" and "hold". Also, various combinations of two different inputs are possible<br />
and for many actions it is possible to use both analog and digital inputs.<br />
This section refers to default controls—please note, you can view and configure<br />
the controls freely by selecting "Options", then "Controls" at any time in the<br />
game Menu. In vehicles it's also possible to use the mouse to steer; to freely<br />
look around (the same as for infantry units) hold Alt (double tapping to toggle<br />
between the two modes). The Numpad keys are used to control the camera<br />
direction at all times and Numpad * can be used as an alternative method to<br />
toggle freelook mode, which also changes if your camera direction control is<br />
permanent or will auto center again. Note, your vehicles consume fuel and often<br />
may also need repair.<br />
Driving Vehicles<br />
Keyboard controls:<br />
• W: Forward<br />
•Shift + W or E: Fast Forward<br />
• Q: Slow Forward<br />
• A: Turn Left<br />
• D: Turn Right<br />
• S: Brake/Reverse<br />
Mouse controls:<br />
• Move Mouse Left/Right: Turn Left/Right<br />
• Move Mouse Up/Down: Look Up/Down<br />
• LMB: Car Horn<br />
Armed and Armored Vehicles<br />
It's important to understand that very often military vehicles are crewed by<br />
more than one person. In tanks, for example, the crew consists of a commander,<br />
a gunner and a driver. Each has a different role in the vehicle.<br />
Commander<br />
The commander is often equipped with a radar that shows enemy targets in<br />
red. Commanders can assign orders to the driver and gunner. The tank commander<br />
often has a machine gun mounted on his turret. LMB fires the commander's<br />
machine gun, while F changes the weapon mode (if possible).<br />
Orders to the driver are:<br />
• Q: Slow Forward<br />
• W: Forward<br />
• E: Fast Forward<br />
• A: Turn Left<br />
• D: Turn Right<br />
• S: Halt / Reverse<br />
Order to the gunner are:<br />
• Tab: Lock next target<br />
• Ctrl + LMB: Fire/Cease Fire<br />
• Ctrl + F: Switch weapon<br />
• RMB: Target object<br />
12<br />
Action Menu:<br />
• Lights on/off<br />
• Turn in/out (open or close the protective hatch)<br />
Commander optics controls: N: Switch optics mode (daylight, night vision,<br />
thermal imaging) Numpad + / Numpad -: Optics zoom control<br />
Gunner<br />
F: Switch weapon<br />
LMB: Fire weapon<br />
RMB: Lock target<br />
N: Switch optics mode (daylight, night vision, thermal imaging)<br />
Numpad + / Numpad -: Optics zoom control<br />
Aircraft Controls<br />
Piloting aircraft is not easy; "practice makes perfect" is particularly relevant to<br />
this role. Despite the aircraft controls being simplified to be a level similar to<br />
the normal infantry controls in Arma 2: <strong>Operation</strong> <strong>Arrowhead</strong>, it requires a lot<br />
of experience to truly master aircraft in the game. As with other armed<br />
vehicles, certain aircraft types contain multiple human-controlled positions;<br />
typically, pilot and gunner.<br />
Keyboard controls:<br />
• A: Bank Left<br />
• D: Bank Right<br />
• W: Pitch Down (Forward)<br />
• S: Pitch Up (Backward)<br />
13<br />
• X: Rudder Left<br />
• C: Rudder Right<br />
• Q: Helicopter Increase Height / Plane Increase throttle<br />
• Z: Helicopter Decrease Height / Plane Decrease throttle<br />
•2x \: Activate auto hovering (available also in the Action menu)<br />
• \: Deactivate auto hovering (available also in the Action menu)<br />
Mouse controls:<br />
• Move Mouse Left/Right: Default turn (Yaw or Rudder Left/Right, based on<br />
current speed)<br />
• Move Mouse Up/Down: Nose Up/Down<br />
• Double tap Alt or * on Numpad to change between Mouse Steer and Mouse<br />
Look modes.<br />
• Hold Alt to to temporarily switch to Mouse Look mode.<br />
There are specific actions usually available when in aircraft, accessible from<br />
the Action Menu by rotating the Mouse Wheel:<br />
• Landing Gear Up/Down<br />
• Eject<br />
• Auto Hovering<br />
• Flaps Up/Down (protrude flaps once when taking off and twice before landing)<br />
• Manual Fire (directly control when the gunner fires his weapon)<br />
• Automated landing<br />
Flying Helicopters<br />
Here are some tips for beginners and experts on how to control helicopters<br />
efficiently.
Flight Controls<br />
There are 3 controls in a chopper:<br />
• Cyclic - controls the attitude of your chopper, it is the stick in the middle of<br />
the cockpit, between the legs. It banks the airframe left and right, and pulls<br />
nose up or down.<br />
• Collective - controls the amount of lift generated by the rotors. Essentially,<br />
when it is pulled, the chopper gains altitude; when it is pushed, the chopper<br />
loses altitude.<br />
• Rudder - controls the power applied to the tail rotor or the differential of<br />
power applied to both main rotors in coaxial-rotor helicopters like the Ka-52.<br />
It makes the chopper change heading without banking or changing attitude.<br />
Flight controls have secondary and in some cases, tertiary effects. Only<br />
a few of them are modelled in Arma 2: <strong>Operation</strong> <strong>Arrowhead</strong>:<br />
• pulling the nose up at significant speeds causes the helicopter to gain altitude;<br />
• on other hand, when you push the nose down to gain speed, you lose altitude;<br />
• the rudder loses authority when speed increases due to the forward<br />
velocity "pushing you straight" up to a point where it has nearly no effect;<br />
• by pulling power in from the ground, the aircraft will want to turn the<br />
opposite way to the blades turning. This is an effect of torque. Counter it by<br />
using the tail rotor (anti-torque rotor).<br />
Landing Tips<br />
• Ensure the area under your chopper is clear of trees, buildings and other<br />
obstacles. Since it is difficult to look directly down, you will want to pick<br />
a suitable landing area before your final descent.<br />
• The airframe gets damaged if you drop down at full speed from a hover<br />
higher than 4m above ground, so land smoothly.<br />
• 80 meters is a perfectly safe altitude for parachute drop at any speed. You<br />
can drop from lower altitudes at lower speeds.<br />
Emergency Landing<br />
If you lose engine power, you can still try to survive the landing by following<br />
this procedure:<br />
• Immediately reduce thrust (Z or Page Down keys, by default) and maintain<br />
level flight.<br />
• Keep the descent key pressed.<br />
• Engage Auto-Hover (Action Menu or double-tap \ ) to reduce horizontal<br />
speed.<br />
• When approximately 30 meters above ground level and less than 30 kmph<br />
forward speed, increase thrust and land.<br />
Dropping Troops Off in a Combat Zone<br />
Use the following tips to improve the chances of a successful sortie:<br />
• Where possible, avoid flying directly over the area of engagement to prevent<br />
yourself from becoming a target.<br />
• Keep the engine running when waiting on a landing zone.<br />
• Eject from the helicopter on the ground by using the "Eject" command and<br />
not the "Get Out" command; the engine will remain running to enable a much<br />
faster take-off.<br />
Helicopter UAV<br />
You will have opportunity to use the Unmanned Little Bird – an experimental<br />
helicopter drone capable of designating targets and the remote launch of<br />
guided missiles. To switch to UAV, select the "UAV" option in the Action Menu.<br />
To return to your normal view from a UAV's camera, select "Leave UAV" in the<br />
Action Menu. You may also command movement of your drone through High<br />
Command (explained later).<br />
Unmanned Little Bird Controls:<br />
• Mouse: Camera control<br />
• LMB: Activate laser marker<br />
• CX: Yaw aircraft<br />
• Q: Fly Up 50 meters<br />
• Z: Fly Down 50 meters, land<br />
• M: Switch to Map view and set waypoints using LMB.<br />
14<br />
1 - Fuel,damage indication and top-down radar.<br />
2 - Speed, heading and altitude.<br />
3 - Targeting cursor. Its appearance varies when laser designator is active or a missile is launched.<br />
4 - Player's helicopter info, hit accuracy, missile distance to target and missile-in-the-air indication.<br />
5 - Helicopter UAV info, target side info, laser functionality indicator and distance to target.<br />
6 - Missile info, stating the type and number of missiles available.<br />
Top-Down Radar<br />
Most vehicles contain a top-down radar, which provides information on the<br />
orientation of a vehicle's turrets, targets and incoming threats:<br />
• Headings of turrets are marked by the semi-transparent angles of sight,<br />
which change acording to their user's field of view. If you control a turret, it<br />
is highlighted so that you may better see your heading relative to the vehicle.<br />
• Targets are marked as colored icons. Their shape indicates the type (square<br />
– ground vehicles, triangle – aircraft); their colour indicates hostility<br />
(red – enemy, green – friendly, grey – unknown).<br />
• Incoming threats (usually a weapon lock or a missile fired on your vehicle) are<br />
indicated by highlighting a section of radar with a blinking red overlay and a<br />
beeping sound, provided your vehicle is equipped with proper sensors to<br />
detect a particular threat. Icon of a unit locking the player's vehicle is marked<br />
by white circle.<br />
15<br />
4<br />
1<br />
6<br />
2<br />
3<br />
5<br />
fuel<br />
damage indicators<br />
incoming threat<br />
Countermeasures<br />
countermeasures release mode<br />
enemy<br />
remaining<br />
countermeasures<br />
turret heading<br />
and field of view<br />
You may defend against incoming threats by active countermeasures, depending<br />
on whether you fight in an armored vehicle or fly an aircraft:<br />
• Flares – Available on the majority of military aircraft to distract an incoming<br />
missile. The number of available flares is displayed on the top left part of the<br />
screen, right to the top-down radar. Note, some missiles don't use infared<br />
guidance, rendering flare defenses ineffective against them. Press R to<br />
release a pair of flares.<br />
• Smoke Screen – Smoke shell launchers are available on most armored<br />
vehicles to cover a vehicle's movement or to counteract laser designation. As<br />
a vehicle commander, select the "Smoke" weapon and fire smokes by<br />
clicking LMB.
Damage Warning Indication<br />
You may notice that the top-left corner of your screen contains a fuel capacity<br />
bar and a varying number of indicators. These icons indicate damage caused<br />
to various parts of your vehicle: hull, instruments, tracks, wheels, engines or<br />
rotors. Green indicates full operability, but as damage accumulates it will<br />
transition to yellow, orange, and then red. Once an icon turns red, the<br />
corresponding part of your vehicle is no longer functional.<br />
HULL vehicle's overall structure<br />
ENG engine<br />
FUEL fuel tank (damage causes fuel leak)<br />
INST instruments<br />
GUN main gun<br />
TRRT turret (tanks and armored vehicles)<br />
MROT helicopter's main rotor<br />
ATRQ helicopter's tail rotor<br />
WHL wheels (wheeled vehicles<br />
L-TR left track (tracked vehicles)<br />
R-TR right track (tracked vehicles)<br />
Head-up Display (HUD)<br />
Many military aircraft sport a green readout displayed on a transparent screen<br />
in the front of a cockpit. This is the HUD. The HUD displays information about<br />
your heading, altitude, orientation relative to an artificial horizon. If you<br />
approach for landing onto a functional runway, the instrument landing system's<br />
(ILS) visual aids are displayed on the HUD. Some aircraft are equipped with<br />
head-mounted display (HMD), which is a personal HUD attached to a pilot's<br />
helmet. The HMD remains centered within your field of view as you look around.<br />
Command and Communication<br />
There are various methods of communication in both singleplayer and<br />
multiplayer modes of Arma 2: <strong>Operation</strong> <strong>Arrowhead</strong>. When operating in an AI<br />
controlled squad, there's often no need to frequently use these report<br />
functions. However, in multiplayer game modes - interacting with people who<br />
might not speak the same language - these simple commands can be used as<br />
an effective form of communication during a mission. Usually, combat<br />
communication between units is done from the Quick Command Menu,<br />
activated by the Spacebar.<br />
Subordinate Unit<br />
Hold the Spacebar (or tap it to show the menu permanently) and select one of<br />
the following messages:<br />
• Copy<br />
• Repeat<br />
• Done<br />
• Fail<br />
• One less<br />
• Where are you?<br />
• Radio - the content of this menu is contextual, used mostly for long range<br />
and other more advanced communication like requesting artillery support or<br />
air strikes<br />
Taking Command<br />
There are multiple methods of commanding the troops at your disposal. Each<br />
is handy in certain situations and may well suit different playing styles.<br />
Quick Command<br />
As commander, your Command Menu is already full of commands, but for<br />
instant access to communication options, use 5 and 0. However, the radio is<br />
still available through the Quick Command Menu. Hold Spacebar to temporarily<br />
activate the Quick Command system or tap Spacebar to display it permanently.<br />
Your cursor will now change to command mode, which is context sensitive—its<br />
functionality and appearance changes depending upon where the cursor is<br />
pointed. By default, you will have everybody selected after you enter Quick<br />
Command mode. You can select an individual unit by clicking the LMB on it<br />
(hold Shift and click if you want to select the entire team to which this unit<br />
16<br />
belongs). You may quickly command any subordinate unit by pressing<br />
the F# key (i.e. F1, F2, F3...) associated to its designated number. You can also<br />
order your selected subordinates using the command cursor (unless it is<br />
pointing on your squad member):<br />
• To move somewhere by clicking on any position on the terrain<br />
• To engage a target by clicking on the target<br />
• To mount a vehicle by clicking on the vehicle<br />
• To watch in a direction or on a unit, vehicle or object if you click while<br />
holding Left Alt<br />
• To hold fire by clicking anywhere while holding Ctrl<br />
If you want to issue multiple commands to your subordinates, hold Ctrl before<br />
giving them the order and they will remain selected and wait for further<br />
orders. After you release Spacebar (or press again to exit permanent<br />
Command Mode), all units are deselected and you return to normal mode.<br />
Complex Commands<br />
More detailed commands can be accessed any time by using the Complex<br />
Command Menu, which offers the full range of commands available to a group<br />
commander. You can see the commanding bar at the bottom of your screen<br />
showing you all your subordinates, their designated number and status. You<br />
may have some communication options available in the commanding menu<br />
even as a single or subordinate unit. To invoke the Complex Command Menu<br />
at any time (also when in the Quick Command mode) press Backspace to<br />
display the root menu of complex commands, or directly press the associated<br />
number on the main keyboard to enter the command menu dedicated to<br />
particular area:<br />
• 1 Move<br />
• 2 Target<br />
• 3 Engage<br />
• 4 Mount<br />
When in the menu, you can use the keyboard shortcuts—number keys for<br />
commands; F# keys for unit selection—to quickly navigate at any time.<br />
Alternatively, use the Mouse Wheel to select, LMB to confirm selection, and<br />
RMB to step one level back in the menu. Press a number key (from the main<br />
keyboard, not Numpad) to directly issue an associated command or open<br />
a related sub-menu of commands.<br />
17<br />
• 5 Status<br />
• 6 Action<br />
• 7 Combat Mode<br />
• 8 Formation<br />
• 9 Team<br />
• 0 Reply<br />
• Backspace: Root Menu<br />
Please note that you can also type a sequence of numbers to directly issue<br />
more complex commands. Example: if you command a subordinate unit 2,<br />
pressing F2 � 1 � 1 will issue the command "Return to Formation" to this unit.<br />
Teams<br />
Units can be assigned to five different color groups for quick selection, which<br />
is useful if you command larger numbers of units. In some missions, units may<br />
already be preassigned to teams; as a commander, you can also assign units<br />
to a team at any point while playing.<br />
• Select the units that should make up the team and choose Assign 9 from<br />
the commanding menu.<br />
• Now assign the units to a particular team color (the white team is used for<br />
any unassigned units).<br />
To select the entire team (alternatively, if you already have the entire team<br />
selected, you can deselect them using the same method):<br />
• Hold Shift and click by mouse using Commanding Cursor on any team member.<br />
• Hold Shift and press the F# key of any team member.<br />
Tactical View<br />
Numpad . (Decimal) switches between Normal View and Tactical View. In the<br />
Tactical View you see the immediate area from above and you can use all<br />
commanding techniques available in Normal View to command troops. The<br />
Tactical View allows the commander to pan and zoom the camera to reveal a<br />
greater scope of the surrounding environment, which enables more strategic<br />
real-time command of troops. In order to switch to the Tactical View, "3rd<br />
Person View" must be enabled in your difficulty settings.<br />
Support Units<br />
The ammo, repair, and fuel trucks that provide support are vital to the success<br />
of any combined-arms operation. Move your vehicle close to any of these support<br />
units and select the appropriate action to either repair, rearm, or refuel<br />
your vehicle. To call a support vehicle, select the appropriate item in the<br />
'Support' section of the command menu. Note that support vehicles may not<br />
be available in a particular scenario or may already be occupied. The following<br />
support can be called in on the battlefield:<br />
Medical Support<br />
When injured, you can inform the rest of your team using the Command Menu<br />
option "Status" �"Injured". To receive treatment, you can walk over to a medic,
EXIT<br />
MENU<br />
HOLD VOIP<br />
TOGGLE*<br />
WALK / RUN<br />
TOGGLE*<br />
RAISE /<br />
LOWER<br />
WEAPON*<br />
Esc<br />
Caps<br />
Lock<br />
Shift<br />
LCtrl<br />
LOOK / AIM<br />
Alt<br />
FREE LOOK<br />
TOGGLE*<br />
LEAN<br />
LEFT<br />
STRAFE<br />
LEFT<br />
BACK<br />
* DOUBLE TAP - FUNCTIONS ARE ACTIVATED BY DOUBLE-TAPPING THE KEY<br />
Q<br />
A<br />
MOVE / RUN*<br />
FORWARD<br />
W<br />
S<br />
E<br />
D<br />
Z X C<br />
LEAN<br />
RIGHT<br />
STRAFE<br />
RIGHT<br />
BASIC INFANTRY CONTROLS MOVEMENT VIEW WEAPONS MISC MENU<br />
REL<strong>OA</strong>D<br />
WEAPON<br />
MODE<br />
R<br />
T<br />
F G<br />
TEAM<br />
SWITCH<br />
GEAR<br />
PLAYER<br />
STATS<br />
COMPASS<br />
WATCH<br />
LIGHT /<br />
LASER<br />
V BINOCULARS B N M , . /<br />
WEAPON ZEROING<br />
DISTANCE +–<br />
PLAYER<br />
LIST<br />
PRONE CROUCH STAND STEP<br />
OVER<br />
VISION<br />
MODES<br />
MAP PREV. NEXT.<br />
CHANNEL CHANNEL<br />
CHAT MINIMAP<br />
CONFIRM<br />
CONFIRM<br />
MENU ITEM<br />
EXIT<br />
MENU<br />
CLICK / HOLD<br />
FIRE<br />
CLICK – IRON SIGHTS<br />
HOLD – ZOOM<br />
REPORT TARGET<br />
UP / DOWN<br />
PREVIOUS / NEXT MENU ITEM<br />
HOLD BREATH<br />
18 19<br />
I<br />
K<br />
O P<br />
L<br />
M<br />
RCtrl<br />
Page<br />
Up<br />
Page<br />
Down<br />
LOOK<br />
DIRECTION<br />
TOGGLE<br />
SIGHTS<br />
7<br />
SCOPE<br />
VIEW<br />
/<br />
FREE LOOK<br />
TOGGLE<br />
8 9<br />
Home Pg Up<br />
4 5 6<br />
1 2 3<br />
End<br />
0<br />
Insert<br />
Pg Dn<br />
+<br />
Enter<br />
ZOOM<br />
OUT<br />
ZOOM<br />
IN<br />
1st / 3rd<br />
PERSON<br />
VIEW<br />
LEAVE<br />
UAV
LOCK / CYCLE<br />
TARGET<br />
Tab<br />
STEER<br />
LEFT<br />
LCtrl<br />
LCtrl<br />
SLOW<br />
FWD<br />
Q<br />
A<br />
FWD<br />
W<br />
BACK<br />
Z X<br />
CYCLE<br />
GUNNER’S<br />
WEAPONS<br />
FIRE<br />
ORDER<br />
FAST<br />
FWD<br />
COUNTER–<br />
MEASURE<br />
STEER<br />
RIGHT<br />
VISION<br />
MODES<br />
STEER<br />
AIM TURRET<br />
LOOK<br />
WEAPON ZEROING<br />
DISTANCE +–<br />
SWITCH<br />
WEAPONS LIGHTS<br />
TURN IN TURN OUT MINIMAP<br />
F<br />
S<br />
E<br />
D<br />
R<br />
F<br />
N<br />
L<br />
M<br />
Page<br />
Up<br />
Page<br />
Down<br />
LOOK<br />
DIR.<br />
RCtrl<br />
SCOPE<br />
VIEW<br />
CLICK / HOLD<br />
FIRE<br />
FREE LOOK<br />
TOGGLE<br />
7 8 9<br />
Home Pg Up<br />
4 5 6<br />
1 2 3<br />
End<br />
0<br />
DEFAULT ACTION<br />
Pg Dn<br />
VEHICLE CONTROLS AIRCRAFT CONTROLS<br />
+<br />
Enter<br />
ZOOM<br />
OUT<br />
ZOOM<br />
IN<br />
1st / 3rd<br />
PERSON<br />
VIEW<br />
LEAVE<br />
UAV<br />
CLICK – SCOPE VIEW<br />
HOLD – ZOOM<br />
REPORT TARGET<br />
LOCK TARGET<br />
20 21<br />
LOCK / CYCLE<br />
TARGET<br />
Tab<br />
BANK<br />
LEFT<br />
LCtrl<br />
LCtrl<br />
INC.<br />
THRUST<br />
Q<br />
DEC.<br />
THRUST<br />
NOSE<br />
DOWN<br />
W<br />
NOSE UP<br />
CYCLE<br />
GUNNER’S<br />
WEAPONS<br />
BANK<br />
RIGHT<br />
A S D<br />
Z X<br />
F<br />
RUDDER<br />
LEFT<br />
MOVEMENT VIEW WEAPONS MISC MENU<br />
C<br />
RUDDER<br />
RIGHT<br />
FIRE ORDER<br />
UAV – MISSILE LAUNCH<br />
COUNTER–<br />
MEASURE<br />
R<br />
F<br />
SWITCH<br />
WEAPONS<br />
LANDING<br />
GEAR LIGHTS<br />
G<br />
N<br />
VISION MINIMAP<br />
MODES SCOPE<br />
VIEW<br />
BANK / TILT<br />
AIM TURRET<br />
LOOK<br />
L<br />
M<br />
AUTO<br />
HOVER<br />
\<br />
RCtrl<br />
CLICK / HOLD<br />
FIRE<br />
LOOK<br />
DIRECTION<br />
DEFAULT ACTION<br />
FREE LOOK TOGGLE<br />
7 8 9<br />
Home Pg Up<br />
4 5 6<br />
1 2 3<br />
End<br />
0<br />
Pg Dn<br />
+<br />
Enter<br />
ZOOM<br />
OUT<br />
ZOOM<br />
IN<br />
1st / 3rd<br />
PERSON<br />
VIEW<br />
LEAVE<br />
UAV<br />
CLICK – SCOPE VIEW<br />
HOLD – ZOOM<br />
REPORT TARGET<br />
LOCK TARGET
F1 F2 F3 F4 F5 F6 F7 F8 F9 F10 F11 F12<br />
` 1 2 3<br />
(DE)SELECT<br />
ALL UNITS<br />
LCtrl<br />
ADD UNIT<br />
WAYPOINT<br />
QUICK<br />
COMMAND<br />
4 5 6<br />
NAVIGATE<br />
UP / DOWN<br />
Space<br />
SELECT UNITS<br />
COMPLEX COMMANDS<br />
CLOSE<br />
COMMAND<br />
MENU<br />
COMMAND CONTROLS COMMAND VIEW SELECTION<br />
7 8 9 0<br />
ALTERNATE<br />
QUICK COMMAND<br />
Alt Space<br />
LCtrl Space or .<br />
22 23<br />
PREVIOUS<br />
UNITS<br />
NEXT<br />
UNITS<br />
COMPLEX<br />
COMMAND<br />
MENU<br />
COMPLEX COMMAND<br />
MENU SHORTCUTS:<br />
1 MOVE<br />
2 TARGET<br />
3 ENGAGE<br />
4 MOUNT<br />
5 STATUS<br />
6 ACTION<br />
7 COMBAT MODE<br />
8 FORMATION<br />
9 TEAM<br />
0 RADIO<br />
TOGGLE HIGH COMMAND INTERFACE<br />
LOOK<br />
TACTICAL VIEW<br />
+<br />
Enter<br />
MOVEMENT<br />
ZOOM<br />
OUT<br />
ZOOM<br />
IN<br />
1st / 3rd<br />
PERSON<br />
VIEW<br />
LEAVE<br />
UAV
ambulance, or field hospital, and select "Heal at ..." from the Action Menu. If<br />
you are unable to move, or can't find a medic, you can call out for one using<br />
the Command Menu option "Call support" � "Medic!". If you are the subordinate<br />
in a squad, your commander can also send a medic to your position.<br />
• As a commander, assign a medic to injured squad members by selecting the<br />
injured soldier and calling radio "Action" � "Heal at Medic"<br />
• If you are an injured commander, select a medic from your squad and order<br />
him to come close to you. When the medic gets close, you will get the action<br />
"Heal" in your Action Menu.<br />
Ammo Resupply<br />
High-tech weaponry is worthless without the proper ammunition, and an<br />
extended firefight can drain your ammo in seconds. Tanks and helicopter<br />
gunships can return to base to replenish their ordnance, but an infantry squad<br />
or a tank platoon in combat zone has to be much more cautious about their<br />
rate of ammo consumption. Getting bogged down in stalemate engagements<br />
and over-extending a mission's duration should be prevented at all costs. If<br />
absolutely necessary, it is possible to pick up weapons and magazines from<br />
fallen friendly or enemy troops. You can do this by walking up to a corpse and<br />
using the Action Menu to pick up any of the weapons or magazines available.<br />
Vehicle Support<br />
Due to their size and tactical significance, vehicles are important on the<br />
battlefield, and require support. As well as damage sustained, vehicle crews<br />
also have to monitor their fuel and ammunition consumption, and should<br />
therefore refuel and rearm whenever possible. However, their ability to quickly<br />
break away from enemy contact often allows vehicles to receive support out<br />
of the range of direct enemy fire.<br />
High Command<br />
Switch between squad and High Command with Ctrl + Spacebar or Win App<br />
key (if you are allowed to take the role of "High Commander"). In some cases,<br />
i.e., when you become a main commander in a large-scale scenario, you may<br />
command whole groups in a similar way as your subordinates.<br />
Group selection and controls are akin to the unit management described in the<br />
"Taking Command" section of this <strong>manual</strong>. You may notice that groups are represented<br />
by simplified NATO unit markers, which vary according to the side,<br />
size and type of group. Enemy groups are also marked in this way when High<br />
Command is active.<br />
Groups can be controlled either in the 3D world or in your map. Your map<br />
offers some additional command options:<br />
• Add multiple waypoints for a group by holding Ctrl when assigning waypoints.<br />
• Move the waypoints by dragging them with LMB.<br />
• Click on a waypoint with 'RMB' to activate a menu to edit the waypoint's<br />
properties; e.g., to change the group's formation or combat mode.<br />
• The "Interact" option in the high-level command menu is context-sensitive.<br />
You may use it to load or unload infantry from vehicles or assign an enemy<br />
to be attacked by a selected group.<br />
24<br />
Group Type Reference Sheet<br />
Unit size<br />
Sides<br />
Unit type<br />
BLUFOR - US Army,<br />
Army of Czech Republic,<br />
German special forces<br />
Unit type:<br />
Unit size:<br />
25<br />
Sides:<br />
OPFOR<br />
Army of Takistan,<br />
Takistani Republican Militia<br />
Infantry Mechanized<br />
infantry<br />
Artillery Reconnaissance<br />
unit<br />
Fixed-wing<br />
Aircraft<br />
NEUTRAL<br />
Independent (Chernarussian<br />
United Nations contingent),<br />
Takistani royalist guerilla,<br />
civilians<br />
Motorized<br />
infanrty<br />
Rotary-wing<br />
Aircraft<br />
UAV drone<br />
Single Section Team<br />
Squad Platoon Company<br />
Armor<br />
Supports<br />
If you are in the role of group commander, it is sometimes possible to call in<br />
various kinds of support, ranging from an artillery strike to overhead cover by<br />
aerial reconnaissance drones. Newly-available support options are indicated by<br />
translucent white icons on the right edge of the screen. You may call in<br />
support by accessing the option "Communication" � "Request Support" in the<br />
Quick Command Menu (or hold Spacebar). Once a support option is<br />
highlighted, you may either confirm its target in the 3D world with the LMB or<br />
you may return to the menu by pressing RMB.<br />
Rules of Command<br />
Remember, simply attacking from the front is usually far from the best<br />
solution. In order to become a successful commander, abide by the following rules:<br />
• Always try to flank and outmaneuver your enemy.<br />
• In open areas, never let infantry advance alone without the support of<br />
combat vehicles.<br />
• In urban areas, combat vehicles need to be protected by infantry.<br />
• The attacking side requires at least a 3:1 numerical advantage to stand<br />
a good chance of victory.<br />
• Reconnaissance is important. Use the UAV to scout the objectives whenever<br />
it's available.<br />
• If you encounter heavy resistance or get into trouble, it is safer to call in<br />
artillery or CAS support.
Playing Arma 2: <strong>Operation</strong> <strong>Arrowhead</strong><br />
Single Player<br />
By selecting "Singleplayer" in the Main menu, various game modes providing<br />
single player experiences are listed. Each of them is described below.<br />
Campaign<br />
The campaign is a series of scenarios which take place within an overarching<br />
plot. You can begin a new campaign in the main screen; later, you will also be<br />
able to replay completed parts of a campaign as you wish. Note that each time<br />
you quit the campaign, your current position is saved and you will be able to<br />
continue from the same position. At times, you may feel things didn't go too<br />
well and you want to try something again. For that, use the "Revert" option in<br />
the main campaign screen.<br />
<strong>Operation</strong> <strong>Arrowhead</strong><br />
Participate in <strong>Operation</strong> <strong>Arrowhead</strong> and experience modern warfare through<br />
the eyes of ordinary soldiers on a merciless battlefield. The conflict begins, and<br />
Task Force Knight is moving out. Become immersed in combat as an infantry<br />
soldier, aircraft pilot, tank commander or a member of an elite special-forces<br />
team. Do your best over several interconnected missions, fighting intense<br />
battles from the borders to the very heart of enemy territory: Zagarbad city,<br />
the stronghold of the Takistani Army!<br />
Scenarios<br />
Scenarios are another core part of the single player experience offered by<br />
Arma 2: <strong>Operation</strong> <strong>Arrowhead</strong>. Providing not only an alternative experience to<br />
the main campaign, scenarios also provide an opportunity to hone essential<br />
combat skills for the campaign and online multiplayer battles. The order of the<br />
scenarios reflect their overall complexity. It is recommended to try the simple<br />
battles first before taking part in large-scale operations. Aside from full-blown<br />
scenarios, it's also possible to fully customize some of the preset mission templates.<br />
Mission Wizard<br />
A good first step into mission design is the in-game mission wizard. This<br />
visual design tool lets you quickly move around starting points, objectives and<br />
other key mission elements, and export the results as a brand-new mission.<br />
Access the single mission wizard by pressing "Singleplayer", followed by<br />
"Scenarios". Open the "My Missions..." folder and double-click "< New Mission >".<br />
First you will be asked to select one of three available mission templates.<br />
These are the basic outlines of your scenario and determine things like how<br />
many enemy bases and patrols will be generated. The available templates are<br />
Basic (reach the destination point alive) and Combat (accomplish sequence of<br />
the randomly generated tasks in a sandbox battlefield).<br />
When you are satisfied with your choice of template, press "Load". The menu<br />
will now display which sides this template is available for and you can choose<br />
any of them. Pressing "Load" once more takes you to a screen where you can<br />
fine tune the mission settings:<br />
• Units - Pick the number and type of units your squad will have.<br />
• Map - Choose any of the maps available to you.<br />
• Name - Enter a name for your mission.<br />
• Map - In the 2D map view you can edit the position of various mission<br />
elements here. Press and hold the LMB over any of the named markers and<br />
drag them to the desired location. Double click LMB to insert a unit (or to<br />
edit a waypoint or unit if your cursor is over one). Click the RMB to add a<br />
waypoint to the currently-selected unit. Press Delete to remove a unit or<br />
a waypoint.<br />
• Time & Date - Prefer to play during a cold winter evening or a warm spring<br />
day? Pick your time and date settings here.<br />
• Weather - Both cloud cover and fog can be altered for your mission.<br />
When you are happy with these settings, press "Preview" and select a difficulty in<br />
the next screen. Pressing "Preview" again will directly place you in your newly<br />
created scenario.<br />
Did you know...<br />
...advanced mission designers can create completely new templates?<br />
26<br />
Boot Camp<br />
Boot Camp provides you with various scenarios where you sharpen up combat<br />
skills, whether it's infantry, armor, or aircraft. You may also practice accurate<br />
parachute insertions, commanding your squad members or forces consisting<br />
of multiple squads, and learn about the new features of Arma 2: <strong>Operation</strong><br />
<strong>Arrowhead</strong>.<br />
Armory<br />
The Armory is a playground for all of the vehicles, weapons and creatures in<br />
the game. It provides background information on equipment and units and<br />
enables you to view everything in detail. Most importantly, the Armory lets<br />
you try out all available content. You will be assigned dynamic challenges<br />
which will test your skills in many core areas. When first starting the Armory,<br />
not all content is unlocked. Completing challenges earns points, which in turn<br />
unlocks items. Another way to unlock all items is to complete the singleplayer<br />
Scenarios or the Campaign. After choosing an item, several modes are<br />
available to interact with the unlocked items.<br />
• Scene - Select "Scene" to be presented with a dynamic cutscene featuring<br />
that item. In this mode, you can view a text description with background<br />
information and statistics.<br />
• Viewer - Select "Viewer" to really inspect all those nice little details. In this<br />
mode, 'RMB' with mouse gestures rotates the item, LMB with mouse<br />
gestures pans around it. Holding LMB + RMB with vertical mouse gestures<br />
zooms in and out. Double-click the LMB to reset to the default rotational<br />
camera.<br />
• Try - This mode enables you to simply play with an item or accept dynamic<br />
challenges that allow you to unlock more items for experimentation.<br />
• "Primary Challenges" are short, dynamic missions such as "Attack Location"<br />
or "Taxi".<br />
• "Secondary Challenges" may be presented at any time, even during a Primary<br />
Challenge. Sometimes their goals conflict—it's up to you to decide which you<br />
want to complete (or try to get them both)!<br />
• If you just want to experiment, you can disable challenges from the Pause<br />
menu. This interface allows you to abort active challenges and return to item<br />
selection.<br />
27<br />
Editor<br />
The basics of the mission editor are easy to grasp, allowing beginners to<br />
create "instant action" style missions in a matter of minutes. Other mission<br />
editing functions are often far more complex and cryptic. Creating a complex<br />
mission can take weeks of editing, and will require knowledge of scripting and<br />
the creation of some supporting text files outside of the game. Multiplayer<br />
missions create some further complexities that will also need to be considered.<br />
You will find basic descriptions of how to use the Editor later in this <strong>manual</strong><br />
(see "Mission Editor"), but more advanced references can be found online at<br />
http://community.bistudio.com.<br />
Multiplayer<br />
Session browser<br />
Your first step on the way to play Arma 2: <strong>Operation</strong> <strong>Arrowhead</strong>'s multiplayer<br />
modes is the Session Browser. Pressing "Play" followed by "Multiplayer" will<br />
take you there. From here, you can choose to join an existing session or host<br />
a new one yourself, on either Local Area Networks (LAN) or the Internet.<br />
Address<br />
By default, your browser is set to search for games on the internet. If you<br />
want to change this, click "Address: Internet" once. You will now search for<br />
sessions on the LAN; click this button again to switch back. When looking for<br />
LAN sessions, you may also need to change the network port that is used,<br />
which can be done by clicking the default "Port: 2303" button once.<br />
Sorting<br />
Filters at the top of the Session list allow you to sort sessions using a different<br />
parameters. Clicking any of these, e.g., "Host", will sort the sessions by this<br />
parameter in ascending order. Pressing it again will sort them in descending<br />
order. From left to right, the columns show:<br />
• Whether the session is password protected or not<br />
• Host name<br />
• Mission currently playing<br />
• Amount of players currently in the session / maximum amount of players for<br />
this session<br />
• Quality of your connection to this host
Filtering<br />
Sometimes you may be overwhelmed by the number of sessions available and<br />
it may be hard to pick a good one. This is where "Filter" settings facilitate your<br />
search. In this menu a number of properties are availablle to filter:<br />
• Host - Description of the host.<br />
• Max. ping - Maximum ping (ms) to hosts.<br />
• Min. players - Minimum amount of players already in this session.<br />
• Max. players - Maximum amount of players in the session.<br />
• Full servers - Toggle to show or hide sessions that are full.<br />
• Mission - Description of the mission name.<br />
• Passworded servers - Toggle to show or hide password protected servers.<br />
Refreshing<br />
The "Refresh" button empties your session list and gathers new information<br />
about available sessions.<br />
Passwords<br />
To the lower-left of the browser the game displays the password you are using<br />
(no password is entered by default). If you do enter a password here and then<br />
start a new hosting session, the session will be protected by this password.<br />
A player wishing to join a protected session needs to enter the correct<br />
password before joining.<br />
Joining a Game<br />
There are two ways of joining an existing session: pick a session listed in the<br />
browser or <strong>manual</strong>ly enter a host's address. To join a session from the browser,<br />
double-click the LMB on a session, or click "Join" with a session already selected.<br />
If you would like to join a specific host, press "Remote" and enter the host's<br />
address plus port number. If the host has password protected the session, you<br />
need to enter this password in the main Session Browser before you join.<br />
Choosing a Role<br />
After you have joined, you will enter the Multiplayer Setup Lobby. This screen<br />
shows mission details, the available roles for all sides, and a player pool. Upon<br />
joining, the game automatically assigns an available role to you. To choose a<br />
different role, do so by dragging your name from the player pool to another<br />
available role with the LMB. Alternatively, you can click the role you want to<br />
switch to with the LMB. Note, sometimes the session host will determine your<br />
role. If this has been done, you can no longer change your role yourself; to<br />
switch roles, your best bet is to politely ask the host. When you are ready to<br />
start, click "OK", which will notify the other players.<br />
Did you know...<br />
...you can disable the AI taking over from a player who disconnects by clicking<br />
the AI icon next to this player's role?<br />
Hosting a Game<br />
To host a new session, click "New" or double-click "Host Session" from the<br />
Session Browser. You will now be asked to select an existing mission on any<br />
of the maps or to create a new one with the editor or wizard. Having done this,<br />
you will find yourself in the Multiplayer Setup Lobby, where you can assign<br />
player roles and change host settings.<br />
• Players highlighted red in the Player Pool have not yet been assigned a role.<br />
• Players highlighted yellow have picked a role, but have not confirmed that<br />
they are ready.<br />
• Players who are ready to start are shown in green.<br />
• Clicking "OK" launches the session.<br />
Kicking a Player<br />
A situation may arise where you need to kick a certain player. You can do this<br />
by selecting the player in the Player Pool and clicking "Kick Off".<br />
Mission Settings<br />
Some missions allow the host to alter the mission settings; e.g., the number<br />
of kills required to win the scenario, or the maximum duration of the mission.<br />
Mission designers are free to create new mission settings, which are displayed<br />
under Player Roles.<br />
Host settings<br />
• 'Disable/Enable all AI players' - toggling this setting will empty all roles on all<br />
sides that are currently filled by AI players, or it will fill all empty roles with<br />
AI players.<br />
28<br />
• 'Lock/Unlock server' - by locking the session, you can prevent any more<br />
players from joining the game.<br />
Dedicated Server Settings<br />
You are allowed to run a dedicated server from the Multiplayer Setup Lobby.<br />
To access dedicated server functions, click on "Dedicated Server" button.<br />
Multiplayer Communication<br />
A multiplayer game is much more tactical and enjoyable when you can<br />
communicate with the other players. Arma 2: Opperation <strong>Arrowhead</strong> offers<br />
various tools to achieve this without needing to use external applications:<br />
Channels<br />
To ensure you don't get overwhelmed by radio chatter, the game uses several<br />
different communication channels.<br />
• Global Channel – Communication to all players.<br />
• Side Channel – Communication to all players on your side.<br />
• Command Channel – Communication to all players on your side who currently<br />
command a group.<br />
• Group Channel – Communication to all members of your command group.<br />
• Vehicle Channel – Communication to all players in the same vehicle as you.<br />
• Direct Communication – Communication to all players within earshot.<br />
To switch to another channel press either . (period) or , (comma).<br />
Text Chat<br />
One method of communicating is sending and receiving text messages.<br />
• To start typing a message, press / (forward slash).<br />
• The Message Box appears, where you can type a message.<br />
• Send the message by pressing Enter.<br />
Typed messages are sent via channels. While typing a message, you can<br />
change the channel it will be sent to by pressing the Up Arrow and Down<br />
Arrow keys.<br />
Voice Chat<br />
Another method is Voice Chat, which is generally much faster, as you can keep<br />
playing while communicating with other players. If a microphone is set up, press<br />
and hold Caps Lock to commence broadcasting. Voice chat uses the same channels<br />
as text chat, and it follows the same rules as to who will be able to hear it.<br />
29<br />
Did you know...<br />
...Arma 2: <strong>Operation</strong> <strong>Arrowhead</strong> has a voice chat build into the game,<br />
which allows better bandwidth balancing and 3D sound positioning in the<br />
game world?<br />
Map Markers<br />
A map marker is a visual aid placed on the Map. Double-click the LMB<br />
anywhere on the map to place a map marker on that location. This marker is<br />
visible to everyone in the selected chat channel (e.g. placing a map marker<br />
while in the Side channel ensures only other players on your side will see it).<br />
Use markers to point out enemy forces, plot routes, assign artillery targets<br />
and convey any other useful information required.<br />
• While placing a map marker, you can enter text to go with your marker.<br />
• The Up Arrow and Down Arrow keys will select another type of marker.<br />
• To change the marker's color, press and hold the Shift key while pressing the<br />
Left Arrow or Right Arrow keys.<br />
• Pressing Enter finalizes the marker and places it on the map.<br />
• A marker can be deleted by hovering your mouse cursor over it and pressing<br />
Delete.<br />
Expansions<br />
Arma 2: <strong>Operation</strong> <strong>Arrowhead</strong> allows you to install various user created<br />
addons and modifications. It is recommended to store modifications to your<br />
Documents/Arma 2 folder; however, you can also install such content directly<br />
to your main game directory.<br />
You can use the "Modifications" option in the Main menu to enable or disable<br />
any installed modification (restart of the game will be needed).<br />
Combat Tactics<br />
When on the battlefield, one of the most important aspects isn't simply the<br />
thought of killing the enemy; rather, it is preventing the enemy from killing you.<br />
Think before you act. Here's a list of some good tactics that could you help<br />
survive on the battlefield, and beat your enemy.
Get Down<br />
• Lay prone whenever possible. It reduces your silhouette and the target it<br />
represents, plus it steadies your aim.<br />
• If you can't lie down, try to crouch.<br />
• Don't get caught with the horizon or open sky behind you, as it makes your<br />
silhouette easy to recognize and target.<br />
Stop to Fire<br />
• You cannot fire while running or sprinting. You may do so while walking, but<br />
for higher accuracy it's always better to stop and, even better, to crouch or<br />
go prone.<br />
• Your aim is less accurate if you are breathing heavily after running. Wait to<br />
catch your breath first for more accurate aim and note that you may also<br />
want to hold your breath for a few seconds.<br />
Look Around<br />
• Scan the area to your front as well as sides, rear and above—avoid tunnel<br />
vision. The main reason flanking is so effective is because of tunnel vision.<br />
• The sun and other bright lights can adversely affect your eyesight, so be<br />
aware that attacking enemies with the sun behind them puts you at<br />
a significant disadvantage.<br />
• You can look around while moving by holding 'Alt' and moving the mouse<br />
simultaneously.<br />
Take Cover<br />
• Reload only behind full cover.<br />
• Don't get suppressed to the extent that you can't peek out of cover. The<br />
enemy might close with your position and shoot you easily.<br />
• Use cover and concealment whenever possible when changing positions.<br />
The enemy can't see you coming if there is a tree between the two of you.<br />
• A bush is concealment, not cover, since bullets can and will go pass through<br />
them. The same applies for other materials; for example, a wooden fence<br />
does not provide good cover either.<br />
Stay Undetected<br />
• Firing an unsuppressed weapon gives away your position, especially at night.<br />
• Your radio chatter and orders can be heard by enemies nearby. Speaking or<br />
giving orders can also give away your position.<br />
• Flashlights and laser pointers are easy to spot at night.<br />
Combat Movement<br />
• When moving under fire, zig-zag randomly. This makes it more difficult for<br />
the enemy to determine a point of aim on you.<br />
• Don't move across a friendly unit's front, especially if he might be about<br />
to fire.<br />
• Keep moving. It forces the enemy to continually search for and track you.<br />
• When stopping, do so behind partial or full cover.<br />
• The longer you stay in one position, the more likely you will be flanked.<br />
Confuse the Enemy<br />
• Try not to be predictable when moving from cover to cover—all the enemy<br />
has to do is aim and wait for you to run into his sights.<br />
• When moving out from cover to fire, do not move out to the same position<br />
twice in a row. This will keep the enemy from predicting where you will<br />
appear next.<br />
• Use smoke to conceal your movement.<br />
30<br />
Options<br />
Video Options<br />
Standard Video Options<br />
• Resolution - Select the optimal screen resolution for your system. Generally,<br />
a higher resolution provides a sharper image; however, it can negatively<br />
affect your frame rate.<br />
• Visibility - The visible distance in meters. This option is mostly dependent<br />
upon your CPU performance.<br />
• Fillrate Optimizer - Allows you to upscale or downscale rendered images<br />
(without influencing the resolution of user interface elements). A lower<br />
resolution may improve game performance. A higher resolution will improve<br />
the overall sharpness of the image. This option is mostly related to the per<br />
formance of your graphics card.<br />
• Brightness - Use the slider to adjust the overall brightness.<br />
• Gamma correction - Controls the overall brightness of the image you see.<br />
• Quality preference - Select a quality settings preset (note that this influences<br />
other video options).<br />
• Default - Restores all custom settings to default.<br />
• Advanced - Show more advanced video options.<br />
31<br />
Advanced Video Options<br />
• Terrain Detail - The higher the terrain detail, the finer the mesh that makes<br />
up the ground will be rendered.<br />
• Objects Detail - Sets the overall quality of object models. A lower setting<br />
renders lower levels of detail for objects.<br />
• Texture Detail - The overall quality of textures in the game. A lower setting<br />
may cause blurrier textures.<br />
• Shading Detail - Affects all of the special shading techniques used in the game.<br />
• Postprocessing - Affects some special effects like depth-of-field.<br />
• Shadow Detail - Detailed shadows can make a scene come alive, yet also<br />
demand a lot from your hardware. If you experience performance issues, try<br />
lowering this option.<br />
• Anisotropic Filtering - A method of enhancing the quality of textures on sur<br />
faces that are far away.<br />
• Antialiasing - This technique attempts to minimize aliasing (jagged edges)<br />
caused by showing high-resolution content at lower resolutions.<br />
• Blood - Configures the level of gore and also allows the disabling of in-game<br />
blood completely.<br />
• Refresh - Choose the best refresh rate for your screen.<br />
• UI Size - Customize the size of all game user interfaces (it requires a restart<br />
of the application).<br />
• Aspect ratio - Toggle between normal CRT monitor (4:3), widescreen TV<br />
(16:9), LCD (5:4), widescreen LCD (16:10), or any other aspect ratio (it<br />
requires a restart of the application).<br />
Audio Options<br />
• Effects - The volume of general sound effects (e.g. weapon reports,<br />
explosions and engine noises).<br />
• Radio - The volume of radio chatter.<br />
• Music - The volume of the in-game music.<br />
• VON - The volume of sounds transmitted by the game's own voice-over-network.<br />
• Samples - Maximum amount of simultaneously-played sound samples.<br />
Controls<br />
The Controls option enables a detailed configuration of all aspects related to<br />
controls. In the main Controls option dialog, a list of all available actions is<br />
displayed. Filter the types of actions displayed with a drop-down box. To<br />
manage control configuration of an action, select it from the list and click with<br />
the LMB. A configuration dialog will be displayed.
Configure Action<br />
In this dialog you can configure the selected action, and assign numerous input<br />
methods to each action. Most actions are assigned by simply pressing/clicking/moving<br />
the desired input. Some exceptions (like the mouse) are<br />
listed to the right side of the dialog;drag and drop them to the action field to<br />
bind it.<br />
A few tips:<br />
• If a keyboard/mouse input has more than one function assigned to it, it will<br />
be marked red. To reveal which other input has been assigned to it, double<br />
click it with the LMB in the controls dialog. Providing there are no actual<br />
conflicts, it is possible to keep it as is—sometimes it's beneficial to assign<br />
two functions to the same key/mouse input.<br />
• Various key combinations are supported: hold a switch key (i.e., Shift or Alt)<br />
and tap the additional action key.<br />
• Double-tapping input keys is supported: rapidly double-tap a key in the<br />
configuration dialog to assign a double-tapped key.<br />
• You can not use the 'Delete' key to remove controls from an action, as this<br />
key is also a supported input option; you always need to use the mouse and<br />
the Delete button.<br />
Mouse Settings<br />
You can configure the orientation of the vertical axis of the mouse, and the<br />
vertical/horizontal mouse sensitivity.<br />
Controllers/Joysticks/Driving Wheels<br />
Compatible joysticks and/or driving wheels can be used with Arma 2: <strong>Operation</strong><br />
<strong>Arrowhead</strong> for optimum control and enjoyment. You can configure multiple joysticks<br />
and controllers at the same time. There are two main types of devices<br />
supported: configurable controllers (most general-purpose sticks and wheels)<br />
and controllers with schemes (essentially, Xbox controllers for Windows).<br />
To manage your controllers, go to "Options", "Controls", and click the<br />
"Controllers" button. A list of all supported controllers is displayed, split into<br />
two categories: "Customizable Controllers" and "Controllers with Schemes".<br />
Note, your controller may be shown in both, but you can freely enable it for<br />
the preferred usage type.<br />
Essentially, "Customizable Controllers" are those which can be freely mapped<br />
to any action using the "Configure" action dialog. Adjust the sensitivity for<br />
each analogue input by pressing the "Customize" button.<br />
Some controllers can be used in different modes based on schemes. This is<br />
chiefly the case with Xbox controllers for Windows. With this mode enabled,<br />
the scheme will define all aspects of the controller configuration and there's<br />
no option to configure it. To access the Scheme configuration, click<br />
"Customize" when you have selected any enabled controller with a scheme.<br />
TrackIR<br />
Arma series is one of the premier first-person shooters to fully support<br />
Naturalpoint's TrackIR system, which tracks the movement of your head using<br />
infrared technology. For more information on TrackIR, please visit<br />
Naturalpoint's website at http://www.naturalpoint.com/.<br />
Game Options<br />
Various game options can be changed:<br />
• Language - To select the language of in-game text (requires restart of the<br />
game), available only if your game version is sold in multiple languages.<br />
• Subtitles - To enable or disable subtitles for in-game dialogs.<br />
• Radio Subtitles - To enable or disable subtitles for in-game radio<br />
communication.<br />
• Blood - To configure the level of blood displayed in the game.<br />
• Aiming Dead Zone - Your weapon cursor floats in a certain zone in the<br />
middle of the screen. Change the size of this zone, or completely disable this<br />
behavior by scrolling the slider all the way to the left.<br />
• Head bob - The head of your character moves realistically as he travels on<br />
foot. Tune the strength of this effect, or completely disable this behavior by<br />
scrolling the slider all the way to the left.<br />
32<br />
Difficulty<br />
Four difficulty modes are available within Arma 2: <strong>Operation</strong> <strong>Arrowhead</strong>;<br />
namely, Recruit, Regular, Veteran and Expert. The difficulty menu, activated by<br />
pressing "Difficulty" in the game's Options dialog, allows you to fine-tune most<br />
of their settings. Note, in a multiplayer game, the difficulty settings of the host<br />
applies to all players in that session. In the list of settings there are two<br />
columns: the setting description and the configured difficult level. If a setting<br />
is red, you cannot change it in the particular difficulty. All the other settings<br />
can be enabled or disabled to match your personal preferences. Below the<br />
settings list you are able to set the difficulty of the AI units, both on your side<br />
and the enemy's. This affects how smart the AI units are in general, how fast<br />
they aim and how accurate they fire at their target.<br />
Did you know...<br />
...that the difficulty you run your game last with is automatically<br />
transferred to the editor and will be used in all editor previews?<br />
Mission Editor<br />
When you enter the Editor, you will first be asked to select a map to set your<br />
mission on. Simply choose the desired map and click "Ok". This will open the<br />
Editor interface.<br />
Basic Controls<br />
The mission editor offers several modes, all accessed through the associated<br />
function keys or the toolbox in the menu on the right side of the screen:<br />
• F1 Units<br />
• F2 Groups<br />
• F3 Triggers<br />
• F4 Waypoints<br />
• F5 Synchronize<br />
• F6 Markers<br />
• F7 Modules<br />
Basic navigation and controls apply in all the editing modes:<br />
• To pan around the map, click and hold the RMB anywhere on the map and<br />
move the mouse.<br />
33<br />
• To change the level of zoom, use the Mouse Wheel and Numpad +/- keys.<br />
• To create a new entity, double-click LMB on an empty space using the<br />
required editing mode.<br />
• To select an entity, LMB click on it. Selected entities are opaque; non<br />
selected entities are translucent.<br />
• To select multiple entities simultaneously, click and hold the LMB in empty<br />
space to begin a drag box and drag the box's borders across the entities.<br />
• To select multiple entities indivudually, hold Ctrl and select the appropriate<br />
entities with the LMB, or with a drag box.<br />
• To cut selected entities to the clipboard, hold Ctrl and press X.<br />
• To copy the selected entities to the clipboard, hold Ctrl and press C.<br />
• To paste a copy of entities from the clipboard, hold Ctrl and press V.<br />
• To paste a copy of entities on their original position, hold Ctrl and Shift<br />
and press V (useful when copying units between missions).<br />
• To move an entity, click and hold the LMB on an entity and move the mouse.<br />
Note, it's not possible to move units in Group mode or move Waypoints in<br />
Synchronize mode.<br />
• To rotate an entity, hold Shift, click and hold the LMB and move the mouse.<br />
• To edit an entity's parameters, double LMB click on an entity to open its<br />
Editing dialog.<br />
• To delete an entity, press Delete which hovering the mouse cursor over<br />
an entity.<br />
• To select all entities associated with that entity's group, hold Shift and click<br />
the LMB on an unit or Waypoint.<br />
• To open an entity's dialog with a waypoint on it (rather than the waypoints),<br />
hold Shift and click the LMB on an entity.<br />
• To create a waypoint for agroup attached to the clicked entity, in Waypoint<br />
Mode, double LMB click on the entity.<br />
Did you know...<br />
...Copy and pasted named entities automatically have a number appended<br />
to their names to avoid conflicts?<br />
Placing Units and Groups<br />
Units are the primary elements of most missions; insert them by double-clicking<br />
the LMB somewhere on the map. In the pop-up window that appears,<br />
a number of properties for this unit can be edited, such as its side, type, health<br />
status and azimuth. You can also set which unit will be controlled by Player<br />
and which by the AI. If you need to place a number of units, which typically<br />
belong together, at the same time, press F2 and insert a group in much the
same way as you used for units. Note, after you place a group, that you in fact<br />
placed a collection of individual units joined together with blue links. You can<br />
<strong>manual</strong>ly create and remove such links in Group mode by clicking on a unit,<br />
holding the LMB and dragging the line showing where the unit belongs to.<br />
Did you know...<br />
...that when you place a unit as "Playable", you can switch to it using Team<br />
Switch or this unit is playable in multiplayer mode?<br />
Waypoints<br />
Giving Units Waypoints<br />
Your unit will be a completely sentient AI being within the game world and it<br />
will react to nearby events. Most likely however, you will want the units to<br />
move about. This can be achieved with waypoints. The different types of<br />
waypoints are:<br />
• Move - Move to this location.<br />
• Destroy - Move to the target location and destroy whatever the waypoint is<br />
placed on.<br />
• Get in - Try to board the vehicle this waypoint is attached to or, if<br />
synchronized with a vehicle's waypoint, the vehicle will stop and wait to be<br />
boarded.<br />
• Seek and Destroy - Move to this location and start actively searching for enemies.<br />
• Join - Synchronize this waypoint with another group's waypoint to join the two.<br />
• Join and Lead - As above, but now become the resulting group's leader.<br />
• Get out - Get out of the vehicle.<br />
• Cycle - Used to create a loop of waypoints. This is explained in the section below.<br />
• Load - Wait for others to board as cargo.<br />
• Unload - Wait for everyone in the vehicle to get out.<br />
• Transport Unload - Wait for passengers of the vehicle who are not in the<br />
same group to get out (usually Get in waypoint of another group<br />
synchronized with this group).<br />
• Hold - Unit or group will stay at this position. Only a "switch" trigger or<br />
scripting can move the group from this point.<br />
• Sentry - Hold position until an enemy is detected.<br />
• Guard - Any of the units within the Guard waypoint will also intelligently<br />
engage enemies anywhere on the entire game map and in the meantime will<br />
find ones Guarded by ... trigger and protect this location.<br />
• Talk - Speak a sentence from the Effects section of the waypoint.<br />
• Scripted - Executes the script file in the Script text field of the waypoint.<br />
• Support - Wait until another unit calls for support (only works for support units).<br />
• Get in nearest - Board in the vehicle nearest to this waypoint<br />
• Dismissed - Units are freely roaming around this waypoint until an enemy is<br />
detected.<br />
Waypoint Synchronization<br />
Synchronization mode is used to make different groups carry out their<br />
waypoint orders at the same time, and optionally only under specific circumstances.<br />
Synchronization can seem like a hard concept to understand at first,<br />
but it's a very powerful and easy-to-use tool. For example, synchronization can<br />
be used to organize friendly forces to wait until everyone is in position before<br />
launching a mass attack, or wait in ambush until an enemy convoy is in the perfect<br />
location before opening fire. You can synchronize the waypoints of two or<br />
more separate groups by pressing and dragging a link between their<br />
waypoints. Neither group will proceed to the next waypoint until they both<br />
finished the synchronized waypoints. Synchronizing links can be made<br />
between any of a group's waypoints and any number of another group's<br />
waypoints, and any number of triggers. A synchronized waypoint will not<br />
complete until all waypoints it is linked with are ready to complete, and all<br />
synchronized triggers are activated. Synchronizing links are displayed by a<br />
dark blue line connecting the entities. To create a synchronized link between a<br />
waypoint and another group's waypoint or a trigger, select Synchronized<br />
editing mode (F5), click and hold on the waypoint with the LMB, move the<br />
mouse to the desired waypoint/trigger, and release. To remove synchronization<br />
lines from a waypoint or trigger, select it, hold and drag a line into empty<br />
space. Note, this will remove all synchronizing lines from that entity.<br />
Waypoint Cycle<br />
A Cycle Waypoint can be used to make the group move in an infinite loop—a<br />
simple method to create a patrol. If you want your group to repeat any of its<br />
previous waypoints, simply insert a new waypoint with type set to Cycle nearby<br />
the previous waypoint and this will be the waypoint executed. Note, the<br />
automatically generated first waypoint (the leader's initial position as seen in<br />
34<br />
the map editor) is considered as a Move type waypoint, and can be used by<br />
the Cycle waypoint as well. Only a Switch trigger or script can be used to<br />
"break" a group out of a cycle loop.<br />
Simple Triggers<br />
Triggers are used to set up a lot of the mission gameplay. Triggers can be used<br />
to detect a virtually unlimited amount of conditions in the game world and<br />
react to those. The simpler forms of triggers are explained below.<br />
Presence Detection<br />
A very common use of triggers is detecting the presence (or absence) of units.<br />
To do this, place a trigger at the position where you would like to detect this<br />
presence, and scale it using the "Axis a" and "Axis b" properties. The<br />
encompassing area is where your trigger will detect units. The Activation<br />
drop-down-box will let you select a particular unit side to listen for. If you don't<br />
need to make a distinction between sides, pick "Anybody". Next, choose<br />
whether you want to check for presence, absence or maybe whether the units<br />
have been detected by another side. This is achieved by selecting one of the<br />
options in the toolbox.<br />
Mission Ending<br />
Any trigger can be classified as an Ending Trigger using the Type property. In<br />
the drop-down-box you can select one of 7 endings (including Lose), which corresponds<br />
to endings in the mission briefing HTML file.<br />
Modules<br />
It is possible to insert more advanced components to your mission using the<br />
Modules mode (F7). The advanced injury system, volumetric cloud or ambient<br />
life are just one double click away from your mission. Some of the modules<br />
need to be synchronized (F5) with another units or objects.<br />
Intel<br />
To tweak the mission name, description, time of day and weather, you can click<br />
on the Intel button in the top-left corner of the editor. You will find four sliders,<br />
controlling your starting weather, weather forecast, starting fog and fog<br />
forecast. Finally, you can choose which side the Independent faction will<br />
ally with in this mission.<br />
35<br />
Mission Management<br />
Loading<br />
Clicking "Load" from the editor shows a pop-up window where you can select<br />
any missions previously saved for the loaded map. If you want to look for a<br />
mission on a different map, you can do so with the Map drop-down-box. The<br />
map will be loaded after pressing OK.<br />
Merging<br />
Sometimes it is beneficial to merge two separate mission files. This can be<br />
achieved with the Merge button. If you save the merged mission under a new<br />
name, the original two missions will be unaffected.<br />
Saving<br />
Having worked on a new mission for a long time, you will want to save your<br />
work somewhere. Do this by clicking "Save". Several exporting options are<br />
then displayed:<br />
User mission - The mission is saved as an editable mission, which can later be<br />
re-opened in the editor. This is the default option and it is always recommended<br />
to save your latest version this way before using any of the other export<br />
options.<br />
Export to Single Missions - The mission is exported to the Single Missions<br />
screen as a published mission. All mission content is compressed into a single<br />
file, which makes it easy to share with friends.<br />
Export to Multiplayer Missions - The mission is exported as a multiplayer<br />
mission in a single compressed file. You can now select the mission when you<br />
a hosting a session.<br />
Playing your Missions<br />
There is no better way to see if your mission works than to try it for yourself.<br />
Do this by simply clicking "Preview". When you are back in the editor, you can<br />
make changes and use "Continue" to resume play. Note, the changes you made<br />
will not be processed until the next time you click "Preview".
Troubleshooting<br />
Game Updates<br />
It is recommended to keep your game updated to the latest version. Game<br />
updates and patches contain various bug fixes and other improvements and<br />
may also contain additional content for the game.<br />
Visit http://www.arma2.com to see if there's a new update available. Note,<br />
when you apply an official BI patch, make sure you have all the original game<br />
files intact - if you've altered any of the official game files, the patch is prone to<br />
failure.<br />
Technical Support<br />
Before contacting our technical support, please prepare a detailed specification<br />
of your computer and an exact description of the problem. It will help us<br />
to provide you with support in a fast, efficient way.<br />
Information Required:<br />
Computer model (CPU, CD-ROM, RAM, Video/Sound card, DirectX version,<br />
Windows version).<br />
In order to get this information, please go to Run in your Windows Start menu<br />
and type ’dxdiag’ in the command line then press the enter key.<br />
The DirectX diagnostic program will start. This will show you all the relevant<br />
driver files installed on your system.<br />
In order to receive a text file of this information, please click the button Save<br />
All Information. You can then save a text file with all the information we<br />
require on your hard drive.<br />
You will then be able to send this information to us via e-mail.<br />
Contact us via email at: support@bistudio.com<br />
Please use the email address provided. All support enquires to the company<br />
address, or phone number(s) cannot be answered by our staff.<br />
For more information and updates please visit: http://www.arma2.com<br />
Useful Links:<br />
http://community.bistudio.com; http://forums.bistudio.com<br />
The Community Wiki and Official Forums are an excellent source of information<br />
and troubleshooting guidance for all aspects of the game, they also contain<br />
a large amount of information and guidance for anyone wishing to explore<br />
enhanced mission creation or addon/mod creation.<br />
36<br />
Credits<br />
Developed by<br />
Bohemia Interactive<br />
Project Leader:<br />
Marek Španěl<br />
Executive Producer:<br />
Lukáš Soukenka<br />
Lead Designer:<br />
Ivan Buchta<br />
Production Manager:<br />
David Zapletal<br />
Visual Lead:<br />
Pavel Guglava<br />
Master Of Arma:<br />
Jakub Horyna<br />
Lead Programmer:<br />
Ondřej Španěl<br />
<strong>Arrowhead</strong> Core Programmers:<br />
Vojtěch Hladík<br />
František Novák<br />
Senior Programmer:<br />
Jiří Martinek<br />
Programmers:<br />
Jan Kadlec<br />
Jakub Šimek<br />
Radim Halíř<br />
Tool Programmers:<br />
Lukáš Bábíček<br />
37<br />
Lukáš Gregor<br />
Jan Mareček<br />
Daniel Musil<br />
Zdeněk Pavlík<br />
Enrico Turri<br />
Additional Graphics Programming:<br />
Michal Varnuška<br />
Filip Doksanský<br />
Milan Dědic<br />
Ján Dupej<br />
Mission Design Lead:<br />
Jaroslav Kašný<br />
Senior Designers:<br />
Joris-Jan van't Land<br />
Karel Mořický<br />
Josef Zemánek<br />
Designers:<br />
István Király<br />
Martin "Dram" Melichárek<br />
Franck Poulain<br />
Jiří Wainar<br />
External Designers:<br />
Vilém Beneš<br />
Mike Melvin<br />
Bart van Paassen<br />
Jakub Kovář<br />
Matthew Hardwick<br />
Senior Artists:<br />
Mario Kurty<br />
Oldřich Kříž<br />
Zdeněk Opletal<br />
Tomáš Pavlis<br />
Jiří Pospíšil<br />
Artists:<br />
Miroslav Tkadlec<br />
Tomáš Novák<br />
Vladimír Soukup<br />
Jana Raudenská<br />
Martin Valášek<br />
Zdeněk Vespalec<br />
Localisation Manager:<br />
Martin Vaňo<br />
Translation:<br />
Michal Beckert<br />
Tomáš Vaňo<br />
Scriptwriters:<br />
Todd Rice<br />
Martin Boček<br />
Cultural and linguistic advisory:<br />
Adriana Stříbrná<br />
Vít Šisler<br />
Environment Designers:<br />
Miroslav Horváth<br />
Petr Sedláček<br />
Jay Crowe<br />
Martin Pezlar<br />
External Environment Designers:<br />
Lukas Fuhrer<br />
Michael Emmerich<br />
Jörg Puls<br />
Configuration Designer:<br />
Jan Kyncl<br />
“Linda” Tree System Design:<br />
Jan Hovora<br />
External artists:<br />
Roman "Gašpo" Gašperík<br />
Ján Lenárd<br />
Vlastimil Müller<br />
Bronislav Prosecký<br />
Christopher J. Torchia<br />
Tom Haerinck<br />
Marcin Piotr Pindara<br />
Pavel Drozhzhin<br />
Johannes Wagner<br />
User Interface Design:<br />
Andrej Boleslavský<br />
Motion Capture / Animation Lead:<br />
Štěpán Kment<br />
Motion editing:<br />
Pavel Očovaj<br />
QA Lead:<br />
Lukáš Haládik<br />
QA:<br />
Miloslav Cinko<br />
David Foltýn<br />
Ondřej Plechata<br />
Anita Bubeníčková<br />
Lukáš Čanda<br />
Jan Libich<br />
Jan Hauer<br />
Josef Frnka<br />
Ondřej Bezucha<br />
Michala Ftoreková<br />
Tomáš Hnízdo<br />
Vendula Kučerová<br />
Ladislav Mráz<br />
Original Music Score:<br />
Ondřej Matějka<br />
(www.silentnoise.cz)
Sound Effects:<br />
Ondřej Matějka<br />
(www.silentnoise.cz)<br />
Jan Dušek<br />
Voice Acting Production<br />
Management:<br />
Štefan Ďurmek<br />
Voice Actors:<br />
Jeff Beck<br />
Dan Brown<br />
Elizabeth Cook-Kellner<br />
Ben Diemer<br />
Christian M. Dunkley-Clark<br />
Jim High<br />
Howard Lotker<br />
Erin Naillon<br />
Robert Polo<br />
John Poston<br />
Robert Scott Williams<br />
Steven Schwartz<br />
Jeff Smith<br />
Cast:<br />
Cpl. Drake – Petri J. Knuutinen<br />
1Lt. Herrera – Lukáš Haládik<br />
SFC. Graves – Jiří Kašný<br />
Dr. Baker – Radka Hlisnikovská<br />
Rita Ensler – Kateřina Sigmundová<br />
Dr. Hladík – Vojtěch Hladík<br />
Public Relations:<br />
Jan Pražák<br />
Paul R. Statham<br />
James Carey<br />
Collateral Design:<br />
Slavomír Pavlíček<br />
Michal Harangozó<br />
Barbora Havličková<br />
IT Support:<br />
Jan Hlavatý<br />
Martin Horák<br />
Sales and Support<br />
Sales Manager:<br />
Jiří Jakubec<br />
Localization & Q/A:<br />
Jan Kunt<br />
Tomáš Pecha<br />
Legal and Administration:<br />
Kateřina Skalická<br />
Miluše Pavlíčková<br />
Monika Růžičková<br />
DTP:<br />
Jan Weyrostek<br />
Pavel Mázl<br />
Special Thanks<br />
Zdeněk Flasar<br />
Jaroslav Kozůbek<br />
Ján Tvarek<br />
Petr Woletz<br />
Marcel Kica<br />
Jiří Pazděra<br />
Martin Bartoš<br />
Daniela Feltová<br />
Karel Kverka<br />
Jakub Vaněk<br />
Ludmila Svozilová-Vaňková<br />
Tomáš "Lipo" Lipka (http://www.gazklub.sk/)<br />
John Binkowski<br />
Petr Pechar<br />
Andrew Gluck and Shack Tactical (www.shacktac.com)<br />
Anareus (www.anareus.cz):<br />
Jan "Harris" Dočkal<br />
173rd Airborne Infantry Reenactment club Praha (http://www.173rd.wz.cz/):<br />
Filip Patera<br />
Jakub Horák<br />
Martin Herceg<br />
2nd Bn of The Royal Regiment of Fusiliers/Reenactment club Praha:<br />
Jan Heřmánek<br />
Vladimír Rajchart<br />
B Company, 9th Infantry Regiment (Manchu), 2nd Infantry Division<br />
(Indianhead) Reenactment club Praha (http://www.2idas.com/):<br />
Radek Syka<br />
Martin Škaloud<br />
LAND INFO Worldwide Mapping, LLC:<br />
Joshua D. Johnson<br />
Nick Hubing<br />
Slůně Language School and Translation Agency<br />
Bohemia Interactive Simulations:<br />
Peter Morrison<br />
Mark Dzulko<br />
Markus Kurzawa<br />
Earl Laamanen<br />
Vladimír Nejedlý<br />
Tomáš Velebný<br />
Adam Boyes<br />
Mark Lacey<br />
Black Element Software:<br />
Petr Víšek<br />
Daniel Dvořák<br />
Hynek Svatoš<br />
Miloš Zajíc<br />
Tomáš Bujňák<br />
Pavel Houska<br />
88th Co."Walking Death":<br />
Alejandro "Azhor" Rodriguez<br />
Joaquin "kinno" Cabrera<br />
Roberto "LORD" López<br />
Clan Linces España:<br />
Mario Aguado<br />
S&H Entertainment Localization<br />
38<br />
EULA<br />
IMPORTANT - READ CAREFULLY: YOU SHOULD CAREFULLY READ THE FOLLOWING<br />
END-USER LICENSE AGREEMENT BEFORE INSTALLING THIS SOFTWARE PROGRAM.<br />
This computer software program, any printed materials, any on-line or electronic documentation,<br />
and any and all copies and derivative works of such software program<br />
and materials (the “Program”) are the copyrighted work. All use of the Program is<br />
governed by the copyright law and by the terms of the End-User License<br />
Agreement, which is provided below (“License”). By using the Program you agree to<br />
be legally bound by the terms of this license agreement. Any use, reproduction or<br />
redistribution of the Program not in accordance with the terms of the License is<br />
expressly prohibited. If you do not agree to the terms of this Agreement, do not<br />
install or use the Program. You may, however, return it to your place of purchase<br />
for a full refund.<br />
End User License Agreement<br />
1. Ownership: All title, ownership rights and intellectual property rights in and to the<br />
Program and any and all copies thereof (including but not limited to any titles,<br />
computer code, themes, objects, characters, character names, stories, narrative,<br />
locations, artwork, animations, sounds, musical compositions, audiovisual effects,<br />
methods of operation, any related documentation, and addons incorporated into the<br />
Program) are owned by Bohemia Interactive a.s. (the Licensor) or its licensors.The<br />
Program is protected by the Czech copyright laws, international copyright treaties<br />
and conventions and any other applicable laws. All rights are reserved.<br />
2. Limited Use of License: the Licensor hereby grants, and by installing the Program<br />
you thereby accept, a restricted, non-exclusive license and right to install and use one<br />
(1) copy of the Program for your personal use. You may not network the Program or<br />
otherwise install it or use it on more than one computer at a time, except if expressly<br />
authorized otherwise in the applicable documentation. The Program is licensed, not<br />
sold. Your license confers no title or ownership in the Program.<br />
3. End User's Obligations:<br />
A. As a Subject to the Grant of License herein above, you may not, in whole or in part,<br />
copy, duplicate, reproduce, translate, reverse-engineer, modify, disassemble,<br />
decompile, derive source code, create derivative works based on the Program,<br />
remove any proprietary notices or labels from the Program or otherwise modify the<br />
Program without the prior written consent of the Licensor.<br />
39<br />
B. You are entitled to use the Program for your own use, but you are not entitled to:<br />
(i) Sell or transfer reproductions of the Program to other parties in any way, nor to<br />
rent, lease or license the Program to others<br />
(ii) Publish and/or distribute the computer Program or any of its parts<br />
(iii) Exploit the Program or any of its parts for any commercial purpose including, but<br />
not limited to, use at a cybercafé, computer gaming center, computer aided training<br />
center or any other location-based site where multiple users may access the<br />
Program;<br />
4. License Transfer: You may permanently transfer all of your rights under this<br />
License to the recipient, provided that the recipient agrees to the terms of this<br />
License and you remove the Program from your computer.<br />
5. Termination: This License is effective until terminated.You may terminate the<br />
License at any time by destroying the Program and any New Material. The Licensor<br />
may, at its discretion, terminate this License in the event that you fail to comply with<br />
the terms and conditions contained herein. In such event, you must immediately<br />
destroy the Program and any New Material.<br />
6. Limited Warranty: THE LICENSOR EXPRESSLY DISCLAIMS ANY WARRANTY FOR<br />
THE PROGRAM.THE PROGRAM IS PROVIDED “AS IS”WITHOUT WARRANTY OF ANY<br />
KIND, EITHER EXPRESS OR IMPLIED, INCLUDING,WITHOUT LIMITATION,THE<br />
IMPLIED WARRANTIES OF MERCHANTABILITY, FITNESS FOR A PARTICULAR<br />
PURPOSE OR NON-INFRINGEMENT.<br />
The entire risk arising out of use or performance of the Program remains with you.<br />
However it is warranted that the media containing the Program shall be free from<br />
defects in material and workmanship under normal use and services and the Program<br />
will perform substantially in accordance with the accompanying written materials, for<br />
a period of 90 (ninety) days from the date of your purchase of the Program.<br />
7. Limitation of Liability: NEITHER THE LICENSOR, ITS PARENT, SUBSIDIARIES,<br />
AFFILIATES OR LICENSORS SHALL BE LIABLE IN ANY WAY FOR LOSS OR DAMAGE<br />
OF ANY KIND RESULTING FROM THE USE OF THE PROGRAM, INCLUDING BUT<br />
NOT LIMITED TO LOSS OF GOODWILL,WORK STOPPAGE, COMPUTER FAILURE OR<br />
MALFUNCTION, OR ANY AND ALL OTHER COMMERCIAL DAMAGE OR LOSSES.
8. Miscellaneous: The License shall be deemed to have been made and executed in<br />
the Czech Republic, and any dispute arising hereunder shall be resolved in accordance<br />
with the Czech law.You hereby acknowledge that you have read and understand the<br />
foregoing License and agree that the action of installing the Program is an<br />
acknowledgment of your agreement to be bound by the terms and conditions of the<br />
License contained herein.You also acknowledge and agree that this License is the<br />
complete and exclusive statement of the agreement between the Licensor and you.<br />
Legal Information<br />
© 2010 Bohemia Interactive a.s. All rights reserved. Arma 2, Arma 2: <strong>Operation</strong><br />
<strong>Arrowhead</strong> and Bohemia Interactive are trademarks of Bohemia Interactive. This<br />
product contains software technology licensed from GameSpy Industries, Inc.<br />
© 1999-2010 GameSpy Industries, Inc. GameSpy and the "Powered by GameSpy"<br />
design are trademarks of GameSpy Industries, Inc. All rights reserved.<br />
Arma 2: <strong>Operation</strong> <strong>Arrowhead</strong> simulates real-world weapons, vehicles and other<br />
equipment. The product names, logos, brands and other trademarks depicted or<br />
referred to in the game or in its ancillary materials are the property of their respective<br />
trademark owners. These trademark owners, and the manufacturers of the<br />
weapons, vehicles and other equipment used in the game, are not affiliated with the<br />
producer of Arma 2: <strong>Operation</strong> <strong>Arrowhead</strong> and do not endorse or sponsor the game.<br />
Trijicon®, ACOG®, and the design of the ACOG® are registered trademarks of Trijicon, Inc.<br />
hashlib++, Copyright © 2007 Benjamin Grüdelbach.<br />
Vorbis Sound Compression Codec, Copyright © 2001 Xiphophorus. Speex Codec<br />
Copyright © 2002 Jean-Marc Valin<br />
LandInfo - SPOT satellite imagery of Bamyan province, Afghanistan Original satellite<br />
imagery: © CNES 2004-2007 / SPOT Image Corporation<br />
http://www.arma2.com<br />
Notes<br />
40
Installation Key:<br />
www.arma2.com<br />
© 2010 Bohemia Interactive. All Rights Reserved. Arma 2, Arma 2: <strong>Operation</strong> <strong>Arrowhead</strong> and Bohemia Interactive are trademarks or registered trademarks of<br />
Bohemia Interactive a.s. �is product contains software technology licensed from GameSpy Industries, Inc. © 1999-2010 GameSpy Industries, Inc. GameSpy and the<br />
"Powered by GameSpy" design are trademarks of GameSpy Industries, Inc. All other trademarks and copyrights are the property of their respective owners.